Computer-controlled Machining
This week was make something big week! Our group assignment for this week was to test our machine, and for the individual portion, we had to make something big!
Group Portion
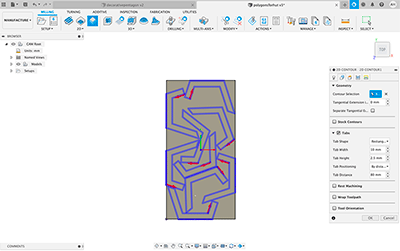
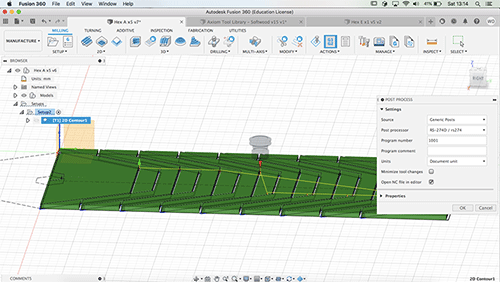
The CNC we have at our lab is an Axiom. For testing our machine, we focused on runout, alignment, speeds, feeds, and toolpaths. To start, we opened a test file in Vcarve, which is the software we use with the Axiom. Our instructor Madison created a test file, with two pieces, each with holes with specific diameters. One of the pieces had a large rectangle cutout, which the other piece should fit into once it gets cut out. There was another hole in that piece, which we were supposed to have the axiom plunge down and drill through.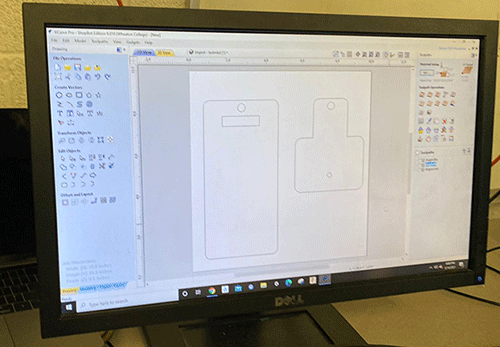
We then selected each element and made a toolpath for each function. The actual pieces were getting cut through, so we added tabs to those paths so they wouldn't fly off due to being loose. A second toolpath was used for the larger holes and the rectangle, which actually could be cut all the way through. When doing this, we had to add the dog bone feature to the rectangle, which adds rounded bits to the corners, which will account for the right angles of the rectangular piece of wood that will go in that hole. Finally, we created a toolpath for the drilling hole. You can see all of these in the bottom right panel of the screen below.
We previewed each toolpath, and then picked the proper tool settings.

Next, we exported these files, and could set up the axiom. To start, we grabbed a piece of scrap wood, and added double sided tape to help it stick to the bed.
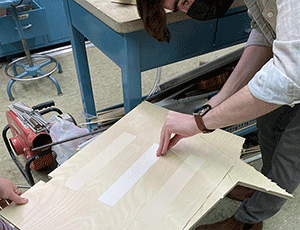
We stuck that to the bed, and then also drilled the corners, for even more stabilization.
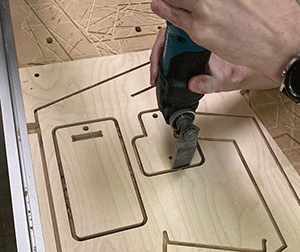
After that, we set the z and the origin, and selected out first toolpath from the usb, which was the holes. That worked out fine, and then we did the drill toolpath. Now we were on to the outline.
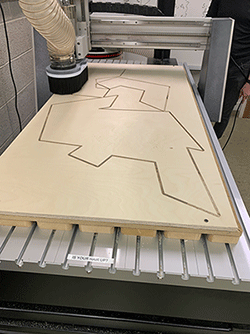
Here's everything cut out!
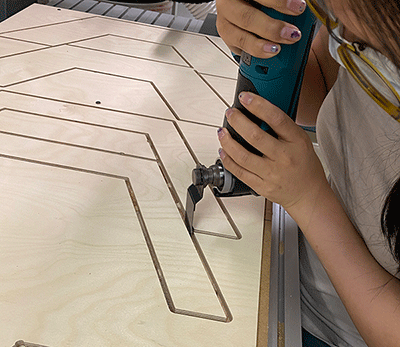
We then had to cut off the tabs which kept everything in place.
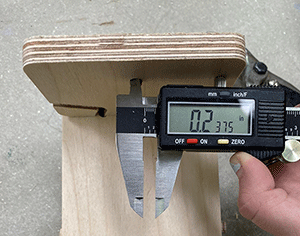
The rectangular hole fit the other piece perfectly! We had to hammer it to get it to fit, but it worked and was nice and snug! That part of our test worked, because the dimensions were accurate enough for it to fit, and the dog bones were correct too! We then measured the hole in our design that was drilled. This was supposed to be 1/4 of an inch, since that was the size of our bit. As you can see, this was a little off, most likely due to measuring error or sawdust in the hole causing it to be less than it should.
Individual Assignment
This week's assignment was a big one (no pun intended), since what I ended up with is going towards my final project! Whitney and I are collaborating to make a seating area, and we used this week to get ahead by using the wood given to us in order to reduce on costs for our actual project! In order to really make the most of it, we got Elizabeth, John, and Tuna to join us as a group for this week, which meant we had a much larger amount of wood to work with!Designing
Whitney and I designed our project (which you can see in more detail on my final project page), and ended up with something based on the following design.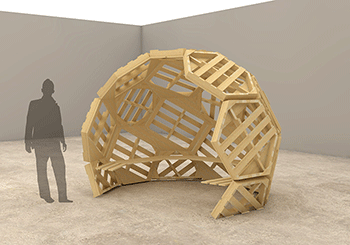
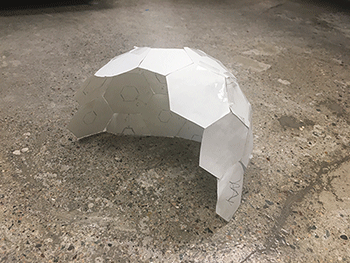
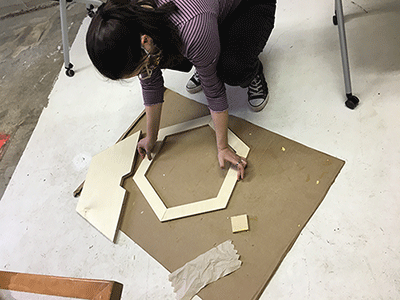
We created a paper model to see how everything would fit together and to figure out the possible size of the final product.
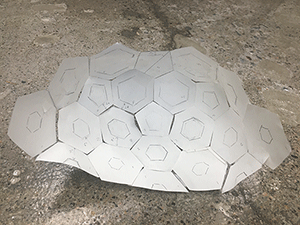
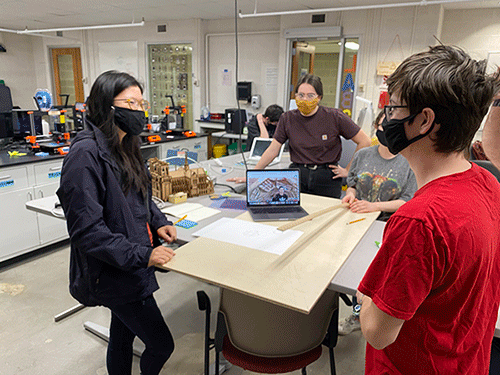
We brought it to the rest of the group, where we all discussed how we would get it to work, and how it might be cut out/made using the wood that we had.
We decided to cut out halves of the hexagons and pentagons, which we would then glue together. The halves of the hexagons would be the width of our board, and the pentagons would match the side length of those hexagons! Each shape would have two layers of wood for added strength. The inner layer would be 2 inches wide, and the outer layer would depend on the placement of the shape itself within the form. The borders would be thicker near the bottom, before increasing to eventually be 2 inches wide at the top of our pod! After getting the little bits figured out, we went and used Fusion to create the shapes that we would cut out on our boards. This was split evenly, with each person working on a specific width we needed. I worked on some of the hexagons but I mainly worked on creating the pentagon files.
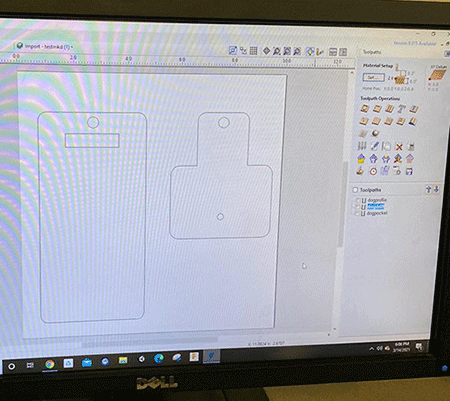
The first time we did this, we made the dimensions 1/4 inch less than the actual board, but when we went to cut, the dimensions were too big for the axiom, so we had to make them smaller. As a group we reworked each of our board files to fit the dimensions of 46 x 22 inches, which worked!
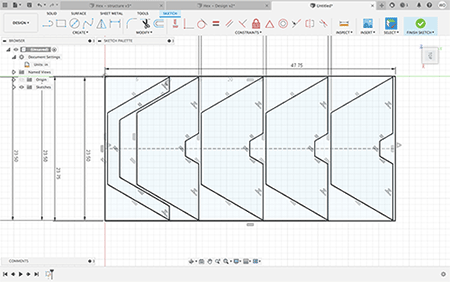
After editing the dimensions, the sketch was extruded, and we went in the manufacture tab to edit the settings to match our machine. To do this we selected the origin point and the bodies we wanted to cut, along with setting the dimensions of the stock. We selected the tool we were using to cut and set the feeds and speeds. We then simulated our cut and exported the file to use on the axiom.
Cutting
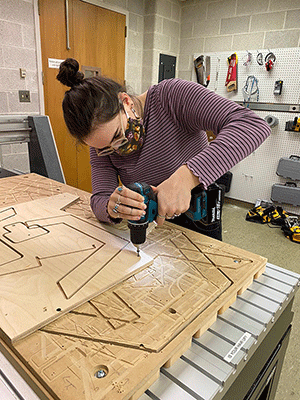
When we actually went to cut out our files, with the correct sizes, it started off relatively successful, before we had a couple big problems. We did all the usual steps, like calibrating the z, setting the origin, and drilling our board into the bed.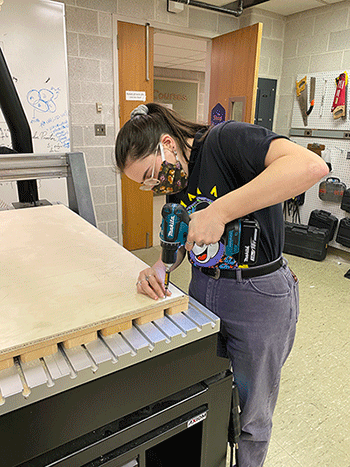
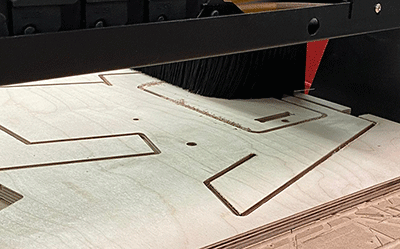
The cuts went well!
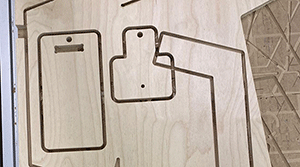
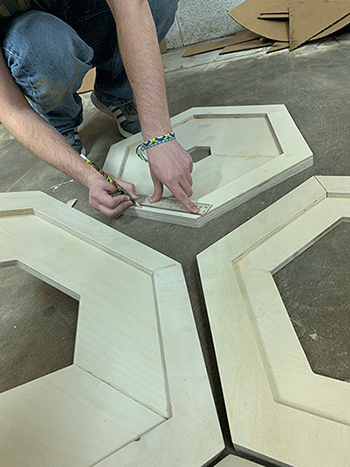
After each board was finished, we cut the tabs of our shapes and took them out to sand.
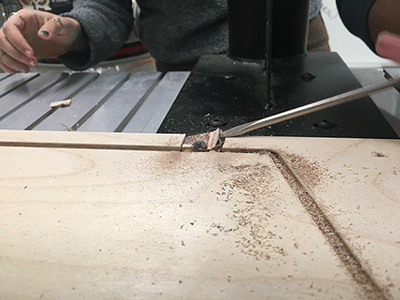
All was going well, until we did something not super great... we broke the bit.
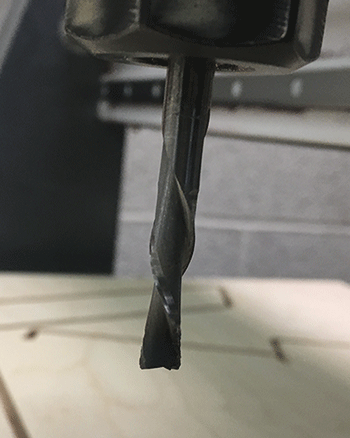
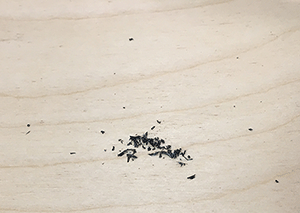
We had accidentally screwed the board down in a place that the axiom went to cut, so the bit hit the screw and shattered. You can see some of the pieces we recovered below.
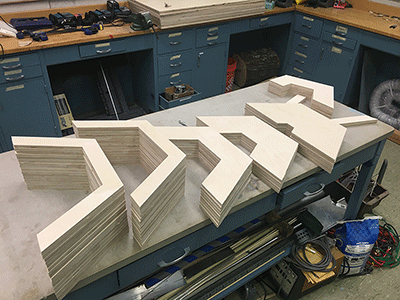
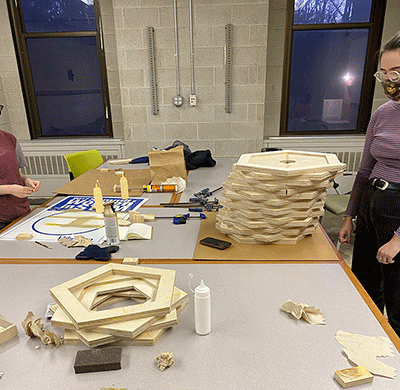
Because of that problem, we ended up switching to a ball nosed mill for a while, since we were initially using a flat end mill, but we found another one of those, so we ended up switching back towards the end! Our cuts were all pretty successful after that, and after many hours, we were done! Here are all of our pieces!
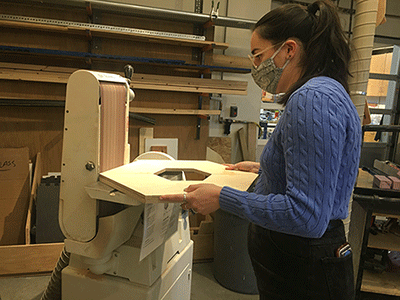
To get them prepped for constructing our seating pod, we sanded each piece, both by hand and with a belt sander.
Once each piece was smooth, we glued them together and let them set overnight!
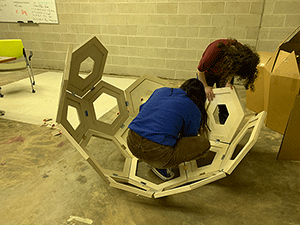
Construction
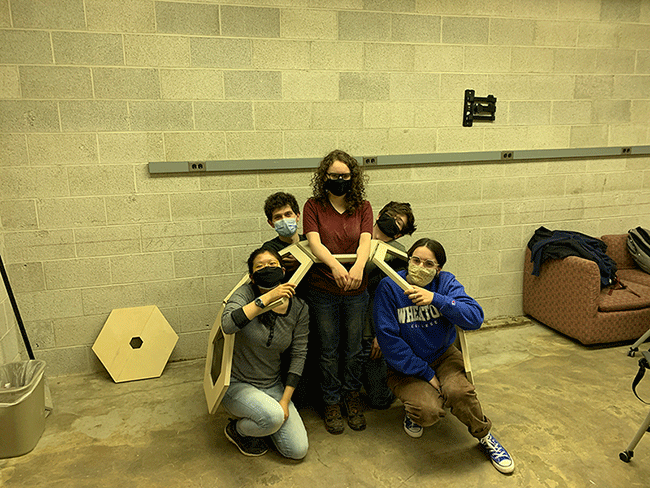
In order to create our structure, we decided to connect the hexagons and pentagons using door hinges! We used our model as a reference and started connecting things together!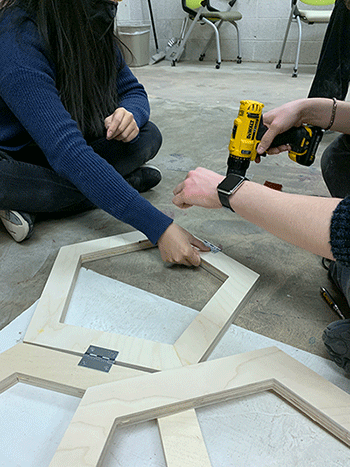
As you can see, the geometry of the shapes and how they were connected caused the curve to form as we were working.
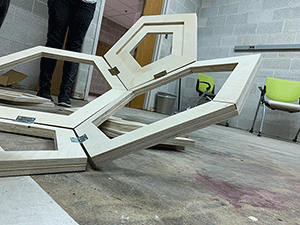
Here are a few progress pictures as we assembled our project!
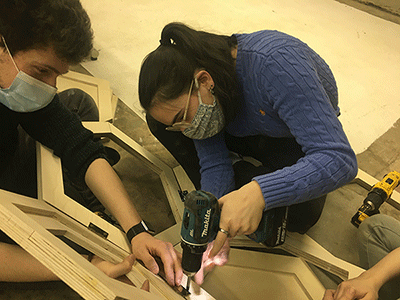
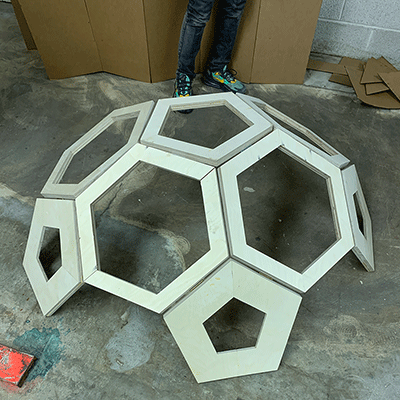
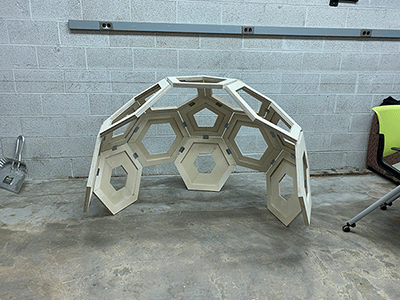
After lots of hinges and drilling, we were done! Here's our final product!