Molding and Casting
For this week, our group had to review safety data sheets and compare molding and casting materials. The individual project was to design and mill a mold, and then cast it!
Group Assignment
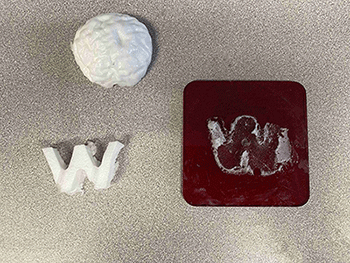
For our group assignment this week, we started by using a mold of the Wheaton logo that we already had and casted it with FlexFoam. This had a 35 second pot life and a 25 minute handling time, so we had to work fast! After mixing the two elements, we poured them into the mold. Because the FlexFoam expands so much, we had to put a piece of acrylic with a hole in it on top of the mold. This allowed our w to keep its shape.
While it definitely expanded, our w wasn't as successful as it could've been, and it was a mess to get out because a bunch of it stuck to the acrylic we had put on top.
Individual Assignment
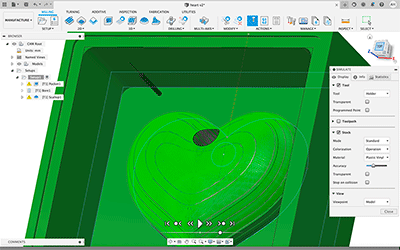
When I was introduced to this week's assignment, I knew I wanted to do something with jewelry. I decided to make a heart charm for a necklace. I started by creating a heart in Fusion, before working to make it dimensional over 3 axises. After adding a rounded top and a hole for the charm, I added a box around it, which would function as the edges of my mold.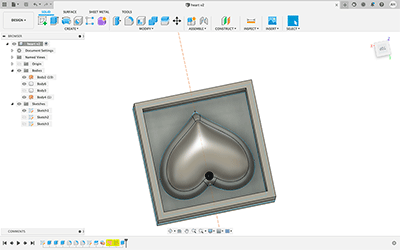
Once this design was done, I went into the manufacturing tab to get the correct bits and files for actually milling out my piece. The first end mill I was going to use was 6mm, which would take material away for the rough cuts much quicker. For the finer details of my design, I was going to use a 1.2 mm bit.
To make the correct milling files, I started with a pocket mill, which took the majority of the excess part of my stock out for my design. This is what the toolpath for that looked like.

I then had a second file that bore down into the hole of the heart. Because the first toolpath made my mold design a bit choppy, I then added another milling file with the smaller bit which would round our the layers of my design a bit more. You can see that here.
After all of my files were finished, I exported them to a usb to be used at the ccomputer with the Roland. I took my machinable wax and put a piece of double sided tape to the bottom, before sticking it to the bed of the mill. The 6mm bit was already in the machine, so all I had to do was move it to the corner of my wax and set the x, y, and z origins.
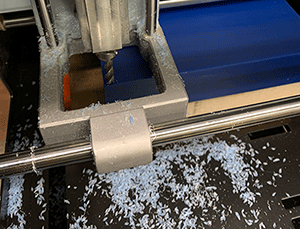
I opened my first cut file and ran it without a hitch!
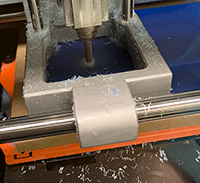
I went ahead and did the boring file as well, as you can see in the following picture.
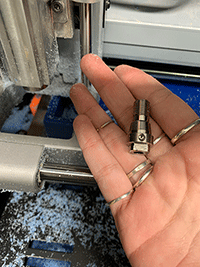
Since my next file was for a smaller bit, I had to not only change the bit out of the Roland, but the collett as well. This was done by putting a wrench on the bottom and top parts and twisting. You can see the collett I took off here.
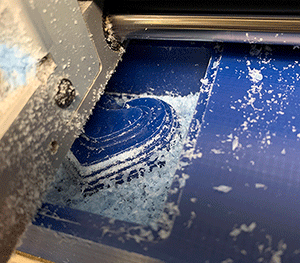
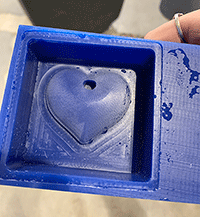
I put the correct bit in, and did my final mill job. This worked out perfectly, and it turned out great!
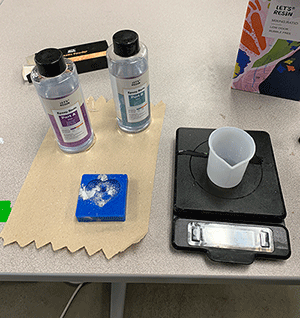
Now that that step was done, I could mix up my molding material to put in the wax! For this I used the Moldstar 30 silicone rubber. This had a 1:1 ratio by volume, so I added equal parts of material A and B, and mixed it together. This mixture has a potlife of 45 minutes, so I didn't have to worry too much on getting everything together in time.

I them poured my mixture into the mold.

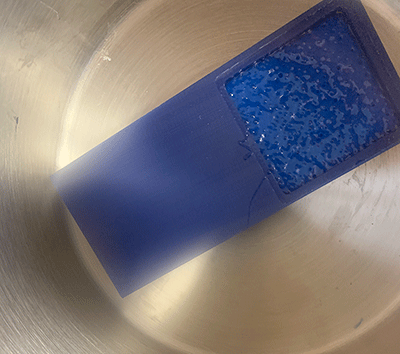
Once that was done, I put it in the vacuum chamber to bring any bubbles to the top.
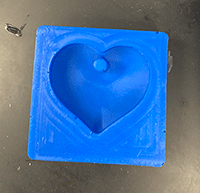
I let that set overnight, and came back the next day to take it out! After shimmying a popsicle stick around the edges of the silicone to loosen it, my mold popped out, and it looked great!
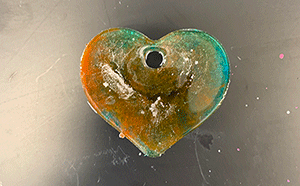
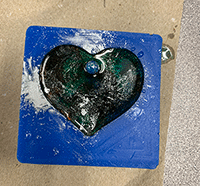
My next step was to add resin to it for my jewelry charm! I measured the two resin parts by weight and mixed them together before splitting what I had into separate cups and adding dyes to get them to the colors I wanted for my heart. I also put some metallic powder in the mold first, to add a shiny outer layer!
The colors I ended up using were blue, green, red, and clear. I poured a bit of each of these in at a time to create a sort of marbling effect.
You think that would be the end of it, but no!! When I went to clean up and put my resin away, one of the containers was sticky on the bottom and stuck to the paper towel that I had put down on the table. I didn't realize this, and when I went to pick it up, it dragged the paper towel with it, upending my mold and spilling my resin all over the table.
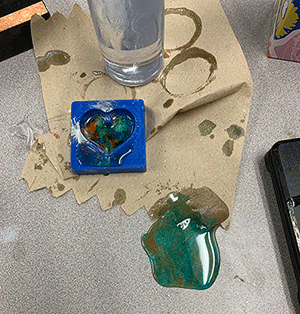
I cleaned that up, and made another batch of resin to fill my mold back up! Easy fix! I let it set overnight, and my charm was done! It came out great!