Input Devices
Our group assignment for this week was to explore and test the function of different sensors. The individual assignment was to create a board that used a sensor as an input.
Group Assignment
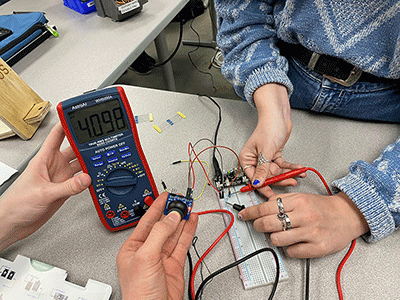
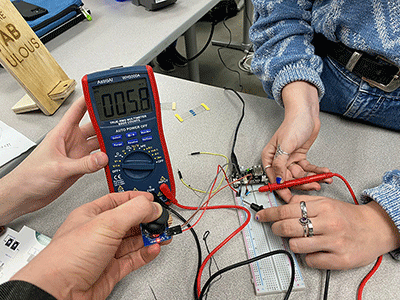
In this portion of this week's work, our group looked at a few different sensors and tested them with a multimeter. We looked at a joystick, water level sensor, thermistor, pir motion sensor, and a photoresistor. The water level sensor changed the voltage depending on what level of the copper was being contacted, the photoresistor had a change in voltage depending on the amount of light, the pir sensor had fluxuations if it sensed movement, and the thermistor changed depending on the temperature.In the images below, we're measuring the voltage in the circuit that has a joystick. You can see that when the joystick is moved in the downwards position, the voltage reads at 4.98. In the second image, the joystick is moved to the right and the voltage is 5.8.
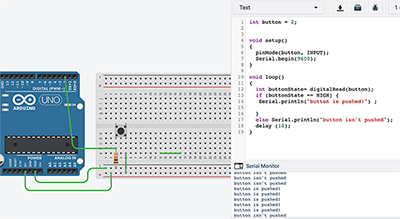
The second part of our lab had us working on our own in Tinkercad to get a better understanding of sensors. Here I made a circuit that used a button as a sensor that would read whether or not the button was pushed.
I made a second circuit that read the amount of light with a phototransistor.
Individual Assignment
For this week's project, I decided I wanted to use a motion sensor. I started in Tinkercad and created a circuit with an led, motion sensor, arduino, and breadboard. I coded it so that when the sensor detects motion, the led will turn on.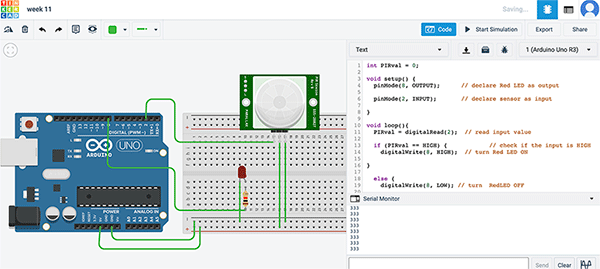
Once I tested that and got it all working, I went to create my board in Kicad. I started by adding all the elements to the schematic and connecting them together.
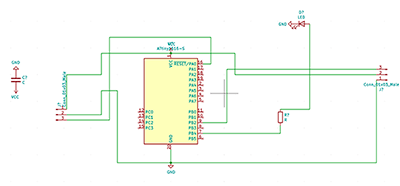
Then, I went to create my pcb.
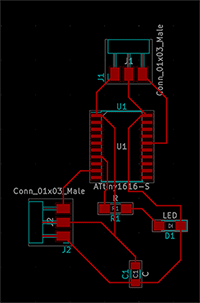
I added the outline and then saved my files, before importing them to mods. I edited the settings to match what was necessary for the Roland, and then saved both the traces and the outline to a usb.
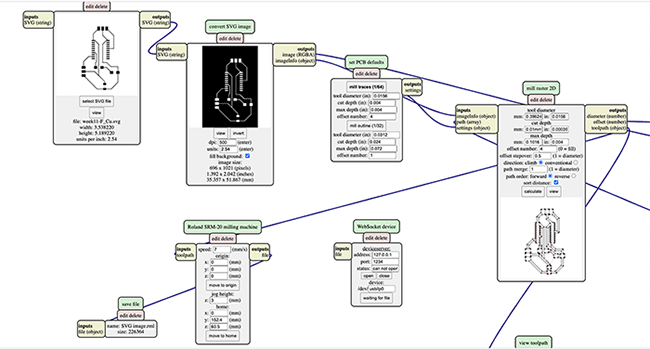
Now that all of my files were ready, I could start on the Roland! Since the traces were first, I put the ballnose end mill in the machine and tightened it. I added my copper to the bed with doublesided tape, and then moved the x and y to the bottom left corner. I made that the xy origin and then moved the z up before aircutting my file as a test. This went well, so I went ahead and actually set my z by moving it close to the bed before loosening the bit until it dropped to touch the copper and then tightening it again. I then set this as the z origin on vpanel and I was good to go! I went ahead and cut my board!
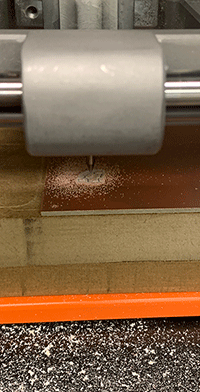
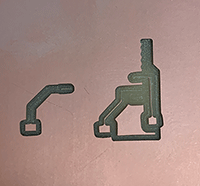
After it was cutting for an unusually long time, I decided to check on my board and see how it was doing, and I found that the traces were practically nonexistent.
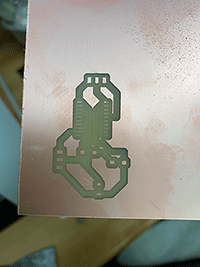
After doing some troubleshooting, I changed my tracks in Kicad from .25mm to .5mm. When making these connections, I had to alter my pcb a bit, so now it looked like it does below.

I went to cut that file, and it did the same thing as before
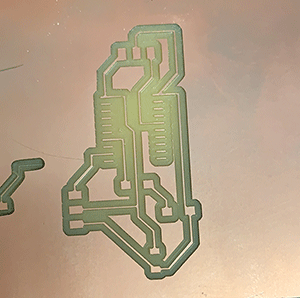
I consulted with the other students in the lab and we couldn't think of any other fix for getting my board to mill correctly, so I went to Professor Goodman. He looked at my files and found that in mods I had put the cut depth as .01mm instead of .10mm. This was odd because my cut still went deep even though this value ended up being so small. Anyways, I changed those settings and went to cut my board. It went pretty well, although the traces were still pretty small.
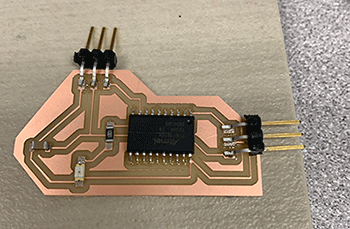
I went ahead and cut the outline and soldered my components to the board.
Then I went to upload my code from Arduino. I changed the pins to match those on the attiny, and clicked on upload, but I got a UPDI Initialization error. I used a multimeter to check connections, and everything seemed fine, so I couldn't figure out what my issue was. I then looked towards troubleshooting online, but found nothing helpful. I checked with the few people that were in our lab, and we couldn't figure it out. Because of our increased covid restrictions here at Wheaton, I was unable to go consult either of our professors, so I'll have to fix my code at a later date.
UPDATE: 5/26/21
Hello! I finally had some time to work on this week's assignment again! I decided to start fresh with new code! First, I found this tutorial for using PIR sensors with an arduino. I went ahead and followed that tutorial with an arduino itself, and it worked perfectly!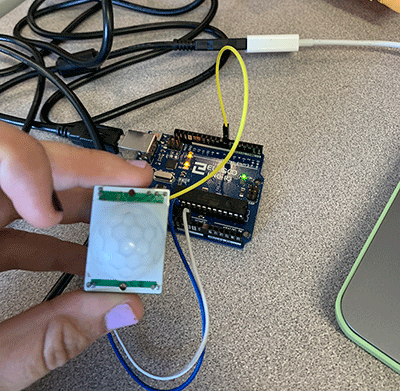
Since I knew that my sensor actually worked, I went ahead and connected it to my own board. I used the same code from that tutorial, just changing the sensor and led pins to match my own. The first time that I uploaded the code, the led ended up turning on the moment that the code was actually uploaded, and wouldn't turn off. After a bit of troubleshooting, I ended up deleting the part of the code that talked about the serial monitor, since I didn't really need that for what I wanted the sensor and my board to do. This was what needed to be done, because after those bits of code were deleted, it worked fine! I realized that the sensor was actually attached to the txd pin of my board, and since that communicates to serial, having code about the serial monitor messed it up! Anyways, getting rid of that code did it, and you can see it all working below!