Wildcard Week
This week was Wildcard week, which meant we could explore any type of fabrication that we hadn't used in a previous assignment! Madison gave us a couple of options to choose from, and I chose metal casting!
Assignment
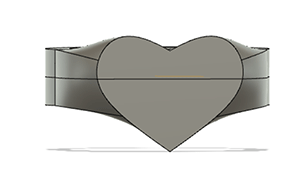
I immediately knew what I wanted to try and cast for this week's assignment! I don't know if it's noticable in some of my documentation for this course, but I wear a lot of rings. 10 to be exact! The first thing that popped in my head when I thought of metal casting was making jewelry, and I thought a ring would be super cool to make! After looking online for inspiration of something that would both be easy enought to create in Fusion, and to make a mold for that could be milled with our Roland. I ended up deciding on making a heart signet ring! I used a ring that I already had as a reference for size, and started by making the band. After that I created a tangent plane and added my heart shape.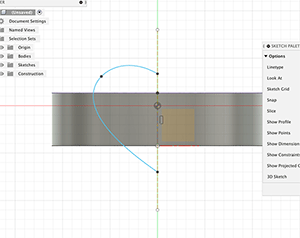
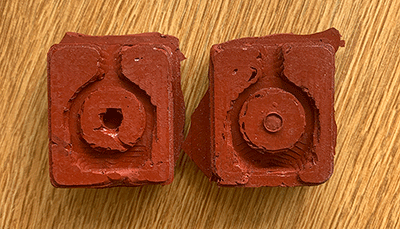
I then connected these shapes in a rounded way using the loft tool. Since my mold was going to be a two half mold, I split the heart in half so the Roland would successfully be able to mill both the rounded top of the heart and the pointed bottom. You can see where the shape was split below by the line running through the heart.
After the halves were to my liking, I created the mold itself in fusion that would fit in the remnants of my machinable wax from molding and casting week.
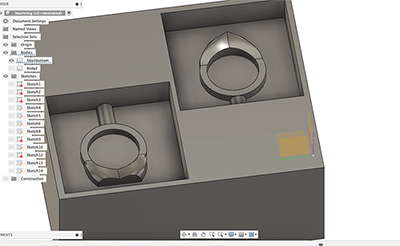
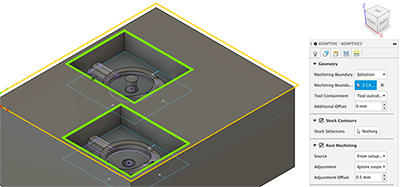
I added both a hole and an extruded cylinder so I would be able to connect these two molds together. Next, I went in the manufacturing tab and created an adaptive clearing path to get rid of the majority of the material in my mold.

I added a bore path for the hole that would connect them together, and then went to add detail. I specified the boundaries of the next toolpath to be the rectangles of my mold, before creating a scallop toolpath.
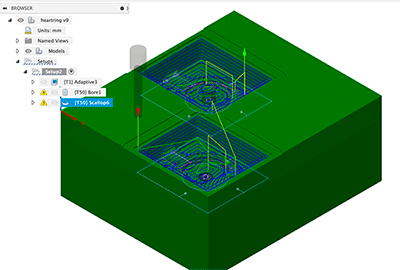
After that, I was set to export my files! For whatever reason, there was an issue with the Fusion post process for the Roland. We usually export our files as .rml files, but this wasn't working so I ended up exporting them for the Roland ISO.

This ended up working fine, and my molds were milled out perfectly! I used a 6 mm bit for the clearing and the bore, and a 1/8 inch bit for the scallop toolpath.
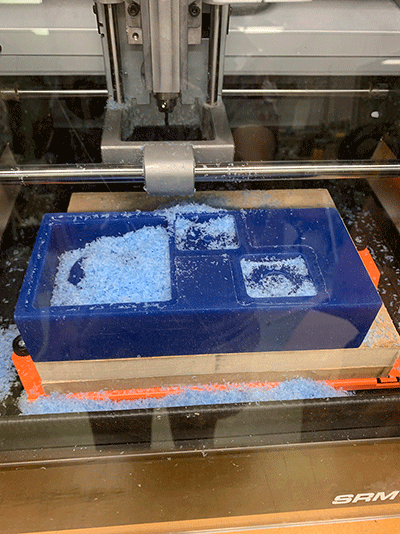
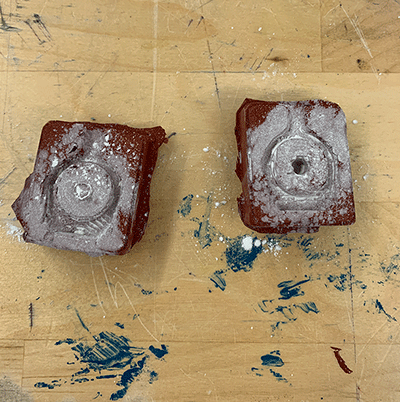
I cleared out the wax and then went to make my mold! For metalcasting, my mold material was the moldmax 60. This had a parts a and b ratio of 100 to 3, and since I only needed a small amount of the mixture to fill my molds, I just kind of eyeballed the amount I needed. After mixing these together they were practically a solid and I could barely pour the mixture in my mold. I figured I messed up when I measured my amounts so I started again. This time, I made a bit more, hoping that my ratios woud be closer to what they should've been. Both parts are supposed to be mixed for 3 minutes, but after only one, it was getting super thick again. This worried me, because David in our class was also doing metalcasting and his mold was a much liquidier solution. I decided to just go with it and slowly poured/scraped the mixture into my molds. I then put it in the vaccuum chamber to get rid of the bubbles and let it set to cure.
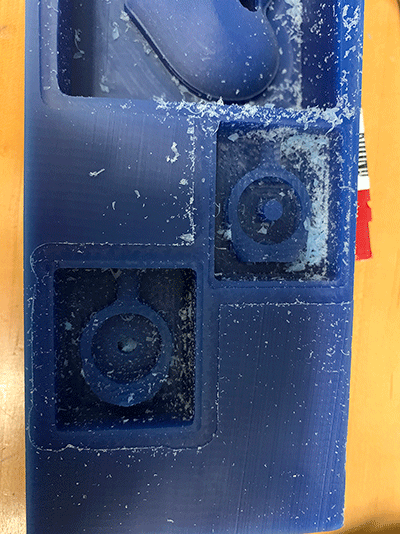
After 24 hours, I went to check on how the mold set and although it was a little sketchy, it worked! The mold didn't end up going in the hole I bored, but this wasn't a huge issue since I could just use something else to keep the molds in place!
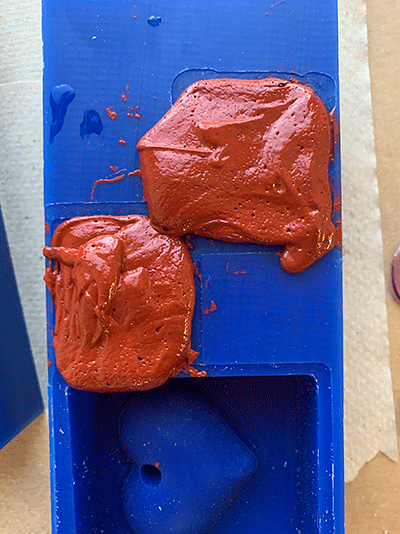
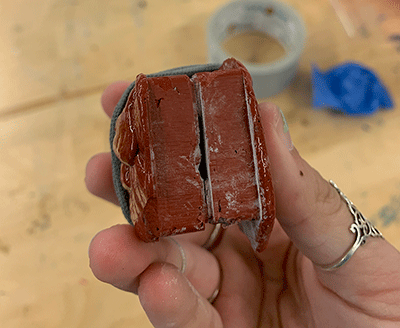
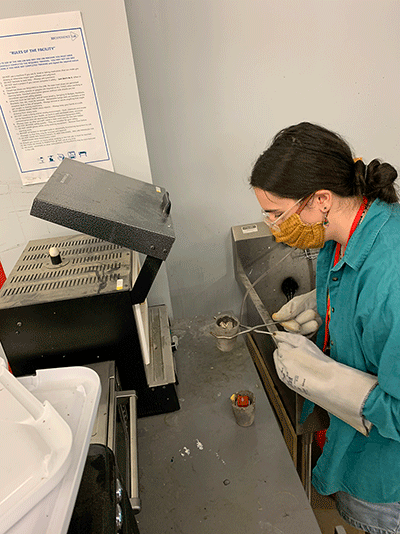
Next, I went to Dassault to actually cast my ring! To start, I sprinkled baby powder on each half of the mold to reduce surface tension and let the molten metal flow easier. After doing that, I lined up my molds and wrapped them with a hairtie.
When I did this, I noticed that there was a hole in the bottom where the molds meet because the edges didn't get completely filled.
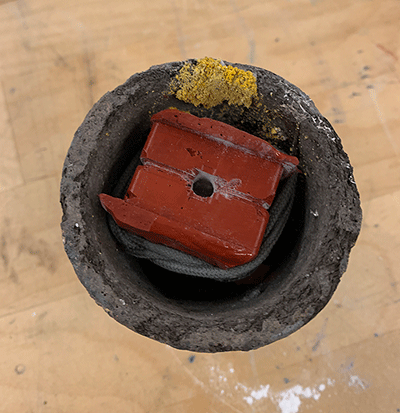
In order to stop/catch the molten metal that might go through that gap, I decided to put my mold in an extra crucible(the thing that holds the metal as it gets heated up).
I heated the pewter I was using to around 550 degrees and went to pour it in. I ended up switching the hairtie out for an actual rubber band since I was worried about the hairtie possibly burning.
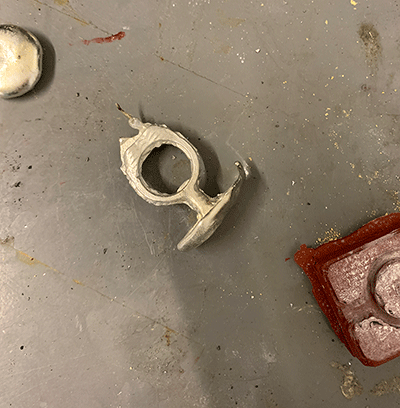
When I went to do my first pour, some of the molten metal poured out the side and snapped the rubber bands. I let it cool down and took out my mold.... and it was an epic fail!!!!!! A huge amount of the metal went straight through the mold and pooled at the bottom of the crucible, and all that was left in the mold was a super thin band and something that wasn't even close to a heart.
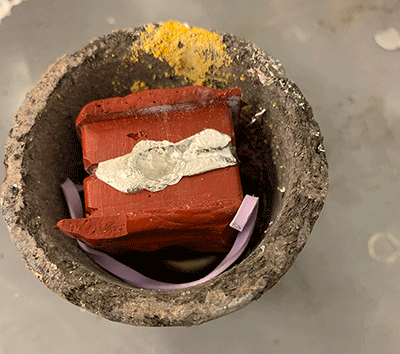
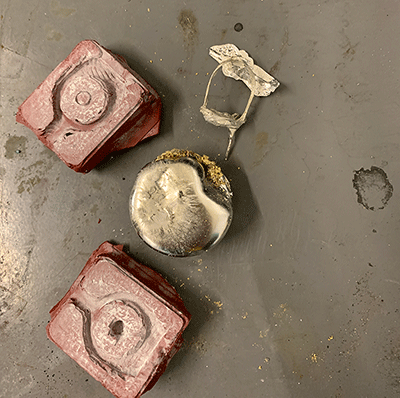
For my second attempt, I decided to bind my molds with wire. I ended up using soldering wire and also pushed the mold further in the crucible so there was less of a gap between the hole in the mold and the bottom of the crucible itself. After getting everything set up, I went to pour the pewter, and it worked great! There was still a large blob at the bottom where the liquid metal went through the hole, but it was much smaller and the ring was actually filled this time!
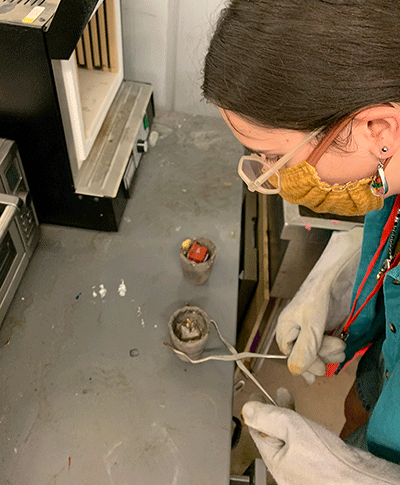
My cast was successful, but there was a lot of work that I had to do to clean it up. Our lab at Wheaton is currently being moved to another location on campus due to construction in the building where we usually work, so I didn't have access to all of our tools in the shop, however, there were some in the sculpture studio that would work just as well. I used wire cutters to snip off the drippy ends of the ring where the heart was, and then used a round and regular file on that face and the inside of the ring.
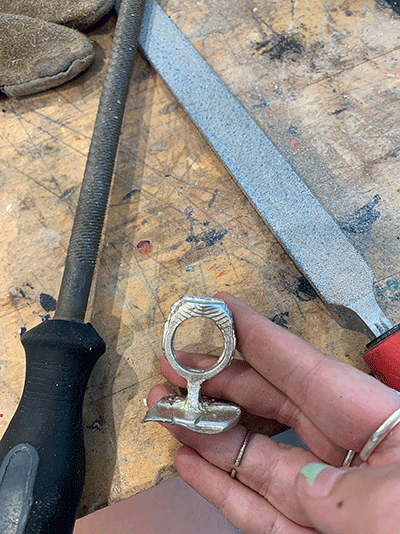
I worked until the inside was relatively smooth and the heart was almost flush. To get rid of the excess on the back of the ring where I poured the metal, I used the edge of the flat file to thin the width of the column that was left, before using the wire cutter to snap it off once it was small enough. I then filed that edge so it protruded less. It isn't as smooth as I want it to be, but I still think it looks quite good, and I'll definitely go back and fix the edges and buff out the scratches created by the file later!
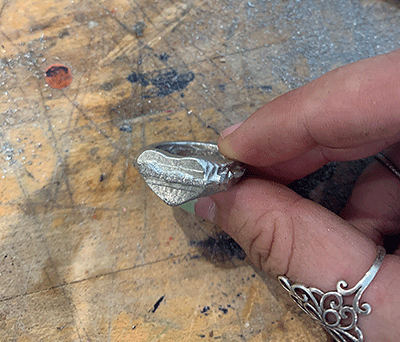
For now though, I'm super happy with it!
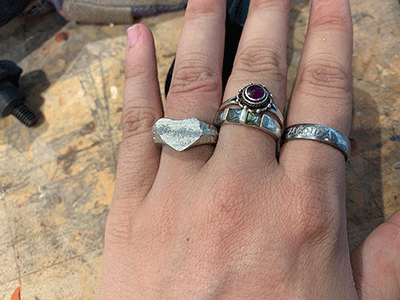
The metal casting experience was super interesting and I really enjoyed it! If I were to do it again, in order to get a better result, I would add more of the holes and cylinders to my design to actually have the two halves of the mold stay together. I would make the overall mold to mill out a bit bigger to fit these added elements. I did add one in the actual design for this week, but the mold material didn't actually go into the hole that was milled in the wax, so there was no part of the design to stick into the other half. Doing this would keep the halves from coming apart like they did when I poured my metal. Redoing the mold might also fix the hole I had in the bottom where the metal ended up dripping out. This would make the heart part of my design actually flush instead of all uneven.