17. Wildcard week
This week I worked on 2 options:
-
3D Printing on fabric
-
wood Textile to make flexible structures like a shelf.
Files to download
3D Printing on fabric
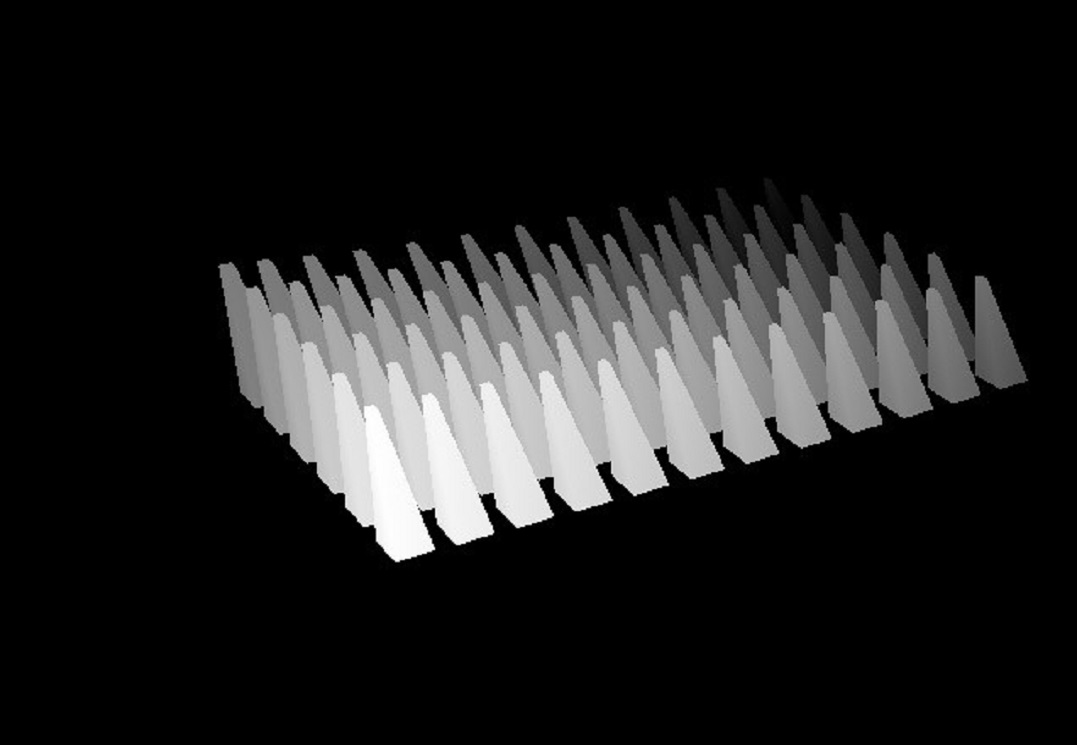
wanted to test printing varying inclinations of the spikes without support material
step1: vector - grid -square grid
srep2: define a size using a number slider and connecting it to the size
step3: add another 2 number sliders and connect them to “extent Y” and “extent X”
step4: flatten cells (with right click on cells)
step5: define a point attractor … type in grasshopper “point”
step6: surface - free from - extrude point
step7: connect cells to base (in extrude point)
step8: surface - area tool (to extract the centroid) then write “move” (to move points up) and write “unit Z” and give it a number slider”
step9: vector- vector 2pt (take geometry from “move” and plug it in “vector 2pt” as point A ) not write/connect point on grasshopper and connect it in “vector 2pt” as point B
step10 : right click on unitize on “vector 2pt” - right click set Boolen - True (it means that the vector is one length- so just giving me a direction to the point attractor )
step11:
PLA on fabric
Slicing on “Cura” Software & Modifying the G code to stop at layer 2 in order to put the fabric
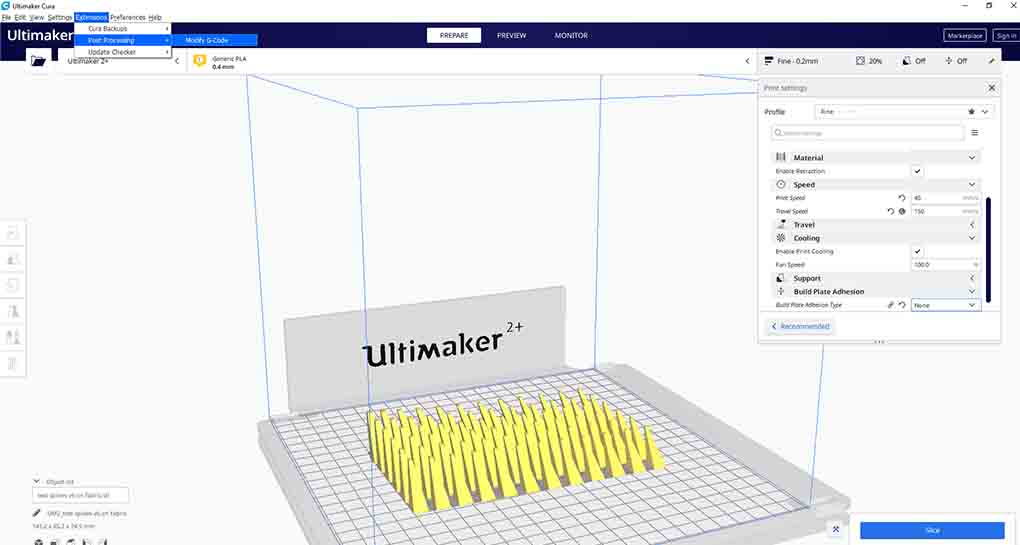 Here I played with the G-code so I can Print on Fabric: Extensions - Post Processing - Modify G-Code
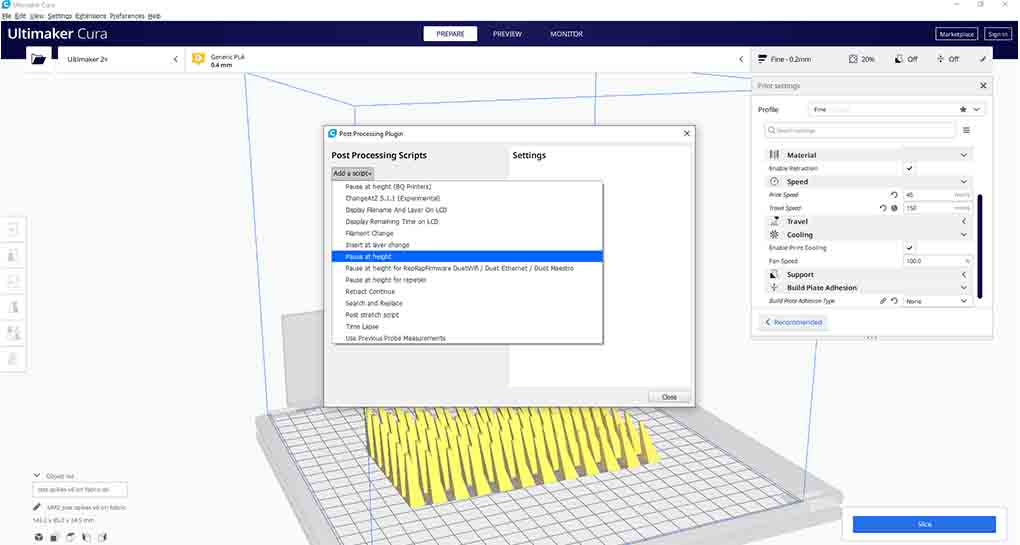 then add a script - from the drop down menu select Pause at height
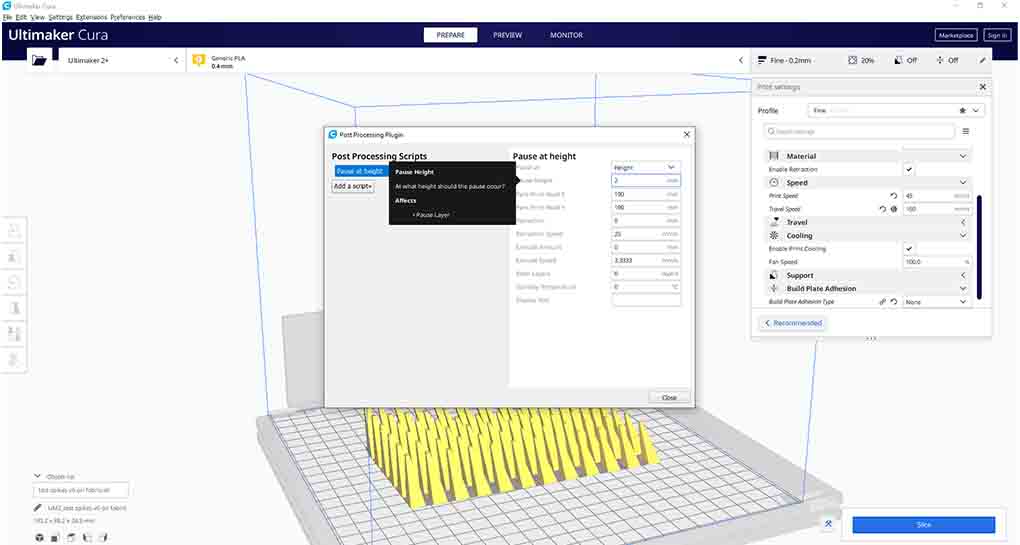 then type next to “Pause at height” the height you desire to pause on I typed “2 mm”
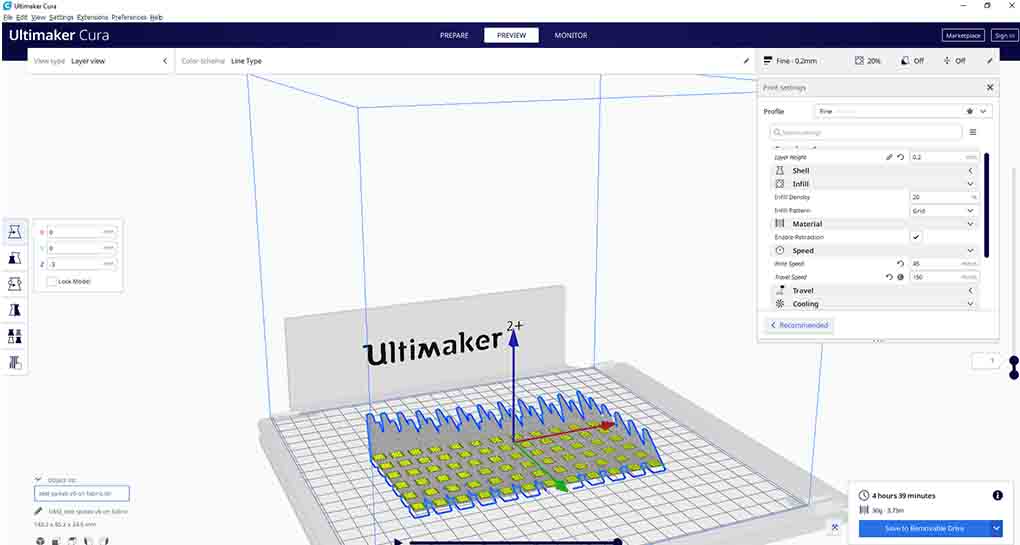 Print speed: 45 , Travel Speed: 150 (most importantly that I modified the travel speed so I wont need support for the inclinations )
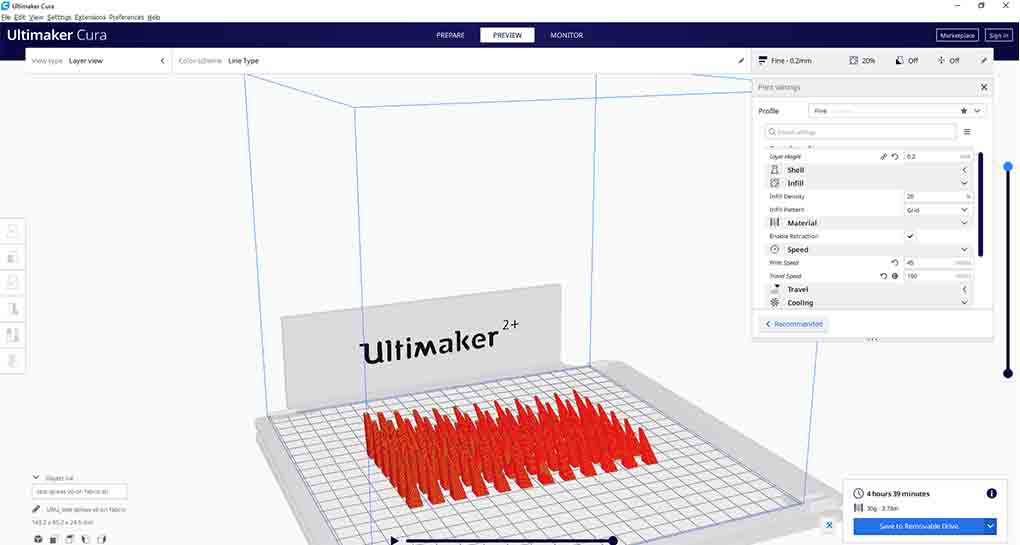 Just Checked everything then saved the G-Code to removable
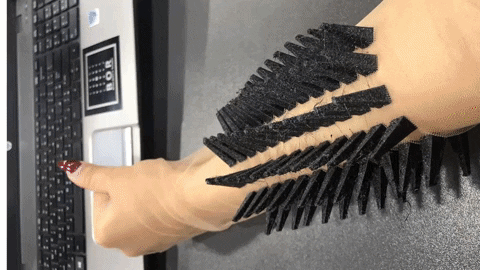
Hero shot!
PLA on fabric from Batoul Al-Rashdan on Vimeo.
TPE (flexi) on fabric


Wood textile
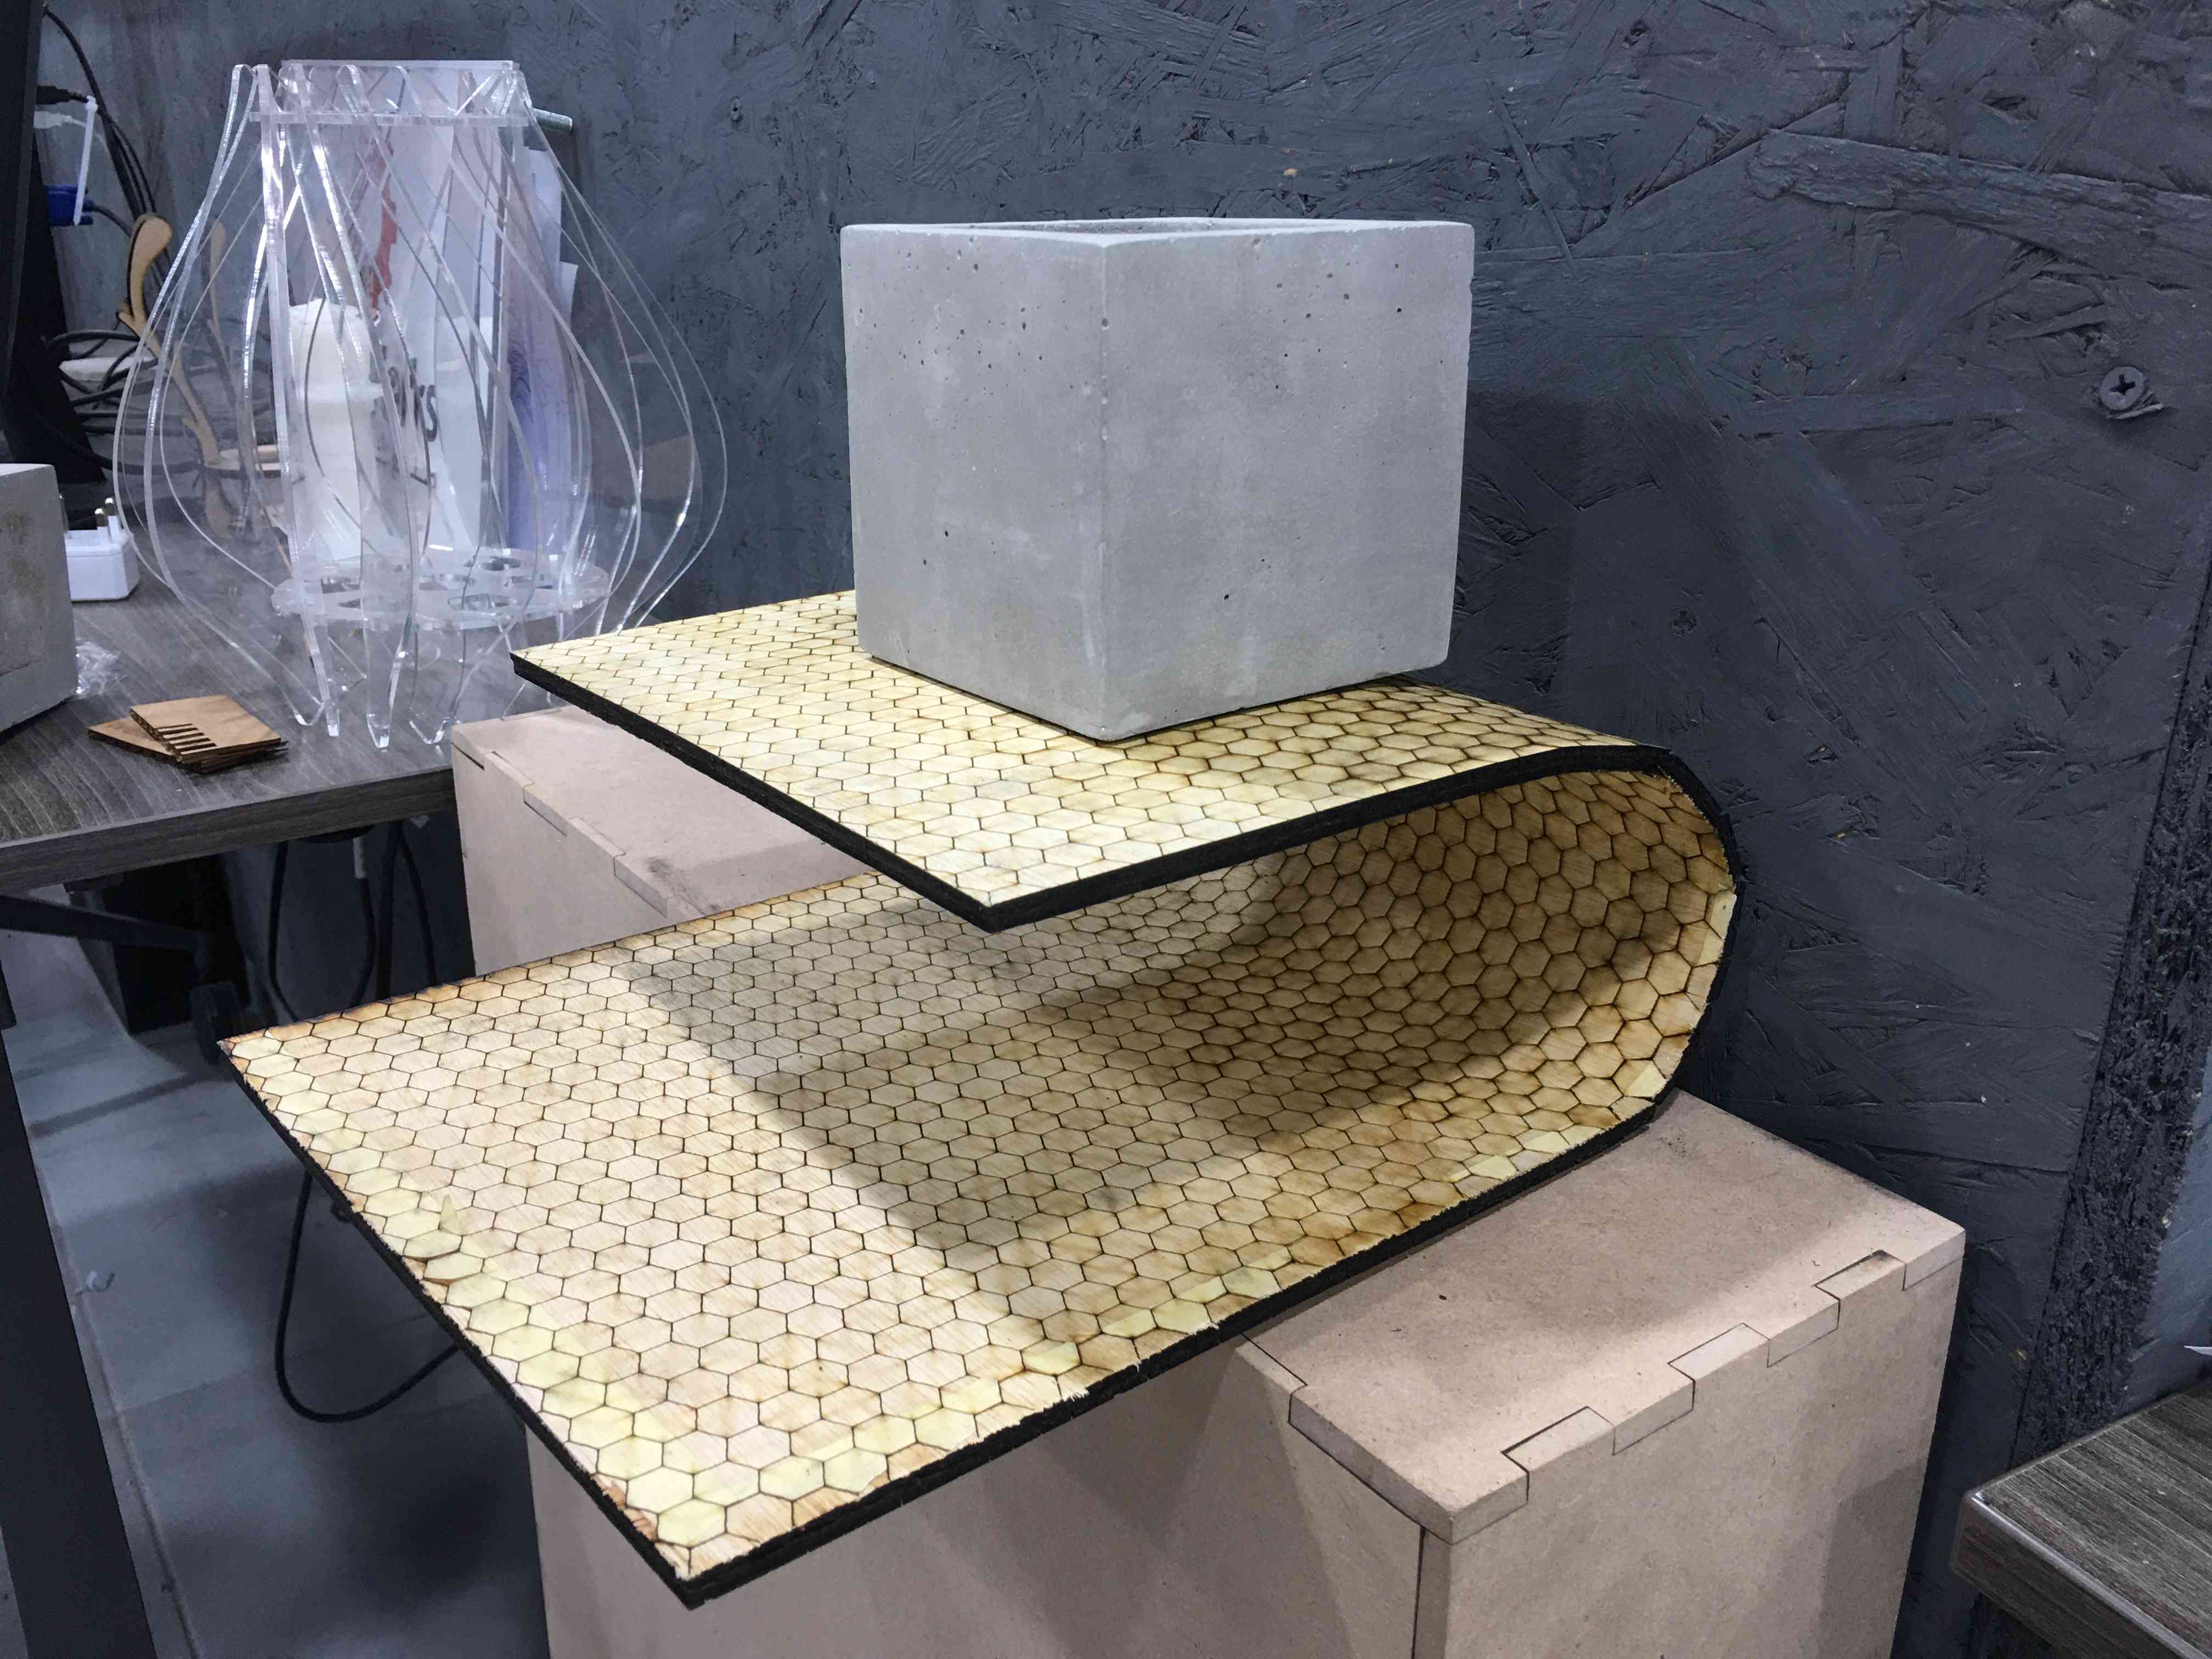
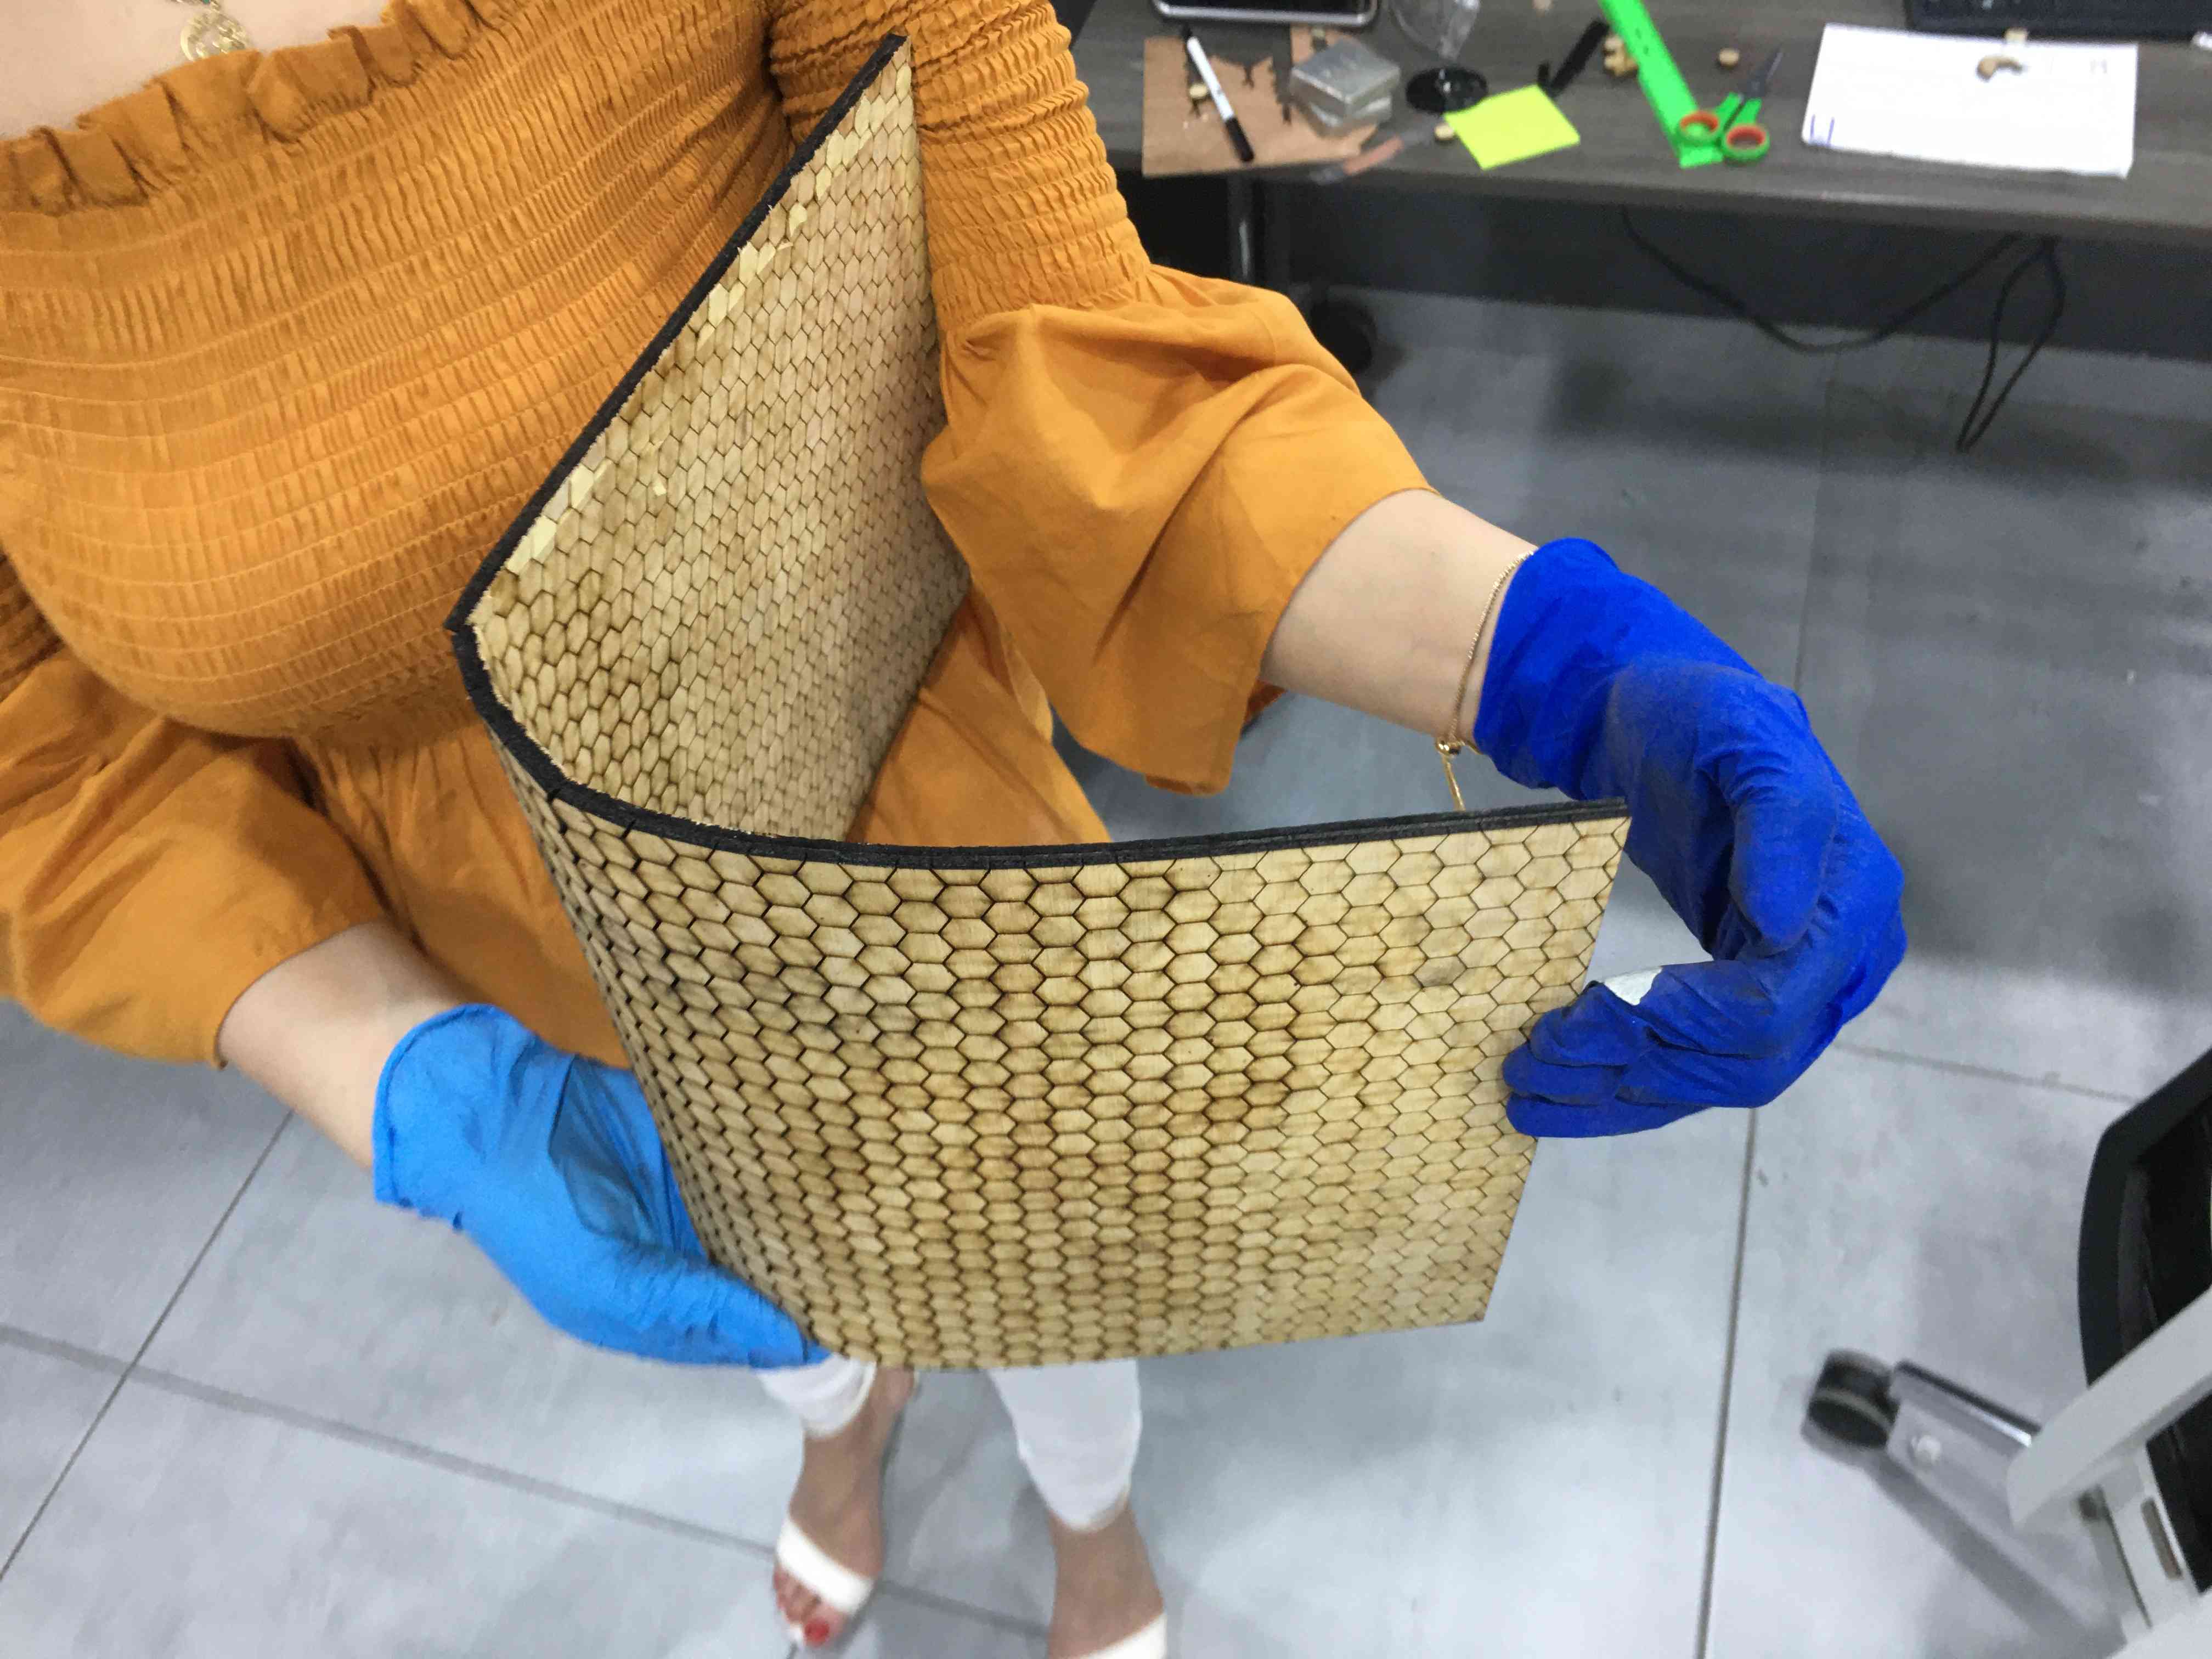
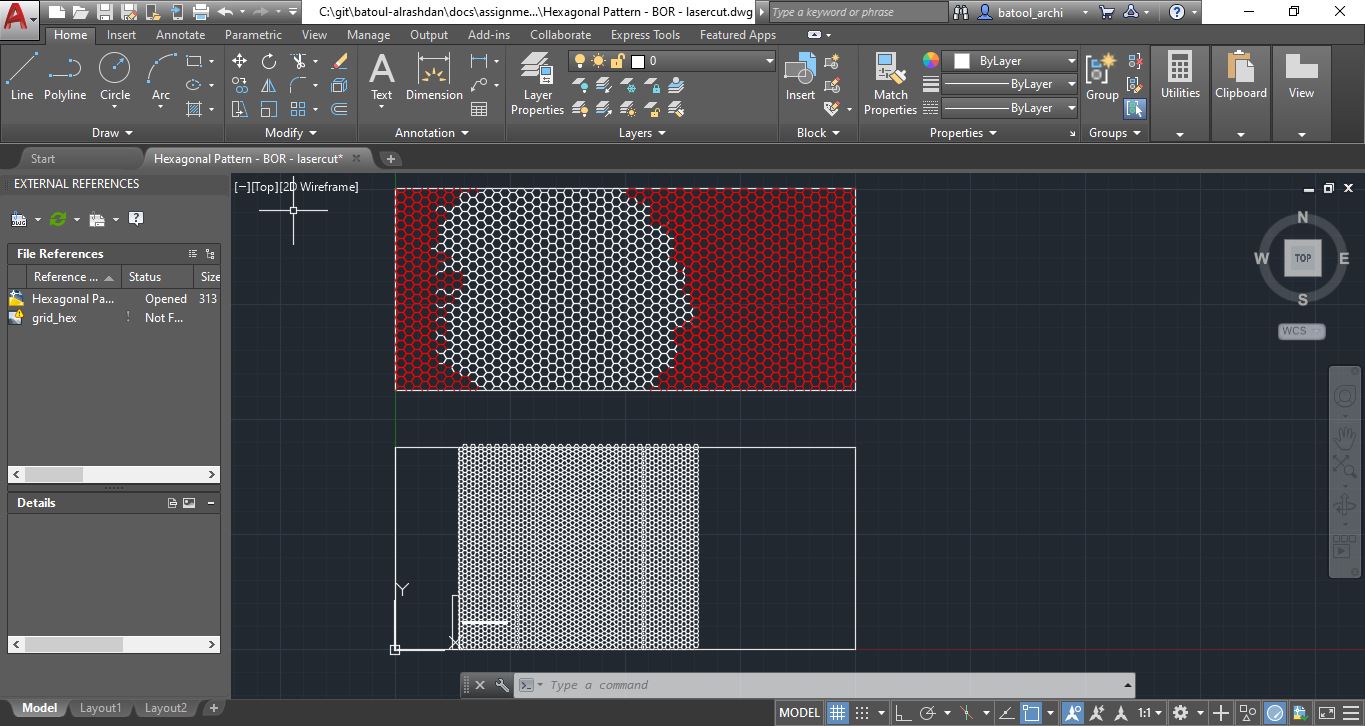 here i sued this 3D design of hexagons to do wood textile i wanted to create shelf like structure that flexible but i wanted to create illusion where its fixed and where it is flexi thats why i created
 so here it shows the sample size i did to test the settings as you would see in the upcoming pictures … in order to get the best setting for the full scale…
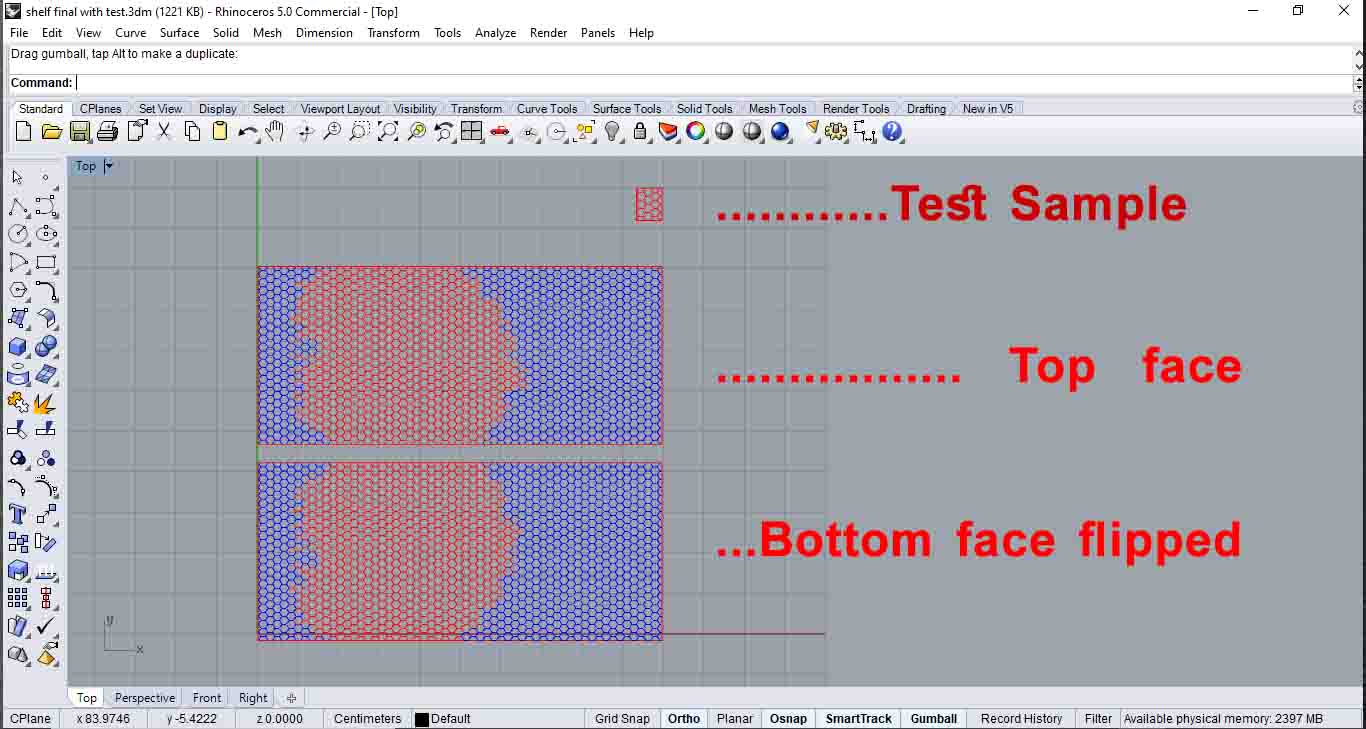
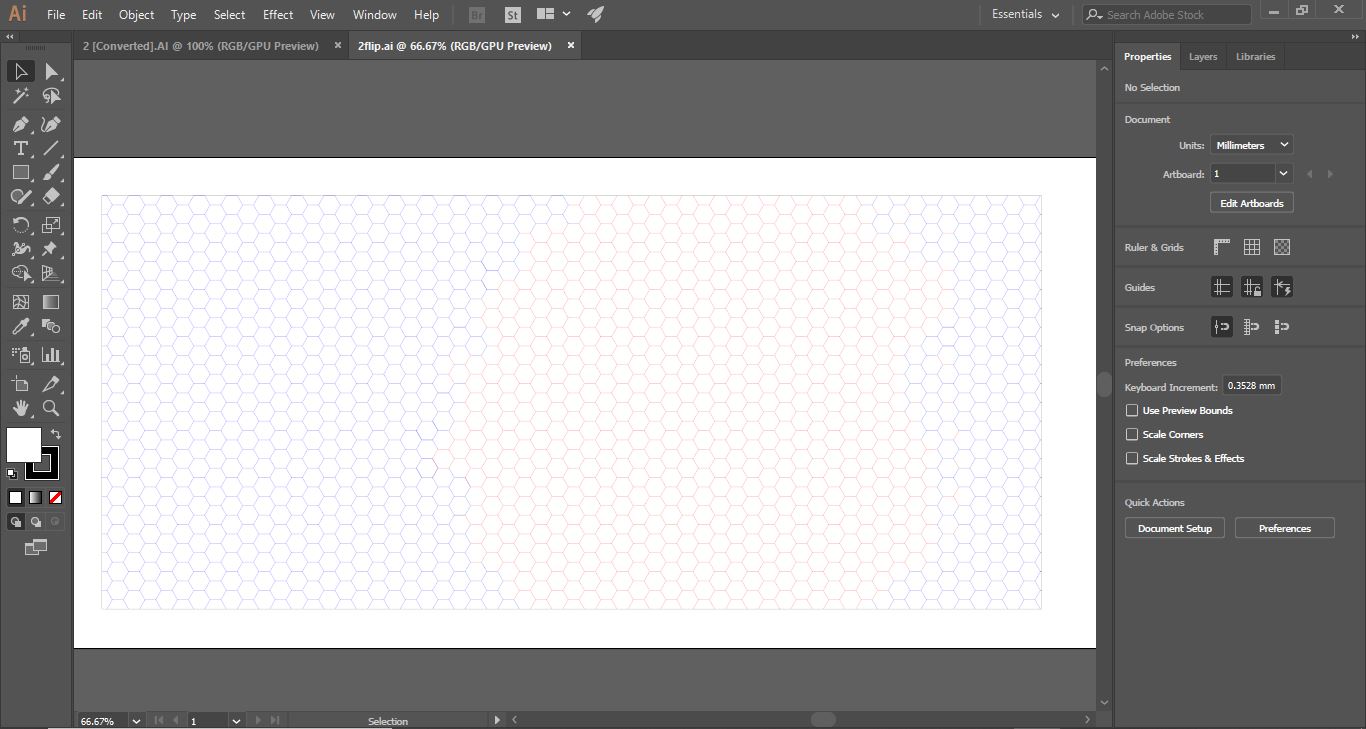
at first i thought i should flip horizontally but then nope
so here it shows the sample size i did to test the settings as you would see in the upcoming pictures … in order to get the best setting for the full scale…
at first i thought i should flip horizontally but then nope
 i realized i should flip vertically to get it exactly in place … like once i flip the rectangle (the shelf) vertically and it fits inside the rectangle subtract so each hexagon would have an opposing hexagon on the exact same place!
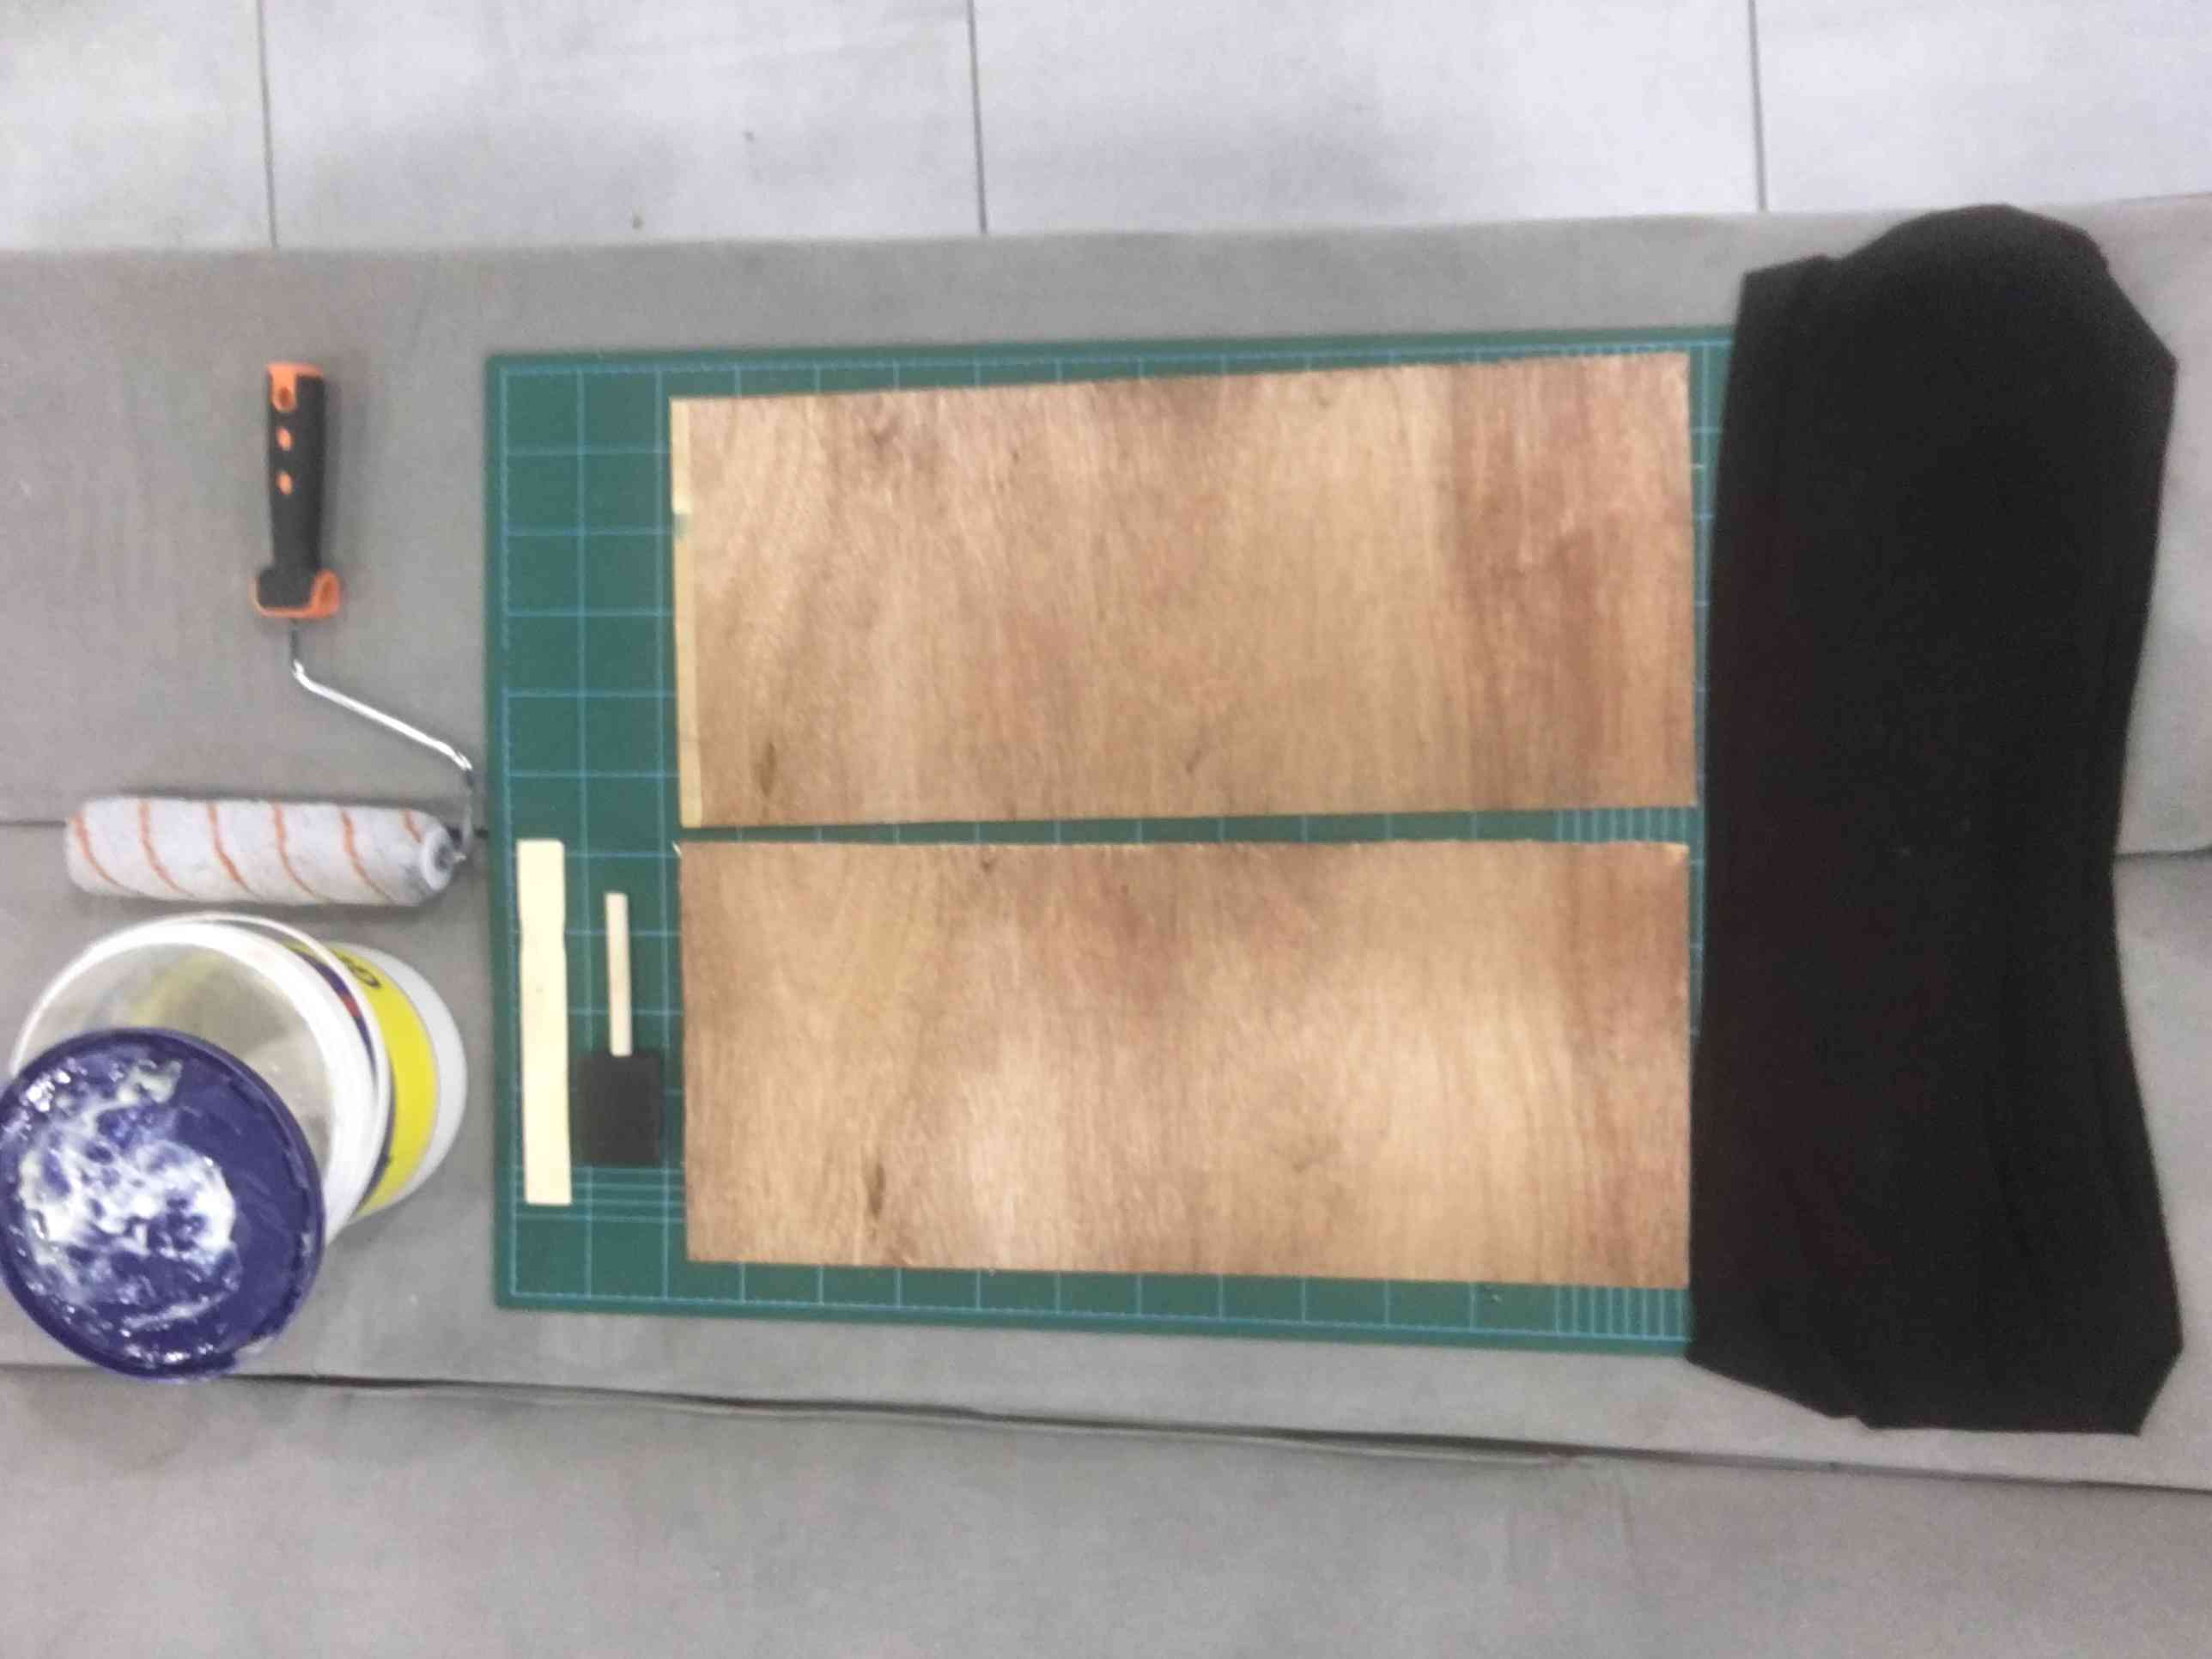
Material used :
3mm wood, Lycra fabric (stretch from both side), wood glue, double tape so hexagons wont start flying while or minimize losing order while laser cutting them
 Firstly i have done it in the Cliché way of just cutting hexagonal grid on laser cutter and try to glue them most by tape and rest piece by piece but was a bit time consuming as i wanted to do both sides…
| Output | Power | Speed | Frequency | Passes | Color | Comments |
|---|---|---|---|---|---|---|
| Cut | 100 | 0.6 | 1000 Hz | 1 | Red | too much cuts all layers (the upper,wood the fabric, the bottom wood) |
| Cut | 100 | 10 | 1000 Hz | 1 | Red | not cutting |
| Cut | 100 | 15 | 1000 Hz | 1 | Red | not cutting |
| Cut | 100 | 1 | 1000 Hz | 1 | Red | too much |
| Cut | 100 | 1.2 | 1000 Hz | 1 | Red | a bit more |
| Cut | 100 | 1.3 | 1000 Hz | 1 | Red | Perfect |
| Engrave | 100 | 0.5 | 1000 Hz | 1 | Blue | too much |
| Engrave | 100 | 0.3 | 1000 Hz | 1 | Blue | Perfect |
of course here to compare and find the optimum settings i had to make 2 aspects consistent and only change one (so i decided to Have the “power” and “frequency” consistent and I tried several values for the “speed” until i got the perfect settings for the cut as well as for the engrave …
 so my instructor Montse told me a way she knew from fabriacademy and researched it that i first glue the 2 side of wood on fabric as you cansee in the picture so basically making a sandwish of(wood,fabric,wood)
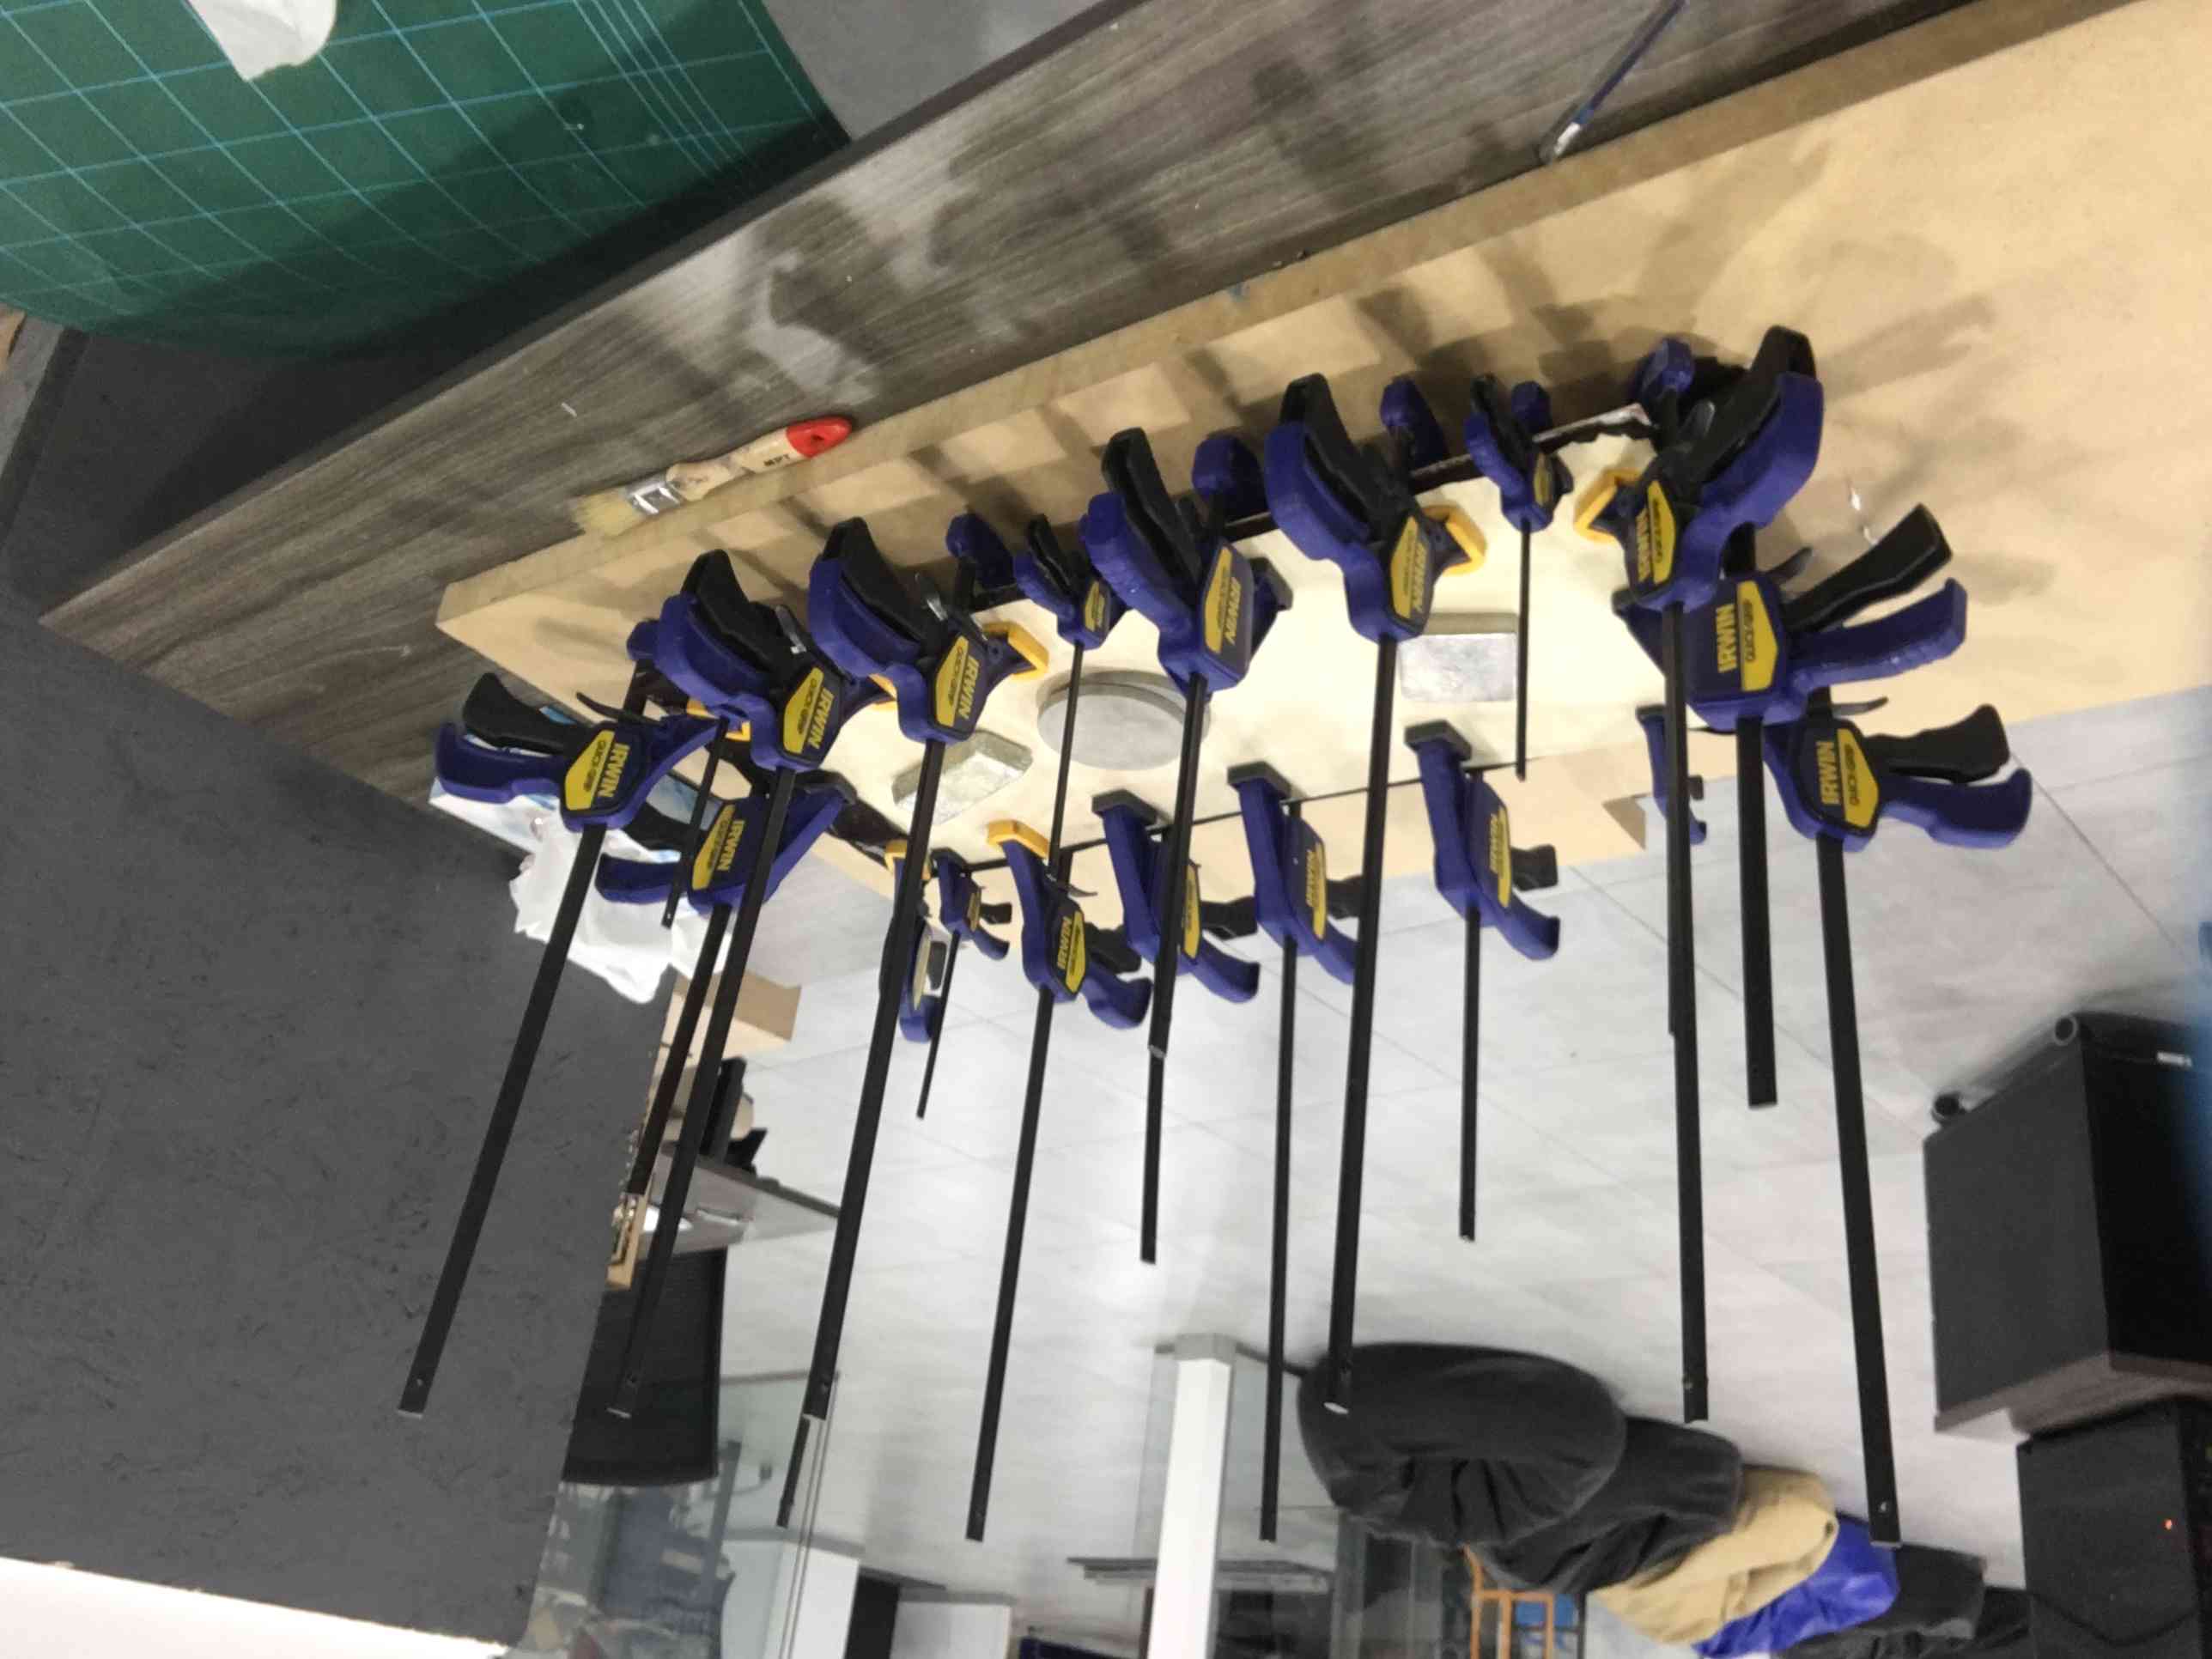 and I left it clamped over night (to be honest i left more than one night just to be extra sure lol) plus adding weight in the middle and bottom to release any extra glue as you wanted fully glued and fully dry once you cut on laser
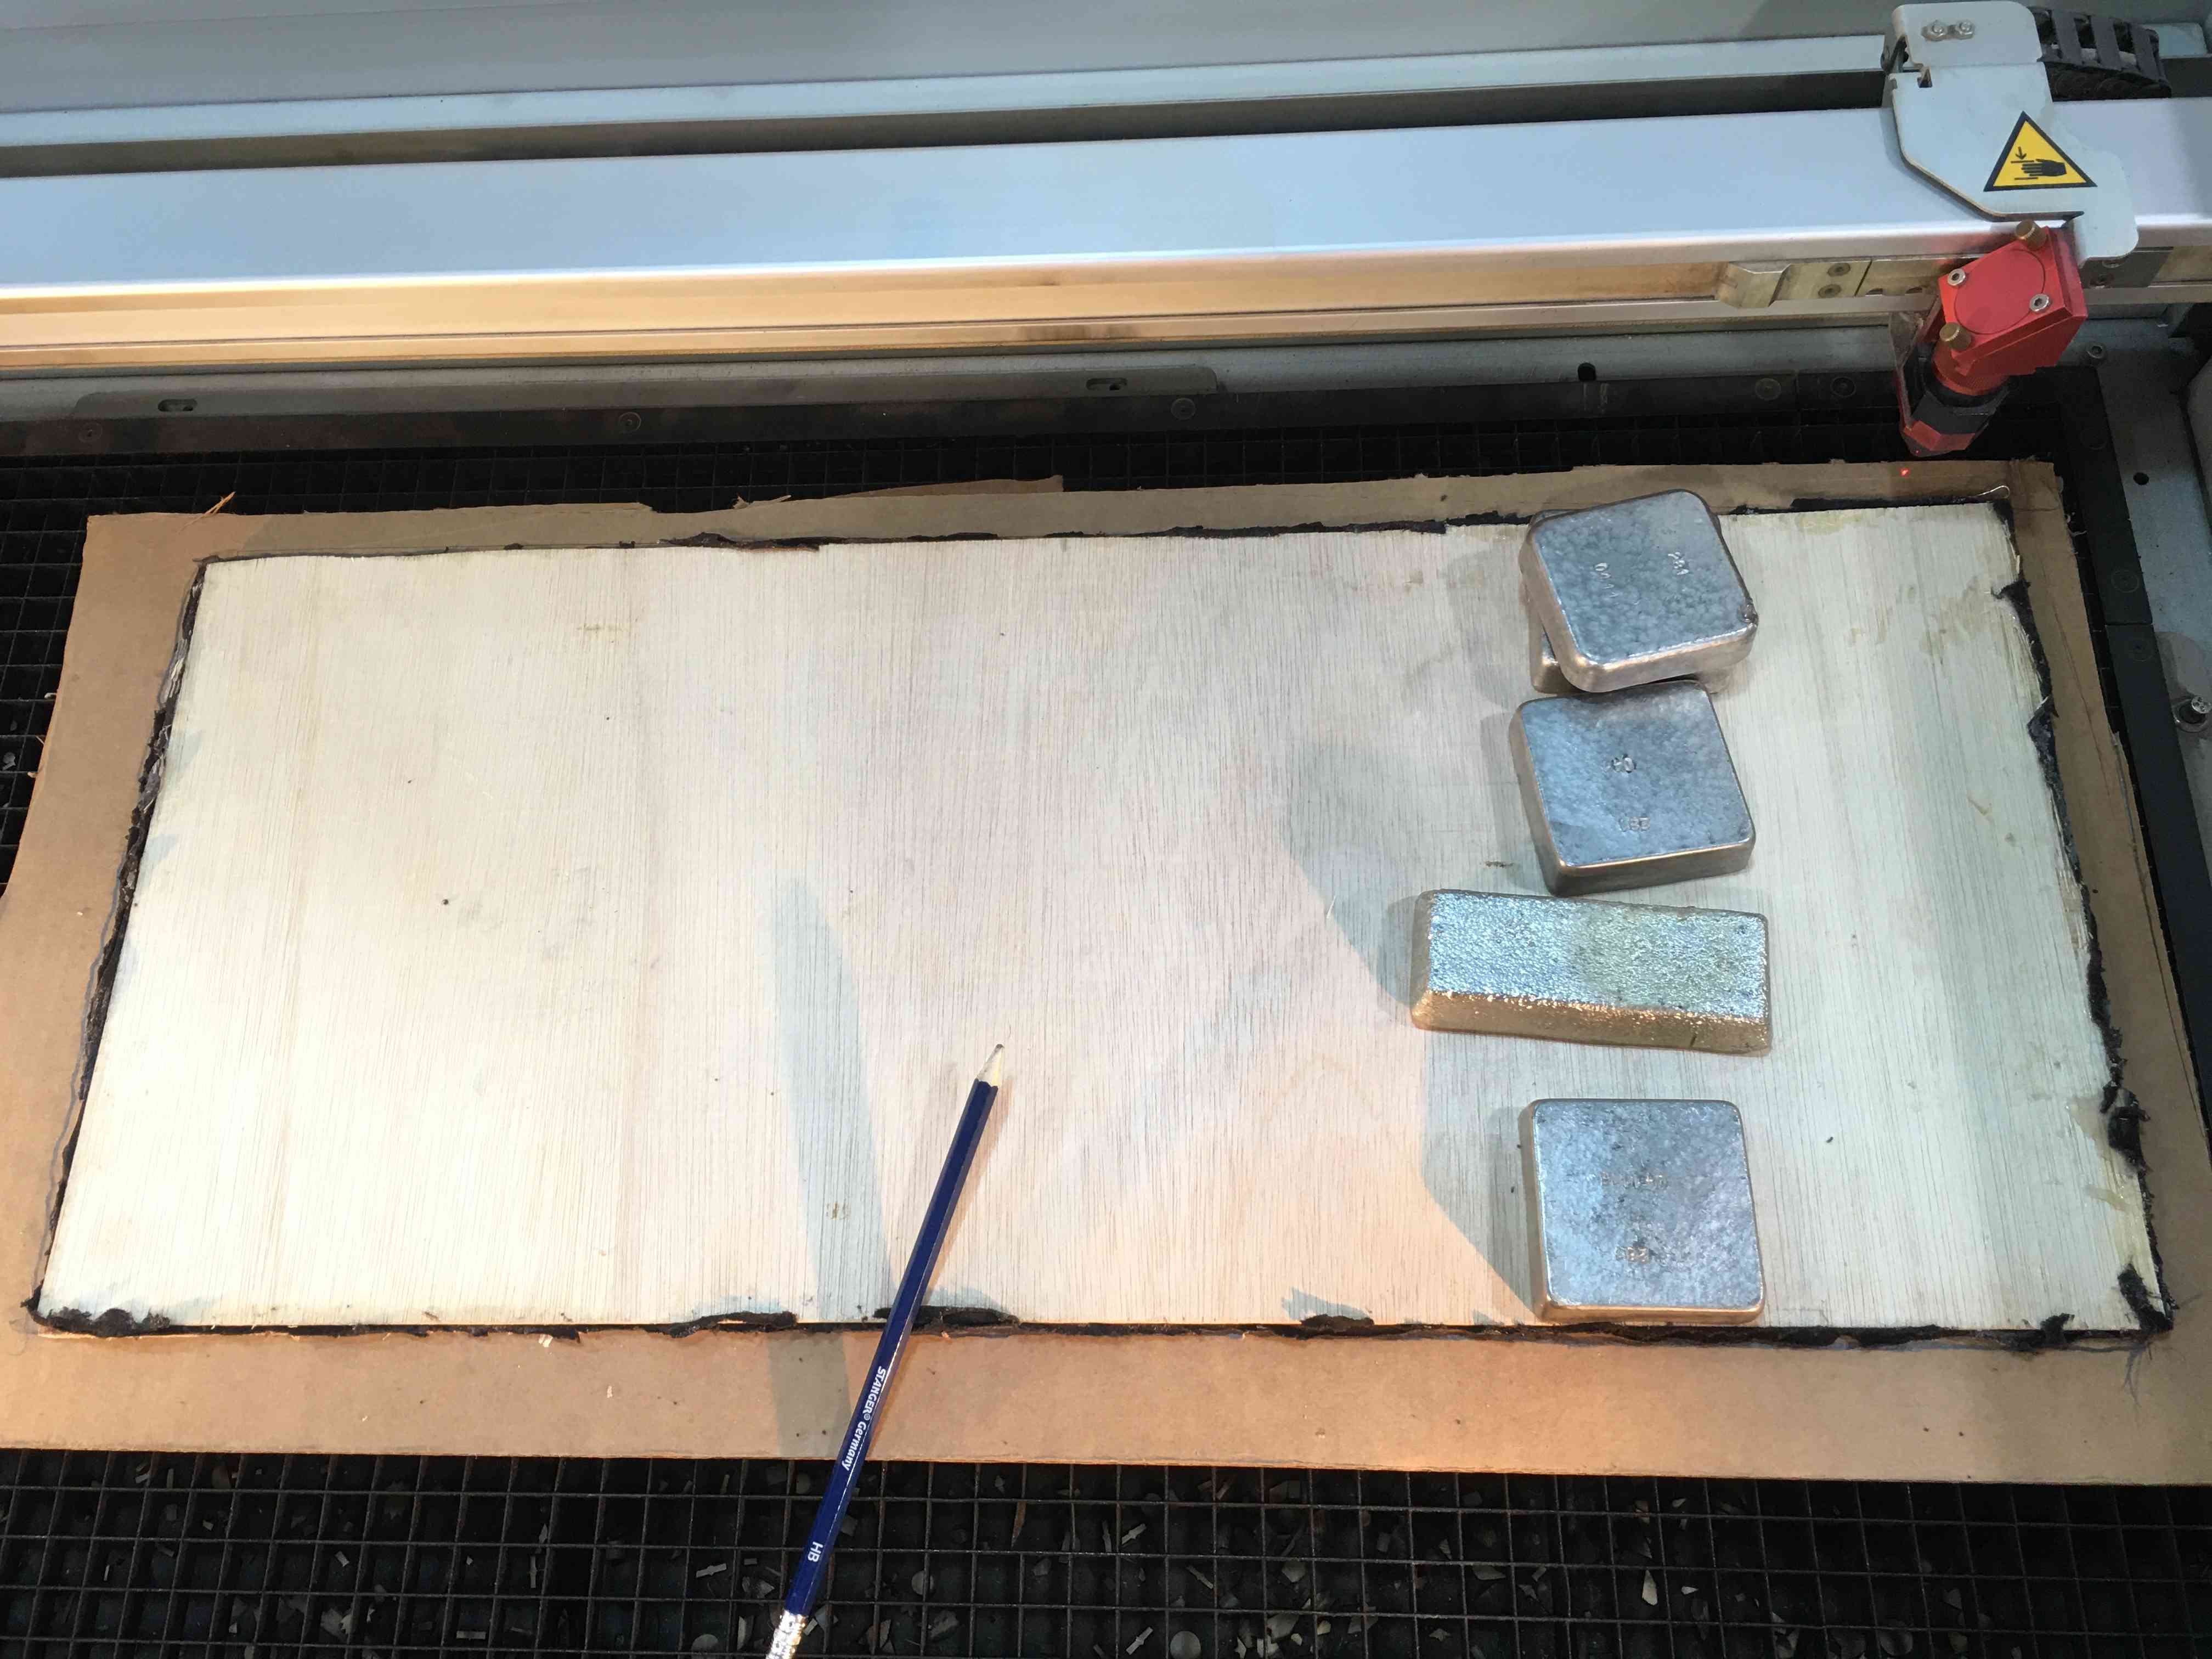 then here the crime seen i placed it on the laser and started modifying the settings so i cut only the wood above and laser doesn’t penetrate to the fabric
 i have tried these various setting on small samples to test … on both sides … it was really hard optimizinf the setting as you want to cut full all the 3 mm wood but doesnt (ino order to avoid limitation in movement) touch the fabric as if it touched then game over and the fabric wont hold the hexagonal wood grid and all would fall apart
 as you can see here this was one of the bad prototypes and trials as laser penetrated to the fabric as a result the hexagonal grid isn’t holding the fabric anymore!
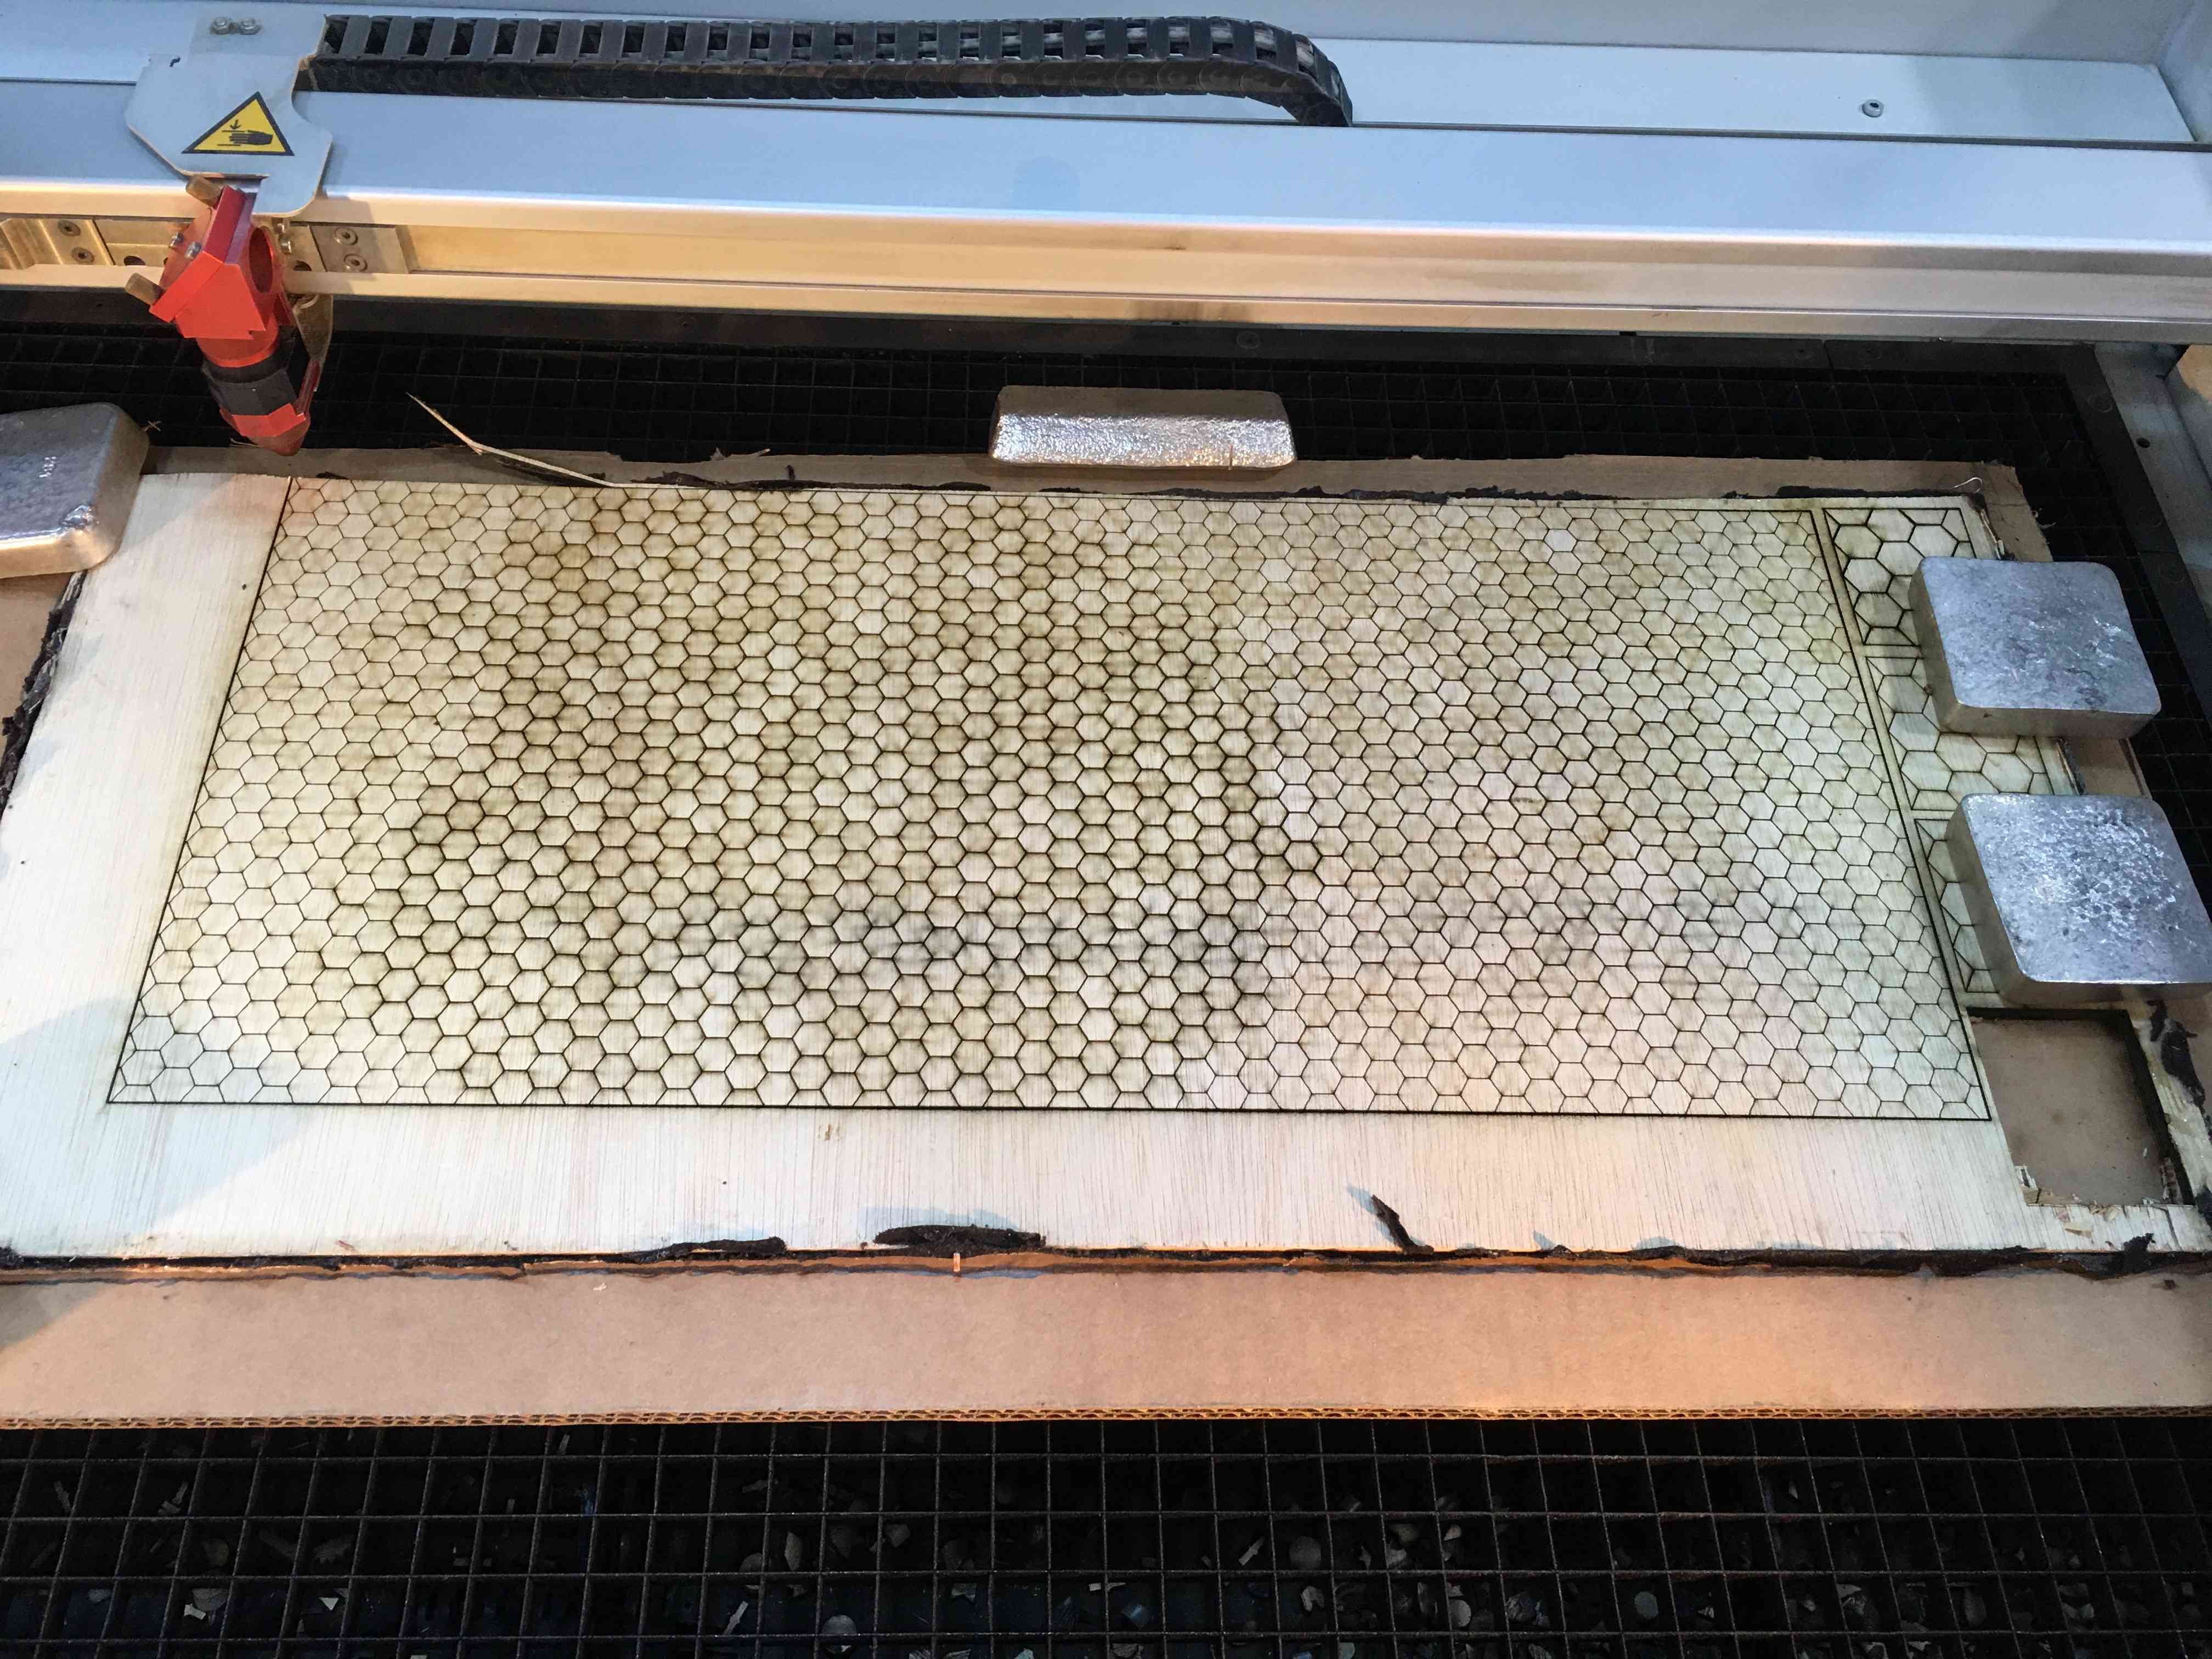 after I found a perfect setting i cut on big scale from one side
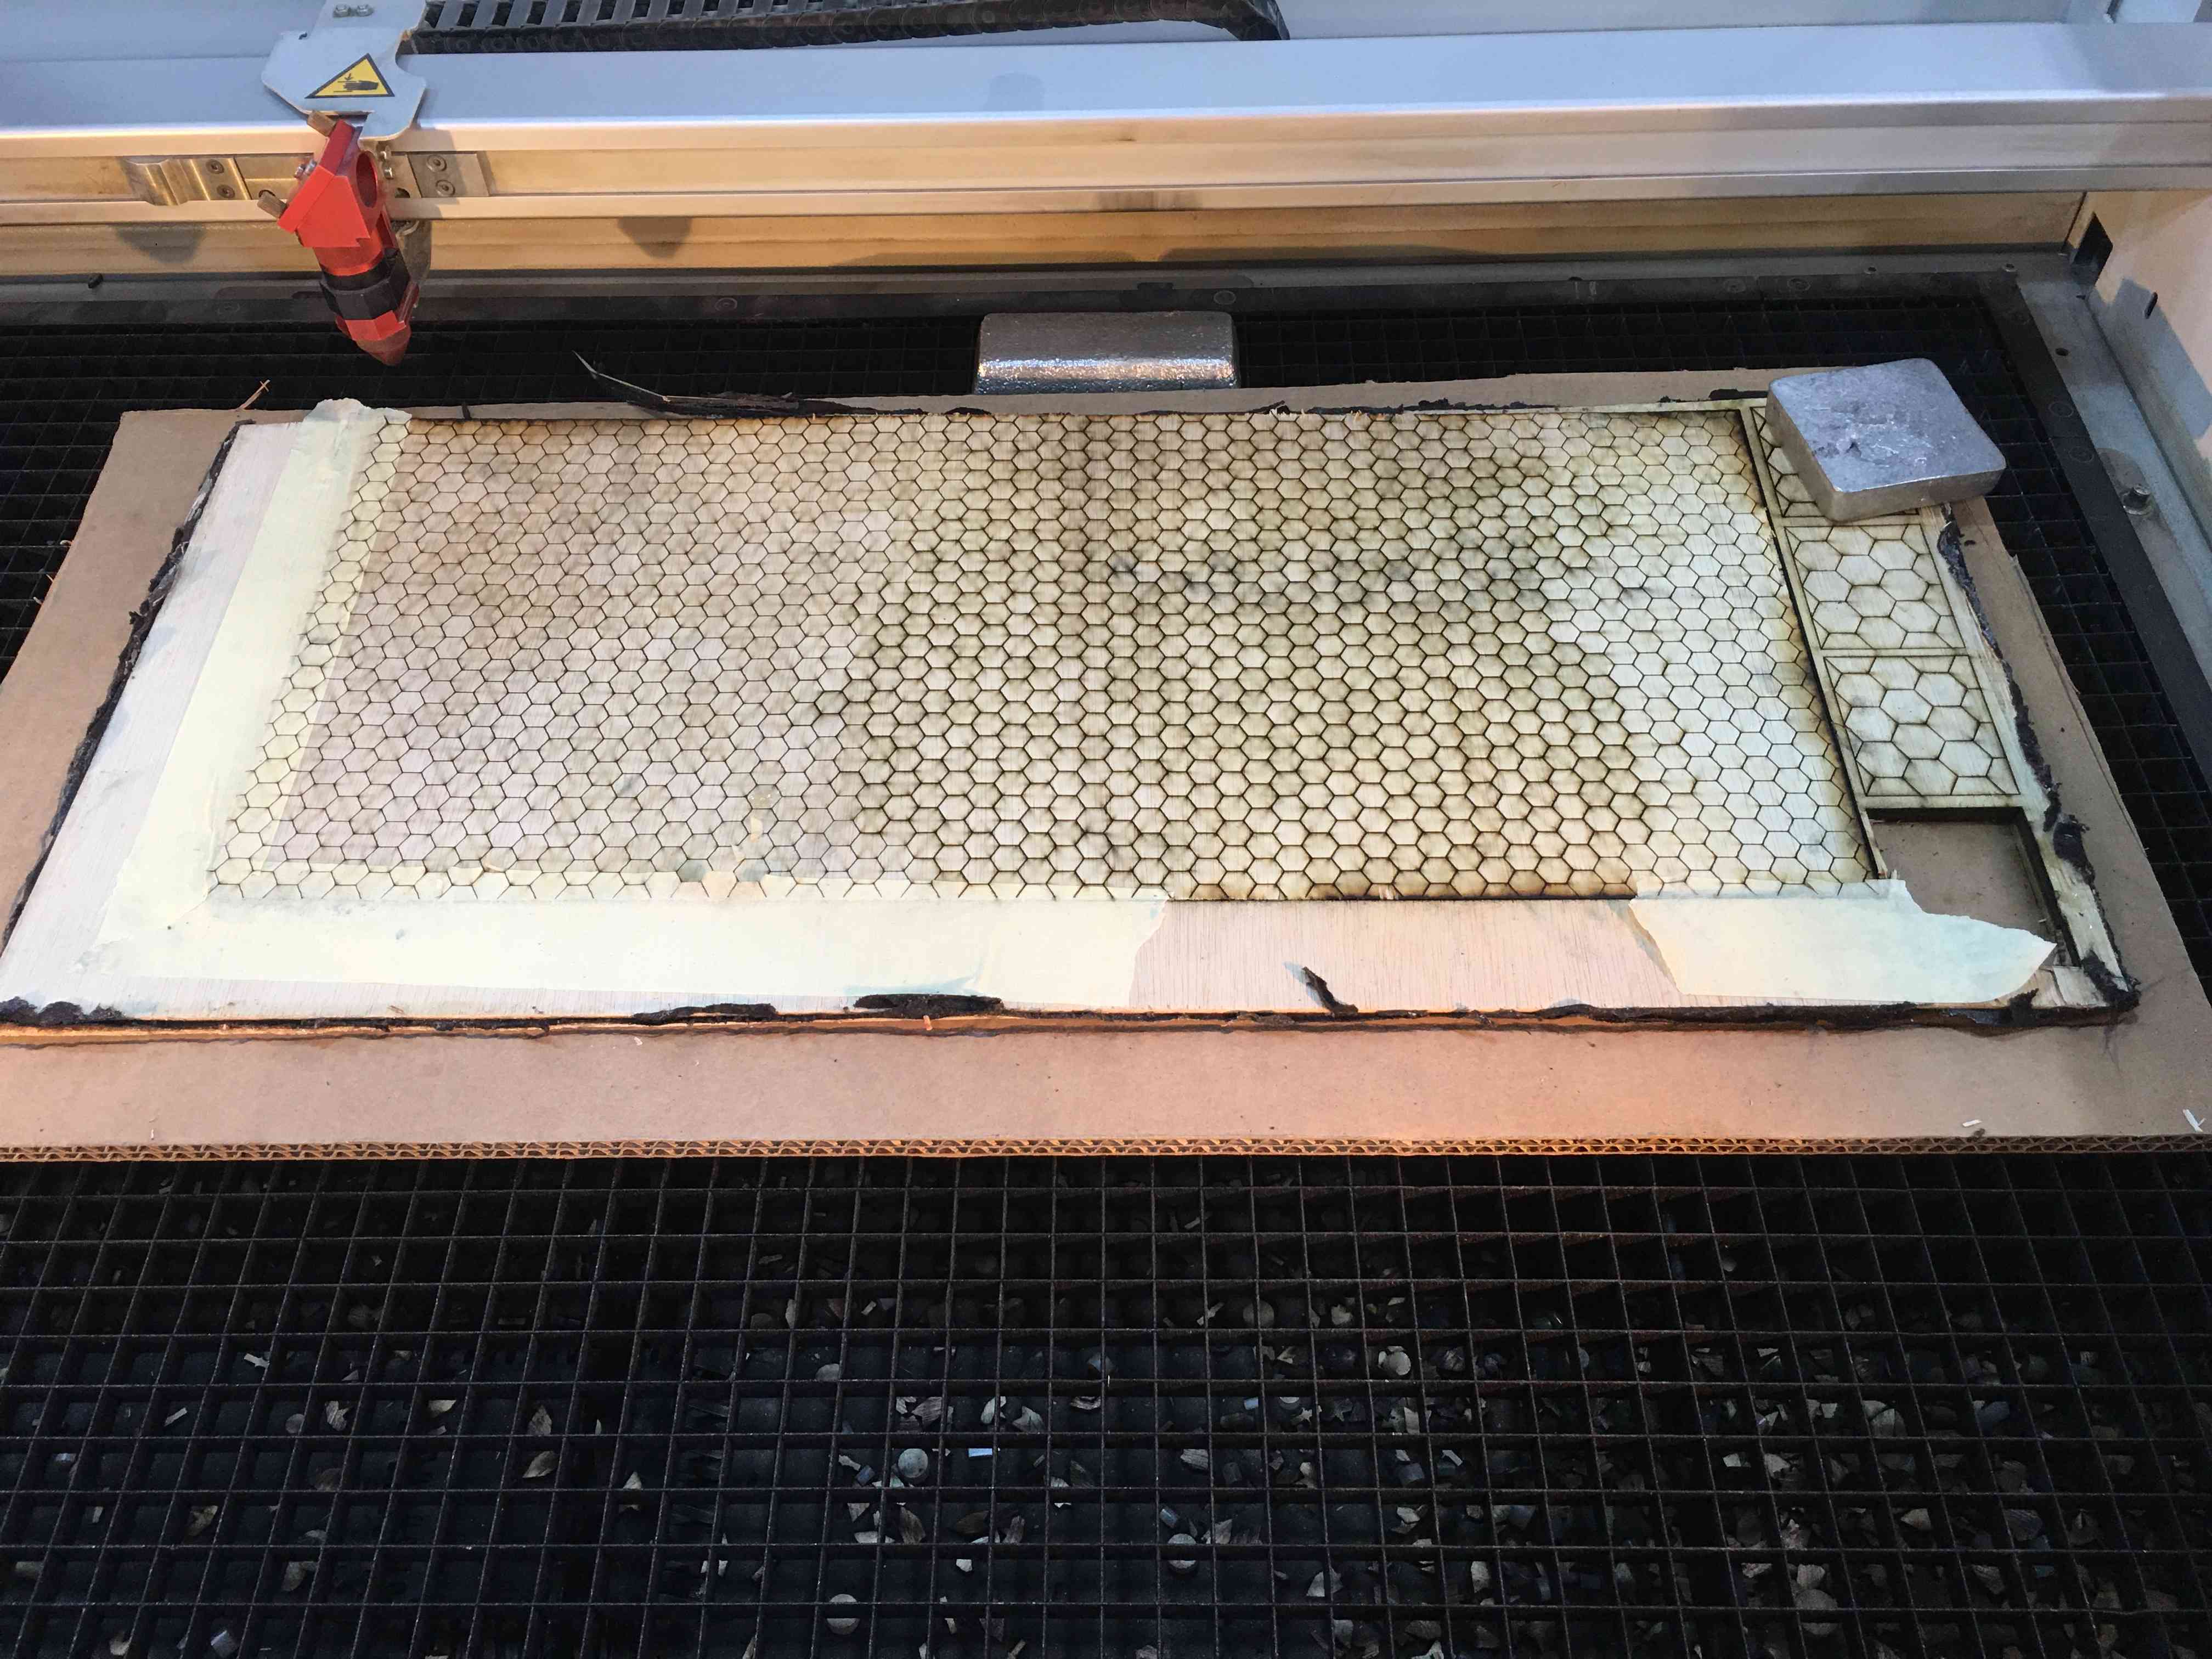 then i cut the other side
and on this video you can see how the characteristics of wood changed and now its flexible … like gained flexibility from fabric!
Video
From Vimeo
Hero Shot