8. Computer controlled machining
This week
Group assignment
test runout, alignment, speeds, feeds, and toolpaths for CNC machine
Individual assignment make (design+mill+assemble) something big
Files to download
Group assignment
Machine: ShopBot PRSalpha ATC 96-60-8
Software: VCarve Pro
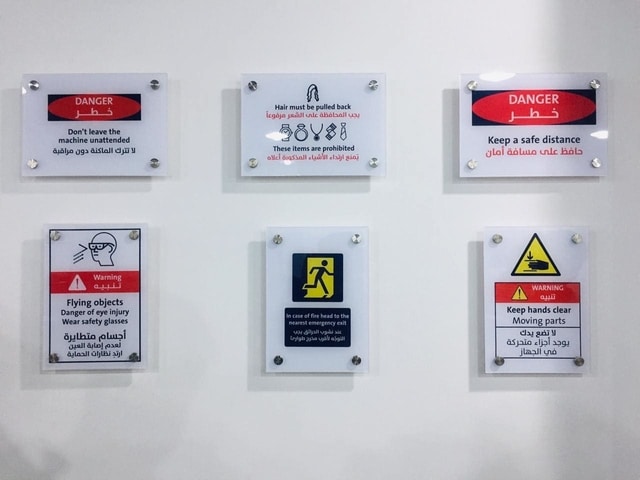
Safety
Machine Overview
The ShopBot PRSalpha ATC 96-60-8 is an affordable full-sized gantry tool for CNC cutting, drilling, carving and machining of wood, plastic, aluminum and other materials.
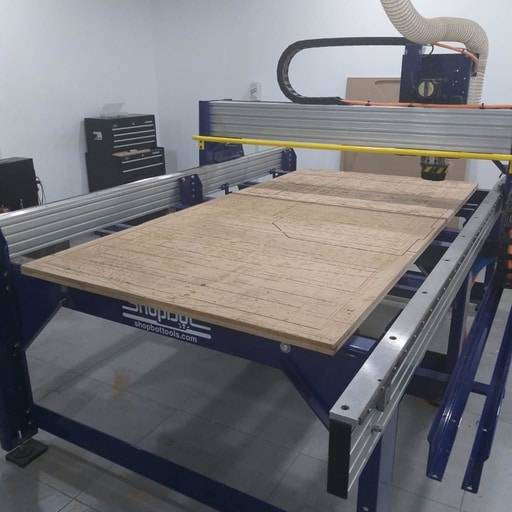
Specs: Cut/Movement Area (Length x Width x Plunge): 105” x 61” x 8” (2.67m x 1.55m x .2m) Step Resolution: 0.0004” (0.010mm) Positional Repeatability: +/- 0.002” (0.051mm) Spindle RPM: Max 18,000 RPM XY Move Speed (with full cutting force): Max 360”/min (9.1m/min) Z Move Speed (with full cutting force): Max 120”/min (3m/min)
Stopping the Machine
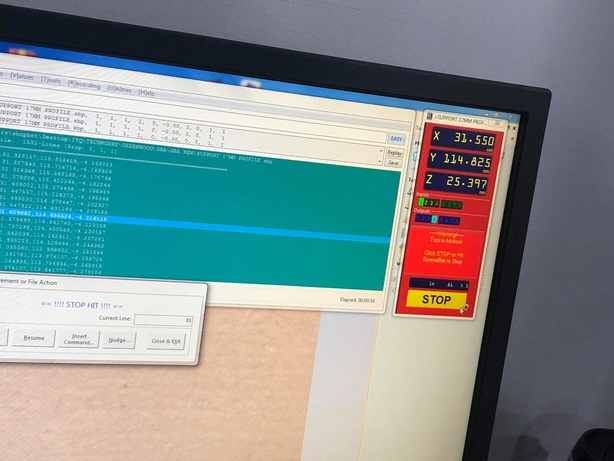
During tool operation the SPACEBAR on your computer keyboard becomes a Panic/Stop/Halt button. Hitting it will immediately stop the tool’s movement. Your ShopBot is also supplied with a STOP Button that you can place in a convenient location on your tool. Hitting this button will stop the tool’s movement. On a PRSalpha ShopBot or Buddy the STOP Button will also cut power to the spindle/router.
When you click on stop or when you hit the space bar the machine will stop and this window will appear in which you can quit the job or resume it :
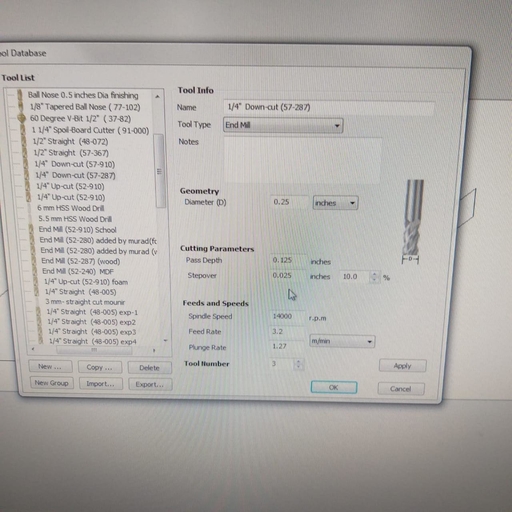
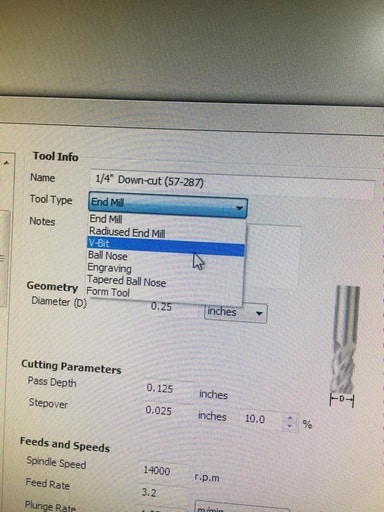
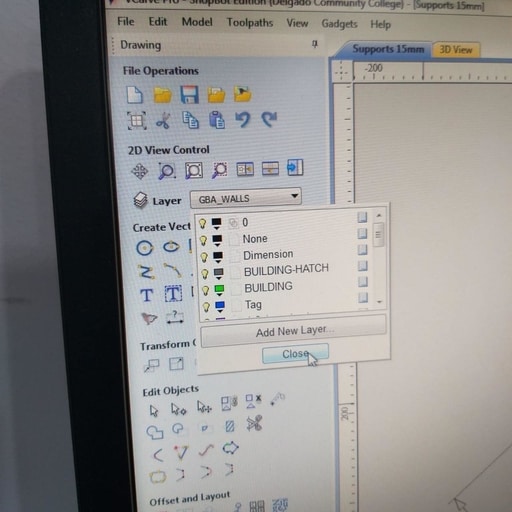
Vcarve-pro
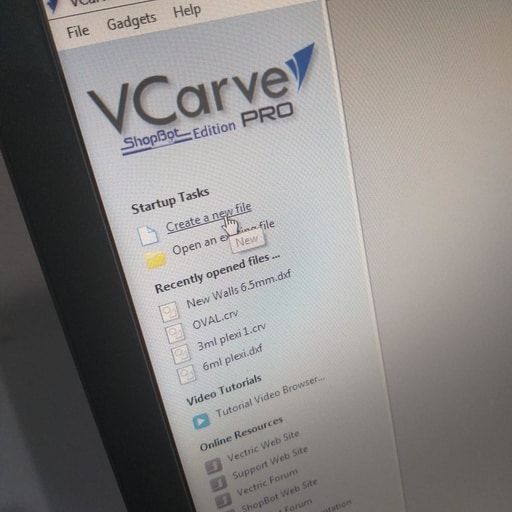
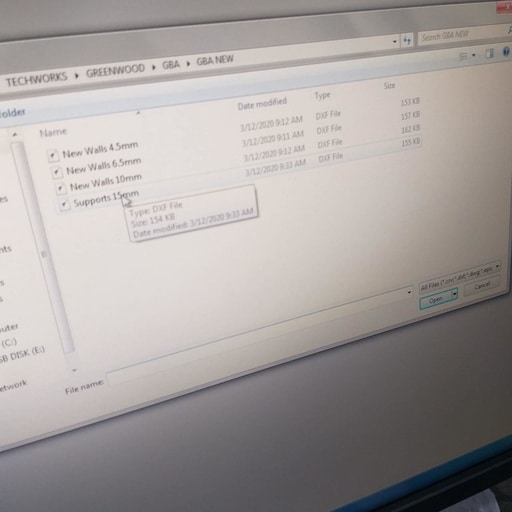
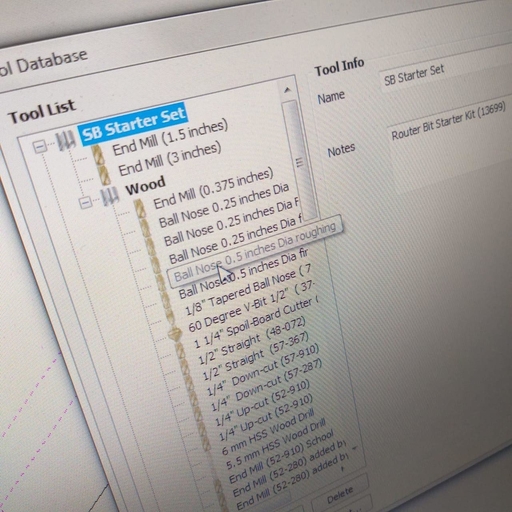
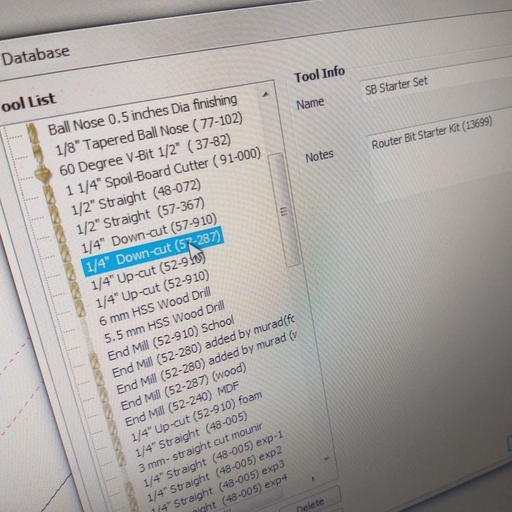
First we open the software and this window will appear, we can make a new file or open an existing file and in our case we have open an existing file in order to see the difference between the milling bits and how to set up the machine properly :

Individual assignment
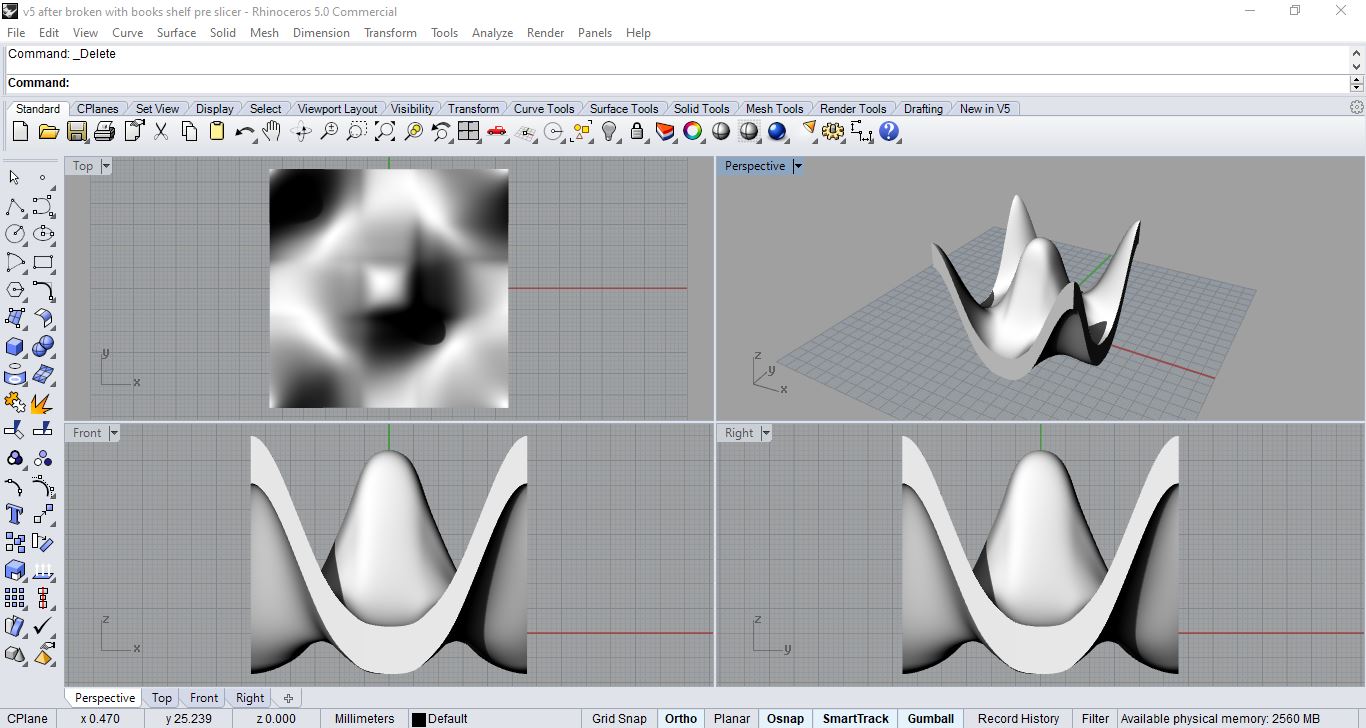
so firstly i started initially modeling the surface i wanted to create to have a wave like
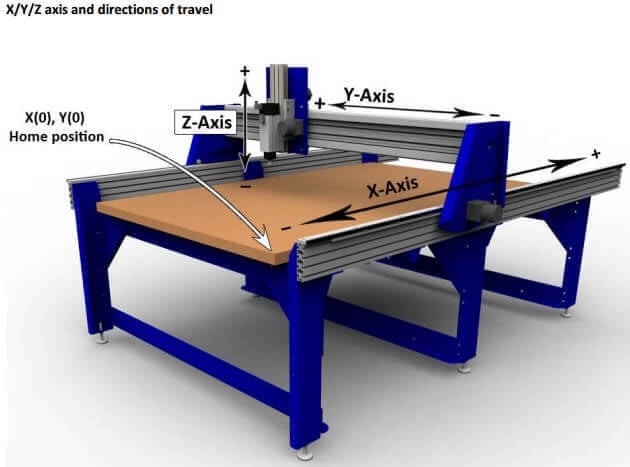
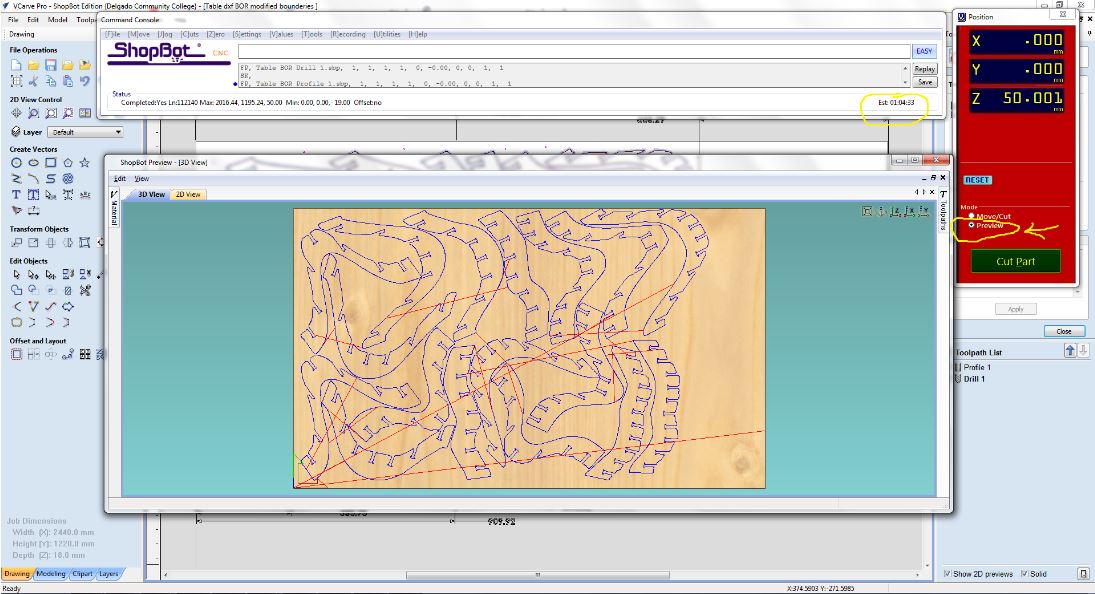
to set the machine x y 0 we have to move the machine to the edges then we press zero
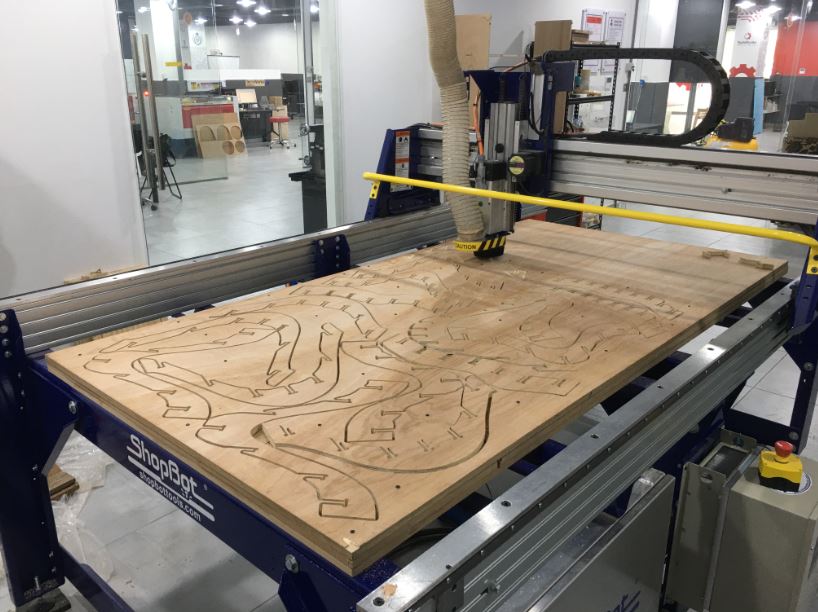
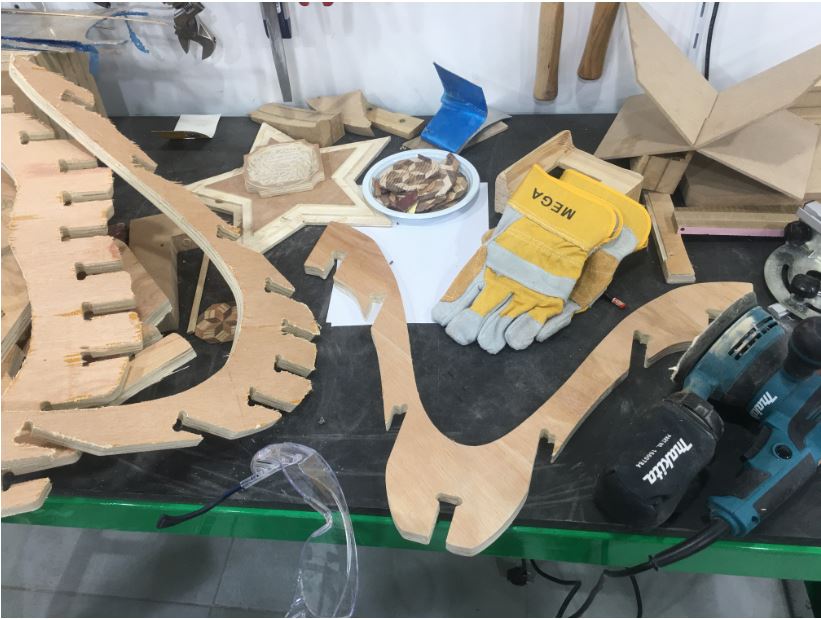
Failed Fabrication table
After fixing the endmill and collet to spindle, Z-Axis should be zeroed. Move X and Y if necessary and put the “Plate” under the tool tip and keep a distance of 10-15mm. Moved Z using KeyPad as needed. Connected the “Alligator Clip” to machine body. Clicked on “Z” in “Position” and the program started a code to zero Z-Axis. Clicked “Ok” for the message asking to put the plate under the tool. When completed a confirmation message will appear. Clicked “OK”.
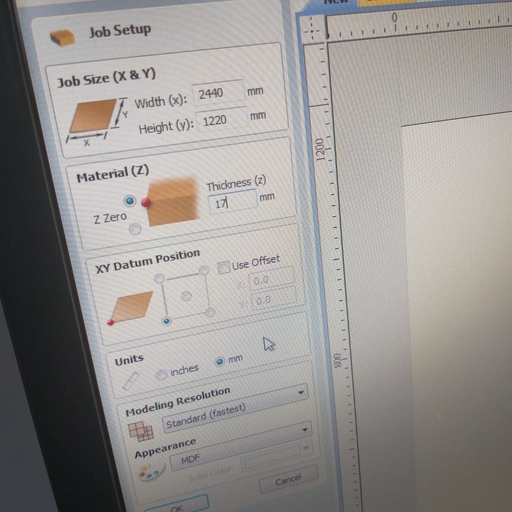
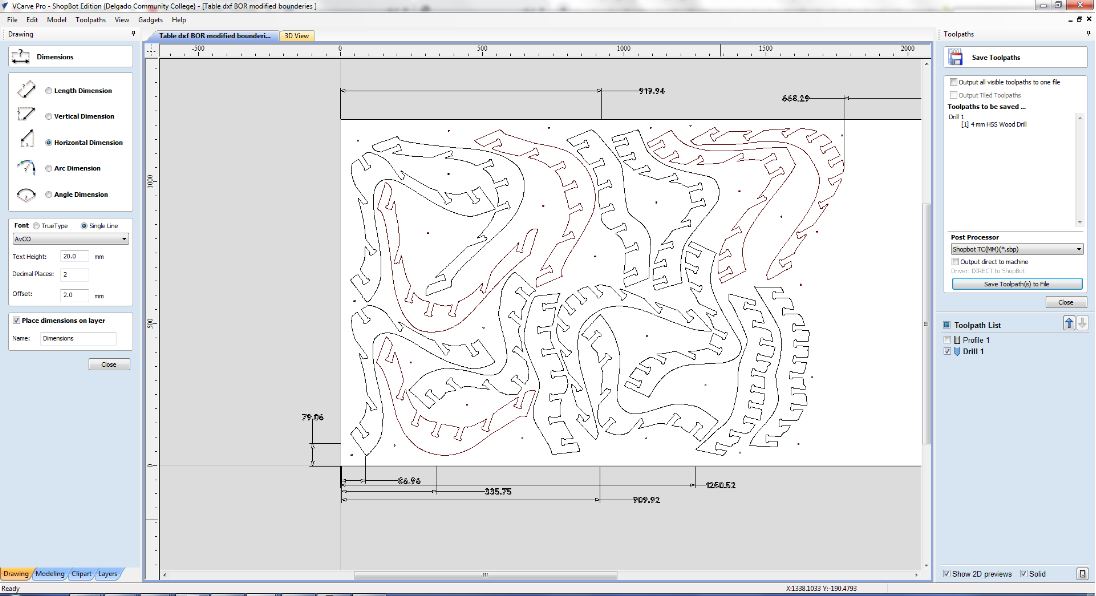
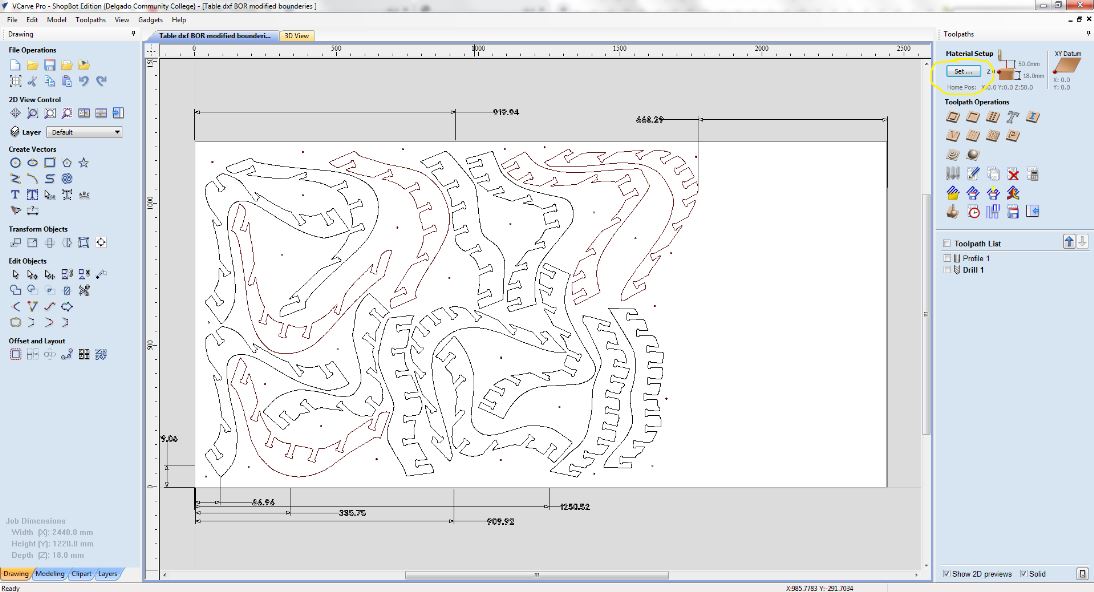
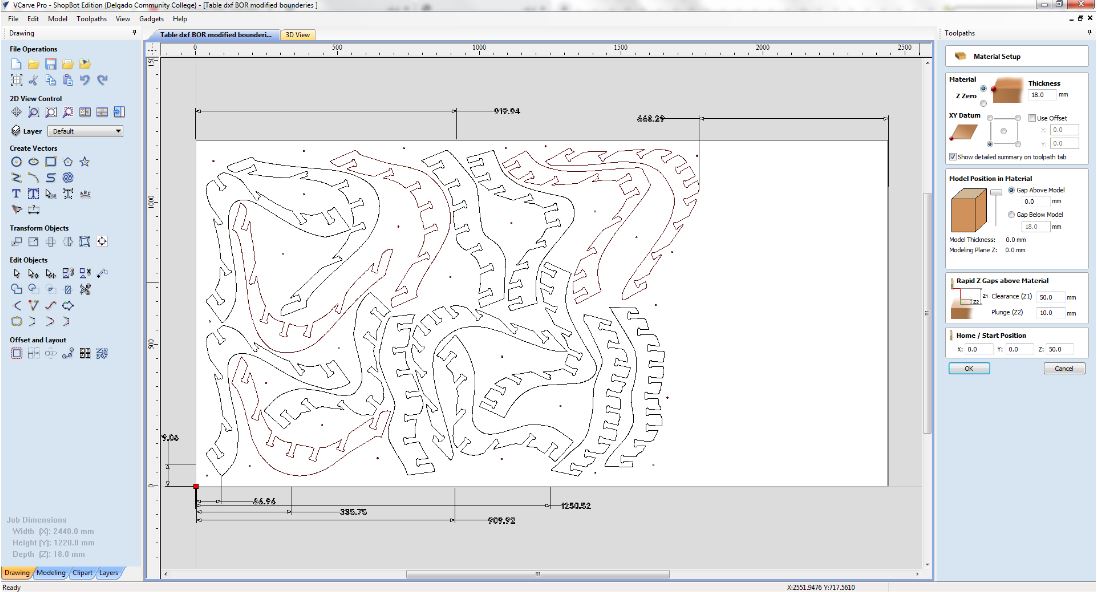
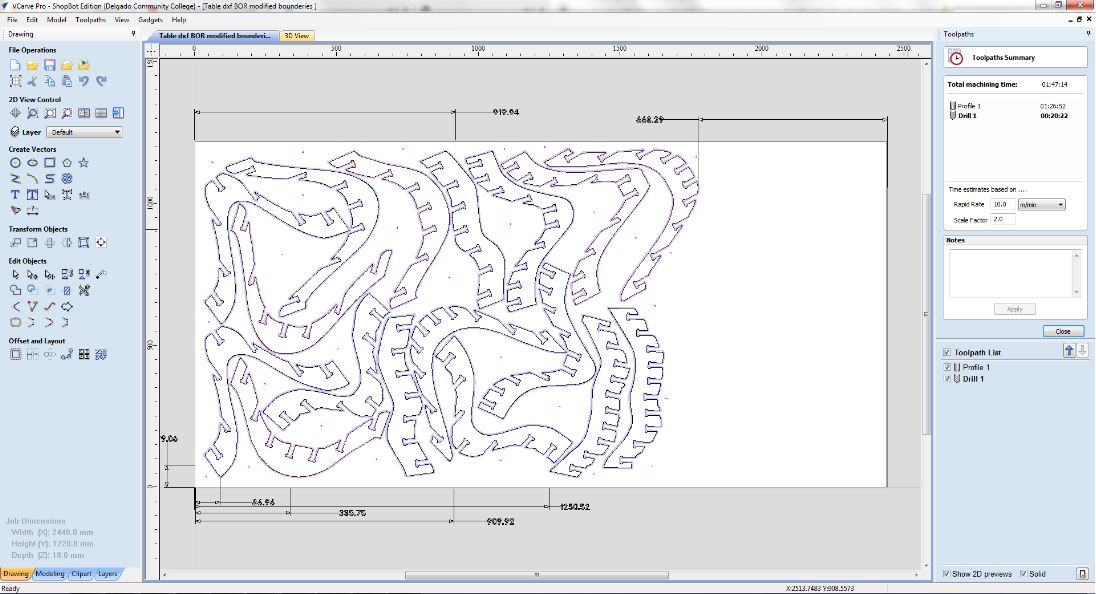
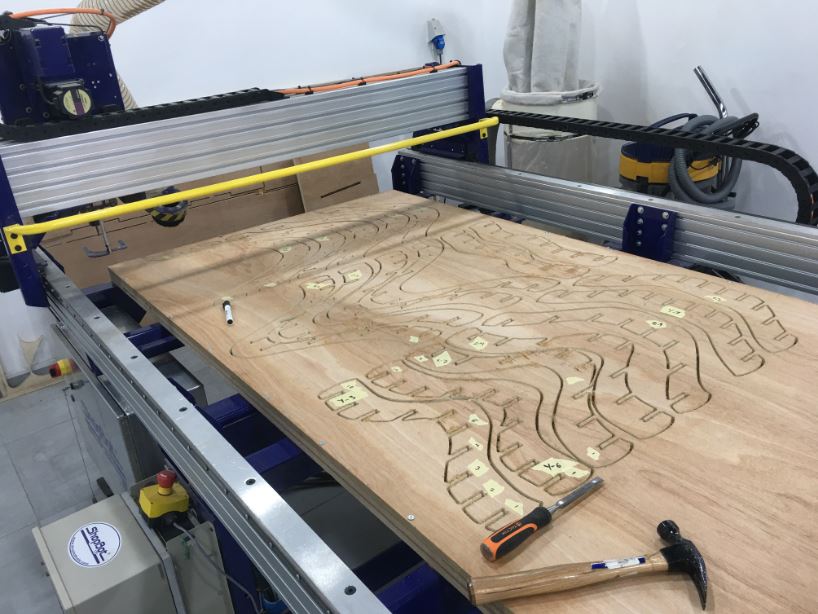
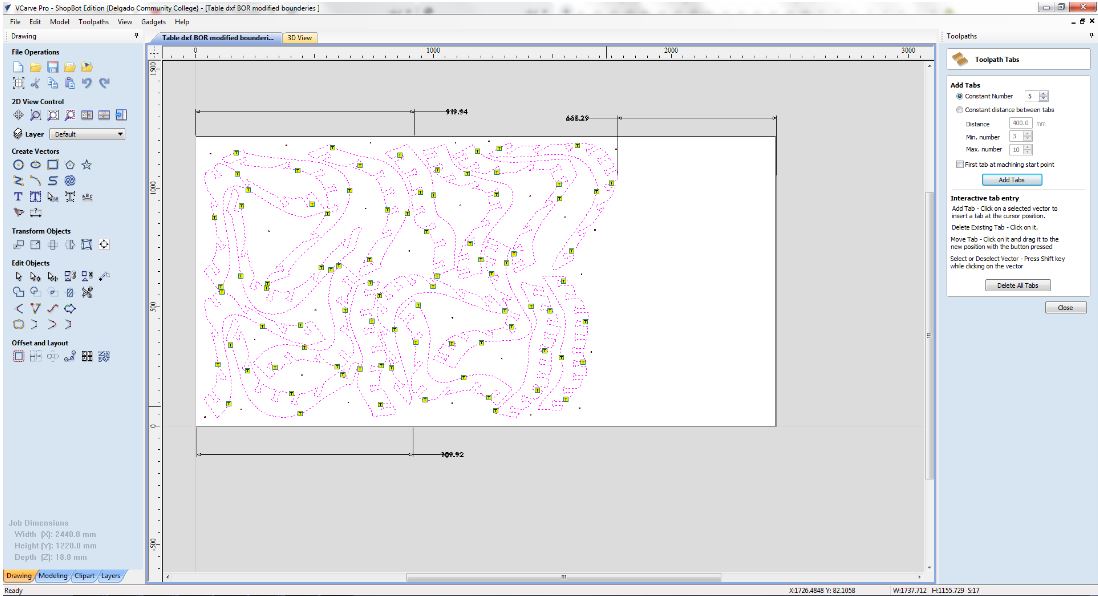 Open VCarvePro and click on “Open an existing file”. Locate the Table dxf midified .dxf file and open it. Dxf file will be displayed and “Job Setup” menu opens. Insert job settings and click “Ok”. The board I used is 2440mm x 1220mm and measured thickness is 17.2mm

 sanding at it’s best
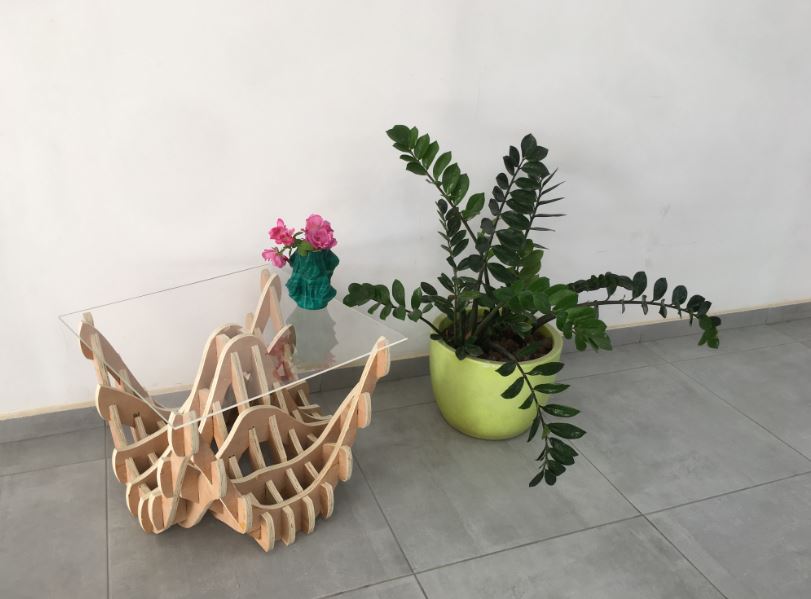
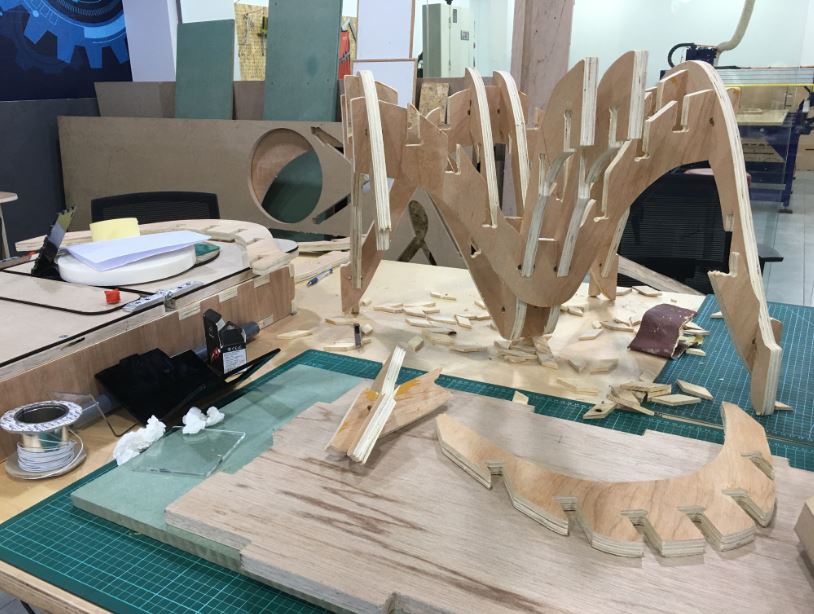
Hero Shot
Succeeded Fabrication table
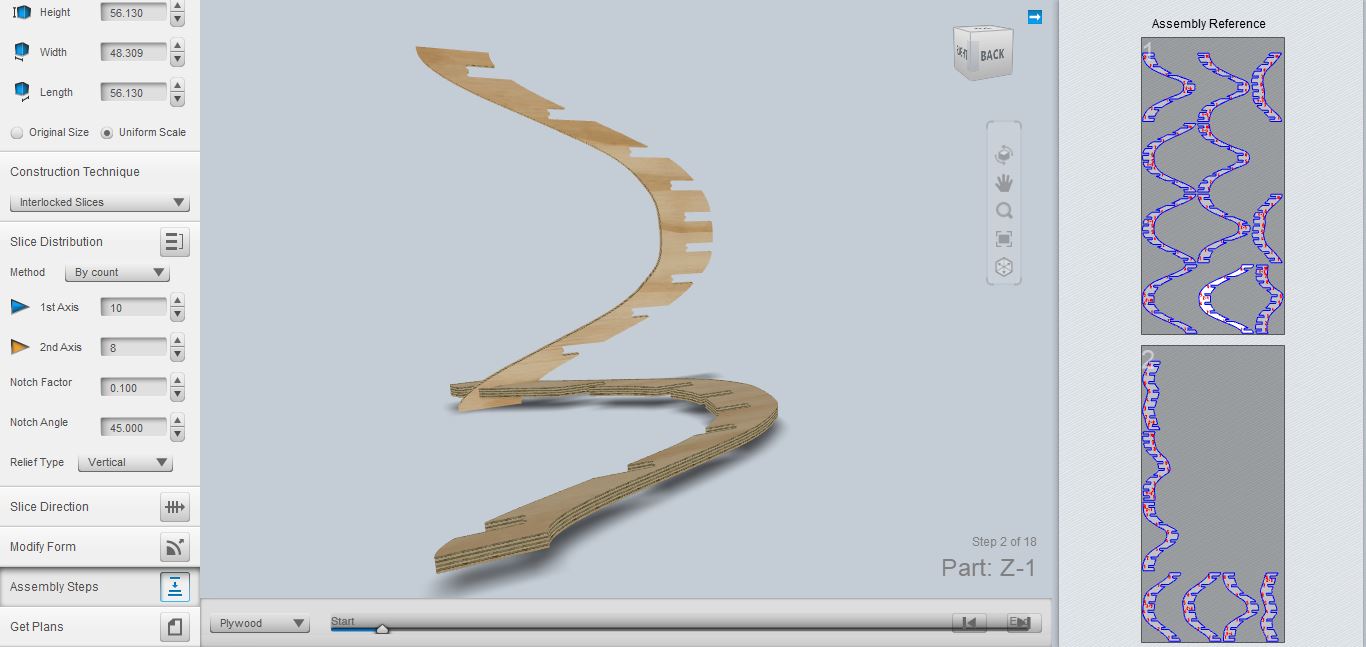 so here i tried to see the press fit in 3D to eliminate previous failure

of course added some tabs to hold the board and the pieces while cutting
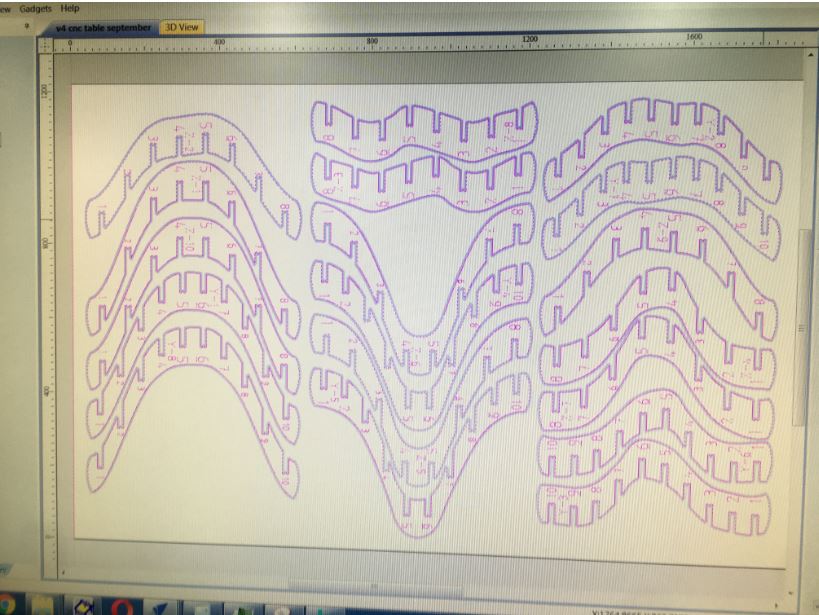 “Dog-bone” Fillets used in order to insert the joints easier but made them in the same direction of the press fit joints as a result the would be hidden and not shown which is neater
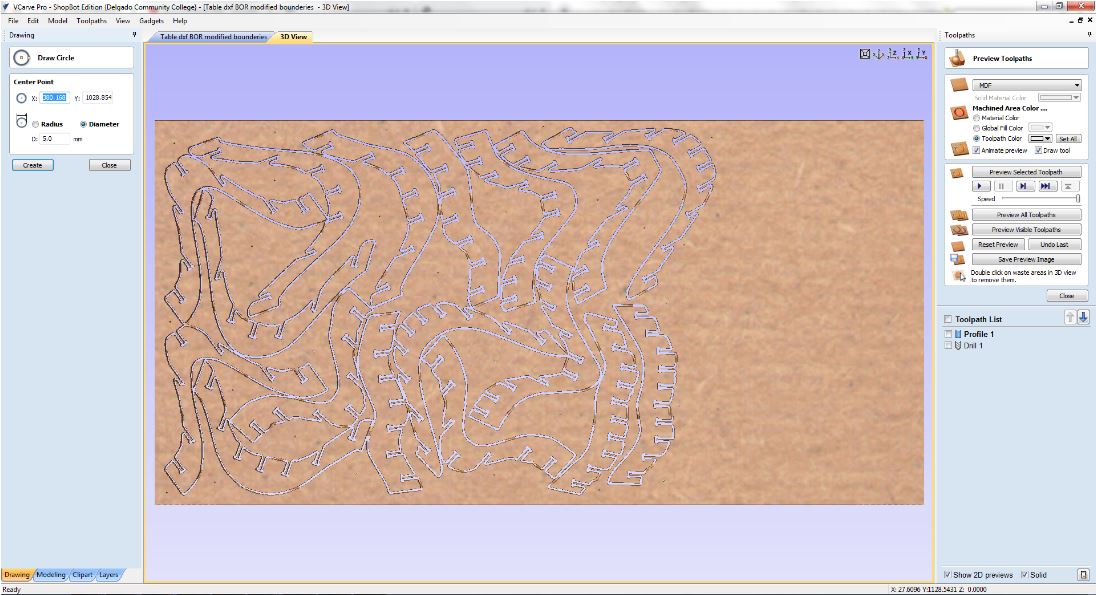
Process Video
BOR wave Table from Batoul Al-Rashdan on Vimeo.
Assembly Video
Assembly CNC - BOR table from Batoul Al-Rashdan on Vimeo.
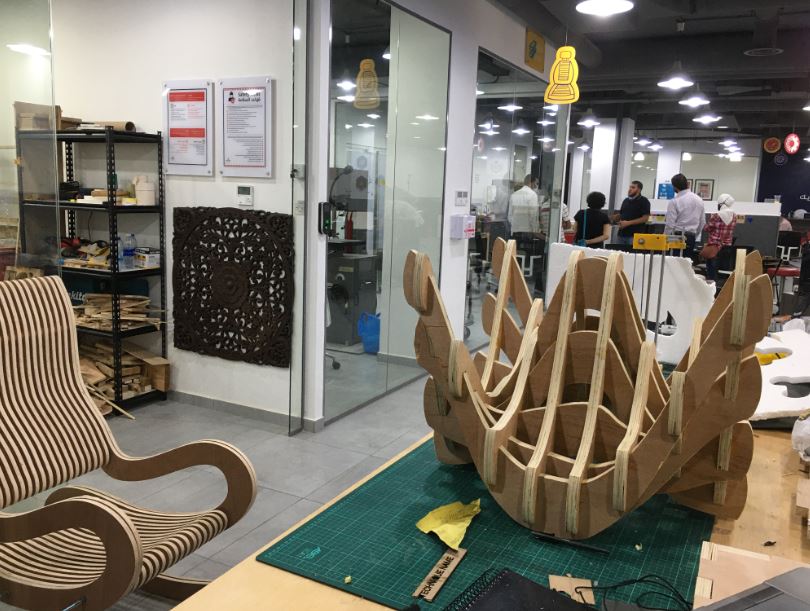
Hero Shot