12. Output devices
This week I worked on defining my final project output and started to getting used to the SMA.
Group Assignment¶¶
In this part we measured the power consumption of a DC motor using a DC motor output board. Power (in Watt) is calculated by P = V x I, where V is the voltage across the load and I is the current passing through the load.
To measure voltage, the digital multimeter (DMM) is connected in parallel with the load, and to measure the current passing through, the DMM is connected in series with the load.
Remember to move DMM positive test lead to current measuring position before connecting in series with the load.
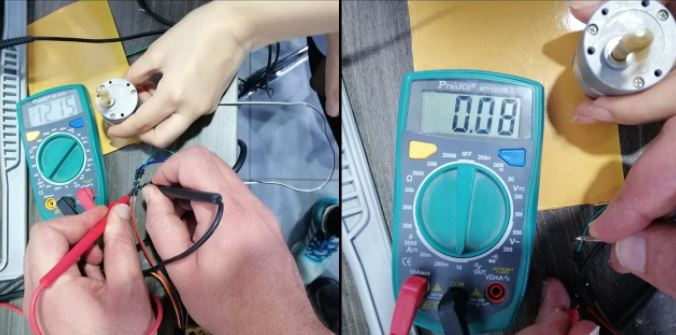
To calculate the power consumption of the DC motor:
P = 12.15 x 0.08 P = 0.972 Watt P = 972 mWatt
Individual Assignment¶¶
Files to download
CONTROLLING WITH ARDUINO - Nitinol
Nitinol datasheet
Carefully read this datasheet to know the instructions how to program this specific Nitinol wire. Here what I used

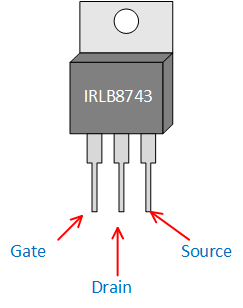
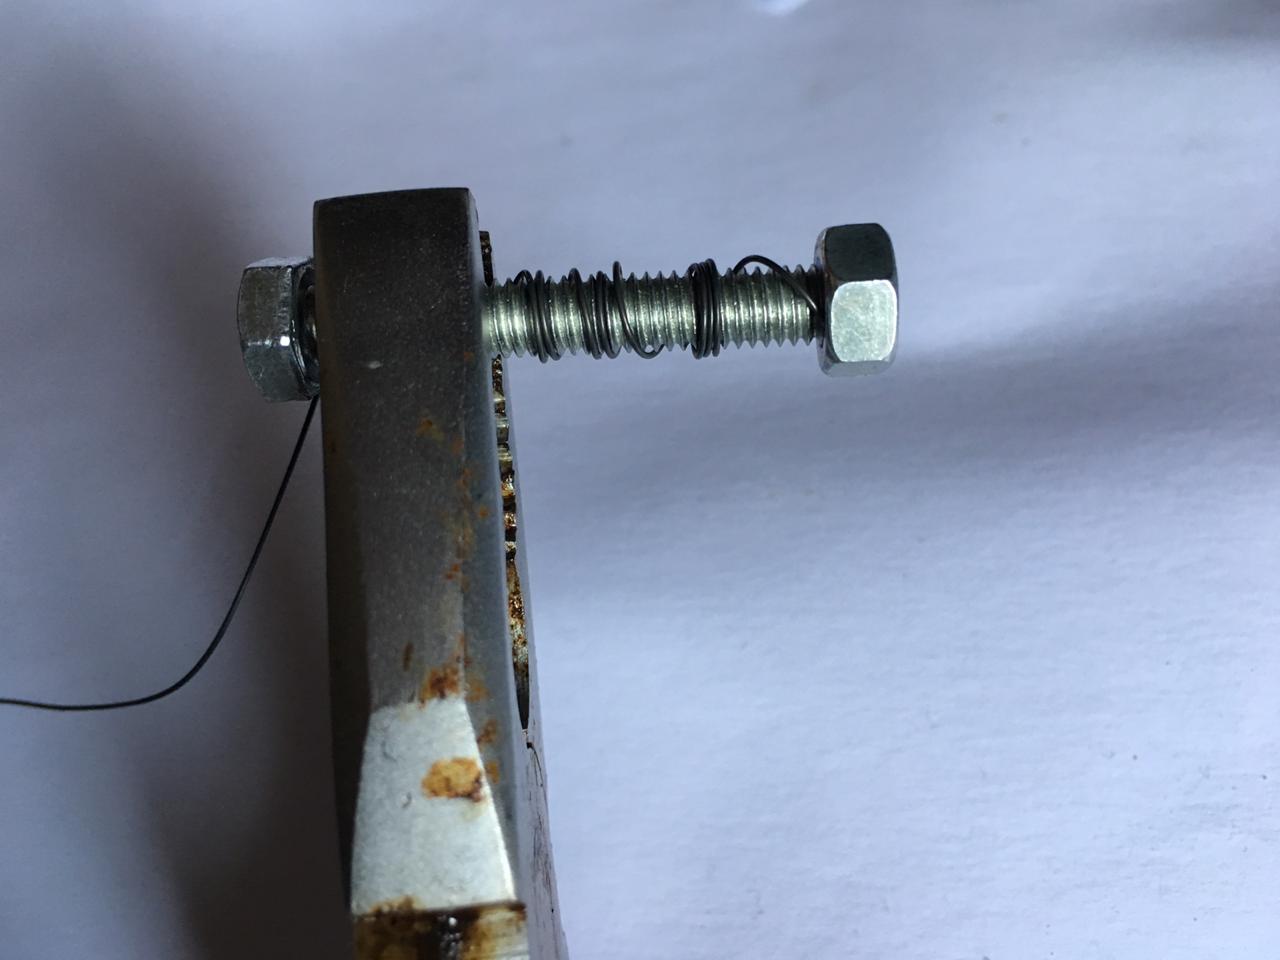
IRB8743 mosFET transistor (N channel) pin configulation
Details of the Transistor switch
Breadboard view of the Transistor Switch. SMA or Coil is connected to the Battery*. If you are using 9V battery, make sure to use resistor (3W or 5W) between battery and SMA/coil so you do not exceed maximum current.
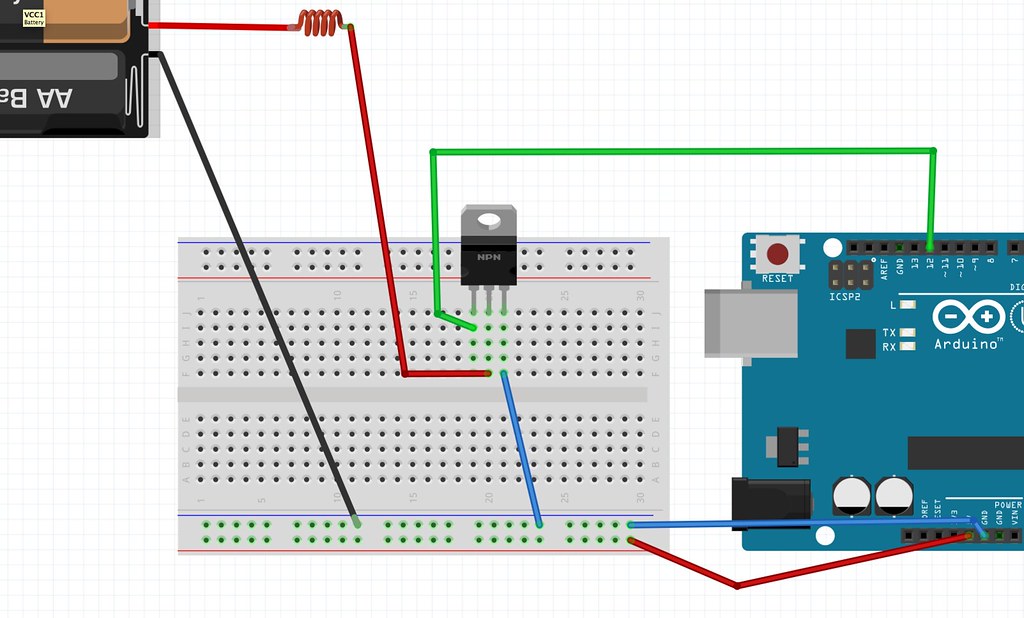
Now you can upload the “Blink” example code from File/Examples/Basics/Blink and see if it works. Make sure to adjust the on/off timing of the code so you do not activate the coil/SMA too long.
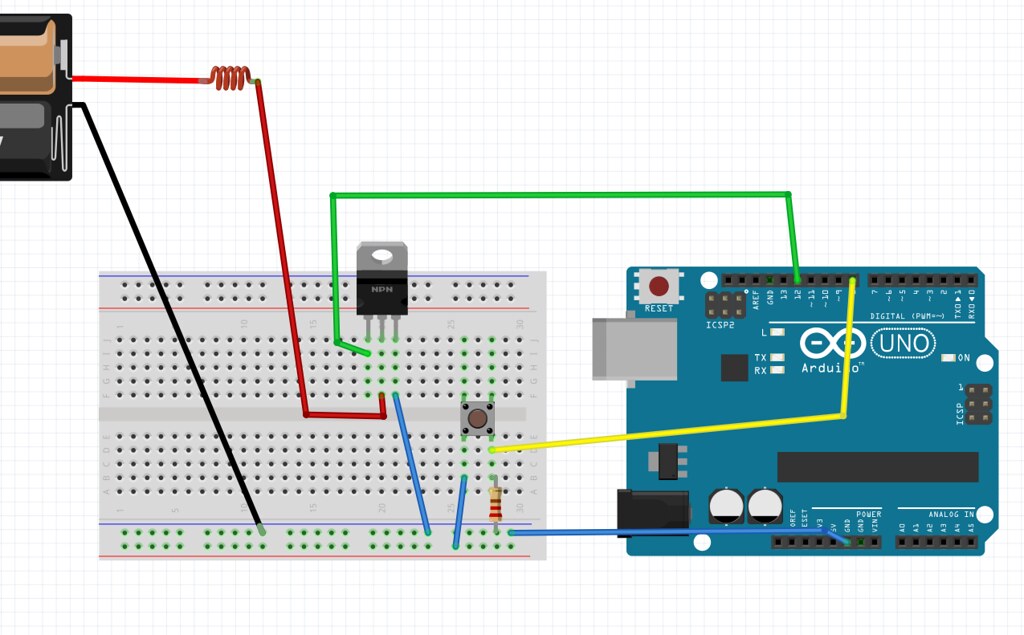
Breadboard view of the Transistor Switch with a push button. Do not forget to add pull-up resistor to the button. The size of the pull-up resistor should be 10K ohm or bigger.
Code
Blink Code.
// the setup function runs once when you press reset or power the board
void setup() {
  // initialize digital pin 12(transistor) as an output.
  pinMode(12, OUTPUT);
}

// the loop function runs over and over again forever
void loop() {
  digitalWrite(12, HIGH);   // turn the transistor  on (HIGH is the voltage level)
  delay(10000);                       // wait for 10 seconds
  digitalWrite(12, LOW);    // turn the transistor off by making the voltage LOW
  delay(10000);                       // wait for 10 seconds
}
SMA Example projects
Animated Vines by Jie Qi
Bacterial Motility by Erdem Kiziltoprak
Hylozoic Ground by Philip Beesley
The Culture Dress by Afroditi Psarra and Dafni Papadopoulou
SMA Tutorials
Further research about the atoms movement explains how “twinning” in the crystal structure of nitinol produces the memory effect
SMA preparations
SMA remembers 1 shape by training it. Note that it does not remember 2 shapes. When heated over certain temperature (refer to the datasheet of the Nitinol to know that temperature), it goes to the shape that is trained, but it will not go to another shape when it is under that temperature. So, when you want to move surface with SMA, you need to plan how it returns to original position from heated state position.
After reading the datasheet and preparing it
step1: roll the nitinol on the nail (for the curl) an attach it strongly (bcuz its strong to heat/program otherwise)

step2: Program the nitinol/ heat for few seconds aunti,l the metal turns red

stetp3: place immediately in cold water
step3: test if it worked and nitinol was programmed by either exposing it to hairdresser hot air or placing it in hot water (after you try to stretch t by hand to almost straighter shaper but please dont over stretch it so it wont break) … in the video below i plqaced it in hot water and kindly notice how it curled again in hot water which means the programming face worked
step4: Nitiol circuit i followed this diagram to make the circuit … by cutting cuppor attaching it to cardboard/paper and soldering components also used this website to know the to determine the value and tolerance of the resistors resistor calculator
step5: i attached everything physically and connected Arduino to blink code and modified the code to 10 seconds as nitinol needs almost minimum that time to start actually seeing it move
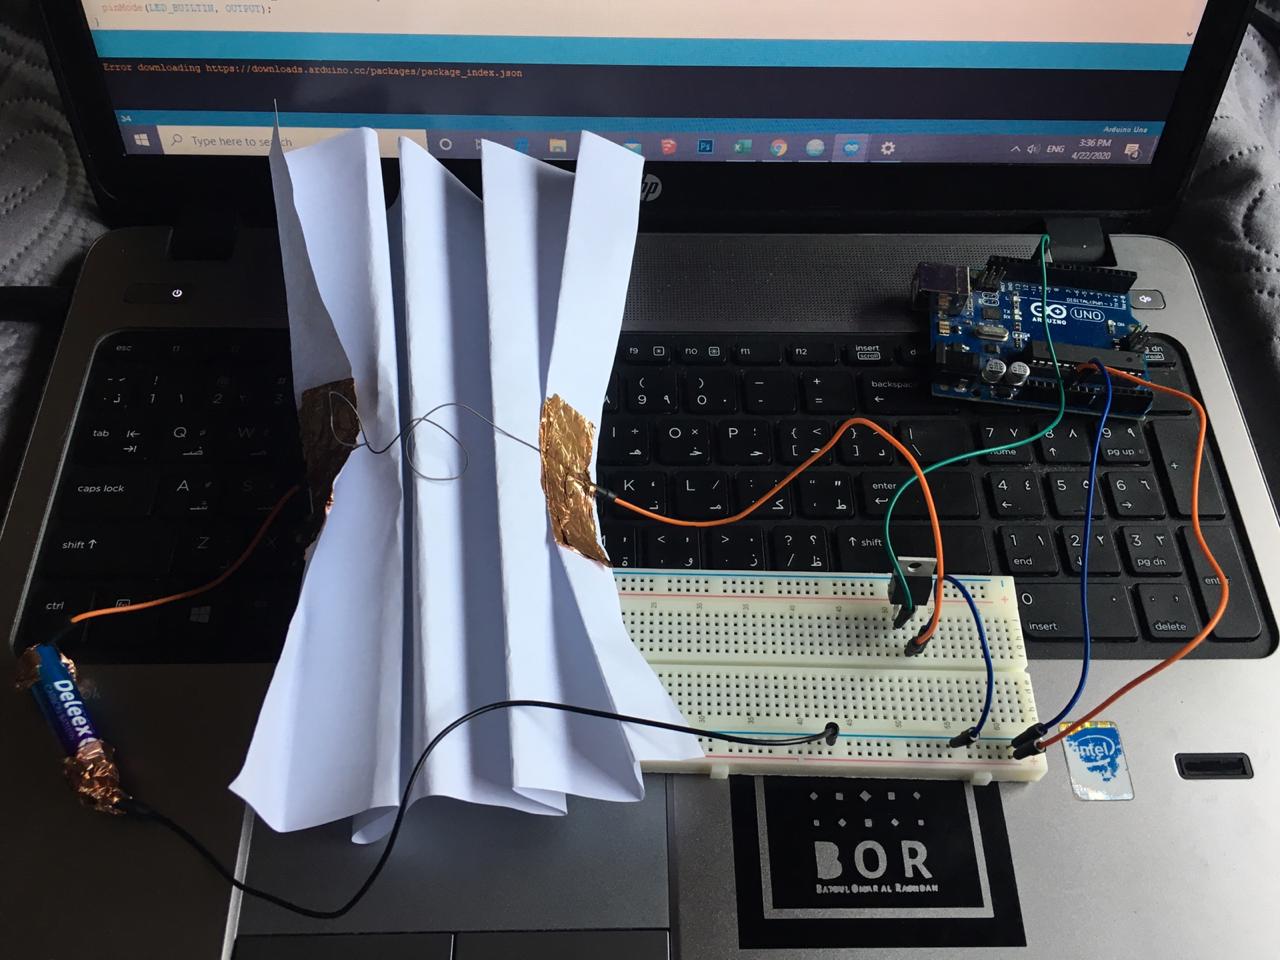
SMA Smocking attempts
Due to the COVID-19 lockdown/ Curfew and shortage of materials I just tried with paper instead of fabrics so here’s the trial…
SMA Smocking Examples
Final Project - Servo Motor
Controlling servo motor with a DIY flex sensor from Batoul Al-Rashdan on Vimeo.
 so here I paid attention to using the right pins that serve the Servo Motor Pin number 6 for example because its PWM which is Pulse Width Modulation, is a technique for getting analog results with digital means that i need for the servo motor.
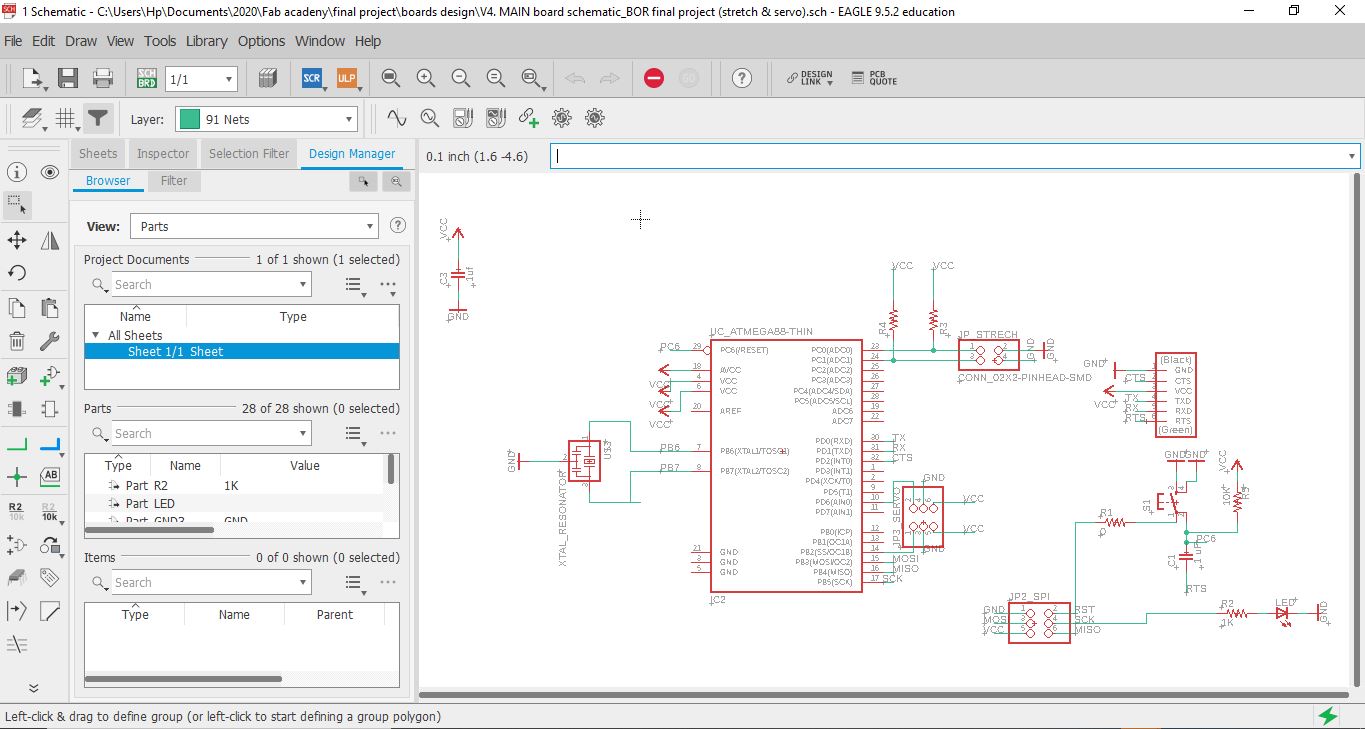
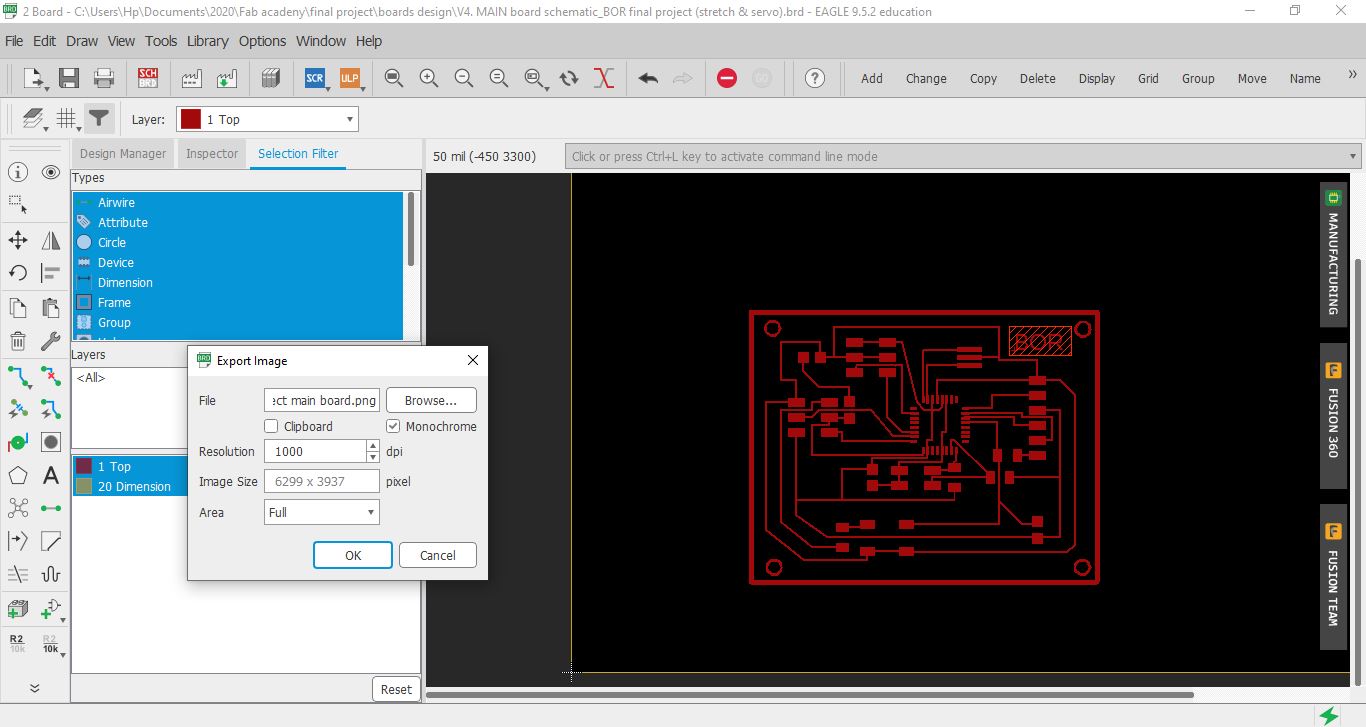 here you can see the board design after I successfully routed all the connections
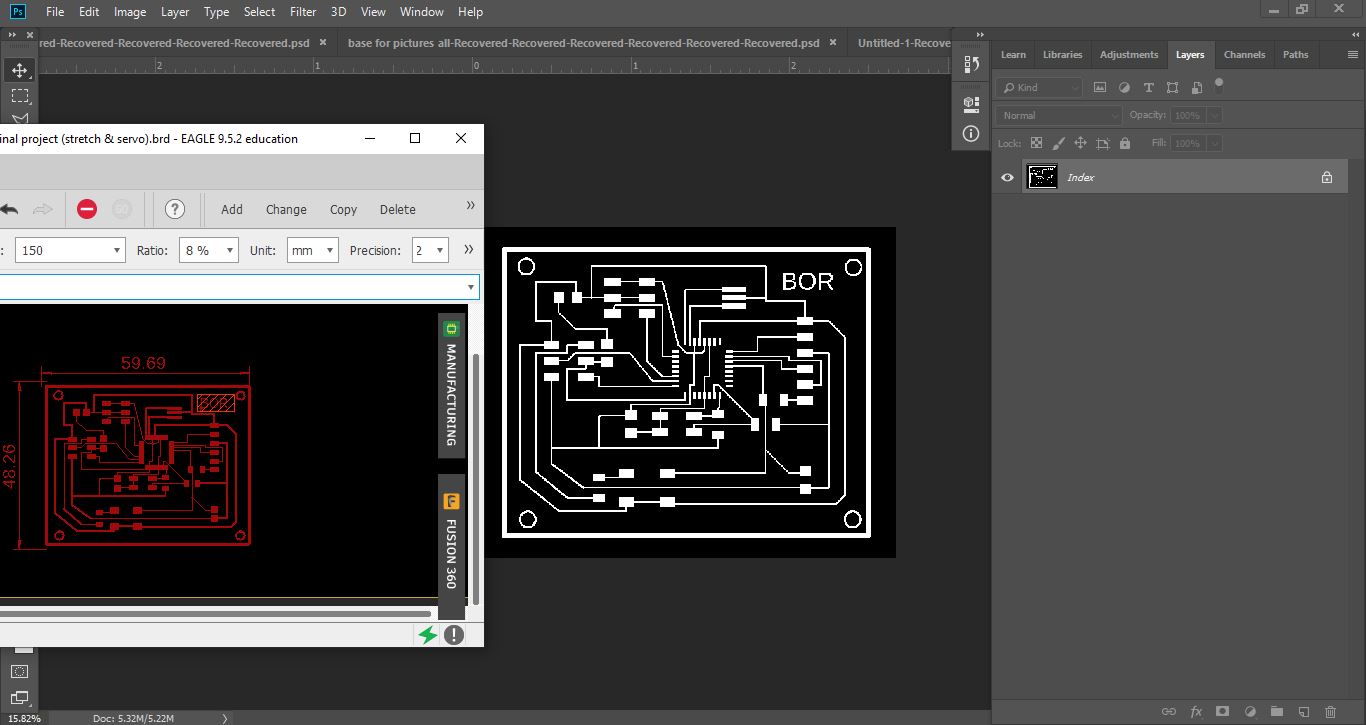 I exported my design and edited it using Photoshop in order to get the traces and the interior “outline” PNG
 a previous designed i designed for the servo and trestch sensor but didnt work it somehow and i tried to figure out why but ended up making another one from scratch which is the final result below
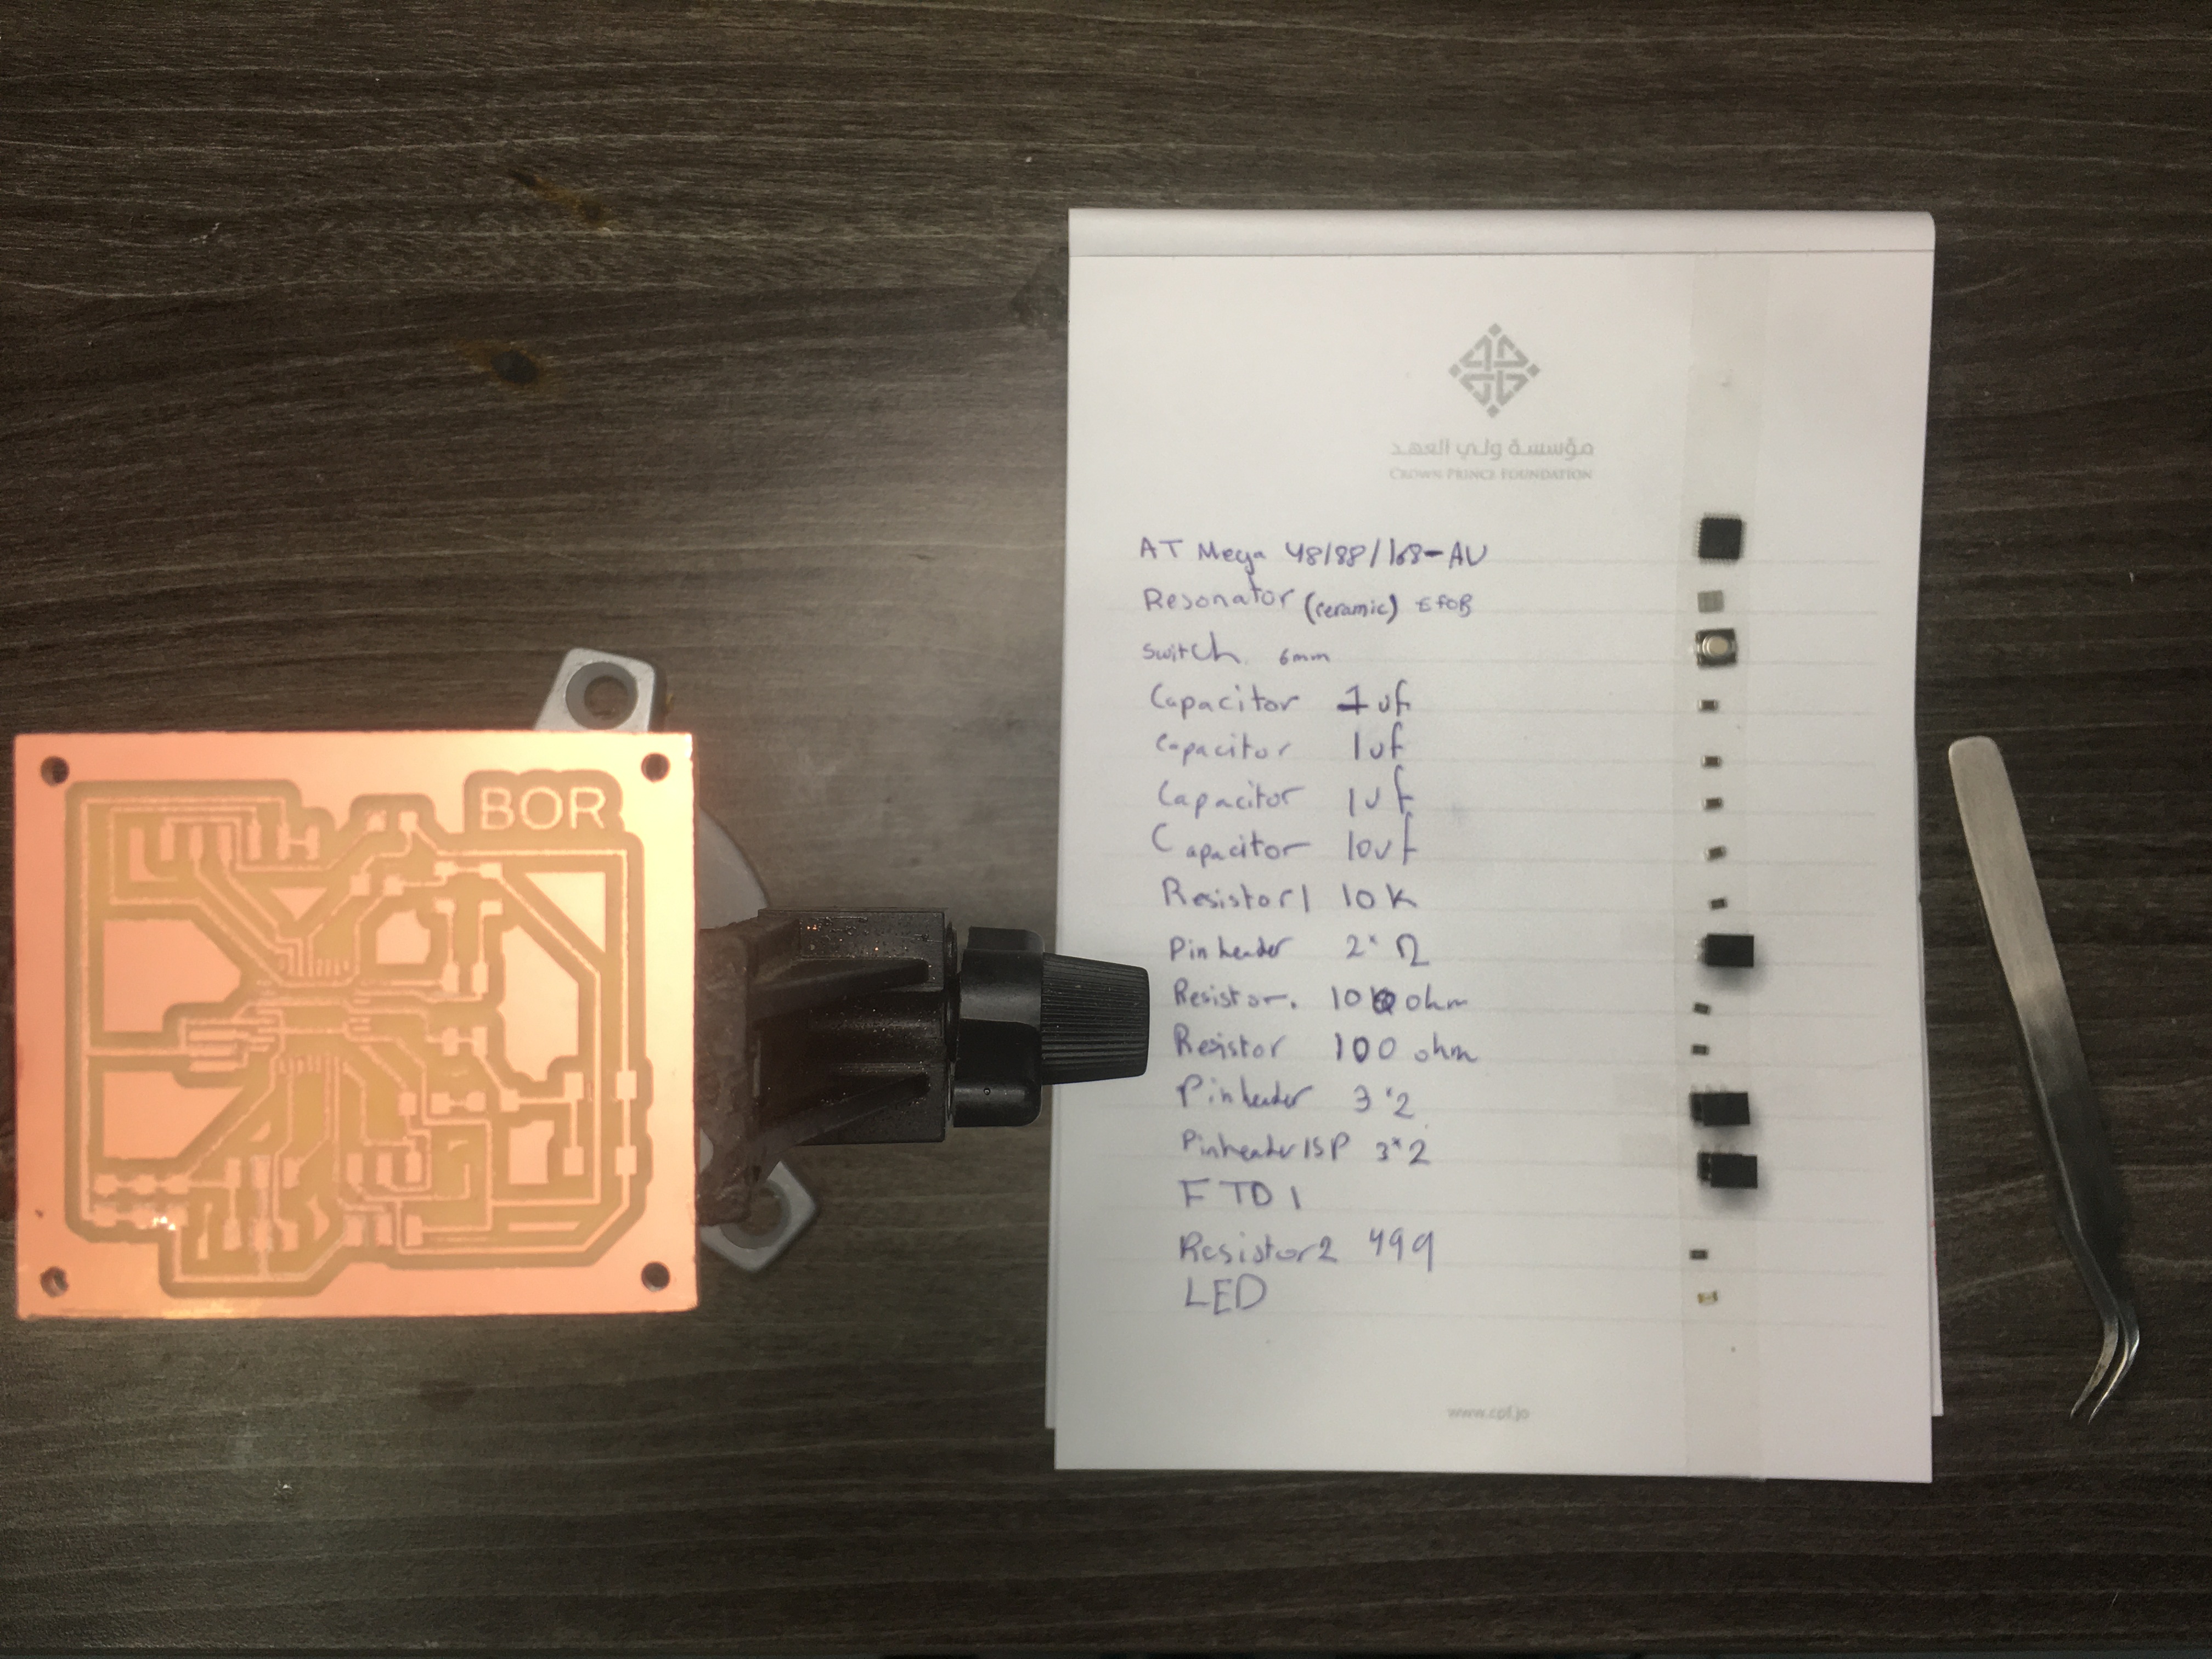
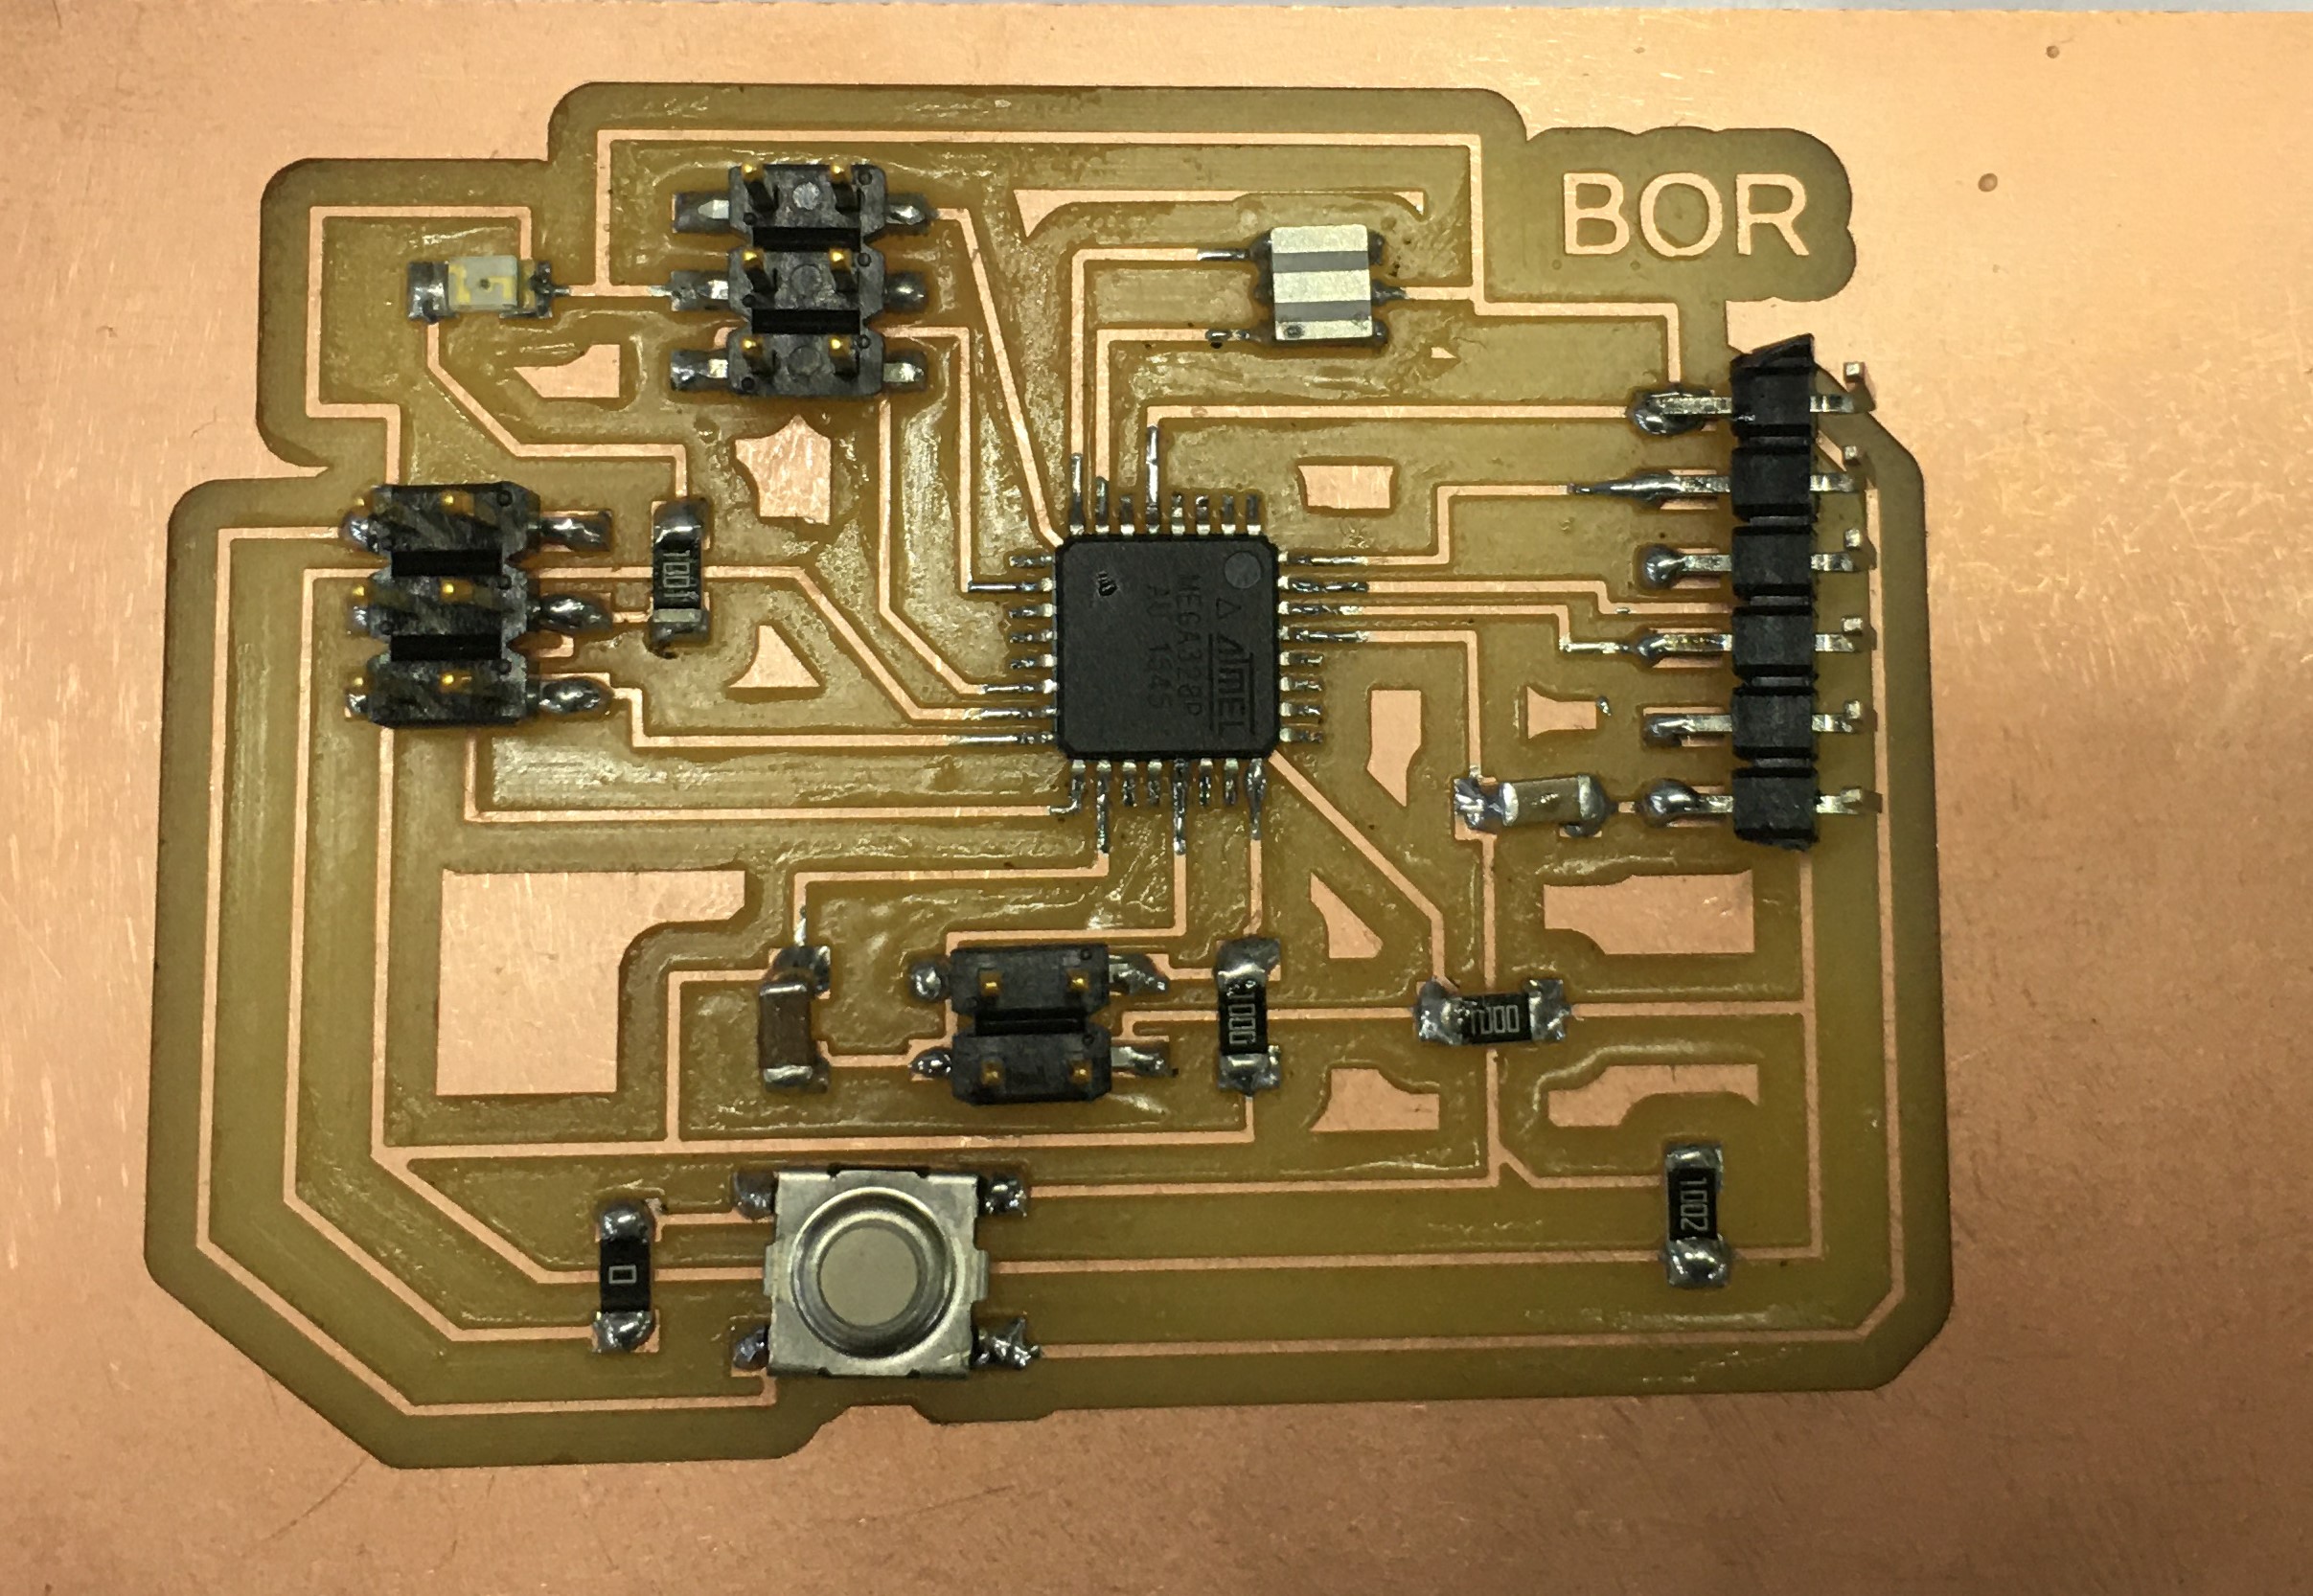
Finally i have the new design all ready so here is the traces and the interior “outline”


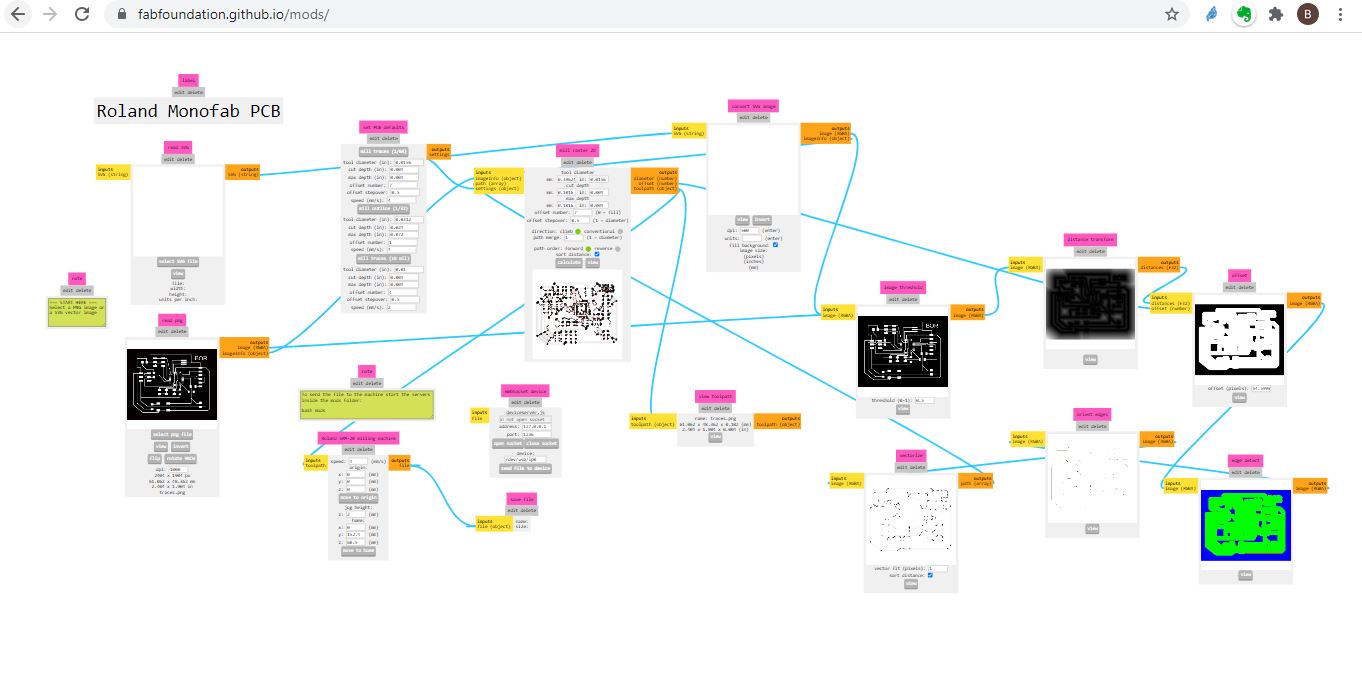
That i used later on mods to cut my via Rolan Monofab PCB machine
i used arduino to program my board after i downladed the need libraries for windows check week 9 for specific details
Code
Servo- Flex code … for my final project
#include <Servo.h>

Servo myServo;
int flexValue;
int servoPosition;
const int flexPin = A0;

void setup()
{
  myServo.attach(6);
  Serial.begin(9600);
}

void loop()
{


  flexValue = analogRead(flexPin);

  servoPosition = map(flexValue, 450 , 1023 , 0, 125);
  servoPosition = constrain(servoPosition, 0, 125);
  Serial.println(flexValue);
 // Serial.println(servoPosition);
  myServo.write(servoPosition);

  delay(100);
}
Hero shot
Proof it works with a video
Board working check from Batoul Al-Rashdan on Vimeo.