6. 3D Scanning and printing
This week I worked on defining my final project idea and started to getting used to the documentation process.
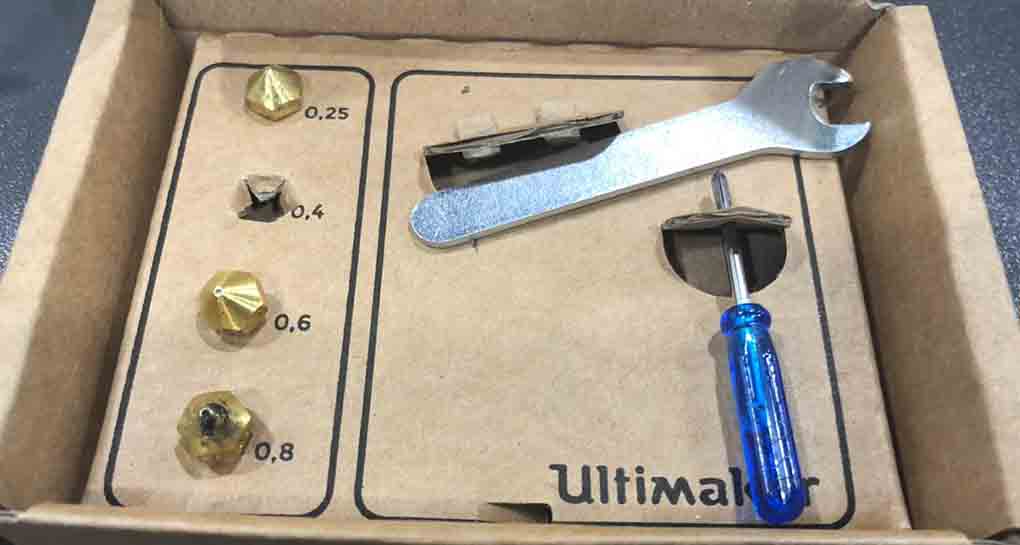
Machine : Ultimaker 2+ series Witbox
Files to download
Software’s
My files:
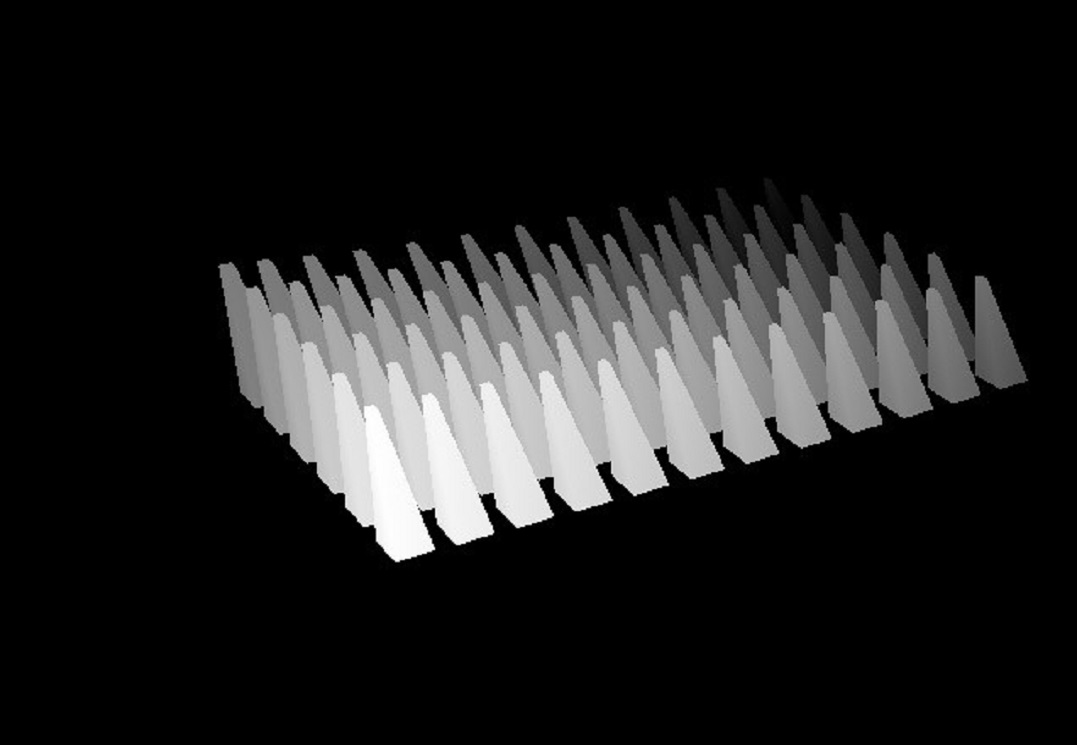
Spikes Design Rhino + Grasshopper Code
Research
 The 9 Different Types of 3D Printers
Types of 3D Printing Materials
“One of the most important parts of 3D printing is to use the right kind of material for the job in hand. In this guide we look at the range of 3D materials, also called filaments, a 3D printer uses, starting with the most popular. We’ll also cover their uses along with pros and cons for each type. This will help you to make better informed decisions when buying your 3D printer filaments. Before you print anything in 3D, there are a few basic questions you should ask yourself, the main ones include: * Strength: How strong does your printed part have to be? * Flexibility: How flexible does your part need to be? * Accuracy: How important is precision to your 3D part? * Special conditions: Any other conditions that apply to your 3D model
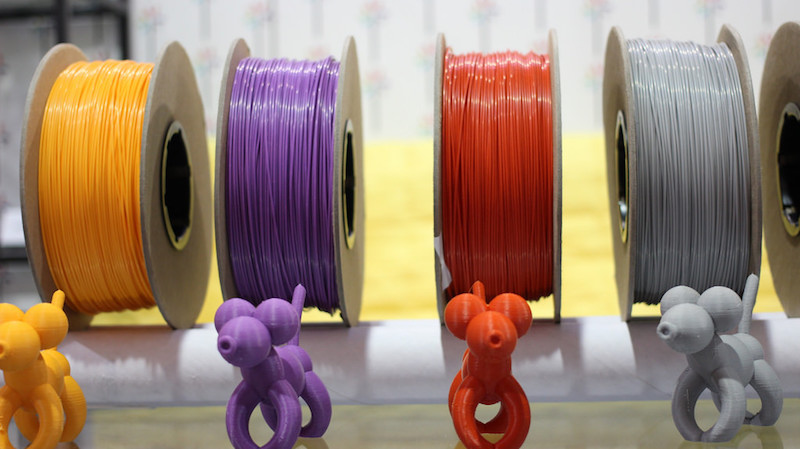
These are some of the 3D printing materials : * ABS Filament * PLA Filament * PET Filament * PETT Filament * Nylon Filament * PVA Filament * Sandstone Filament * Wood Filament * Metal Filament * HIPS Filament * Magnetic Iron Filament * Conductive Filament * Carbon Fiber Filament * TPE Filament * Glow in the Dark Filament * Amphora Filament
3D Filament Defined
3D filaments are special types of plastics called thermoplastics. Once heated to the right temperature, thermoplastics become flexible. It’s this pliability that allows the printer to sculpt the filament to create your shapes before it cools down. In 2017, the two common types of 3D filaments are: ABS (Acrylonitrile Butadiene Styrene) PLA (Polylactic Acid) Don’t Miss: Best 3D Printing Filament Brands. These are not the only 3D filaments available. For now we’ll focus on ABS and PLA, and see what makes them such popular choices. For each material we’ll start with a short introduction followed by the average price, print temperature, and applications. At the end of each 3D material we’ll list its pros and cons. Also worth noting is that not all 3D printers can utilize both ABS and PLA. Some can, but not all, so you need to know your 3D printer capabilities as well as the abilities of the 3D filaments.
1. ABS 3D Filament abs-filament -PRICE STARTING FROM: $20 for 1.75 mm, 1kg spool -ABS is popular for good reasons. It’s tough, and has impact-resistant properties. It’s this strength and moderate flexibility that makes it such a great choice for printing in 3D. It’s also easy to extrude from the printer’s nozzles, which makes it an easy material to work with. * ABS print temperature range: 210°C – 250°C (high)
2. PLA 3D Filament pla-filament-PRICE STARTING FROM: $20 for 1.75 mm, 1kg spool-PLA (Poly Lactic Acid) is popular for amateurs and professionals alike. It’s a special type of thermoplastic made from organic materials, namely cornstarch and sugarcane. The main benefits of PLA are that it’s safer and easier to use, and with no toxic fumes to worry about. Some users even find the sweet smell of the sugar-based filament pleasant. Compared to ABS, PLA produces 3D parts which are more aesthetically pleasing. This finish is thanks to its unique sheen and smooth appearance.You might think it sounds like the perfect solution, but there are some drawbacks. For one, the melting point of PLA is much lower than ABS, and that makes it weaker. This matters if you’re printing moving parts or exposing the parts to high temperatures. Both of these things can result in the 3D objects, cracking, warping or even melting. If none of the above applies to you and your 3D projects, then PLA should be your filament of choice. It will award you with superior print details and is also less prone to printing errors during the build process. * PLA print temperature range: 180°C – 230°C (low)
3. PET Filament pet-filament Image from Bpet Filaments PRICE STARTING FROM: $24.99 for 1.75 mm, 1kg spool Today, PolyEthylene Terephthalate (PET) is a popular 3D material. Another common use for PET is in everyday plastic bottles. This plastic is both stable and harmless, emits no unpleasant or harmful odors, and is 100% recyclable. In its raw state, the filament has no color and is crystal clear. Once exposed to cold or heat the material quickly changes to a non-transparent state. A more advanced version if PET is a filament called PETG, also marketed as Amphora AM1800. * PETG print temperature range: 210°C – 230°C
4. PETT Filament pett-filament Image from 3D Prima PRICE STARTING FROM: $25.99 for 1.75 mm, 453.5g spool PETT, whose long name is PolyEthylene Trimethylene Terephthalate, is what’s known as a T-Glase filament. Like PET (one ‘T’), it’s also a popular 3D printer material that’s food-friendly. The filament is non-biodegradable, though it is a recyclable material. PETT Print Temperature Range: 210°C – 230°C
5. Nylon Filament nylon-filament Image from Taulman3D PRICE STARTING FROM: $39.99 for 1.75 mm, 1kg spool
Nylon filament, also called polyamide, is another popular choice. This is a synthetic polymer that’s stronger and more durable than ABS and PLA—and cost-effective. It’s also flexible, light, wear-resistant, and less brittle than both ABS and PLA. There are different kinds of nylon filament available, and what you choose will depend on which one suits your budget and needs. The difference between them is in the filament’s layer bonding abilities, tensile strength, and water absorption. You can also choose nylon filament that has a translucent or opaque finish and reduced shrinkage.
Nylon print temperature range: 210°C – 250°C (high)
6. PVA Filament pva-filament Image from Form Futura PRICE STARTING FROM: $35.99 for 1.75 mm, 0.5 kg spool
PVA (long name Polyvinyl alcohol) is a good 3D filament that’s typical use is as a support material when printing with ABS or PLA. Support materials are necessary when printing 3D parts with notable overhangs. Without the support, these parts would be impossible to print or perfect. As a support material, PVA works best with printers that have duel extruders. This is a biodegradable, non-toxic material that easily dissolves in tap water. All popular desktop FDM printers can use PVA with a heated build platform as this prevents warping during the build process. For best results as a support material, the print bed temperature should not exceed 200 °C.
PVA print temperature range: 190°C – 220°C (low)
7. Sandstone Filament (PLA + Brick) sandstone-filament Image from Quora PRICE STARTING FROM: $32 for 1.75 mm, 0.25 kg spool
Sandstone filaments offer a unique finish to your 3D printed parts. This is a PLA material that includes a fine chalk powder to produce a stone-like color and texture. It’s also possible to alter the surface characteristics simply by adjusting the printer’s extrusion temperature during the print process. With a little practice, you’ll be able to produce parts that are smooth, rough, or anywhere between the two. 3D sandstone material is a brick filament offered by various suppliers under different product names. The most well-known right now is LayBrick.
Sandstone print temperature range: 165°C – 210°C
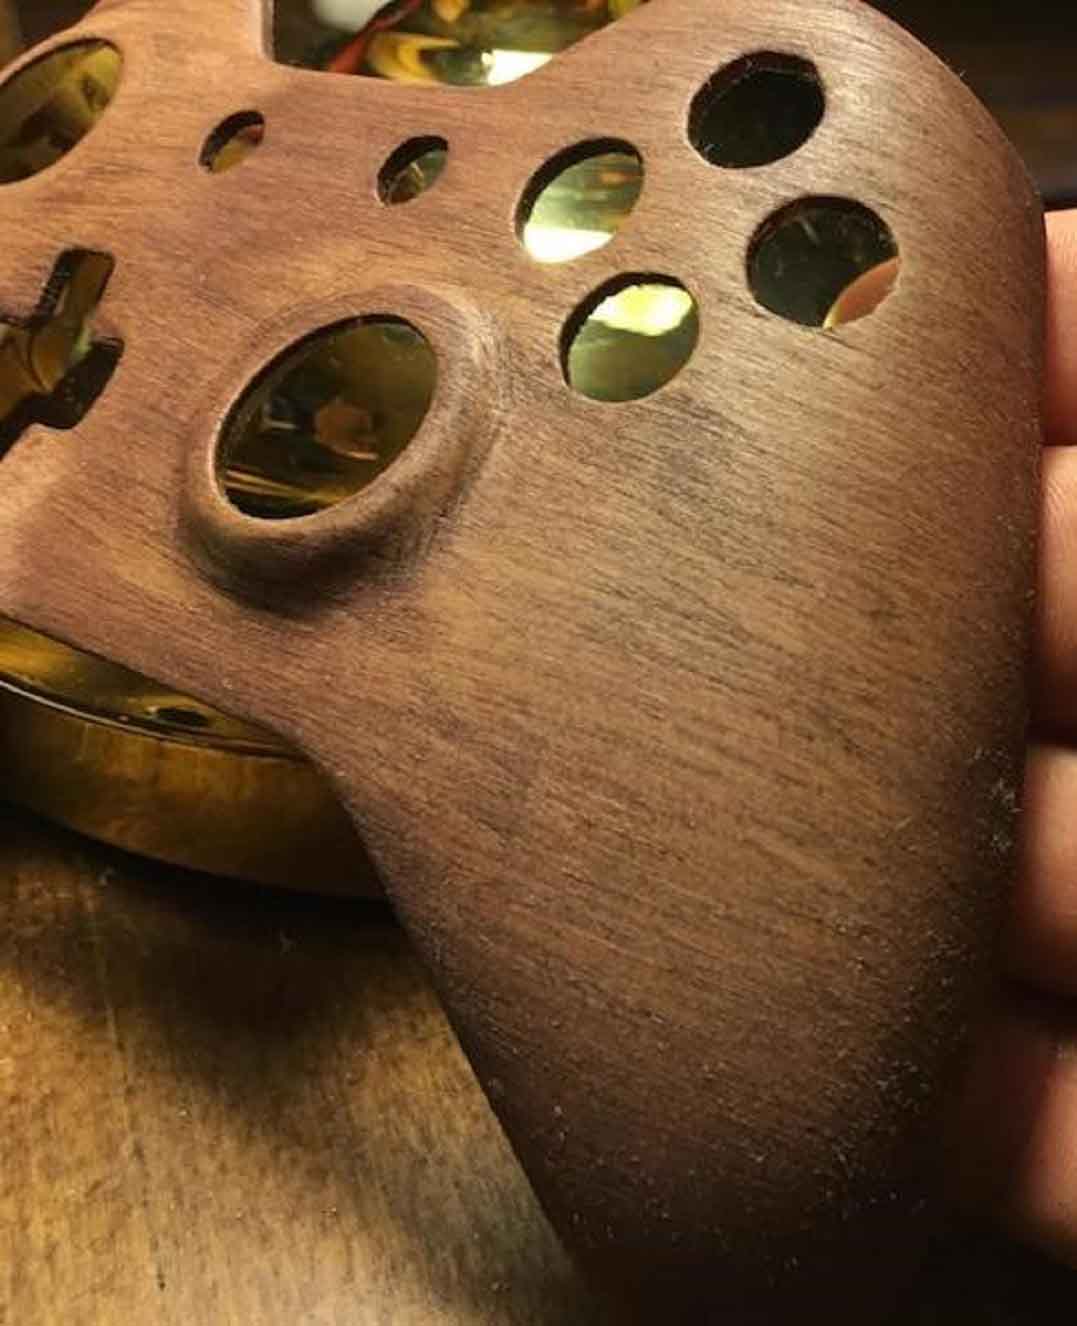
8. Wood Filament wood-filament Image from Imgur PRICE STARTING FROM: $30 for 1.75 mm, 1kg spool
It seems strange, but yes, 3D wood filaments are very real. It’s a great material for anyone who wants or needs to be more creative with their 3D printed projects. These filaments contain a careful mixture of recycled woods with a special binding polymer. The output model not only looks like real wood, it smells like it too. There’s no shortage of impressive examples online that illustrate the amazing finish wood filaments can produce when printed to perfection.
Wood print temperature range: 200°C – 260°C
9. Metal Filament PLA / ABS metal-filament
PRICE STARTING FROM: $29 for 1.75 mm, 1kg spool (prices vary a lot depending on metal)
Metal filaments are in a league of their own—offering some very impressive, unique finishes to 3D printed parts. The materials consist of PLA combined with a higher percentage of fine metallic powders. The 3D printed parts look and feel just as they would if they had been made of 100% metals. Popular choices include aluminum, brass, bronze, copper, and stainless steel. Anyone who wants more of a creative effect can work on the end piece. For example, you can polish the finished part, or tarnish / weather it so that it looks even more genuine. Although they’re not pure 3D metal parts, they’re pretty close to the real thing.
Metal print temperature range: 195°C – 220°C (will vary depending on filament)
10. HIPS Filament hips-filament Image from Adafruit PRICE STARTING FROM: $24.95 for 1.75 mm, 1kg spool
High Impact Polystyrene, HIPS for short, is a bright, white colored 3D biodegradable material. It’s safe to use, meaning it has no harmful effects for users who are in close contact with the filament. It’s safe with pets too. Like PVA, HIPS also works as great secondary (support) material. On its own, it’s tricky to use for creating 3D printed parts, especially with printers that don’t have a heated bed. As a support structure, a colorless solution called liquid hydrocarbon quickly dissolves the filament.
Don’t Miss: Best HIPS Filaments.
HIPS print temperature range: 230°C – 250°C
11. Magnetic Iron PLA Filament magnetic-iron-pla-filament
PRICE STARTING FROM: $35 for 1.75 mm, 500 g spool
As the name suggests, magnetic iron PLA filament has magnetic properties. This unique filament is PLA material infused with a powdered iron. It’s these iron particles that give the 3D parts their grainy gunmetal type finish. The objects will also stick to magnets, something that could be useful on various creative projects. It’s a specialist material that few will have a need for, but those who do work with it find PLA iron filament invaluable.
Magnetic iron PLA print temperature range: 195°C – 220°C
12. Conductive PLA conductive-pla-filament Image from Proto Pasta PRICE STARTING FROM: $17.95 for 1.75 mm, 125 g (comes in various weights)
Anyone wanting to broaden their horizons in 3D printing may want to look to conductive PLA 3D printer filament. It’s a special type of 3D material that includes a conductive carbon particulate. Without getting too technical, this means the material is able to print low-voltage electrical circuits. These will typically include sensors and light-emitting diodes (LEDs). When combined with regular PLA filament and a dual-extrusion 3D printer, users can make simple circuit boards direct from the printer’s bed. Note that conductive ABS filament is also available for users who prefer to work with ABS.
Conductive PLA temperature range: 215°C – 230°C
13. Carbon Fiber 3D Printer Filament carbon-fiber-pla-filament Image from Color Fabb PRICE STARTING FROM: $29.99 for 1.75 mm, 500 g spool
Carbon Fiber PLA is an impressive 3D filament. The material contains tiny strands of carbon fiber which results in a material that has an excellent structure. It’s also rigid and has superior layer adhesion. Carbon Fiber PLA shares similar properties with standard PLA but it’s stiffer. It also offers more dimensional stability, which means warp-free printing. The downside to carbon fiber filament is that its abrasive nature speeds up the wear and tear of printer nozzles, especially those made of brass.
Carbon fiber print temperature range: 190°C – 230°C
14. Flexible, TPE Filament tpe-filament Image from Creative Tools PRICE STARTING FROM: $31.99 for 1.75 mm, 1kg spool
TPE 3D printer filament is easily the most flexible of all the printer materials. It is ‘super stretchy’ because of the thermoplastic elastomers, or TPE for short. It has such high elasticity properties that it feels like real rubber, easily springing back into shape like an elastic band. TPE is great to use with most FDM 3D printers. If you need to fabricate stretchable 3D parts that can endure more punishment than any regular ABS or PLA, this is your material.
TPE print temperature range: 225°C – 235°C
15. Glow in the Dark Filament glow-in-the-dark-filament Image from Form Futura PRICE STARTING FROM: $17.99 for 1.75 mm, 1kg spool
The name needs little introduction as this fun filament does exactly what it says on the label—it glows in the dark. It won’t glow indefinitely though, as the 3D printed object needs exposing to a light source to charge it. Once charged it will emit light in whatever colors you have made your part in. A great use for this material it to decorate children’s bedrooms or to make Halloween themes, and other such creative ideas. It’s a safe, environmentally-friendly filament, making it harmless for everyone to use. One of the major drawbacks is that glow-in-the-dark material is abrasive. The problem with abrasive filaments is that they can quickly wear out nozzles, especially brass. If you plan to use glow-in-the-dark 3D printing material often, be sure to install a hardened steel nozzle.
Glow-in-the-dark print temperature range: 180-240 °C
16. Amphora 3D Printer Filament amphora-filament
PRICE STARTING FROM: $00 for 1.75 mm, 1kg spool
Amphora is a great filament for anyone who wants to produce objects which are lustrous, bright, and opaque. The Eastman Chemical Company created this fancy material specifically for 3D printing. Most common thermoplastics have uses other than 3D printing technologies, but not this one.
Amphora print temperature range: 220°C – 250°C
Useful links
3D Scanning
This is a 3D scan of myself
Step 1: Open the Sense software for Sense 3D scanner. Select type of scan (Person or Object), then select the size of object to be scanned. In our case it is a small object.
Step 2: One must be statis and one must rotate … It is better if the scanner was static and the obj a rotating base if possible. Hold the scanner in front of the object. Move forward and backward till you have a good view and a green rectangle surrounding the object. Make sure that the object is centered to the circle appearing in software screen. Stay still at your position holding the scanner. Ask your colleague/someone near to press on “Start Scan”.
Step 3: Ask your colleague to rotate the base slowly till a complete turn is completed. When it is done, click “Next” to finish scanning and move to next step. Now the scan is hollow and should be solidified. Click “Solidify” to fill in the scan. Click “Next”.
Step 4: Using “Trim” tool, draw a straight line at the bottom of your scanned object to make sure it will have a flat base for 3D printing. Click “Next”.
Step 4: Export in “.ply” extension from sense “.stl”Open in Meshmixer to modify the mesh
but I have tried rhino as well
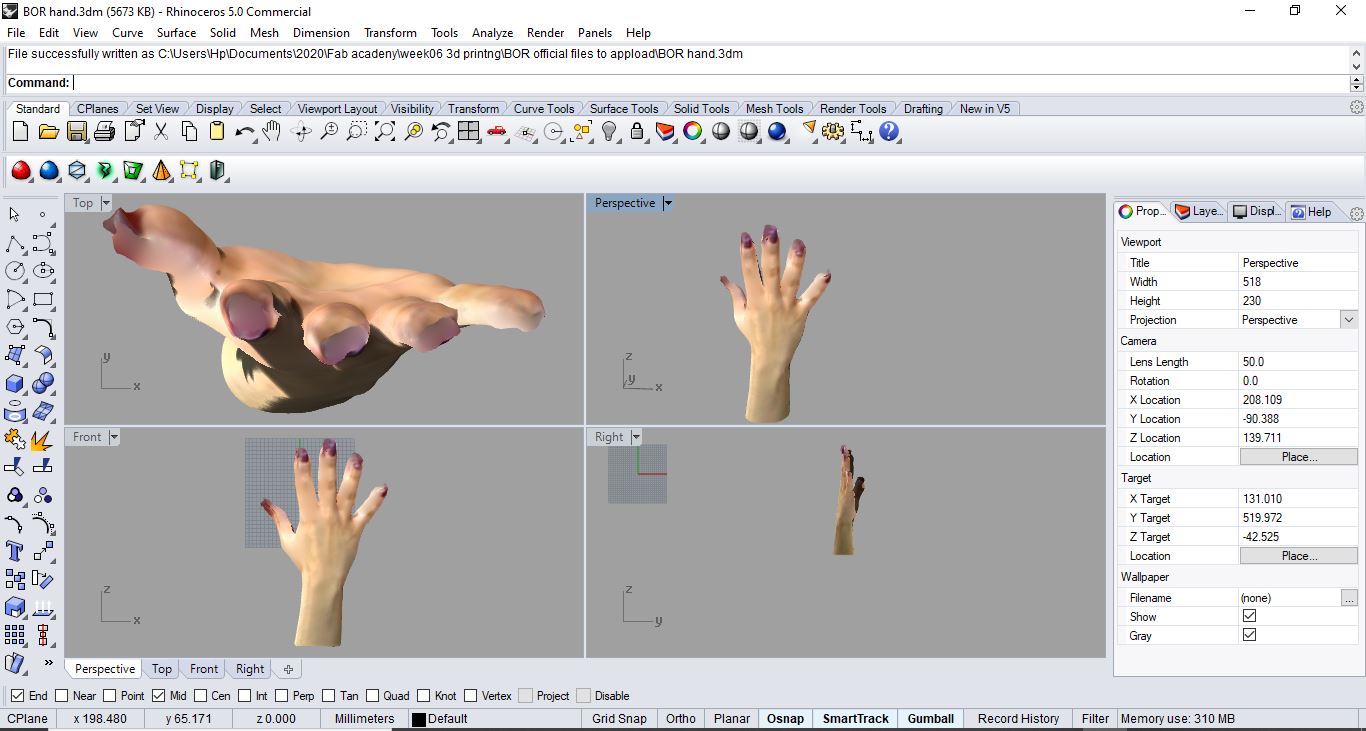 type in the command box ReduceMesh then select the mesh (my hand scan) and press enter
type in the command box Repair mesh then select the mesh (my hand scan) and press check mesh then next … next … and finish.
HOWEVER, I didnt get the modification I wanted so I went back to Meshmixer to modify the mesh.
type in the command box ReduceMesh then select the mesh (my hand scan) and press enter
type in the command box Repair mesh then select the mesh (my hand scan) and press check mesh then next … next … and finish.
HOWEVER, I didnt get the modification I wanted so I went back to Meshmixer to modify the mesh.
I have scanned my friend Hani as my assignment

Conclusion the best tip for 3D Scanning a human is indeed starting for a side way with little of the front and a little of the back shown to avoid losing track! plus hold the scanner from a higher height than the object statically almost at 220 degrees angle (like viewing the object a bit from a higher level down to capture all- that should be the starting point)
3D Printing
Group assignment :
Testing different designs and forms to get into the machine design rules and get some conclusions:
Nozzle Sizes:
Test Number1-Supported Overhangs and Clearance: This print consists of two STL files. The point is to test the quality of supported overhang and clearance between moving parts
Settings for printing the “Supported Overhangs and Clearance”
Quality
Layer Height: 0.20 mm
Line Width: 0.35 mm

Shell
Wall Thickness: 0.7 mm
Top/Bottom Thickness: 0.6 mm

Infill
Infill Density: 20%
Infill Pattern]: Grid

Material
Printing Temperature: 200 °C
Build Plate Temperature: 60 °C

Speed
Print Speed: 45 mm/s

Travel
Enable Retraction: Yes

Cooling
Enable Print Cooling: Yes
Fan Speed: 100%

Support
Generate Support: Check
Support Placement: Everywhere
Support Overhang Angel: 50°
Support Pattern: ZigZag

Build Plate Adhesion
Build Plate Adhesion Type: Skirt
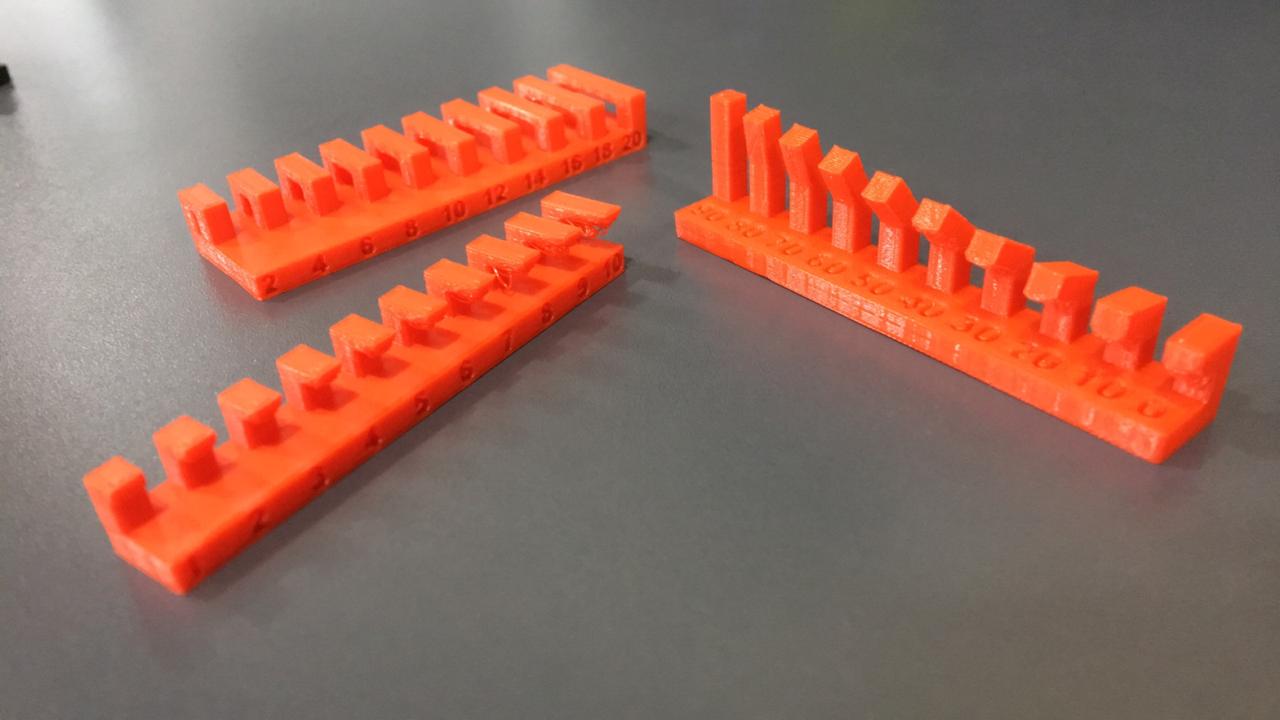
Test Number 2-Unsupported Overhangs, Bridging and Angle: This print consists of three STL files. The point is to test the quality of unsupported overhangs, bridging and angles.

 Settings for printing the “Unsupported Overhangs, Bridging and Angle”
Quality
Layer Height: 0.20 mm
Line Width: 0.35 mm

Shell
Wall Thickness: 0.7 mm
Top/Bottom Thickness: 0.6 mm

Infill
Infill Density: 20%
Infill Pattern]: Grid

Material Printing Temperature: 200 °C
Build Plate Temperature: 60 °C

Speed
Print Speed: 45 mm/s

Travel
Enable Retraction: Yes

Cooling
Enable Print Cooling: Yes
Fan Speed: 100%

Support
Generate Support: Uncheck

Build Plate Adhesion
Build Plate Adhesion Type: Skirt
so as long as you are bridging you can use as much without support
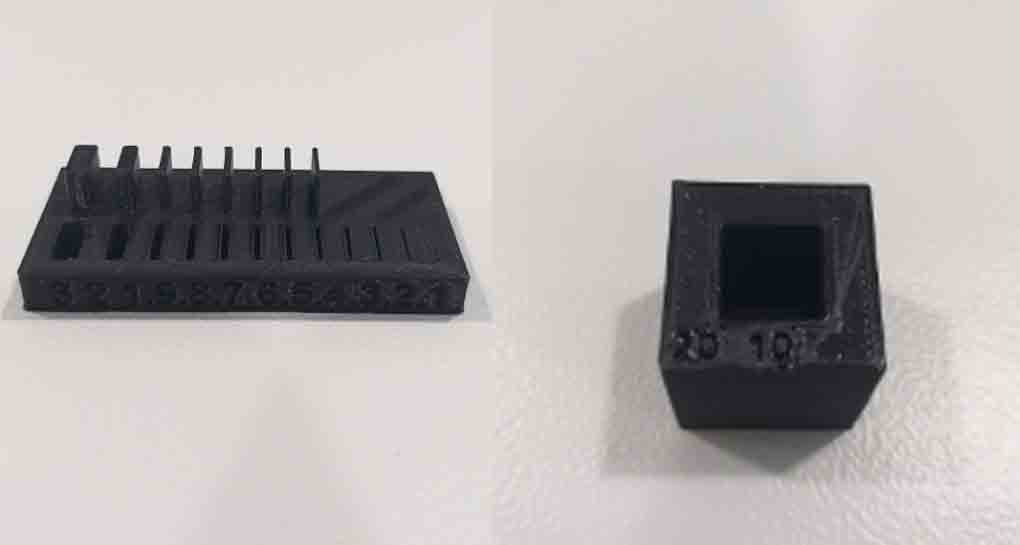
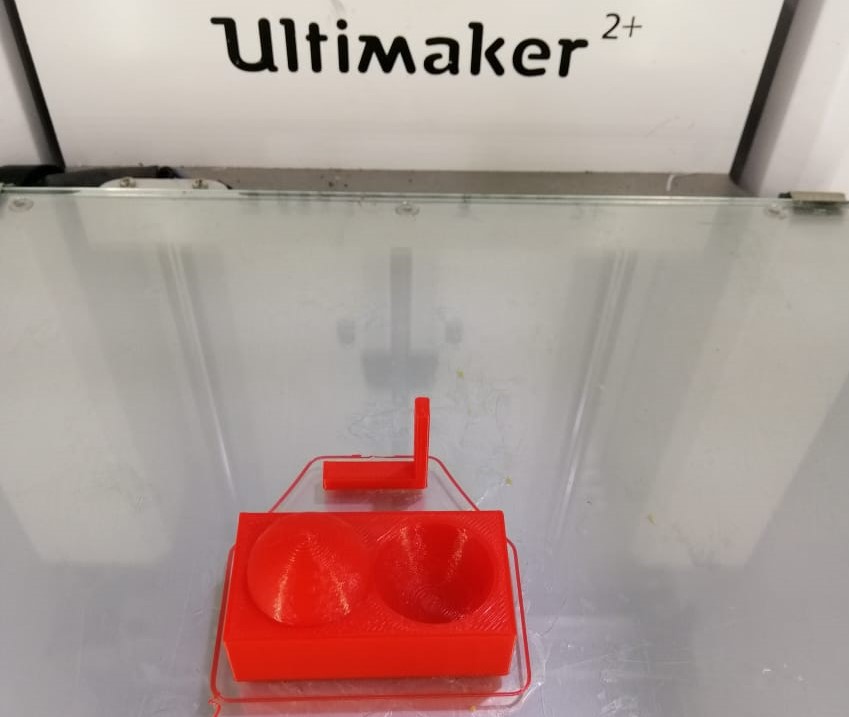
Test Number 3-Wall Thickness and Dimension: This print consists of two STL files. The point is to test the quality of wall thickness and dimensions.

 Settings for printing the “Wall Thickness and Dimension”
Quality
Layer Height: 0.20 mm
Line Width: 0.35 mm

Shell
Wall Thickness: 0.7 mm
Top/Bottom Thickness: 0.6 mm

Infill
Infill Density: 20%
Infill Pattern]: Grid

Material Printing Temperature: 200 °C
Build Plate Temperature: 60 °C

Speed
Print Speed: 45 mm/s

Travel
Enable Retraction: Yes

Cooling
Enable Print Cooling: Yes
Fan Speed: 100%

Support
Generate Support: Uncheck

Build Plate Adhesion
Build Plate Adhesion Type: Skirt
Test Number 4-Anisotropy and Surface Finish: This print consists of two STL files. The point is to test the quality of anisotropy and surface finish.

 Settings for printing the “Anisotropy and Surface Finish”
Quality
Layer Height: 0.20 mm
Line Width: 0.35 mm

Shell
Wall Thickness: 0.7 mm
Top/Bottom Thickness: 0.6 mm

Infill
Infill Density: 20%
Infill Pattern]: Grid

Material Printing Temperature: 200 °C
Build Plate Temperature: 60 °C

Speed
Print Speed: 45 mm/s

Travel
Enable Retraction: Yes

Cooling
Enable Print Cooling: Yes
Fan Speed: 100%

Support
Generate Support: Uncheck

Build Plate Adhesion
Build Plate Adhesion Type: Skirt
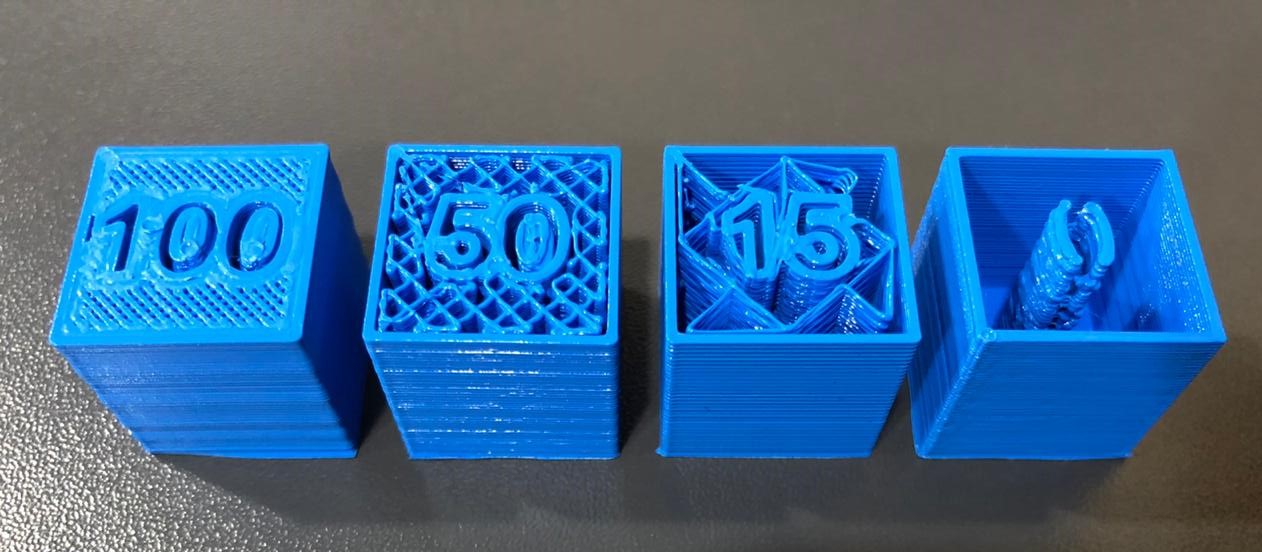
Test Number 5: Infill: This print consists of four STL files. The point is to test the infill of 3D printing.
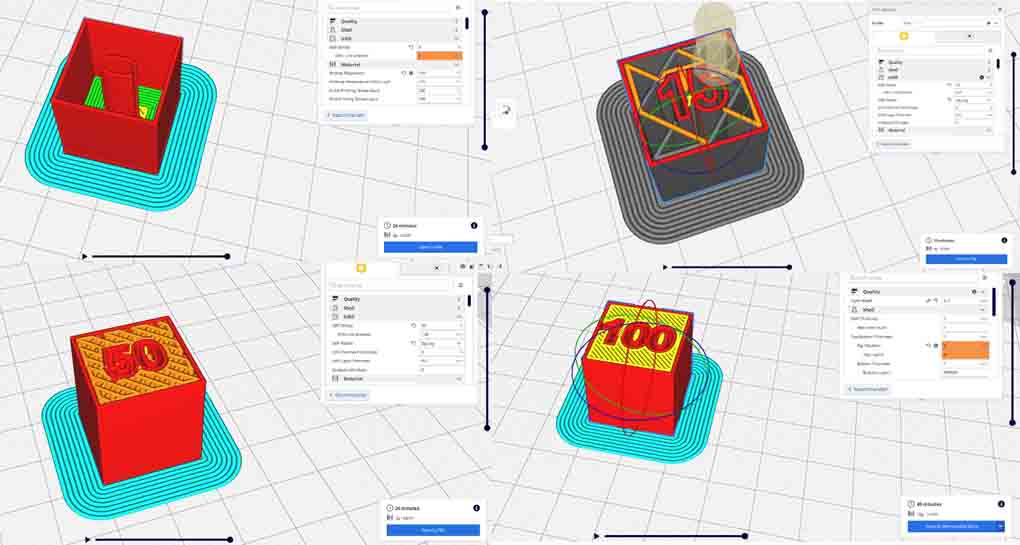
 Settings for printing the “Infill”
Quality
Layer Height: 0.20 mm
Line Width: 0.35 mm

Shell
Wall Thickness: 0.7 mm
Top/Bottom Thickness: 0.6 mm

Infill
Infill Density: 0%, 15%, 50%, 100%
Infill Pattern]: Grid

Material Printing Temperature: 200 °C
Build Plate Temperature: 60 °C

Speed
Print Speed: 45 mm/s

Travel
Enable Retraction: Yes

Cooling
Enable Print Cooling: Yes
Fan Speed: 100%

Support
Generate Support: Uncheck

Build Plate Adhesion
Build Plate Adhesion Type: Skirt
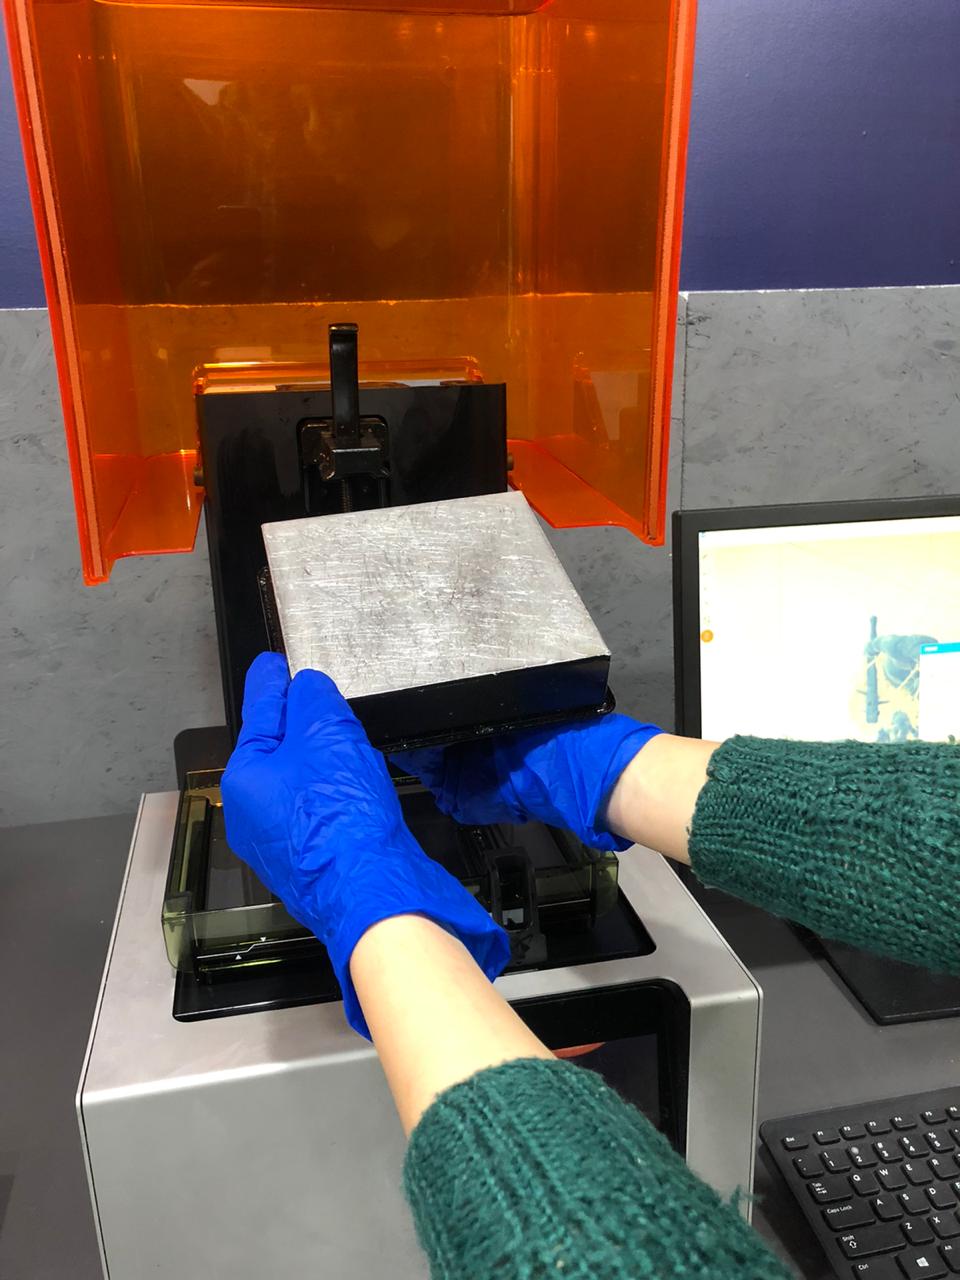
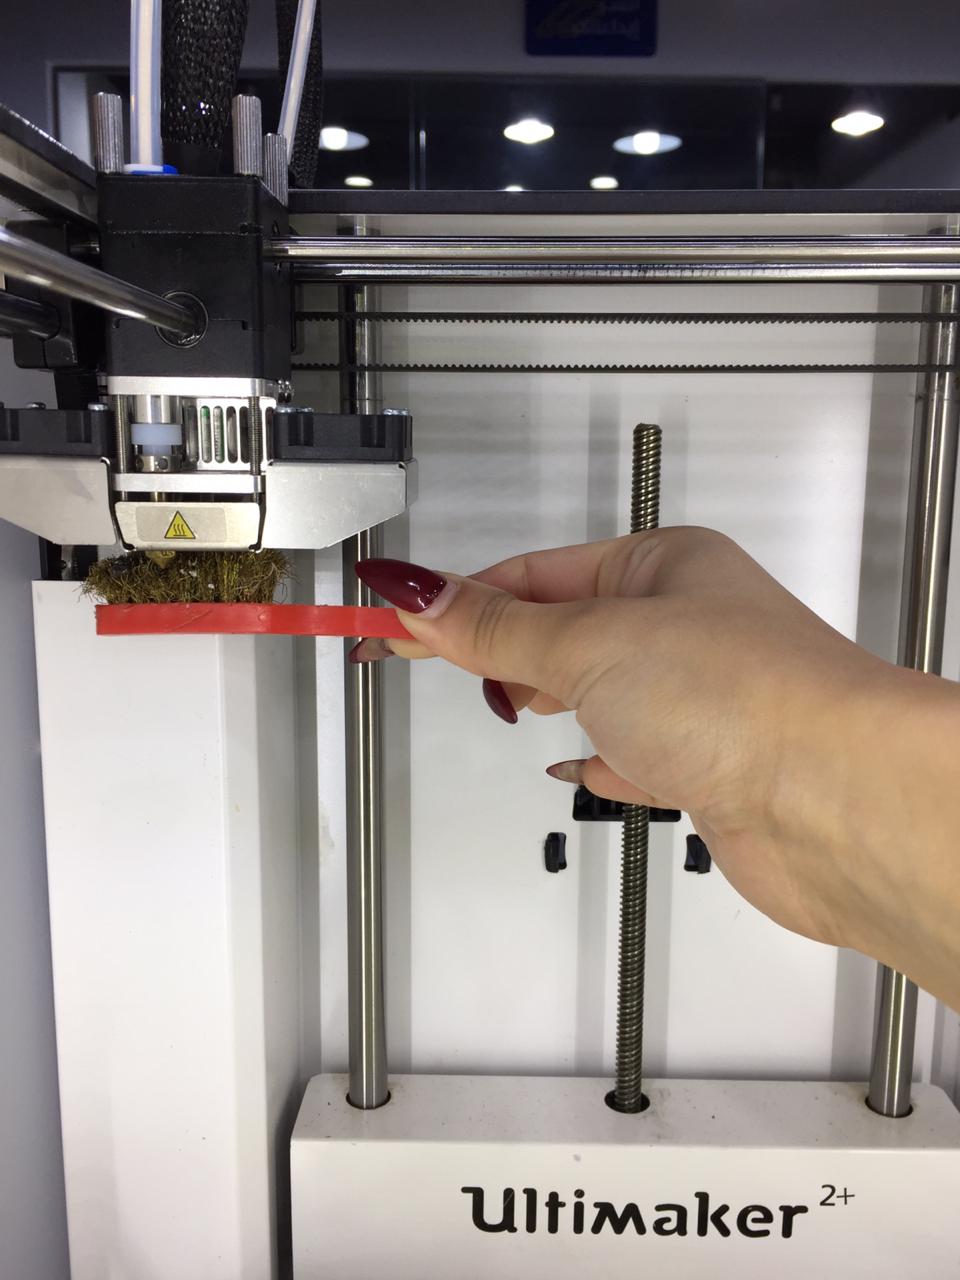
Here is the bed after we cleaned it and its ready to use “the scratches may effect the print”.
This SLA has resin tank behind which can last for two months for regular use, also this tank has a smart chip which notify the machine of the tank is placed or not.
This machine needs to be levelled 100% in order to print otherwise the bed will be affected in a bad way, so here we choose the option “Printer levelling”
Basics - changing Material
Individual assignment:
- Design and 3D print an object (small, few cm3, limited by printer time) that could not be made subtractively).
I have wanted to experiment printing on fabric trying to get as much as possible of the spikes effect as a result testing 1-Machine limitations in terms of the minimum thickness it can provide on the peak of the spike in proportion to the Nozel Size 2-material limitation in terms of using PLA vs. Flexi
Firstly I started with testing diameter size of the prints to check the quality of each…

PLA
Flexi / TPU
Further more wanted to test printing varying inclinations of the spikes without support material
step1: vector - grid -square grid
srep2: define a size using a number slider and connecting it to the size
step3: add another 2 number sliders and connect them to “extent Y” and “extent X”
step4: flatten cells (with right click on cells)
step5: define a point attractor … type in grasshopper “point”
step6: surface - free from - extrude point
step7: connect cells to base (in extrude point)
step8: surface - area tool (to extract the centroid) then write “move” (to move points up) and write “unit Z” and give it a number slider”
step9: vector- vector 2pt (take geometry from “move” and plug it in “vector 2pt” as point A ) not write/connect point on grasshopper and connect it in “vector 2pt” as point B
step10 : right click on unitize on “vector 2pt” - right click set Boolen - True (it means that the vector is one length- so just giving me a direction to the point attractor )
step11:
PLA on fabric
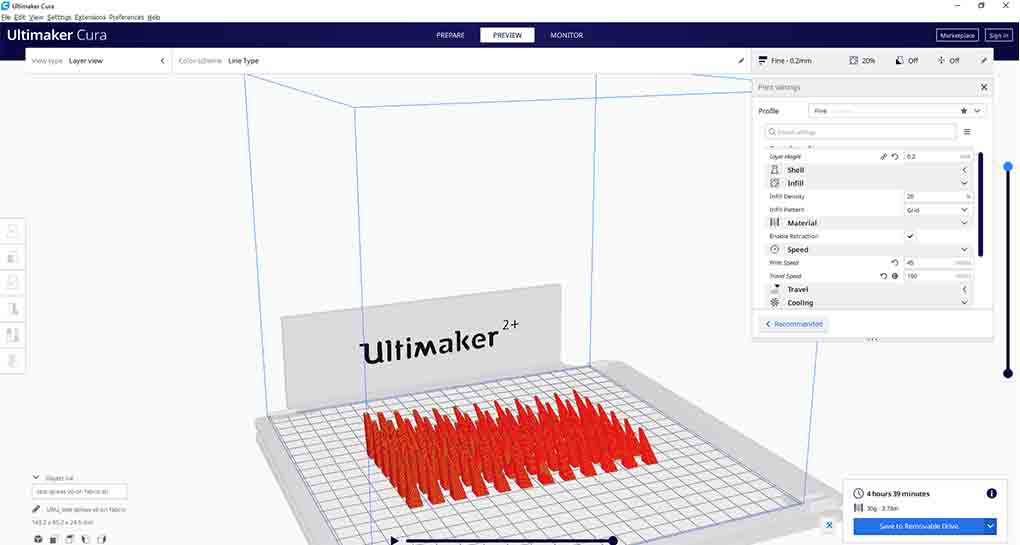
Slicing on “Cura” Software & Modifying the G code to stop at layer 2 in order to put the fabric
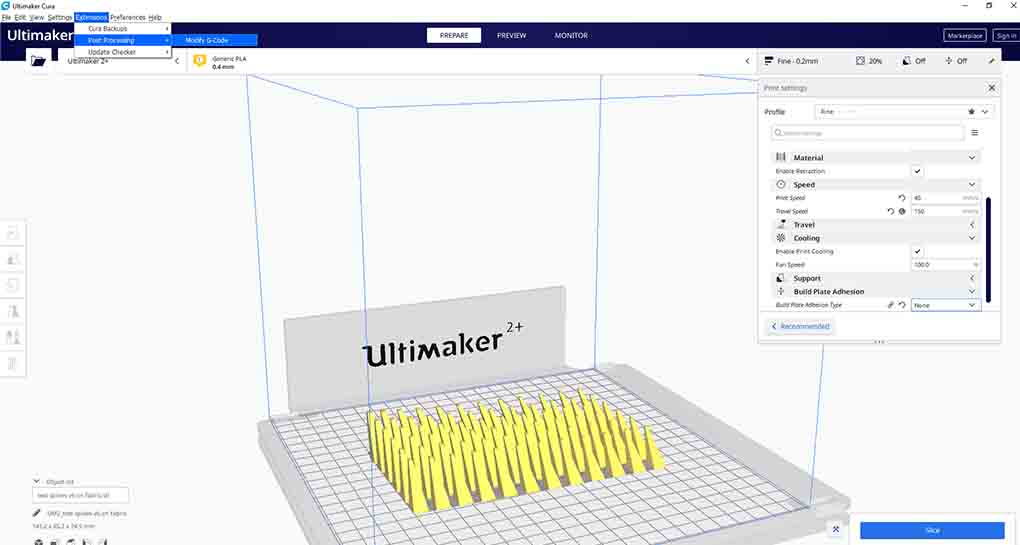 Here I played with the G-code so I can Print on Fabric: Extensions - Post Processing - Modify G-Code
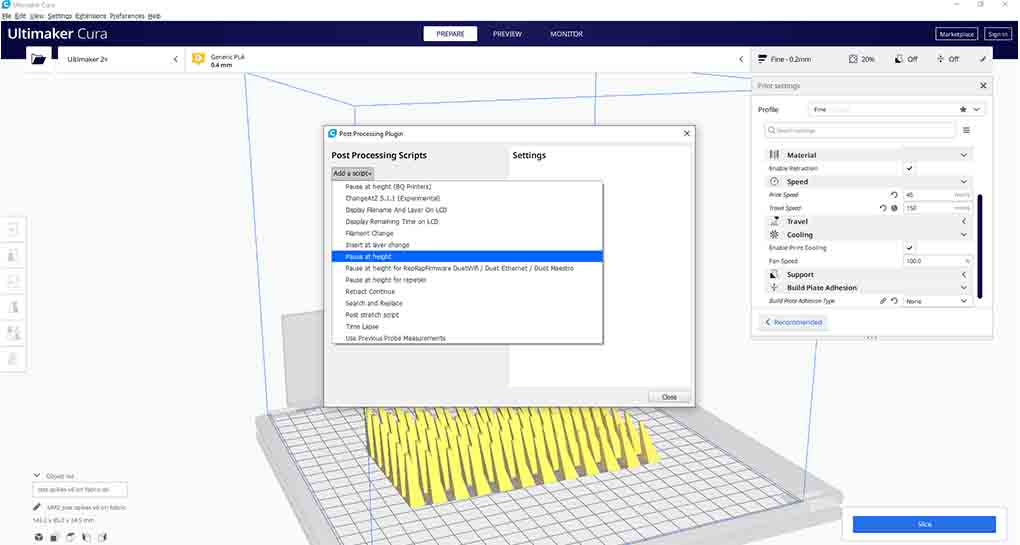 then add a script - from the drop down menu select Pause at height
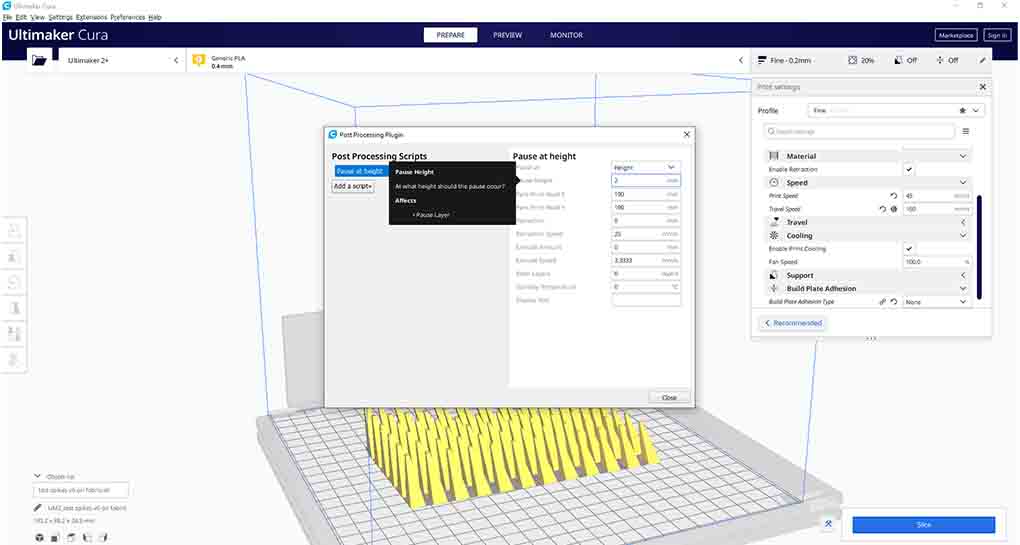 then type next to “Pause at height” the height you desire to pause on I typed “2 mm”
 Print speed: 45 , Travel Speed: 150 (most importantly that I modified the travel speed so I wont need support for the inclinations )
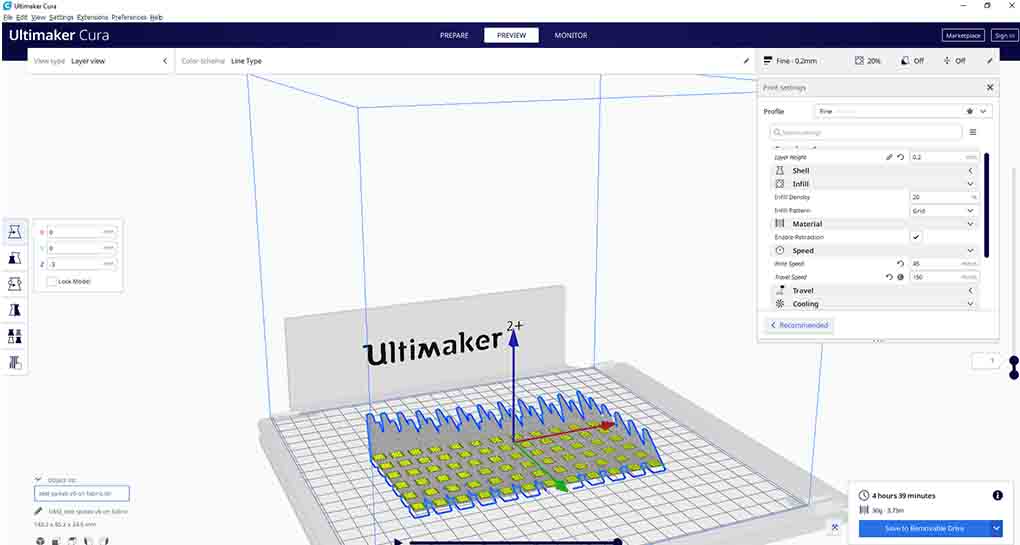
 Just Checked everything then saved the G-Code to removable
Hero shot!
PLA on fabric from Batoul Al-Rashdan on Vimeo.
TPE (flexi) on fabric


PCB Case
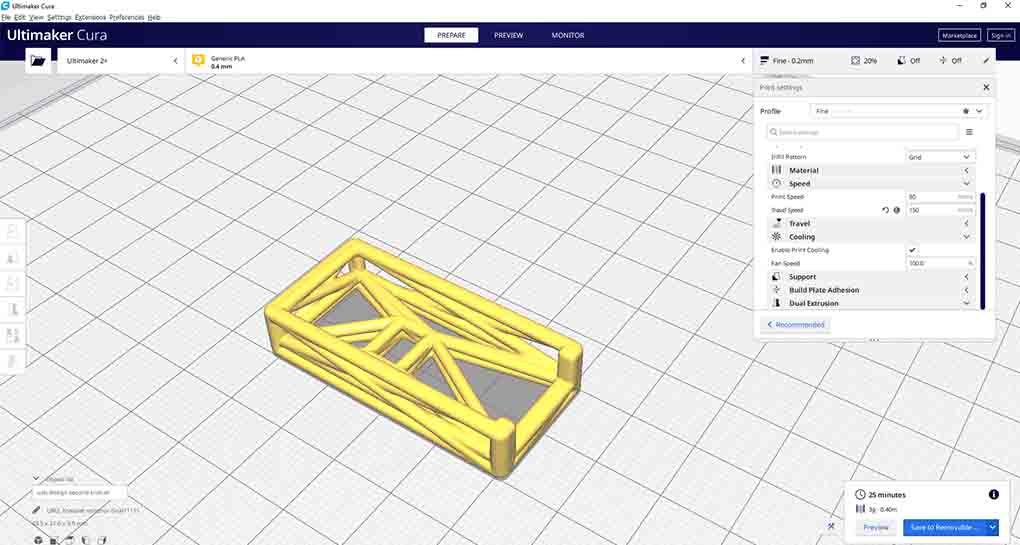
I have designed several options for the upper case then chose the 4th one to print
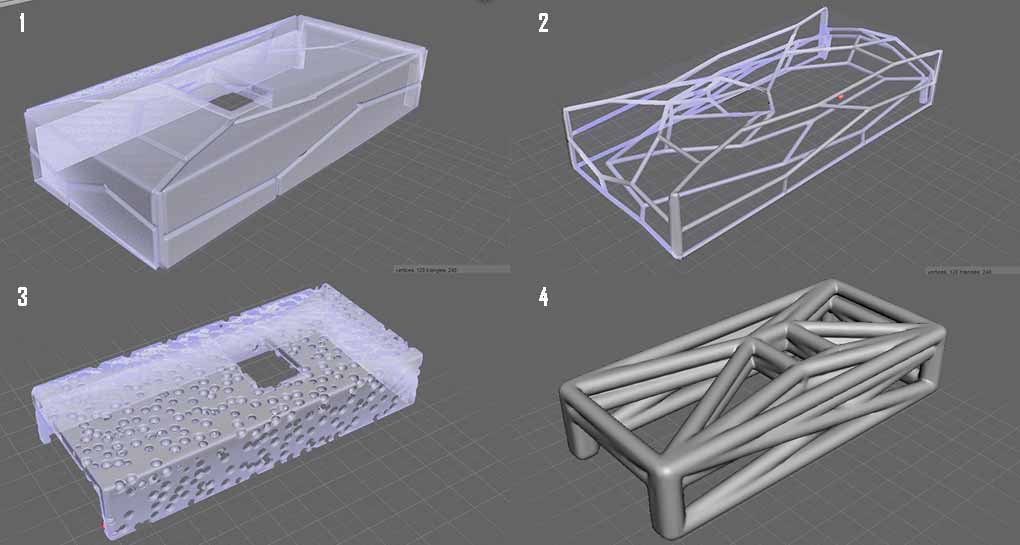 I just designed them on rhino and tried different artistic patterns I was just playing around and checking the result finally decided to stick with the one I liked the most
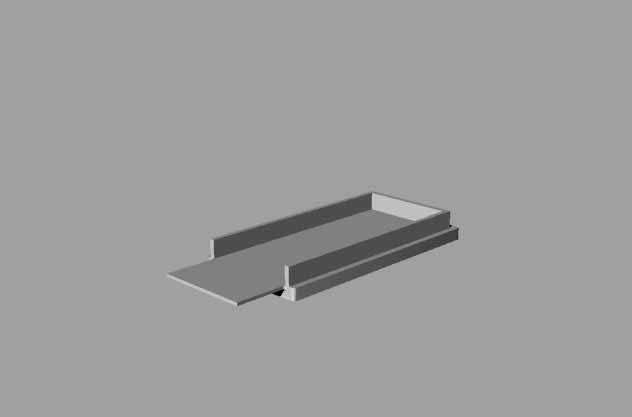 However I started all this by accurately measuring my PCB using the caliper and reflecting all measurements into 2D and 3D design ( take into consideration depth, reasonable hight and openings …)
 I have separated the files the bottom alone and the top alone to make it easier to print…Now after exporting the STL file from Rhino I open it on Cura and modified the settings preparing the STL file for printing the bottom
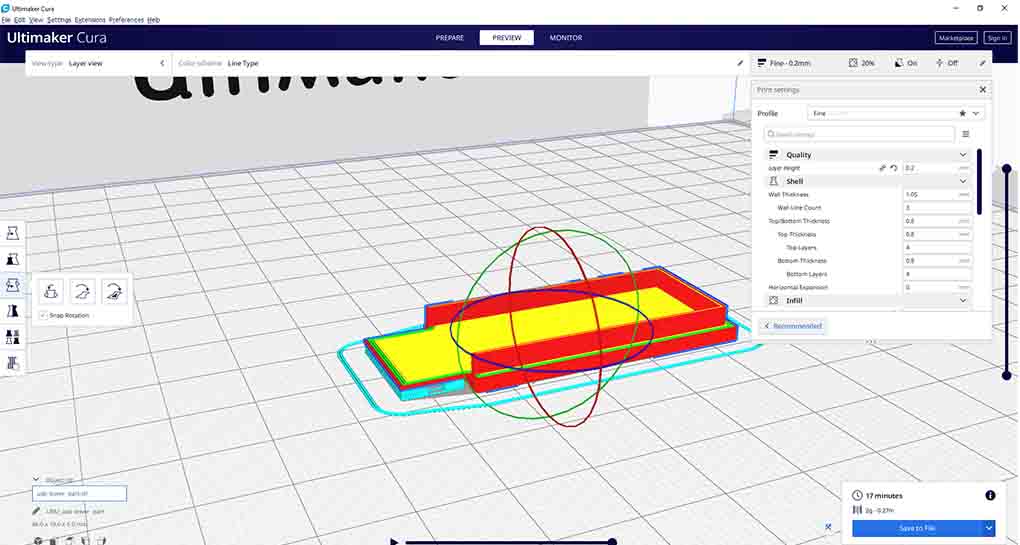
 I repeated the same step as well for the top and kindly pay attention to orientation here in order to minimize the support needed I flipped it (upside down) - Here I’ve increased the travel speed to minimize the support for openings in my geometry
Hero shot!
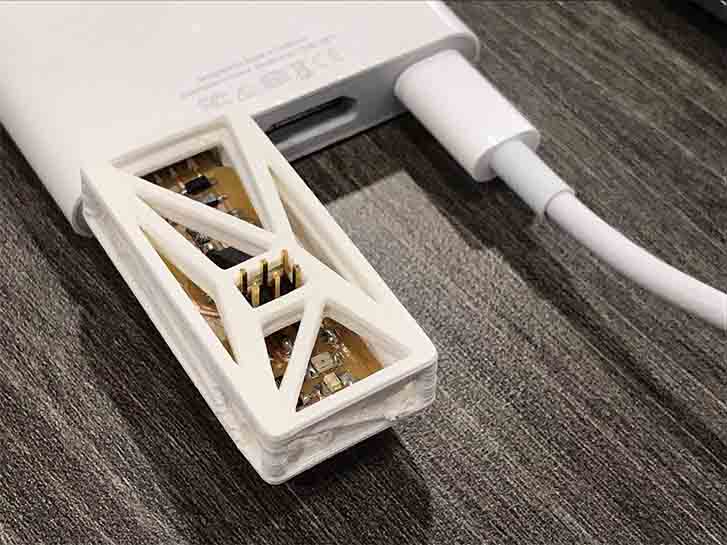 I placed my PCB in the bottom case and fit perfectly then I added/put the top of the case and it was a pressfit I have checked inserting it in a USB drive and finally it recognized it as it was perfect height to make it stick in the USB drive and for the computer to recognize it without me holding it
