10. Input Devices
This week :
individual assignment:
measure something: add a sensor to a microcontroller board that you have designed and read it
Group assignment:
probe an input device’s analog levels and digital signals
Kindly note: Due to COVID-19 situation and no access to the lab … been using whatever online sources i can have access to…
Individual assignment
Download Files
- ATtiny44 datasheet.
- SW-200D Tilt sensor datasheet.
- Stretch sensor datasheet.
- Silicon Stretch sensor datasheet.
- Fabric Stretch sensor datasheet.
- EAGLE Library.
- Download EAGLE.
- Arduino IDE.
- Tilt Sensor (LED on/off) TinkerCAD.
- BOR Schematic and Board design.
Tilt Sensor
Tilt Sensor (LED on/off) on tinkerCAD
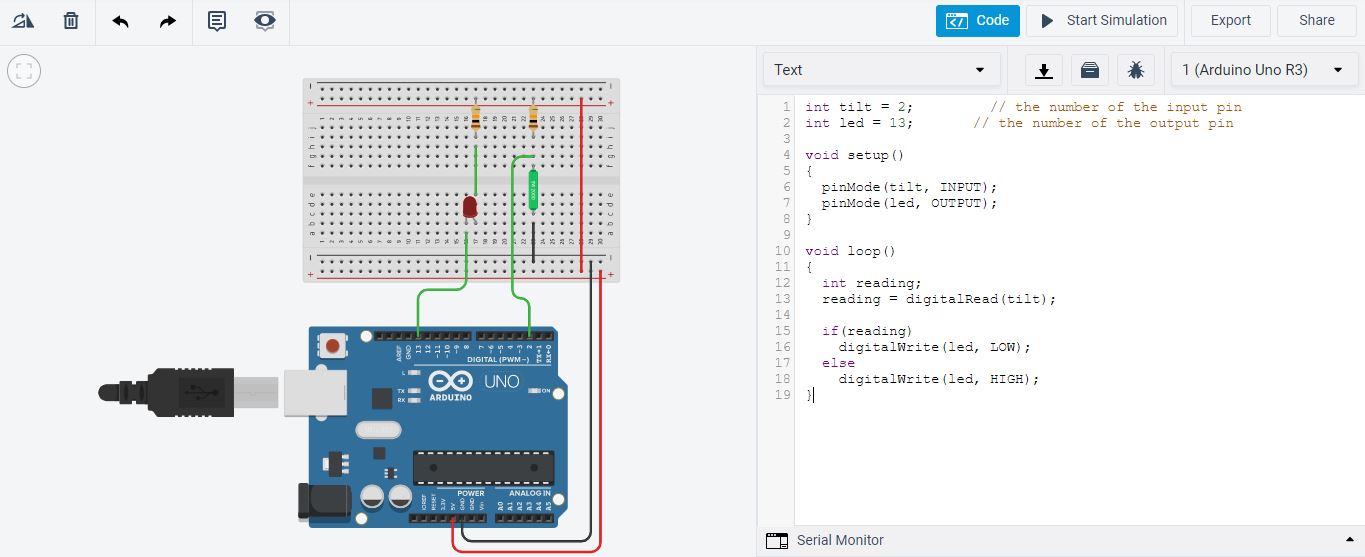
Code
int tilt = 2;         // the number of the input pin
int led = 13;       // the number of the output pin

void setup()
{
  pinMode(tilt, INPUT);
  pinMode(led, OUTPUT);
}

void loop()
{
  int reading;
  reading = digitalRead(tilt);

  if(reading)
    digitalWrite(led, LOW);
  else
    digitalWrite(led, HIGH);
}
Stretch Sensor
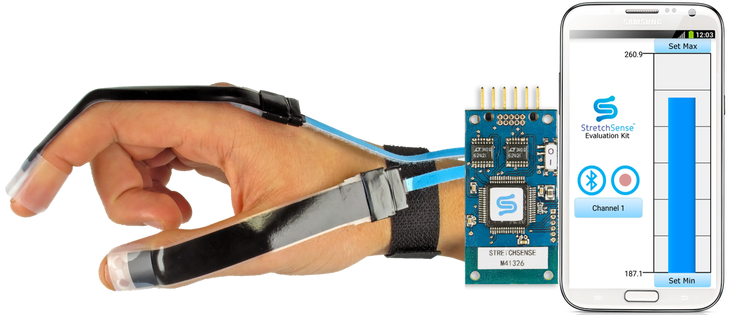
Stretch sensors are a type of sensor designed to measure soft structures, including soft robots and the human body. These stretch sensors are essentially flexible capacitors. When the sensor deforms (due to stretching or squeezing) its capacitance value changes. The sensor sends data about its capacitance to a Bluetooth enabled device, and the StretchSense App translates the data to give a user highly precise information about what the sensor is detecting. Stretch sensors can be made in various sizes, elasticities, and sensitivities depending on desired application.
sensors on hand
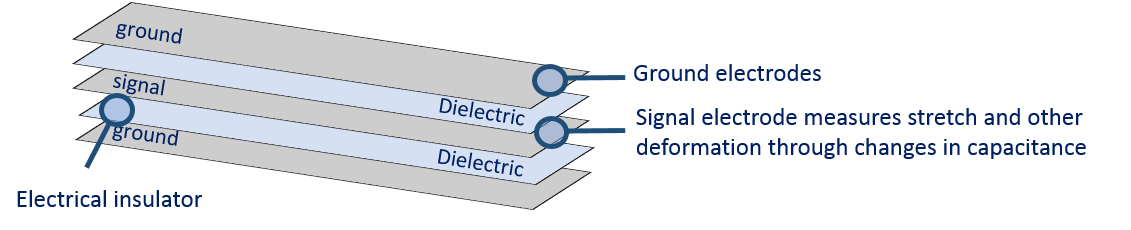
The inside of the stretch sensor consists of a stretchable signal electrode sandwiched between two ground electrodes which are separated by silicone dielectric insulators. Since the sensor is essentially a flexible parallel plate capacitor, the two dimensions that change when the sensor is stretched are thickness and area of the conductive layers. Stretching the sensor increases area and decreases thickness which both contribute to an increase in capacitance. Since capacitors resist a change in voltage, the capacitance can be indirectly measured through an applied voltage. By applying a voltage to the sensor and comparing the actual voltage output to what would be expected without a capacitor, the capacitance of the sensor can be determined.
stretch sensor structure
There are two main versions of stretch sensor: A silicone based sensor and a fabric based sensor. The silicone variety offers a set of mounting holes to attach to your system, while the fabric variety has a thin sew-able region on each side of the sensor which is perfect for integrating with wearable applications.
Silicone stretch sensor
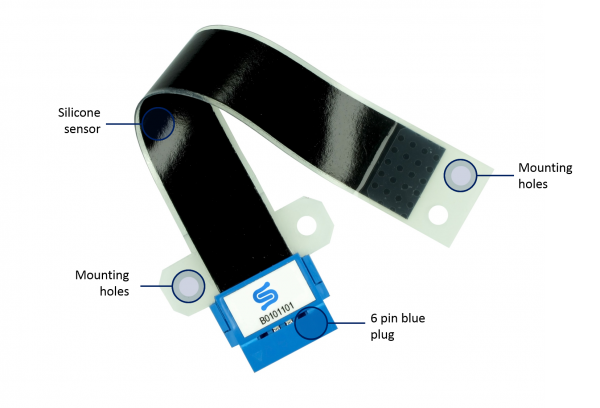
Fabric stretch sensor
From Youtube
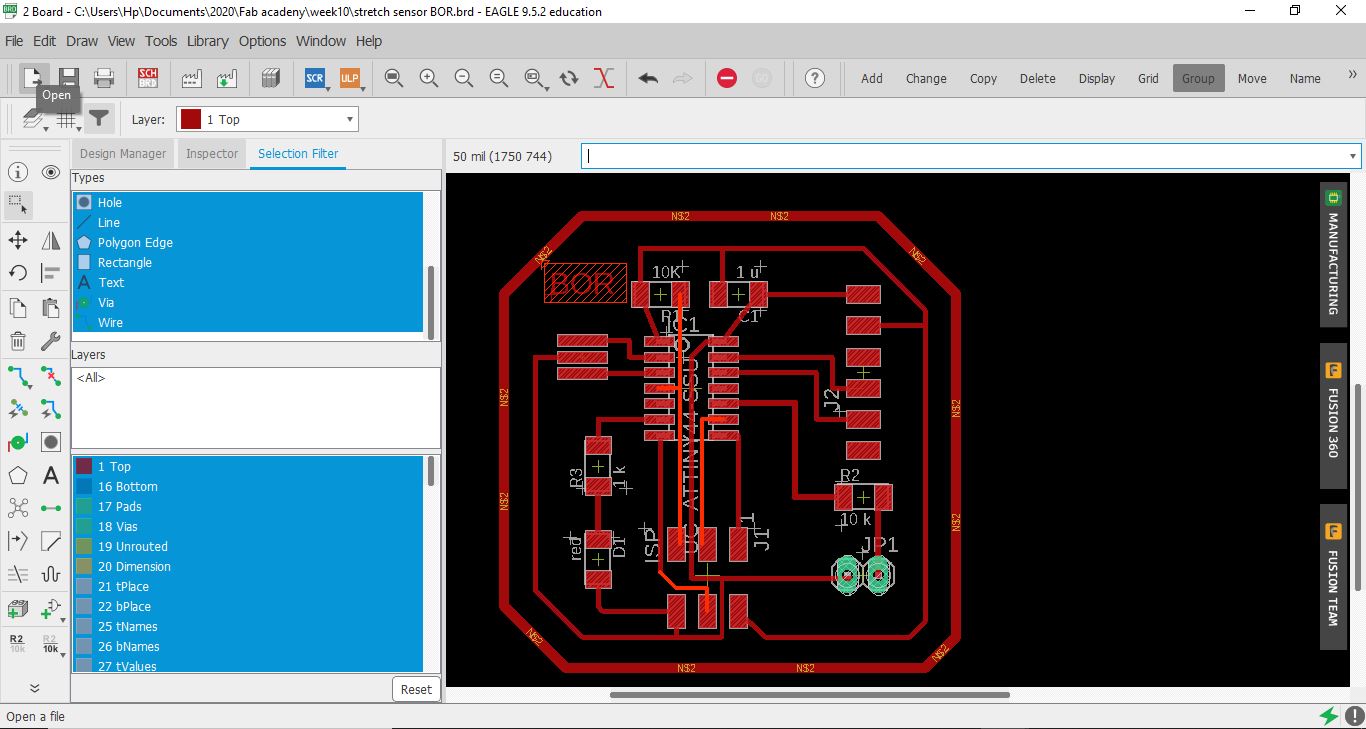
BOR stretch sensor board design.
BOR Schematic design
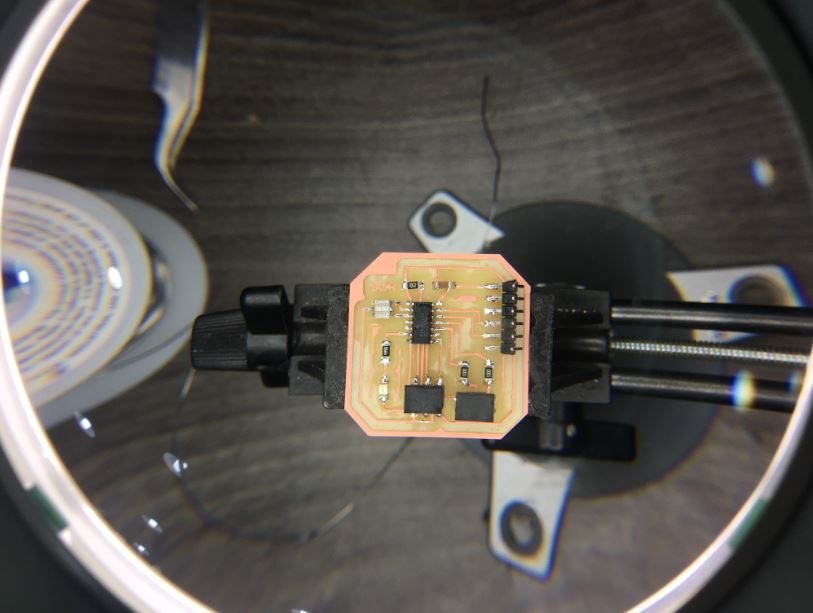
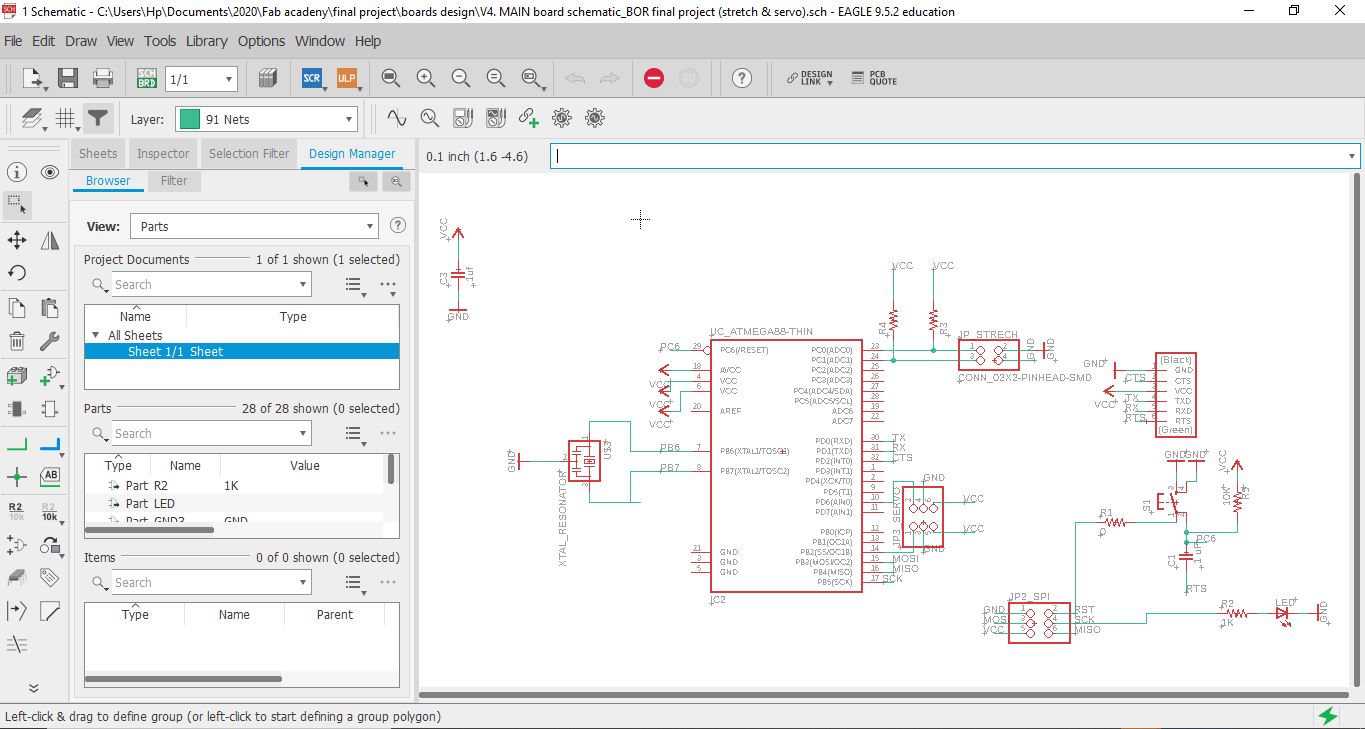
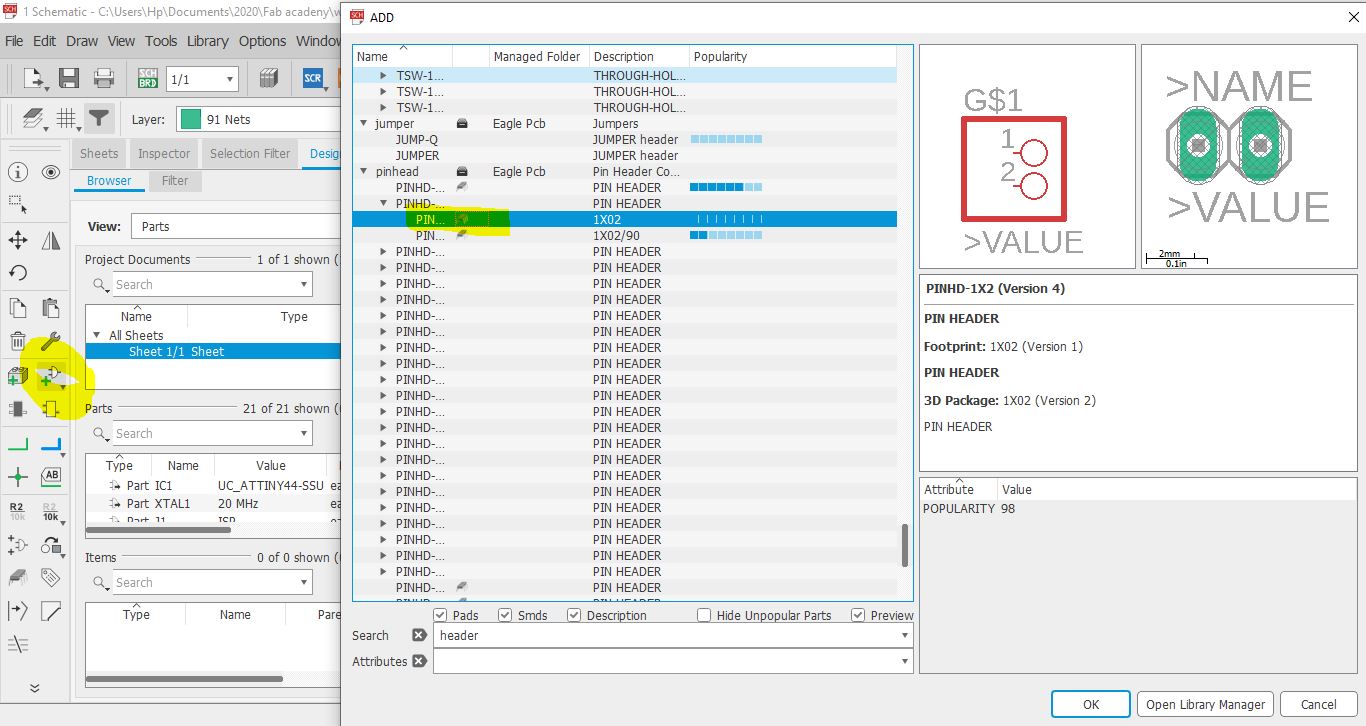 so remember the board i design Week07.I open it’s schematic design on eagle and replaced the Button with a pinhead 1*02 (from add part)so i can connect the stretch sensor to it.
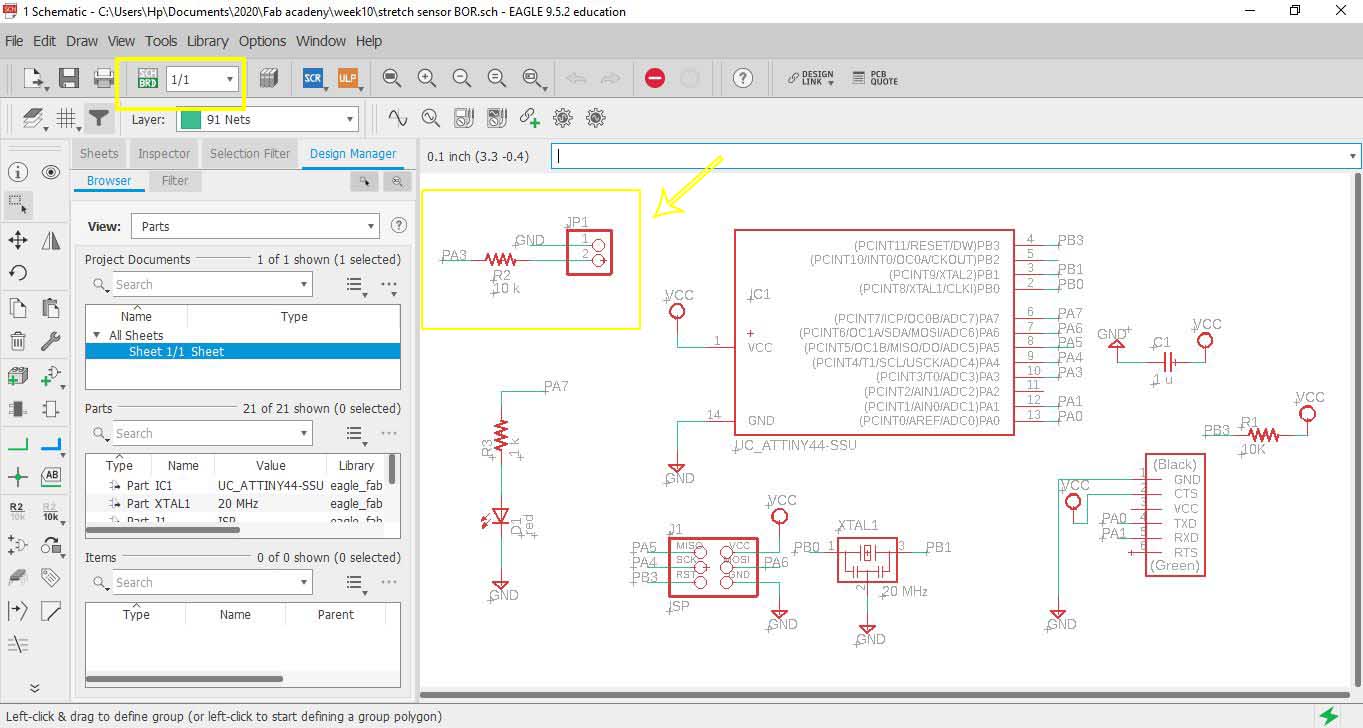 then connected the Pin head 1- to GND and 2- to resistor and one of pins of ATTiny in this PA3
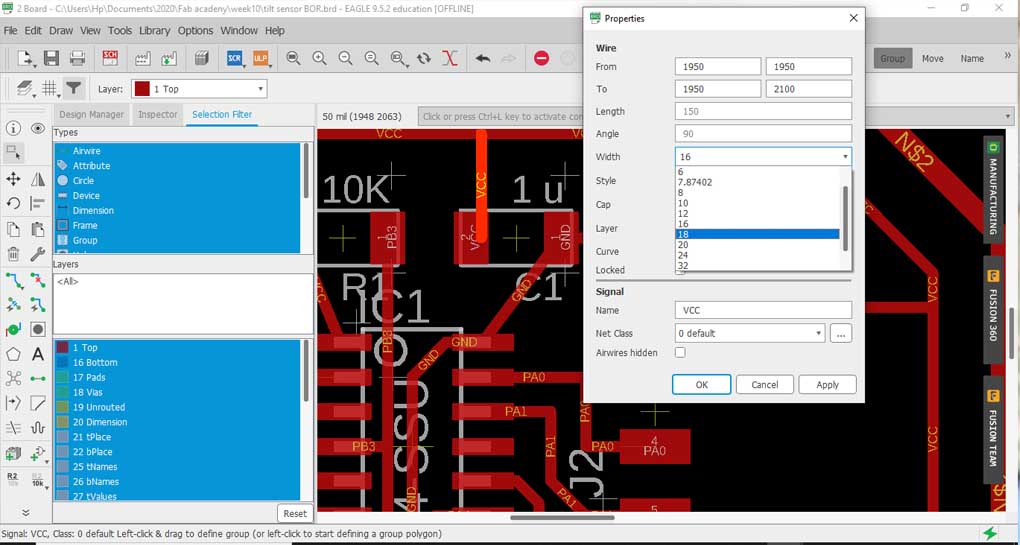 i thought of changing the wire width since during Week07 I got a short circuit and I had to scratch a part that mods didn’t read and the machine didn’t cut by hand a cutter so changed wire width from 16 to 18 BUTTTTTTT
 first I got more errors regarding the spacing! but the main problem is I misunderstood this … increasing wire width would create more problems! instead I should be changing the spaces between wires AKA the “clearance”
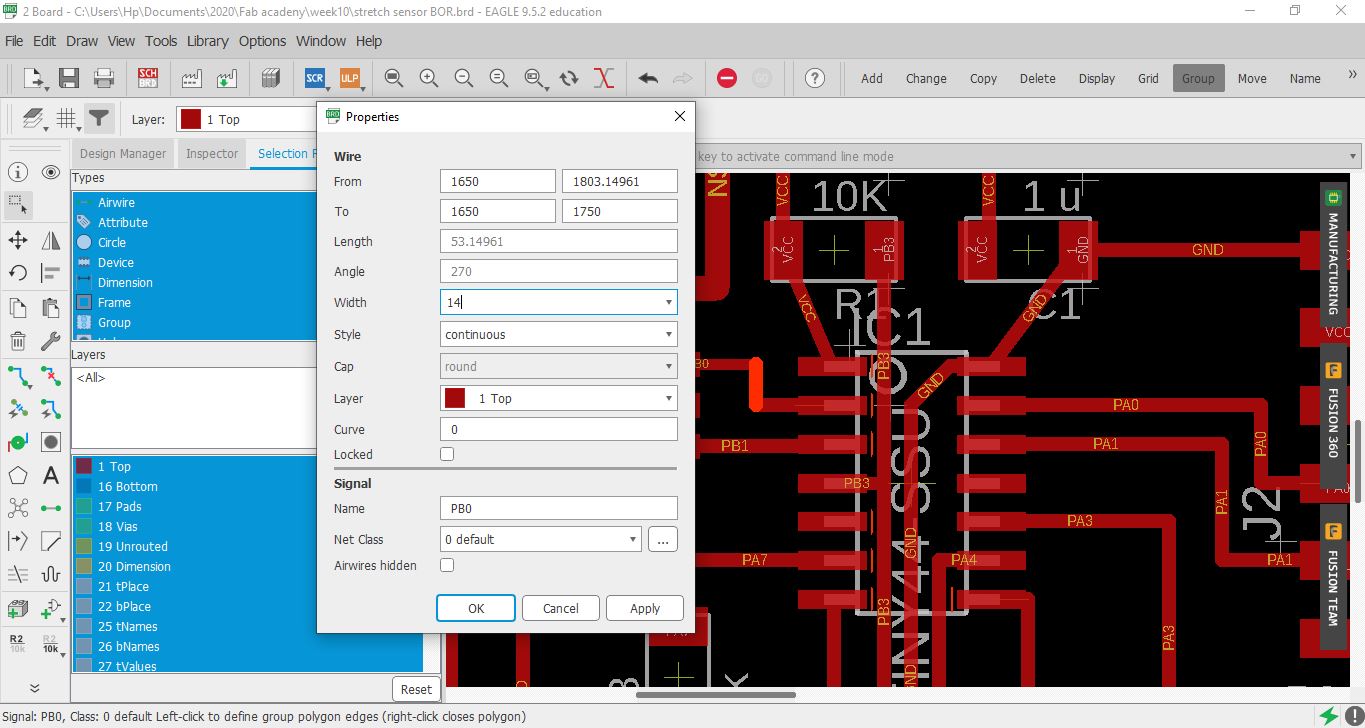 so like a really good girl went back to and changed all wires to from 18 to 14 (even less wire width as it shall be better)
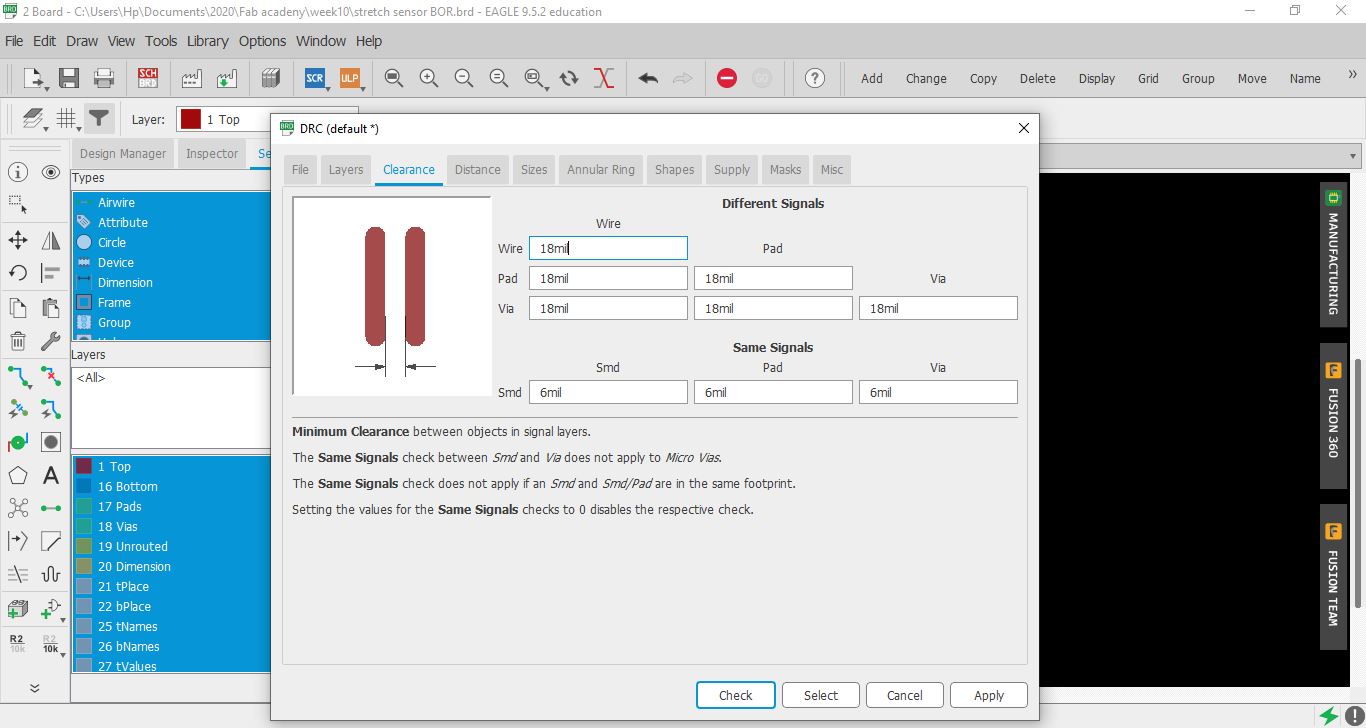 changed the clearance from DRC (bottom left) all to 18mil.
but guess what?
yup got more and more errors yay
changed the clearance from DRC (bottom left) all to 18mil.
but guess what?
yup got more and more errors yay
 Wonderful! I was scared I’ll have to re-route but nahhh, not today!
Bill Gates was right, once said “I choose a lazy person to do a hard job. Because a lazy person will find an easy way to do it.” Yup ladies and Gentlemen I AM THAT LAZY PERSON so here is what I did…
Wonderful! I was scared I’ll have to re-route but nahhh, not today!
Bill Gates was right, once said “I choose a lazy person to do a hard job. Because a lazy person will find an easy way to do it.” Yup ladies and Gentlemen I AM THAT LAZY PERSON so here is what I did…
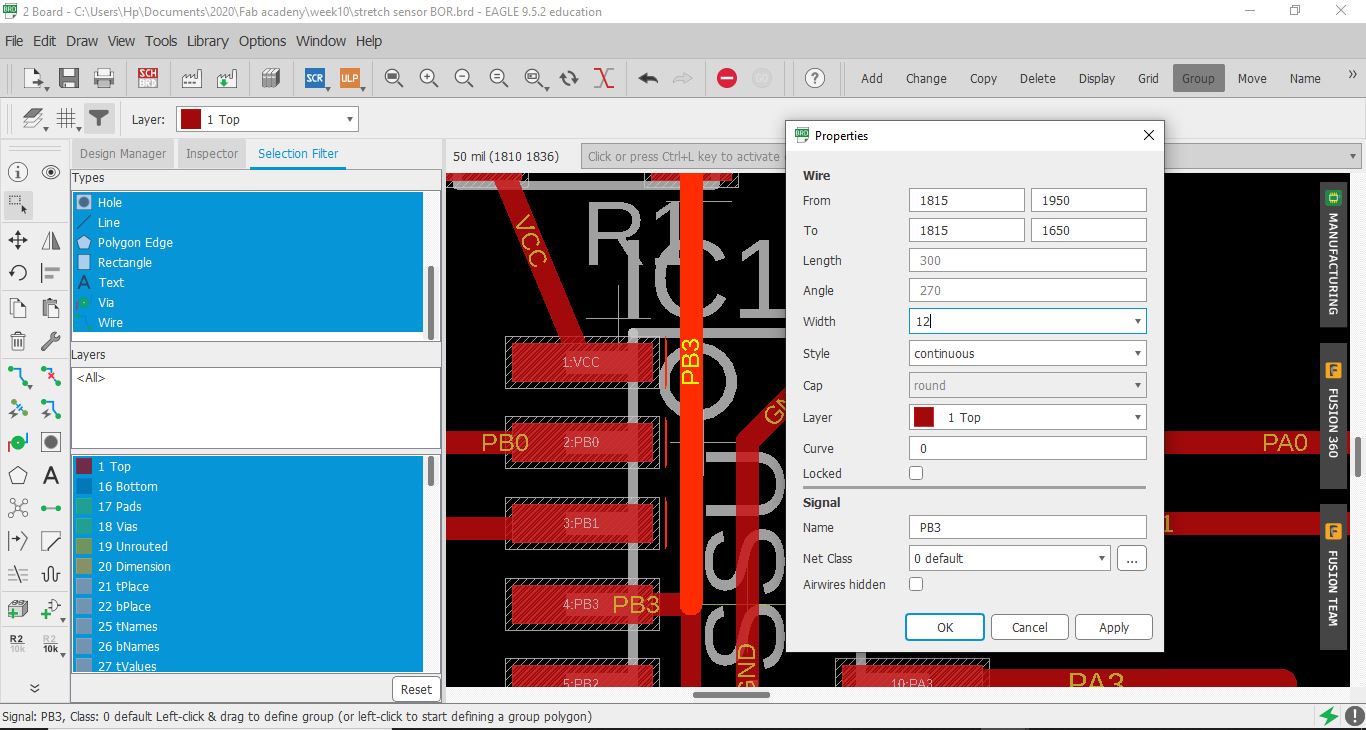 wherever I saw an error, just changed the wire next to them from 14 to 12(wire width by right clicking - properties - width - 12 )
 so I ended up only changing the wire width of these highlighted wires and no errors anymore … aka “bbye re-routing”
so as you can see here ive used FTDI to read the signal and pin A0 and A1 for the analogue signal
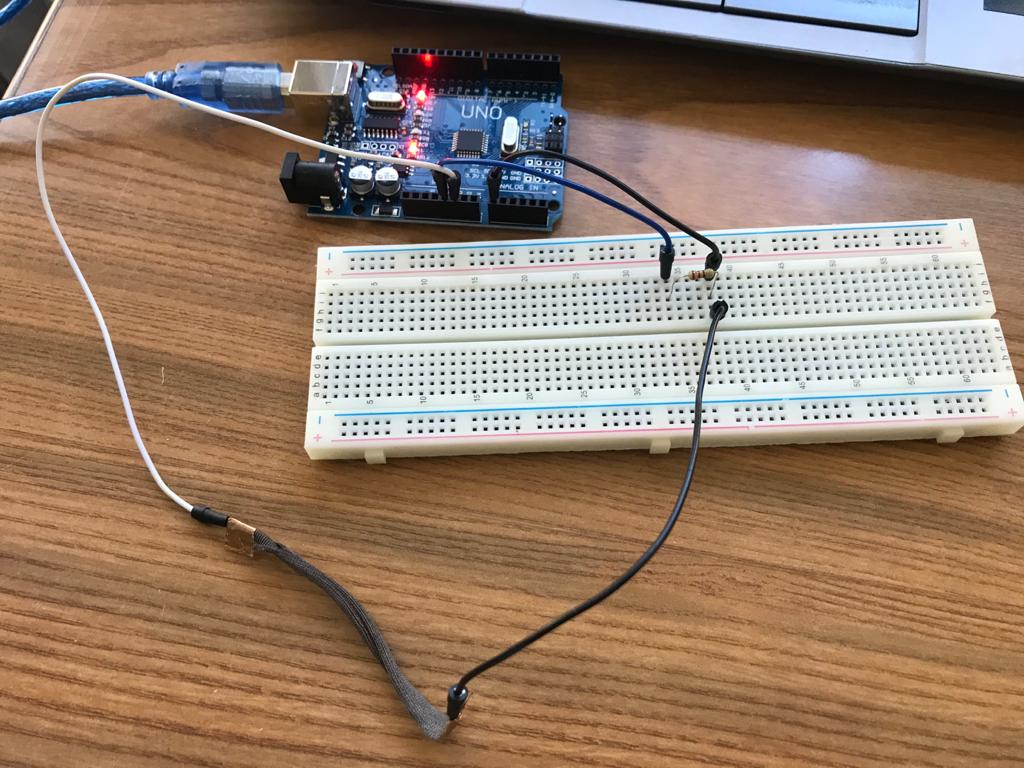
Step 1 : (http://fabacademy.org/2020/labs/techworks/students/batoul-alrashdan/assignments/week10/) I used stretch sensor after folowwing this schematic

Step 2: where I got physical then connected Arduino and verified and uploaded the code
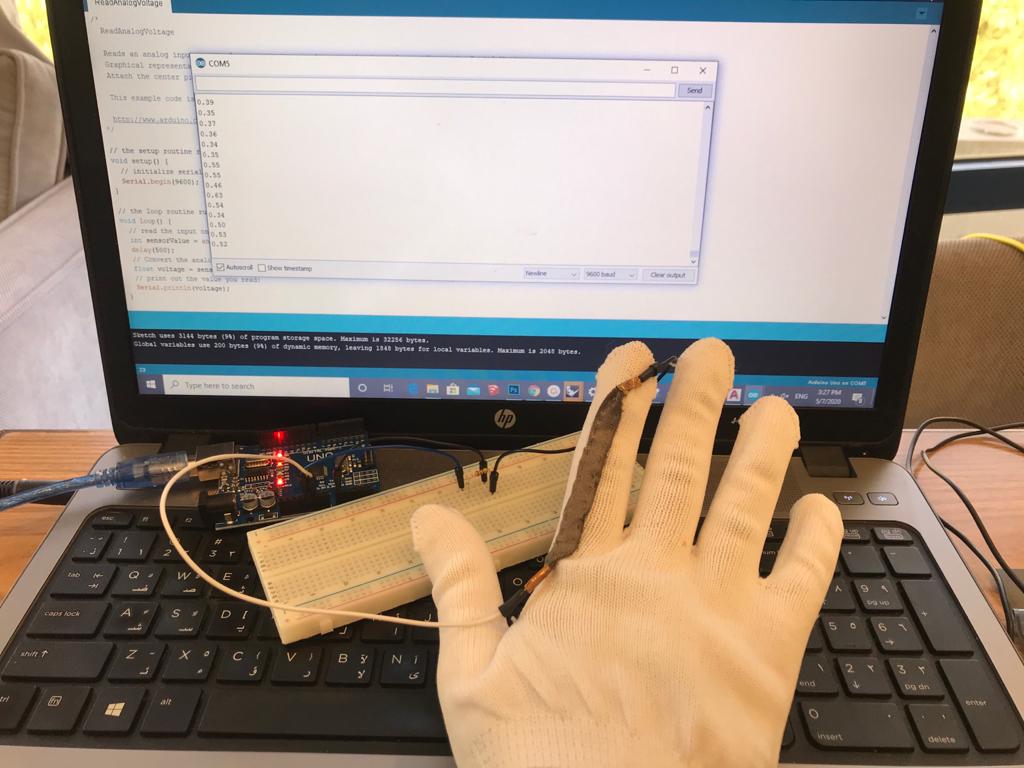
Don’t freak out Neil! this is the piece i wanted to use for final project making glove so i didnt want to cut any part from it just in case due to COVID-19 if wouldn’t be able to buy online again …
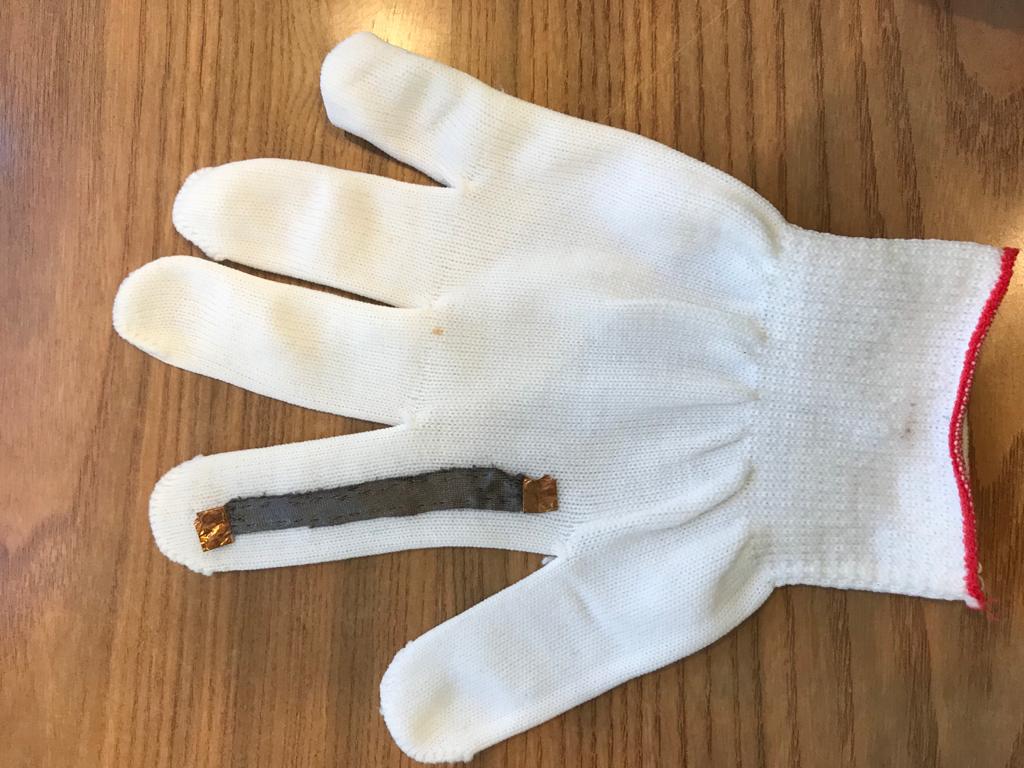 tried sewing the stretch conductive fabric to the glove as we are in a lockdown due to COVID-19 and added copper to the ends to make it easier connecting it with wires available
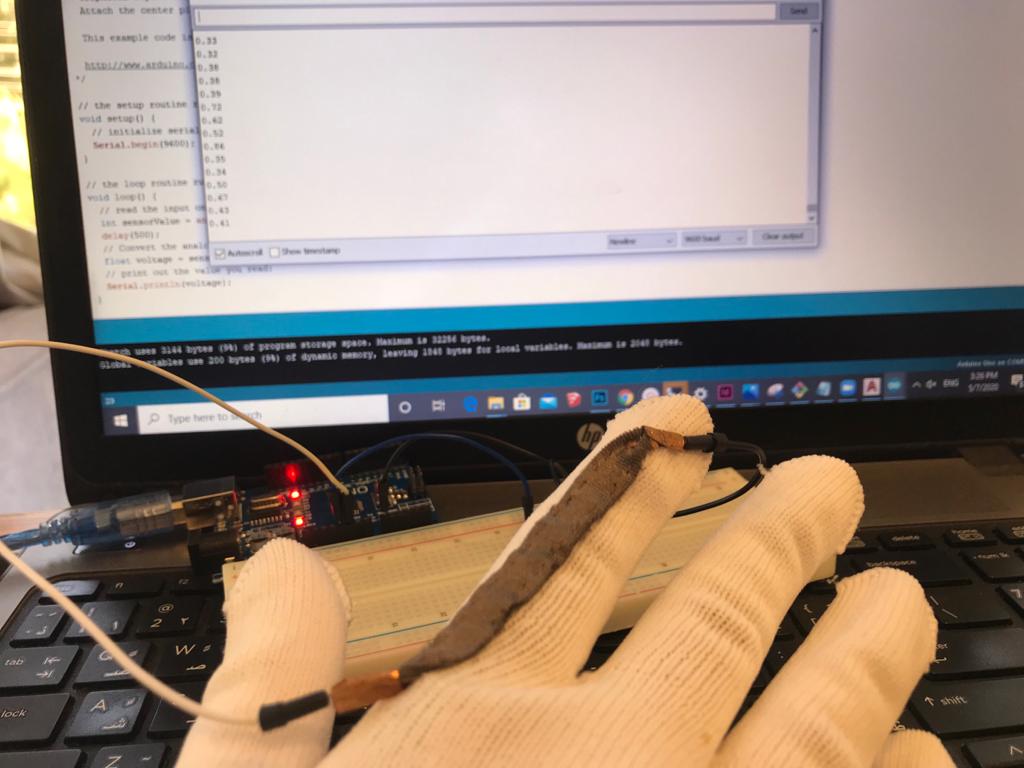 then I connected the circuit/wires to the copper attached to the conductive stretch fabric and connected arduino with ReadAnalogVoltage Code after modifying it to delay so I can be able to see the change in voltage
Code Example
Use the three backticks to separate code.
/*
  ReadAnalogVoltage

  Reads an analog input on pin 0, converts it to voltage, and prints the result to the Serial Monitor.
  Graphical representation is available using Serial Plotter (Tools > Serial Plotter menu).
  Attach the center pin of a potentiometer to pin A0, and the outside pins to +5V and ground.

  This example code is in the public domain.

  http://www.arduino.cc/en/Tutorial/ReadAnalogVoltage
*/

// the setup routine runs once when you press reset:
void setup() {
  // initialize serial communication at 9600 bits per second:
  Serial.begin(9600);
}

// the loop routine runs over and over again forever:
void loop() {
  // read the input on analog pin 0:
  int sensorValue = analogRead(A0);
  delay(500);
  // Convert the analog reading (which goes from 0 - 1023) to a voltage (0 - 5V):
  float voltage = sensorValue * (5.0 / 1023.0);
  // print out the value you read:
  Serial.println(voltage);
}
Soldering