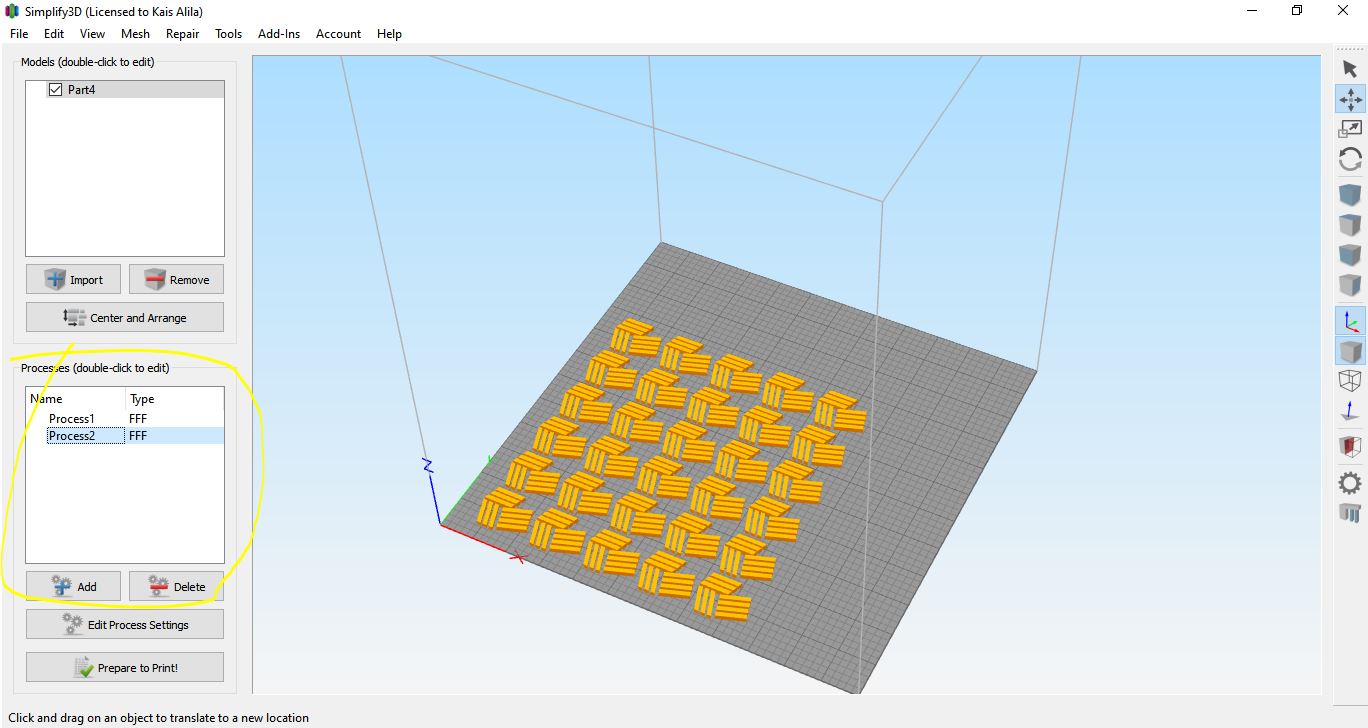
18. Wildcard week
For this week I decided to test something new in 3d printing which is 3D printing on Fabric. I tested this methode in 3d printing at home using my printer because of the quarantine due to covid 19.
3D printing on fabric
3D printing has many applications, but did you know that making fabrics was one of them?
The field of 3D printed fabrics has already shown a lot of potential. Even NASA has taken an interest, and researchers are getting close to bringing some 3D printed fabrics to consumers. 3D printing not only provides a solution to the environmental crises caused by the textile industry, but it has also opened many new doors for textile scientists.
In this assaignement I will show ow to print on fabric using diffrent methodes. The printer I use is an Anet A8+ with TPU (flexible) filament from polymaker and normal PLA.
Choose Your Fabric
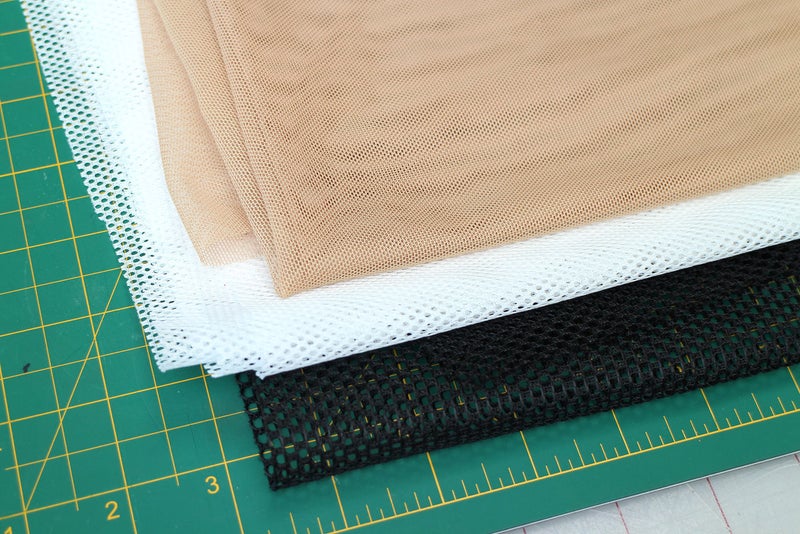
In order for the 3D filament to stay on fabric it either needs to be perforated or be coated with a hot-melt polymer.
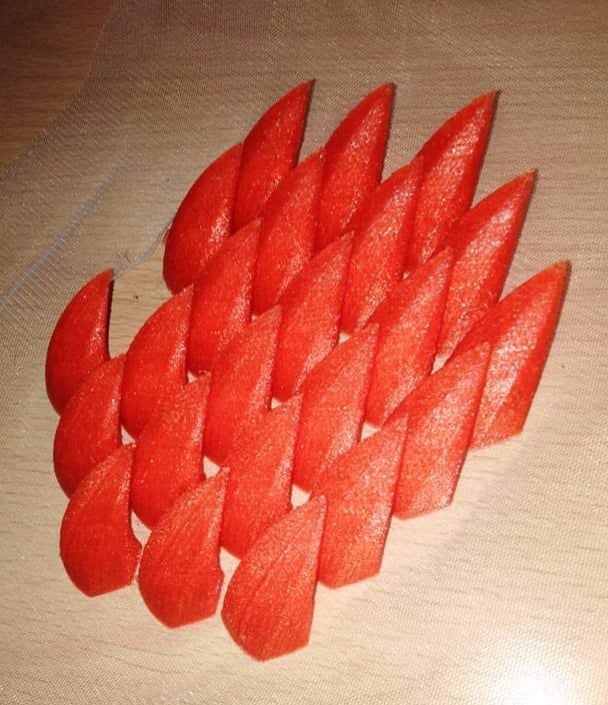
The perforated fabric can be a mesh or netting. The fabric is placed in between layers of printed filament making contact and bonding with itself through the holes in the netting or perforation. The fabric then gets locked in and your print stays on the fabric. In this Instructable I use Tule. You may find other fabrics that will also work, some may take some experimentation.
-
Power mesh
-
Cargo netting
-
Tulle
-
Lace
Choose Your Filament
TPU is worked very well on cotton but PLA and ABS have also worked well but only on tule. It can be because of the filament qulaity which didn’t stick well on the fabric.
Modeling: 3D design
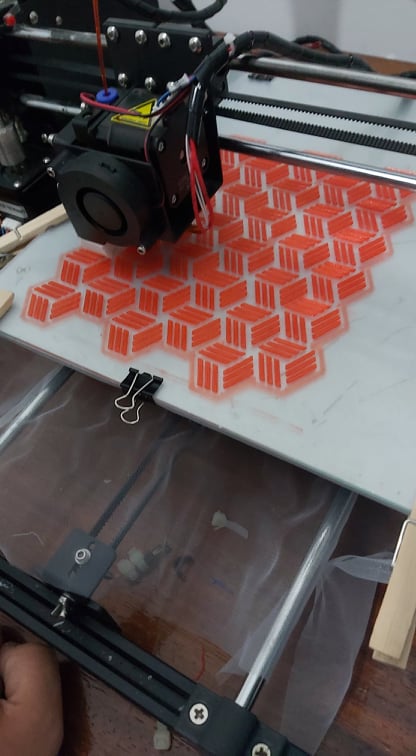
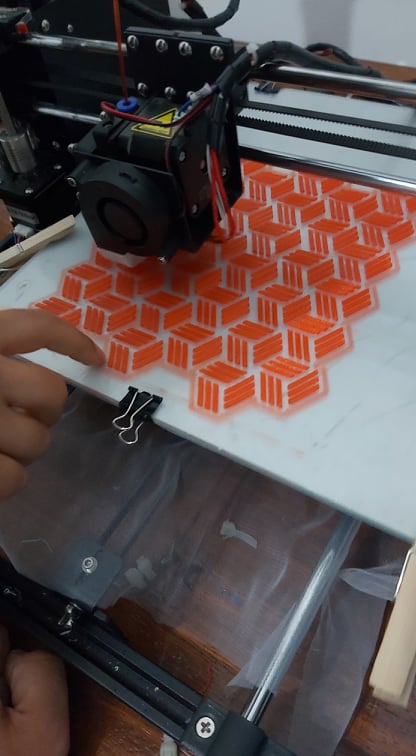
As first test, I donwloaded a model from thingiverse which is Dragon scale file on tule

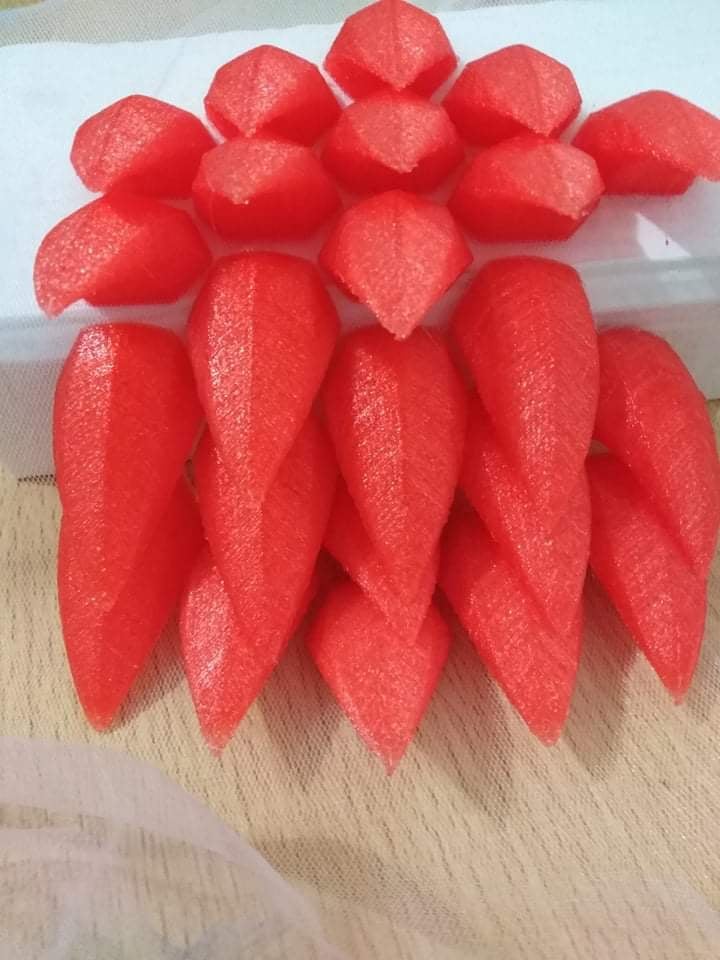
For the seccond test i modeled a pattern using solidworks to test it.
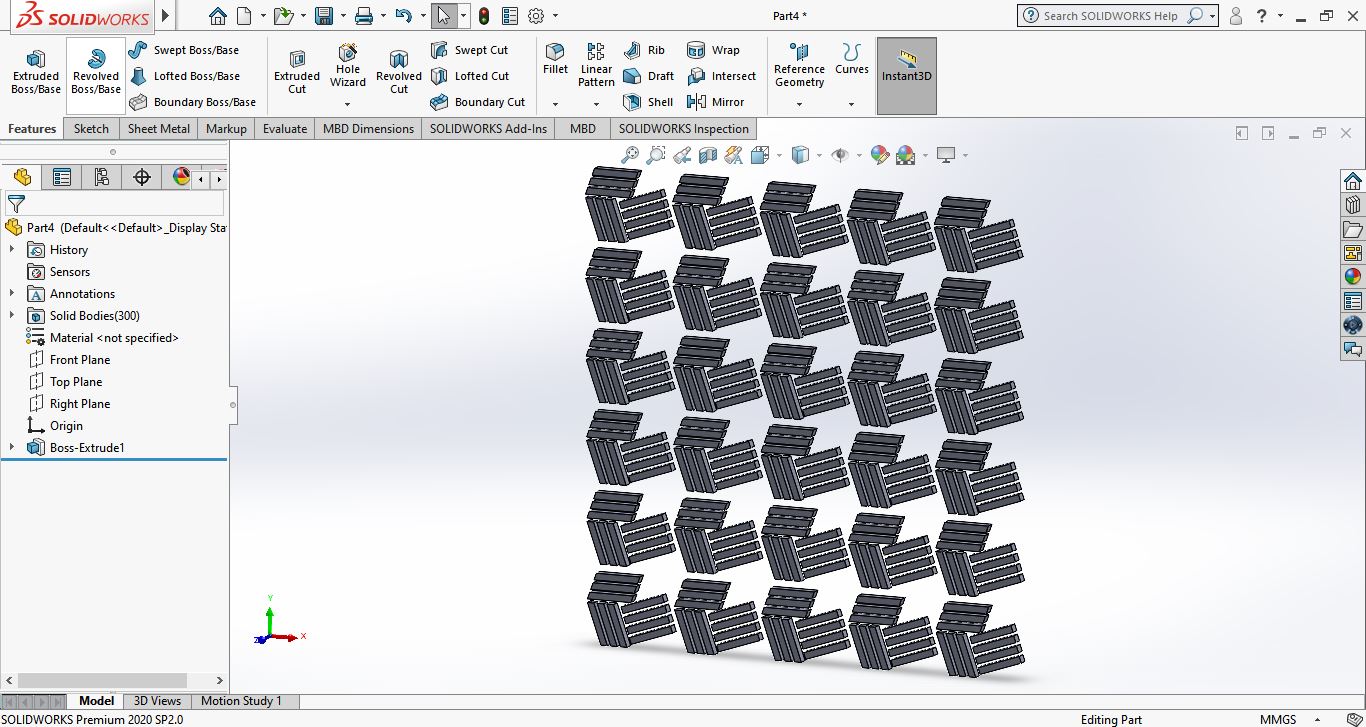
Here is the STEP File; Solidworks File
Manipulation: 3D printing, Gcode
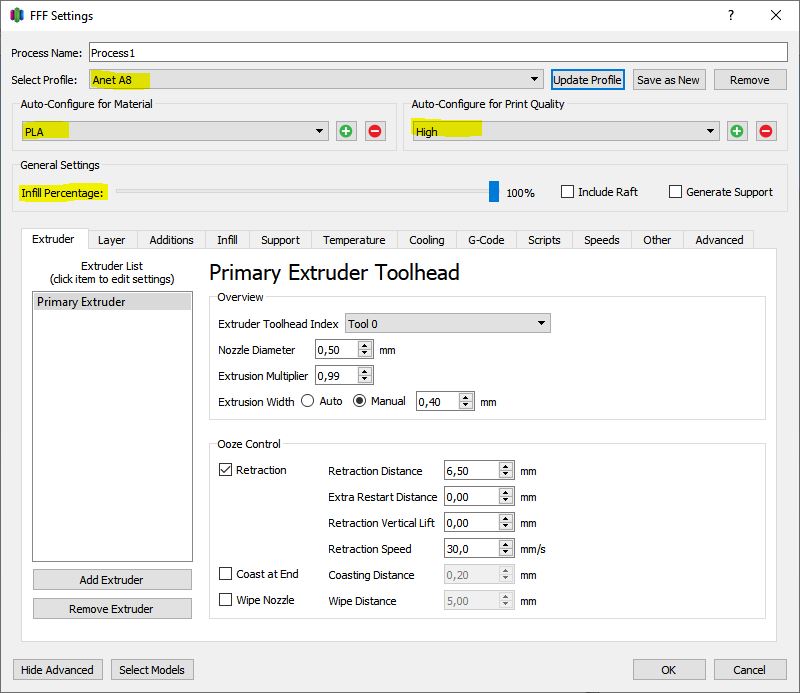
For 3D printing on fabric I used Simplify3D to generate the Gcode because of a very special option which is Layer Modifications.
Steps:
1- The first step is to print the 2 first layers of the print on the heated bed
2- Pause the print.
3- Attach the tulle in the bed and try to make it tigh to print on it
Note: The tulle should be tight to be able to print on it and the next layer stick with the previous layer fixing the tulle
To make a good print quality here is the settings using simplify3d:
1- First Upload the STL file in simplify3D.
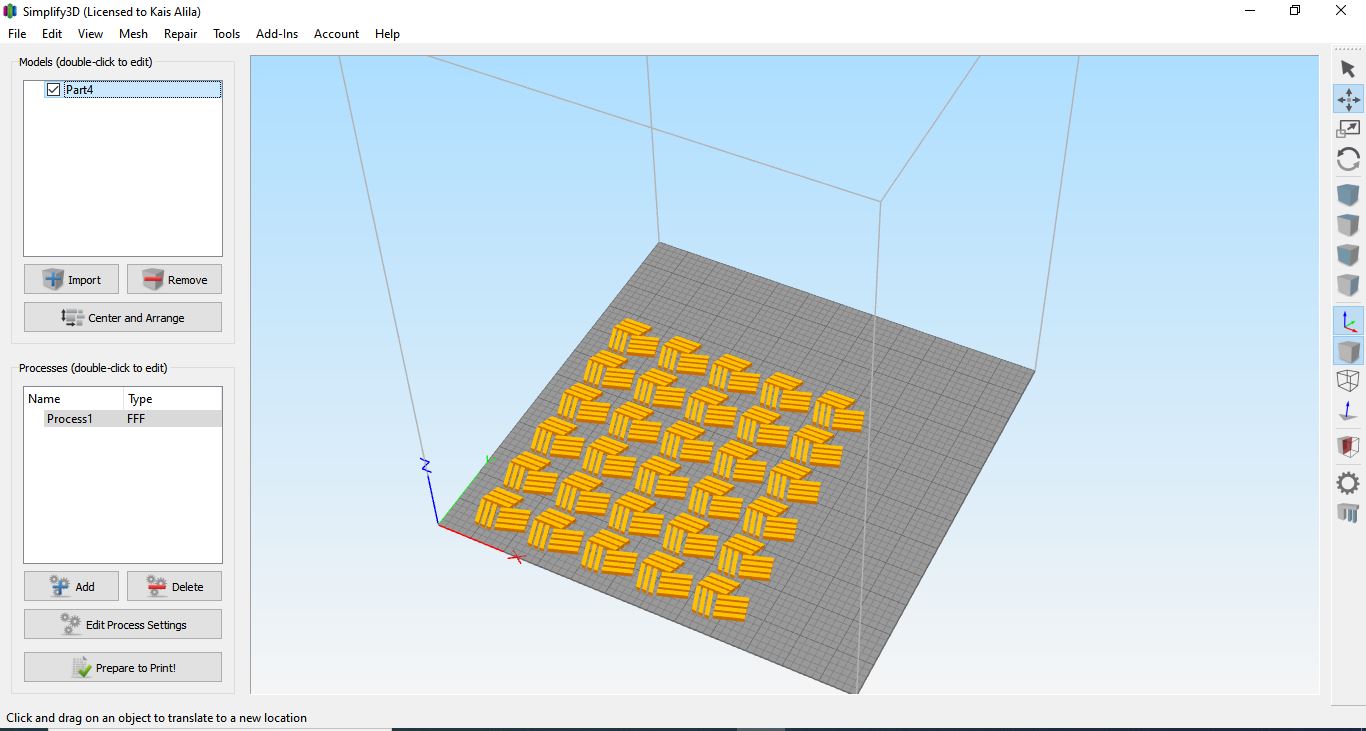
2- Add Two process for the two parts print to be able to split the print
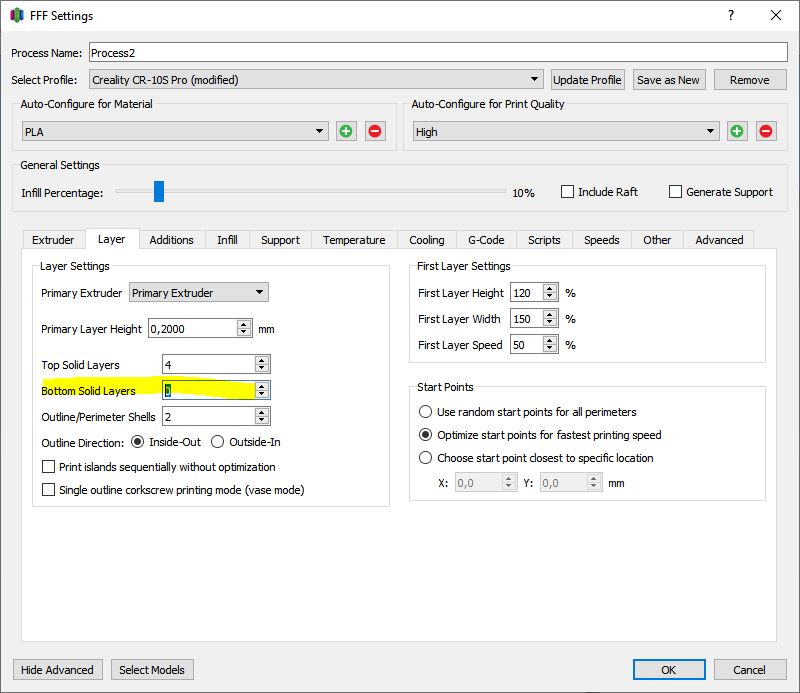
3- Open the first process: Choose your printer, The filament type and the print quality. Set the settings as default for PLA and the indill to 100%
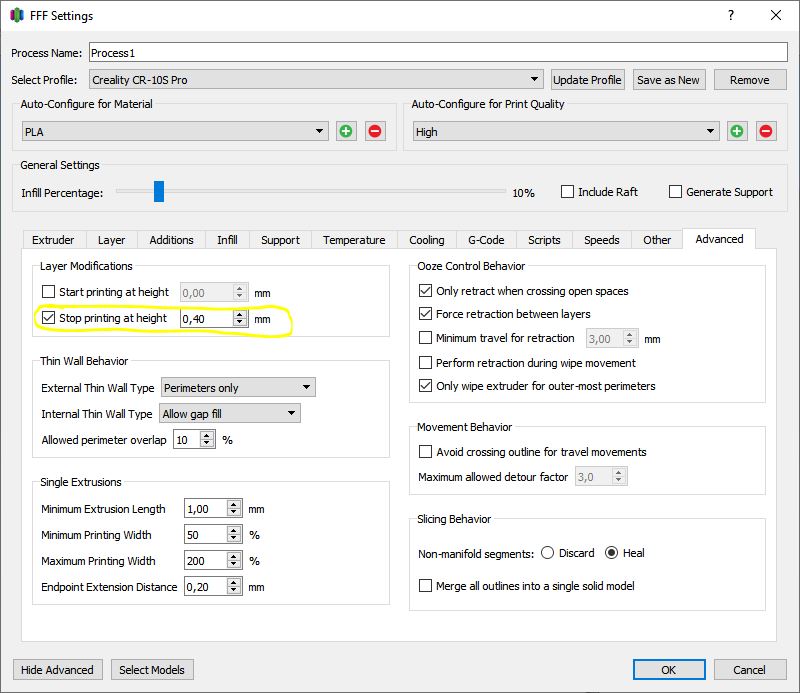
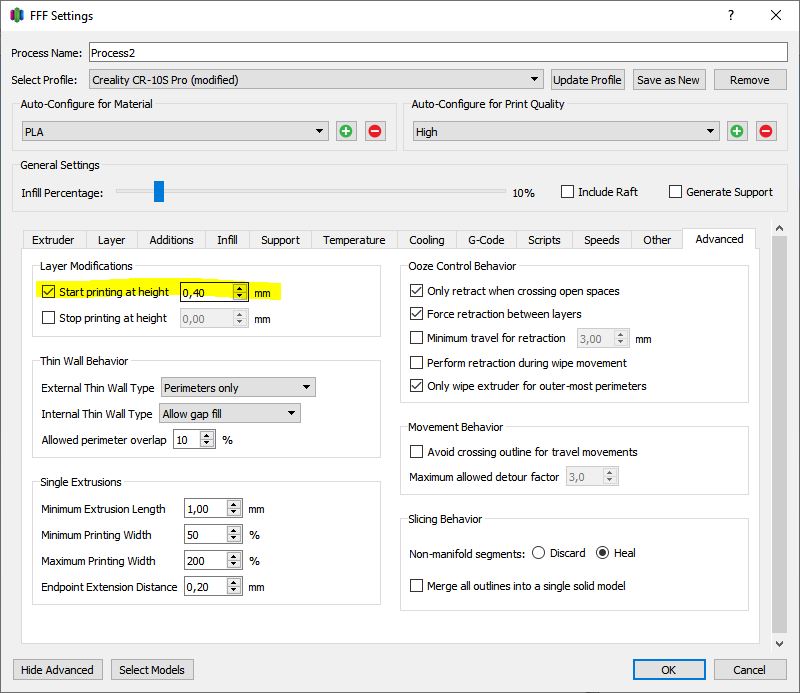
3- Go to advanced, And we will activate the Layers Modification option. Select Stop Printing at height 0.4mm this means that the print of the first part will stop after printing two layers of 0.2mm layer height.
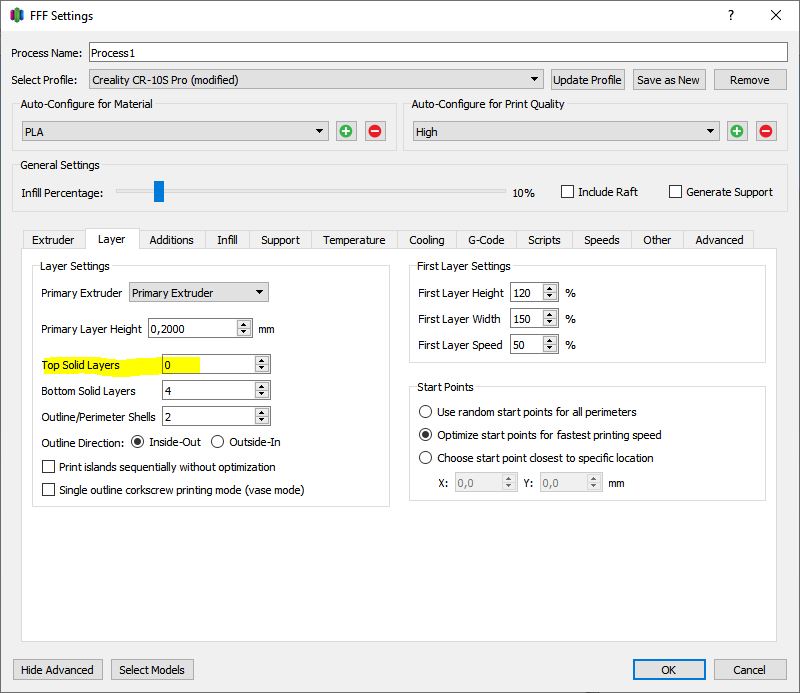
4- After activating this option we shoud do some modifications on the ending script and the top layer of the first part. We should just remove all the top layers from 4 layers at the top to 0 layer and in the ending we need to move the x axis to the home position and remove the other instructions. Disactivate the skirt and brim.


5- For the second part, Double click on the second process, We need to remove the bottom layer from 4 layers at the top to 0 layer. Go to script to delete the starting script we need only G28 command on the starting script and finally to advanced select Start Printing at height 0.4mm . Disactivate the skirt and brim.

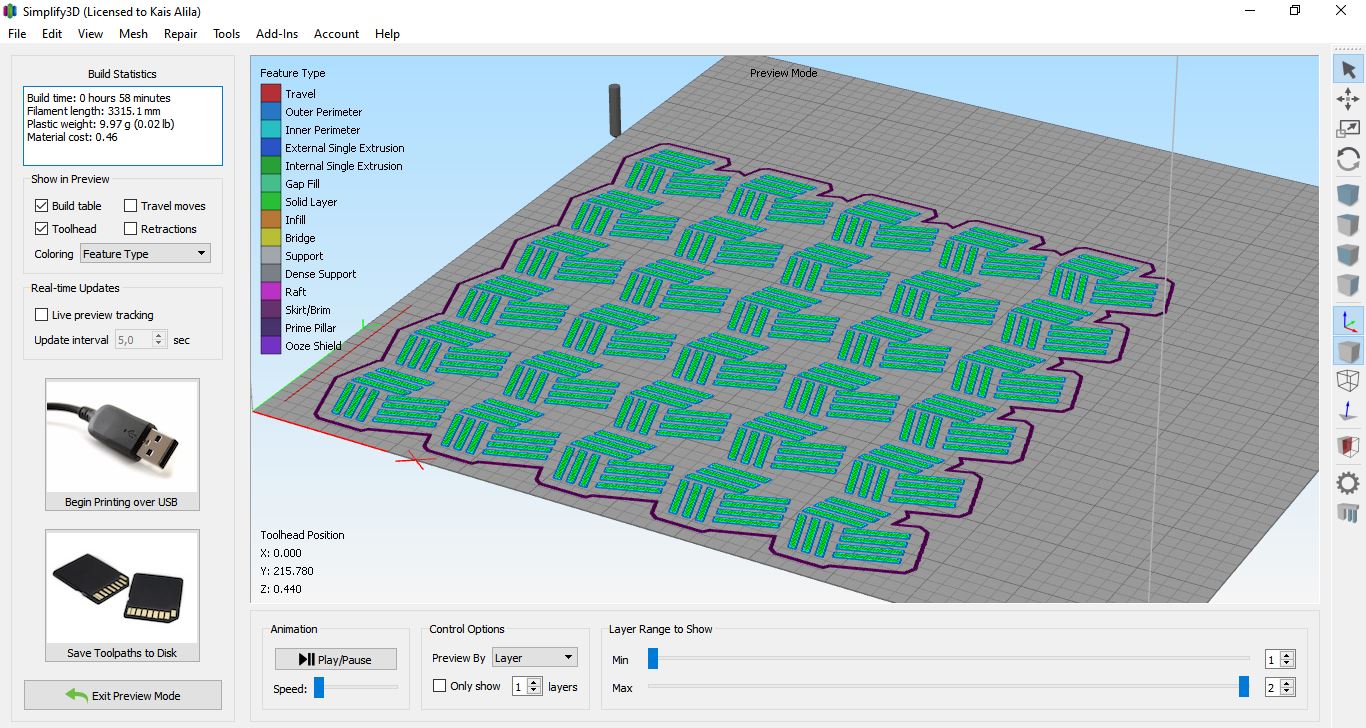
6- Simulate the first part
7- Simulate the seccond part
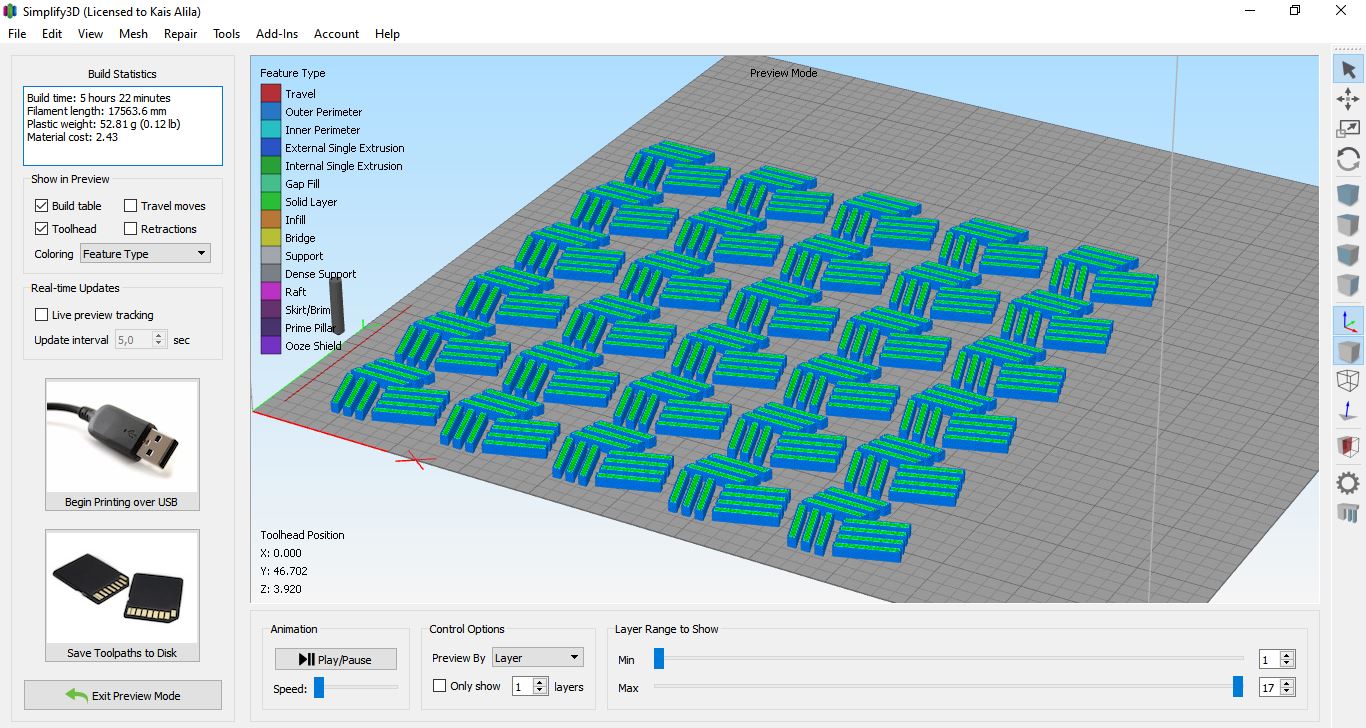
Result:
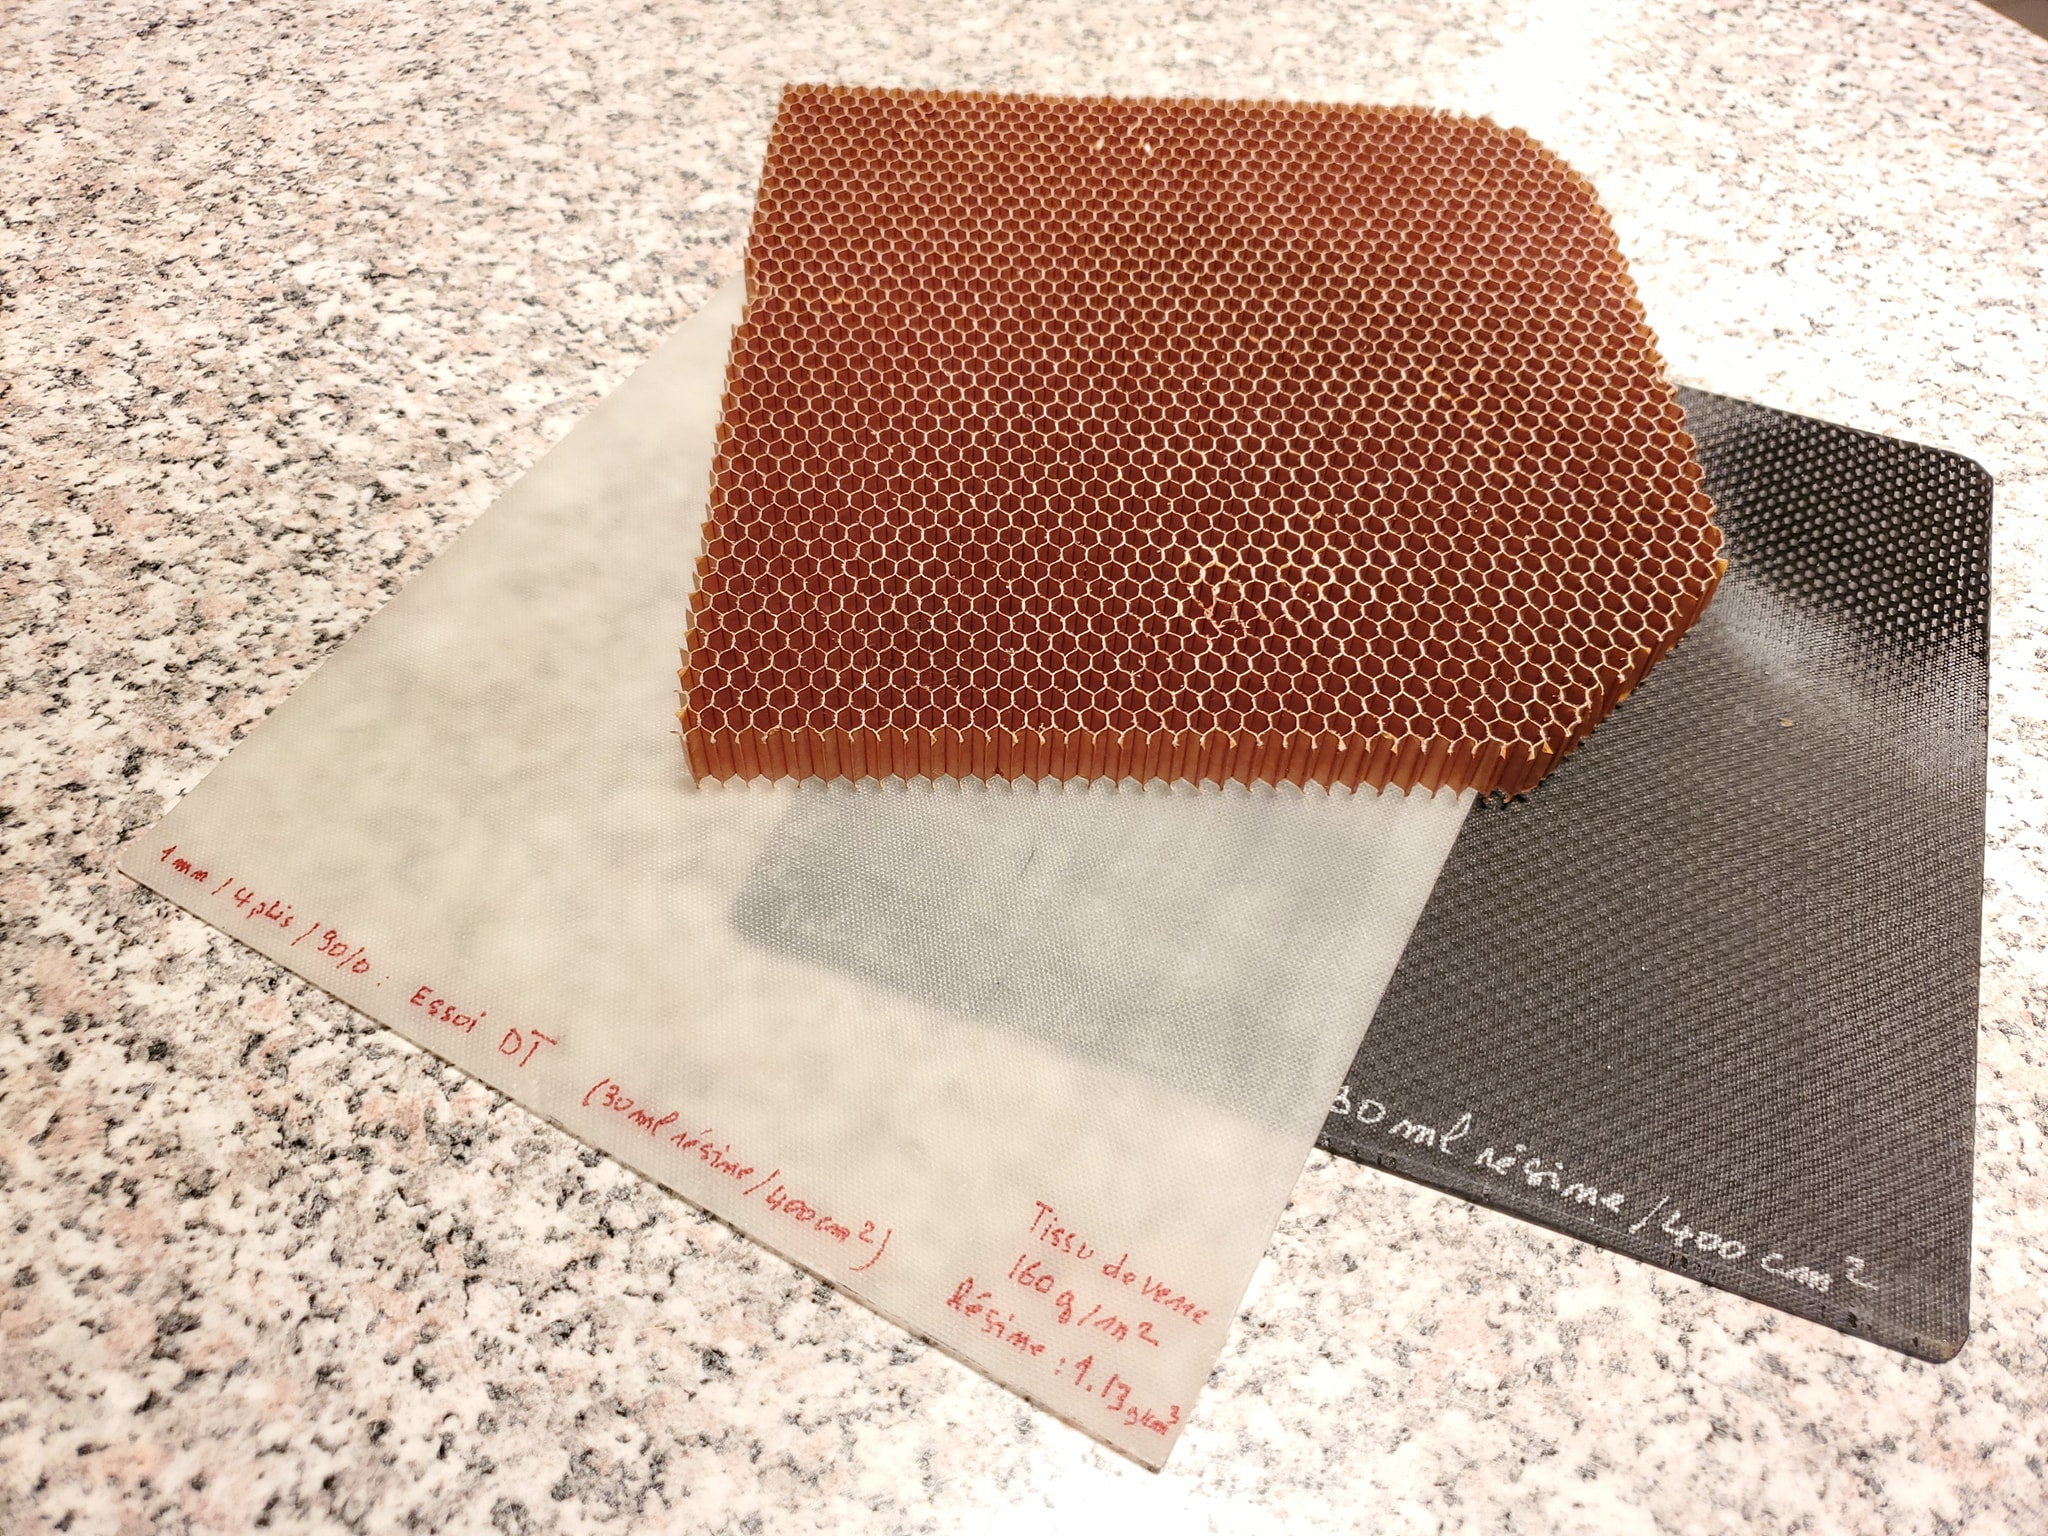
Composites
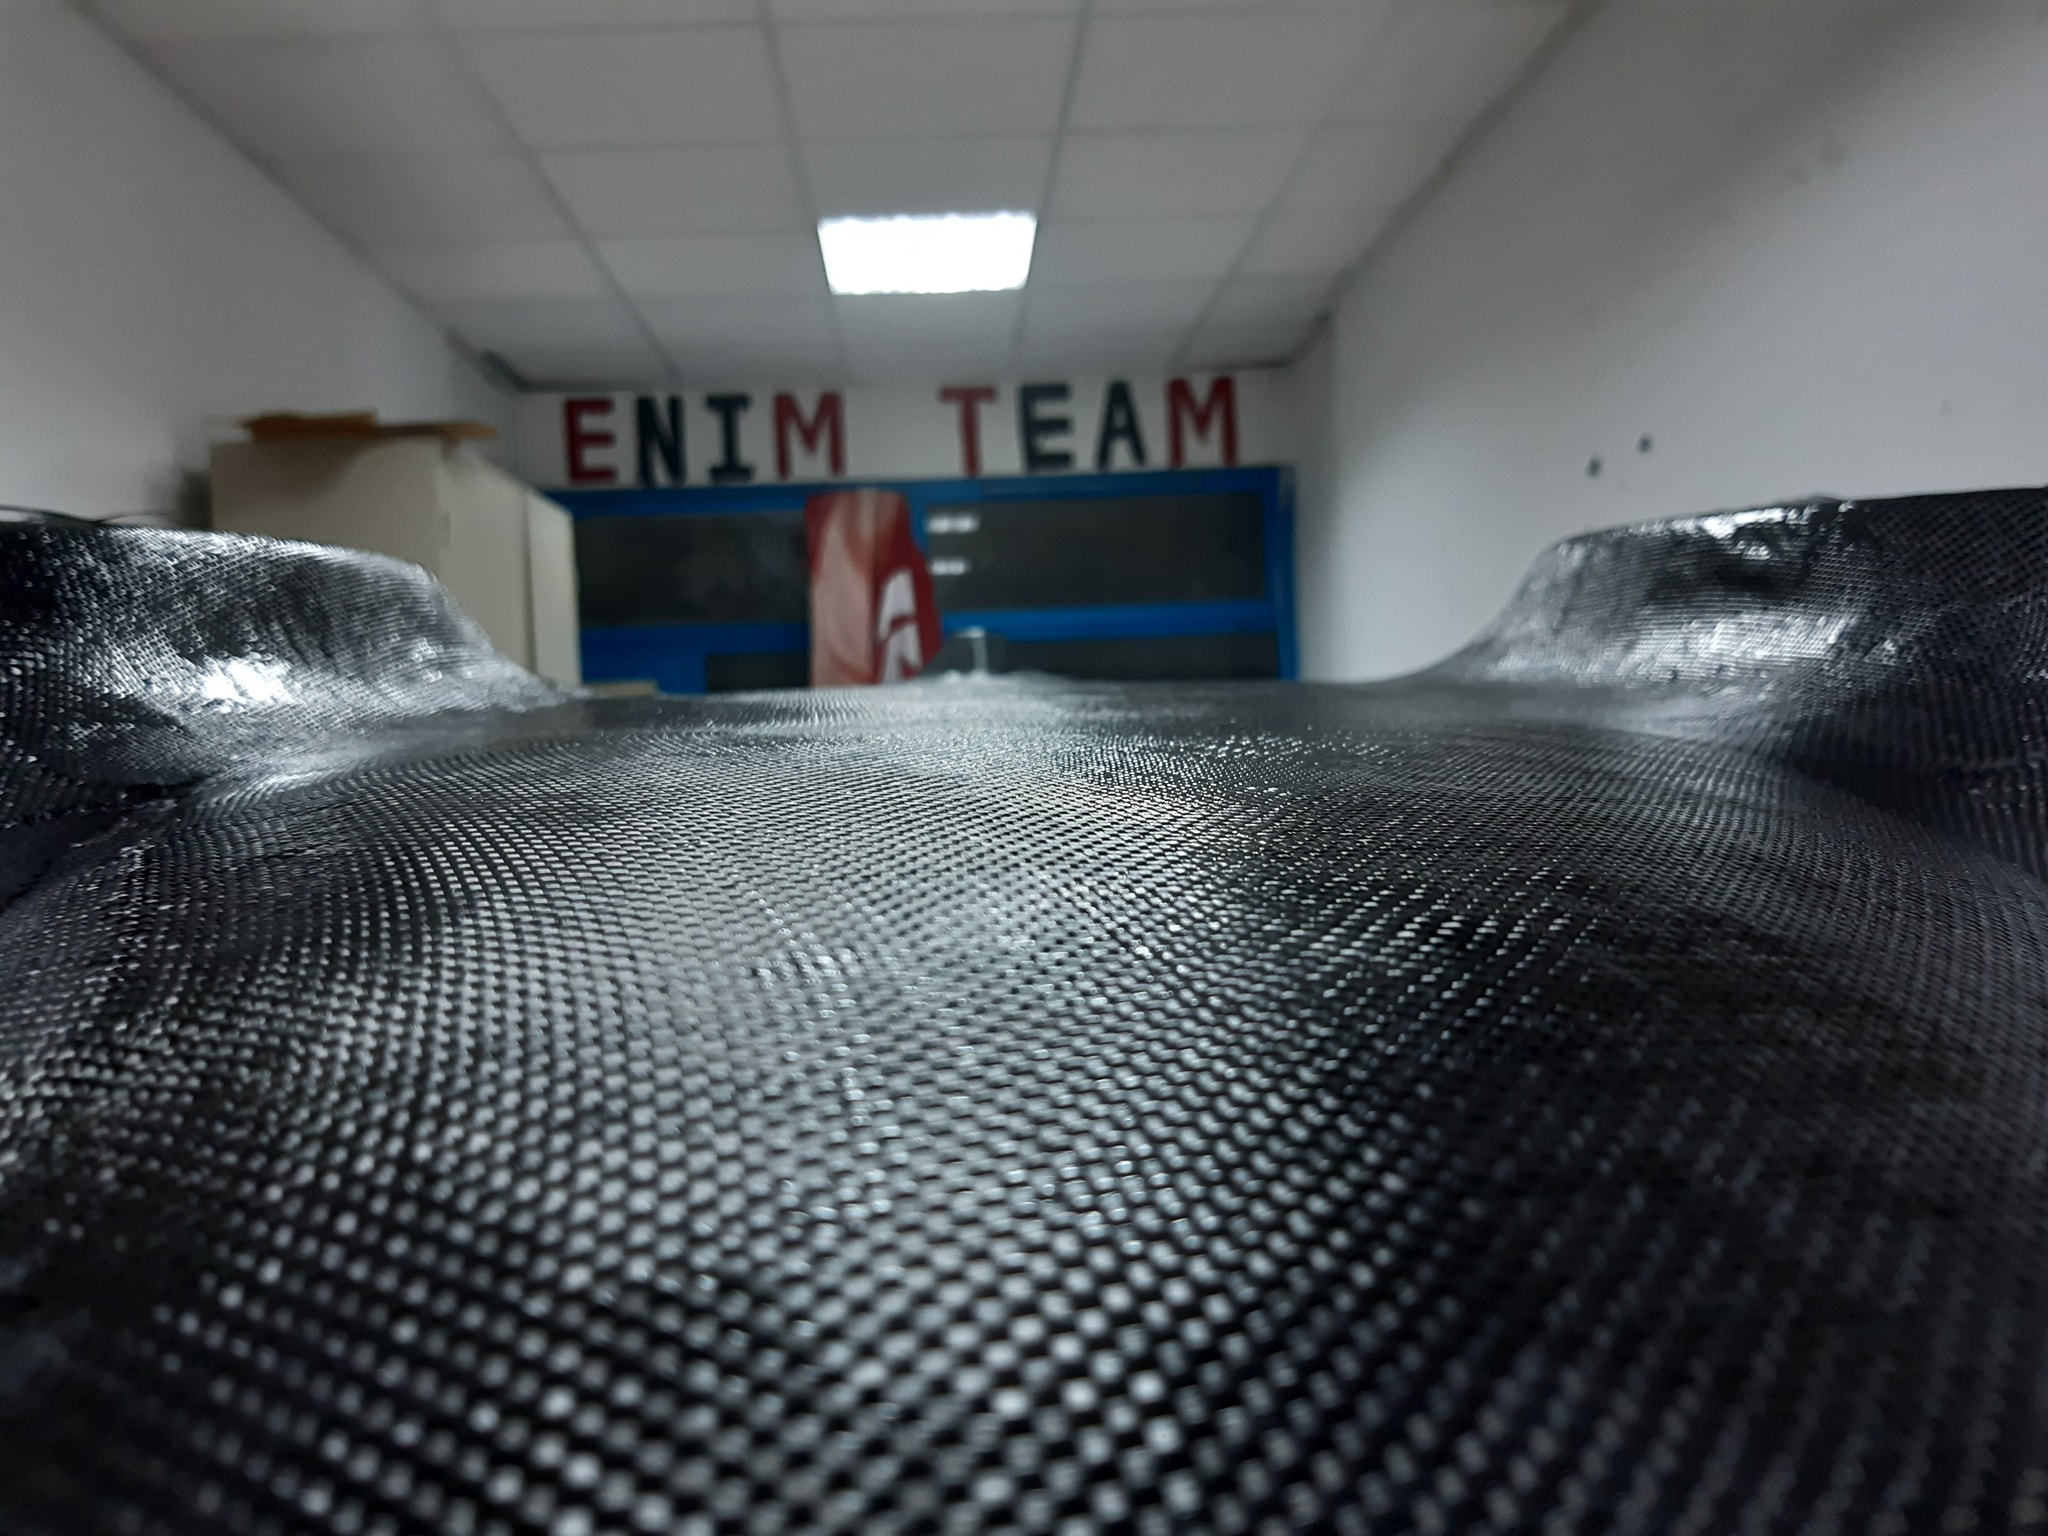
After the quarantine and ging back to my university and fablab I decided to learn more about composites. I helped my university team which works on ShellEco marathon competition and manufacture a very light electric car using a strong carbon fiber Shell reinforced with Honeycomb. After ths small workshop done in the fablab of my university ENIM I was able to to understand composites and how to work with.

Car Shell and body
Mold
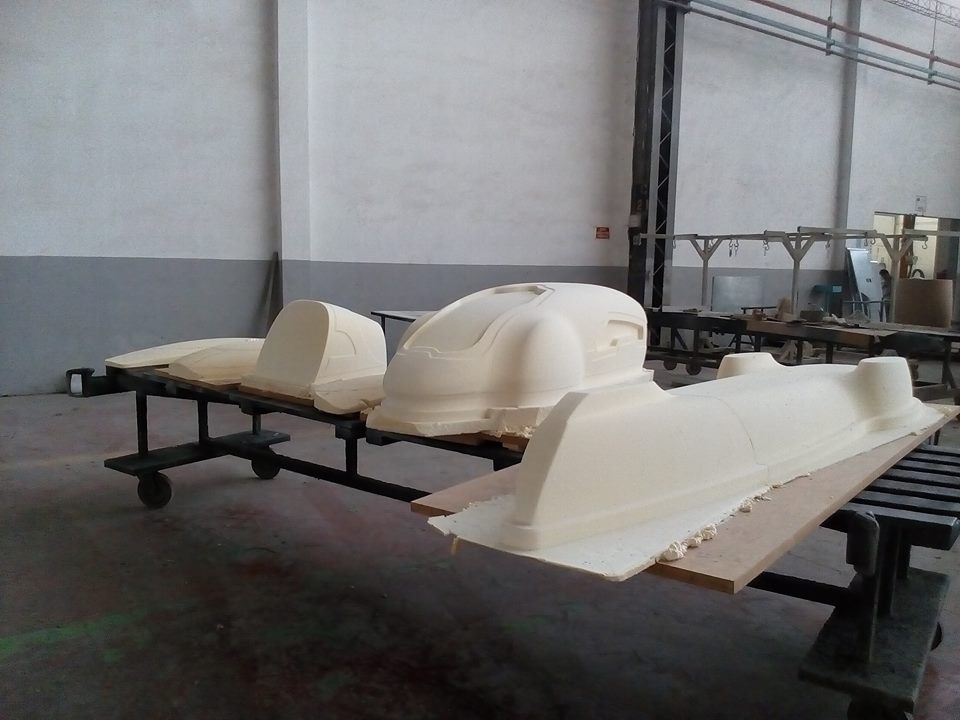
For the car shell we decided to work with Carbon fiber insted of glass fiber to gain weight and rigidity.
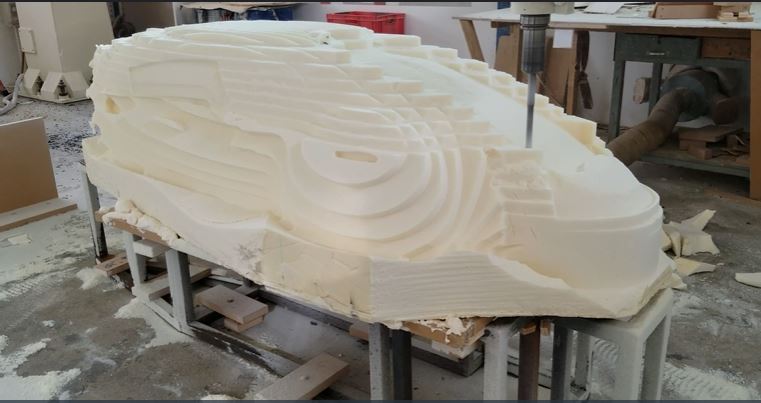
To Make the shell we need first a mold manufactured from high density foam using a very big 5 axis CNC machine. This machining was ,ot done in the university we have only 4 axis CNC but it was done with the help of our sponsors.
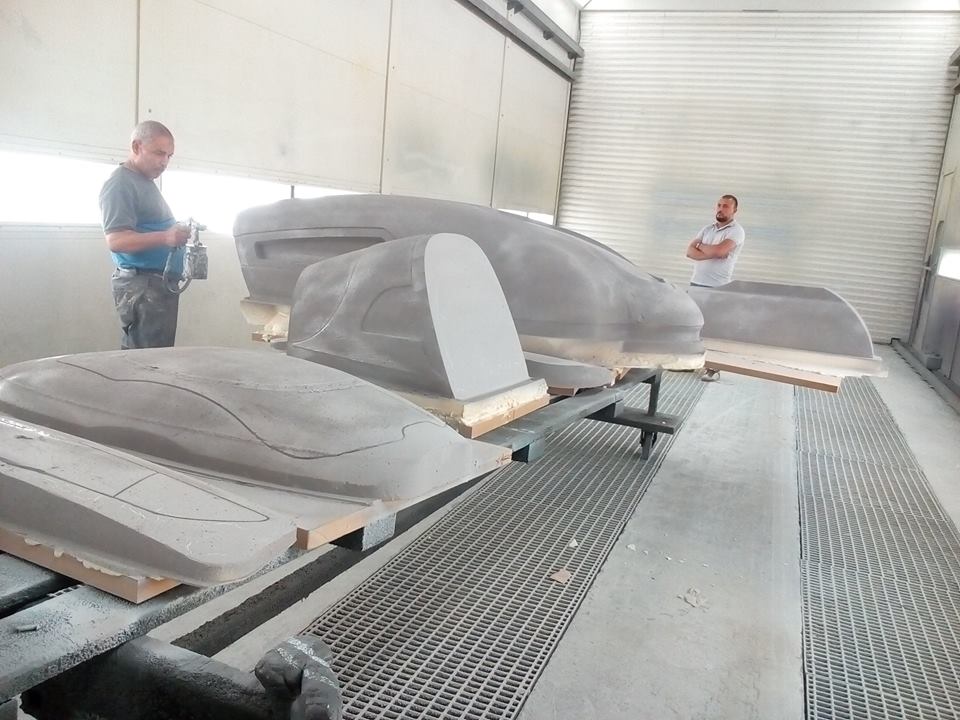
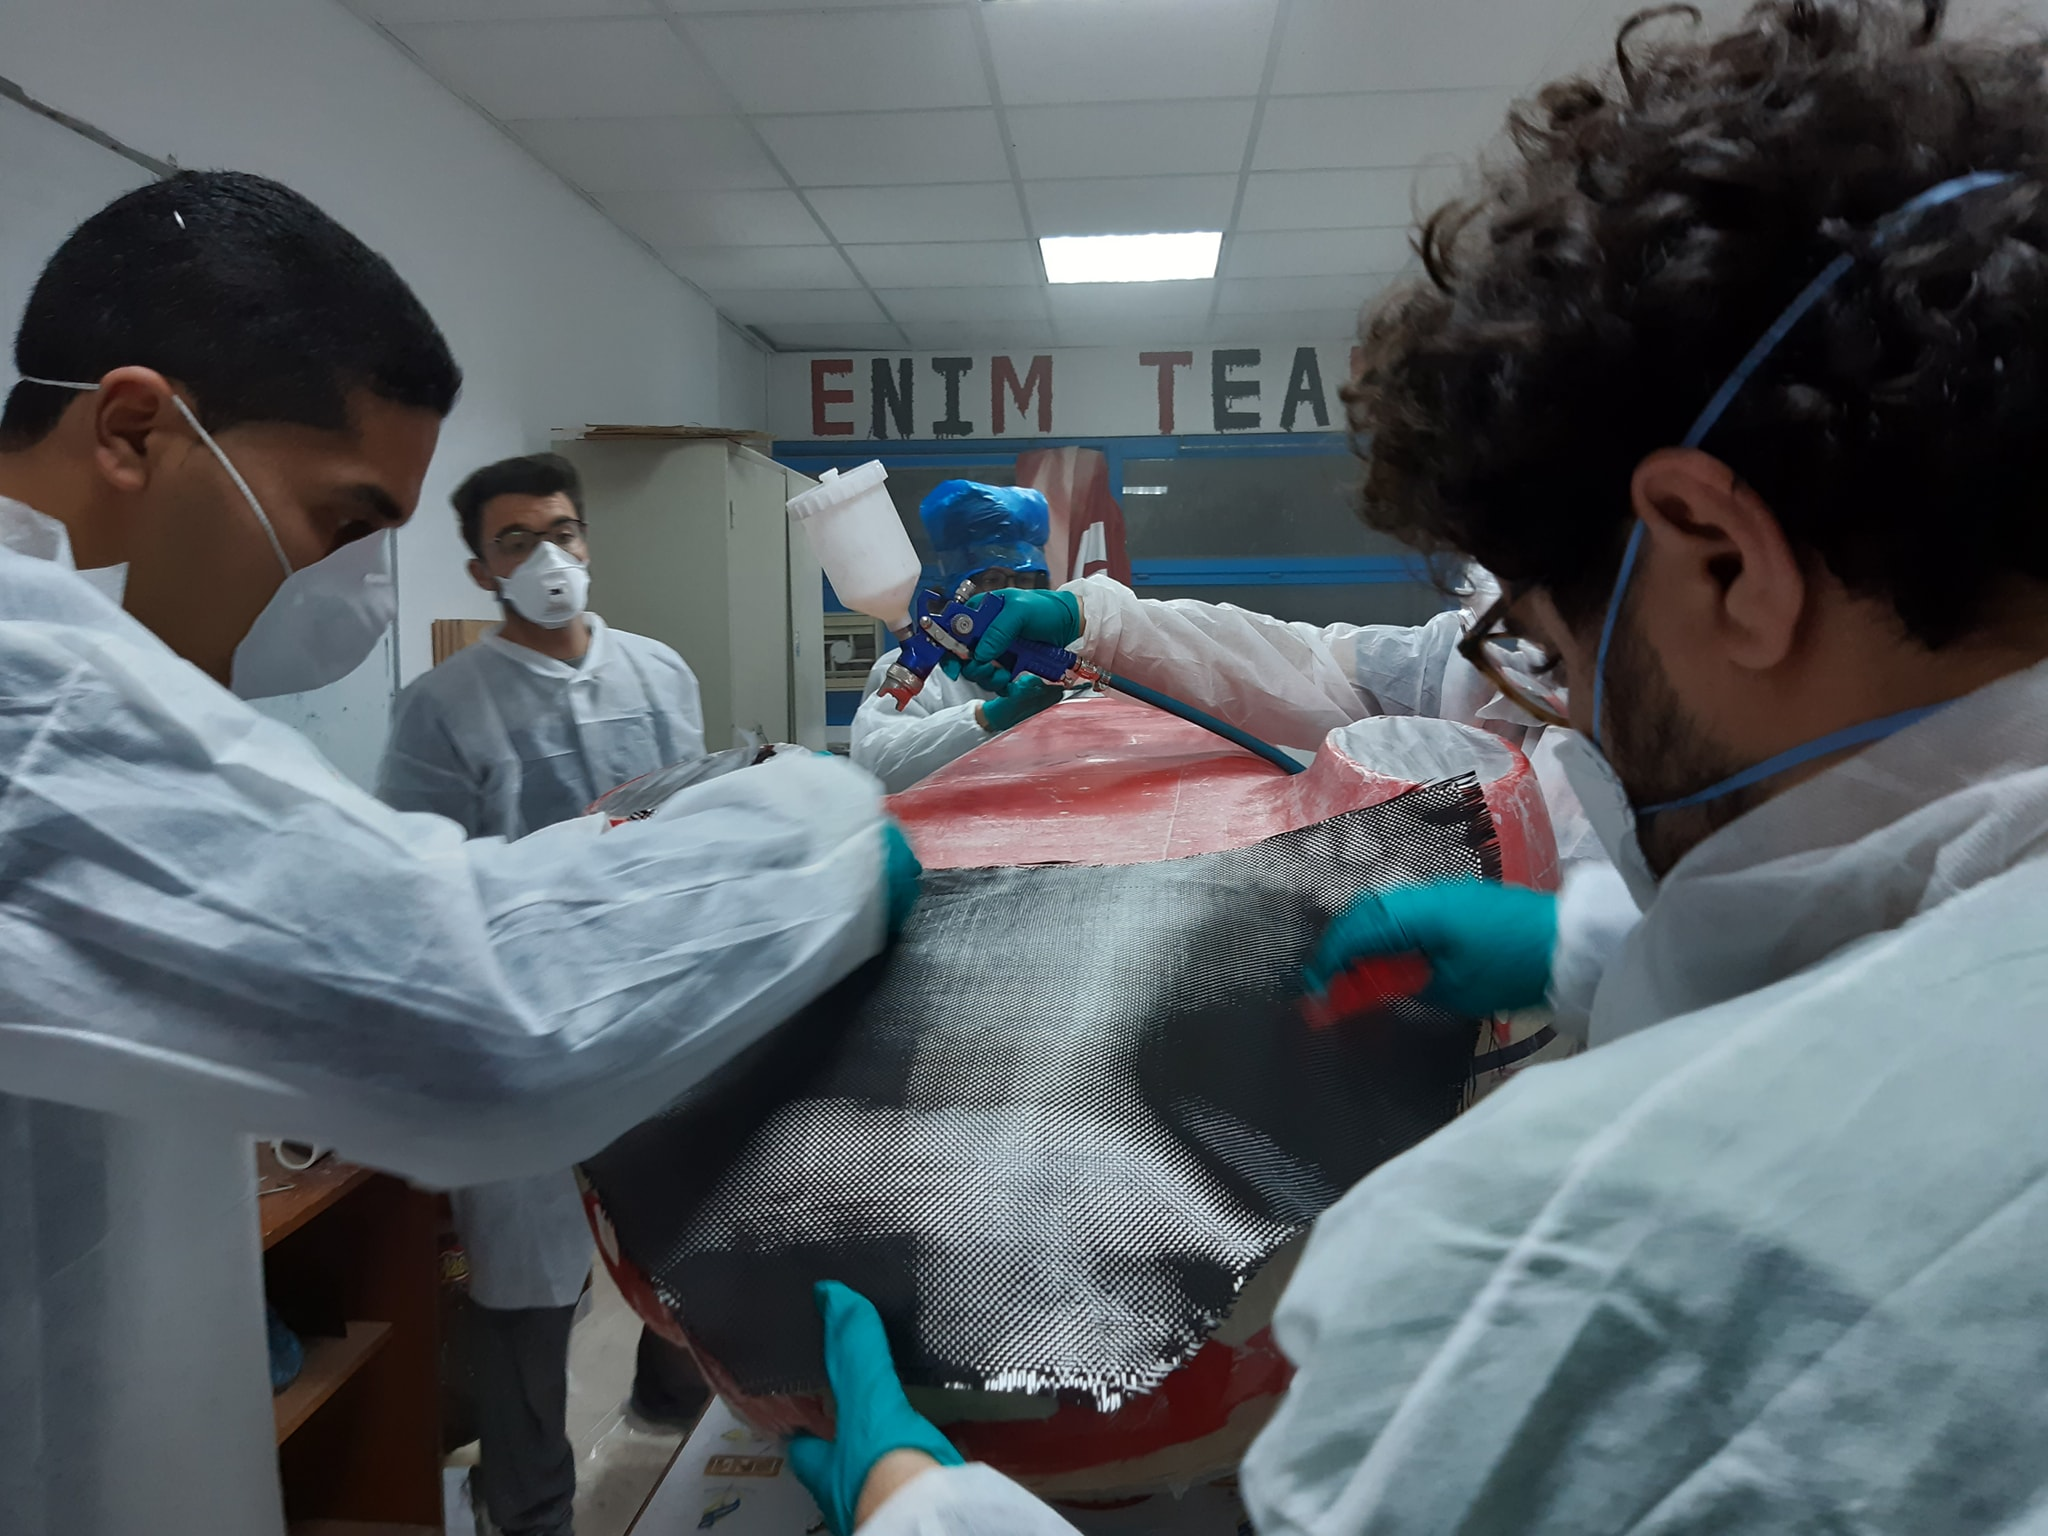
Composites Drapping
After Making the mold and assembling it We started the Draping phase. We applied first a demolding pouder on the mold to make sure that the carbone fiber do not stick with the resin.
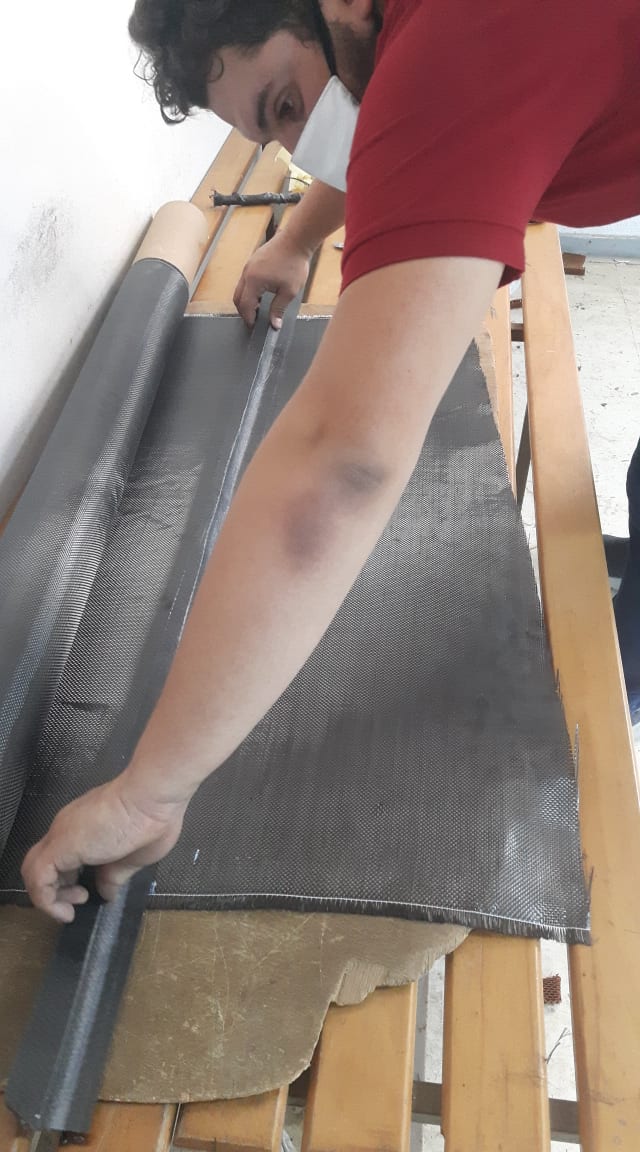
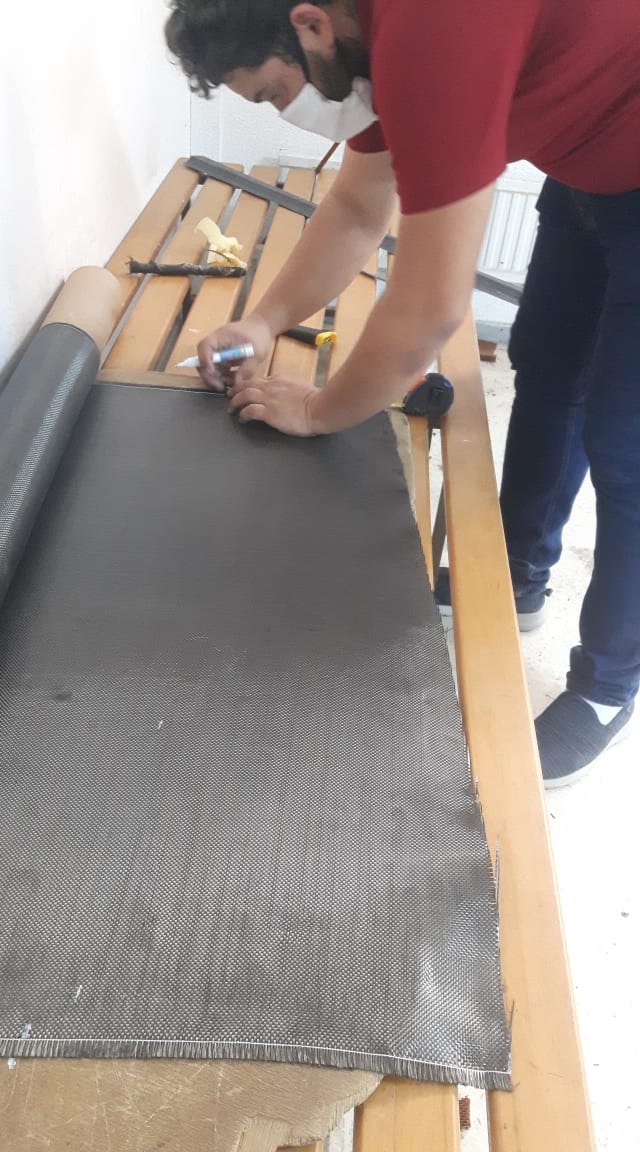
I prepared the carbon fiber bfore drapping it and deposited on the mold
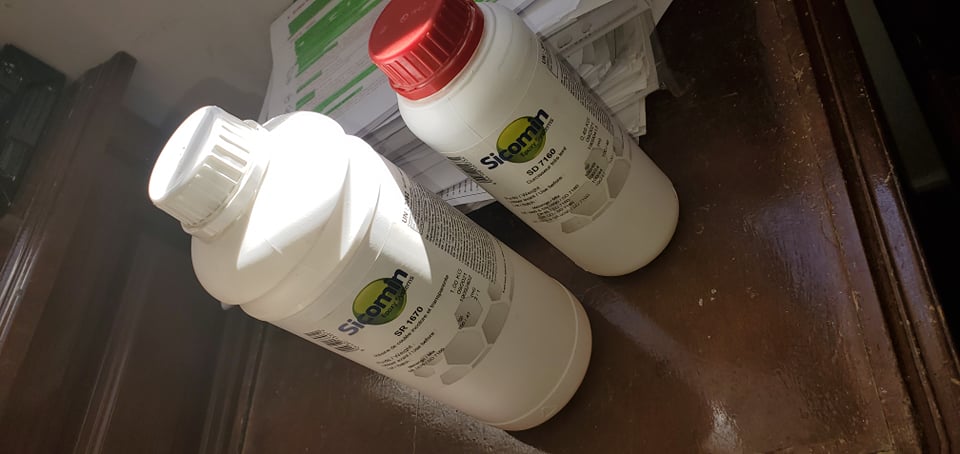
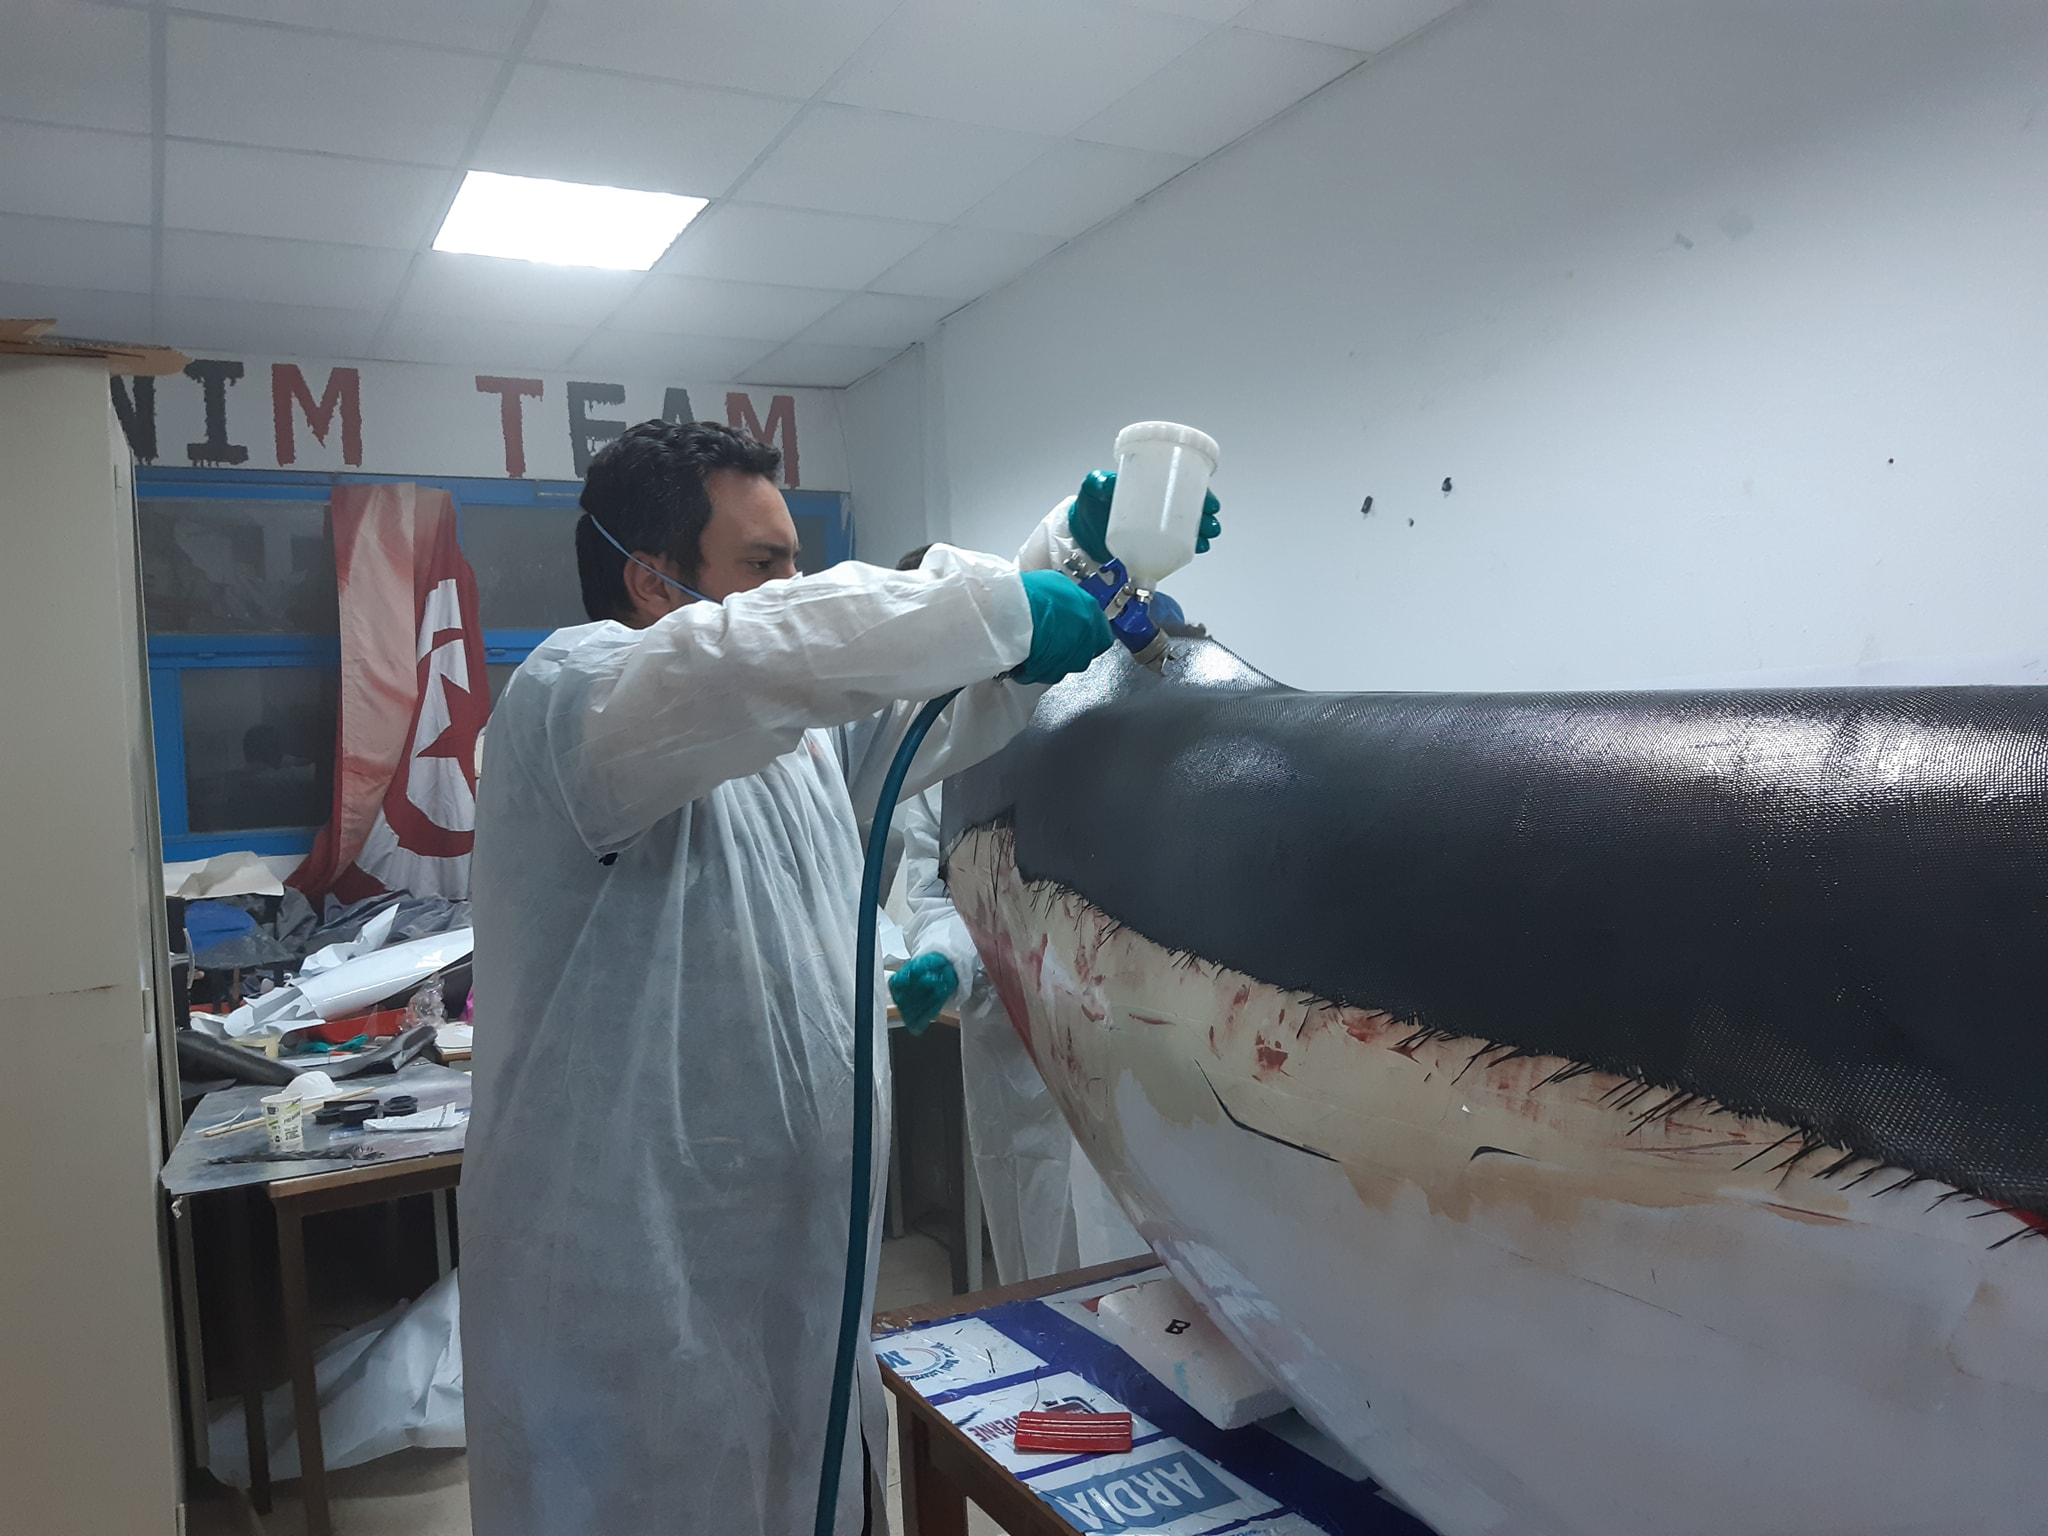
After that we will use an 8 bar compressor to spray the resin on the carbon fiber layer by layer. This methode is best one to recover all the surface with the same amount of resin. First we should dose the Epoxy resin, we chose the sicomin resin which can be applied on the carbone fiber and take 10 minutes to cure so we should be fast in shaking the Epoxy and the catalyst. For 100g of Epoxy we need 30g of catalyst and start shaking the two solutions.
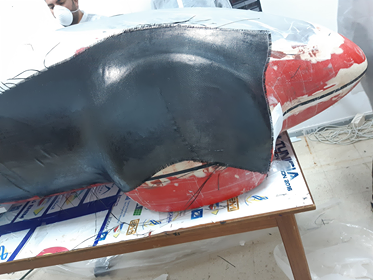
For some parts that should be reinforced we added some Honeycomb and layers of carbone fiber.
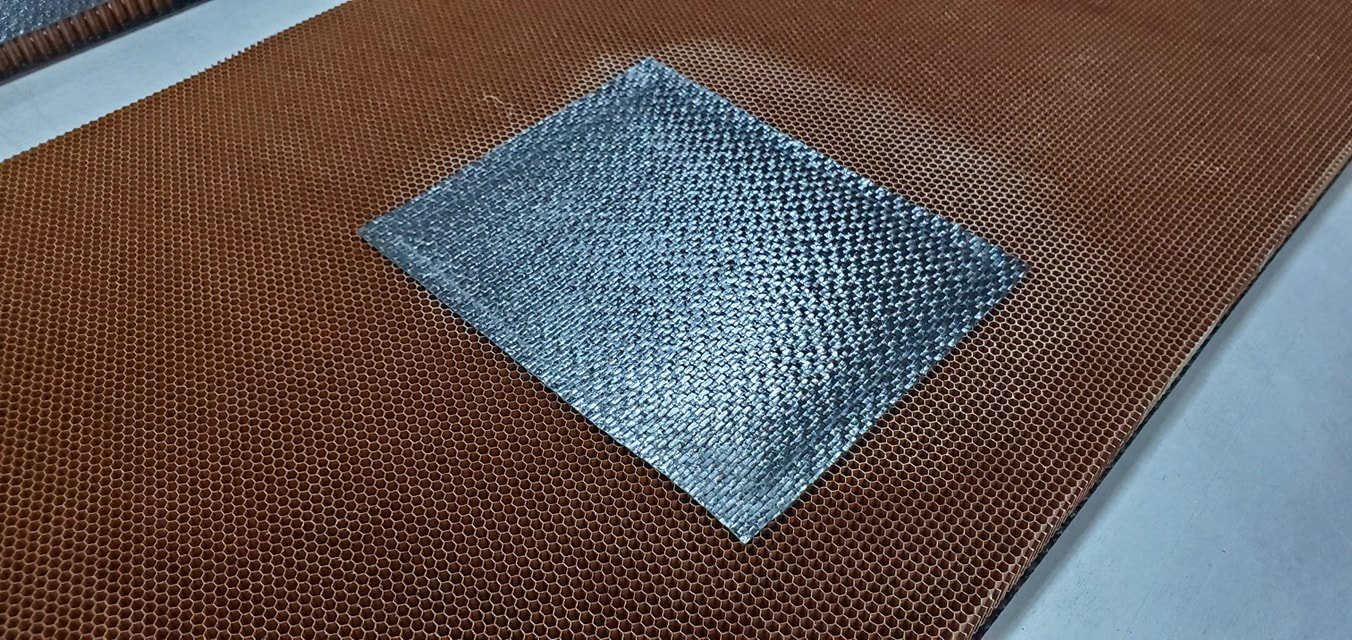
The total car needs maximum 5 layers in some critical angles and Minimum 3 layers of course after deposing each layer we add a resin layer with the compressor.