2. Project management
Make your own website!
This week I got started on using Git in order to set up my web page, I will also be using it to document Fab Academy courses.
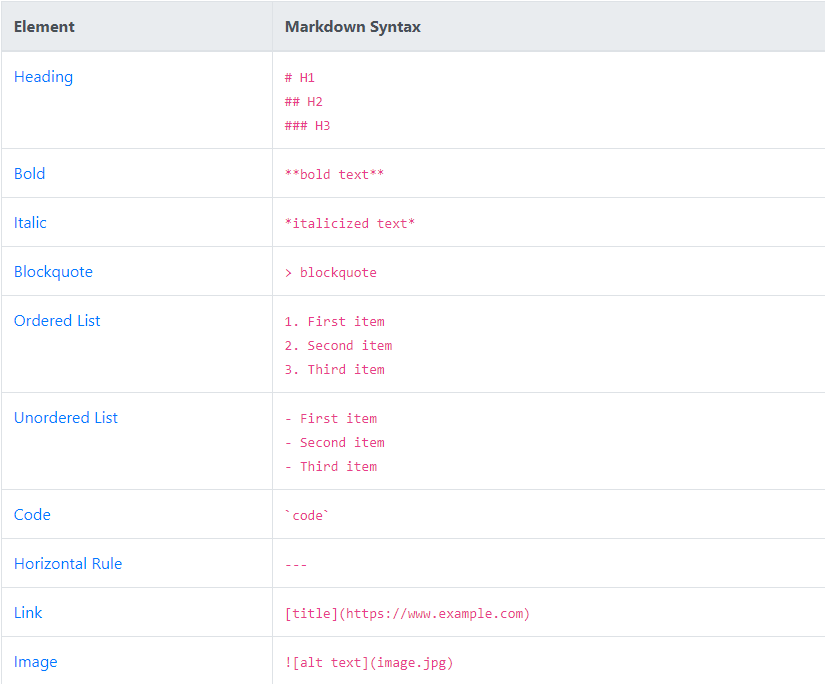
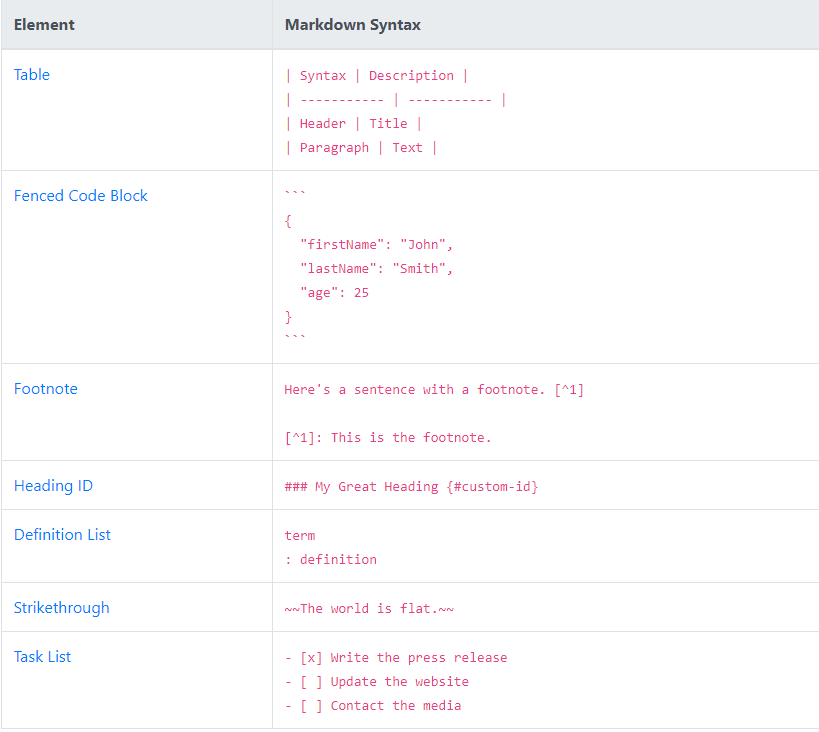
I am using Markdown to make all the changes on the website. Following are the commands I mainly used.
STEPS
-
Getting started
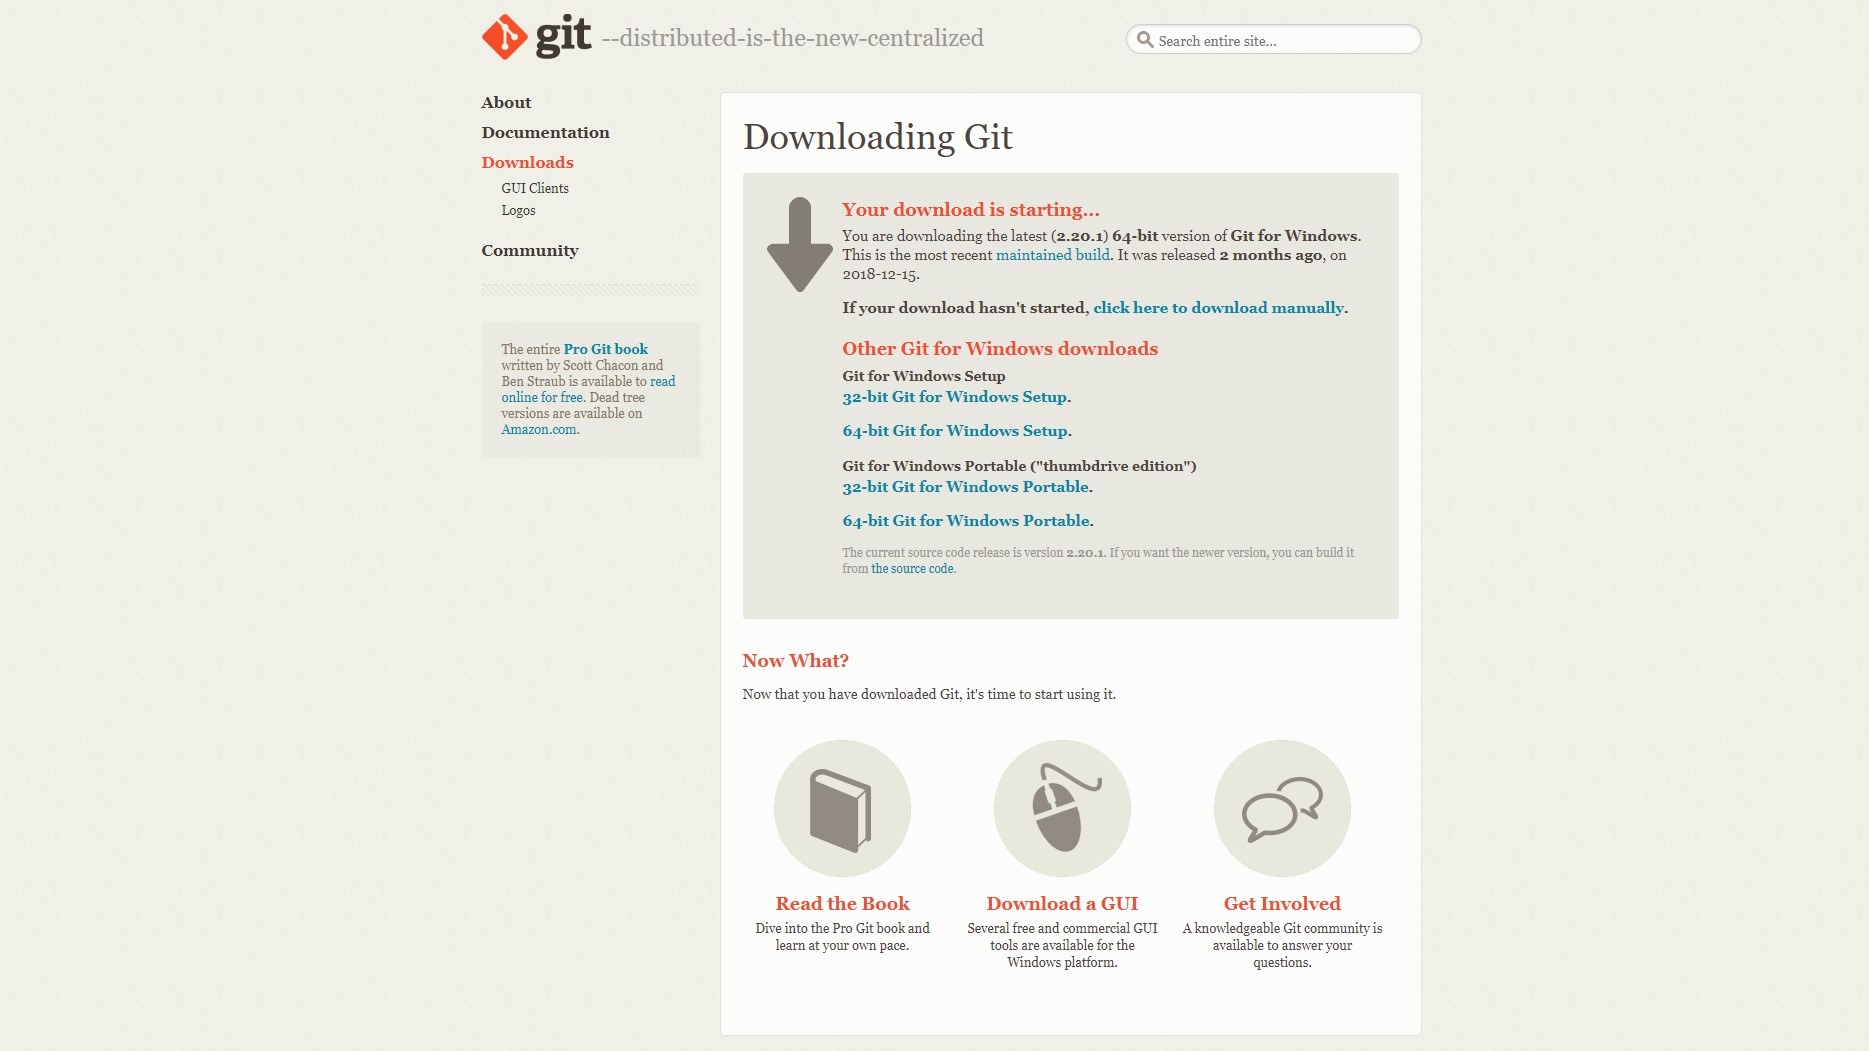
The first step is installing Git. I headed for the Git page and downloded the latest version of the software.
-
Set Up Git: This step is only for the first time:
-Create a Repository “init”
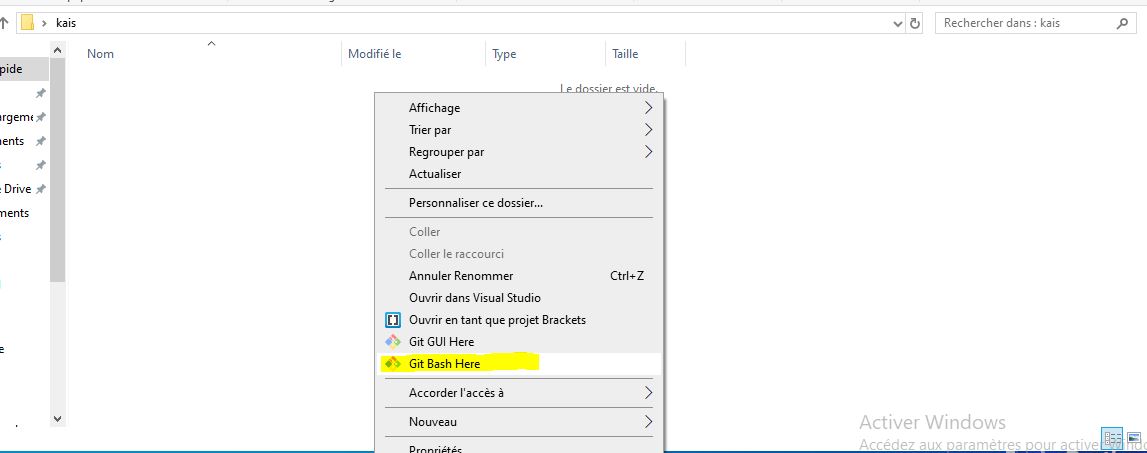
First create a new folder in the desktop, then with the right mouse button, Click ‘git bash’
$ Git init
After sendig this command, ‘(master)’ will appear next to the directory like shown on this image

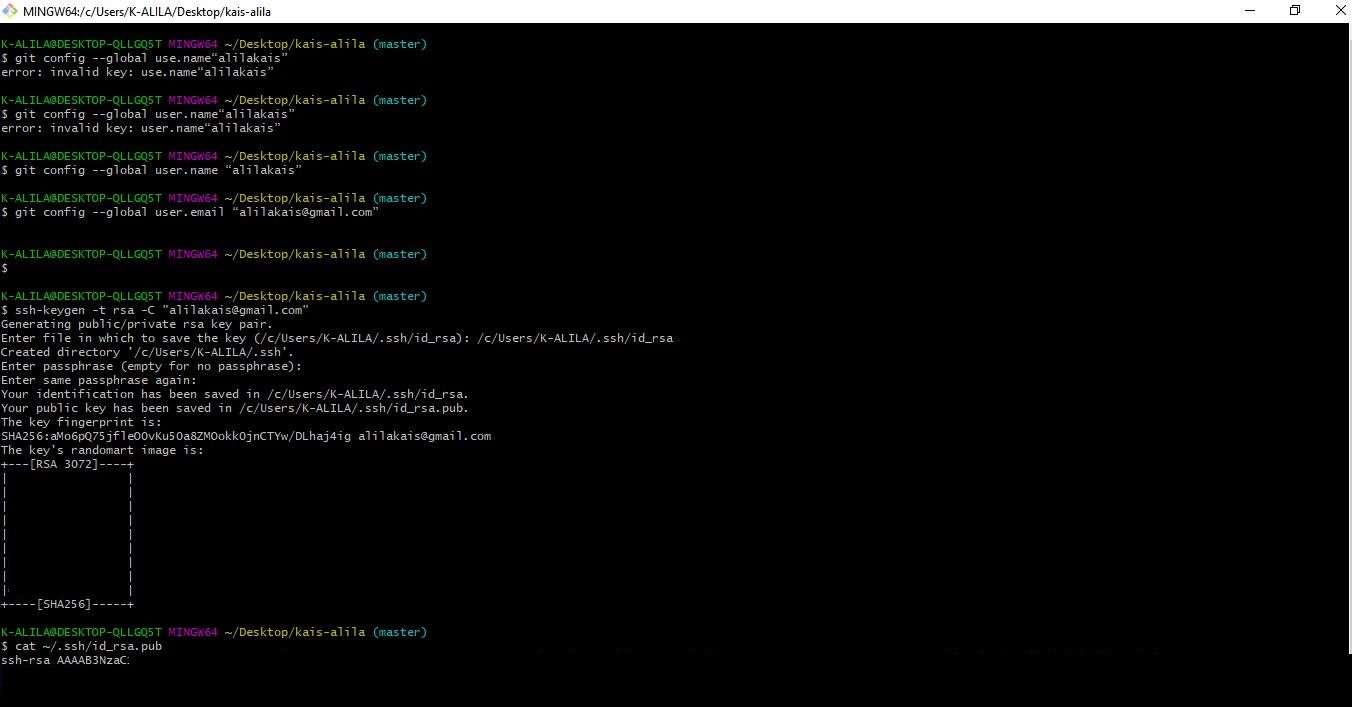
-Add git user name
$ Git config –global user.name “alilakais”
-Configu email adress for uploading
$ Git config –global user.email”alilakais@gmail.com”
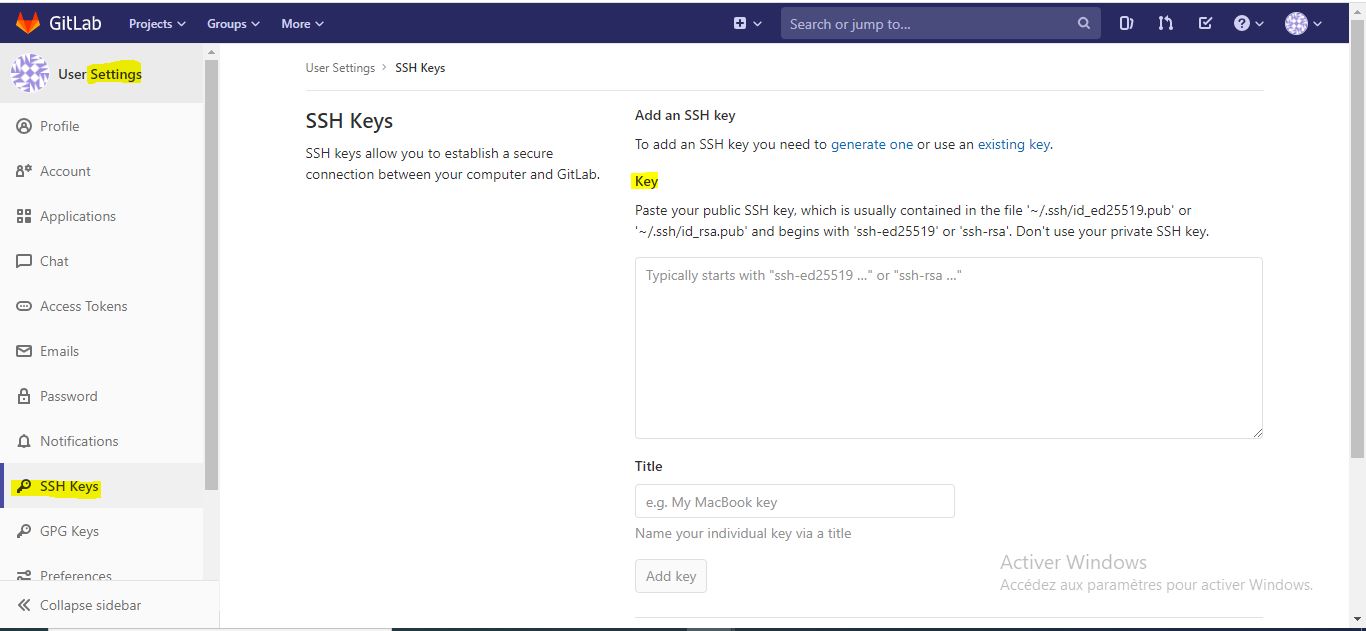
-Check if there is an SSH Key already
$ cat ~/.ssh/id_rsa.pub (If you see a long string starting with ssh-rsa, you can skip the ssh-keygen step)
-Generate SSH key
$ ssh-keygen -t rsa -C “alilakais@gmail.com”
-Keygen
$ cat ~/.ssh/id_rsa.pub
-Copy the Key
-Add the copied key to GIT on the web version
Summary
-
Clone The Repository
-Copy the URL from your GitLab (SSH Clone is recommended )

-Git clone
$ git clone git@gitlab.fabcloud.org:academany/fabacademy/2020/labs/kamplintfort/students/kais-alila.git
MkDocs Local
MkDocs is the tool to change the web page template.
With the following steps, you will be able to modify the webpage template:
-Edit the MkDocs file (.yml) using Notepad or Barackets.
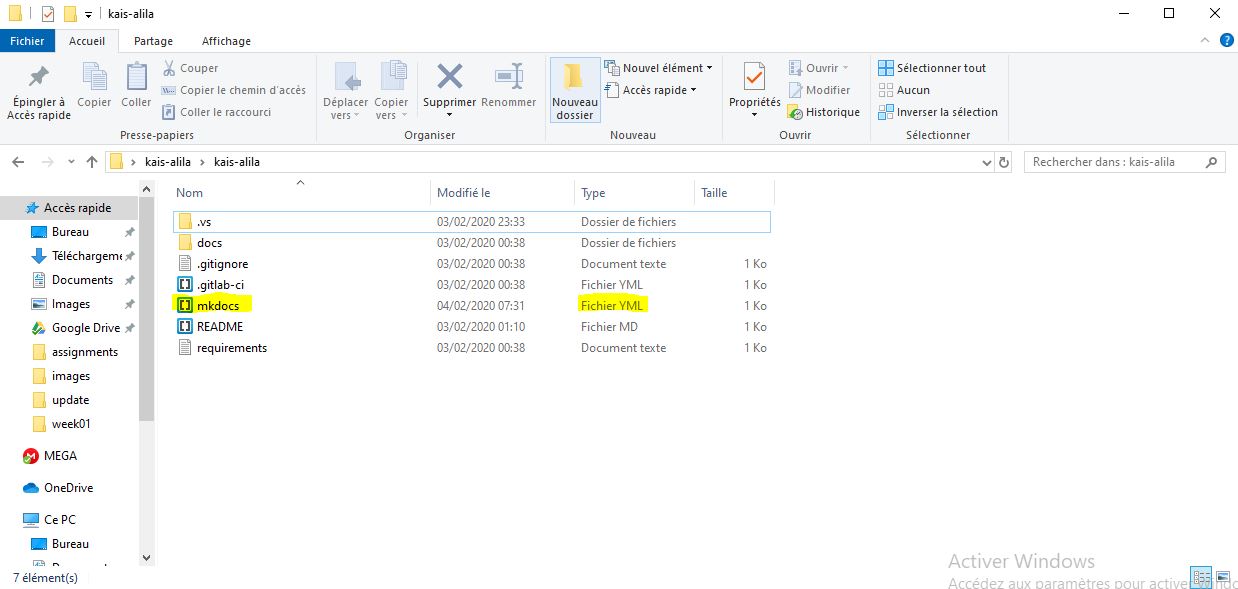
-Make the suitable changes you need.
Using this code you will be able to change font, type, coulor and colour scheme as well as a variety of other settings that can be modified.
# Replace the text below to customize your site
site_name: Kais Alila
site_description: My Fabacademy site 2020

site_author: Kais Alila
docs_dir: docs
site_dir: _site
copyright: Creative Commons Attribution Non Commercial
theme:
  logo: 'images/Fab logo.svg' #Here I've changed the .svg logo
  name: material
  # see https://squidfunk.github.io/mkdocs-material/getting-started/#color-palette
  palette:
    primary: "blue" #Here I've changed the primary color
    accent: "indigo"
  font:
    false
    # text: "Ubuntu"
    # code: "Ubuntu Mono"
  feature:
    tabs: true
extra:
  social: #Here I've added my social channel
    - type: "github"
      link: "https://github.com/FAB619"
    - type: "twitter"
      link: "https://twitter.com/fabacademany"
    - type: "linkedin"
      link: "https://www.linkedin.com/in/kais-alila-3a1b35163/"
    - type: "instagram"
      link: "https://www.instagram.com/kaisalila/?hl=fr"

markdown_extensions:
  - extra
  - smarty
  - admonition
  - codehilite:
      guess_lang: false
  - toc:
      permalink: true
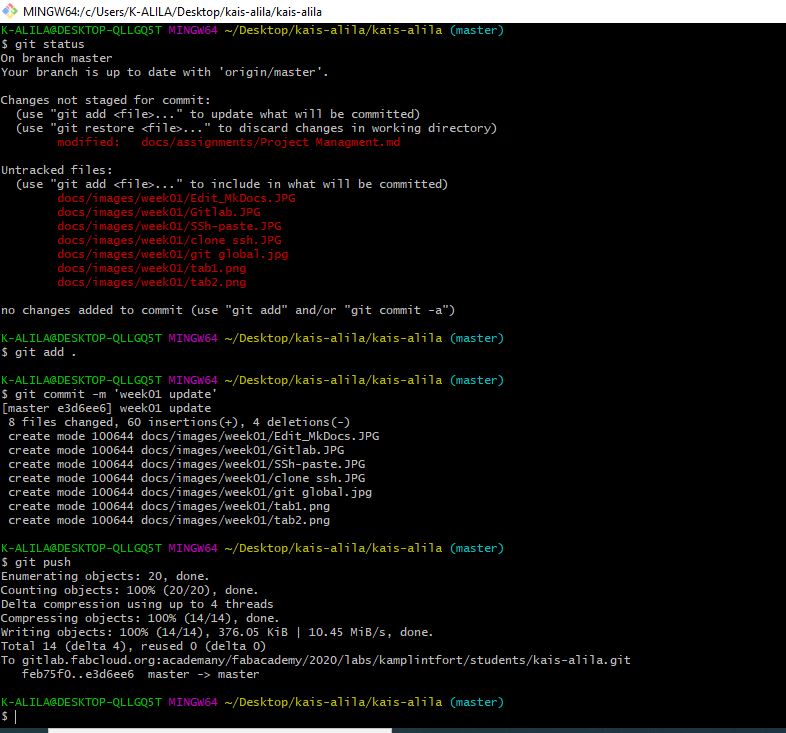
Uploding The Website To The Server
To upload the changes you made in your repo, go to the folder where your repo is saved offline, right click and select git bash here. This will launch the gitbash window with command line.
Here are the main operations to do when you want to push your work:
git pull in order to get an updated version of everything

git add for selecting a specific file

or git add . for selecting all files

or git add -u for selecting already tracked files that are modified

git commit -m “message” for saving a commit in the local repository. Please write a meaningful message.

git pull in order to be sure that you have everything updated

git push in order to send everything you commited to github