10. Molding and Casting
Assignment
Group assignment
- Review the safety data sheets for each of your molding and casting materials
- Make and compare test casts with each of them
Individual assignment
- Design a 3D mold around the stock and tooling that you’ll be using,
- Mill it (rough cut + (at least) three-axis finish cut),
- and use it to Cast parts.
Cast Resin Initials Block
I realized I had spent too much time on metal casting and sand mold creation. The goal of this week was to learn about machining a mold. So I decided to re-group, reduce my spiral diameters, and narrow my scope.
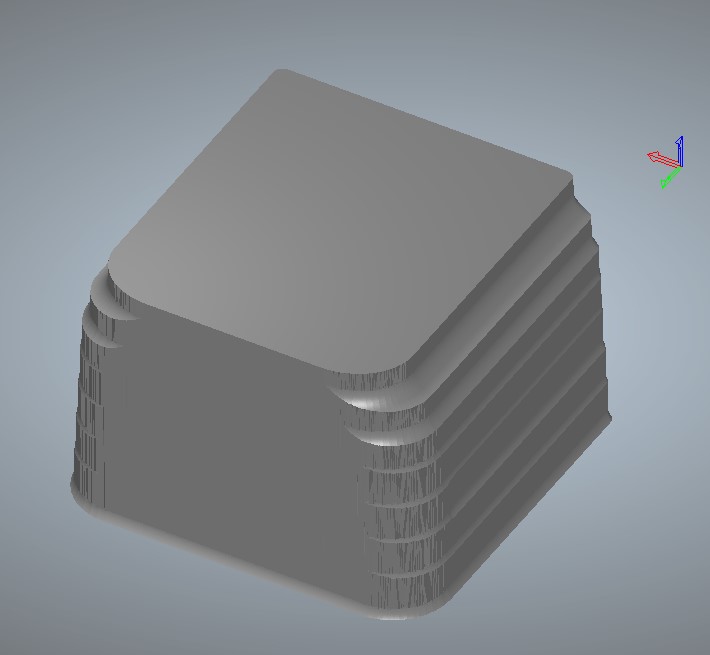
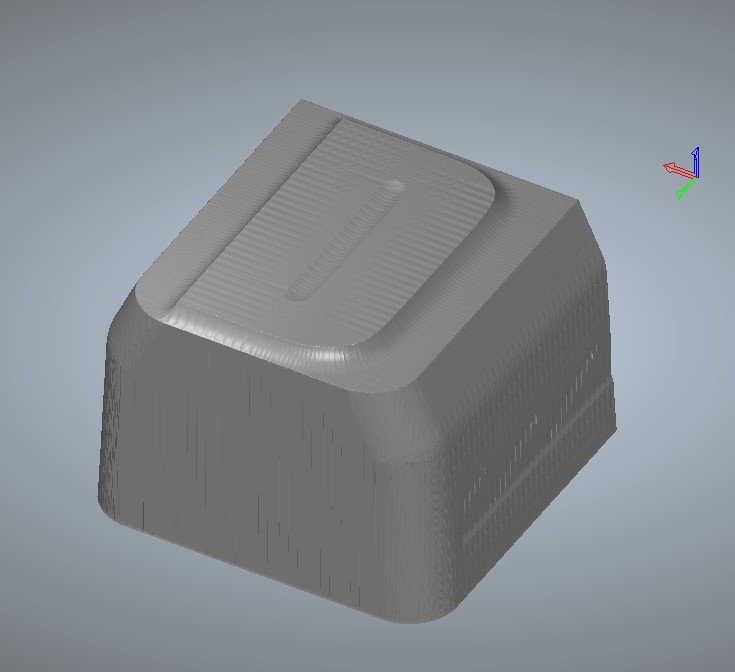
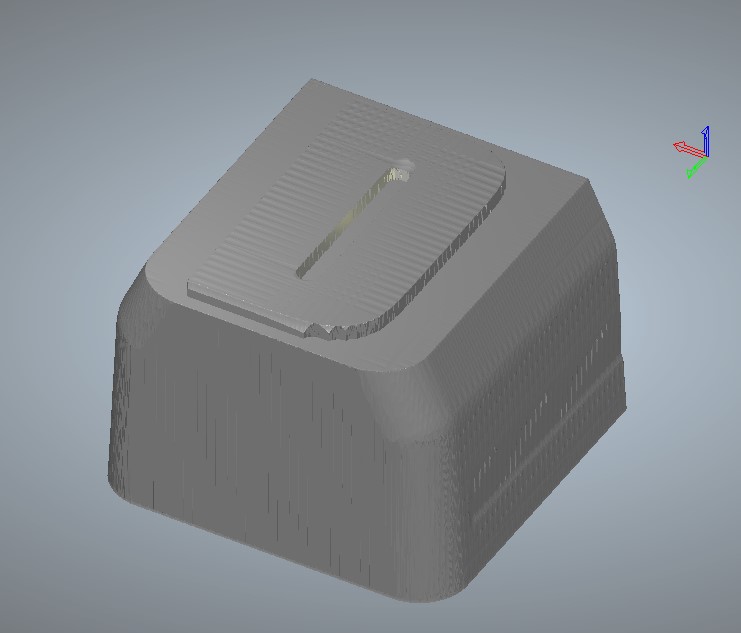
I decide to something fun! Cast a Cube or block with my initials on 3 sides and generous fillets on all but one perimeter edge.
Above is what my cast part will look like
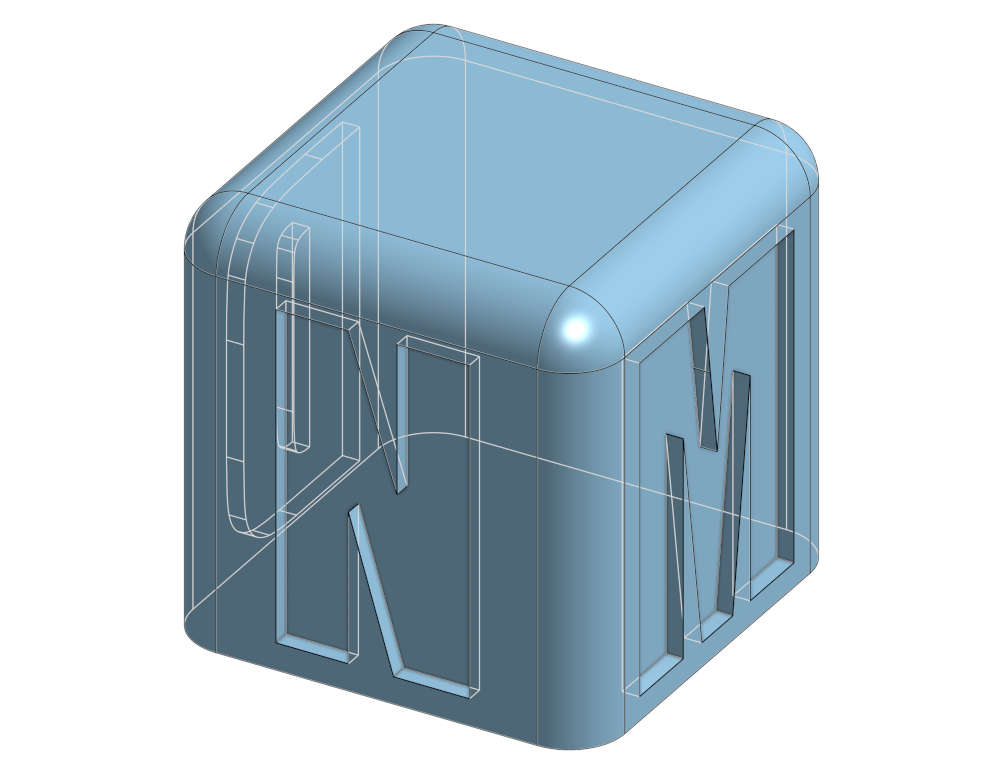
Based on the 4 sided nature of my Initial Cube or block, I decided to mill a 4 part mold from machinable wax. Note the fillets on all edges except the bottom edge. This bottom edge will be open to the pour of clear resin I will use to cast the final part(s). This will require carefully selecting paring lines between the mold cavity and side action faces.
Review the safety data sheets
Amazing Clear Cast Resin
I decided to cast my part in Amazing Clear Cast. I reviewed the Amazing Clear Cast Safety Data Sheet, Technical Data Sheet and other info. The SDS listed the following PPE and procedures.
- Ventilation: Use with adequate general or local exhaust ventilation to minimize exposure levels.
- Respiratory Protection: If needed, an approved respirator with organic vapor cartridges may be used. Respirator selection and use should be based on contaminant type, form and concentration. For higher exposures or in an emergency, use a supplied-air respirator.
- Skin Protection: Wear impervious gloves, such as butyl rubber or nitrile rubber.
- Eye Protection: Wear chemical safety glasses/goggles.
- Other Protective Measures: Prevent skin contact and contamination of personal clothing. An eye wash facility and washing facility should be available in the work area. Follow applicable regulations and good Industrial Hygiene practice.
I decide to use my full face respirator with Organic Vapor Cartridges with prescription inserts. I also wore gloves and made sure to cover my work surface with a plastic garbage bag. I also put the mold with liquid resin in it in my bathroom shower stall with the exhaust fan running during the 72hr curing process.
Machinable Wax
Safety Data Sheet for Machinable Wax After reading this SDS, the only thing I noted it that around open flame the chips may ignite. So I will avoid using lighters, heat guns and being near other sources of flame like a gas stove or water heater, while machining this wax. I will keep the chips in a covered container. I will also use PPE when melting the chips and re-casting the blocks. I will use a pot heated on a sealed electric hot plate to heat the wax to melting point. I will not use a gas burner with open flame.
Mold Design
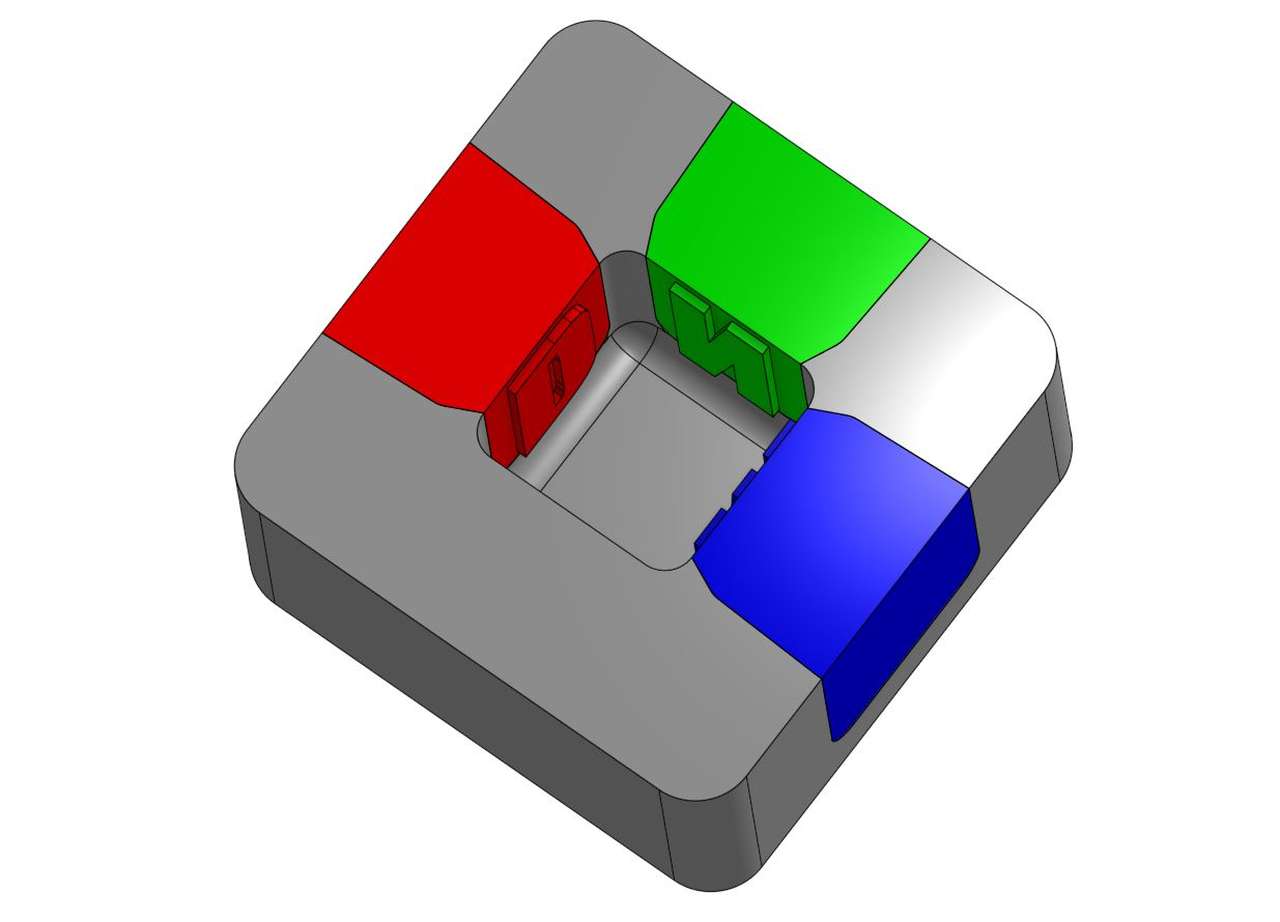
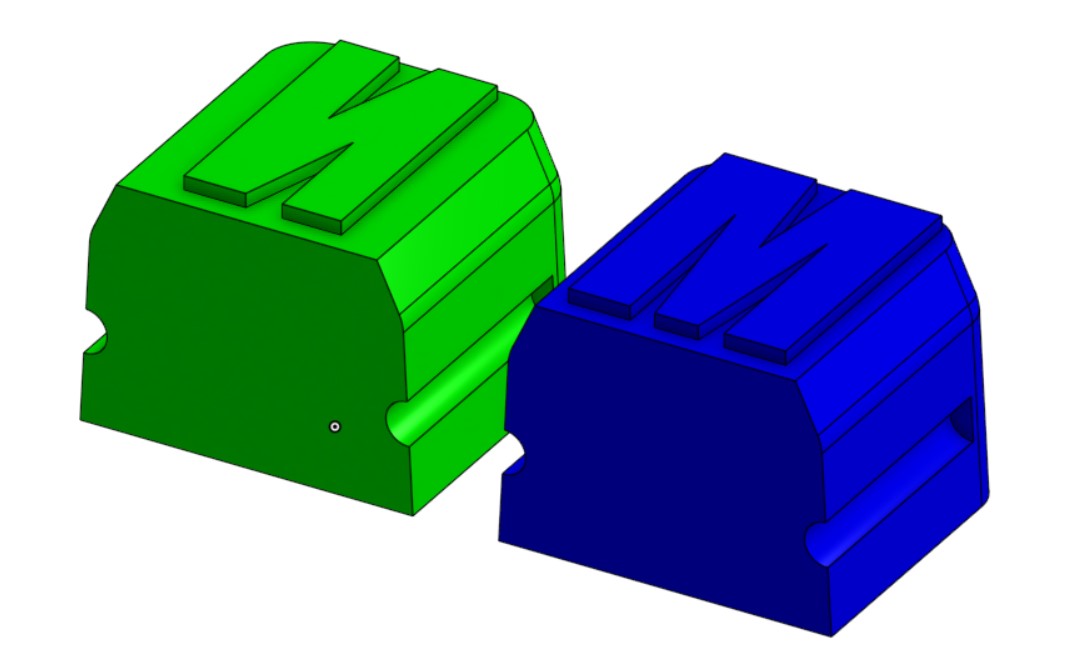
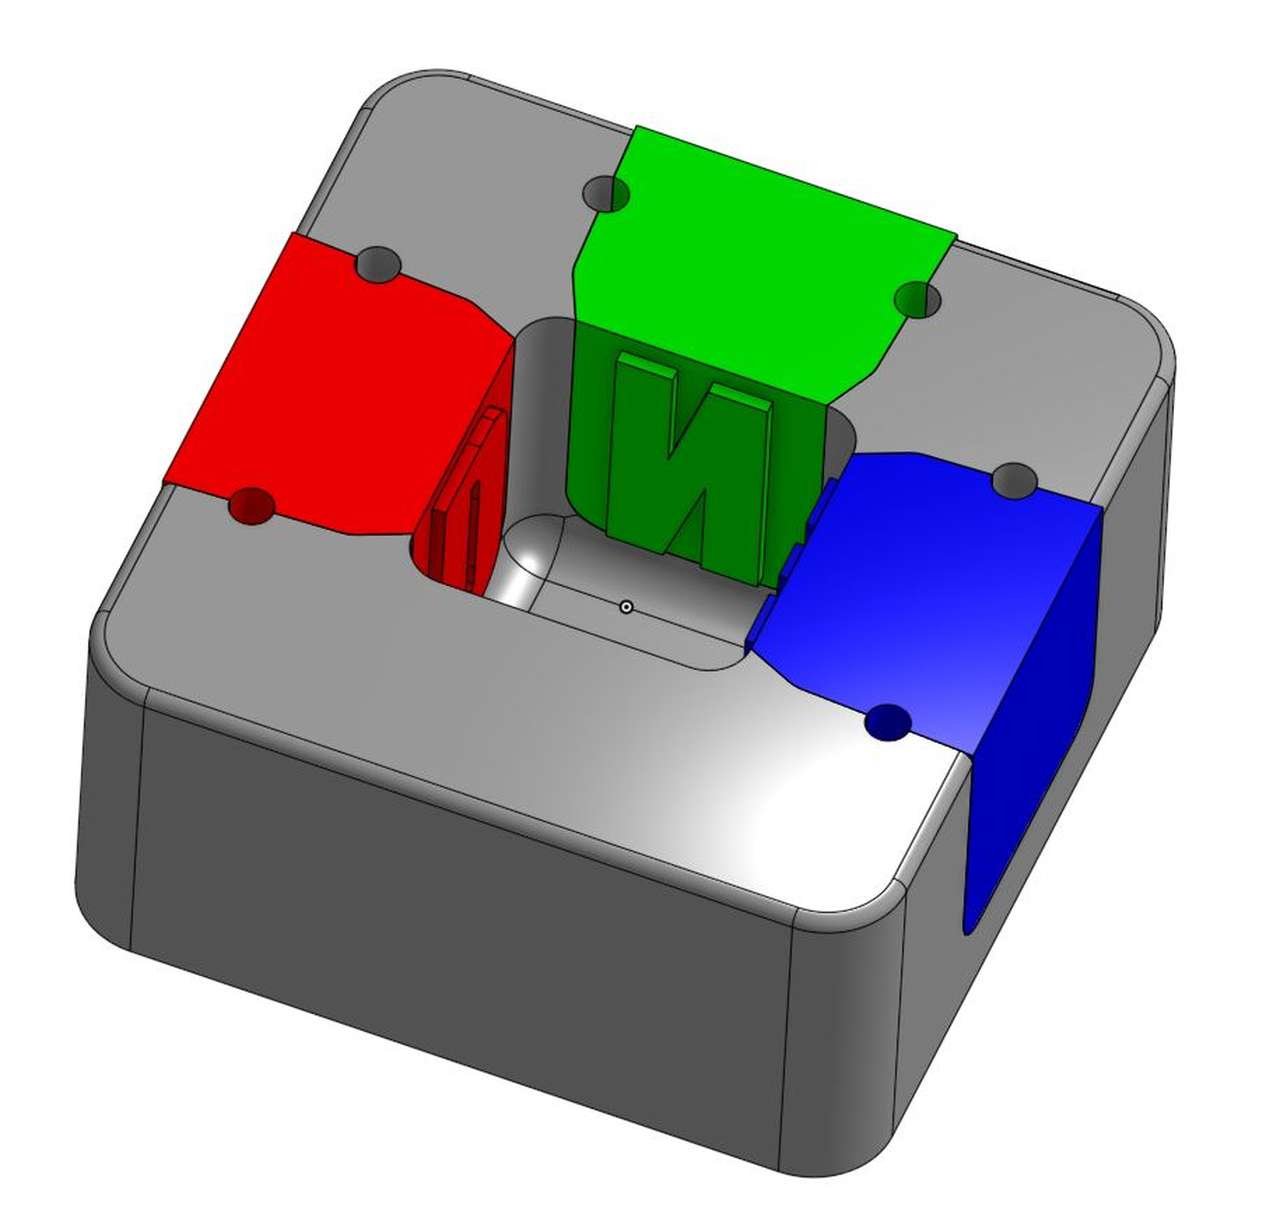 Mold cavity in Gray, side actions in Red, Green and Blue. The embossed letters could have been deeper to take advantage of the side actions of a rigid mold. A silicone mold could have been made from a pattern of my cube to accomplish a flex off removal from the embossed letters, but I wanted to make a rigid machinable wax mold.
CAD Files
DNM Block (Native onshape CAD, with export rights)
Mold Machining
Machine the two patterns from machinable wax on the x-carve cnc router/milling machine.
In needed to figure out speeds and feeds for machinable wax, so I visited MACHINABLEWAX.COM Technical Data They stated: (This example was obtained using 1/2” end mill. If you slow down the feed rate then you can reduce the RPM):
Roughing: Spindle speed 3,000 rpm at ~ 2540 mm/s (100 ipm)
Finishing: Spindle speed 8,000 to 10,000 rpm at ~ 17 - 42 mm/s (40-100 ipm)
The max feedrates of the x-carve are:
X 133 mm/sec (8000 mm/min) Y 133 mm/sec (8000 mm/min) Z 8.3 mm/sec (500 mm/min)
Reference: what-is-maximum-feed of x-carve
Since I was doing a roughing cut with a 1/8” end mill I will x 4 the rpm to maintain the same surface rate, so: - 12,000 rpm at 2540 mm/s (100 ipm)
This wasn’t enough to really establish a feed rate like I have for aluminum and other common materials, usually feed rates are established with calculations, or with chip size studies. I had heard however that machinable was was quite forgiving as long as you didn’t machine it so fast your melted it into the flutes of your cutter.
CAM
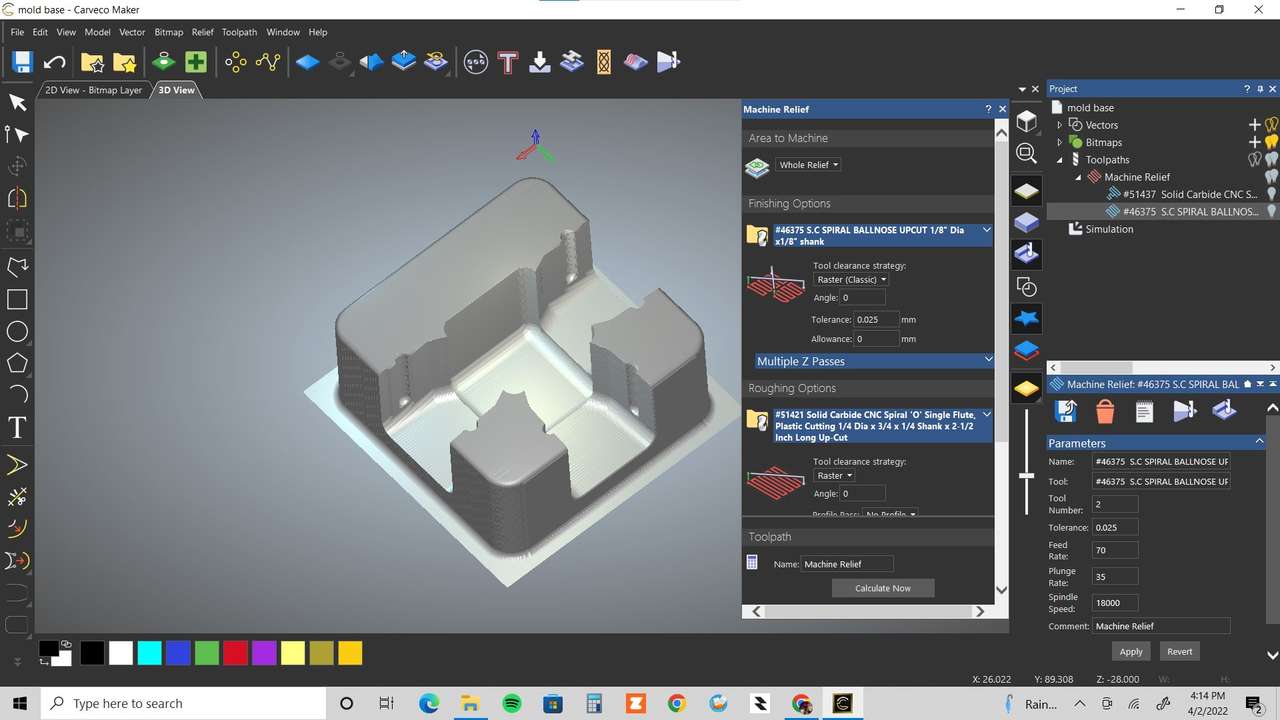
 STEP model exported from OnShape in Carveco CNC Routing Software.
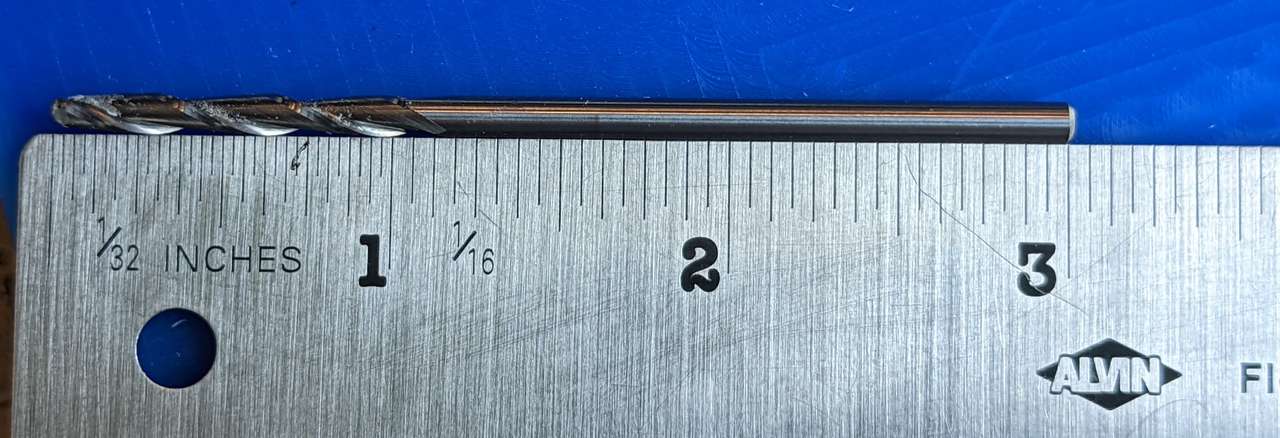 Milling Cutter: 3.175mm (.125”) diameter ball end nose, 2 flute, 25.4mm length effective side milling. This tool will be able to machine deep draw features up to 25mm deep.
files/week10/images/DNMCube/CAM/CAM001.jpg “”)
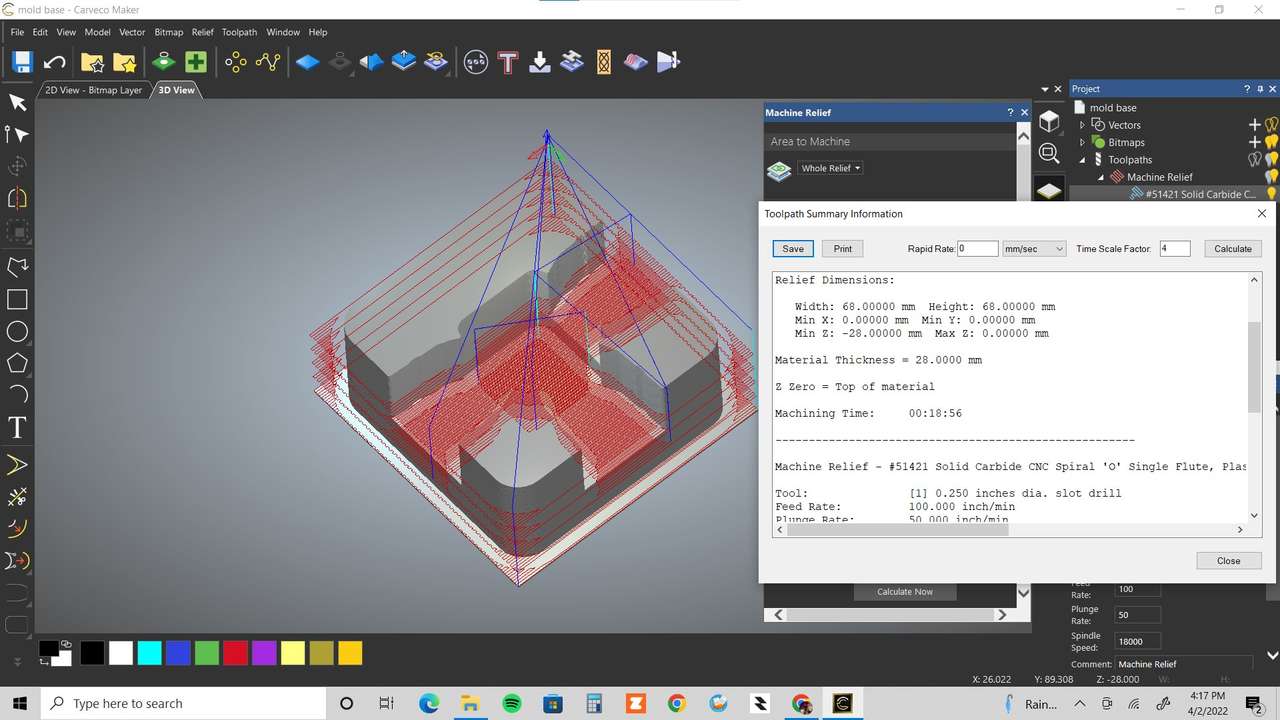
Roughing Machining time: 2 hrs 24 min with above cutter.
Milling Cutter: 3.175mm (.125”) diameter ball end nose, 2 flute, 25.4mm length effective side milling. This tool will be able to machine deep draw features up to 25mm deep.
files/week10/images/DNMCube/CAM/CAM001.jpg “”)
Roughing Machining time: 2 hrs 24 min with above cutter.
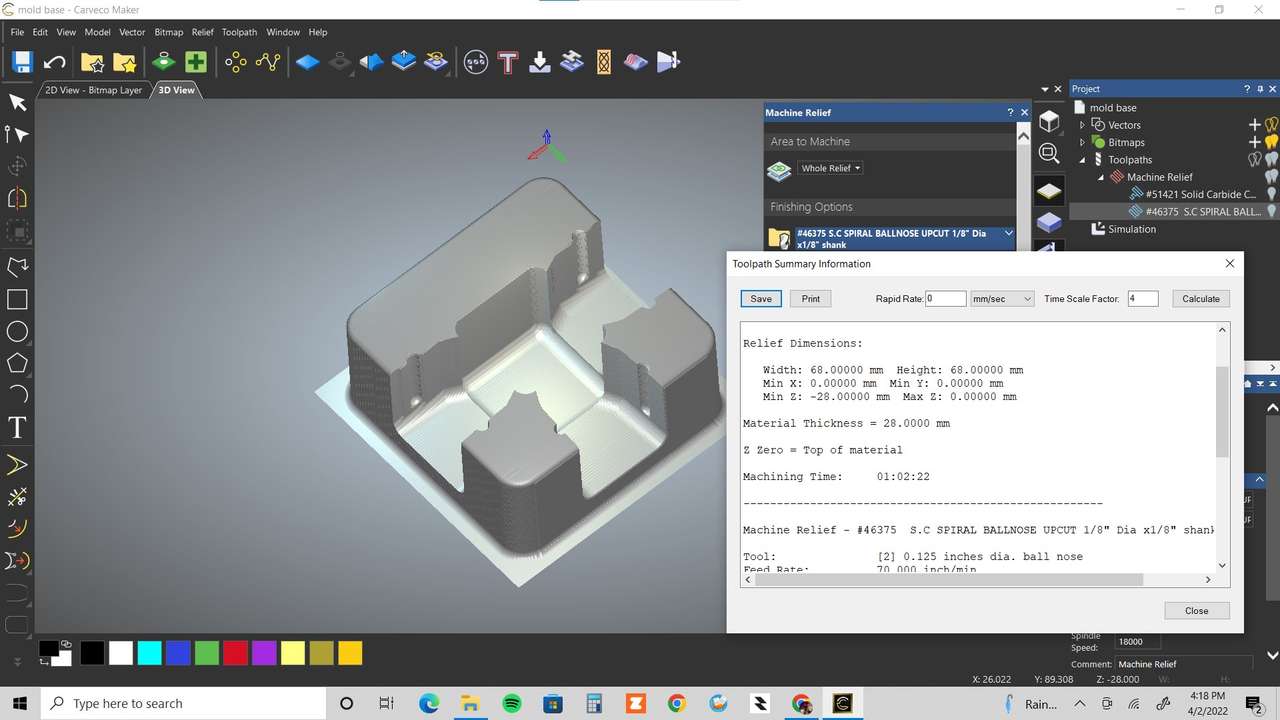
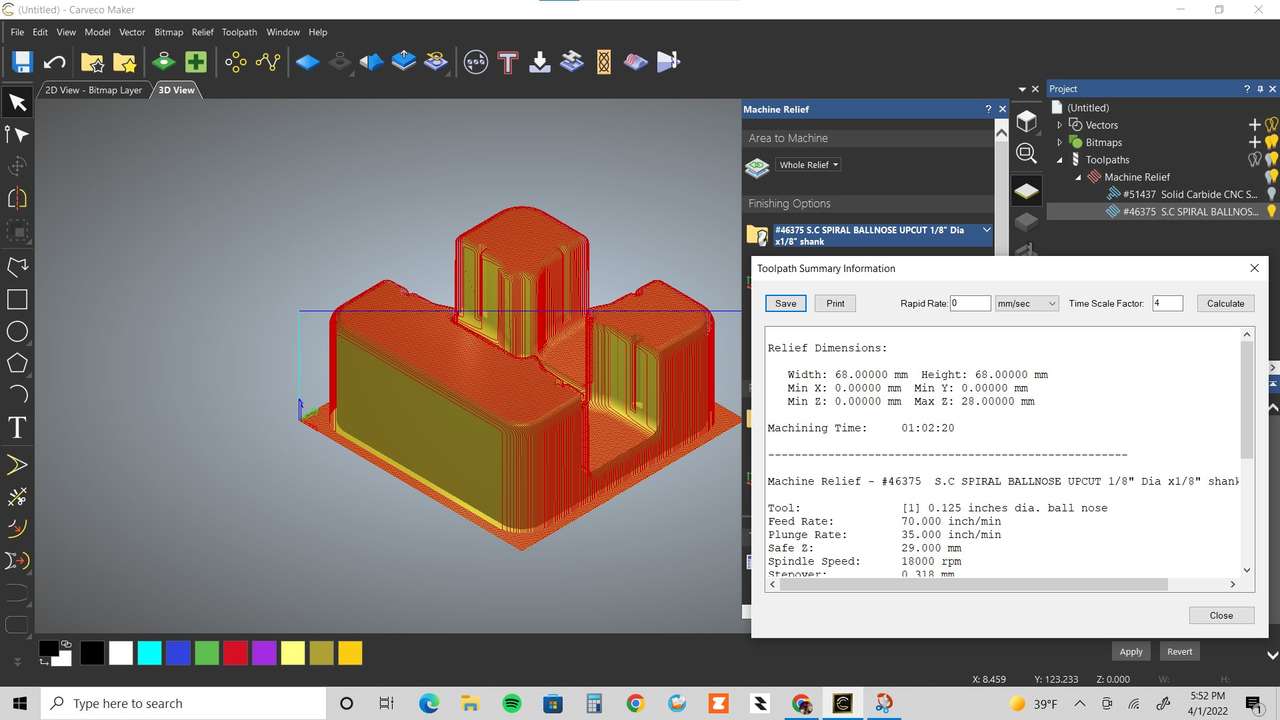 Finishing Machining time: 1 hrs 02 min same cutter above.
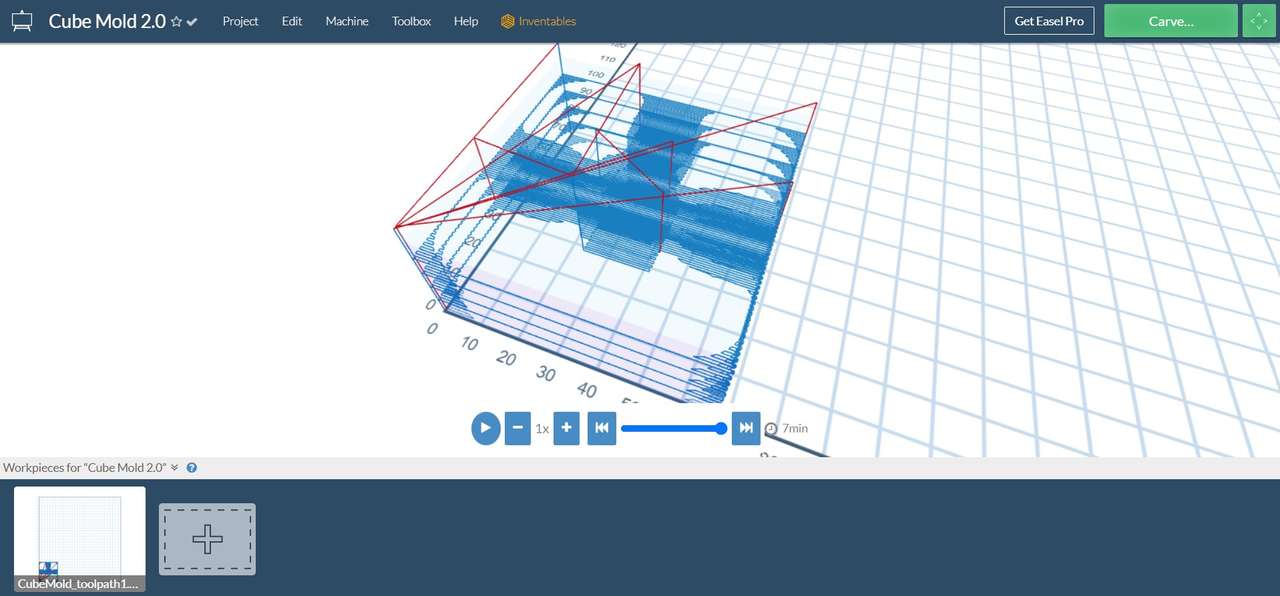
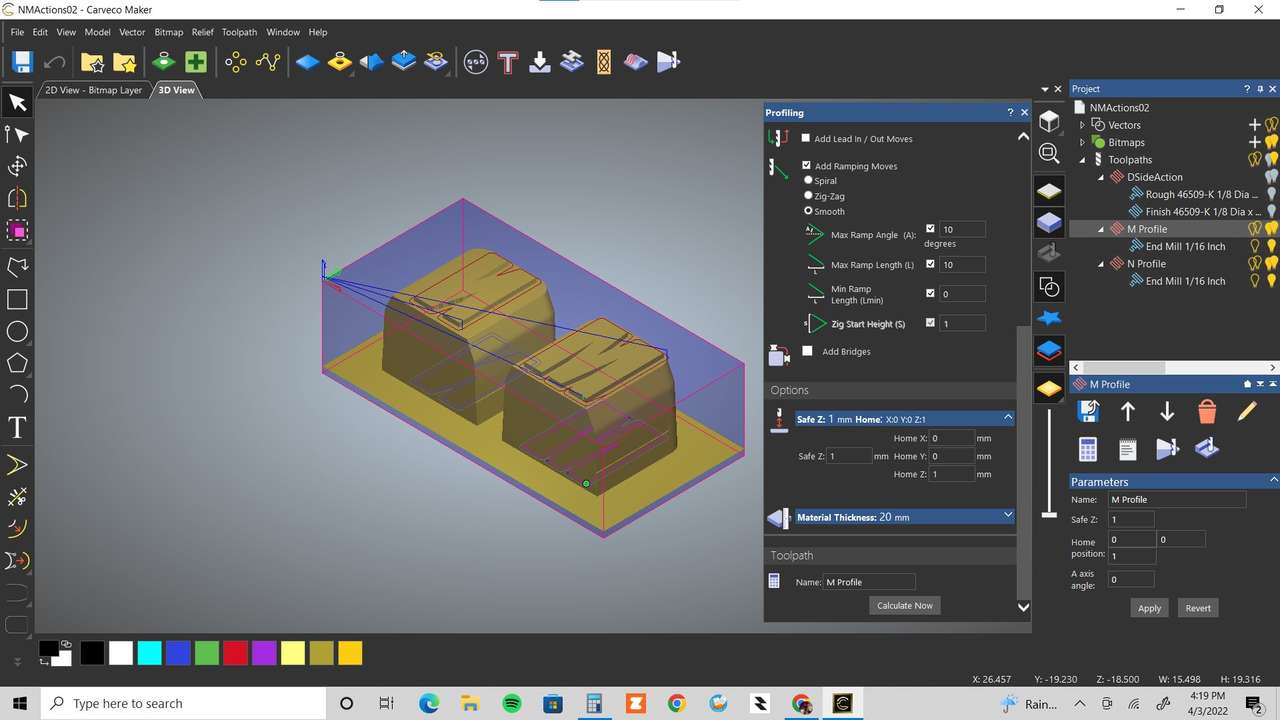
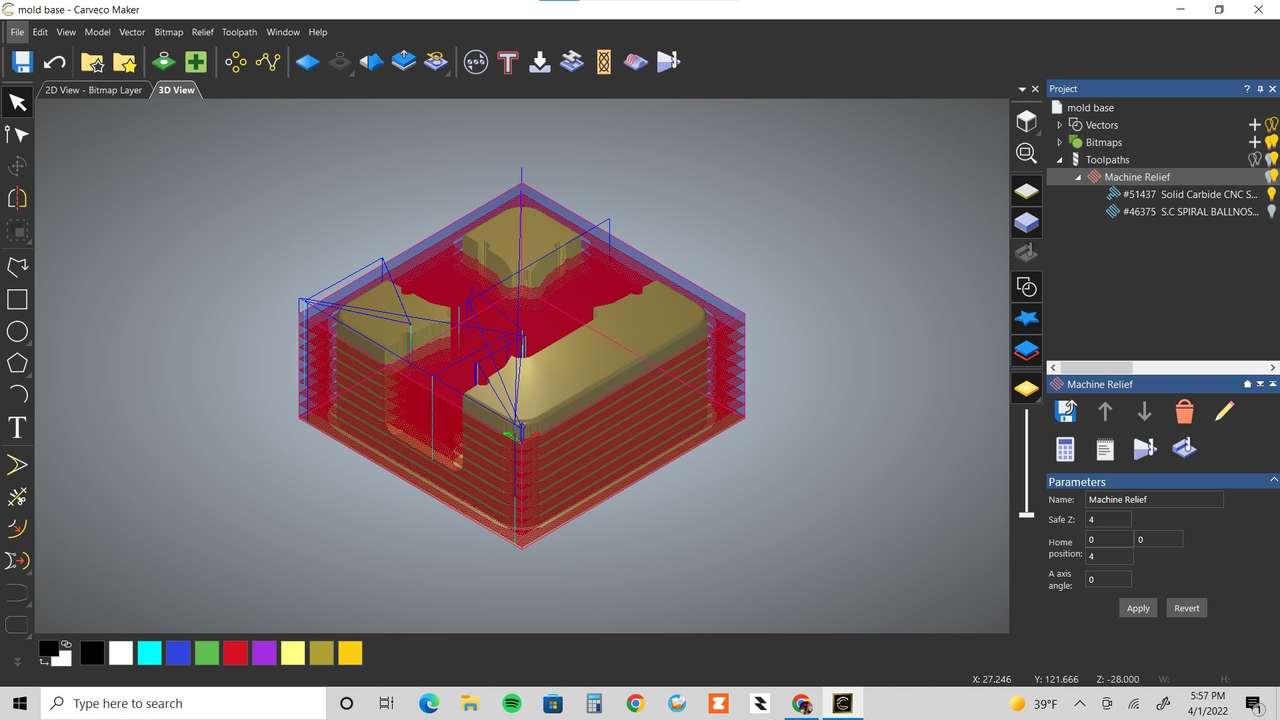 Finishing and roughing tool paths overlayed. I’m looking for and paths that look like they stray off above the top of the part, through the part, or through the bed of the machine. Everything looks good.
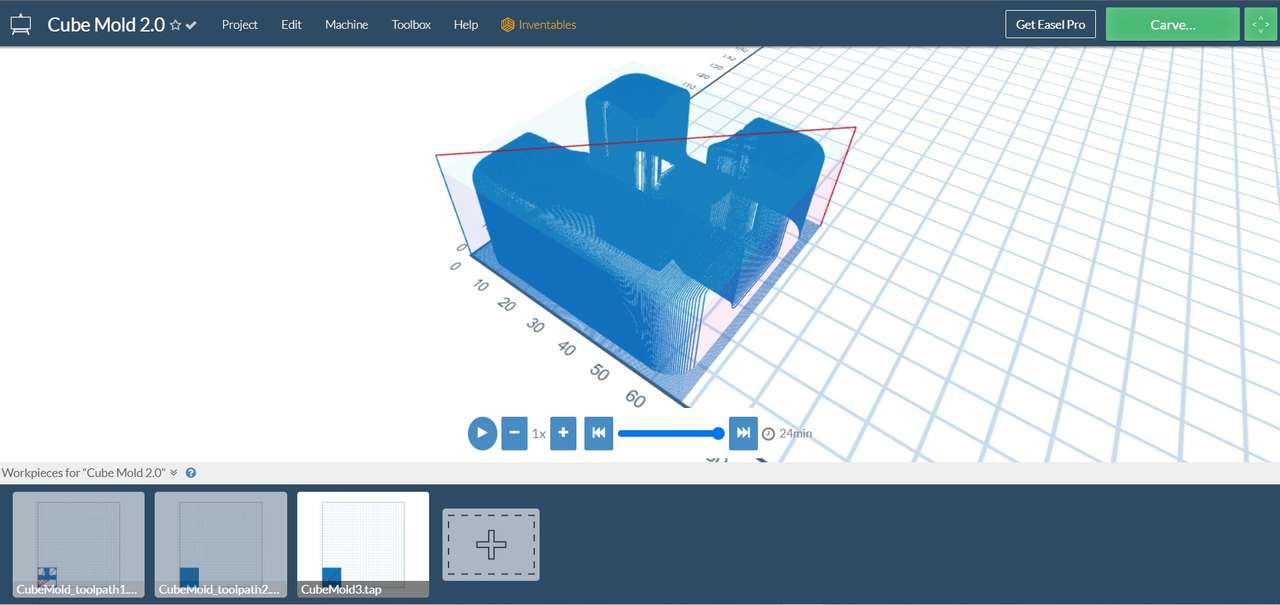
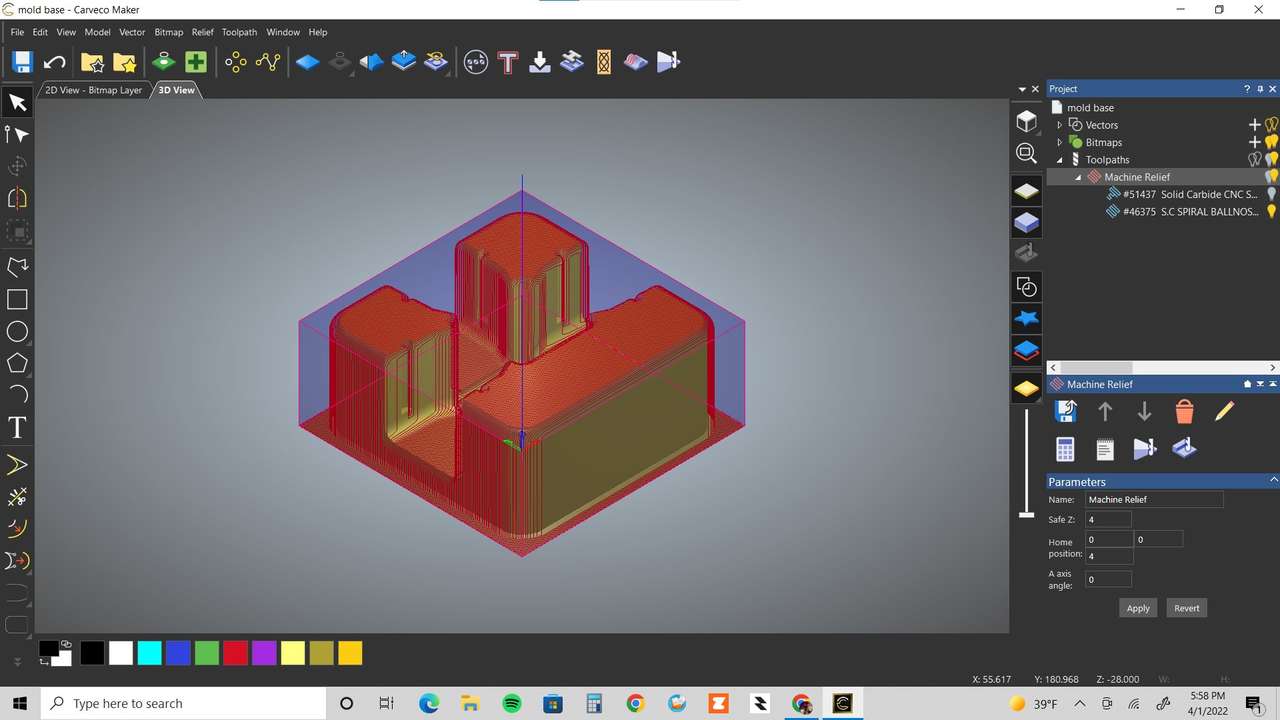 Finishing cut from another view.
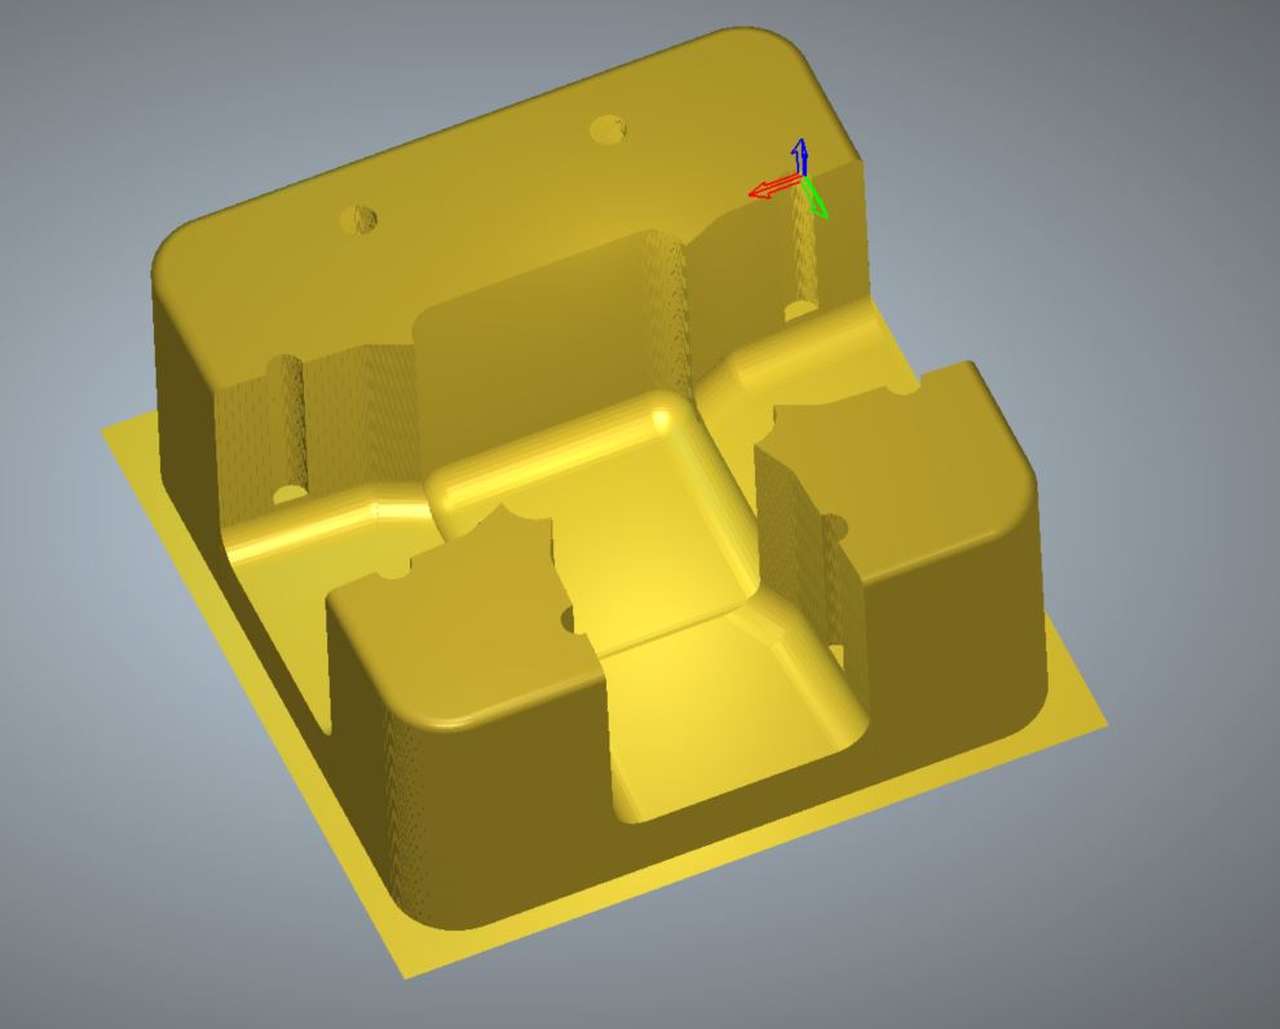
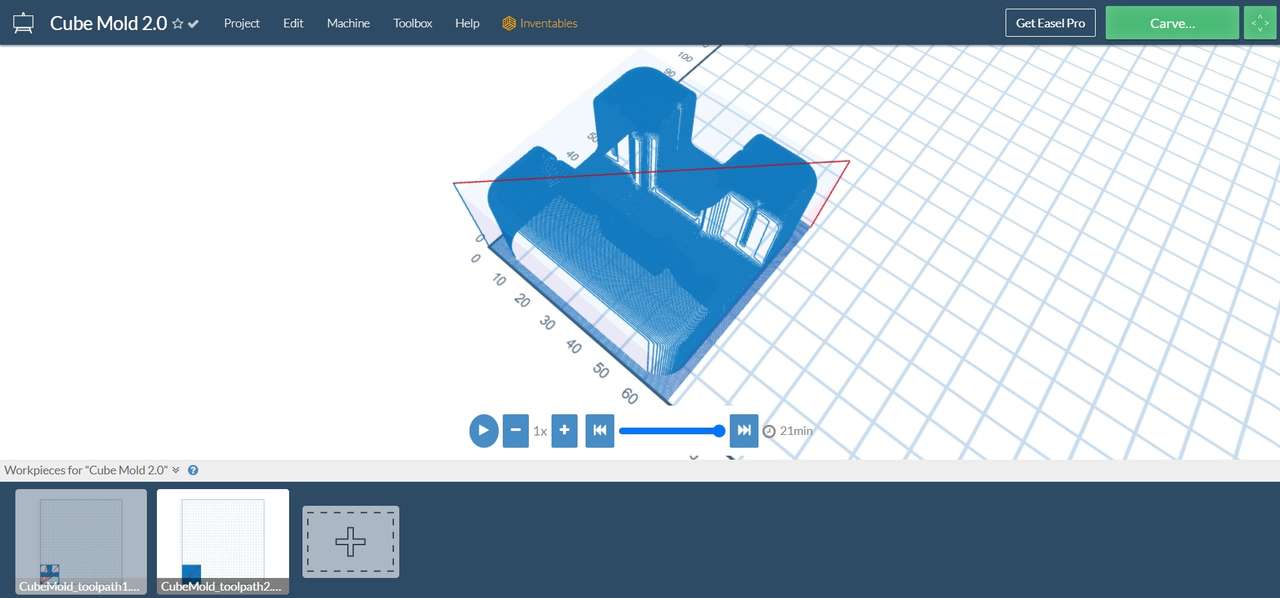
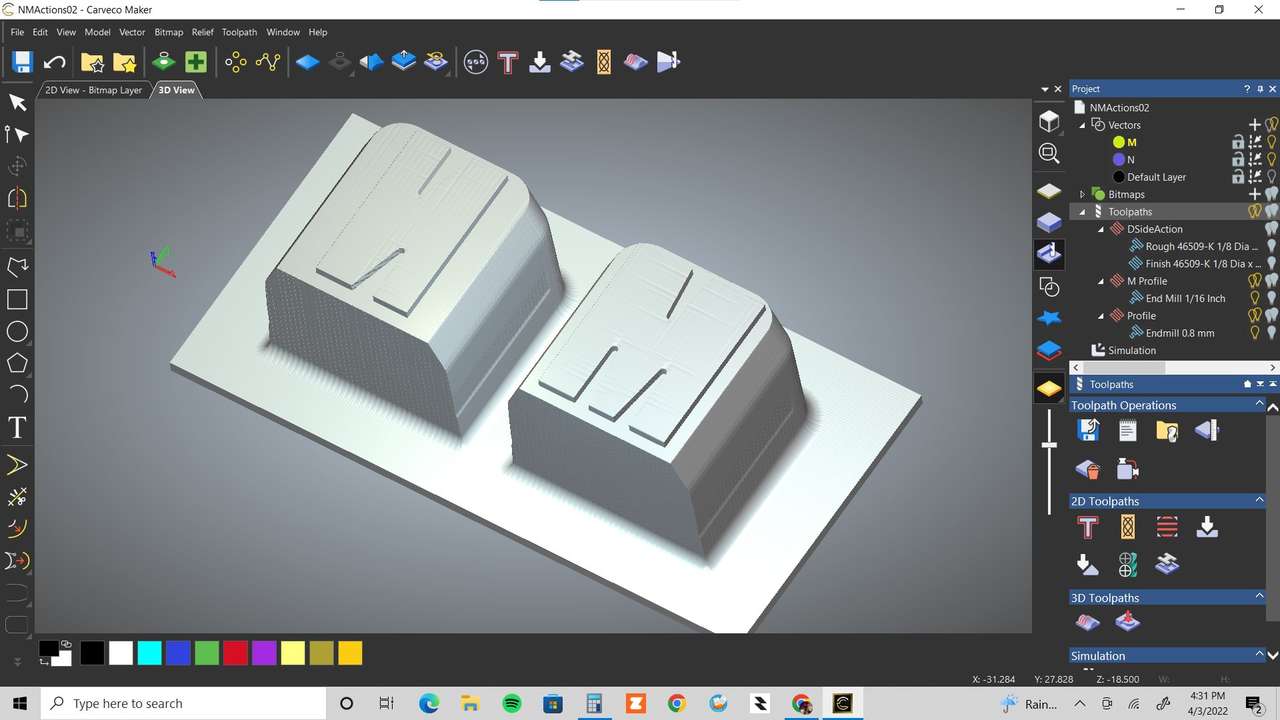
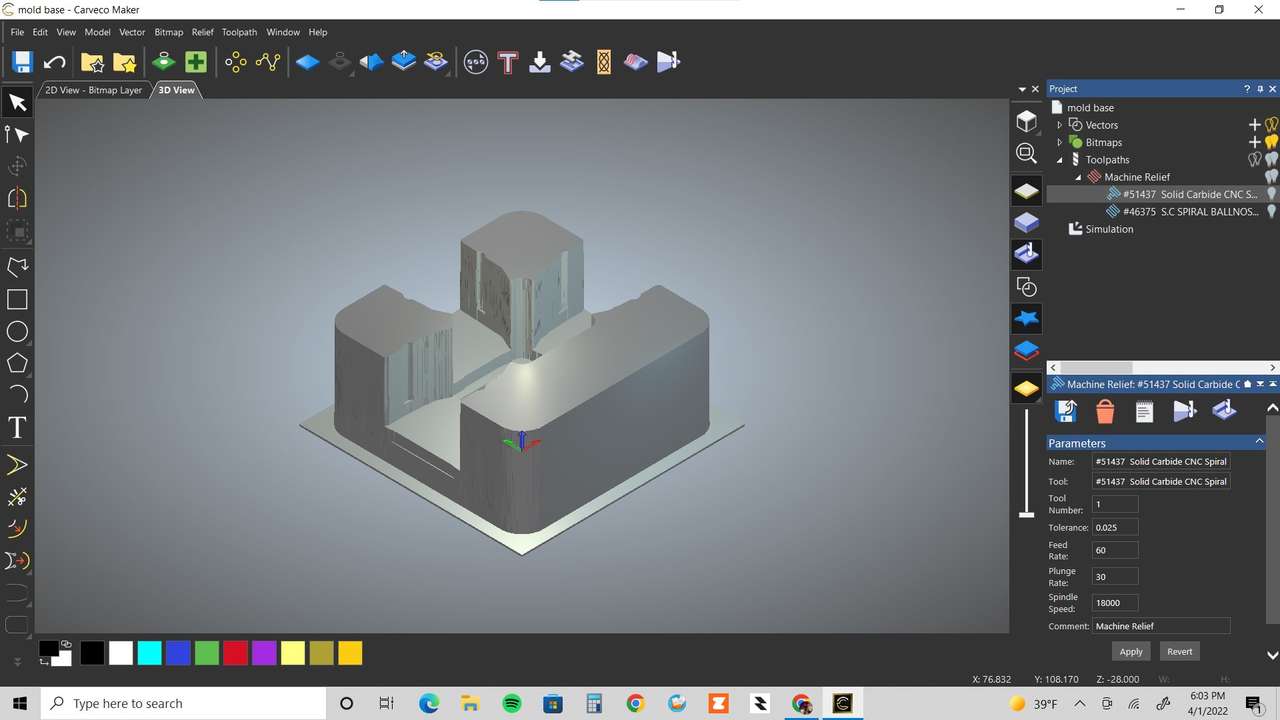 Stock machining sim results
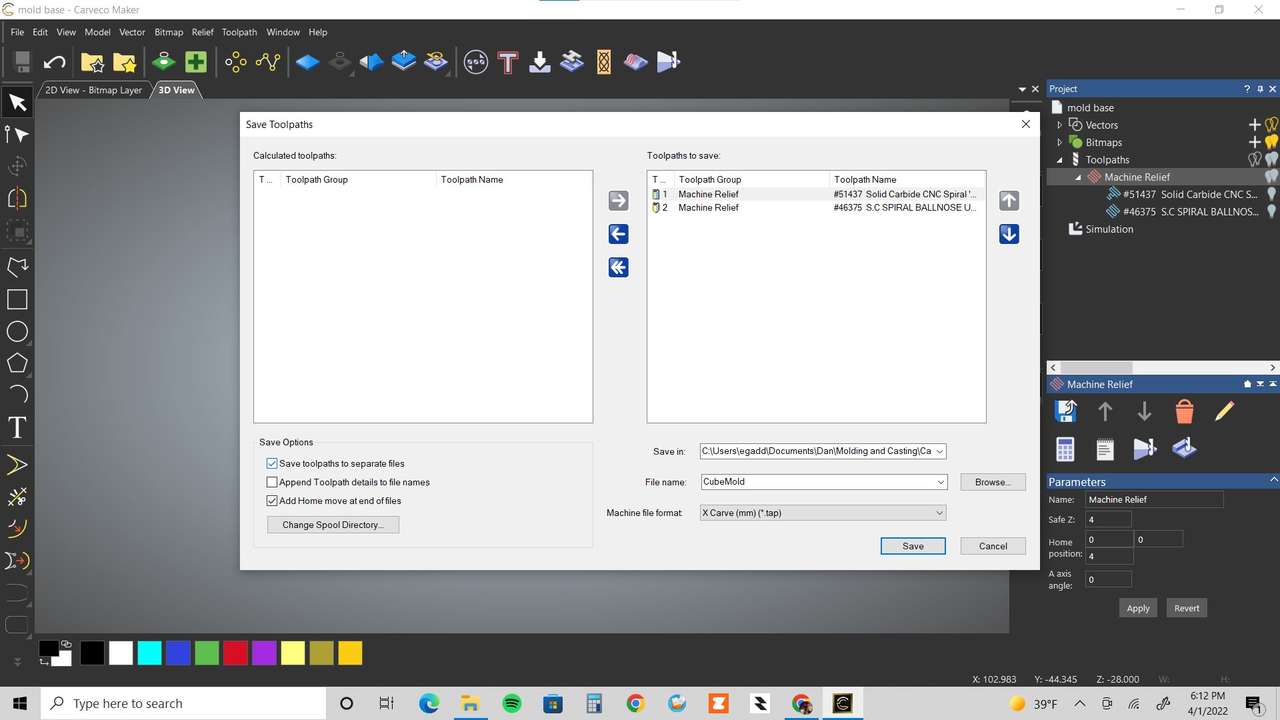 Saving g-code flavored for x-carve cnc router.
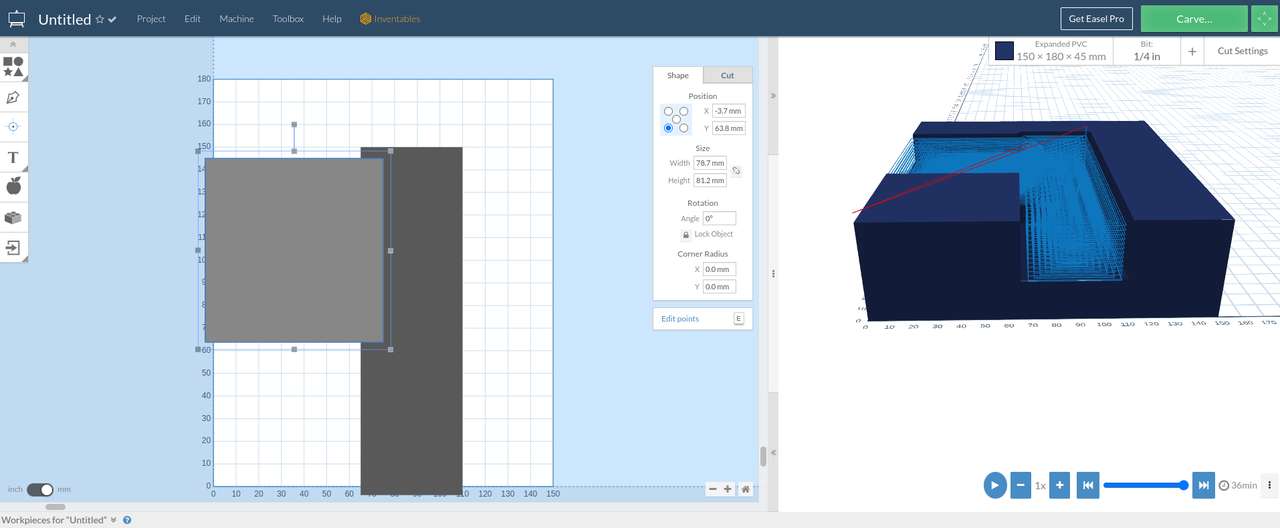
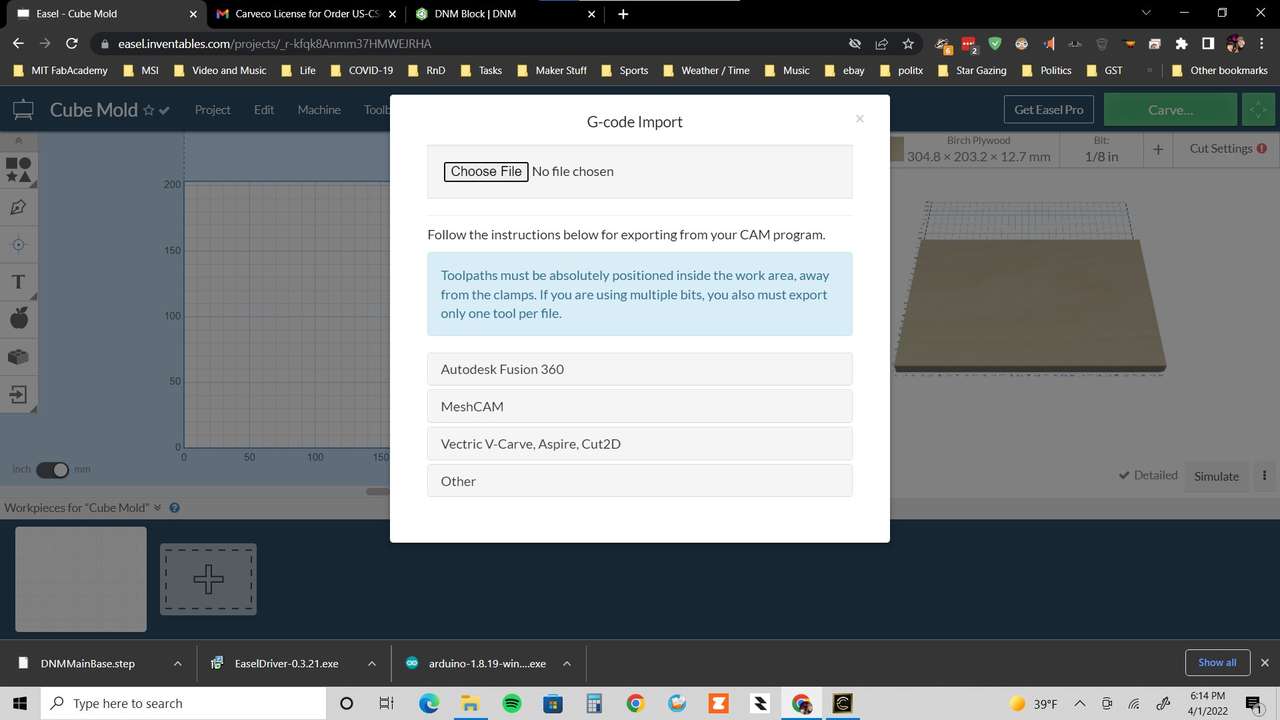 Importing g-code into Easel web based software to run the x-carve router
 Deciding to rough out mold base with .250” diameter cutter. Roughing time now reduced to 18 minutes!
 New higher feed rate finish milling with 1/8” diameter cutter.
 Roughing preview in Easel, I check again for stray tool paths, especially red rapid moves.
 X direction Finish cuts preview
 Y direction Finish cuts preview
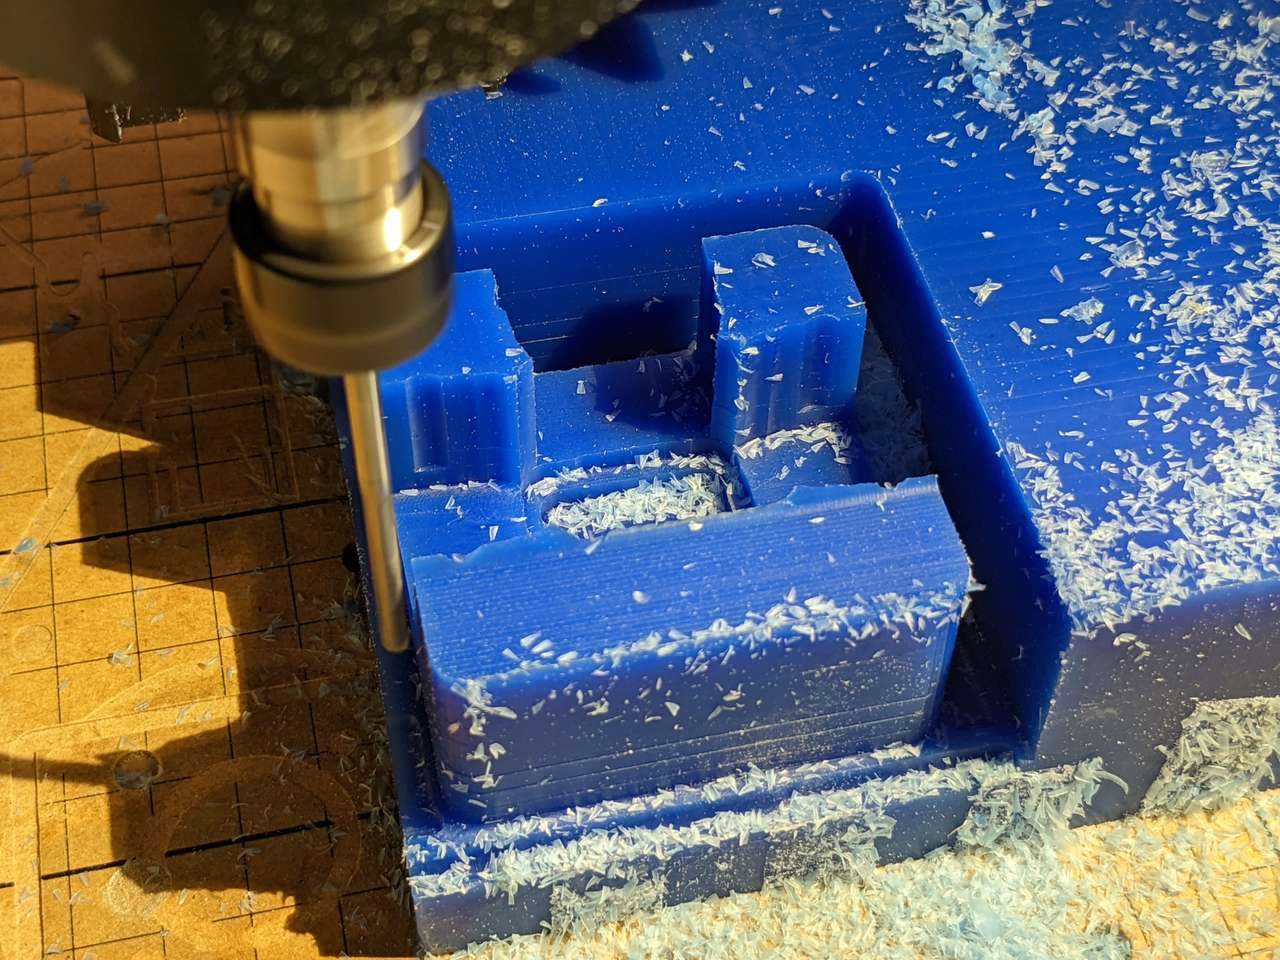
 .250” diameter roughing cuts begin!
 Roughing done!
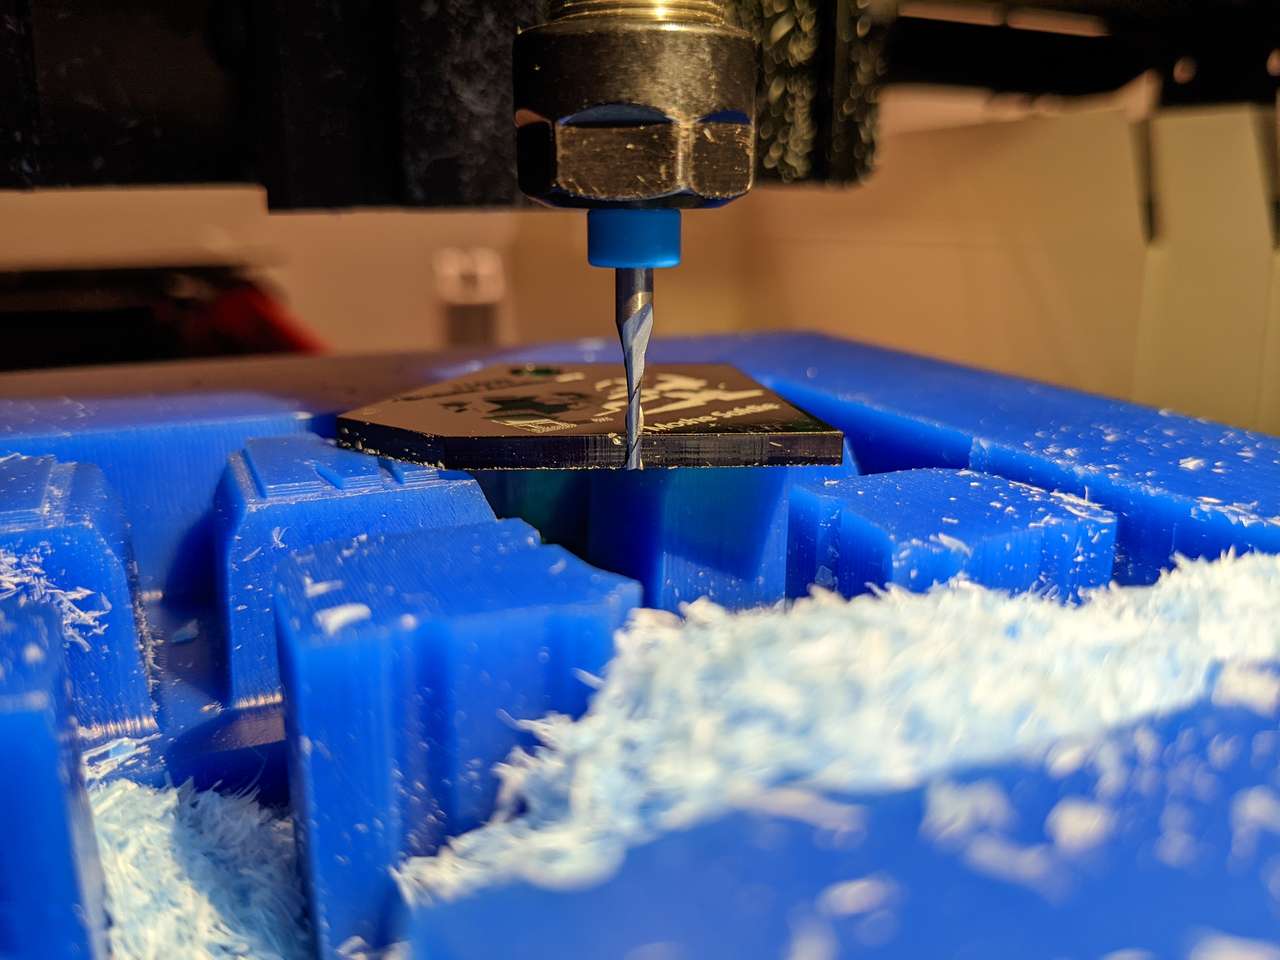
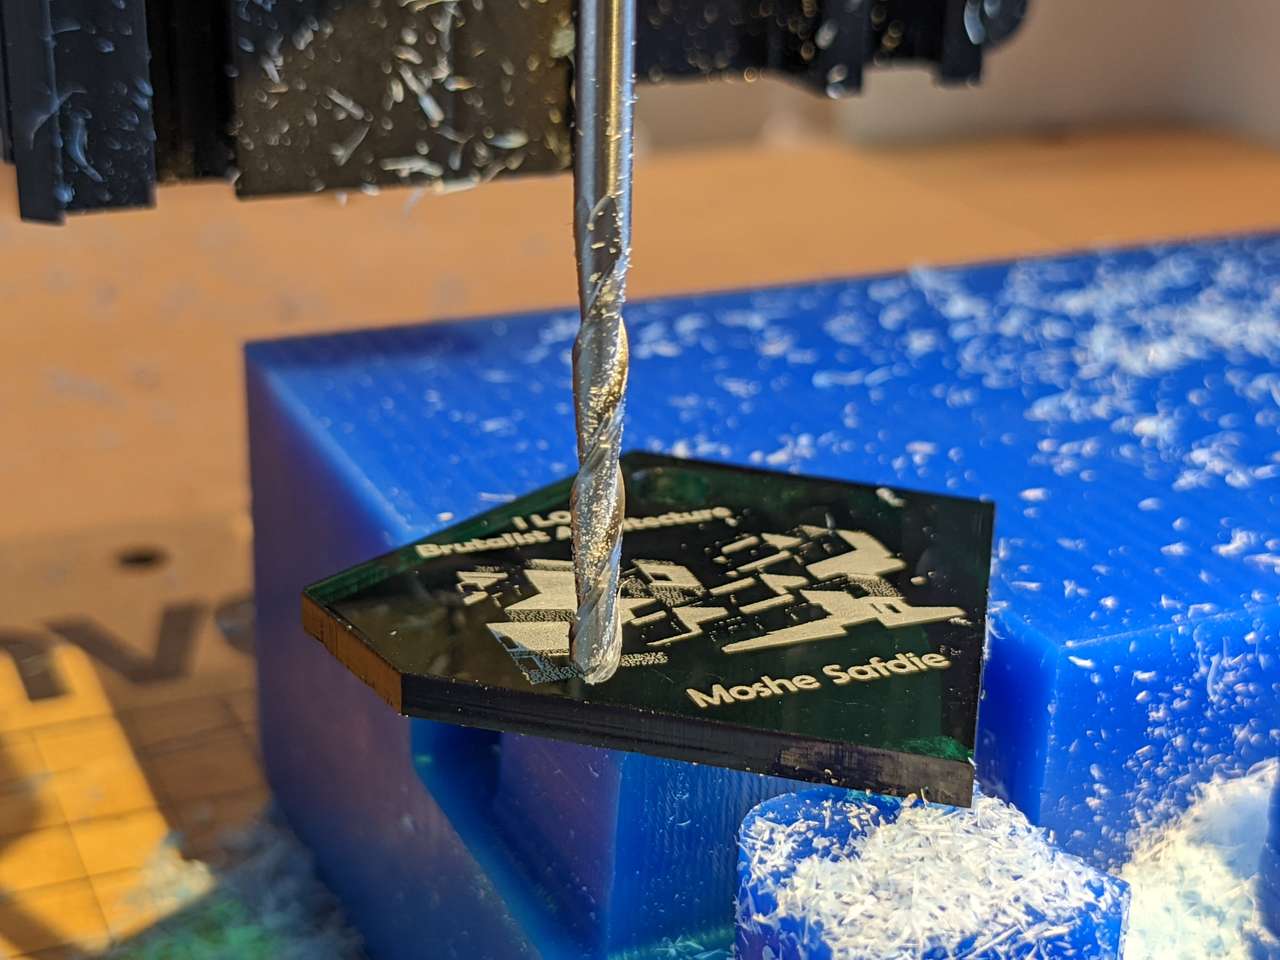 Setting Z zero with 3mm acrylic shim. I prefer this over using the brass zero puck, having broken solid carbide tooling on it.
 .125” cutter x finish cuts.
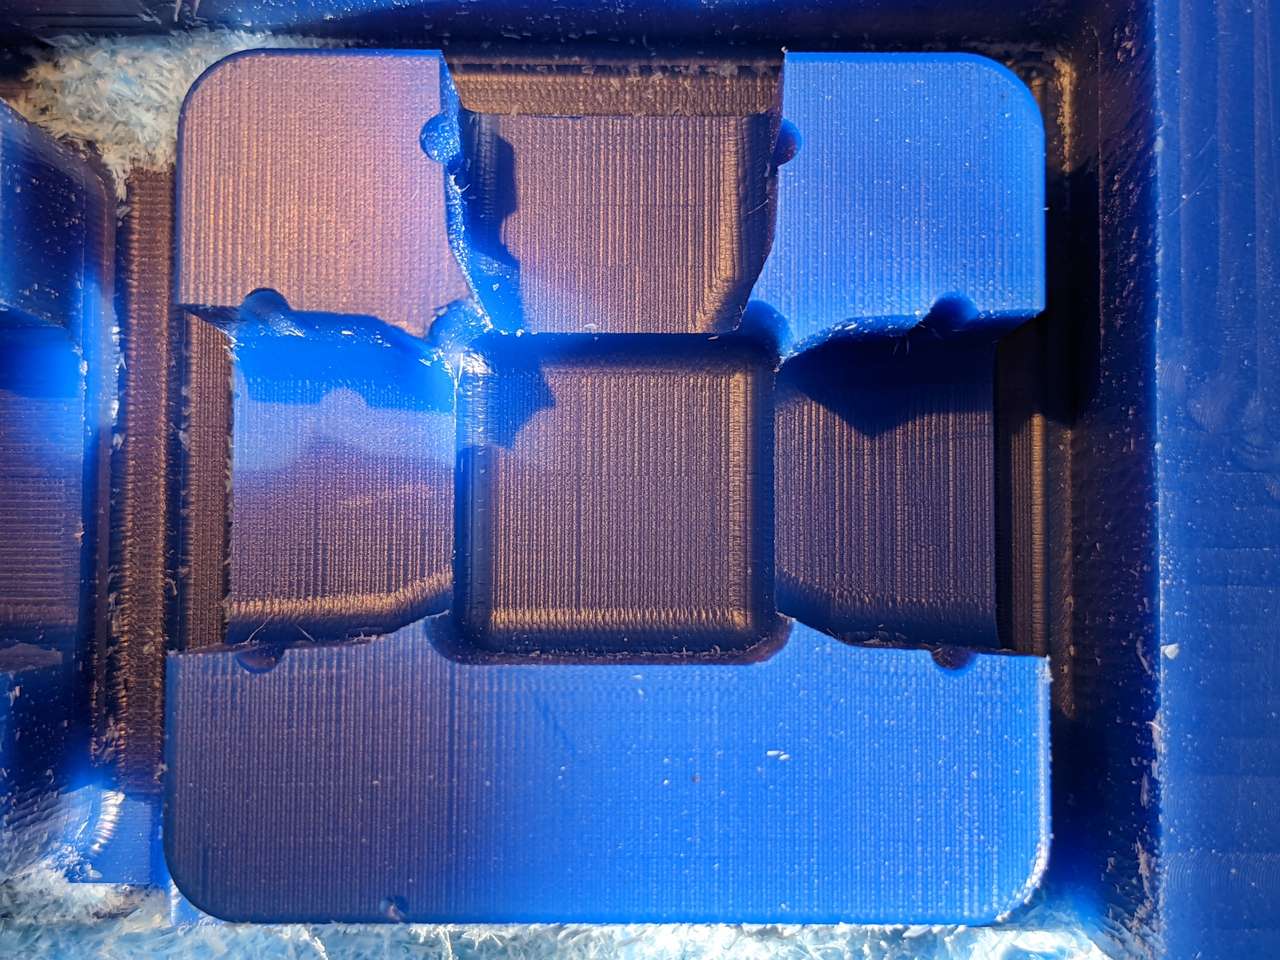 .125” cutter x and y finish cuts complete!
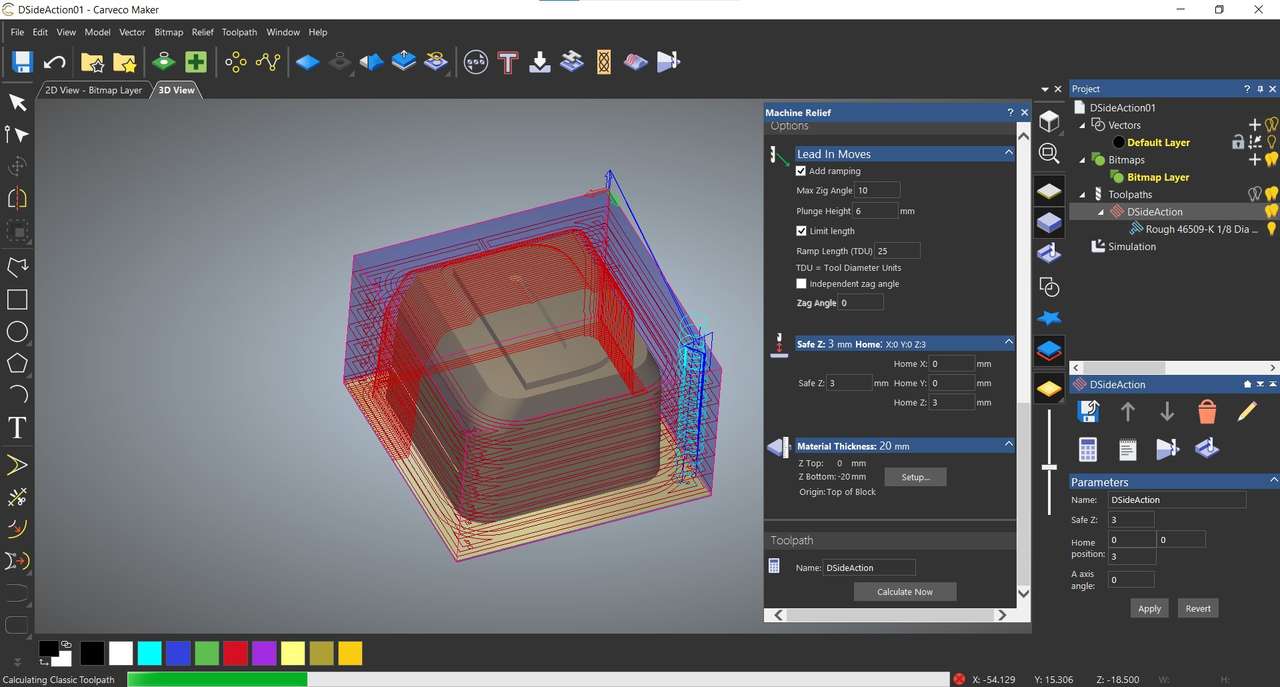

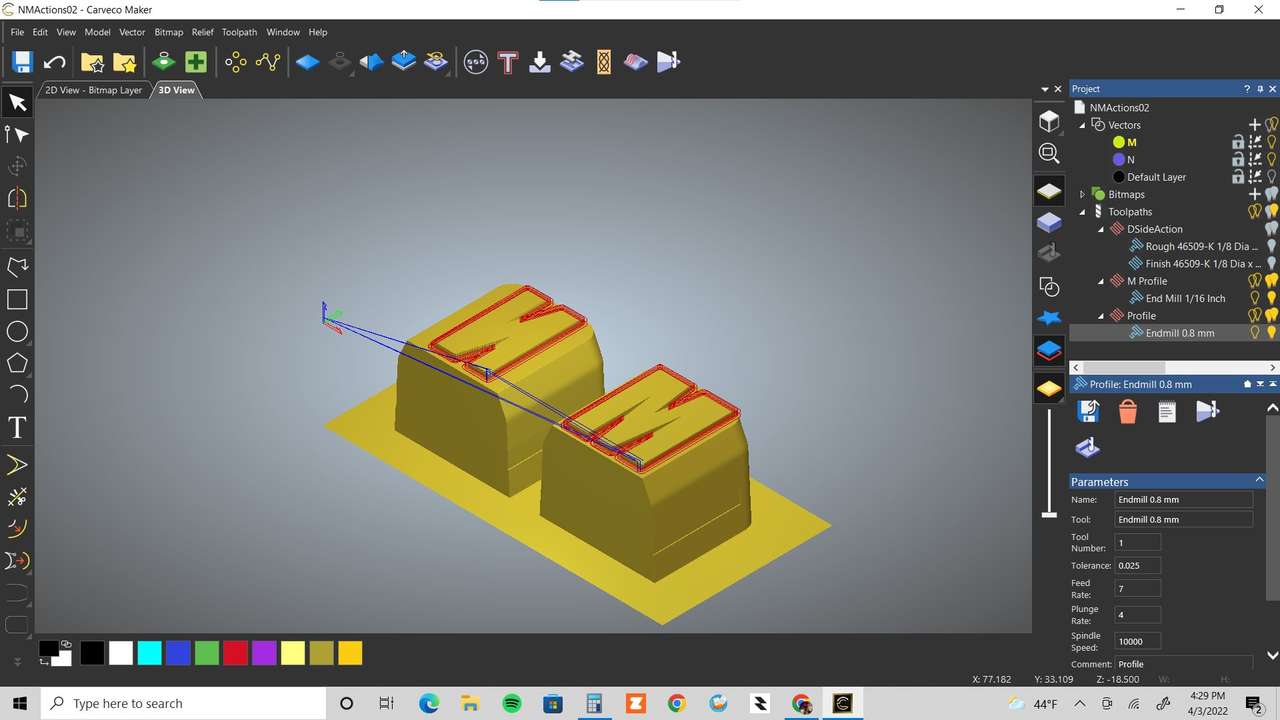
 CAM complete for all 3 side actions!
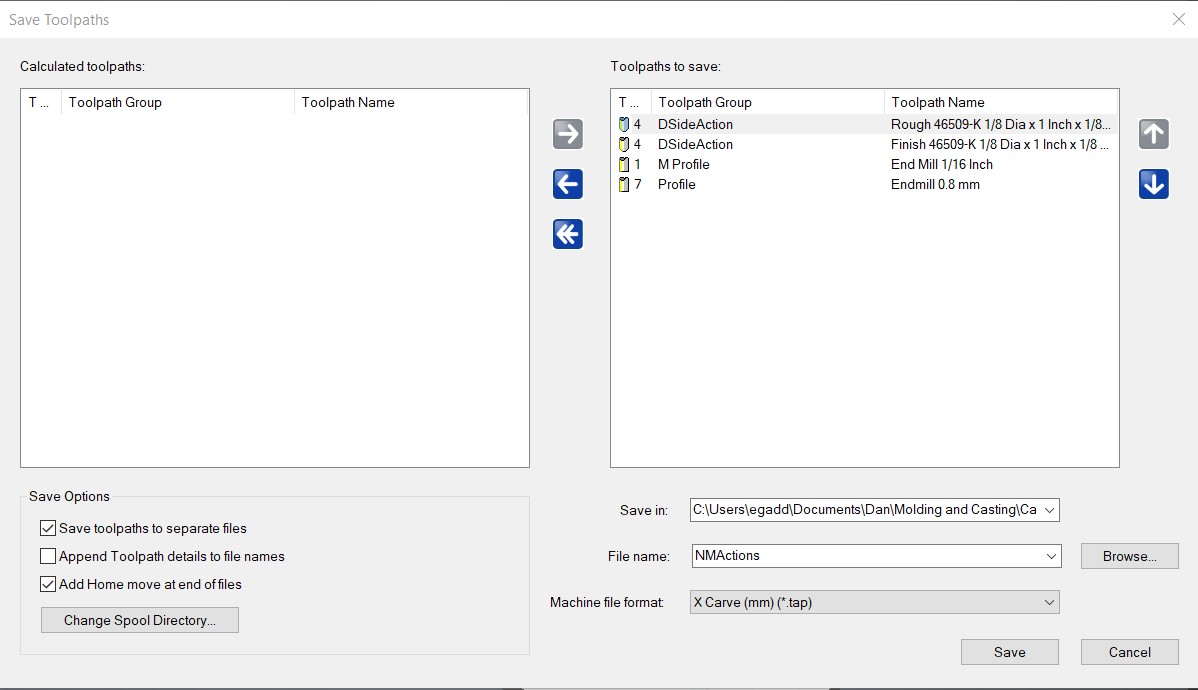 Saving tool paths for 3 different diameter tools to create fine details.
Milling Video
Video of roughing process
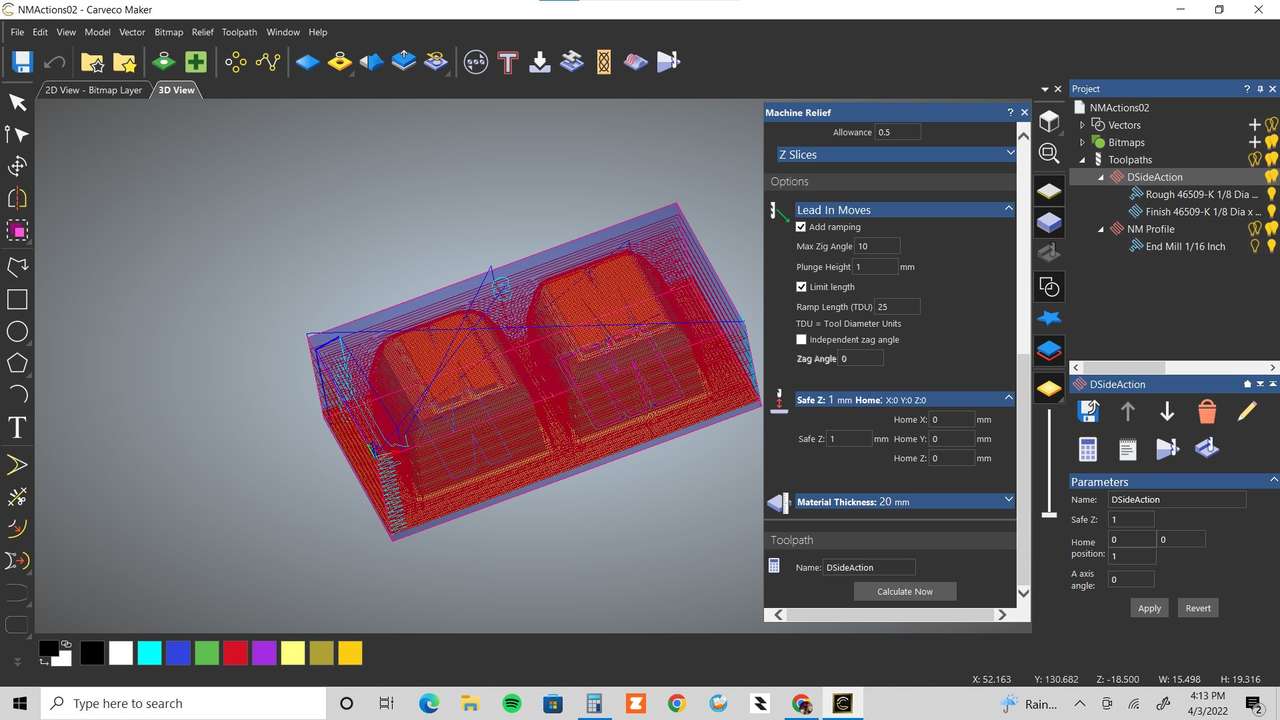
 Roughing D side action with 1/8” ball end milling
Medium finishing D side action with 1/8” ball end milling
Roughing D side action with 1/8” ball end milling
Medium finishing D side action with 1/8” ball end milling
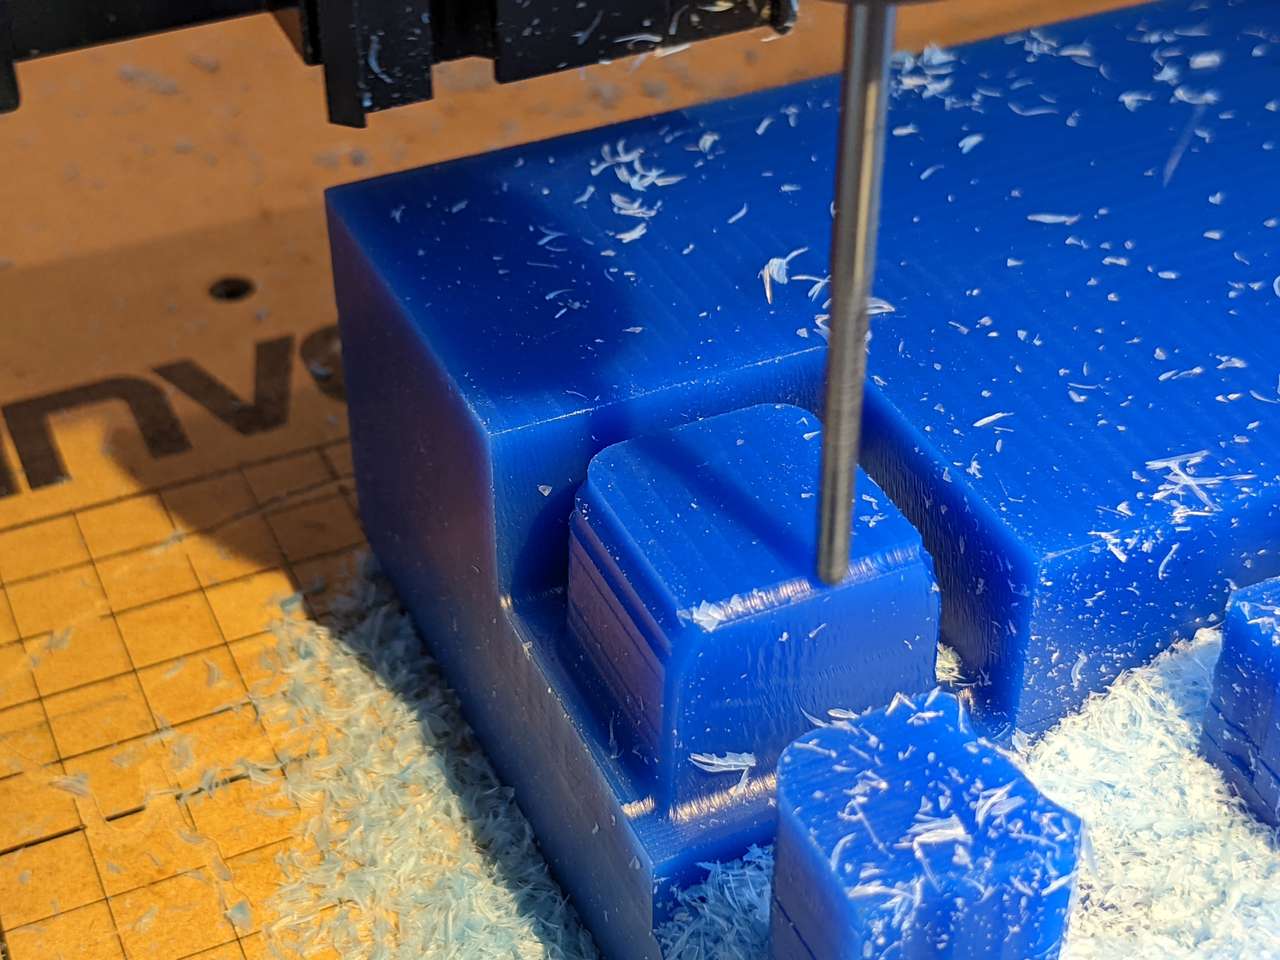
 1/16” diameter end mill, finishing D side action with 1/8” ball end milling
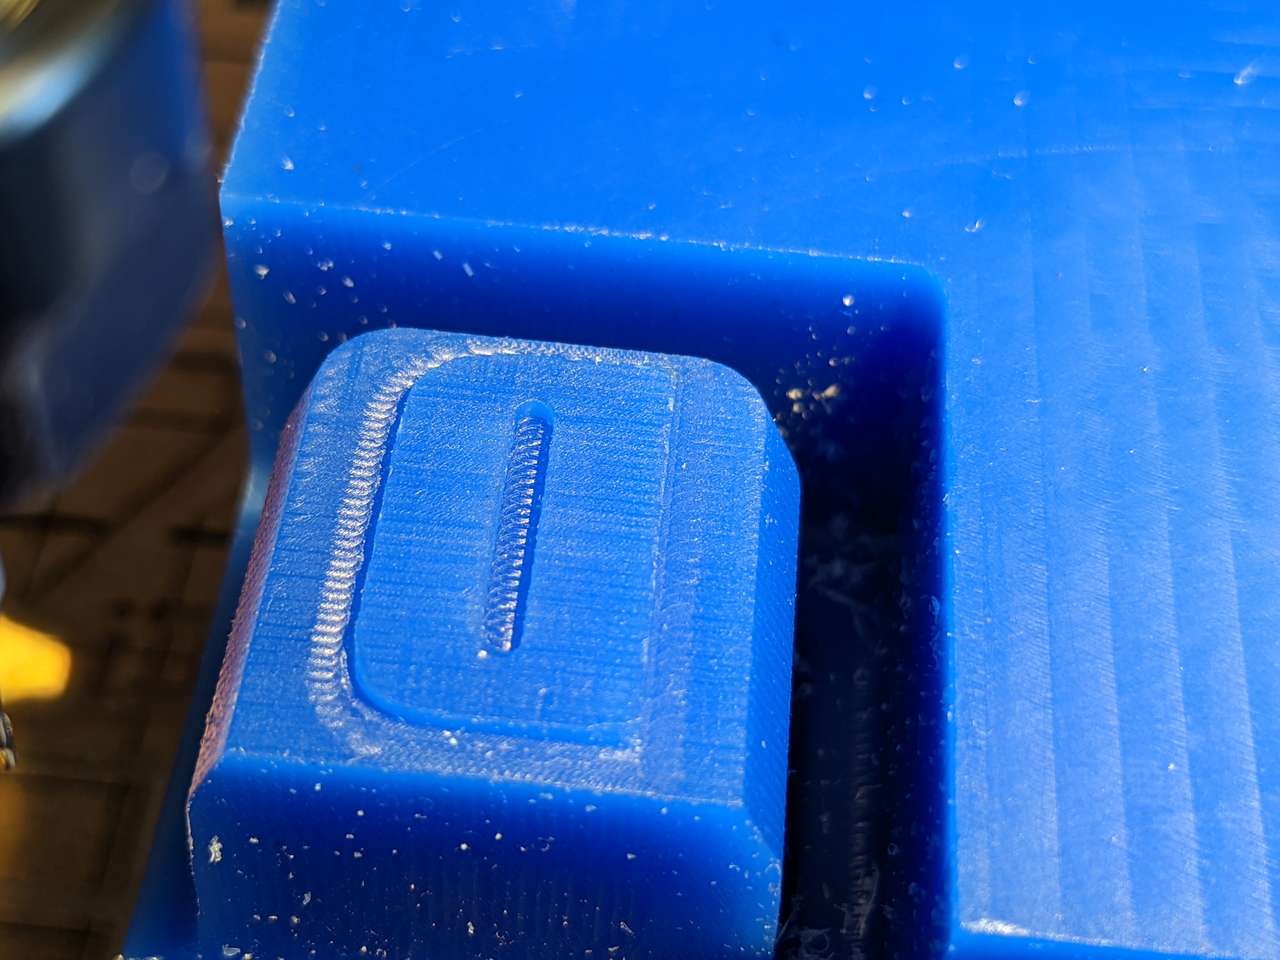 D side action done!
 N & M side actions done!
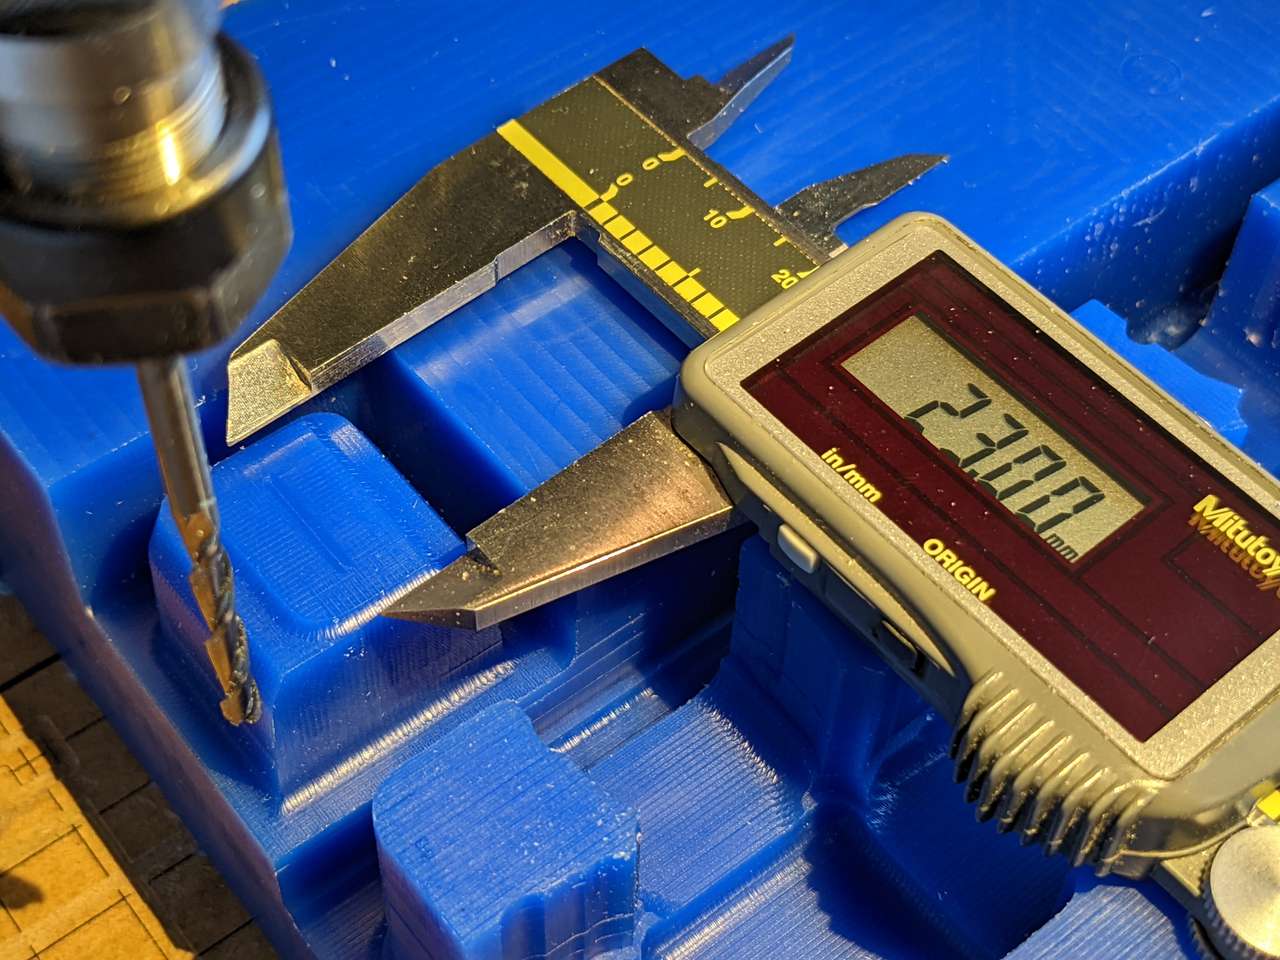 Measure to make sure the side actions will fit properly, in this case the D side action and my first mold base somehow got scaled down and I had to re-cut again.
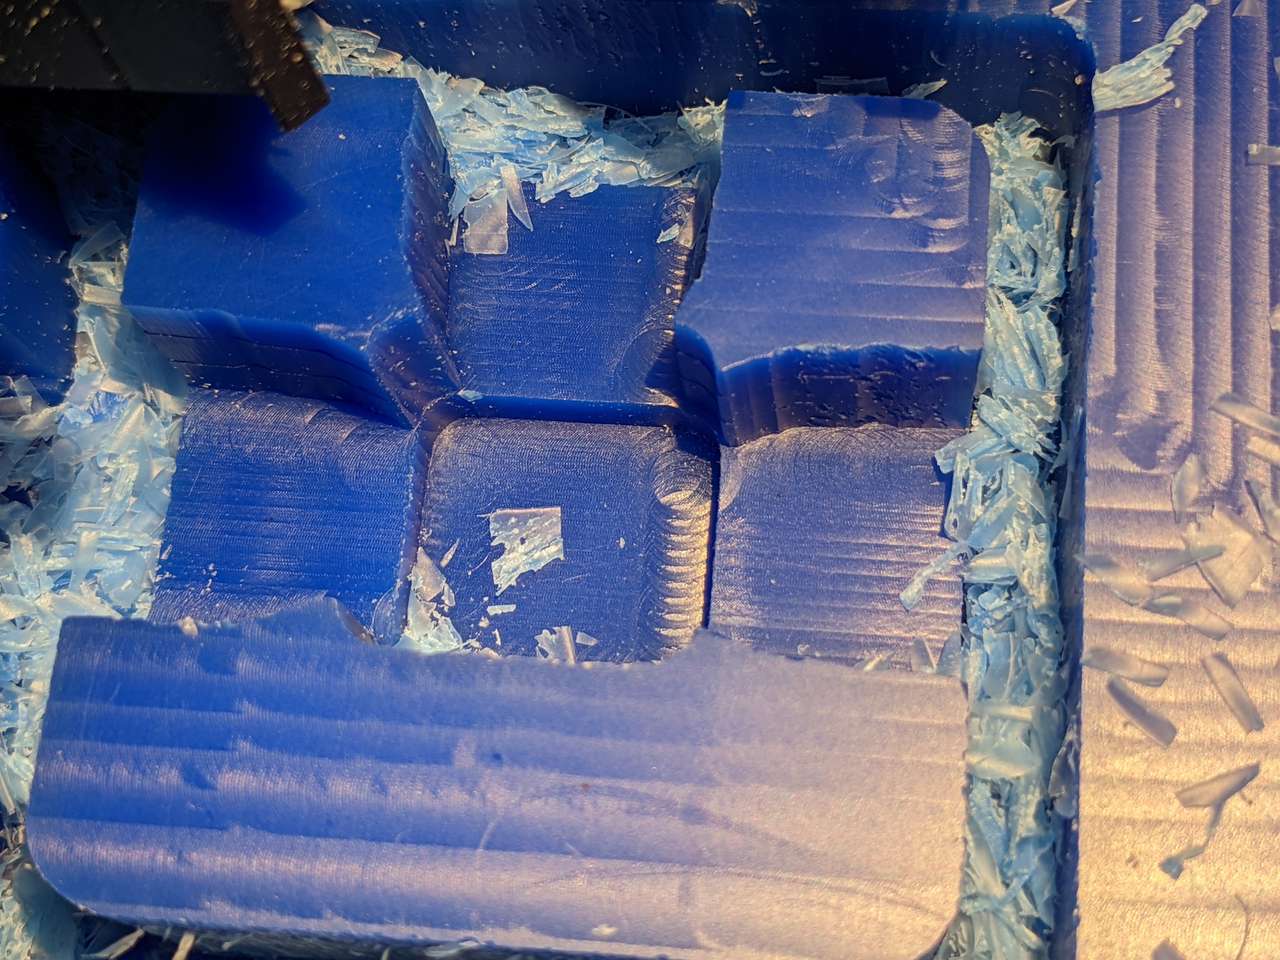
 All done milling, now to free all these part from the wax block.
 Tool paths to onion skin wax block from back side.
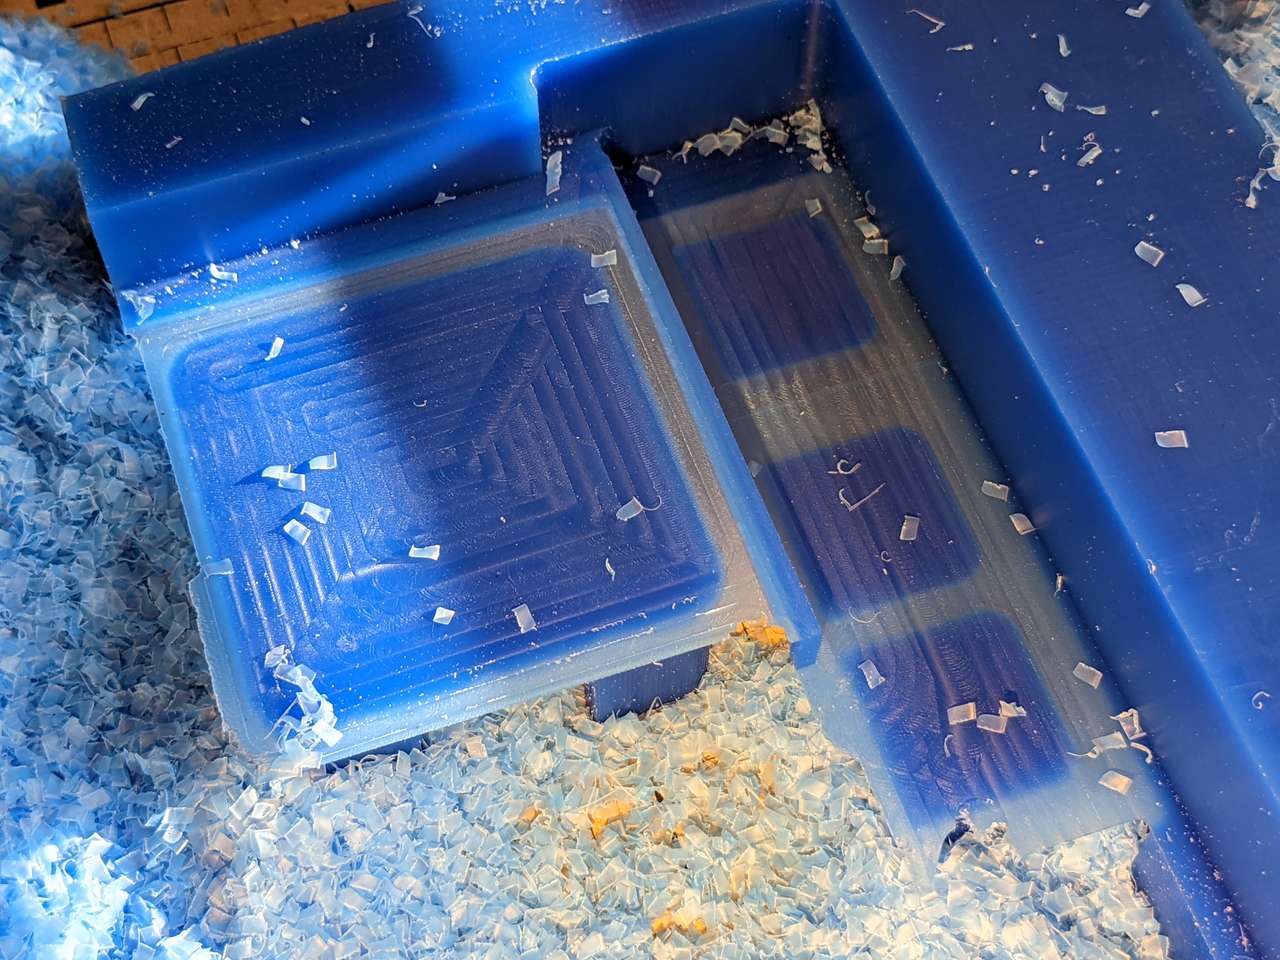 onion skin!
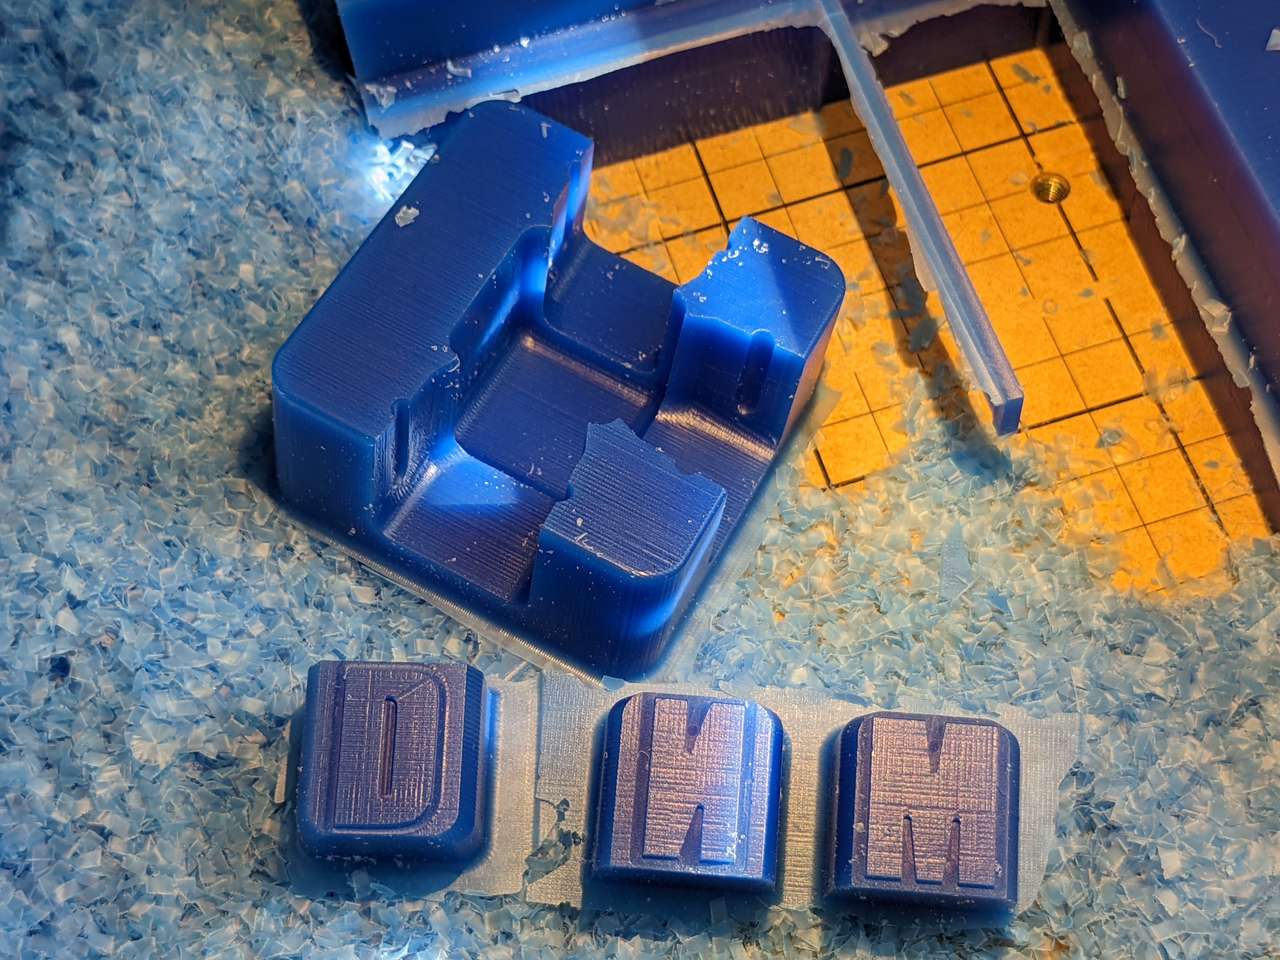 Parts are free!

 The side actions fit quite well!
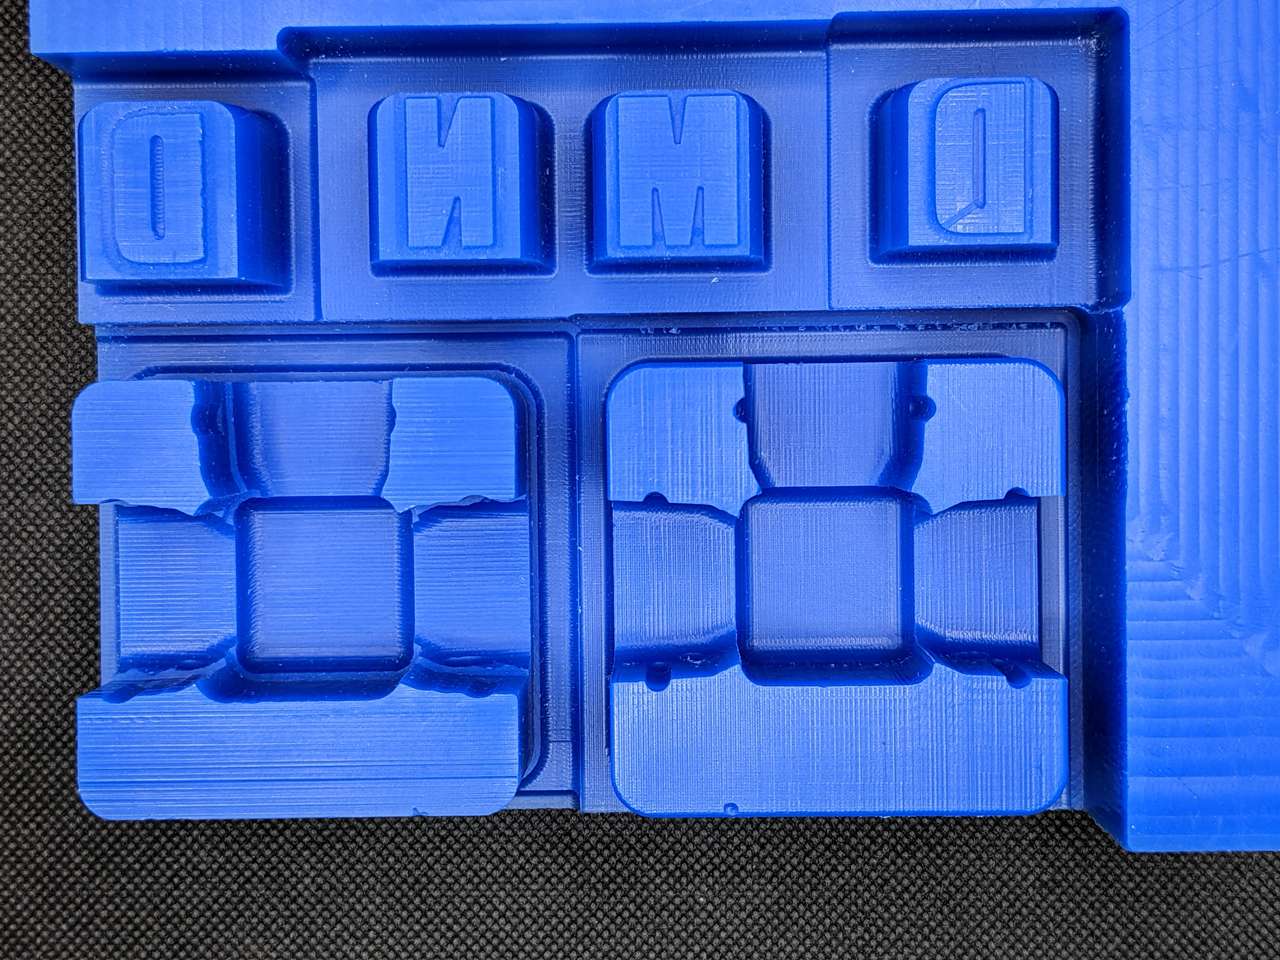
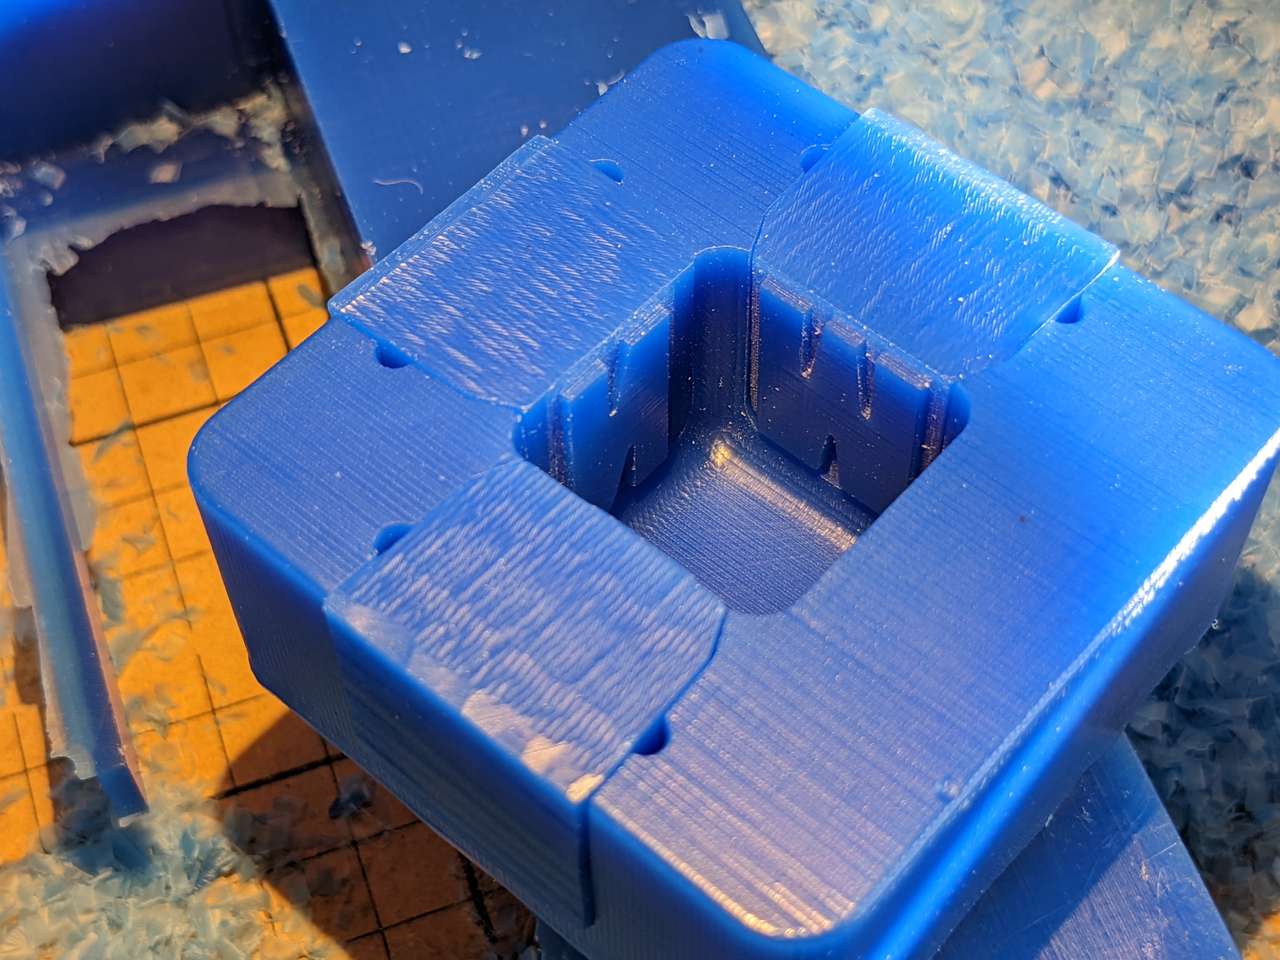
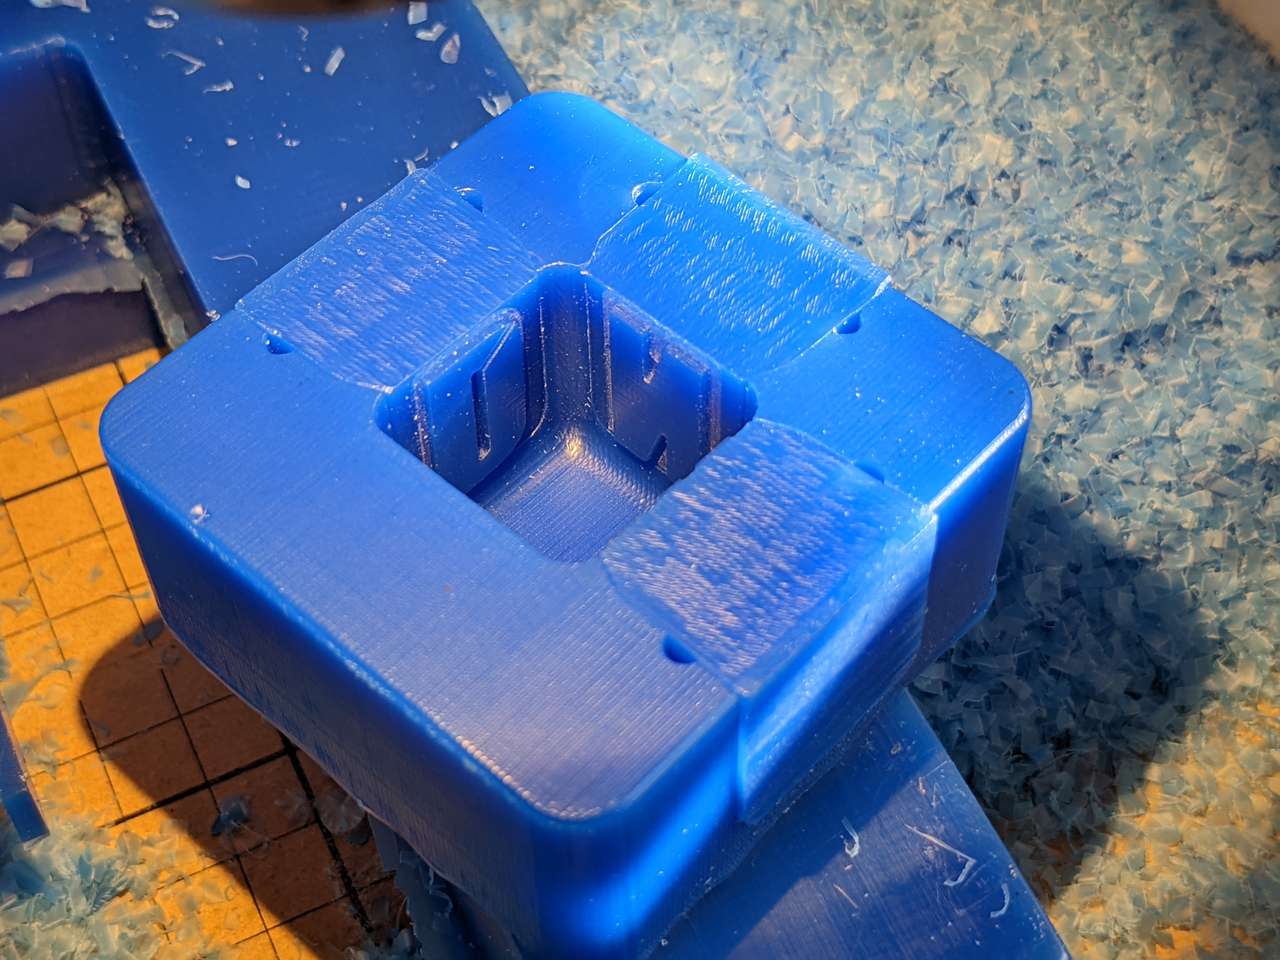 Finished mold ready for resin casting!
Resin Casting
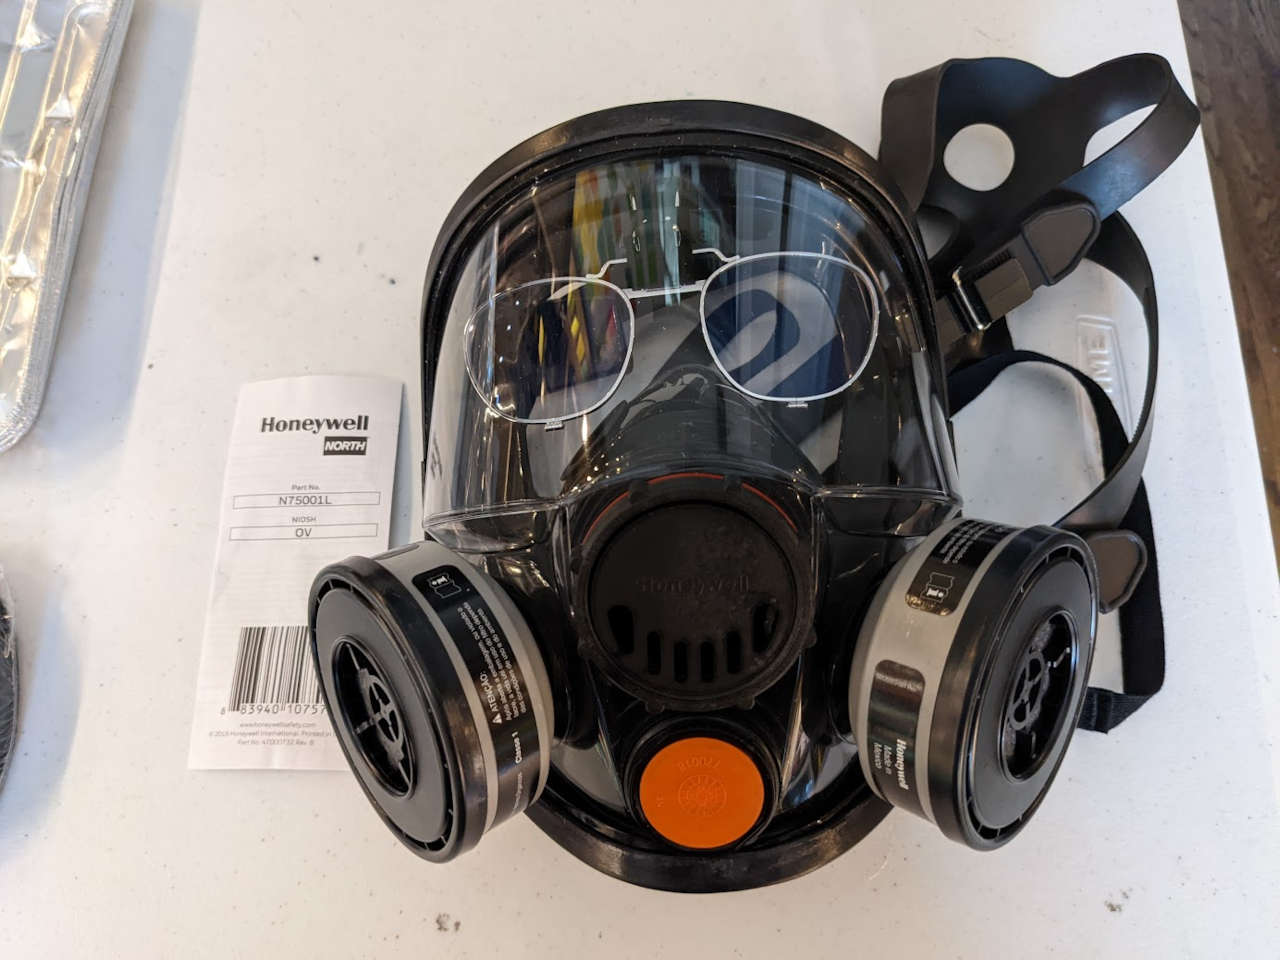 Safety first! I highly recommend the Honeywell 7600 Full Facepiece Respirator. I wear glasses the 7600 has prescription lens adapters available. You can wear this respirator for over 8 hours at a time with very little fatigue. It is so much more comfortable than a half face respirator.
I also wore gloves.
Pouring Resin
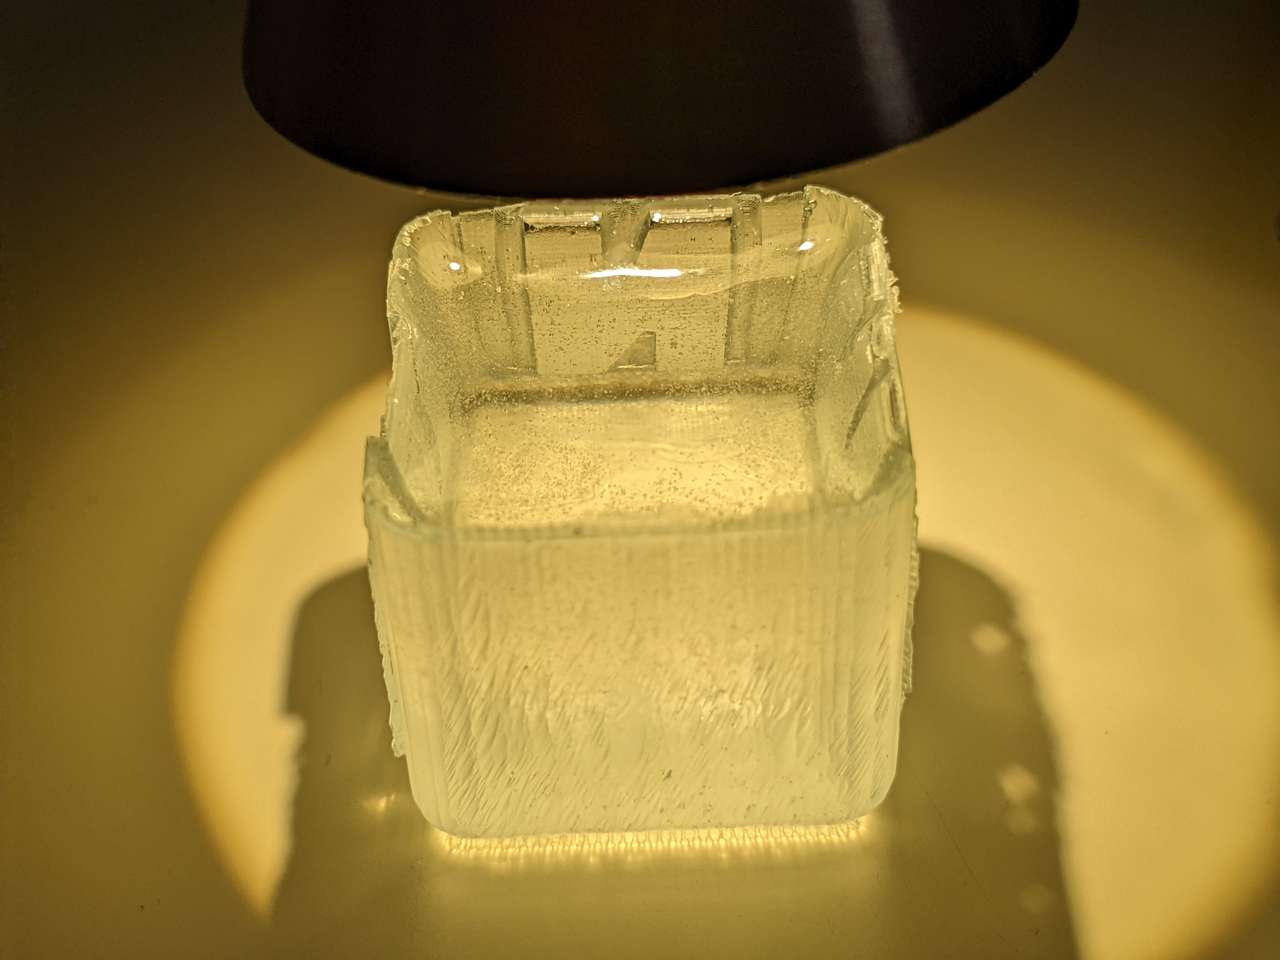
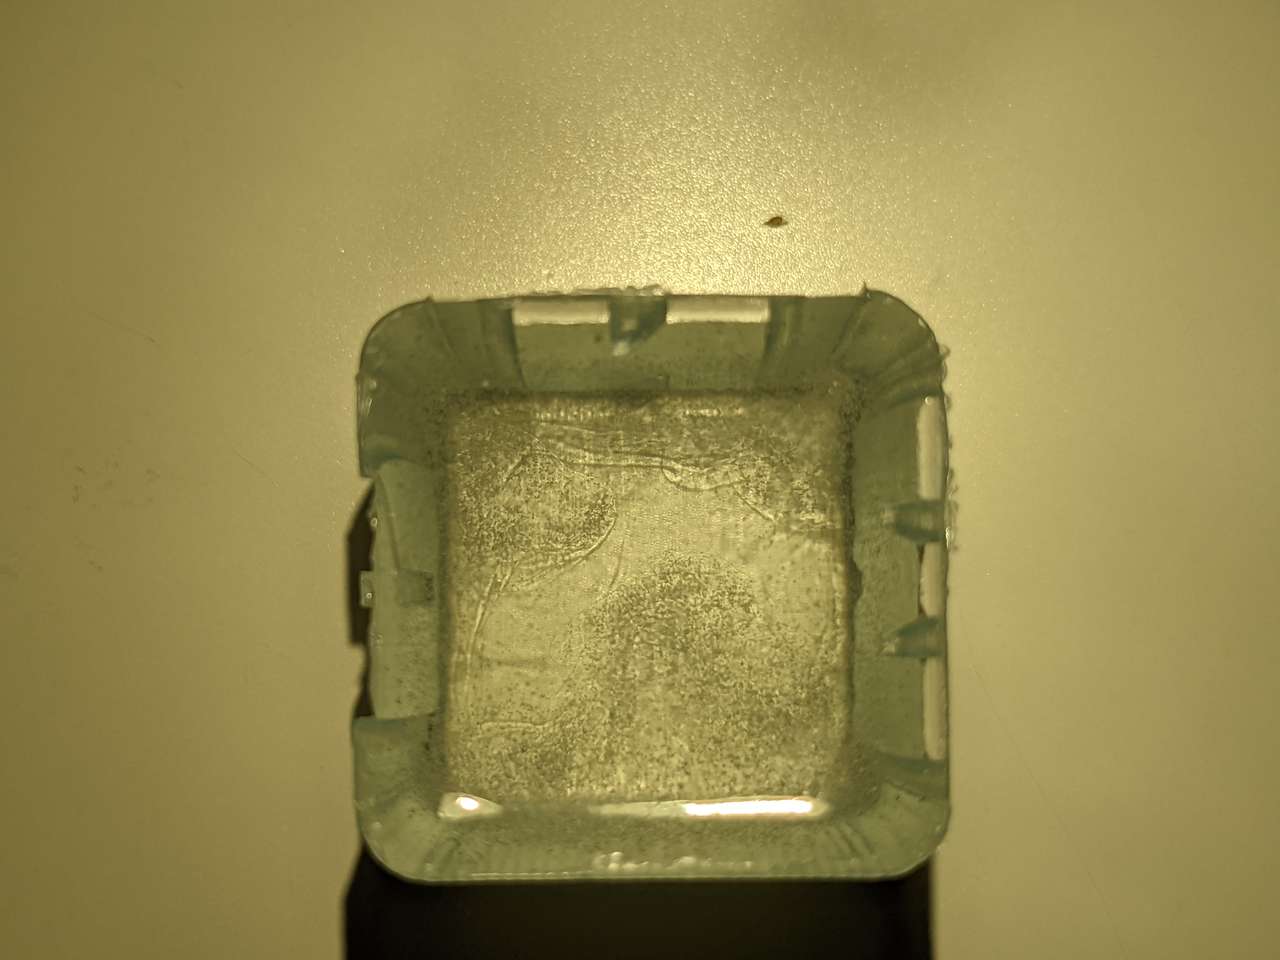
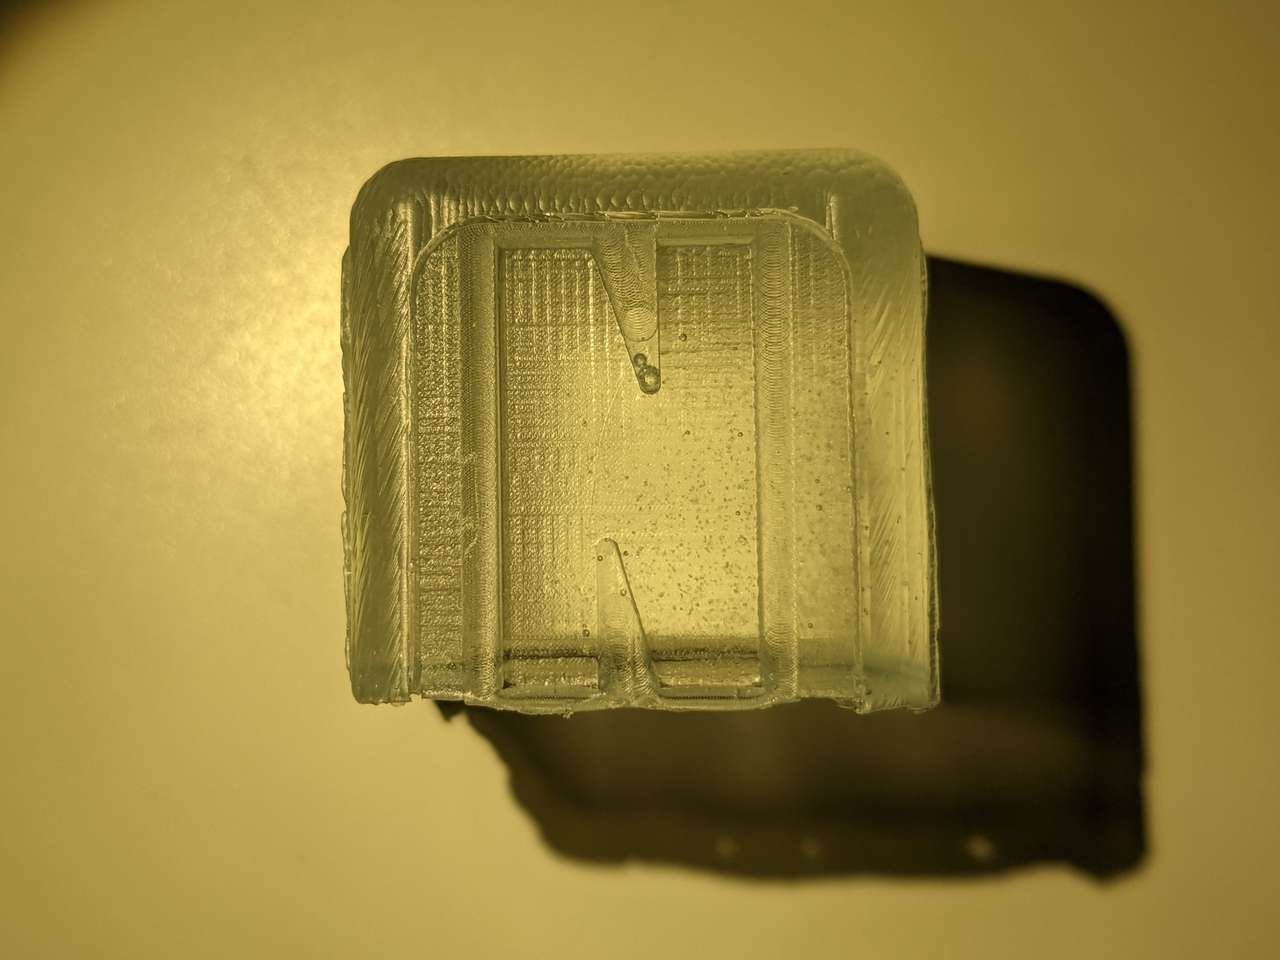
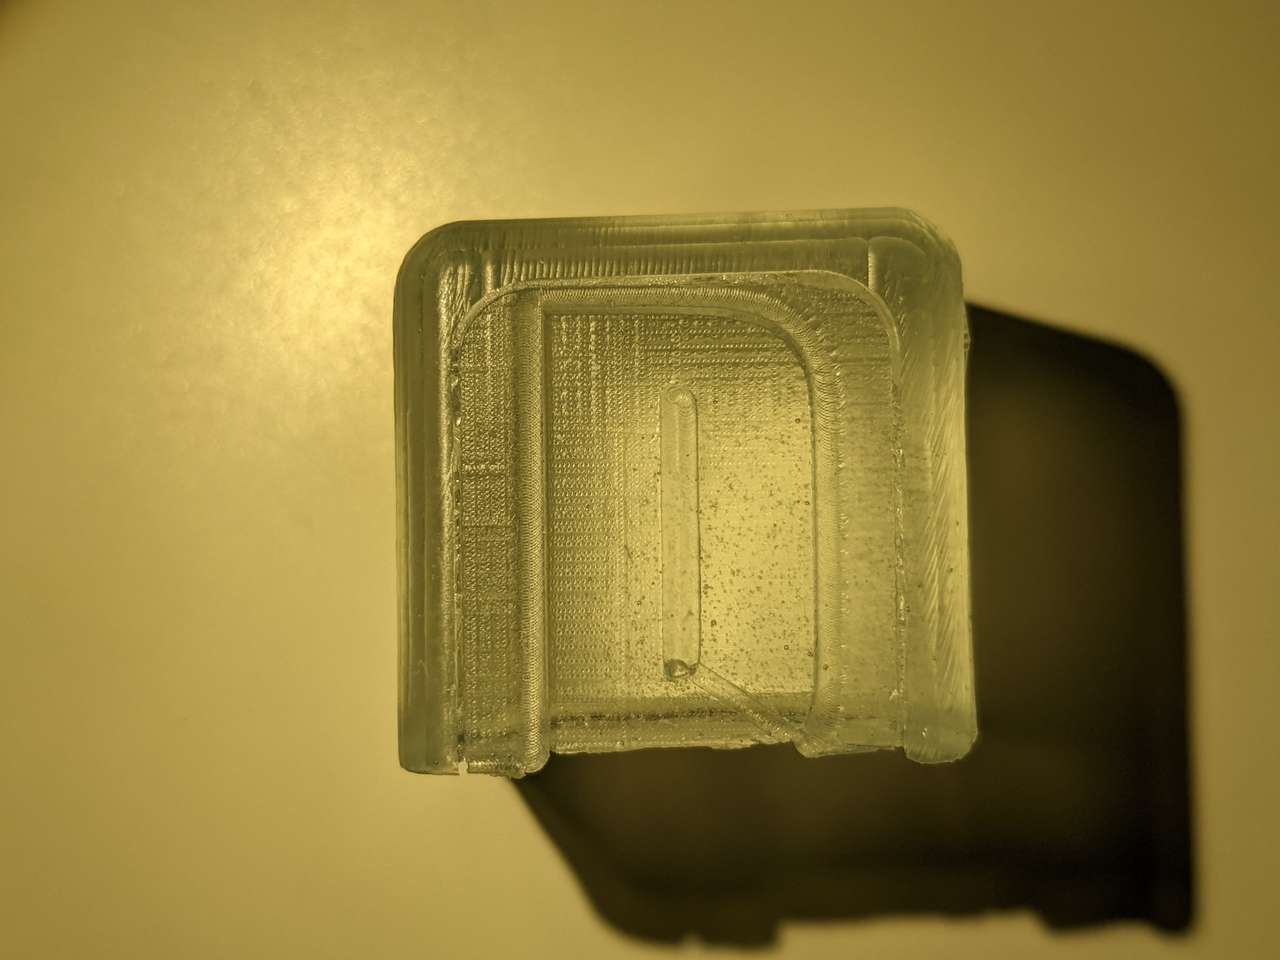
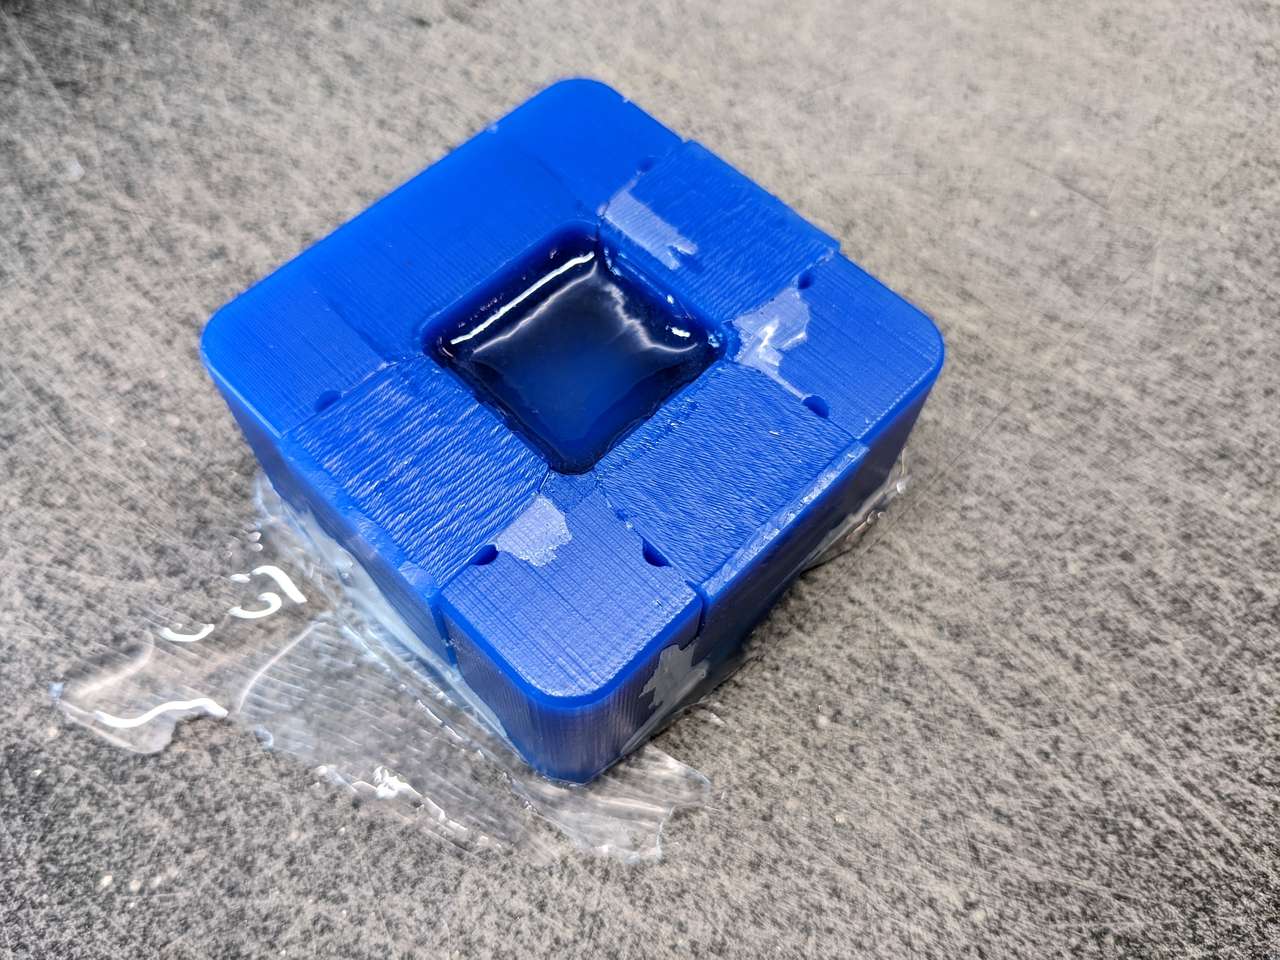 The resin became very thin durign the pour and leaked into the side action seam. I will pin the side actions for future pours. The side action even seemed to float up on the resin. This resulted in a pour a little short of the volume I wanted. In the future I will make open face molds like this with extra depth to allow for a heel of material that can be sanded and polished off later.
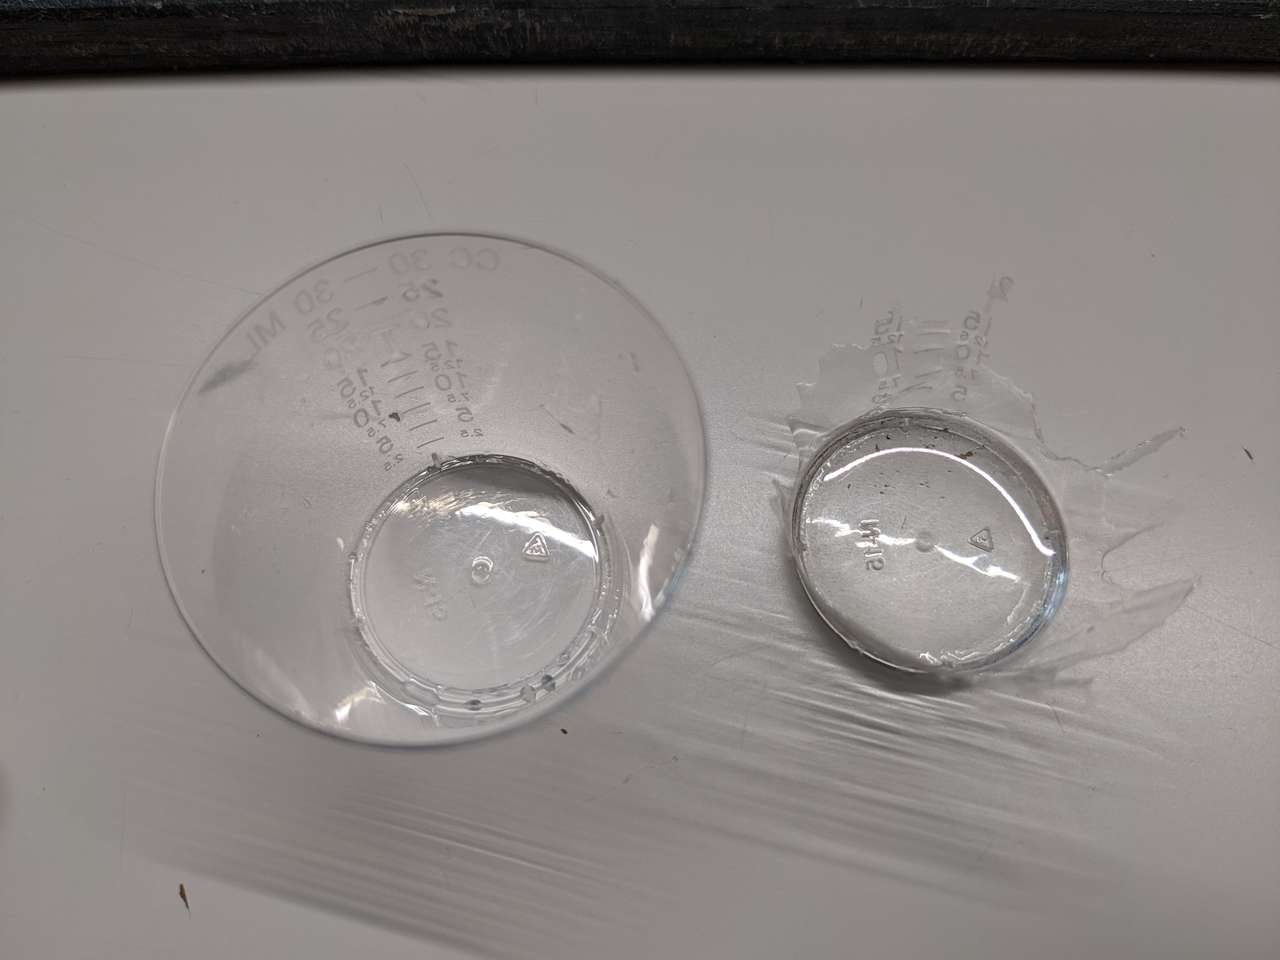 Here is the cup I used to make sure I used exactly a 50/50 ratio. I stirred the mix slowly for 3 minutes scrapping the sides as recommended.
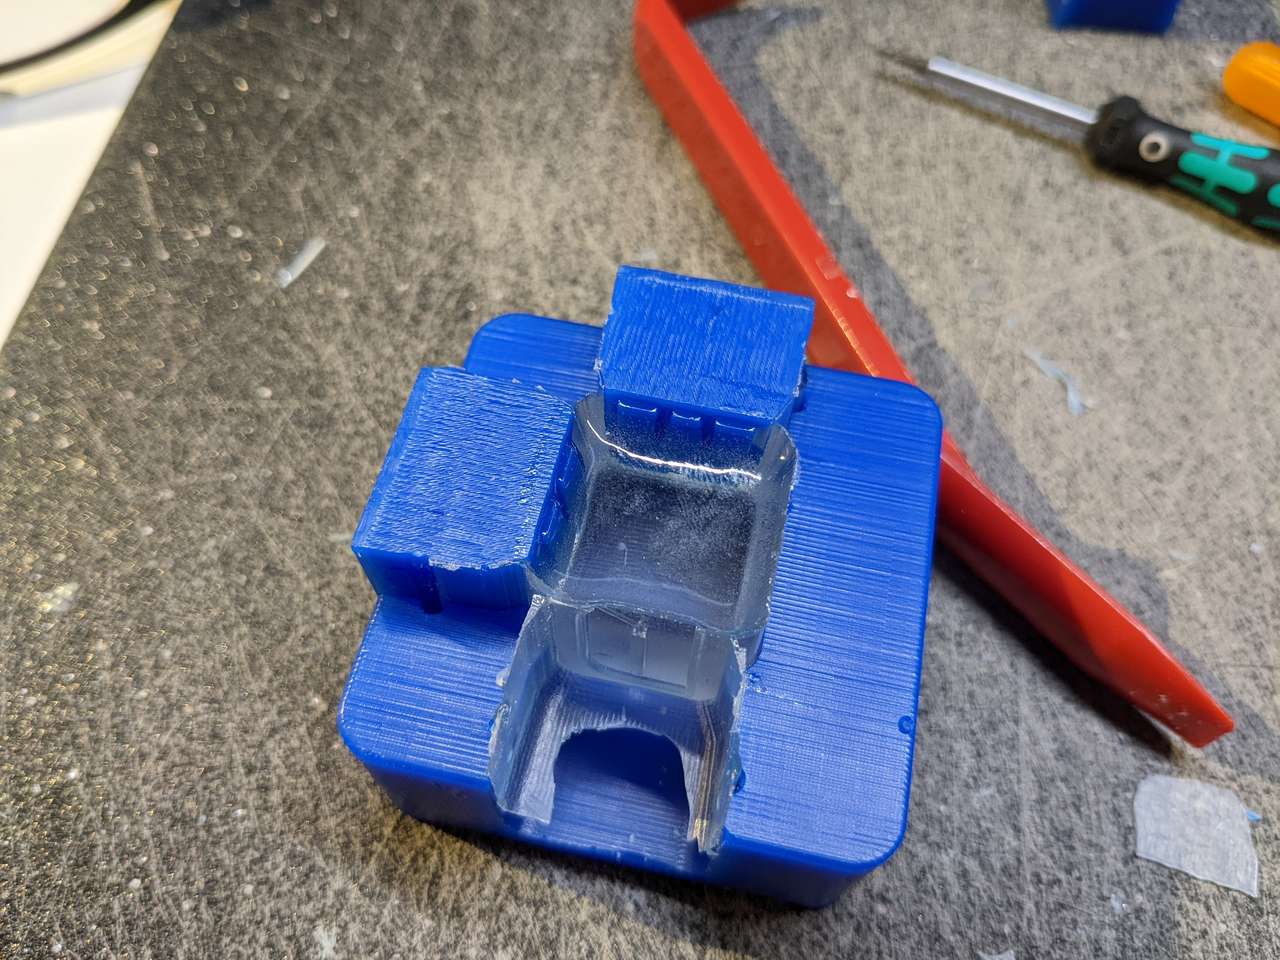
Removal from mold
 It was very hard to remove the side actions since the resin had leaked into the seams. I will coat the side action seams with release spray in the future. I slowly pried all three side actions upward evenly, working my way around the mold.
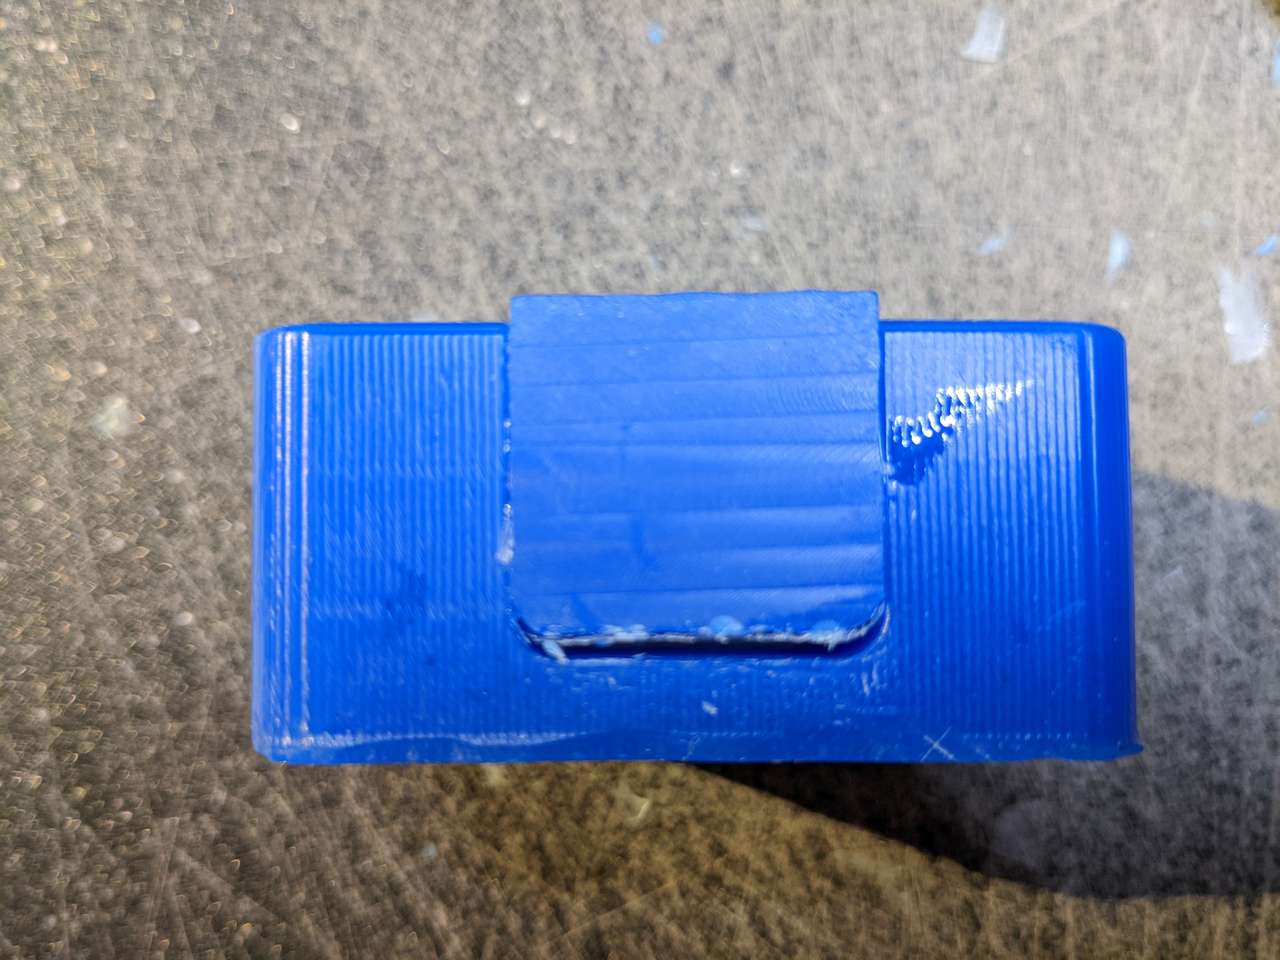
 I then wiggled the D side action loose!
 Then I proceeded to side the cube up with the other two side actions riding along.
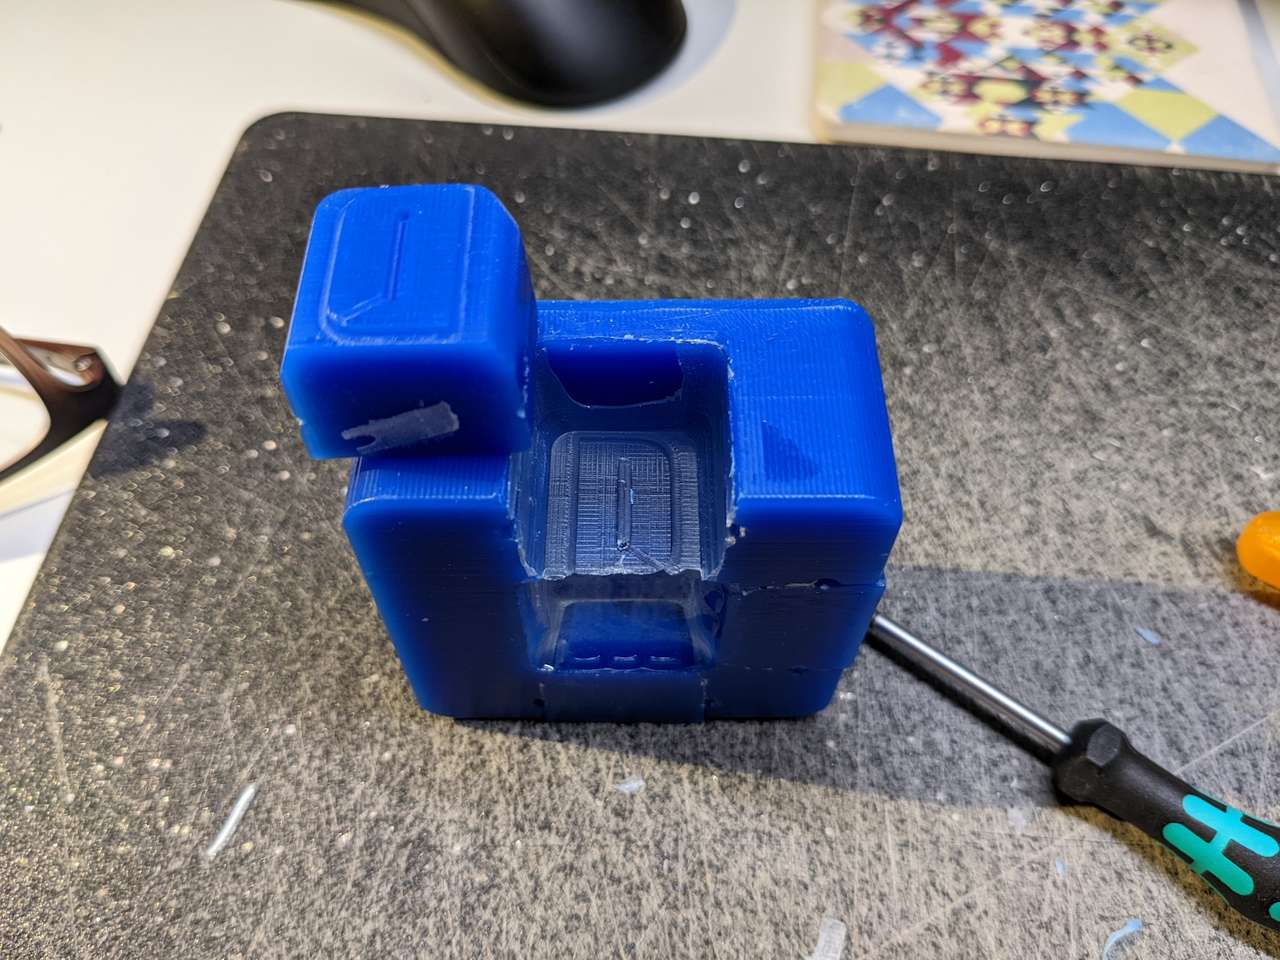
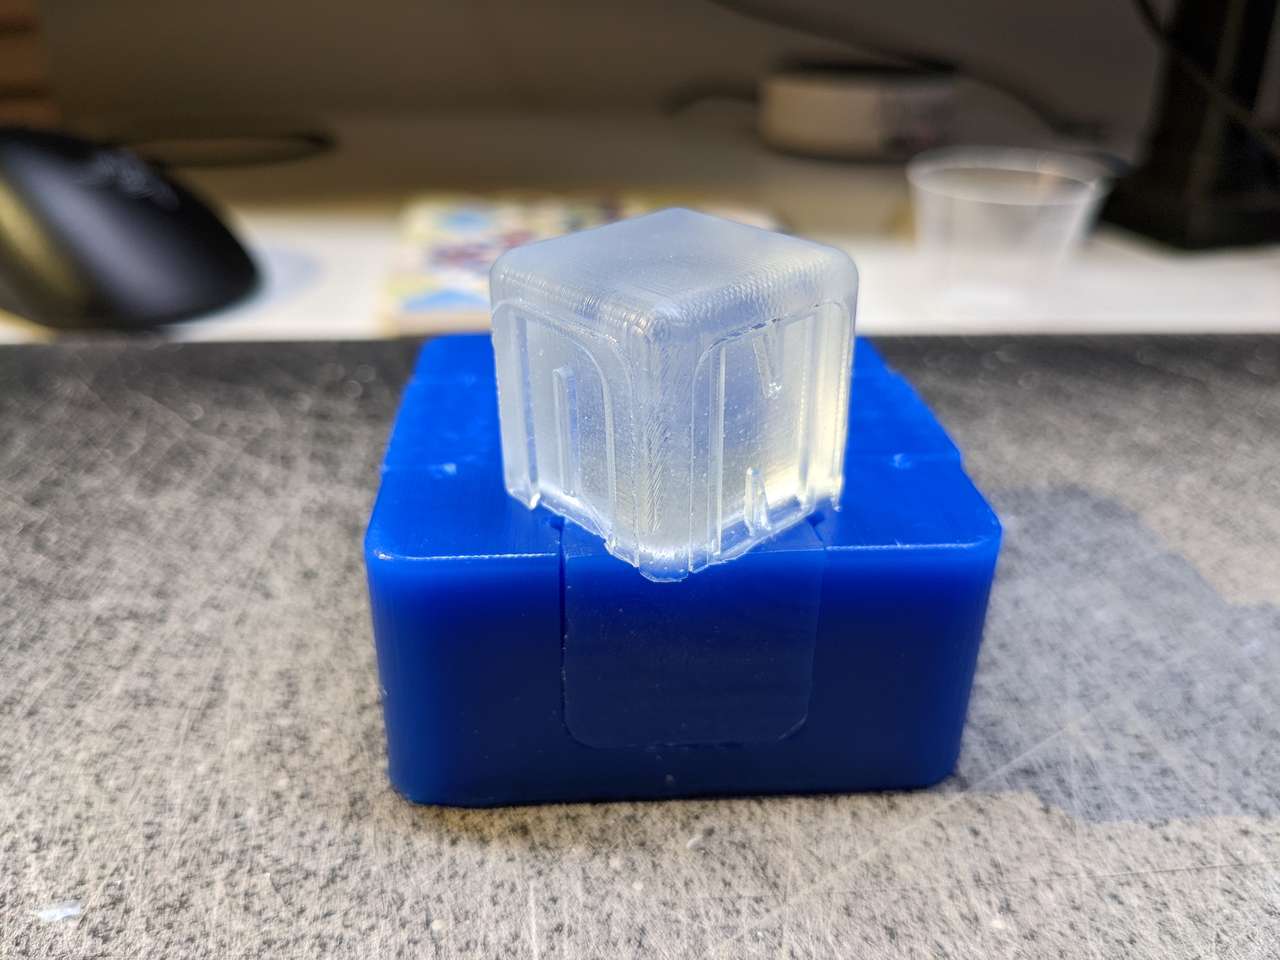 I then wiggled the two remaining side actions out of the block! DN view.
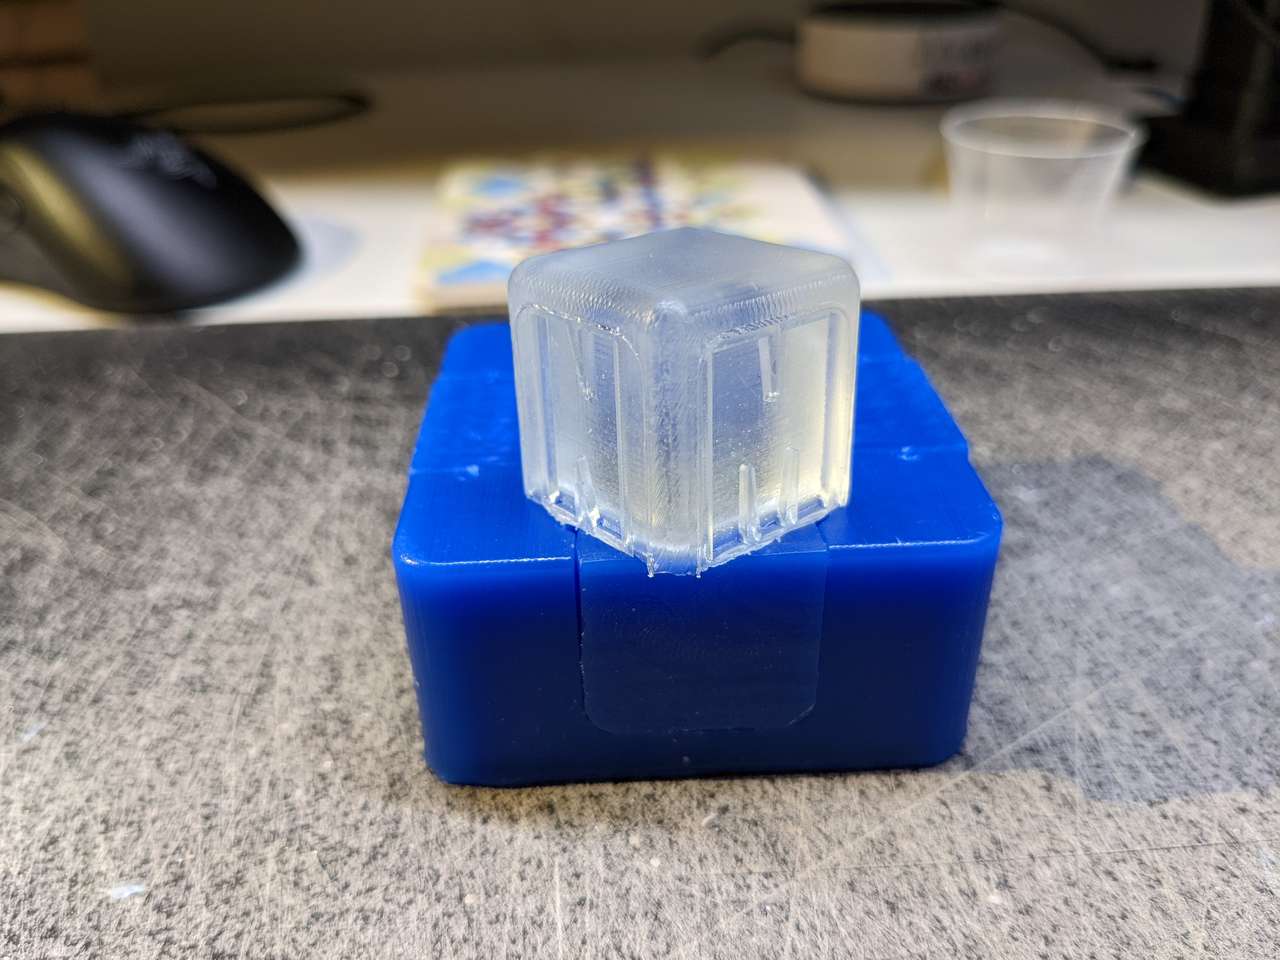 NM View.
Boy that was a pain in the ass getting the side actions free. I learned a lot thought and will make improvements to my next mold design.
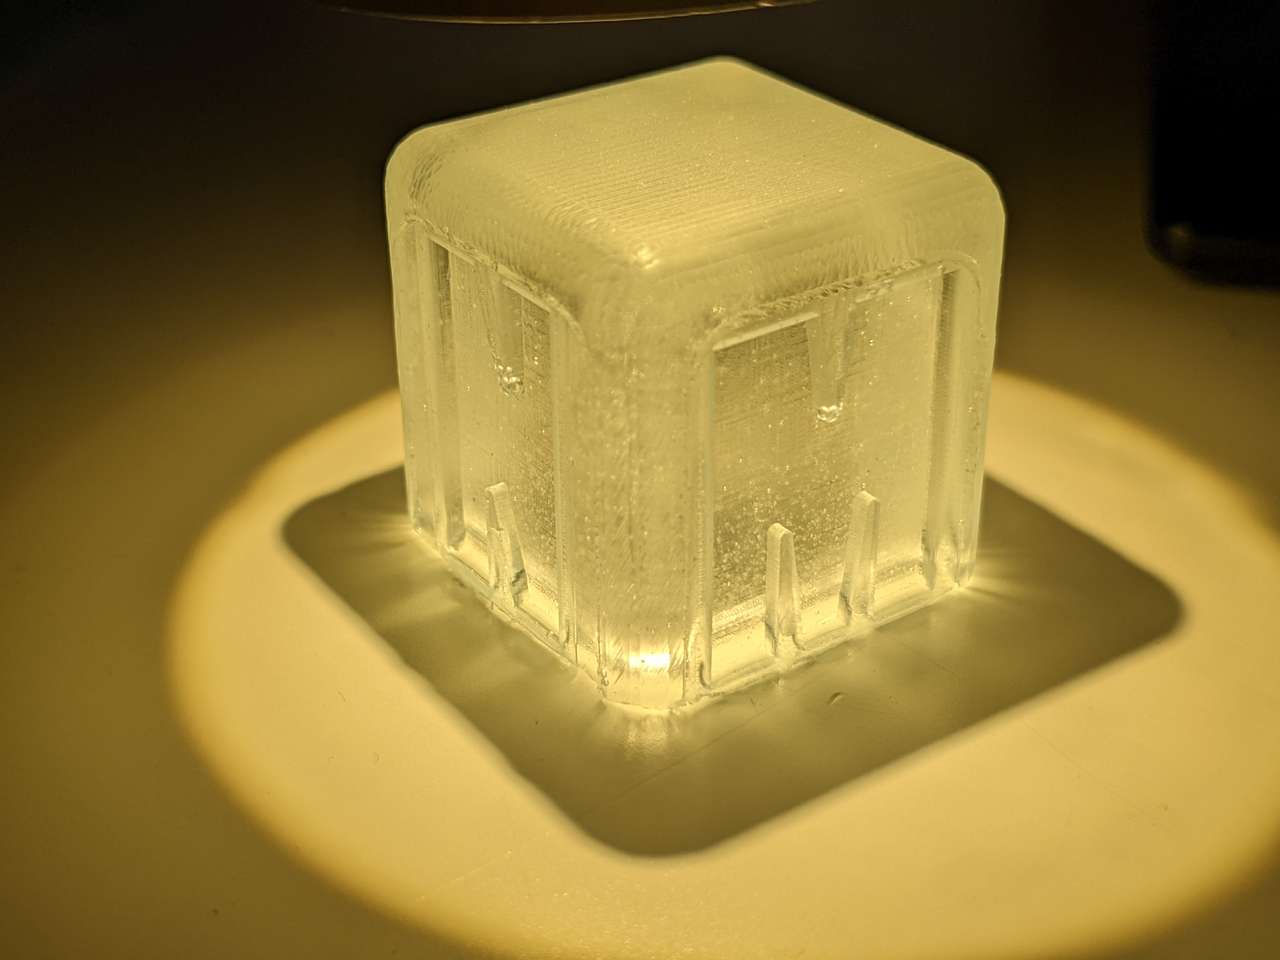
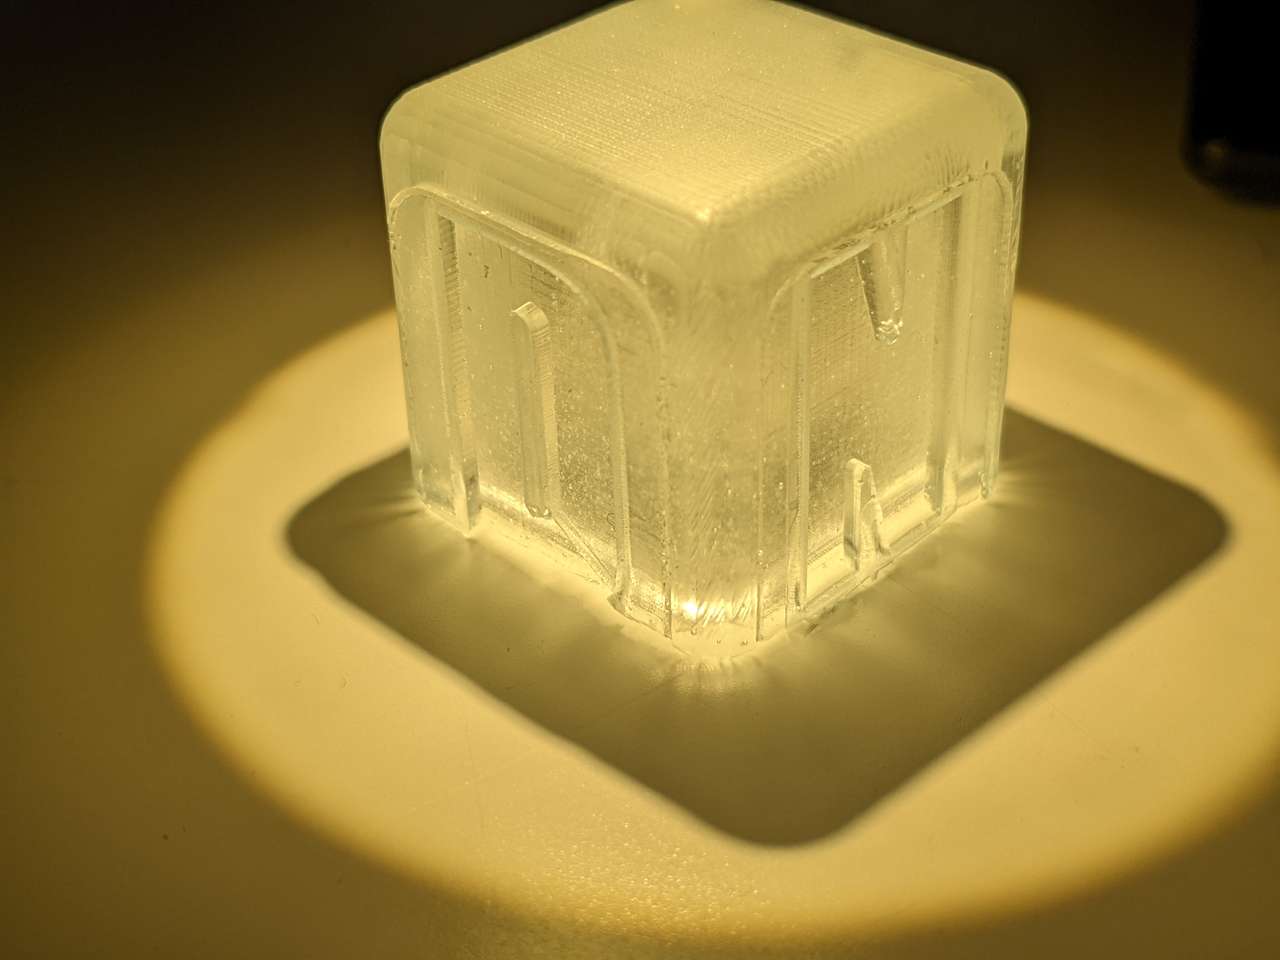
Hero Shots
Wow! The final part is cool looking!