16. Wildcard week
My wildcard week is a mashup of projects based on previous assignments, but were typically growing to far beyond the scope of meeting the assignment criteria (spiraling too wide). Or in other words the projects here were beyond the constraints of the assignment I set for myself as a project manager. To complete my assignments and graduate in 2022, I found it best to stop and switch to simpler and faster processes.
However, the wider scope of several projects were still of value and great interest to me. Some of the wider ranging projects were moved here to wildcard week her and others were moved to my Projects section of my site.
Assignment
Task: Wildcard Week
Design and produce something with a digital fabrication process (incorporating computer-aided design and manufacturing) not covered in another assignment, documenting the requirements that your assignment meets, and including everything necessary to reproduce it. Possibilities include but are not limited to wildcard week examples.
My plan to complete the assignment
- CAD: Design a part to cast in ZA-12 Zinc Aluminum Alloy with a hollow undercut core
- CAD: Design a double sided pattern to create a sand mold
- CAD: Design a two part core box to form a sand core, to core out the center of the spherical part
- FAB: 3D Print core box parts in PLA
- FAB: 3D Print the two patterns in PLA
- FAB: Mount the pattern on a pattern plate
- Mold Making: Make the sand mold and core with the Foundry in a Box kit
- Cast: Cast the parts from ZA-12 Zinc Aluminum Alloy
- Try casting with CerroTru low temperature bismuth metal alloy
Technical info and SDS
Tin 99.9%
Although I did not use tin to cast my parts here, tin is the metal to try first. Especially if you are new to making sand molds and molten metal casting.
Tin Cut Wire Pieces 99.9% Pure from ROTO METALS
SDS 99.9% Tin Metal
Properties
- Melting point: 232°C (450°F)
- Density: 7.31 g/cm³ (0.264 lb/in³)
- Young’s Modulus: 50 GPa (7,251,887psi)
Safety
- Skin irritation or corrosion: May cause irritation
- Eye irritation or corrosion: May cause irritation
Safety
ZA-12 Zinc Aluminum Alloy
ZA-12 Technical Data Sheets and SDS
Properties
- Melting Range: 377-423°C (710-810°F)
- Casting Temp: 460 - 490 °C (860 - 914 °F)
- Density: 6.0 g/cm³ (0.218 lb/in³)
- Young’s Modulus: 83.0 GPa (12000 ksi)
The SDS sheet for ZA-12 includes an excellent section on handling in the molten state. The Tin SDS sheet above neglects to cover the molten state of Tin and the directions below should be followed if melting Tin. Some foundry people disagree and say tin is safer than Zinc. I disagree Tin does melt at lower temperature, but because of this it sticks to surfaces the same as zinc does. Steam explosions in Tin would only be slightly less powerful than Zinc.
Safety
- After inhalation: After inhalation of fume: Remove the victim into fresh air: Respiratory problems: consult a doctor/medical service
- Skin contact: In case of burns: Wash immediately with lots of water (15 minutes)/shower; Remove clothing while washing; Do not tear off solidified product from the skin; Do not remove clothing if it sticks to the skin; Cover wounds with sterile bandage
- Consult a doctor/medical service
- If burned surface > 10% of body, take victim to hospital Eye contact: Rinse immediately with plenty of water for 15 minutes
- Take victim to an ophthalmologist
- Fire-Fighting Measures
- Suitable extinguishing media: Use an extinguishing agent suitable for the surrounding fire. Typically, apply dry chemical, dry sand, or special powder extinguishing (Class D) media. Do NOT use water, carbon dioxide or foam on molten metals. Water may be ineffective for extinguishing a fire but should be used to keep fire exposed billets, ingots and castings cool.
- Unsuitable extinguishing media: If molten: no water
- Special exposure hazards: On burning formation of metallic fumes (zinc oxide) In molten state: violent to explosive reaction with water (moisture)
- Instructions: Dilute toxic gases with water spray. In case of metal bath fire: add metal blocks. When cooling/extinguishing: no water in the substance
- Special protective equipment for fire-fighters: Gloves; Protective clothing Heat/fire exposure: compressed air/oxygen apparatus.
- Accidental Release measures
- Respiratory protection from dust production: dust mask
- Hand protection: gloves
- Eye protection: safety eyewear
- Skin protection: protective clothing
- Environmental precautions: Within the present knowledge of the supplier, this product is not regarded as hazardous waste, as defined by EU Directive 91/689/EEC.
- Methods for cleaning up: If melted: allow liquid to solidify before taking it up
- Pick up the material; wash clothing and equipment after handling
- Exposure controls:
- Carry out operations in well ventilated areas or with respiratory protection
- Personal protective equipment:
- Respiratory protection from dust production: dust mask
- Hand protection: gloves; on heating: insulated gloves
- Eye protection: safety eyewear; on (re)melting: face shield & goggles/safety glasses
- Skin protection: protective clothing; on (re)melting: heat resistant clothing, safety footwear
These are serious issues, on the other hand with proper planning and equipment casting molten metal in sand molds can be made safe and is incredibly rewarding. Keep in mind the most serious risk is only during heating, melting and pouring of of the metal. Making the mold, packing sand around a pattern of your own design is fun and very safe.
Dan’s Foundry Safety
To protect myself from molten tin, zinc and aluminum alloy hazards I do the following:
- Wear a high temperature hard hat with wire mesh face shield.
- Wear a respirator if you are melting metals such as tin, zinc, lead, or bismuth, if they overheat they can vaporize creating hazardous fumes.
- Use a PID controlled Electric Furnace to prevent overheating metals.
- Wear safety glasses under the face shield
- Wear full body leathers covering the front of your body completely, this includes the top of your feet all the way up to covering your neck.
- NEVER use water or other liquids in, on, or near molten metal!
- DANGER! Liquids and molten metal may mix causing violent steam explosions spraying molten metal everywhere!
- If possible use a helper with the same protective equipment mentioned above.
- Keep the work area clear of moisture, don’t work over damp floors or surfaces.
- Keep pans with and without sand in them nearby, for emergency pour out or to cover and cool spilled metal.
- Keep a fire extinguisher nearby for putting out fires started by molten metal after the metal has solidified.
- Keep others without full molten metal protective equipment on at least 25 feet away from the work area. Make sure observers have at least safety glasses on and warn them of the dangers of exploding molten metal, due to crucible drops or steam explosion.
- Plan your path from the melting area to the sand mold, make sure it is clear, plan for and actually practice your movement around doors, lids ect. with a cool crucible filled with tin cut offs. When transporting molten metal and call out “pouring molten metal, stand clear!”
- Keep the mold as close to the melting area as possible.
FOUNDRY IN A BOX
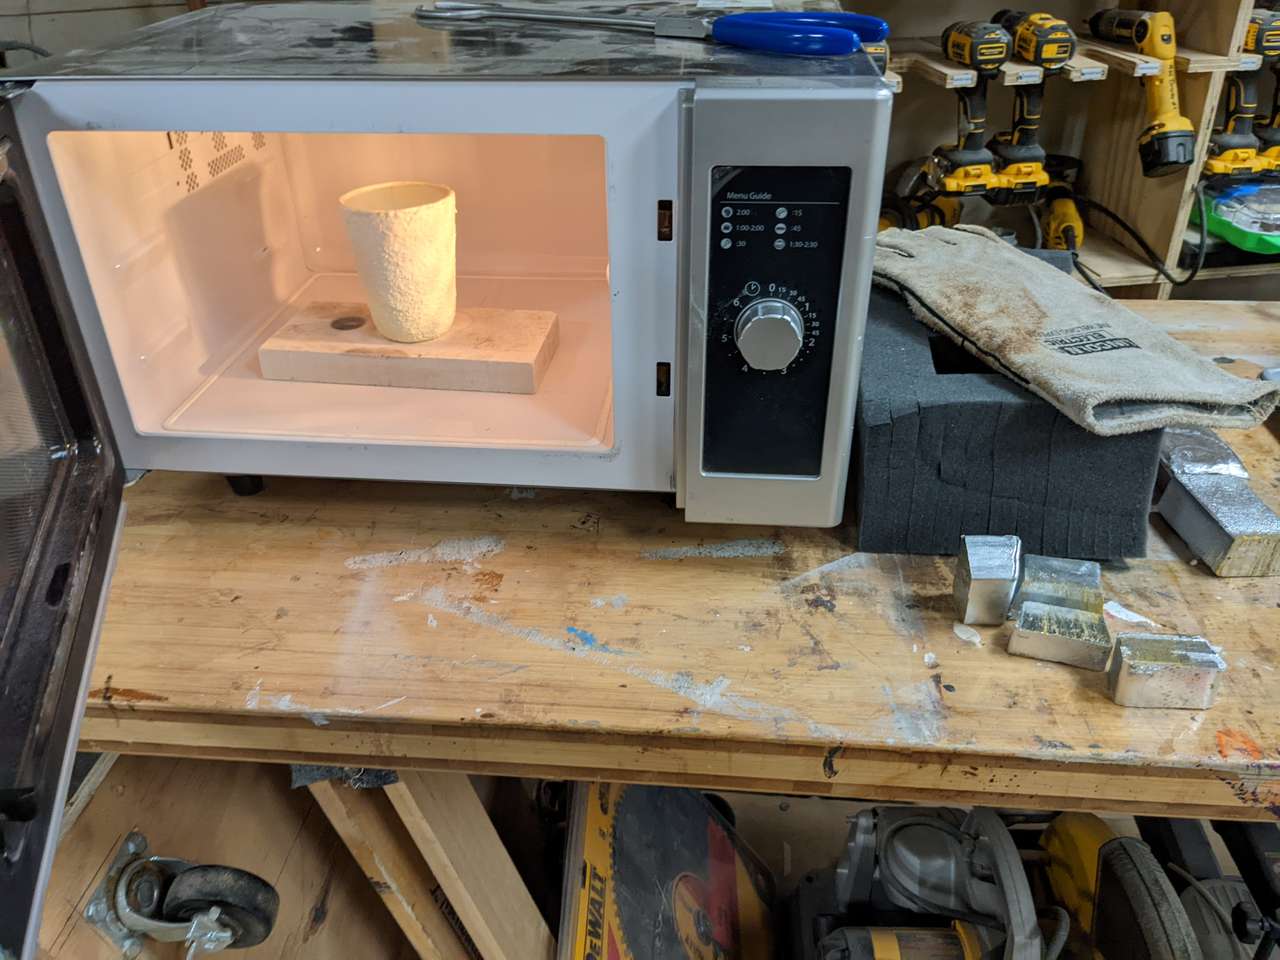
Foundry in a Box from AFS is the smokeless sand casting mold system I’ll be using to cast my parts. Local High School students in our Fab Lab use the Foundry in a Box to cast tin parts of their own design.
Above: MSI Fab Lab Science Achievers casting metal with the Foundry in a Box (Video by Colin Parsons)
I have already cast many parts in Tin. This week I will try ZA-12 Zinc Aluminum alloy. Finally I will work my way up to casting aluminum. All of these metal are able to be melted in my microwave attracting crucible that is included in the foundry in a box system.
Other ways to melt metal
LEE PRECISION Production Pot IV $77 482C (990F) 90009 model 110VAC Zinc Melting & possibly ZA-12 Alloys. Billy Buckskin Co. Hot Pot 2 $82 Tin Melting.
3KG Melting Furnace 2100W 110V $255 Same furnace below with quicker shipping. Amazon Fast Ship, 3KG Melting Furnace 2100W 110V $270
NOTE: For Graphite Crucibles. Make sure you heat your crucible to 200C-300C and hold for 15 minutes, then naturally cool before using! A laser thermometer is best to check the crucible temperature during the curing process.
Sand Casting Patterns and Core
I ended up experimenting with a the metal sand casting and making the sand molds to cast ZA-12 Zinc aluminum alloy. In retrospect this was spiraling way wider than the constraints of this weeks assignment.
I also realized my sand casting patterns and core were too large and the details I wanted were very small. This resulted in patterns that, alone, would take over 12 hours to machine. Because of this 3D Printing ended up being a much faster fab process for my Metal Earth sand mold and metal casting idea.
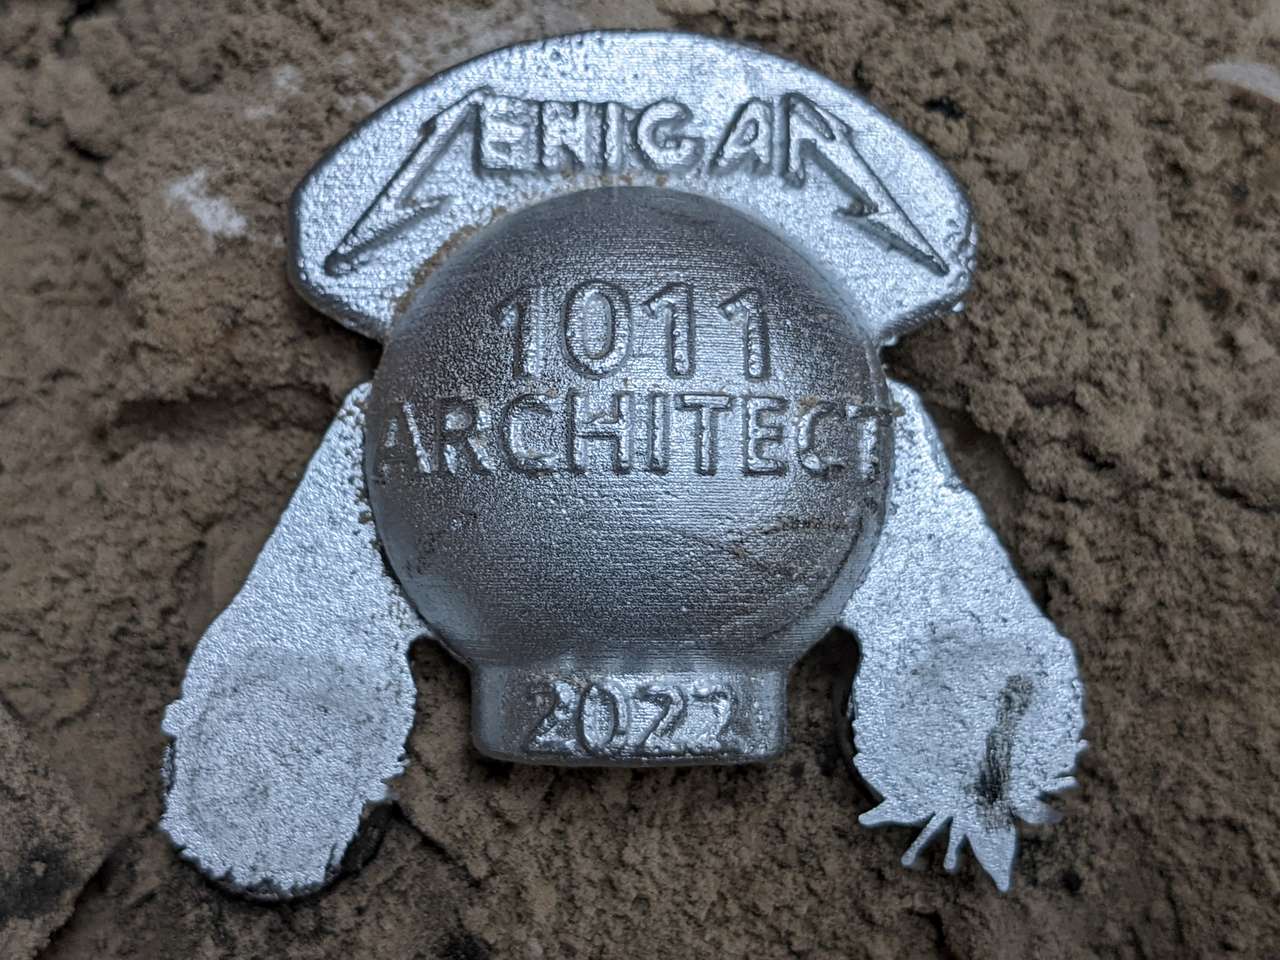
I will produce the Metal Earth patterns and core with 3D Printing.
CAD
Part design
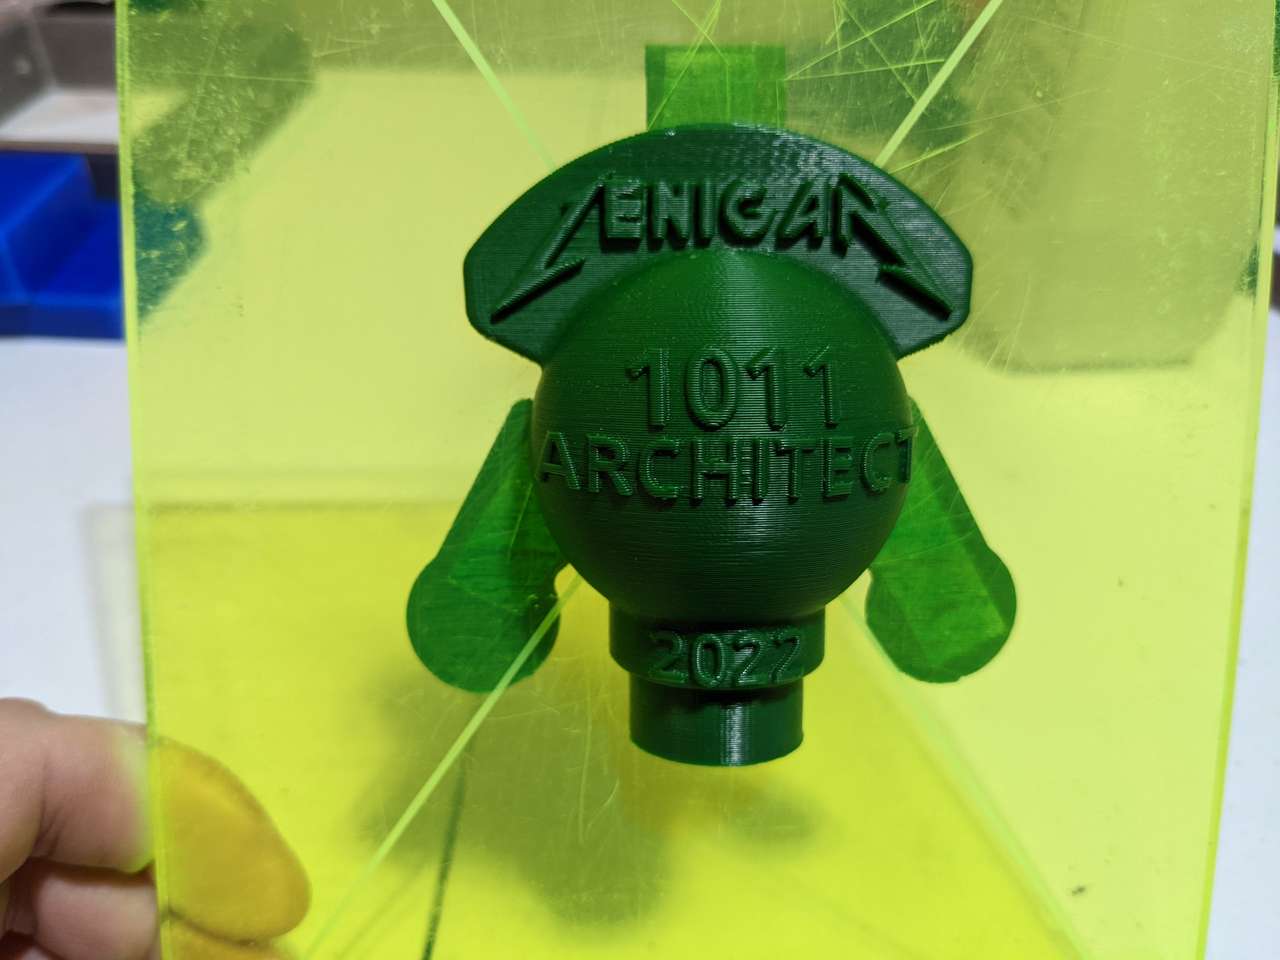
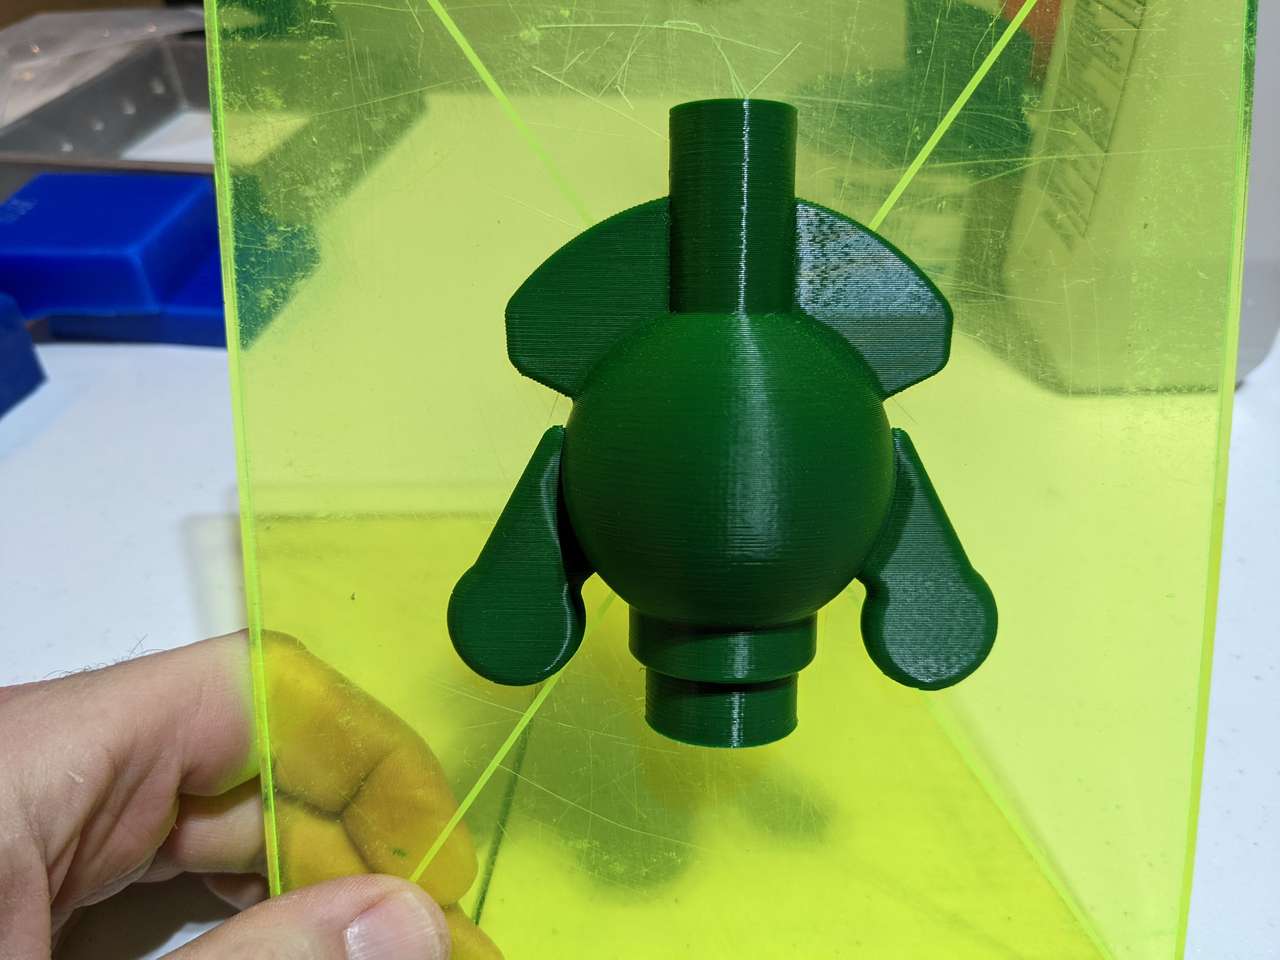
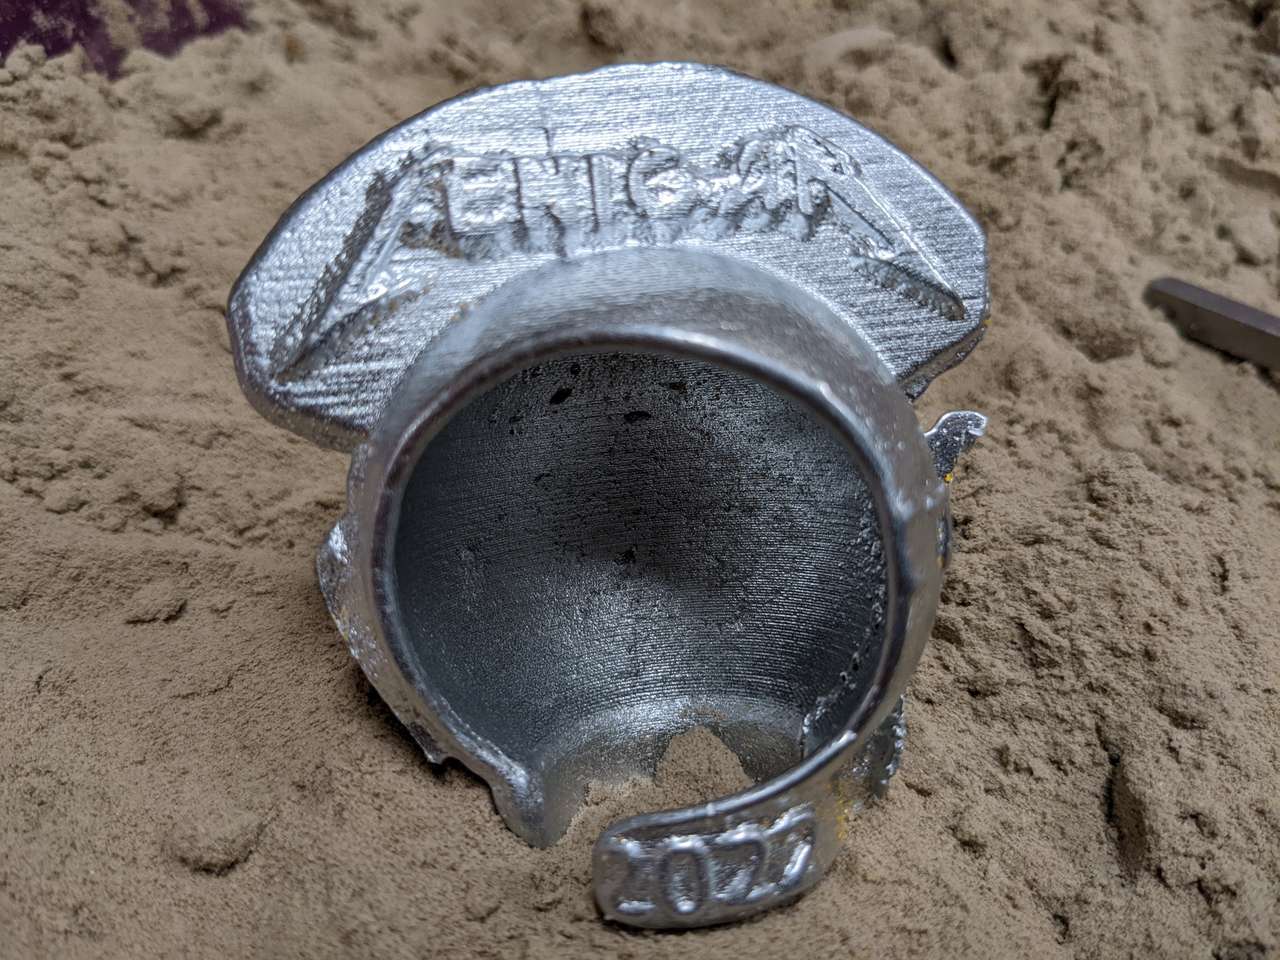
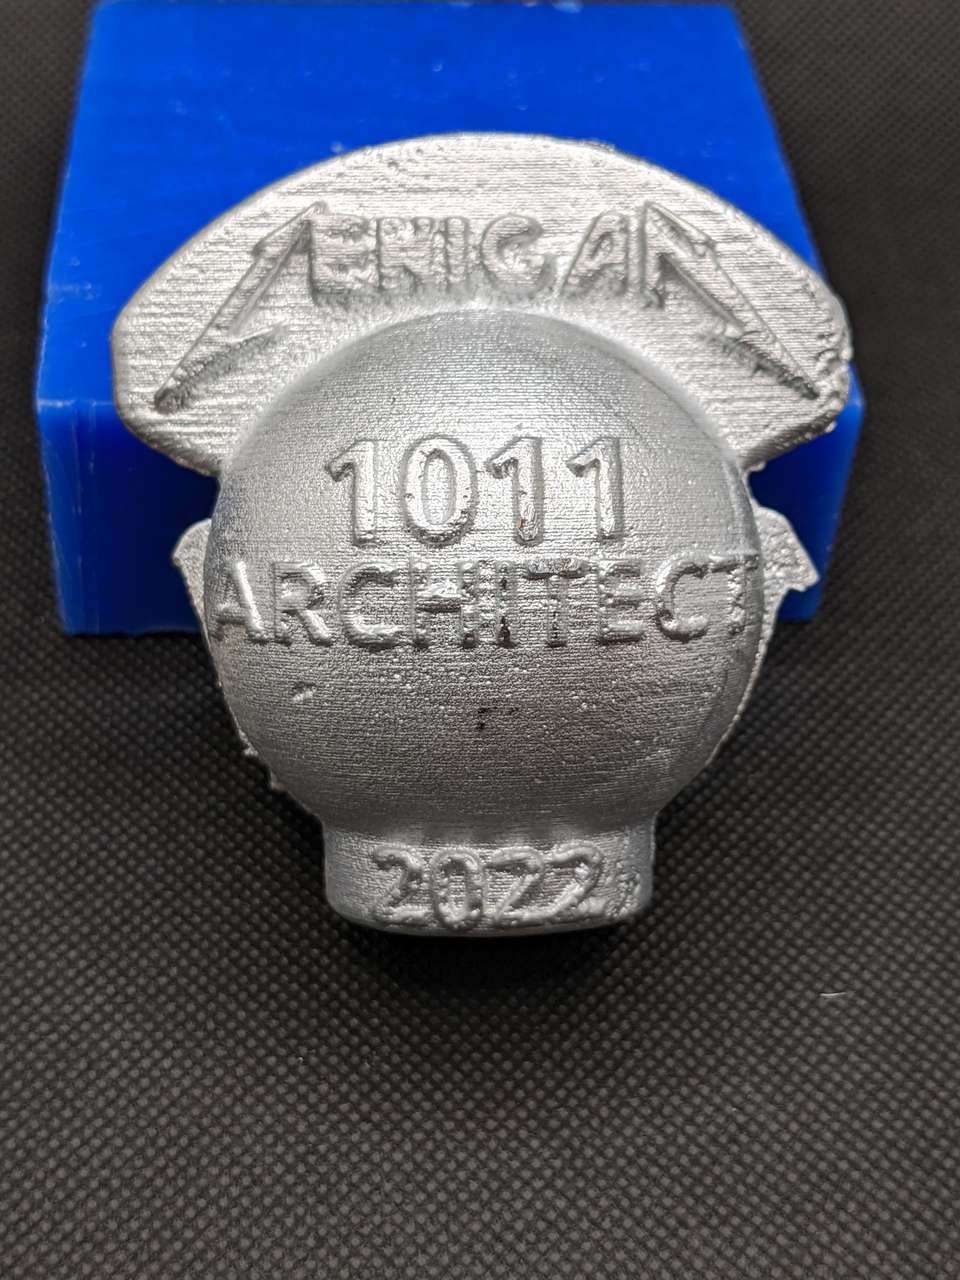
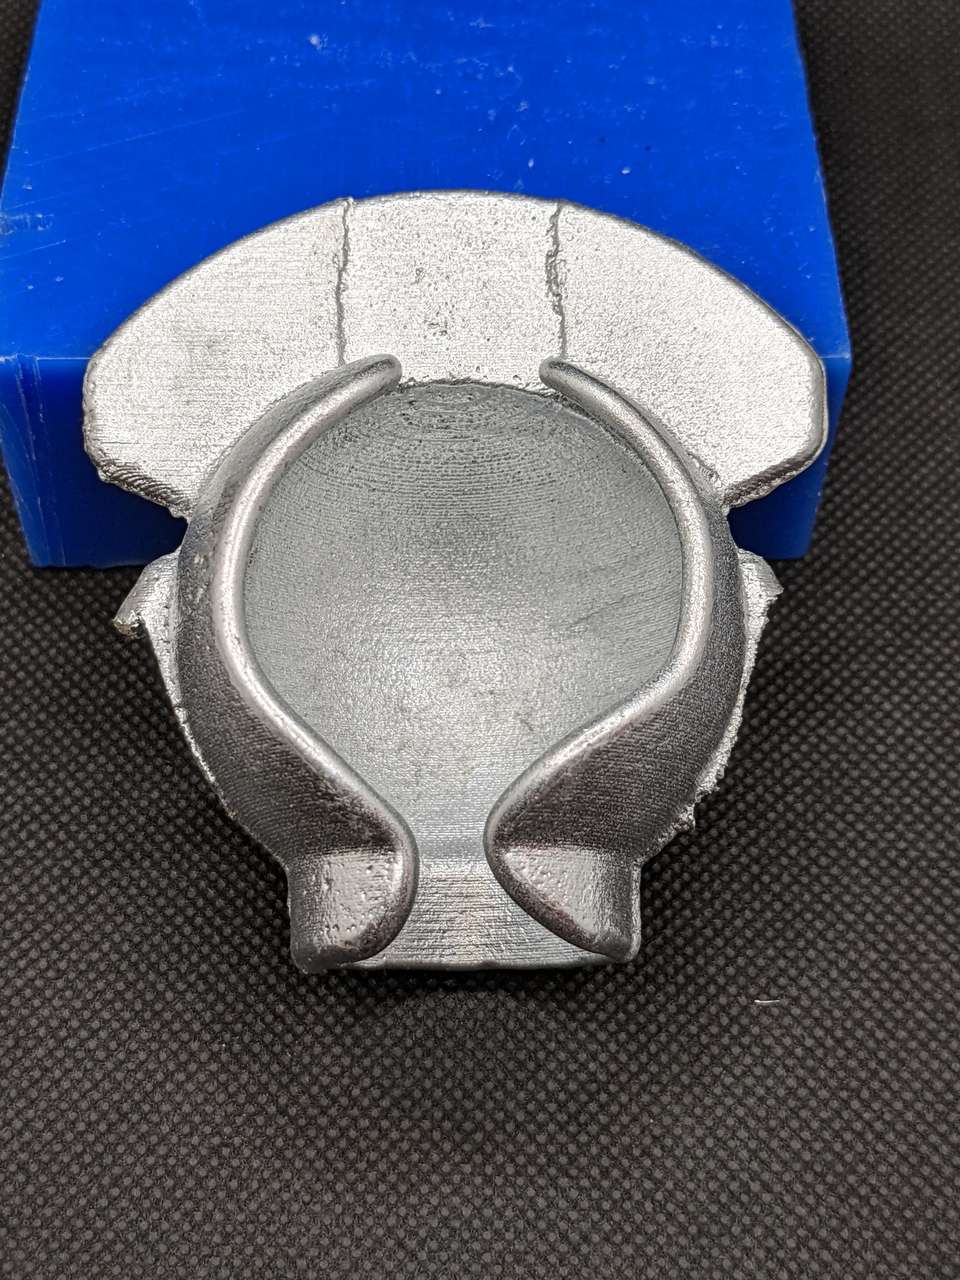
I designed hollow sphere like part in OnShape, called Metal Earth (Cue Black Metal Music now!). This part would be very difficult to make with most of the common processes in a Fab Lab. But I know technique used by foundry people that will help out called… the Core.
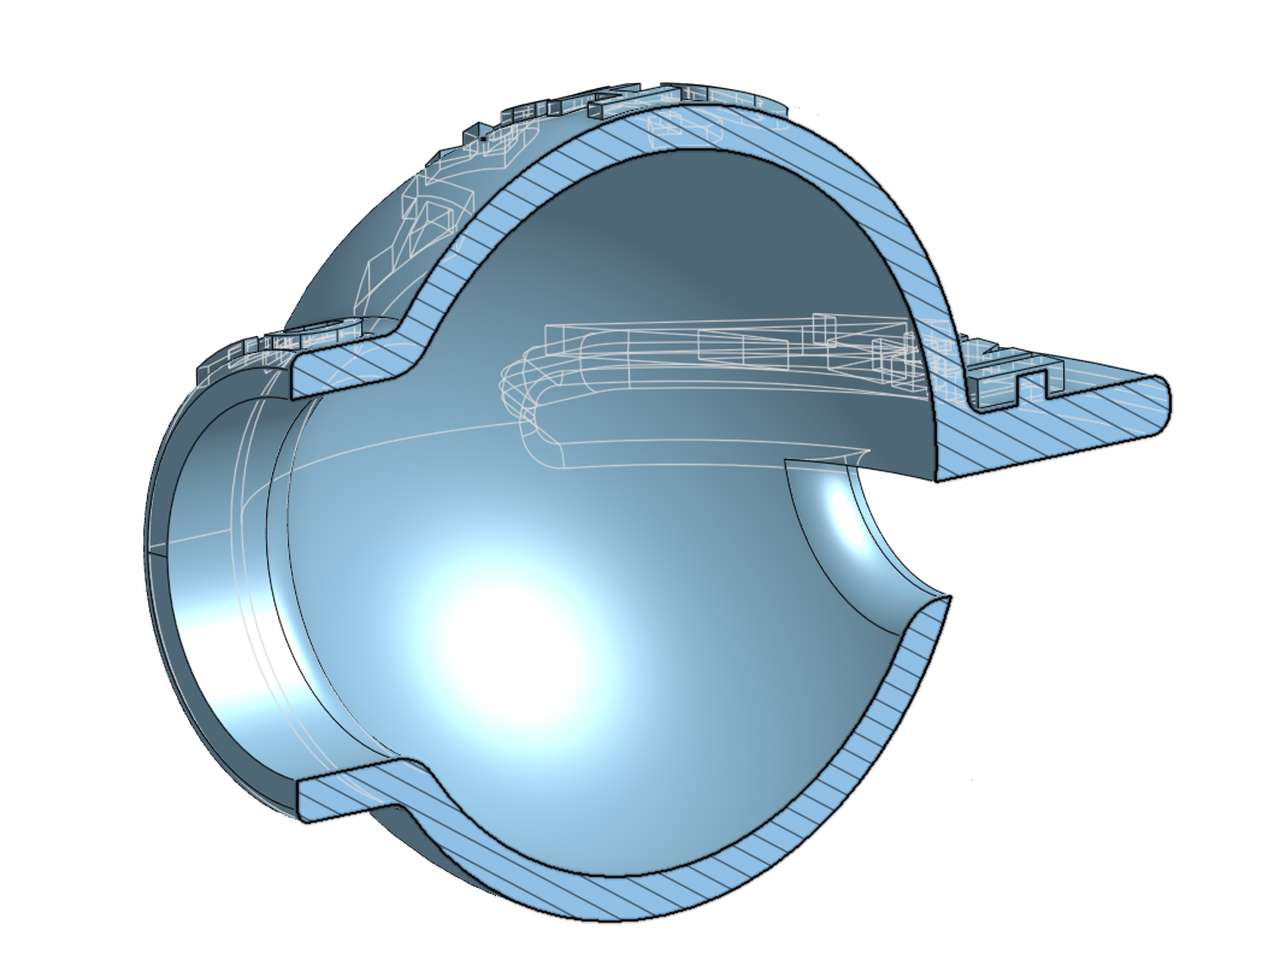
Above: Note this part is cross sectioned so you can see the hollow interior feature. This interior feature is the feature I hope to meet my instructor Blair’s challenge with. An advanced casting method to create blind undercut interior features.
Patterns
I need to design a double sided pattern to create a sand mold. To start this process I design Boolean negatives off of my part design. This process allows me to see what the sand mold and core will look like.
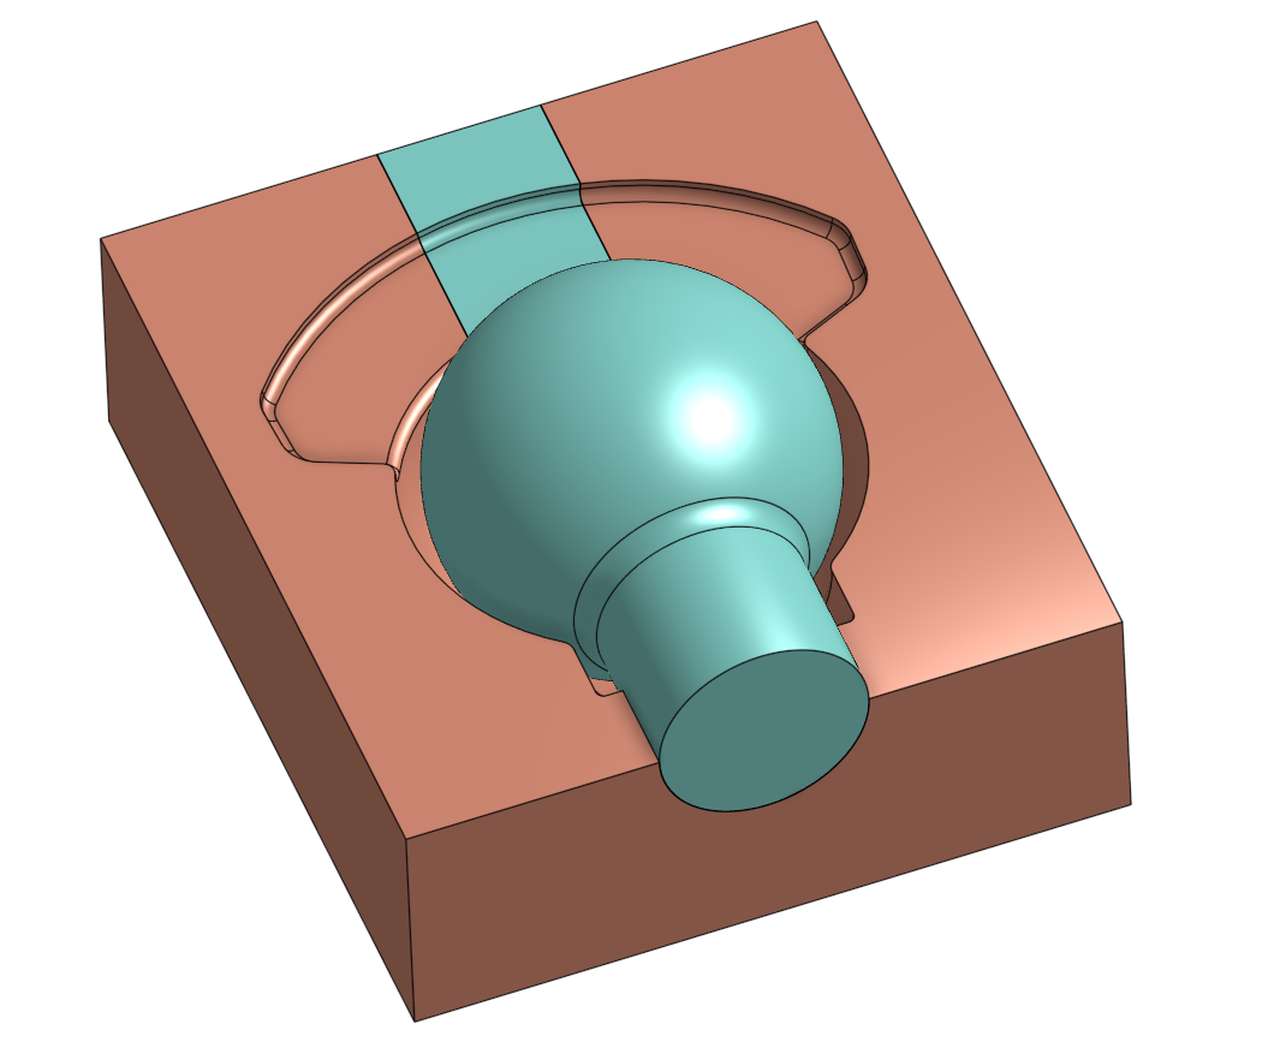
Above: Early version of my ideas for a sand mold in red and the core in blue.
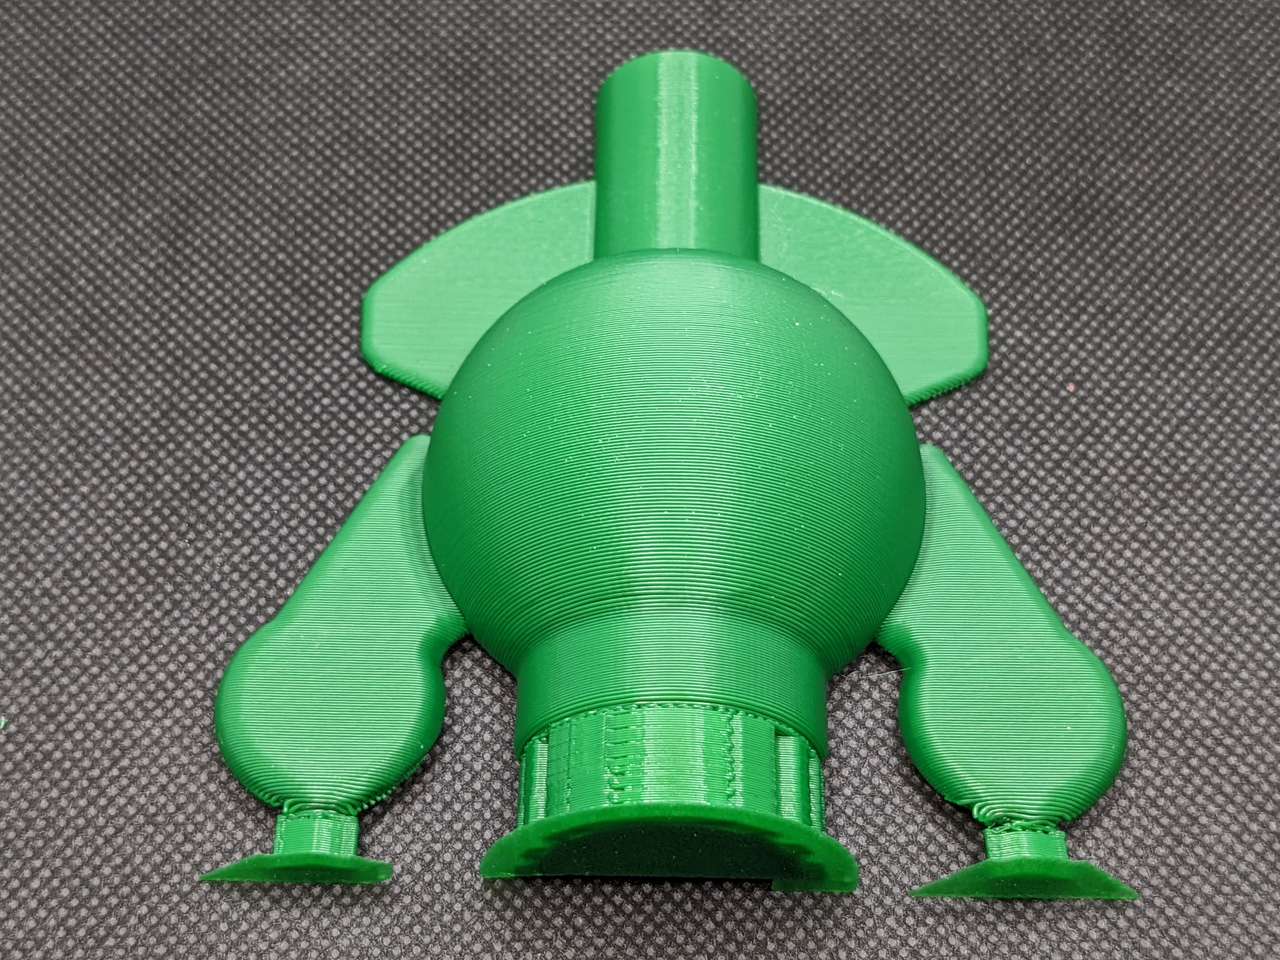
Above: the final pattern halves. In red is the Lower Pattern for drag side of match plate, and the blue part is the Upper Pattern for the cope side of the match plate.
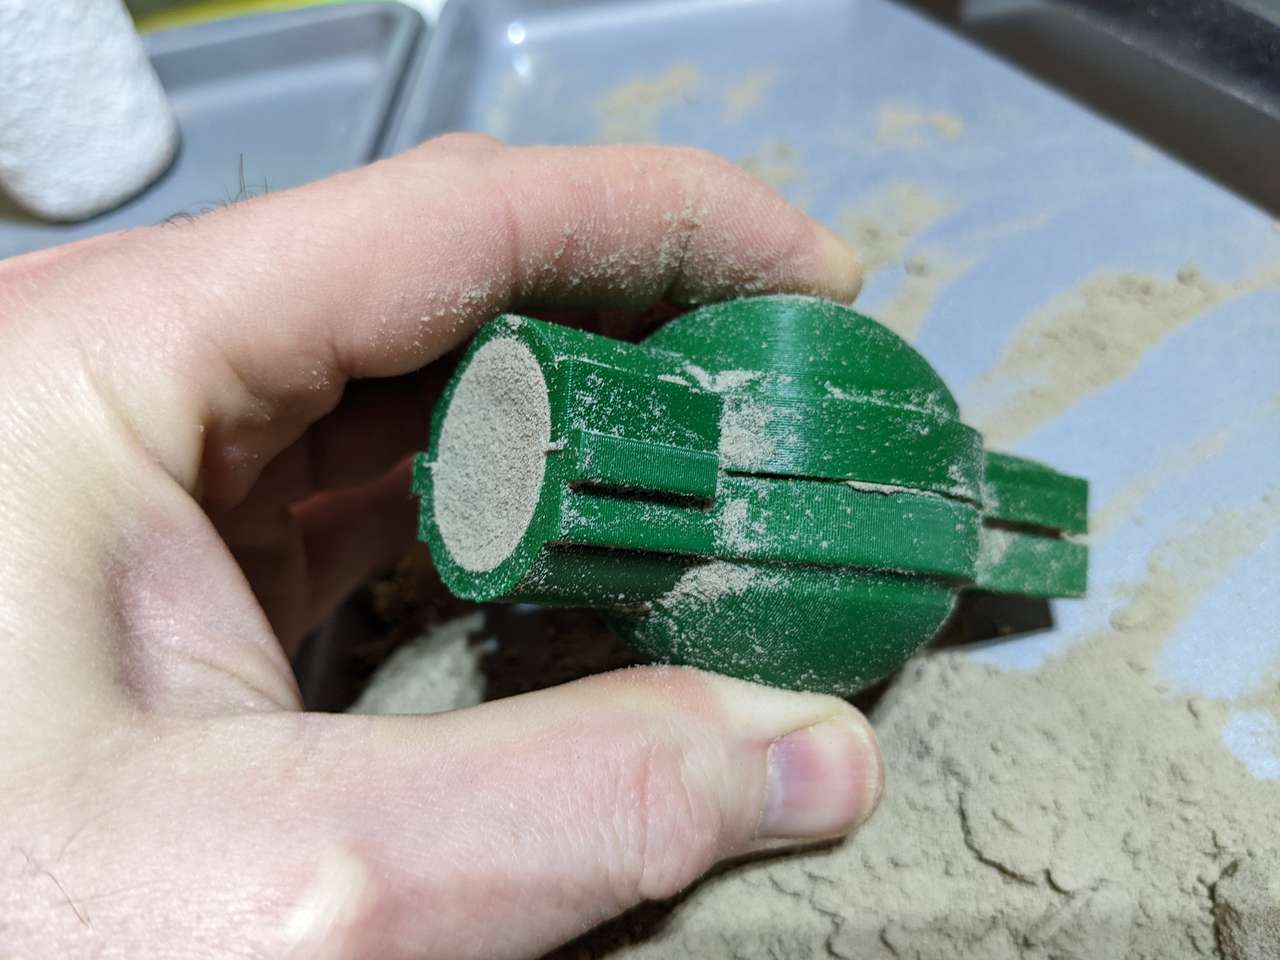
Core Box
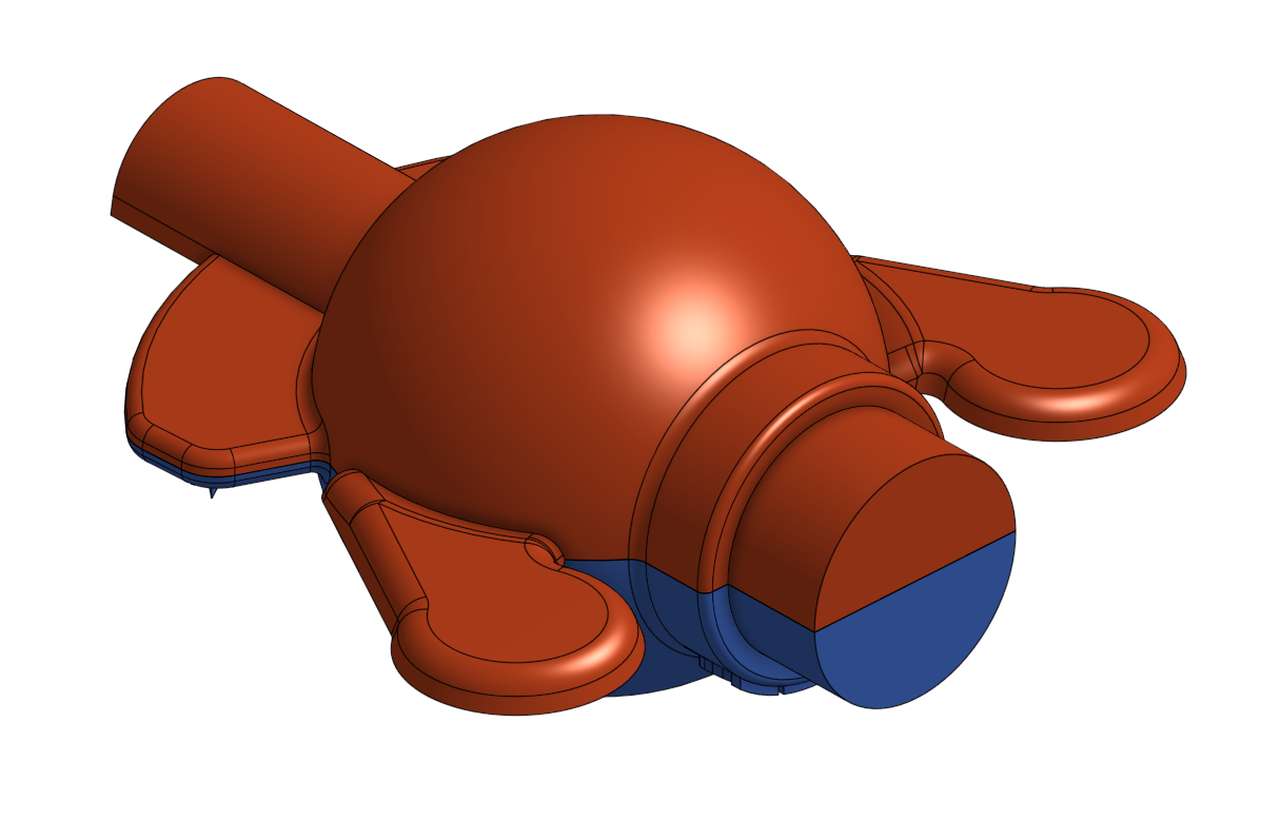
Next I will design a two part core box to form a sand core. This will core out the hollow center of the spherical Metal Earth part I designed. I will include geometry called core prints to hold the core suspended across the sand mold cavity.
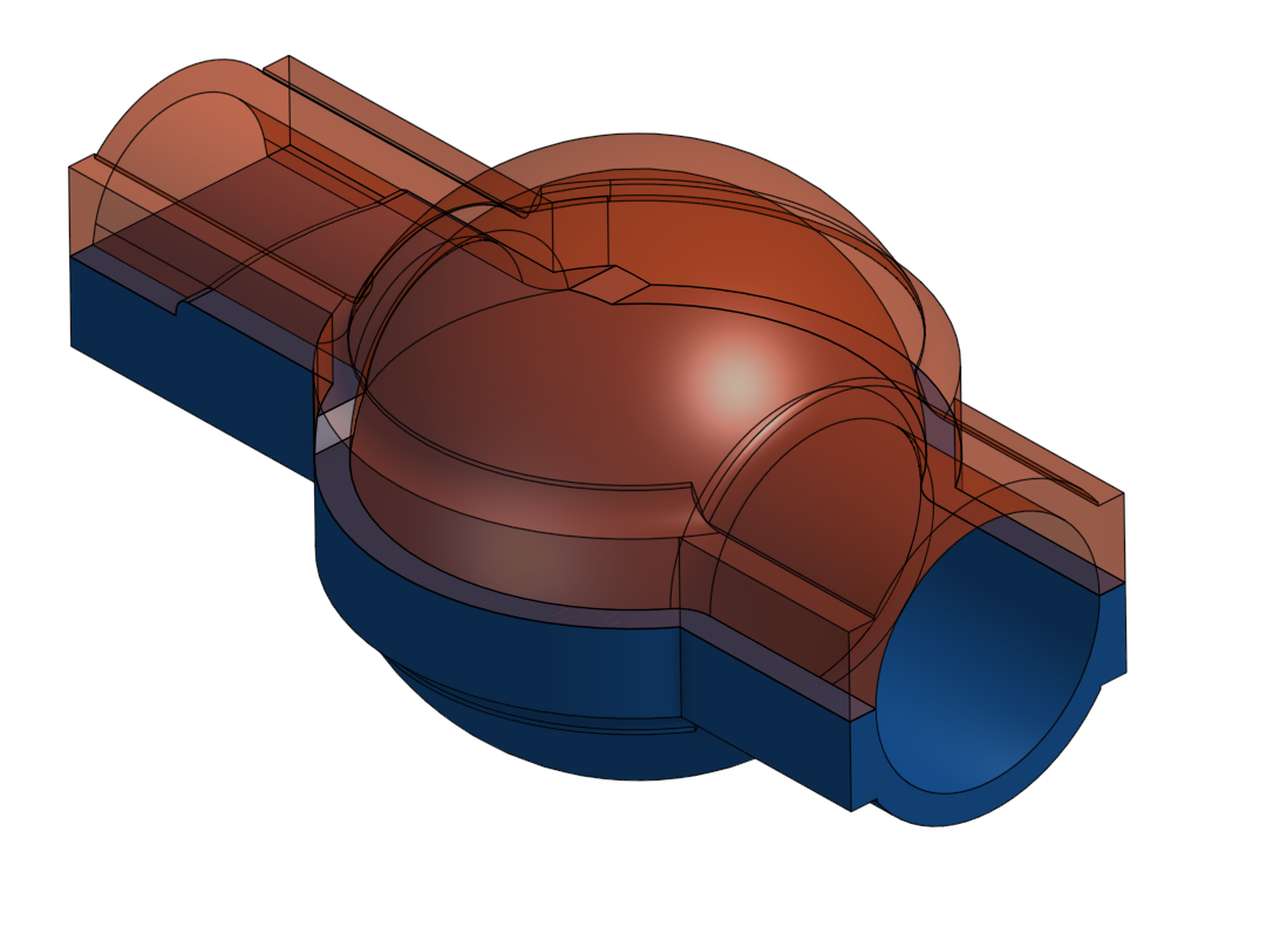
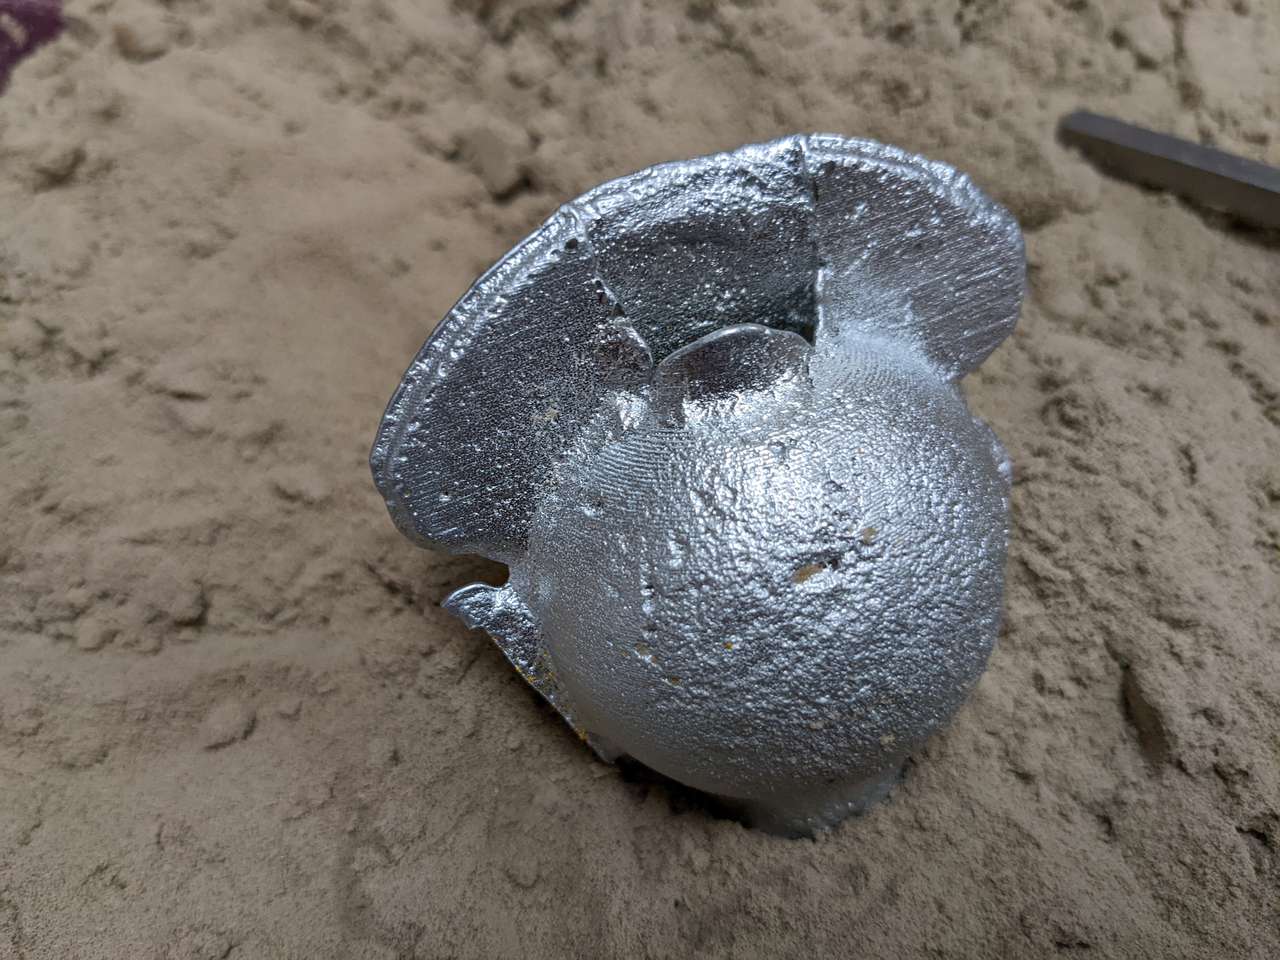
Above: These red and blue parts form the core box. The two halves are pressed together around the casting sand to for the hollow core of our casting. This may not make sense now, but will later once castings are broken out of the sand.
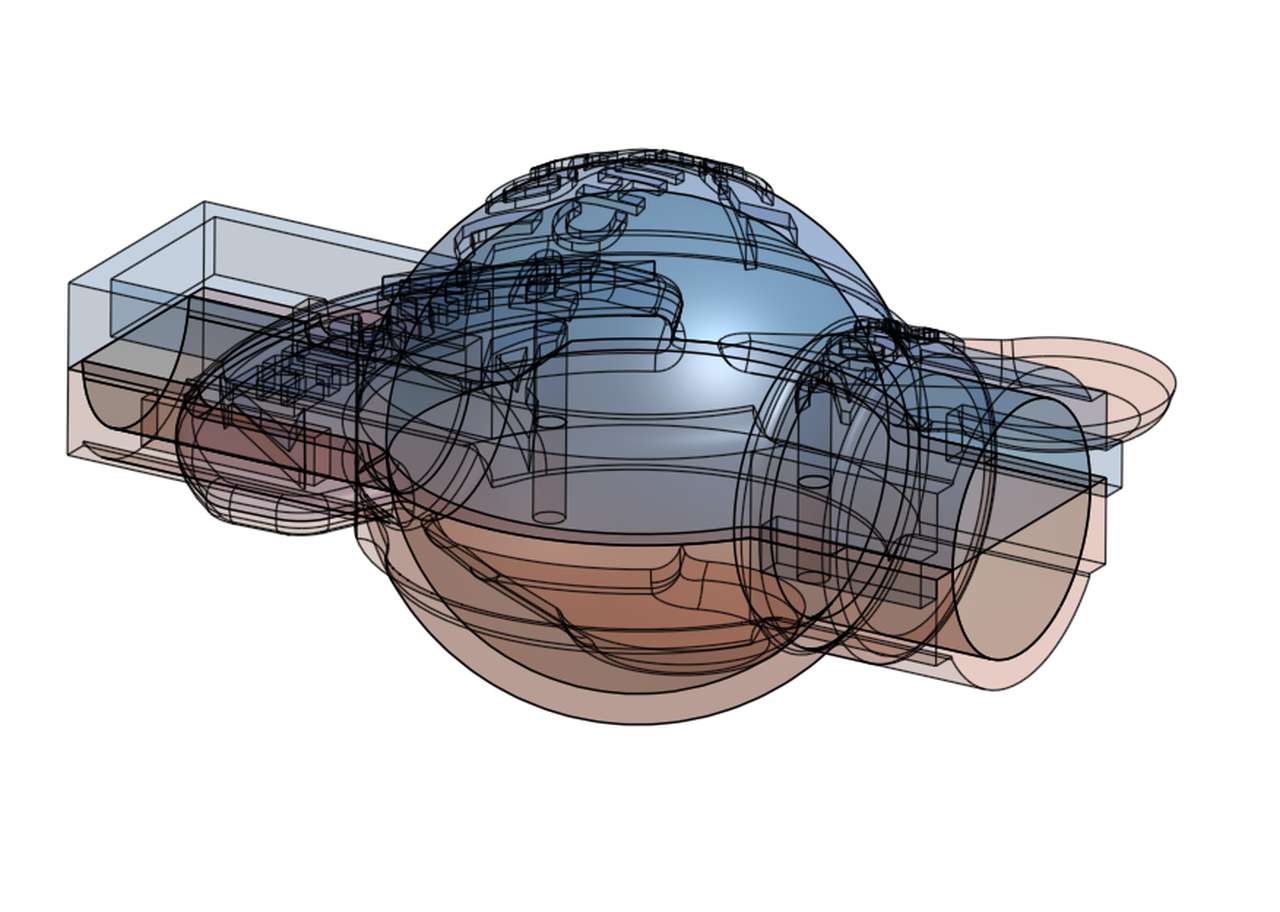
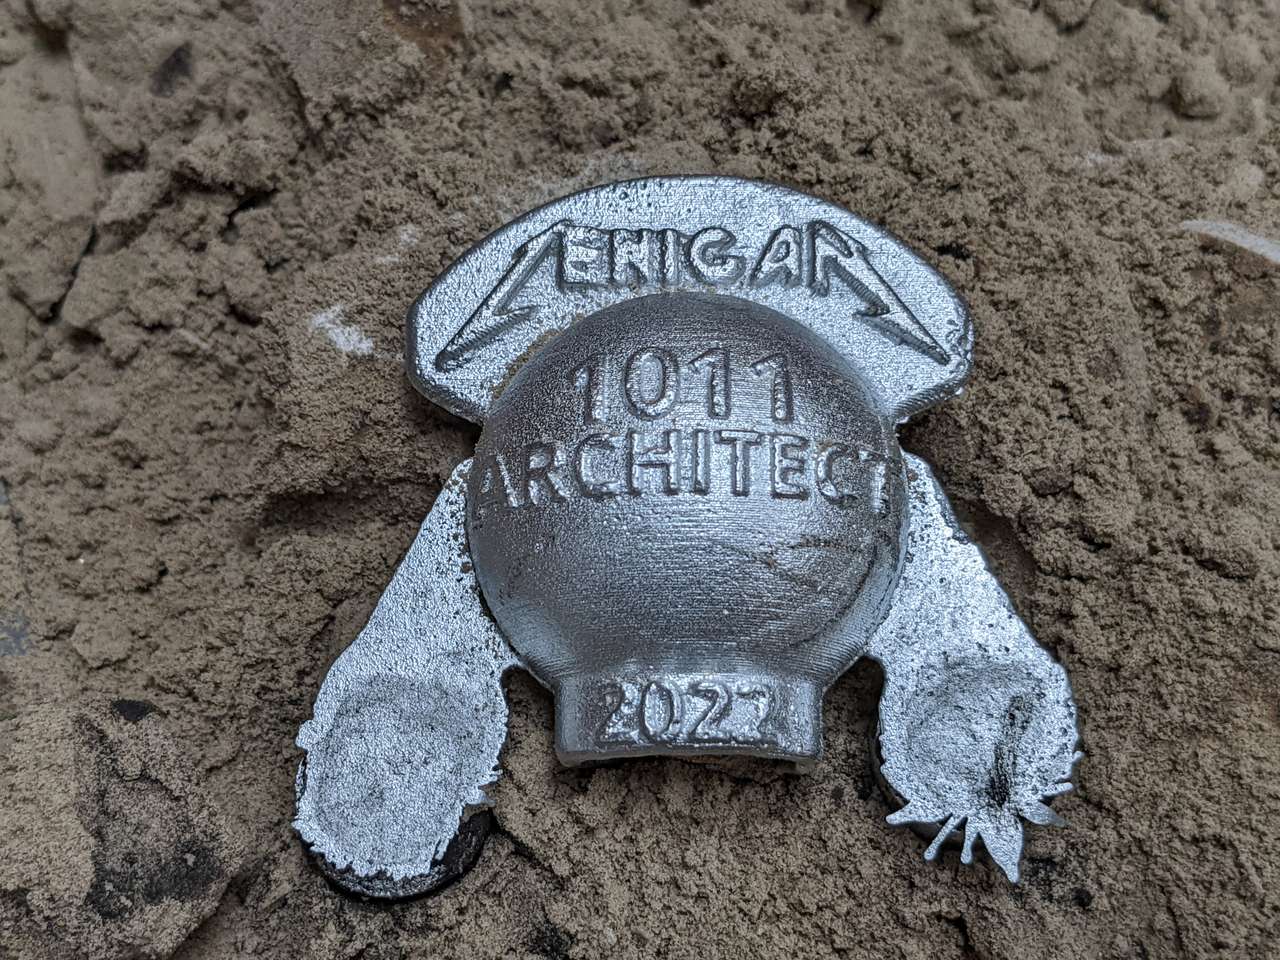
Above: Here is the part, core, and patterns overlayed. The front detail is obscured on propose, because I want the final metal casting to be a surprise when it’s revealed. This will be a present for my good Fab Academy friend.
CAM
I used PrusaSlicer to produce the g-code to 3D print my patterns and core boxes.
FAB: 3D Print Core Boxes
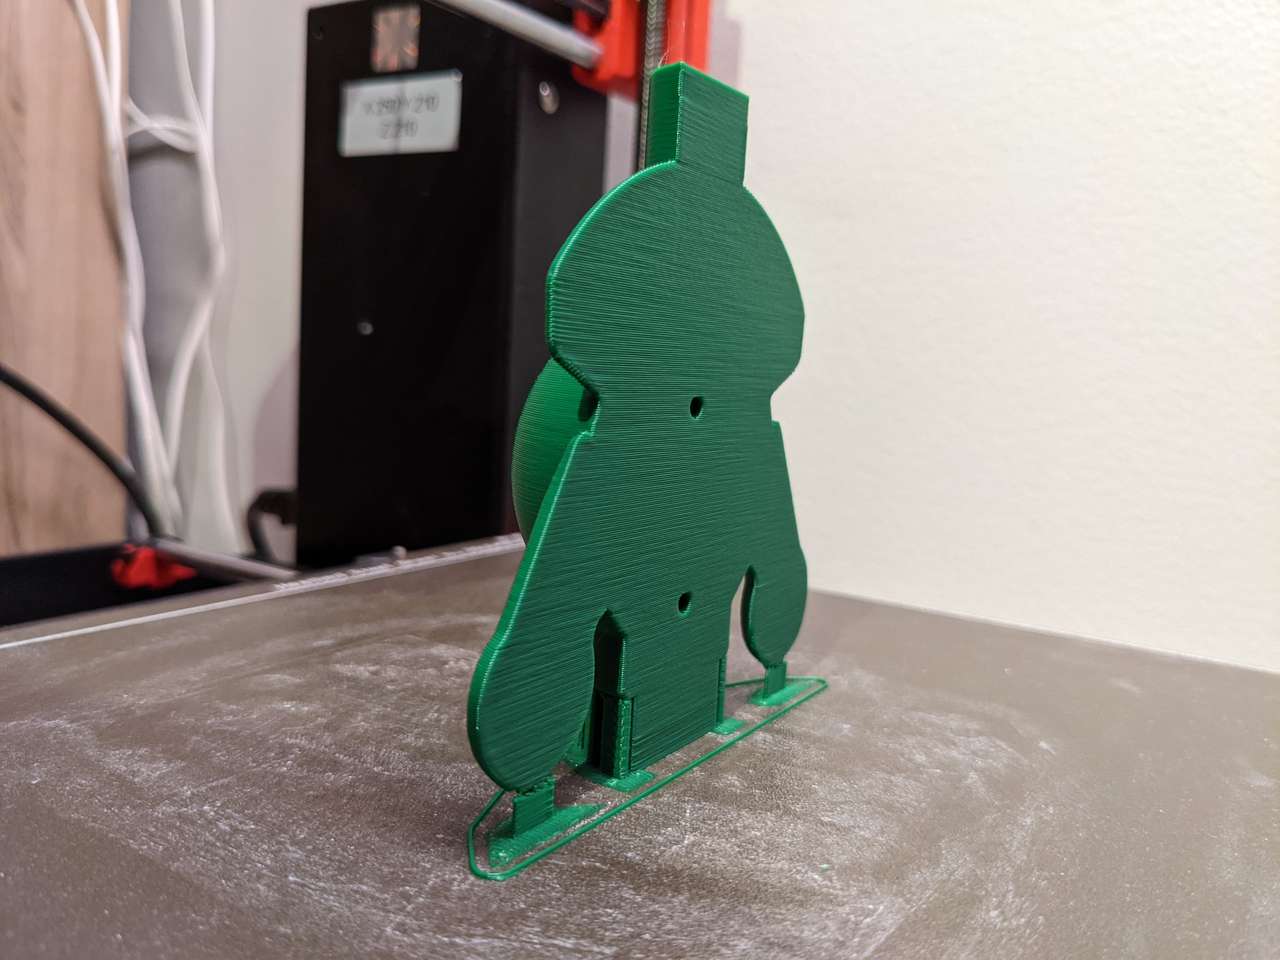
Core boxes will be 3D printed since surface finish is not important in the interior. However it is important that the sand release for the surfaces of the core box, so the orientation and grain direction of the core boxes surfaces are very important. I printed my core boxes standing on end.

FAB: 3D Print Patterns
Generate tool paths (gcode) to mill the two patterns.

Mount the pattern on a pattern plate
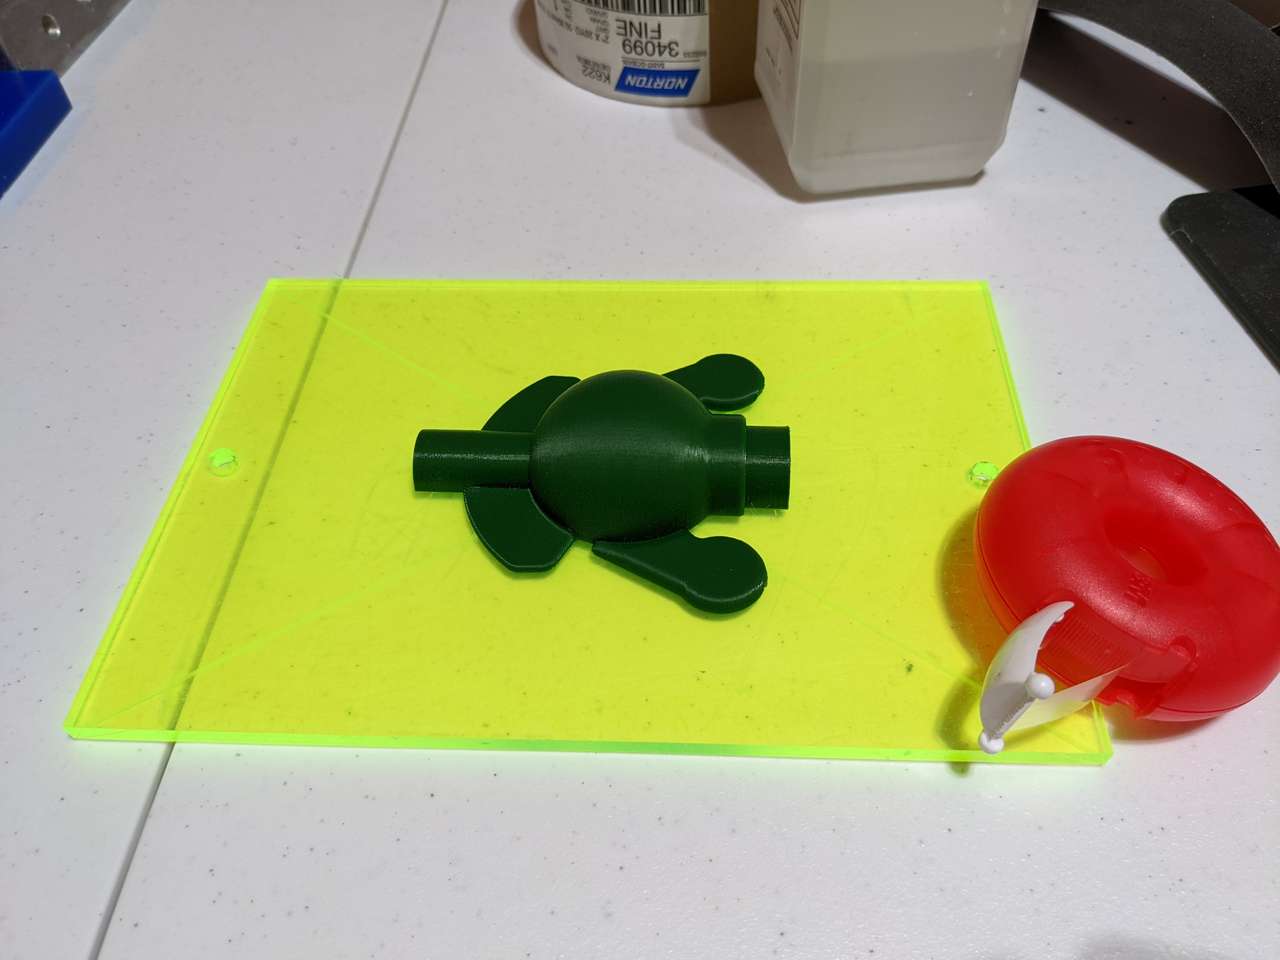

FAB: Mold Making
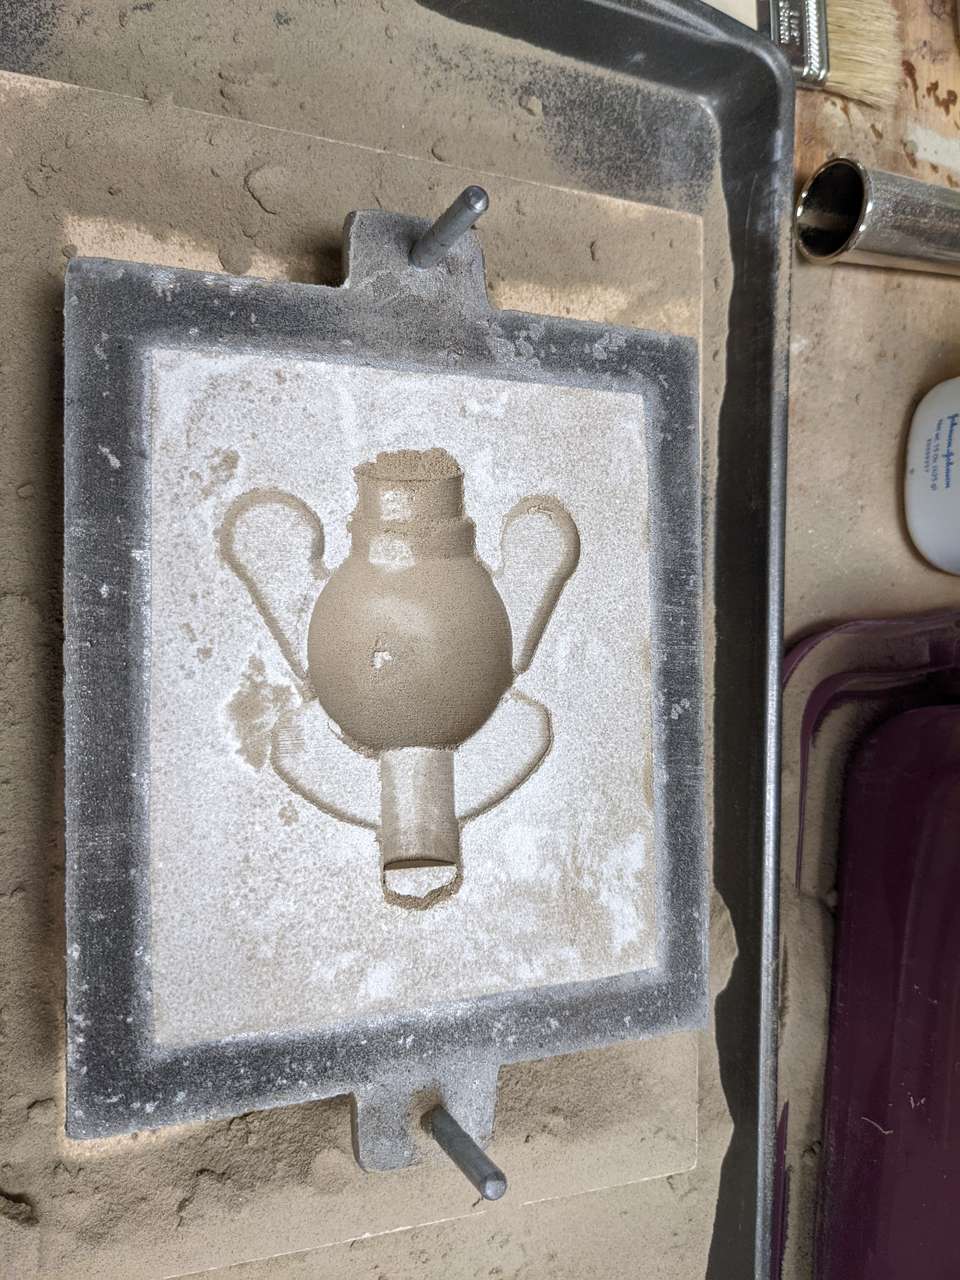
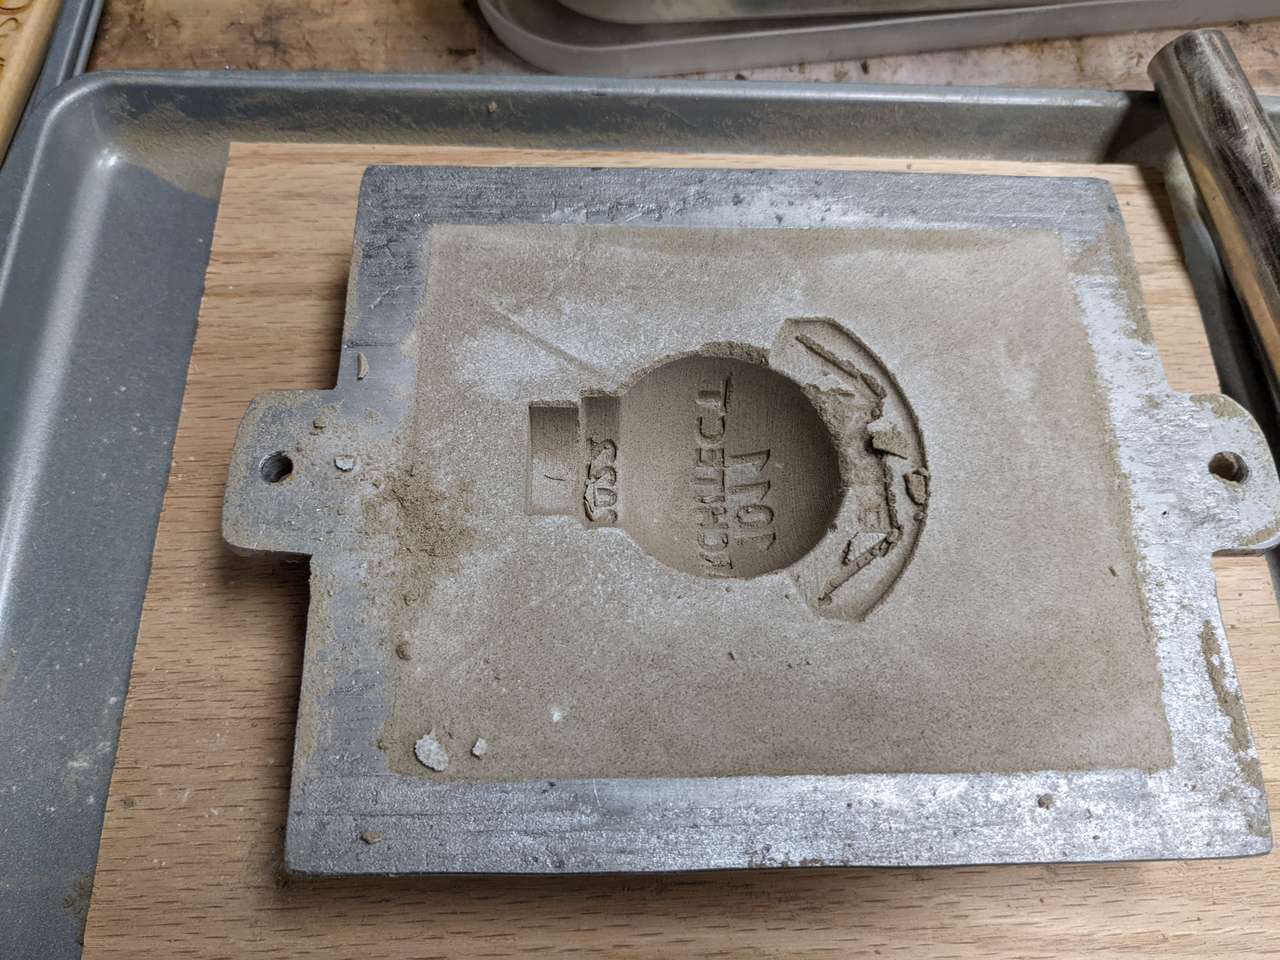
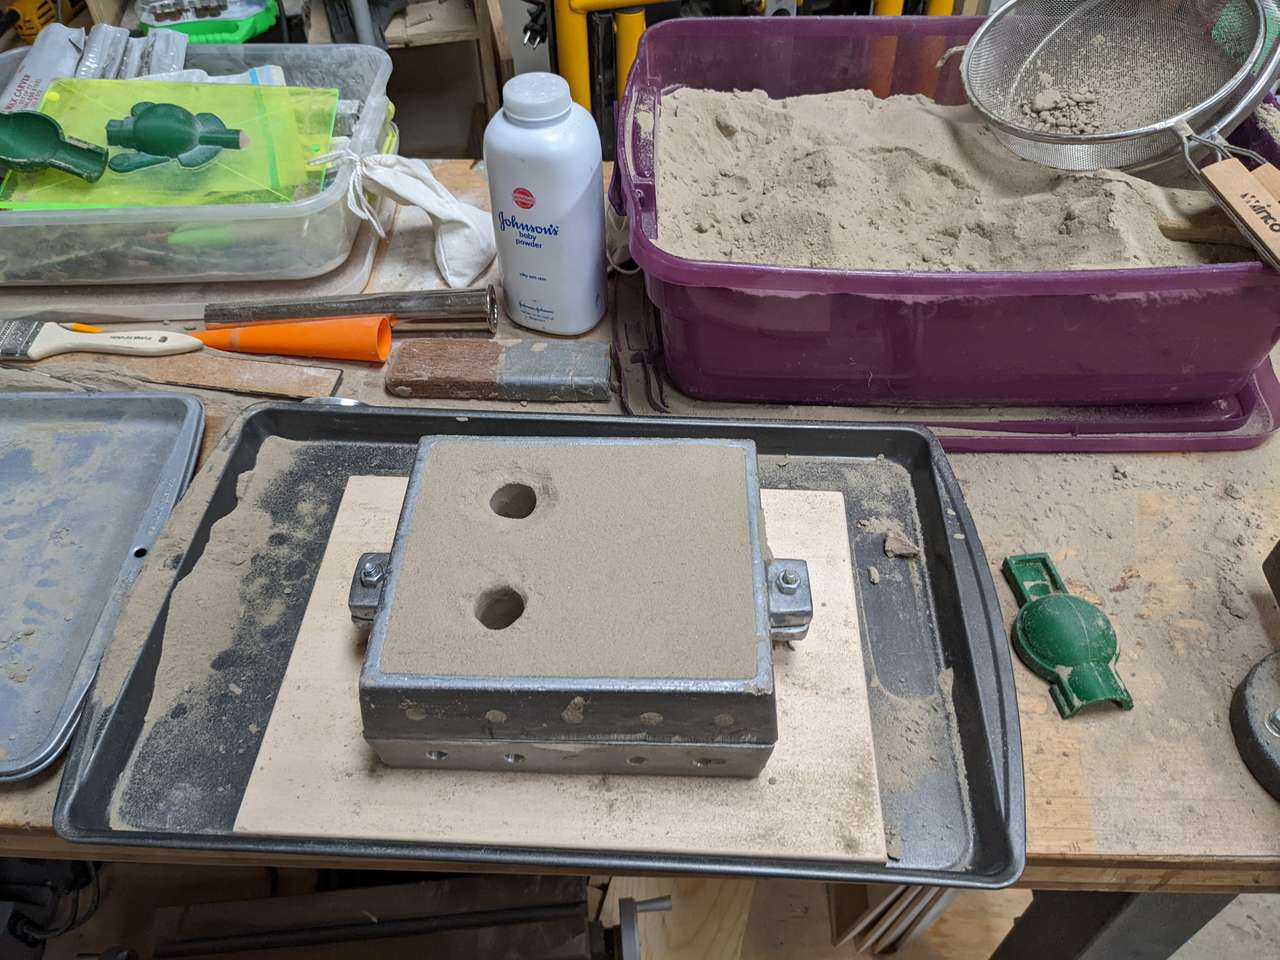
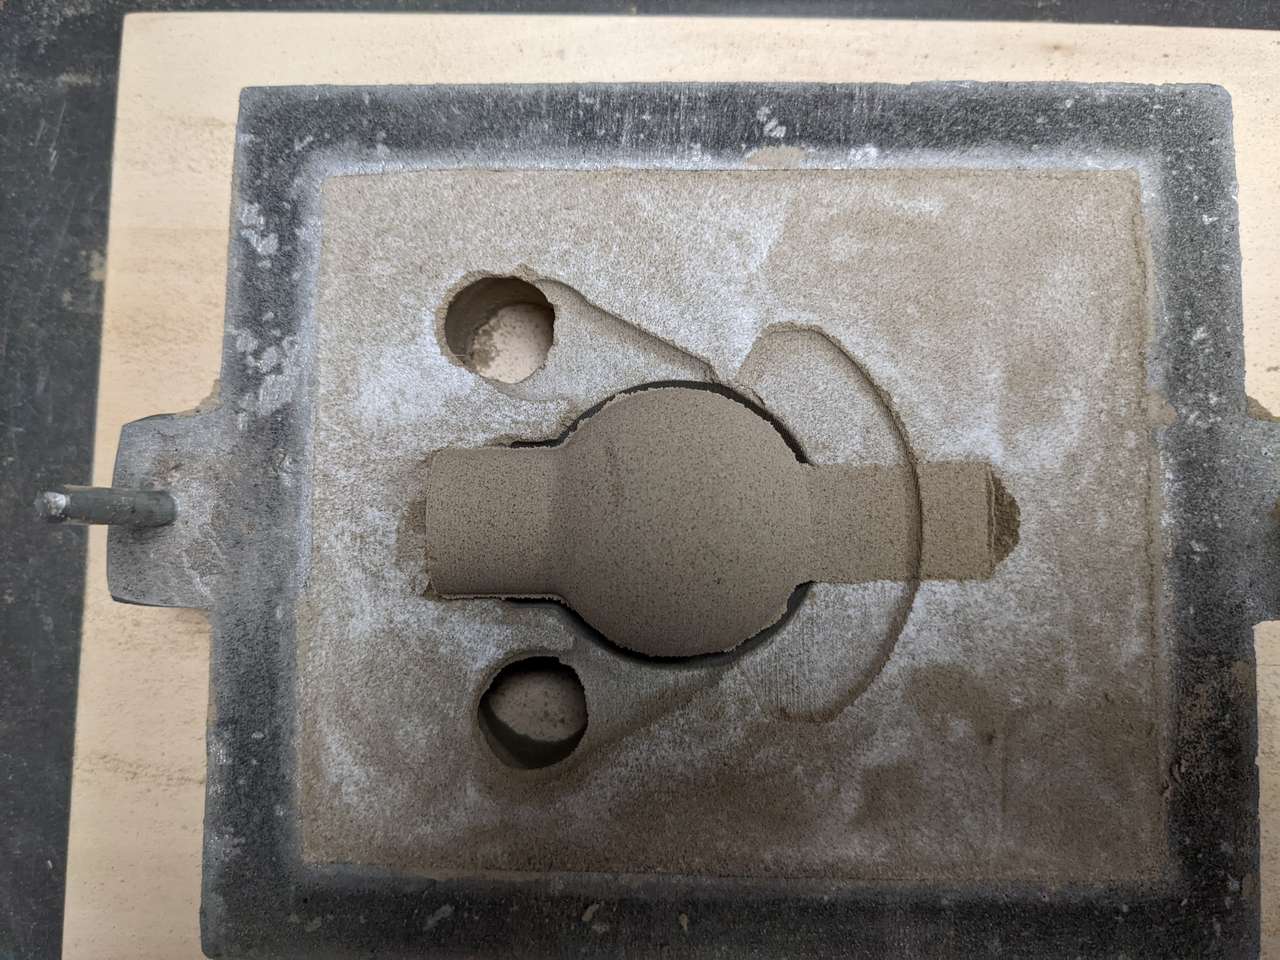
Make the sand mold and core with the Foundry in a Box kit. Explain and photograph process.
Sand Mold
Sand Core
Cast ZA-12
Cast the parts from ZA-12 Zinc Aluminum Alloy
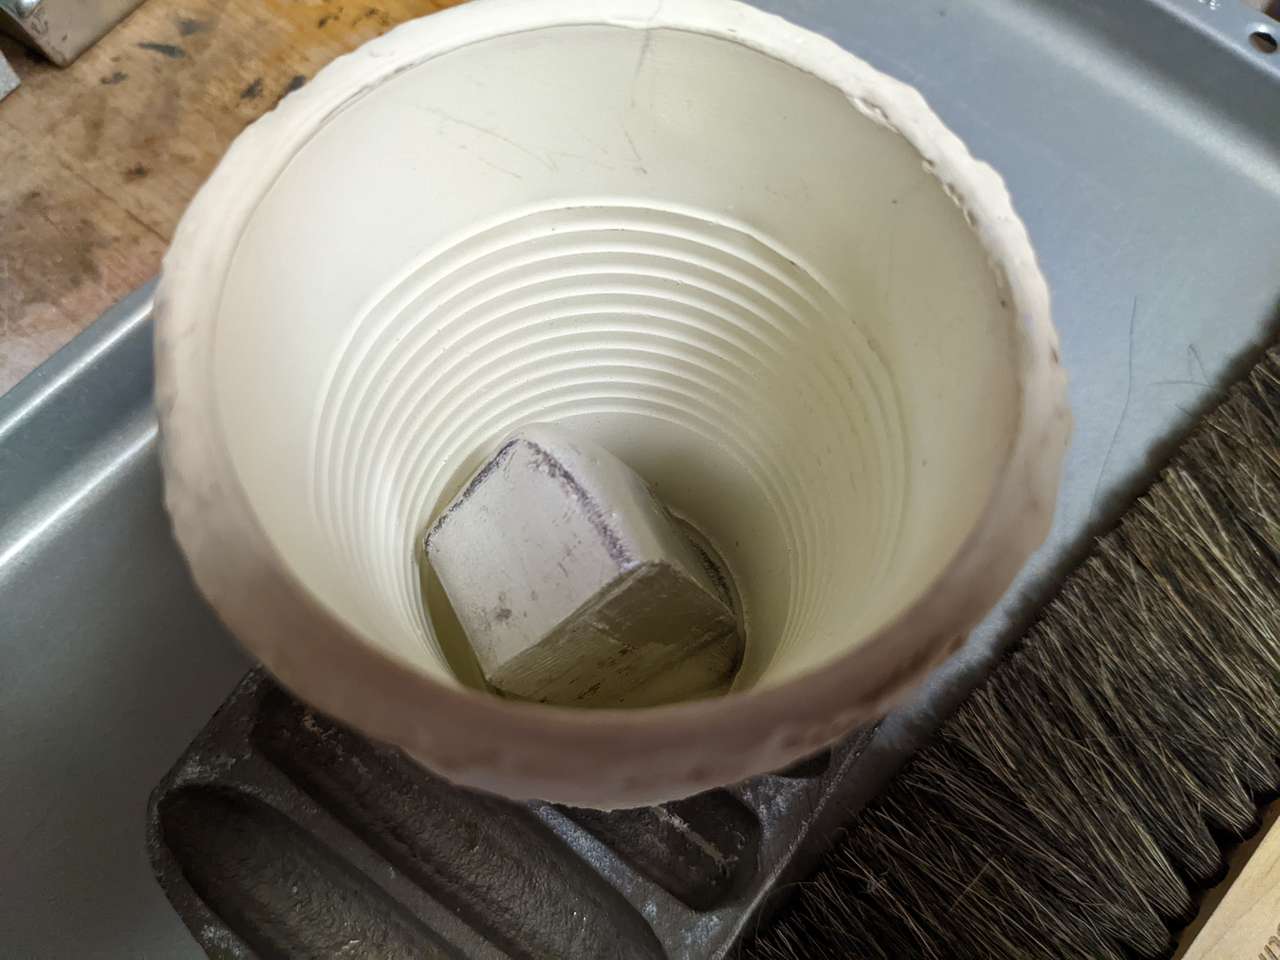
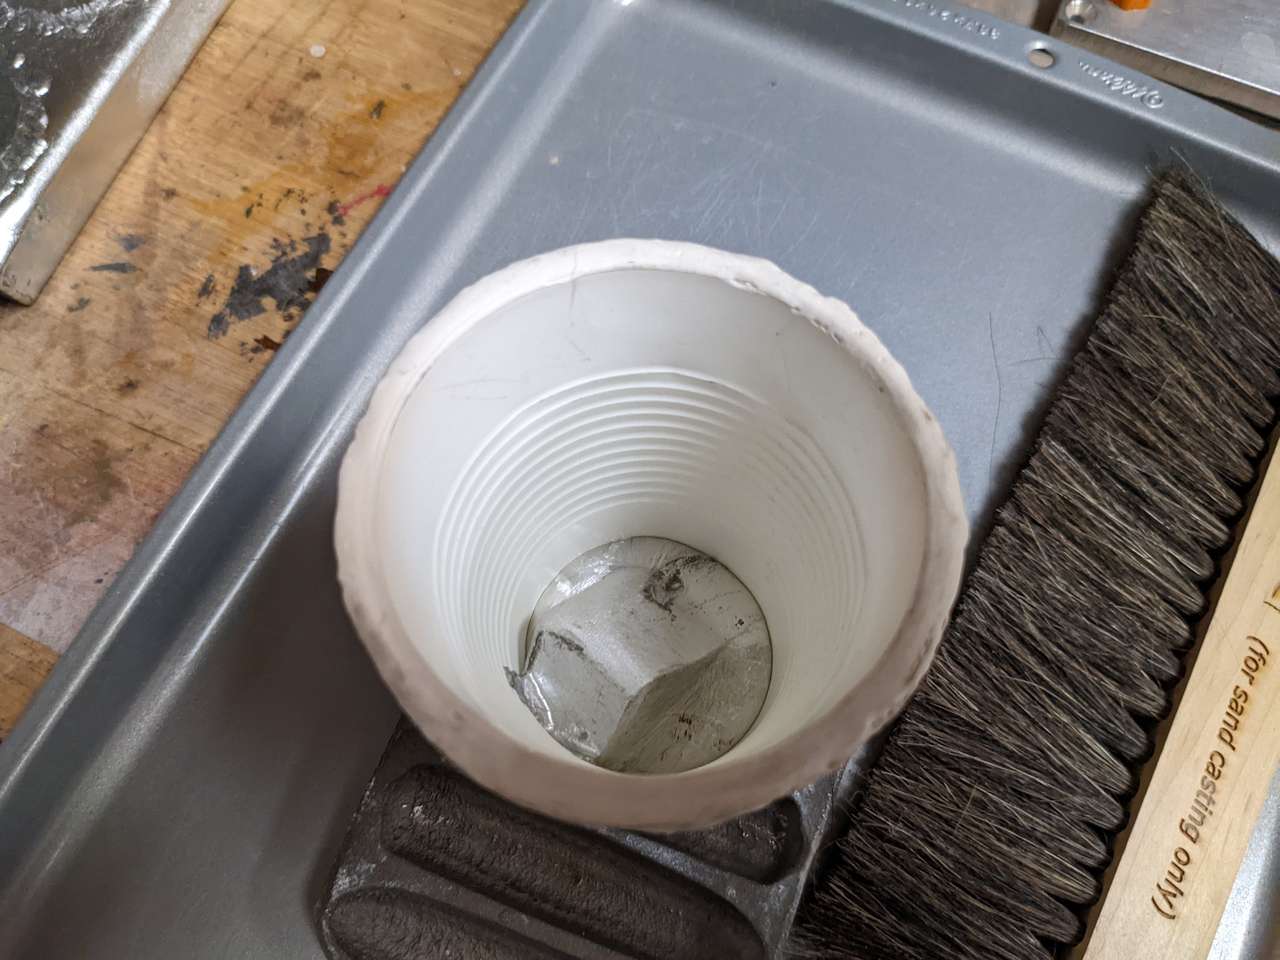
Melt
Pour

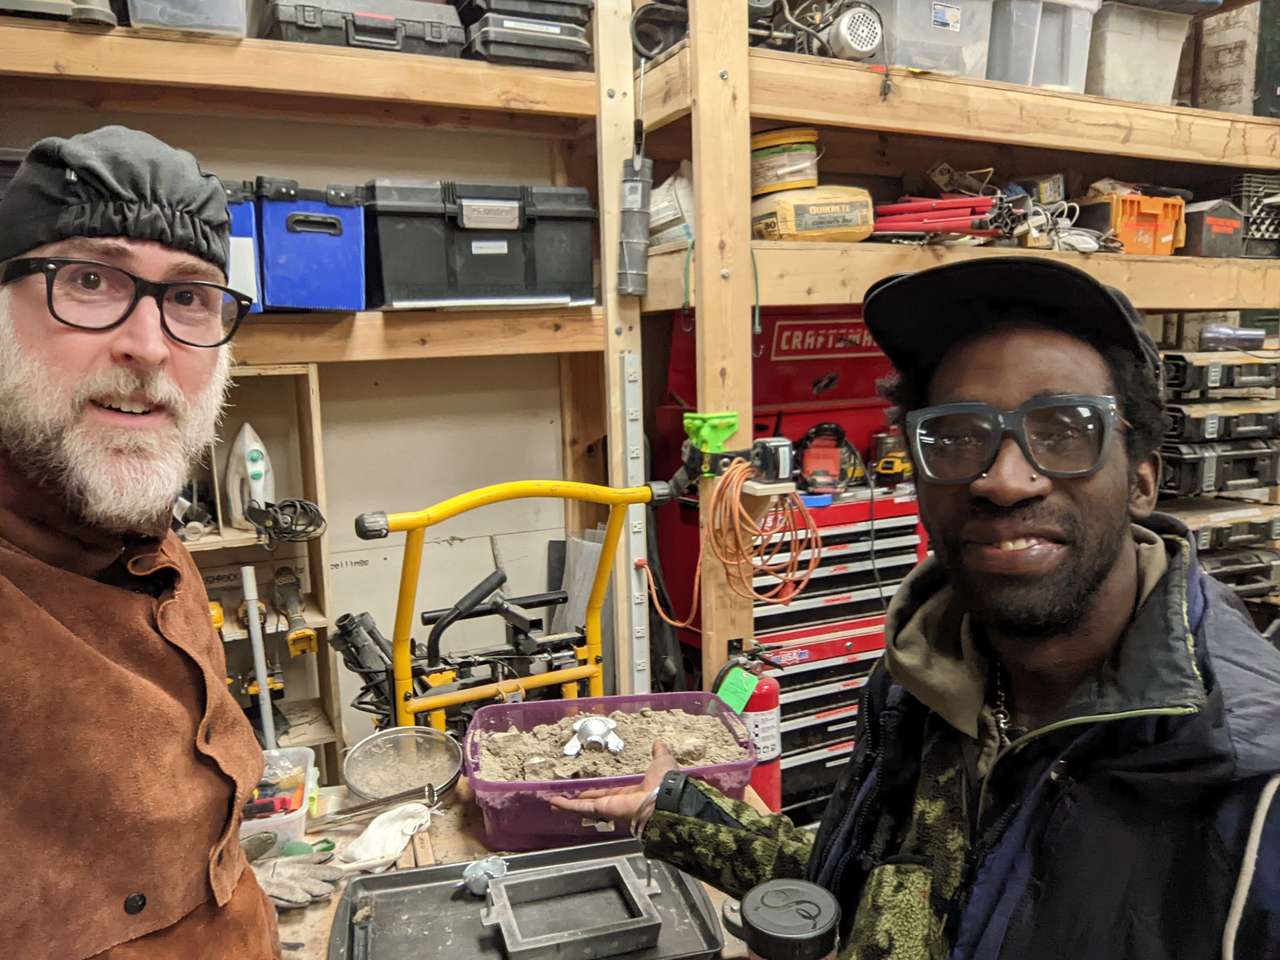
Fellow hacker Xavier helped me take video and kept me company while I made molds and cast parts.

Why not machine the patterns?
Machining takes too long
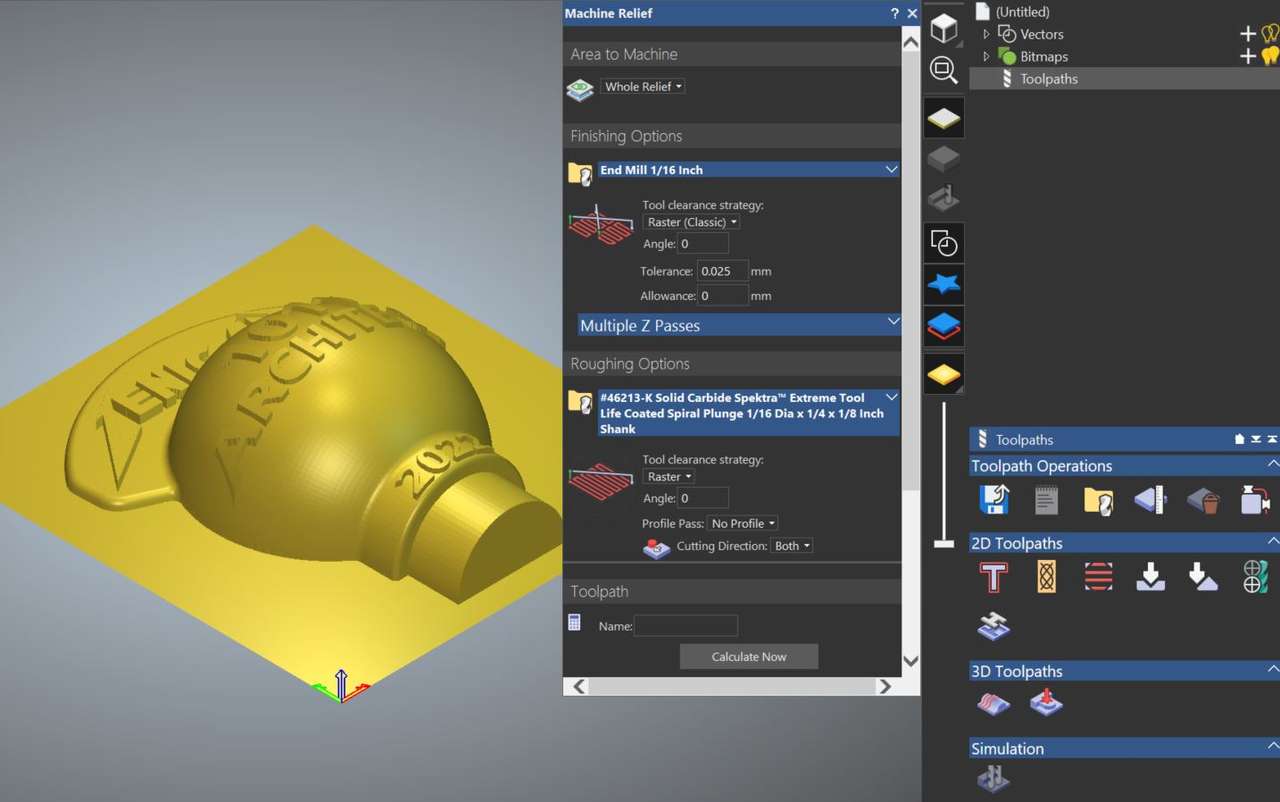
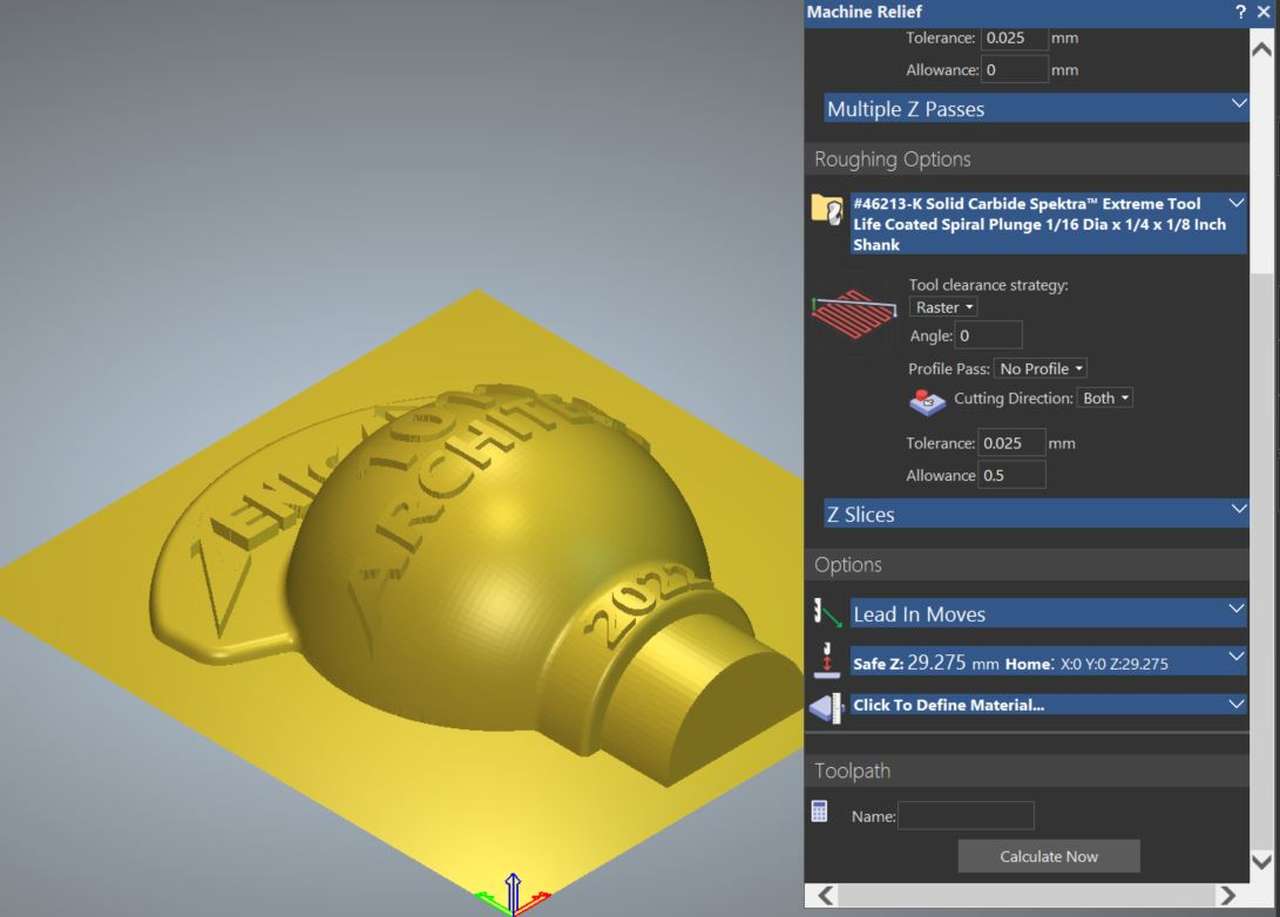
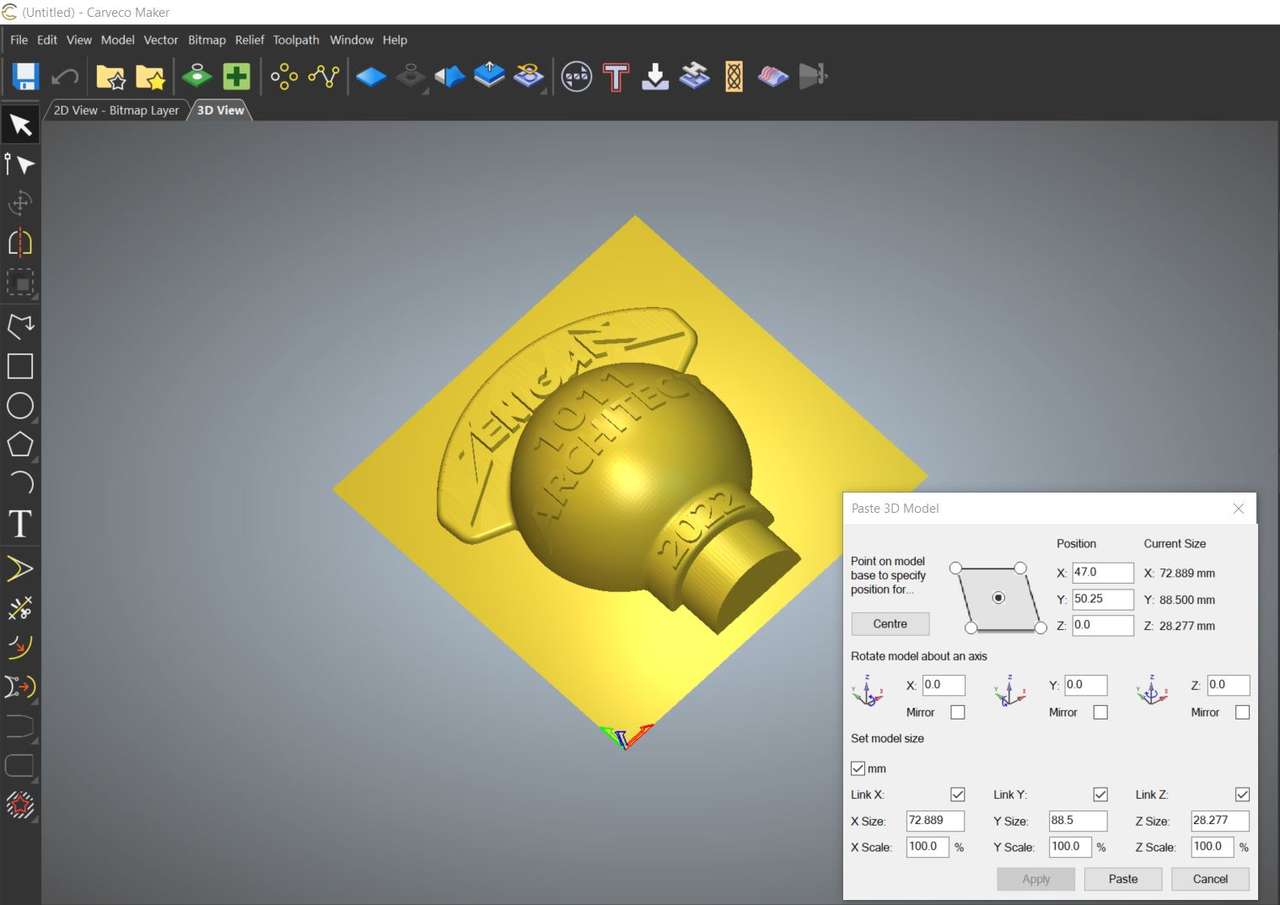 Import into Carveco CNC software
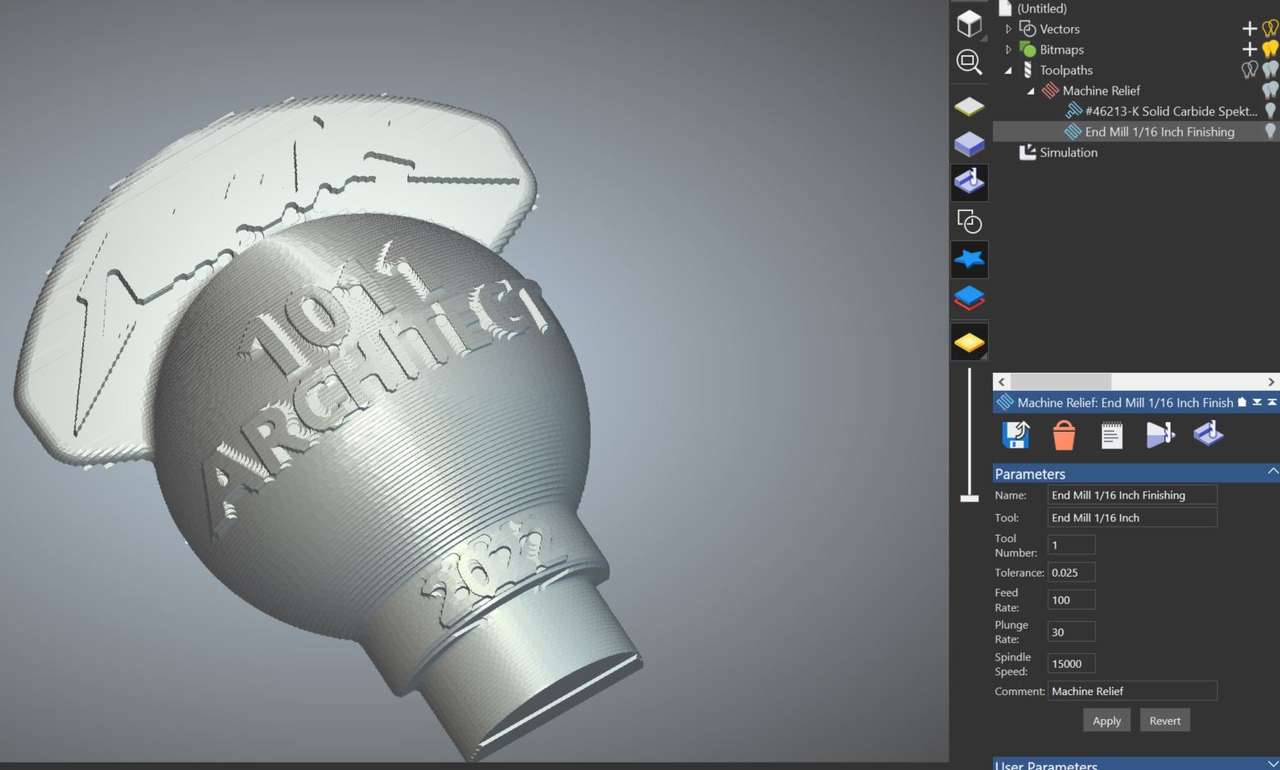
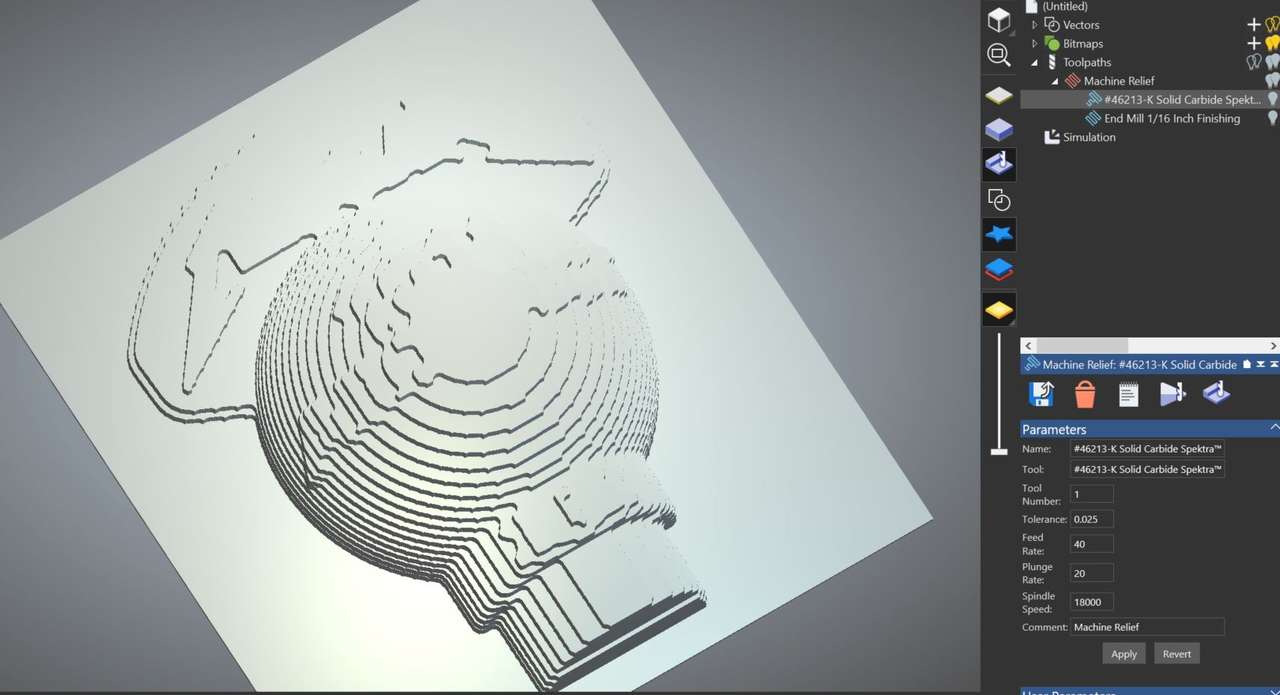
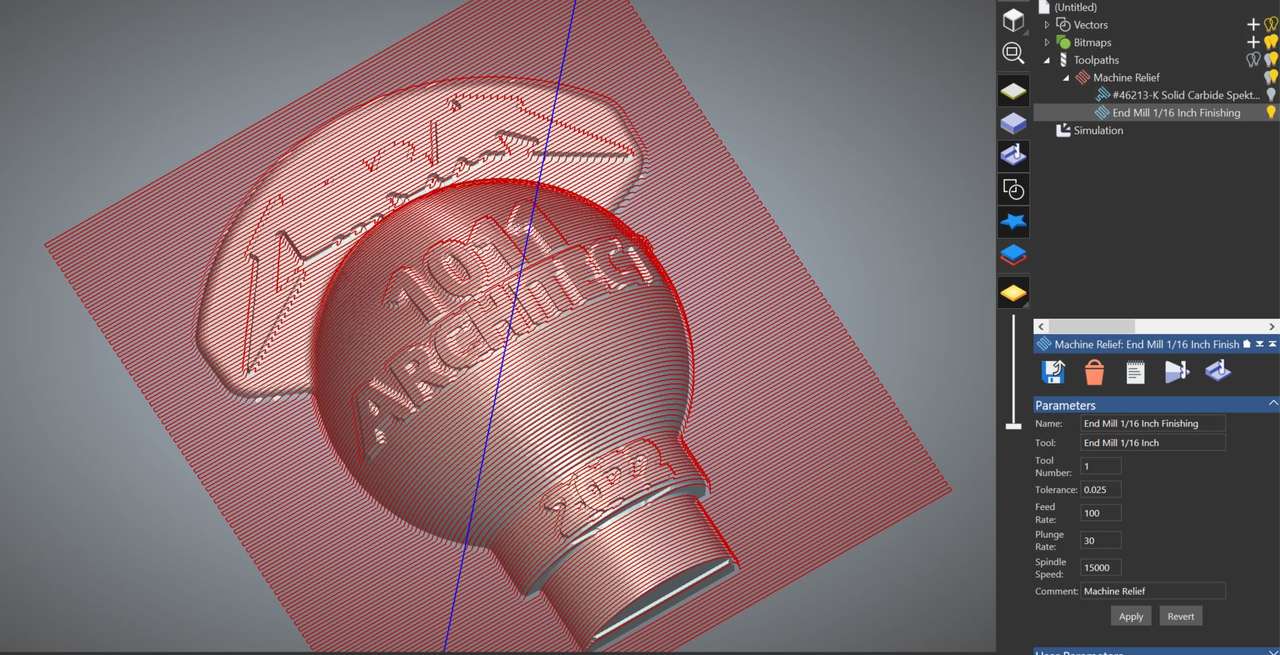 Finish Tool paths surface simulation
 Rough cut toll path
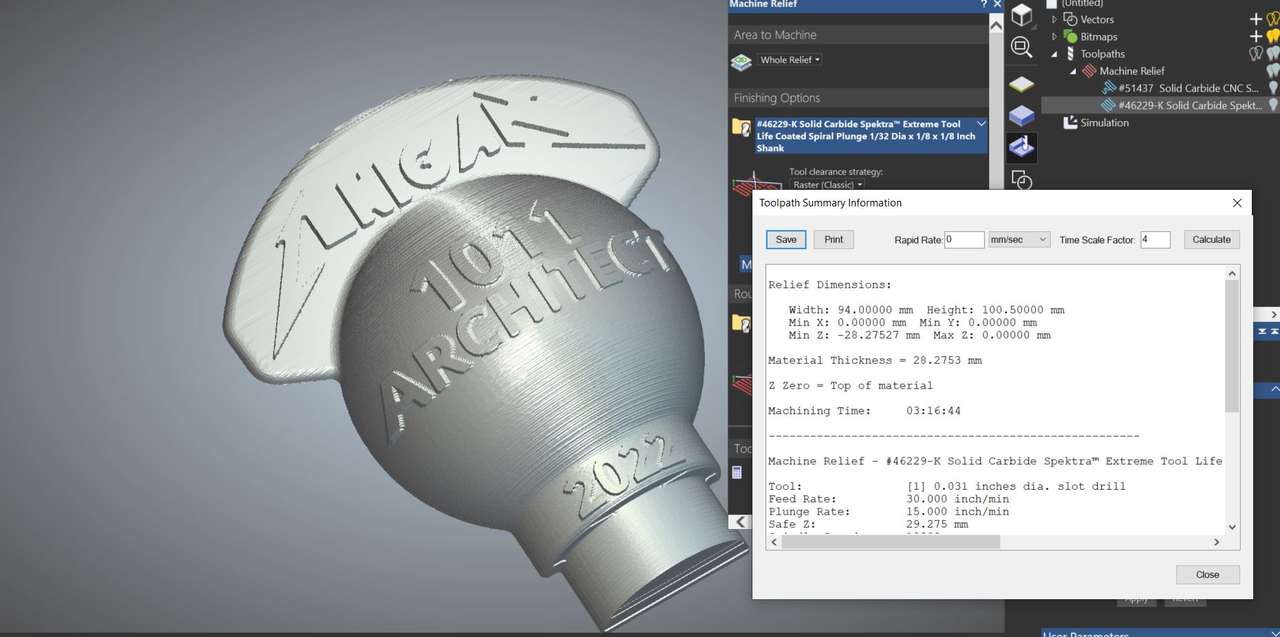 Finish Cutting time 3hrs 16min
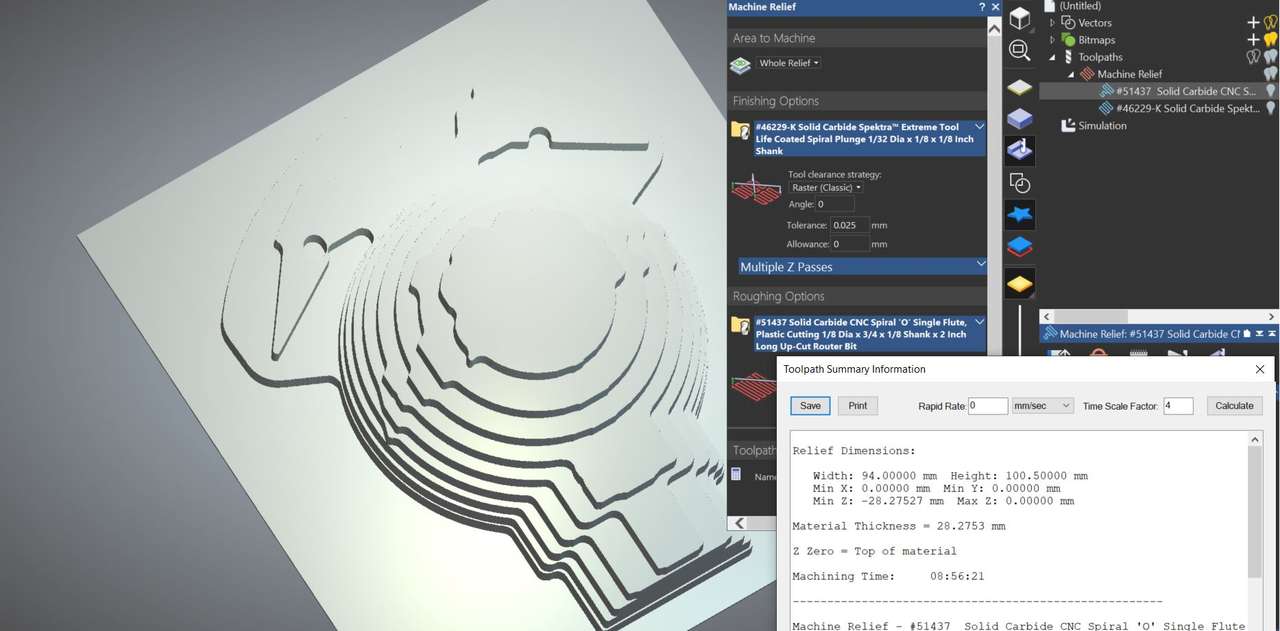 Rough Cutting time 9hrs 54min
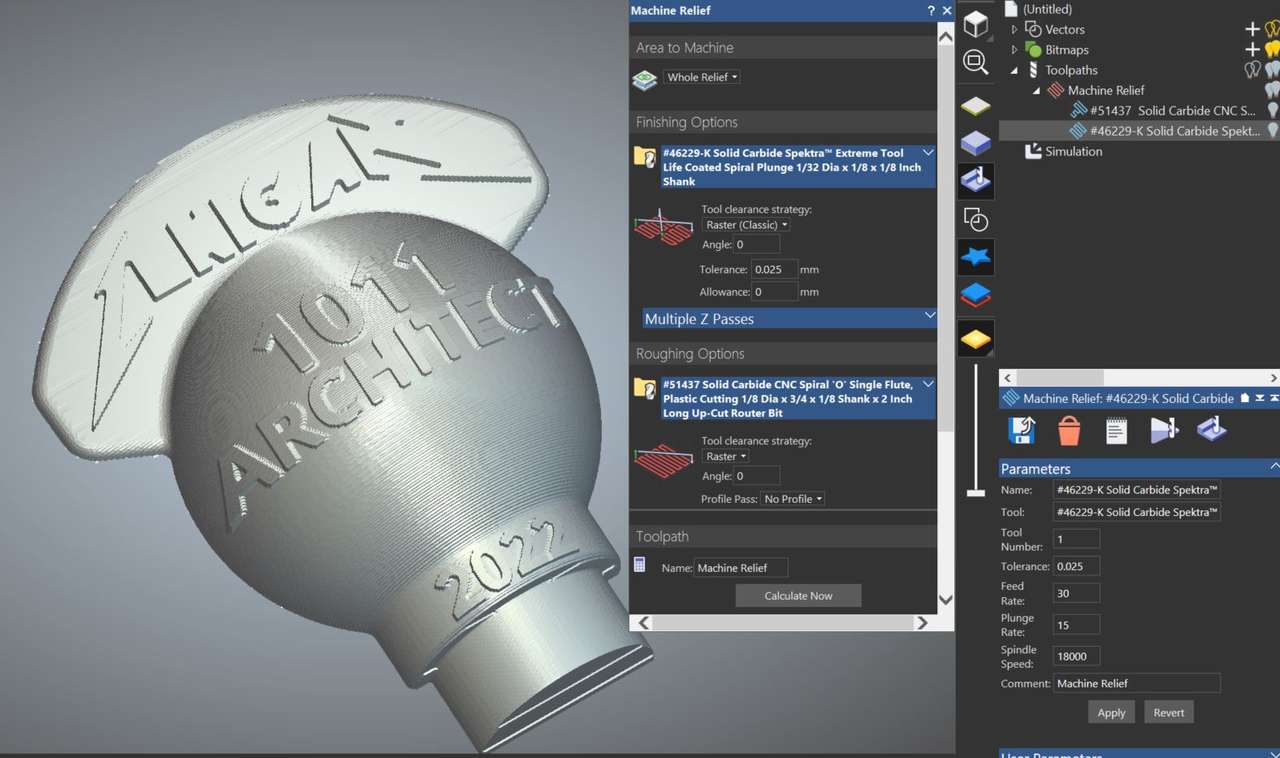 My part is so big it takes too much time to mill. Over 12 hours of milling would be required, longer if even smaller bit were used to get the correct detail. 3D Printing is faster to generate CAM, gives decent detail, and is much faster. In addition, for even smoother details, the surface of the 3D printed patterns could be smoothed.
Machining does not provide enough detail
The finish is not that great even with small end mills. 3D Printed patterns produce more detail and the 3D Printer is sooo much easier and quieter to operate. I hope some day to create a milling machine that has a operating process flow that is just as easy to use as a 3D printer. This pains me as a machinist who values milling machines and lathes as fabrication devices, but no one seems interested or willing to address this issue except the Shaper Origin folks.
CAD files
Metal Earth: Native Onshape CAD Files Metal Earth: Universal STEP CAD File
Since the Native Onshape CAD Files are an assembly with advanced geometry for creating sand casting tooling, below is a list to the CAD patterns and core box parts you’ll need to export from OnShape to make the sand mold and sand core yourself. I recommend these parts be 3D Printed, and not machined. 3D Printed parts should stand on their end when printed to allow the printing layers to align with the direction of mold pull (opening and closing action).
- Upper Pattern
- Lower Pattern
- Upper Core Box
- Lower Core Box
References
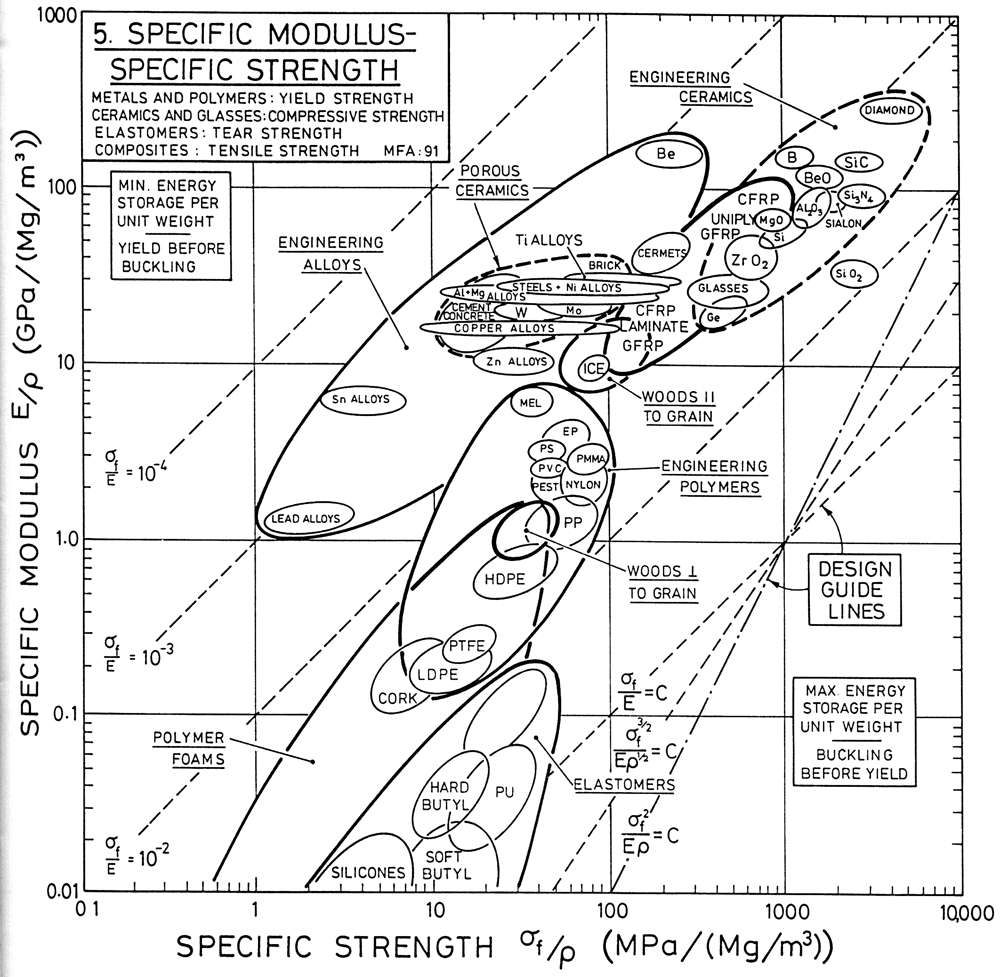
- Above: Specific Modulus and Strength of Fabrication Materials. Note the position of Sn (Tin) Alloys and Zn (Zinc) Alloys Source: Resources The Tribology Laboratory at Lehigh University
- Properties source MatWeb Zinc ZA-12