13. Molding & Casting
The goal for this week was to design and make a mold for the process I chose, prepare the surface carefully, and use it to cast a final piece.
The general workflow was:
- Review the molding and casting process, including safety considerations and material behavior.
- Design or prepare an original object that could be reproduced with a mold.
- Make the mold with a smooth surface so the fabrication marks would not transfer to the cast.
- Test casting materials, ratios, curing time, demolding, and surface quality.
For the group assignment, we reviewed the safety data sheets for the materials used in the lab and tested different material combinations before applying the process individually.
Group AssignmentConcept: Robot Artoy
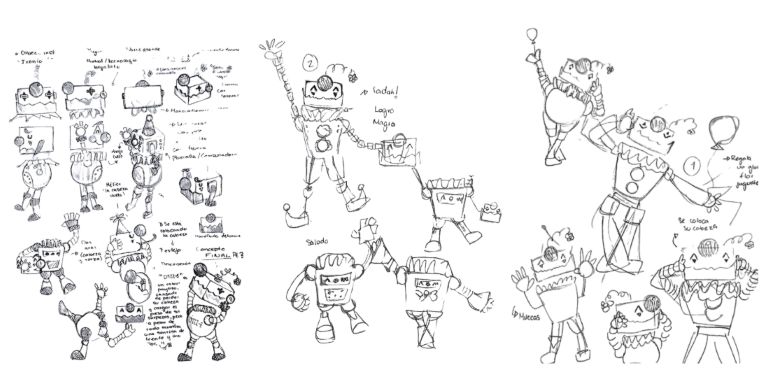
For this week I designed and casted an artoy (a designer toy figure) inspired by the concept of robots and circus. The character is a playful clown/robot called Scrappy that was rescued from a landfill. The concept grew from a moodboard combining circus performers (clowns, acrobats, jesters) with different robot design styles, rescuing the raw metal textures and mechanical parts.

About the original piece
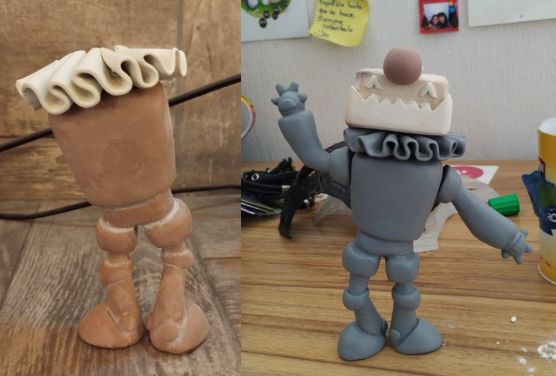
The base figure was built in separate parts to allow independent mold making. The head and collar were sculpted in polymer clay and baked to harden giving them a very smooth, hard surface ideal for fine detail. All other parts (torso, legs, arms) were built up with epoxy putty, sanded progressively, and primed before molding. The body was sculpted by hand to have more freedom and control over the organic shapes and textures, while the collar was reproduced digitally to explore a more reproducible workflow, specially because this piece was the most dificult to sculpt by hand and everytime I repeated it, it looked different, so I wanted to test if I could achieve a more consistent result with digital fabrication.
Firts I started with an aluminum wire skeleton to define the proportions and posture base oon my sketches.This gives a stable core and saves material.
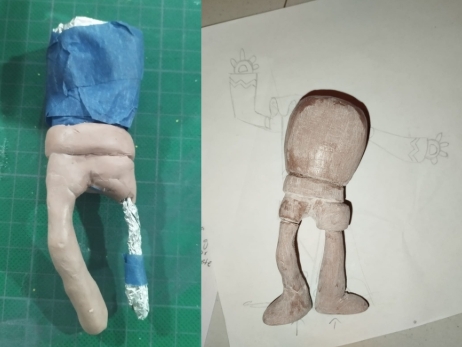
Epoxy putty was applied over the armature in layers to sculpt the boxy torso (50/50 mix), while the head and the collar were made from polymer clay. After it was baked, the pieces were sanded smooth and primed.
Why digital fabrication?
The artoy body was sculpted entirely by hand in polymer clay and epoxy putty. To fulfill the digital fabrication requirement and to explore a more reproducible workflow. I chose the clown collar as the part to mold digitally. This way the collar can be cast in unlimited identical copies directly from a 3D-printed mold.
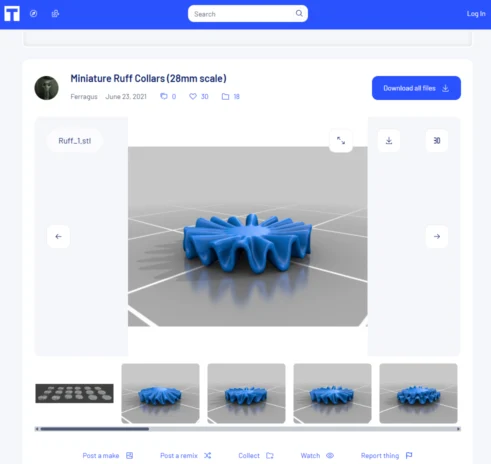
Clown collar model downloaded from Thingiverse. The model was reviewed for wall thickness and undercuts before being used as the master reference for the mold design.
A two-part mold was designed around the collar in OnShape. The parting line was placed at the collar's widest point to avoid undercuts, and registration keys were added so both halves align precisely every pour.
Mold halves printed in PLA. Layer lines are visible at this stage and must be removed before use so they do not appear on the final cast surface.
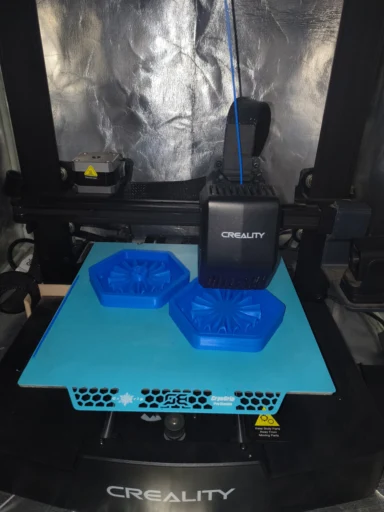
The inner mold cavities were sanded progressively and filled with body filler (resane) to eliminate layer lines. The goal is a surface as smooth as possible so the cast piece requires minimal post-processing.
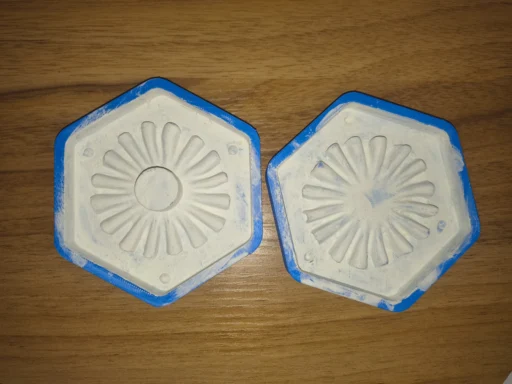
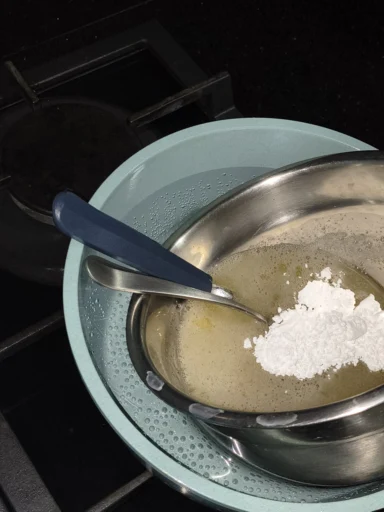
Gelatin powder was measured (40 g) and soaked in ~80 ml of cold water for several minutes until fully bloomed. This step ensures there are no dry lumps before heating.
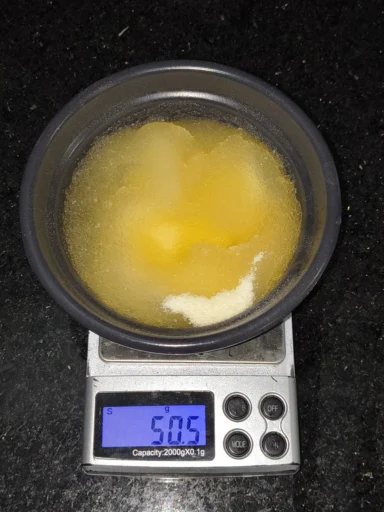
The hydrated gelatin was melted gently in a double boiler. Direct heat should be avoided as it degrades the gelatin. Once fully liquid, the glycerin (90 g) was stirred in slowly until the mixture was completely uniform.
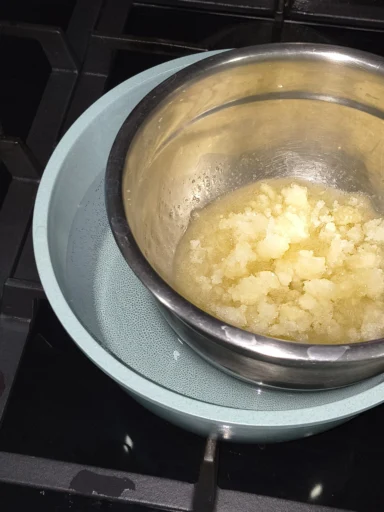
Two tablespoons of powdered sugar were stirred into the hot mixture to increase final strength. Meanwhile, a thin coat of cooking oil was brushed onto all interior surfaces of the PLA mold halves to act as a release agent.
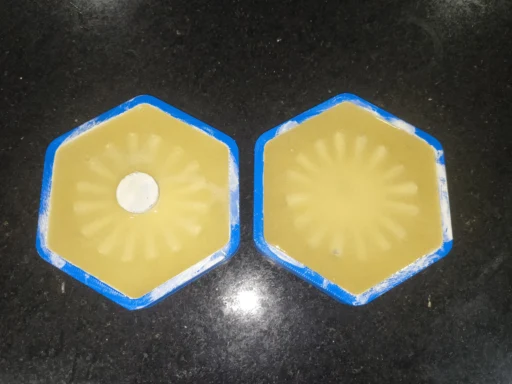
The hot gelatin mixture was poured carefully into the oiled PLA mold. The mold was left at room temperature and began to set in under an hour, then placed in the refrigerator for 3 hours to ensure a full, even cure throughout.
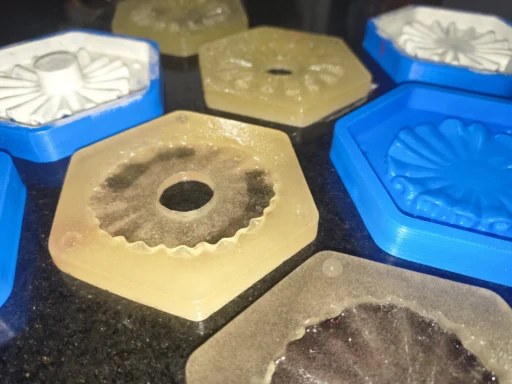
After 3 hours in the fridge the gelatin mold was demolded from the PLA halves. The flexible material released cleanly, picking up the collar detail faithfully. The resulting mold halves are ready for casting.
Gelatin mold: pros & cons
| Aspect | Notes |
|---|---|
| Cost | Very low - all ingredients from supermarket or pharmacy |
| Toxicity | Food-grade, non-toxic, no PPE required for mixing |
| Flexibility | Good - flexible enough for easy demolding |
| Detail capture | Good surface detail reproduction |
| Durability | Limited - sensitive to heat; store in fridge between uses |
| Reusability | Can be remelted and reused if the mold degrades |
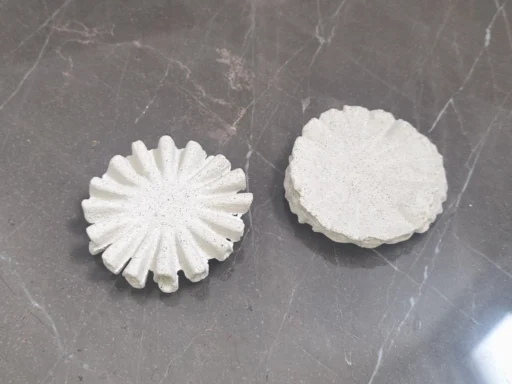
Plaster was mixed with water to a smooth, lump-free consistency and poured into the assembled gelatin mold halves. Both halves were held together firmly while the plaster was poured in a thin, steady stream to avoid trapping air.
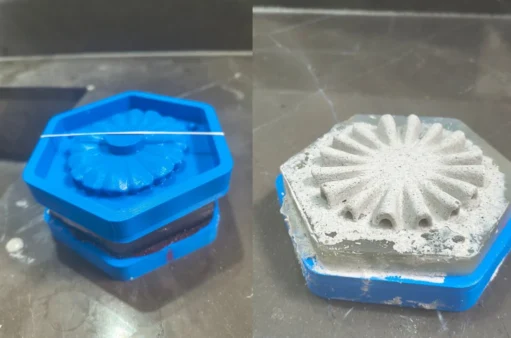
The plaster set within the mold and was demolded once firm. The cast collar came out cleanly, with good surface detail. The result confirmed that the gelatin mold performs well as a low-cost alternative for plaster casting.
With the piece embedded in sculptor's clay a mix of silicone (diluted + TP + colorant) was poured slowly creating a thin layer, after the first layer was cured I repeated the process two more times for better coverage.
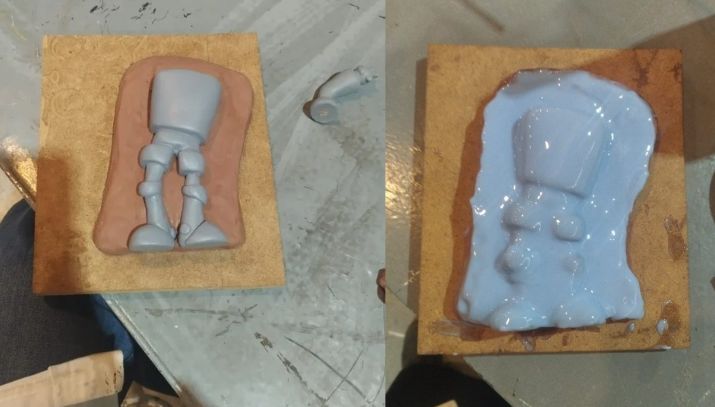
Once silicone cured, dental plaster was mixed with water (4:1 ratio) and poured over it to create a rigid shell. This prevents the silicone from deforming under the weight of liquid resin during casting.
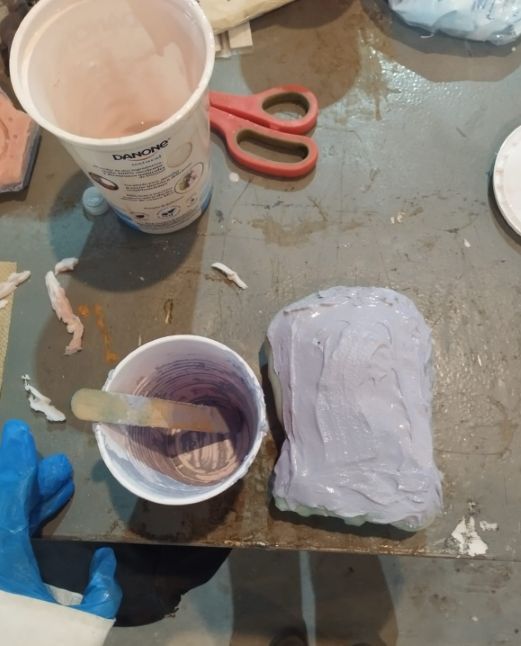
After the plaster set, the sculptor's clay was removed. The exposed silicone and mold edges were coated with vaseline as a release agent; without it, the two silicone halves would bond permanently to each other. After the second silicone half was cured the overflow at the edges was trimmed cleanly with a cutter.
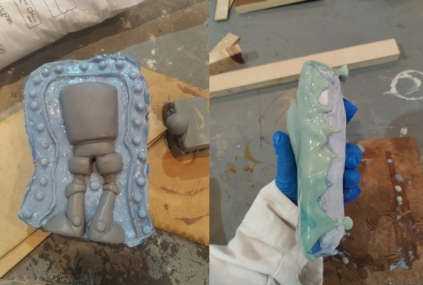
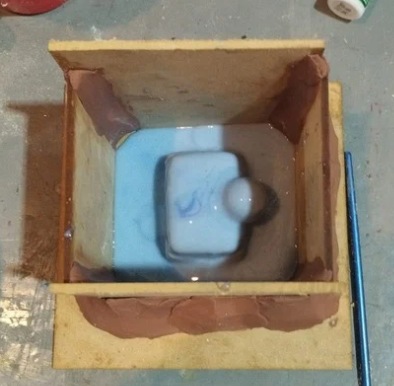
For the head the process was a little bit different, walls of MDF were used to create the mold. And the silicone was poured in layers to ensure even coverage. Even though the head came off, the nose caused a small lock during demolding, so I would recommend splitting the mold into more parts.
Each mold with its plaster mother mold for rigid support.
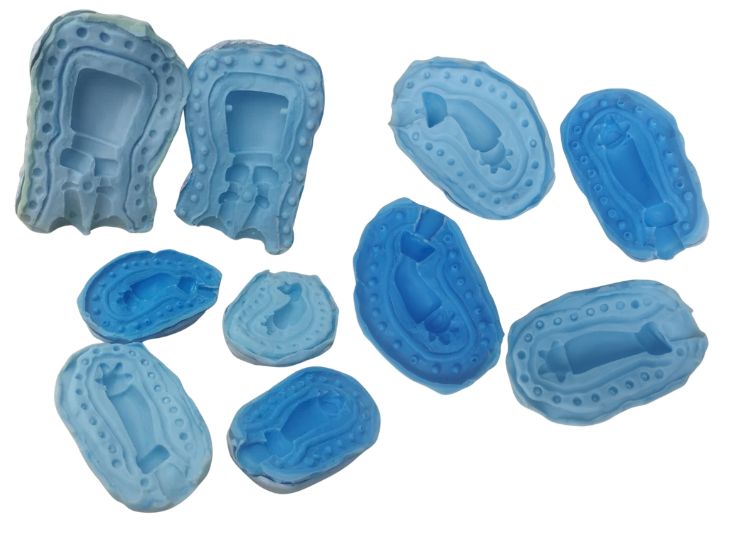
Mold summary
Most of the molds came out well, with good detail capture and clean demolding. The head mold was the most challenging due to its complex geometry and undercuts, which caused some tearing during demolding. For future iterations, I would recommend designing the head mold in multiple parts to allow for easier release. The body and arm molds were successful with the two-part design and vaseline release agent, resulting in clean casts without damage to the molds.| Part | Mold type | Silicone halves |
|---|---|---|
| Head | Open face | 1 |
| Body (torso) | Two-part | 2 |
| Left arm | Two-part | 2 |
| Right arm | Two-part | 2 |
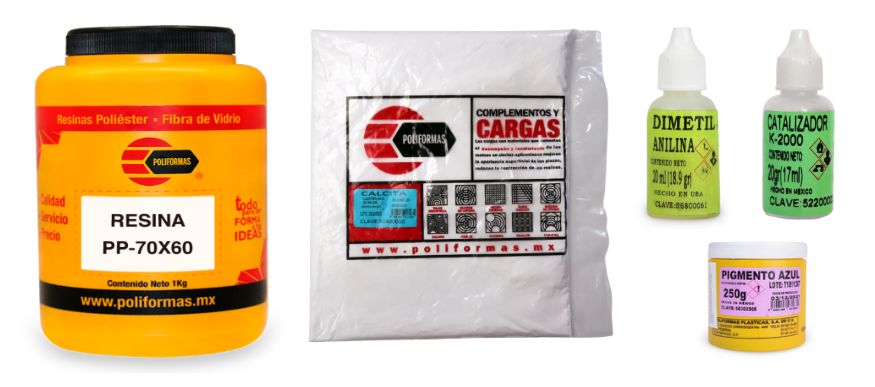
Resin, calcita, dimetil and colorant were combined first and stirred well. The catalyst was added at the very end and mixed for 1 minute before pouring.
Resin was poured slowly into the mold cavity. Both halves were pressed together and secured with rubber bands. A small amount was left to overflow at the pour hole to ensure no internal voids in the part.
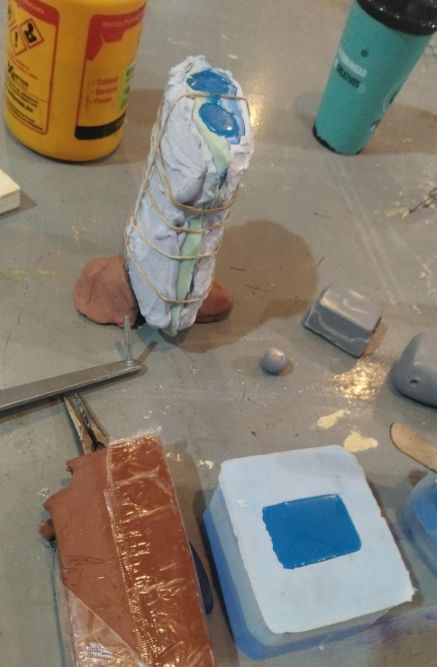
Molds were left at room temperature. The resin heats up noticeably during curing (exothermic) it takes about 30 min to 2hrs to cure. Once the mold is cool again, the resin was fully set, for better results its recommended to leave them for a longer period (12-48 hrs).
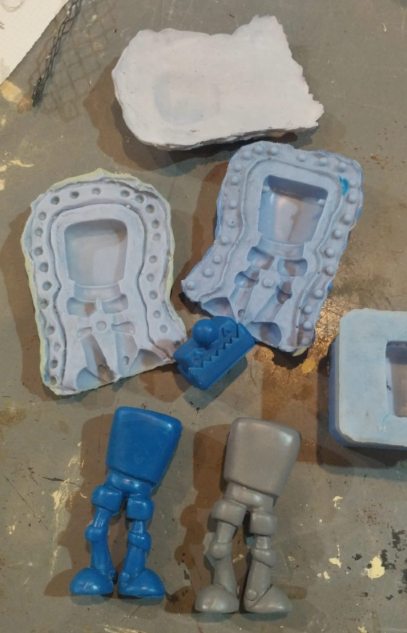
After demoulding and cleaning rest pieces, molds were ready to reuse for additional replicas. The seam lines and imperfections of the replicas were cleaned with 220-grit sandpaper.
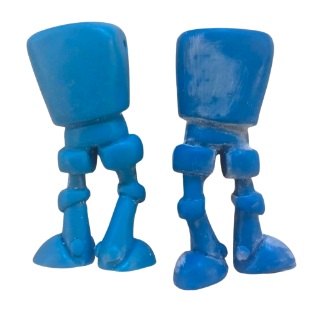
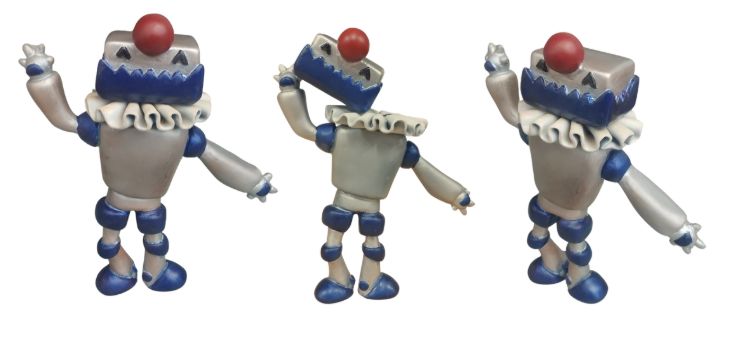
After casting and demolding, all parts were assembled and painted. The replicas faithfully capture the surface detail of the original sculpt including textures.Multiple replicas were produced from the same set of molds.
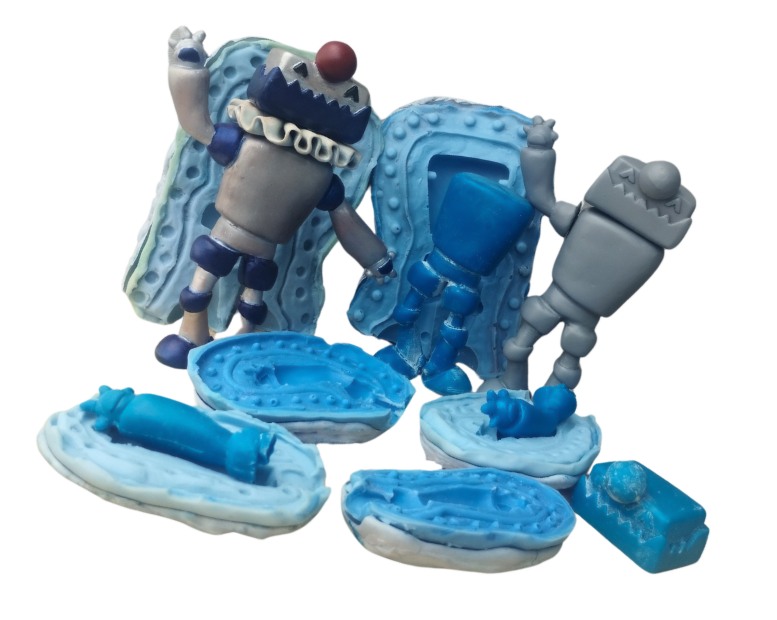
What worked well
| Aspect | Observation |
|---|---|
| Surface finish | Smooth replicas, minimal post-processing required |
| Mold registration | Plaster mother mold kept both silicone halves perfectly aligned every pour |
| Detail capture | Fine details like joint texture reproduced faithfully in every replica |
| Mold reusability | Molds survived multiple pours without damage or deformation |
Gelatin mold materials (eco alternative)
Food-grade, non-toxic ,available at supermarkets & pharmacies
| Material | Amount | Purpose |
|---|---|---|
| Unflavored gelatin powder | 40 g | Structural base of the flexible mold |
| Water | ~80 ml | Hydrates the gelatin before melting |
| Glycerin | 90 g | Plasticizer ,keeps mold flexible, prevents cracking |
| Powdered sugar (icing sugar) | 2 tablespoons | Increases final mold strength |
| Cooking oil | Light coat | Release agent on the PLA mold interior |
Gelatin mold mixing order
Hydrate gelatin in cold water > melt in double boiler (baño maría) > add glycerin once liquid > stir in powdered sugar > oil the mold > pour hot mixture > room temperature until set (~1 hr) > refrigerate 3 hours > demold.
Silicone mold materials
Where to buy: Poliformas
| Material | Purpose | Used | Recommended |
|---|---|---|---|
| Silicone rubber P48 | Flexible mold base | 100 g | 100 g (base) |
| Catalyst TP | Vulcanizing agent | ~50 drops | ~10 g / 10% by weight |
| Silicone thinner | Reduces viscosity for detail | ~50 ml (some consider is too much) | Depends on material |
| Colorant | Homogeneity check only | A few drops | No functional limit |
Resin casting materials
Where to buy: Poliformas
| Material | Purpose | Amount per 50 g resin |
|---|---|---|
| Polyester resin 70x60 | Cast material base | 50 g |
| Catalyst MEKP (K2000) | Triggers curing | 20–25 drops hot/ up to 50 per 100 g cool |
| Calcita (calcium carbonate) | Filler (body, less shrinkage) | ~5–10% by weight |
| Colorant | Tints the piece | To taste, max ~3% |
Other materials used
| Material | Purpose | Where to buy |
|---|---|---|
| Plaster | Rigid mother mold shell + casting material for collar | Dental supply stores |
| PLA filament | 3D printed mold for collar | Fab Lab / filament suppliers |
| Body filler (resane) | Surface finishing of 3D printed mold halves | Hardware stores |
| Vaseline | Release agent between silicone halves | Market |
| Sculptor's clay / plastilina | Embed piece to define parting line | Poliformas / art stores |
| MDF | Mold base | Hardware stores |
| Rubber bands | Clamp mold halves during casting | Market/Stationary |
| Polymer clay | Head sculpt, bakeable, smooth surface | Art stores |
| Epoxy putty | Structural sculpting, cures hard at room temp | Hardware stores |
Golden rule: catalyst always goes in last
Silicone: base > thinner > colorant > add Catalyst TP last and mix well
Resin: base > calcita > colorant > dimetil > add Catalyst MEKP last.
Once catalyst goes in, working time is limited. Mix everything else first, add catalyst only
when you are ready to pour immediately.
Learning Outcomes
- Digital fabrication enables true reproducibility: Hand-sculpted masters are unique, no two pieces will ever be identical. Designing the collar in OnShape and printing the mold in PLA means every collar cast from it is dimensionally identical, which is the real power of integrating digital tools into a molding and casting workflow.
- Gelatin is a viable low-cost mold material: The glycerin/gelatin mold (40 g gelatin, 90 g glycerin, ~80 ml water, 2 tbsp powdered sugar) produced a flexible mold capable of capturing good surface detail and releasing plaster cleanly. It sets in under an hour at room temperature and is fully food-safe , a practical alternative when silicone rubber is not accessible or budget is limited. Its main limitation is heat sensitivity, so it must be stored in the refrigerator between uses.
- Surface preparation is everything: Sanding and priming the original before molding was the most critical step. Any tool marks or fingerprints on the original show up faithfully in every replica.
- The mother mold solves deformation: Without the rigid dental plaster shell, soft silicone walls bow outward under liquid resin pressure and distort the shape. The mother mold is not optional for two-part molds. A soft mold helps with demolding, but it needs the support of a hard shell to maintain dimensional accuracy and detail fidelity.
- Catalyst amount depends on climate: In warm weather fewer drops of MEKP are needed. Too much heat combined with too much catalyst creates an exothermic spike that can crack the piece.
- Catalyst always goes in last: both for silicone (TP) and resin (MEKP). Mix everything else first and add catalyst only when you are ready to pour immediately, adding colorant can help you verify the mix is fully homogeneous, not mixing the catalyst well can result in sticky uncured spots in the mold or resin that never fully hardens.