4. Embedded Programming
This week we learned about embedded systems which are specialized computing systems designed to perform specific functions within larger mechanical or electrical systems.
In other words, they are designed for a particular task or set of tasks, and have a limited processing power, memory, and storage.
To run this task we need a micro-controller which is a compact integrated circuit that includes a CPU, memory (both RAM and ROM), and peripherals (like timers, I/O ports, and communication interfaces) all in one chip.
To learn more about embedded programming, check out the group assignment
Data sheet comparative
Understanding and comparing the micro-controller datasheets is important because it will help us to select one that adjusts to our project requirements (like GPIO Pins, Operating Voltage, and compatibility). For this exercise I compared the ESP32 and the Raspberry Pi Pico (RP2040) both good micro-controllers for my project
ESP32 series
The ESP32 is a chip that combines Wi-Fi and Bluetooth in one device. It uses low-power technology to work efficiently and reliably. The ESP32 is part of the ESP family of micro-controllers, making it suitable for many different applications.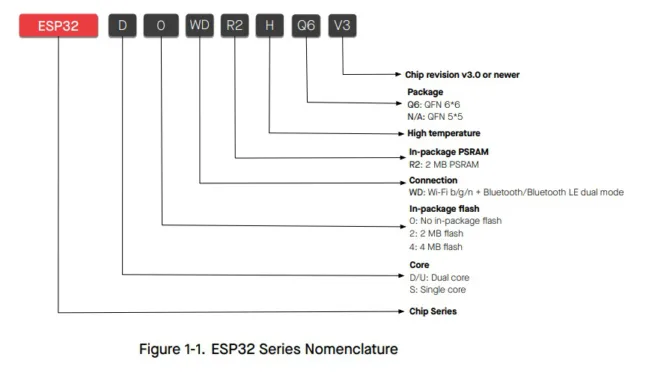
This series encompasses a variety of model variants, each denoted by a unique set of characters after "ESP32-", such as D, O, WD, R2, H, Q6, and V3. Regardless of the specific model, all ESP32 devices share common core capabilities
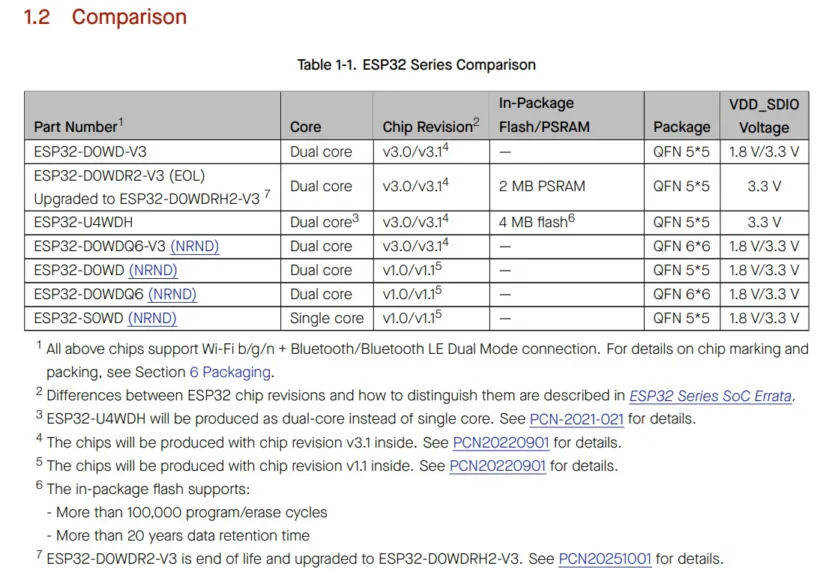
The series is designed to work with chip revisions v3.0 and newer, ensuring the latest advancements and improvements. The models that have the abbreviation "NRD" are no longer recommended for new product designs, for different reasons like newer versions.
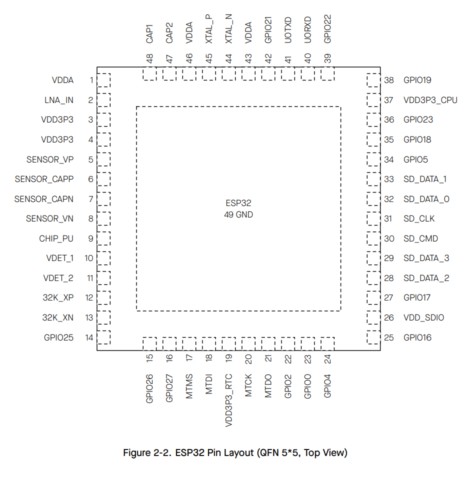
The ESP32 chip comes in different physical sizes, called packages. The most common ones are 5×5 mm and 6×6 mm.
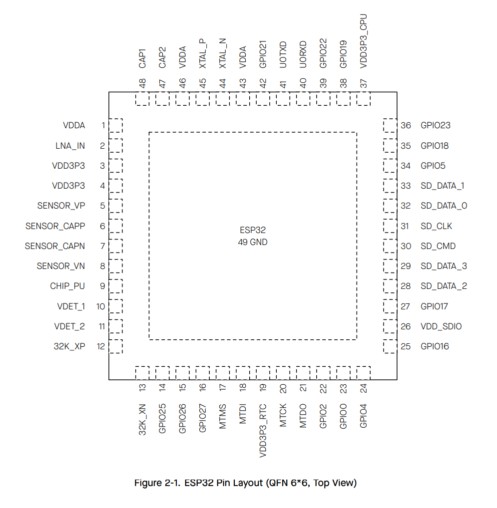
The chip packages do not change the pin numbers or functions on a development board.
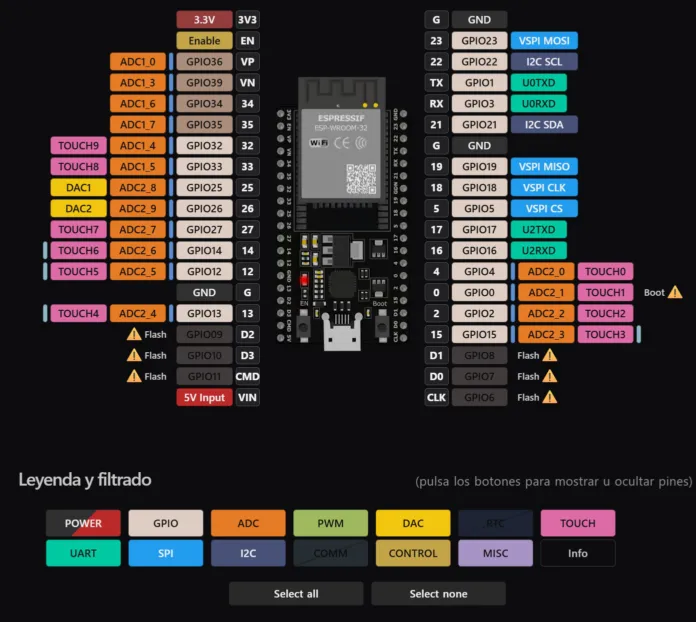
The image shows the pin out diagram of an ESP32, on the table we can see the general description of the pin.
ESP32 Datasheets| Pin Name | Description |
|---|---|
| 3.3V | 3.3V power supply |
| EN | Enable pin to power on/off the ESP32 |
| VIN | 5V input voltage |
| GPIO0 - GPIO39 | General-purpose input/output pins |
| ADC1_0 - ADC1_7 | Analog-to-Digital Converter pins |
| ADC2_0 - ADC2_9 | Analog-to-Digital Converter pins |
| GPIO that can be used for PWM | Pulse-Width Modulation output |
| DAC1, DAC2 | Digital-to-Analog Converter pins |
| TX, RX | UART pins |
| VSPI MOSI, VSPI MISO, VSPI CLK, VSPI CS | Versatile SPI pins |
| I2C SCL, I2C SDA | I2C pins |
| TOUCH0 - TOUCH9 | Touch sensor pins |
| Flash, Boot | Pins used for flashing firmware and booting the ESP32 |
| Feature | ESP32 | RP2040 |
|---|---|---|
| CPU | Dual-core Xtensa LX6 | Dual-core ARM Cortex-M0+ |
| Power | 3.0V – 3.6V (3.3V typical) | 1.8V – 3.3V (3.3V typical I/O) |
| SRAM | 520 KB SRAM | 264 KB SRAM |
| Flash Memory | External SPI Flash (usually 4MB) | External QSPI Flash (typically 2MB on Pico) |
| Clock Speed | Up to 240 MHz | Up to 133 MHz (overclockable) |
| GPIO Pins | Up to 34 usable GPIO | 26 usable GPIO |
| Analog Inputs | 18-channel 12-bit ADC | 4-channel 12-bit ADC |
| Communication | UART, SPI, I2C, I2S, CAN | UART, SPI, I2C, USB (no CAN/I2S) |
| Languages | C, C++, MicroPython, Arduino | C, C++, MicroPython |
| Wireless | WiFi 802.11 b/g/n + Bluetooth | None (Pico W adds WiFi) |
I chose the ESP32 for my pill dispenser project because it has a powerful dual-core processor and sufficient memory to handle real-time alarms, time management, and multiple components such as a display, buttons, buzzer, and servo motor simultaneously. Additionally, the ESP32 includes built-in WiFi and Bluetooth, giving me the option to add wireless notifications or app connectivity in the future if needed.
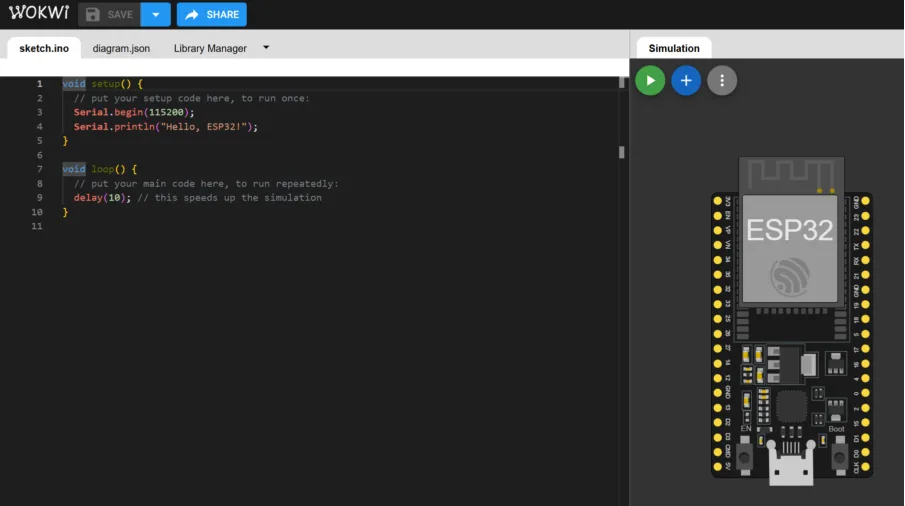
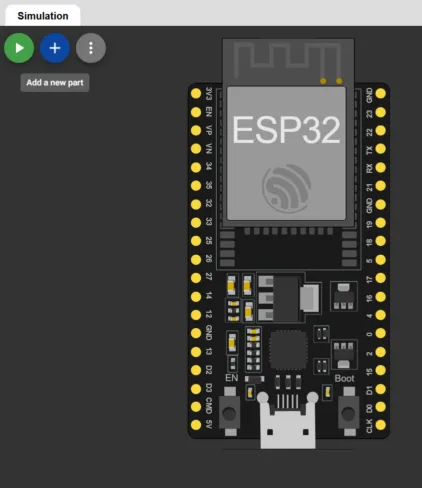
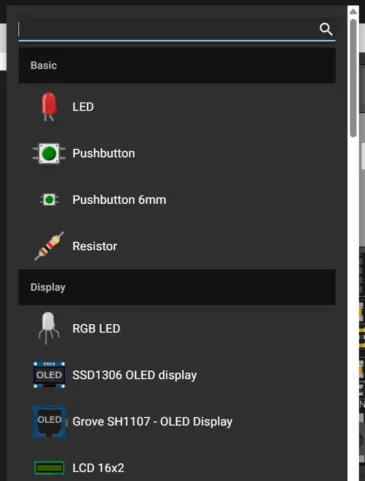
First exercise (button and led)
Before doing an exercise related to my project (pill dispenser), I wanted to do a small warm up on wokwi using an ESP32 to turn on a led with a button and screen printing if the led is on or off. I also compared the same exercise but with different languages (MicroPython and C++)
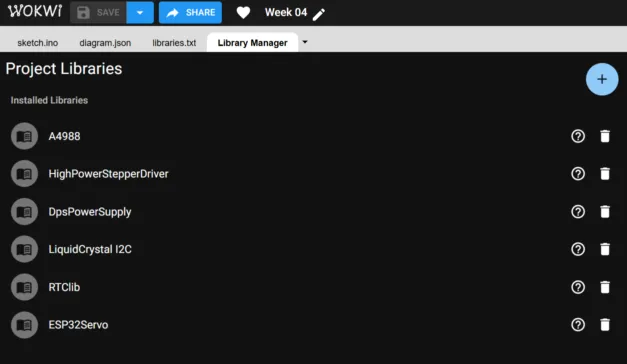
Wokwi Project Link C++
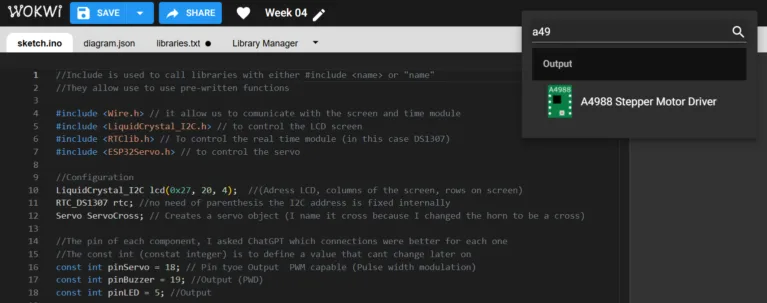
This is the code I used, with annotations to study and explain what each code line means. You can also visit my wokwi project.
At the end I chose to use C++ because of debugging. As a beginner, I make a lot of mistakes, and having compile-time errors helps me detect problems before running the program. I also prefer C++ because it uses strict data types, which makes the code more structured and easier for me to understand while learning.
Pill dispenser exercise
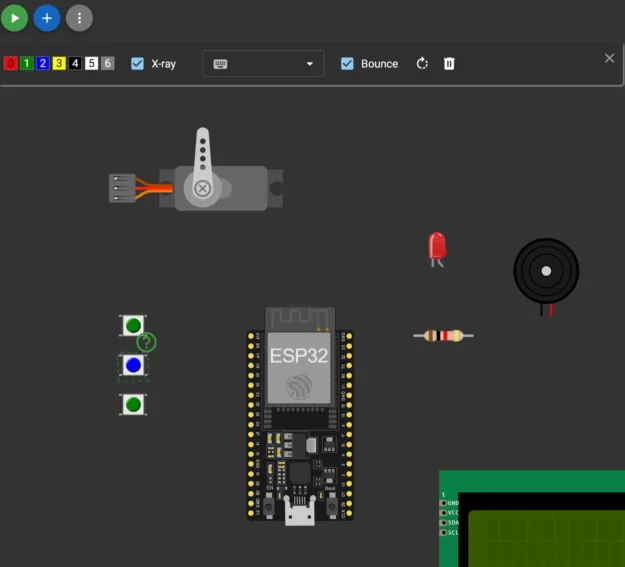
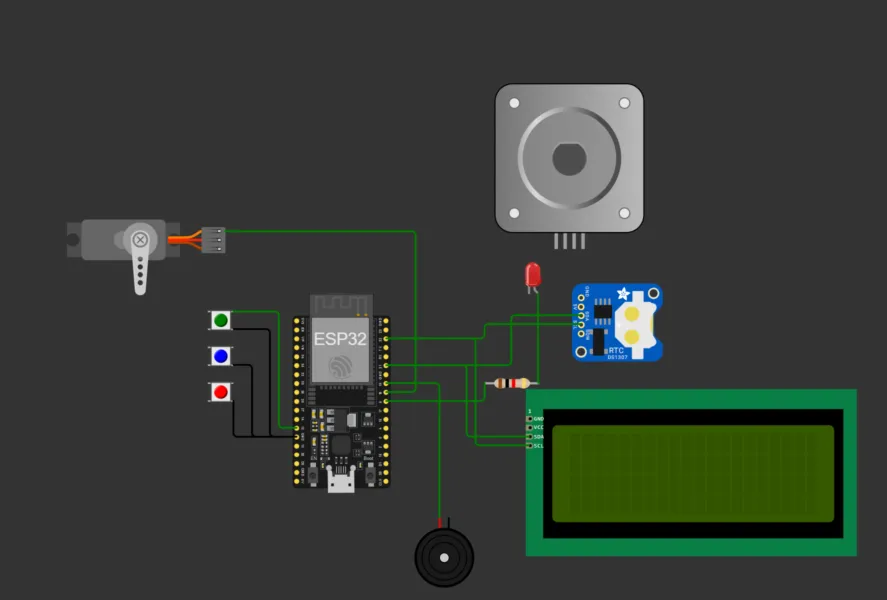
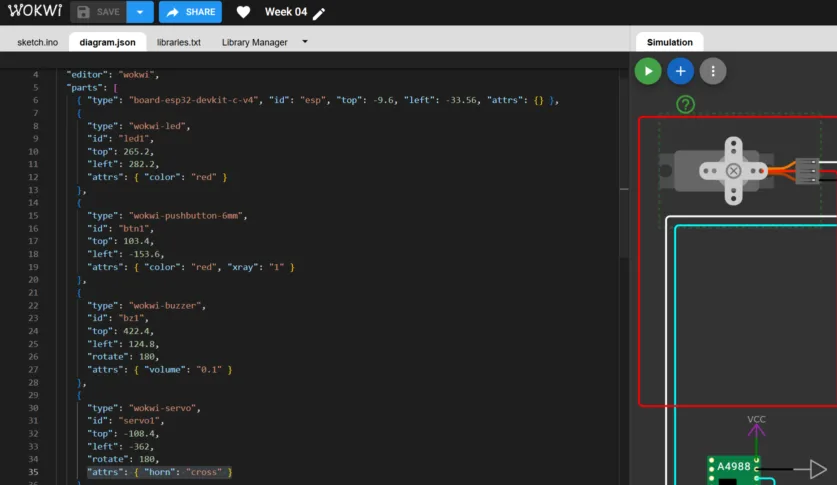
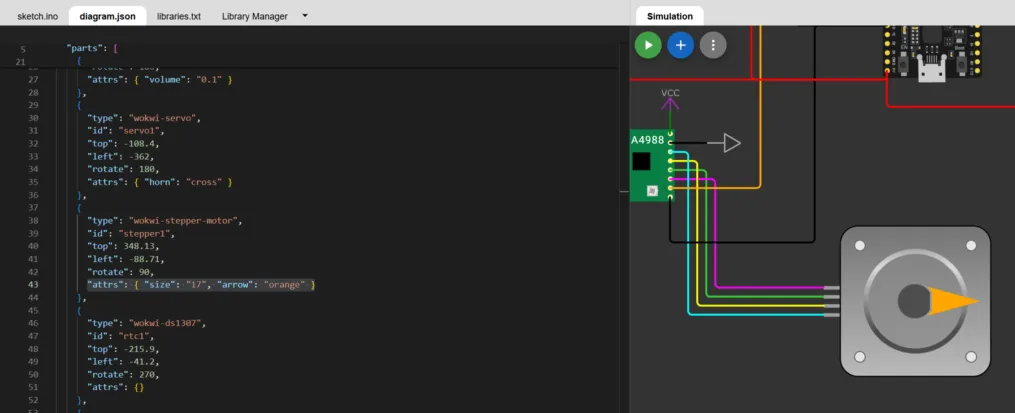
In this exercise I created the base for a pill reminder alarm using the ESP32. The system shows the real time (thanks to the DS1307) on a screen and lets the user set a specific hour and minute for the alarm with the buttons. When the time matches, it activates a song, a led, and moving parts (that represent the movement of the pill dispenser future mechanism) to make sure the reminder is noticeable.
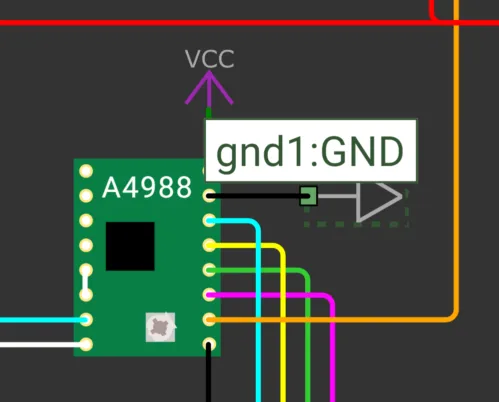
Alarm (buzzer + led + servo + stepper)
Here you can find my Wokwi exercise, code and simulation result

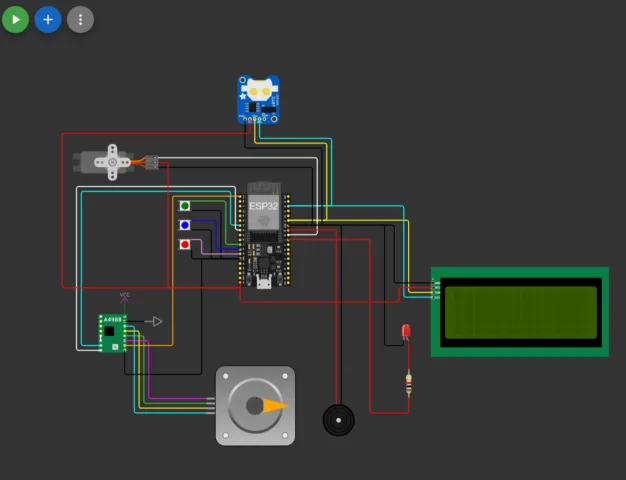
In this exercise I used ChatGPT as a support tool to improve my project. I asked for recommendations on the best GPIO pins to use on the ESP32 to avoid conflicts and make the wiring more reliable. I also used it to help generate the melody for the alarm and convert musical notes into frequency values. When I encountered errors or unexpected behavior in the code, I used ChatGPT to help me debug and understand what was happening. It helped me not only fix issues but also understand the logic behind the solutions.
For example, one prompt I used was: “Which GPIO pins are safe to use on the ESP32 for a servo, buzzer, buttons with INPUT_PULLUP, and a stepper motor?”
However I still think there are areas to improve, for example adding an option for setting time with the Serial Monitor to optimize the simulation (setting it with buttons can take time)Learning Outcomes
This week wa a challenge for me because I did not have much prior knowledge in programming. However, I learned more about it in a significant way.
- Learning by analyzing others: Reviewing existing projects and breaking down code line by line helped me understand logic structure and syntax.
- Debugging mindset: Programming requires patience. Small syntax errors can stop everything from working. As a beginner C++ helped me detect errors more clearly through compile-time feedback.
- Using AI as a learning assistant: Asking ChatGPT to explain errors, improve code, or identify problems helped me understand logic mistakes instead of just copying solutions.
- Connection to my final project: This exercise was designed considering my final project (pill dispenser). It allowed me to simulate the alarm and movement logic that I hope to physically prototype in the future.
I believe this week is the base for future projects. Lastly, I would like to physically build this or a similar alarm system, with an improved disperser movement.