2. Computer-aided design
This week we learned about different software tools both in 2D and in 3D, after that we compared its workflow and evaluated them.
The three main activities I did where:
- Vectoring my avatar drawing both in Affinity and Adobe Illustrator.
- Modeling a part of my final project in Onshape and Inventor
- Compressing media with ffmpeg (videos) and XnConvert (images)
2D Design
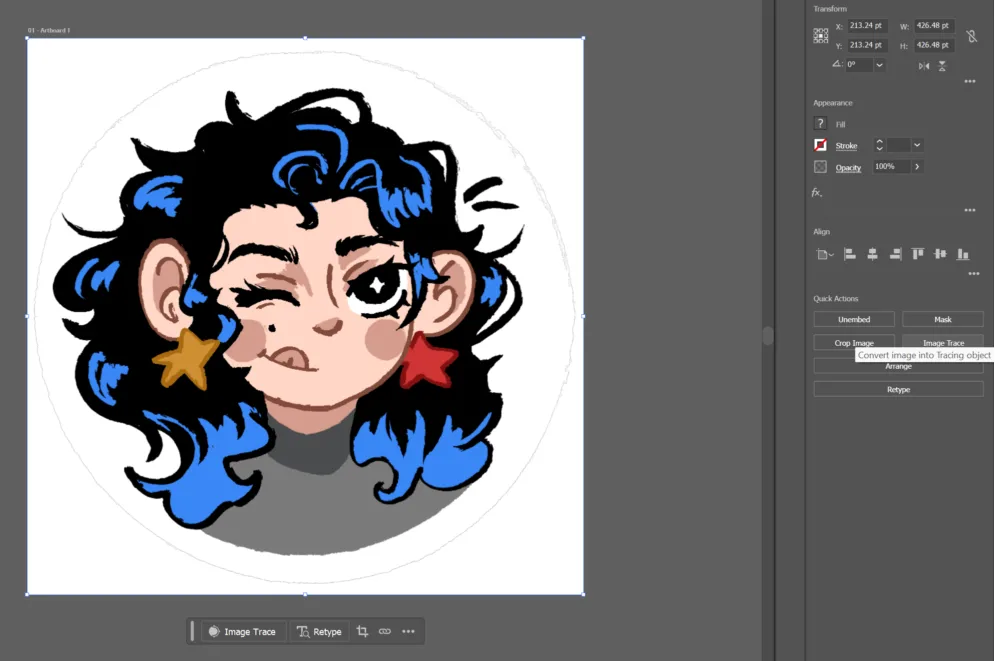
During week 01 I drew an avatar of myself in GoPaint, however to maintain its resolution in any scale I needed to vectorize it. The general workflow in both Affinity and Adobe Illustrator are pretty similar, in both we:
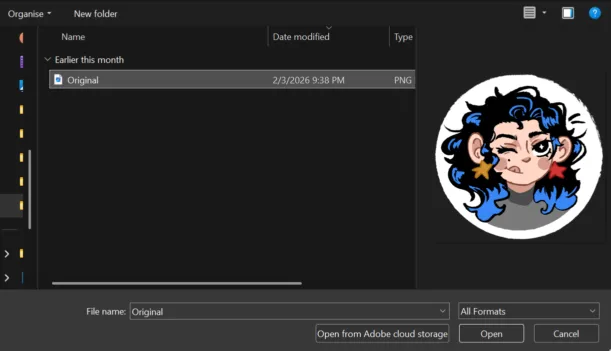
- Open the original image in the software
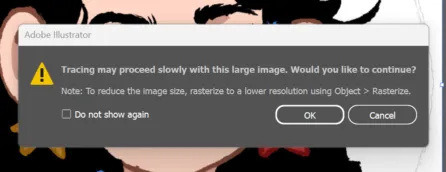
- Search the image trace tool
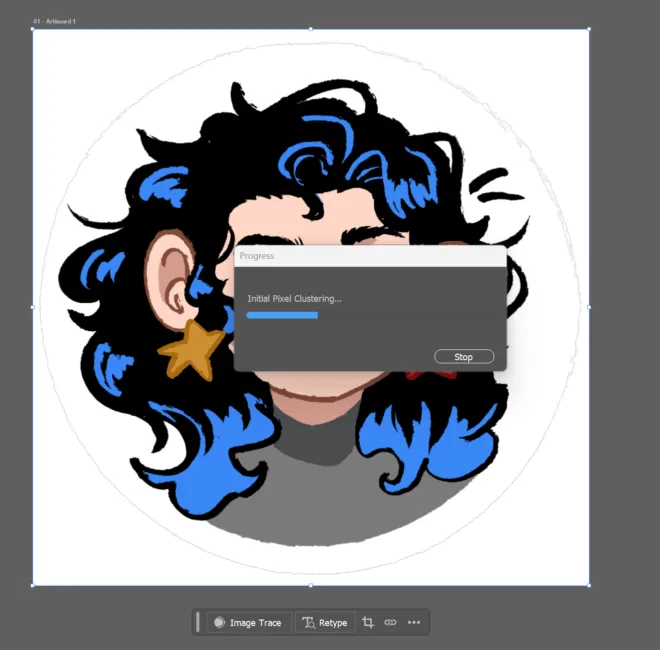
- Adjust the parameters to our necessities
- Convert the image (expand)
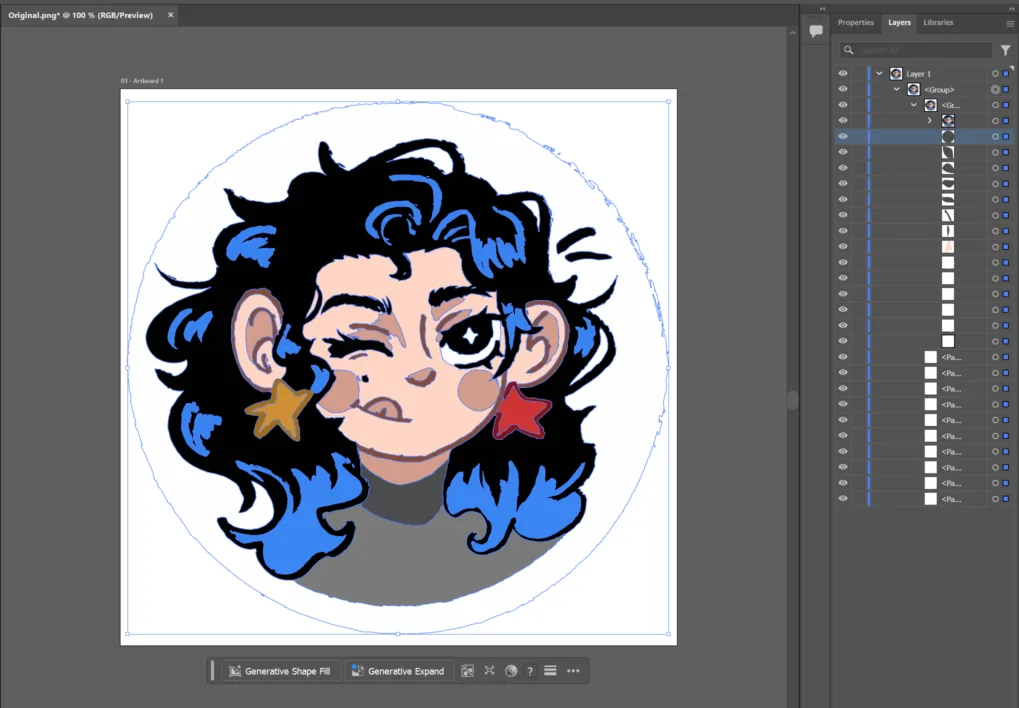
- Clean our paths and make corrections
Here you can watch the step by step tutorial in both softwares
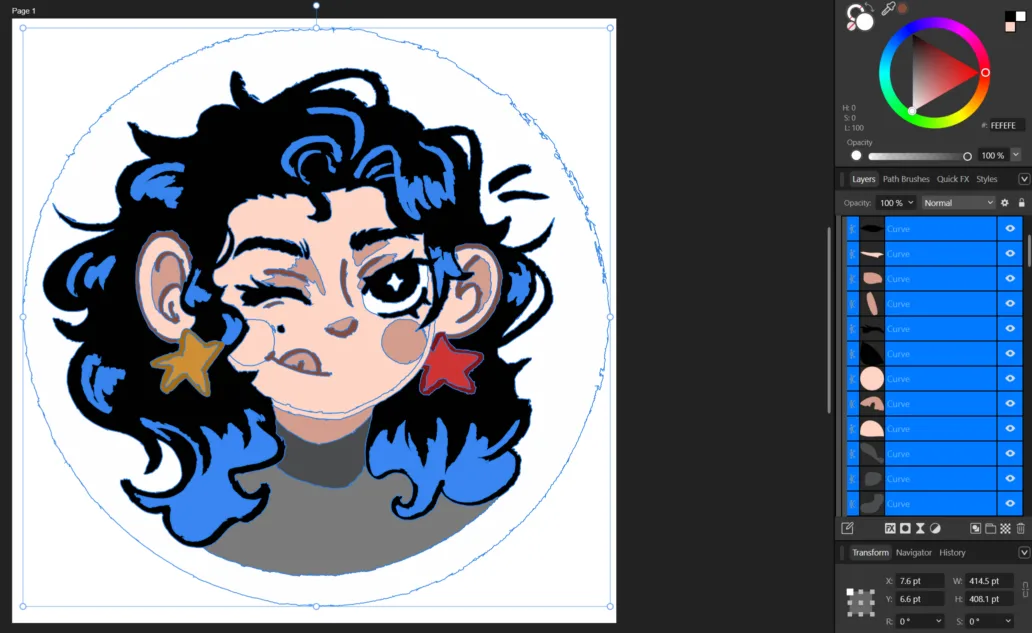
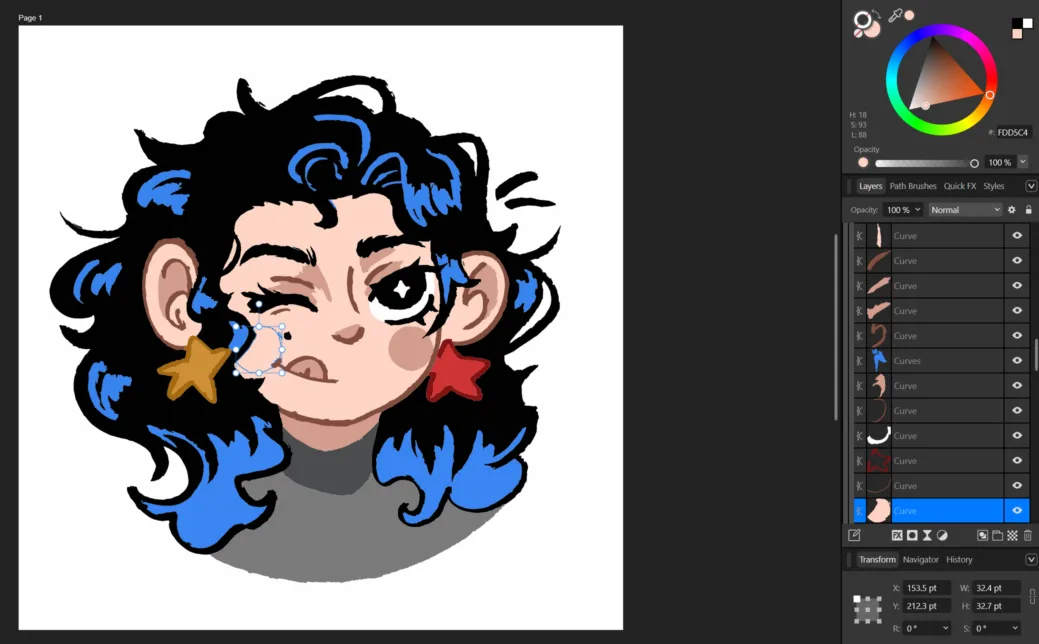
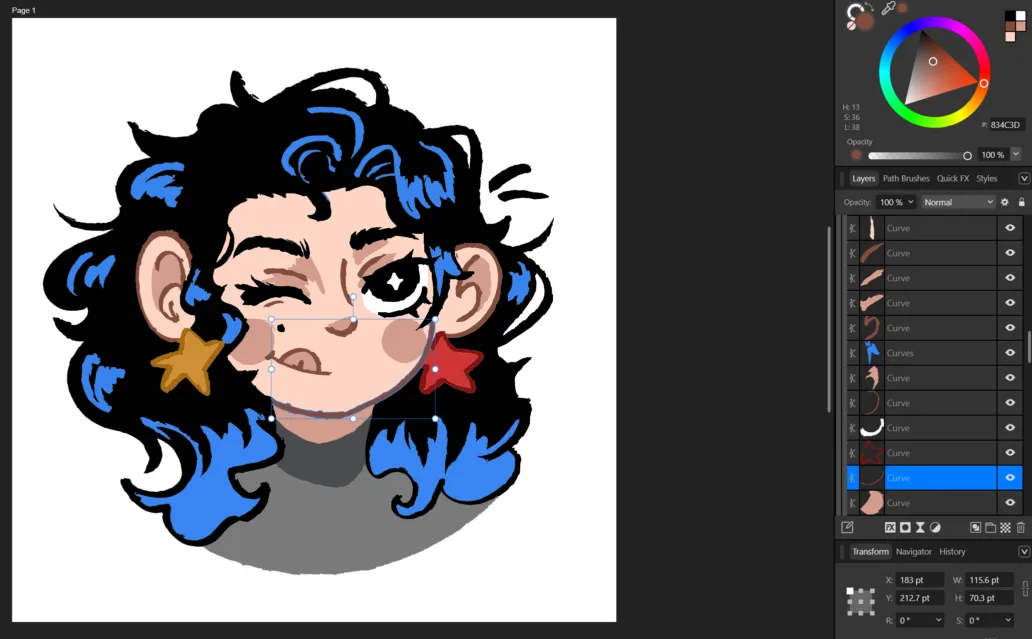
Vectorizing an image in Affinity
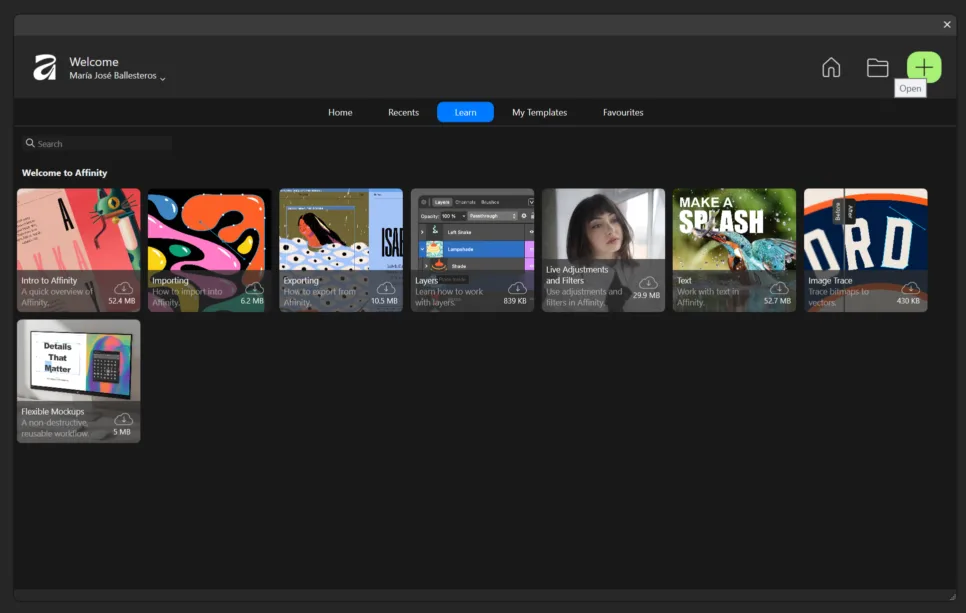
1. Open Affinity and click the green + button.
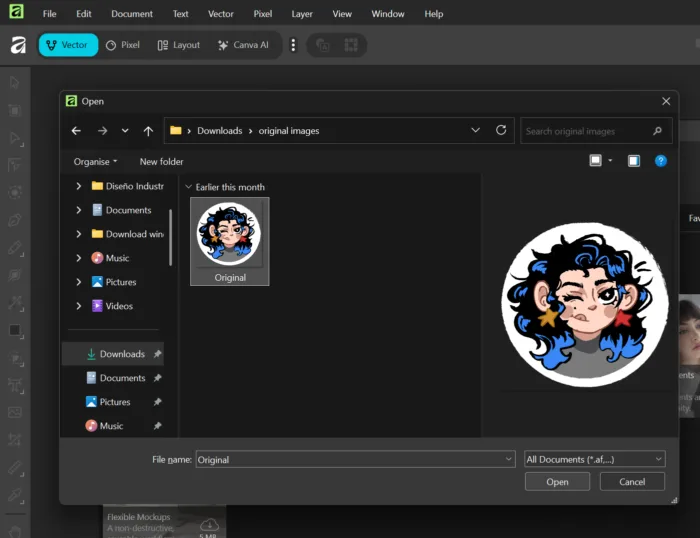
2. Open the image you want to vectorize.
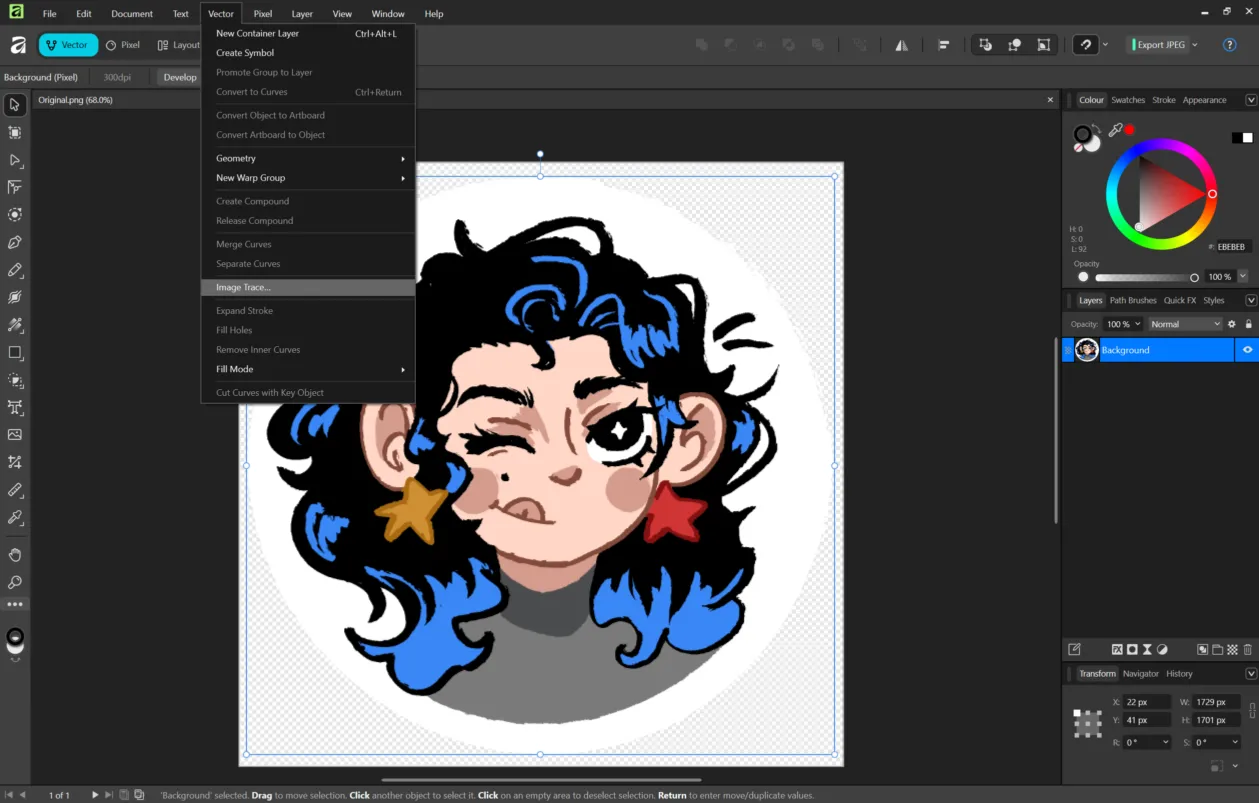
3. Search the vector section and select image trace.
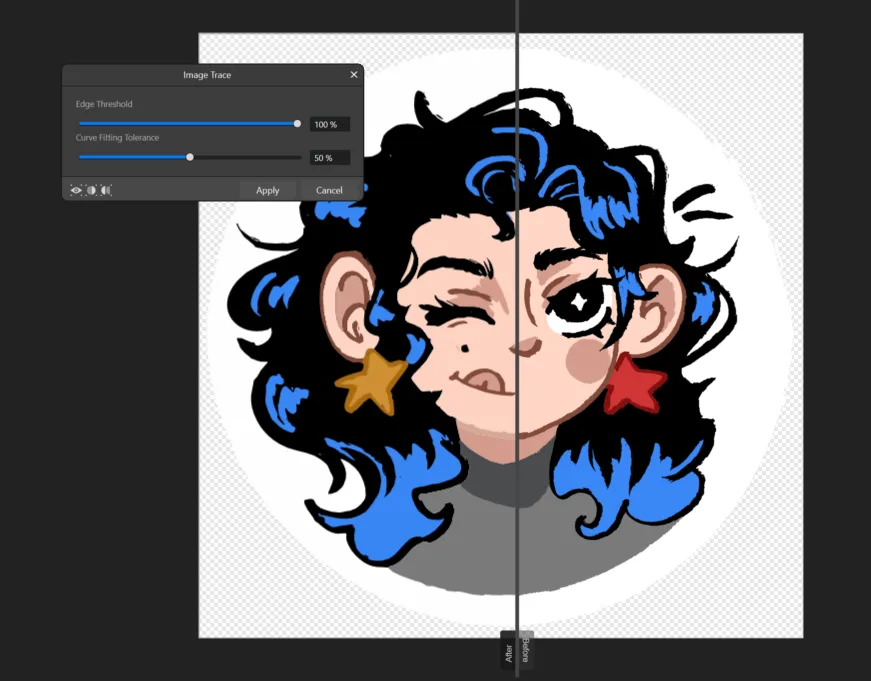
4. Adjust threshold and curves. Then click apply.
5. Now you have paths. Change colors if needed.
5.1. Select the part and apply desired color.
5.2. Repeat the process until needed.
After that you will have your vectorized image complete.
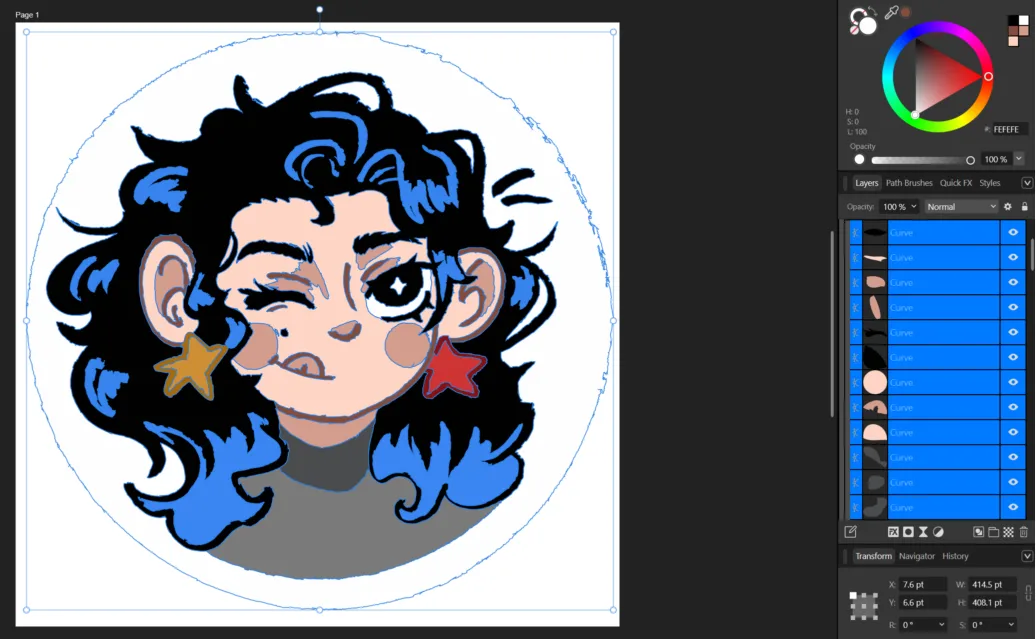
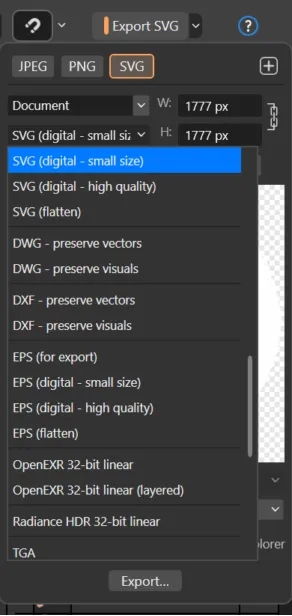
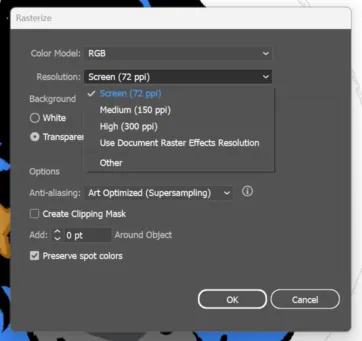
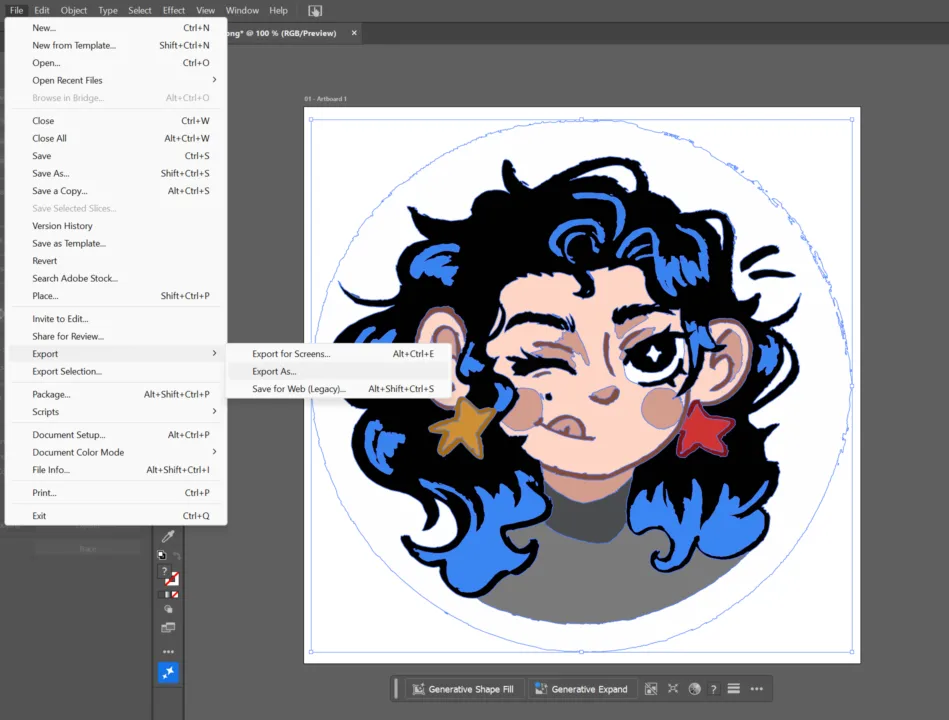
6. Export your image in SVG
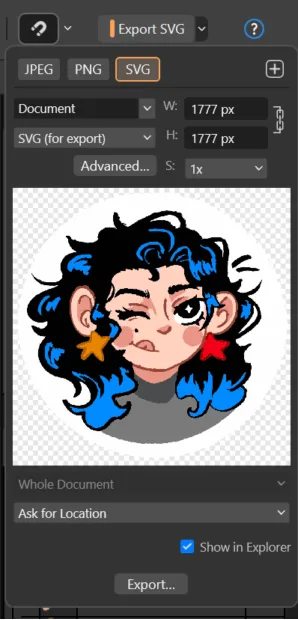
6.1 Affinity has an advanced window to chose the settings of your export, select what adjust to your necessities

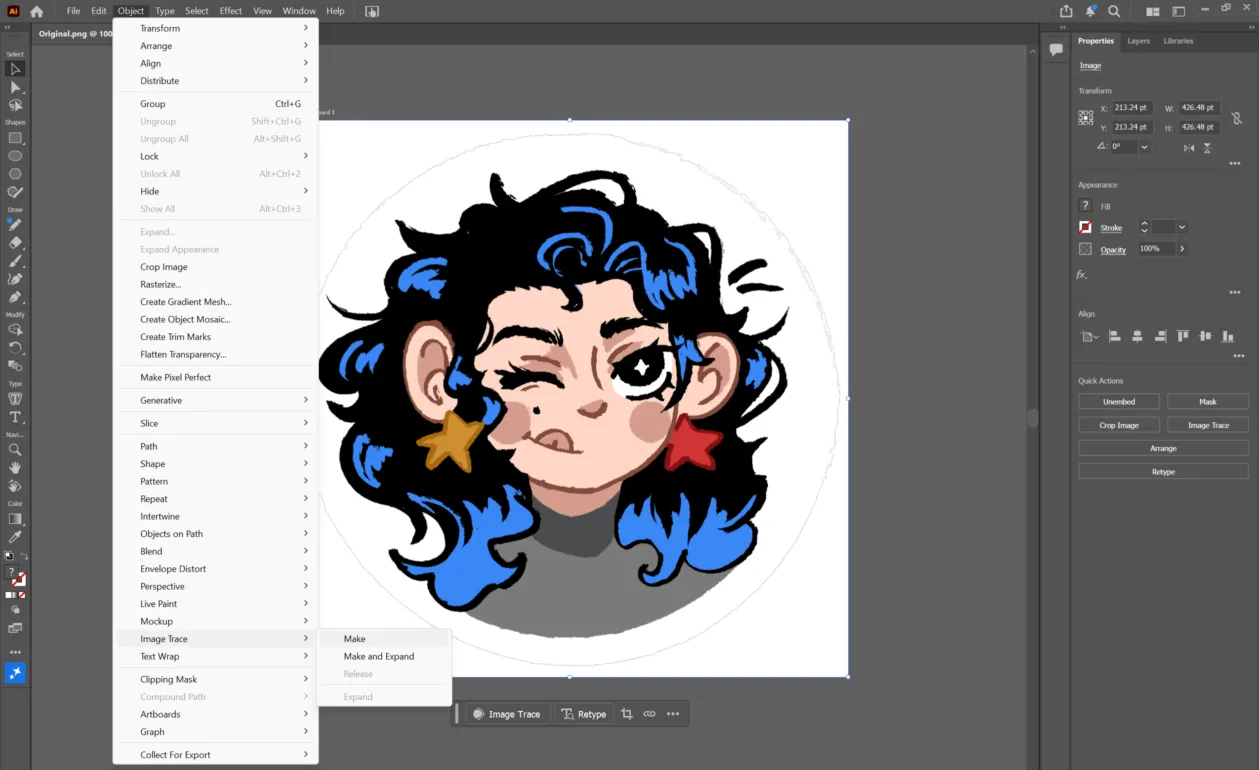
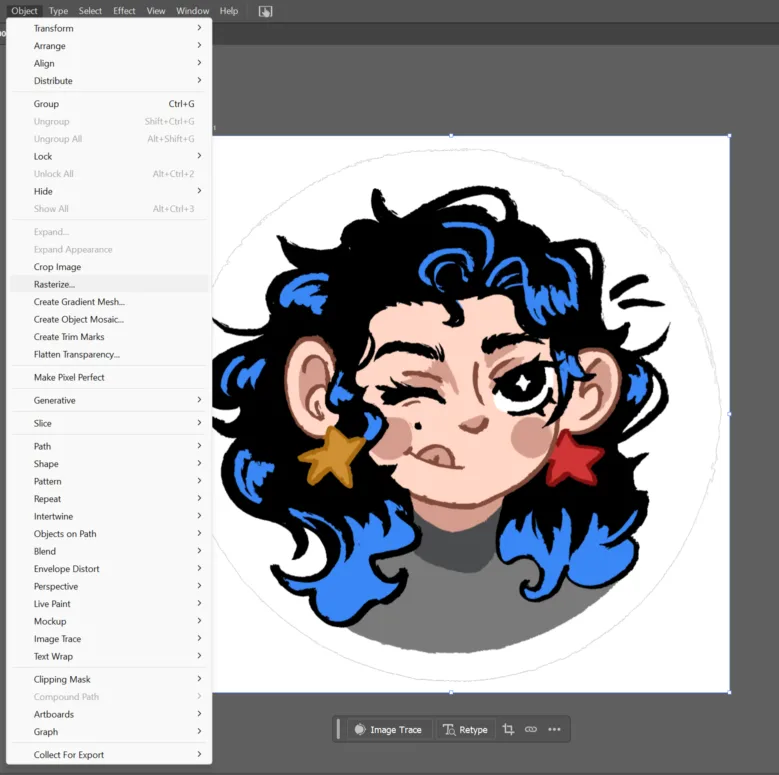
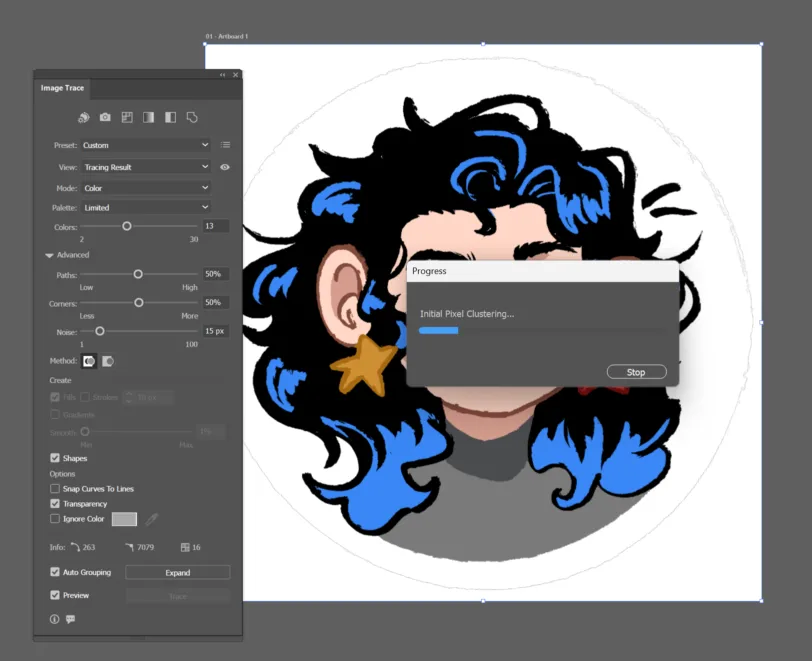
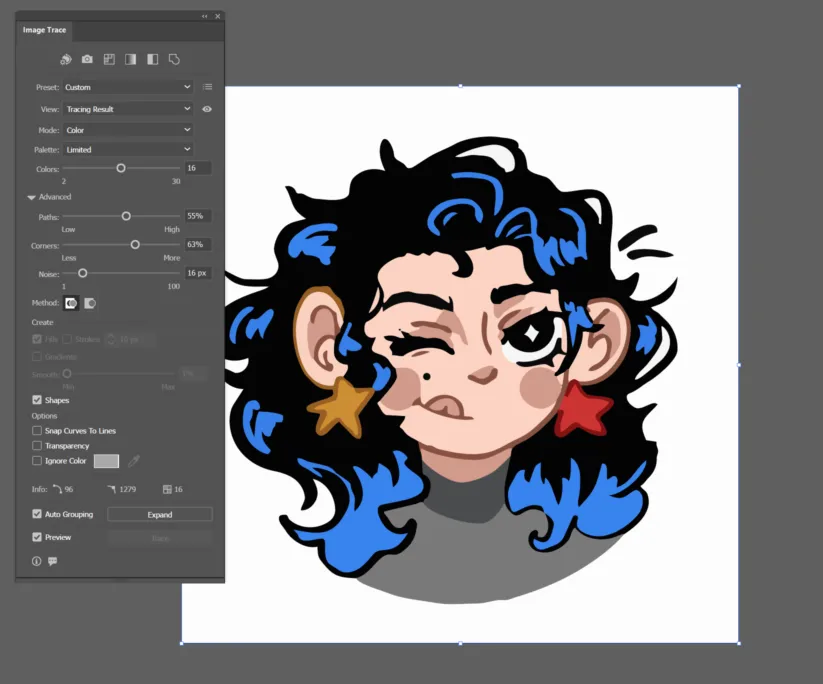
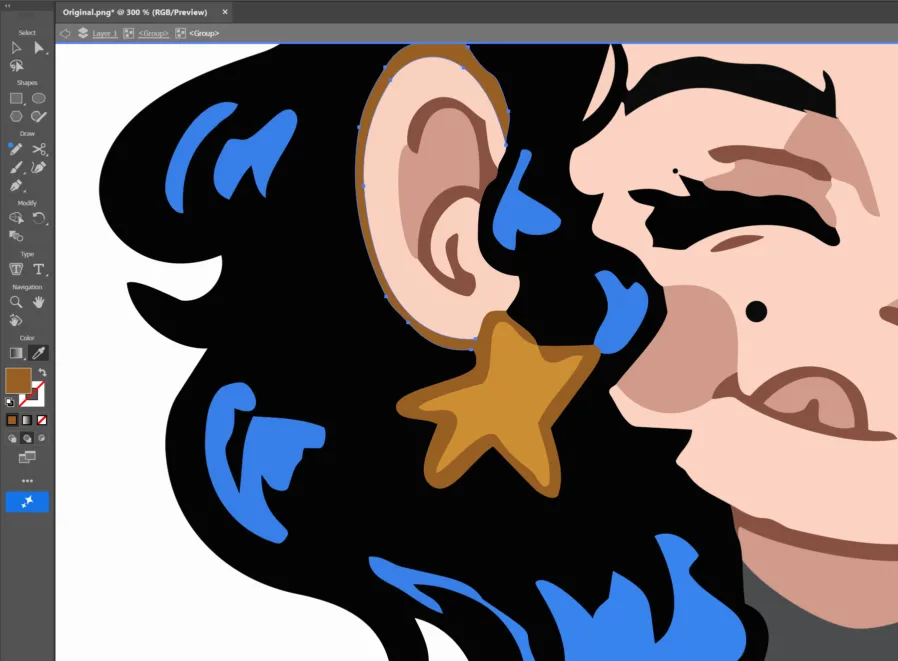
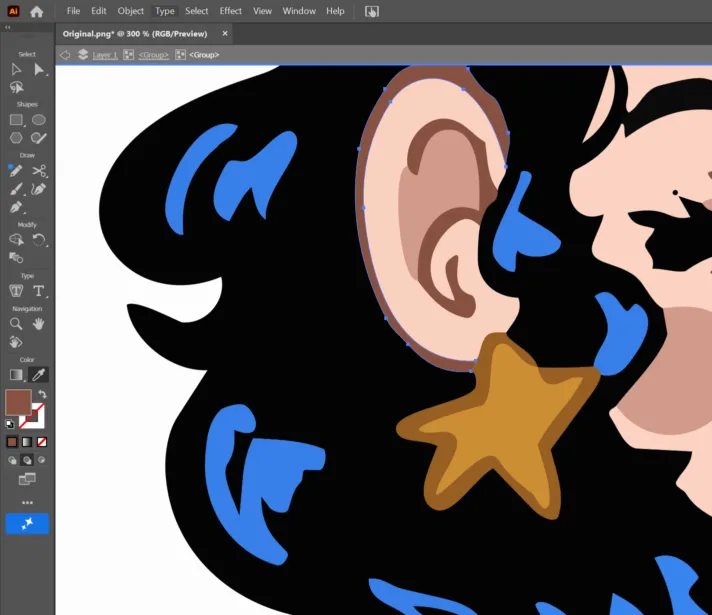
One big difference between both is that Adobe Illustrator offers more adjustable parameters. Allowing better control over colors and detail, representing the original image more accurately. While Affinity has has smoother line termination and visually pleasing curves, it has limited control over the number of colors. That sometimes lead to the misinterpretation of shapes during automatic vectorization.
However, due to Adobe being a paid software, Affinity offers a great free alternative. I often use it when I'm not at college (we have an Adobe license but only on institutional computers).
3D Design
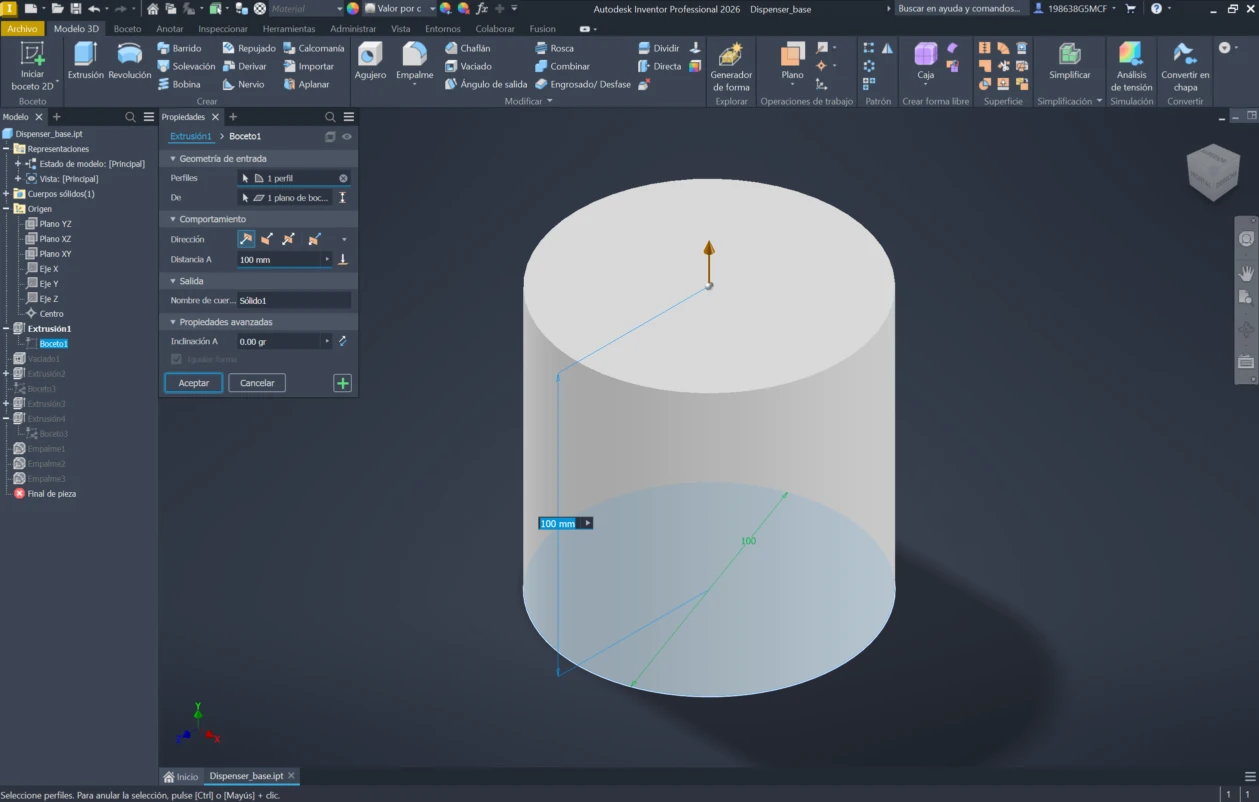
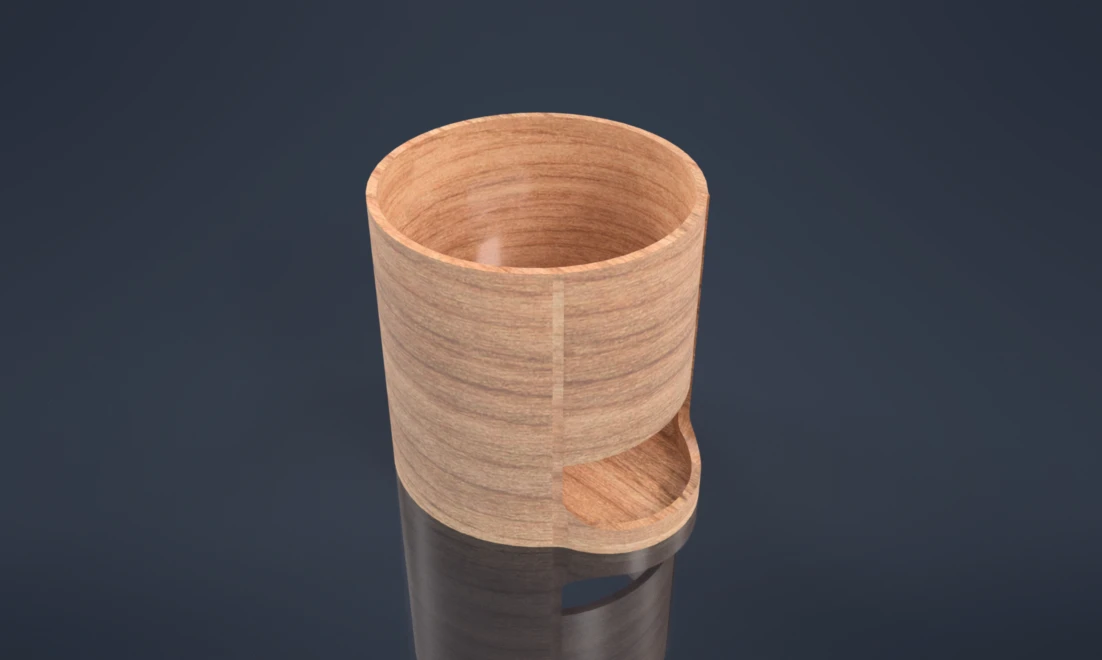
There are several 3D softwares with different uses, the principal are parametric design (SolidWorks, Fusion 360, Onshape) and direct modeling (Blender,Maya). Because of the nature of my project I will be focussing on parametric design, specifically with Onshape and Autodesk Inventor. The exercise was the basic form of a pill dispenser, where I principally used basic operations (add, remove, shells, and fillets). The general workflow was:
- Sketch the body with a circle and extrude it
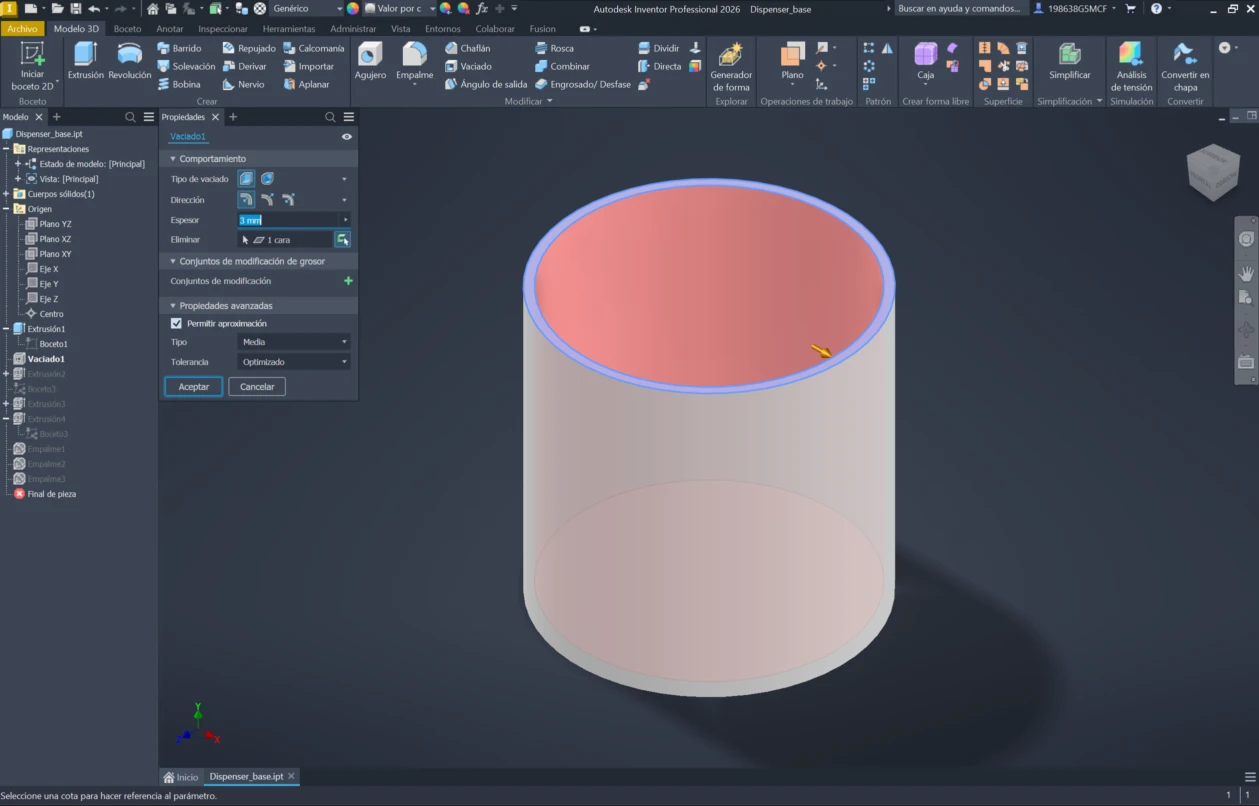
- Shell the cylinder
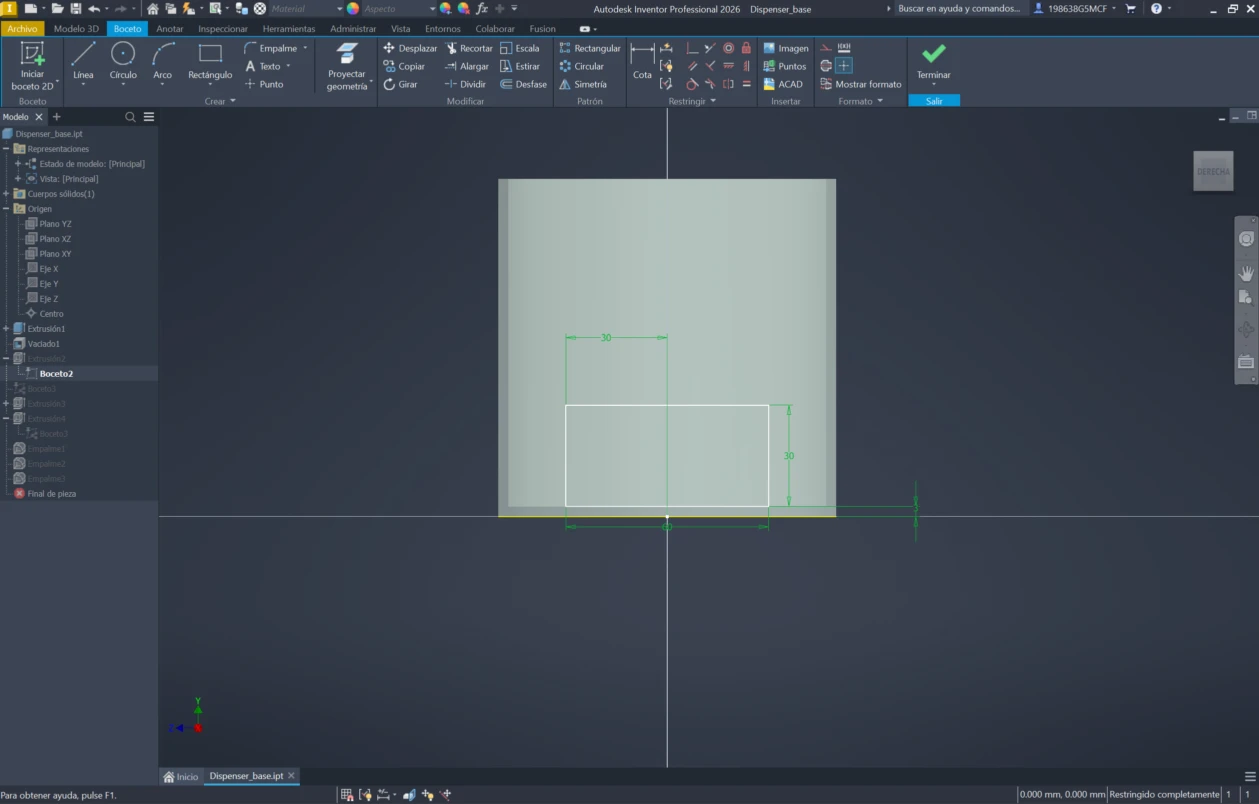
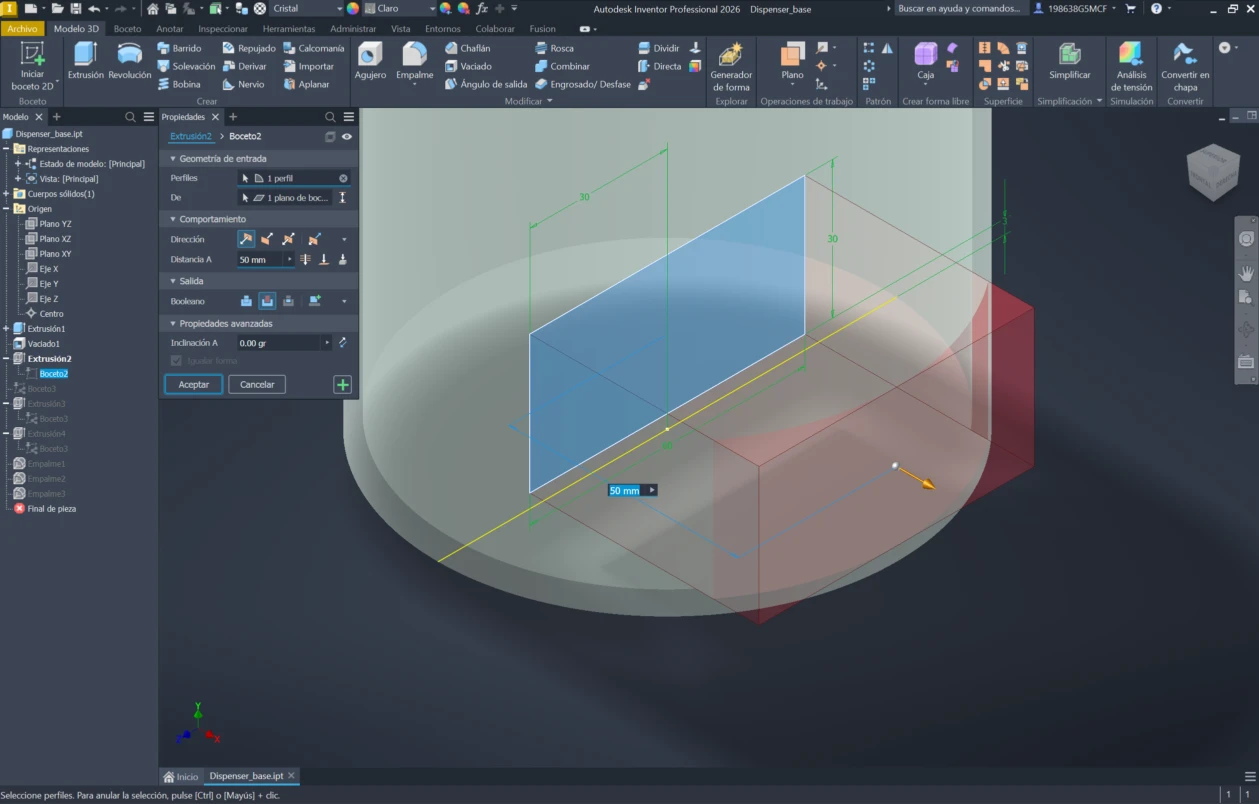
- Sketch a rectangle and do a negative extrusion (to make exit of the dispenser)
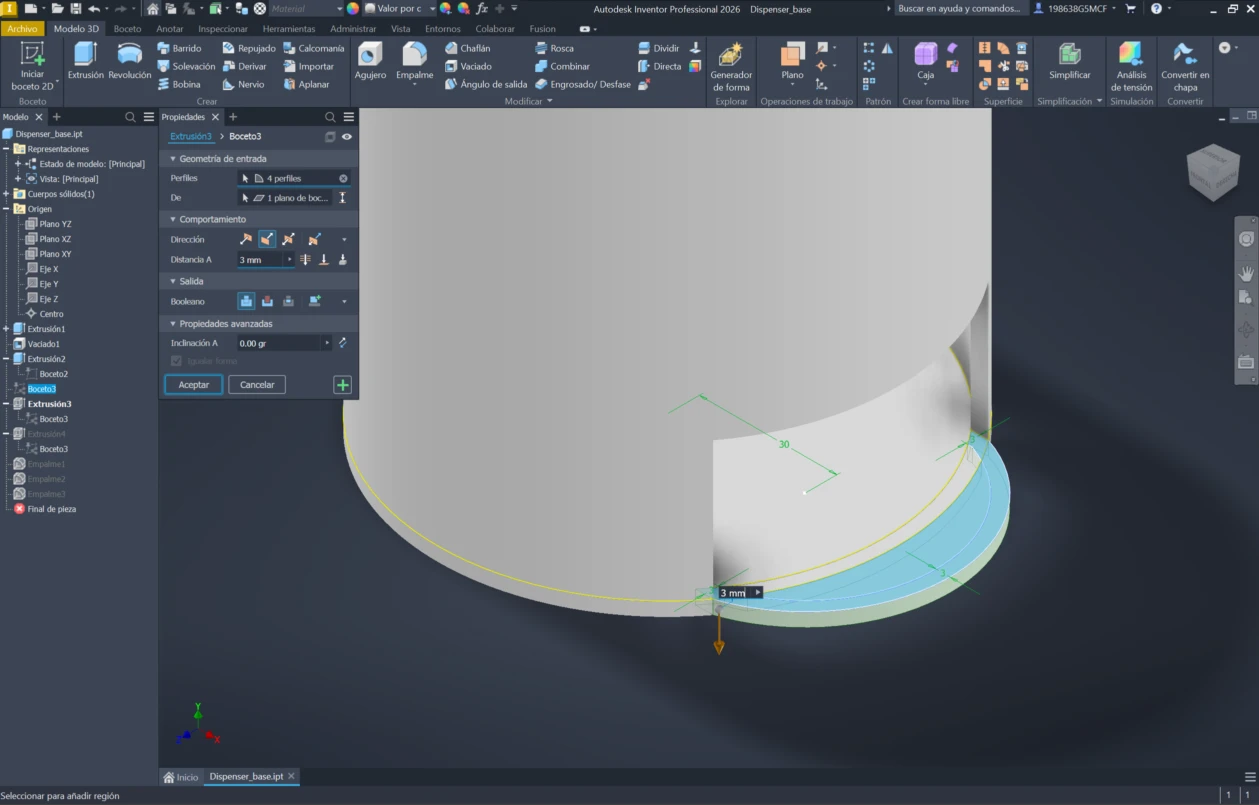
- Sketch an arc and extrude it to match the thickness of the dispenser
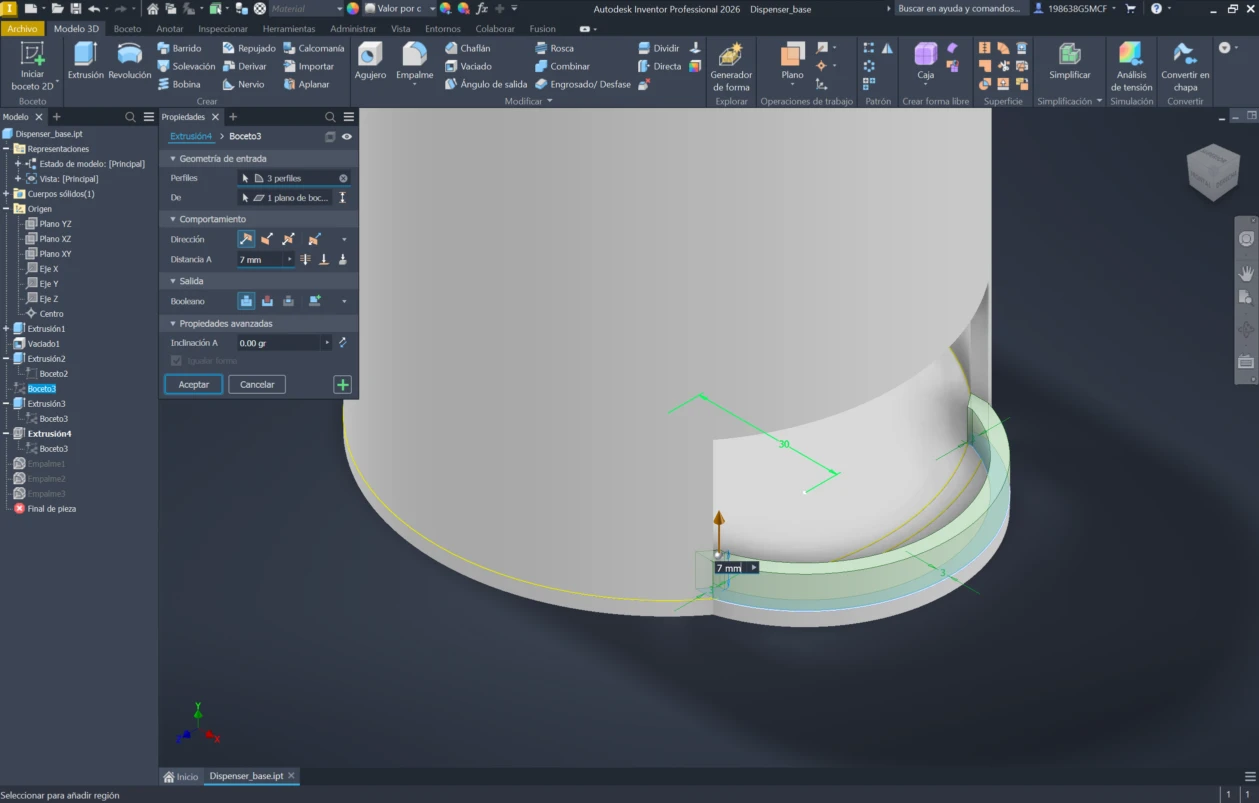
- Extrude a wall to contain the pills
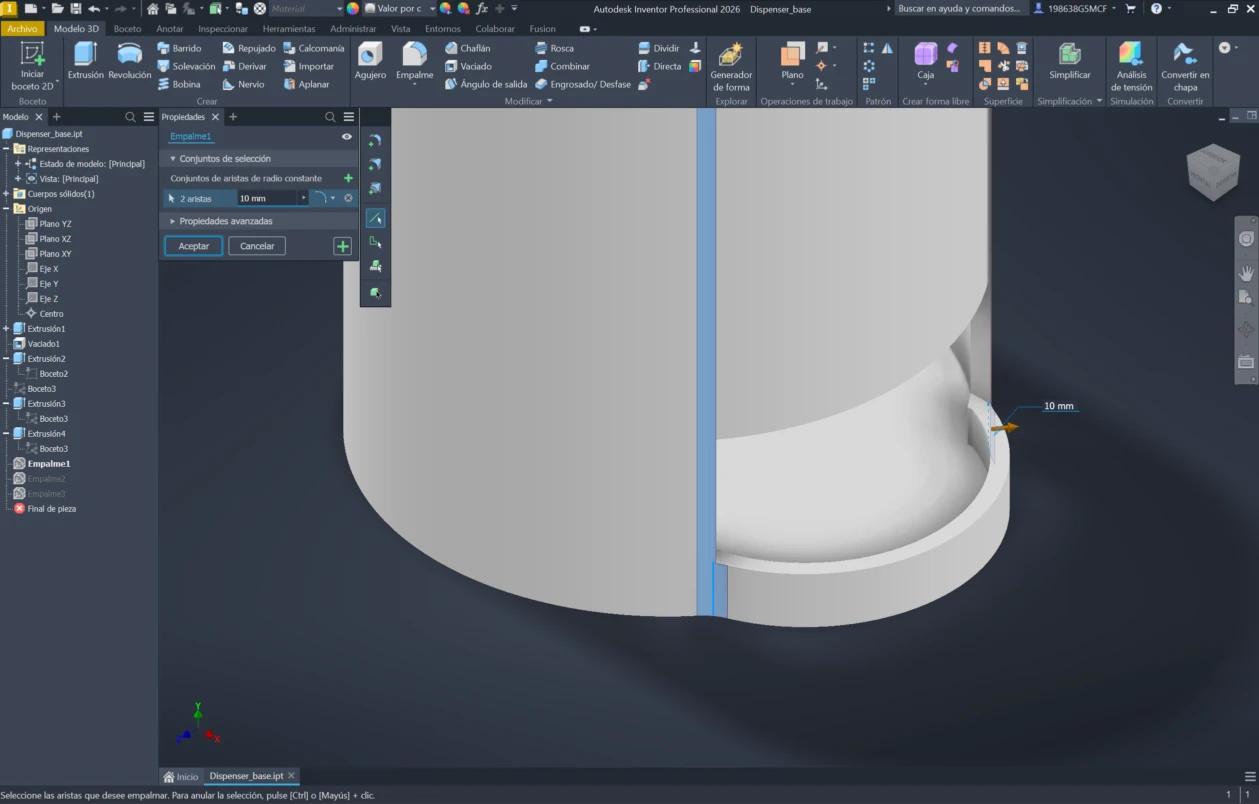
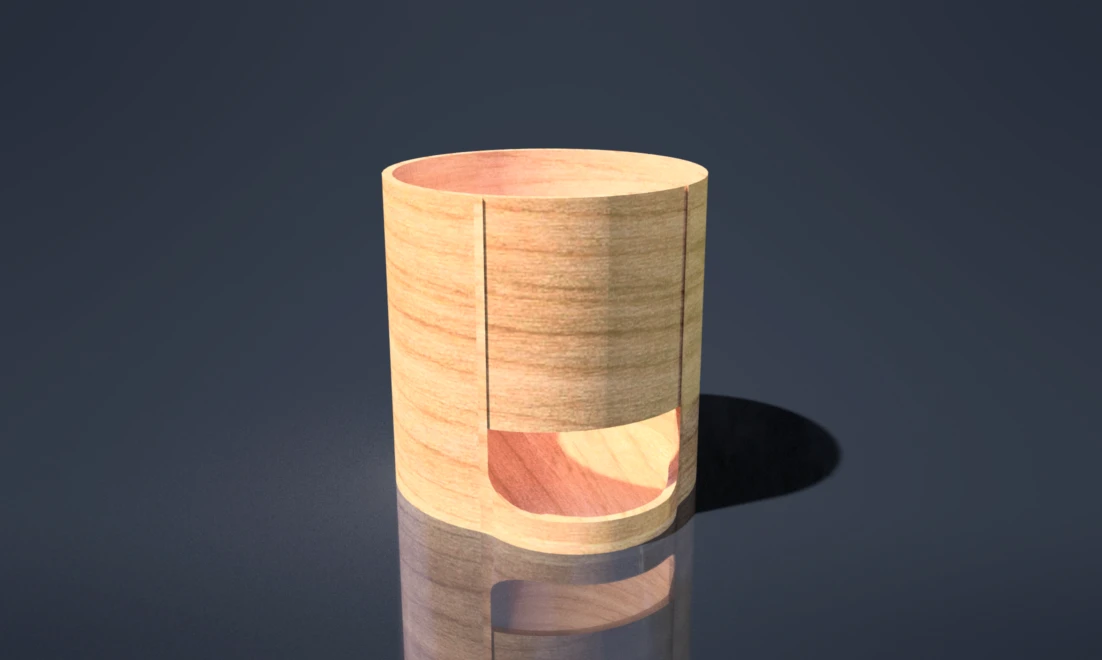
- Round the edges
- Render or change its appearance.
Modeling in Onshape
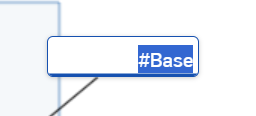
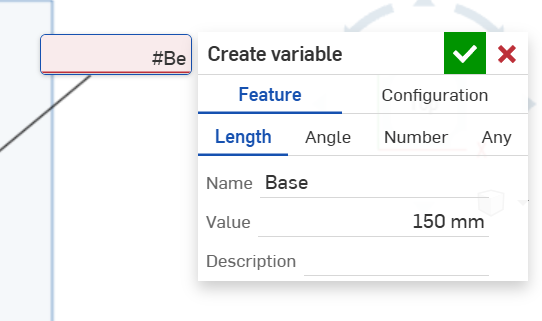
1. Create a sketch on top plane and draw a circle.
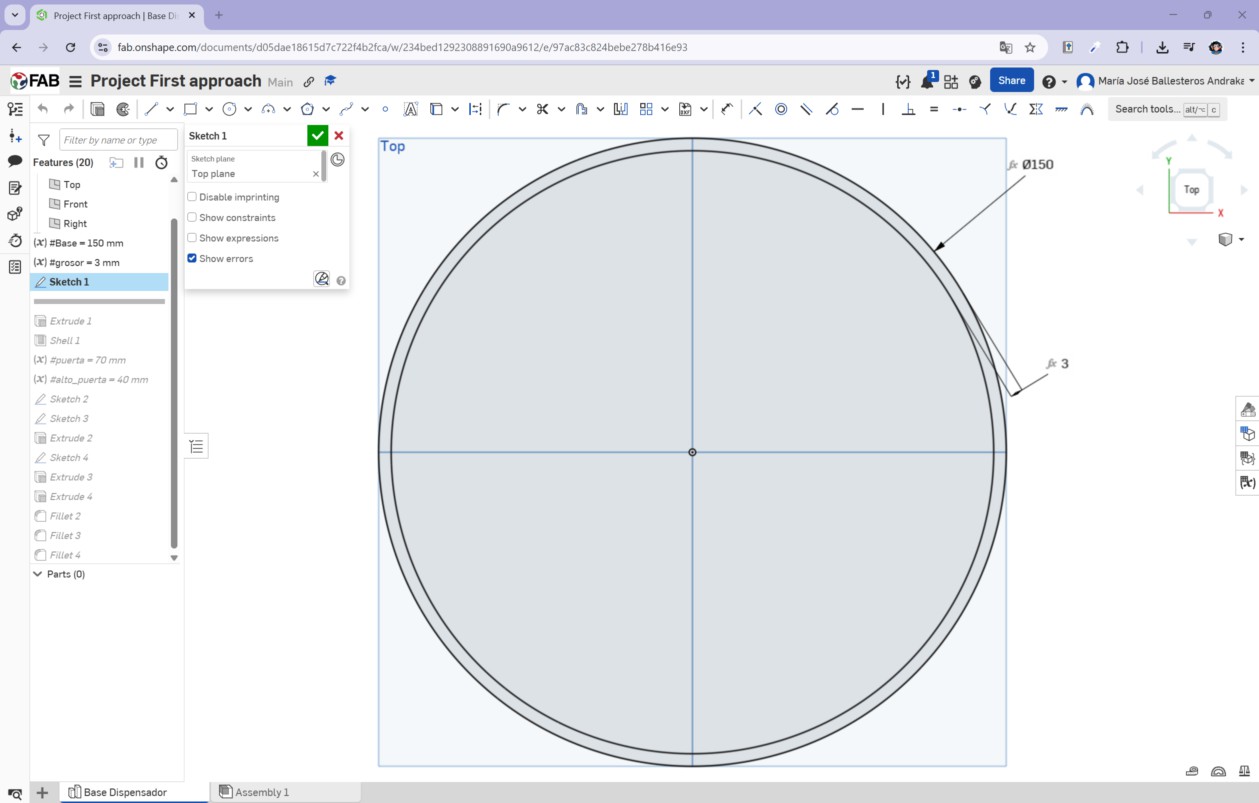
Variables: write (#) and assign a name and dimension.
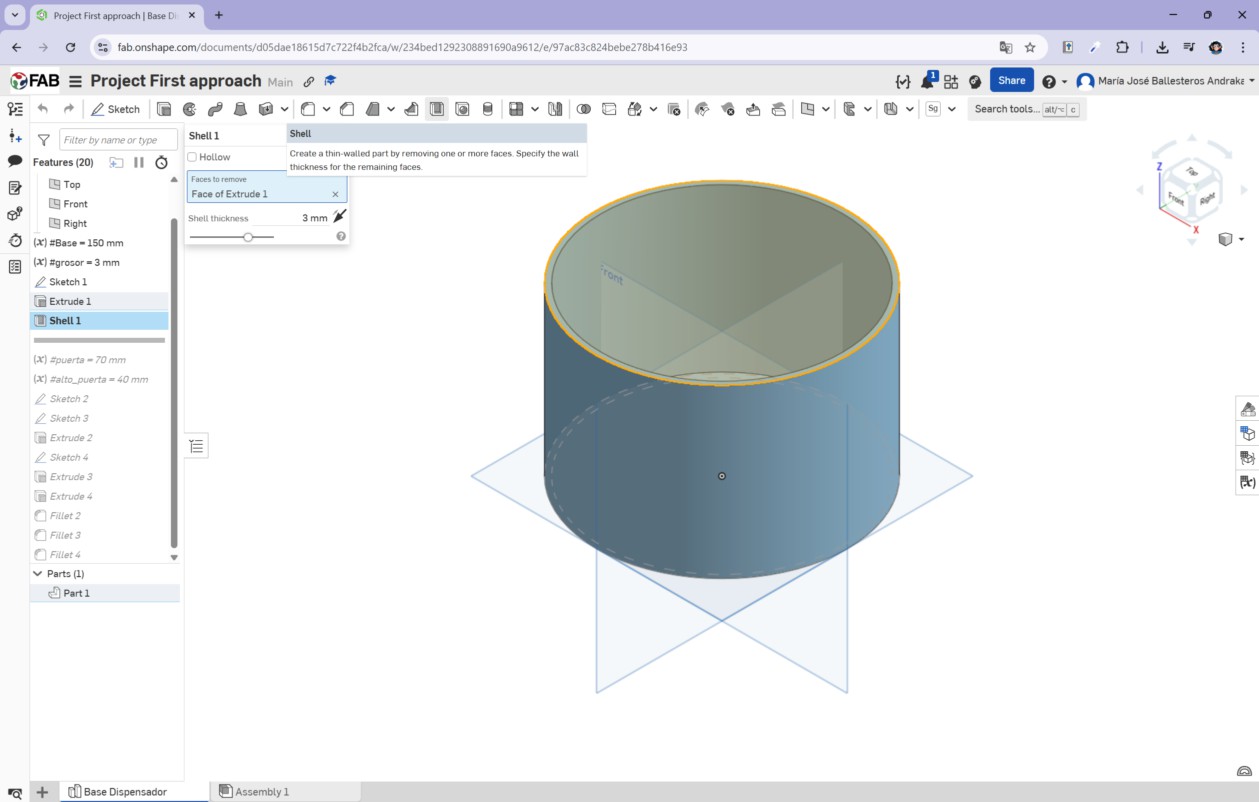
2. Extrude and shell the extrusion (3 mm).
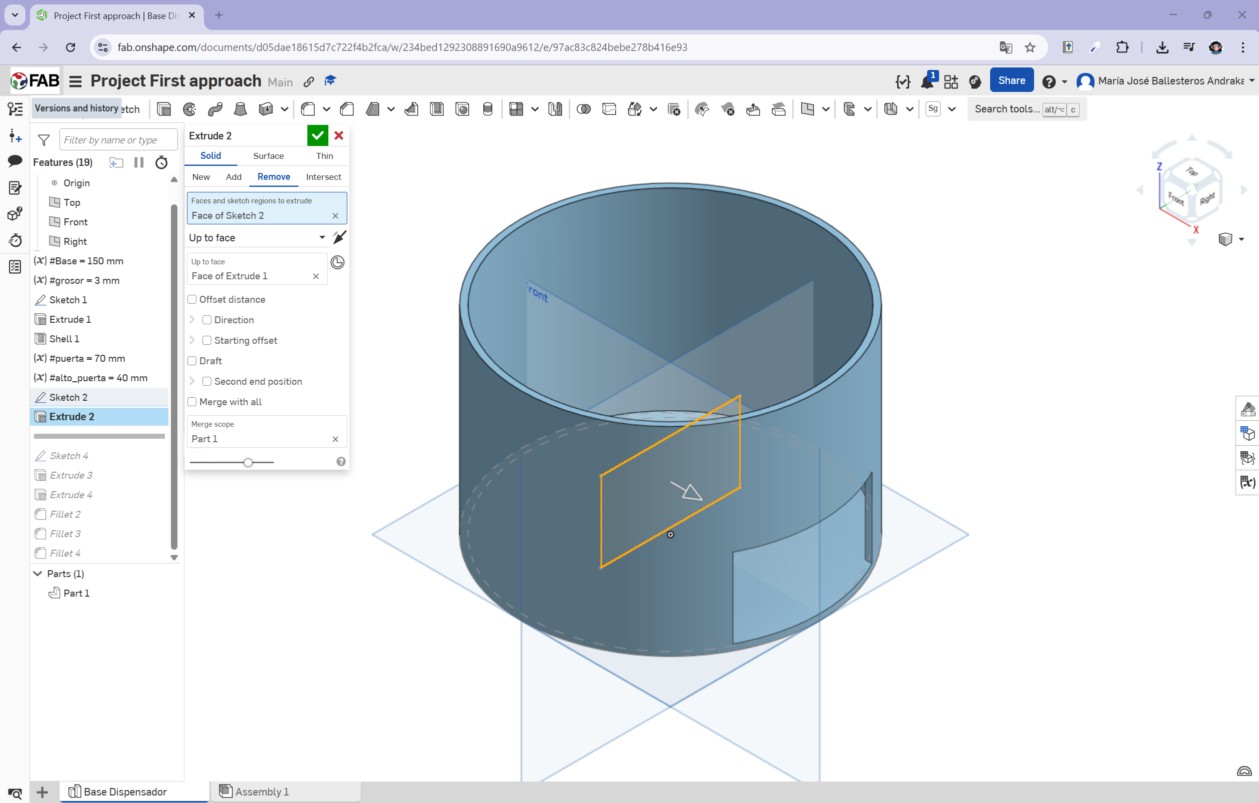
3. On the right plane, draw a rectangle for the opening.
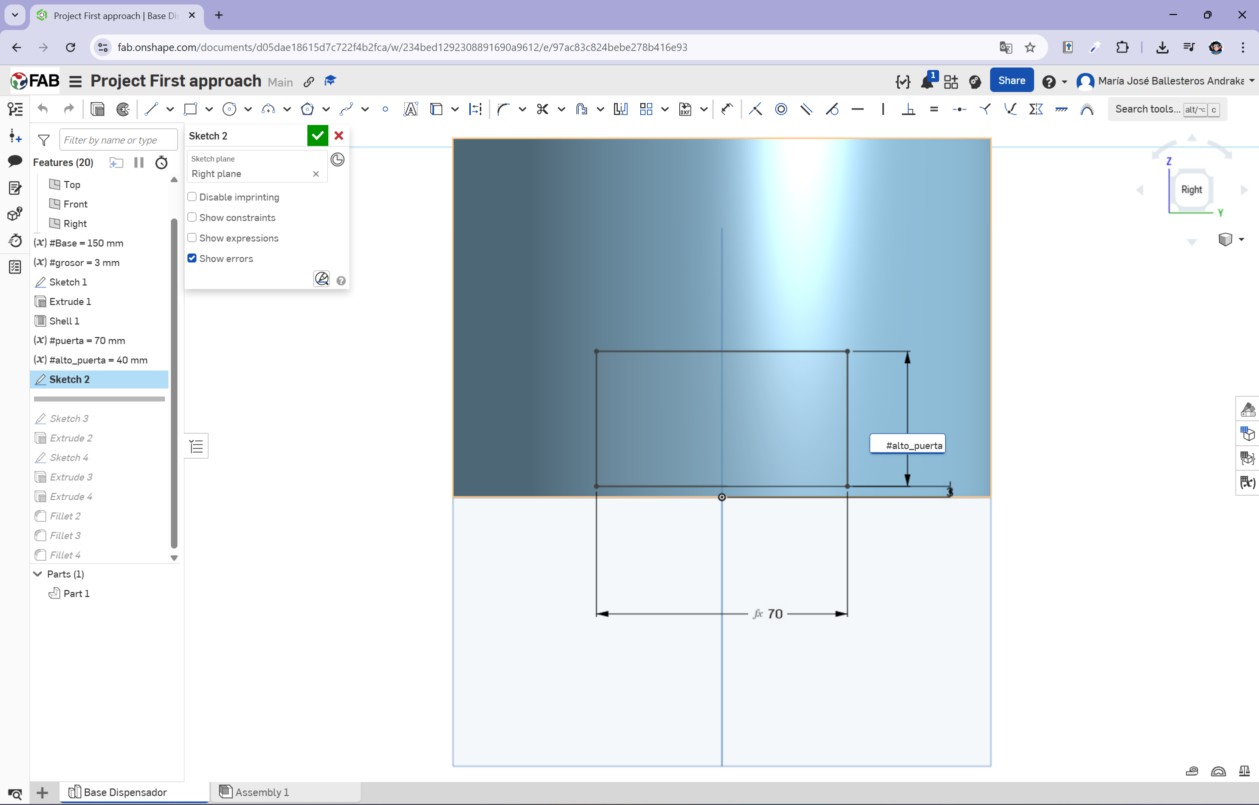
4. Extrude up to the exterior face of our base.
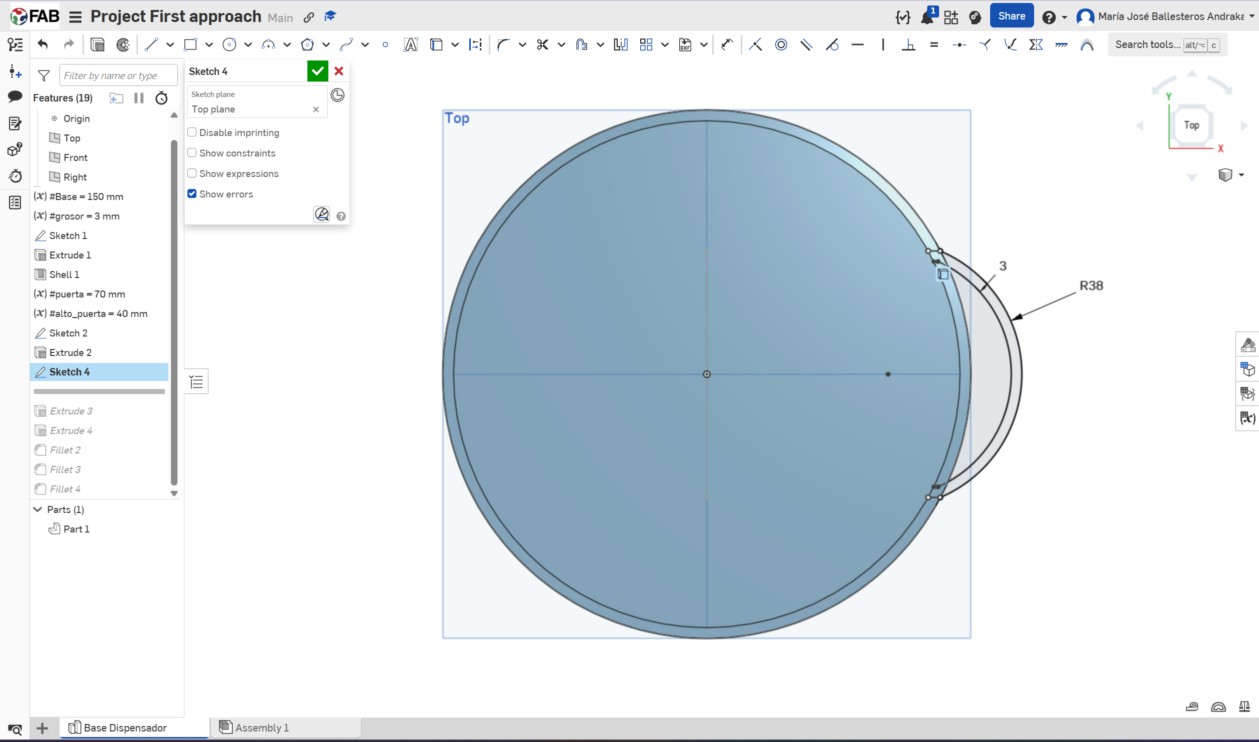
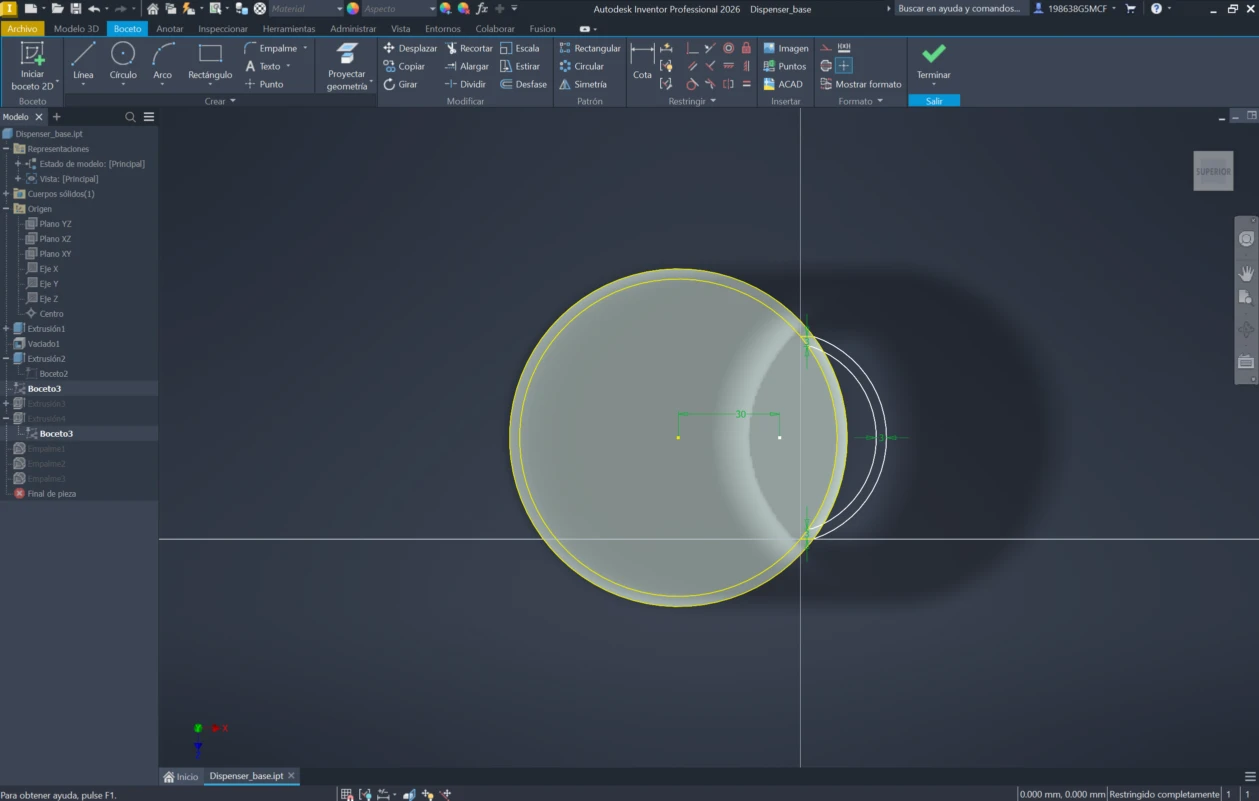
5. Create a sketch at the bottom and draw two arcs.
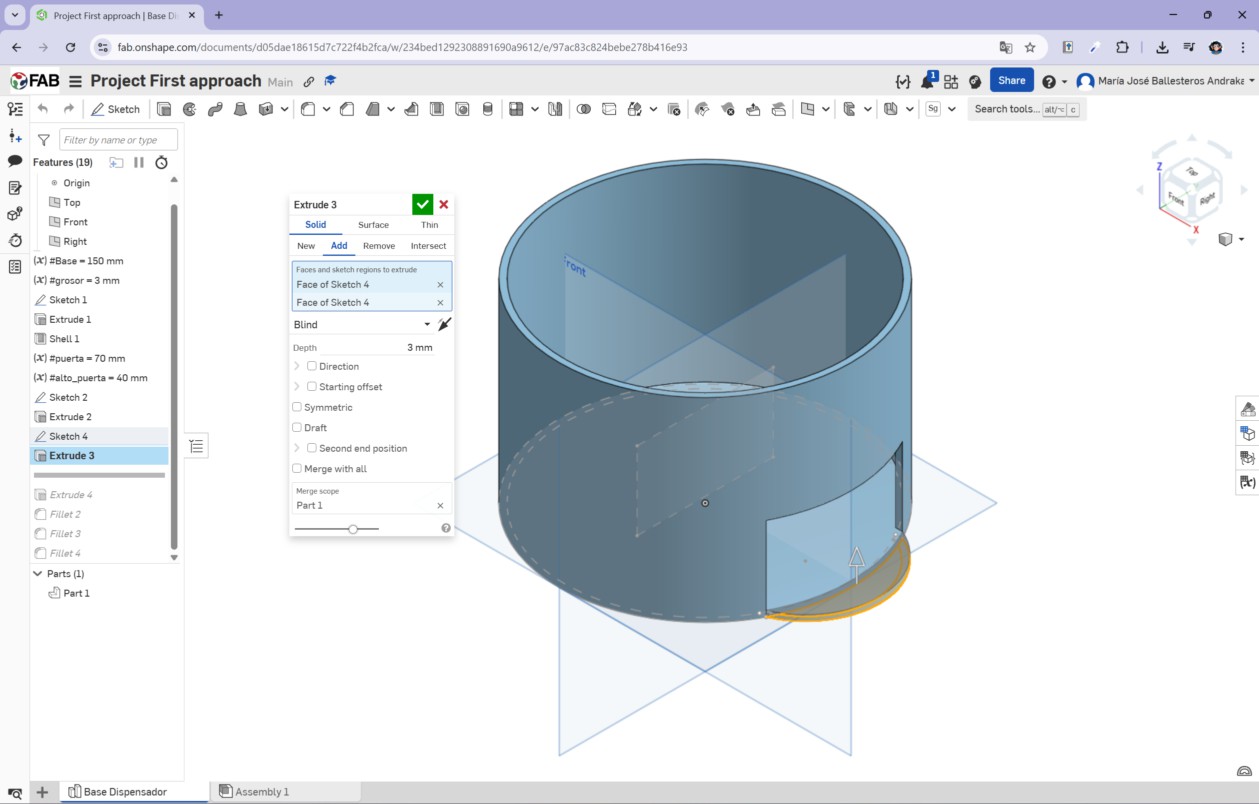
6. Extrude the sketch to create the floor and a wall.
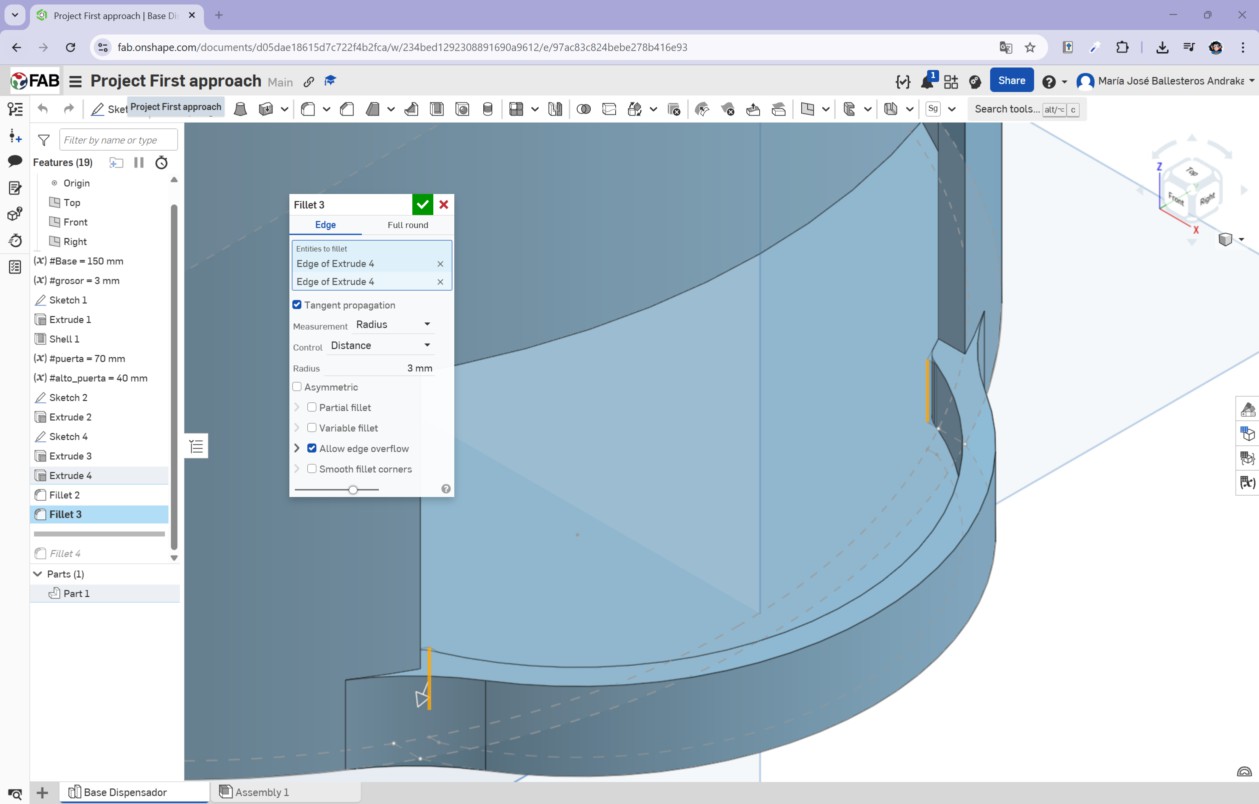
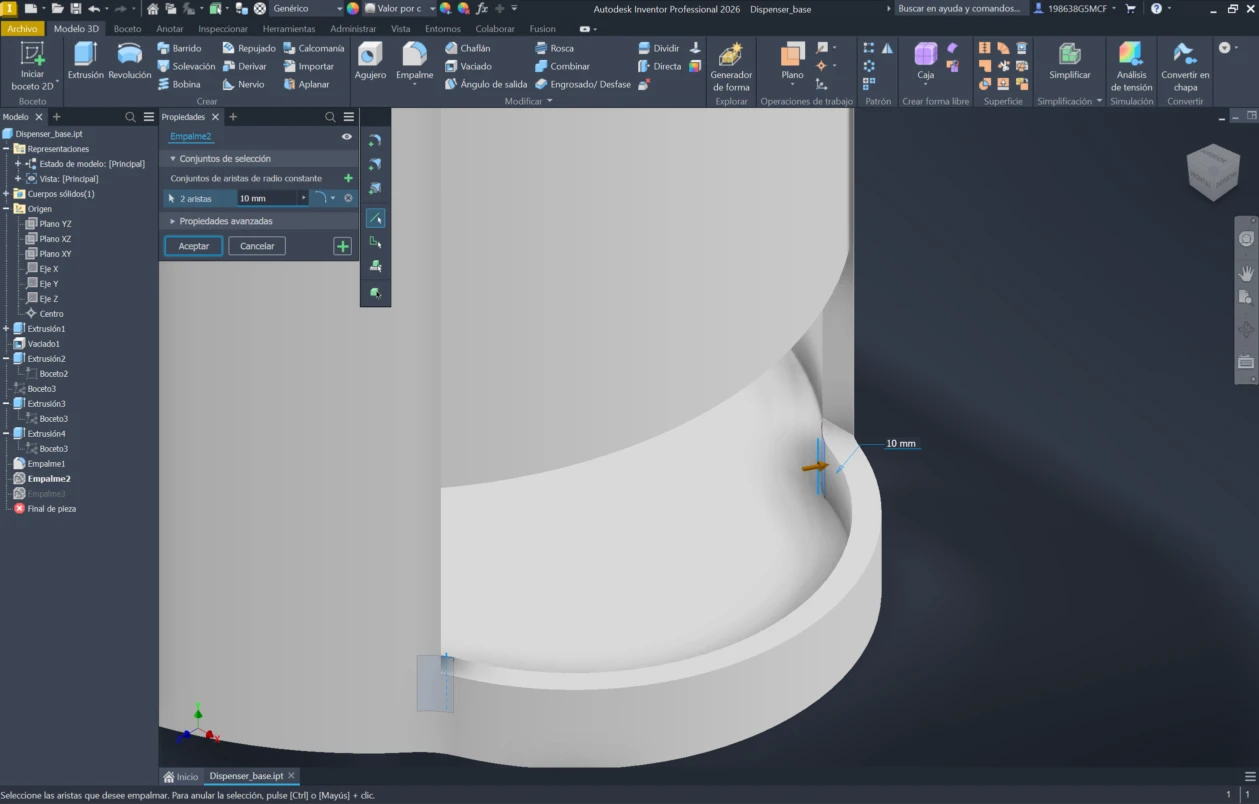
7. Fillet the edges.
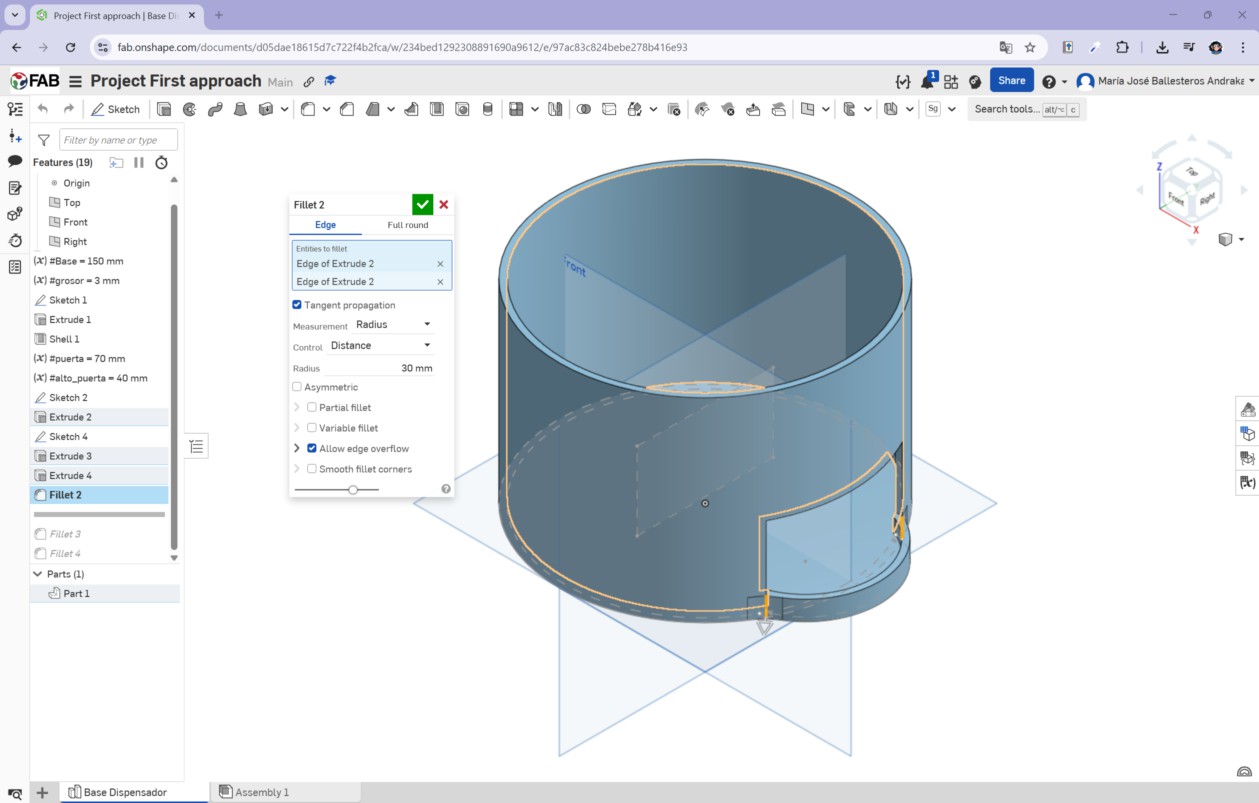
7.1. Change the fillet parameters.
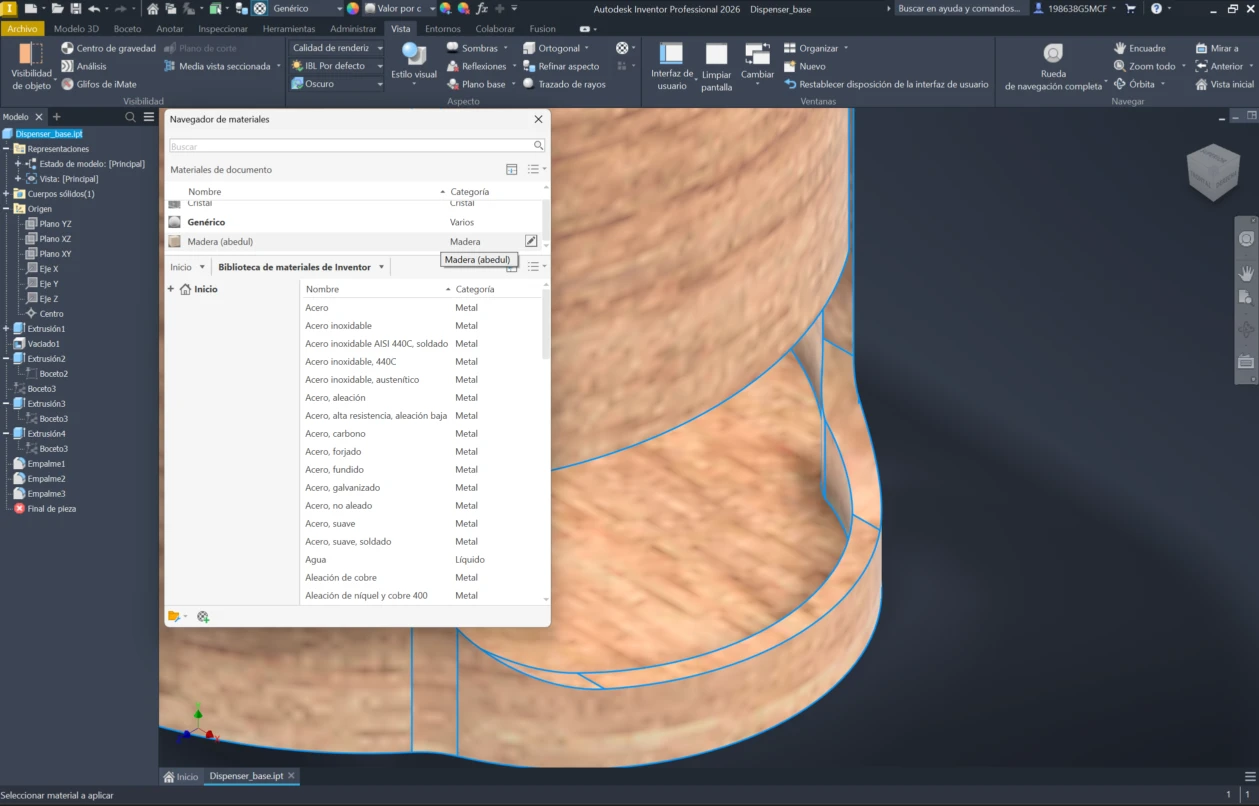
8. Change the part's colors.
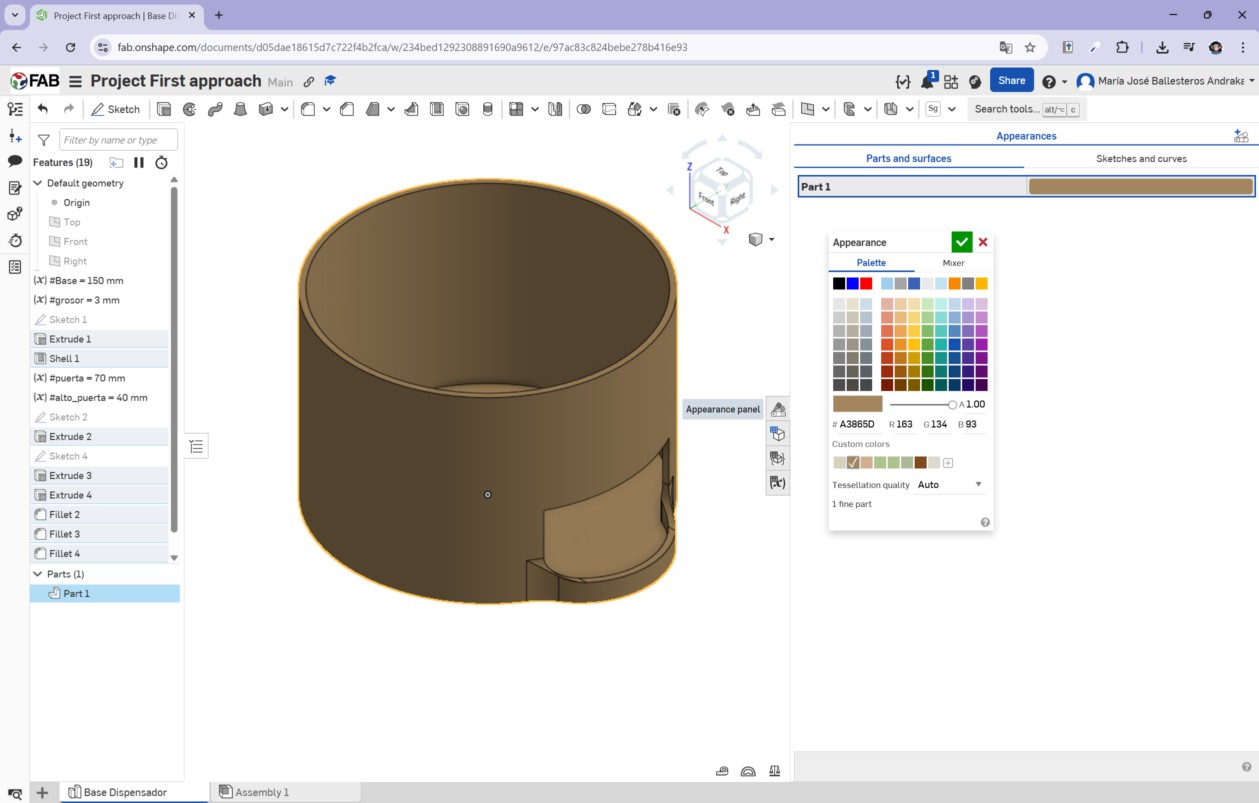
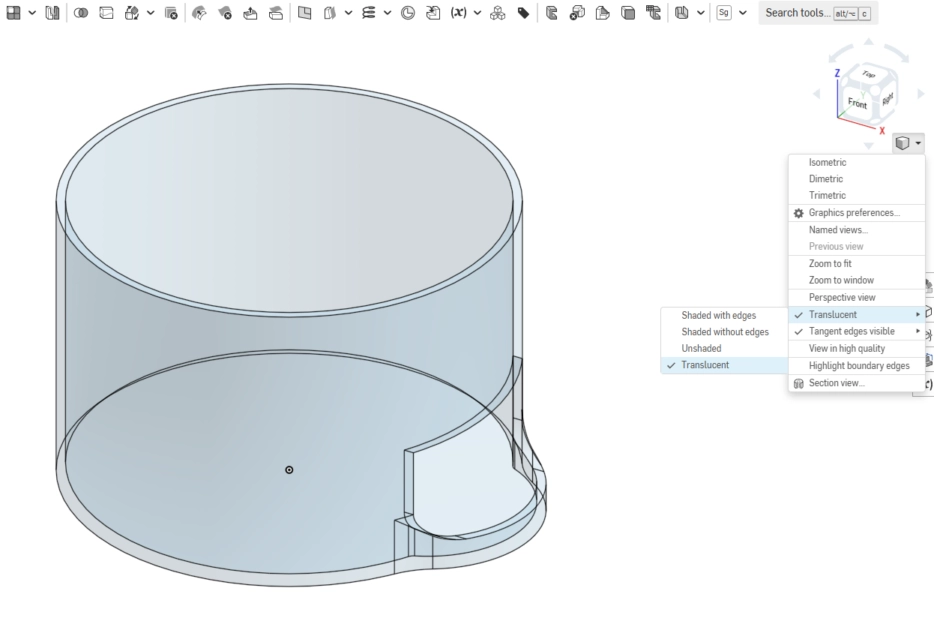
8.1 Edit the appearance (translucent view).
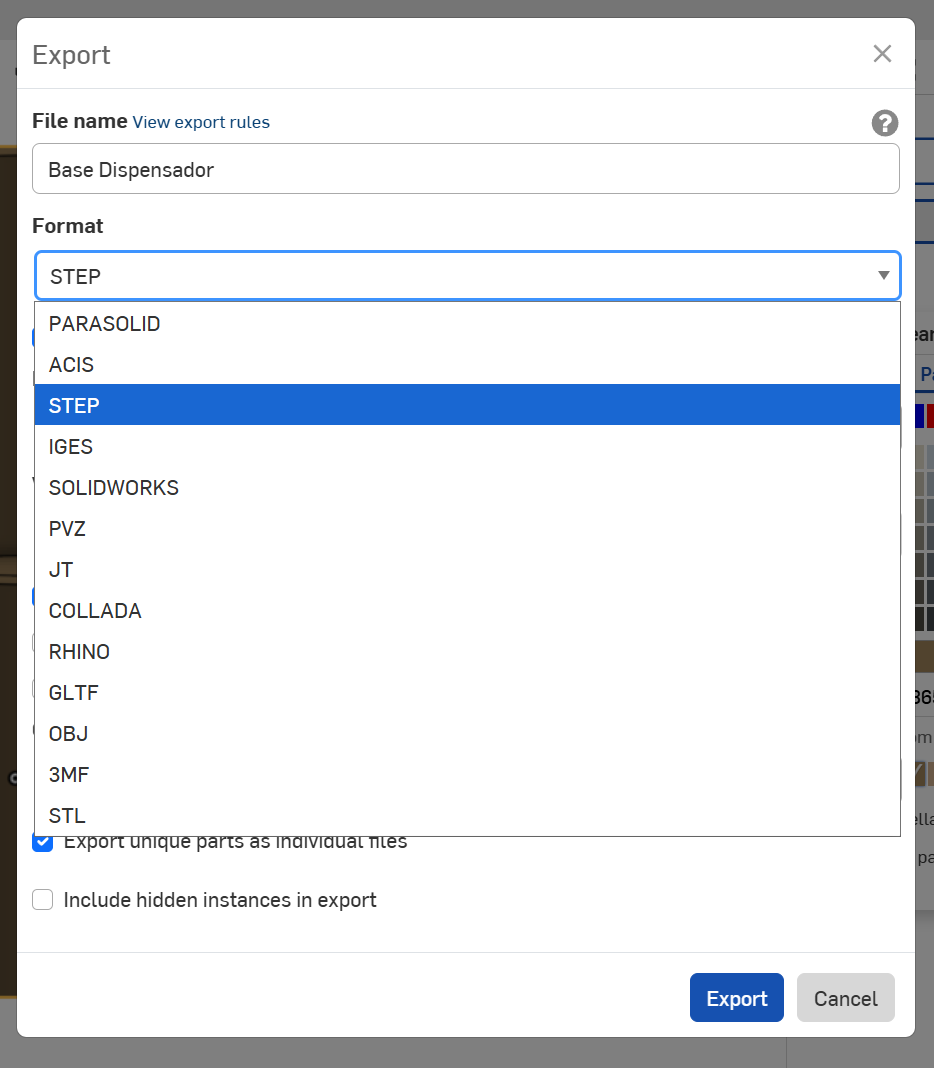
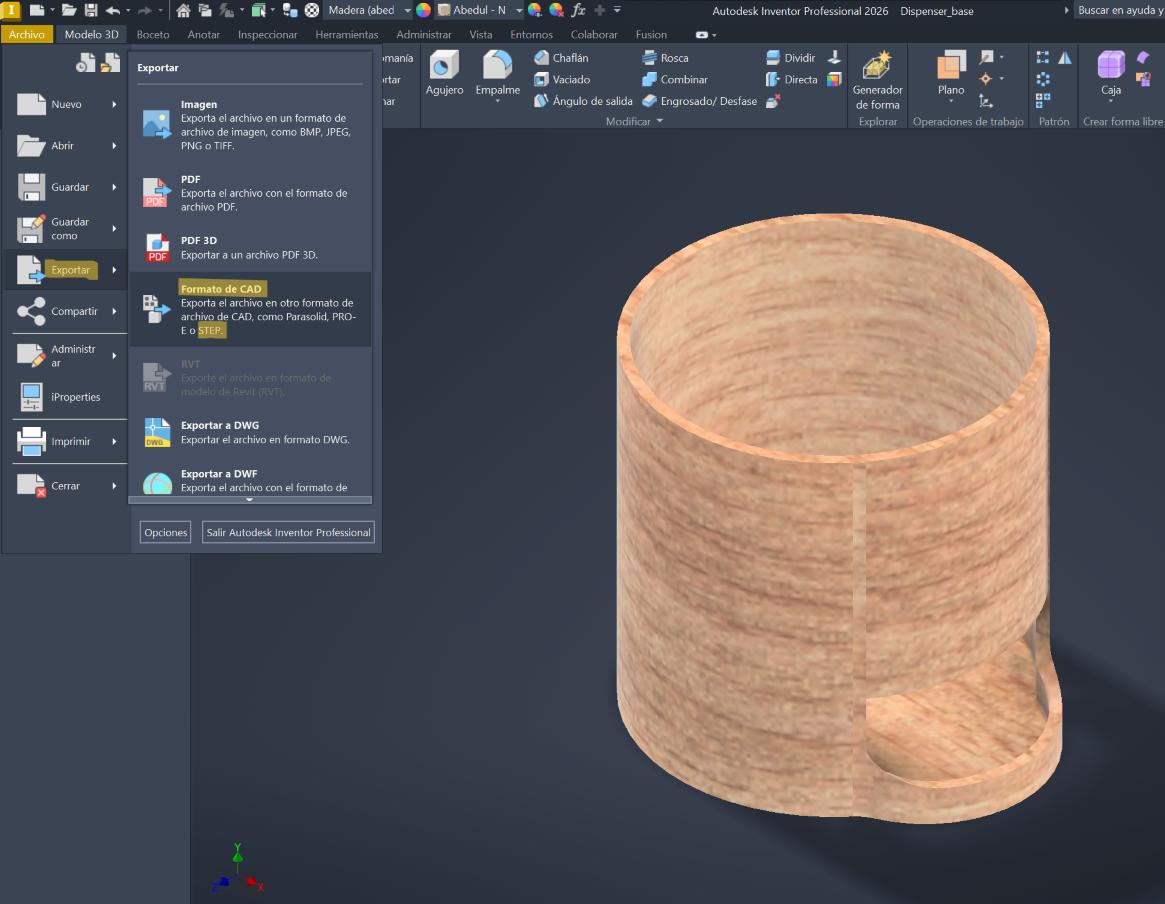
9. Export the part (STEP format).
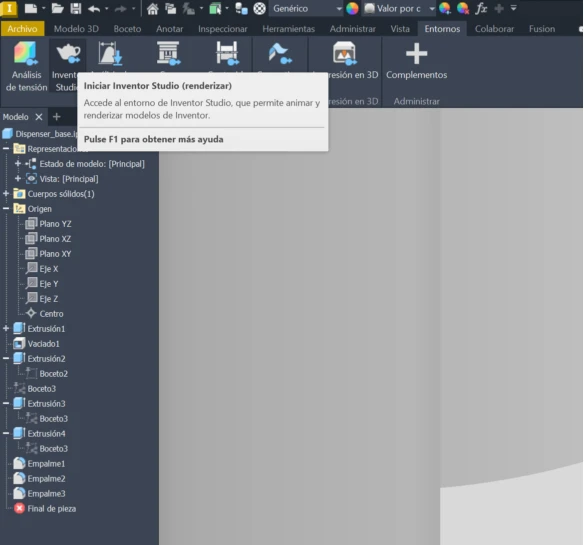
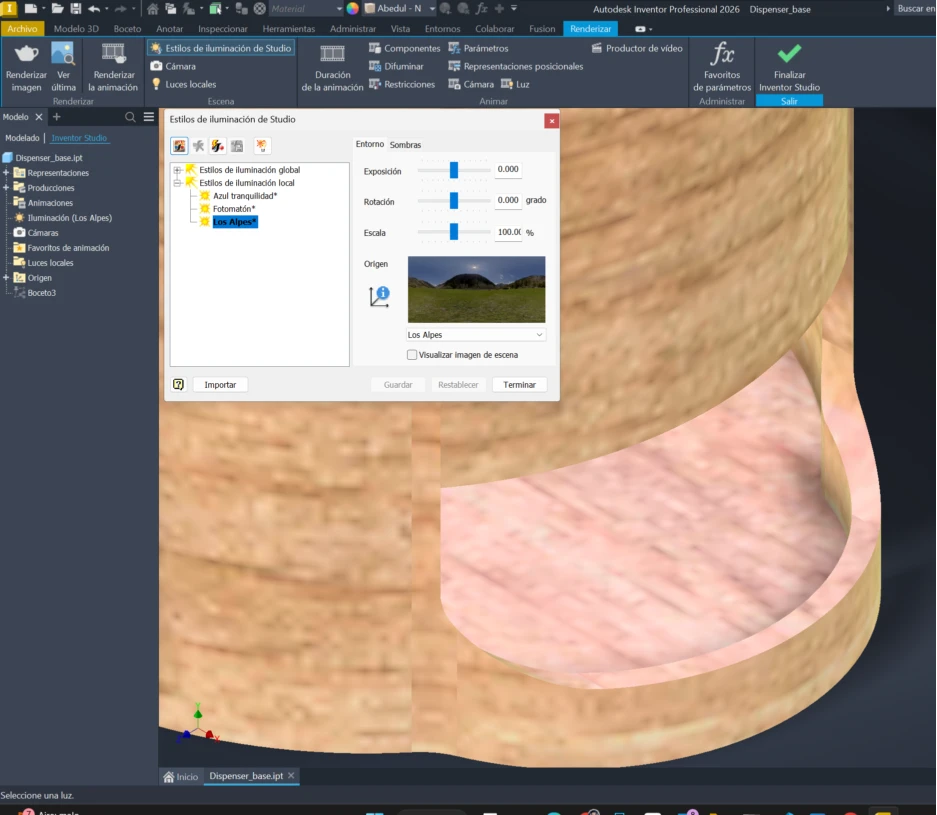
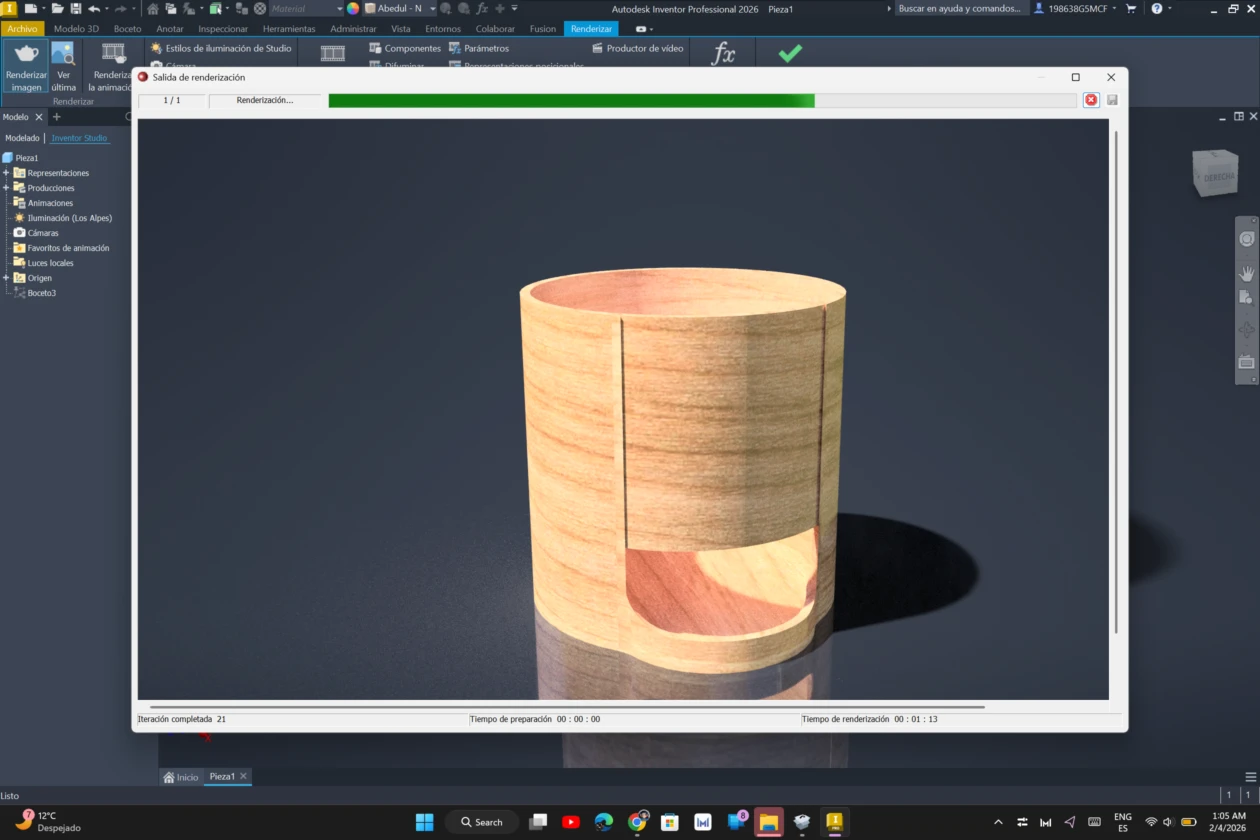
Both softwares are pretty good options and choosing one depends on your design. Onshape is a cloud-based and accessible alternative, that is efficient for modeling and collaboration. However, rendering options are limited (can change color but not add textures). While Inventor allows rendering directly inside the software, with ambience lights, materials. But can take a while to renderize depending of your computer and the quality of the image.
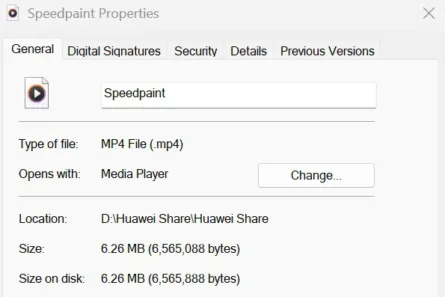
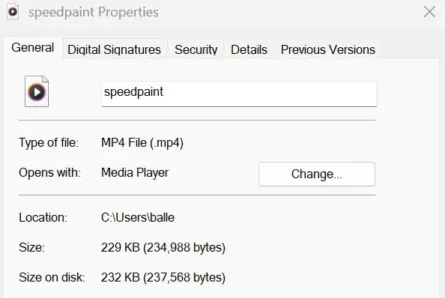
Media Compression
Media compression is important while documenting our process. Some media files (images, video, audio) are often large and by compressing it we are not only reducing its size but speeding up the page load times.
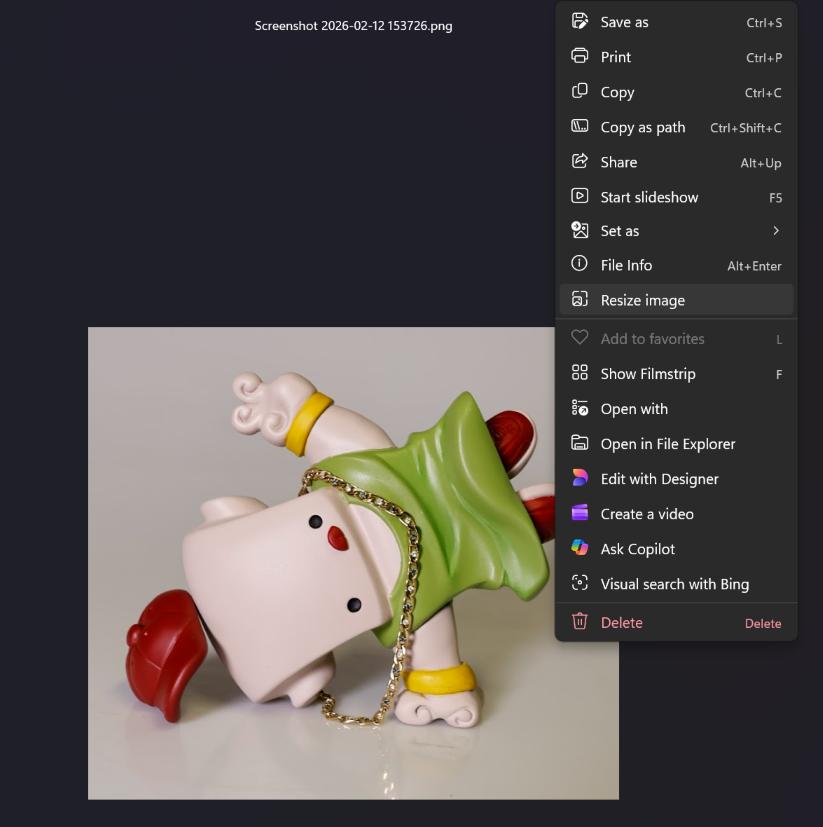
For Images I use Xconvert on my phone and, because it allows me to control the compressing parameters and file format, if the images are on my computer I either use the Photos app or share them via phone link to compress them in Xconvert and share them back to my computer.
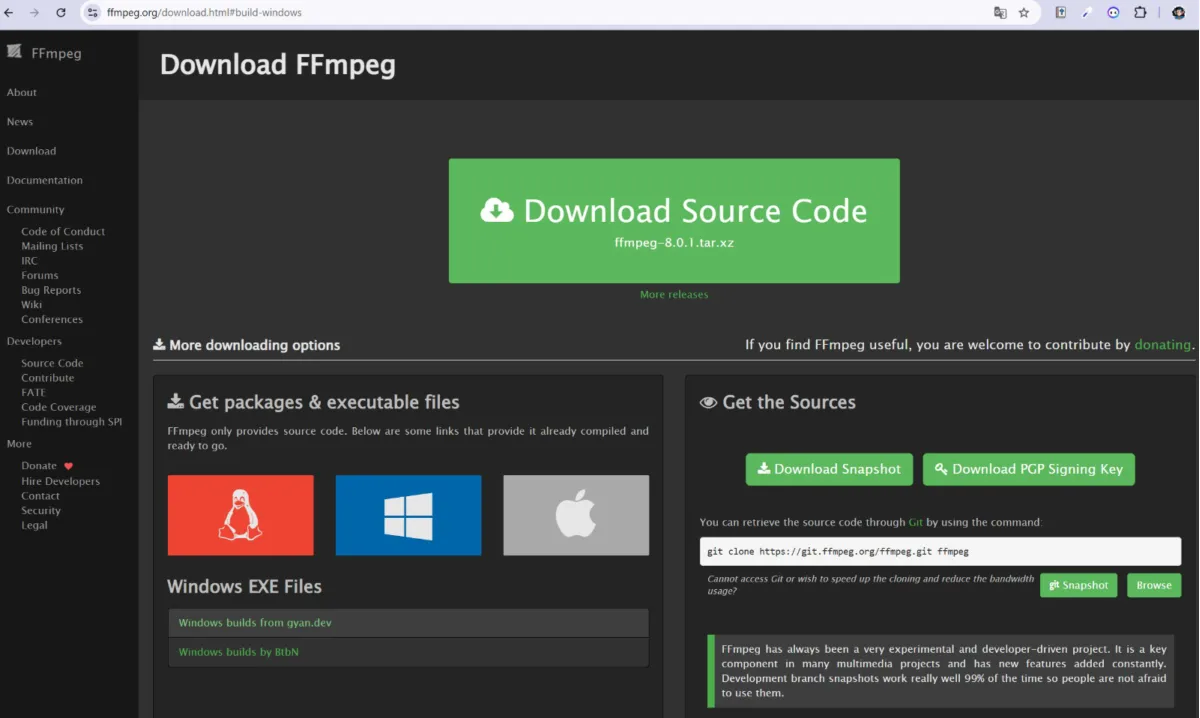
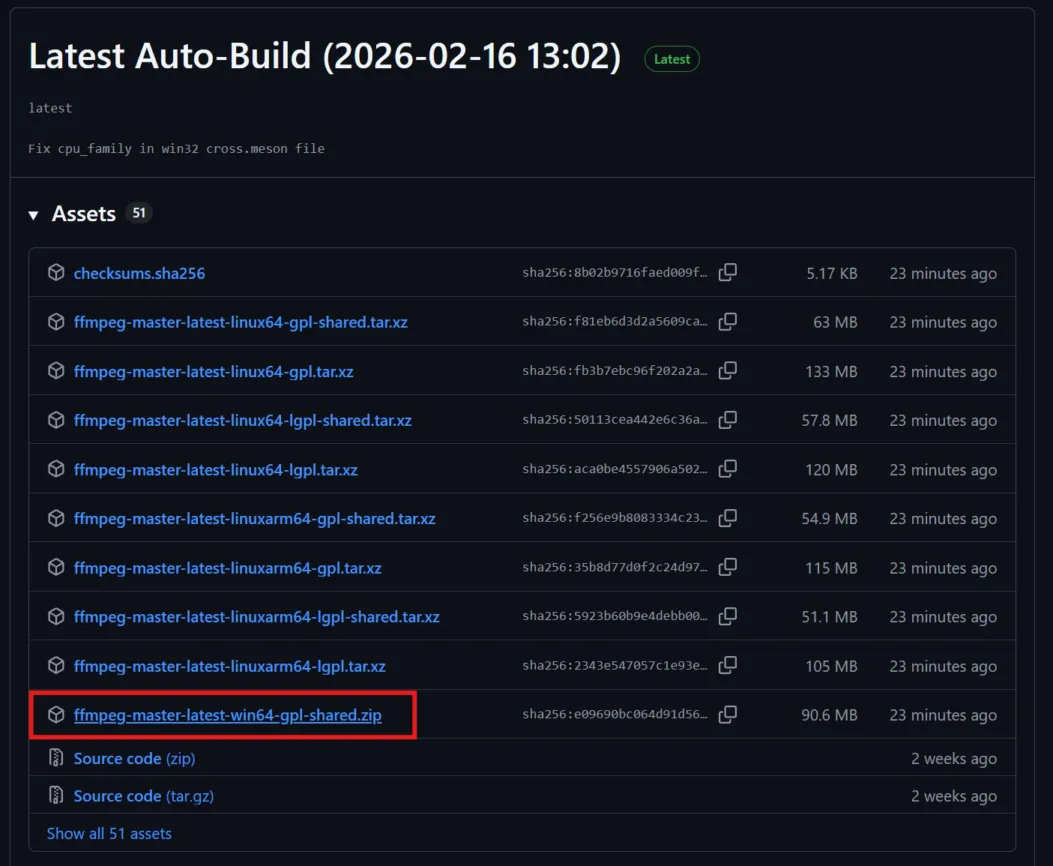
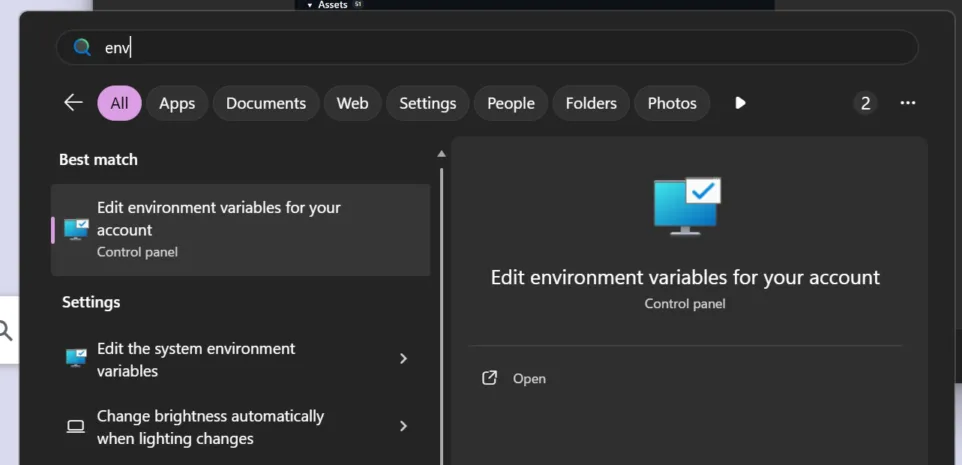
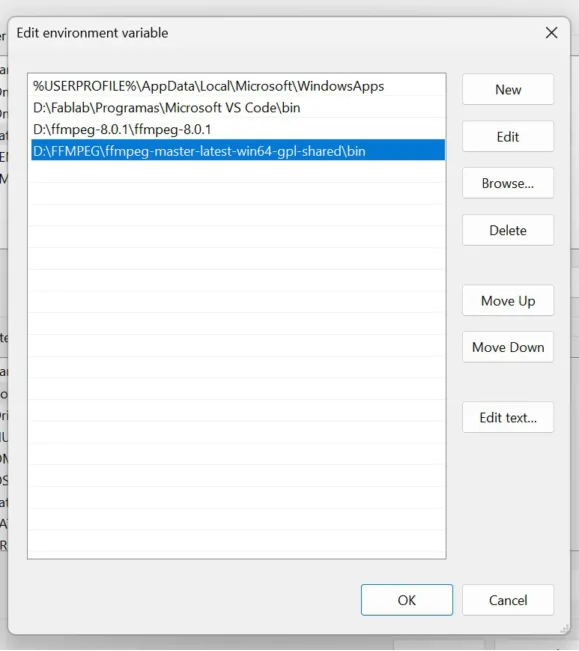
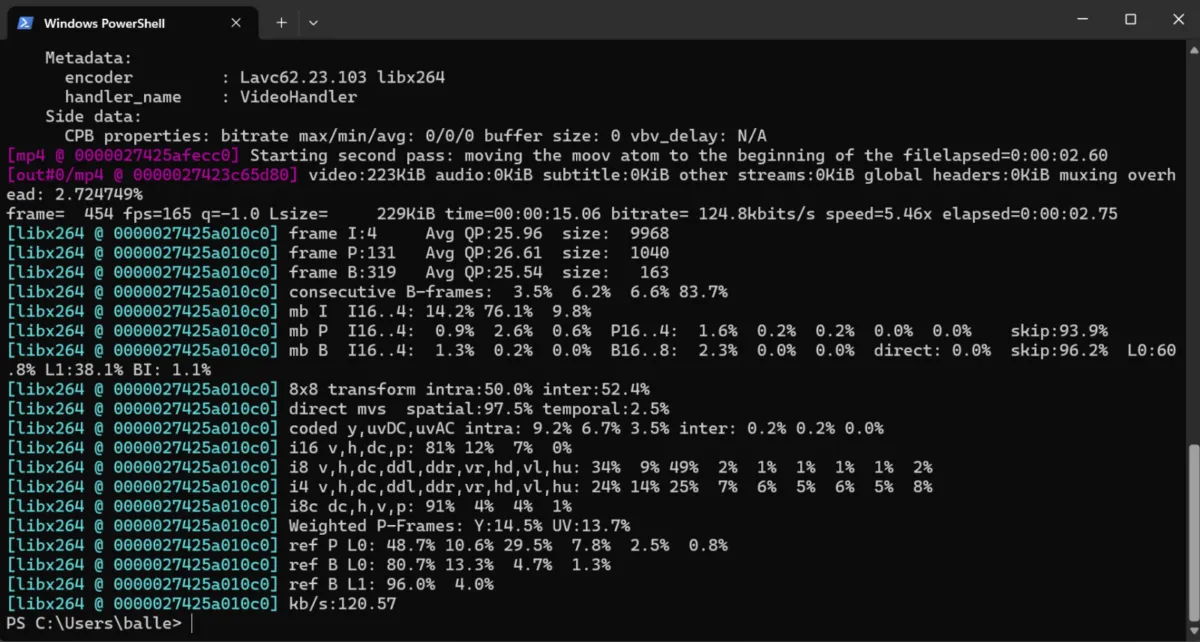
For videos I use FFMPEG, that works on our computer terminal and has different parameters that we can edit if we write them. Its interface can be confusing but its really practical.
Compressing images with XnConvert
1. Install XnConvert on your phone.
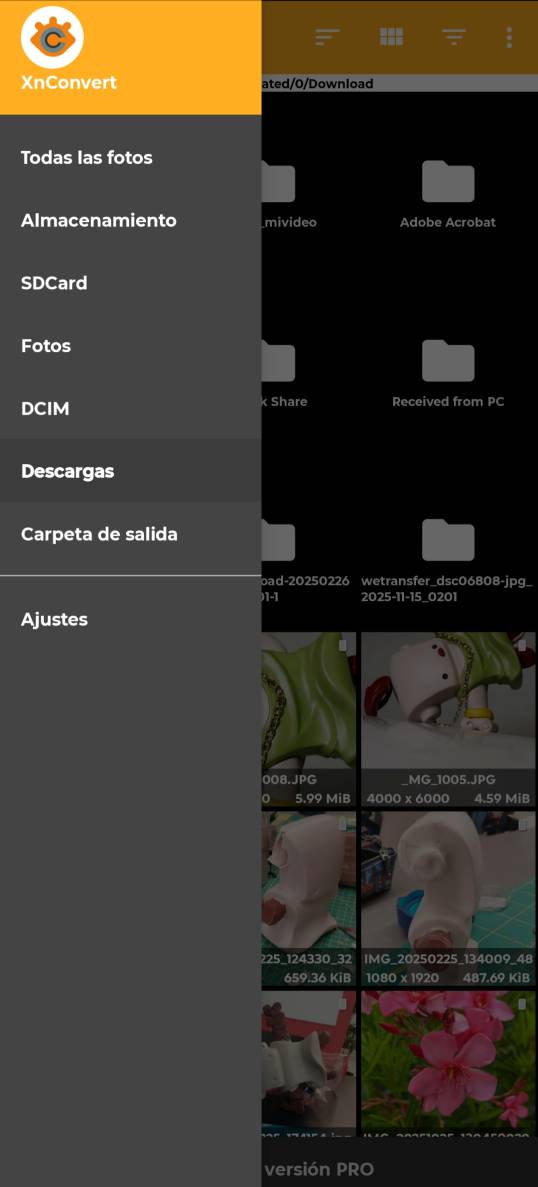
2. Open the app and select the folder your images are. In this case downloads.
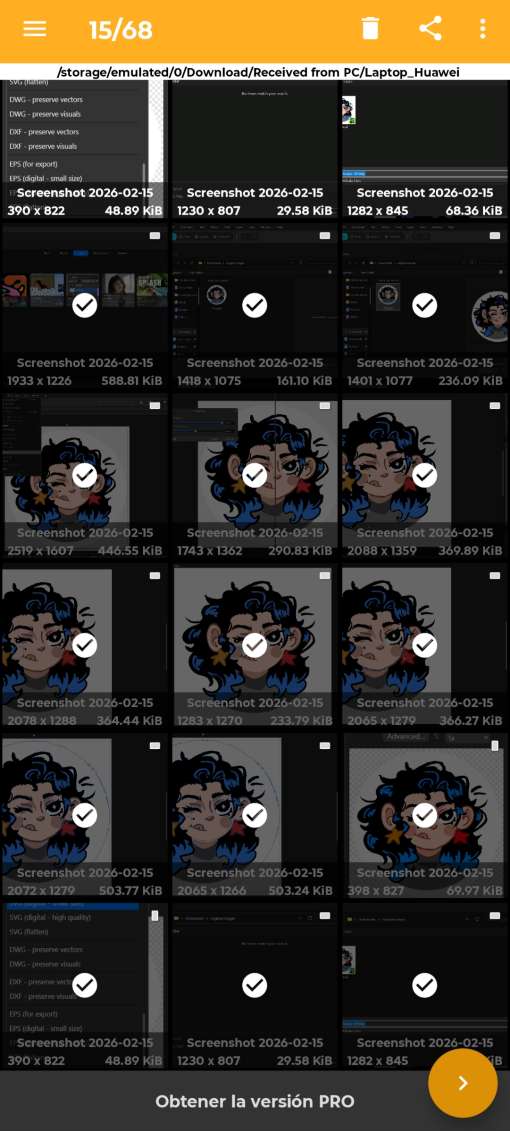
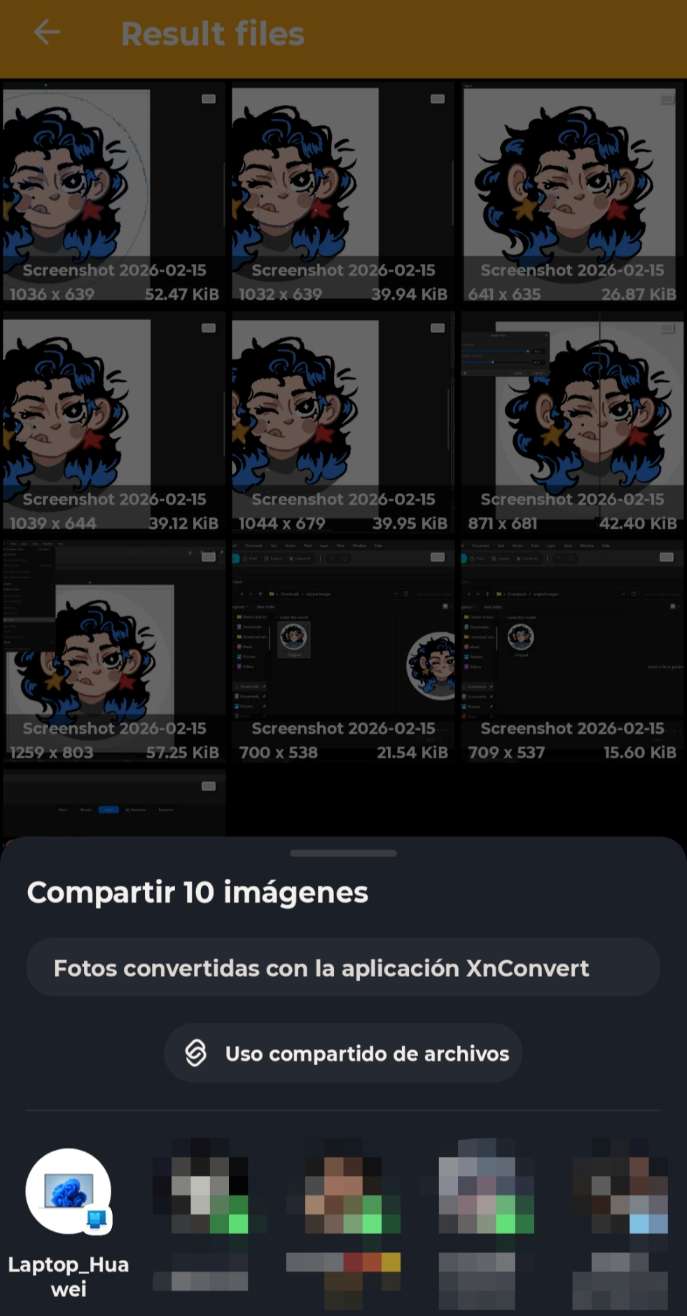
3. Select the images you want to compress. However XnConvert can only do batches of 10, if you select more, the app will only process 10.
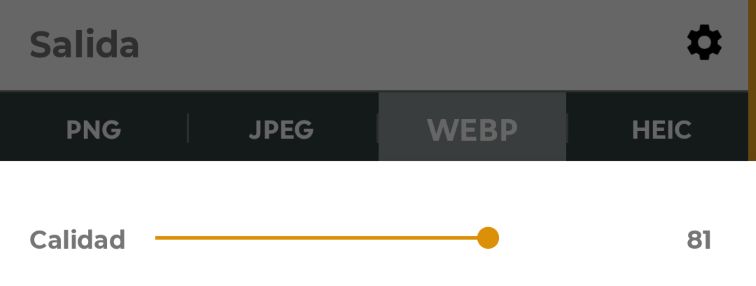
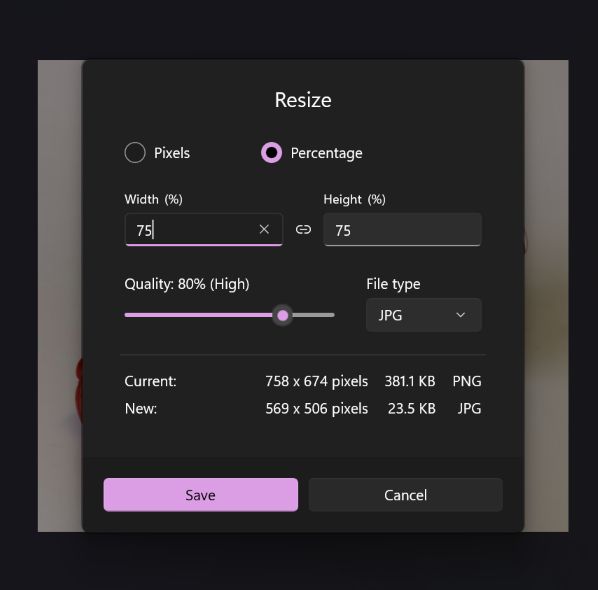
4. Change the parameters to your needs, you can change the file type, the quality and the size percentage.
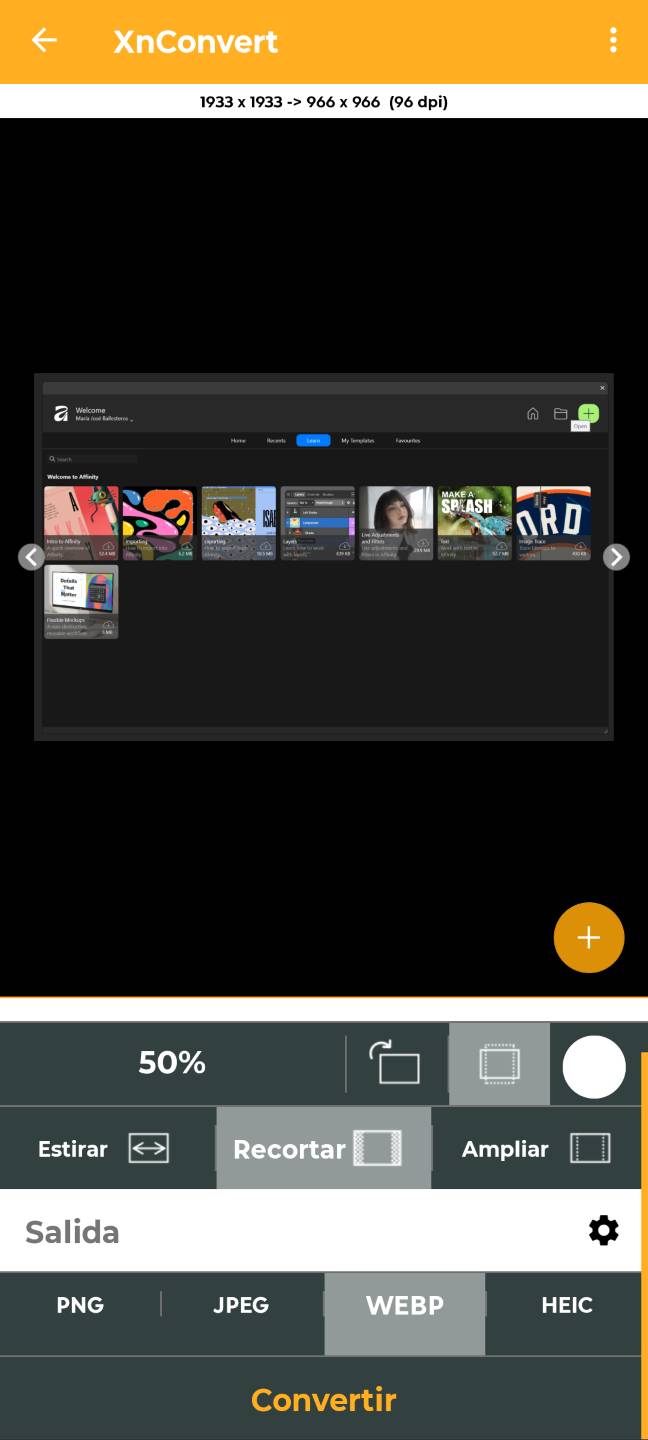
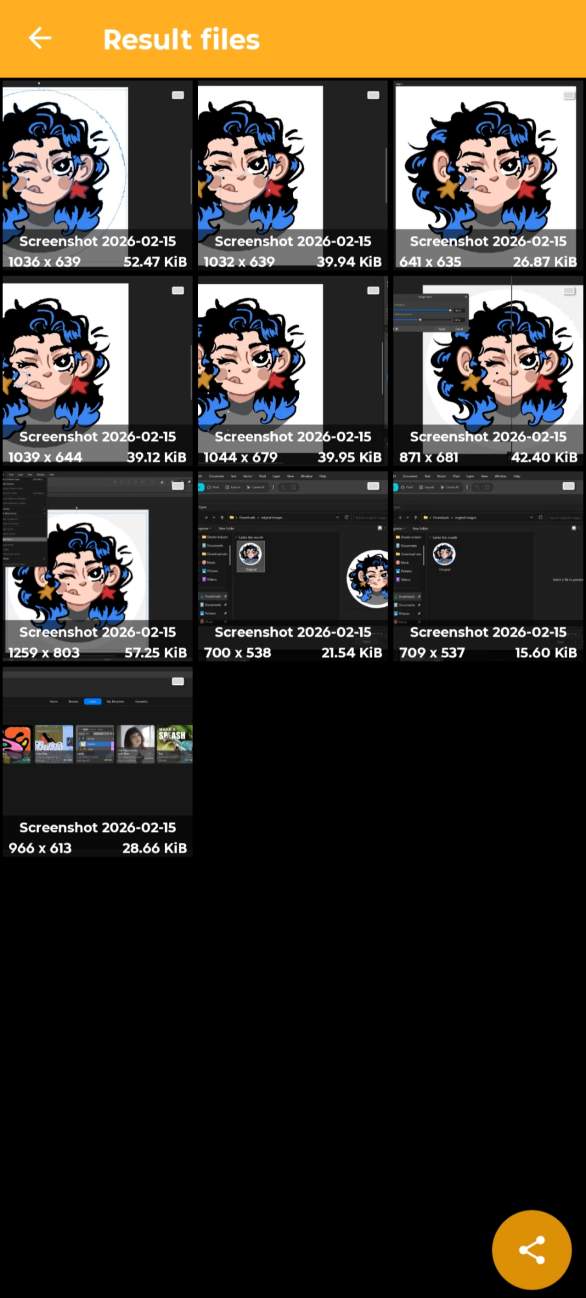
5.Click on convert and you will have the result files, its size appears at the bottom corner.
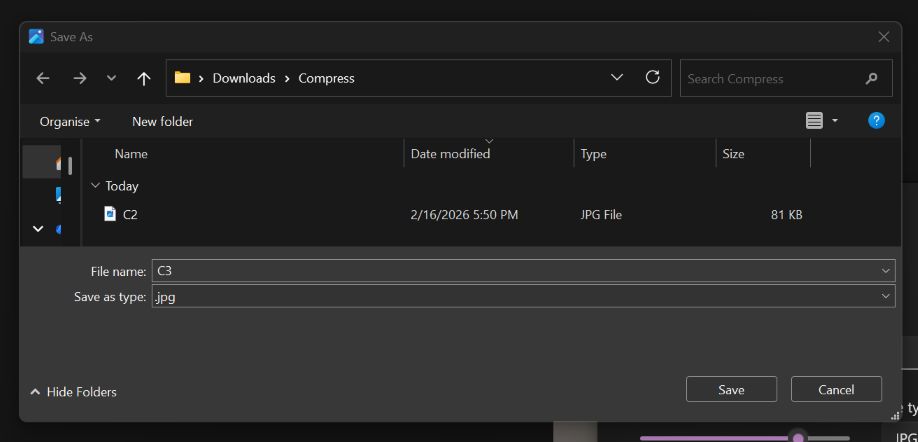
6. Click on the share icon. I have my cellphone and computer synchronized, so I select my computer.
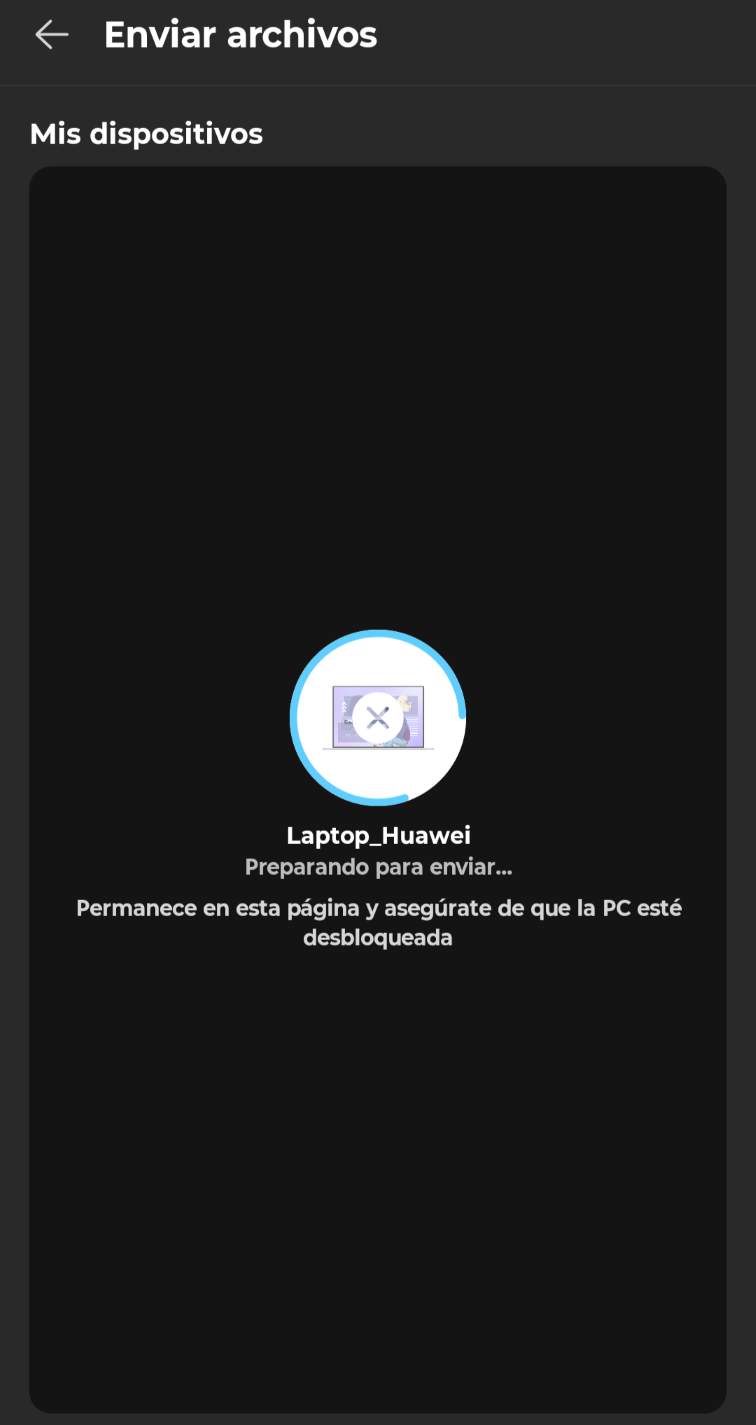
7. The file's share interface will appear, click on the circle of the device.
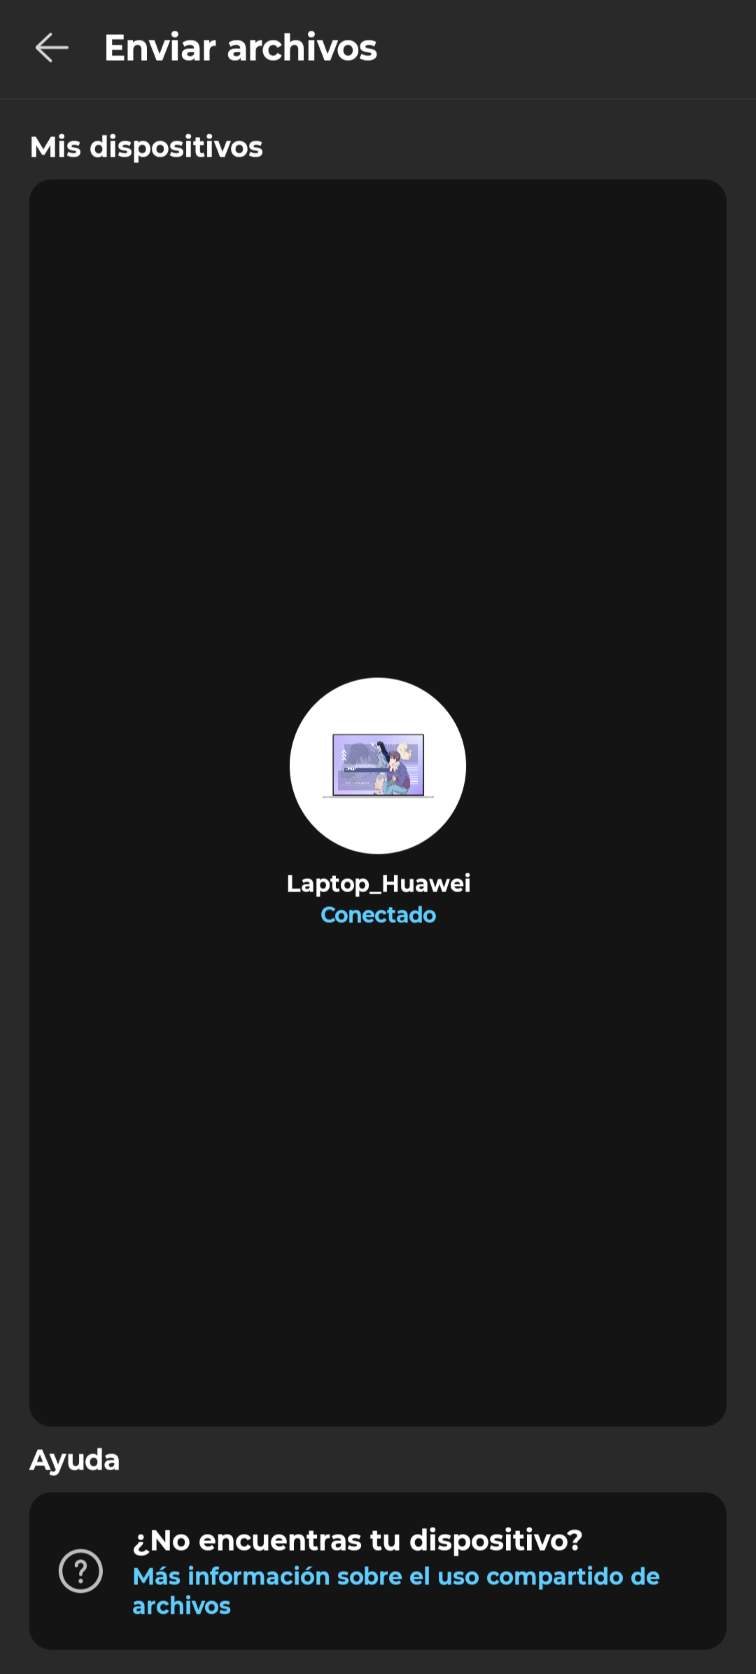
7.1 After clicking the center circle it will load the images.
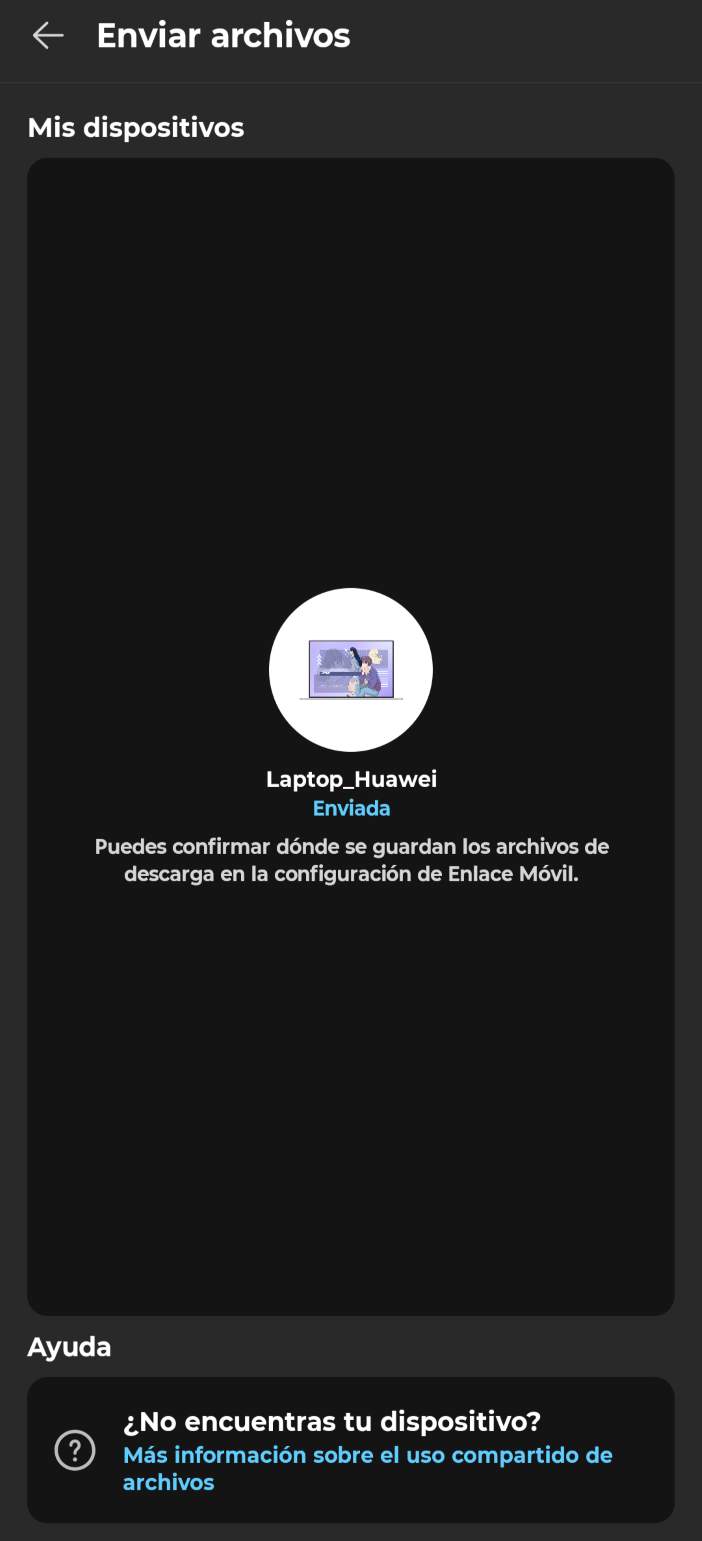
7.2 After sending all the images to my computer, it will actualize its status to "Shared"
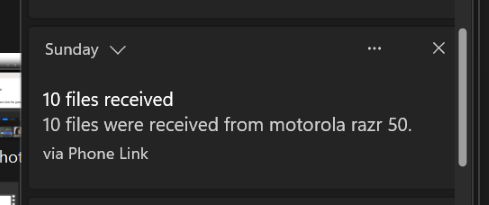
On my computer appears a notification that my files were sended.
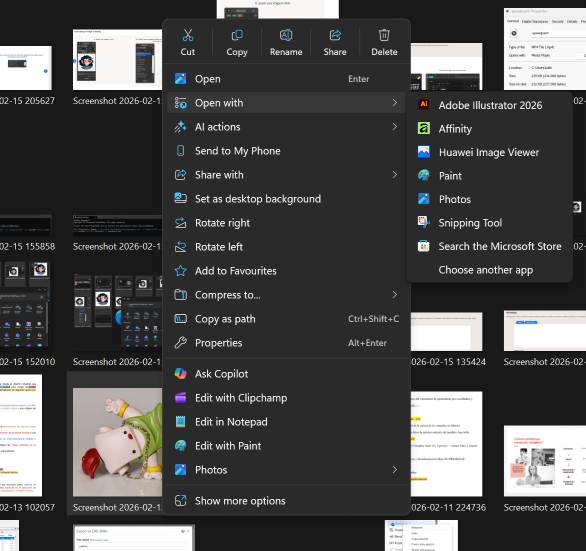


For large batches I prefer XnConvert, even if I need to share them back and forward between my computer (Phone Link is pretty fast and XnConvert has more resize parameters). However for single files on my computer that I need fast, I use the Photos app.
Learning Outcomes
This week helped me understand that digital design is not only about creating shapes, but designing with intention.
- Vector precision is not automatic: Achieving a faithful vector can be tricky and time-consuming. Image tracing tools are helpful, but they do not always produce clean geometry. I learned that sometimes it is better to manually redraw vectors to have full control over curves and anchor points.
- Dominating parameters takes practice: Working with parametric tools requires understanding constraints and relationships between dimensions. It can be difficult at first to structure variables correctly, but once defined properly, we can have an iterative designs.
- Different CAD environments, different strengths: I did not struggle much transitioning between Onshape and Inventor because their interfaces are similar. However, Inventor offers more advanced tools like rendering, while Onshape is excellent for cloud-based modeling and accessibility.
- File compression and optimization: I learned that large files can slow down the webpage and sharing processes. So by compressing files properly we can reduce file size without losing a lot of quality. This is especially important when uploading our documentation. The biggest challenge for me was using FFMPEG to compress videos, but with some practice I understood how to use it.
This knowledge will help me trough my Fab LAB journey,as the fundamentals to document and model for my final project. Through this process I would like to learn how to use other CAD programs (Aside from Onshape I have worked with SolidWorks, Rhino, Fusion 360 and Blender, but have limited knowledge).