INTERFACE AND APPLICATION PROGRAMMING
Individual Assignment
- Write an application that interfaces a user with an input &/or output device that you made
Group Assignment
- Compare as many tool options as possible
You can see our Group Assignment here.
Ways Devices Can Communicate to an Interface
Before choosing WiFi for this project, I looked at the different options available for getting a phone or computer to talk to a microcontroller. Each method has different trade-offs in range, speed, complexity, and whether you need extra hardware.
| Method | Range | Needs router? | Best for |
|---|---|---|---|
| USB Serial | Cable length (~5 m) | No | Desktop apps, debugging, wired control |
| Bluetooth (BLE) | ~10 m | No | Phone-to-device, wearables, low power |
| WiFi (HTTP/REST) | ~50 m indoors | Yes (or AP mode) | Web/mobile apps, multiple clients, fast data |
| WebSockets | Network range | Yes | Real-time live data, sensor dashboards |
| MQTT | Internet-wide | Yes + broker | IoT fleets, remote monitoring, publish-subscribe |
| ESP-NOW | ~200 m open air | No | Board-to-board, no infrastructure needed |
I chose WiFi with a simple HTTP REST API because my phone and the ESP32 were on the same network. It needed no extra pairing step, and the React Native fetch() API makes it trivial to call HTTP endpoints. The trade-off is that both devices must be on the same network. It would not work over mobile data without extra setup.
Individual Assignment
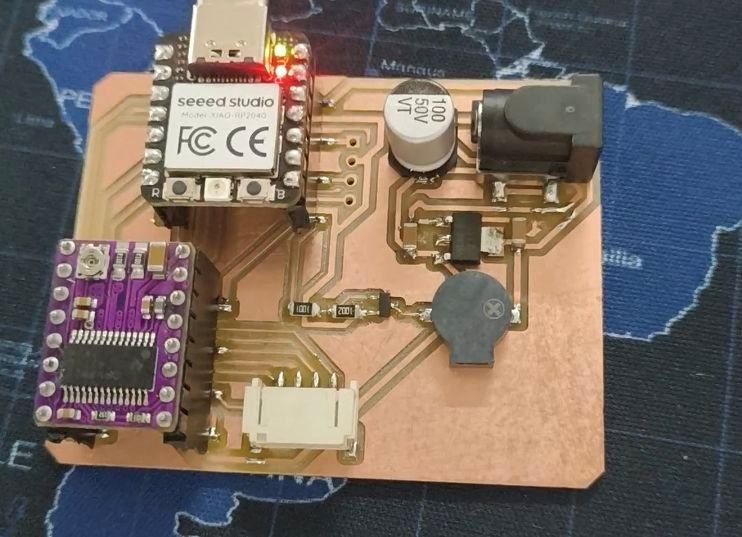
For this week, the task was to make an app that talks with a board I made. I reused the output board I made in Week 10 as part of the assignment. The one with the Xiao ESP32-S3, a DRV8825 stepper driver, and a passive buzzer.
I used Wifi to talk to the board from my mobile.
I wrote a small REST API that runs on the ESP32 itself. Then I built a phone app that sends HTTP requests to it. When I hit "Start Motor" on the app, the ESP32 gets the request and drives the stepper. When I hit "Buzzer On", it beeps.
Click here to go to the output devices week page.
Prompt
I used Claude to generate the ESP32 firmware. The full prompt I gave it:
Build a complete system to control a stepper motor and buzzer from an Android app over WiFi.
HARDWARE:
- XIAO ESP32-S3 (Arduino framework)
- DRV8825 stepper driver controlling a NEMA 17 motor (needs separate 12V VMOT supply)
- Passive buzzer
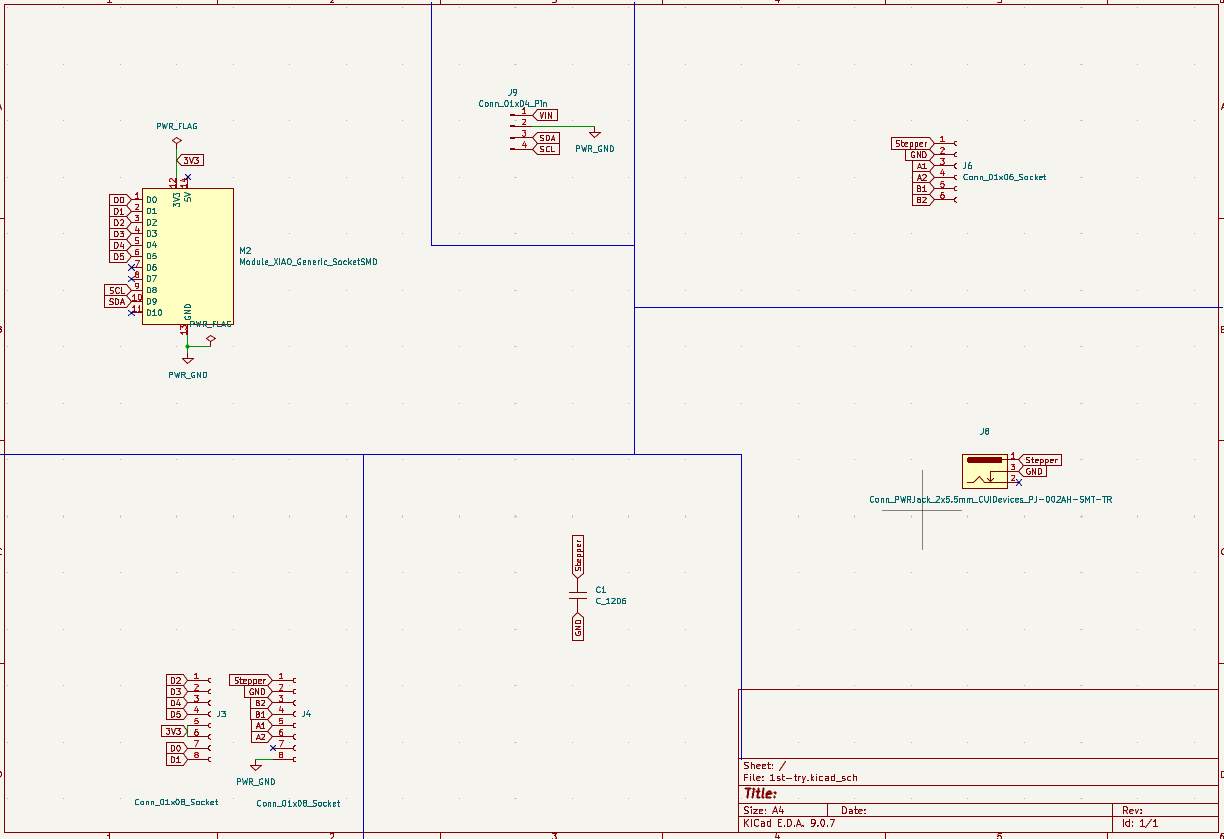
- Pin mapping (use Arduino "D" pin aliases):
- STEP = D0
- DIR = D1
- ENABLE = D2 (DRV8825 enable is ACTIVE-LOW: LOW = enabled, HIGH = disabled)
- M0 = D3, M1 = D4, M2 = D5 (microstep select; keep all LOW for full step)
- BUZZER = D7
- ESP32 joins an existing WiFi network (station mode), not AP mode.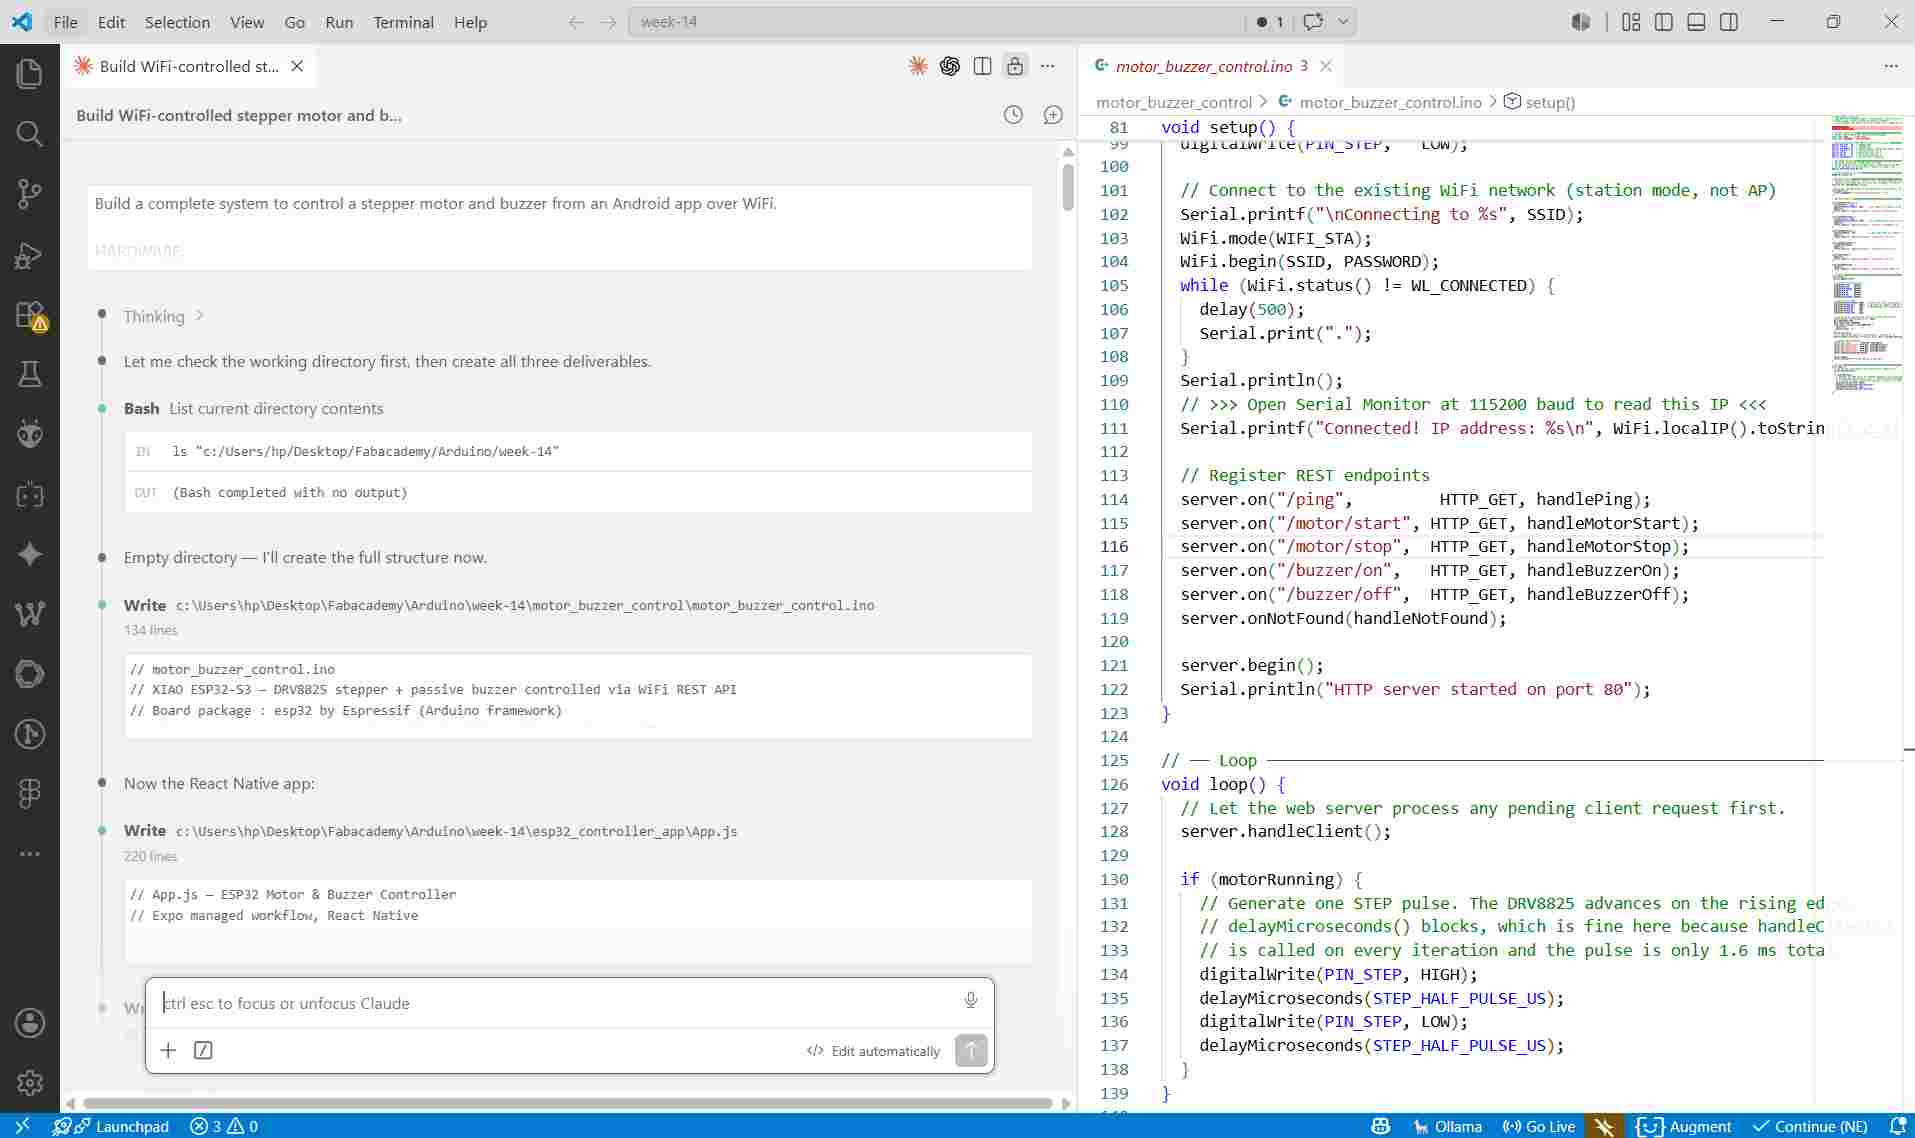
I used Claude in Visual Studio code text ditor to generate the code.
Then I copied each of the files that claude gave me. It gave me two files. One was for the arduino program. And the other was the app file.
ESP32 Firmware
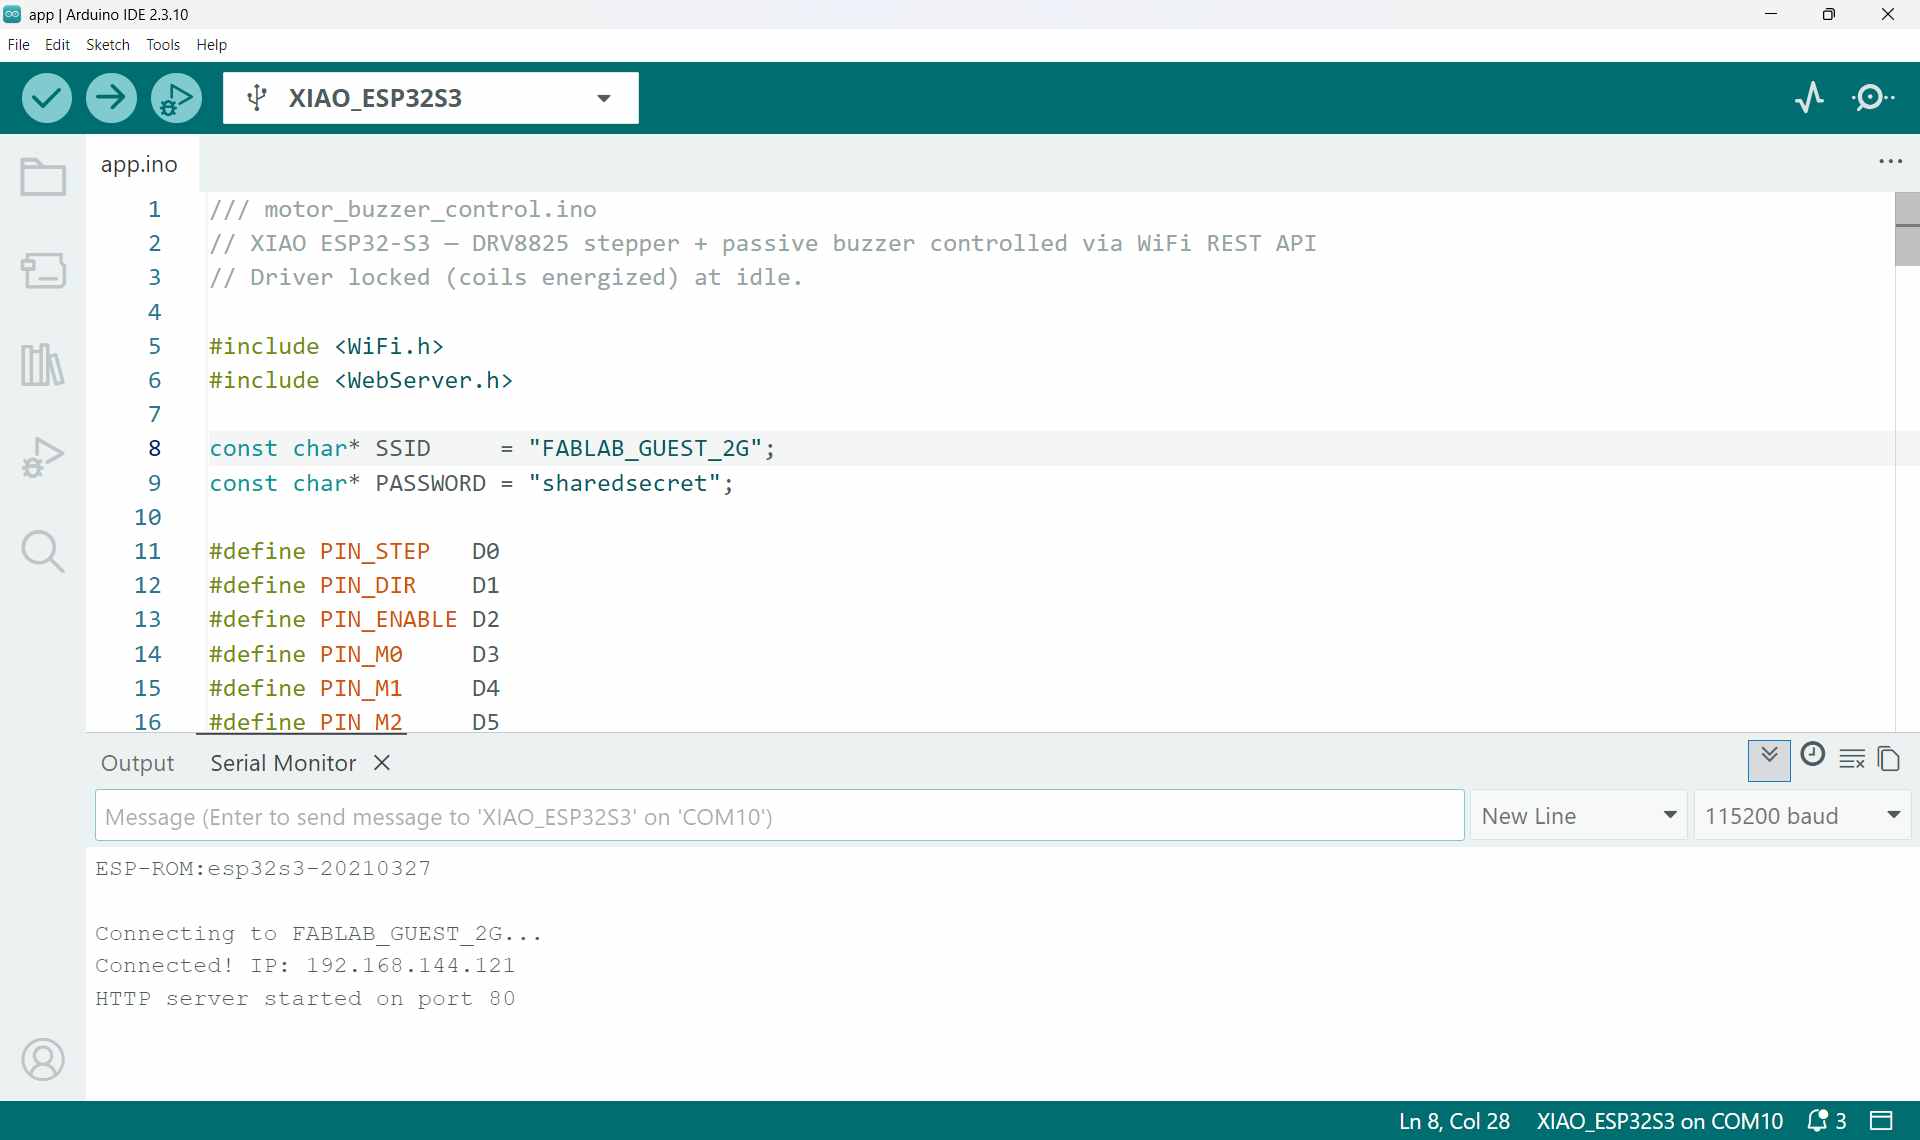
This is the Arduino code that I flashed to the ESP32-S3.
/// motor_buzzer_control.ino
// XIAO ESP32-S3 — DRV8825 stepper + passive buzzer controlled via WiFi REST API
// Driver locked (coils energized) at idle.

#include
#include

const char* SSID     = "your-ssid-here";
const char* PASSWORD = "your-password-here";

#define PIN_STEP   D0
#define PIN_DIR    D1
#define PIN_ENABLE D2
#define PIN_M0     D3
#define PIN_M1     D4
#define PIN_M2     D5
#define PIN_BUZZER D7

#define STEP_HALF_PULSE_US 800

WebServer server(80);

volatile bool motorRunning = false;

void addCors() {
  server.sendHeader("Access-Control-Allow-Origin", "*");
  server.sendHeader("Access-Control-Allow-Methods", "GET,POST,OPTIONS");
  server.sendHeader("Access-Control-Allow-Headers", "Content-Type");
}

void handleMotorStart() {
  motorRunning = true;
  digitalWrite(PIN_ENABLE, LOW);   // enable driver
  addCors();
  server.send(200, "application/json", "{\"motor\":\"running\"}");
}

void handleMotorStop() {
  motorRunning = false;
  digitalWrite(PIN_ENABLE, LOW);   // stay enabled = stay locked (holding torque)
  addCors();
  server.send(200, "application/json", "{\"motor\":\"stopped\"}");
}

void handleBuzzerOn() {
  ledcWriteTone(PIN_BUZZER, 1000);
  addCors();
  server.send(200, "application/json", "{\"buzzer\":\"on\"}");
}

void handleBuzzerOff() {
  ledcWriteTone(PIN_BUZZER, 0);
  addCors();
  server.send(200, "application/json", "{\"buzzer\":\"off\"}");
}

void handleNotFound() {
  addCors();
  if (server.method() == HTTP_OPTIONS) { server.send(204); return; }
  server.send(404, "application/json", "{\"error\":\"not found\"}");
}

void setup() {
  Serial.begin(115200);

  pinMode(PIN_STEP,   OUTPUT);
  pinMode(PIN_DIR,    OUTPUT);
  pinMode(PIN_ENABLE, OUTPUT);
  pinMode(PIN_M0,     OUTPUT);
  pinMode(PIN_M1,     OUTPUT);
  pinMode(PIN_M2,     OUTPUT);

  ledcAttach(PIN_BUZZER, 1000, 10);

  digitalWrite(PIN_ENABLE, LOW);   // enable driver at boot = motor locked
  digitalWrite(PIN_DIR,    HIGH);
  digitalWrite(PIN_M0,     LOW);
  digitalWrite(PIN_M1,     LOW);
  digitalWrite(PIN_M2,     LOW);
  digitalWrite(PIN_STEP,   LOW);

  Serial.printf("\nConnecting to %s", SSID);
  WiFi.begin(SSID, PASSWORD);
  int tries = 0;
  while (WiFi.status() != WL_CONNECTED) {
    delay(500);
    Serial.print(".");
    if (++tries > 20) {
      Serial.printf("\nStatus: %d\n", WiFi.status());
      tries = 0;
    }
  }
  Serial.printf("\nConnected! IP: %s\n", WiFi.localIP().toString().c_str());

  server.on("/motor/start", HTTP_GET, handleMotorStart);
  server.on("/motor/stop",  HTTP_GET, handleMotorStop);
  server.on("/buzzer/on",   HTTP_GET, handleBuzzerOn);
  server.on("/buzzer/off",  HTTP_GET, handleBuzzerOff);
  server.onNotFound(handleNotFound);

  server.begin();
  Serial.println("HTTP server started on port 80");
}

void loop() {
  server.handleClient();

  if (motorRunning) {
    digitalWrite(PIN_STEP, HIGH);
    delayMicroseconds(STEP_HALF_PULSE_US);
    digitalWrite(PIN_STEP, LOW);
    delayMicroseconds(STEP_HALF_PULSE_US);
  }
}
After flashing the code successfully, I got the IP address of the ESP32 from the Serial Monitor.
The App
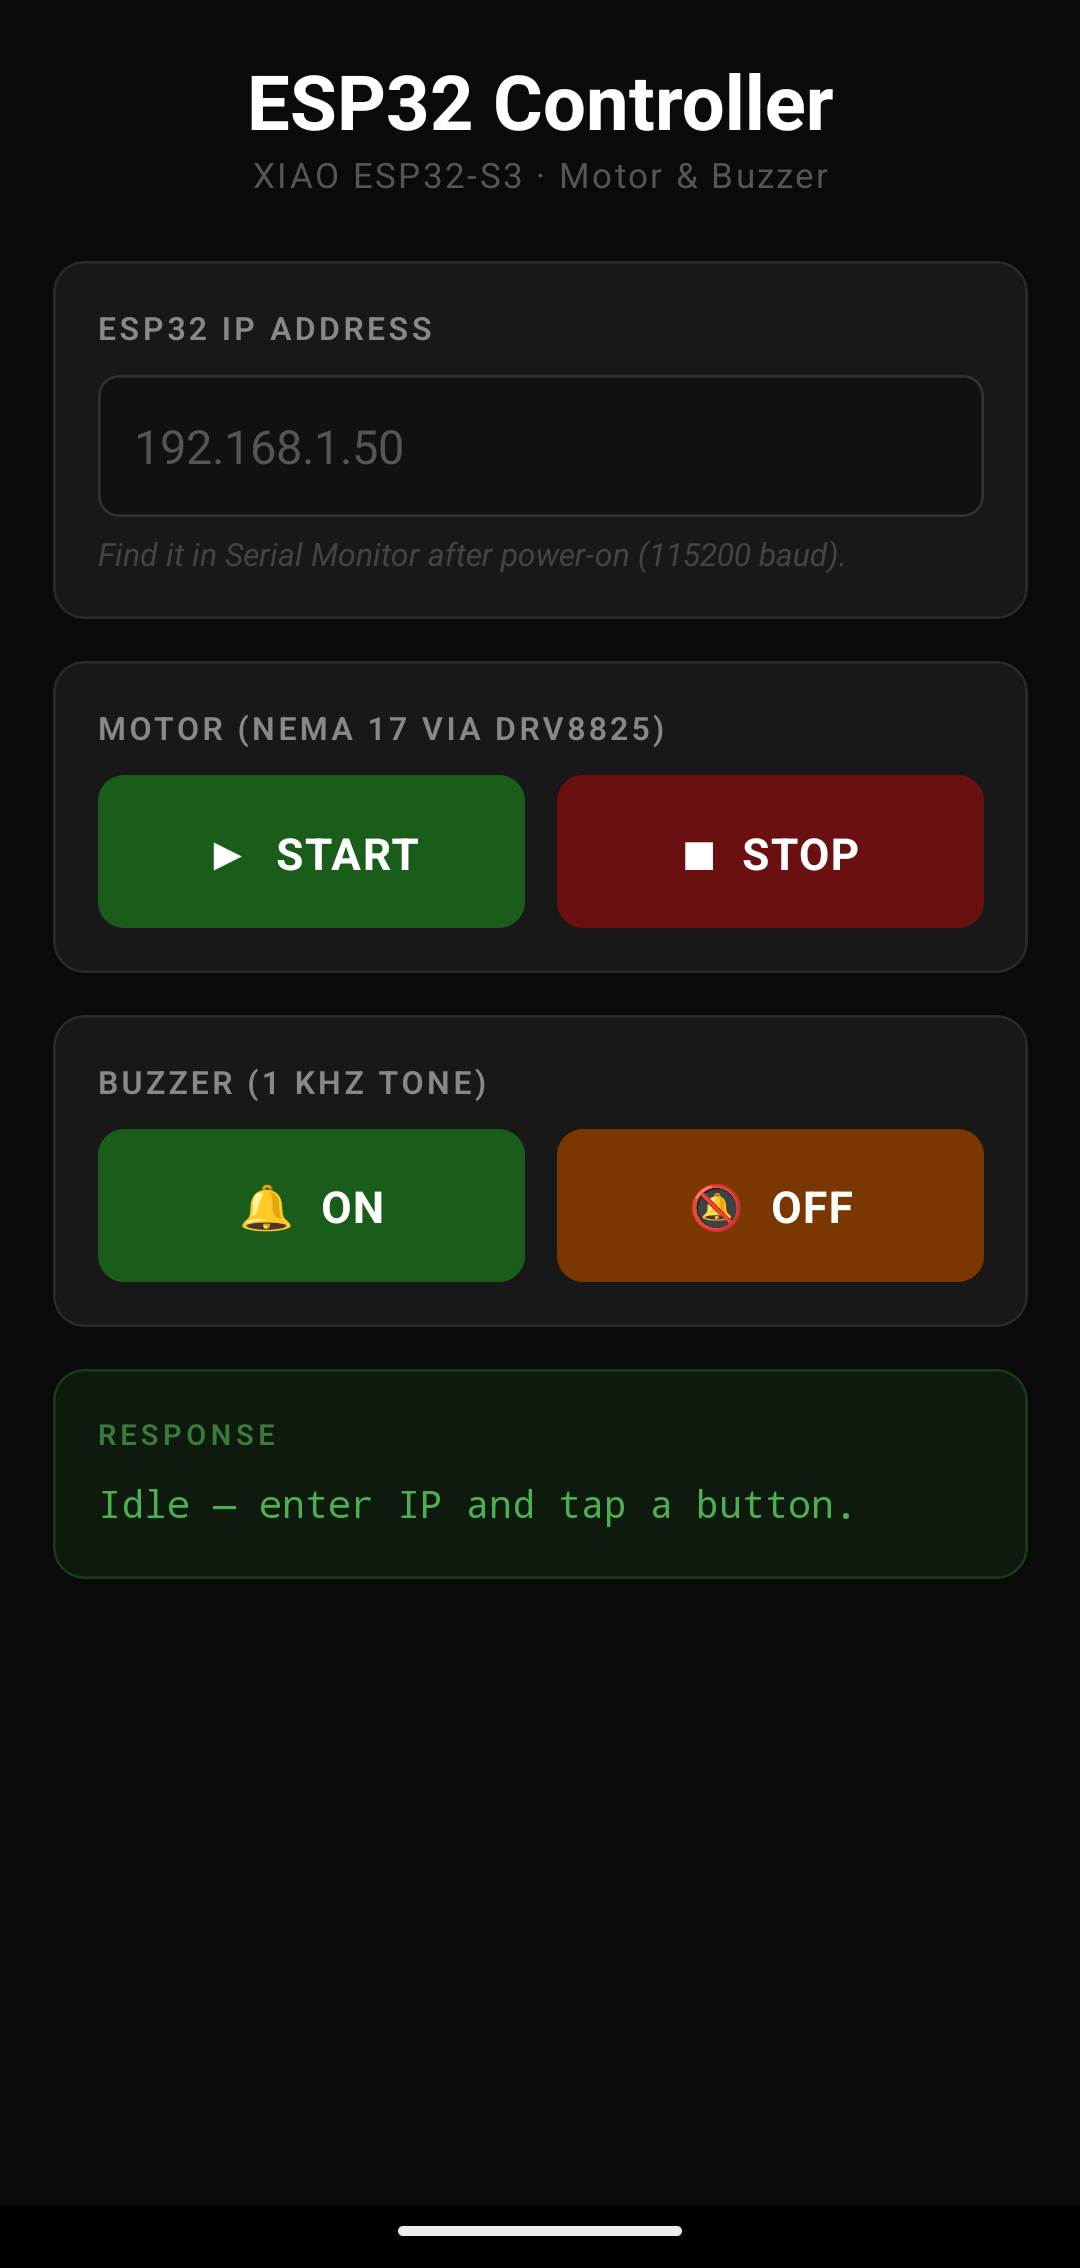
How it works
The ESP32 runs a small HTTP server. The app lets you type in the board's IP address (printed to Serial Monitor at 115200 baud on power-on) and then tap buttons to trigger actions:
| Button | HTTP endpoint | Action |
|---|---|---|
| START | /motor/start |
Begin continuous stepper rotation (DRV8825 + NEMA 17) |
| STOP | /motor/stop |
Halt the stepper |
| Buzzer ON | /buzzer/on |
Emit a 1 kHz tone |
| Buzzer OFF | /buzzer/off |
Silence the buzzer |
App Code
// App.js — ESP32 Motor & Buzzer Controller
// Expo managed workflow, React Native

import React, { useState } from 'react';
import {
  StyleSheet, View, Text, TextInput, TouchableOpacity,
  SafeAreaView, StatusBar, ScrollView,
} from 'react-native';

const DEFAULT_IP = '192.168.1.50';

export default function App() {
  const [ip, setIp]         = useState('');
  const [status, setStatus] = useState('Idle — enter IP and tap a button.');

  const callEndpoint = async (path) => {
    const host = ip.trim() || DEFAULT_IP;
    const url  = `http://${host}${path}`;
    setStatus(`→ ${url}`);
    try {
      const response = await fetch(url, { method: 'GET' });
      if (!response.ok) {
        setStatus(`HTTP ${response.status} from ${url}`);
        return;
      }
      const json = await response.json();
      setStatus(JSON.stringify(json, null, 2));
    } catch (err) {
      setStatus(`Error: ${err.message}`);
    }
  };

  return (
    <SafeAreaView style={styles.safe}>
      <StatusBar barStyle="light-content" backgroundColor="#0a0a0a" />
      <ScrollView contentContainerStyle={styles.container} keyboardShouldPersistTaps="handled">

        <Text style={styles.title}>ESP32 Controller</Text>
        <Text style={styles.subtitle}>XIAO ESP32-S3 · Motor & Buzzer</Text>

        <View style={styles.card}>
          <Text style={styles.label}>ESP32 IP Address</Text>
          <TextInput
            style={styles.input}
            placeholder={DEFAULT_IP}
            placeholderTextColor="#555"
            value={ip}
            onChangeText={setIp}
            keyboardType="numeric"
            autoCapitalize="none"
            autoCorrect={false}
          />
          <Text style={styles.hint}>
            Find it in Serial Monitor after power-on (115200 baud).
          </Text>
        </View>

        <View style={styles.card}>
          <Text style={styles.label}>Motor (NEMA 17 via DRV8825)</Text>
          <View style={styles.row}>
            <TouchableOpacity style={[styles.btn, styles.btnGreen]} activeOpacity={0.75}
              onPress={() => callEndpoint('/motor/start')}>
              <Text style={styles.btnText}>▶  START</Text>
            </TouchableOpacity>
            <TouchableOpacity style={[styles.btn, styles.btnRed]} activeOpacity={0.75}
              onPress={() => callEndpoint('/motor/stop')}>
              <Text style={styles.btnText}>■  STOP</Text>
            </TouchableOpacity>
          </View>
        </View>

        <View style={styles.card}>
          <Text style={styles.label}>Buzzer (1 kHz tone)</Text>
          <View style={styles.row}>
            <TouchableOpacity style={[styles.btn, styles.btnGreen]} activeOpacity={0.75}
              onPress={() => callEndpoint('/buzzer/on')}>
              <Text style={styles.btnText}>🔔  ON</Text>
            </TouchableOpacity>
            <TouchableOpacity style={[styles.btn, styles.btnOrange]} activeOpacity={0.75}
              onPress={() => callEndpoint('/buzzer/off')}>
              <Text style={styles.btnText}>🔕  OFF</Text>
            </TouchableOpacity>
          </View>
        </View>

        <View style={styles.statusCard}>
          <Text style={styles.statusLabel}>RESPONSE</Text>
          <Text style={styles.statusText}>{status}</Text>
        </View>

      </ScrollView>
    </SafeAreaView>
  );
}

const styles = StyleSheet.create({
  safe:        { flex: 1, backgroundColor: '#0a0a0a' },
  container:   { padding: 20, paddingBottom: 40 },
  title:       { color: '#ffffff', fontSize: 26, fontWeight: '700', textAlign: 'center', marginTop: 8 },
  subtitle:    { color: '#555', fontSize: 12, textAlign: 'center', marginBottom: 24, letterSpacing: 0.8 },
  card:        { backgroundColor: '#181818', borderRadius: 12, padding: 16, marginBottom: 16,
                 borderWidth: 1, borderColor: '#2a2a2a' },
  label:       { color: '#888', fontSize: 11, fontWeight: '600', letterSpacing: 1.2,
                 textTransform: 'uppercase', marginBottom: 10 },
  input:       { backgroundColor: '#111', color: '#fff', borderRadius: 8,
                 paddingHorizontal: 14, paddingVertical: 12, fontSize: 16,
                 borderWidth: 1, borderColor: '#333', marginBottom: 6 },
  hint:        { color: '#444', fontSize: 11, fontStyle: 'italic' },
  row:         { flexDirection: 'row', gap: 12 },
  btn:         { flex: 1, paddingVertical: 18, borderRadius: 10, alignItems: 'center', justifyContent: 'center' },
  btnGreen:    { backgroundColor: '#1a5c1a' },
  btnRed:      { backgroundColor: '#6b1010' },
  btnOrange:   { backgroundColor: '#7a3800' },
  btnText:     { color: '#fff', fontSize: 15, fontWeight: '700', letterSpacing: 0.6 },
  statusCard:  { backgroundColor: '#0d1a0d', borderRadius: 12, padding: 16,
                 borderWidth: 1, borderColor: '#1a3a1a', minHeight: 80 },
  statusLabel: { color: '#3a7a3a', fontSize: 10, fontWeight: '600', letterSpacing: 1.5, marginBottom: 8 },
  statusText:  { color: '#4caf50', fontSize: 13, fontFamily: 'monospace', lineHeight: 20 },
});
1. Imports
import React, { useState } from 'react';
import {
  StyleSheet, View, Text, TextInput, TouchableOpacity,
  SafeAreaView, StatusBar, ScrollView,
} from 'react-native';
These lines of codes are used to import different files to the main code.
2. State Variables
const DEFAULT_IP = '192.168.1.50';

export default function App() {
  const [ip, setIp]         = useState('');
  const [status, setStatus] = useState('Idle — enter IP and tap a button.');
Variable are like containers used to store data like numbers, names etc.
'const' is used to create a variable whose value cannot be changed later.
3. The HTTP Request Function
This is the part that actually sends the request to the board.
  const callEndpoint = async (path) => {
    const host = ip.trim() || DEFAULT_IP;
    const url  = `http://${host}${path}`;
    setStatus(`→ ${url}`);
    try {
      const response = await fetch(url, { method: 'GET' });
      if (!response.ok) {
        setStatus(`HTTP ${response.status} from ${url}`);
        return;
      }
      const json = await response.json();
      setStatus(JSON.stringify(json, null, 2));
    } catch (err) {
      setStatus(`Error: ${err.message}`);
    }
  };
This function is responsible for sending a request from the app to the ESP32 and displaying the response.
It takes the IP address the user gives it and creates a website url to that address. ANd waits to get a response from the device.
Button Pressed
      │
      ▼
Get IP address
      │
      ▼
Use entered IP
      │
      └──► If empty, use DEFAULT_IP
      │
      ▼
Build URL
      │
      ▼
Show URL on screen
      │
      ▼
Send GET request to ESP32
      │
      ▼
Did the request succeed?
      │
 ┌────┴─────┐
 │          │
Yes         No
 │          │
 ▼          ▼
Read JSON   Show HTTP error
 │
 ▼
Display response
 │
 ▼
If any network error occurs
 │
 ▼
Show error message
4. UI — App Shell and Title
  return (
    <SafeAreaView style={styles.safe}>
      <StatusBar barStyle="light-content" backgroundColor="#0a0a0a" />
      <ScrollView contentContainerStyle={styles.container} keyboardShouldPersistTaps="handled">

        <Text style={styles.title}>ESP32 Controller</Text>
        <Text style={styles.subtitle}>XIAO ESP32-S3 · Motor & Buzzer</Text>
This section creates the user interface (UI) that the user can see on the screen.
It contains the status bar, sets the color of background and text and a scrollwheel.
5. UI — IP Address Input
        <View style={styles.card}>
          <Text style={styles.label}>ESP32 IP Address</Text>
          <TextInput
            style={styles.input}
            placeholder={DEFAULT_IP}
            placeholderTextColor="#555"
            value={ip}
            onChangeText={setIp}
            keyboardType="numeric"
            autoCapitalize="none"
            autoCorrect={false}
          />
          <Text style={styles.hint}>
            Find it in Serial Monitor after power-on (115200 baud).
          </Text>
        </View>
This section creates the IP Address input card. It allows the user to type the IP address of the ESP32
It opens a numeric keyboard to type in the IP address.
6. UI — Motor Buttons
        <View style={styles.card}>
          <Text style={styles.label}>Motor (NEMA 17 via DRV8825)</Text>
          <View style={styles.row}>
            <TouchableOpacity style={[styles.btn, styles.btnGreen]} activeOpacity={0.75}
              onPress={() => callEndpoint('/motor/start')}>
              <Text style={styles.btnText}>▶  START</Text>
            </TouchableOpacity>
            <TouchableOpacity style={[styles.btn, styles.btnRed]} activeOpacity={0.75}
              onPress={() => callEndpoint('/motor/stop')}>
              <Text style={styles.btnText}>■  STOP</Text>
            </TouchableOpacity>
          </View>
        </View>
This is the section that contains the buttons to control the motor.. It contains two buttons 'START' and 'STOP' for both.
7. UI — Buzzer Buttons
        <View style={styles.card}>
          <Text style={styles.label}>Buzzer (1 kHz tone)</Text>
          <View style={styles.row}>
            <TouchableOpacity style={[styles.btn, styles.btnGreen]} activeOpacity={0.75}
              onPress={() => callEndpoint('/buzzer/on')}>
              <Text style={styles.btnText}>🔔  ON</Text>
            </TouchableOpacity>
            <TouchableOpacity style={[styles.btn, styles.btnOrange]} activeOpacity={0.75}
              onPress={() => callEndpoint('/buzzer/off')}>
              <Text style={styles.btnText}>🔕  OFF</Text>
            </TouchableOpacity>
          </View>
        </View>
This section controls the functioning of the buzzer.
8. UI — Status Box (where the board's reply appears)
        <View style={styles.statusCard}>
          <Text style={styles.statusLabel}>RESPONSE</Text>
          <Text style={styles.statusText}>{status}</Text>
        </View>

      </ScrollView>
    </SafeAreaView>
  );
It creates a Response section that displays messages returned by the ESP32.
9. Styles
const styles = StyleSheet.create({
  safe:        { flex: 1, backgroundColor: '#0a0a0a' },
  container:   { padding: 20, paddingBottom: 40 },
  title:       { color: '#ffffff', fontSize: 26, fontWeight: '700', textAlign: 'center', marginTop: 8 },
  subtitle:    { color: '#555', fontSize: 12, textAlign: 'center', marginBottom: 24, letterSpacing: 0.8 },
  card:        { backgroundColor: '#181818', borderRadius: 12, padding: 16, marginBottom: 16,
                 borderWidth: 1, borderColor: '#2a2a2a' },
  label:       { color: '#888', fontSize: 11, fontWeight: '600', letterSpacing: 1.2,
                 textTransform: 'uppercase', marginBottom: 10 },
  input:       { backgroundColor: '#111', color: '#fff', borderRadius: 8,
                 paddingHorizontal: 14, paddingVertical: 12, fontSize: 16,
                 borderWidth: 1, borderColor: '#333', marginBottom: 6 },
  hint:        { color: '#444', fontSize: 11, fontStyle: 'italic' },
  row:         { flexDirection: 'row', gap: 12 },
  btn:         { flex: 1, paddingVertical: 18, borderRadius: 10, alignItems: 'center', justifyContent: 'center' },
  btnGreen:    { backgroundColor: '#1a5c1a' },
  btnRed:      { backgroundColor: '#6b1010' },
  btnOrange:   { backgroundColor: '#7a3800' },
  btnText:     { color: '#fff', fontSize: 15, fontWeight: '700', letterSpacing: 0.6 },
  statusCard:  { backgroundColor: '#0d1a0d', borderRadius: 12, padding: 16,
                 borderWidth: 1, borderColor: '#1a3a1a', minHeight: 80 },
  statusLabel: { color: '#3a7a3a', fontSize: 10, fontWeight: '600', letterSpacing: 1.5, marginBottom: 8 },
  statusText:  { color: '#4caf50', fontSize: 13, fontFamily: 'monospace', lineHeight: 20 },
});
Responsible for the appearance of the app
Making the App Work on My Phone
Writing the code is only half the job. To actually run it on my Android phone I needed to convert i into a apk file.
Step 1 — Install Android Studio
Android Studio is the official IDE from Google for building Android apps.
Even though I'm not writing Java or Kotlin, I still need it to compile the native Android project that Expo generates. I downloaded it from developer.android.com/studio and ran the installer. The setup wizard installs the Android SDK and all the build tools automatically. I just clicked through it and let it download what it needed.
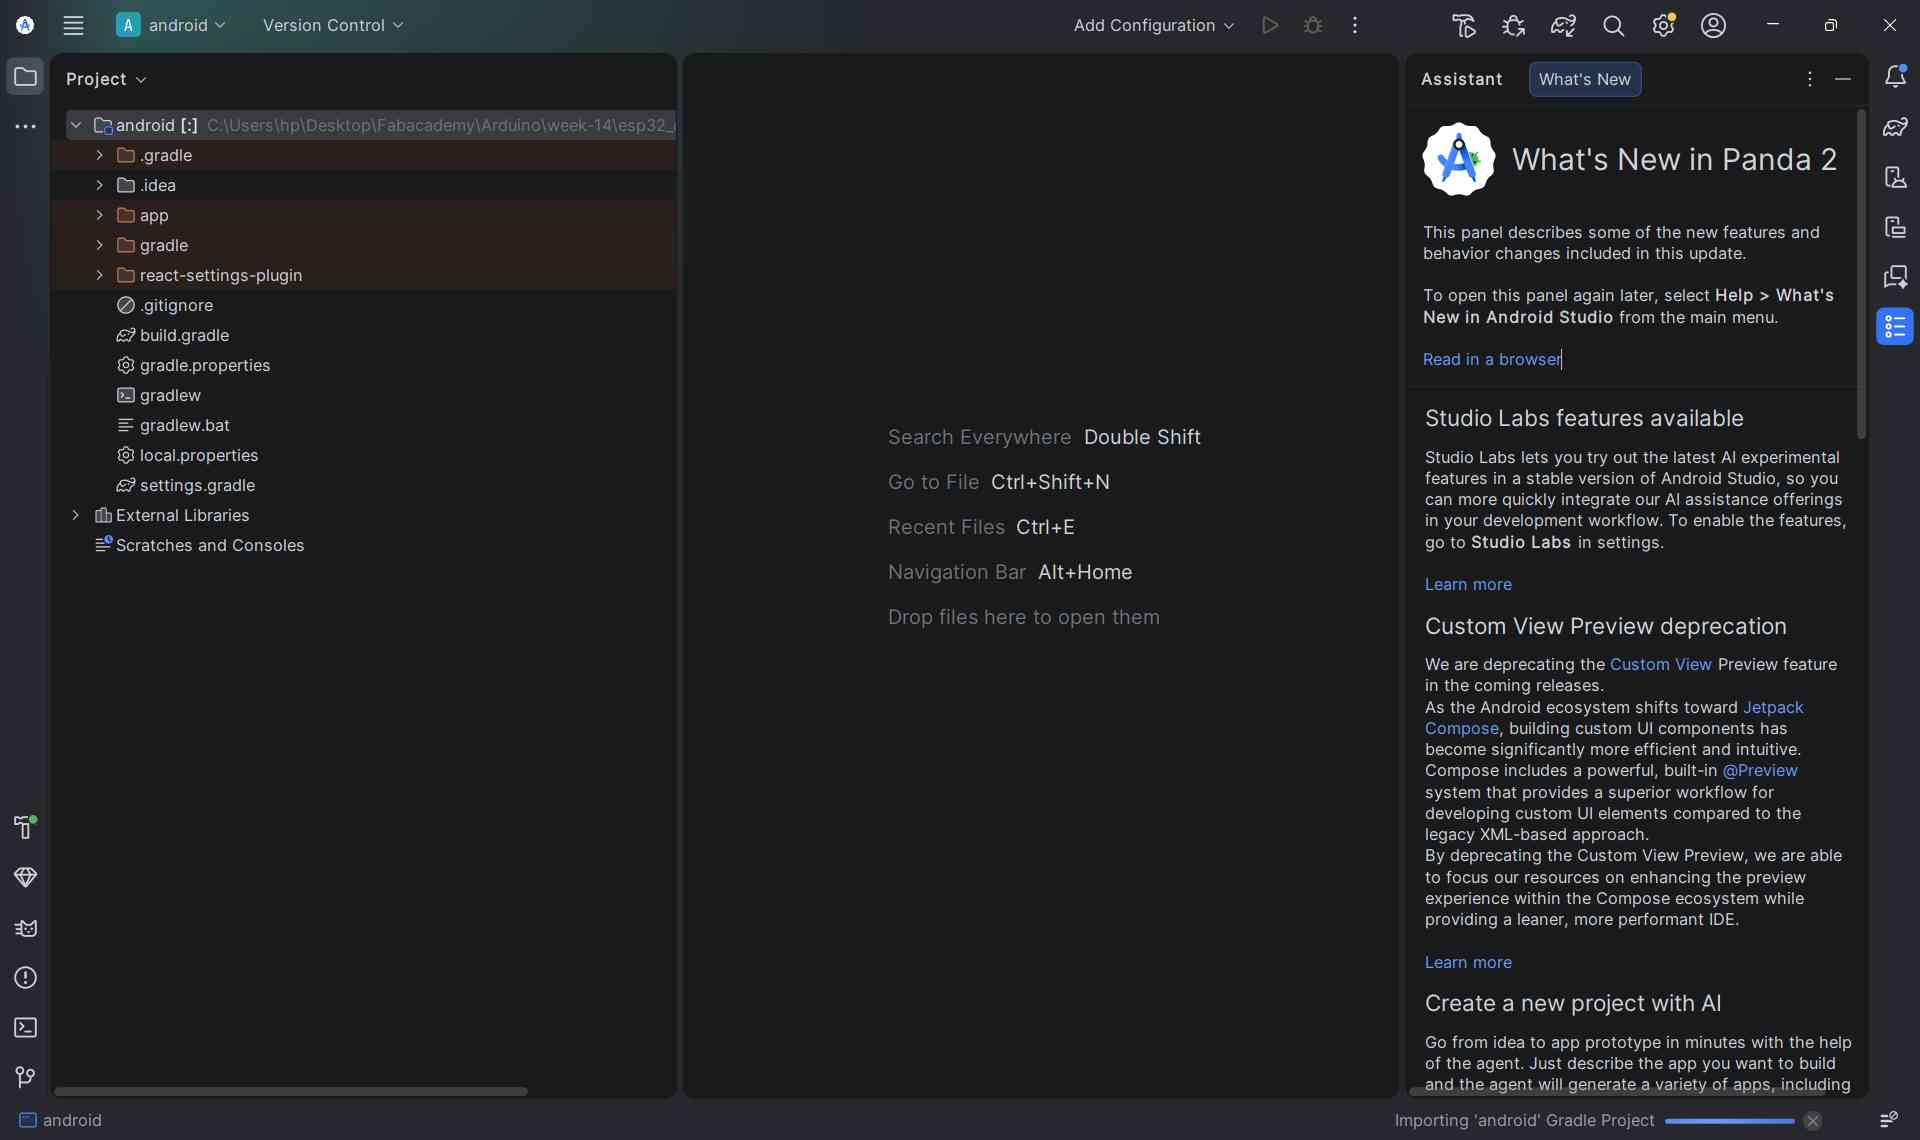
Step 2 — Generate the Android project files
I went to the folder where I stored the code files and opened terminal. Then I typed the following line of code:
npx expo prebuild --platform androidThis created a full Android project inside the folder, Gradle files, manifest, all of it. I only had to do this once.
Step 3 — Bundle the JavaScript code
React Native apps are split into two parts: the native Android shell, and the JavaScript bundle that runs inside it. This command packages all the app code into a single bundle file and drops it where Android Studio can find it:
npx react-native bundle --platform android --dev false --entry-file node_modules/expo/AppEntry.js --bundle-output android/app/src/main/assets/index.android.bundle --assets-dest android/app/src/main/resWithout this step, the APK would build but crash on launch because the JavaScript wouldn't be inside it.
Step 4 — Open the project in Android Studio
I opened Android Studio, clicked Open, and selected the android folder that Expo had generated inside my project.
Android Studio then spent a few minutes syncing Gradle and downloading any missing SDK components.
I just waited for the loading bar at the bottom to finish. It shows "Gradle sync finished" when it's done.
Step 5 — Build the APK
Once the project loaded, I went to the top menu: Build → Generate App Bundle / APK. I chose APK.
Not Bundle. a Bundle is for the Play Store, an APK is what you sideload directly onto a phone.
Then I clicked through the wizard and hit Build.
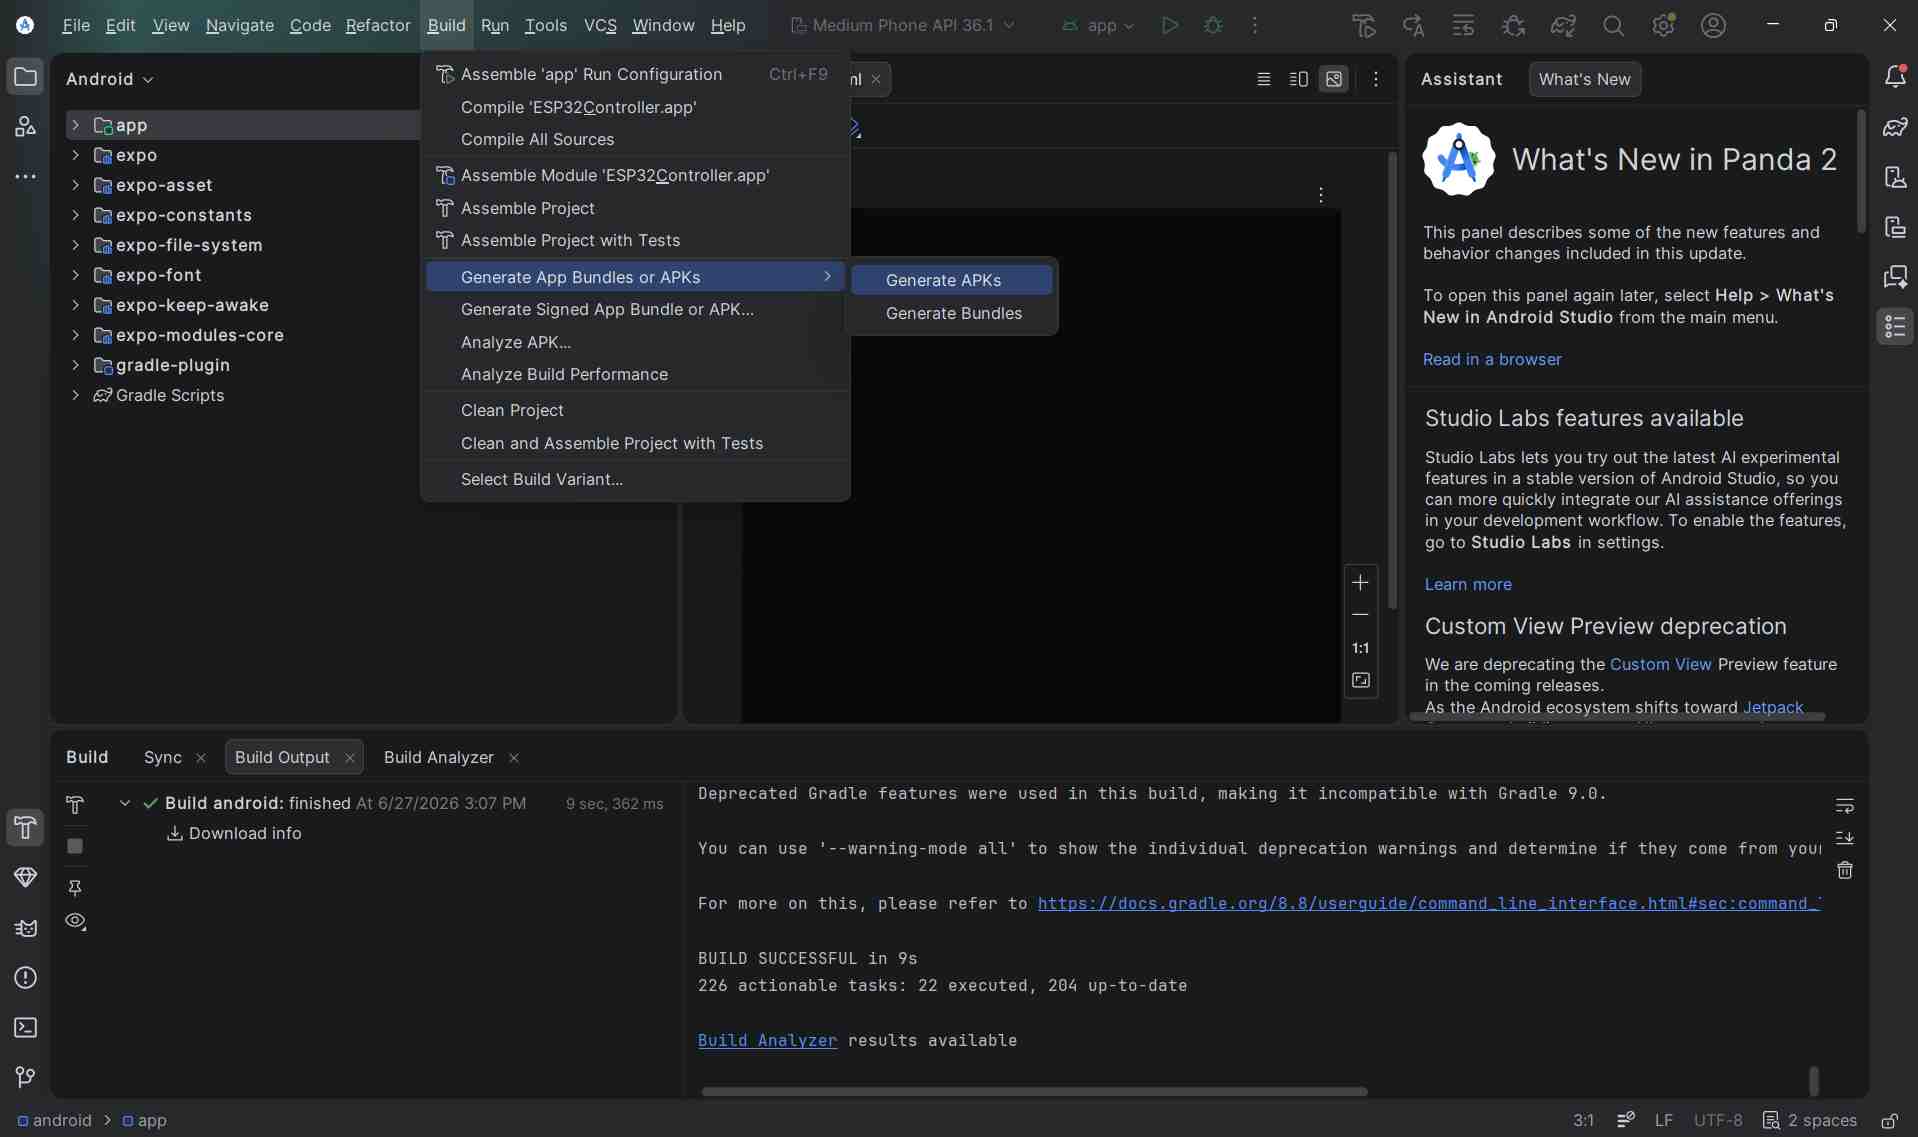
Android Studio compiled everything and saved the APK file to android/app/build/outputs/apk/release/. There's a small notification at the bottom of the screen with a locate link when it finishes.
Step 6 — Install on my phone
I sent the APK file to my phone over WhatsApp. Tapped it to open it. My phone warned me that it's from an unknown source since it didn't come from the Play Store.
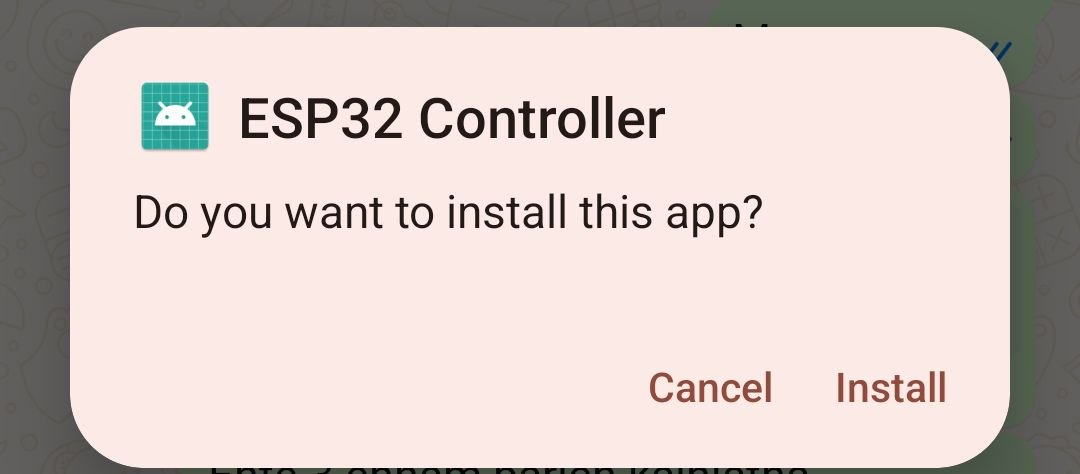
I tapped Allow from this source in the settings it opened, then went back and tapped Install.
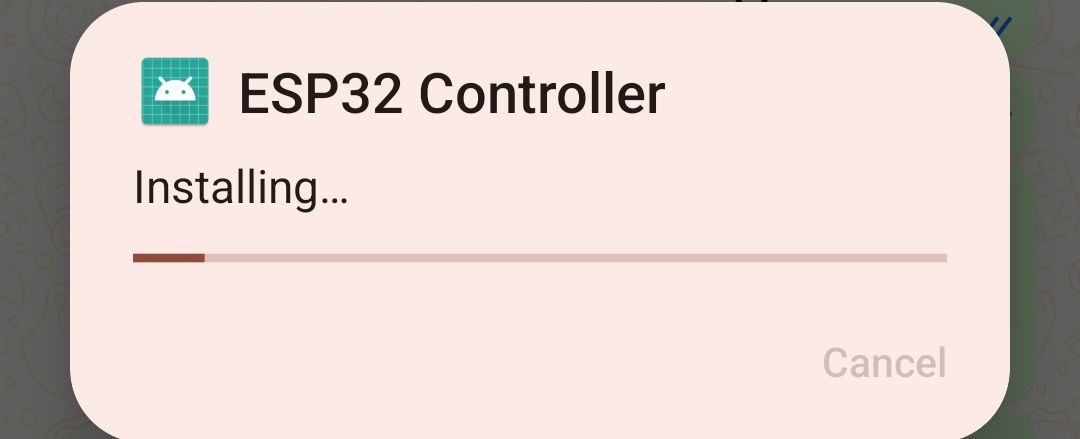
The app installed and opened.

Results
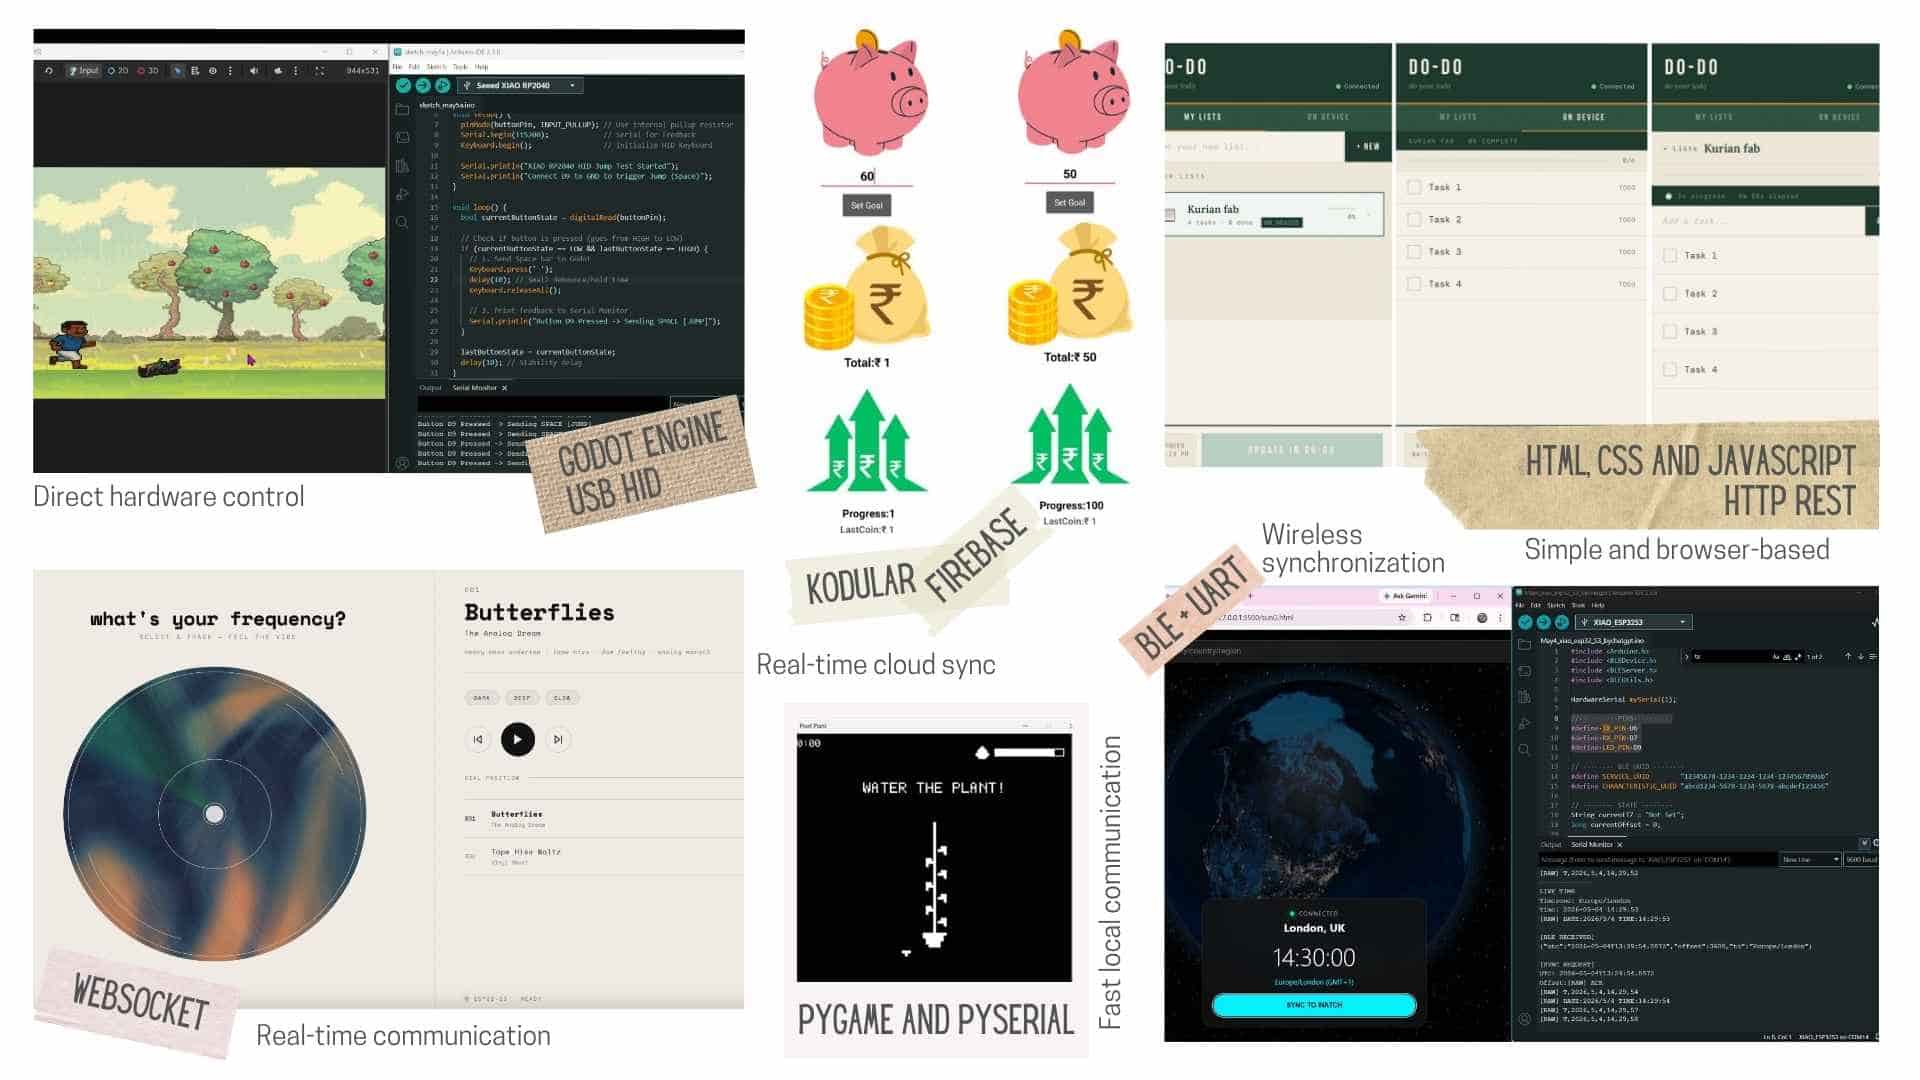
Group Assignment
This week our group explored different interface types and communication methods with our hardware projects. Most members built an interface application connected to their final project, spanning web apps, mobile apps, and varied device communication protocols.
| Project | Member | Interface | Microcontroller | Communication | Direction |
|---|---|---|---|---|---|
| Butterflies (music player) | Architha | Web app | XIAO ESP32-S3 | WebSocket over WiFi (port 81) | Two-way |
| DODO (task list) | Kurian | Web app (HTML/CSS/JS) | XIAO ESP32-S3 | HTTP REST (GET/POST), 3s polling | Two-way |
| Pixel Game | Ashtami | Godot 2D game | XIAO RP2040 | USB HID (keyboard emulation) | One-way (device → PC) |
| Pixel Plant | Kevin | Pygame desktop game | Microcontroller board | Serial (PySerial) | Two-way |
| Smart Piggy | Michael | Mobile app (Kodular) | XIAO ESP32-C6 | WiFi via Firebase Realtime DB | Two-way (cloud sync) |
| Time Sync | Ardhra | Web app | ESP32-S3 + ATtiny1614 | BLE → UART → I2C (DS1307 RTC) | One-way (app → device) |
| SmartToolBox | Nadec | Mobile app | ESP32 | WiFi via Firebase Firestore | Two-way (cloud sync) |