01 — Overview
Project Overview
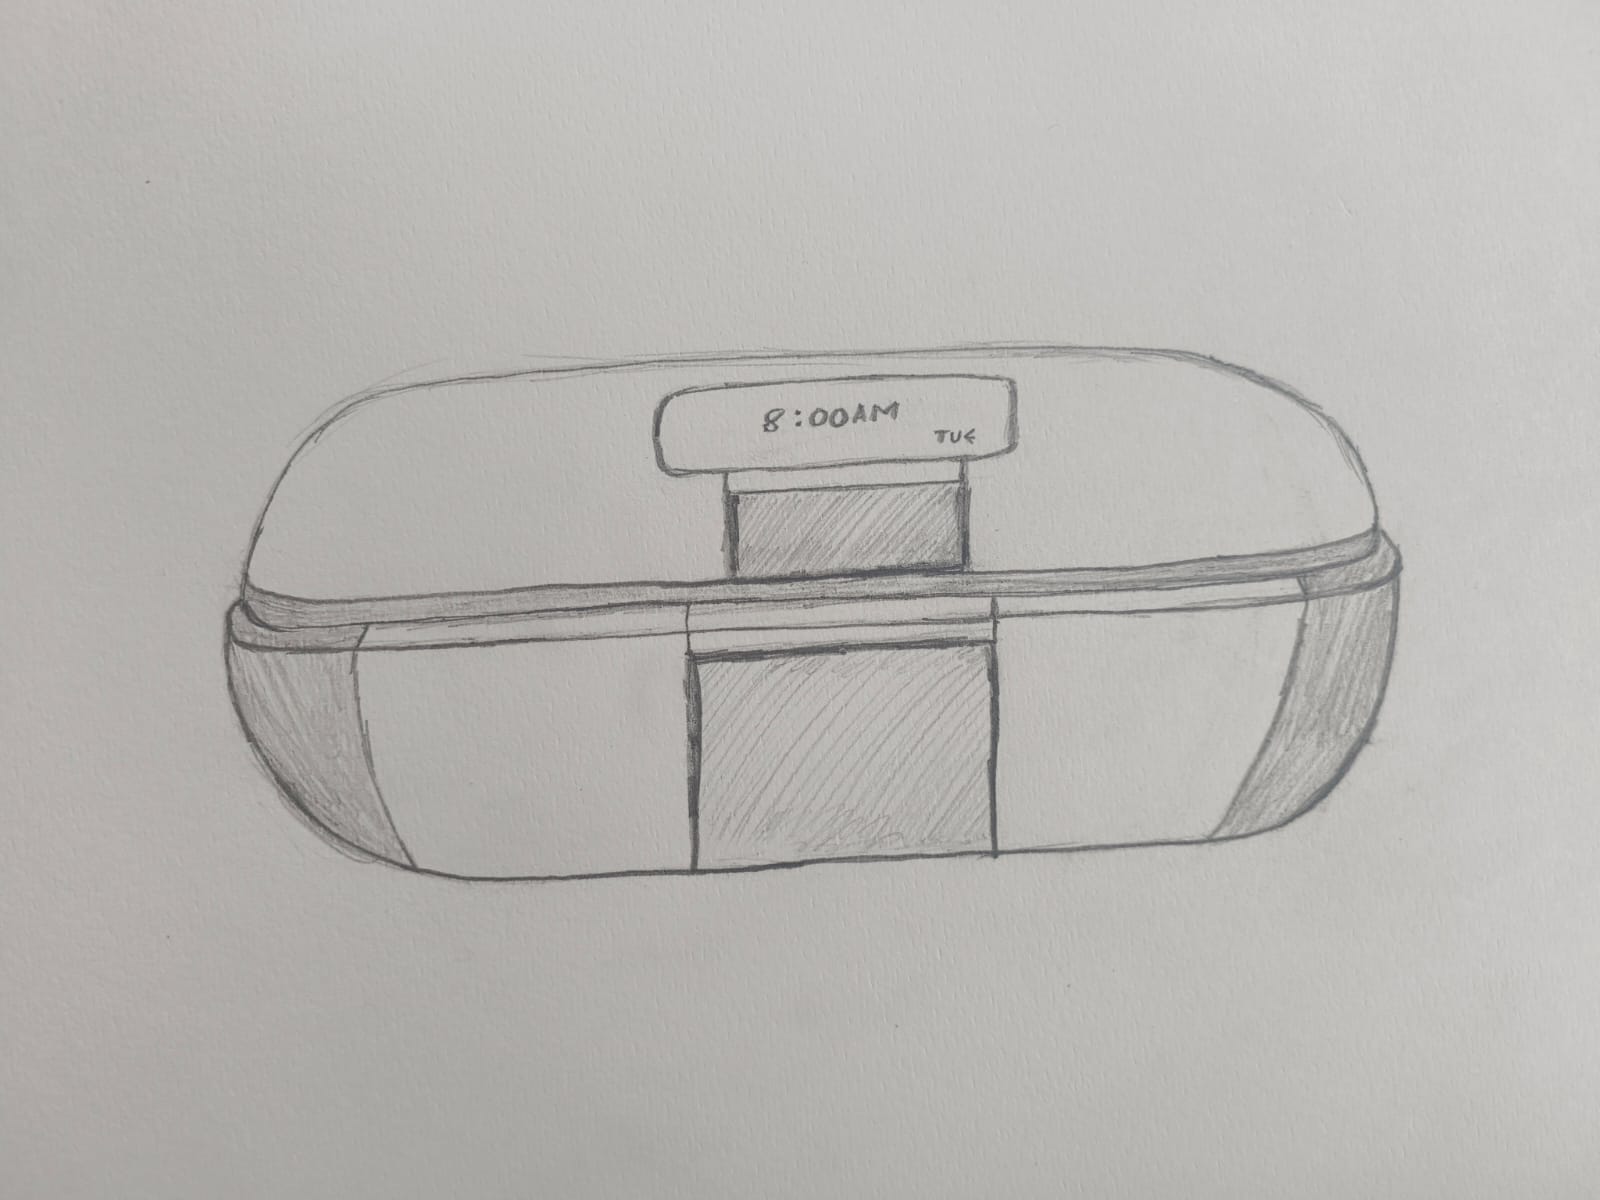
The shape is a big oval, like an oversized pill lying on its side. On top there's a small screen that shows the time and which day of the week it is. Running through the middle horizontally is a seam: that's where the body opens up when you need to refill the medication inside. At the bottom there's a dispensing door, it swings open downward, like the payload bay of a jet, and the pill drops out into the slot.
Inside are three circular rotor discs, one for morning, one for lunch, one for night. Each disc is divided into seven equal sections, one for each day of the week. When the time comes, the right disc rotates to line up with the bottom door and the dose dispenses. The screen tells you what's happening.
What I'm trying to do
- 3D print the outer oval body with a functioning bottom dispensing door and top screen housing.
- Design and fabricate the three circular rotor discs (morning / lunch / night), each with 7 day-sections.
- Get a small screen and microcontroller running inside to show the time and trigger dispensing.
- Document everything clearly enough that someone else could build one too.
02 — Problem Statement
Problem Statement
I started thinking about this because I had to multiple tablets every day when I was having fevers and kept forgetting them. Not because I didn't care, but because I was usually busy and tended to forget the pills. You walk past it and your brain doesn't register it.
The usual fixes don't really work either. Phone alarms get snoozed and eventually disabled. Existing pill organisers look like something from a hospital supply catalogue. None of them feel like something you'd actually want to own.
Who's it for?
- Older people managing several medications at once — where missing a dose actually matters.
- Anyone on a strict schedule where morning / afternoon / night doses are all different.
- Caregivers who fill a weekly tray for someone else and need it to be obvious when it's been opened.
- Honestly, anyone who just wants something nicer looking on their bedside table.
03 — Concept & Sketch
Concept & Visual Sketch
The shape is an oval,a big pill lying flat. It came from the sketch below. I started drawing it and realised that the body of the dispenser being pill-shaped was almost too obvious, and that meant it was probably right. The hand-drawn version shows the three key parts: the screen at the top, the horizontal seam that splits the body open for refilling, and the dispensing door at the bottom that opens downward to drop the pill out.

Inside there are three circular discs. Each one is a rotor with 7 compartments around the edge, one for each day. The morning disc, the lunch disc, and the night disc each rotate independently. When it's time for a dose, the right disc spins to align its current day-compartment with the opening at the bottom, and the door swings open.
The dispensing door is the part I'm most uncertain about mechanically. It needs to open cleanly without the pill bouncing off and rolling away, and close firmly enough that nothing spills if you tilt the device. Still figuring out the hinge and latch geometry — that'll probably take a few print iterations to get right.
04 — Components
Possible Components
This is still a work in progress, so some of these are confirmed and some are "I think this will work." I've tried to be honest about which is which.
Mechanical & Structural
PLA for the first prototype, maybe PETG later if I need it tougher. About 2 mm walls, 20–30% infill.
StructureClear acrylic so you can see at a glance whether the compartment is empty. Seven trays, three slots each.
StructureHinged door at the bottom of the body — swings open downward to drop the pill out. Needs a latch so it doesn't open accidentally.
MechanismThree circular discs (morning, lunch, night), each with 7 compartments around the edge. A small motor or manual turn rotates them to the right day.
MechanismElectronics
Dual-core, USB, runs MicroPython. Wi-Fi and BLE built in.
MicrocontrollerAddressable RGB LEDs that'll sit along the seam line. The glow-through-the-gap effect should look good.
OutputFor when the LEDs aren't enough. Ideally not too loud — just enough to notice.
Output500 mAh LiPo tucked inside the dome. The TP4056 handles USB-C charging. Should last a week or more.
PowerThis keeps time even when the microcontroller is asleep, which is most of the time. Essential for battery life.
TimingThe ESP32 has Wi-Fi and BLE built in so it's tempting. Would let you update the schedule from your phone. A stretch goal.
CommunicationSoftware & Firmware
I picked this because I can actually read it back the next day. Handles the RTC, LEDs, and buzzer.
FirmwareSimple BLE app (built with MIT App Inventor or Flutter) to set reminder schedules.
SoftwareUsed this to model the whole thing. It's also where I've spent most of my time so far, honestly.
Design ToolFor the PCB layout. I want the board to be circular so it sits neatly inside the shell — we'll see how that goes.
Design Tool11 — Timeline
Project Timeline & Progress
Where things are right now. I'll keep updating this as I go.
| Phase | Deliverable | Target Week | Status |
|---|---|---|---|
| Concept | Idea definition, sketches, BOM draft | Week 01 | Done |
| CAD | Parametric 3D model & render in Fusion 360 | Week 02 | Done |
| Animation | Product animation in Blender | Week 02 | Done |
| Laser Cutting | Inner tray prototypes from acrylic | Week 03 | In Progress |
| 3D Printing | First physical shell prototype | Week 05 | Planned |
| Electronics | PCB design & milling | Week 08 | Planned |
| Firmware | RTC + LED + buzzer code | Week 09 | Planned |
| Integration | Full assembly, testing, iteration | Week 16 | Planned |
| Documentation | Complete project page with all files | Week 19 | Planned |
12 — Future Work
Future Improvements
Things I'd like to add eventually, once the basic version actually works.
Hardware
- A capacitive touch area to mark a dose as taken — nicer than a button.
- A small e-ink display on the surface so you can see which day you're on without opening it.
- Wireless charging, so there's no hole in the shell for a USB-C port.
- Proper injection moulding if it ever goes further than a prototype — with food-safe lining inside the trays.
Software
- A phone app that lets you update the schedule over Bluetooth without plugging anything in.
- OTA firmware updates — so you can fix bugs without flashing the board by hand.
- Some kind of logging, so a caregiver can check whether doses are being taken.
- Multi-user support if there's more than one person in a household using it.
13 — References