Week 20 — Final Project Presentations
Group assignment
There was no separate group assignment for the final presentation.
Individual assignment
- Prepare the final project documentation, a 1920 × 1080 summary slide, and an approximately one-minute video.
- Present the completed final project.
Learning outcomes
- Create an integrated product using different digital fabrication processes.
- Demonstrate 2D and 3D modelling competencies applied to an original design.
- Select and apply appropriate additive and subtractive fabrication processes.
- Demonstrate design, fabrication, and programming of a fabricated microcontroller PCB with an input and output.
- Demonstrate techniques and applications in system integration.
Checklist
- Made your slide (1920 x 1080 pixels) with your name, project name, Fab Lab name, a photo/render/sketch of your project, a brief description of what your project is/does
- Made a ~1 minute (25MB/1080p) video of your final project showing its fabrication and functionality
- Made a separate Final Project page that summarises/documents your project
- Included the BOM (Bill of Materials) for your project
- Linked from this page to any weeks that you worked on your final project
- Documented how you implemented system integration in your final project
- Linked to your presentation.png and presentation.mp4; make sure they are located to the root of your website
- Included all of your original design files in the archive (2D & 3D, board files & code). No external hosting of final project files - discuss file sizes with your instructor
- Included the license you chose
- Acknowledged work done by others
Documentation
Week 20 brought the completed Seebscribe project into its final presentation format. I prepared one summary slide and a short video that communicate the project idea, fabrication process, system integration, and final result.
Final project slide
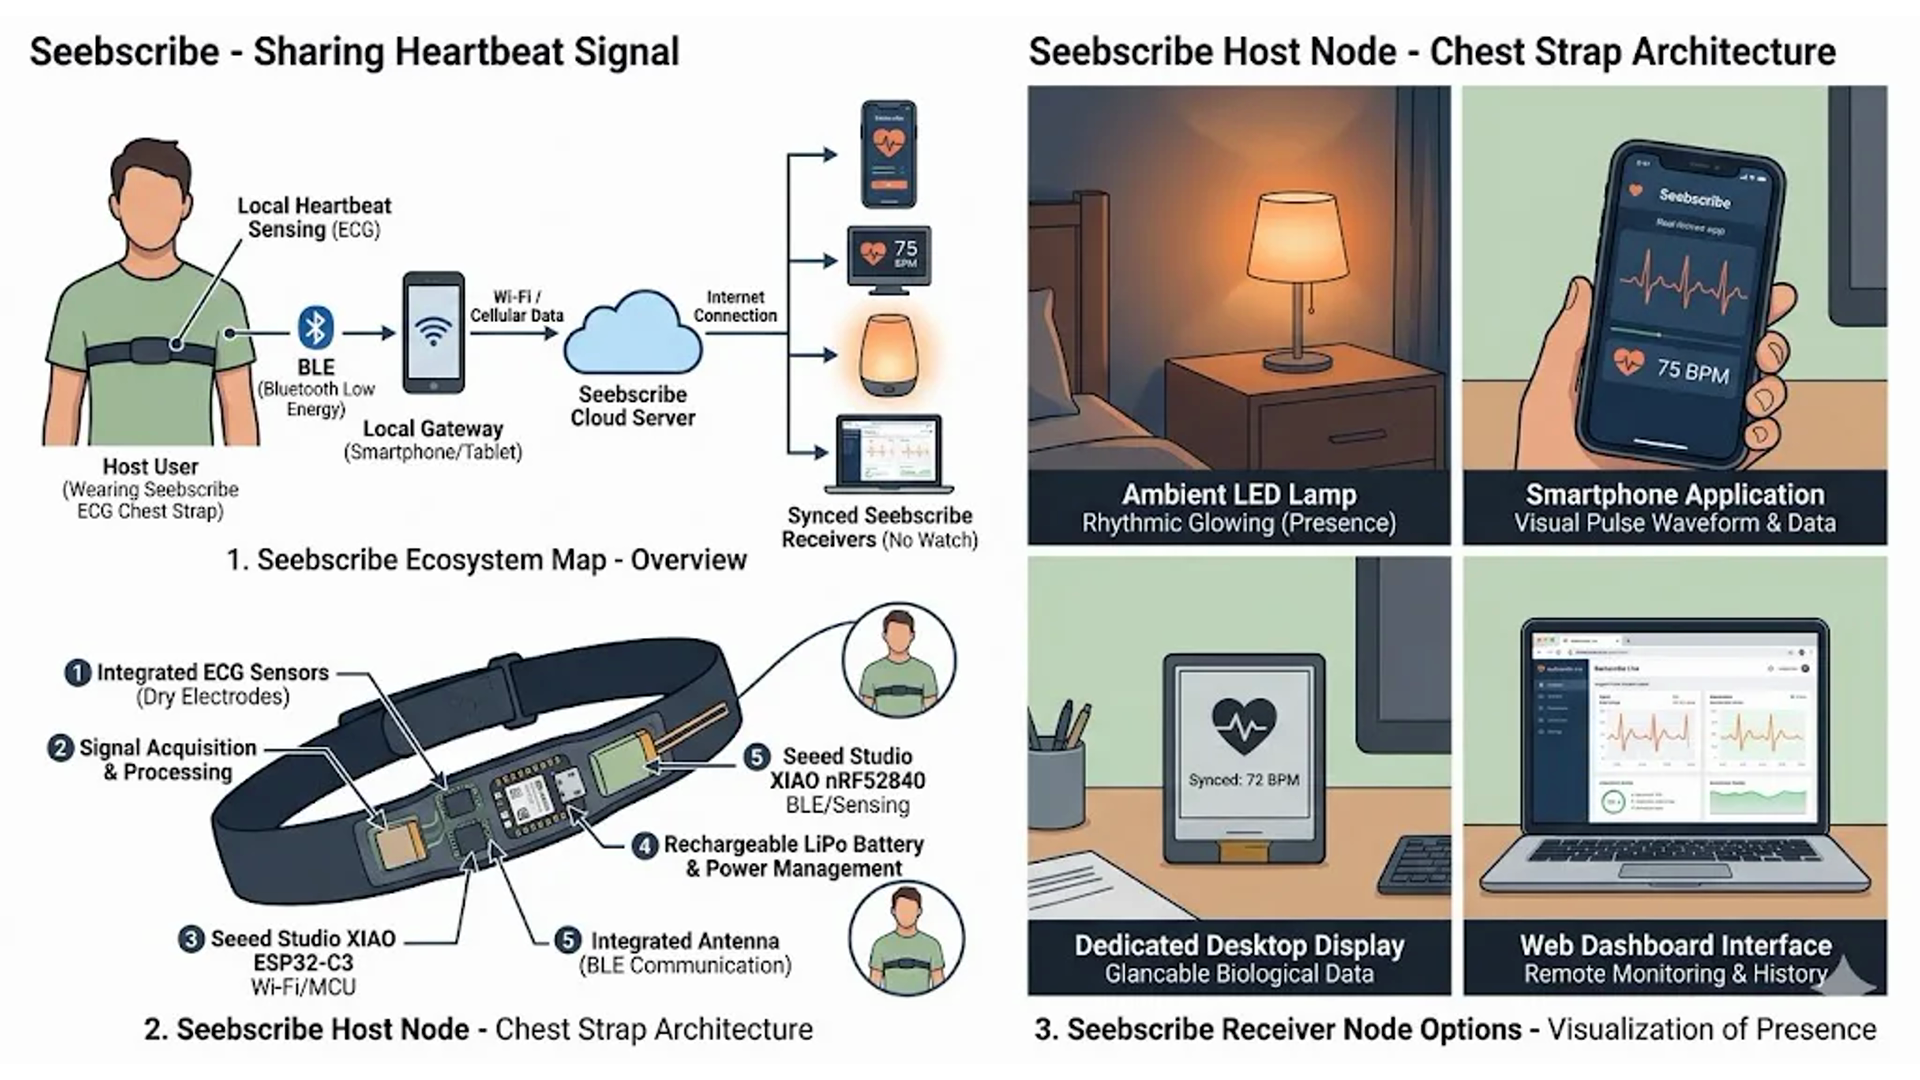
The final slide introduces Seebscribe as an open-source wearable ECG device and presents the completed chest strap, electronics, live dashboard, and main fabrication processes in one overview.
Updated final project video
During the presentation, I received feedback that the video needed to show more clearly how the project works in practice and how the live information changes while I am using the device. I updated the video to include a more direct demonstration of wearing Seebscribe, receiving the ECG signal, and observing the live dashboard respond to my heartbeat. The video above is the revised final version.
Presentation references
- Final project presentation slide (PNG)
- Updated final project presentation video (MP4)
- Complete Seebscribe final project documentation
- Week 16 — System integration and packaging
- Week 18 — Applications and implications
- Week 19 — Invention, intellectual property, and project files
Reflection
I learned that a final presentation should not only show that a product exists; it should make its behavior immediately understandable. Fabrication photographs explain how Seebscribe was built, but the practical demonstration is what proves that the sensor, firmware, Wi-Fi communication, dashboard, and wearable enclosure operate together as one system. Updating the video made the final presentation clearer and more convincing.