Week 14 — Molding & Casting
Group assignment
- Review the safety data sheets for each of your molding and casting materials
- Make and compare test casts with each of them
- Compare printing vs milling molds
Individual assignment
- Design a mold around the process you'll be using, produce it with a smooth surface finish that does not show the production process toolpath, and use it to cast parts.
Learning outcomes
- Design appropriate objects within the limitations of your process
- Demonstrate workflows used in mold design, construction and casting
Checklist
- Linked to the group assignment page and reflected on your individual page what you have learned
- Reviewed the safety data sheets for each of your molding and casting materials, then made and compared test casts with each of them
- Documented how you designed and created your 3D mold, including machine settings
- Ensured your mold has smooth surface finish, that does not show the production process (by postprocessing if necessary)
- Shown how you safely made your mold and cast the parts
Documentation
Below is my moulding and casting documentation, separated into the group assignment and the individual assignment so each required part is clear.
Group Assignment
This section documents the group assignment. Our group reviewed the safety data sheets for molding and casting materials and discussed the difference between printed molds and milled molds. I was responsible for documenting the material review and safety notes.
I separated this group work from my individual mold design work below because the group assignment focuses on material behavior, safety, and process comparison, while the individual assignment starts with my own silicone mold and PLA filament waste casting test.
For the group work we reviewed safety data sheets and compared the expected behavior of several casting materials. The materials reviewed here include tin-based metal, gypsum plaster, construction cement/mortar, alginate/gypsum from a quick-setting hand casting kit, and related powders or additives.
For molding and casting week we need to review the safety data sheet about materials and for the materials themselves I bought some that I found on Taobao.
Here I have:
Tin-based solder alloy
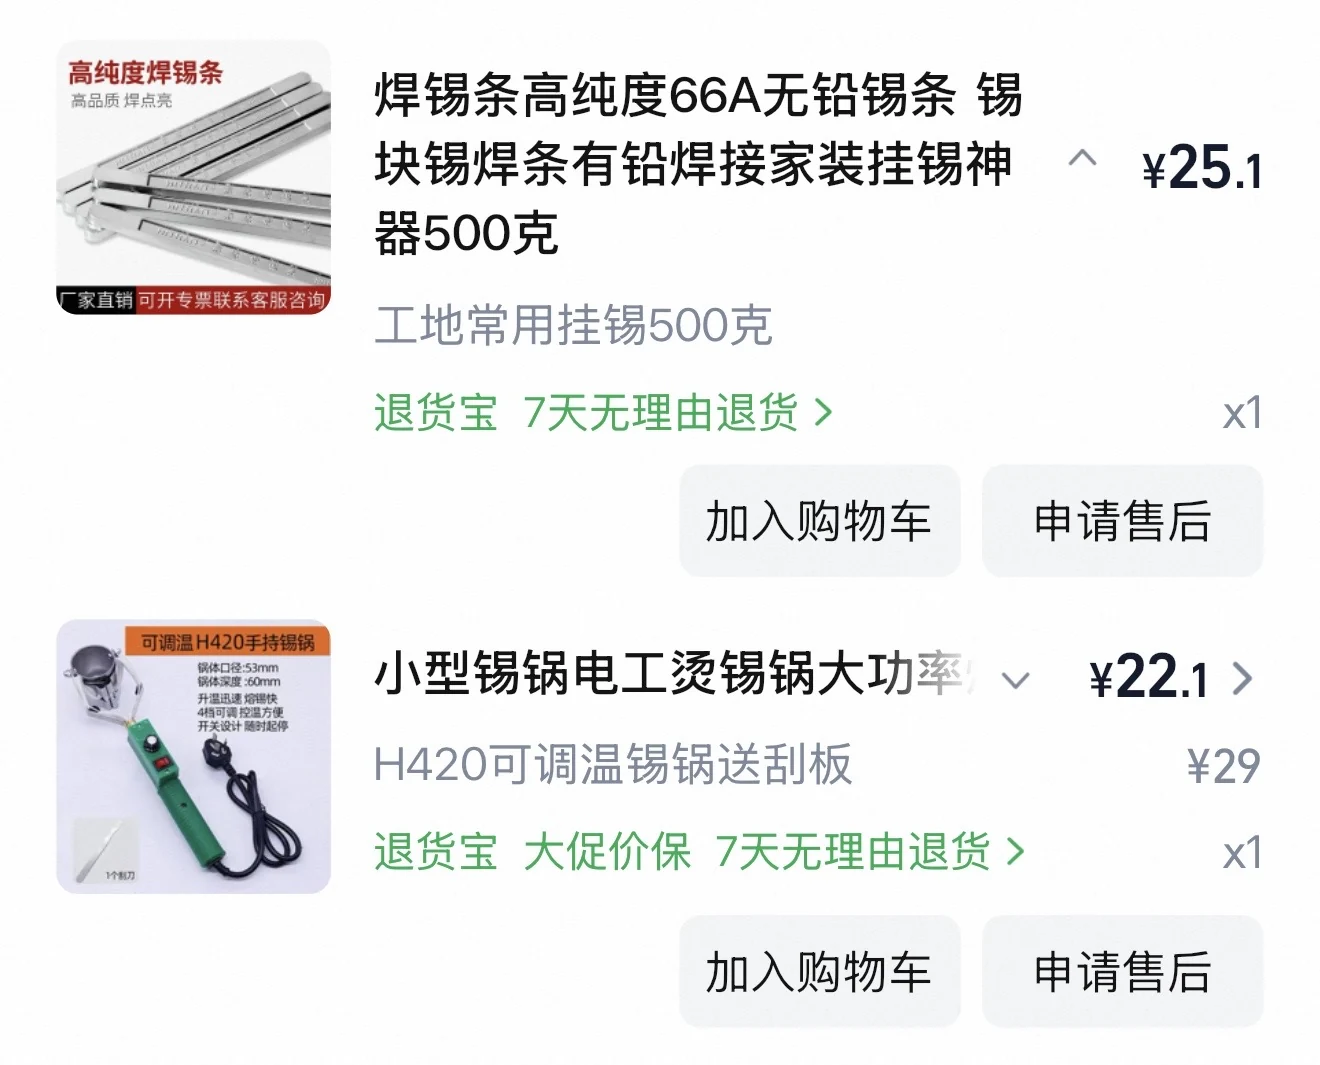
Material Tin-based solder alloy bar (Translation - High-purity 66A solder bar, lead-free tin bar, tin block / soldering bar, leaded soldering tin-coating tool for home use, 500 g): This is a metal solder material, usually made mainly from tin with other metals added. It is designed for soldering, but in this activity it may be melted and used for a small molding/casting test. Supplier didn't provide me with a safety datasheet so I found it on the internet.
Safety Data Sheet: https://www.tme.eu/Document/a983e27d3e3ec8eb1590a33db6220793/SN993CU07LASKI_EN.pdf
Device: Small electric tin melting pot / solder melting pot This is a small electric heating device used to melt tin-based solder materials. It heats the solder bar until it becomes liquid, so it can be dipped, coated, or poured carefully into a mold.
Safety set up: · Ventilation: Work outdoors or with a fan pulling air away from you — fumes are the main hazard
- Temperature: Melts at 217–230°C; use a temperature-controlled pot, not open flame
- PPE: Heat-resistant gloves, splash-rated goggles, long sleeves
- Mold: Must be completely dry — moisture causes violent spattering
- Fire: Keep dry sand or powder extinguisher nearby — no water on molten metal
- Hygiene: Wash hands after; no eating/drinking in the workspace
High-purity tin metal, metal and non-metal powders:
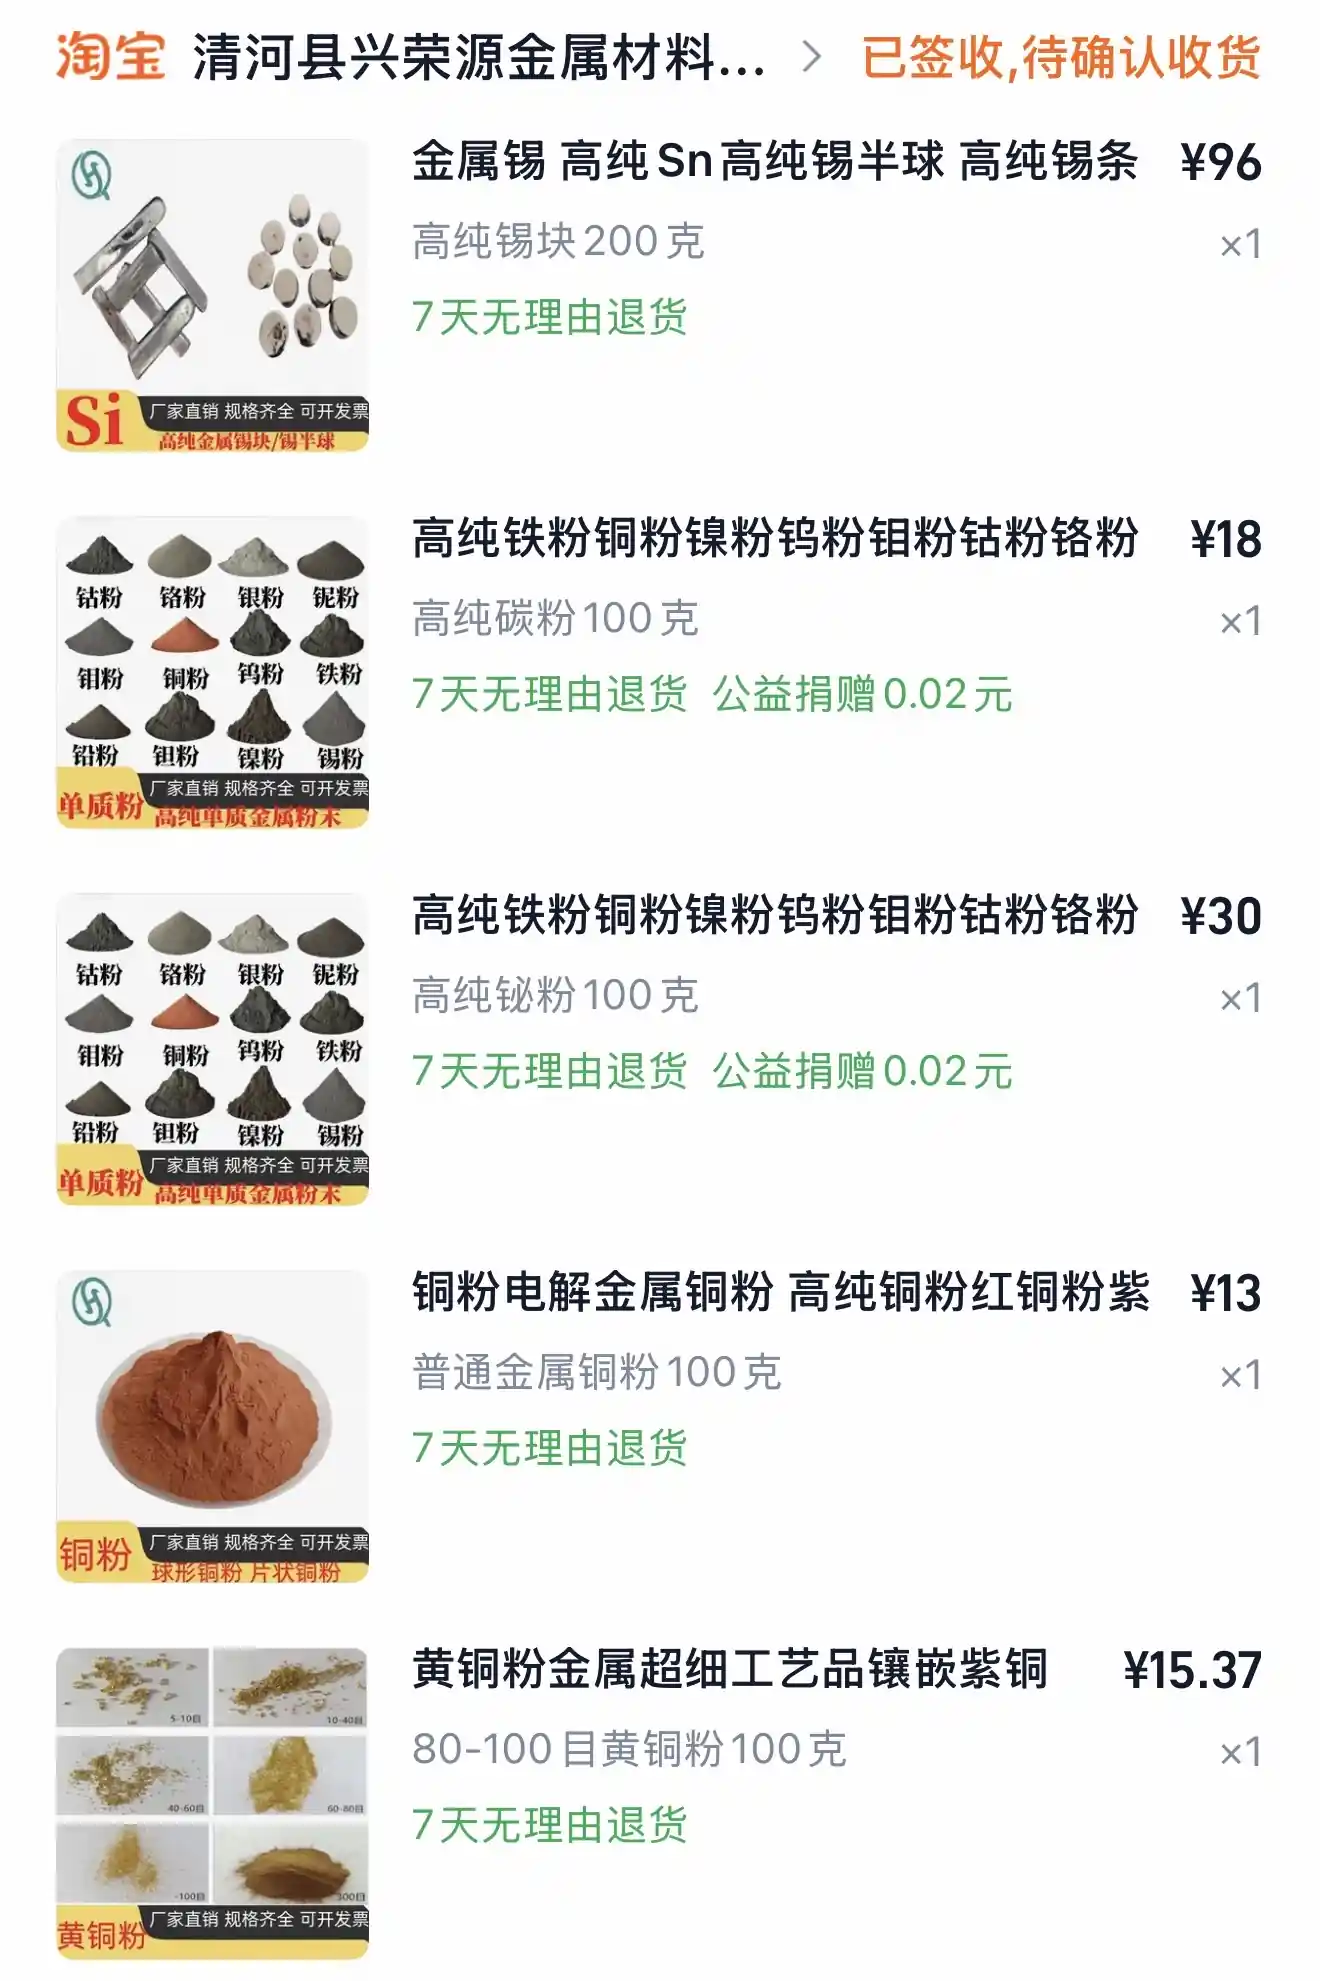
- 金属锡 高纯Sn 高纯锡半球 高纯锡条 — High-purity tin metal (Sn), tin half-spheres / tin bars — 200g — ¥96
- 高纯铁粉铜粉镍粉钨粉钼粉钴粉铬粉 → 高纯碳粉 — High-purity carbon powder (碳粉) — 100g — ¥18
- 高纯铁粉铜粉镍粉钨粉钼粉钴粉铬粉 → 高纯铋粉 — High-purity bismuth powder (铋粉) — 100g — ¥30
- 铜粉电解金属铜粉 高纯铜粉红铜粉紫 — High-purity electrolytic copper powder (铜粉) — 100g — ¥13
- 黄铜粉金属超细工艺品镶嵌紫铜 — Brass powder (黄铜粉), 80–100 mesh — 100g — ¥15.37
Material: High-purity tin block (Sn 99%+) Translation: 金属锡 高纯Sn 高纯锡半球 高纯锡条 — 200g
This is nearly pure elemental tin in solid block/half-sphere form, with no alloying additions. It melts at around 232°C and is the primary casting material for this activity — it will be melted in the electric tin pot and poured into a mold.
Safety setup:
- Ventilation: Work outdoors or with a fan pulling air away — tin fumes are the primary hazard
- Temperature: Melts at ~232°C; use temperature-controlled pot only
- PPE: Heat-resistant gloves, splash-rated goggles, long sleeves
- Mold: Must be completely dry — moisture causes violent spattering
- Fire: Dry sand or powder extinguisher only — no water on molten metal
- Hygiene: Wash hands after; no eating/drinking in the workspace
Materials: Metal powders (handle as dry powders only — not for melting) Carbon powder (碳粉) 100g · Bismuth powder (铋粉) 100g · Copper powder (铜粉) 100g · Brass powder (黄铜粉) 100g
These are fine metal and non-metal powders purchased for surface finishing, coloring, or embedding experiments.
Bismuth (铋粉) — can be melted and mixed with tin to create a lower-melting-point alloy. Tin-bismuth combinations reduce shrinkage during casting. Bismuth melts at 271°C.
Copper powder (铜粉) — melting point 1085°C, cannot be alloyed with tin in a standard melting pot. Use cold only — surface texture or finishing.
Brass powder (黄铜粉) — melting point too high for tin pot. Use cold only — surface finishing or embedding.
Carbon powder (碳粉) — not a metal, does not melt into tin. Use cold only — surface coloring or resin mixing.
Safety setup (powders):
- Inhalation: Fine metal powders are a respiratory hazard — wear an FFP2/N95 dust mask when handling
- Skin/eyes: Avoid contact; wash hands thoroughly after use
- Ignition: Some metal powders (copper, brass) are flammable in fine particle form — keep away from open flame and sparks
- Storage: Keep sealed and dry; label clearly
Plaster:
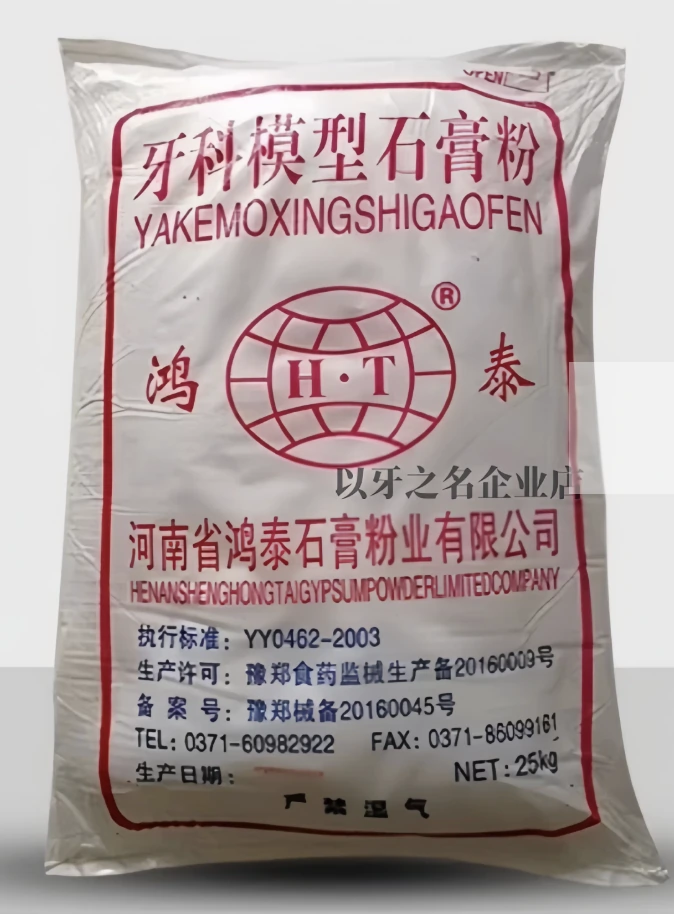
Material: Dental Model Gypsum Powder (牙科模型石膏粉) Manufacturer: Henan Hongtai Gypsum Industry Co., Ltd. — 25 kg bag
Dental model gypsum (calcium sulphate hemihydrate, CaSO₄·½H₂O) is a fine white powder used to create hard, accurate casting molds. Mixed with water, it sets into a rigid solid through a chemical hydration reaction. In this activity it is used as a mold material for metal casting.
Safety Data Sheet: USG Dental Gypsum SDS (equivalent product) — usg.com Note: No SDS available from the Chinese supplier. The USG document covers the same chemistry (calcium sulphate hemihydrate) and is applicable for safety reference.
https://www.usg.com/content/dam/USG_Marketing_Communications/united_states/sds/usg-coecal-dental-gypsum-cements-sds-en-52000000009.pdf
Mixing ratio:
- Dental plaster requires a water/powder ratio of approximately 0.55 Pocket Dentistry — roughly 55 ml water per 100 g powder
- Add powder to water, not water to powder; mix 1–2 minutes until smooth
- Vibrate the mix to bring air bubbles to the surface Pocket Dentistry before pouring — air pockets reduce mold accuracy
Safety setup:
- Dust: Primary hazard — minimize dust production when mixing or opening the bag; avoid inhalation of dust USG
- PPE: FFP2/N95 dust mask, safety goggles, gloves when mixing dry powder
- Setting: Generates mild heat during setting — normal, not a hazard
- Important for metal casting: Mold must be completely dry before pouring molten tin — any retained moisture causes violent spattering
- Hygiene: Wash hands after use; do not pour waste slurry down drains — it sets solid in pipes
For dental/model gypsum used as a metal casting mold, drying time has two stages:
Initial set (surface hard): 30–45 minutes — the mold feels solid but contains significant internal moisture.
Safe for metal casting: This is the critical point. You need the mold fully dry, not just set. Residual moisture causes steam explosion when molten metal contacts it.
- Air drying at room temperature: 24–48 hours minimum
- Oven drying (recommended): 200–250°C for 1–2 hours — this drives out both free and chemically bound water, and also preheats the mold which improves metal flow and reduces thermal shock
Construction cement:
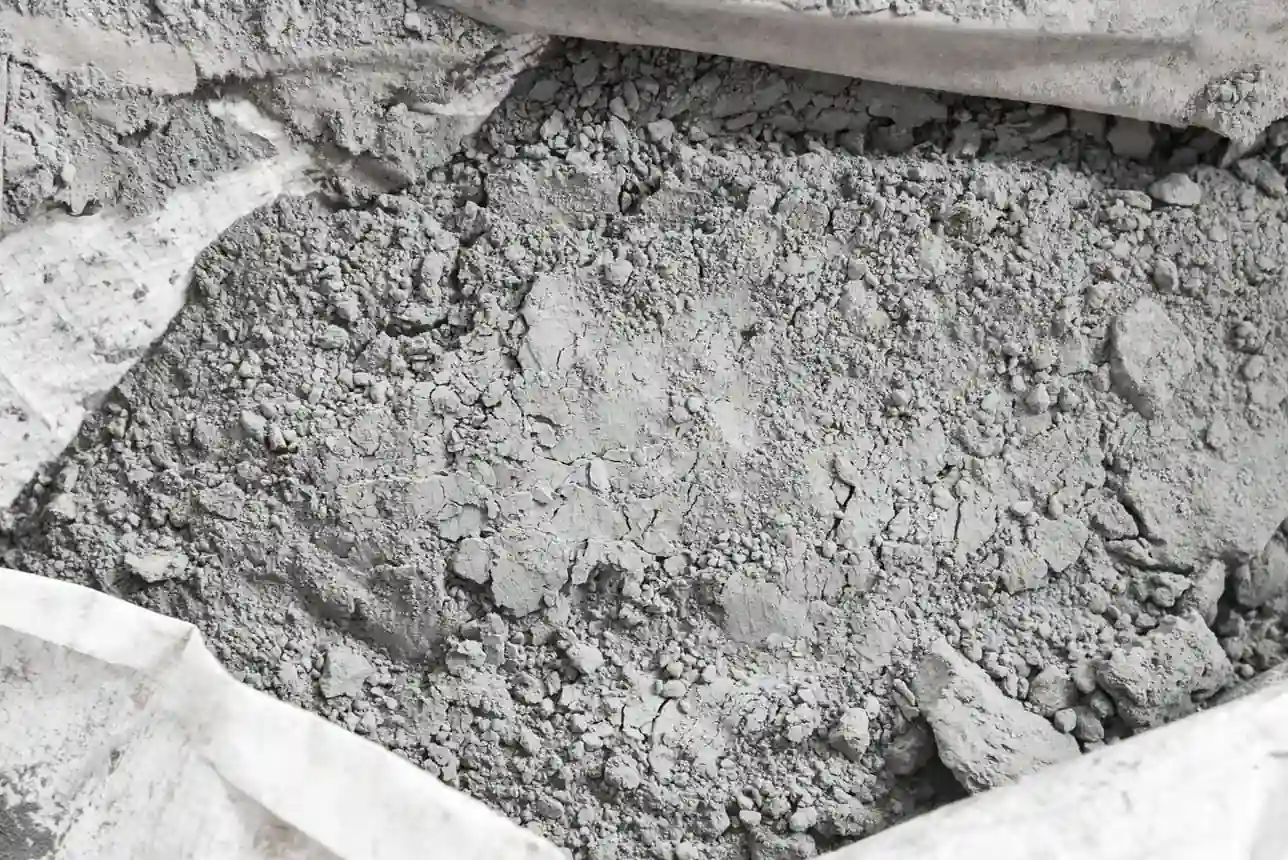
Material: Construction Cement (建筑水泥)
Standard grey construction cement, sourced locally in Hangzhou. No brand identified — typical general-purpose cement available from local building material suppliers across China. Chemistry and handling properties are consistent with standard cement regardless of brand.
Safety Data Sheet: No supplier SDS available. Standard cement SDS applicable — USG Construction Cement SDS
Mixing ratio:
- Water/cement ratio 0.4–0.5 — 40–50 ml water per 100 g cement
- Add cement to water gradually; mix until smooth and pourable
- Vibrate after pouring to remove air bubbles
Drying / curing time:
- Initial set: 2–4 hours
- Demolding: 24 hours minimum
- Safe for metal casting: 7 days full cure, then oven dry at 150–200°C for 2–3 hours to remove residual moisture
Safety setup:
- Dust: Alkaline — FFP2/N95 mask, goggles, gloves when handling dry powder
- Skin: Chemical burns with prolonged contact — wash off immediately
- Eyes: Flush 15 minutes with water if contact occurs
- Ventilation: Work outdoors or with airflow when mixing dry powder
- Hygiene: Do not pour waste slurry down drains
Note: Cement cures much slower than dental gypsum. For casting tests, gypsum is the faster and more practical mold material.
DIY hand casting kit: alginate and gypsum
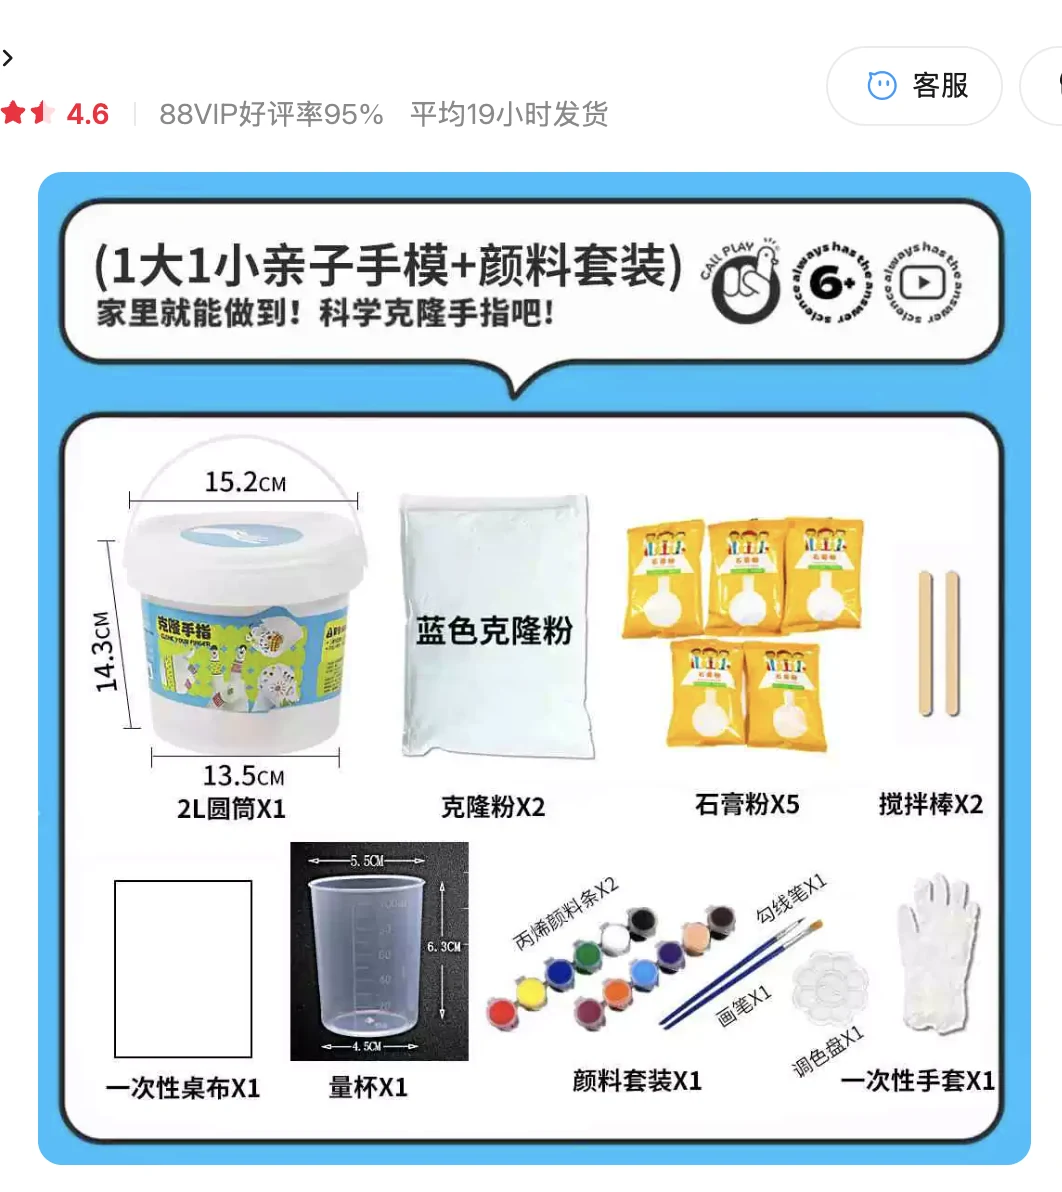
Material: DIY hand casting kit (亲子手模套装). The kit contains quick-setting alginate impression powder, gypsum powder, a mixing bucket, measuring cup, mixing sticks, disposable gloves, and paint. The product was sold as a consumer hand/finger casting kit.
This was one quick-setting material option I reviewed during the material comparison. The material in the kit is described as 克隆粉, or clone powder, which is an alginate-type impression material. It is mixed with water, sets quickly, and can capture detail from a surface. Then gypsum can be poured into the alginate impression to make a cast. For my final cast, however, I used the AB moulding putty documented later in the individual assignment section.
Equivalent datasheet / SDS reference: The Taobao supplier did not provide a brand-specific SDS. For the same material family I used Smooth-On Alja-Safe as a reference because it is also a quick-setting alginate molding powder for hands, faces, and body-part impressions, and its product page links to the Technical Bulletin and SDS: Smooth-On Alja-Safe alginate molding powder.
Kit process:
- Alginate impression: mix alginate powder with water and work quickly because it sets in a few minutes.
- Gypsum cast: mix gypsum powder with water, pour it into the alginate impression, and wait before demolding.
- Safety: avoid inhaling dry powders, wear gloves, protect eyes from powder contact, and do not pour leftover material into the sink because it can set inside the drain.
Individual Assignment
This section documents my individual assignment. I started with silicone mold and PLA filament waste casting tests, then tested plaster, mortar, and tin in existing molds. After that I designed my own mold based on a 3D head model, prepared positive and negative mold options, generated CNC milling toolpaths, milled a wax mold with roughing and finishing passes, and used a quick-setting casting material to evaluate the final surface result.
Silicone mould and PLA filament waste
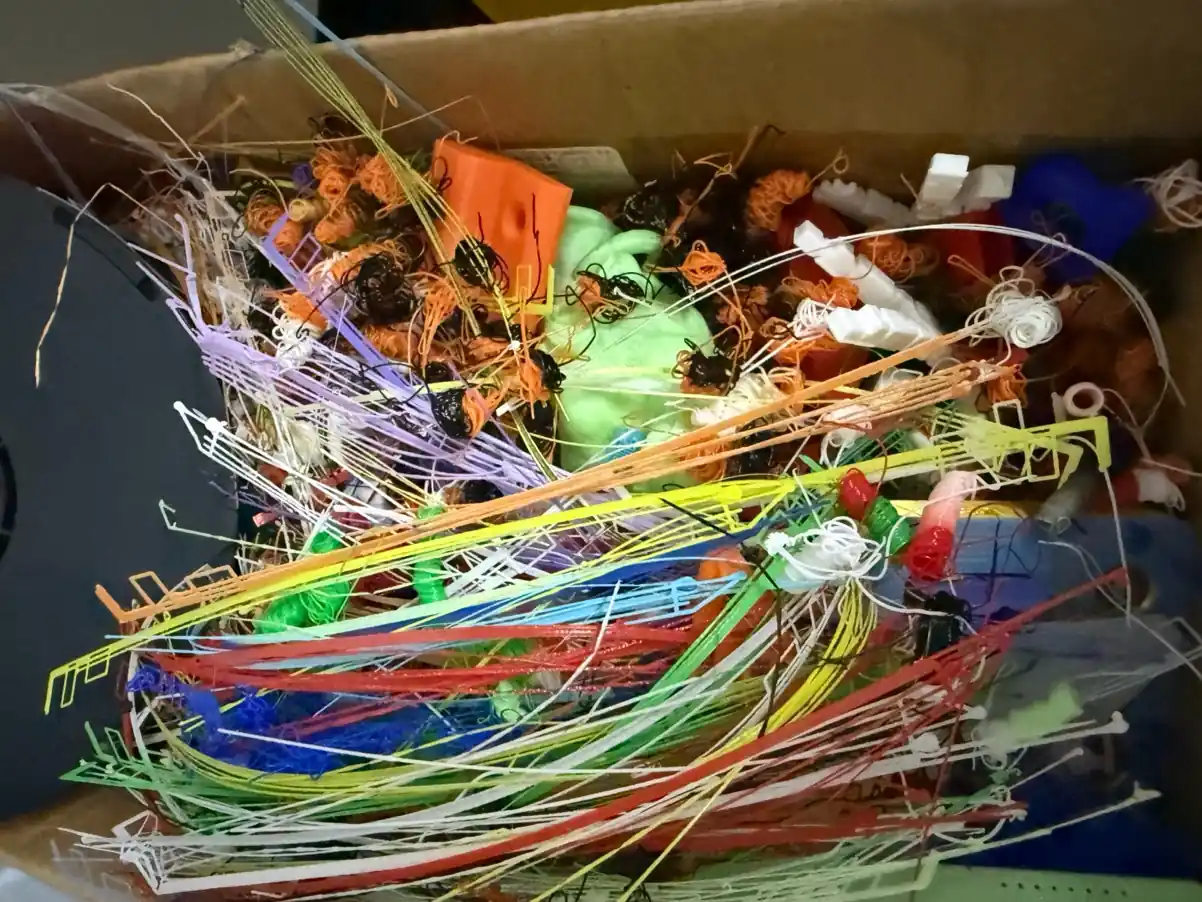
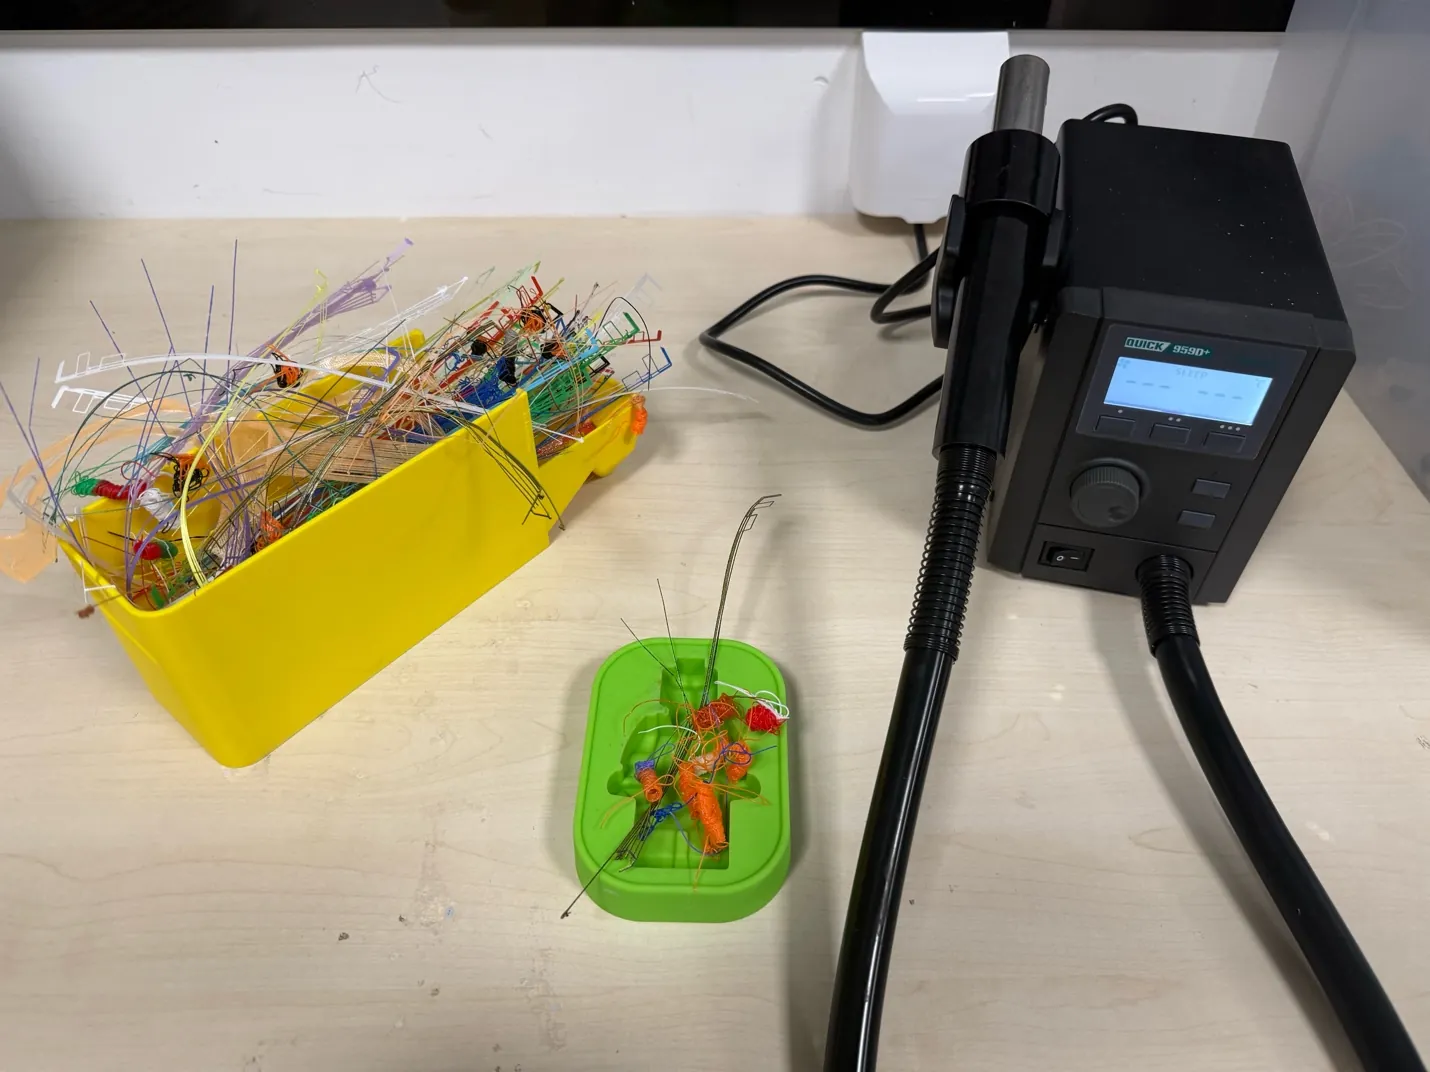
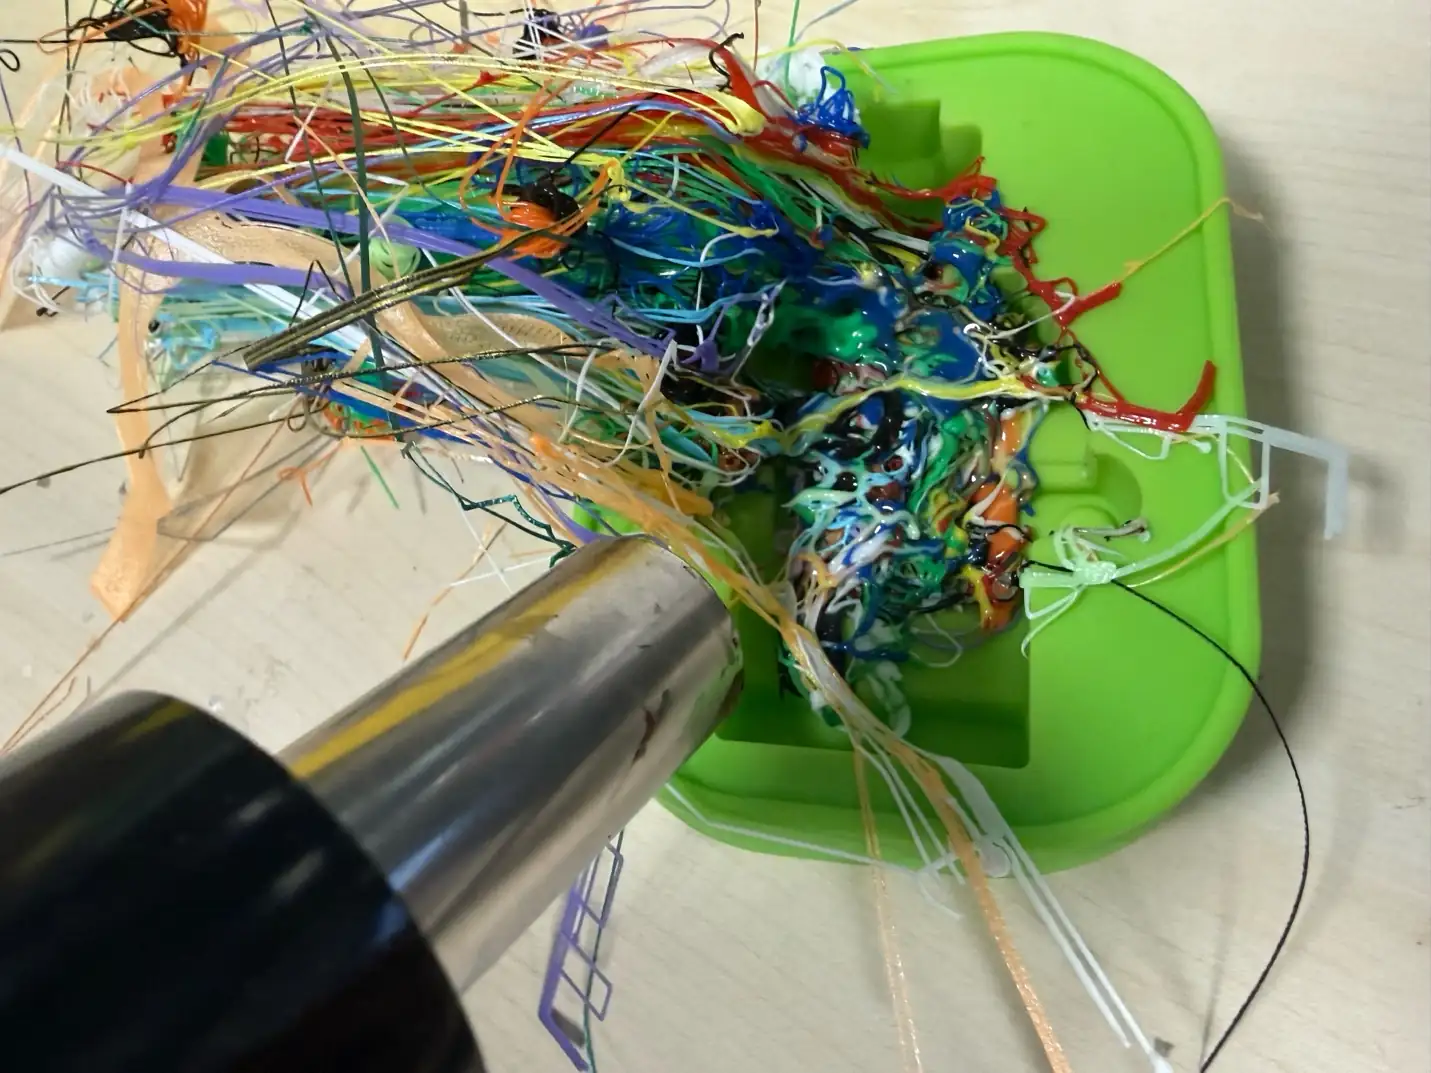
For my first warm-up casting experience I got some food-friendly silicone mould and I want to use PLA waste from a 3D printer and also low-temp PLA waste from a 3D pen.
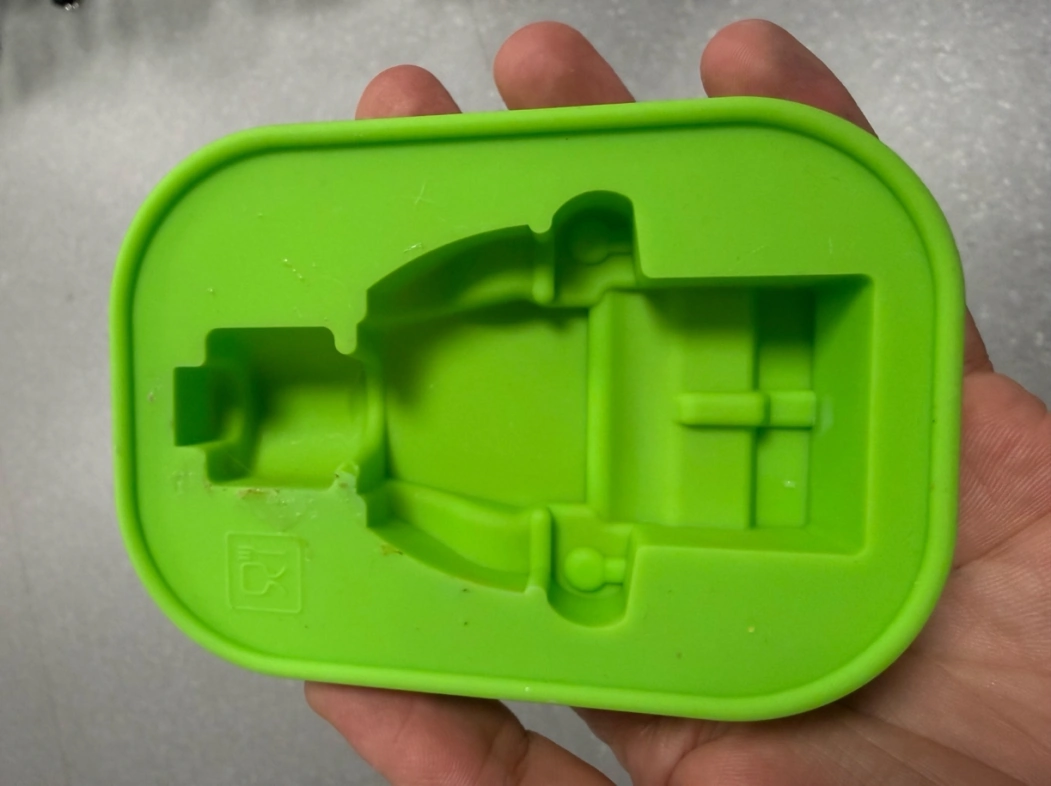
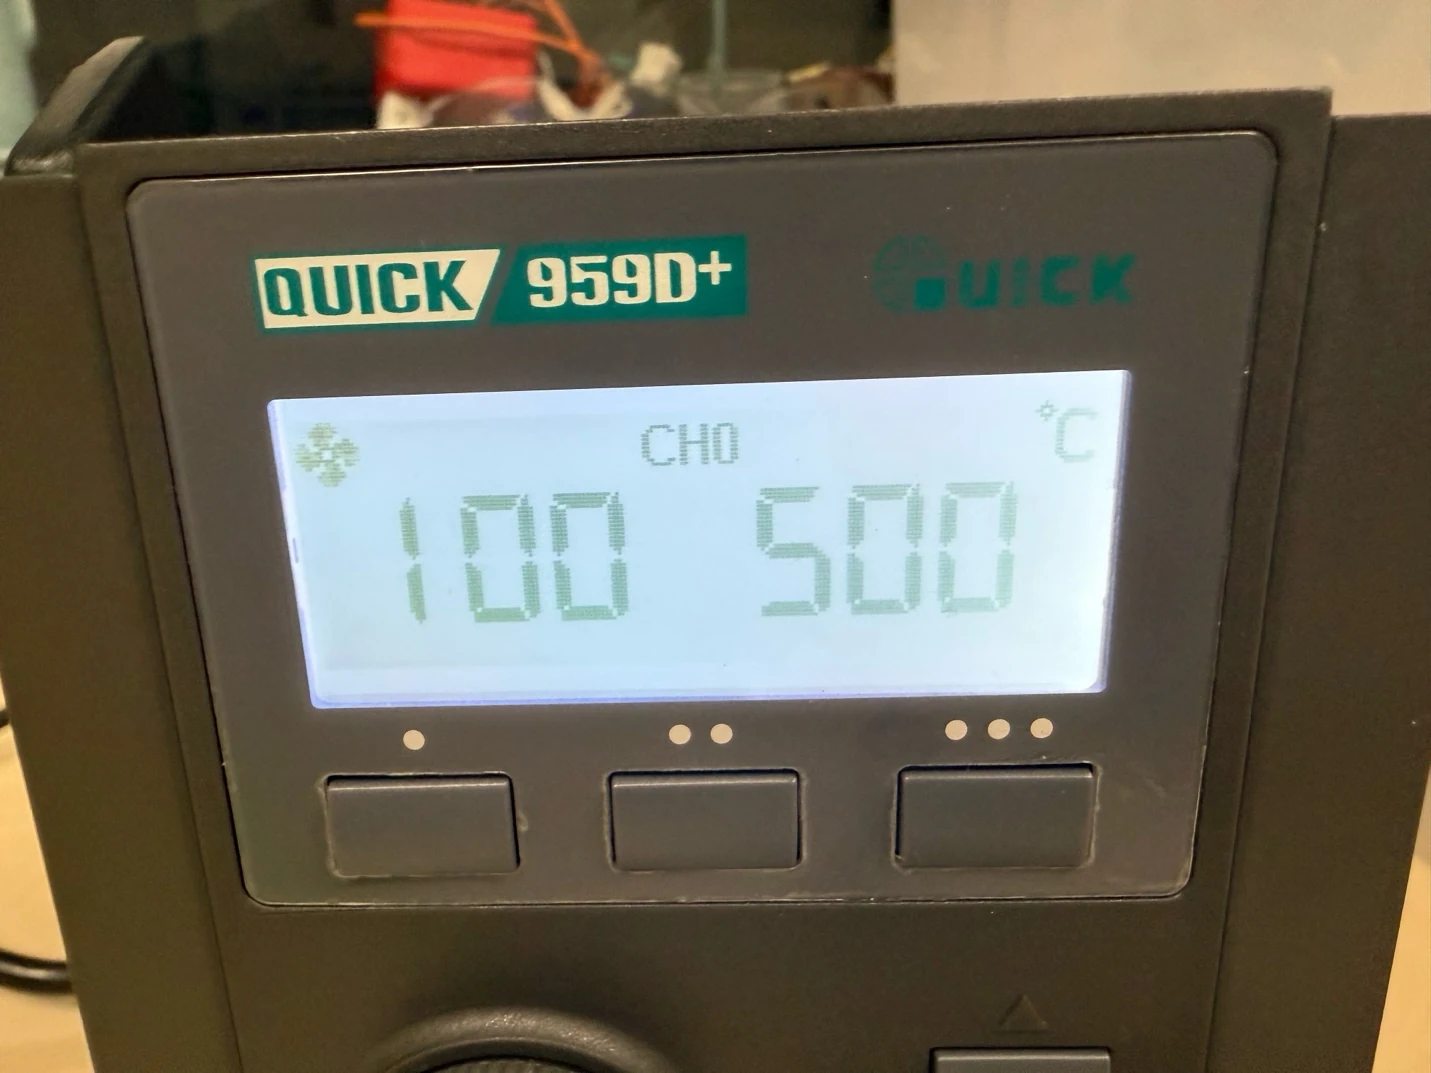
Procedure is simple: place PLA waste by some small parts into the mold and melt it by hot air blower. Maximum temperature of hot air blower is 500°C.
During the melting I gradually added some waste PLA, and it melted just fine. Of course it is better to spend more time heating to achieve a smoother shape. Wooden popsicle sticks and a metal spatula did not help to press the melted filament because the filament started sticking to the metal or wood. I used a silicone soldering mat to press the melted filament and it was useful because I still need to apply some force, heat it for longer, or melt it for longer to achieve more liquidity.

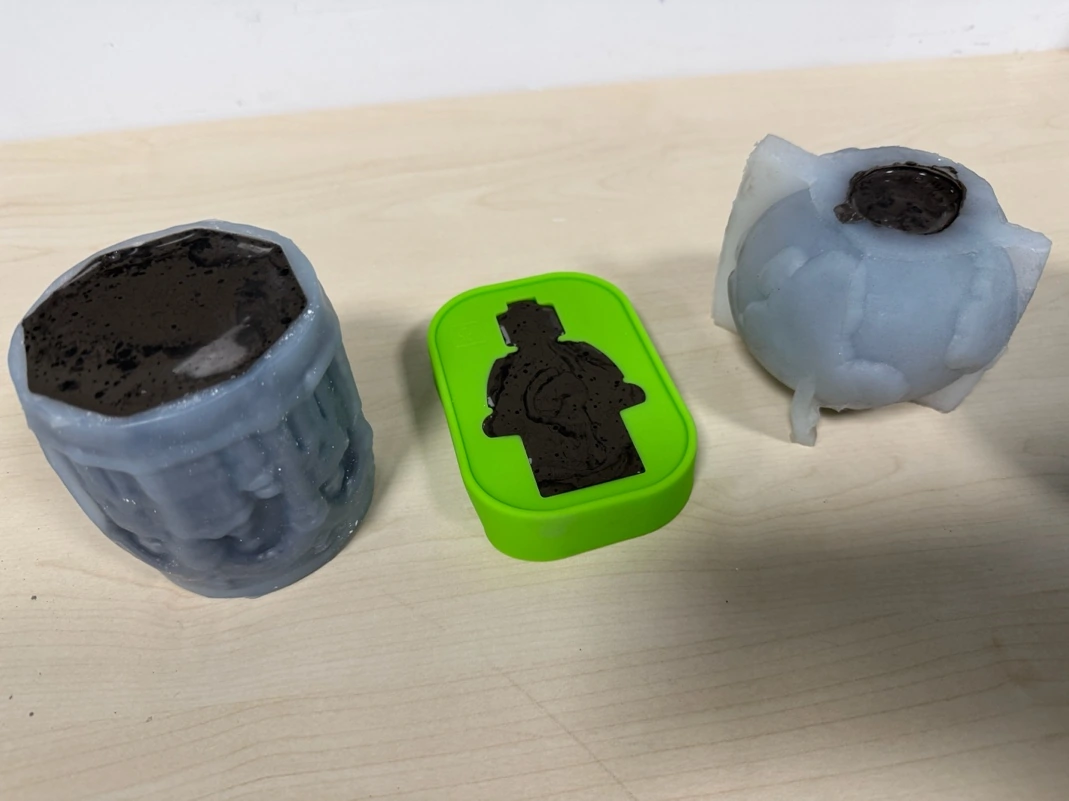
On the left red LEGO figure I used low-temperature PLA filament, which can melt faster (60-80°C). Then I used normal PLA filament (220-240°C).
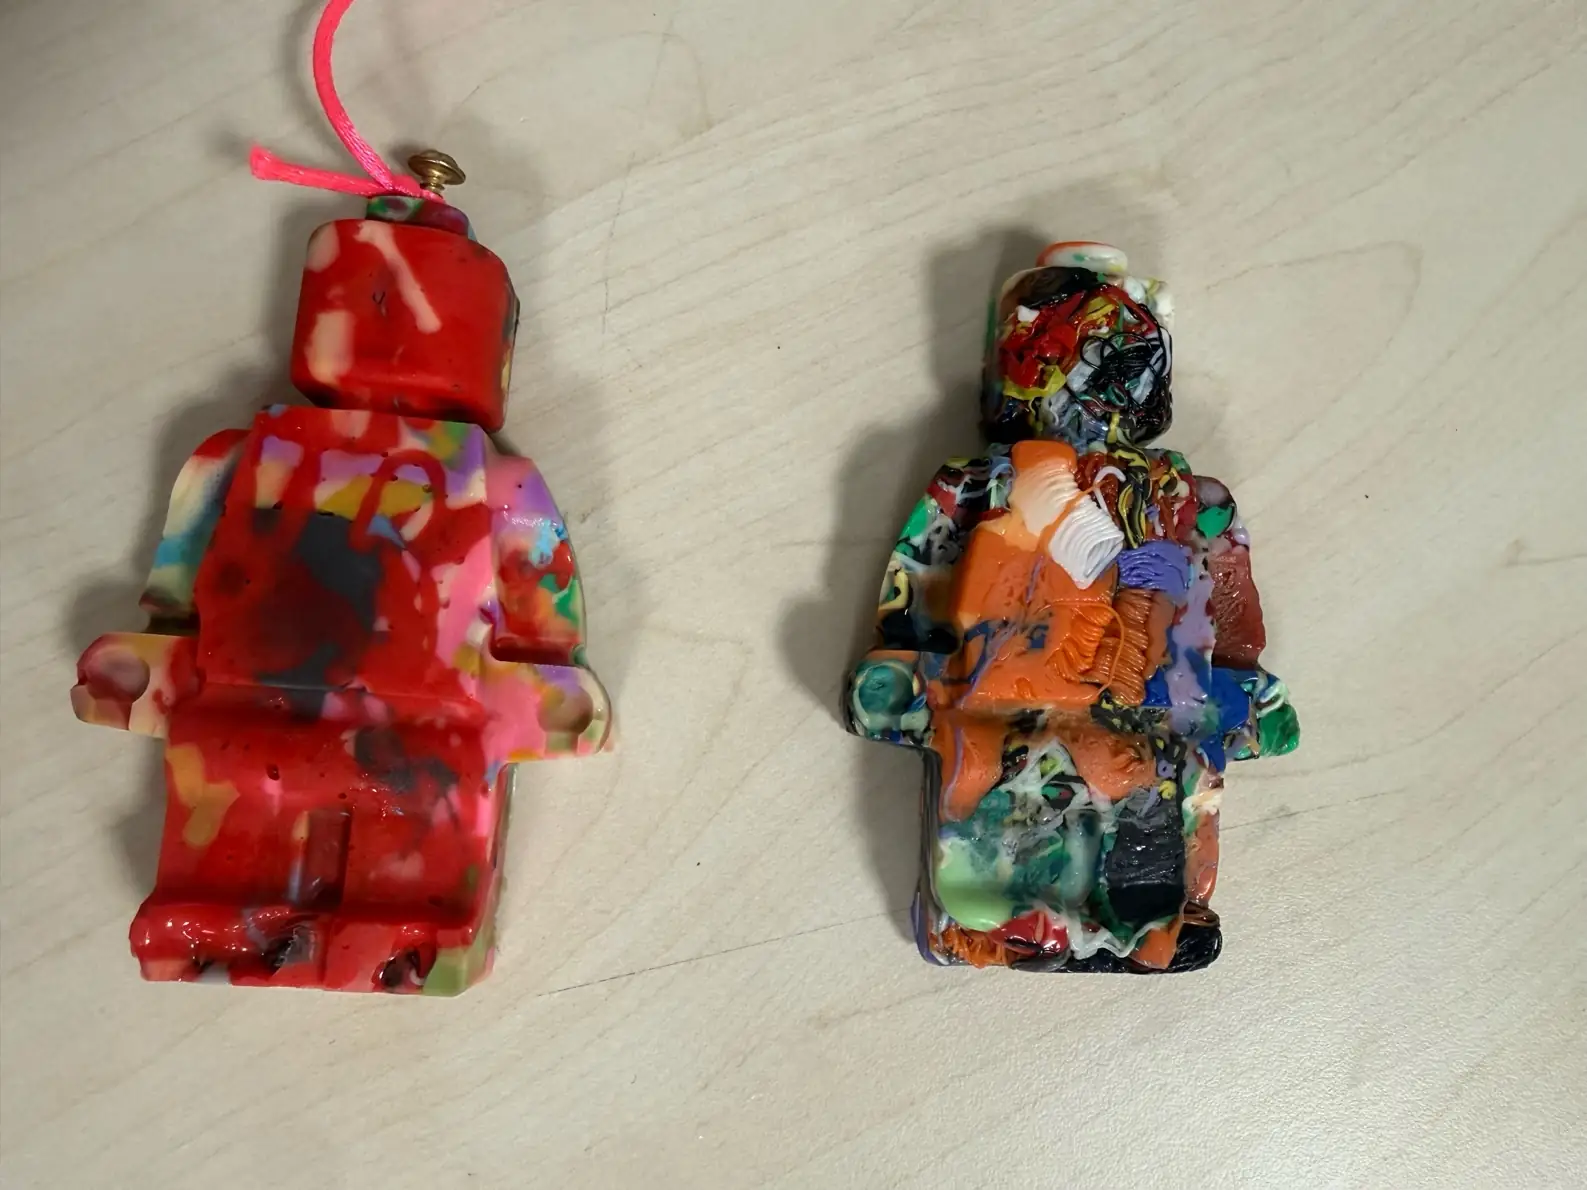
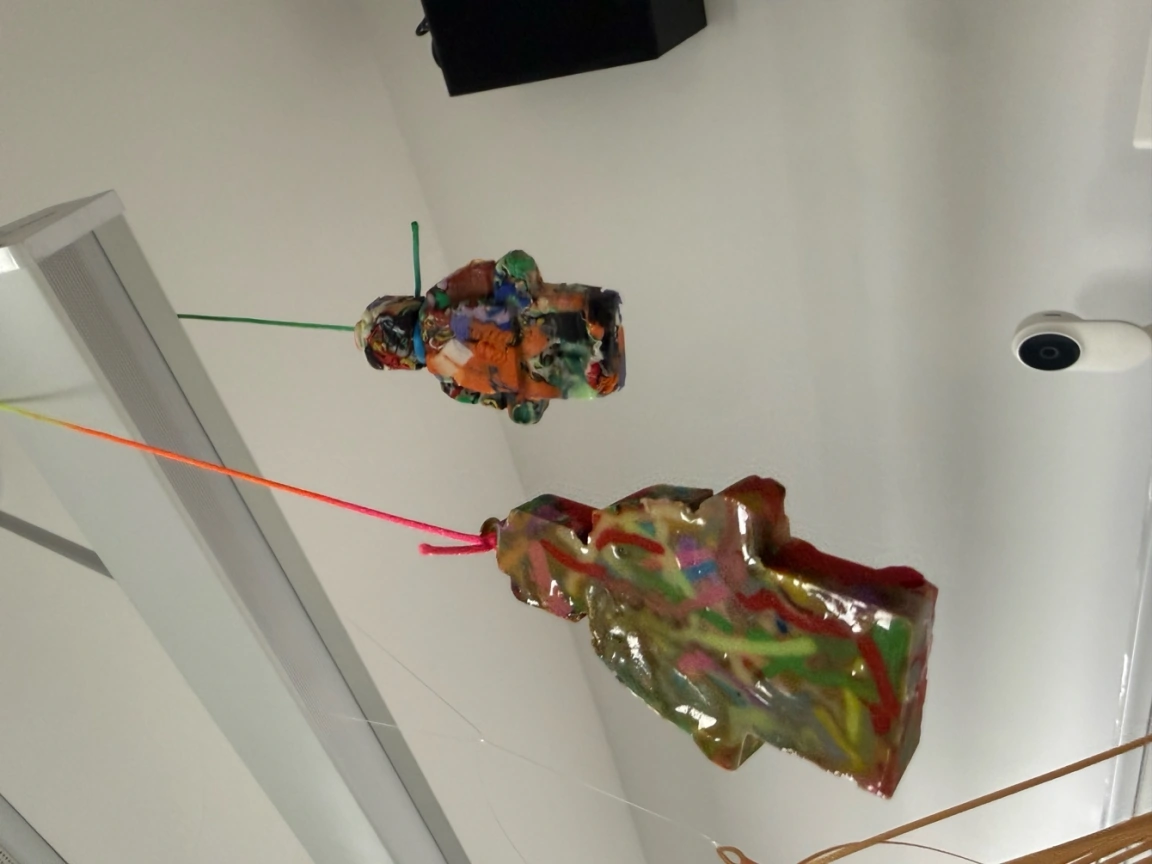
Result of this test: low-temperature PLA gave me a more solid and cleaner figure, because it melted faster and connected together better. The normal mixed PLA waste also worked, but it kept more small pieces and rough texture. For me it was a good warm-up, because I could see that casting with waste plastic is possible, but it is not easy to control details and surface.
Plaster
I got some plaster and I can experiment with existing silicone molds for plaster. The ratio is two parts of plaster and one part of water, but it's not exactly the same, and better to always see how the paste mixes and how possible it is to pour into the mold because sometimes space can be too dense.
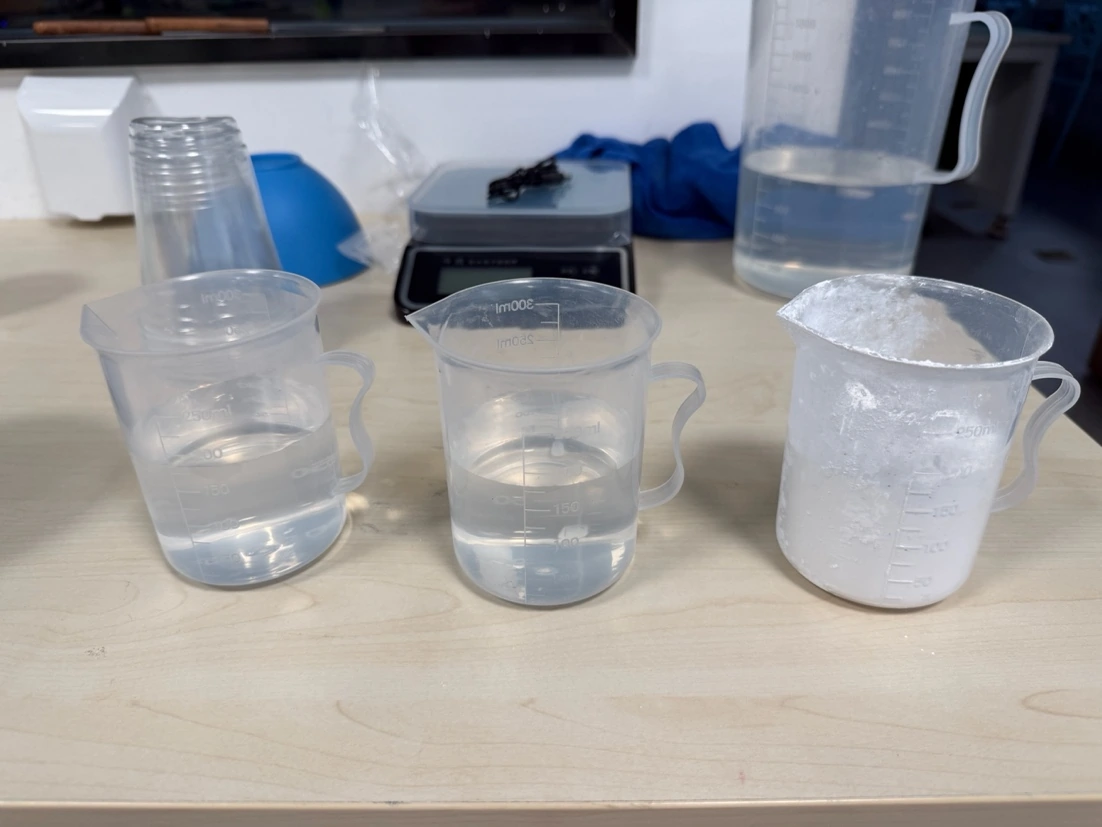
Also, plaster can become solid very fast, so better to mix it within 1-2 minutes and pour it into the mold. It's an exothermic reaction, and the mold and plaster will warm up a little.
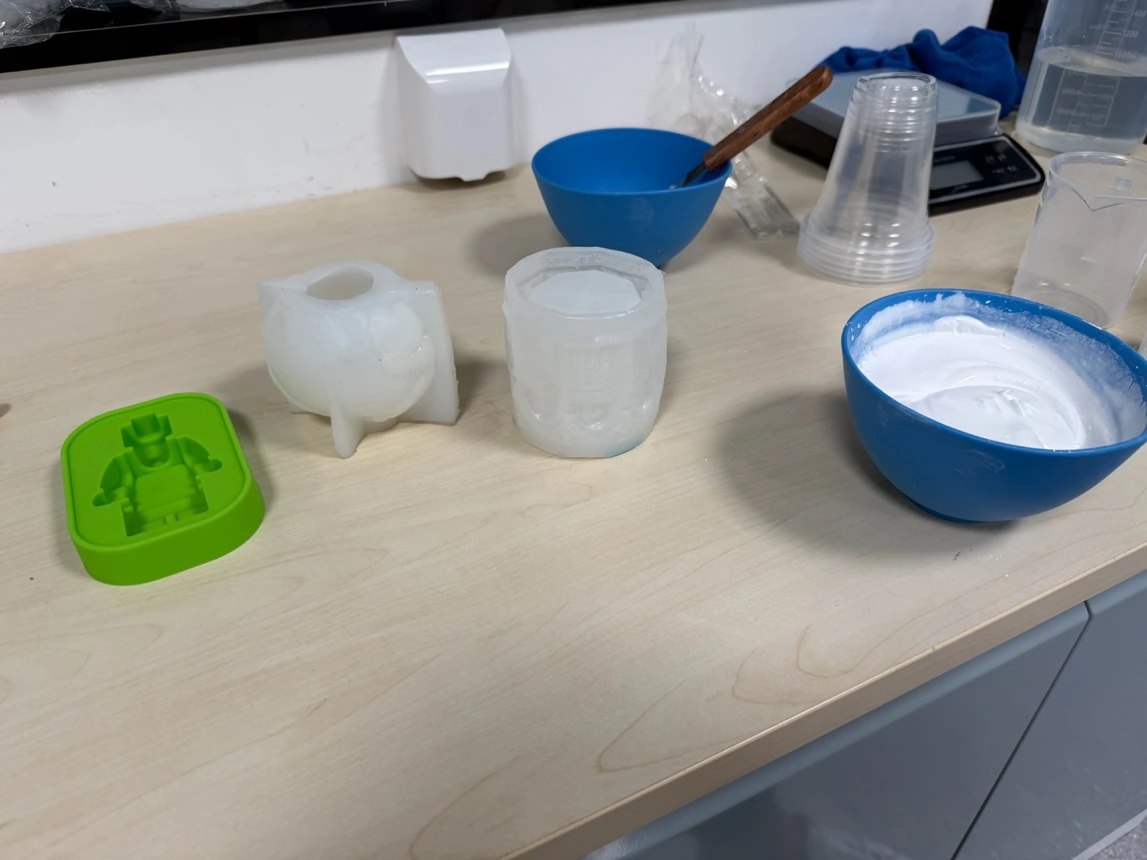
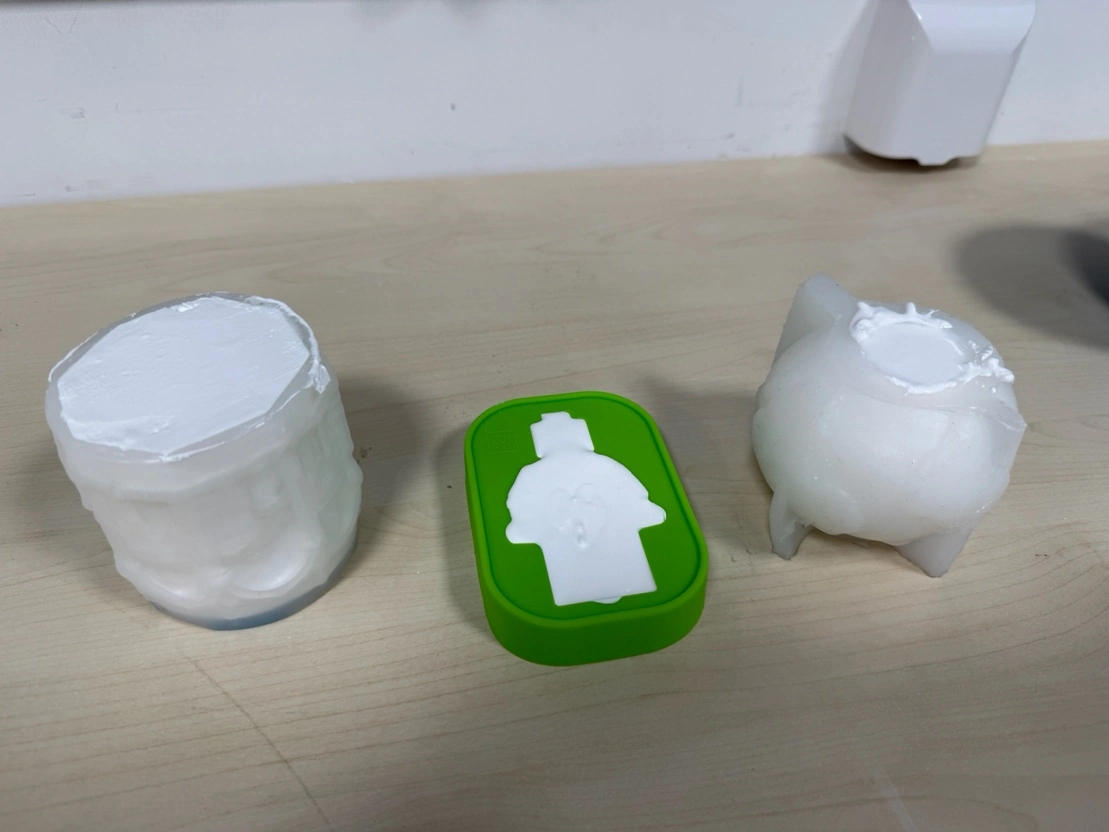
In the photos I show the plaster mix before and after pouring, including the plaster cast tests in the silicone molds. I tried to make it pourable, but not too watery. The main problem with plaster is air bubbles, so after pouring I tapped and moved the mold a little. It is simple material for testing because it becomes hard quickly, but it is also easy to lose detail if the mix is too thick.
Mortar
And the same fan with cement and water, which can create mortar.
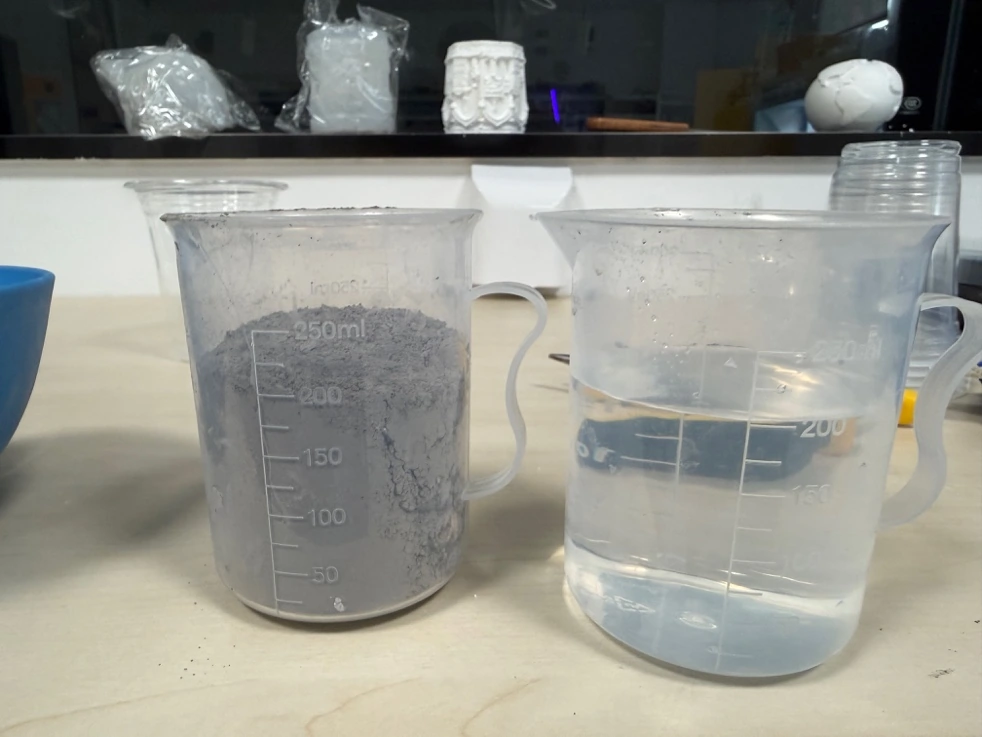
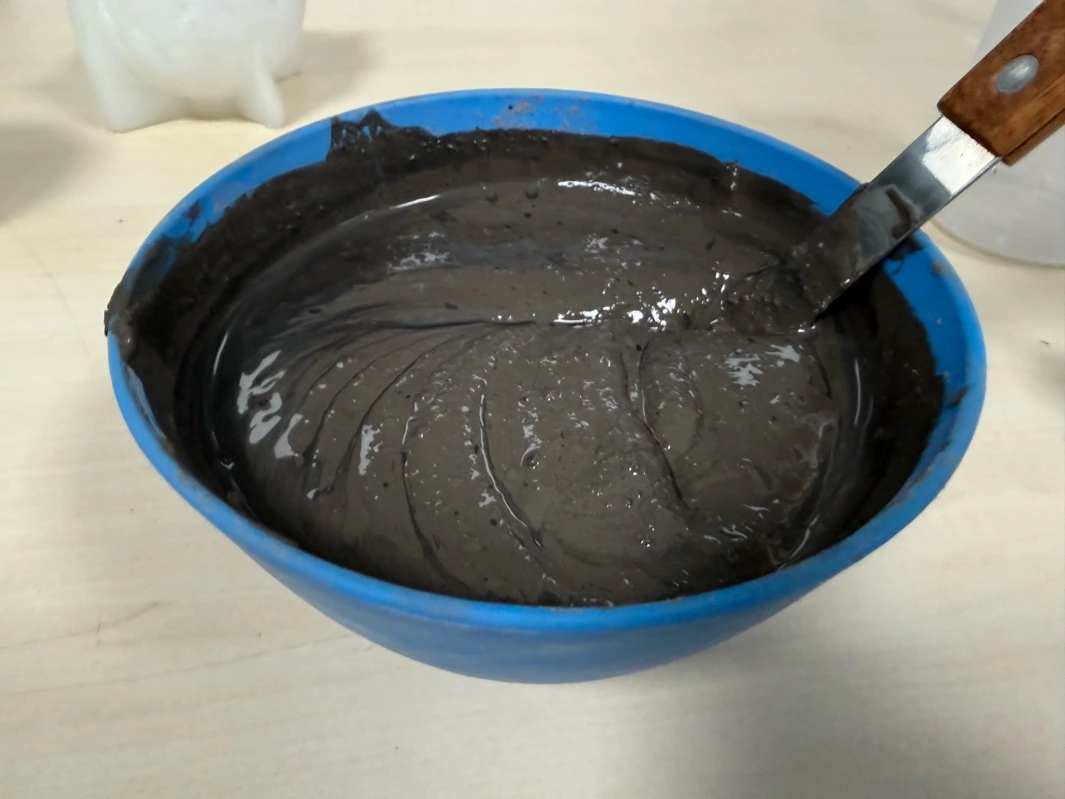
For mortar/concrete I used the same silicone molds, but the material behaves different from plaster. It is heavier, darker, and it needs much more time to cure. The surface can be interesting, but for small details it is not as convenient as plaster. The photos show the dry material, water, and the concrete/mortar cast tests after pouring. I kept it as a comparison material, not as the fastest solution.
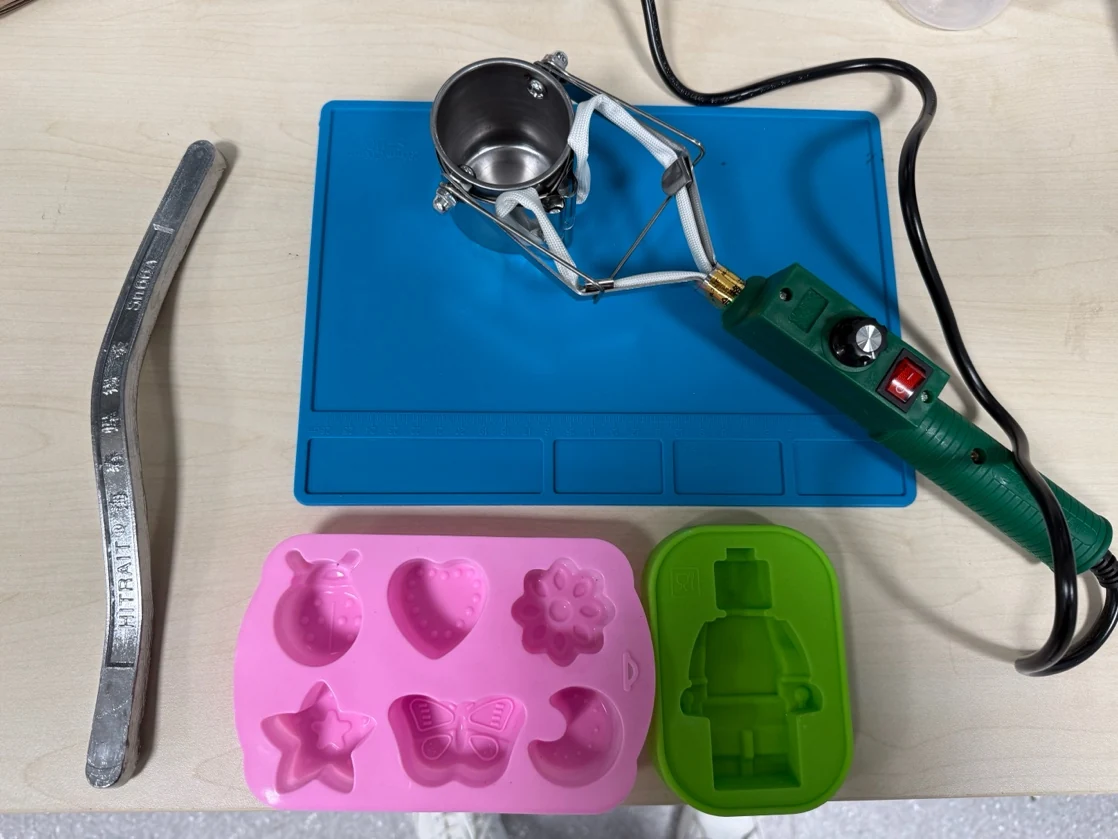
Metal casting
Especially for this molding and casting week, I bought a melting device plus five 600 grams of tin. I will use silicon molds because my plaster and mortar molds are still drying, and I don't have options how to speed up with an oven in my lab.
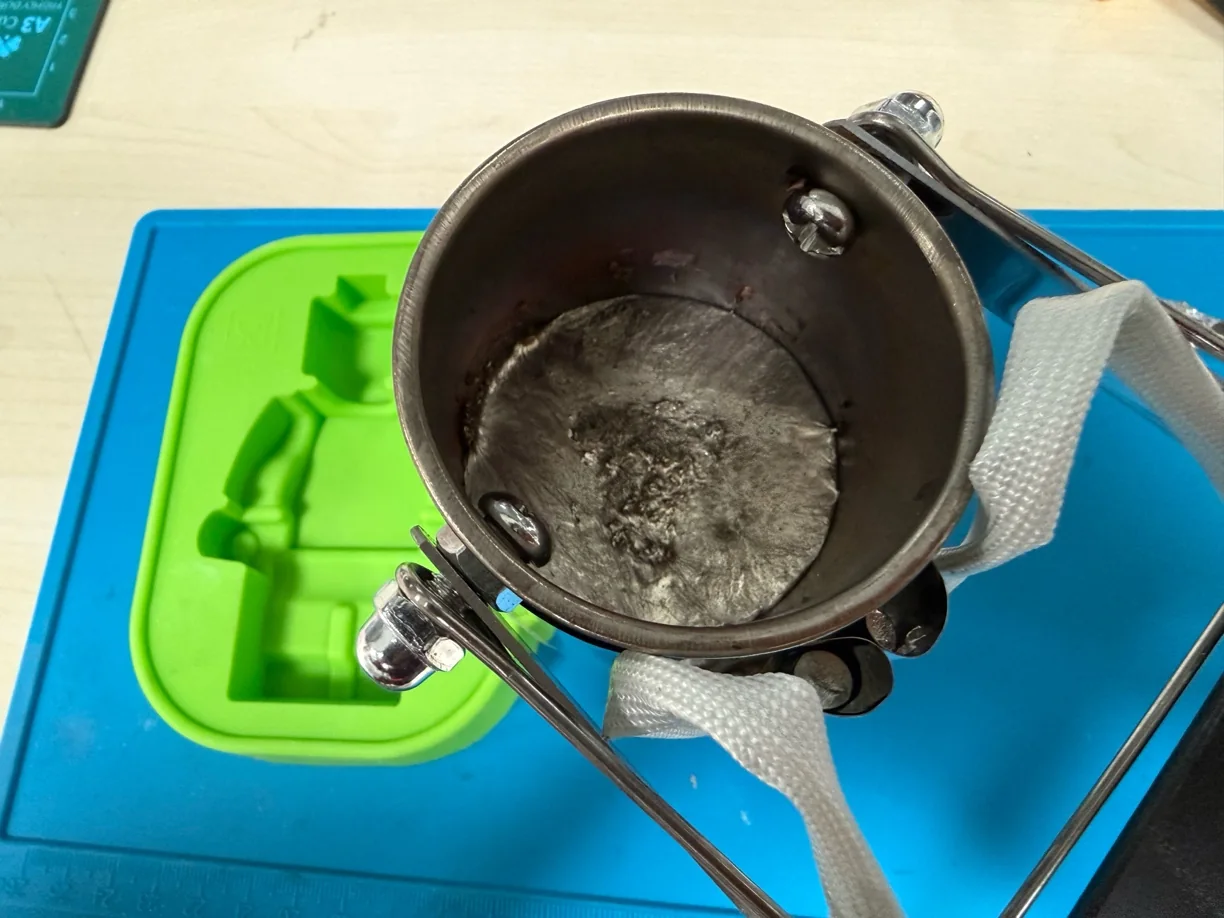
It is better to cut tin into some small pieces, and then it will melt faster.
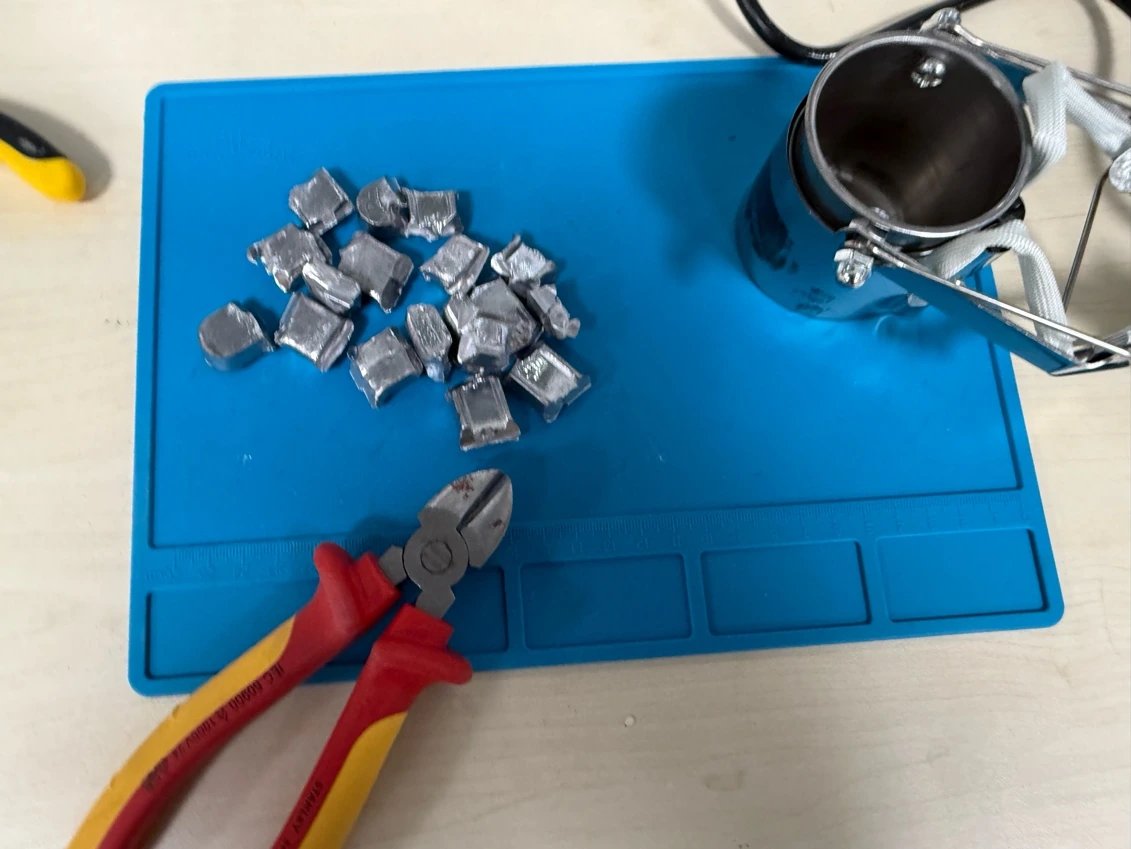
I set up support with clamps to be sure that the heating part can be raised in the air and I can add tin without any problems with holding it.
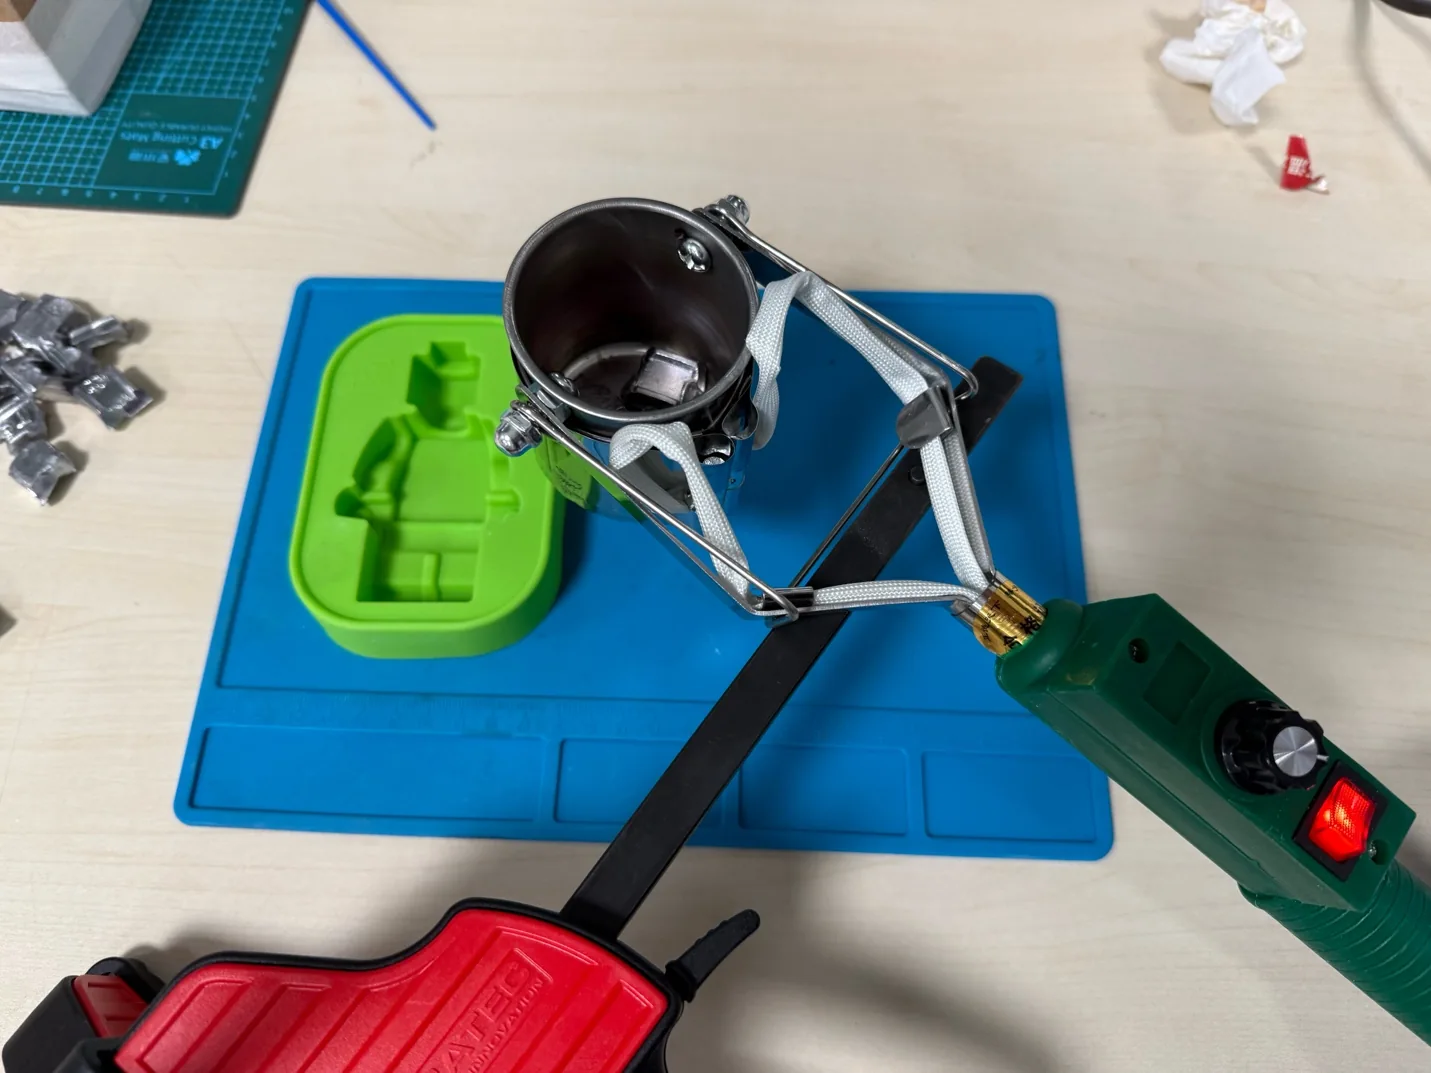
Within five minutes I melted almost everything and then poured it into a silicone mold. I just decided to test whether the silicone mold could hold the hot metal and it was successful.
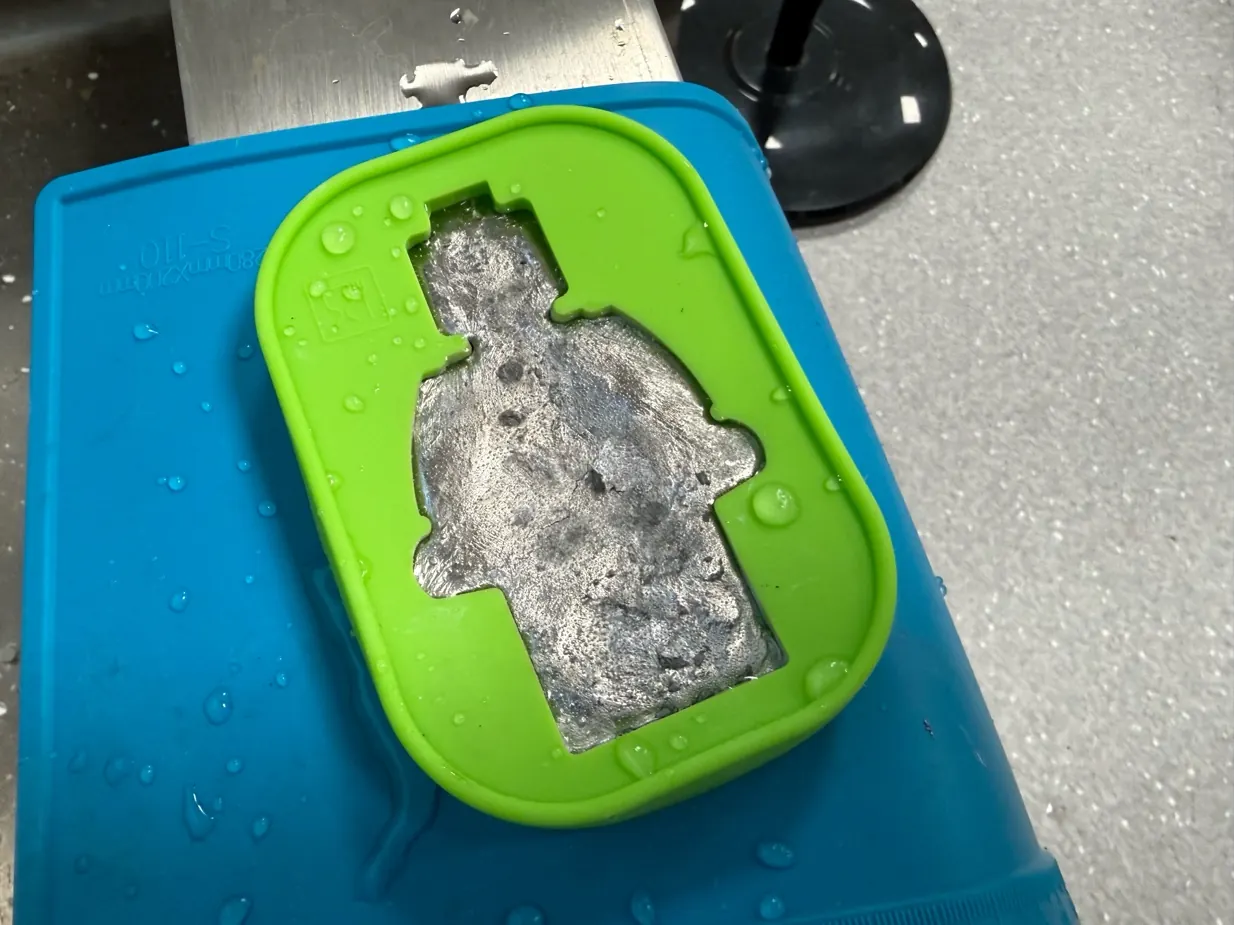
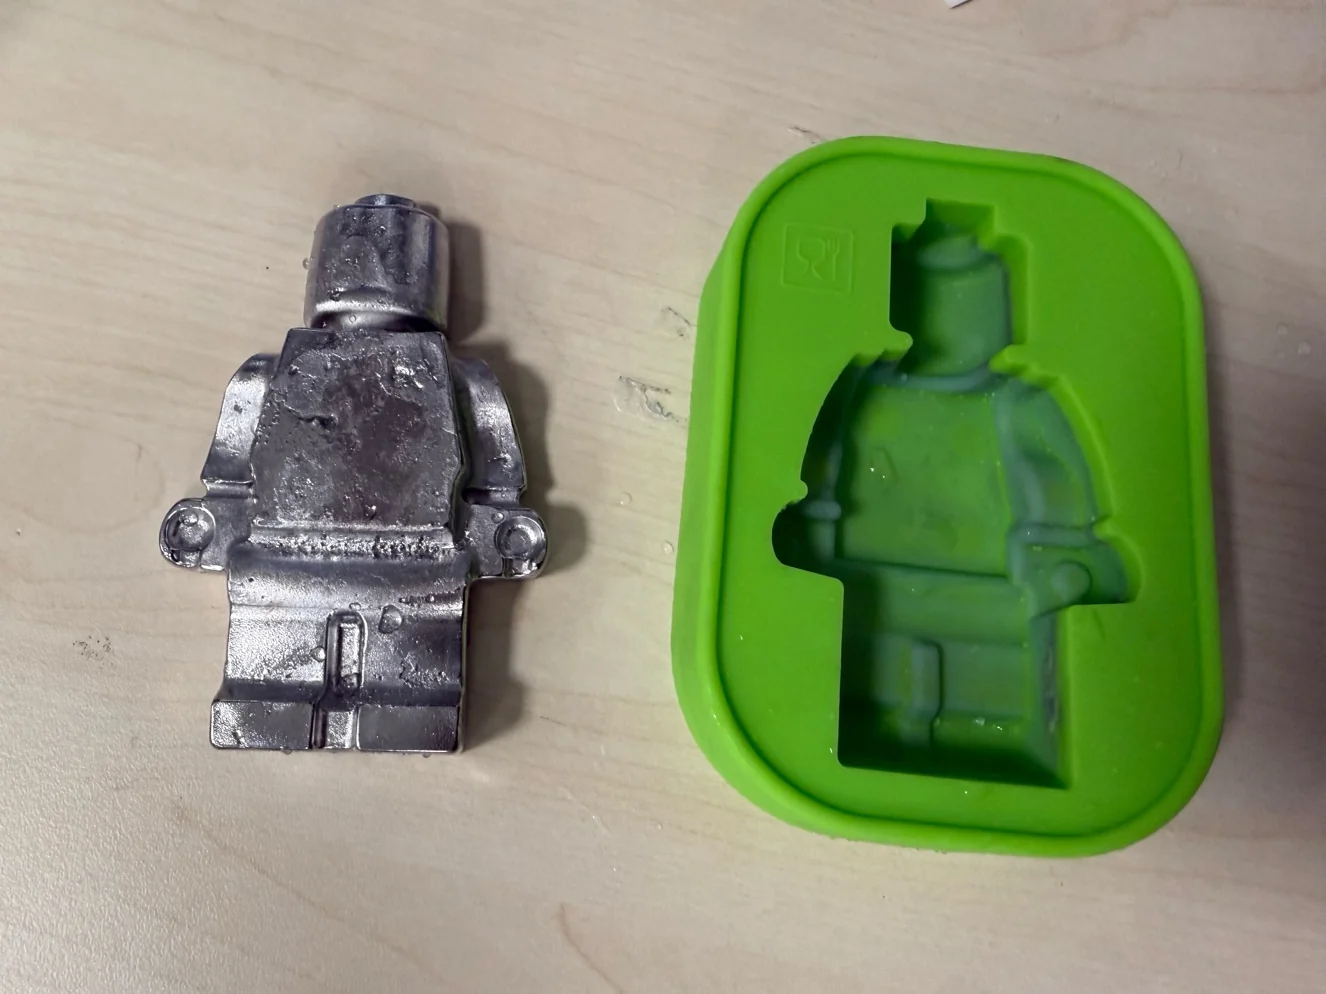
The metal test was mostly to understand if the silicone mold survives and if the tin can take the LEGO shape. It worked, and the figure came out from the mold, but the surface was not perfect. I think the metal cooled fast, and also this mold was not designed specially for metal casting. Still, it was useful because I learned how important dry mold, stable support, and safe pouring position are.
Individual casting comparison summary
| Material / process | What we learned |
|---|---|
| PLA waste in silicone mold | It can form a cast, especially with low-temperature PLA, but it is sticky, hard to press into fine detail, and the surface is rough. |
| Gypsum plaster | It mixes and sets quickly, is easy for fast tests, and gives a clean white cast, but it can trap bubbles and becomes too thick if not poured quickly. |
| Mortar / concrete | It is heavier and slower than plaster. It can create an interesting surface, but it needs more curing time and is less convenient for small details. |
| Tin in silicone mold | It proved that metal casting can work, but it needs much more safety control, stable support, ventilation, and a completely dry mold. |
| Printed molds vs milled molds | Printed molds are fast and flexible but show layer lines. Milled wax molds can be smoother, but the result depends strongly on tool diameter, stepover, and finishing time. |
These tests helped me compare different casting behaviors before moving into my own mold design, wax milling workflow, final quick-setting cast test, and reflection.
Mould creating
Before I created my 3D statue head from Maker World, I want to use it for molding and casting experiments.
https://makerworld.com/en/makerlab/makeMyStatue?from=makerlab
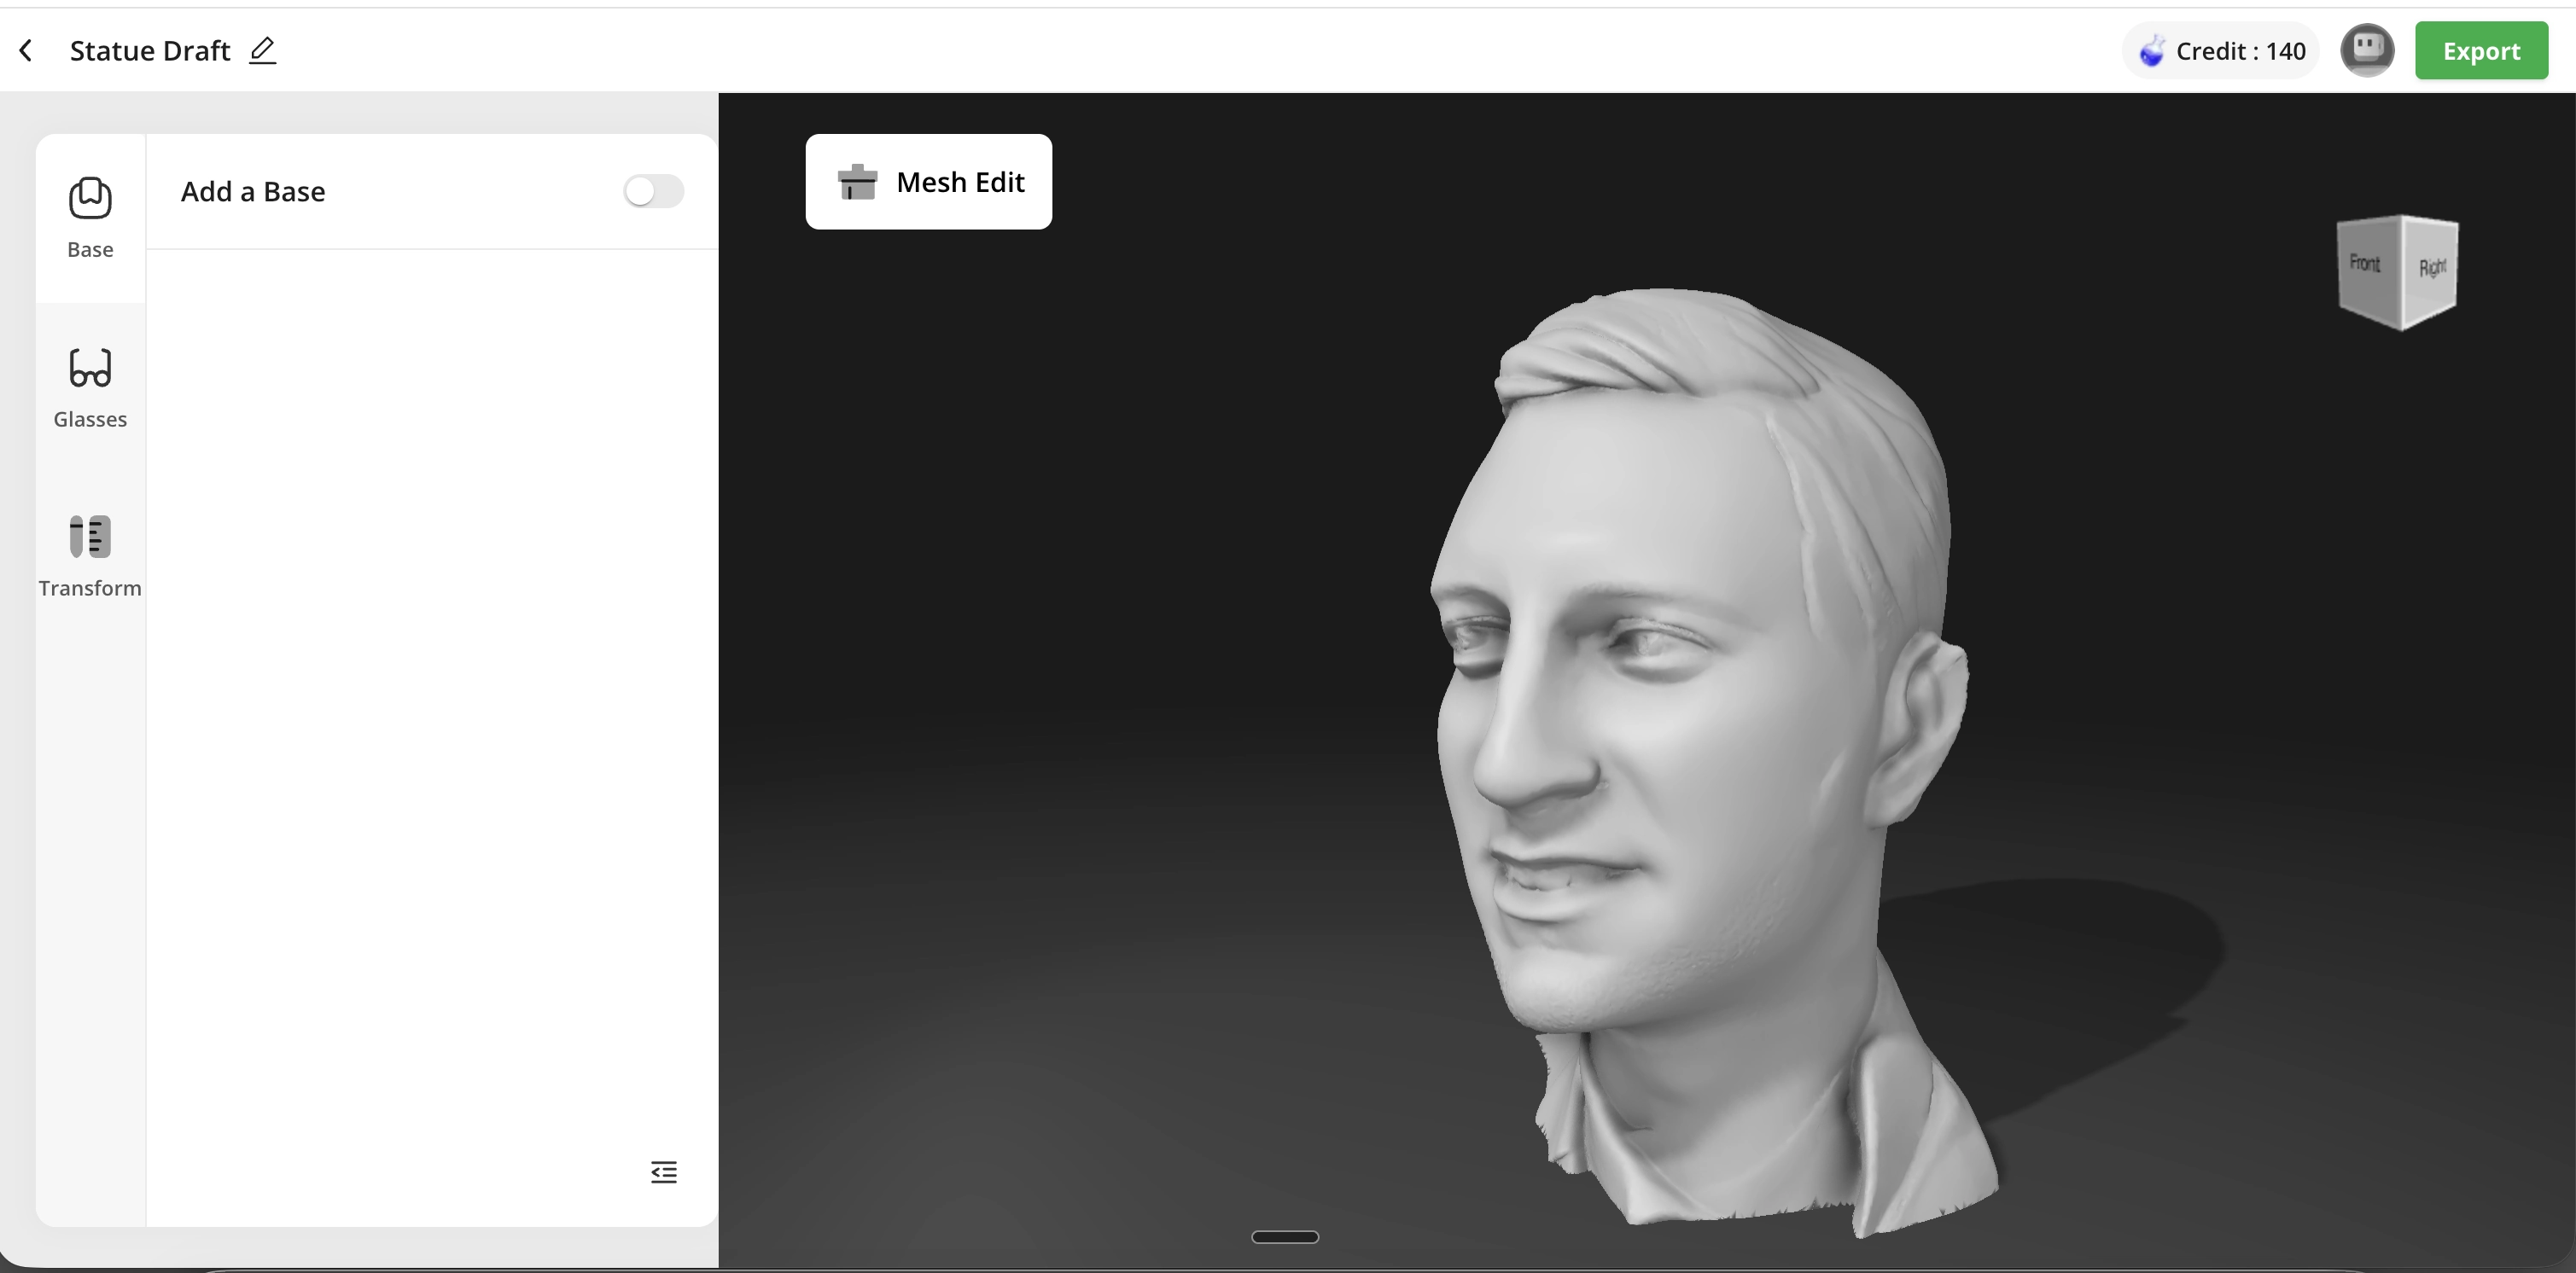
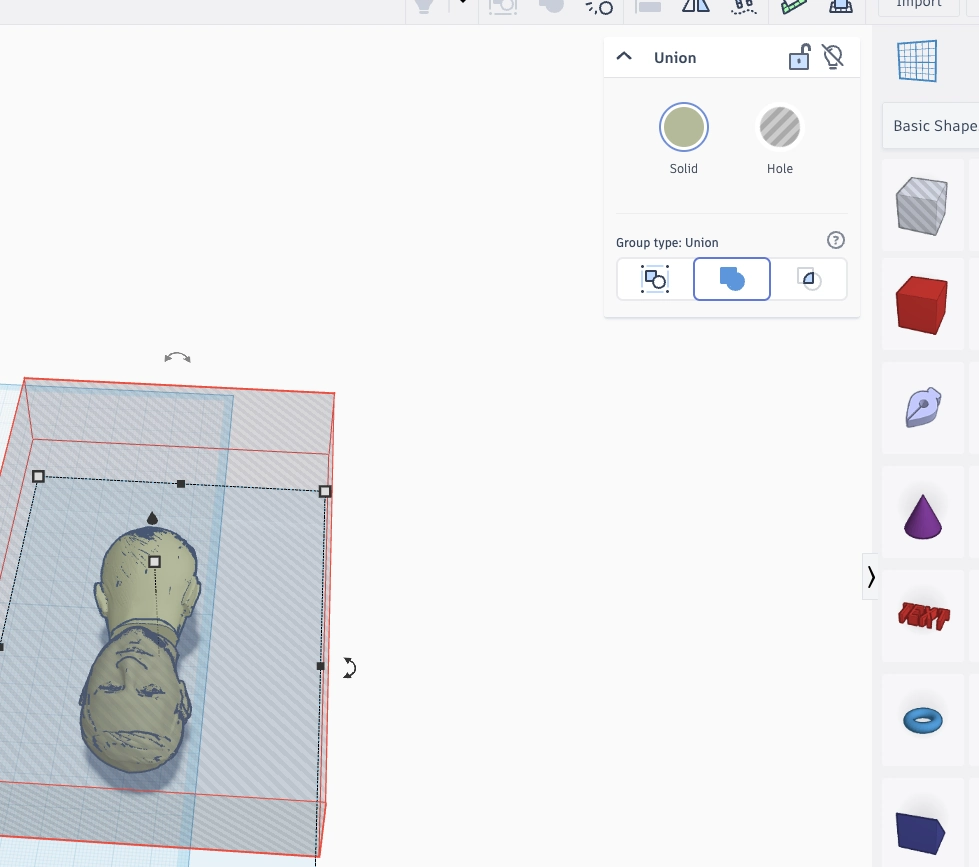
I found a fast way to use Tinkercad and I can rotate and cut any mesh shape as I want.
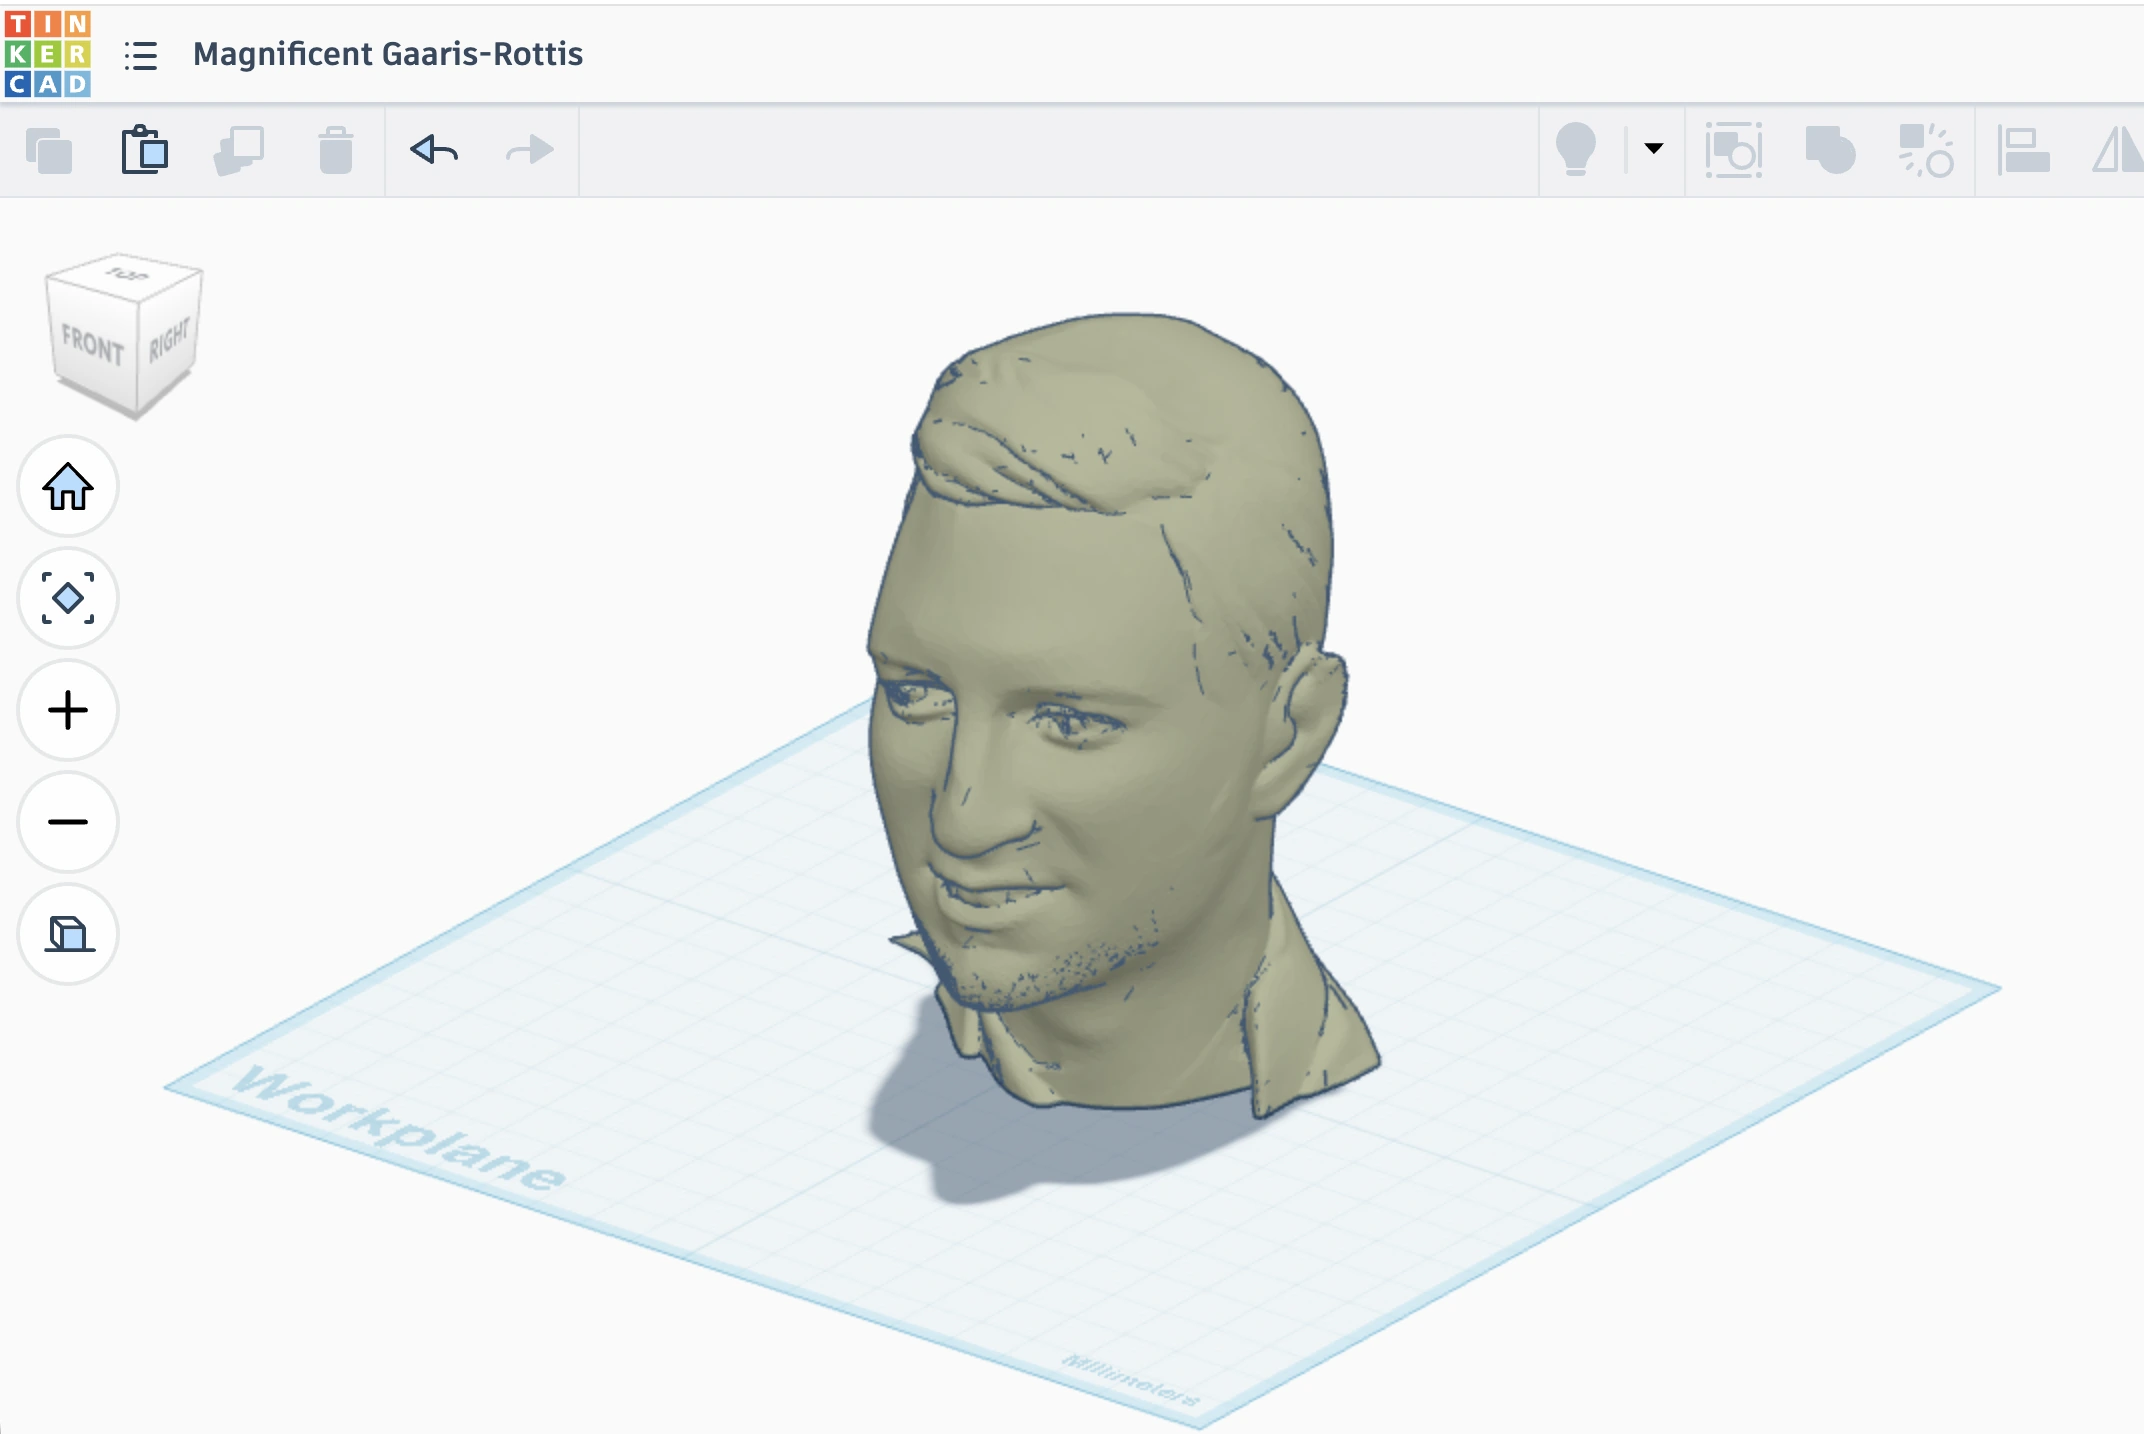
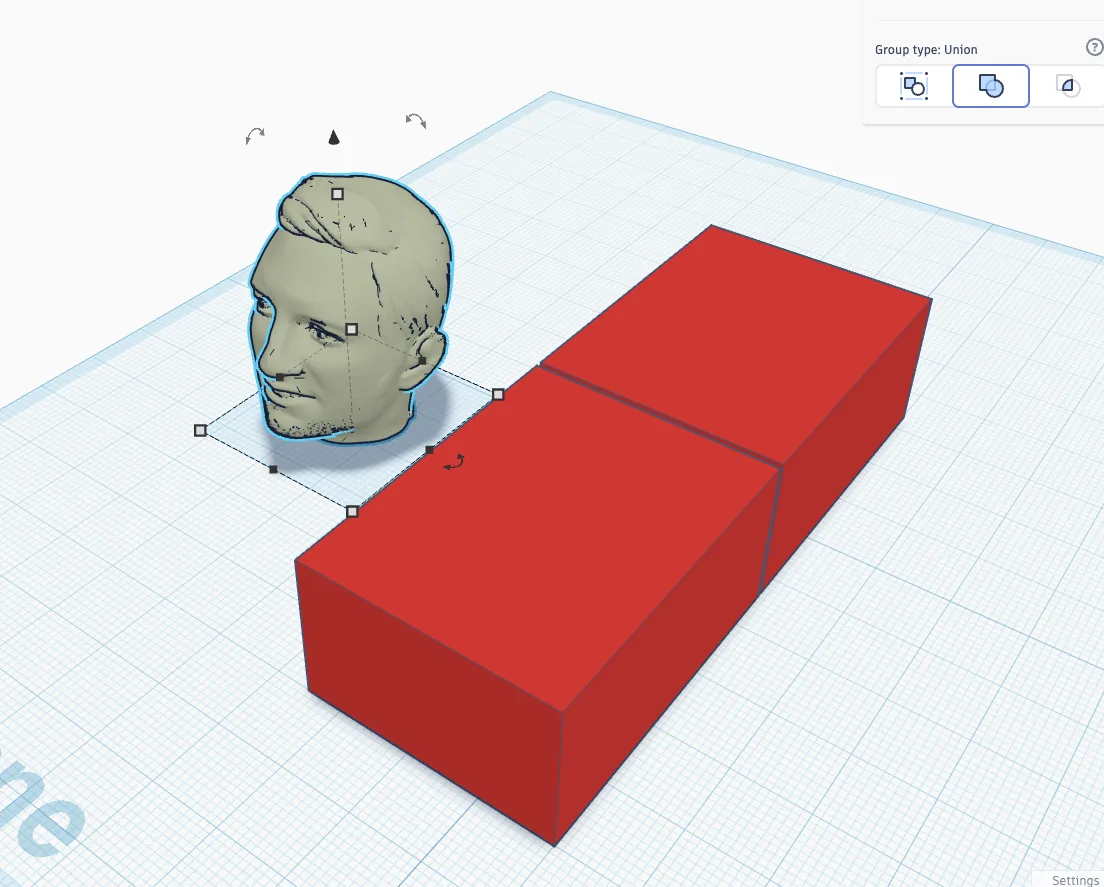
First I want to create one side positive mold. Cutting and tinker-cut is easy. I just need to use another shape as a hollow figure and then group two objects together so the hollow figure will cut another figure.
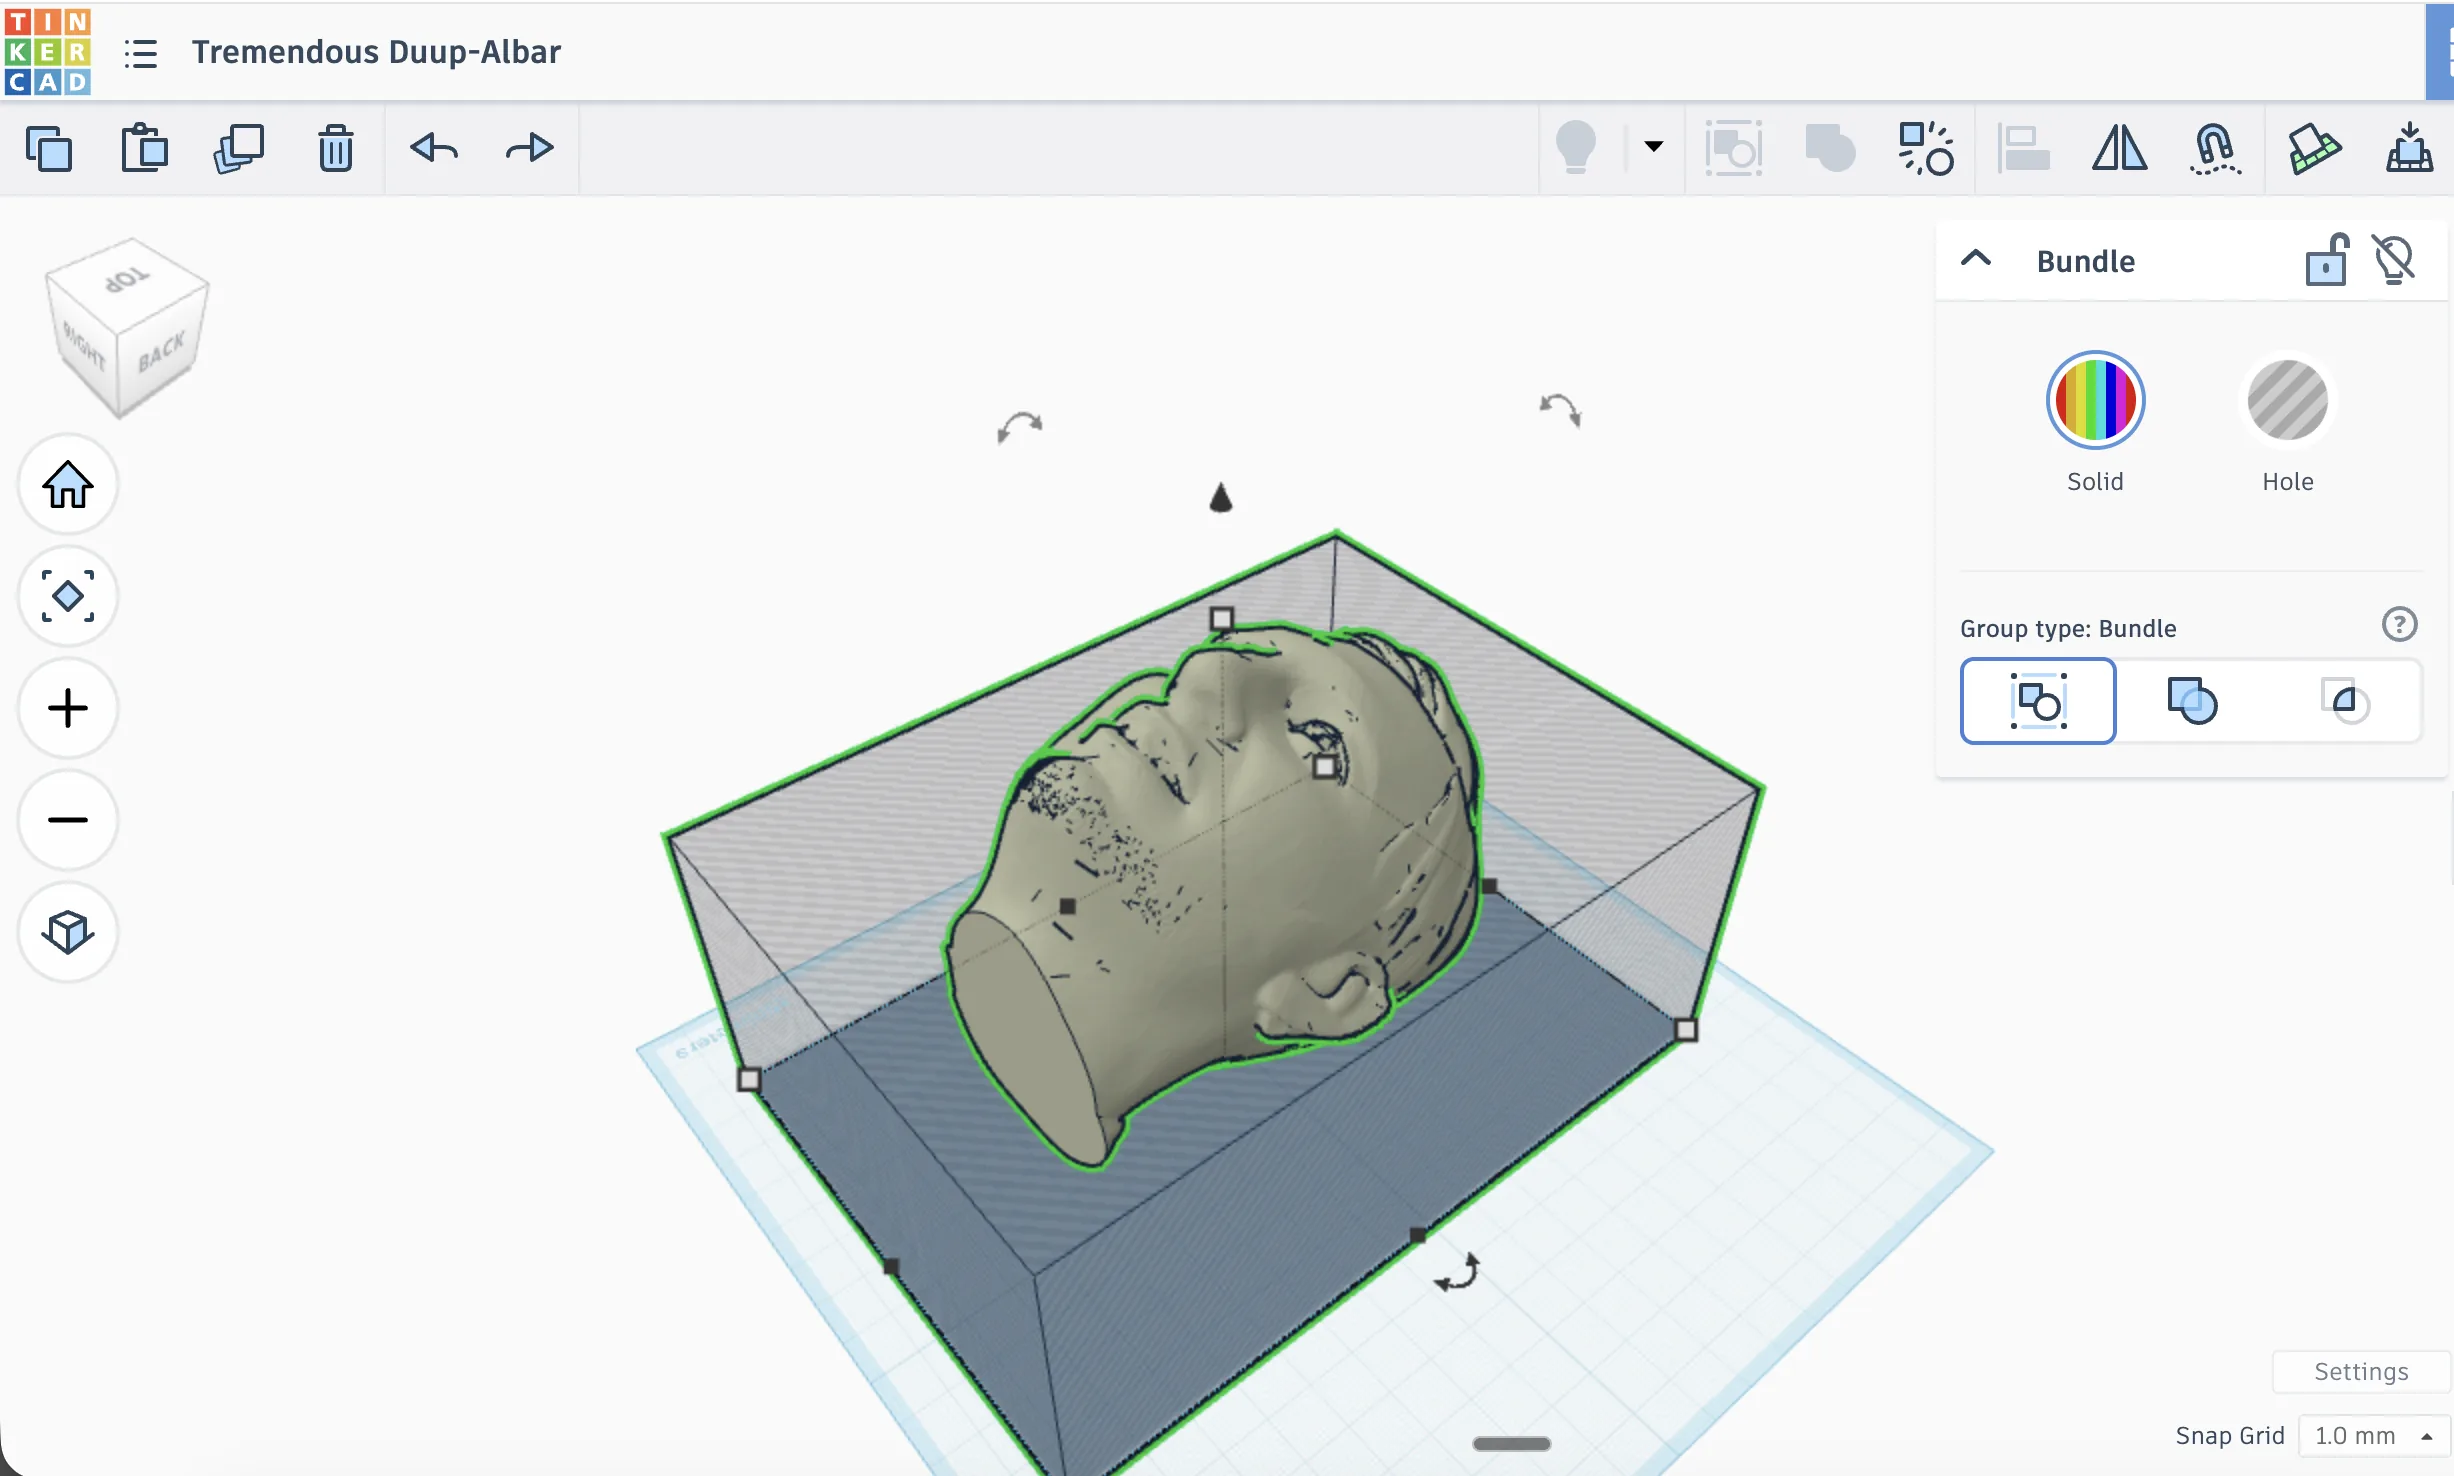
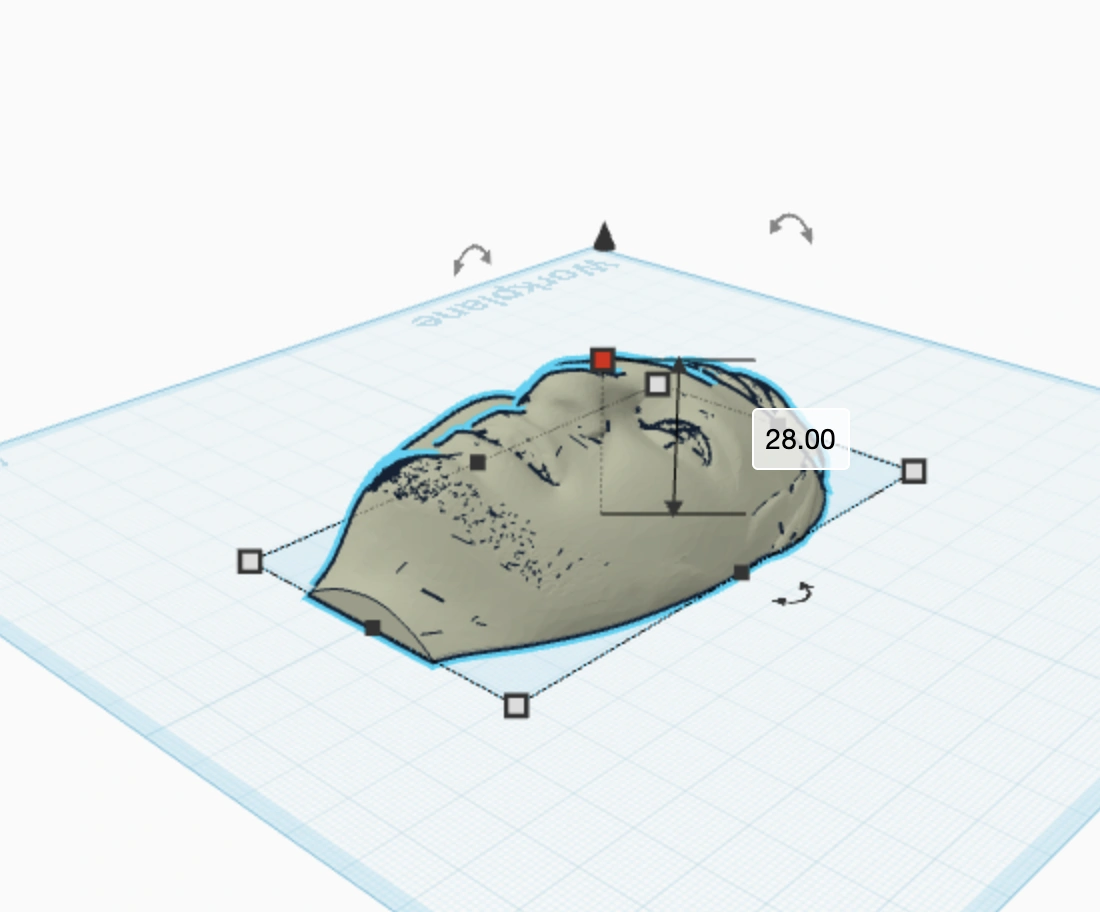
These screenshots show the first digital mold idea. I used the head model and a simple box, then used another shape as a cutter. It is not very advanced CAD, but for this experiment Tinkercad was fast enough. The important part was to make the head lower and easier to cast, because a full 3D head is too deep and complicated for a first mold.
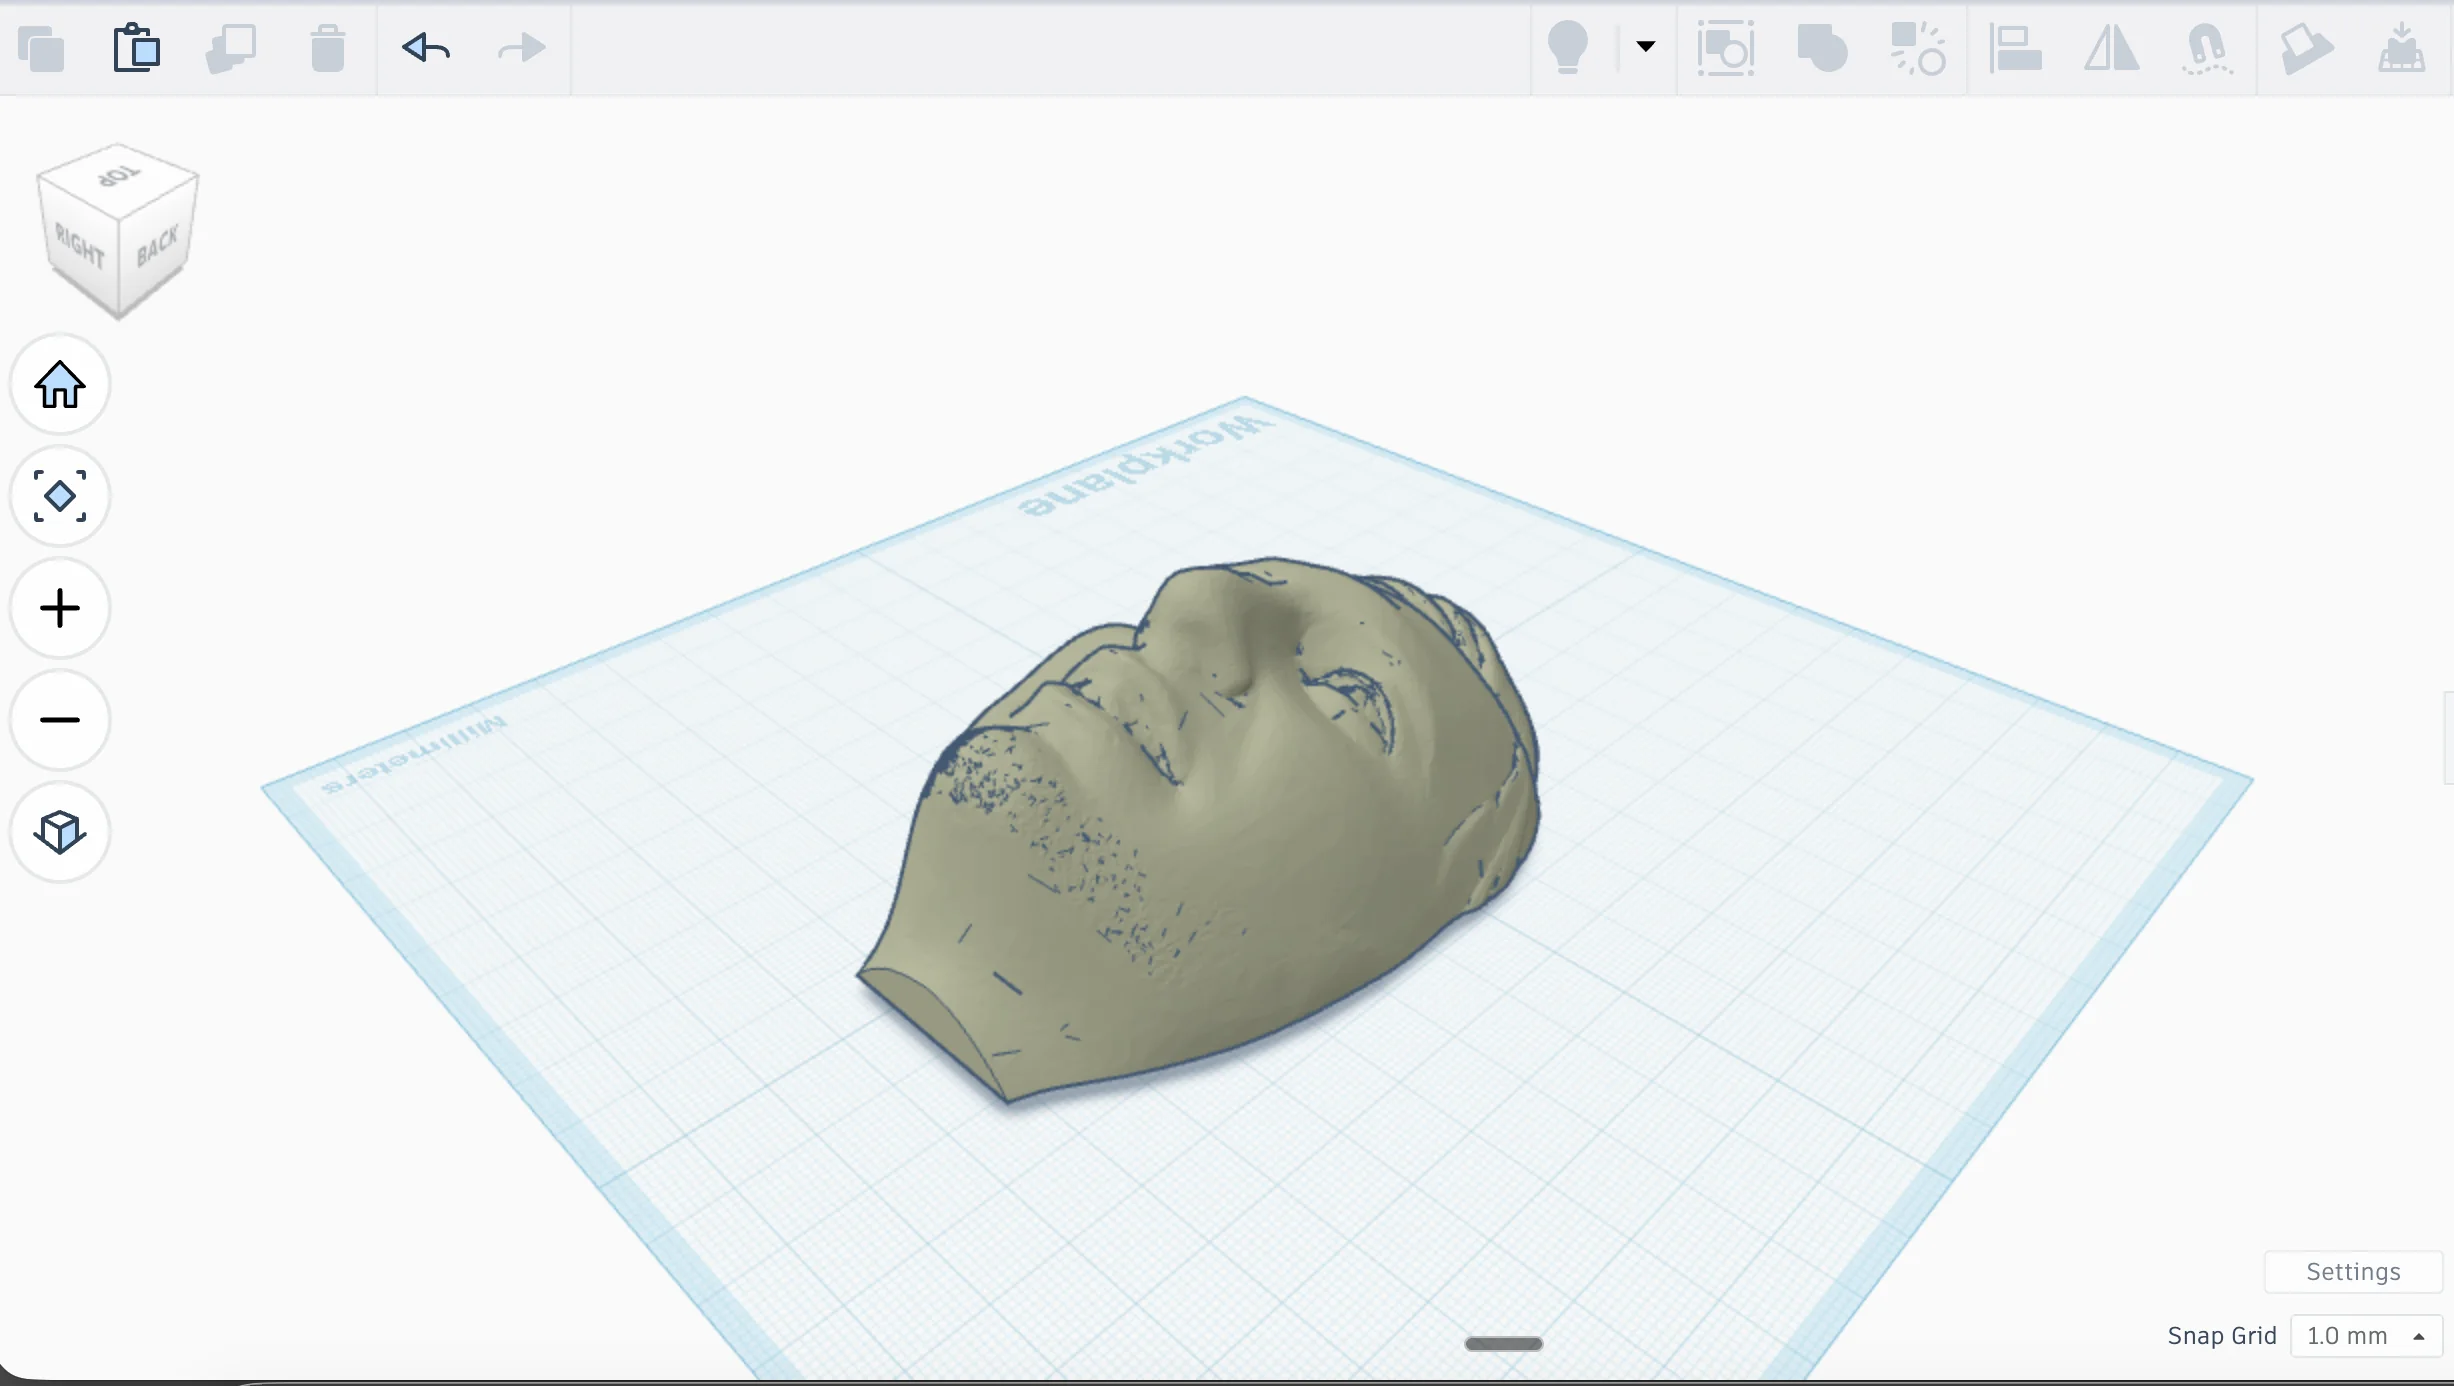
After cutting I reduce the height of the face for better fitting.
Positive Mould.
I can use this mold and fill it by plaster or mortar, which is a pure mix with cement and water.
This positive mold means the face is raised from the base. I can use it to create another negative mold from plaster or mortar. It is one more step, but it makes sense if I want to make a reusable mold from a printed object.
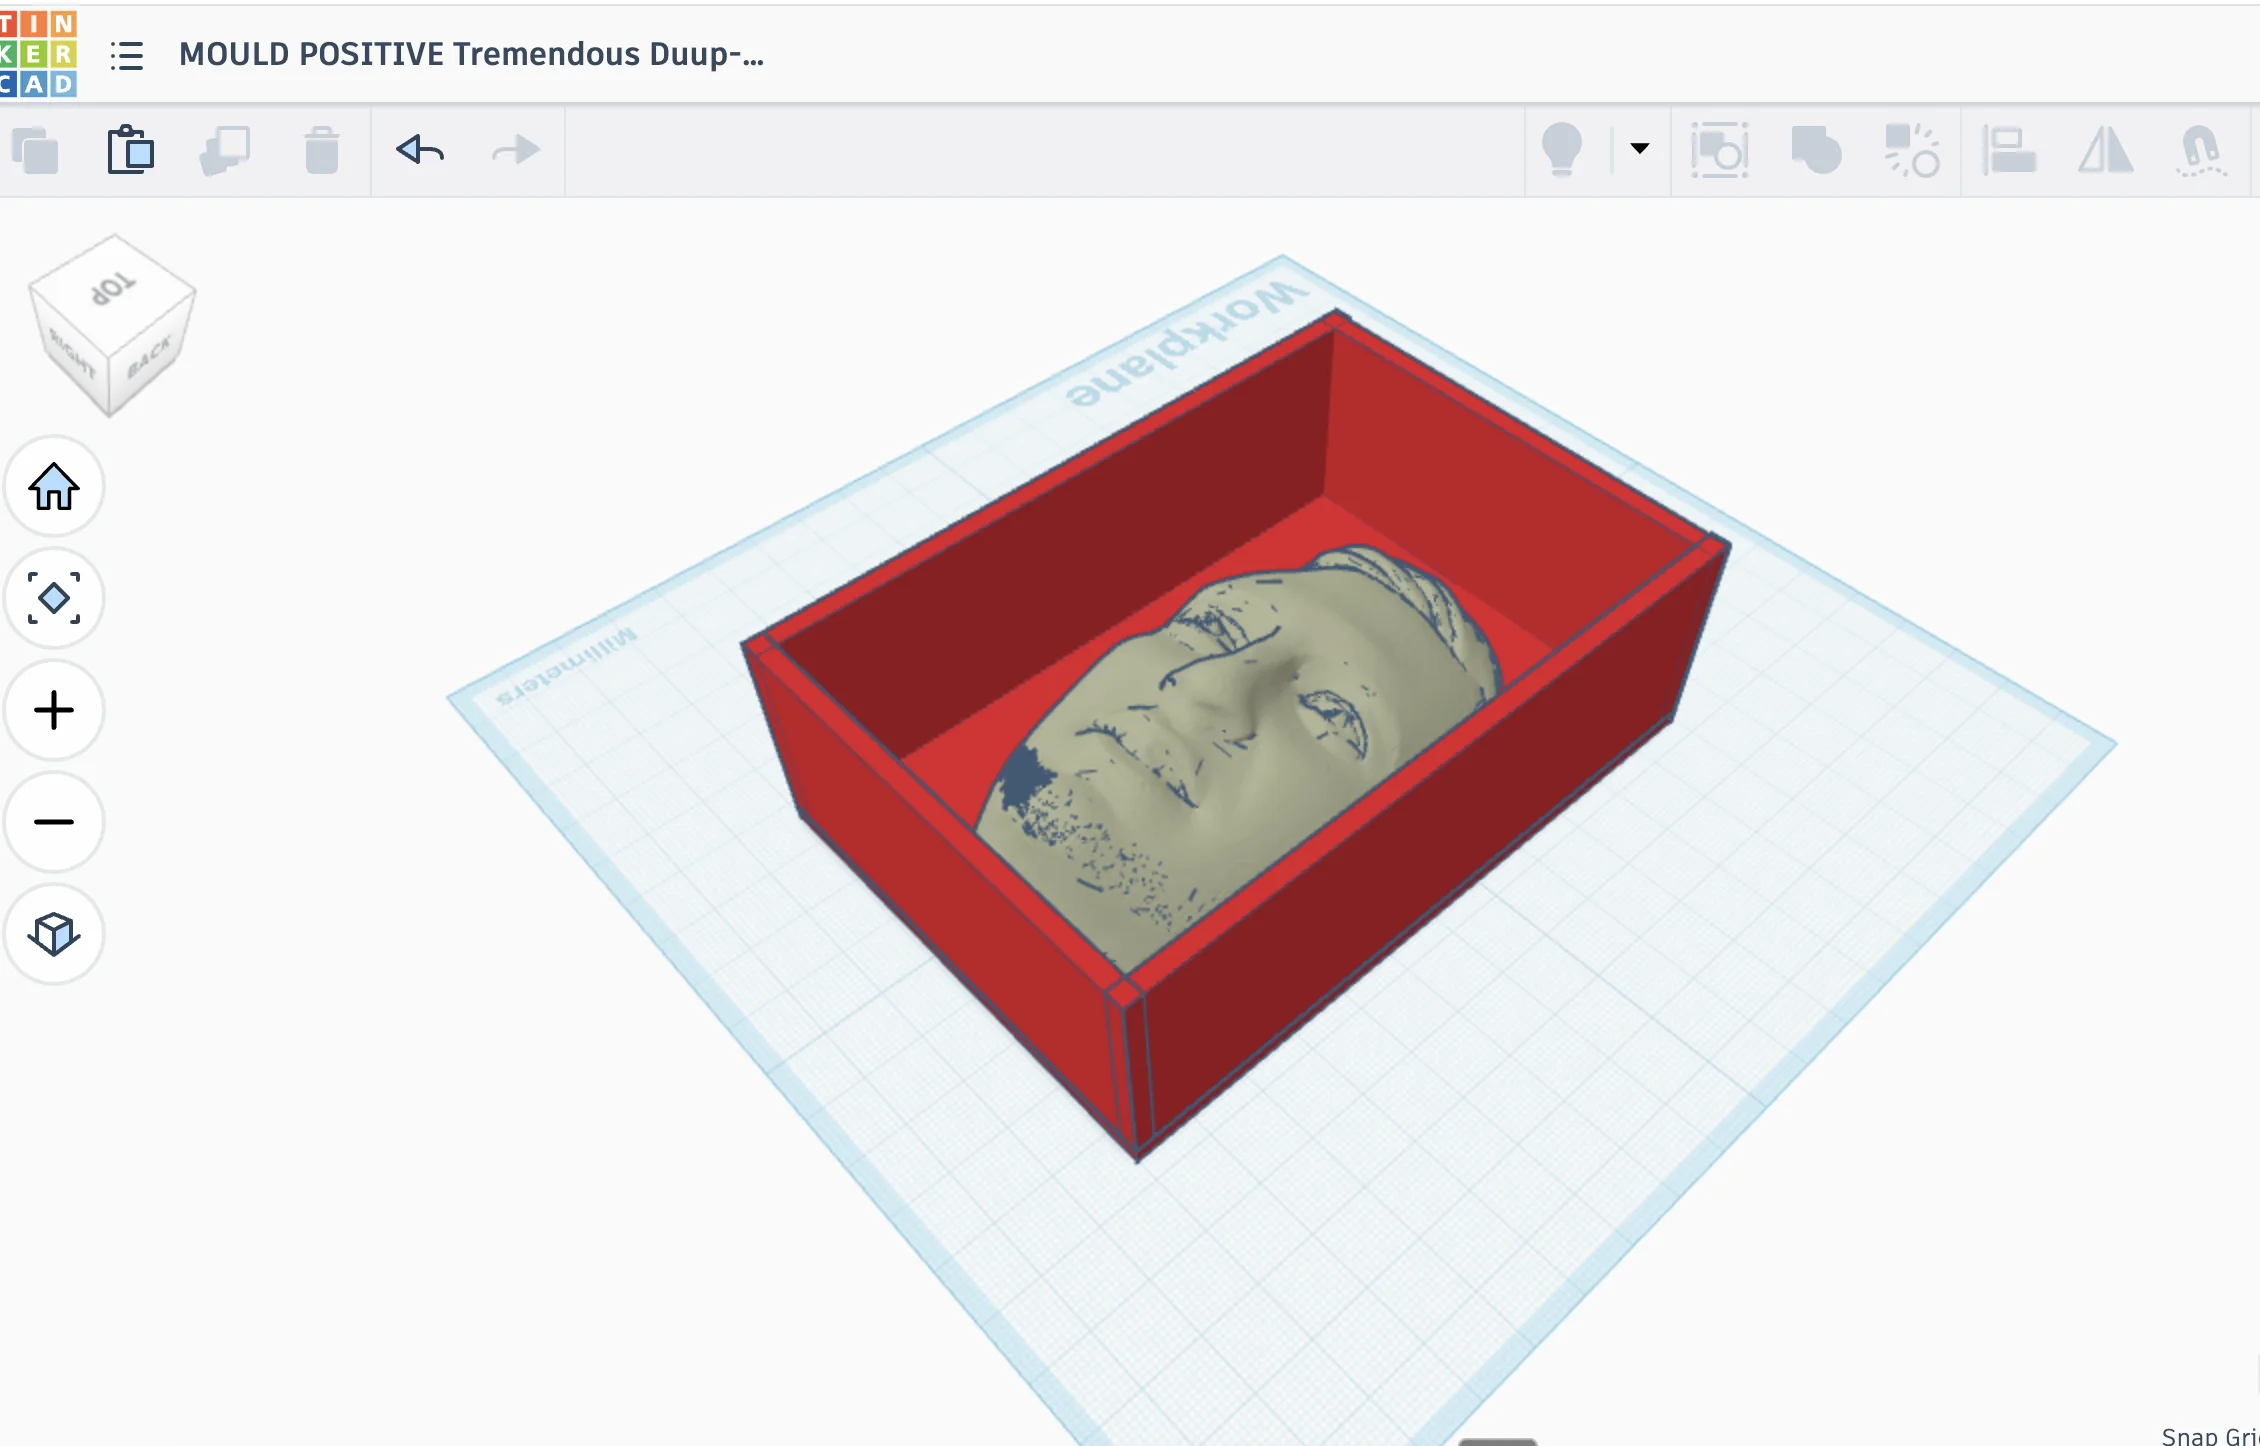
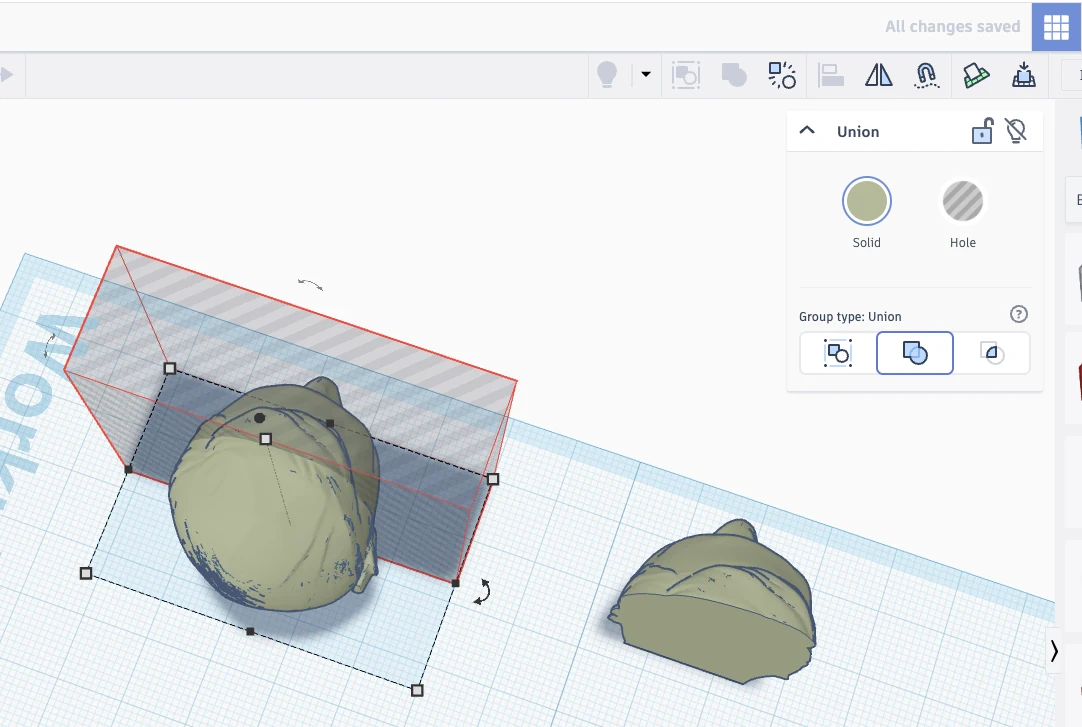
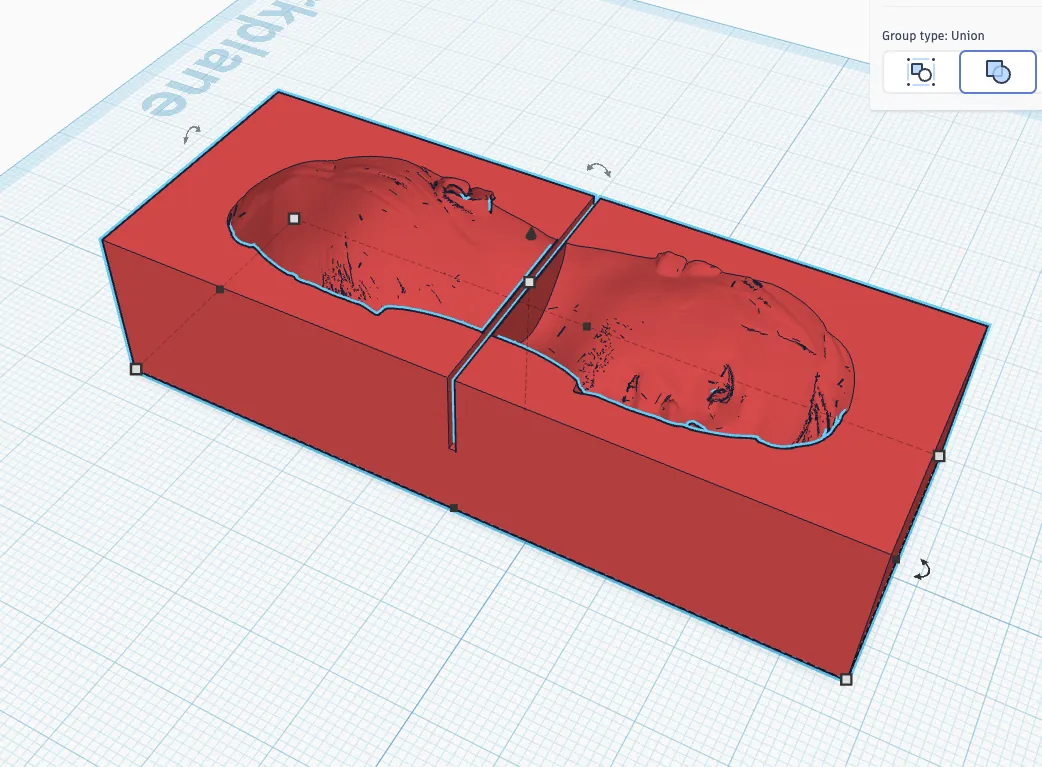
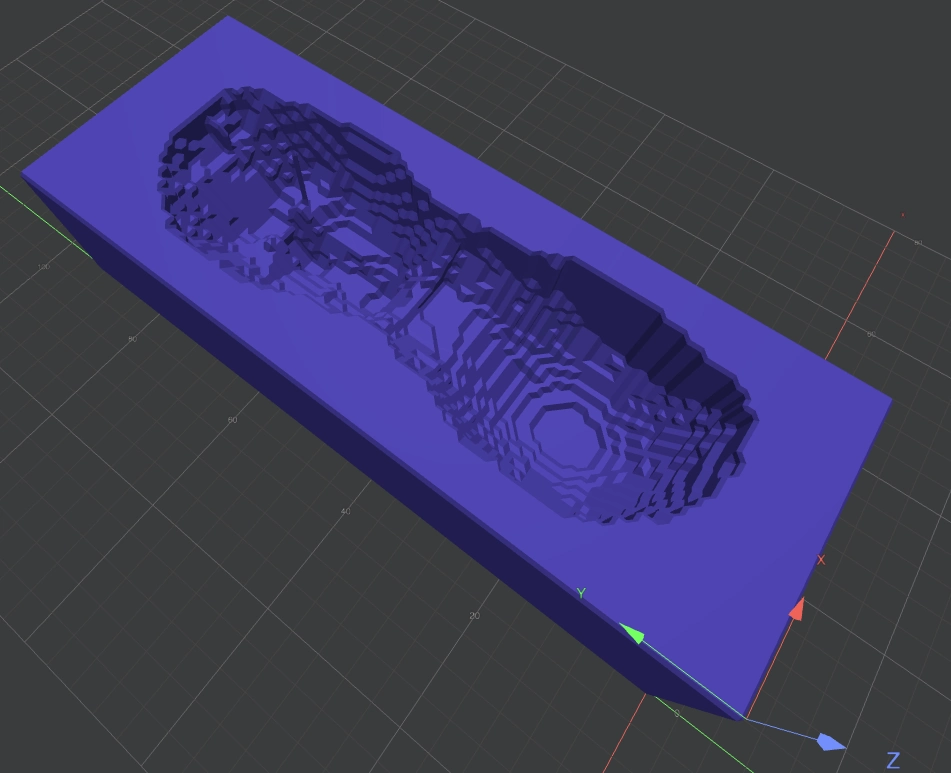
For negative mode the face object can become hollow and make an empty space in the surface of the rectangle brick.
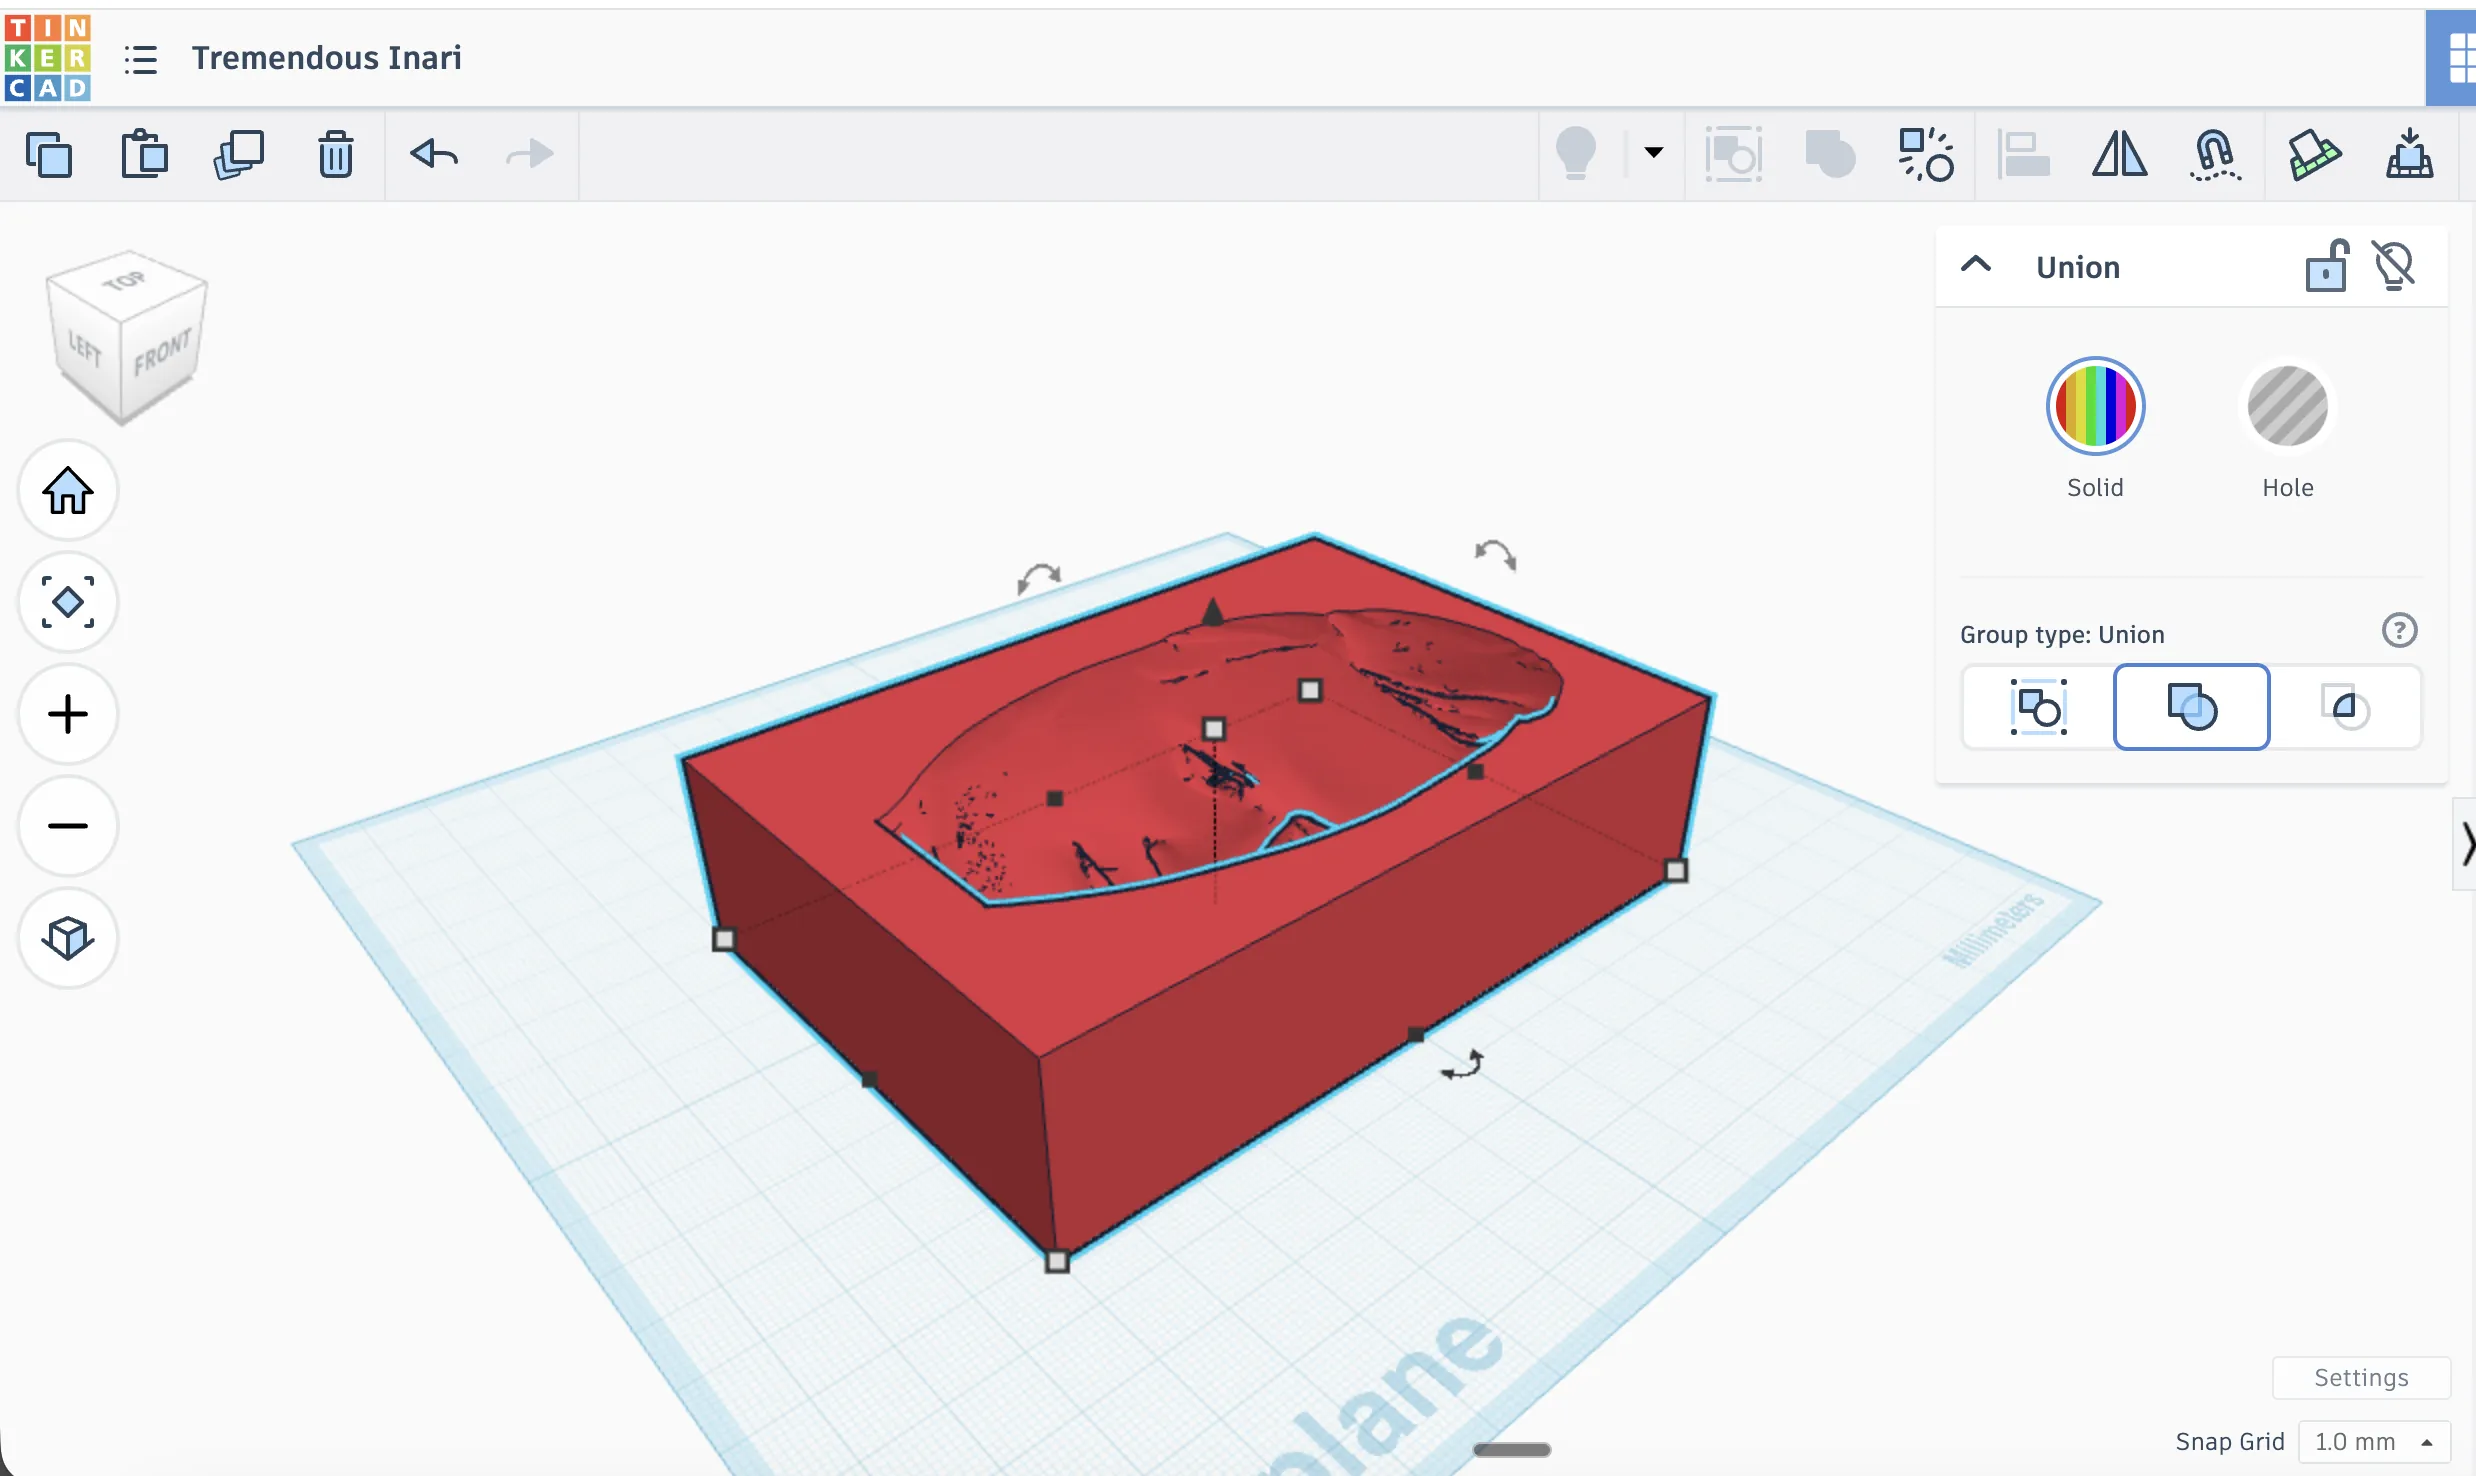
The negative version is more direct for casting, because the material can be poured into the cavity. Here I was checking if the face details are still visible after making it hollow. Some small details can disappear or become too sharp, so this is why I tested both positive and negative approaches.
For wax milling I can use a similar approach and create a negative mold. At first I want to make one side mold and pour concrete and pour mortar and plaster for experiment.


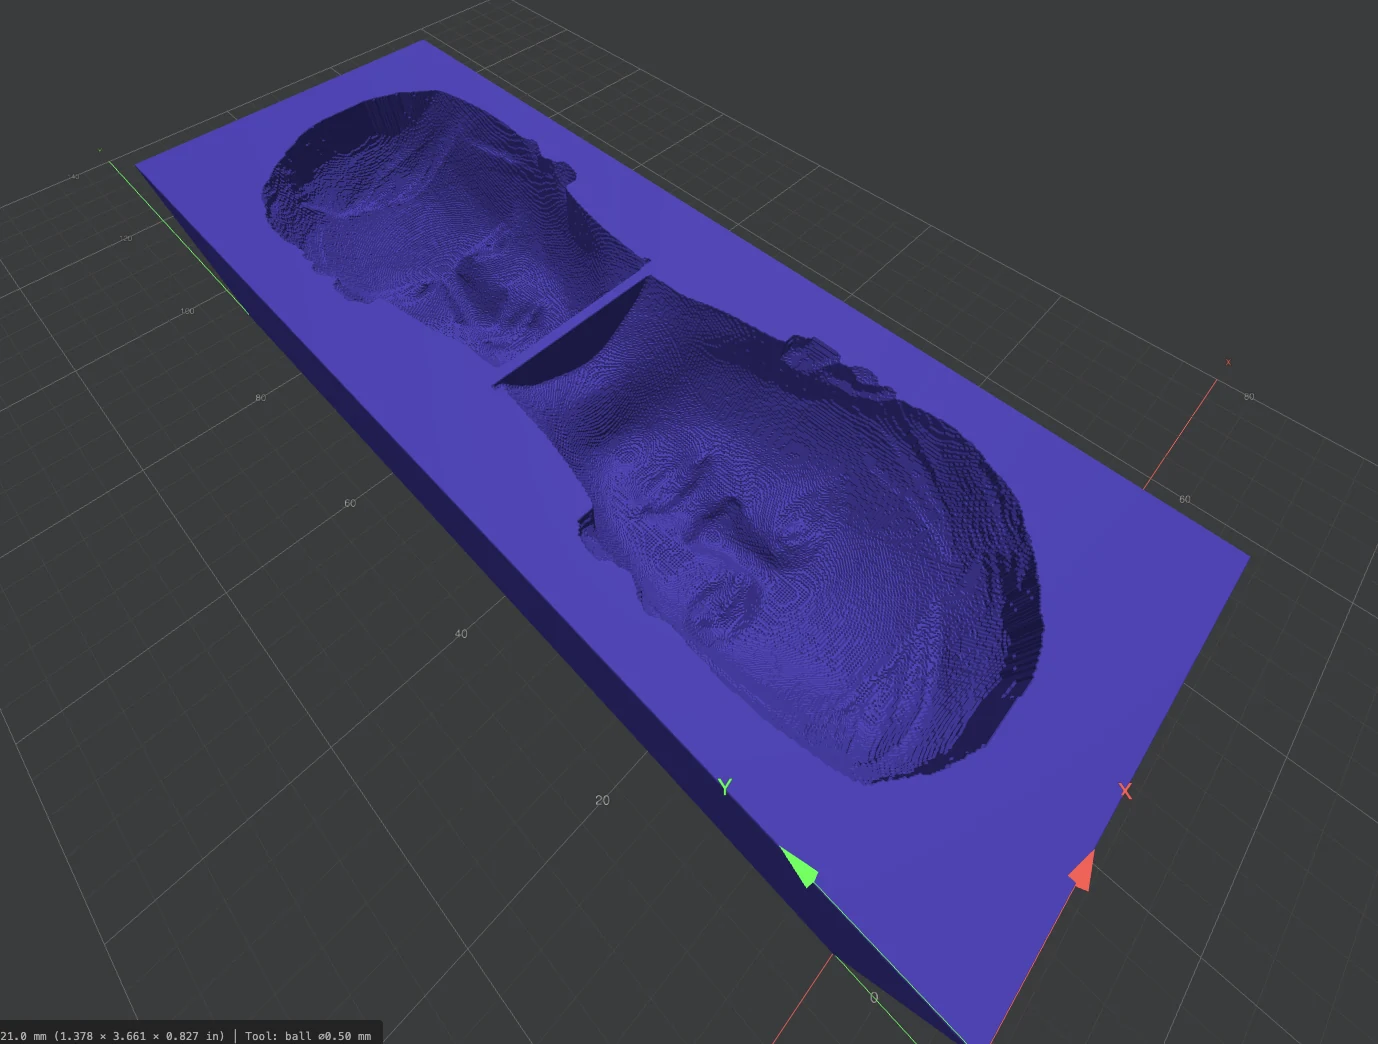
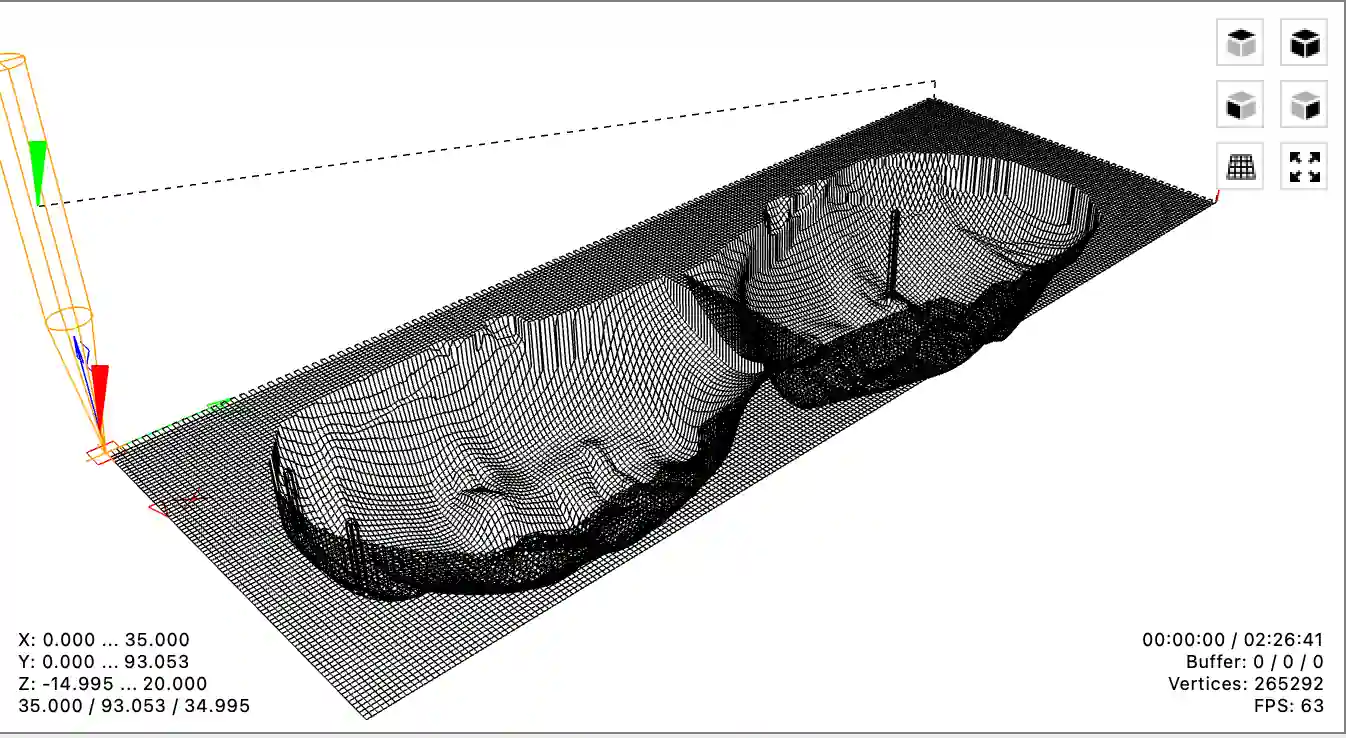
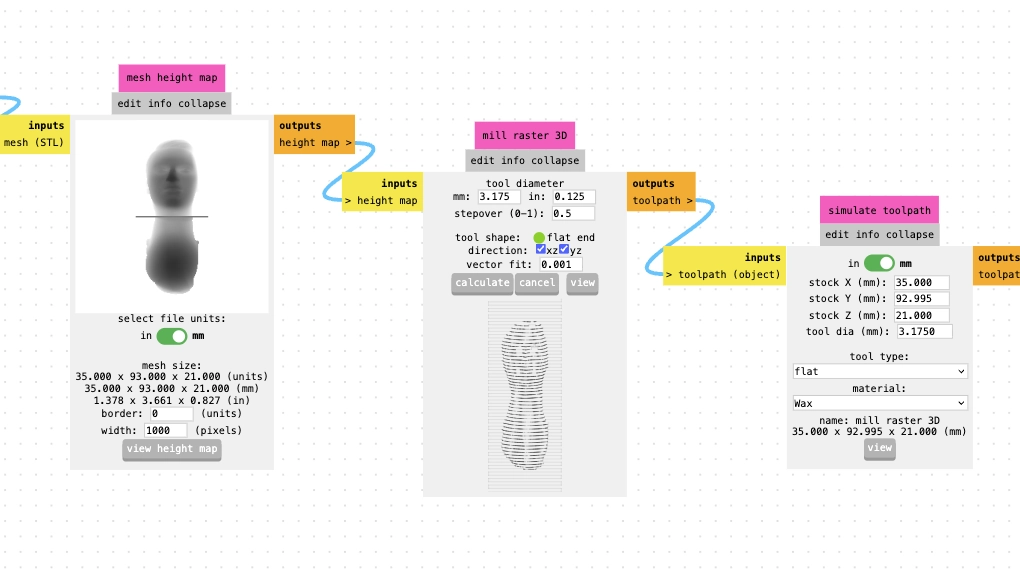
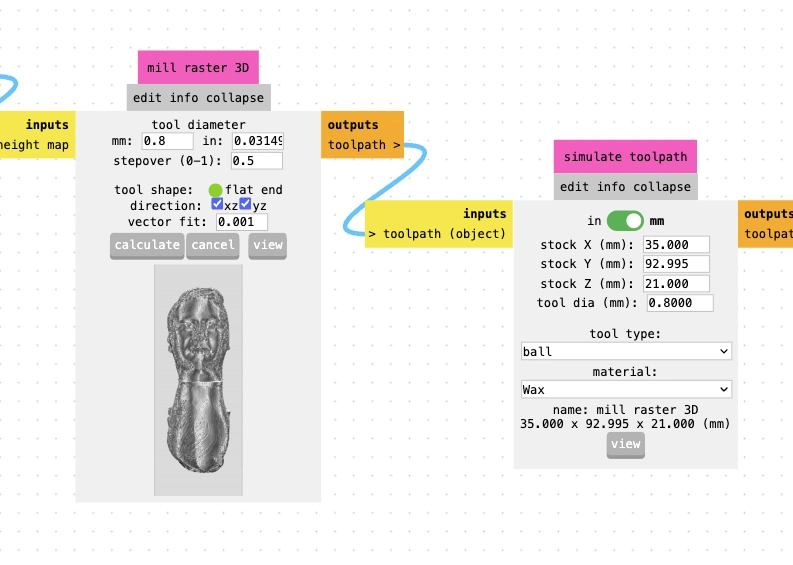
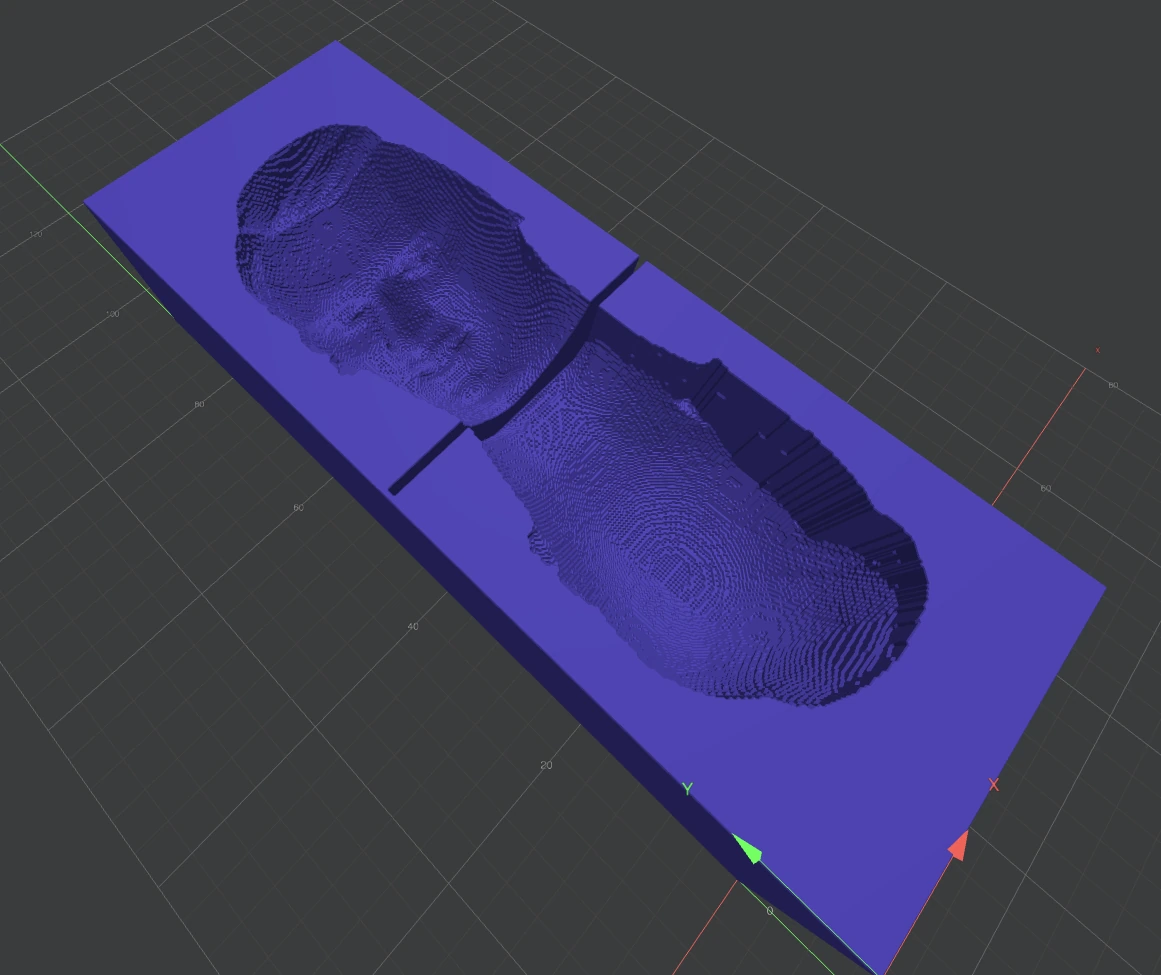
In the Mods Project we can select a milling 3D shape from STL. It will be two passes, first with a 3.175 flat end mill. And second, finish pass with 0.8 mm ball end mill


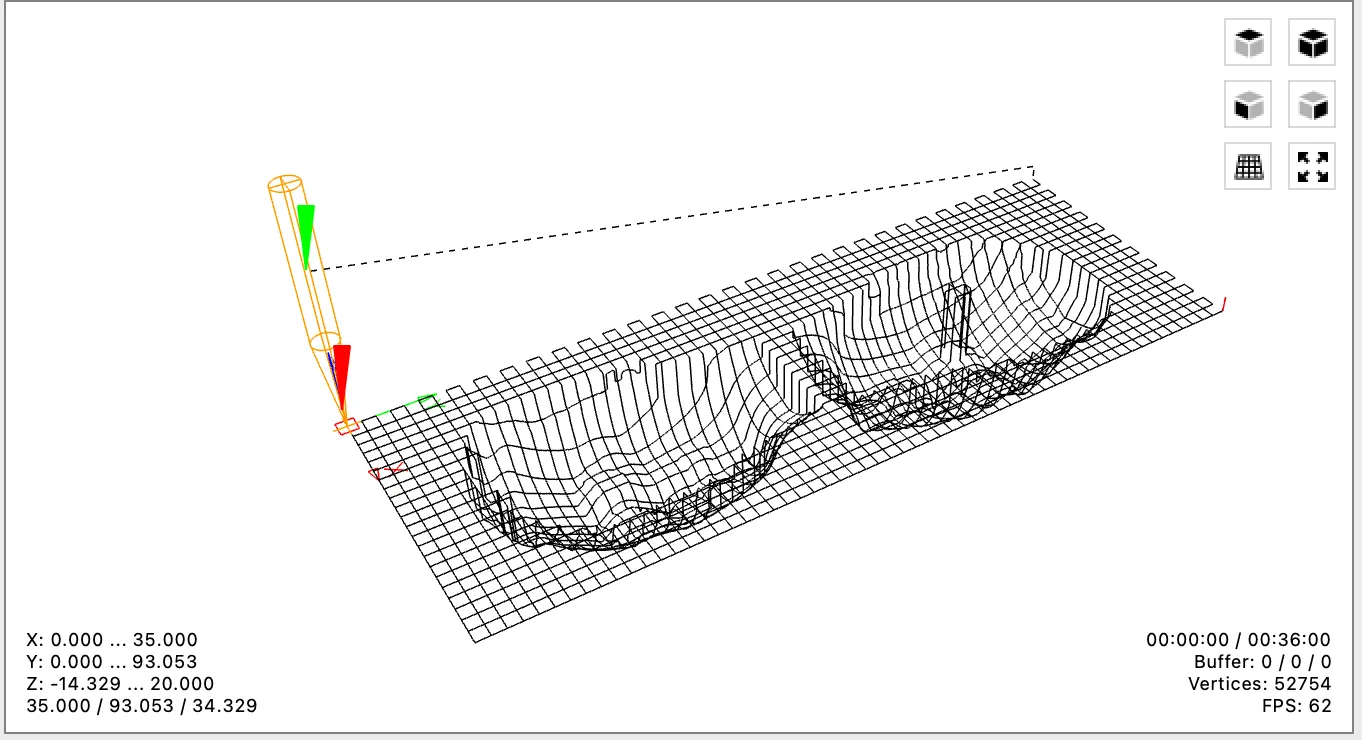
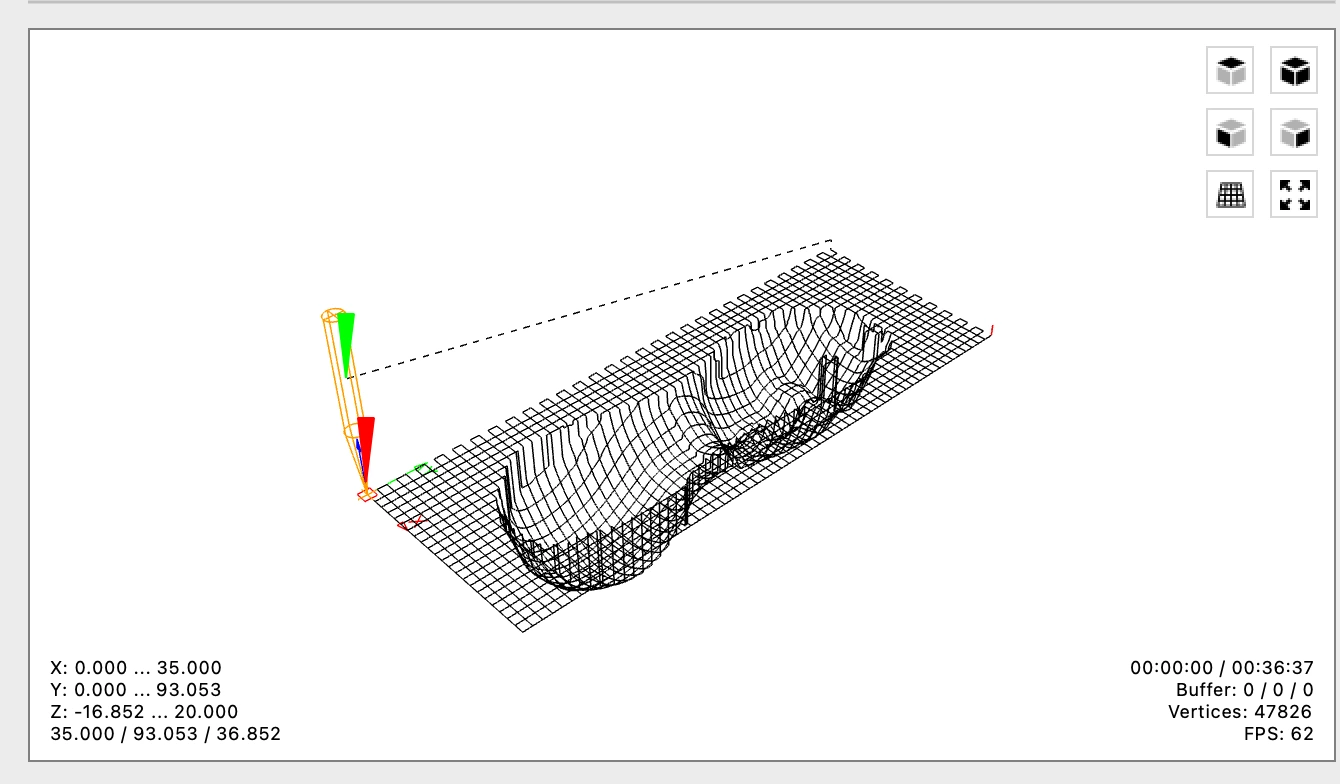
In Mods I loaded the STL, rotated the model, created a height map, and generated the 3D raster toolpath. At first this looked easy, but the result depends a lot on the bit diameter and stepover. If the stepover is too big, the mold will show lines. If it is too small, the machining time becomes very long.
Milling time: 36 minutes.
For milling finish part, I didn't realize how to set up Mods first, and I used Easel.
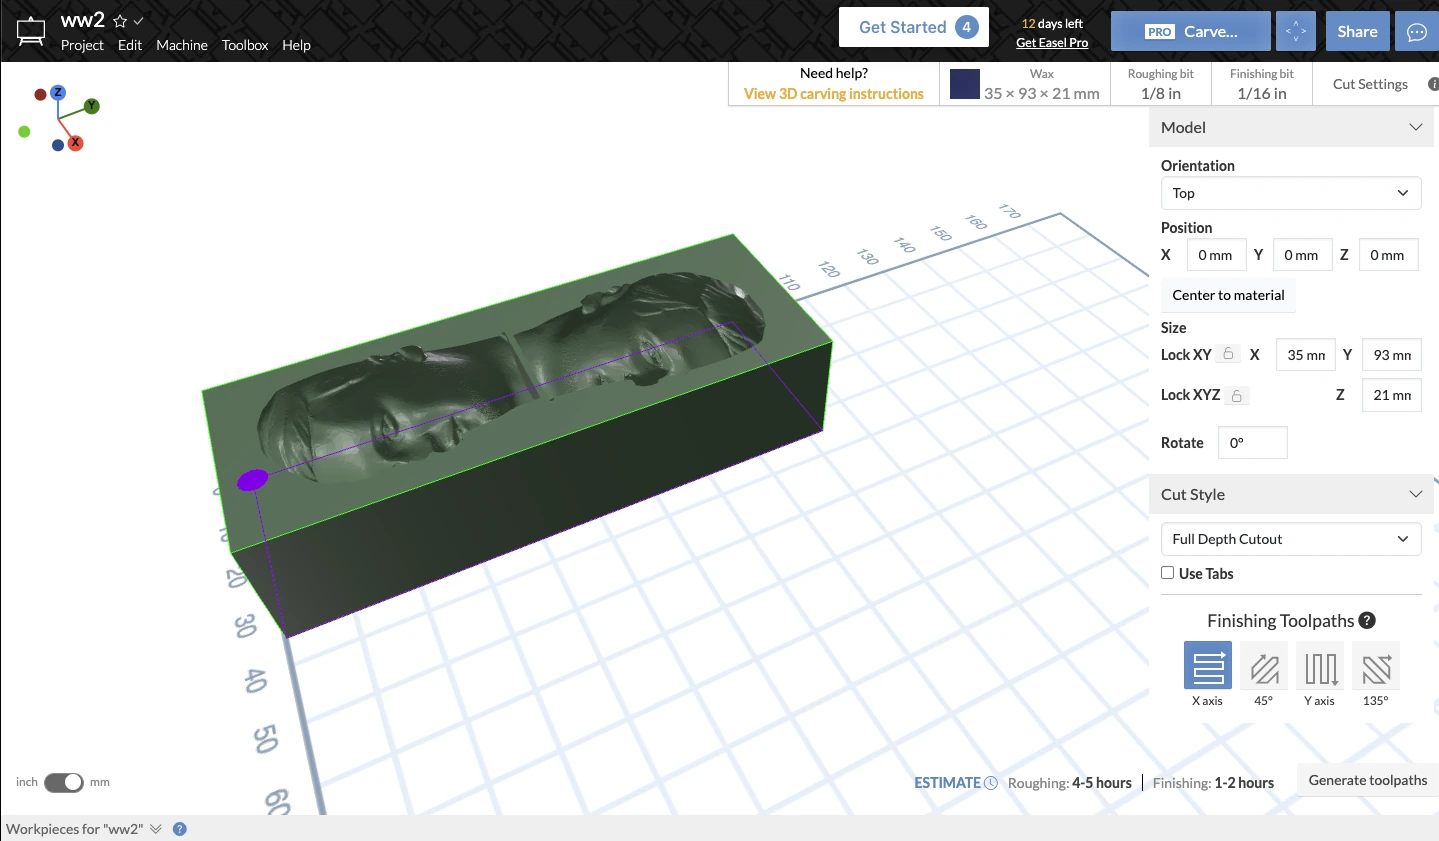
The settings are not flexible for beginner level but still after exporting G-code I found that it is easily creating the unnecessary cuts around the shape.
I edited G-code manually and removed this section of cutting the shape around, but still the timing was not so good because for rough milling it's 1 hour 20 minutes, and for finish milling it's 4 hours.
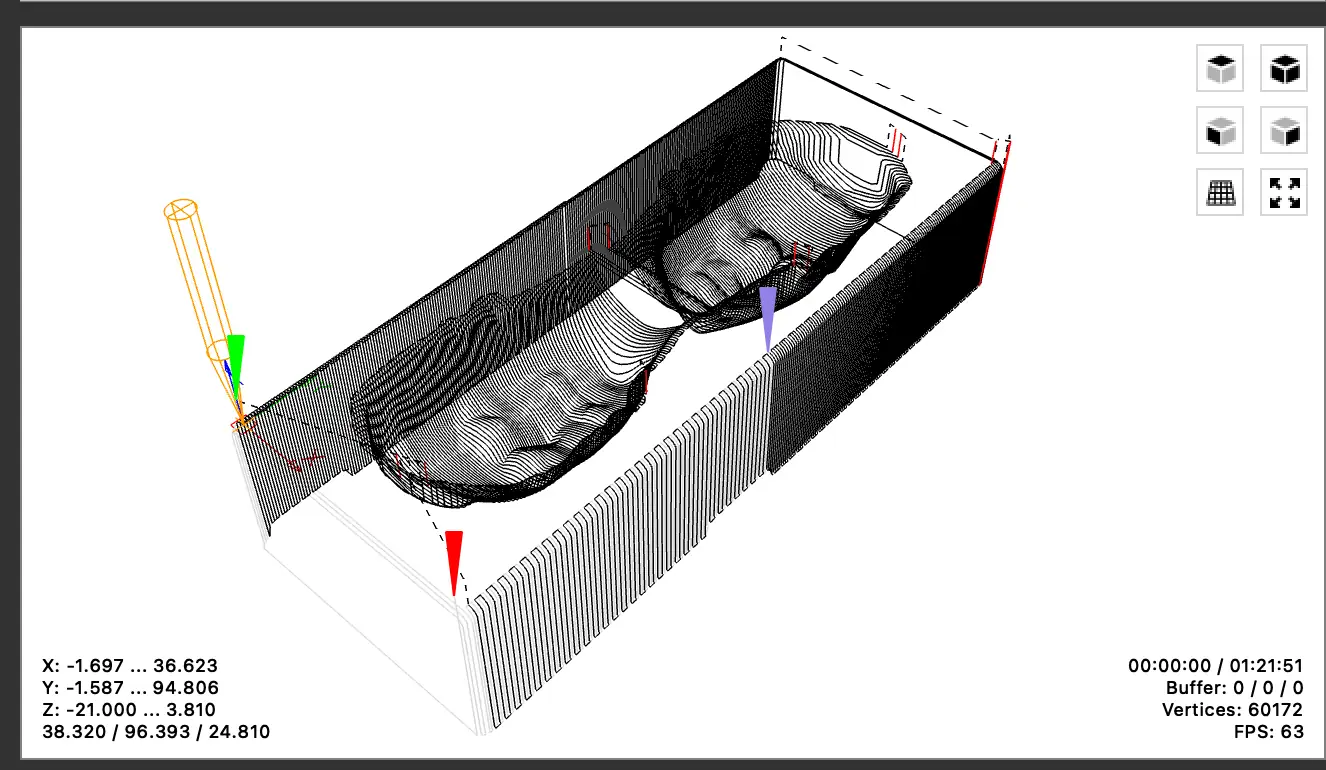
Then I found the way that I can choose the tool dimension in the Mods project, and I can operate more flexibly.
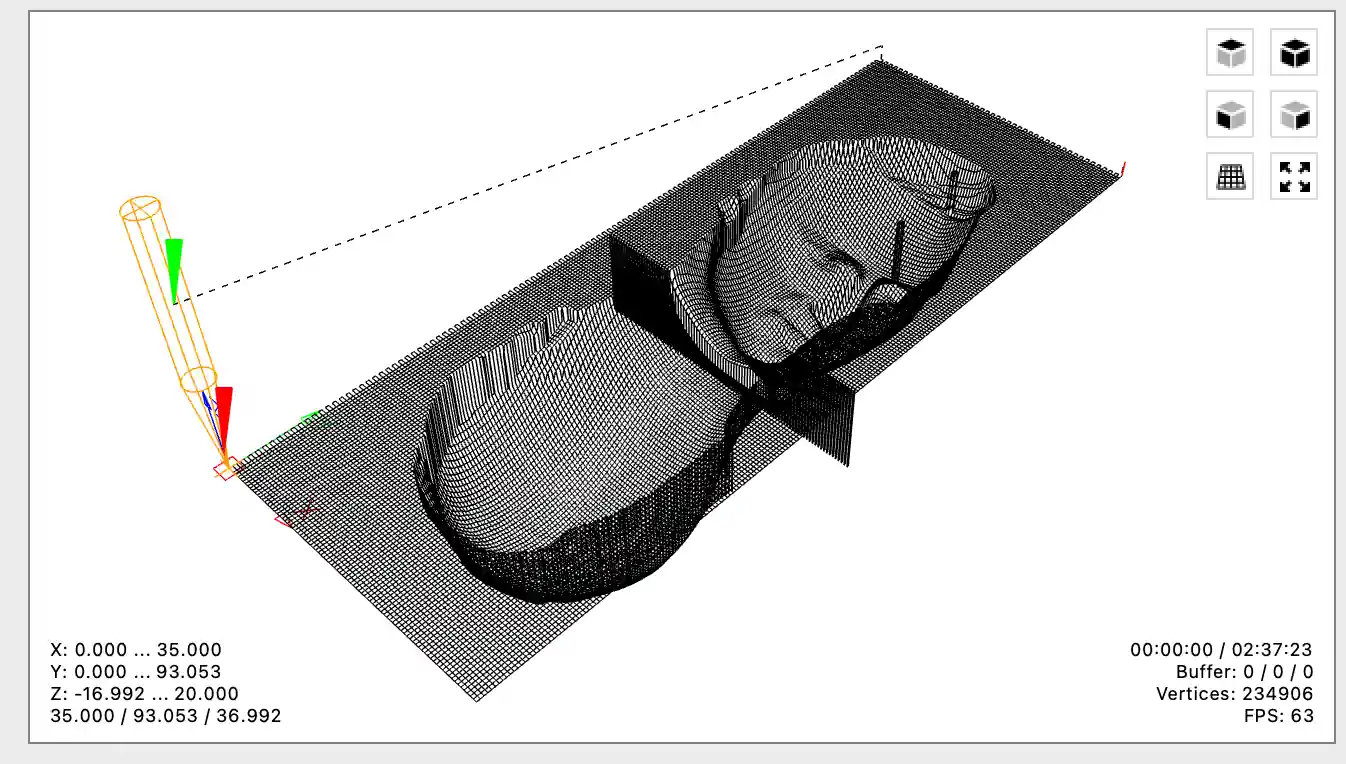
For the finish milling settings a bit different and milling time 2 hours 37 minutes

After this I changed the finishing setup and used the 0.8 mm ball end option. This gave better detail and a more realistic smooth surface, but the time increased to 2 hours 37 minutes. This was a clear lesson for me: smooth mold finish is possible, but it is not automatic. It needs experiments with milling bits, stepover, and finishing passes.
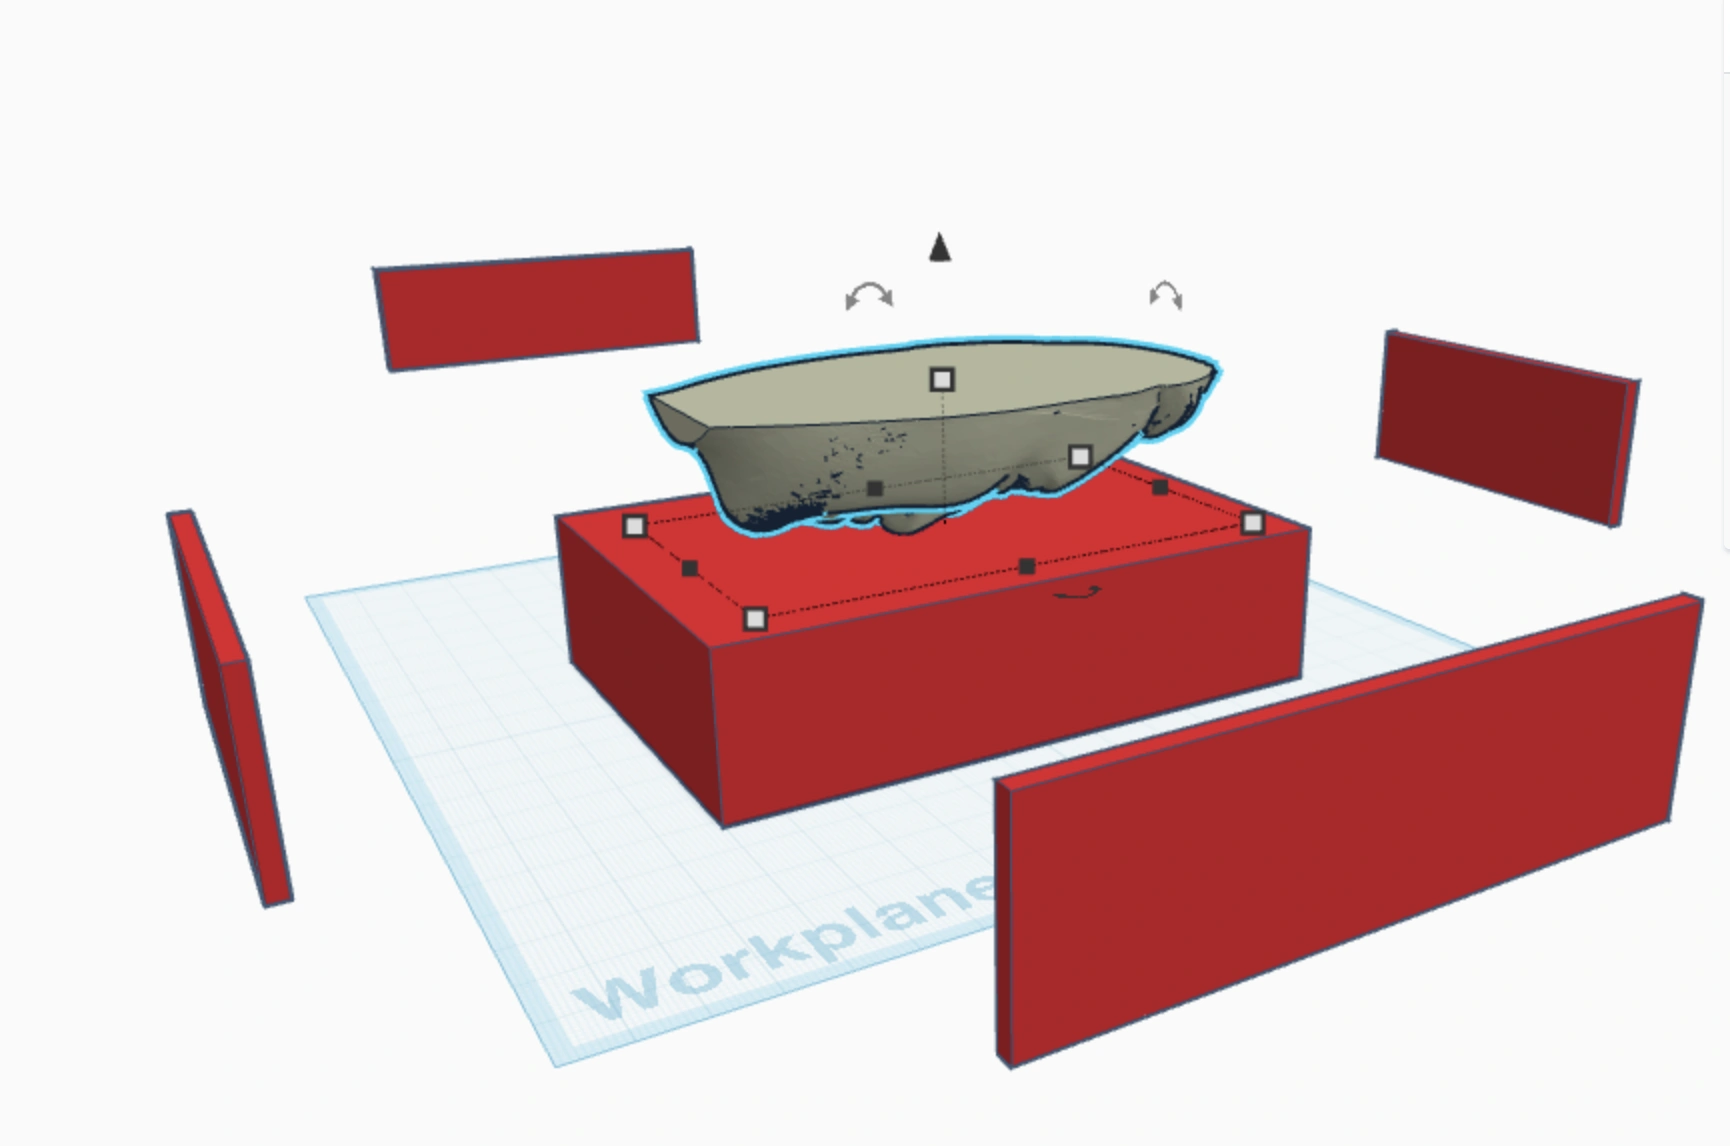
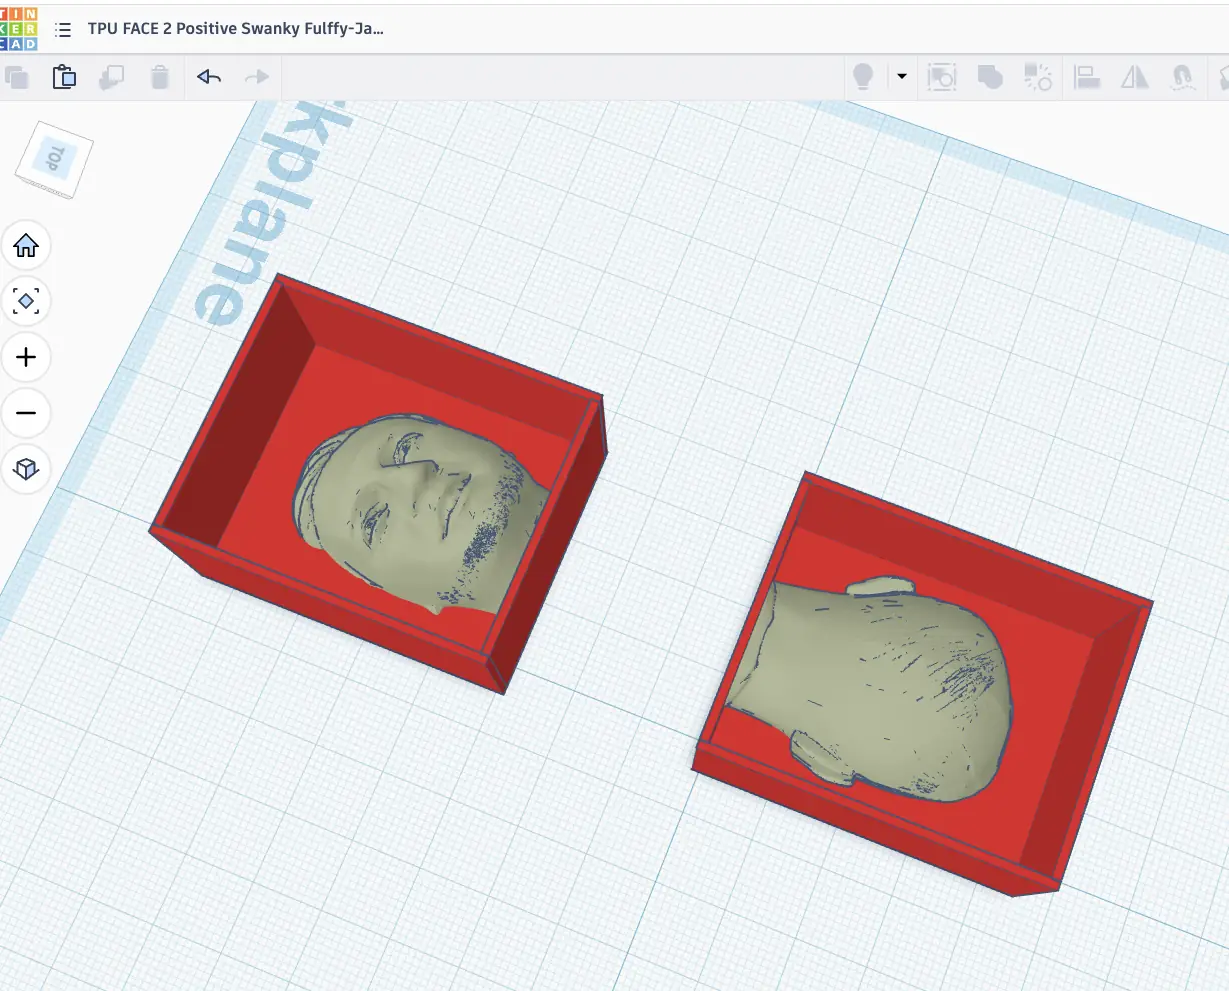
Also, because I have a shape of my head, it's good to cut it in half on the front and back part and mill together. Then I can use it like a mold and pour plaster mortar and probably tin.

Here I started to think about the mold as two parts: front side and back side. This is more logical for the head shape, because one flat one-sided mold cannot capture the full volume. Splitting the model also helps to understand where the parting line should be and where material can enter the mold.
Also for printing in TPU (Positive mould for plaster or mortar mould making – and later for metal)
Negative PLA mould
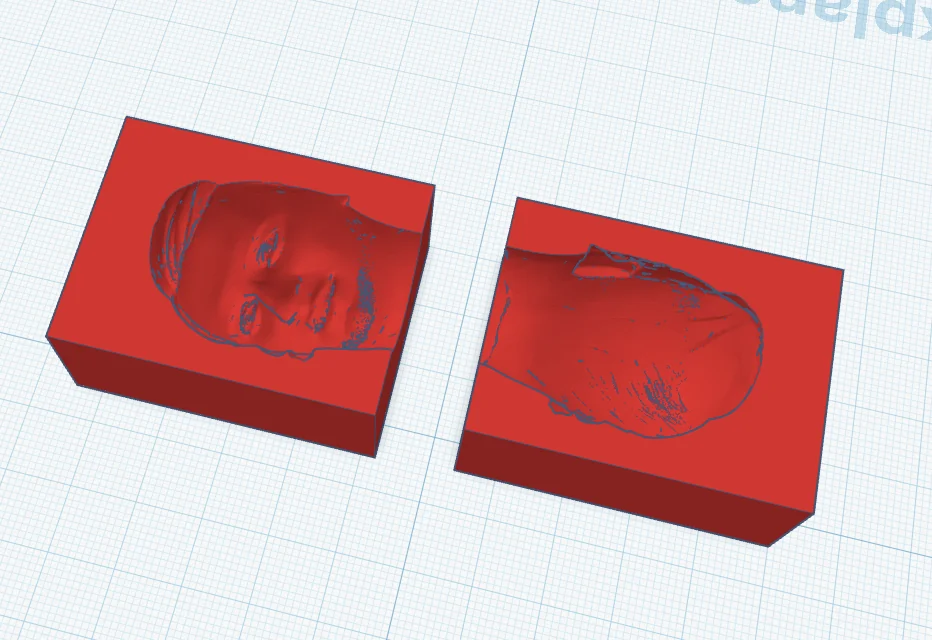
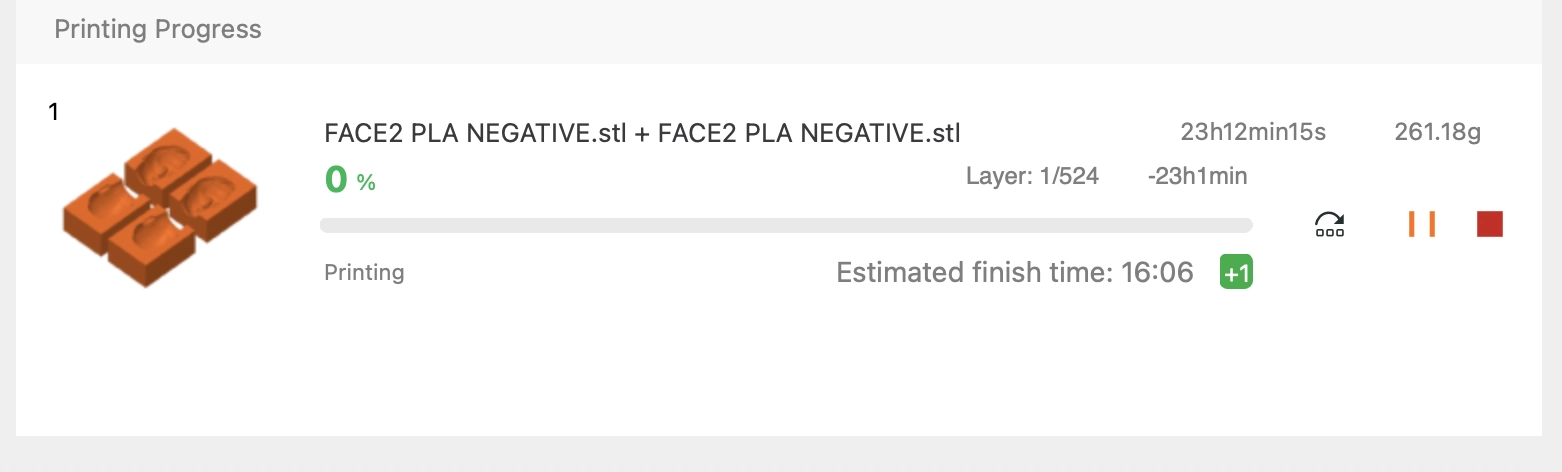
For the printed mold I prepared both positive and negative options. Printing is easier to start because I can quickly see the physical object, but it also has layer lines. For plaster or mortar this can still be acceptable for testing. For metal casting I need to be more careful, because plastic molds are not the final mold for hot metal, they are more useful for making another mold.
36 min
2 hours 37 min
Quick-setting AB moulding putty used for the final cast
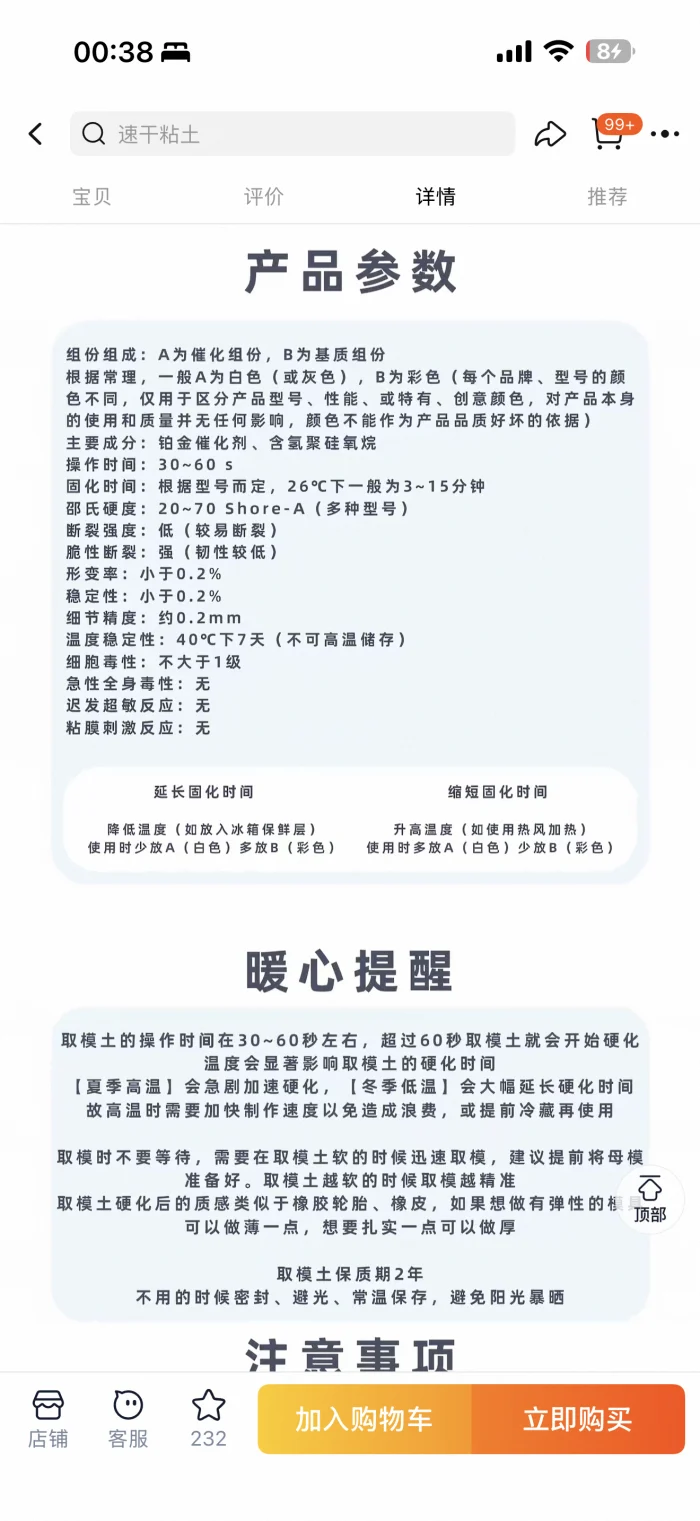
For the final cast I did not use a standard pourable silicone rubber. The quick-setting alternative I used was a two-part AB hand moulding putty sold as AB hand mould clay / hand mould silicone material (手工AB取模土 / 手握翻模硅胶材料取模胶). It comes as two parts: part A and part B. When equal amounts are kneaded together, the material starts curing quickly and can be pressed around a model to capture surface detail.
The supplier did not provide a formal downloadable SDS, so I used the product information screenshots as the available datasheet reference. According to the supplier page, the material is intended for fast manual mould making, has an operation time of about 30-60 seconds, and cures in about 3-15 minutes at 26°C, depending on the model and temperature. The listed hardness range is 20-70 Shore A, with low shrinkage/deformation and detail precision around 0.2 mm. The page also describes the material as soft, flexible, odorless, and suitable for taking impressions from clay, resin clay, glue, soft ceramics, plastic, metal jewelry, small objects, and similar craft materials.
My working process was to prepare the wax mould and the cast area first, take similar amounts of A and B, knead them quickly until the color was even, press the mixed putty into the mould while it was still soft, and demould after it became elastic and firm. The main limitation is the very short working time: if I mix too slowly or wait too long, the material starts hardening before it fully reaches the details of the mould.
- Material used: quick-setting AB hand moulding putty / hand mould silicone material.
- Reason for use: I did not have normal pourable silicone available, and this material cured much faster for a small final test.
- Mixing: combine equal-looking amounts of A and B, then knead immediately until uniform.
- Working time: about 30-60 seconds according to the supplier page.
- Curing time: about 3-15 minutes at 26°C according to the supplier page.
- Safety handling: I treated it as a chemical moulding material: gloves, clean work surface, no food contact, no inhaling dust or residues, and hand washing after use. I did not treat the supplier's marketing claims as a medical or certified safety datasheet.


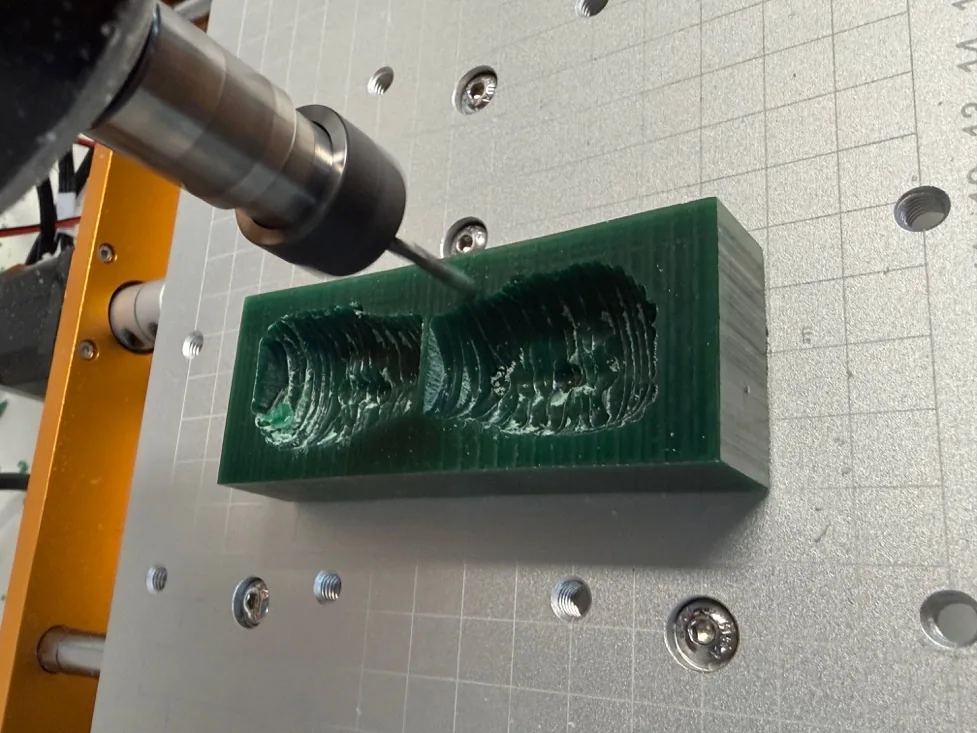
Milled mould result and cast figure
The final finishing pass took approximately two to three hours. Compared with the rough pass, the surface became much smoother and the details of the face were easier to recognize. The result is semi-smooth rather than completely polished: fine parallel toolpath lines are still visible, especially on the forehead, cheeks, and the flat area around the cavity.
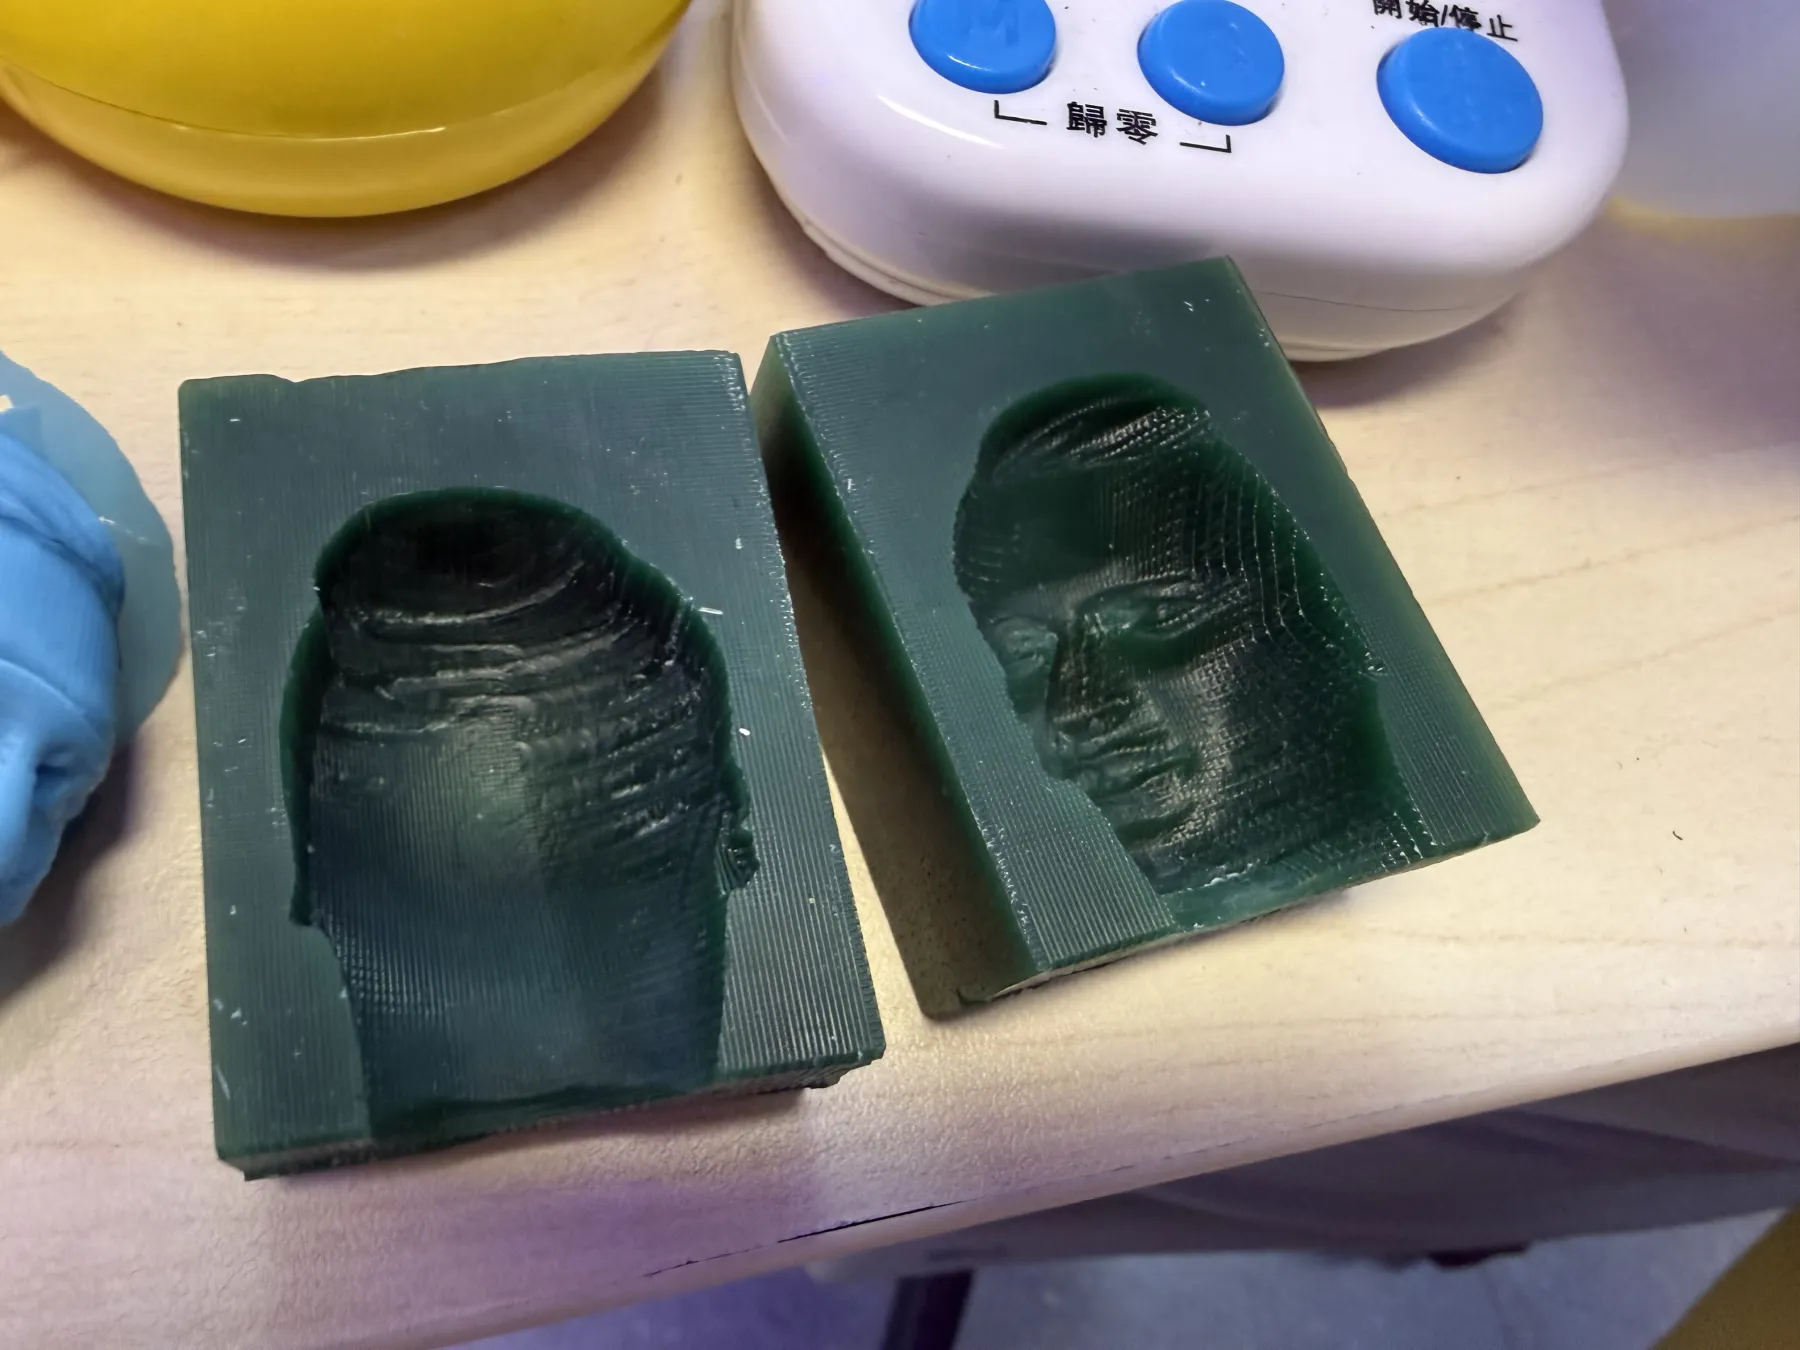
The two milled halves after the finishing pass. The smaller ball-end mill improved the facial detail and surface quality, while the remaining raster lines show how the CNC tool moved across the wax.
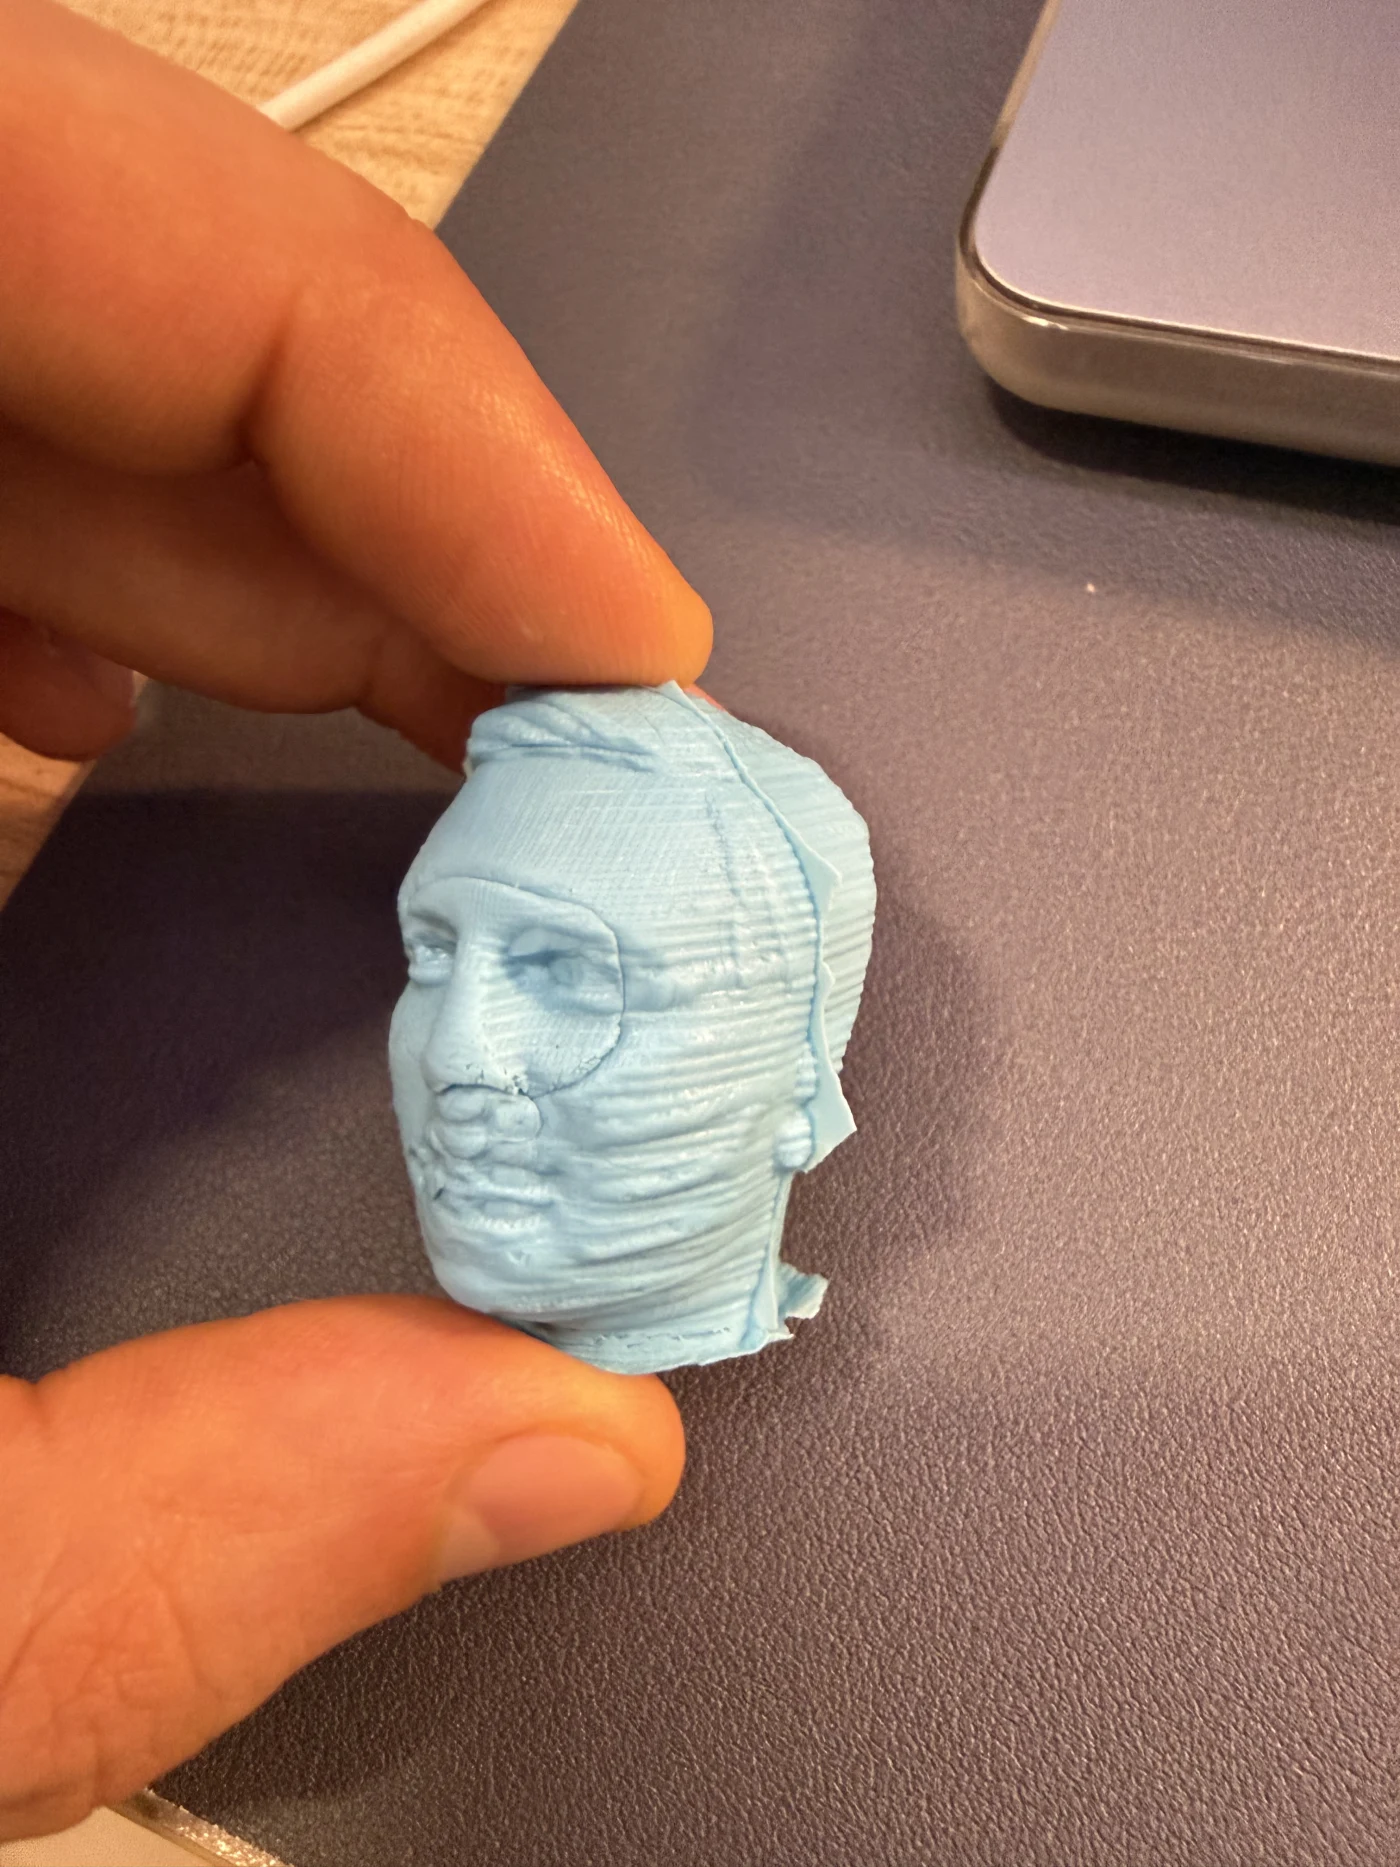
The final cast figure shows the result from the mould workflow. The shape is recognizable, but the surface still records some toolpath texture from the milled mould, which confirms that the mould worked and also shows where a smoother finishing pass would help.
The video records the completed two-part mould and makes the difference between the smoother areas and the remaining toolpath texture easier to see.
I did not have standard pourable silicone available for the final mould-making step, so I used the quick-setting AB moulding putty documented above as an alternative. This material cured much faster and allowed me to continue testing without waiting for silicone. Because it reproduced the surface closely, it also transferred and revealed the CNC toolpath. This was useful evidence that the mould was functional, but it showed that another finer finishing pass, a smaller stepover, or manual polishing would be needed for a fully smooth cast.
For this final test, the quick-setting AB putty was useful because it made the surface result visible quickly. The limitation is that it has a very short working time and is less controllable than a slower pourable silicone system. For a more controlled final cast, standard silicone would still be better because it is more stable, flexible, reusable, and easier to pour into small details before curing.
The main trade-off was time versus finish quality. A rough pass was fast, but it left an obviously machined surface. Spending another two to three hours on finishing produced an acceptable semi-smooth mould with recognizable detail, although completely removing the production marks would require considerably more machining or post-processing.
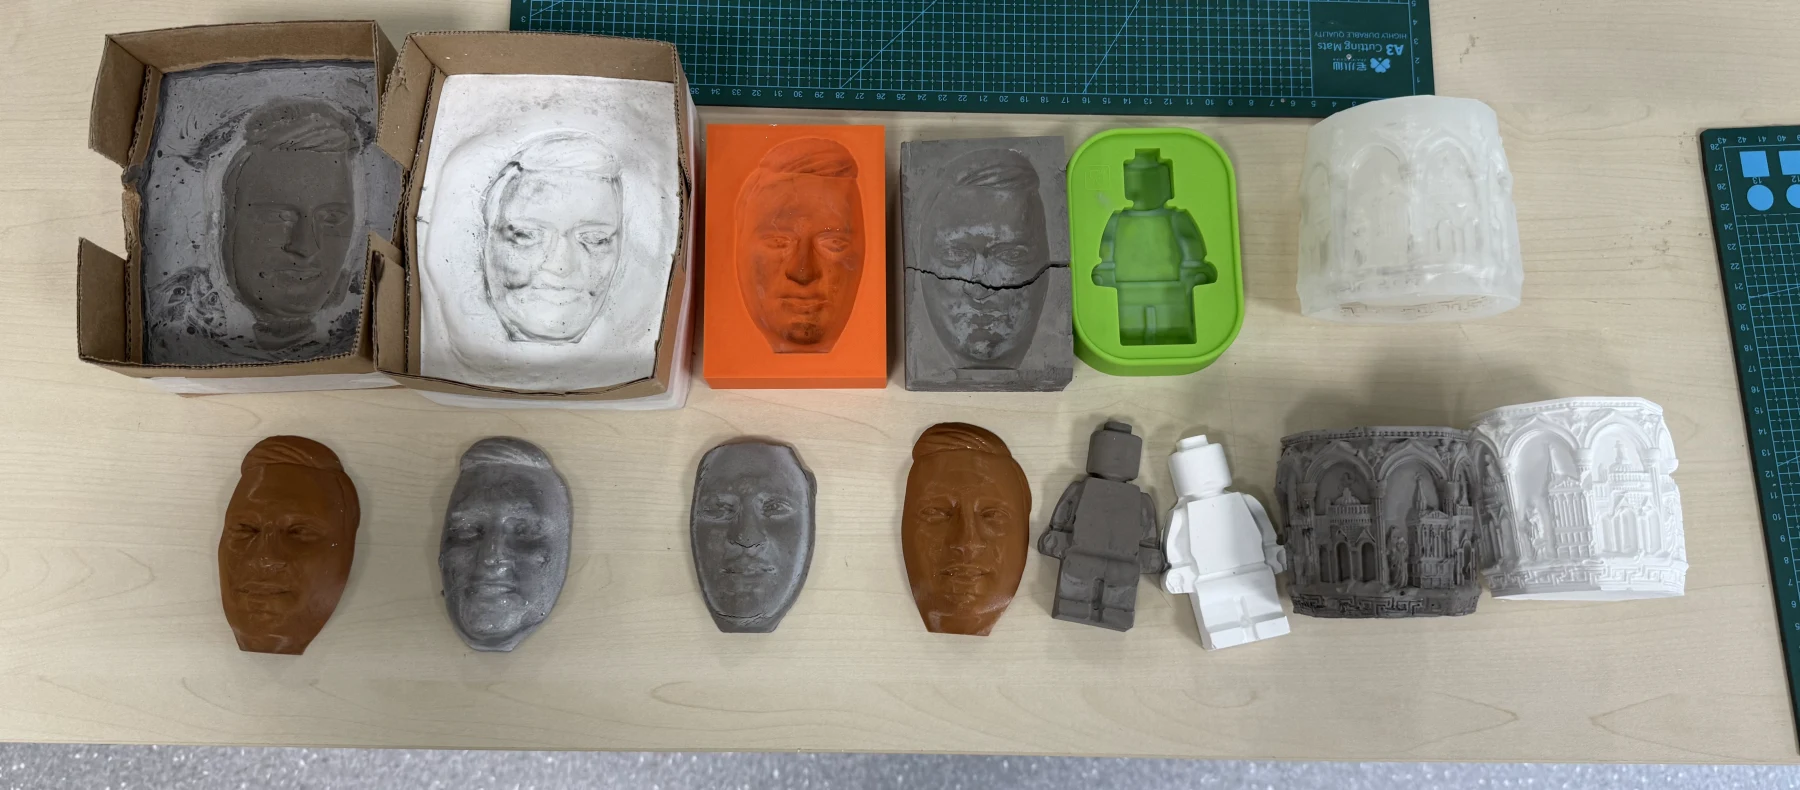
Final overview of my Week 14 molding and casting experiments: printed and milled moulds, plaster and mortar tests, PLA waste casting, tin casting, and the face cast results. Seeing all of them together made it easier to compare material behavior, surface quality, and process limitations.
Reflection
1. Safety data sheets and safe handling
I reviewed safety information for the materials I used or tested: tin-based solder alloy / tin metal, gypsum plaster, construction cement, and metal or non-metal powders. The main safety points were ventilation, dust protection, eye protection, gloves, and keeping plaster or cement molds completely dry before any metal casting.
2. Test cast comparison
I tested several casting approaches. PLA waste in a silicone mold worked as a quick experiment, but it was hard to press into details smoothly because the melted plastic stayed sticky and viscous. Plaster was easy to mix and set quickly, while mortar/cement was slower and needed more curing time. Tin metal cast successfully into the silicone mold, but it required much more safety control because of heat, fumes, and splash risk.
3. Printing vs milling molds
3D printing a mold is fast and flexible, and it is good for testing shapes quickly, but printed molds can show layer lines and the material choice limits temperature resistance. Milling a wax mold can create a smoother and more detailed surface, but reaching a smooth milled result requires knowledge and experiments with milling bits, tool diameter, roughing and finishing passes, and CAM settings. In the beginning my milled example was not as smooth as needed, so I had to continue testing tool choices and finishing settings.
4. Smooth surface finish and toolpath
The finish milling pass improved the surface compared with the rough milling pass and produced a semi-smooth final mould. It took approximately two to three hours, but fine raster lines remained visible and were reproduced by the quick-setting material. The surface quality depends strongly on the bit, stepover, toolpath direction, and finishing time. The important lesson is that a smooth mould is not only a design problem; it also depends on machining strategy and post-processing.
5. Mold process used for casting
For my mold process I used 3D printing and then mortar and plaster to create mold experiments. I also did wax milling to create a mold. These tests helped me compare printed molds, cast mineral molds, and milled wax molds before choosing the better process for a smoother final casting workflow.
6. Two-part mold alignment
One evaluator feedback was that when using a two-part mold, it is recommended to design placeholders or registration keys into the mold so the two pieces stay in place when pouring. I agree with this. In my current two-part head mold, the halves can be placed together visually, but the alignment is not mechanically constrained enough. Next time I would add small matching pins, pockets, cone-shaped registration features, or an external clamp frame around the mold so the front and back parts lock together more reliably during casting.
Final conclusion
This week was more experimental than I expected. In the beginning I thought molding and casting was mostly about making a shape and pouring material into it, but every material behaves in its own way. PLA waste needs heat and pressure, plaster is fast but can trap bubbles, mortar is slower, and metal casting needs much more safety and preparation. I also understood that mould quality depends not only on the 3D model, but also on the production process. A printed mould is fast, but it can show layer lines. A milled wax mould can be smoother, but only if I choose the correct bit and spend enough time on finishing. The final two-to-three-hour finishing pass gave me an acceptable semi-smooth result, even though some toolpaths remained visible. Because standard pourable silicone was unavailable, the quick-setting AB moulding putty allowed me to complete the test and clearly showed where further finishing was still needed. For the future I would make small toolpath and material tests first, because they can save several hours before milling the complete mould, and I would add registration keys to any two-part mold so the halves stay aligned during pouring.