Week 7
Assignment - Computer-Controlled Machining
-
Group assignment:
- Complete your lab’s safety training
- Test runout, alignment, fixturing, speeds, feeds, materials and toolpaths for your machine
- Document your work to the group work page and reflect on your individual page what you learned
-
Individual assignment:
- Make (design+mill+assemble) something big
From Assignment Details.
Group Assignment
Training
- Complete your lab’s safety training: Yes
- General Procedure: CreativeSpark-CNC.pdf
Reflection
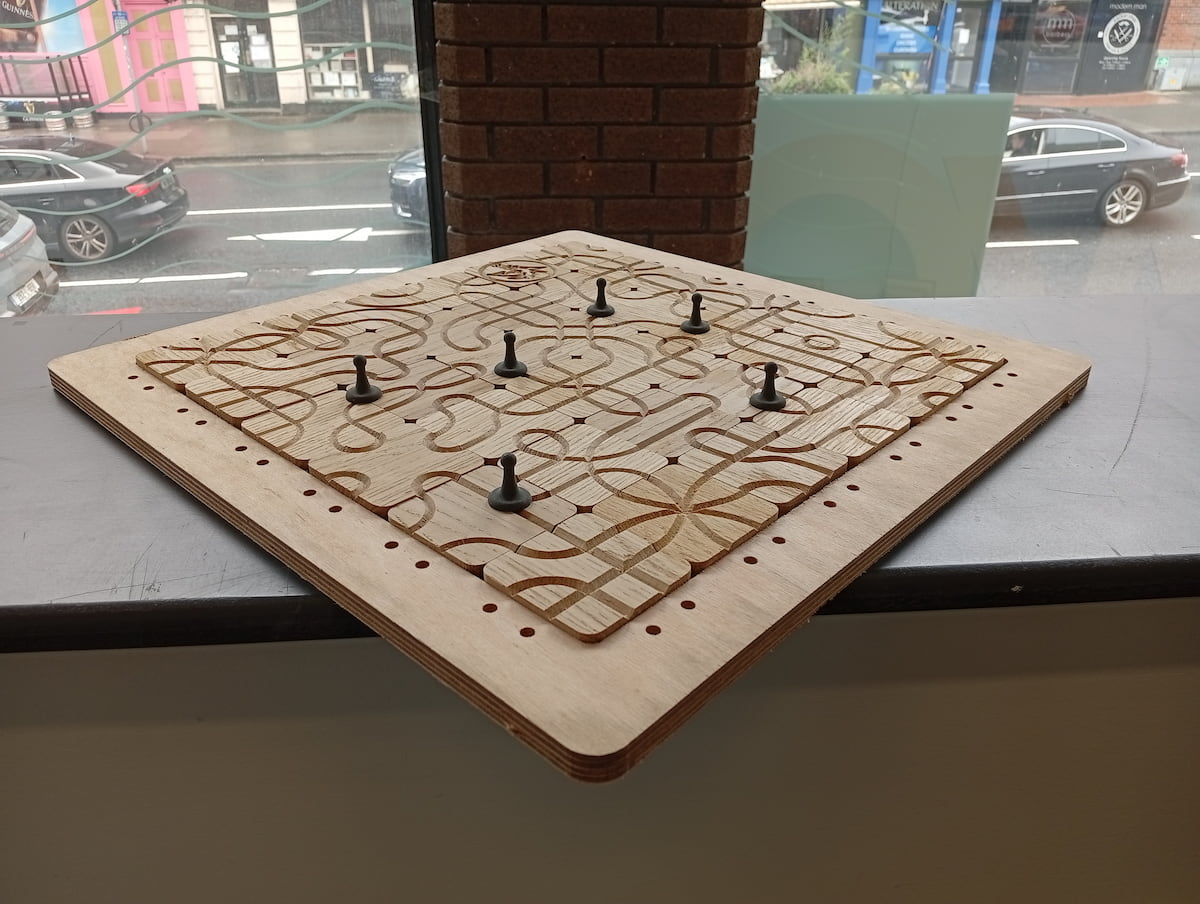
In my individual assignment, I used a sheet of Oak (It was a kitchen cabinet door!). I used Plywood for the Base.
Oak is a hardwood. It was dense and harder on the tools than plywood or MDF would be. I was really happy with the finish and the router table made taking off the tabs very easy and the result was clean, almost didn’t need sanding. I was very happy with the finish.
V-Carve was a great option to go from digital design to physical. It’s a verbose process, with great possibility as a result because everything is customisable. You need to visualise and orientate parts for cutting, but some steps, like nesting and solid tool operations make the software more modern.
Tools, Feeds and Speeds
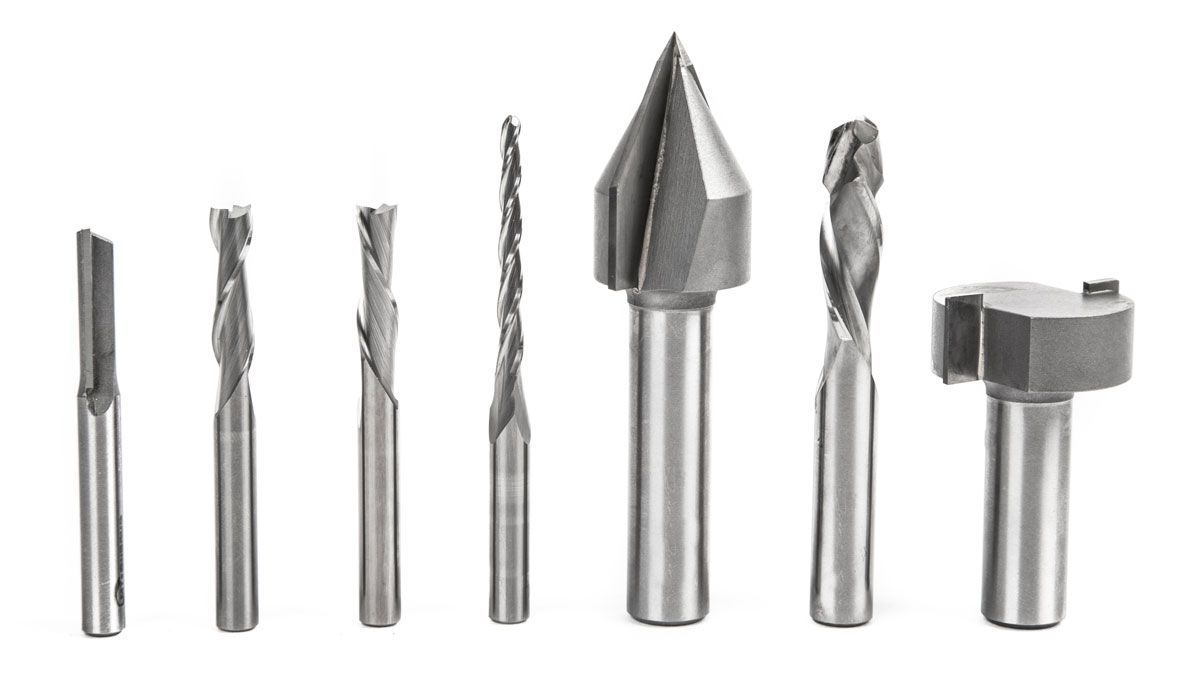
Carbide or HSS bits, Upcut, Downcut, Compression, and V-cutters as per image above, Chipload is available from the manufacturer,
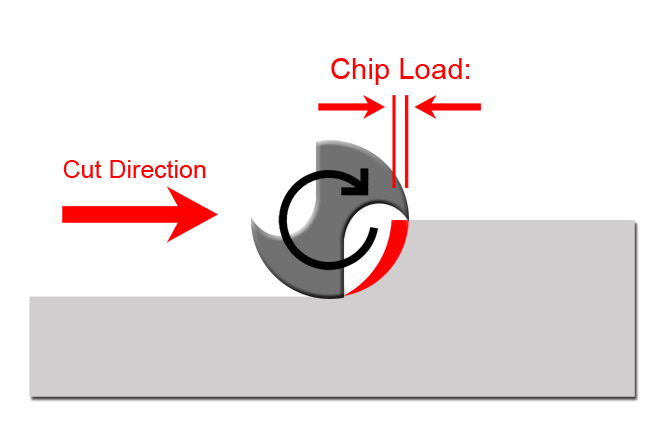
Chipload = Feed Rate / (RPM x no. of flutes)
$$ \text{Chip Load} = \frac{\text{Feed Rate}}{\text{RPM} \times \text{Number of Flutes}} $$
Runout
Runout is the amount that the machine deviates from square. The Shopbot is a very rigid machine, with aluminium rails on the gantry and rails of the machine, it uses rack and pinion on its X Y and Z axes, and it very rigid.
In the past, I used a machine with a slightly loose Z-plate. We actually noticed with V-Carve profiles, because if your V-bit wobbles, the tip moves , and you get a small flattening at the bottom of your V channel.
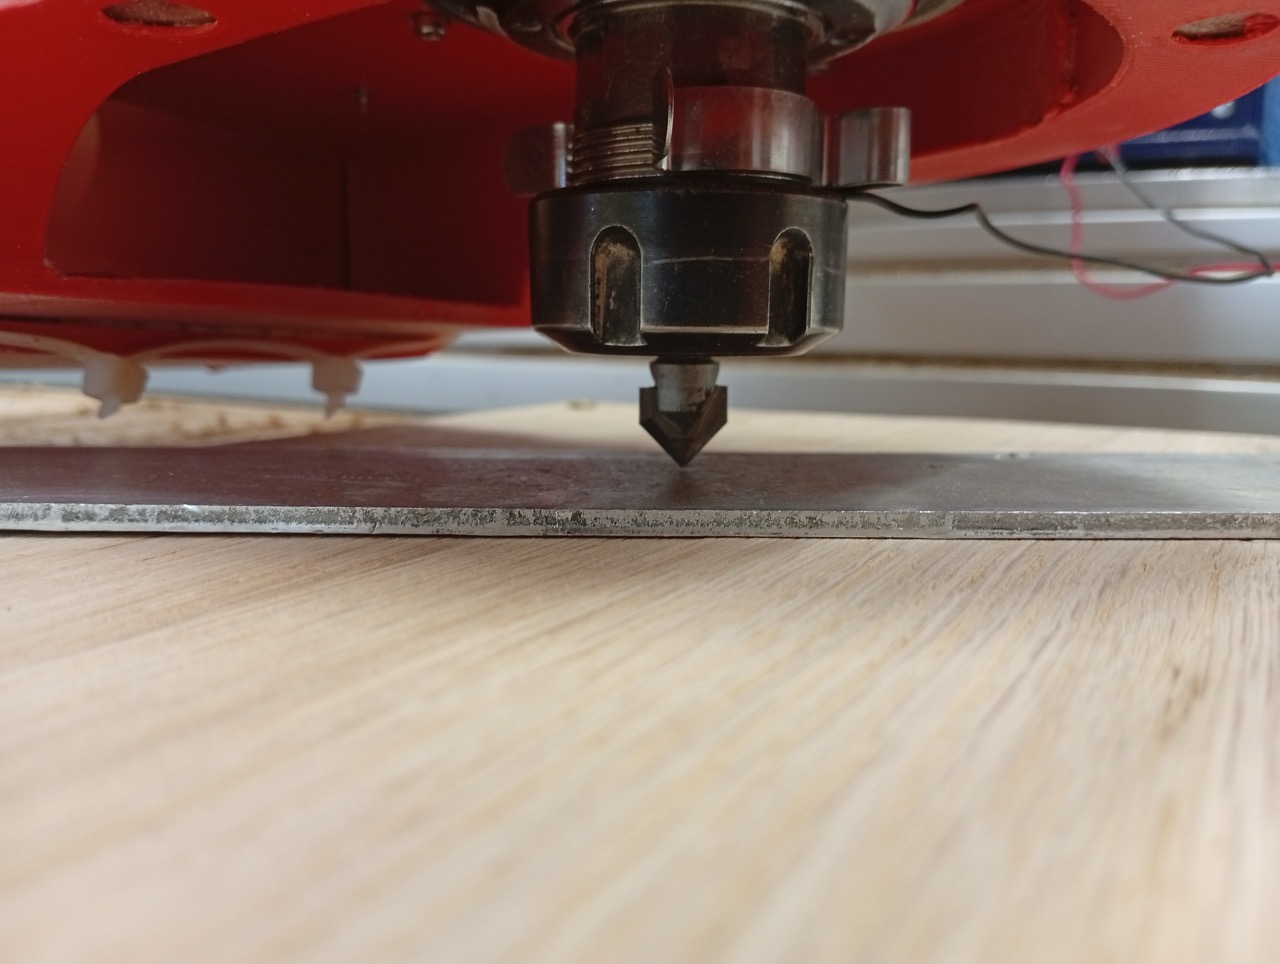
To align
To set up run the XY zero calibration routine. It resets the X and Y origin by moving the machine to the hardstops, and then back to a preconfigured position (margin from sensors to cutting bed, set up when calibrating the machine initially).
Then run the Z zero (C2 on the SB3 control program). Get the plate, and the clip from above the spindle.
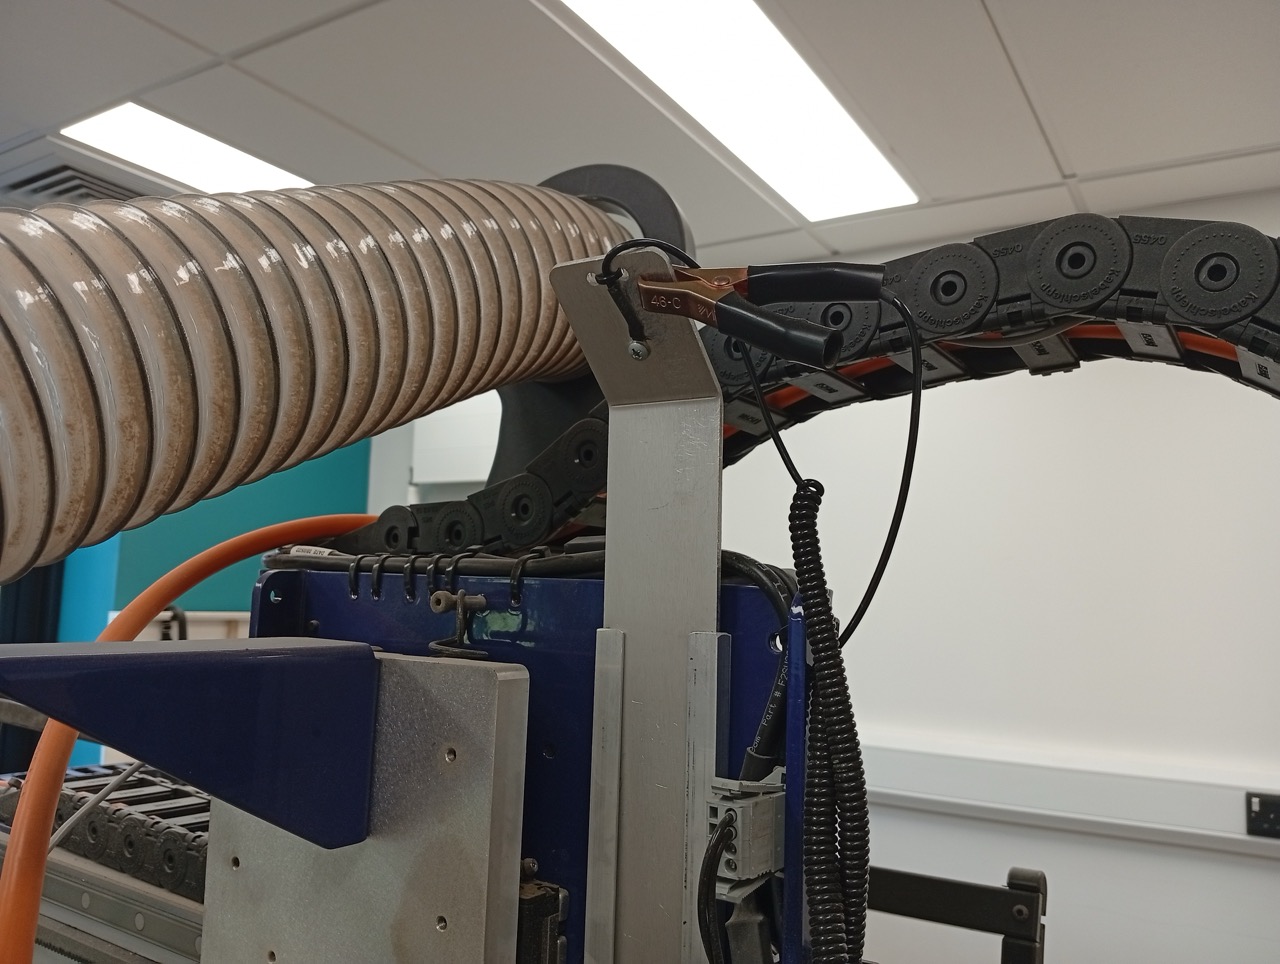
Put the clip around the neck of the Spindle; place the plate on the flat, on the surface of the material.
Run the command C2, or the Z button on the red SBC panel.
The machine will touch off the plate (twice), and subract approx 2.1mm, for the thickness of aluminium.
Fixturing
Fixing the Timber, is done by screws on a sacrificial board. There are machines that have vacuum tables and clamping rails.
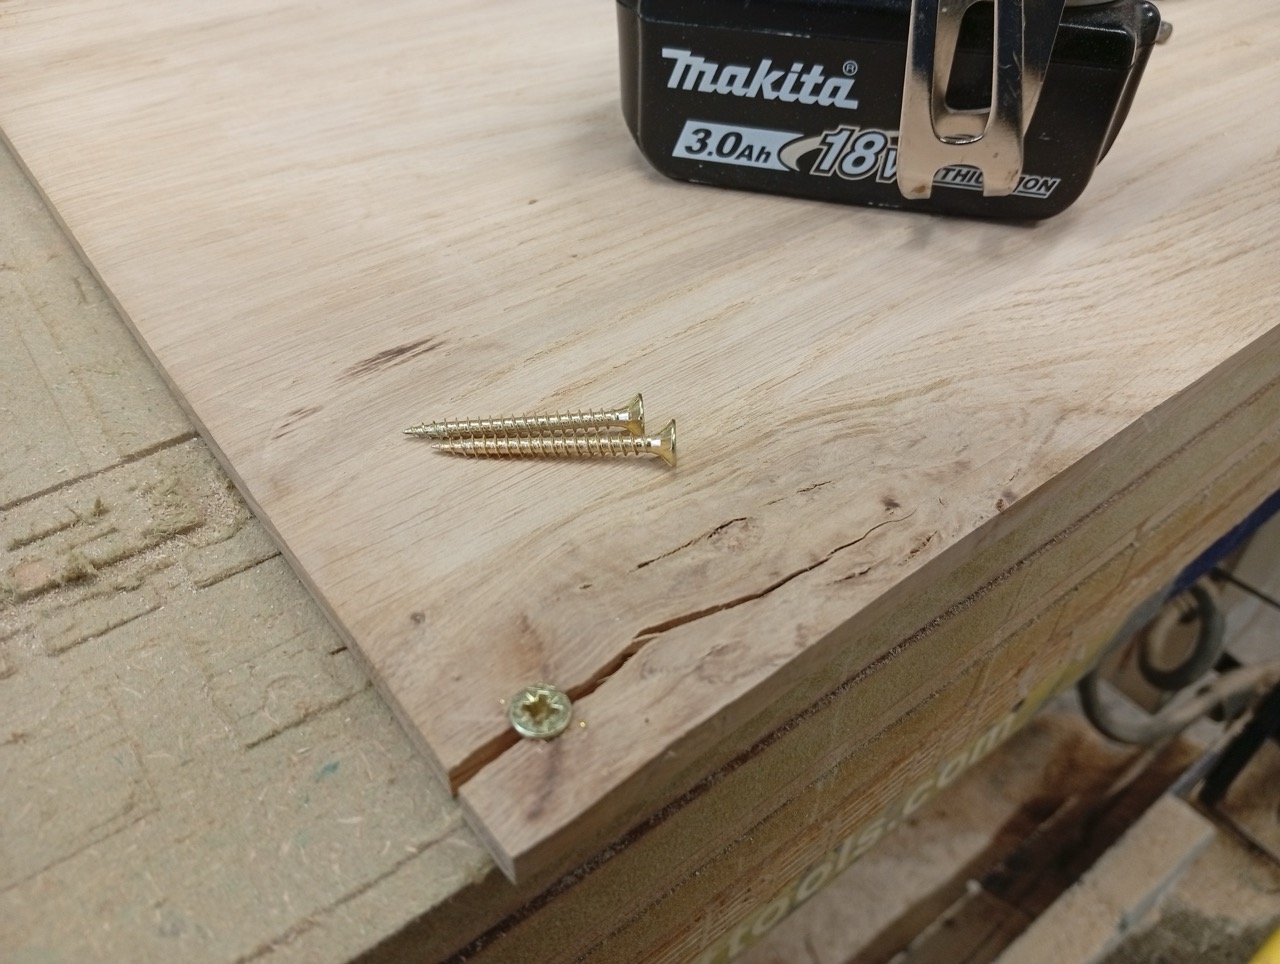
Small split in the oak, added more screws and left a margin of approx 30mm around the workpiece.
Other notes:
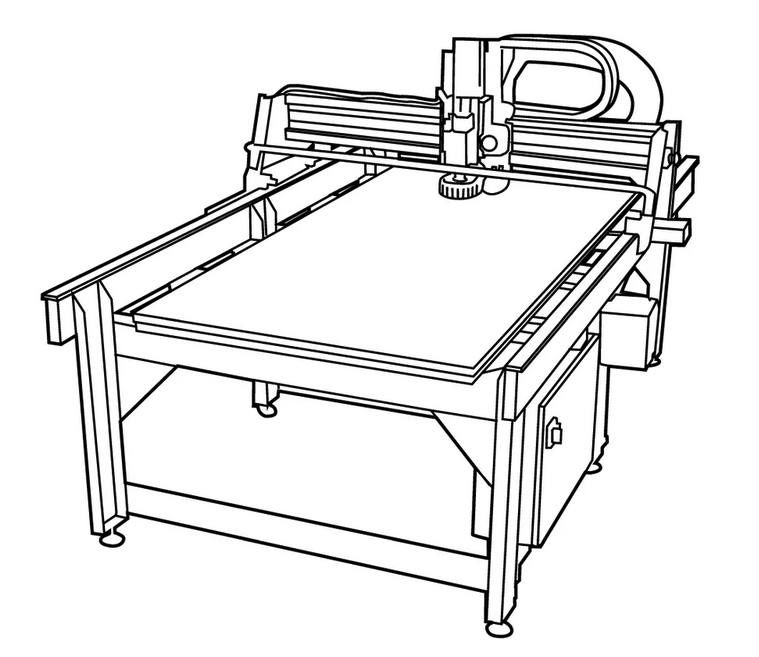
Machine Spec
The Shopbot is a factory-built CNC Router able to cut wood, plastic, foam, composites and some soft metals. Maximum material size: 2440 x 1220 x 150mm. Many different sizes and types of cutting bits can be used.
PPE Requirements
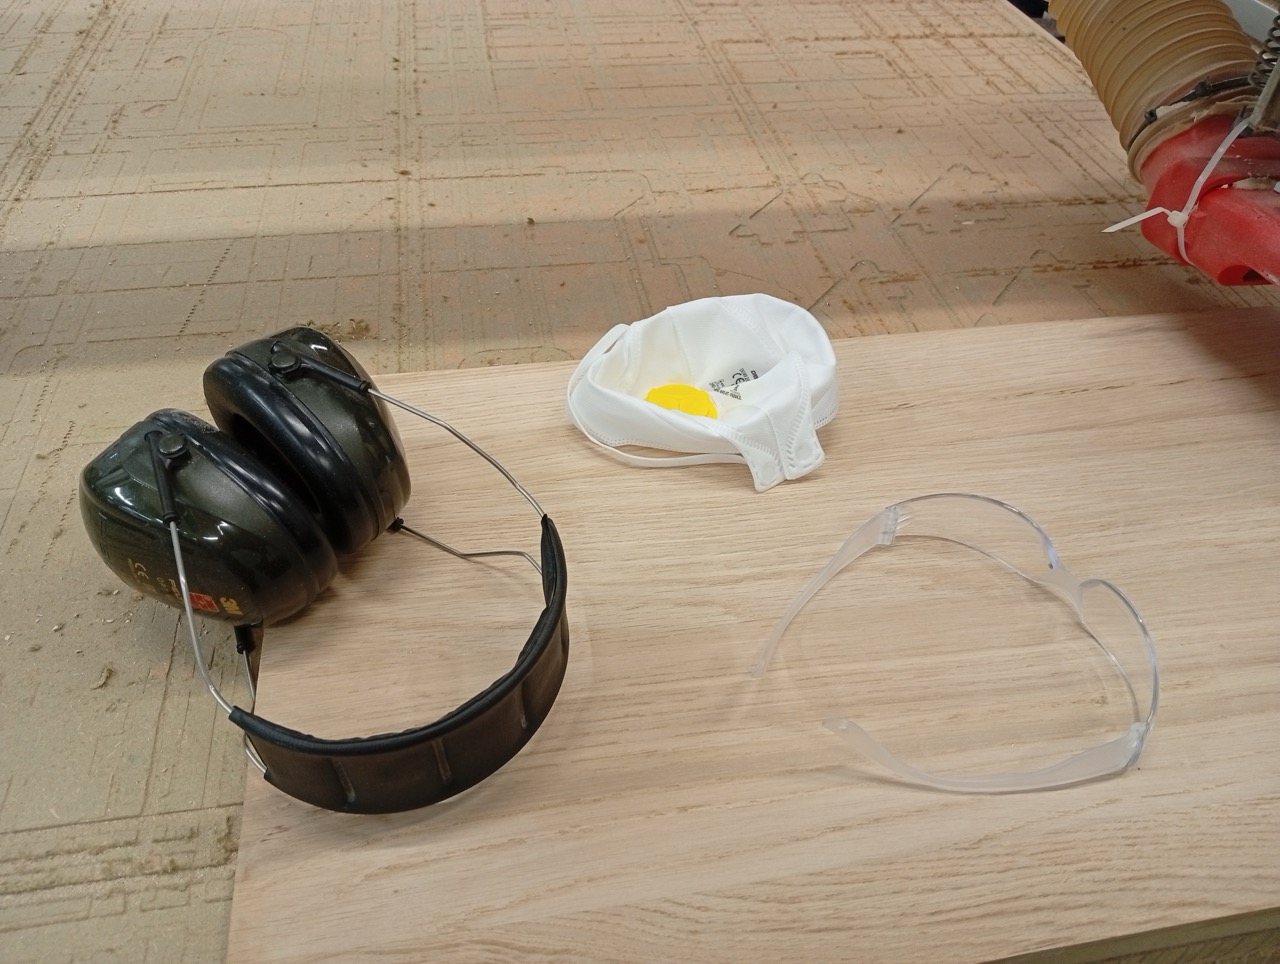
- Dust Mask (or, even better, respirator)
- Eye protection
- Ear Protection (Ear Plugs, or Ear Defenders)
Hazards, Dust Extraction
- Cutter
- Carbide or HSS bits, router spins at 20000 - 24000 RPM,
- Loose Material and Flying Debris
- Crush Injury, fast moving machine with heavy and rigid frame
- Dust particles
- Fire, friction
- Electrical, 3-phase machine
- Above Active Noise Threshold
Emergency Stops
Located on the remote (mounted on the machine beside the computer), and on the gantry (at the main lab side). During operation, the mouse is locked to the stop button, so any press on the computer, pauses the machine and prepares for a stop. If not an emergency, you can press spacebar to pause.
Individual Assignment: Make (design+mill+assemble) Something Big
The Computer
We need the file to be cut, in DXF format. V-Carve Pro and Shopbot Controller SB3 are installed on the machine already.
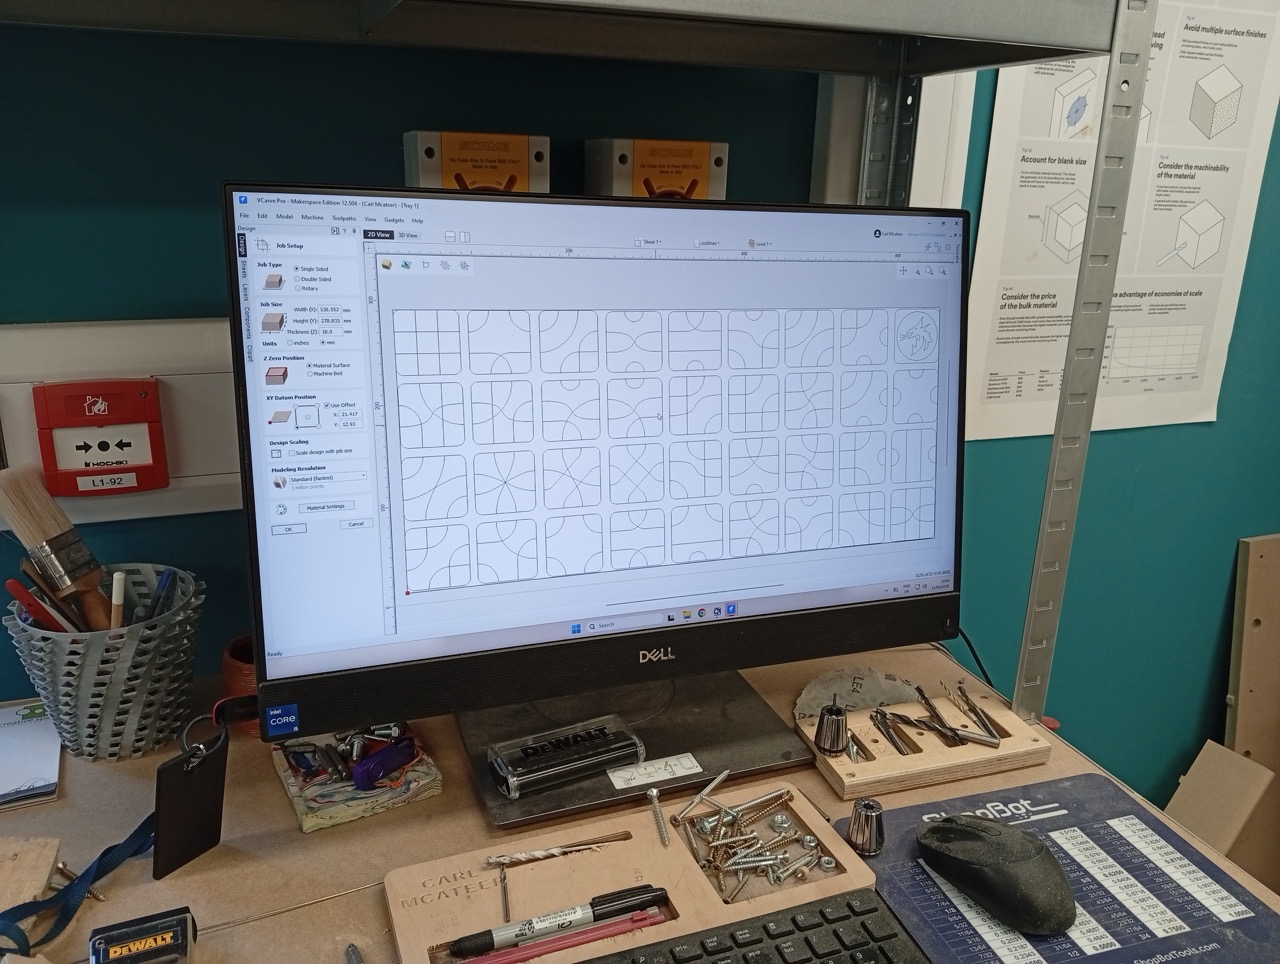
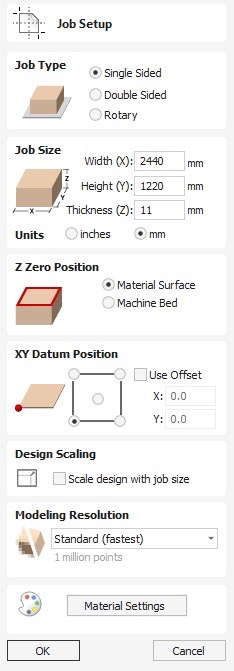
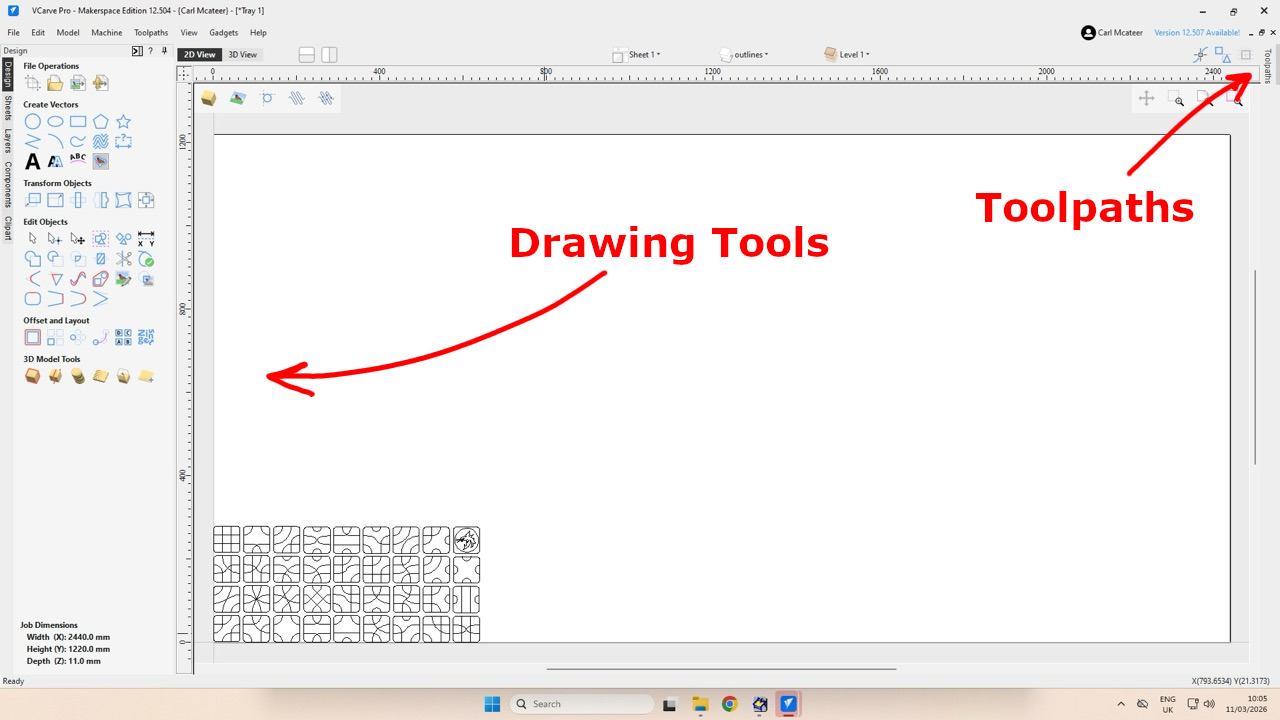
This shows the first screen
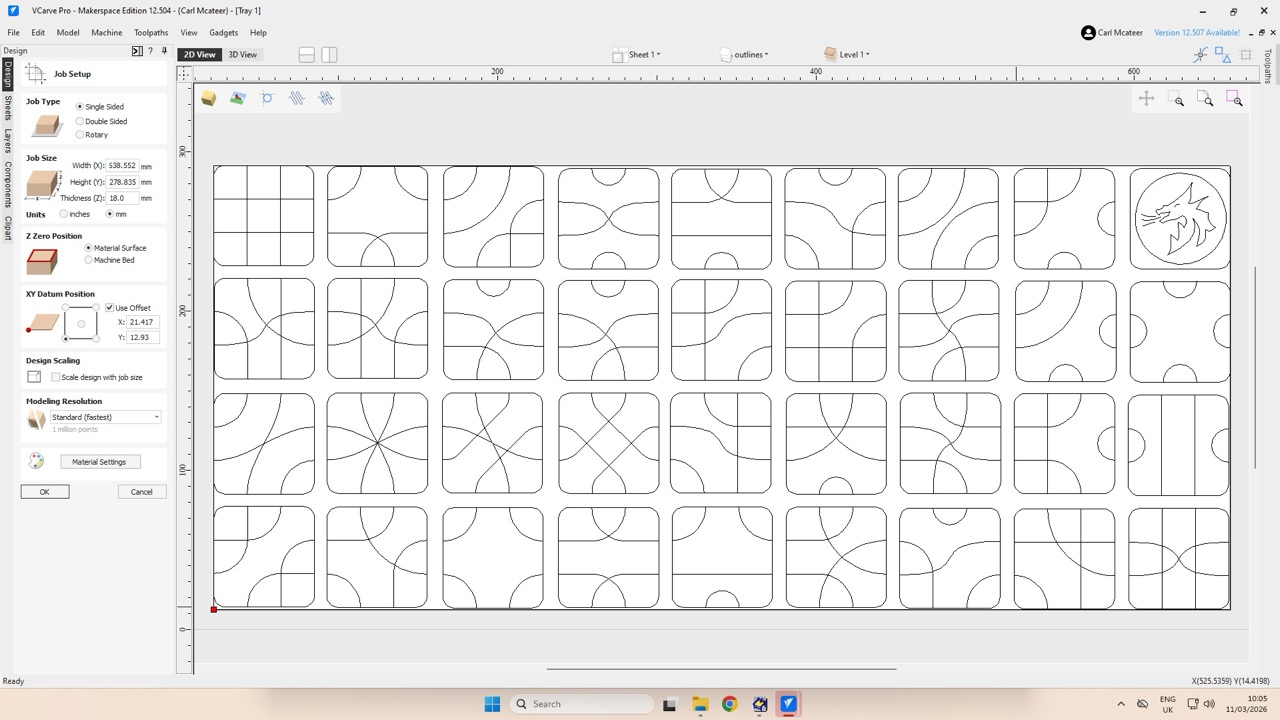
This is the setup screen,
Generally, you have drawing and setup tools on the left, and assign toolpath operations on the right
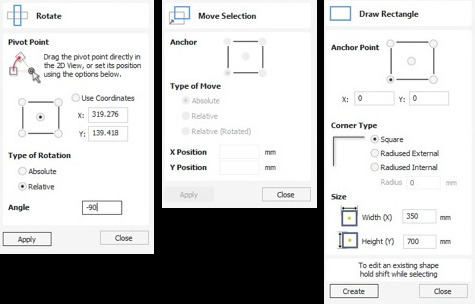
Use the tools, rotate, move and draw guidelines representing your material edges (leave 30mm at the edge for mounting). Like so,
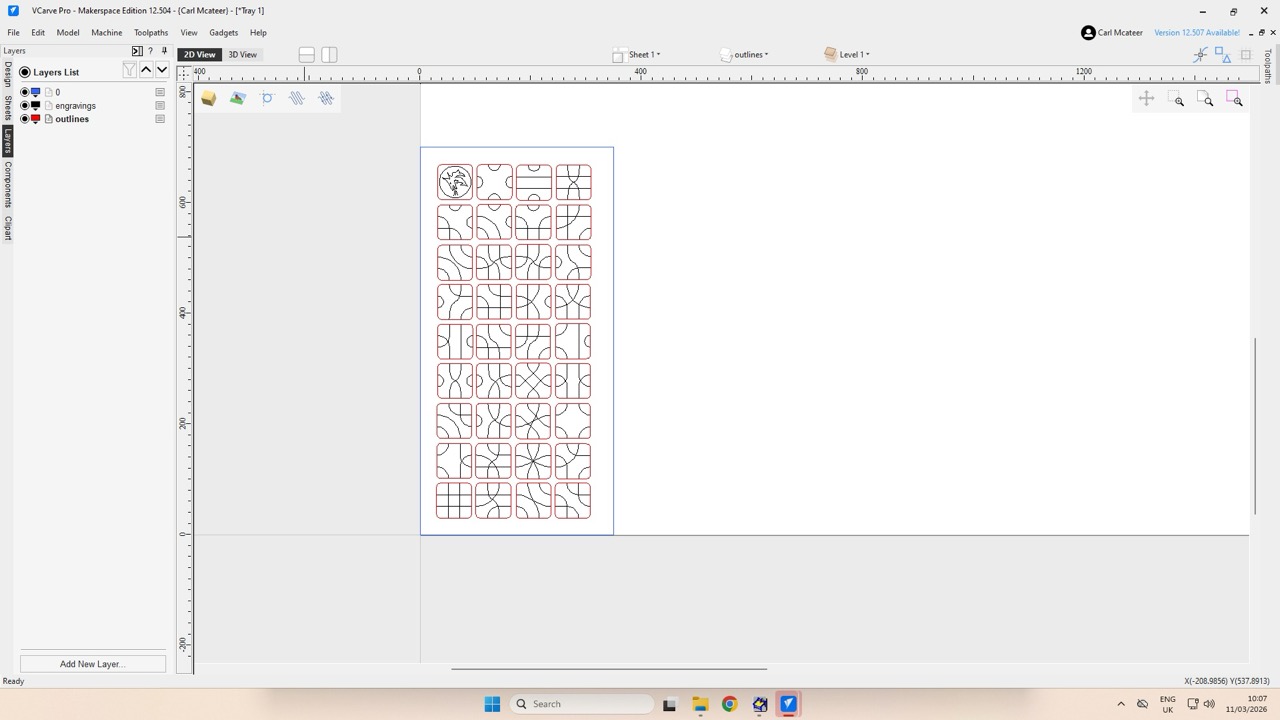
On the left, select Layers, and you’ll find layers from your .DXF. Lightbulb to show/hide, colour to change line colour. Active layer is the bold one.
Toolpath Panel (Dockable/hidden on the right, hover over where it says Toolpaths to show it, pin it to keep it open):
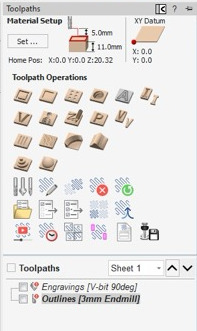
Main Toolpaths
-
 Drilling Toolpath - cut holes to the diameter of the tool with this centre-drilling option
 -
 Profile Toolpath - follow a line, specify a depth, align inside/outside/on the line, easier if closed,
 -
 Pocket Toolpath - Remove the entire of a shape with the current tool, specify the depth, be aware of rounded internal radii
 -
 V-Carve Toolpath - uses a V-shaped bit to carve text, rises into the corner to produce bevels,
 -
 Roughing Toolpath - first step of a 3D workflow, remove material in rough contours, to prepare for a smaller tool for finer work
 -
 Finishing Toolpath - finishing 3D toolpath, smaller toolpath, vary stepover to adjust time vs. quality
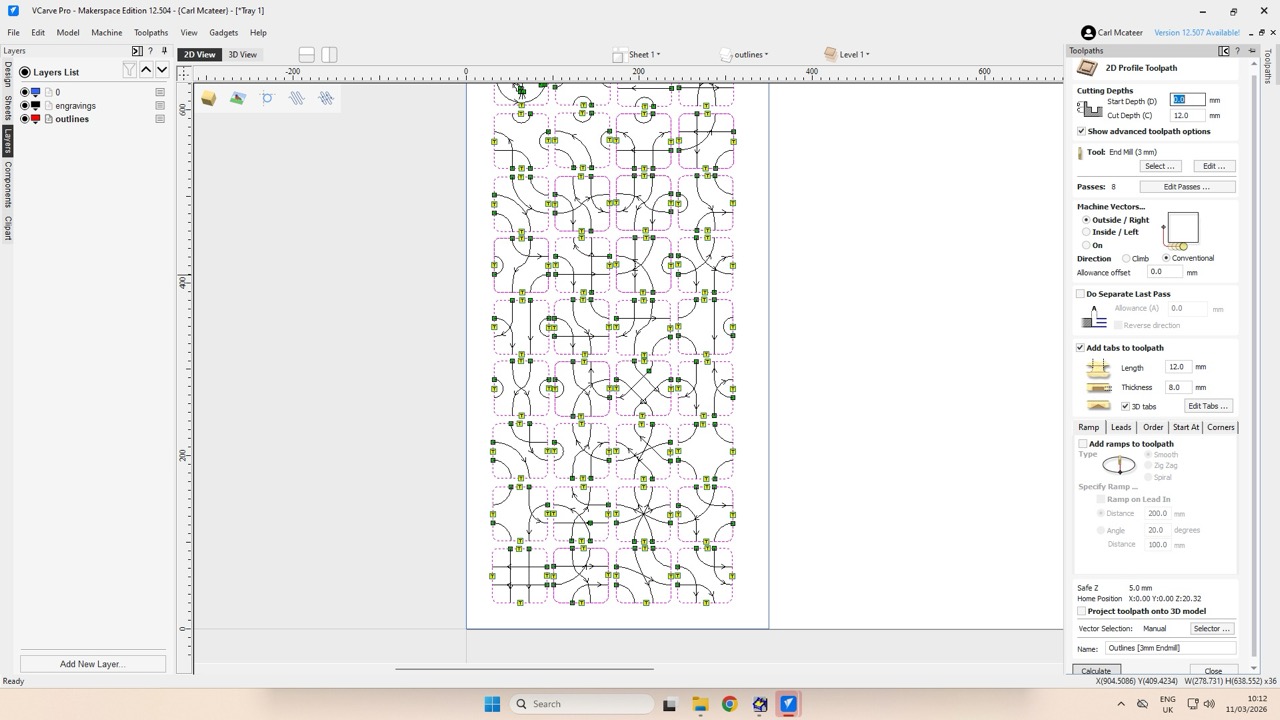
For profile toolpaths,
Select the icon from the right dockable panel:
Selected geometry appears with pink dashed effect. Tabs are show with the little yellow icons.
This is a form to fill out, go through each step, before pressing Calculate at the bottom.
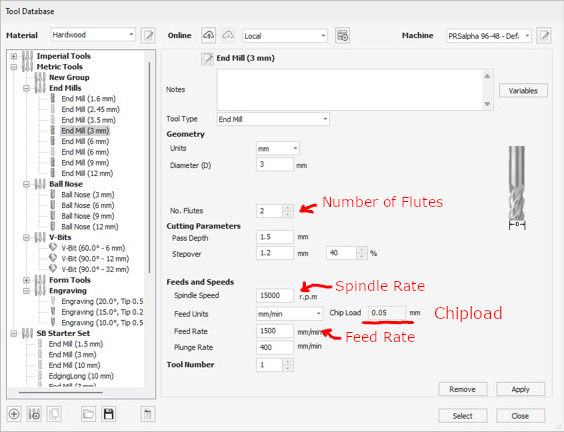
This is your tool selection…
Main parts are to fill in the cutter type and dimensions, highlighted Feed rate, Spindle rate and number of Flutes. The Chipload is calculated on this screen, compare with your manufacturers recommendations, and adjust Feed or Speed to adjust.
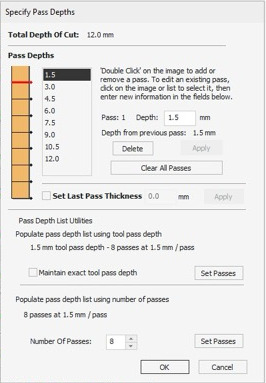
You can set your pass depths with these settings. Click Edit Passes...
Add tabs to your toolpath:
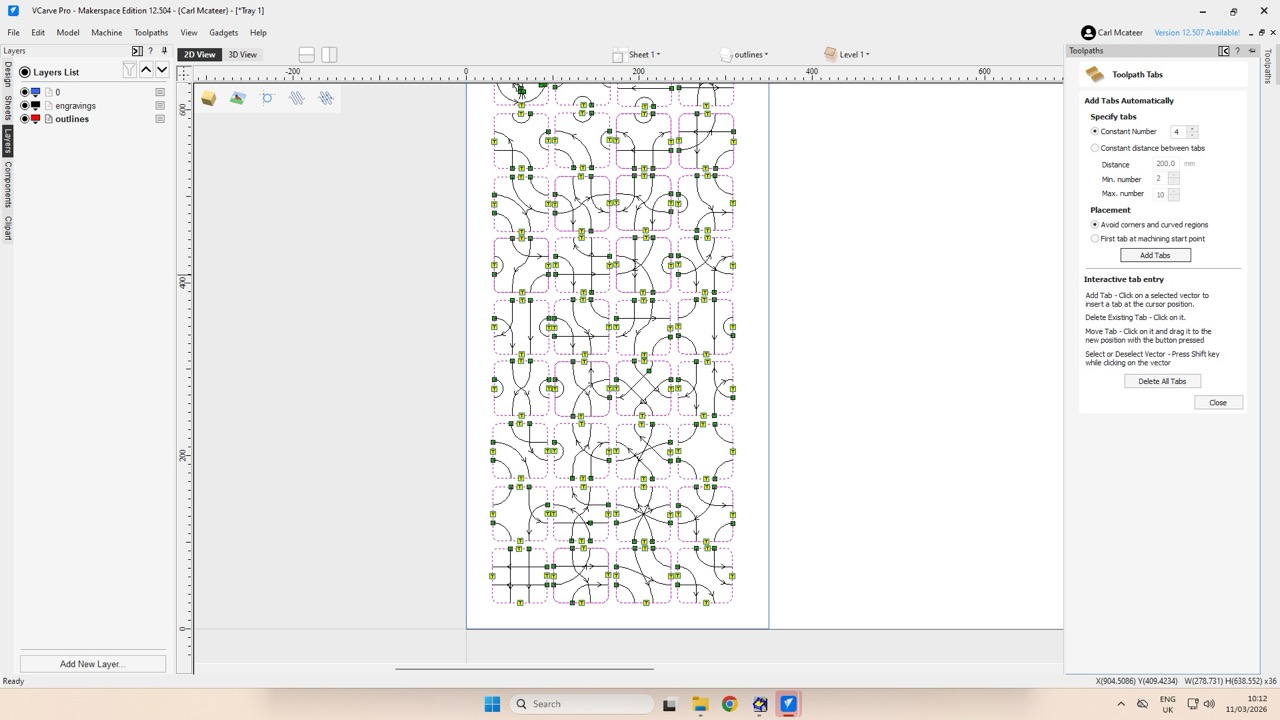
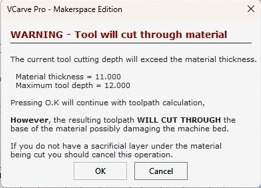
You are going to cut through (we’re using a spoilboard, but still good to let you know!)
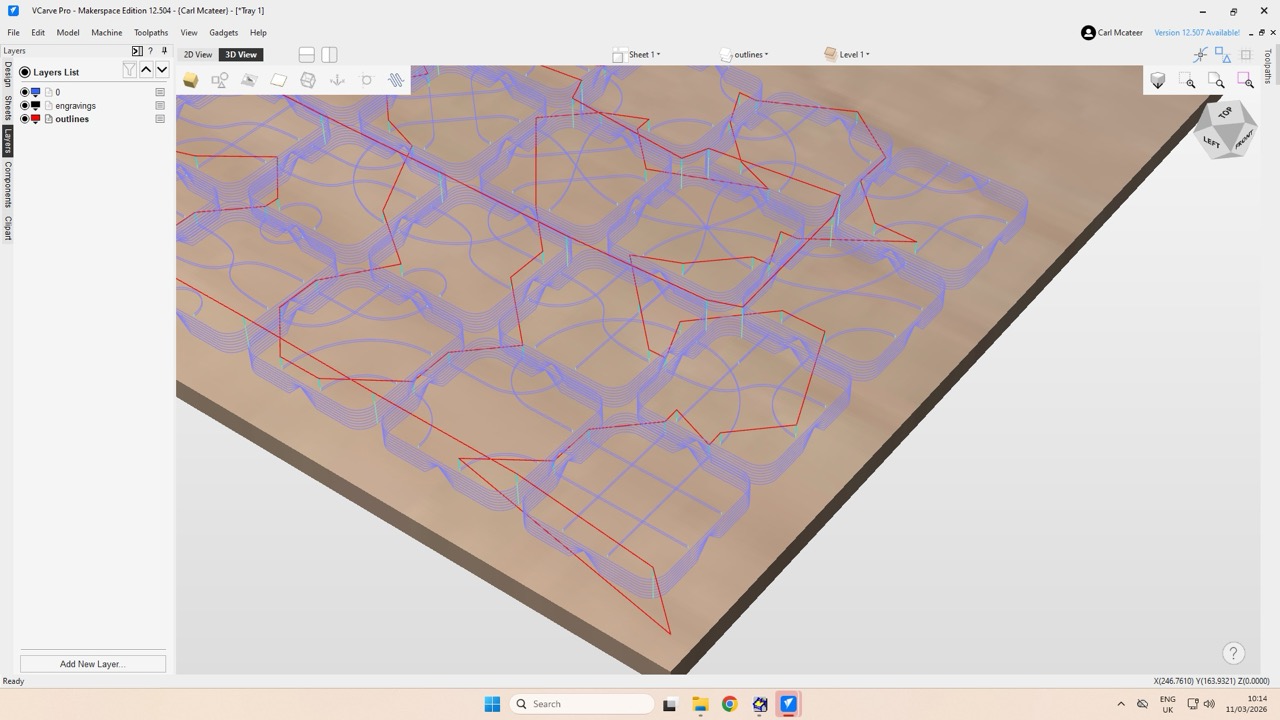
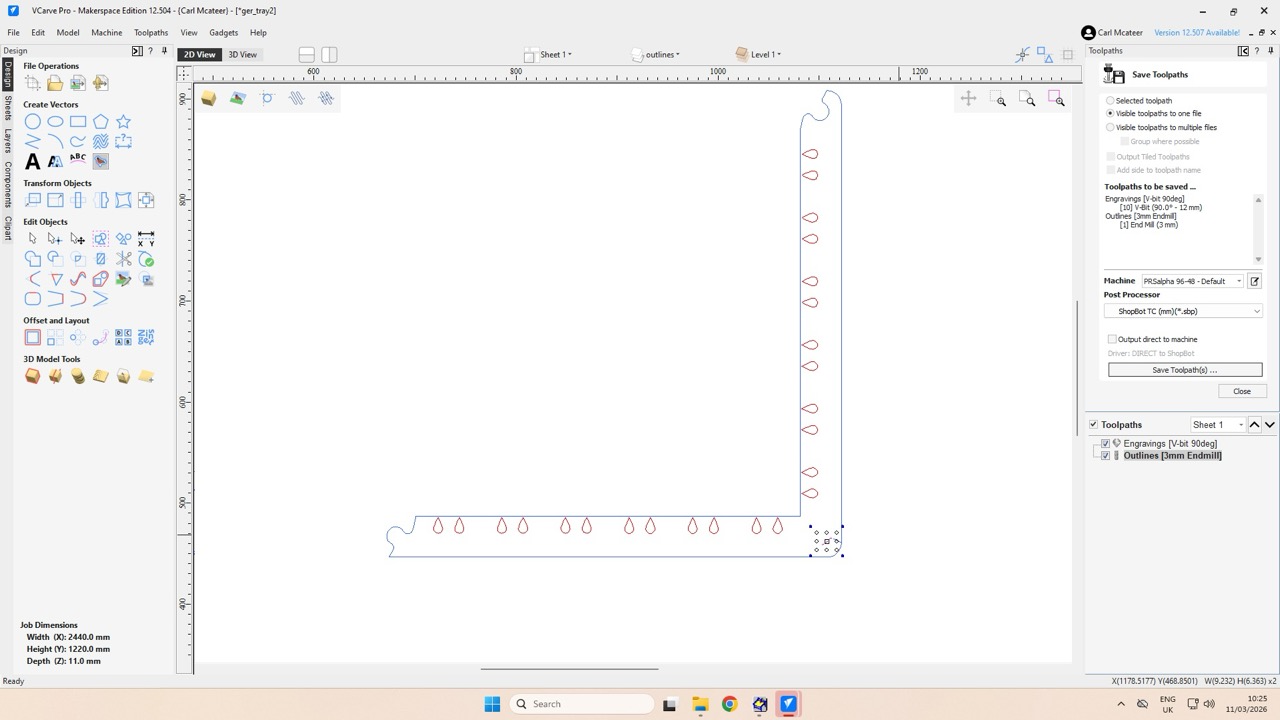
Now, a preview. The different coloured lines show different toolpaths, travel lines are above the material (safety height), plunges and toolpath lines (centre lines at each pass depth is shown). Use the preview panel at the right to see an animated preview.
Then Close. On the panel at the right, Export, icon with a save and tool symbol, first option like Visible Toolpath to One File...,
Choose your post processor (“Shopbot, mm”). Choose whether to go direct to the machine (problem with the current version of V-Carve Pro?).
Then Save Toolpaths. Saves an SBP file.

Previews:
2D Toolpaths,
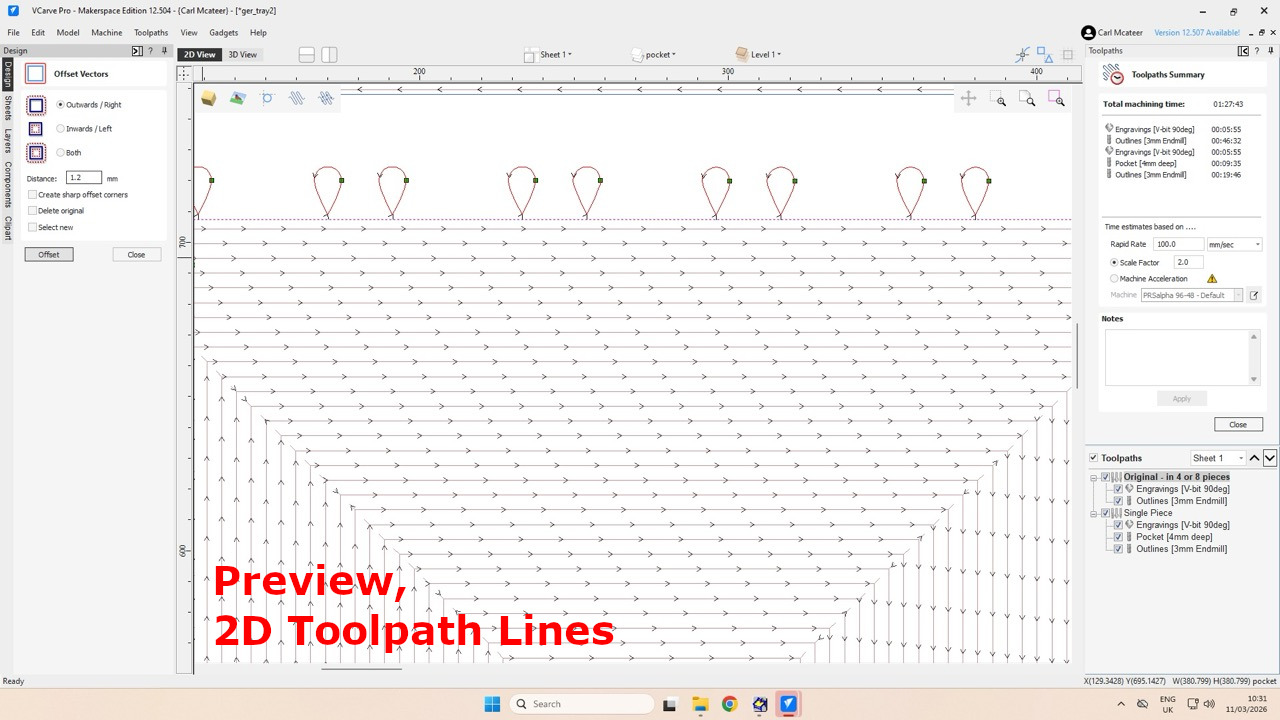
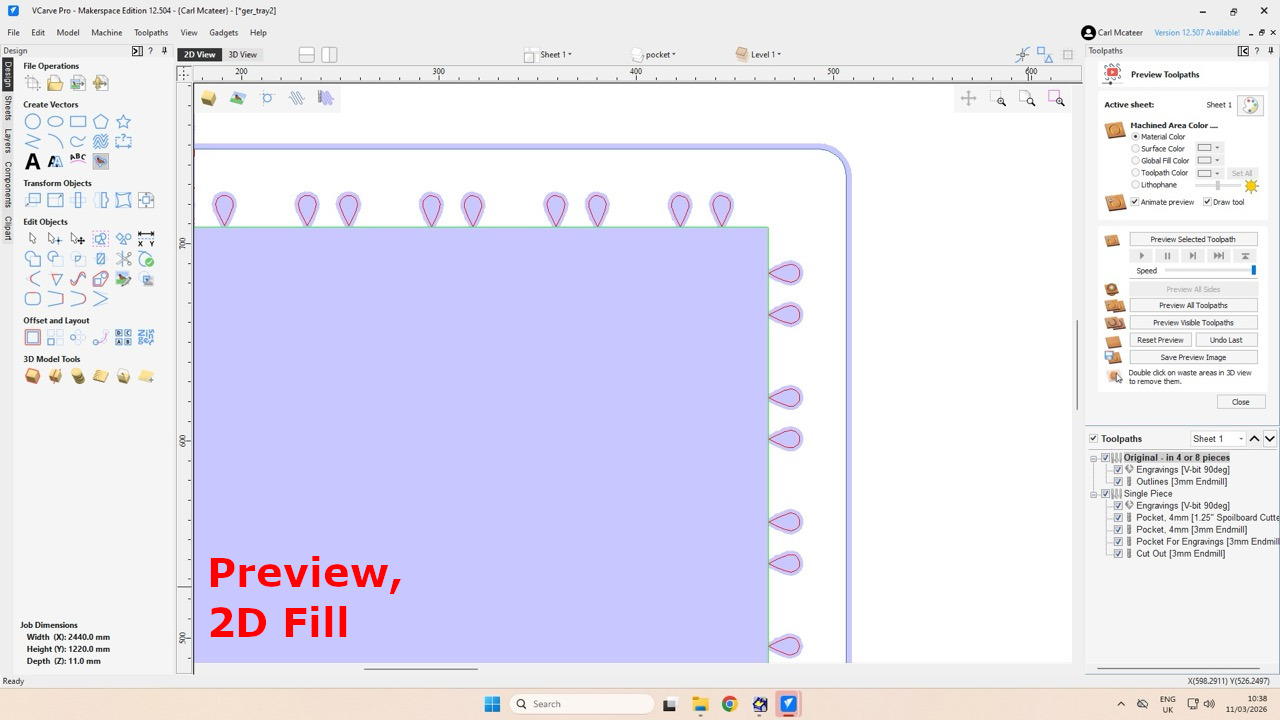
2D Filled Toolpaths,
3D Toolpaths,
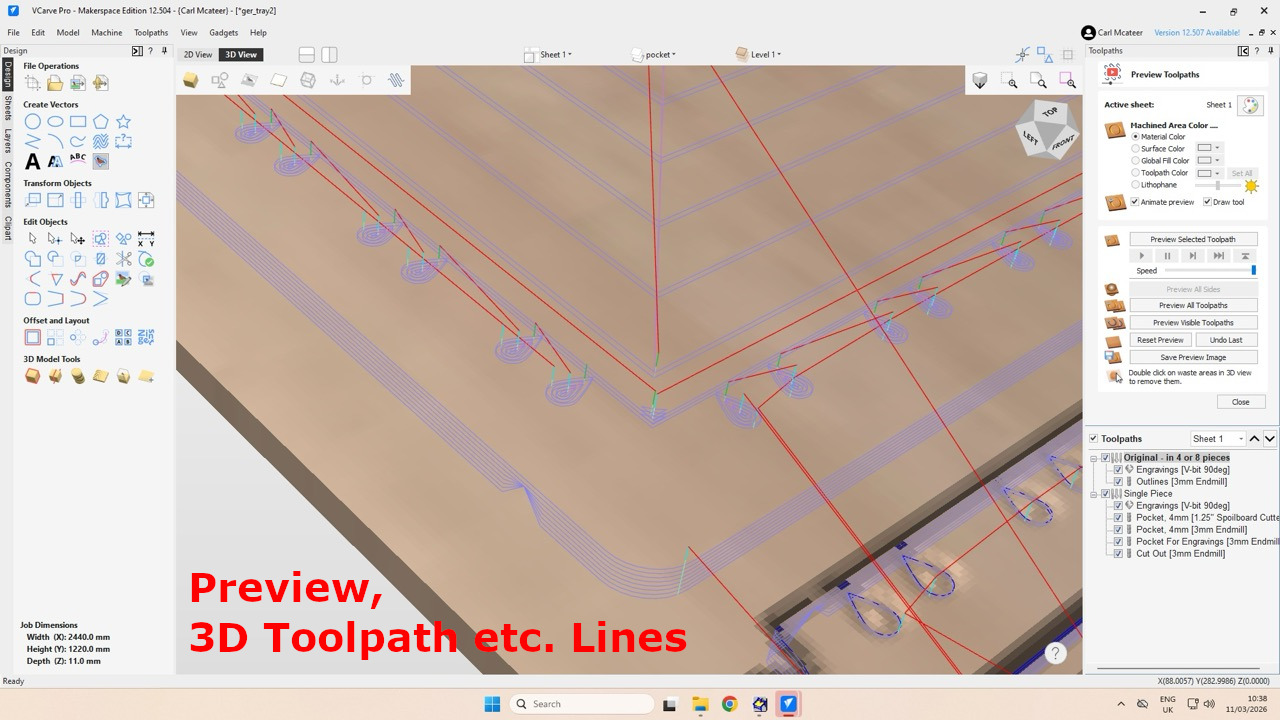
3D Rendered,

Setting up the machine,
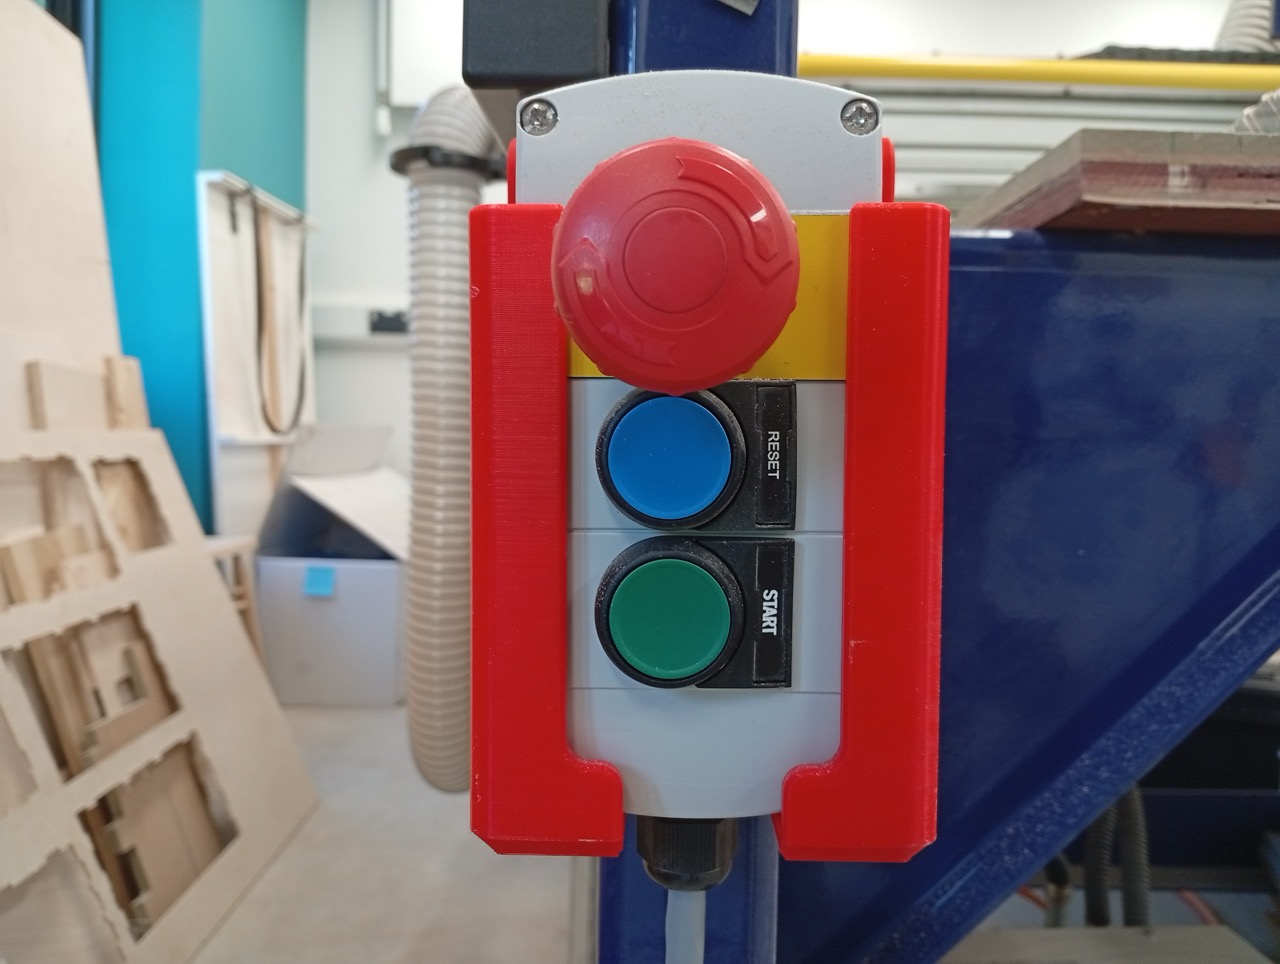
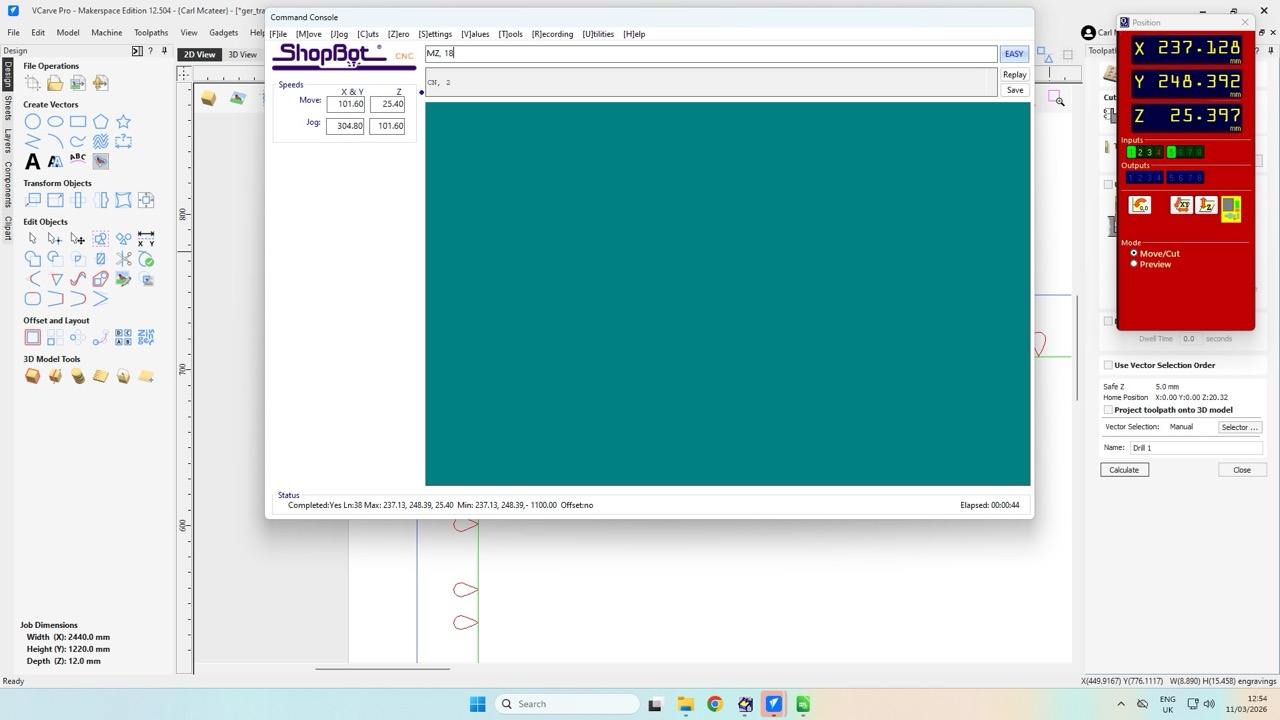
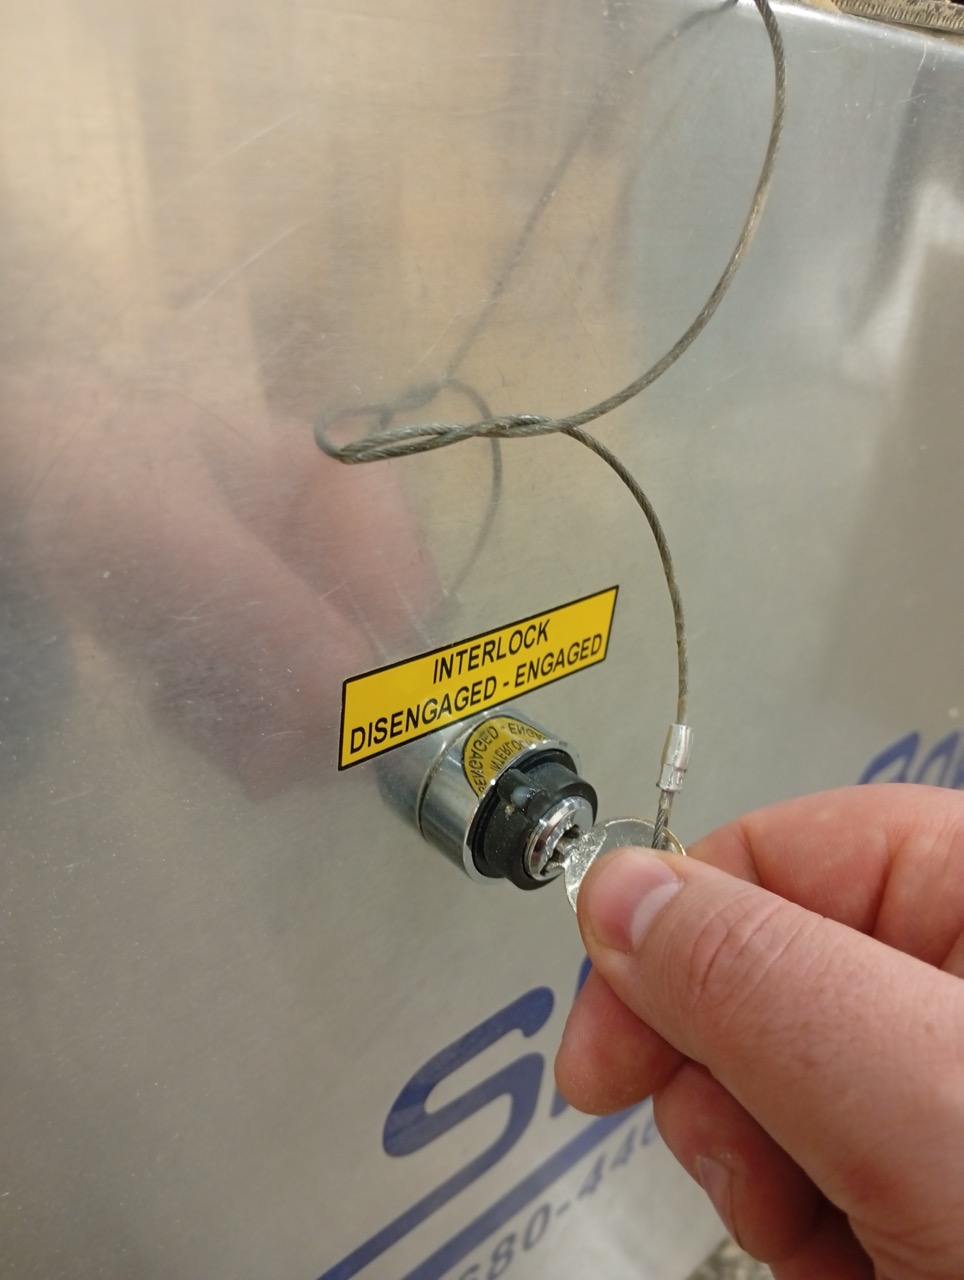
Shopbot Controller, SB3:
Key switch that acts as an interlock for the tool. You have to undo it to get the spanner to change the bit, so it’s a good safety feature!
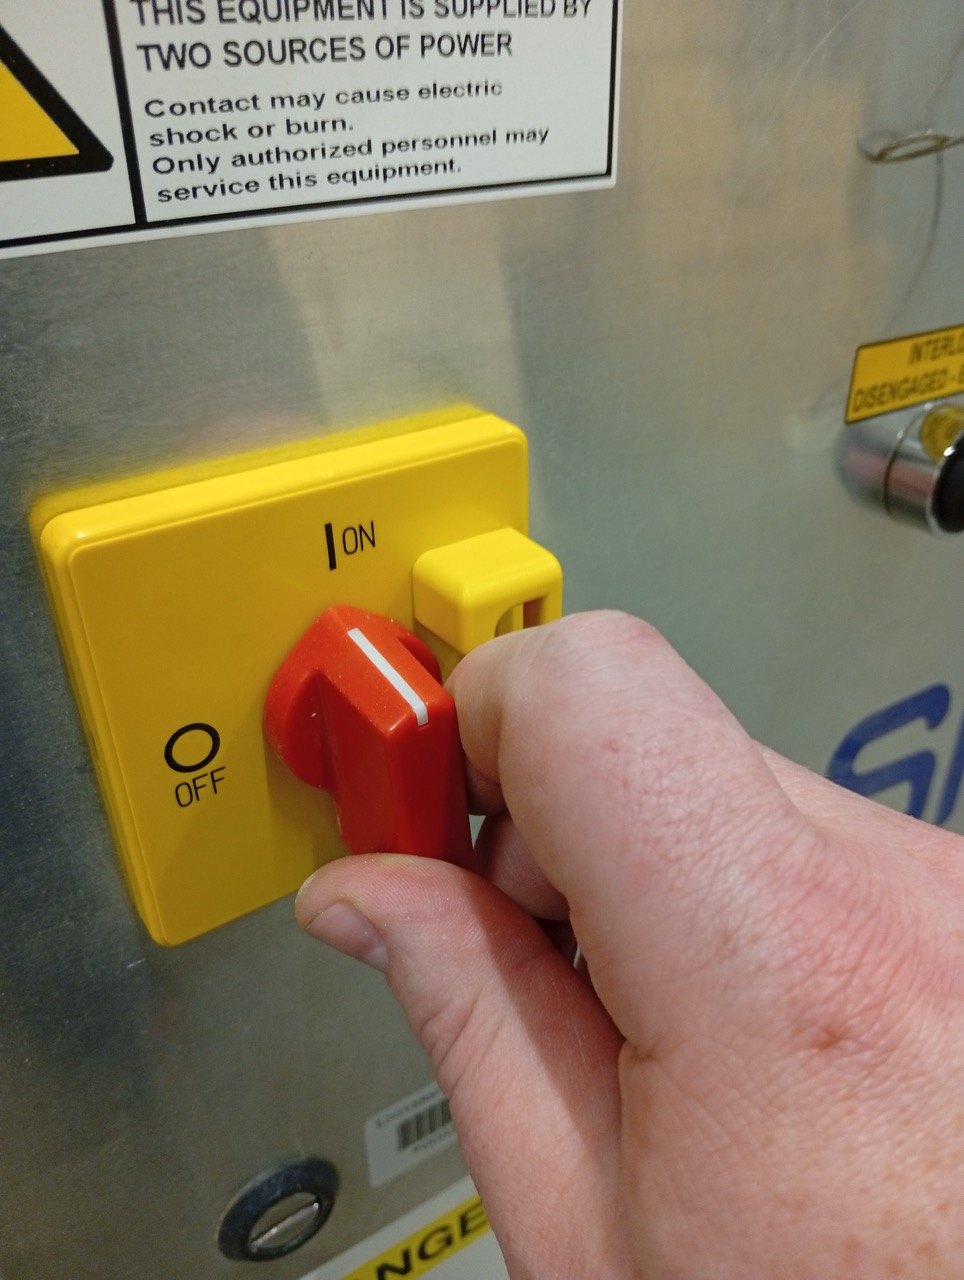
Green button to start, Red emergency stop, Blue to clear an alert, after a machine crash etc.
The spanners located on the control box:
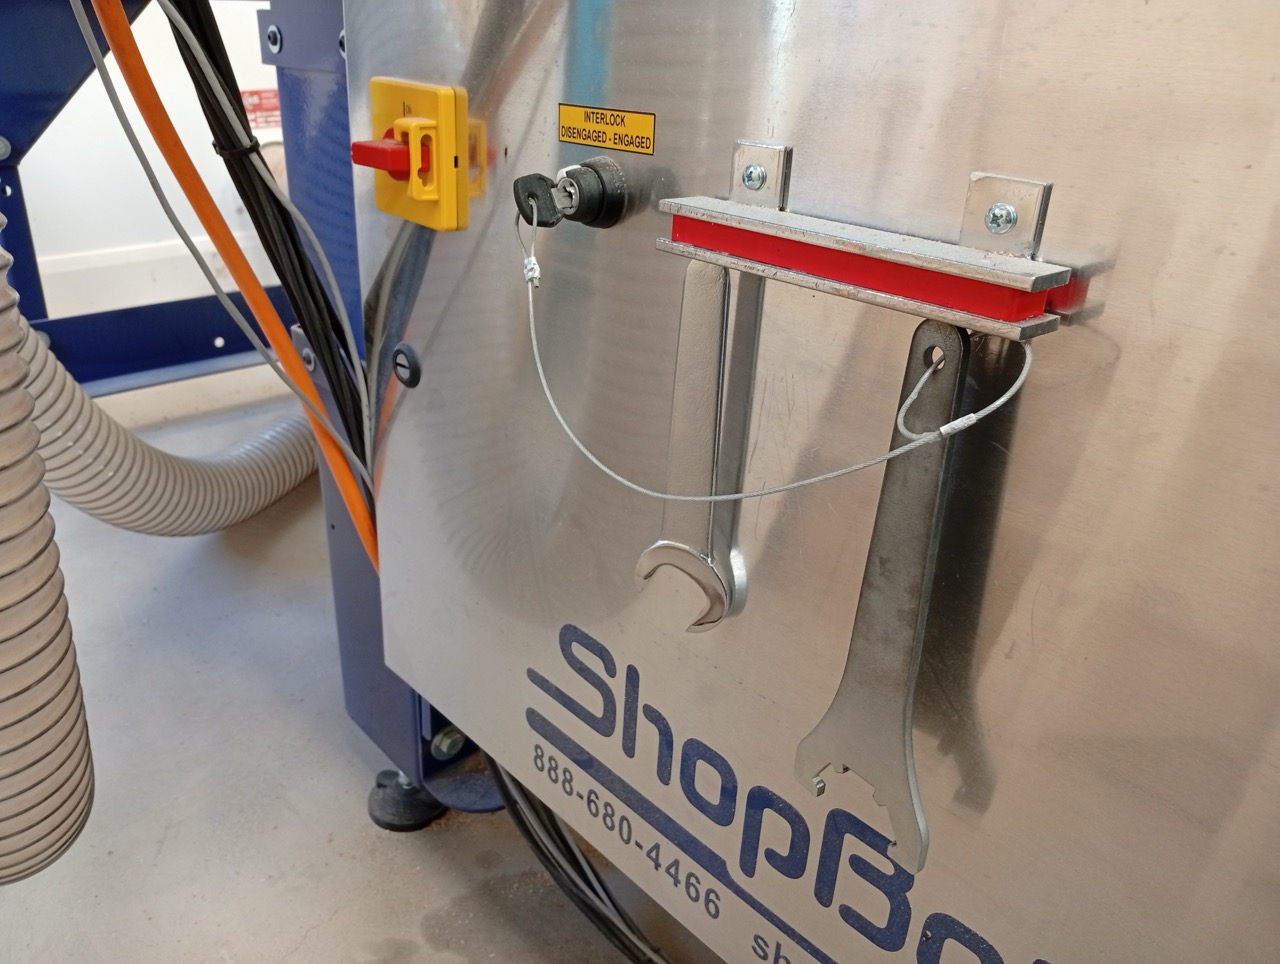
Fixing the Timber, is done by screws on a sacrificial board. There are machines that have vacuum tables and clamping rails.
Get the Aluminium Zero Plate from the holder on the gantry,
Put the clip around the neck of the Spindle; place the plate on the flat, on the surface of the material.
Run the command C2, or the Z button on the red SBC panel.
The machine will touch off the plate (twice), and subract approx 2.1mm, for the thickness of aluminium.
Personal Protective Equipment:
Final pre-flight check
Return to the Shopbot control software,
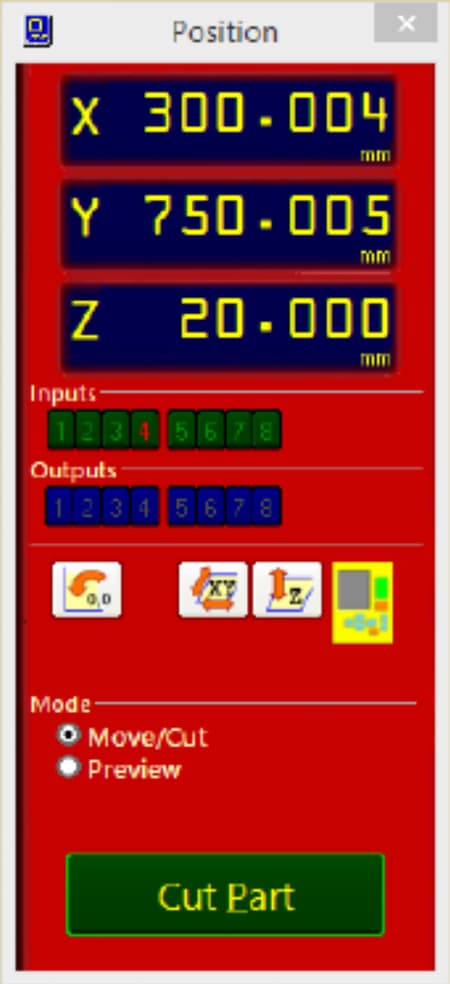
The Green Cut Part button will start the cutting job,
-
Select the file you exported from V-Carve Pro (
.SBPextension) -
As it processes the setup g-code, it may prompt you for a tool change, and to set the
Zagain. (It remembers what the last tool used was). -
Then it shows this screen:
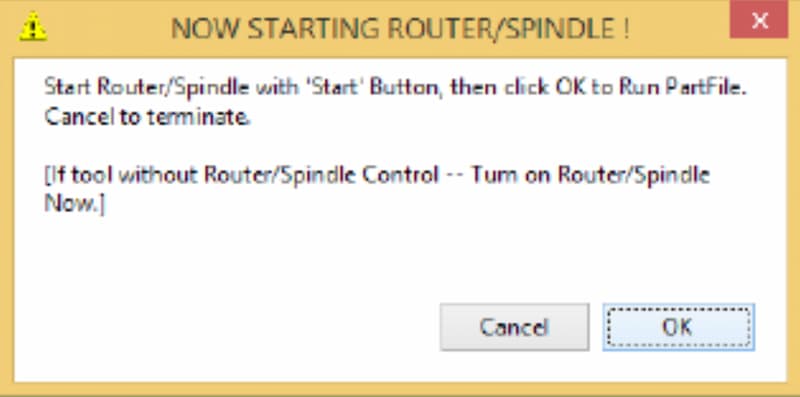
You can now start the spindle from the remote!
(And make sure you do(!), before you press
EnterorOK. Otherwise the head will plunge into the material without spinning and will break the bit).
Remind yourself of the locations (on the remote, and at the end of the gantry) of the e-stops and make sure you are wearing your PPE now.
Cutting
Cutting the pieces:
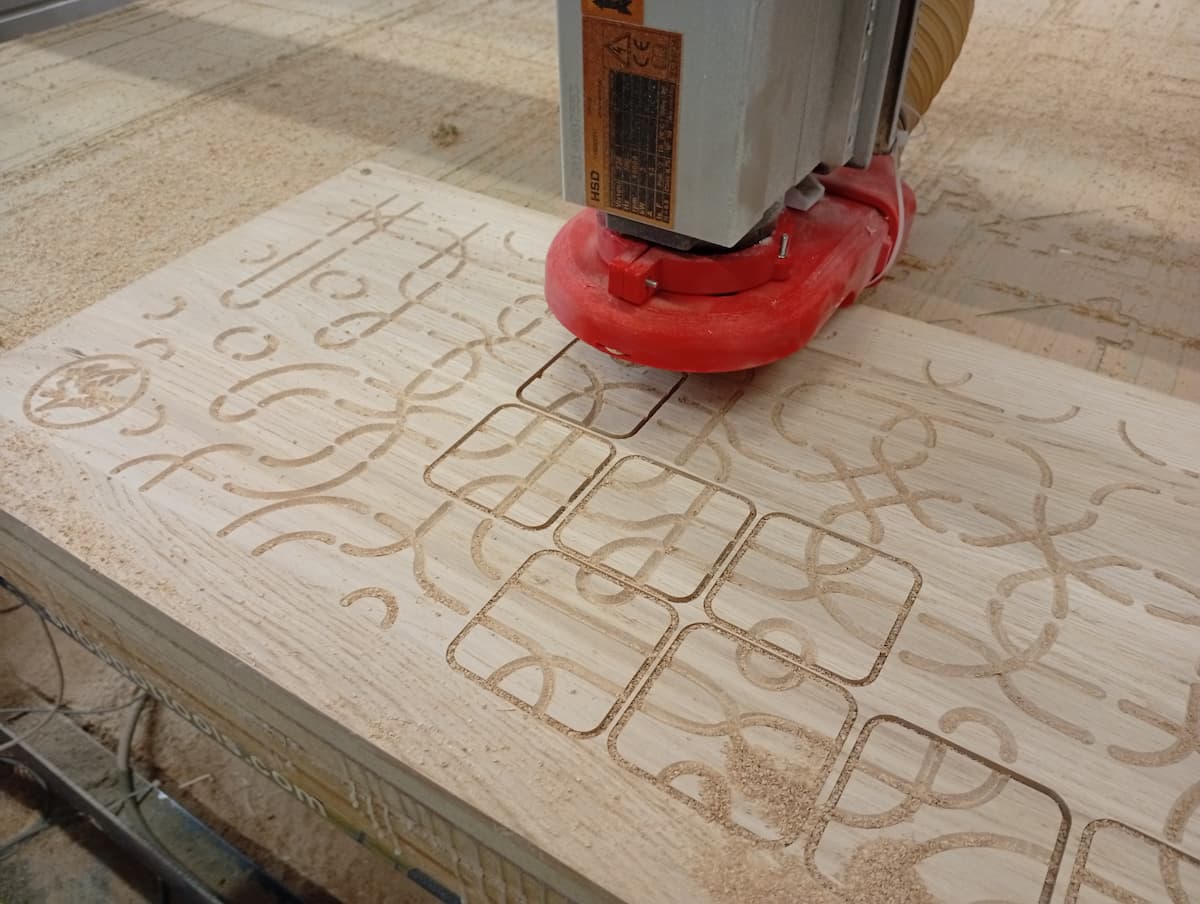
Pocketing the base:
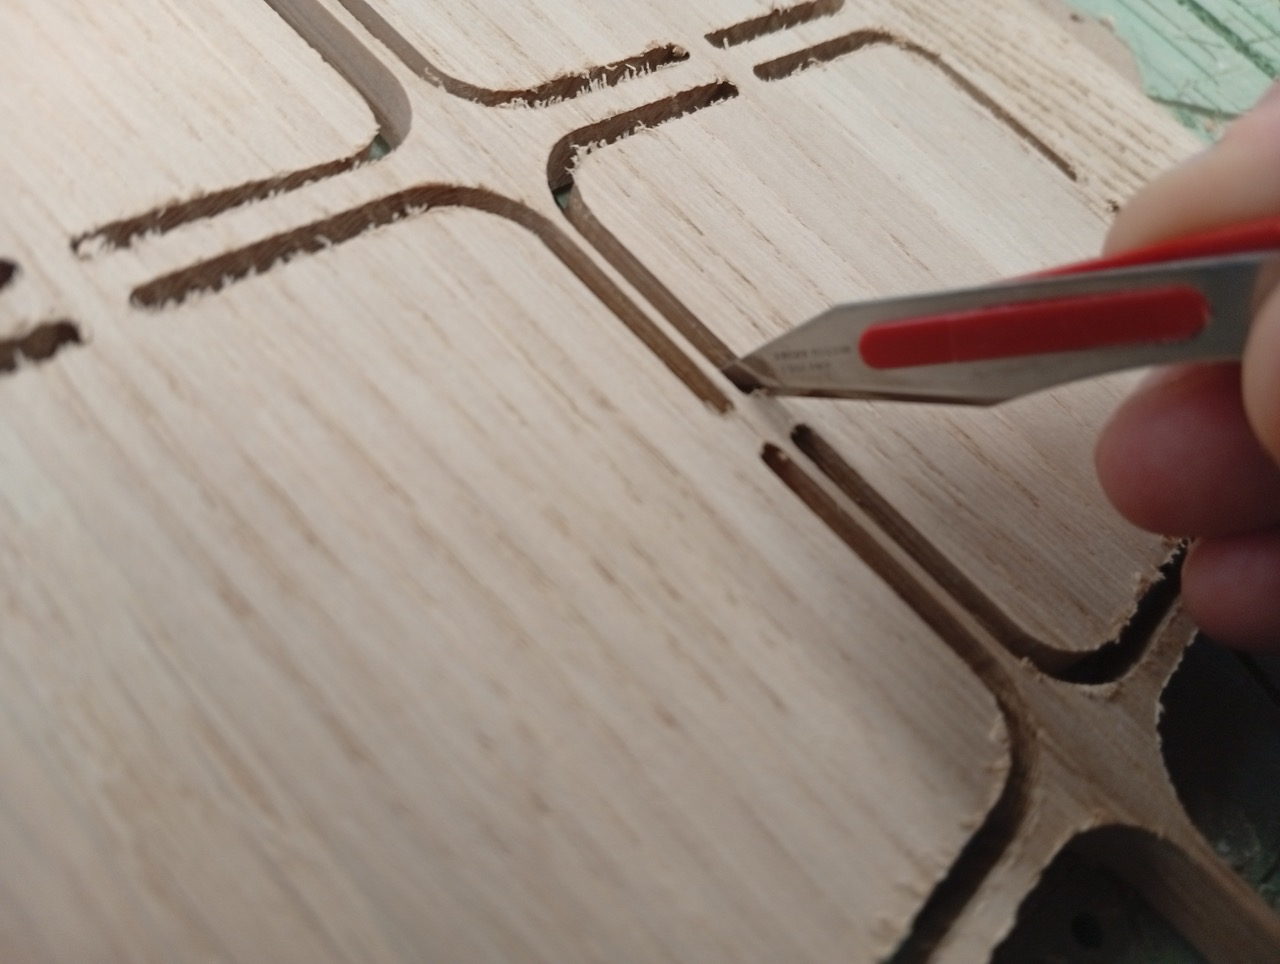
Breaking out Tabs, use a knife or chisel. With experience with the material, you can know how small of a tab you can get away with. I used the Hand Router in the workshop to clear the tabs off after.
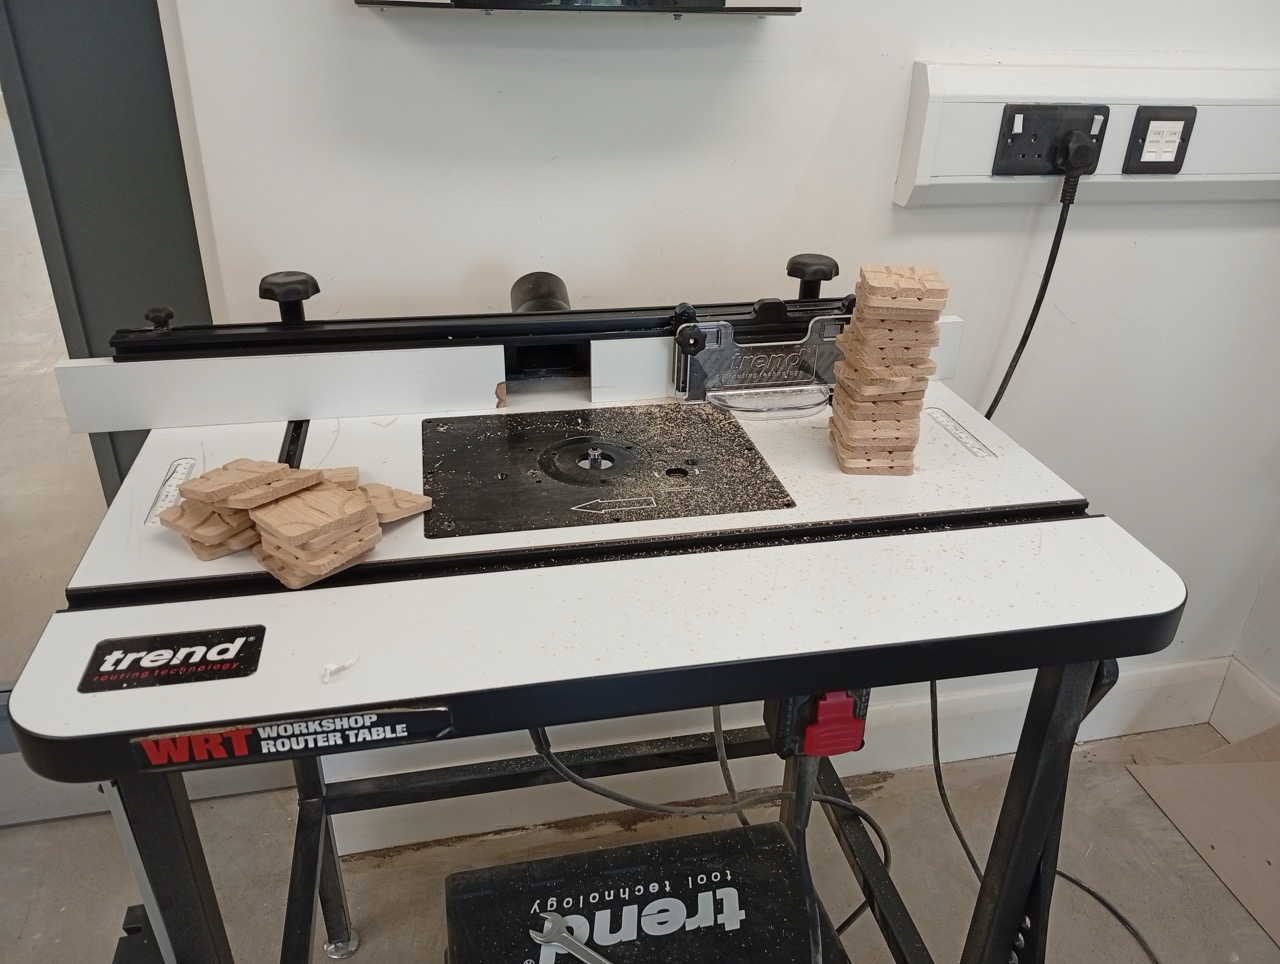
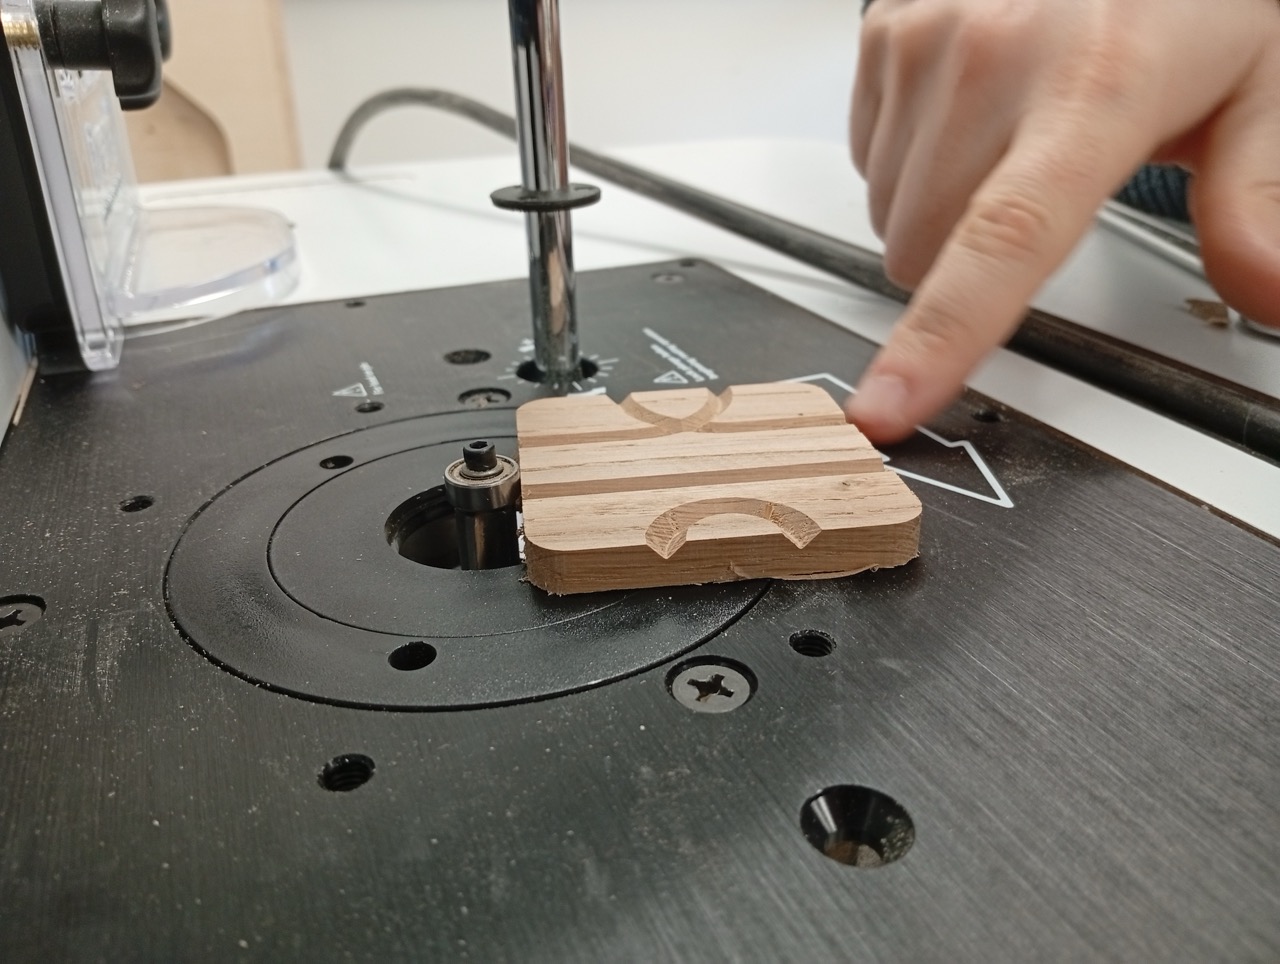
Cleaning up with the Hand Router:
This is a Router Table (Trend brand). Note all required PPE. You need eye protection and dust mask, not any loose clothing that could get caught. Emergency stop is at the front of the table.
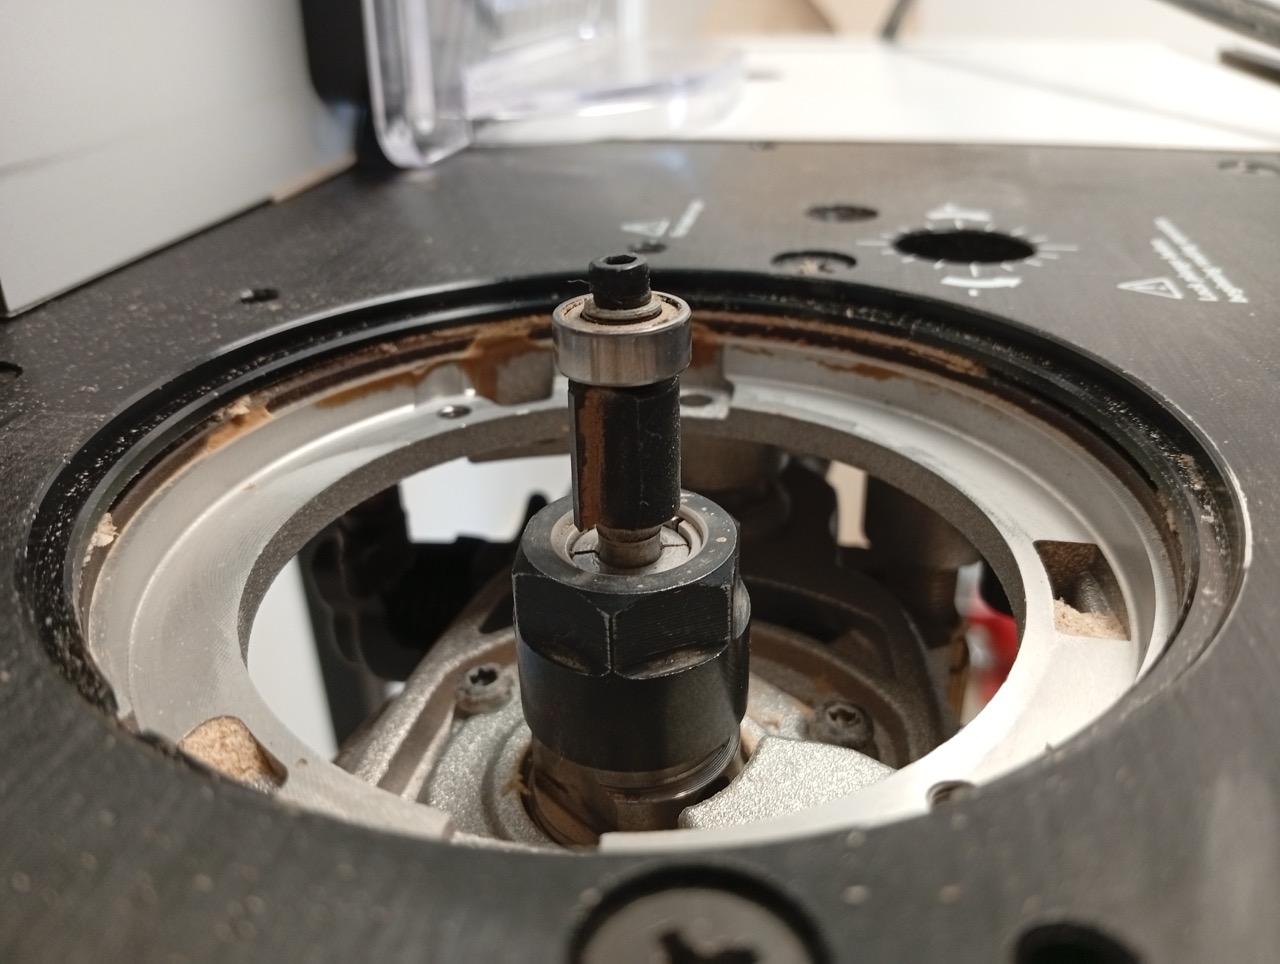
This is the way the bit is held,
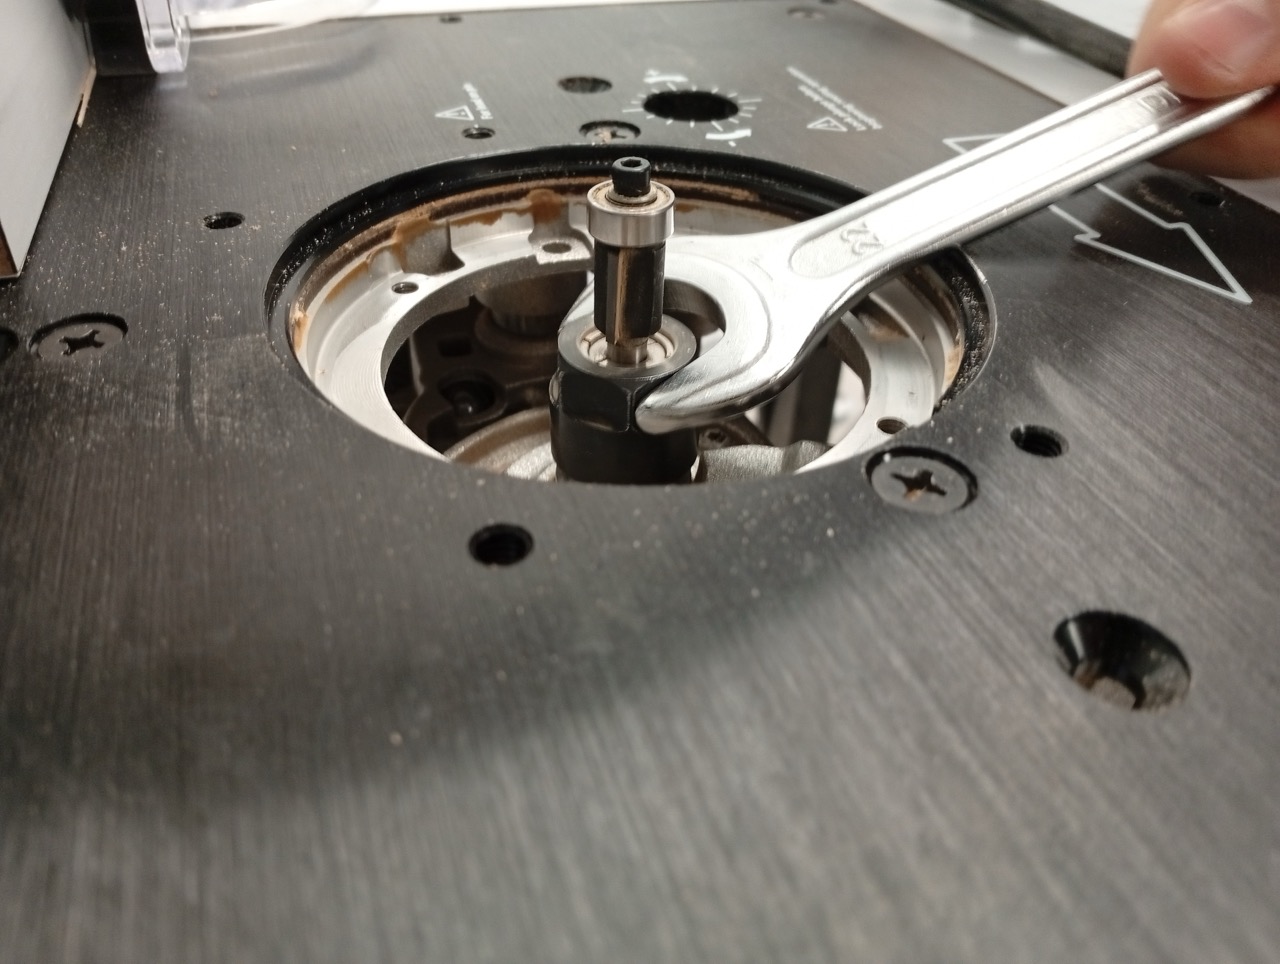
Use a spanner, and hold the lock to stop the spindle spinning while you losen the tool,
The bearing will ensure that the part moves only as close as intended. Follow the arrow indicated on the machine, and keep your hands away from the tool. Note the circle guard in place under the workpiece.
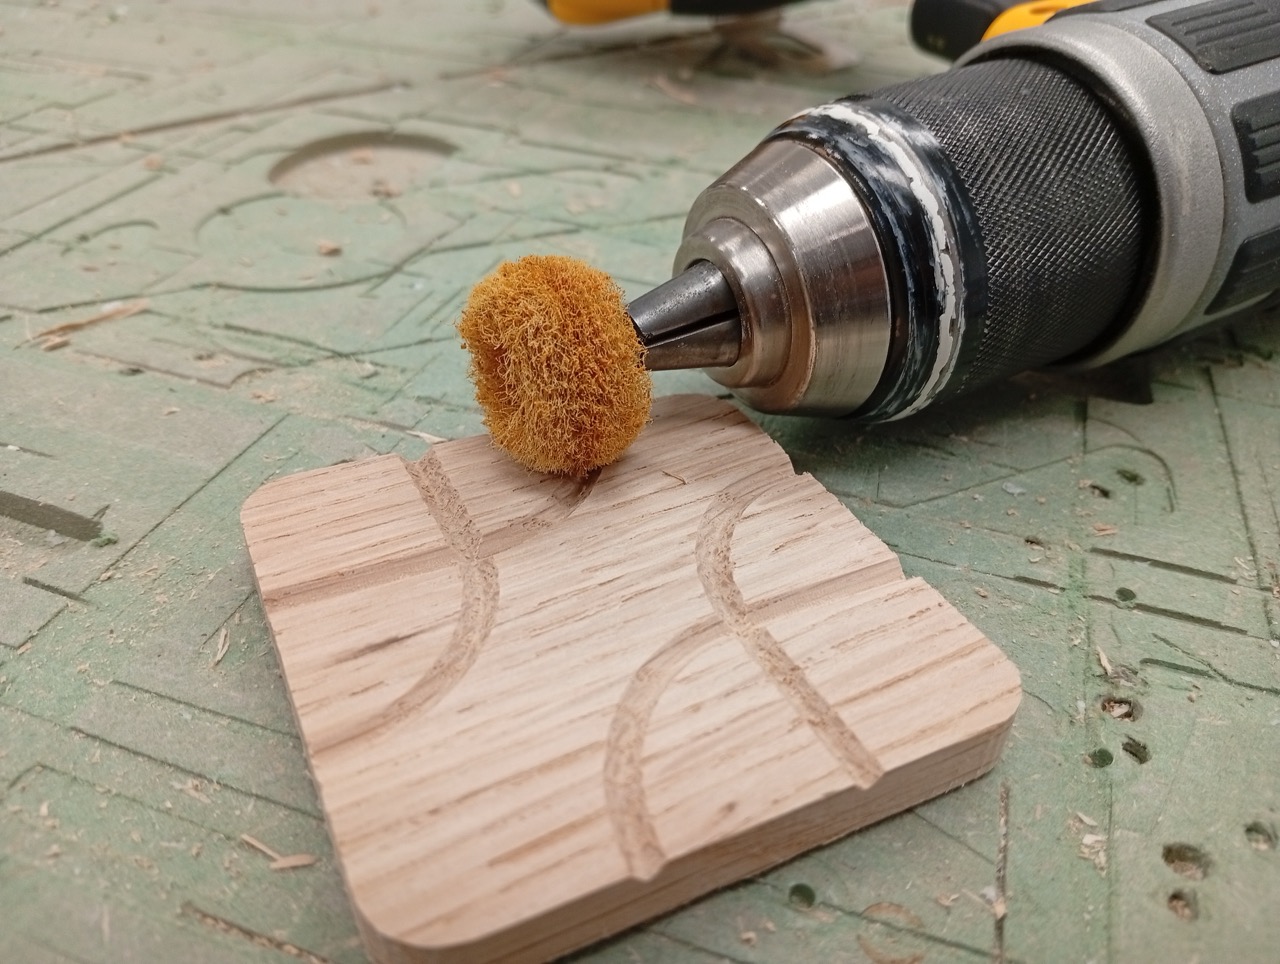
Sandpaper and Drill to polish.
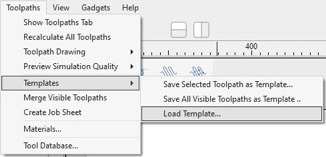
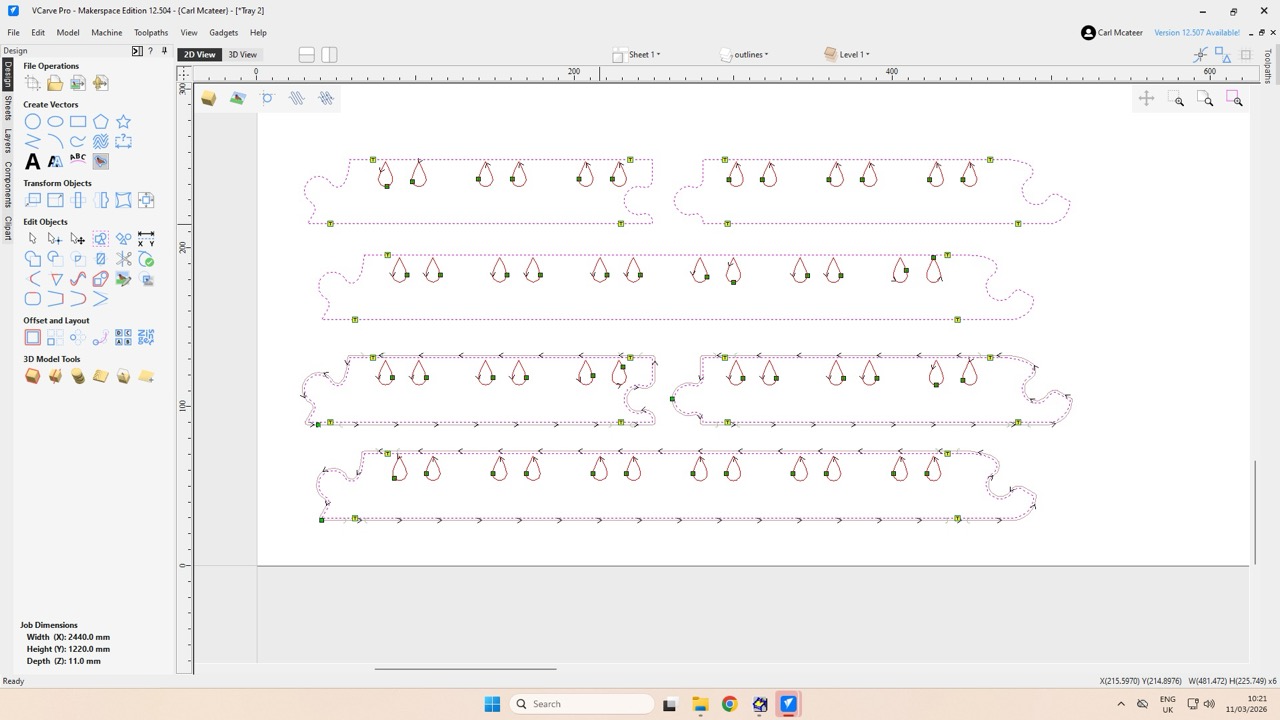
Optional 1: V-Carve Pro Templates
Make Template file for repeated jobs. A template file contains already set up profiles, so you just need to double click to edit the toolpath, add geometry (hold shift while clicking to add to your selection) and recalculate for each you want to use. Very handy to cut out repetitive steps!
Optional 2 Node Editing
Copy, and join your polylines,
Move together. And note how the mouse icon changes when you drag something next to a snappable object, like another endpoint. Use this to make sure you align everything.

Then use Union and remove bits…
Remove other bits…

Delete Points by selecting nodes and right clicking,
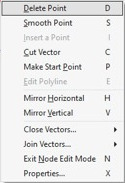
When done, make a new layer to keep everything organised…
