Week 12
Assignment - Machine Design (part 1 of 2)
-
Group assignment:
- Design a machine that includes mechanism + actuation + automation + application
- Build the mechanical parts and operate it manually
- Document the group project
-
Individual assignment:
- Document your individual contribution
Machine Design (part 2 of 2)
- Group assignment:
- Actuate and automate your machine
-
Document the group project
-
Individual assignment:
- Document your individual contribution
Group Assignment
Final Slide and Video
Day 1
Initial concept and set out
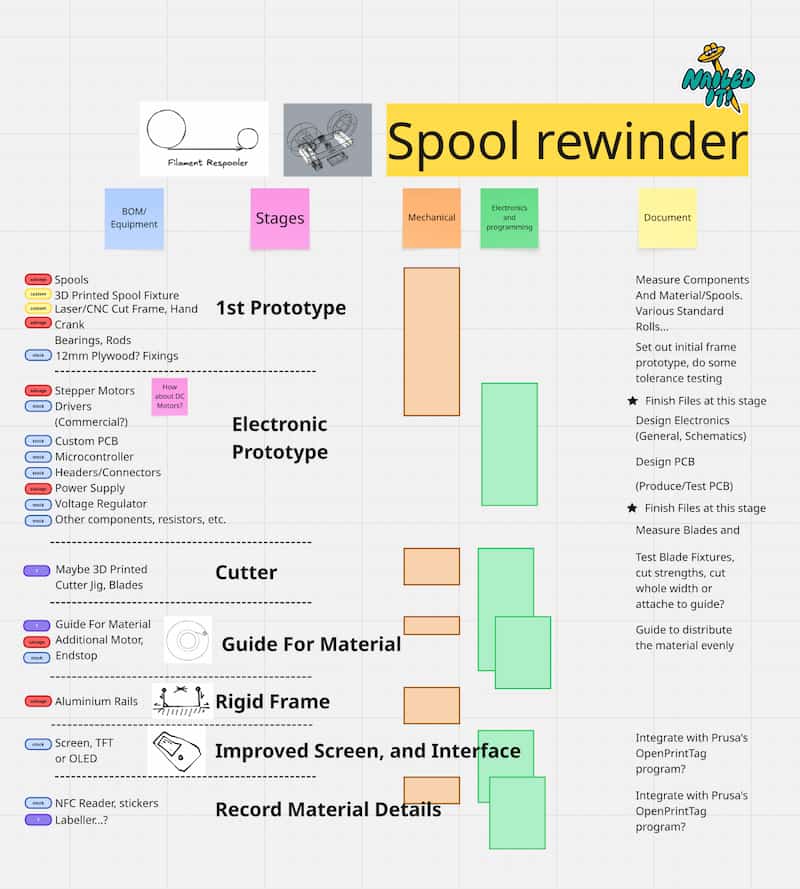
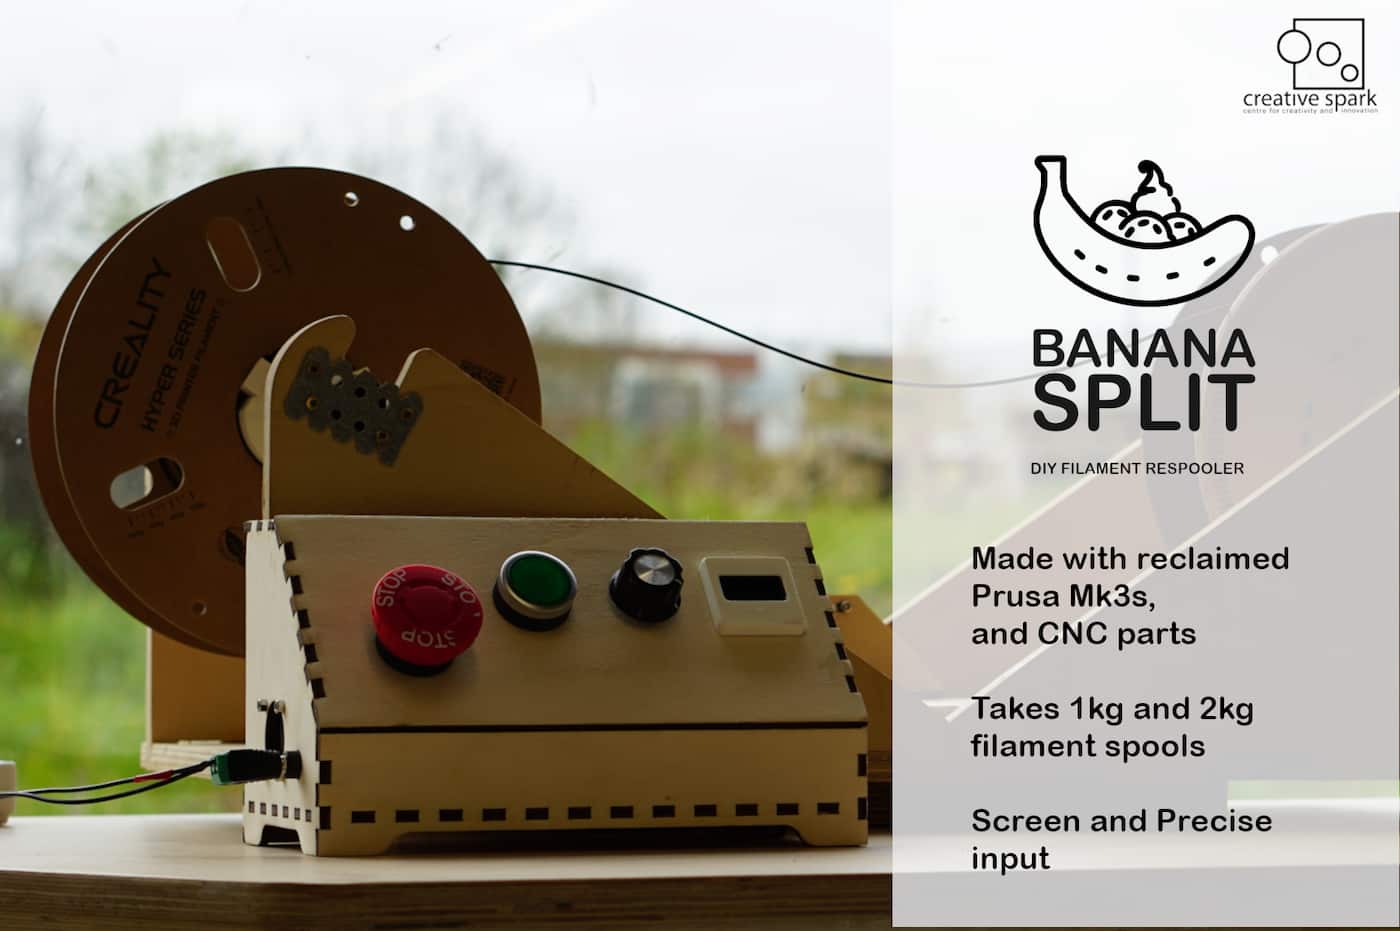
Components
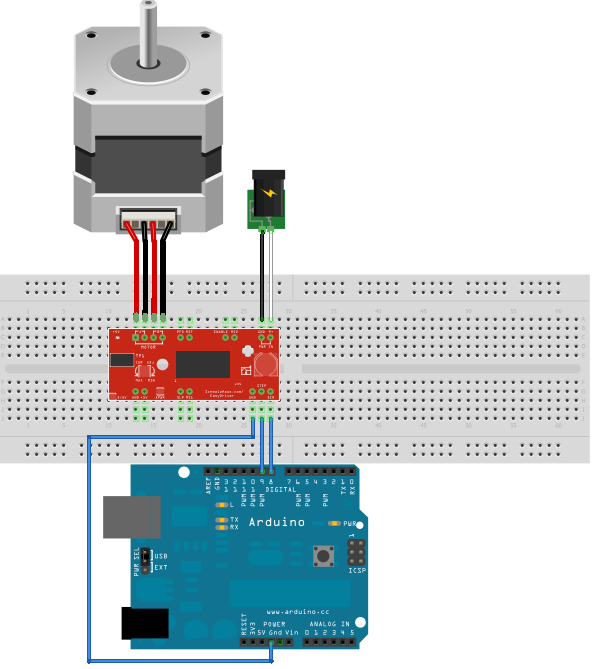
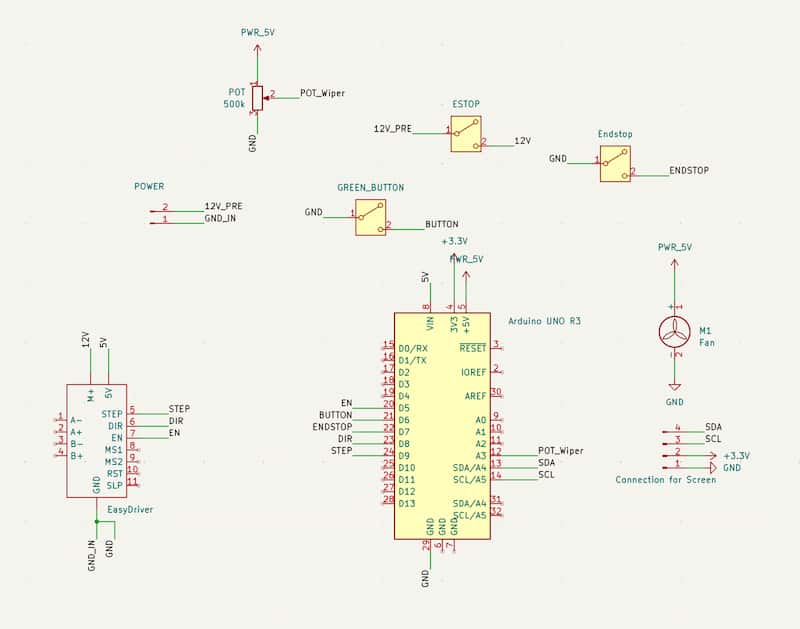
- Arduino Uno R3, Arduino Prototyping Shield, EasyDriver v4.4
- Power Supply (12V 2A), and barrel jack
- Buttons and potentiometer, OLED screen (SSD1306, yellow and white)
- Stepper Motor (left over after a Prusa Mk3S got upgraded)
- GT2 belt loop
- 5V Fan (salvaged off an old Ultimaker 2)
- Old Spool Holders, 12mm Plywood, with 22mm chrome poles
Minimal Viable Version
void setup() {
  pinMode(8, OUTPUT);
  pinMode(9, OUTPUT);
  digitalWrite(8, LOW);
  digitalWrite(9, LOW);
}

void loop() {
  digitalWrite(9, HIGH);
  delay(1);
  digitalWrite(9, LOW);
  delay(1);
}
Files
- Measured Spool Examples (CSV)
- Parametric Spool (GHX, Grasshopper Script)
- Parametric Toothed Gear Model (GHX, Grasshopper Script)
- Old Spool Holder CNC Files (DXF)
- Example Spool (STL)
- Spool Collet v1 (STL)
- UMS5_spoolcollet_v2.ufp (UltiMaker G-Code)
Day 2
I added the Accelstepper library, and the following example, and it works great on the machine!
XXX XXX XXX XXX XXX Video Running XXX XXX XXX XXX XXX
#include <AccelStepper.h>

// Define a stepper and the pins it will use
AccelStepper stepper(AccelStepper::DRIVER, 9, 8);

int pos = 3600;

void setup()
{
  stepper.setMaxSpeed(3000);
  stepper.setAcceleration(1000);
}

void loop()
{
  if (stepper.distanceToGo() == 0)
  {
    delay(500);
    pos = -pos;
    stepper.moveTo(pos);\
  }
  stepper.run();
}
From Easy Driver Documentation (Scroll down to example 3)
Then I made 2x my own spools, using BoxesPY. And added engraved dashes, for a future feature, to be able to use an optical sensor to count rotations (200 dashes/turn, which I think lines up with this type of stepper if I remember correctly…).
Files
Day 3
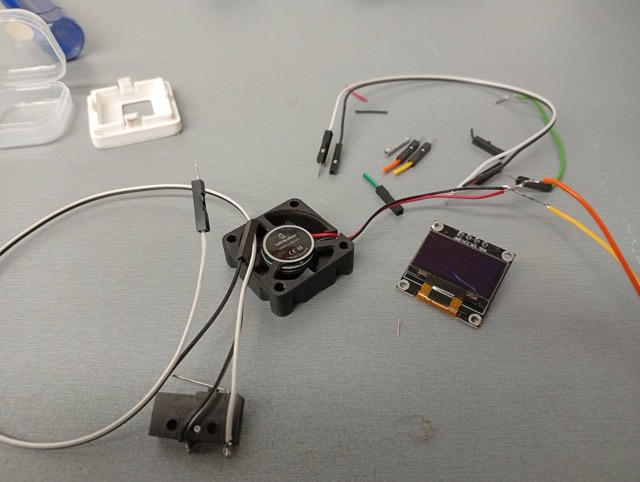
Did a lot of crimping and shortened a lot of wires.
Chose pins for the remaining electronics.
| device | pin_name | wire_colour | uno_pin |
|---|---|---|---|
| oled_screen | SCL | grey | A5 |
| oled_screen | SDA | yellow | A4 |
| POT | Wiper | black | A3 |
| EasyDriver | STEP | red | 9 |
| EasyDriver | DIR | black | 8 |
| EasyDriver | EN | white | 5 |
| endstop | Endstop | white | 7 |
| green_button | Button | green | 6 |
I made this into a schematic in KiCAD, but a custom PCB may be difficult this week.
Made an enclosure using the “Console2 template”, on BoxesPY.
To this template, I added openings for screen bezel (3D Printed, design courtesy of Carl), and added the Fan mount holes and the DC power jack hole.
Planned: Back plate cover, with magnetic latch instead of the designed one in the template.
I used ChatGPT to do some boilerplate code. However, it was incapable of using the library effectively. At this stage UI reads prints and delays were blocking the main loop, and the machine does not move smoothely.
Realisation: can’t use a pot to turn the spool directly if applying accelleration/decelleration.
Files
Day 4
I fixed some things:
- Screen broke yesterday evening. Reprinted the bezel part with better internal tolerance, and fit new screen.
- Cables were too short for the Green Button, the 5V fan, and the Endstop, made some new cables and crimped them.
I made a version of my previous KiCAD schematic, and asked ChatGPT to suggest equivalent pins on a Xiao ESP32-C3. But had to verify with the documentation myself. I used this to design a PCB to improve the connections and nest of cables which are starting to become more annoying.
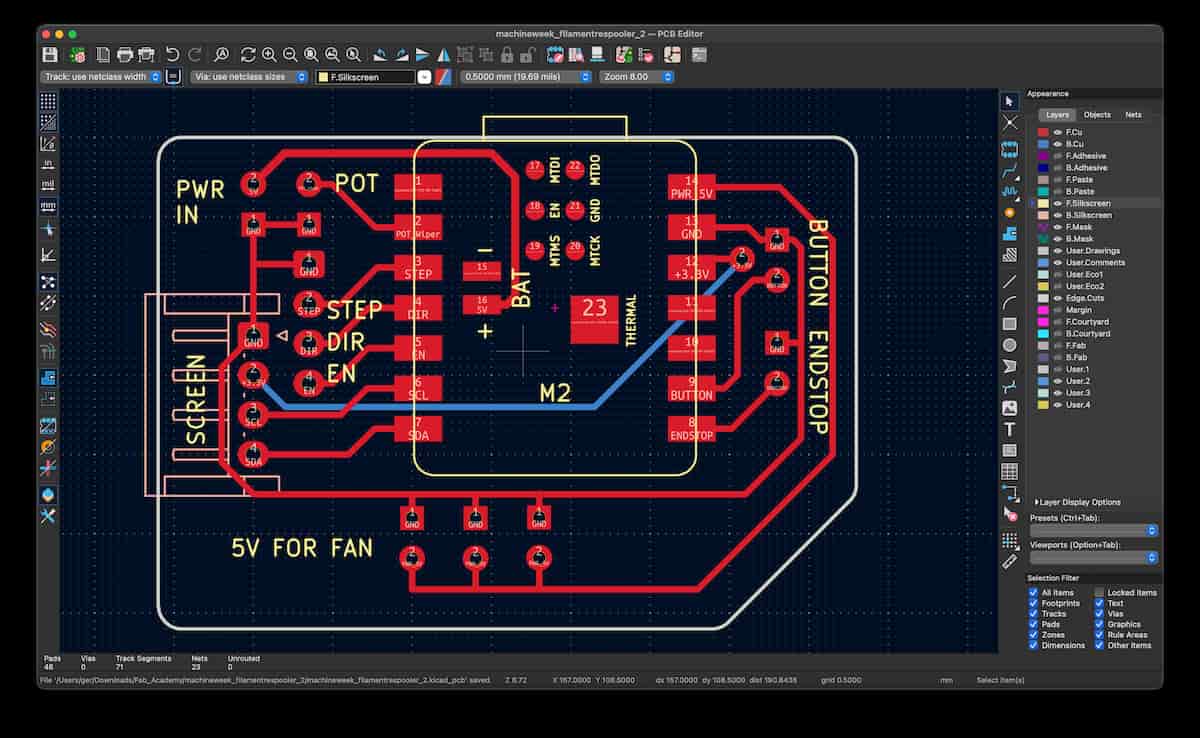
Files
- Bezel For Reprint (STL)
- KiCAD updated for Xiao ESP32 Board (ZIP)
- Gerber, Drill Paths exported (ZIP)
- chatgptlog_esp32pins_20260416.txt
Next Steps
- Add an actuated blade to cut, or buzzer for notification,
- Add filament guide to fill rolls more evenly,
- Refactor the code and fix bugs. There are issues with the main loop that causes motor jitter.
- Design and make a dedicated PCB:
- Wiring simplified; terminals, no Dupont connectors,
- Move from EasyDriver to the driver components,
- Screen on board,
- Slimmed down enclosure.
- Redesign cut files for CNC and Laser,
- Add shoulders to steady rolls,
- Change to clicky potentiometer to work better with menu navigation.
- Add an NFC reader (maybe to work with OpenPrintTag project)