Week 1
Assignment, Principles and Practices (part 1 of 2)
- Plan and sketch a potential final project
Assignment, Project Management (part 2 of 2)
- Read, sign (add your name to) the student agreement and commit it to your repo.
- Work through a git tutorial.
- Build a personal website in the class archive describing yourself and your final project. Refer to the lecture material for examples.
- Upload parts 1 and 2, to the class archive.
From Assignment Details
Final Project Ideas
For Week 1, here are my initial concepts to explore.
Updates and further detail on Final Project Initial Ideas Page.
Idea 1 - Paper 3D Printing
Based on an interesting idea of building up 3D models with paper, sort of like Laminated-Object-Modelling.

Idea 2 - Peripherals for BioGun Extruder
More equipment for systems like the BioGun(TM): material preparation, and supply, pressure and power, more…

Idea 3 - A Big Plotter
A wide-spanning machine to make large format illustrations.

Idea 4 - Ghost Bus Stop
deployable temporary bus stop, with various shelter and data solutions.

Idea 5 - Enclosure for 3D Printers
Accumulation of design ideas for FDM enclosures. Extraction, Sensors, chamber heating/insulation.

Idea 6 - Cat Academy Projects
A few ideas for cat owners.

Updates and further detail on Final Project Initial Ideas Page.
Student Agreement
- Agreed and Committed.
- See Agreement Page.
Git
I had a little experience with Git. I maintain this Gitbook instance for our Fab Lab, and we use a GitBook/Markdown workflow, that I have continued to use during Fab Academy.
Setting Up Git, Setup the public key in gitlab
I’m on MacOS, using Terminal and ZSH, with Git already installed.
-
Generated SSH keys keys:
ssh-keygen -t rsa -C "$your_email". Useful command (Mac Only):cat ~/.ssh/id_rsa.pub | pbcopy. -
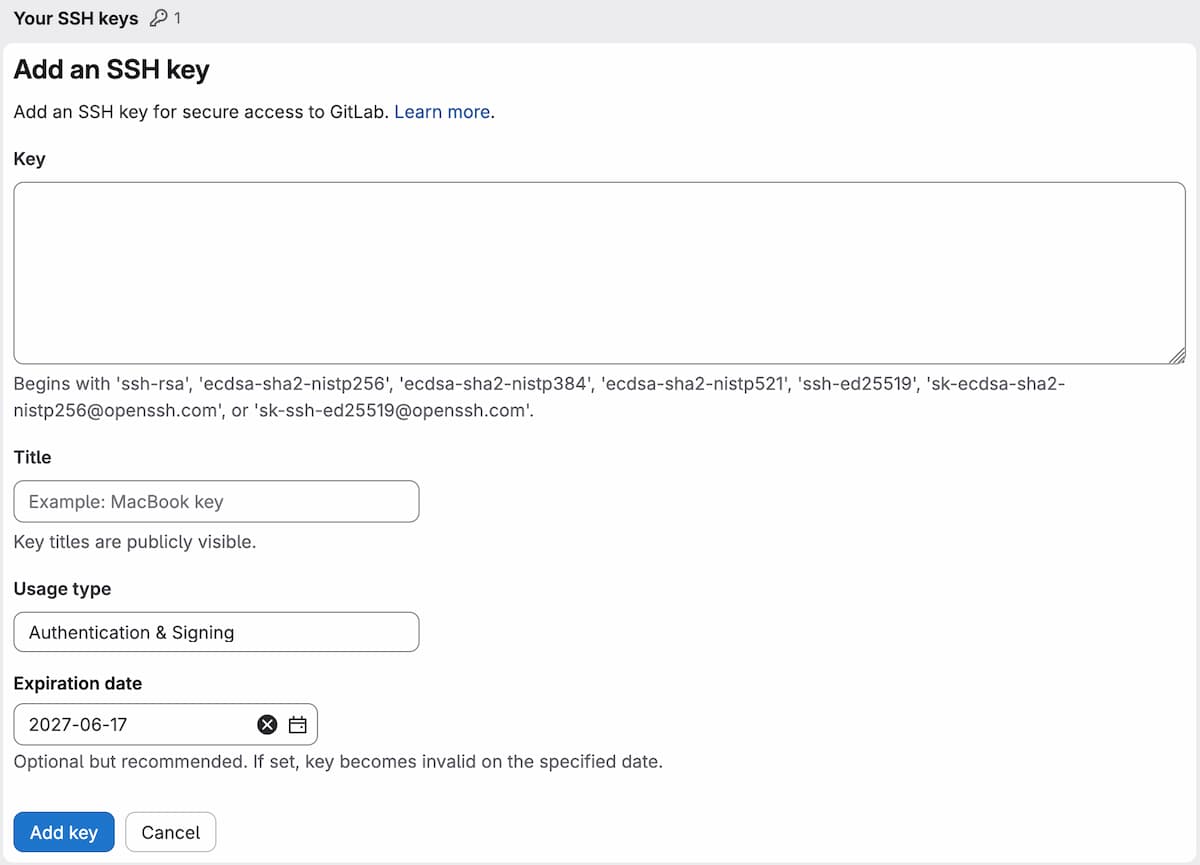
Add this key to your GitLab. Log in to Gitlab,
Preferences, thenAccess>SSH Keys. Fill out the details as follows:
- Make sure configure my local user so that I can make pushes to GitLab, as follows.
git config user.name "Your Name"
git config user.email "your.email@example.com"
Workflow
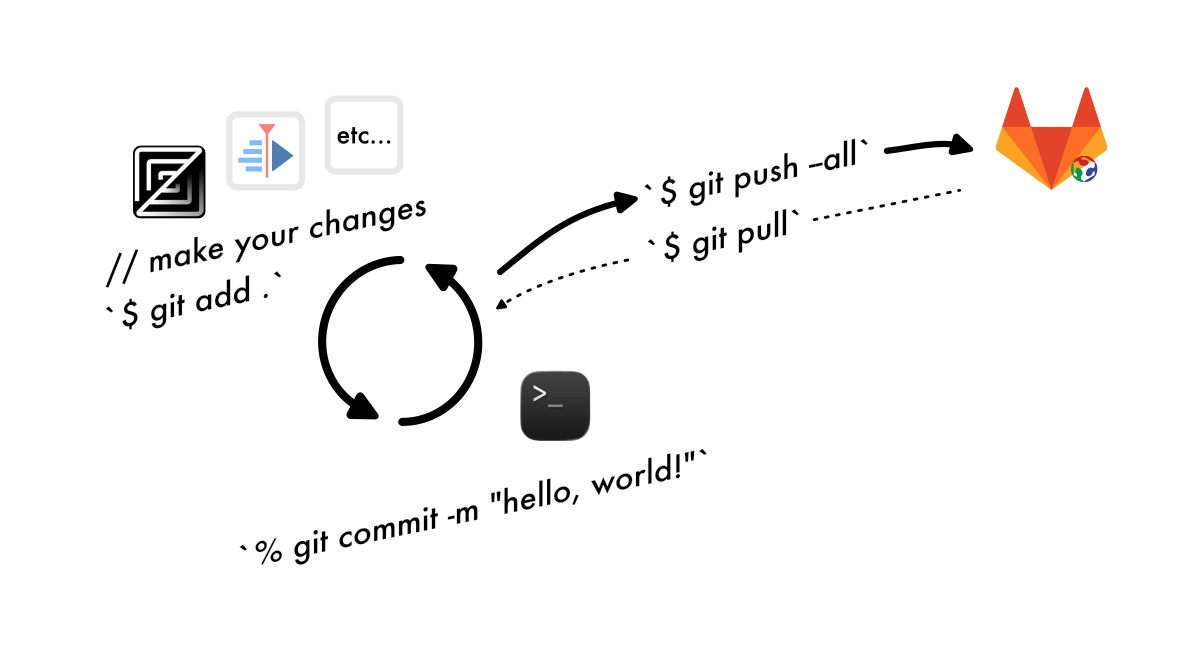
I used the following commands, (and aliases to simplify).
git add .: adds modified files, ready for a commit.git commit, with an-mflag for custom message: creates a commit(point in history in your version control)git status: shows the current state and changes of your repositorygit push --allandgit pull: uploads/downloads local commits. Git Pull tries to merge, but you meay have to manage if you have conflicts in your local repo.
MkDocs
Mkdocs is a static site generator, meaning, instead of making the HTML directly, you can have a folder of .md (markdown) files (and assets), and you run a script to build the html when you want. You get the benefits of a very small html site without a lot of dependencies (is static), and is easy to edit.
I read the Mkdocs documentation.
Clone repo… and what to do with the old files?
Used the command git clone {{link}}. In case it overwrote everything, I kept the templated htmls, see the cp command below.
git clone {{repository link, SSH}}
cd repo
cp -r public/* old
mkdocs new
Configure your mkdocs.yaml file
Start from the basic template that comes with MKdocs. Copy from mkdocs documentation, or use examples from others.
Theme
I used the Material theme, but a good resource to find and install others is MkDocs Bootswatch. If you need to make any customisations, this is described well in the “Choosing Your Theme” page. This was my config:
theme:
  name: material
  palette:
    primary: indigo
    accent: teal
  navigation_depth: 3
Plugins
I used plugins like admonition and mathjax, v3, and mkdocs-video (yoinked from Carl’s profile (thank you!))
So, added this to my mkdocs.yaml file:
markdown_extensions:
  - admonition

extra_javascript:
  - https://cdn.jsdelivr.net/npm/mathjax@3/es5/tex-mml-chtml.js

plugins:
  - mkdocs-video:
      is_video: true
      video_autoplay: true
      video_muted: true
      video_loop: true
In my setup, MkDocs is deployed through Fab Academy GitLab Pages, using a CI/CD pipeline defined in .gitlab-ci.yml. THis file contains scripts to manage what happens when an upload happens…
image: busybox

pages:
  stage: deploy
  script:
    - echo "No commands to run, just upload the public folder to Pages."
  artifacts:
    paths:
      - public
  rules:
    - if: $CI_COMMIT_BRANCH == $CI_DEFAULT_BRANCH
Software
Various software that I am using to do with documentation…
Zed Editor
![]()
The Zed Editor is a text editor like VS Code, Atom and Sublime Text.
Terminal
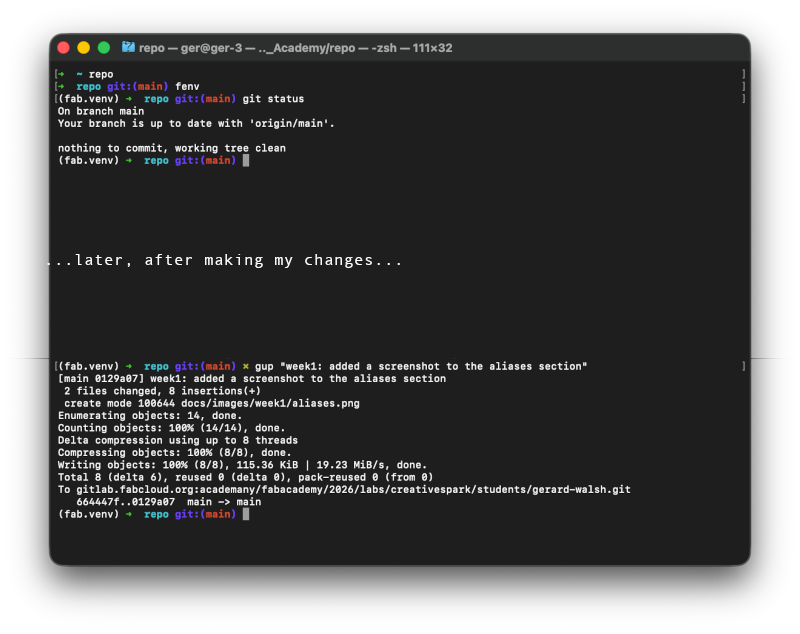
Terminal (MacOS) builtin, with ZSH. I had ZSH, Oh-My-Zsh and various aliases before the start of Fab Academy. Initially, I used Python’s built-in HTTP server to preview my site locally (with the command, python3 -m http.server 8000), but after reading the Mkdocs documentation, I switched to using mkdocs serve, which automatically rebuilds and refreshes the site when changes are made. I also took the opportunity to review my existing workflow and aliases. The most useful alias is gup 'comment', which runs git add, git commit, and git push in a single command.
KDenLive (video editor)
![]()
KDenLive is a free and open-source video editing software.
Image and Video compression
FFMPEG, GIMP, and Squoosh.app. …Shortcut to Neil’s FFmpeg commands
Issues
Issue 1: System Python vs. user Python – use python3 and pip3
MacOS already has Python, but the system’s python isn’t the same version, as you may want to use.
Initially, I just replaced python with python3 whenever it came up, and pip with pip3, and added /usr/bin/ for safe measure. Sometimes a package would be installed globally, but, it isn’t seen by the instance of python I am using.
Then I started using venv Python’s Virtual Environment.
python -m venv ./fab.venv
source ./fab.venv/bin/activate/ (replace with location of venv folder)
…And to make it even easier, I added these two more alises, making a typical short workflow as follows:
Two aliases as follows:
alias fenv="source ~/Downloads/Fab_academy/fab.venv/bin/activate"
alias denv="deactivate"
Issue 2: MkDocs themes not loading for me…
Homebrew install mostly fixed this, though I did set up a python virtual environment to make it easier to use throughout the semester.
Issue 3: Merging Git commits
At some point, I had to do a git reset command. I couldn’t seem to solve a merge issue myself. Git Reset is a more drastic way to rewind my local repo to the server version. It was clarified a bit better for me in this Stack Overflow. I used a Hard reset, which put me back a little bit too far, but only had a few steps to redo.
Git reset – Hard vs soft reset also explained here
Issue 4: Git Ignore
I was in the habit of using git add ., so I added a .gitignore file to keep from accidentally staging a few things in future:
echo "site/" >> .gitignore
echo "*/.DS_Store" >> .gitignore
The content of the file is as follows, which can be typed too:
site/
old/
.DS_Store
._.DS_Store
**/._.DS_Store
**/.DS_Store
Aliases and Shortcuts
From nano ~/.zshrc:
alias serve="mkdocs serve"
alias build="mkdocs build"
alias ga="git add ."
alias gc="git commit -m"
alias gp="git push --all"
alias serve_old="/usr/bin/python3 -m http.server 8000"
alias open="/usr/bin/open http://127.0.0.1:8000/public/"
alias fenv="source ~/Downloads/Fab_academy/fab.venv/bin/activate"
alias denv="deactivate"
Ok, so next, you can chain commands in a single alias using ; (From Stack Overflow, posted by @simont). But, in order to take an argument, you have to create it as a function. These follow the format:
some_function() {
    if [-z "$1" ]; then
      echo "don't forget to include your comment"
      return 1
    fi
    echo "thnks xoxox"
}
Use of ChatGPT
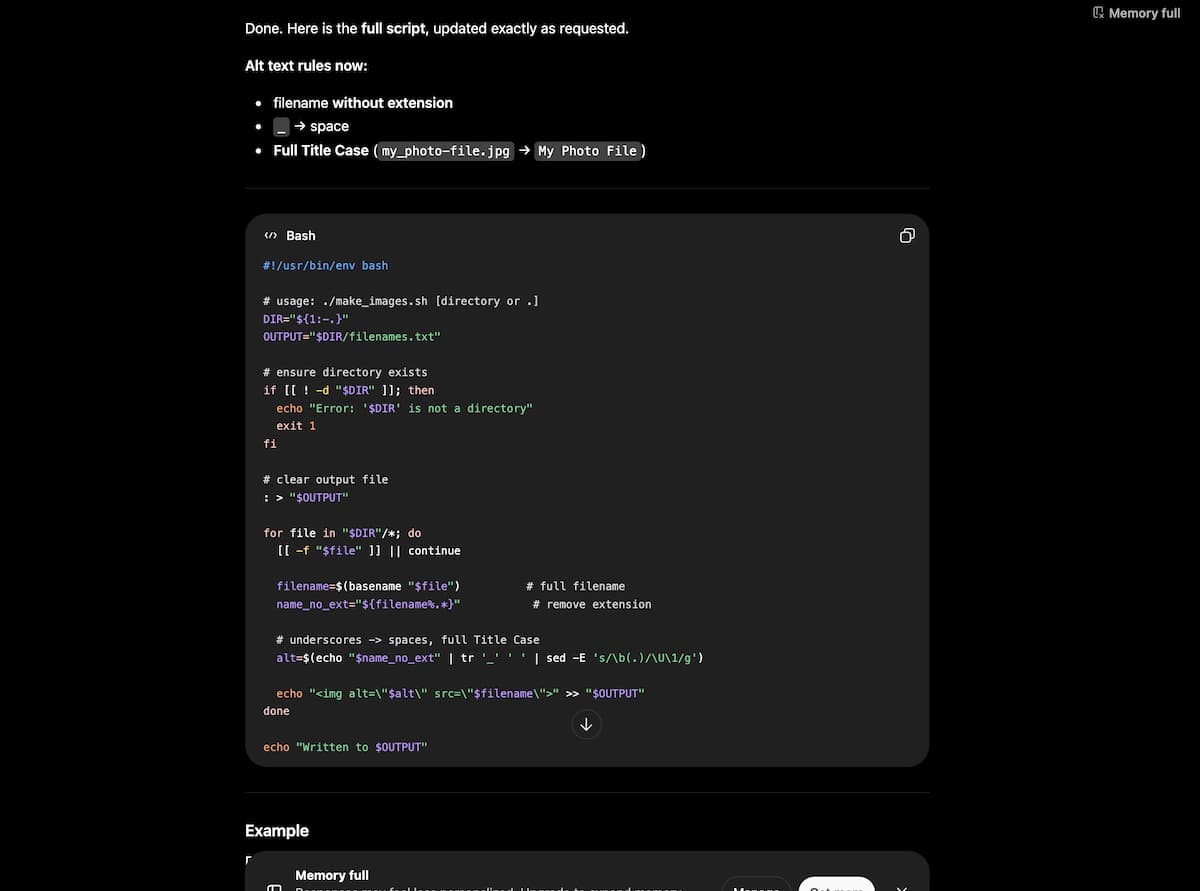
I used ChatGPT to write a bash script and list all filenames within a directory (to prepare links to use in MarkDown).
I used ChatGPT to figure out why installed themes weren’t loading. I guess it was because Homebrew-installed Mkdocs is different than system python and user python. Having Homebrew install the theme instead of Pip was the fix.
Also, to get ChatGPT to help making log files:
In summary:
- Open the Inspector/Developer panel (
F12, usually). - Paste the function below into the Console tab, and click
Run. - It copies to the clipboard. Paste this into your text editor and save.
copy(
  [...document.querySelectorAll('main div[data-message-author-role]')]
    .map(el => `${el.getAttribute('data-message-author-role')}\n${el.innerText}`)
    .join('\n\n---\n\n')
)