Week14 - Molding and Casting
Group Assignment
The link to our group work: https://fabacademy.org/2026/labs/chaihuo/docs/week14/chaihuo/week14_group_assignment
Objective
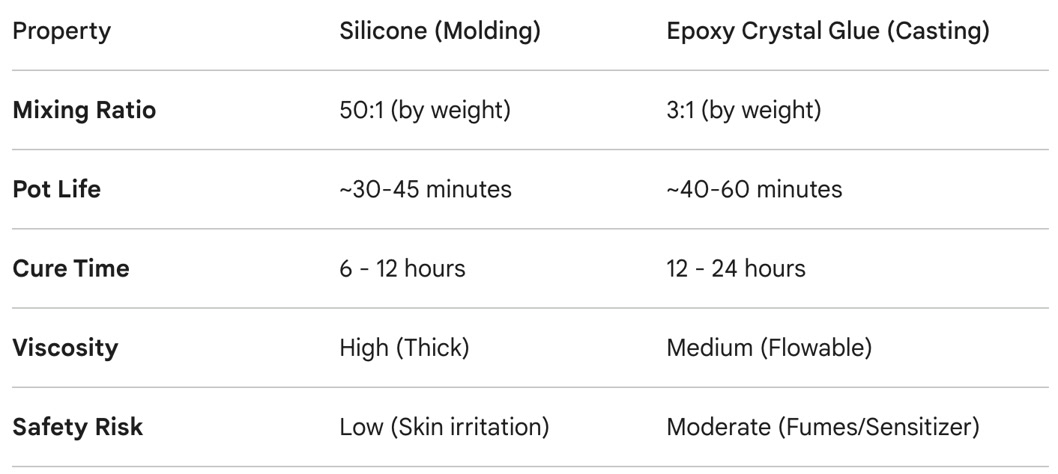
The goal of this week's group assignment was to compare the technical specifications and actual performance of the molding and casting materials available in our lab. We focused on understanding the mixing ratios, safety requirements, and material properties of silicone and epoxy resin.
Safety First: SDS and Protective Gear
Before starting, our team reviewed the Safety Data Sheets (SDS) for the materials we used.
-
Silicone (Liquid Rubber): Generally low toxicity, but can cause skin irritation.
-
Silicone Rubber (Addition Cure): The SDS indicates that while the base is relatively inert, the Catalyst (Part B) often contains organotin compounds or platinum complexes that can be harmful if swallowed or in contact with eyes. It is categorized as a low-hazard chemical but requires strict skin protection to avoid long-term sensitization.
-
Epoxy Crystal Glue: The SDS for the Resin (Part A) and Hardener (Part B) highlights higher risks. The Resin is an irritant and environmentally hazardous (toxic to aquatic life). The Hardener is often corrosive, capable of causing skin burns and serious eye damage. We noted the importance of the Flash Point—keeping these chemicals away from open flames despite their slow curing speed.
Safety Conclusion: Based on the SDS, the primary risks are skin absorption and allergic sensitization. This justifies our requirement for nitrile gloves and a dedicated chemical waste management flow.
Safety Protocol:
-
Always wear nitrile gloves.
-
Work in a well-ventilated area.
-
Wear eye protection when mixing.
-
Use a protective mat to prevent desk contamination.
Material Comparison: Technical Specifications
To complete the molding and casting cycle, we used two distinct chemical systems. Understanding the role of each component is key to a successful result.
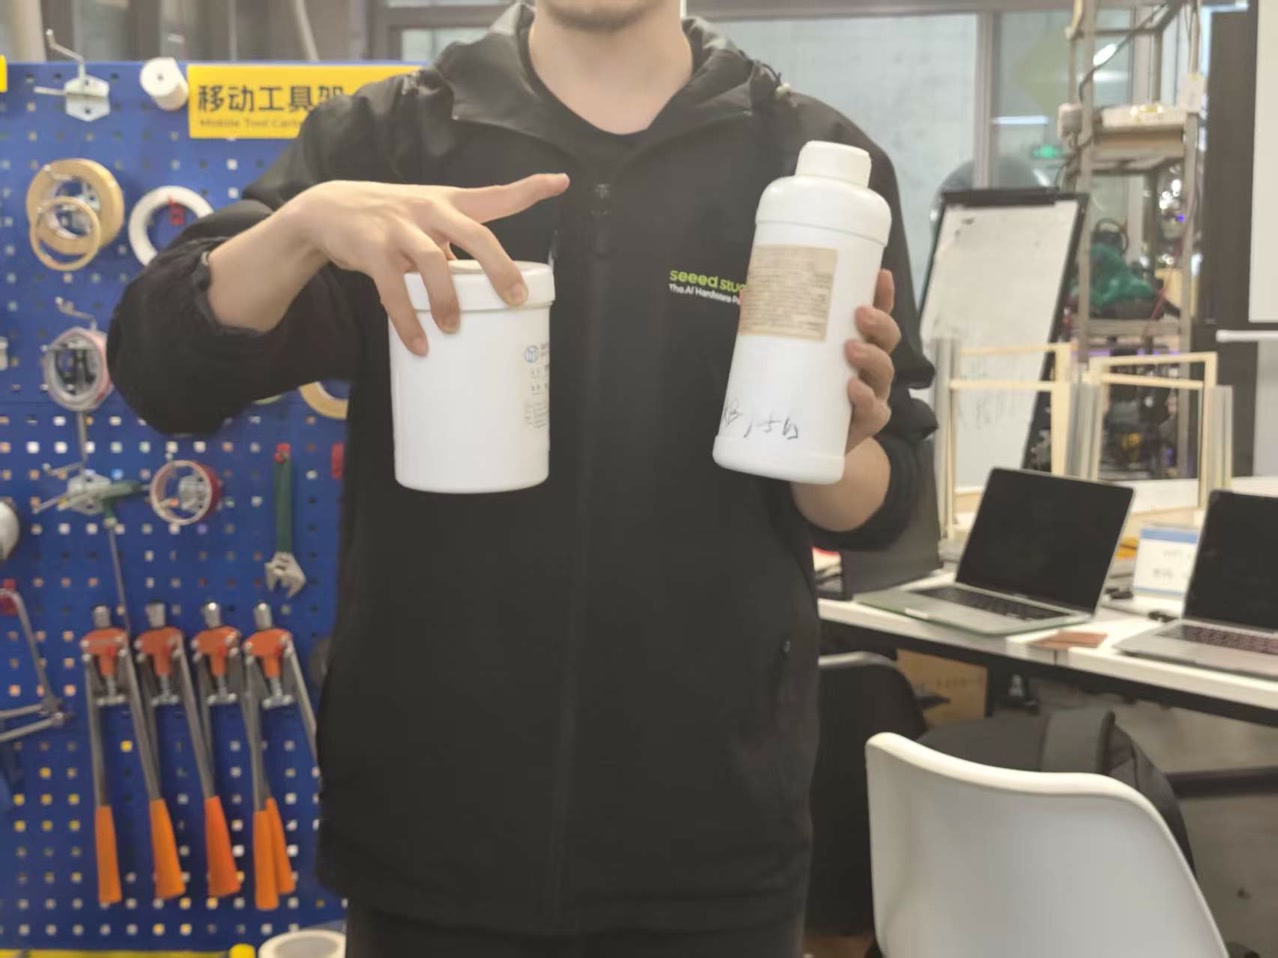
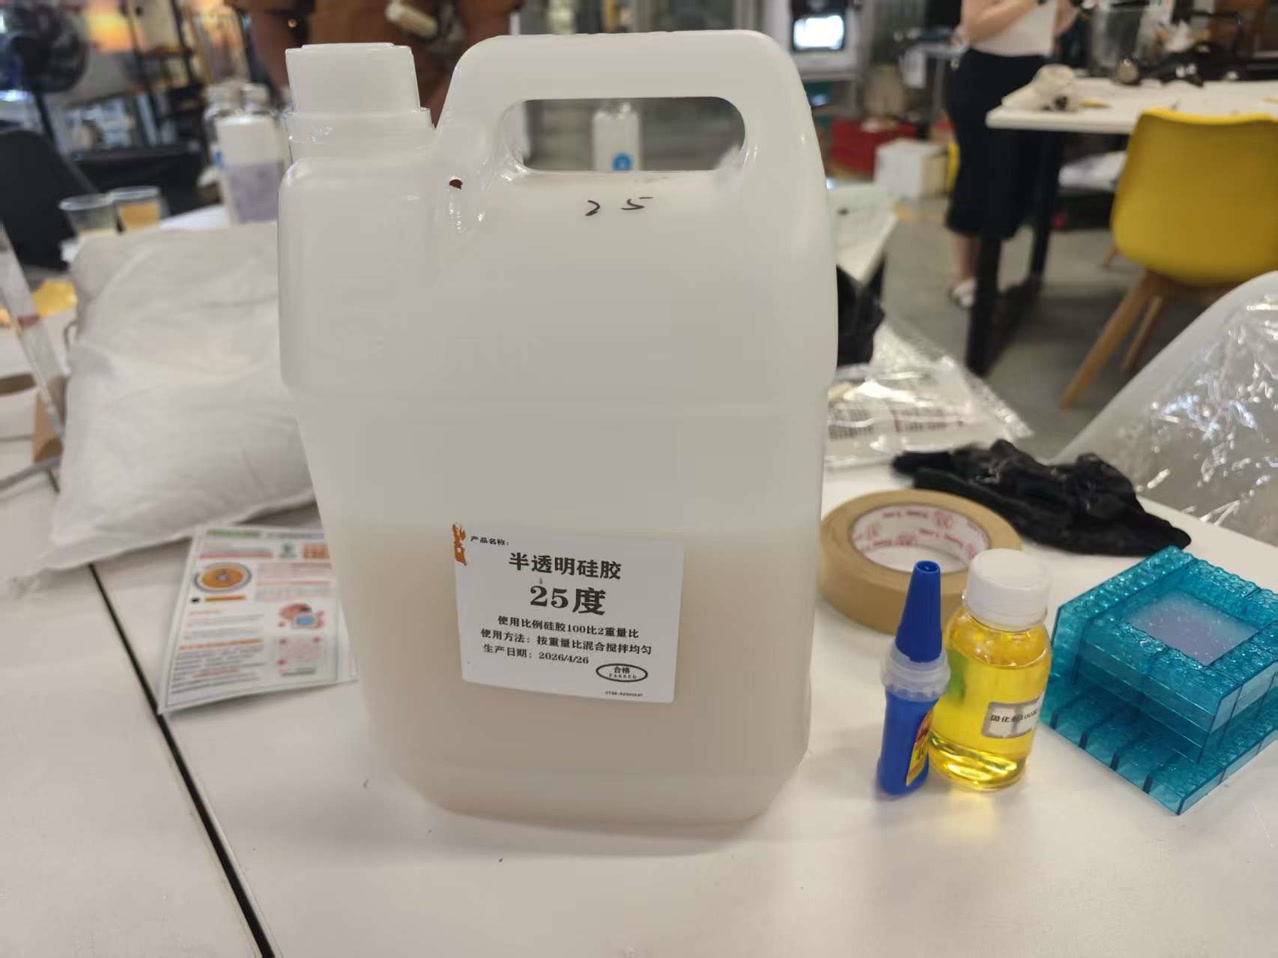
**Silicone Rubber (The Mold Maker): **Silicone is a two-part elastomer used to create the flexible "negative" of our design, consisting of a viscous liquid base and a specialized catalyst that initiates a cross-linking reaction. We chose this material because its high flexibility allows for easy demolding of complex shapes, and its excellent chemical stability ensures it can capture extreme microscopic details from the 3D-printed master model with high fidelity.
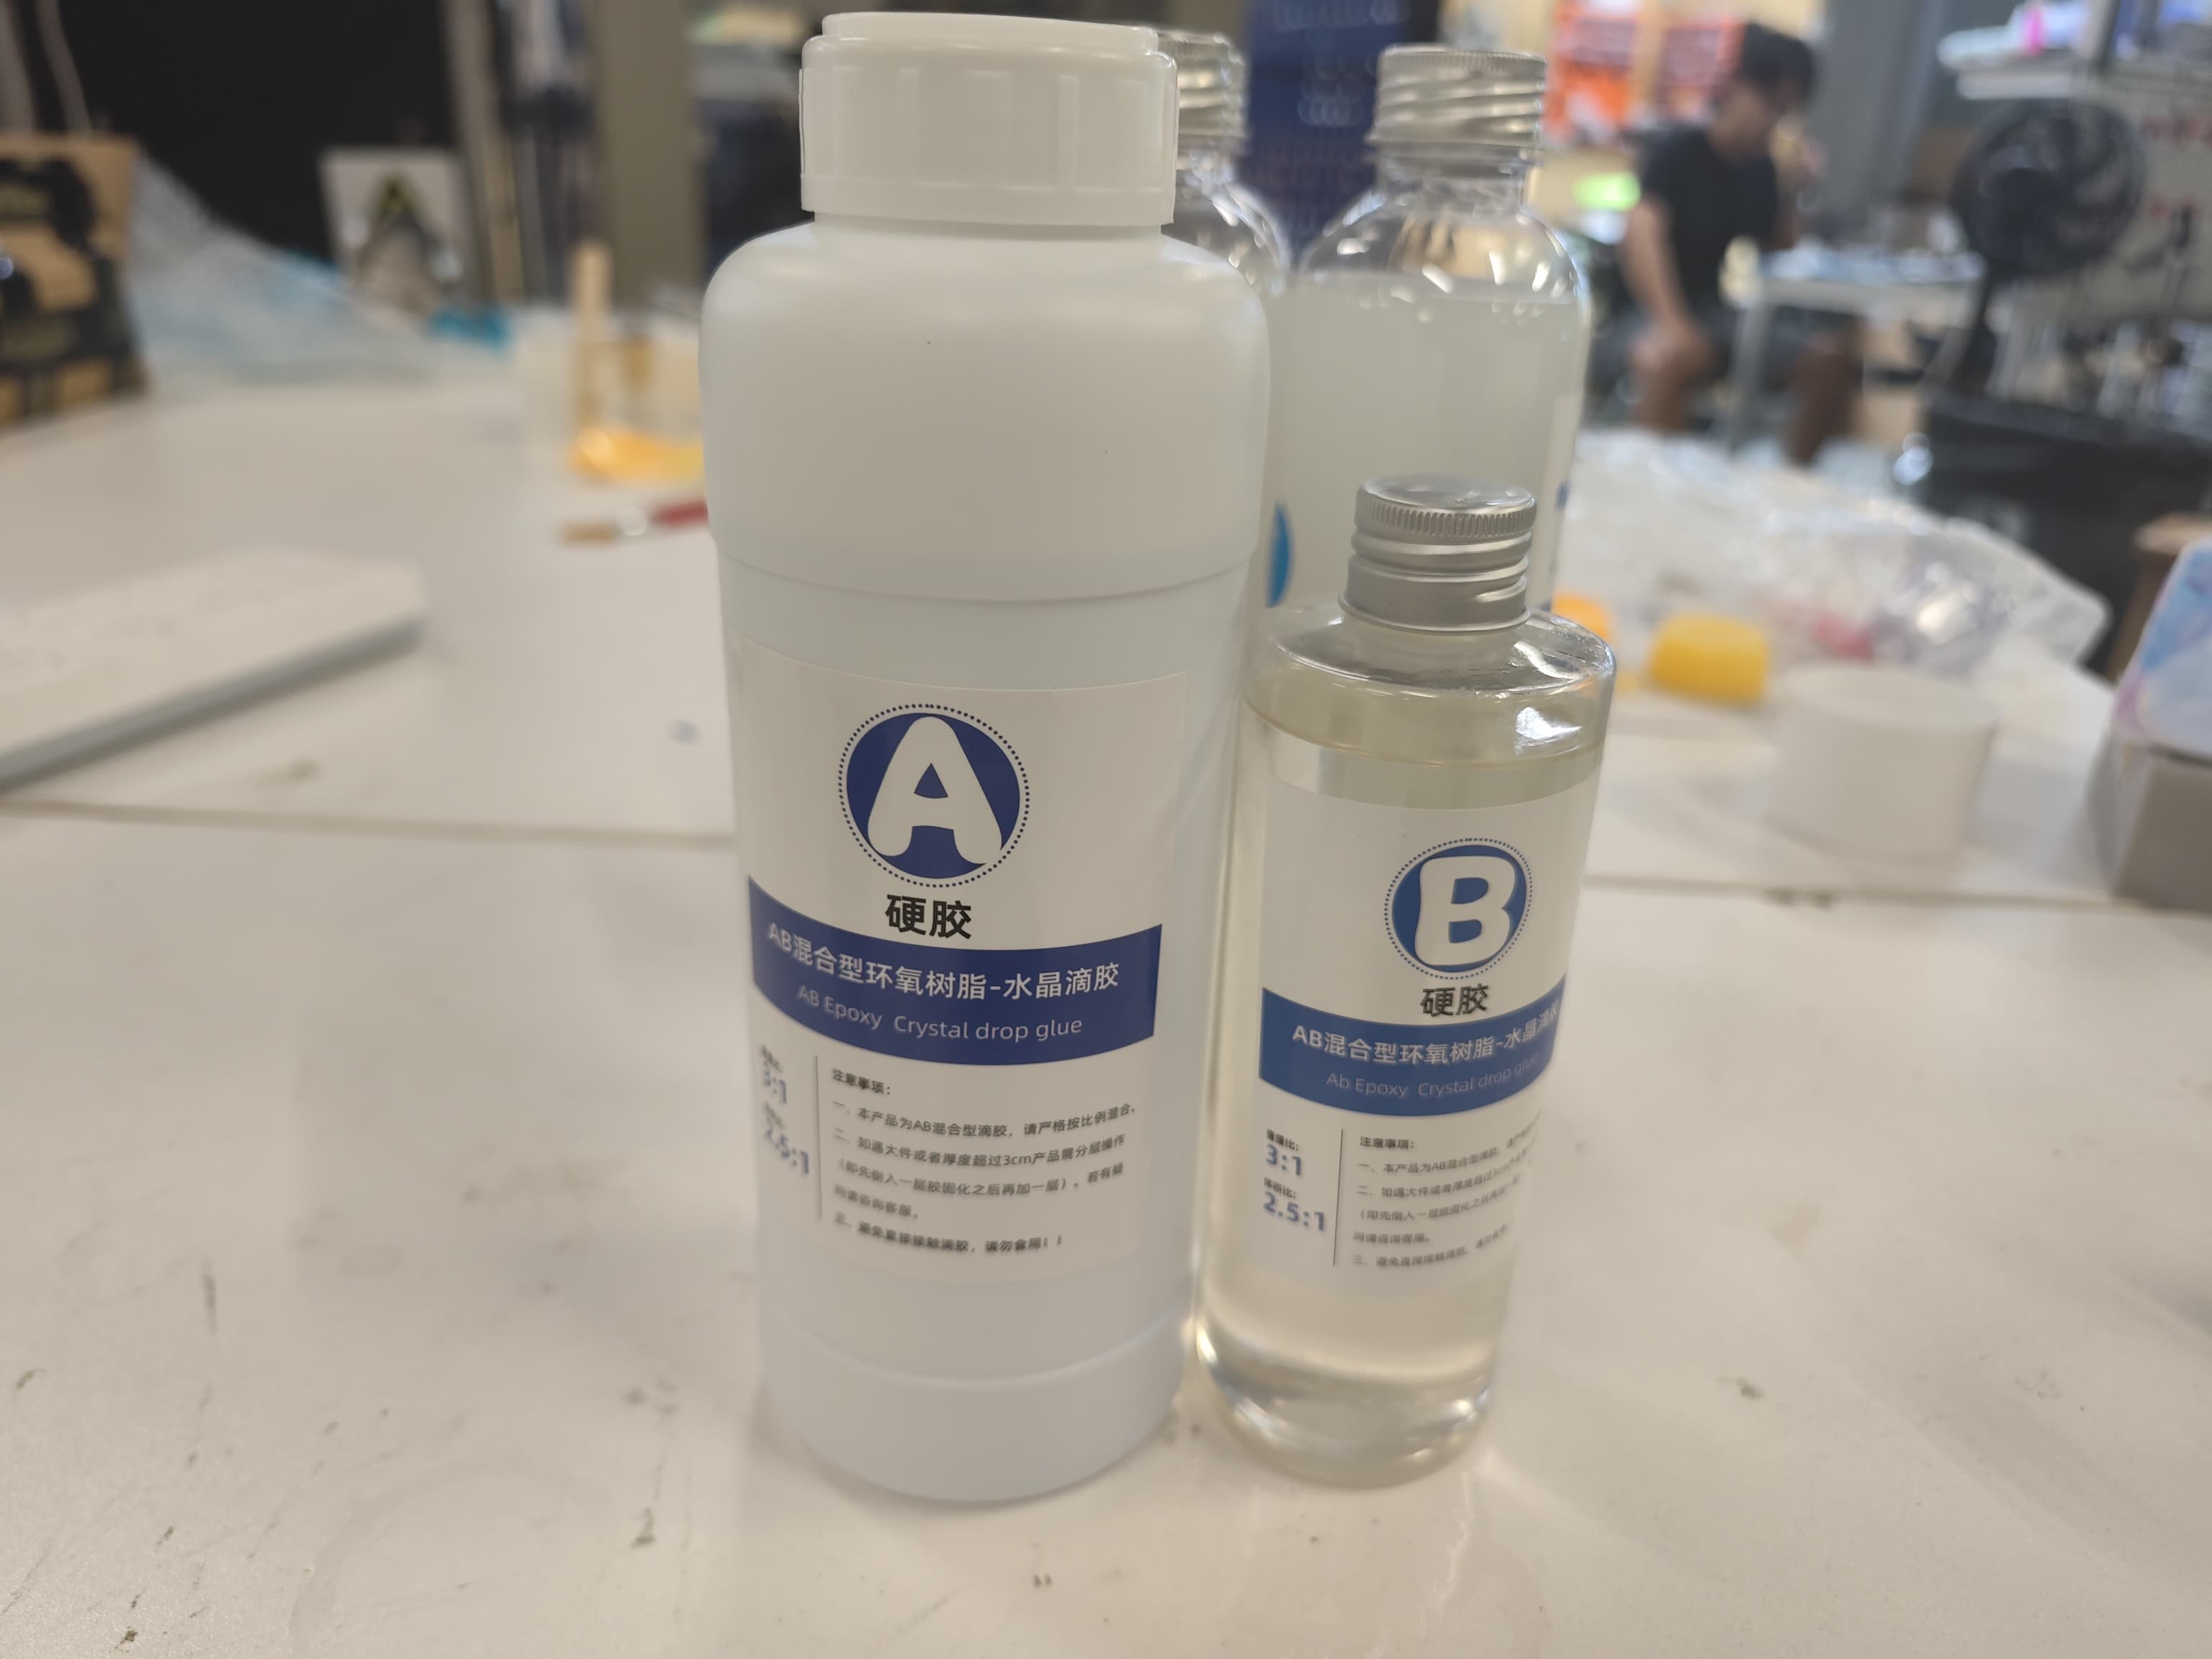
Epoxy Crystal Drop Glue (The Casting Resin): This is the "positive" material used to create the final hard object, formed by mixing a liquid epoxy resin with a hardener to create a rigid, plastic-like structure. We specifically selected "Crystal" epoxy for its low viscosity and high transparency, which allows it to flow into fine crevices while providing a glossy, glass-like finish that is ideal for decorative items like our star coins.
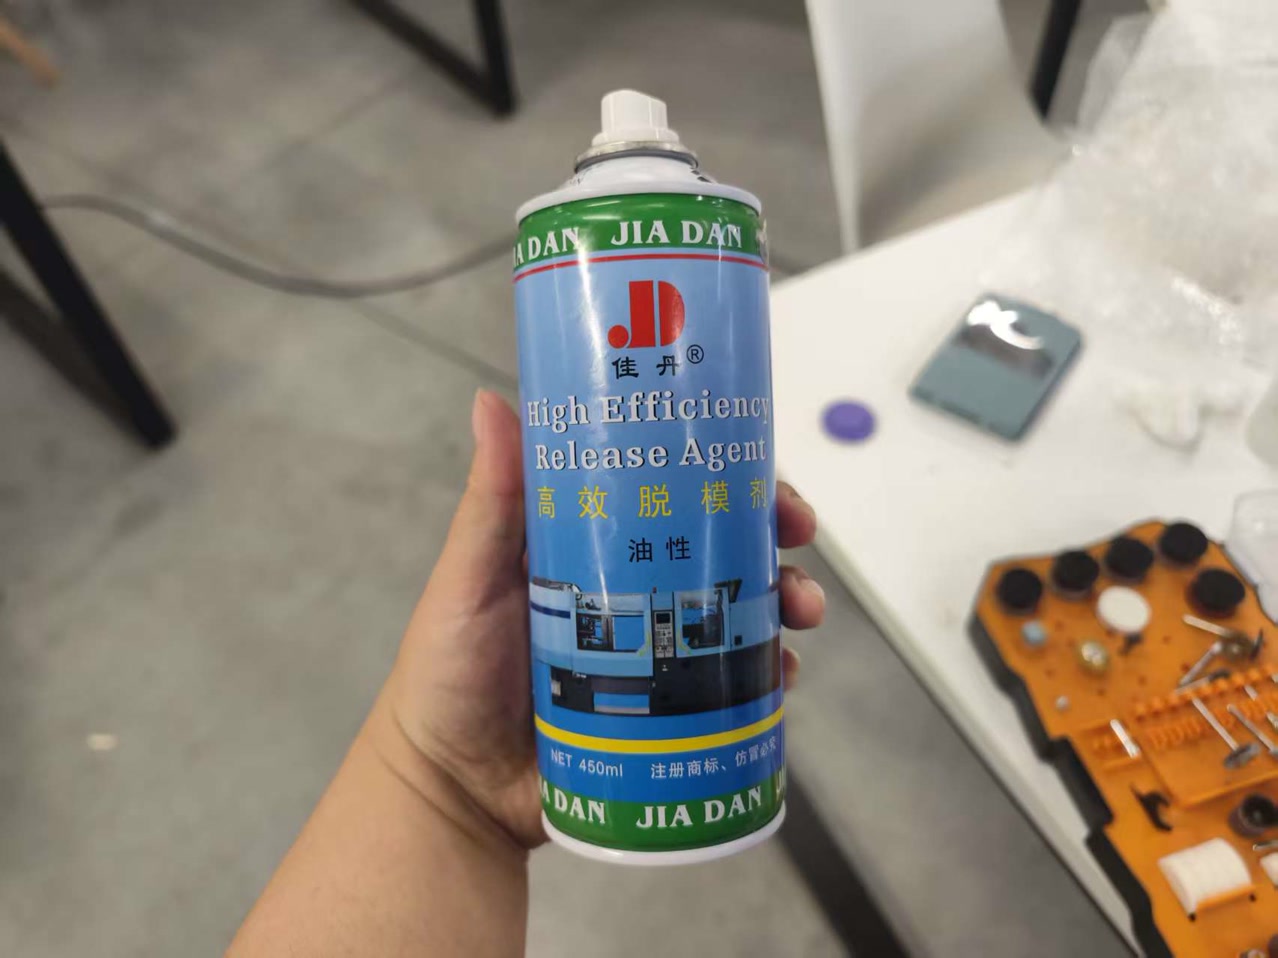
Mold Release Agent (The Separator) The mold release agent, typically packaged in a pressurized spray can, is a specialized lubricant used to prevent the casting material from bonding to the mold surface. By applying a fine mist of this agent before pouring the resin, we create a microscopic barrier that significantly reduces friction and mechanical grip. This not only ensures a smooth, non-destructive demolding process but also extends the life of the silicone mold by preventing tearing during the removal of the cured part.
Characterization Tests
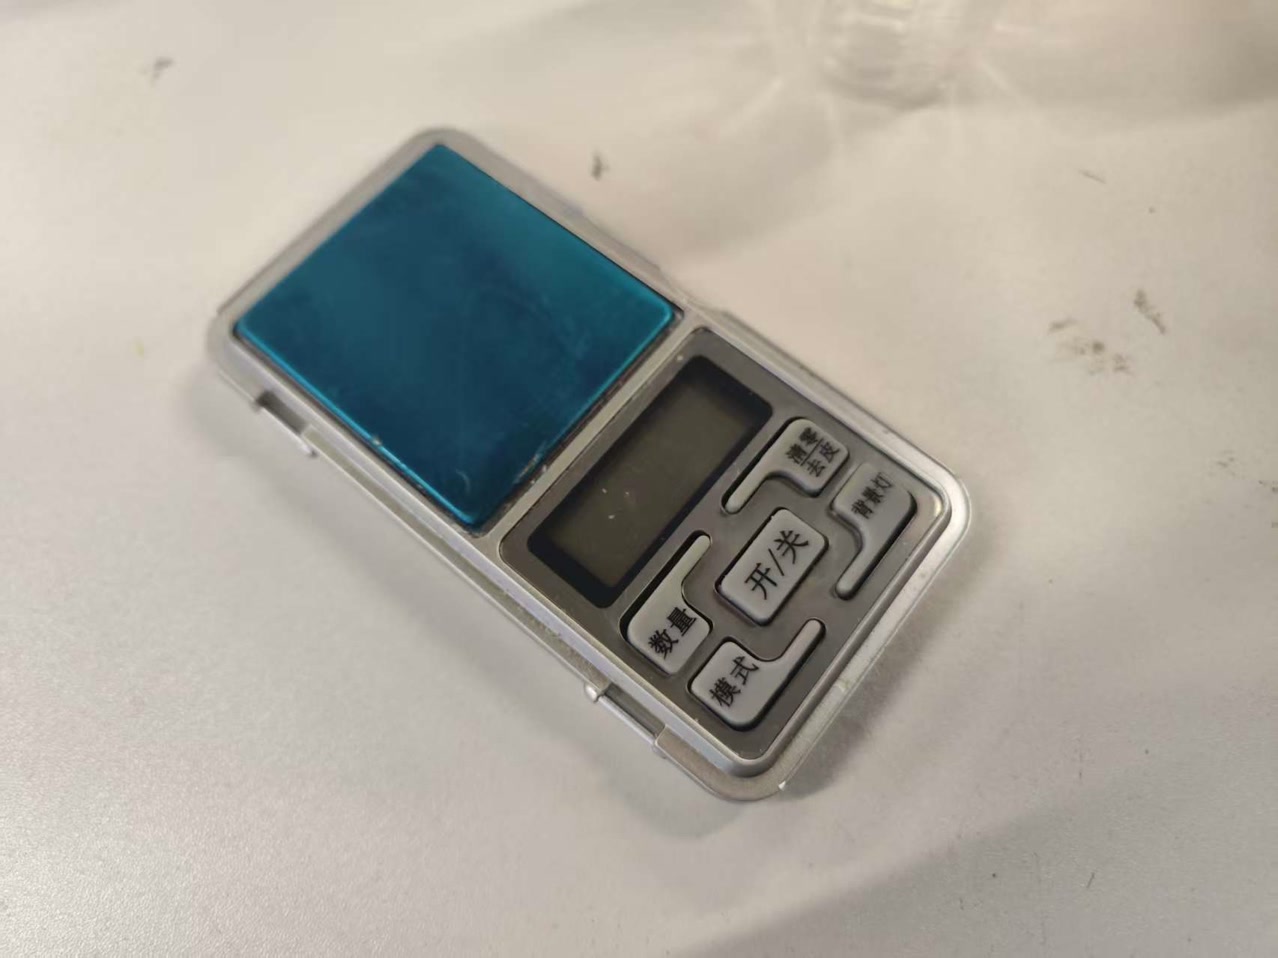
A. Mixing Precision and Chemical Sensitivity We analyzed the high sensitivity of the 50:1 mixing ratio required for silicone compared to the more forgiving 3:1 ratio of the epoxy resin. Our discussion highlighted that even a milligram-level error in the silicone catalyst can lead to a "poisoned" mold that remains liquid indefinitely. We concluded that the most critical tool for this stage is a high-precision digital scale, and the process must always include "taring" the scale with the mixing cup to ensure net weight accuracy.
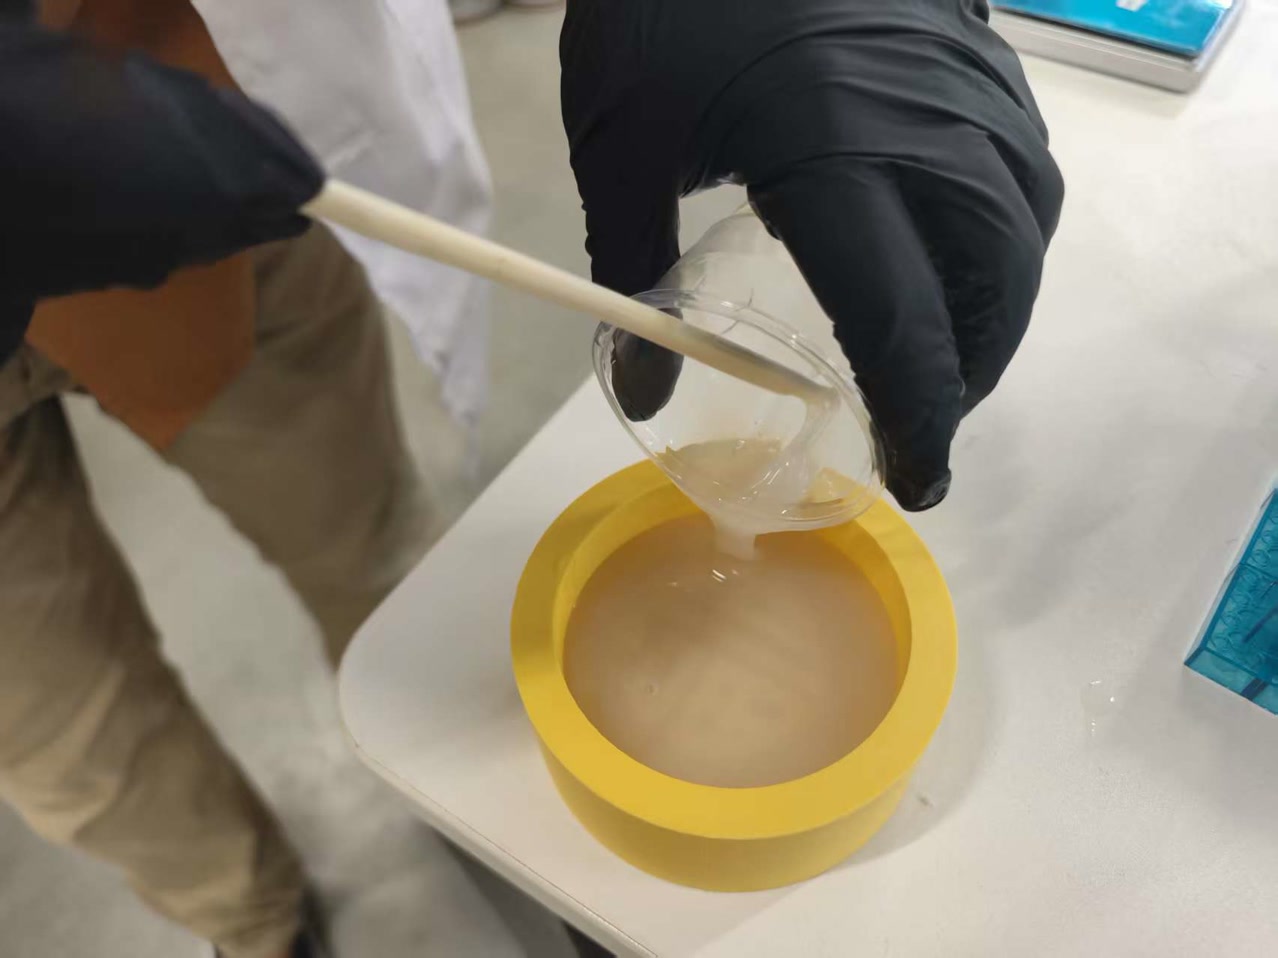
B. Viscosity and Degassing Strategies We theoretically compared how air behaves in materials of different densities. For high-viscosity silicone, which traps air easily, we discussed the "High Pour" or "Thin Stream" technique: pouring the material in a long, needle-like strand from a significant height to mechanically stretch and pop bubbles before they enter the mold. For the more fluid Epoxy Crystal Glue, we identified that while bubbles rise more naturally, a light heat source (such as a quick pass with a lighter flame) is an effective way to break surface tension and clear the top layer.
C. Material Properties and Design Suitability Our characterization of the final results focused on the mechanical contrast between the two materials. We identified that the silicone's flexibility (Shore A hardness 20-30) makes it the ideal candidate for designs with "undercuts," as the mold can stretch during demolding. Conversely, the Epoxy Crystal Glue is valued for its rigid, glass-like clarity, but we noted its brittleness as a significant constraint; thin or sharp geometric features in the design must be handled with care to prevent snapping upon removal.
Comparative Analysis: 3D Printing vs. CNC Milling Molds
We discussed the technical trade-offs between creating the "Master" or the "Mold" using Additive Manufacturing (3D Printing) versus Subtractive Manufacturing (CNC Milling).
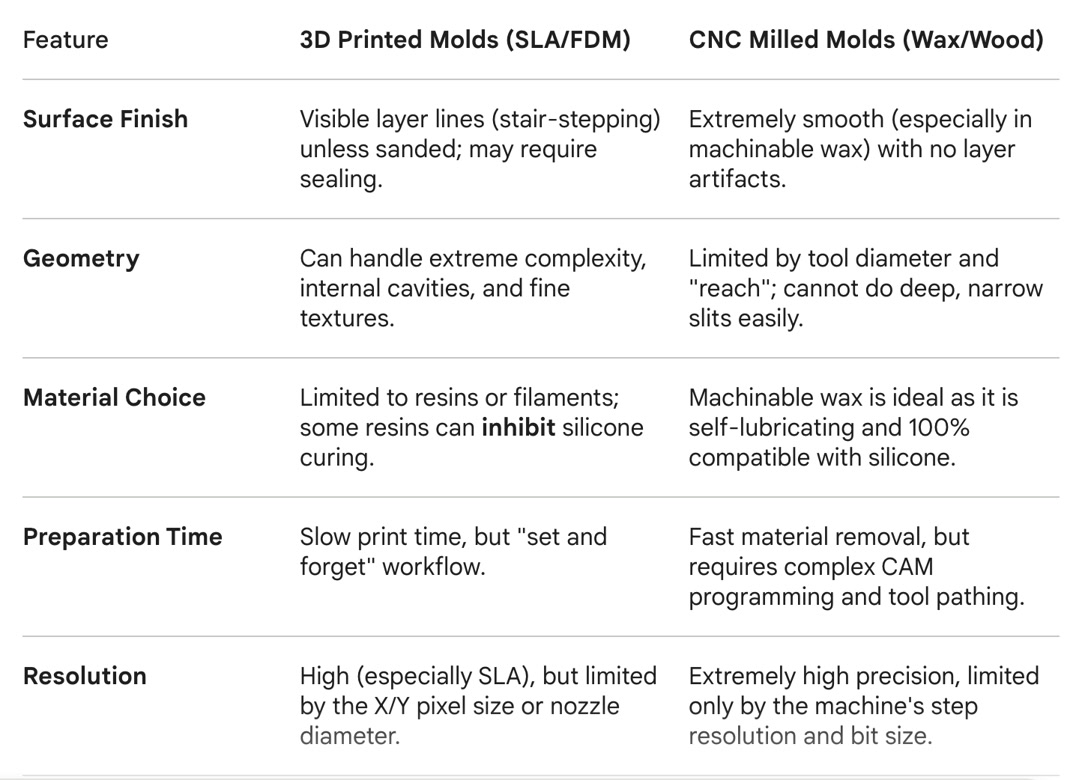
In our lab's workflow, 3D Printing is the preferred choice for rapid prototyping and projects with complex, detailed textures that would be impossible for a drill bit to reach. However, it requires careful consideration of resin-silicone compatibility. On the other hand, CNC Milling (especially in wax) is the superior method for projects requiring a professional, "mirror-like" surface finish. We concluded that if the design allows for 3-axis milling, CNC is the more reliable choice for producing clean, high-fidelity silicone molds without the risk of curing inhibition.
Conclusion
Through this group characterization, I learned that successful molding and casting is less about the pouring itself and more about precise prep-work. From analyzing SDS to understand chemical risks to mastering the 50:1 mixing ratio, I realized that small details—like degasification techniques and choosing between a 3D-printed or CNC-milled master—directly dictate the final surface quality and structural integrity of the part.
Individual Assignment
Design Concept & Strategy
The goal of this assignment is to design a mold, print it, and use it to cast a final part. I decided to create a 3D Embossed Relief Coin featuring a five-point star. This design is ideal for a first attempt at molding because it focuses on mastering surface finish and "release-ability."
Key Technical Considerations:
-
One-Part Mold: Since I am a beginner, I chose a single-sided mold to avoid the complexity of registration pins and air vents required in two-part molds.
-
The "Positive" Master: I am 3D printing the "Positive" (the final shape). I will then pour silicone over it to create the "Negative" (the mold).
3D Design in Onshape
I used Onshape for the CAD process. To ensure a successful mold, I followed a specific geometric workflow:
Step 1: Establishing the Substrate (The Base Plate)
The base plate acts as the "container" floor for the relief.
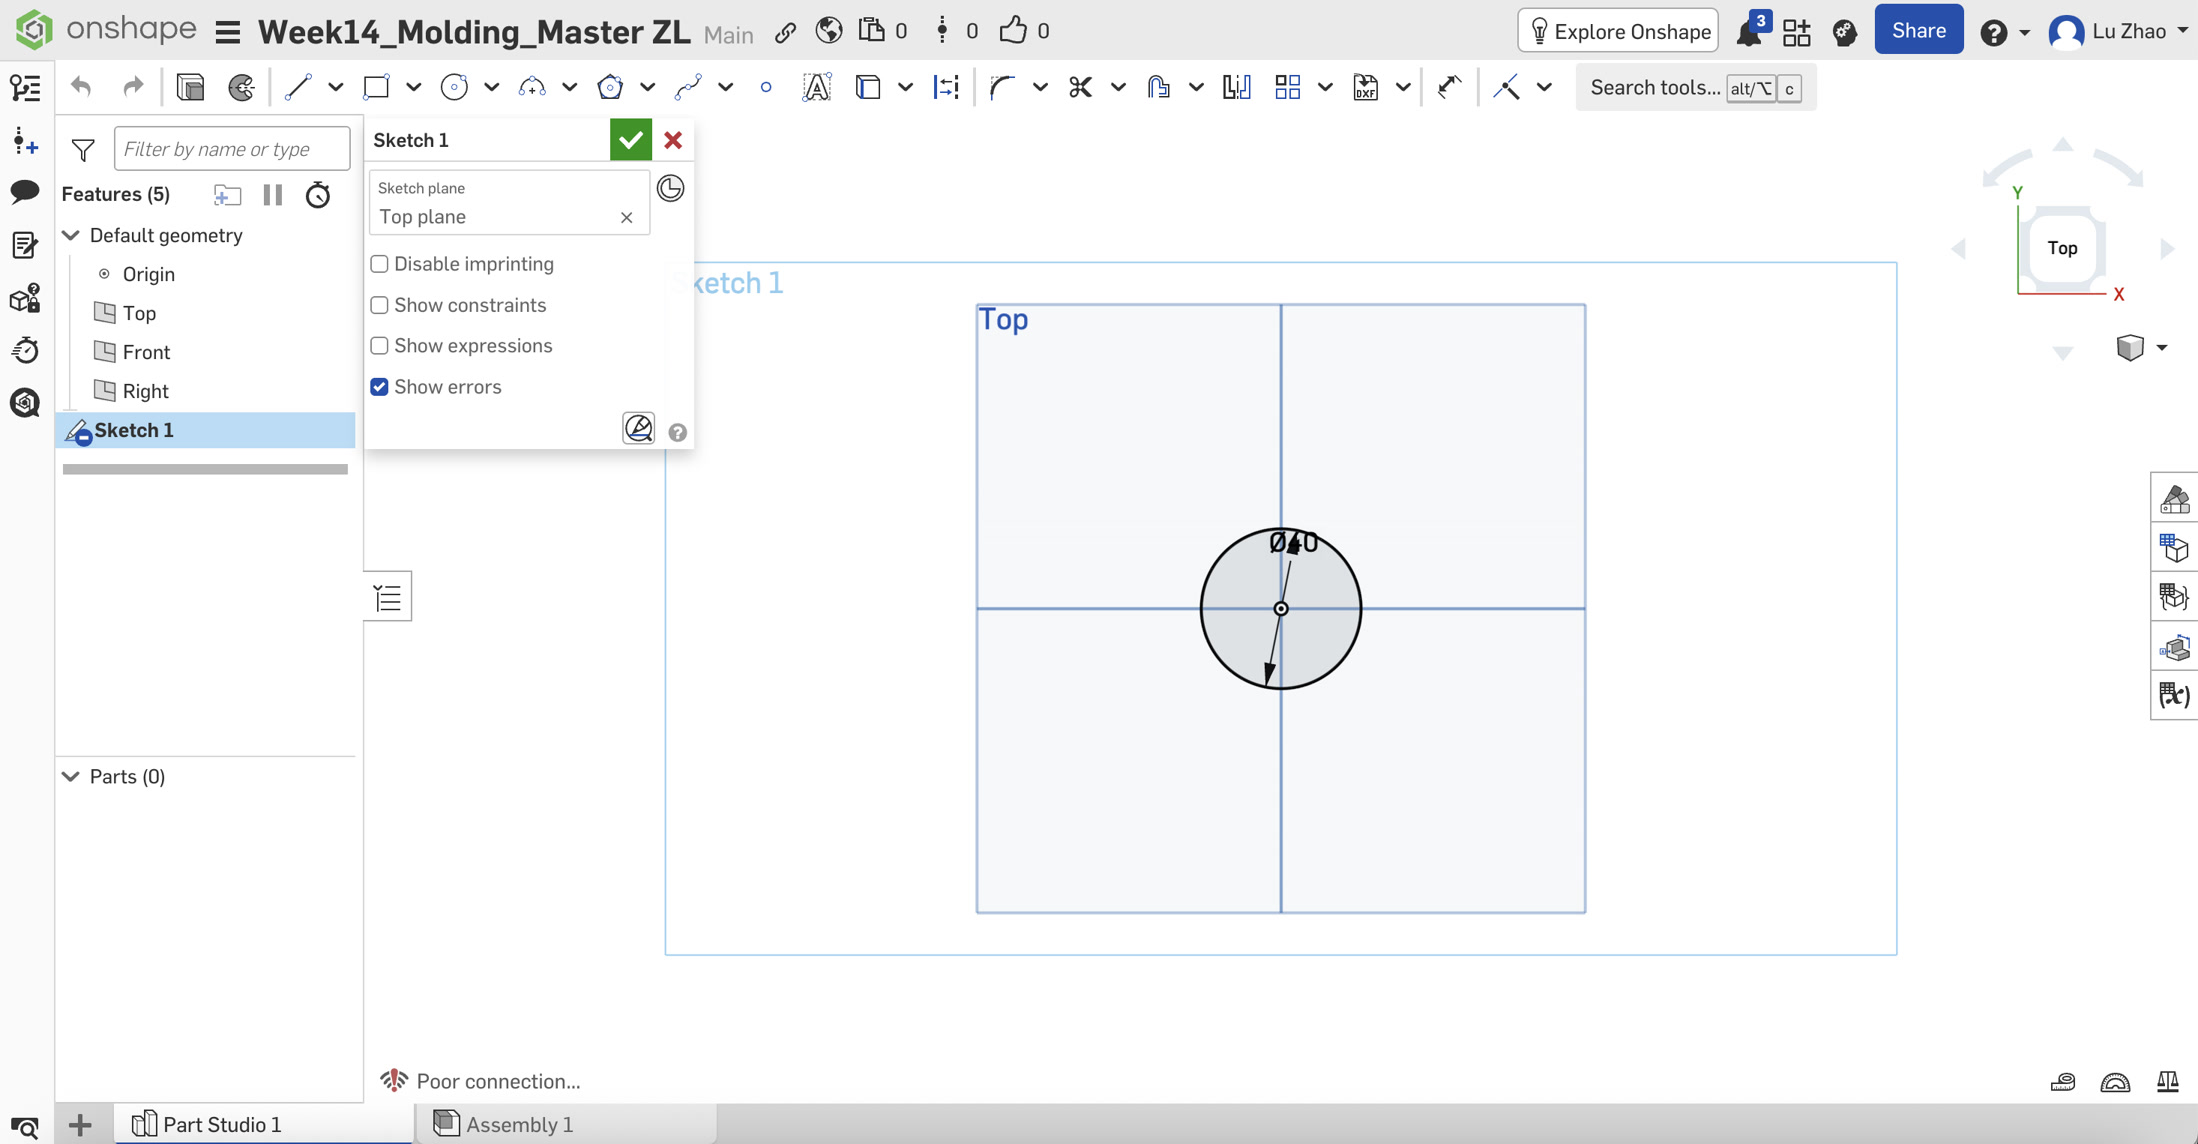
- Action: On the Top Plane, I used the Center Point Circle tool, snapping to the origin (0,0) to ensure symmetry. I dimensioned it to 40mm.
-
Engineering Logic: A 40mm diameter provides a substantial "brim" around the 25mm star. This extra space is essential for the structural integrity of the silicone mold, ensuring the walls of the mold don't collapse or distort during the casting phase.
-
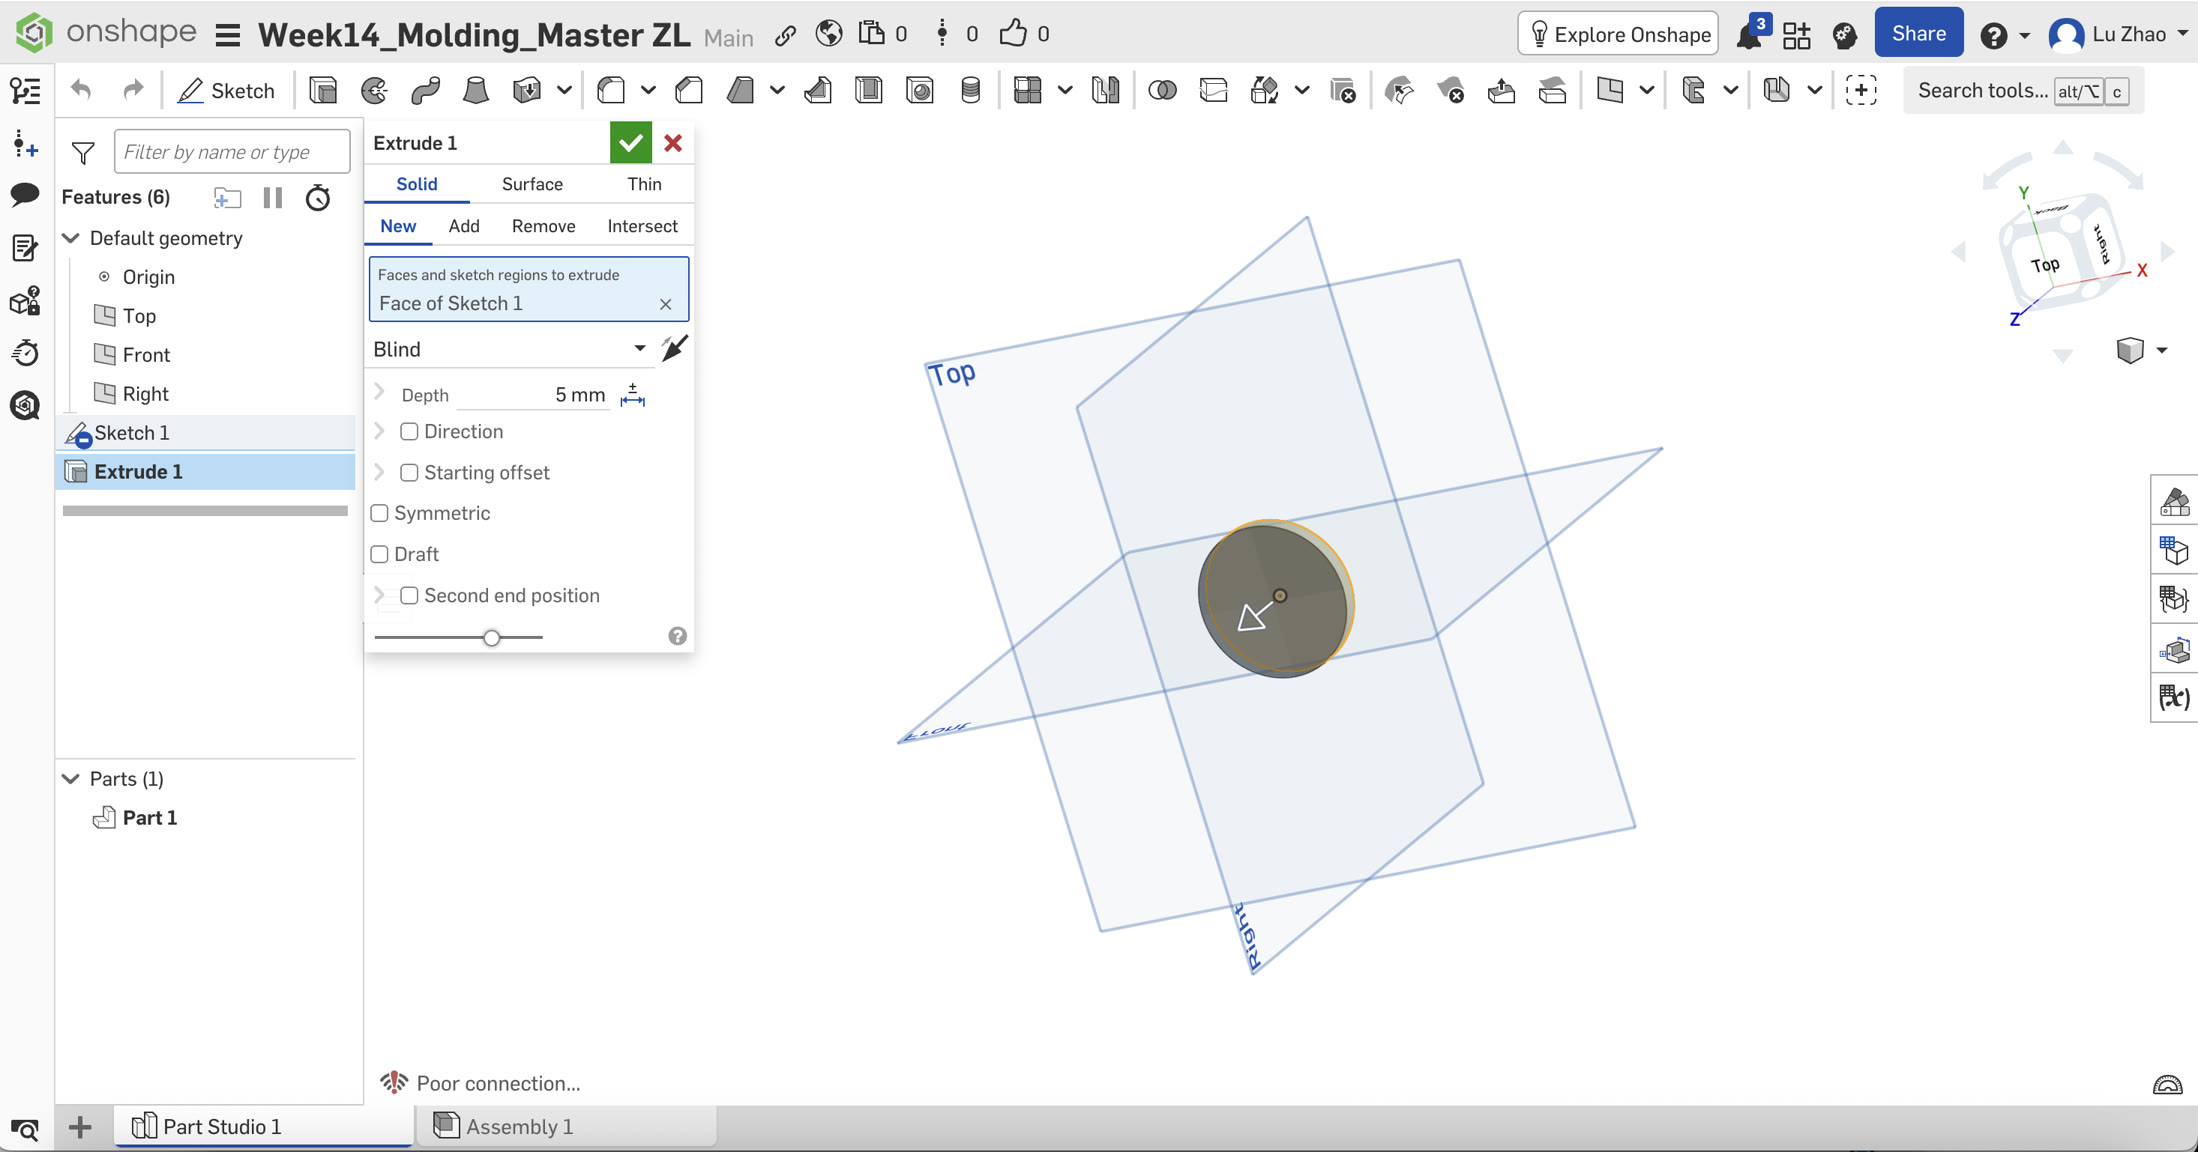
Extrusion: I extruded this to 5mm using the
Newpart setting.
Step 2: Geometric Construction of the Star (The Relief)
Creating a clean, balanced star requires precise geometric constraints:
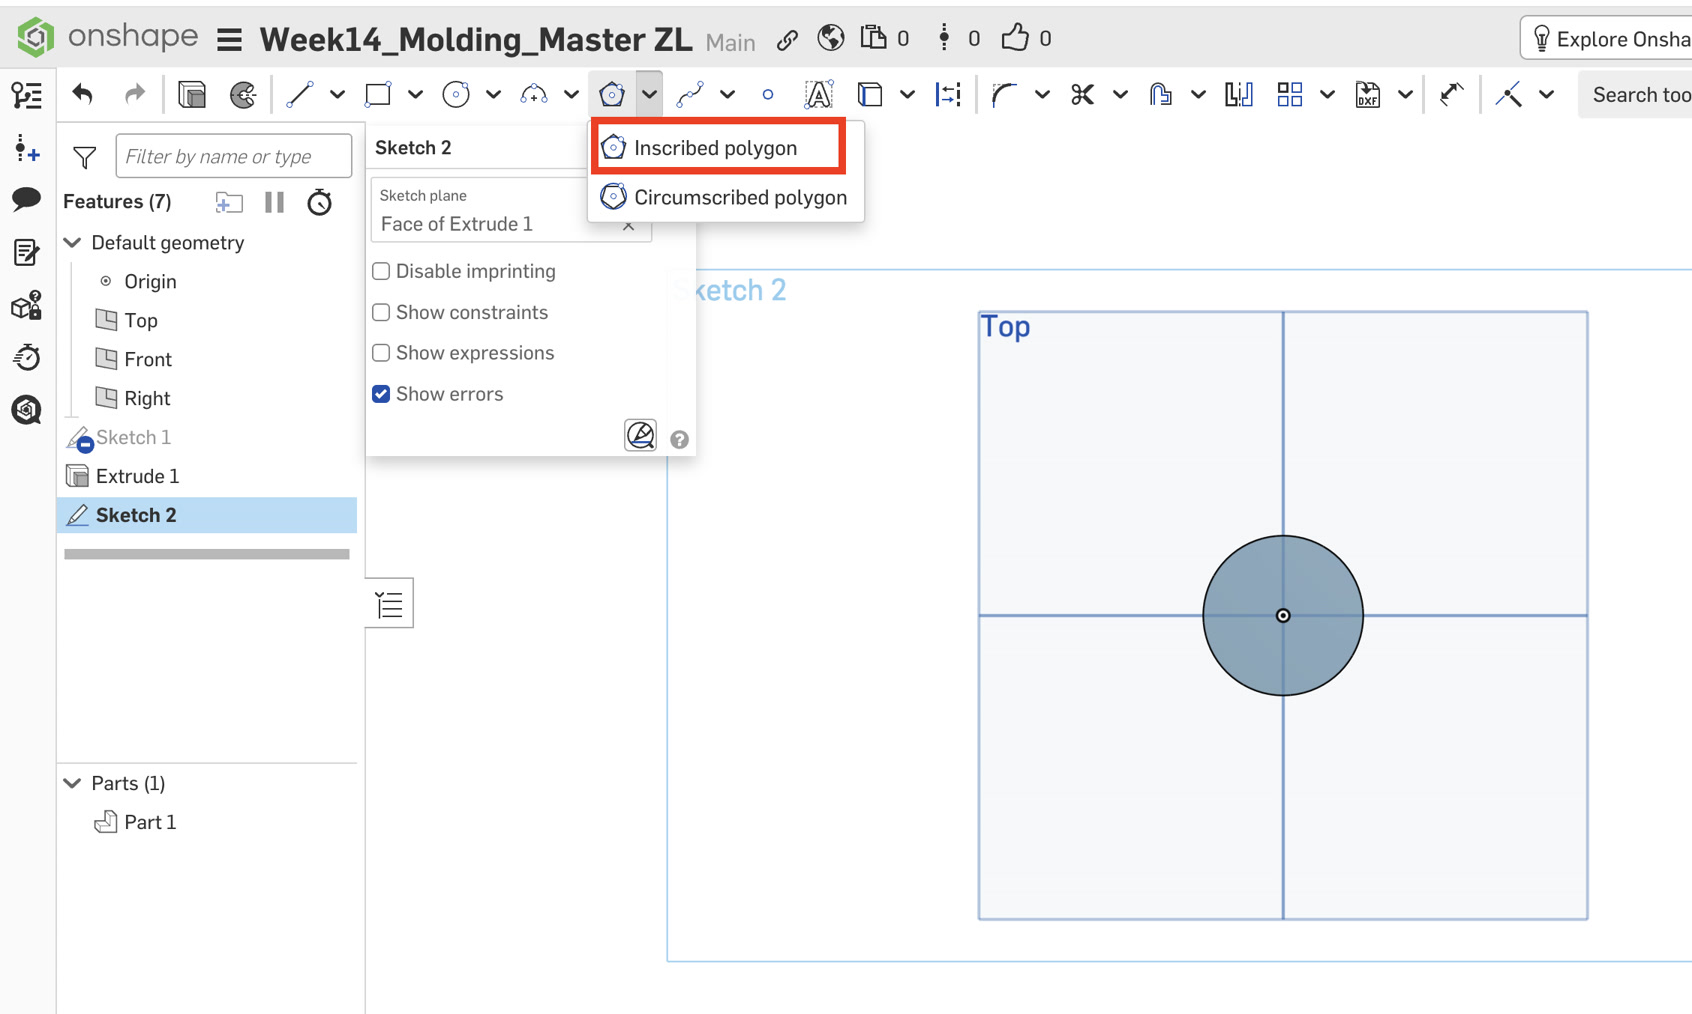
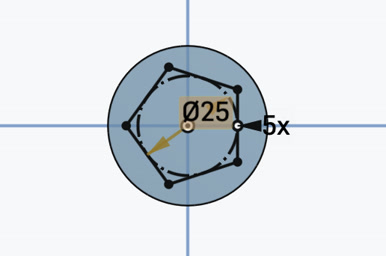
- Inscribed Polygon: On the top face of the base, I used the Inscribed Polygon tool. I set the vertex count to 5 and the construction circle diameter to 25mm.
Step 3: Advanced Extrusion & Draft Angle Physics
This is the most critical step for mold-making.
-
Operation: I selected the star profile and extruded it by 3mm using the
Addmerge scope. -
The Draft (5 Degrees): I checked the
Draftbox and set it to 5°.
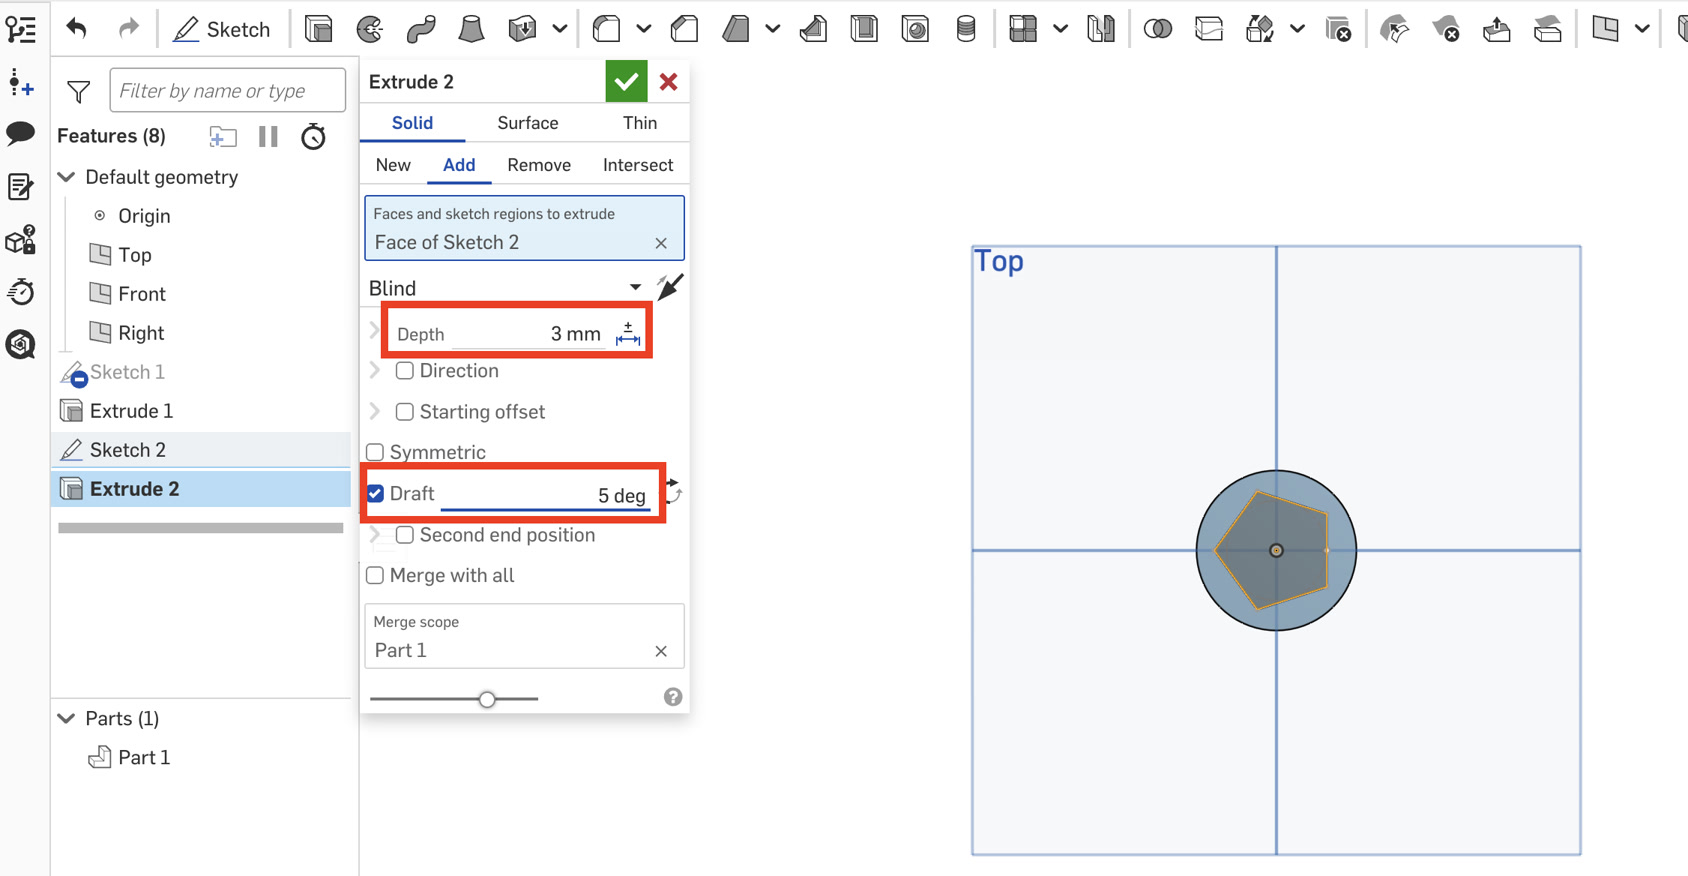
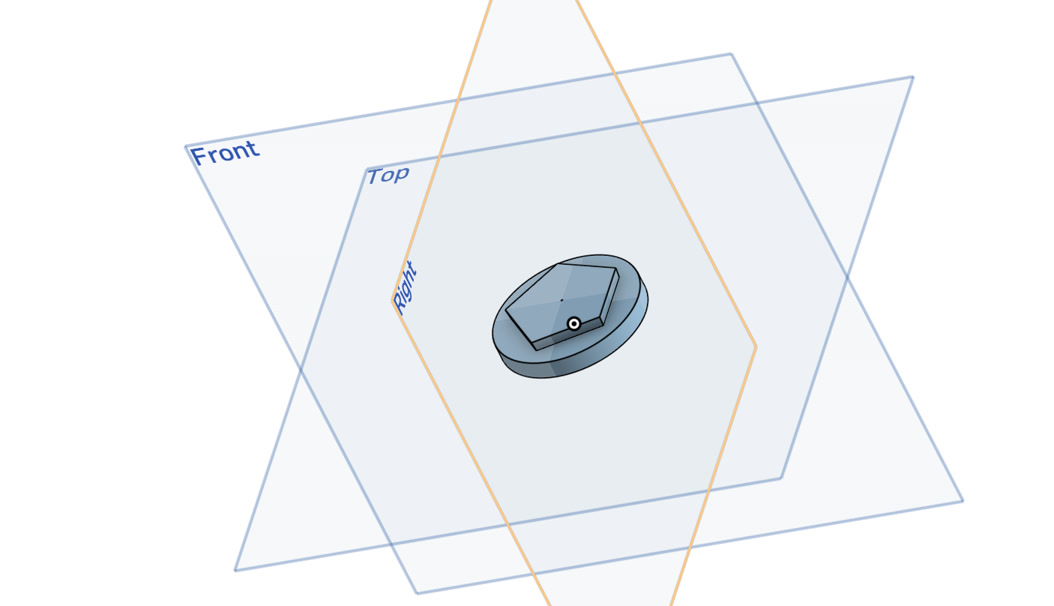
- Why 5 Degrees? In industrial injection molding, a 1° or 2° draft is standard. However, for 3D printed masters, the surface is naturally "ridged" due to layer lines. These ridges create micro-friction. By increasing the angle to 5°, I am creating a "sloped release path." As soon as the silicone mold moves upward by even 0.1mm, it is no longer touching the walls of the master, drastically reducing the risk of a "vacuum lock" or tearing the mold.
Step 4: Filleting for Fluid Dynamics and Durability
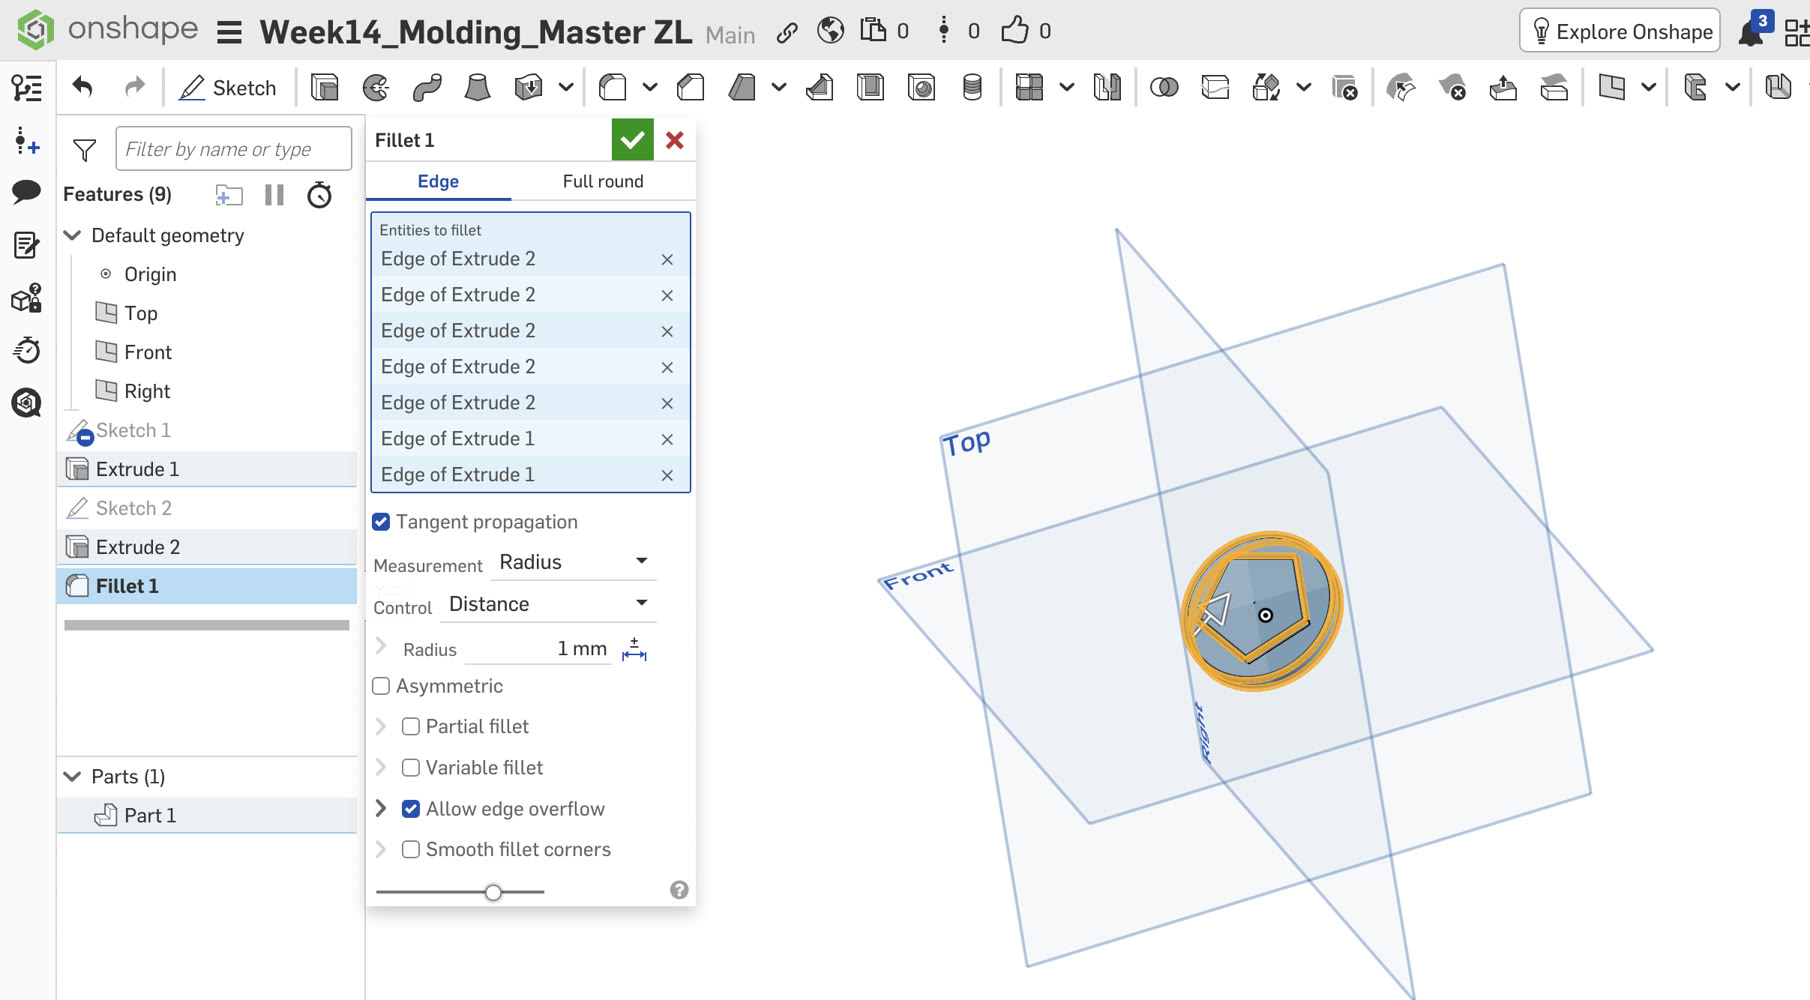
I added a 1mm Fillet to the top perimeter of the star and the top edge of the base.
-
Stress Management: In molding, sharp 90-degree internal corners are "stress concentrators." They are the most likely places for air bubbles to get trapped (creating "voids" in the cast) or for the silicone to tear.
-
Fluid Flow: Rounded edges allow the liquid silicone (and later the casting resin) to flow smoothly over the surface, utilizing surface tension to push air bubbles upward and away from the detail.
-
Aesthetics: Filleting catches light better on the final cast, giving the finished "coin" a polished, high-end manufactured look rather than a raw "digital" look.
Slicing & Surface Optimization (Bambu Studio)
To achieve a "cast-ready" surface, the 3D print must be as smooth as possible. Any layer lines on the print will be captured by the silicone and visible on the final cast.
Advanced Slicing Setup:
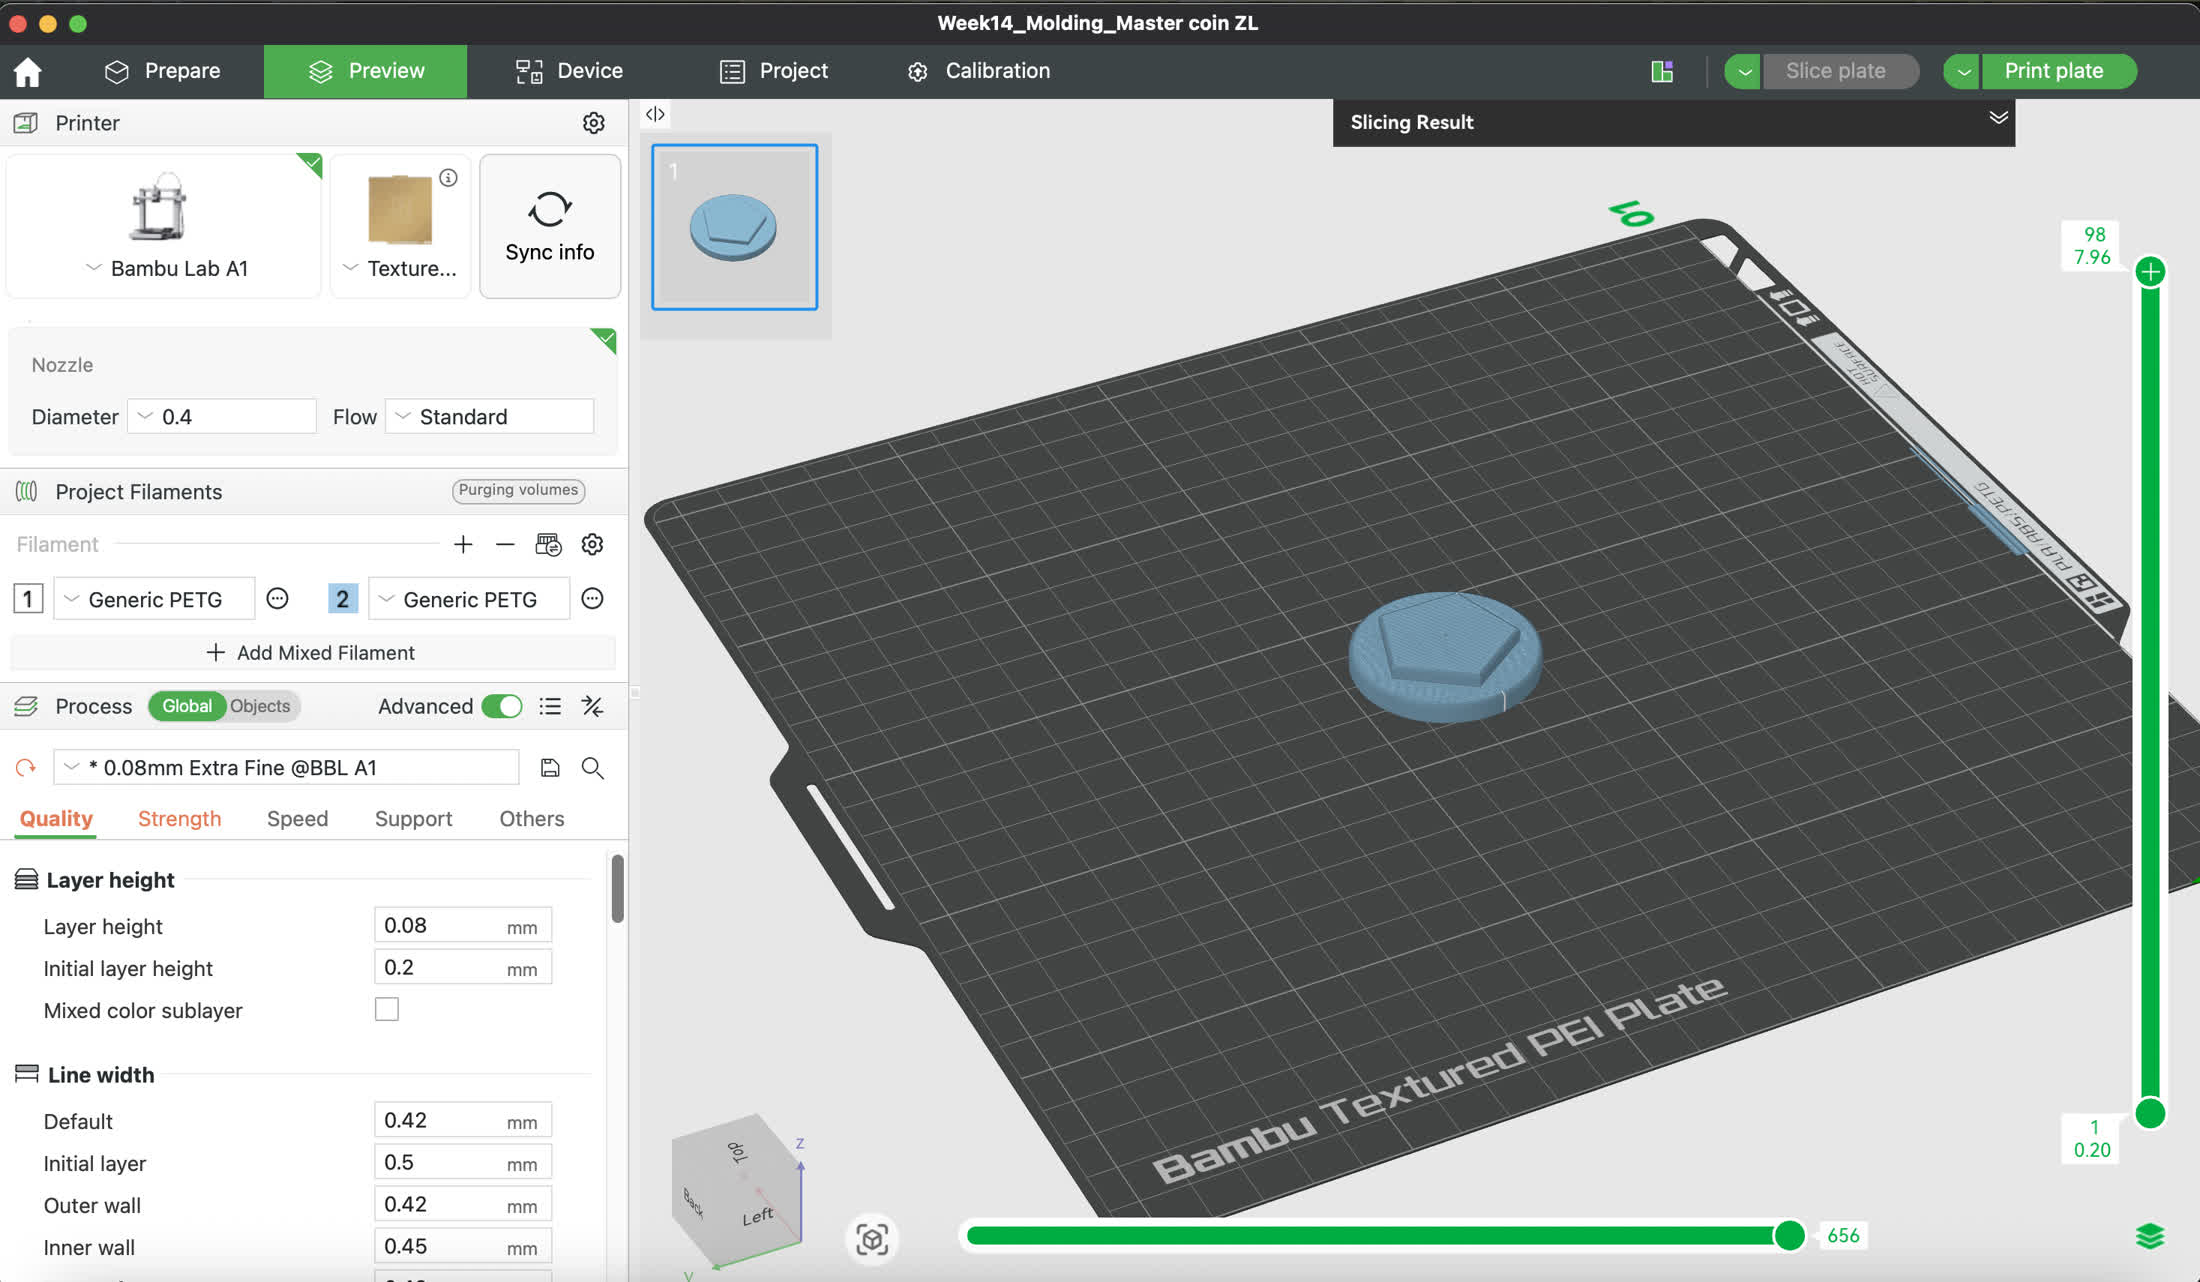
I used the Bambu Lab A1 and the Bambu Studio slicer. I toggled on the Advanced Mode to access high-end surface quality settings:
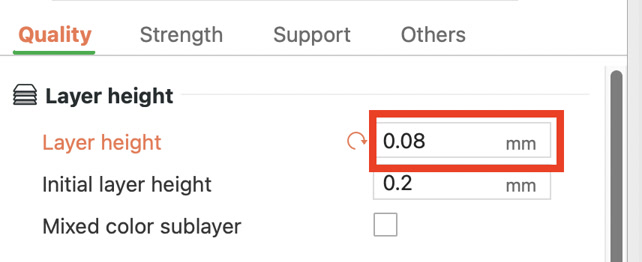
- Extra Fine Layer Height (0.08mm): By reducing the layer height from the standard 0.2mm to 0.08mm, I minimized the "staircase effect" on the 5-degree sloped walls.
-
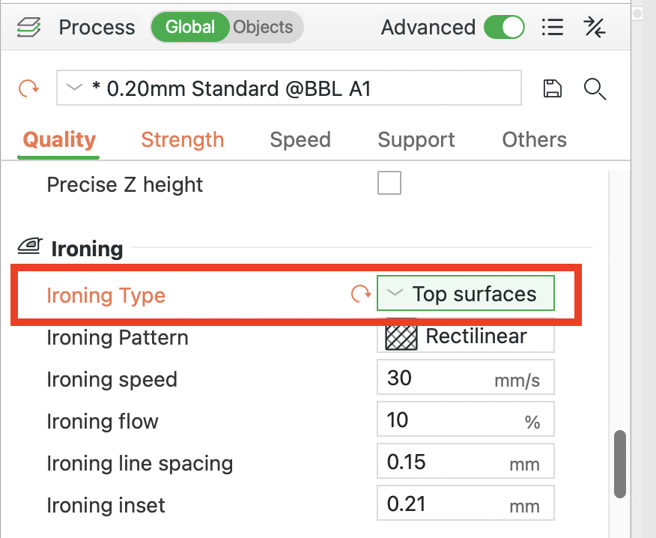
The Ironing Feature: I enabled Ironing for "All top surfaces."
Knowledge Point: Ironing This is a process where the nozzle travels back over the printed top layer at a very low flow rate (15%) and slow speed (30mm/s). The heat from the nozzle "melts" and flattens any tiny gaps or ridges between the lines, creating a mirror-like finish. This significantly reduces the need for manual sanding.
-
Monotonic Line Pattern: I set the top surface pattern to Monotonic. This ensures all plastic lines are laid down in the same direction, preventing uneven light reflection and ensuring a consistent texture for the silicone to replicate.
-
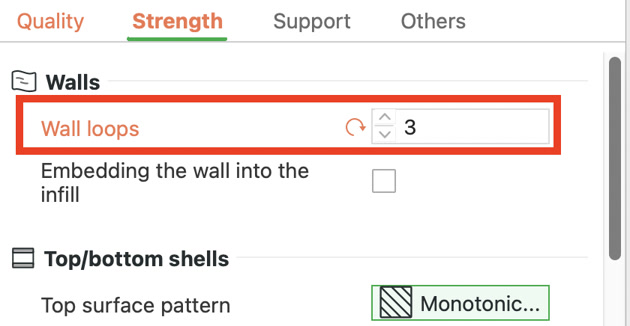
Wall Loops: I increased the wall count to 3 layers to ensure the model is sturdy enough to withstand the pressure of the silicone during the curing process.
Bambu Studio setup interface:
3D Printing Results & Post-Processing
The Issue: "Spaghetti" Artifacts
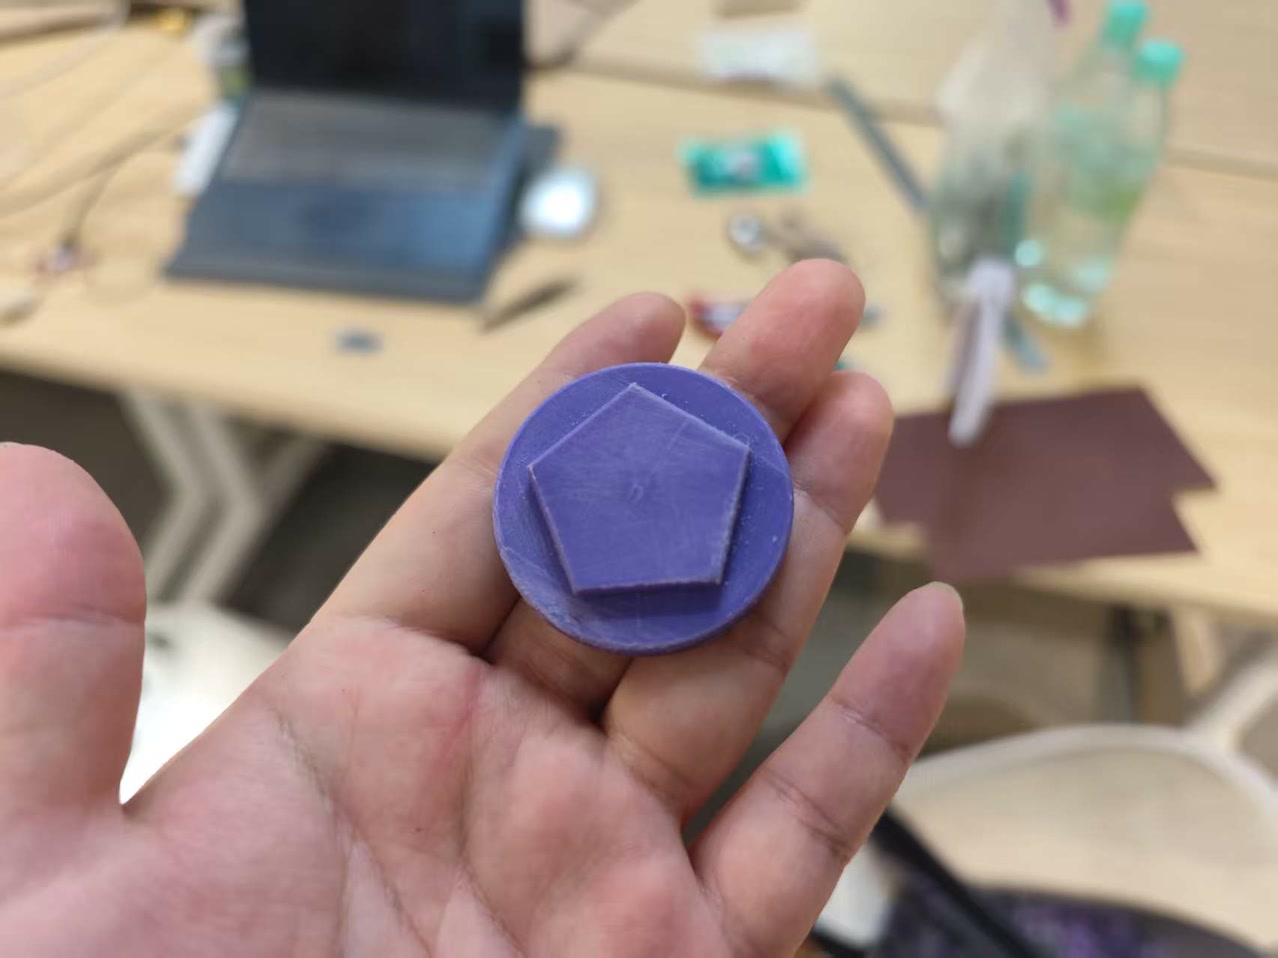
Despite the high-quality settings, the print had some loose plastic strands (spaghetti) around the base. This was likely due to minor oozing during travel moves at the ultra-fine 0.08mm layer height.
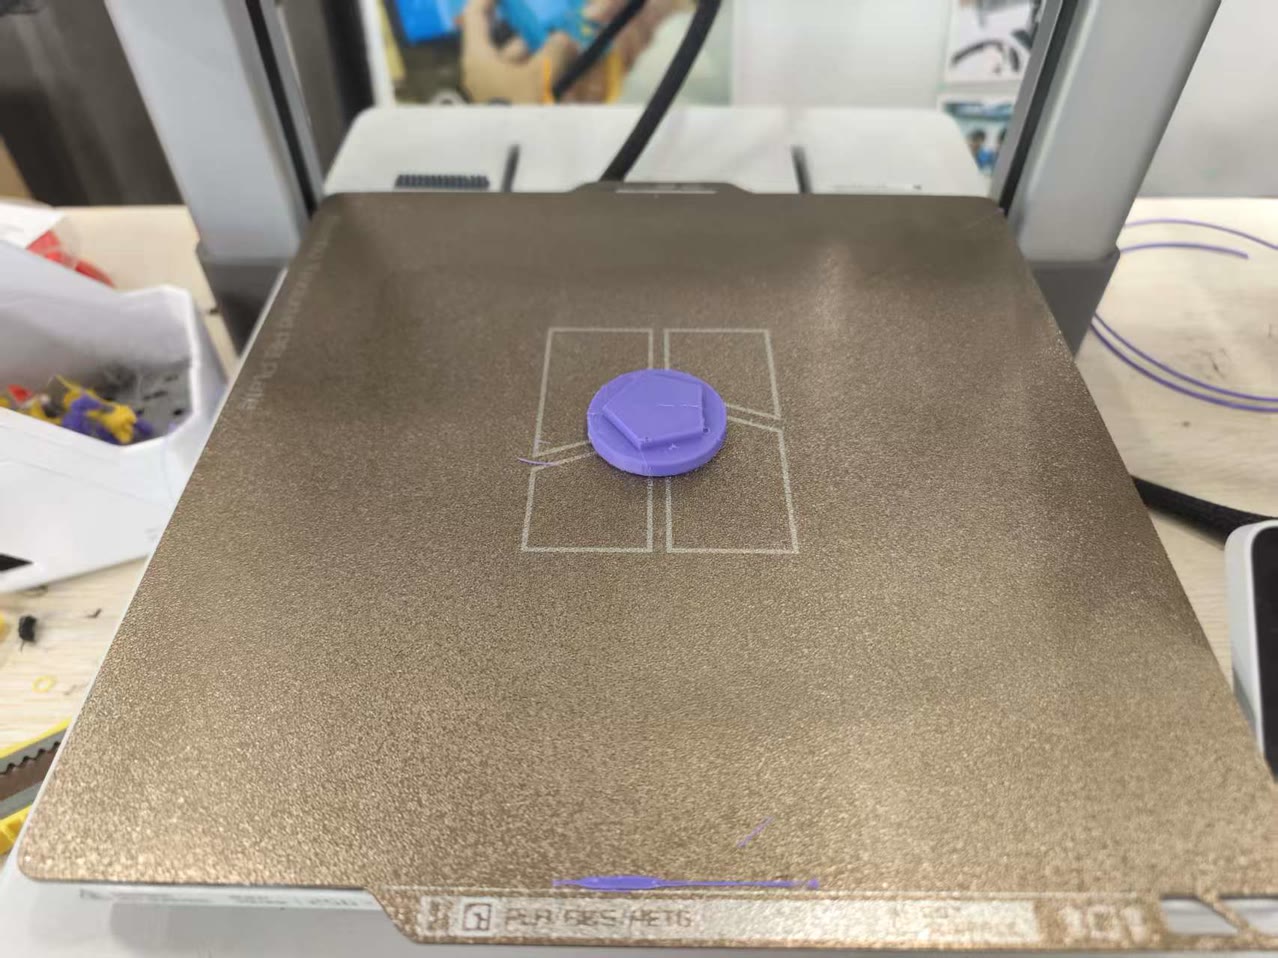
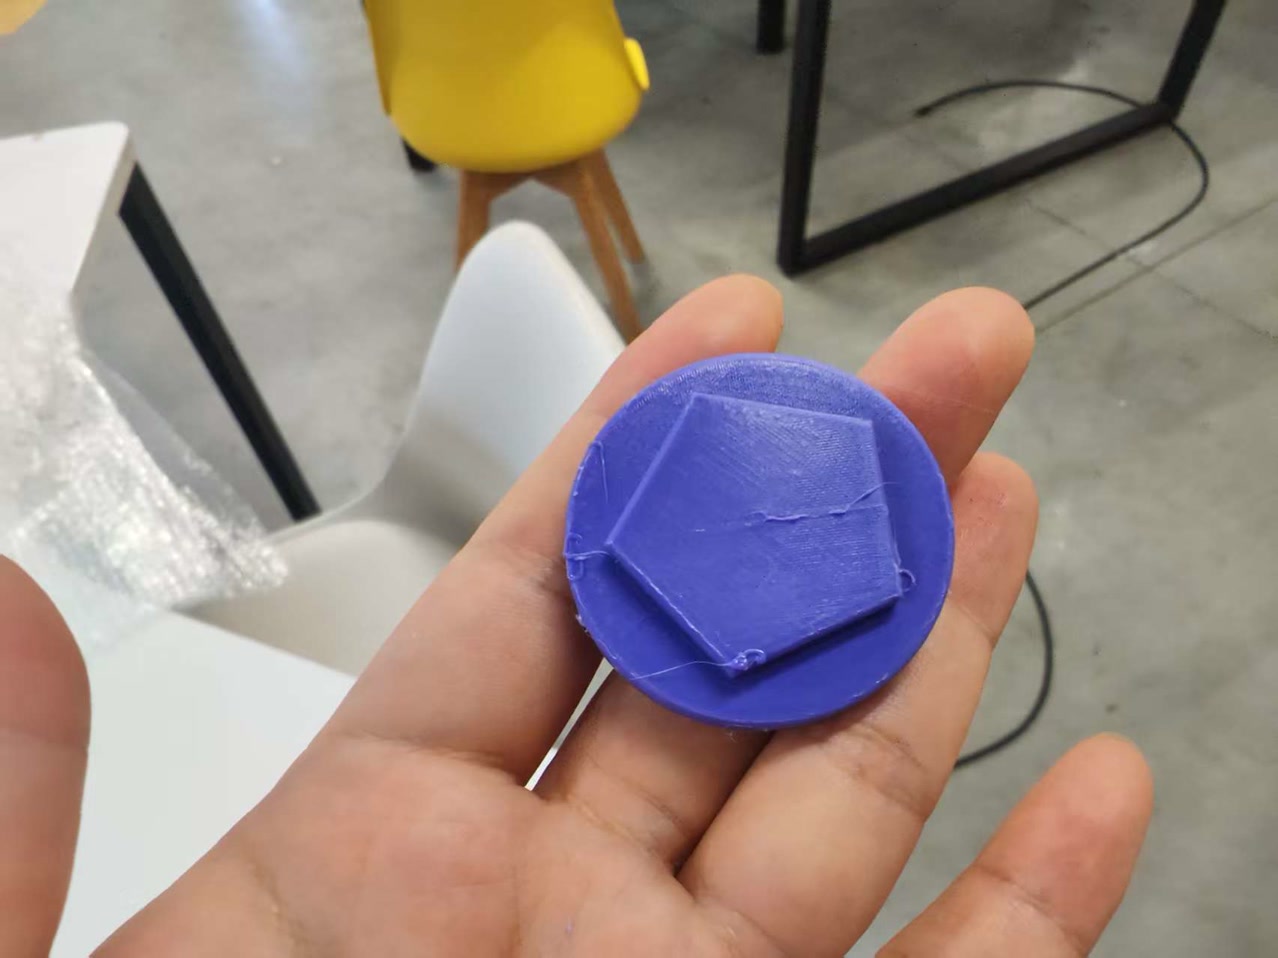
The bottom of the coin reflects the PEI plate's wavy texture because the first layer was squished against the metal bed to ensure adhesion, while the 1mm fillet disappeared due to the "Elephant's Foot" effect, where the initial layer's outward expansion filled in the curve. Although this makes the base less precise than the "ironed" top, it won't impact the mold's functionality since it only serves as the coin's flat backside.
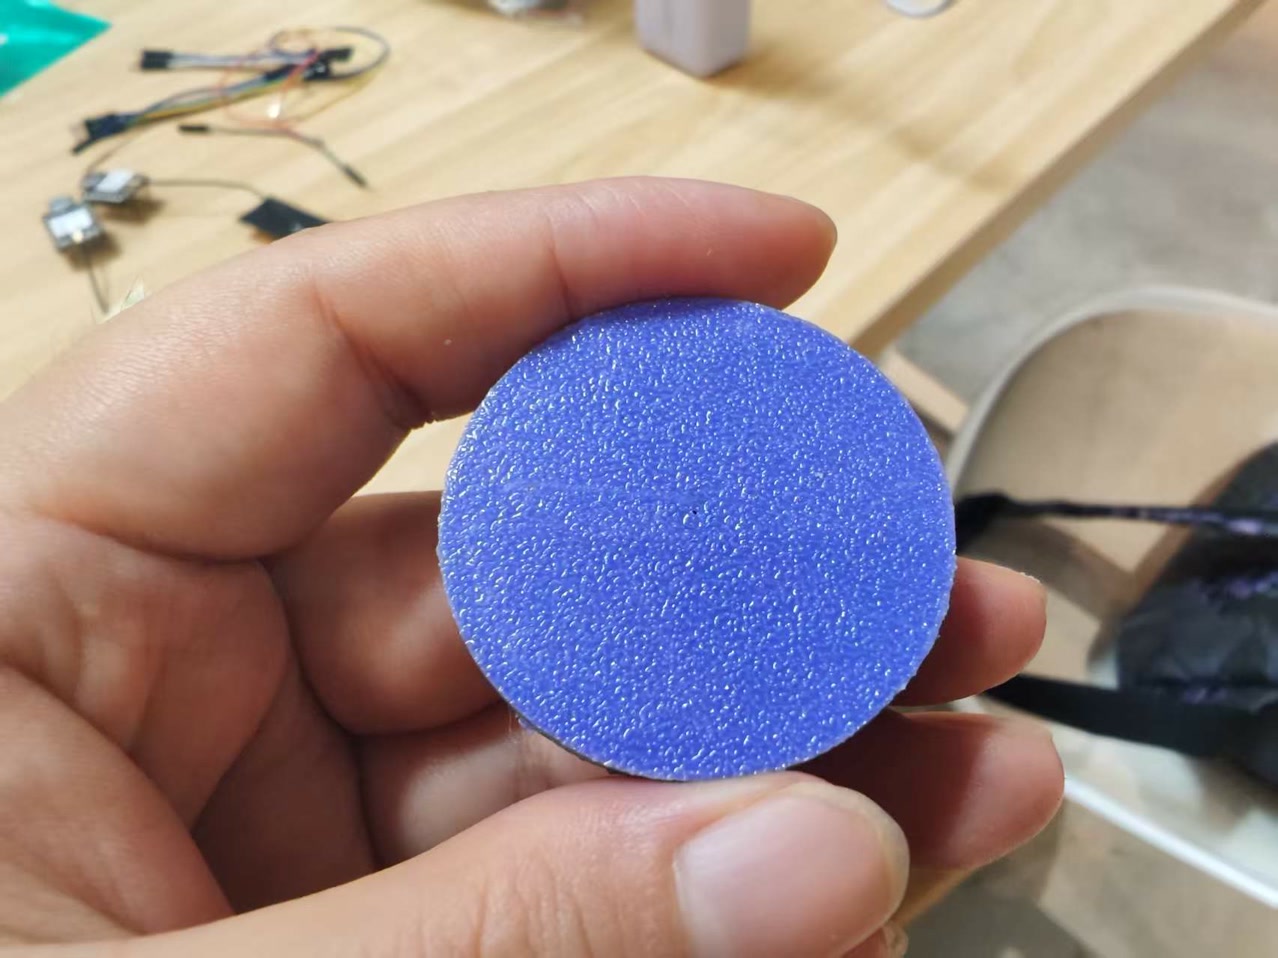
The Success: Ironing Effect
The Ironing feature was somehow a success. As shown in the photos, the top surface of the star is relatively** **smooth and glossy compared to standard prints. The nozzle effectively "cauterized" the gaps between scan lines. This mirror-like finish means the silicone mold will be flat, saving me hours of manual polishing later.
The Fix: Manual Cleanup
I used tweezer, a craft knife, and sandpaper to remove the stray filaments. Because I designed the model with 3 wall loops, I was able to lightly sand the edges without damaging the structural integrity of the master.
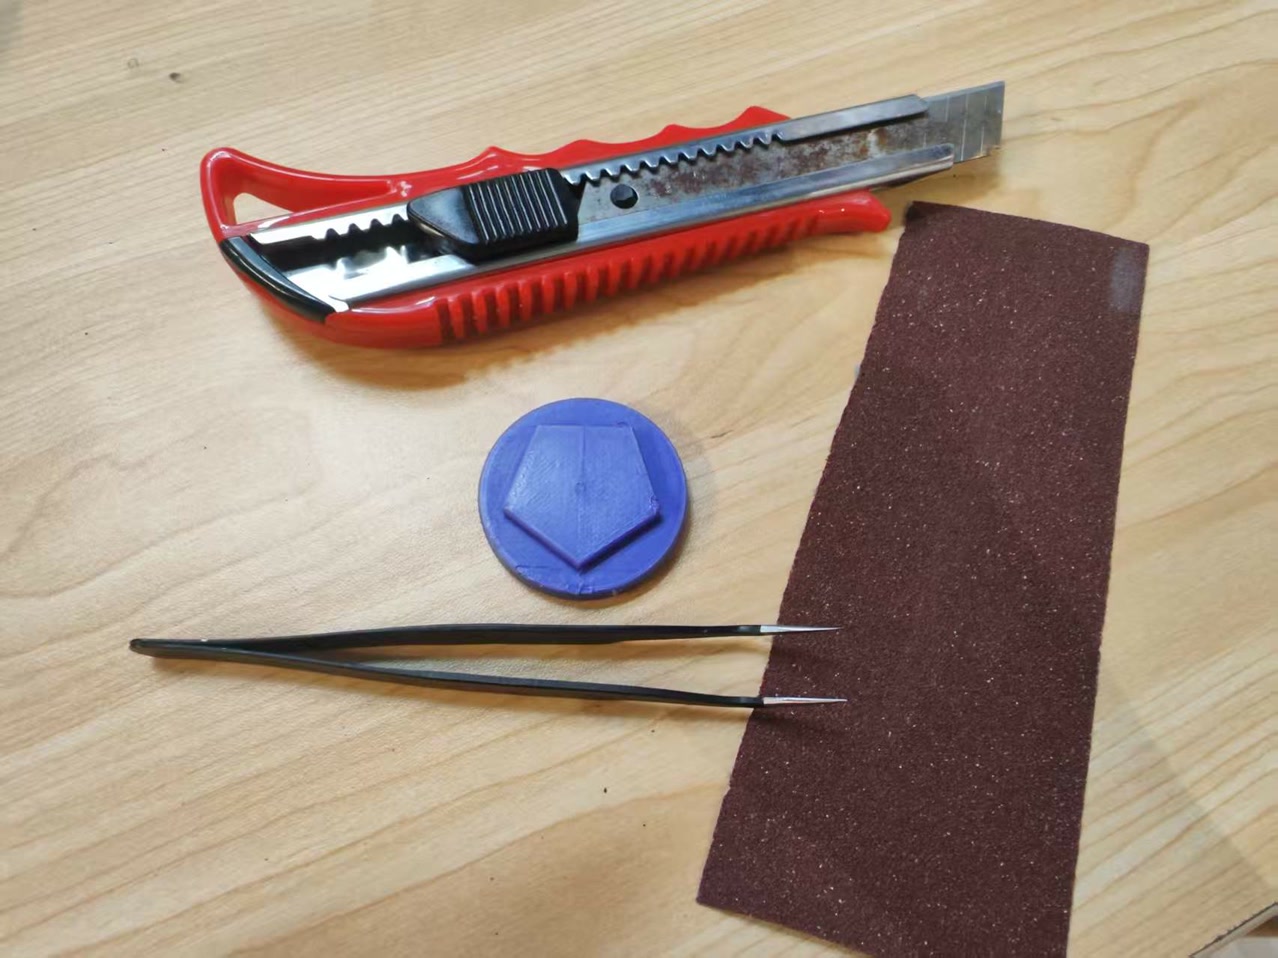
After polishing, the spagetti is removed and the surface is smoother.
Setup: Building the Mold Box & Prepare the Chemicals
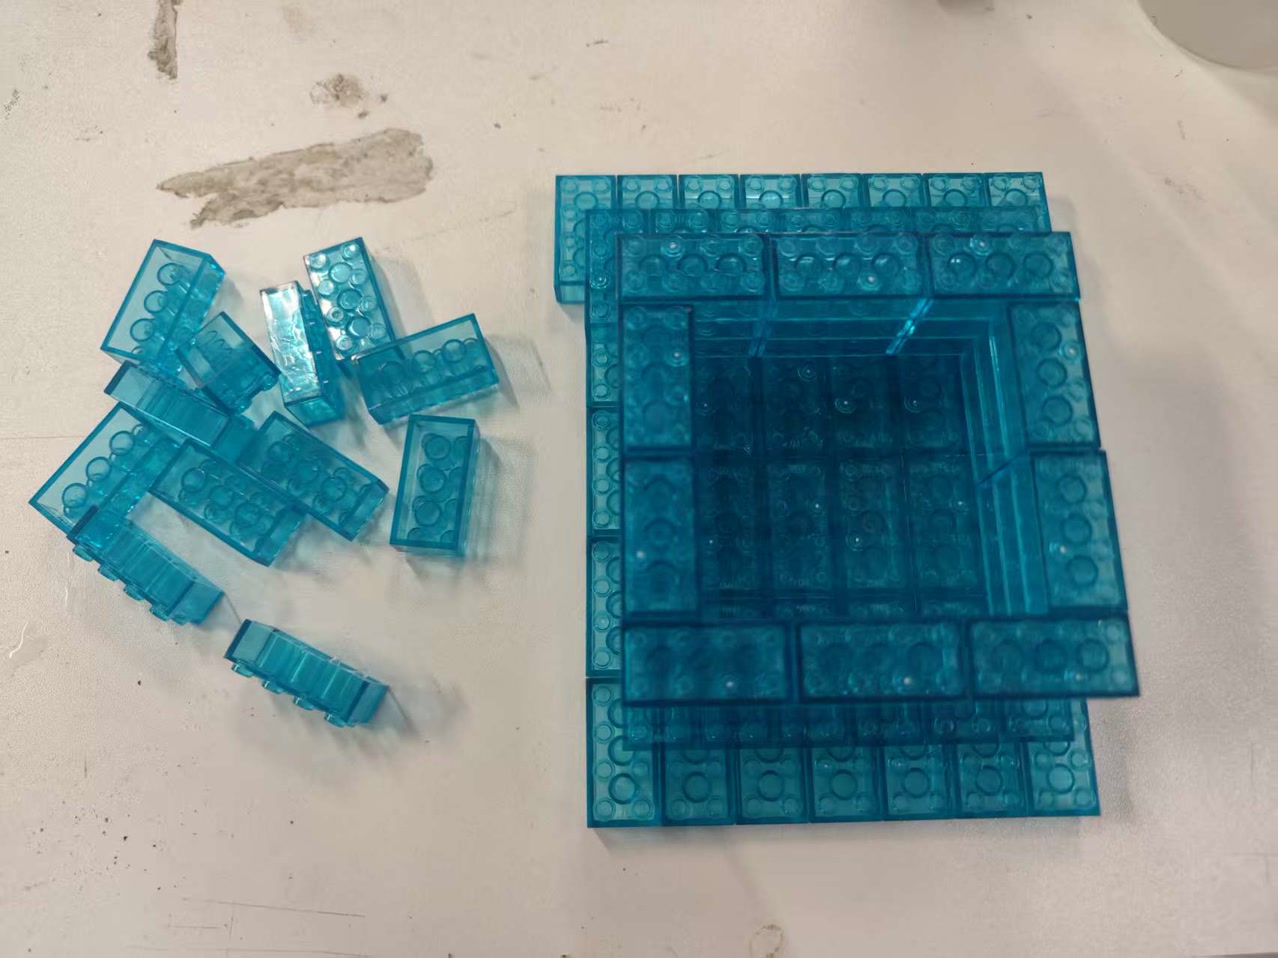
The first step was to create a container for the liquid silicone. I used building blocks to build a custom mold box. I snapped the bricks together to create a rectangular enclosure around my 3D-printed master. I used such building blocks because they are modular; I could adjust the size perfectly to ensure at least 5mm clearance around my coin, saving material while maintaining structural strength.
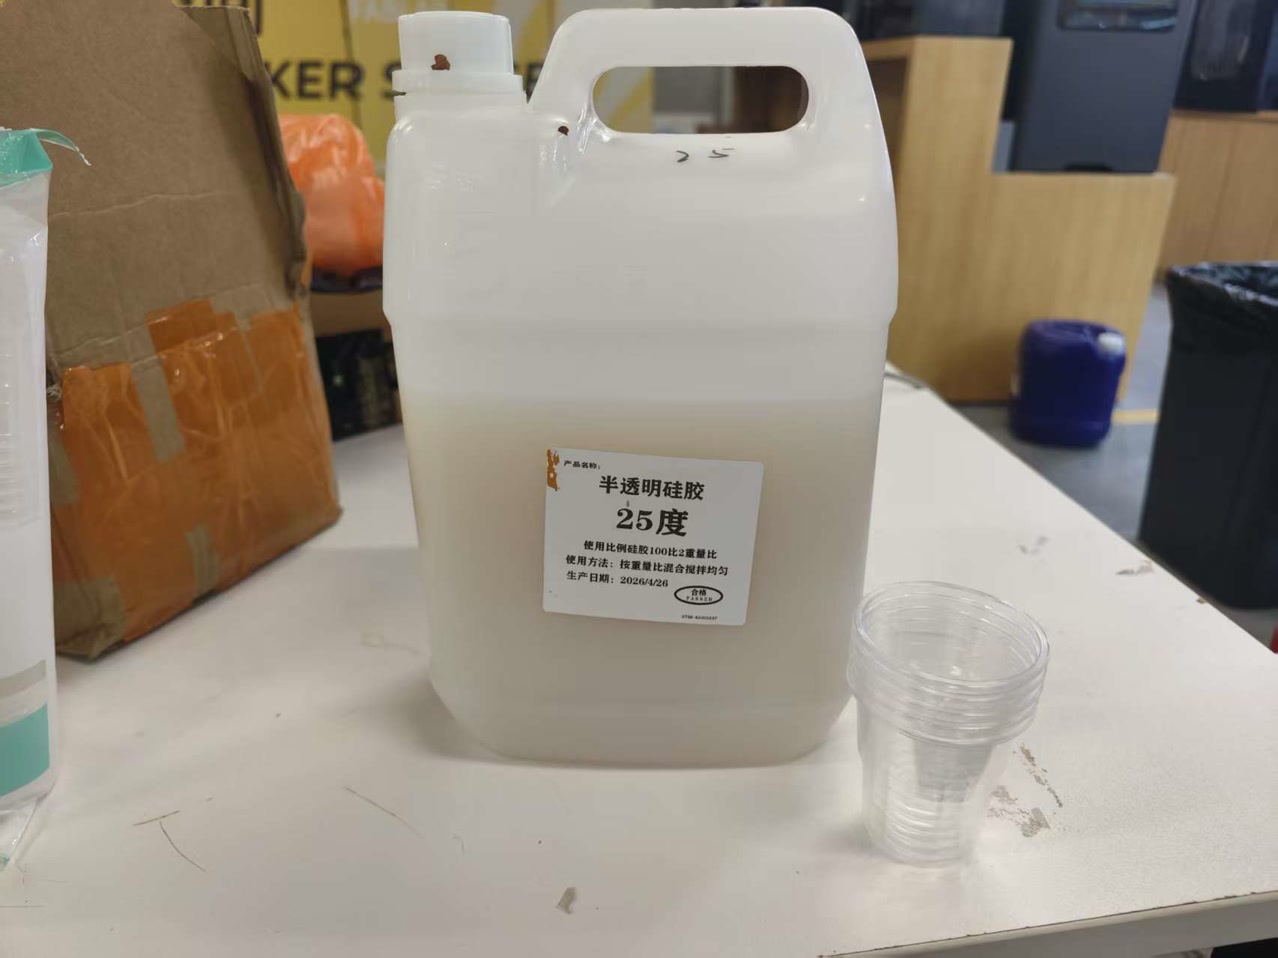
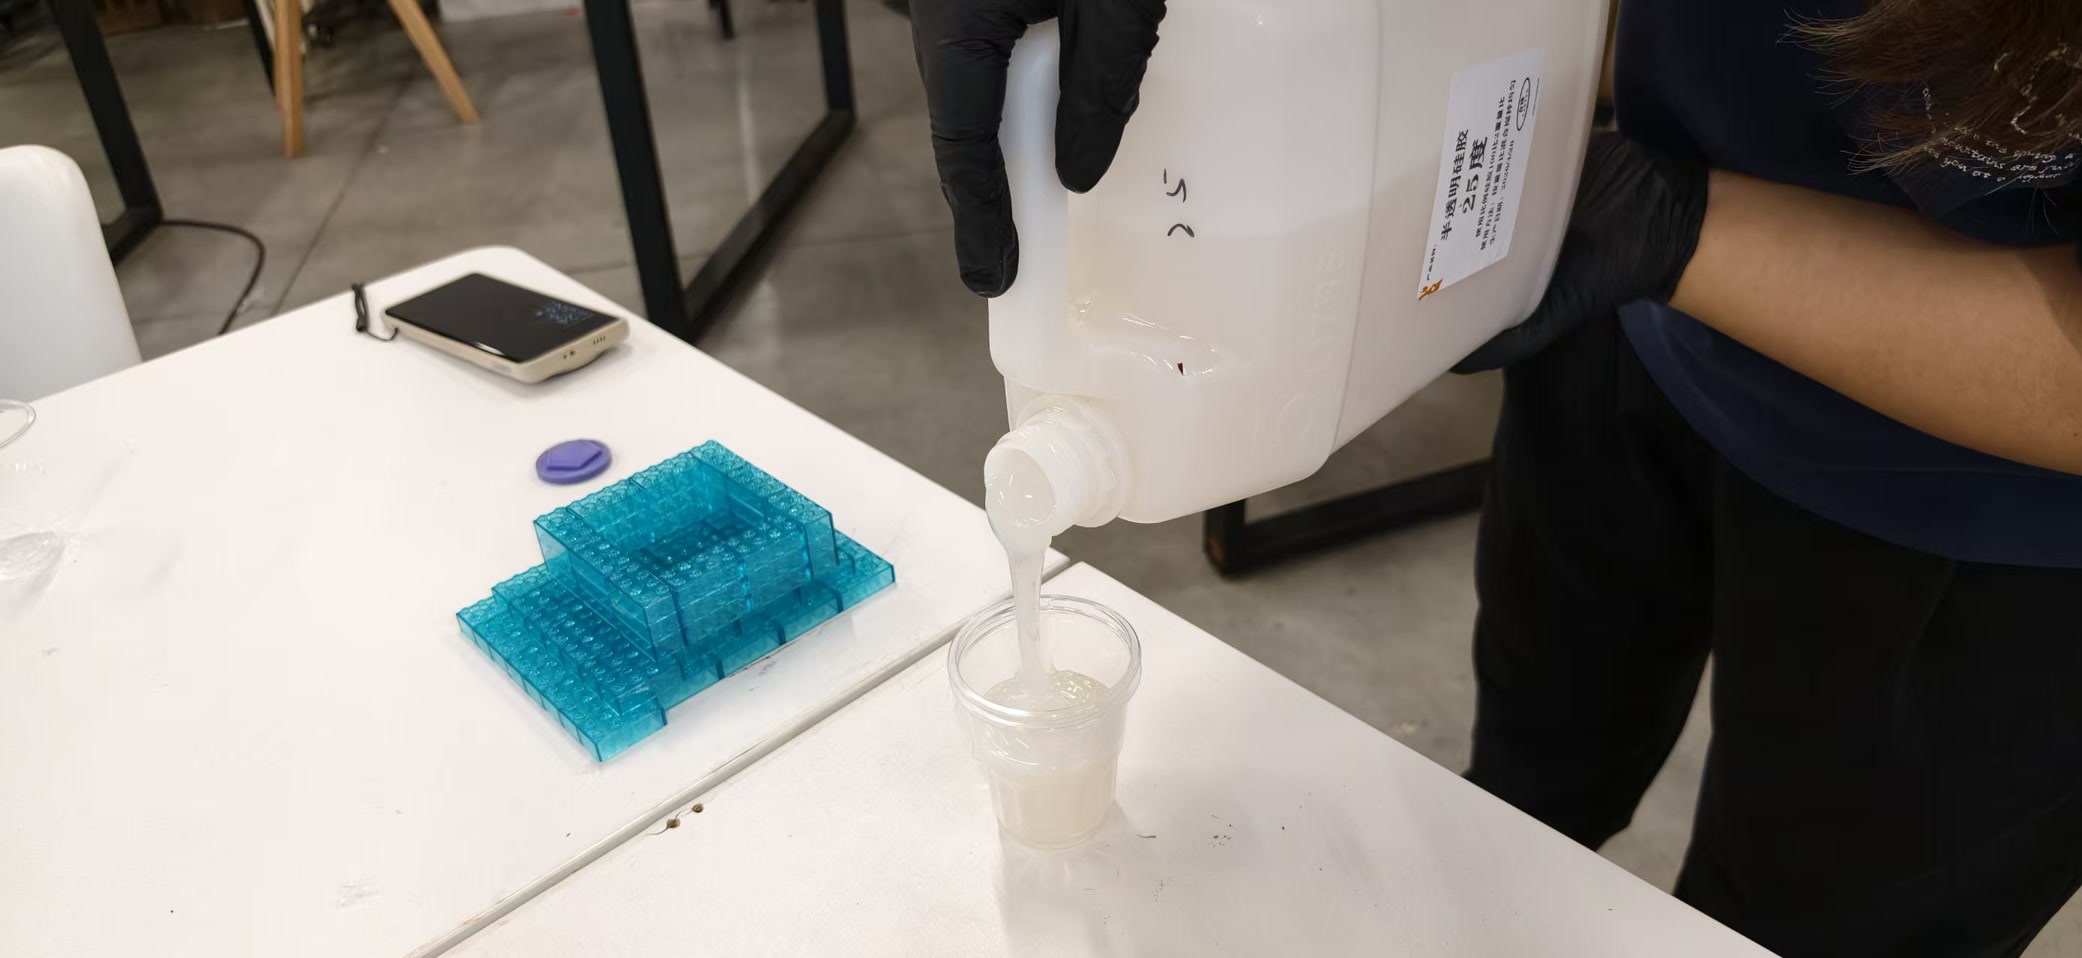
Get prepared for the silicone, I used plastic cup to contain the silicone from the bulk container.
The Iterative Journey (A Timeline of Failures and Success)
My molding experience was a steep learning curve. I failed twice before understanding the critical chemistry and physics involved.
Attempt 1 (Failure):
My experience with silicone molding was a process of continuous learning through failure.
I first sprayed the degreasing agent into the box.
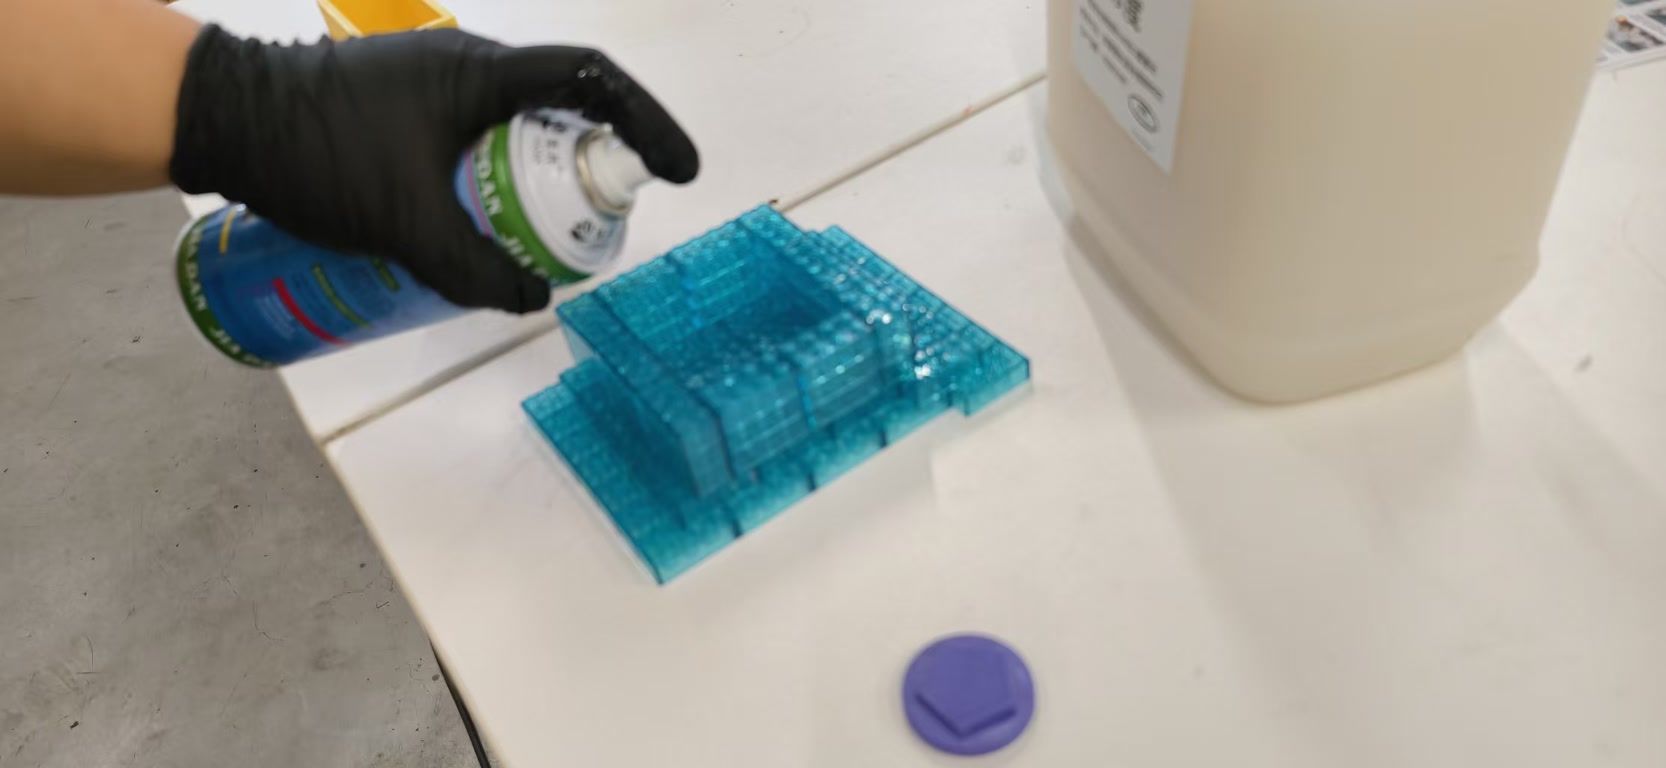
I simply placed the 3D-printed coin at the bottom of the mold box and poured the silicone directly from a disposable cup.
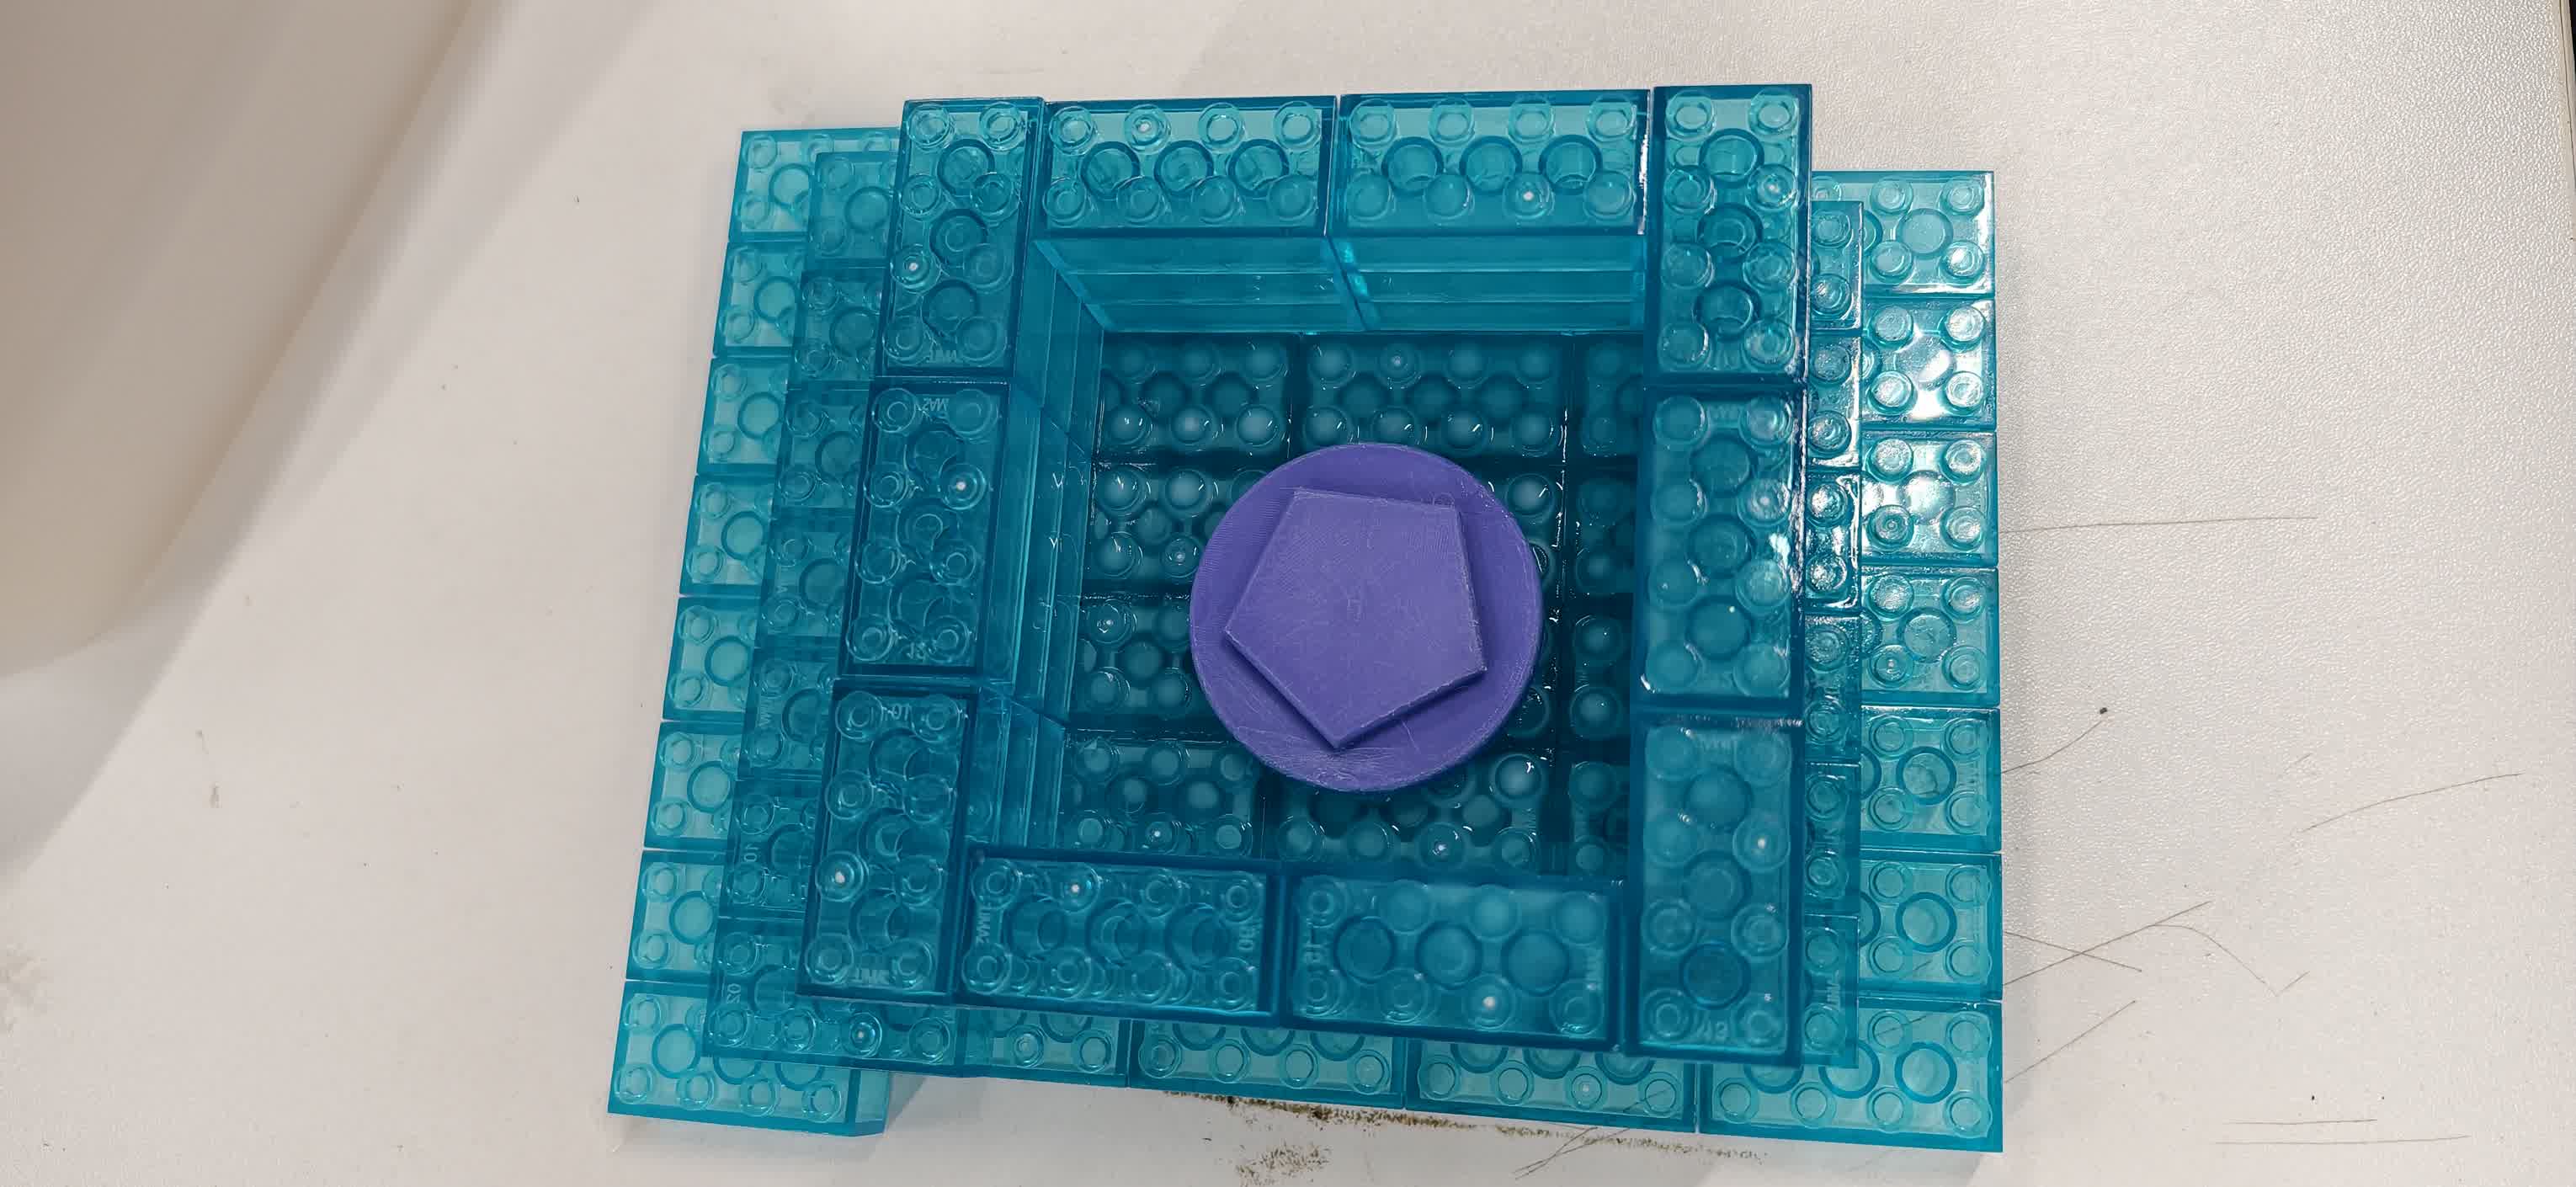
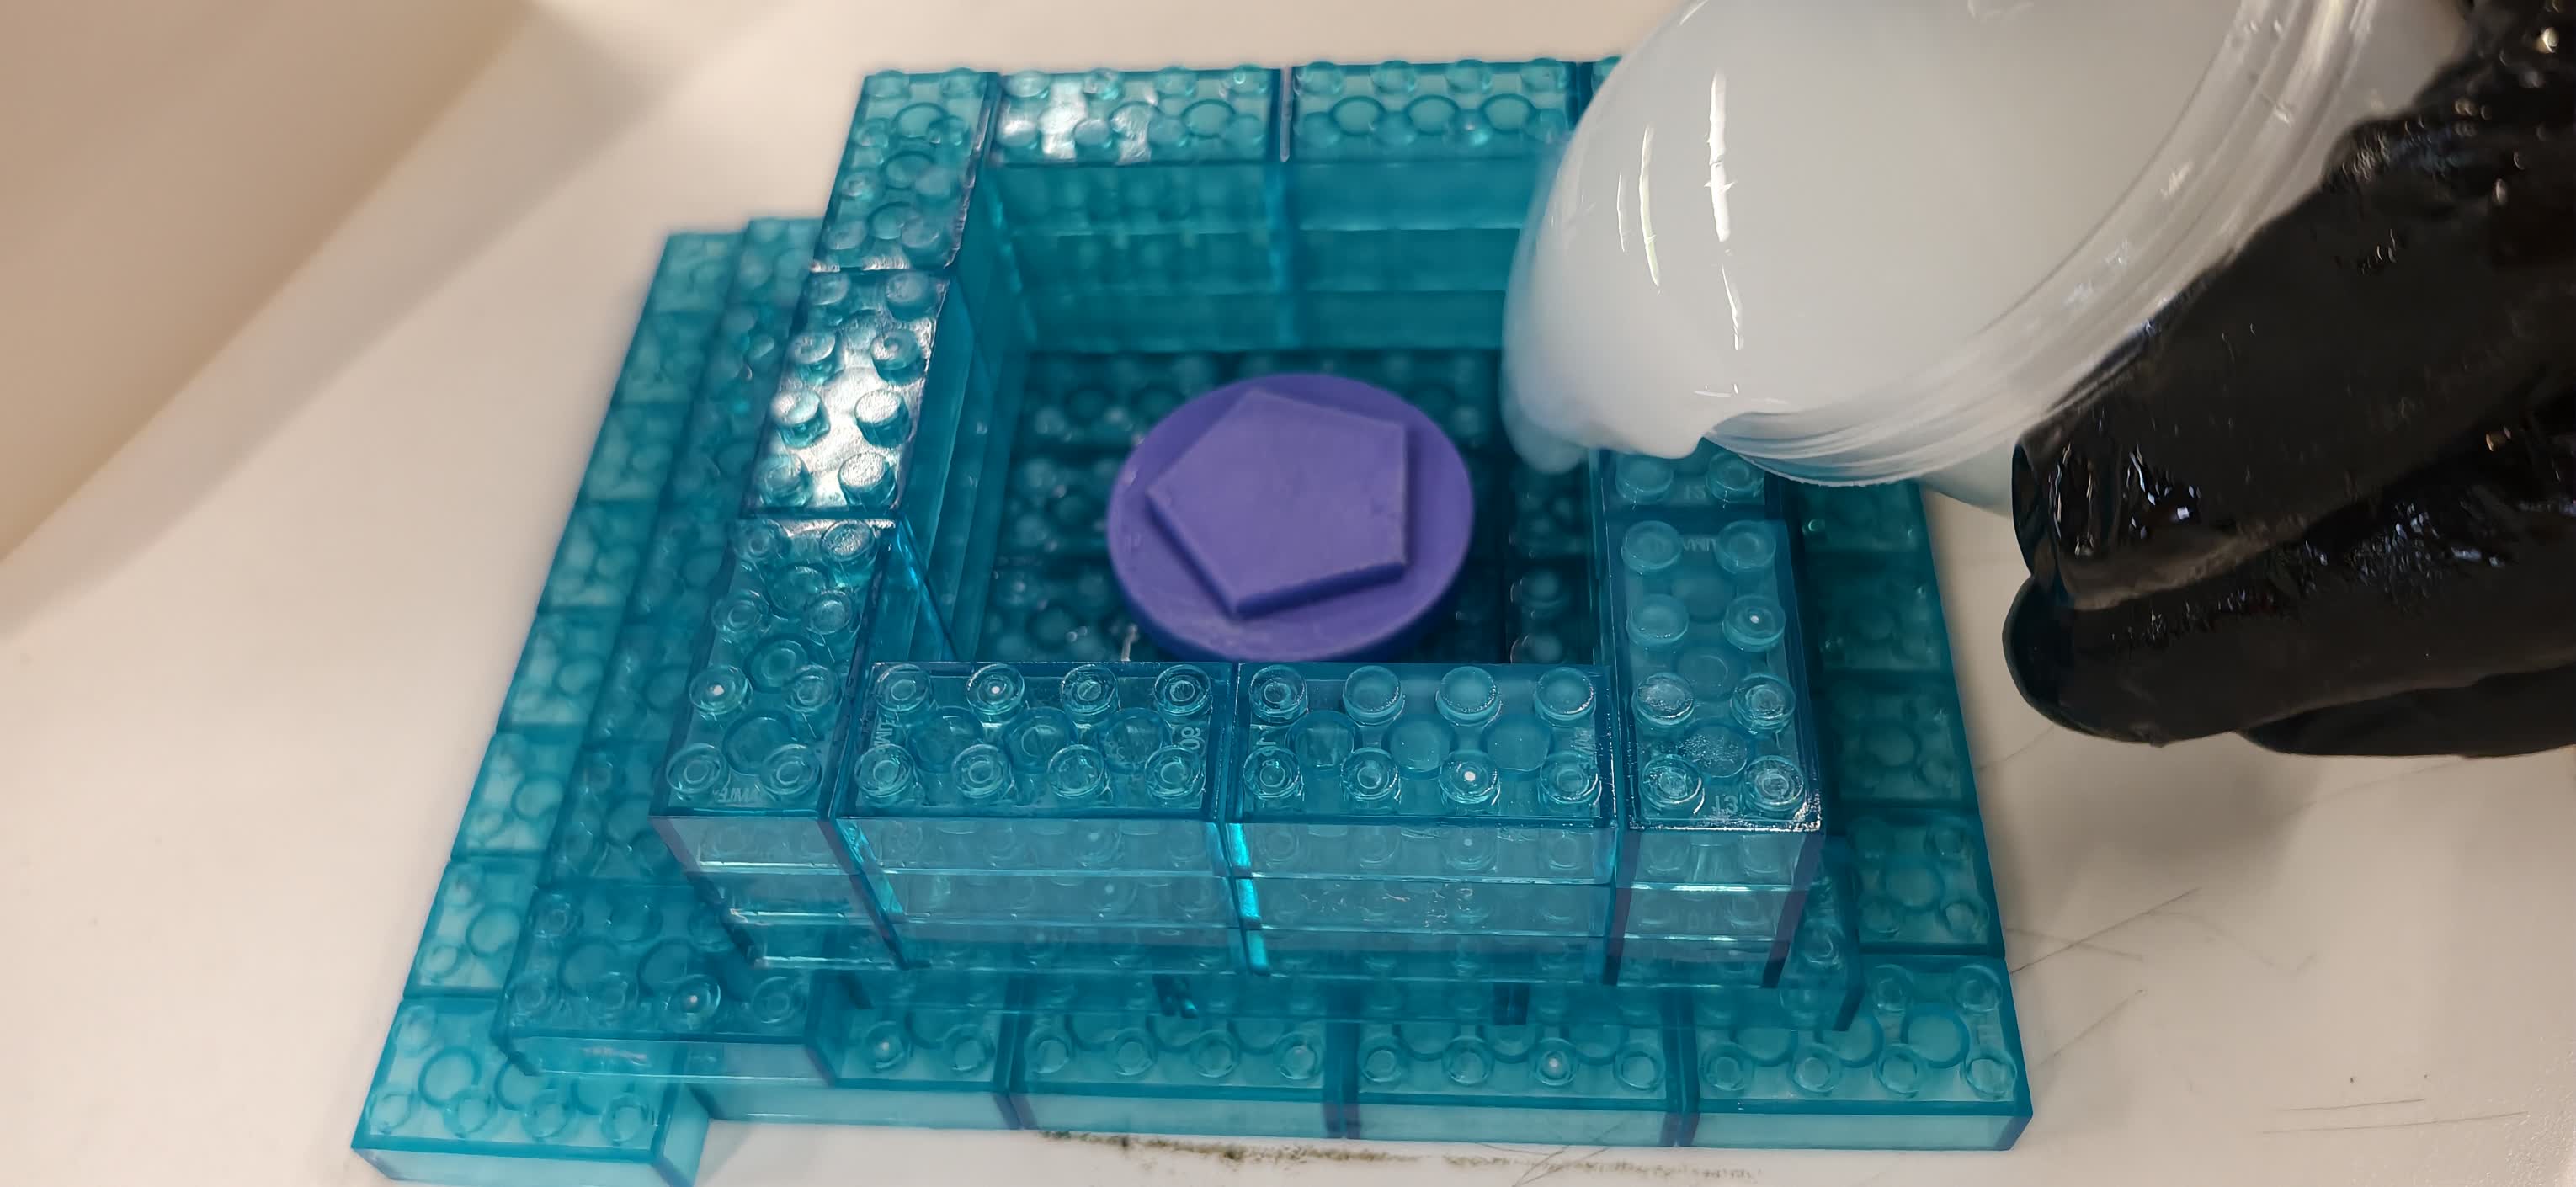
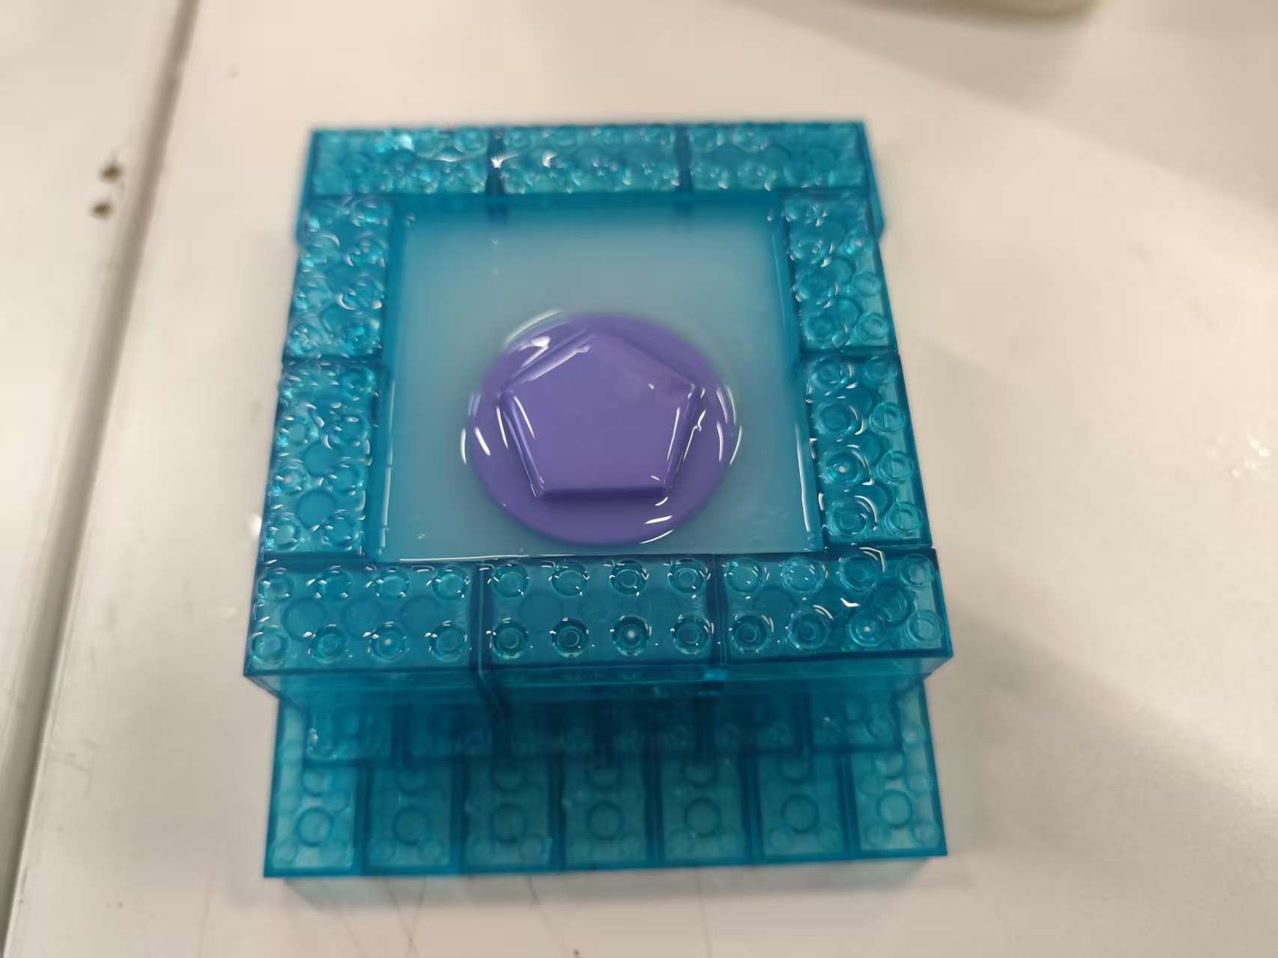
I quickly realized I had overlooked a basic law of physics: the PLA coin was much lighter than the liquid silicone. Without any fixation, the master model eventually floated to the surface, resulting in an unusable mold.
Attempt 2 (Failure):
For the second attempt, I tried to solve the buoyancy issue by sanding the coin’s bottom and applying double-sided tape to secure it to the mold box base.
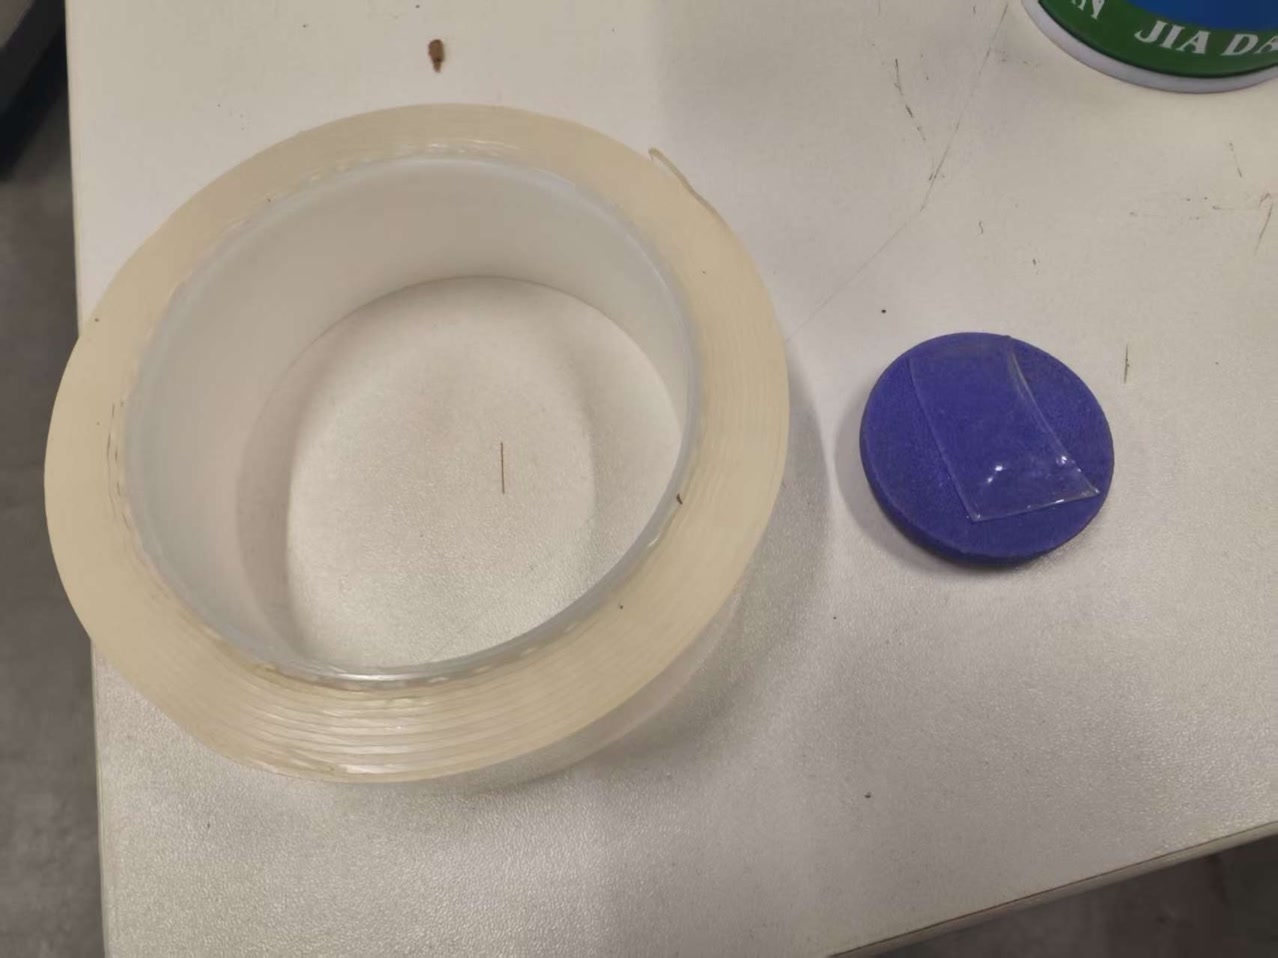
To prepare for demolding, I also sprayed a generous amount of release agent into the box. However, I made a critical error in the sequence of operations. The oily mist of the release agent contaminated the adhesive surface of the tape before I could secure the coin, causing it to lose its stickiness.
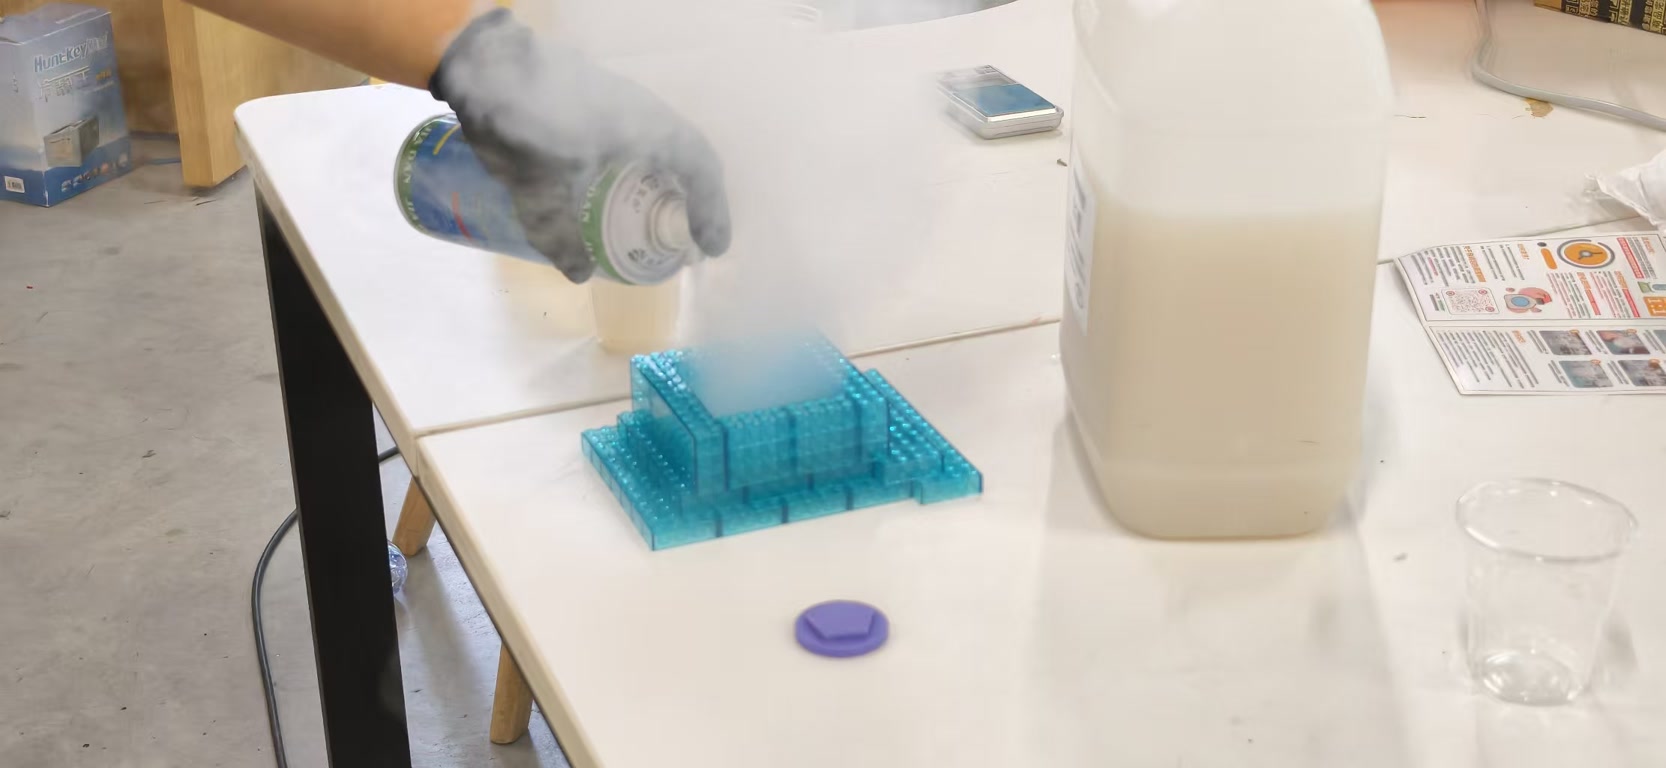
Once again, the coin drifted upward.
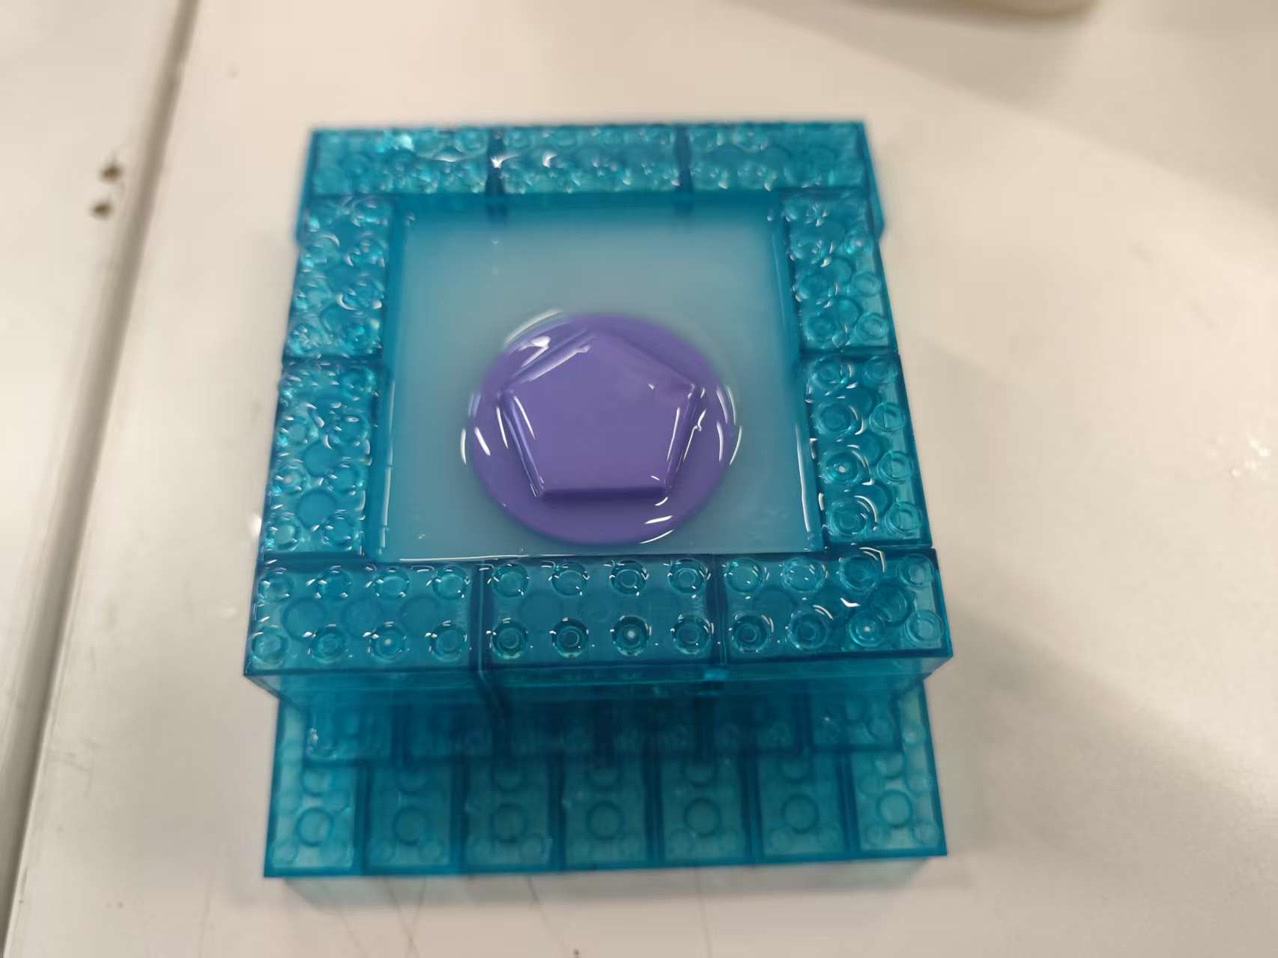
Furthermore, I discovered a fundamental chemical mistake: I had been pouring only the silicone base without adding the necessary curing agent, meaning the mixture remained a sticky liquid that would never have cured.
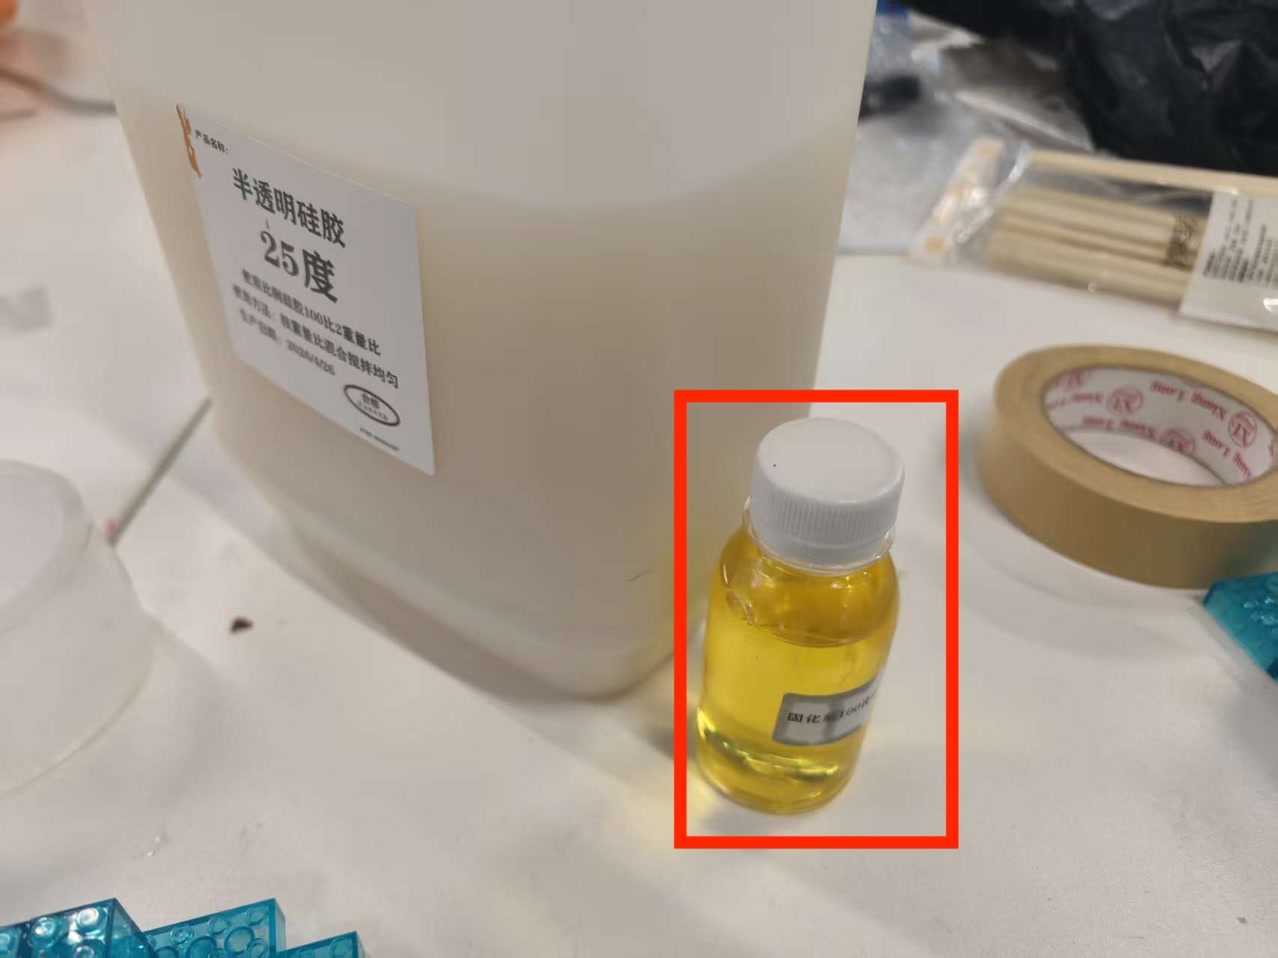
Attempt 3: The Successful Breakthrough
The third attempt was where I finally achieved success by refining both my physical setup and chemical precision. After consulting with my classmate Tim and Emily, I learned the correct 1:50 mixing ratio and used a digital scale to measure the curing agent accurately, stirring it thoroughly with a wooden stick to ensure a homogeneous chemical reaction.
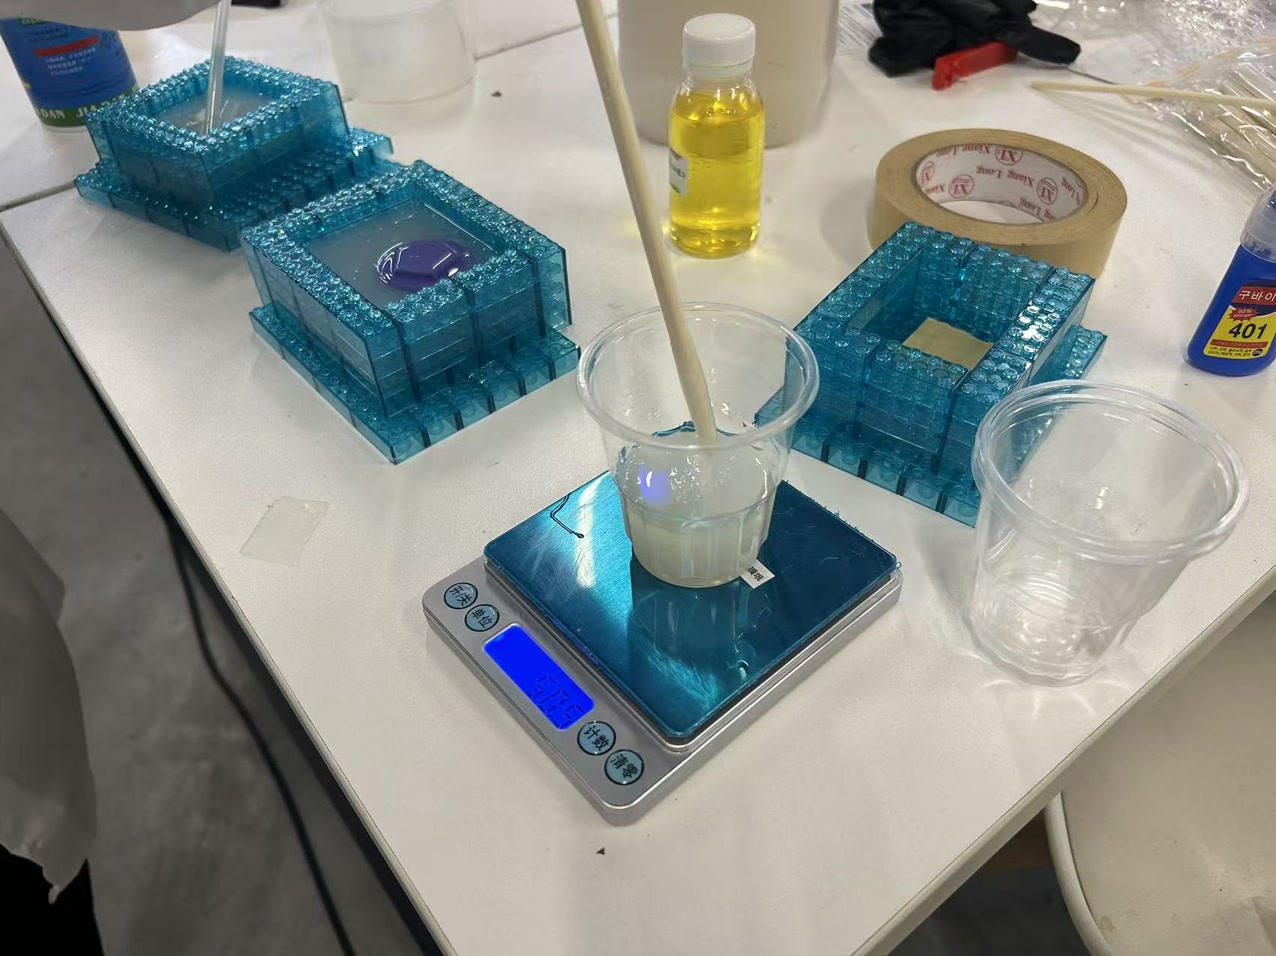
To fix the buoyancy problem, I changed my strategy by applying adhesive tape to the mold box base first and then using Super Glue to bond the coin directly to the tape, skipping the release agent entirely to ensure a clean, strong bond.
In addition, I did not use the release agent spray, since I realized for building blocks I can easily disassemble the box and get my mold.
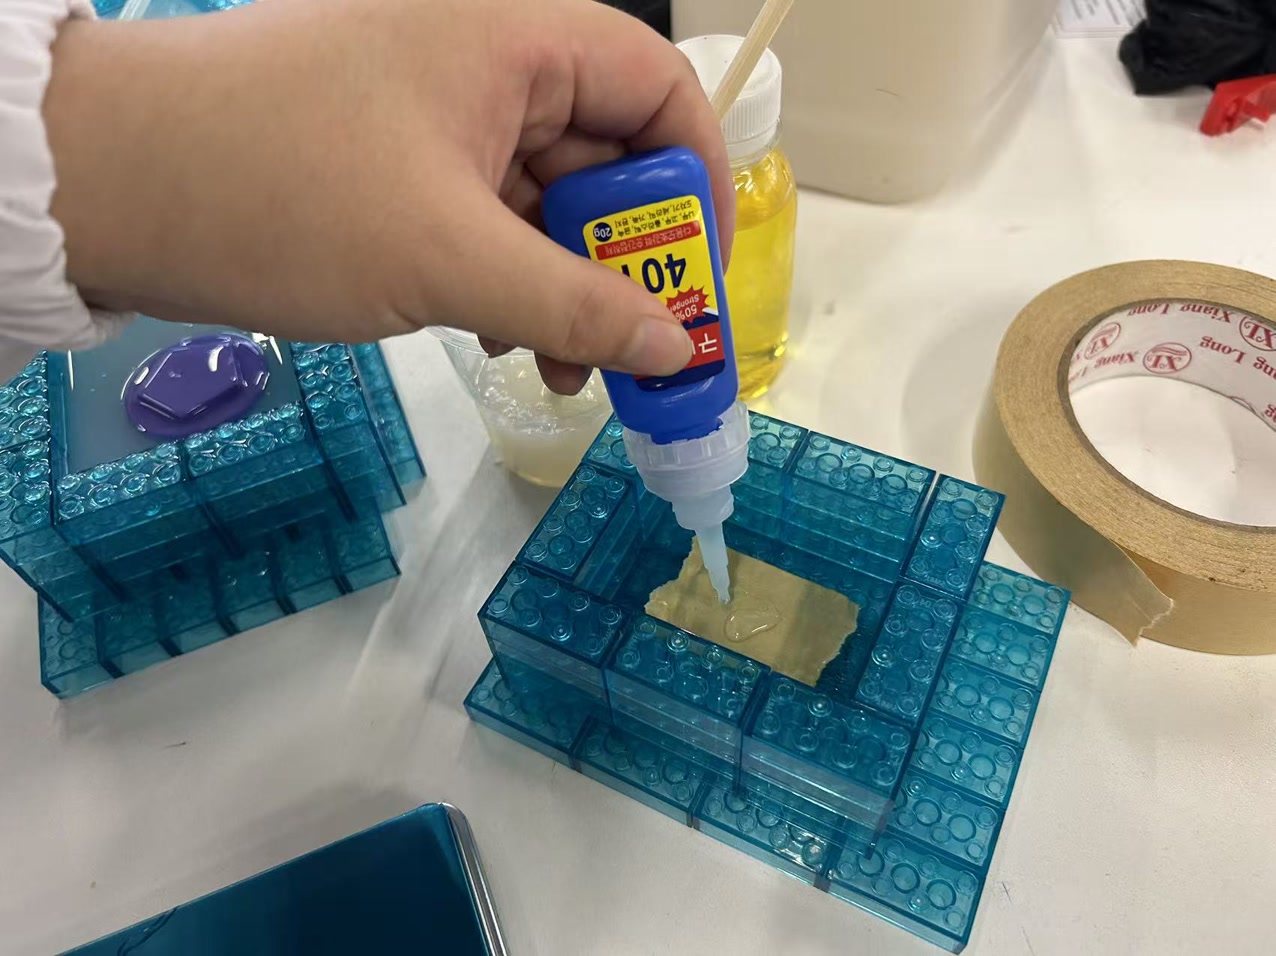
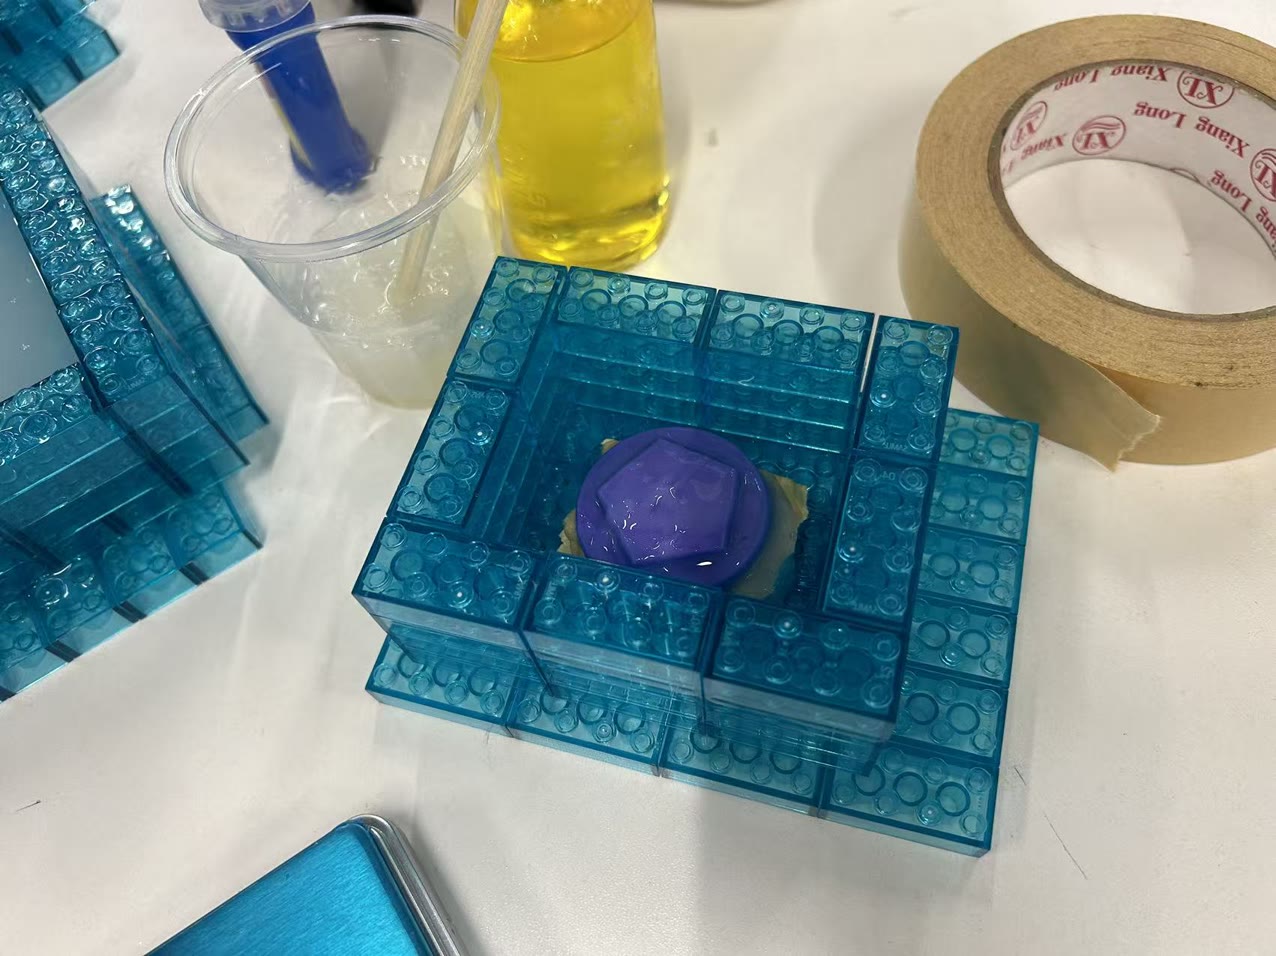
When it came time to pour, I implemented a professional technique to manage air bubbles: I slightly began pouring the silicone in a slow & continuous stream against the inner wall of the box.
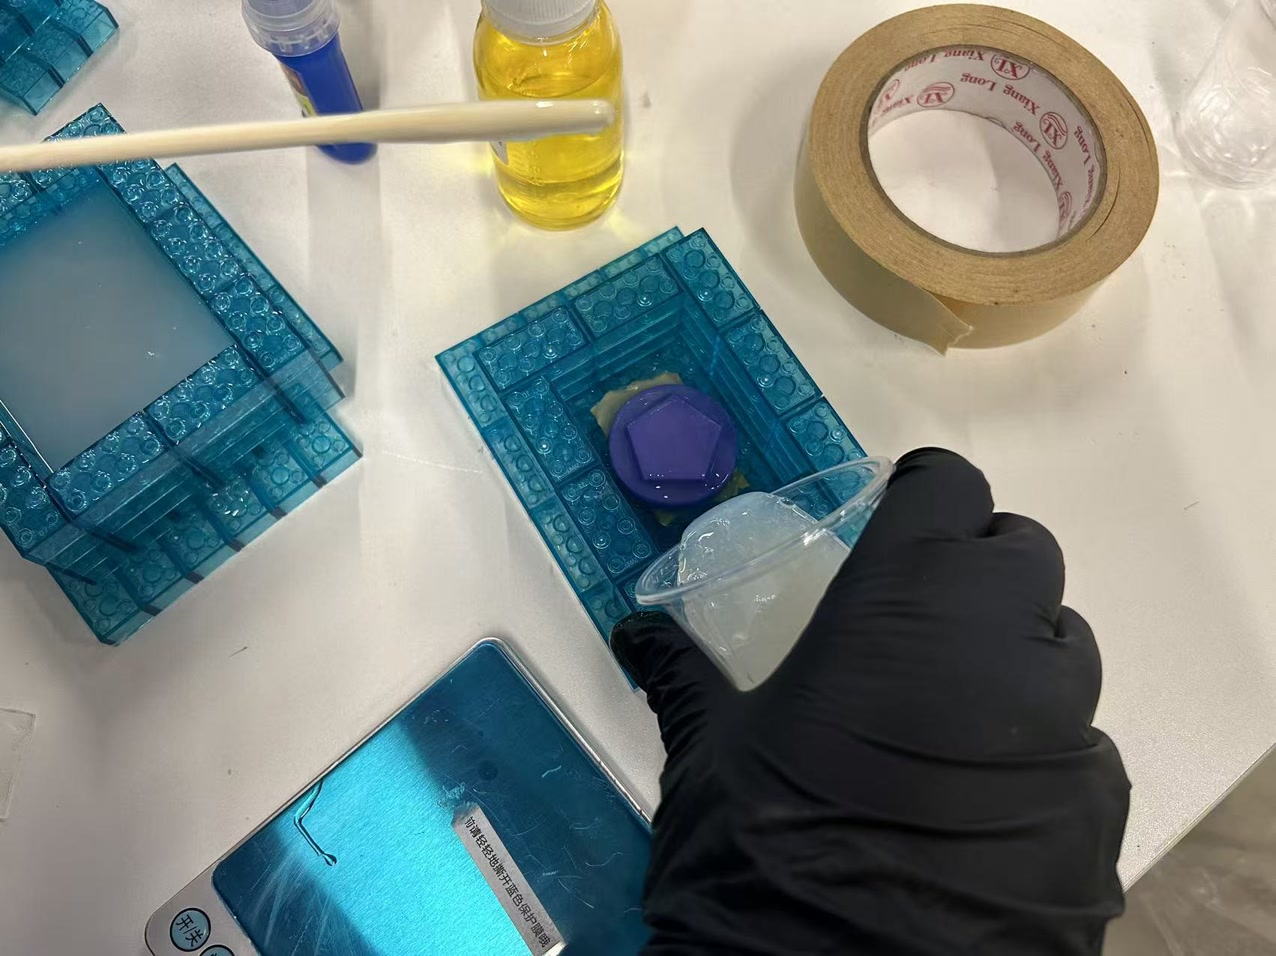
This "stretch-pouring" method from a height helps pop larger bubbles before they enter the mold. By letting the silicone flow slowly down the wall and rise gradually from the bottom, the liquid was able to gently envelope the fine details of the star relief, pushing the air upward and outward rather than trapping it in the crevices. This time, the coin stayed perfectly submerged, and the mold cured into a high-quality, solid negative.
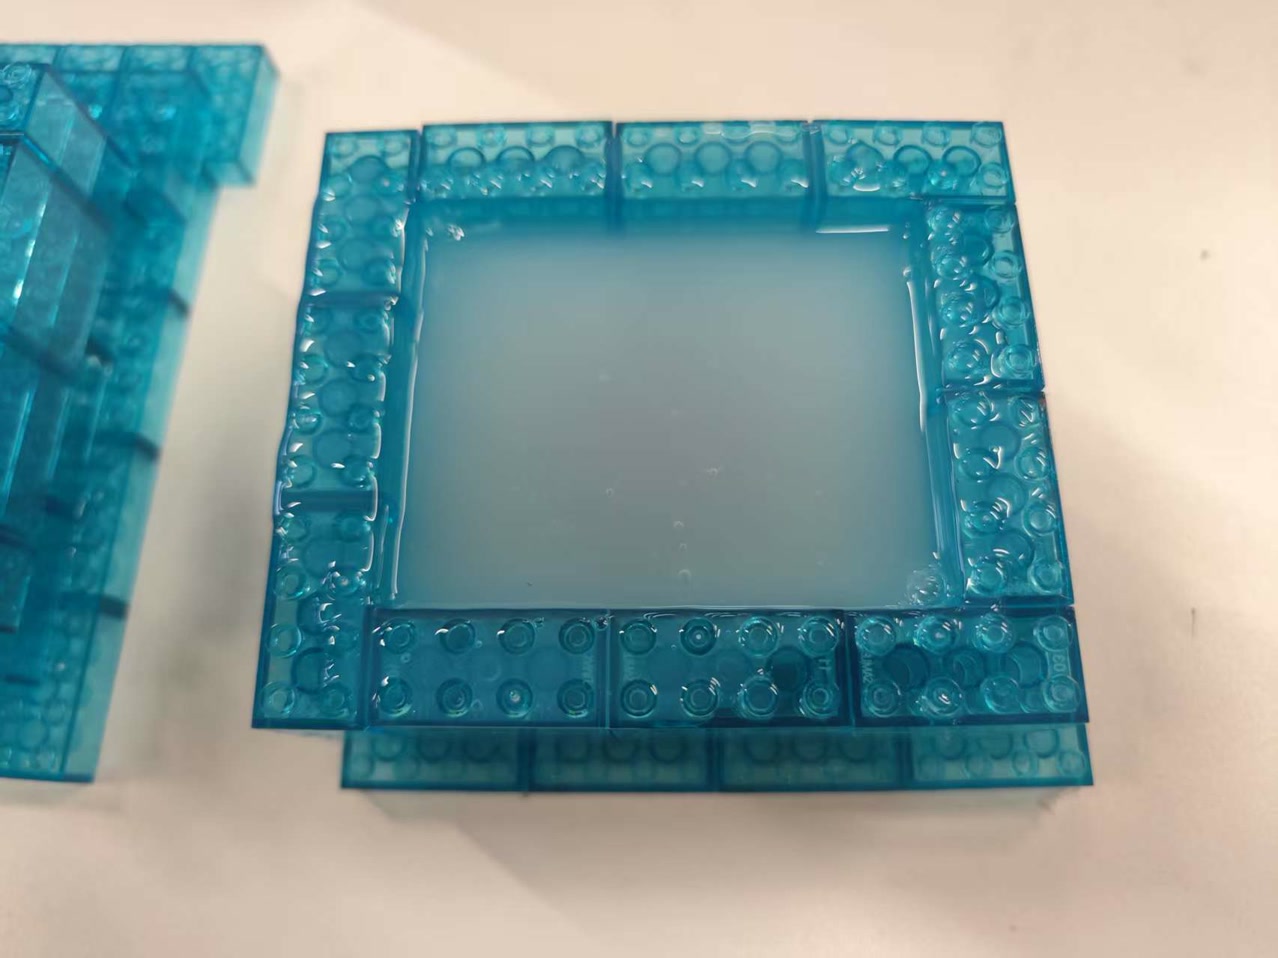
Now I wait for the second day to get my mold.
Day 2:
After allowing the silicone to cure completely, I moved to the final stage of the process: retrieving the mold and casting the final product.
I touched the silicone and it was hard enough. I removed the building blocks to get my silicone mold.
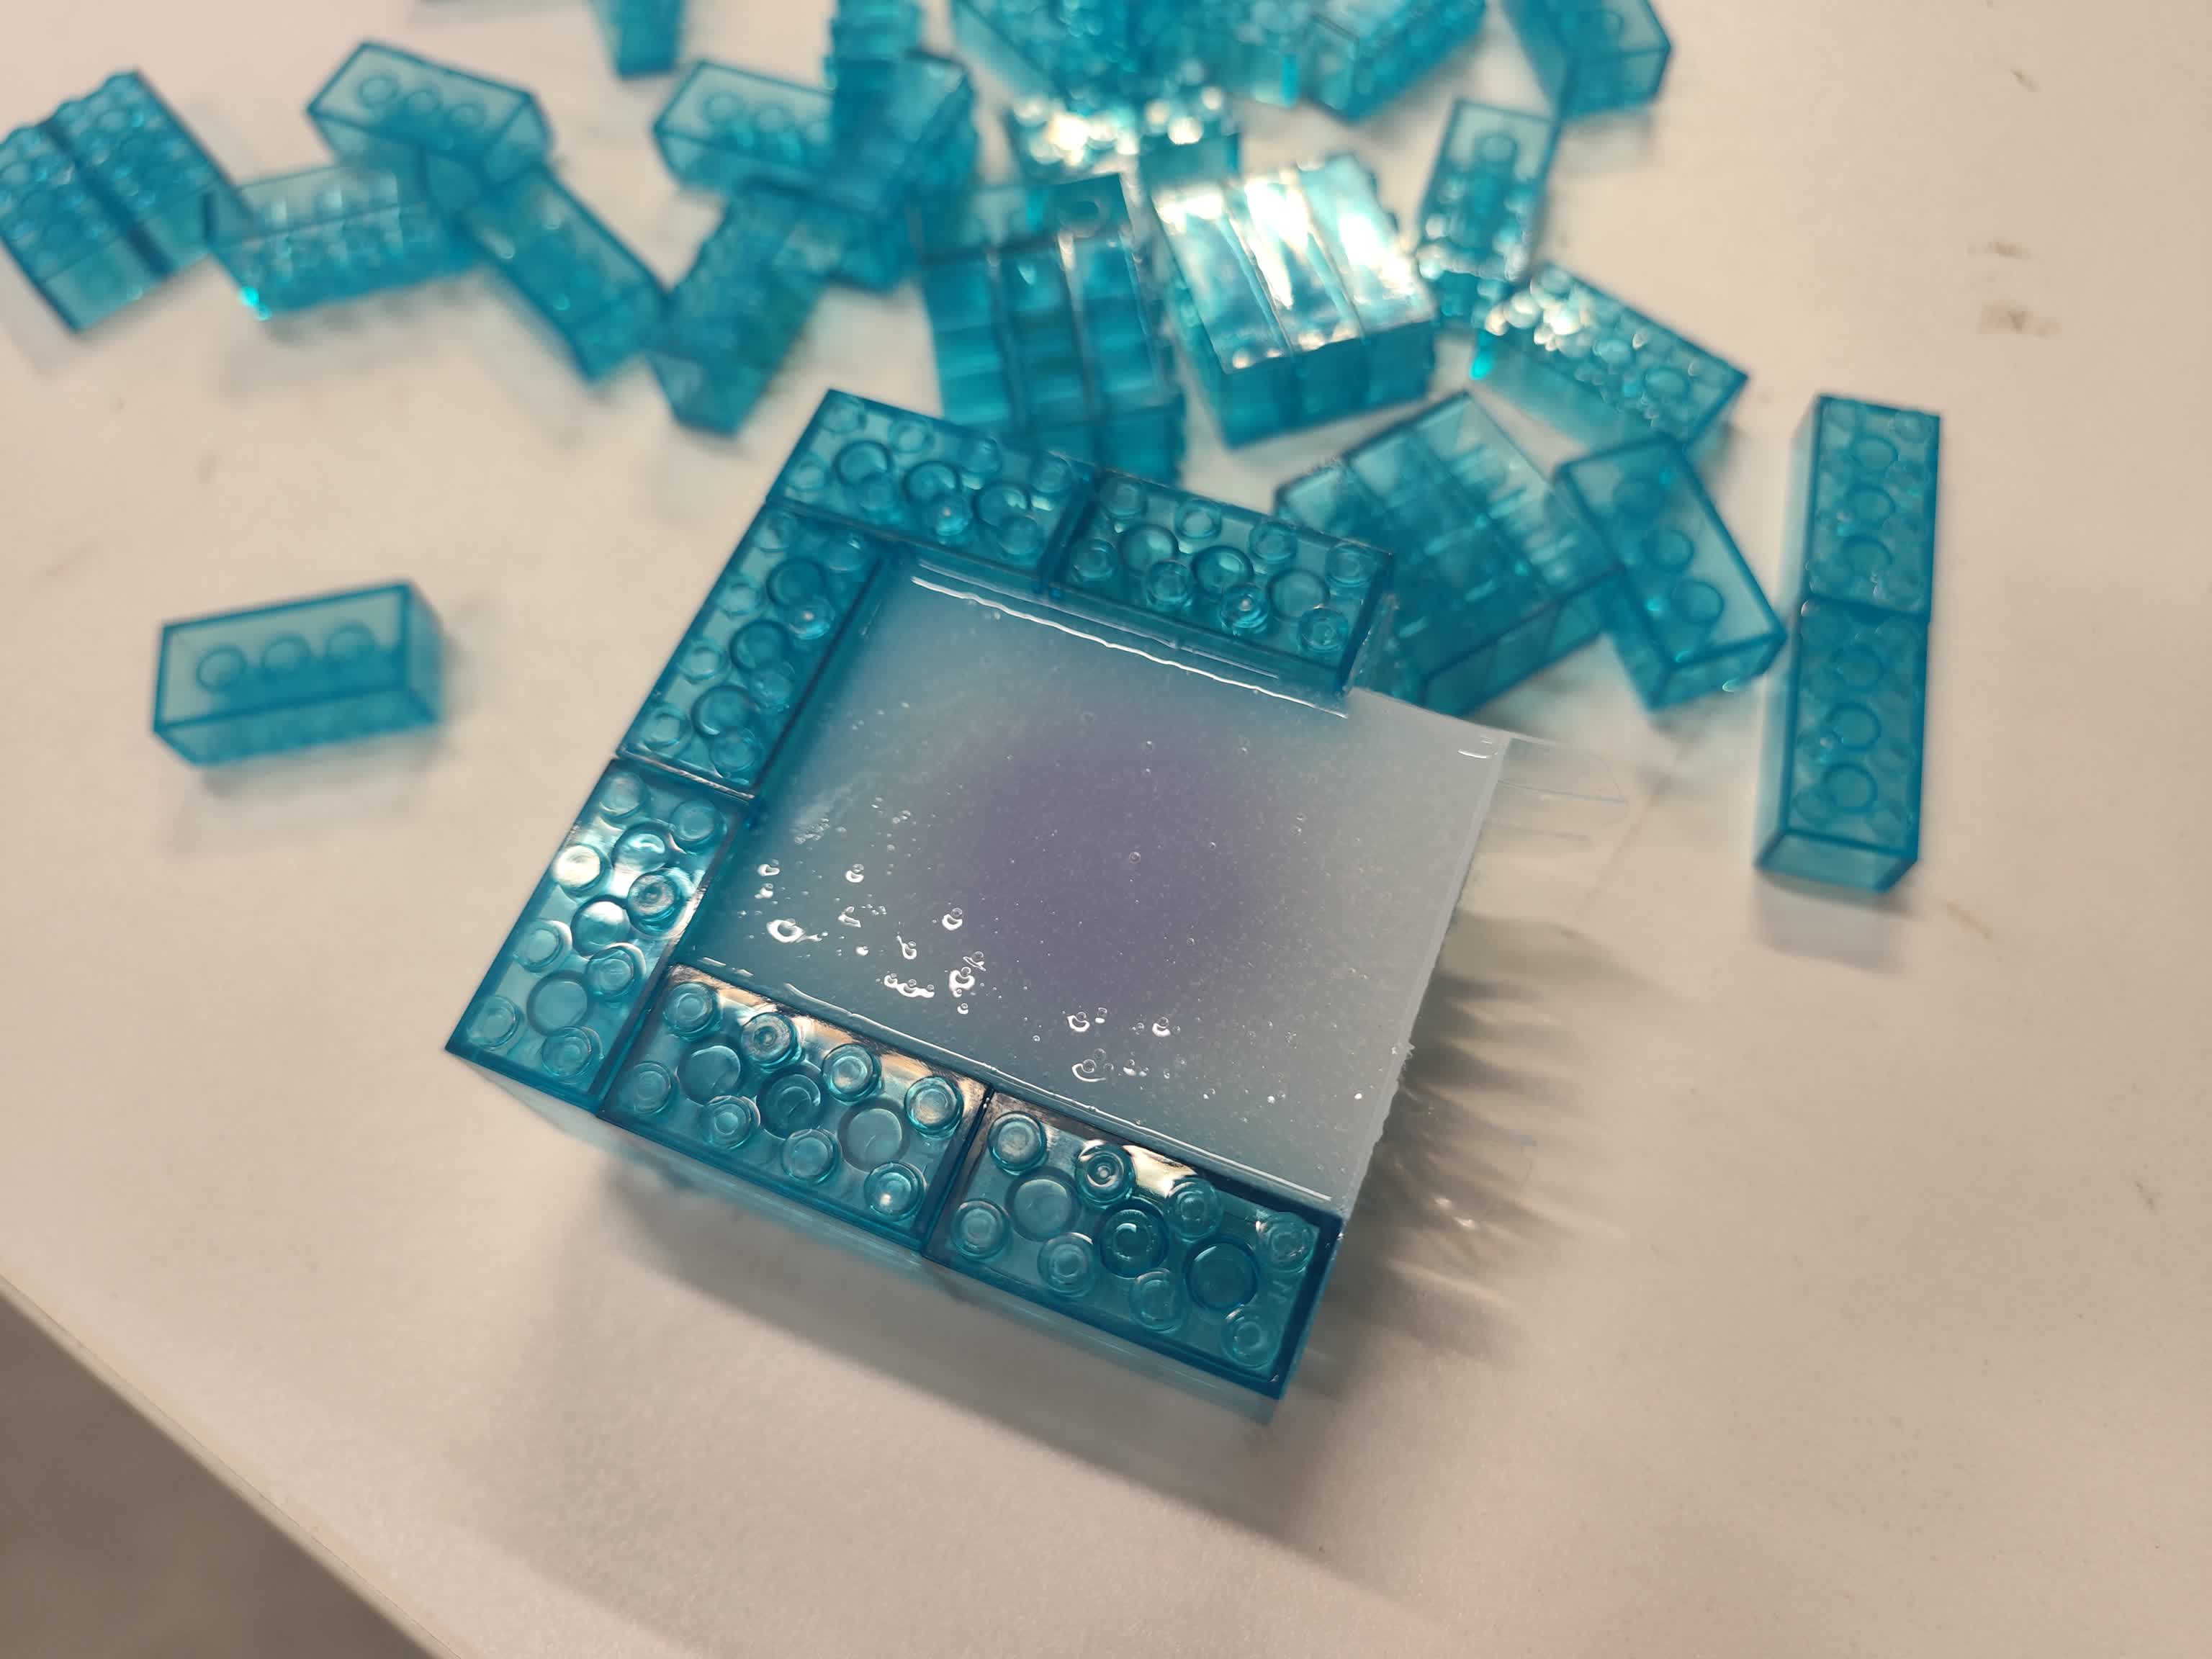
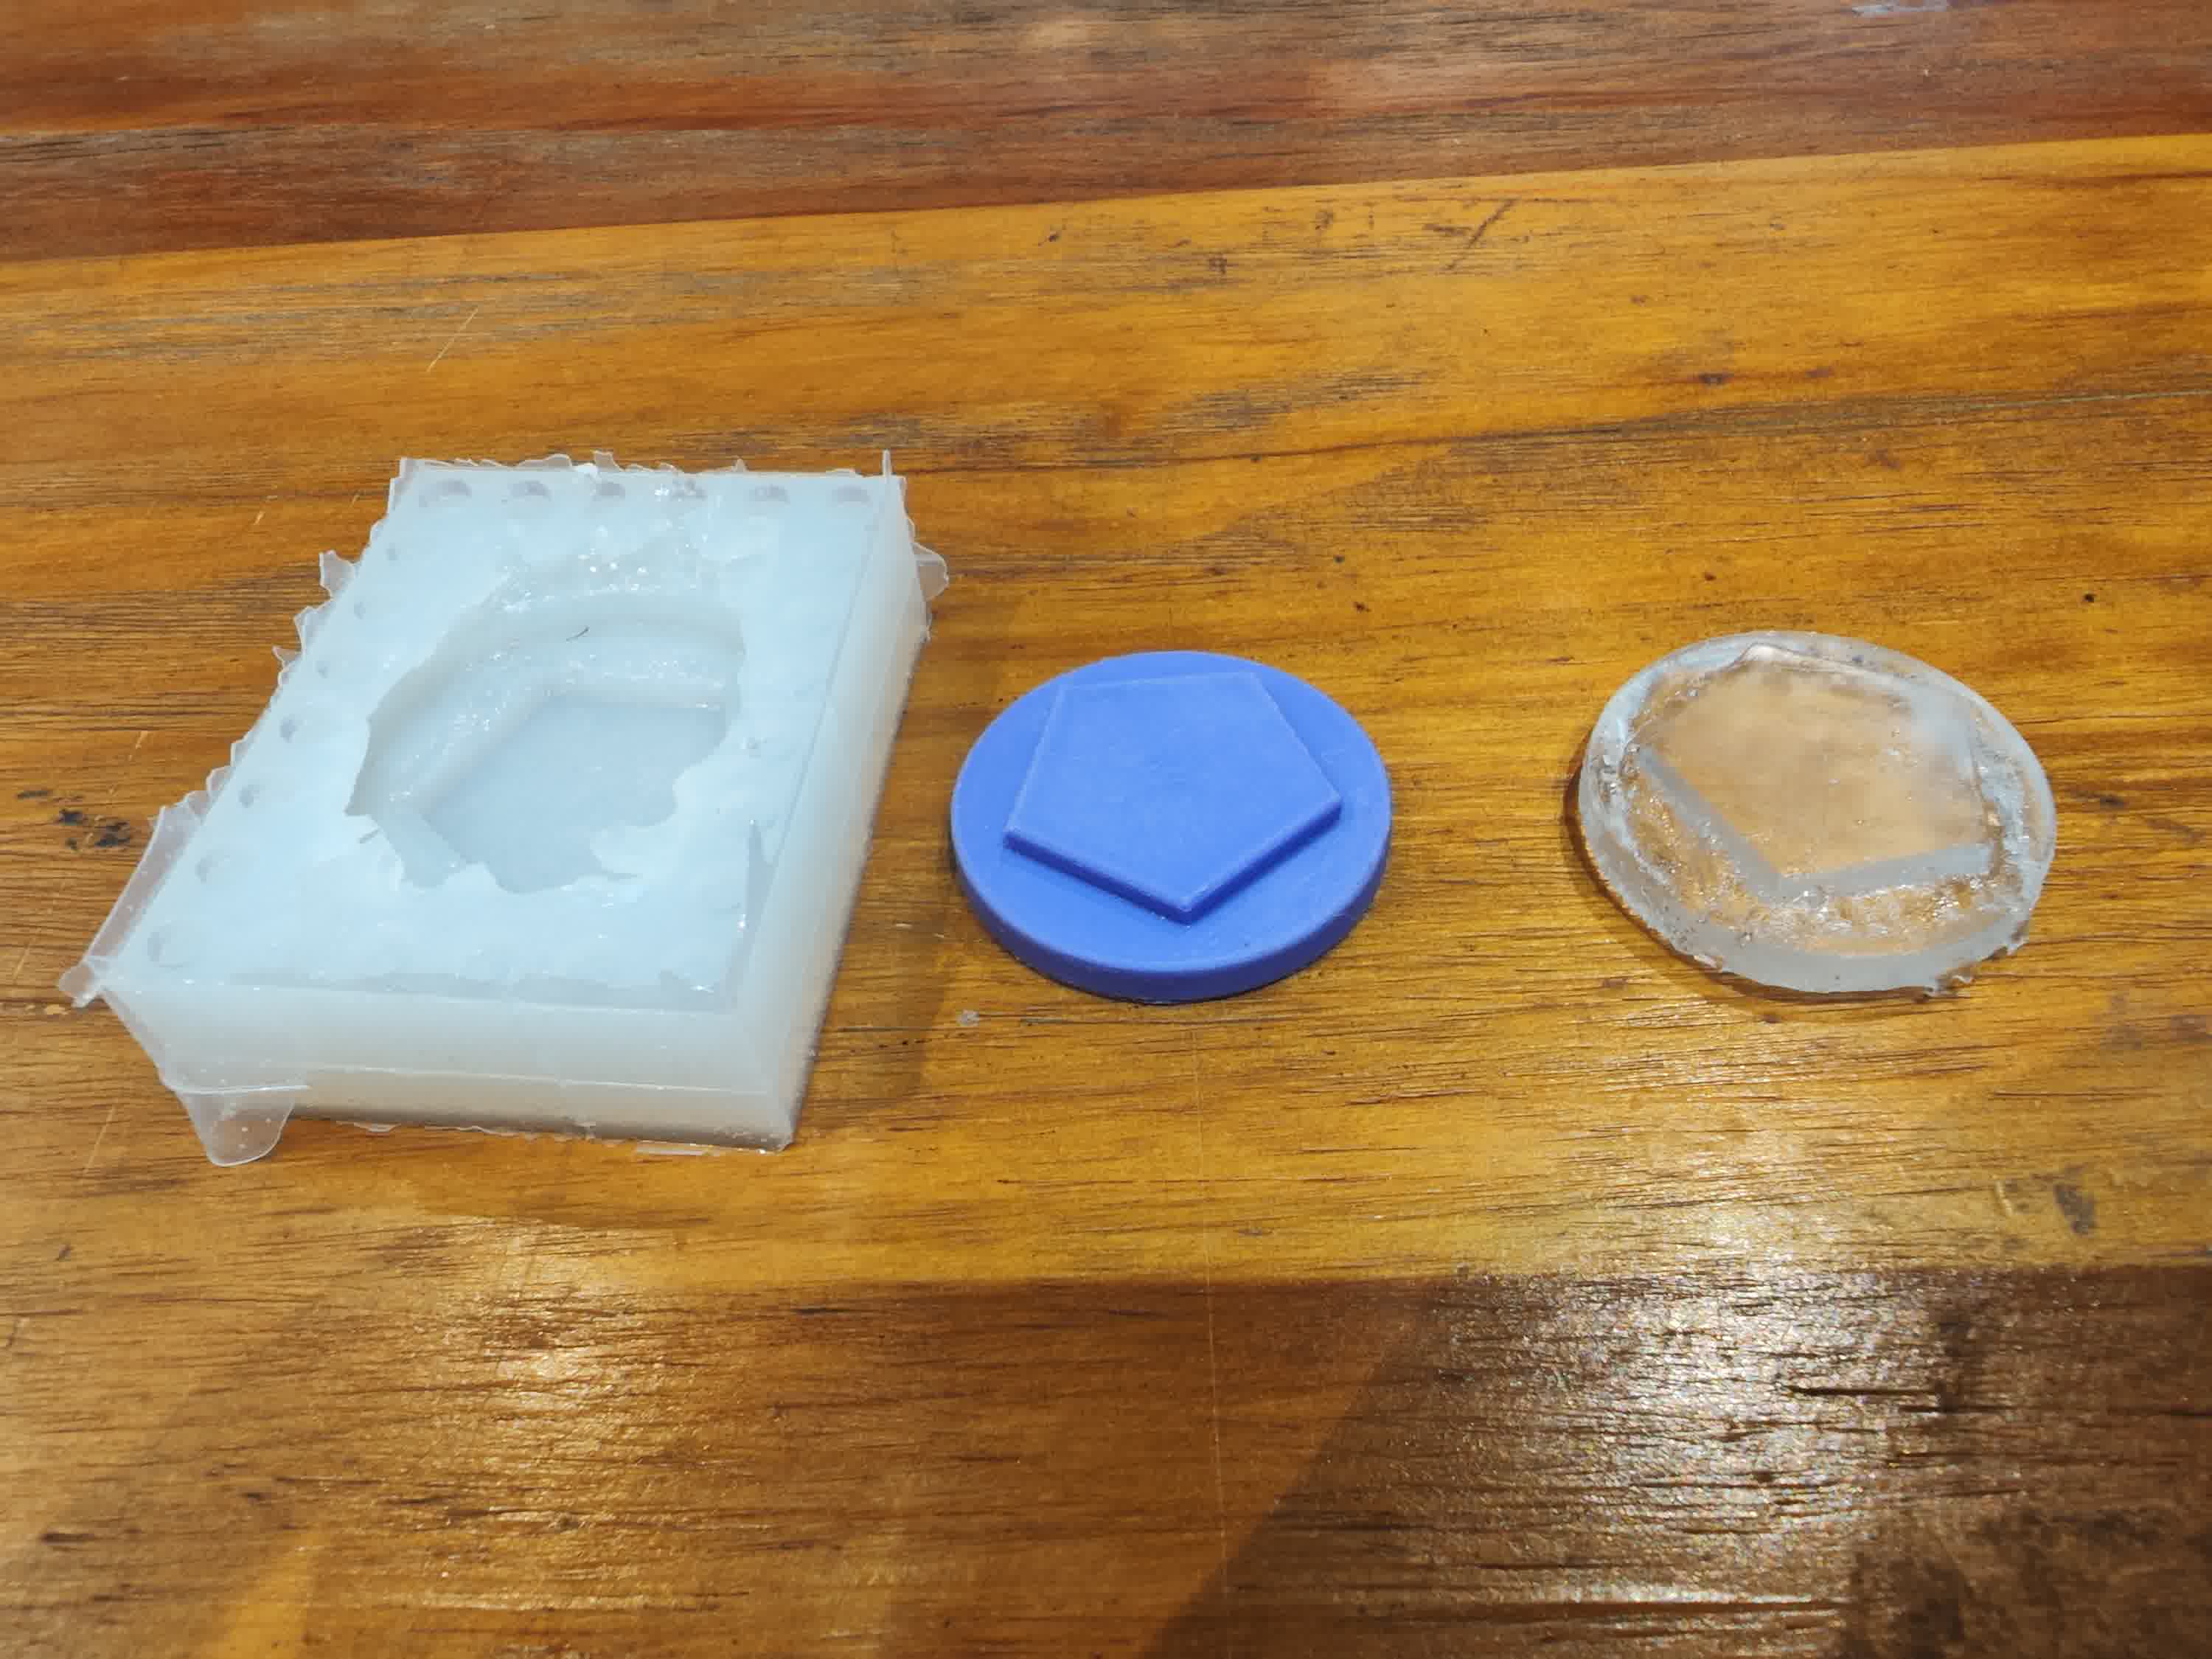
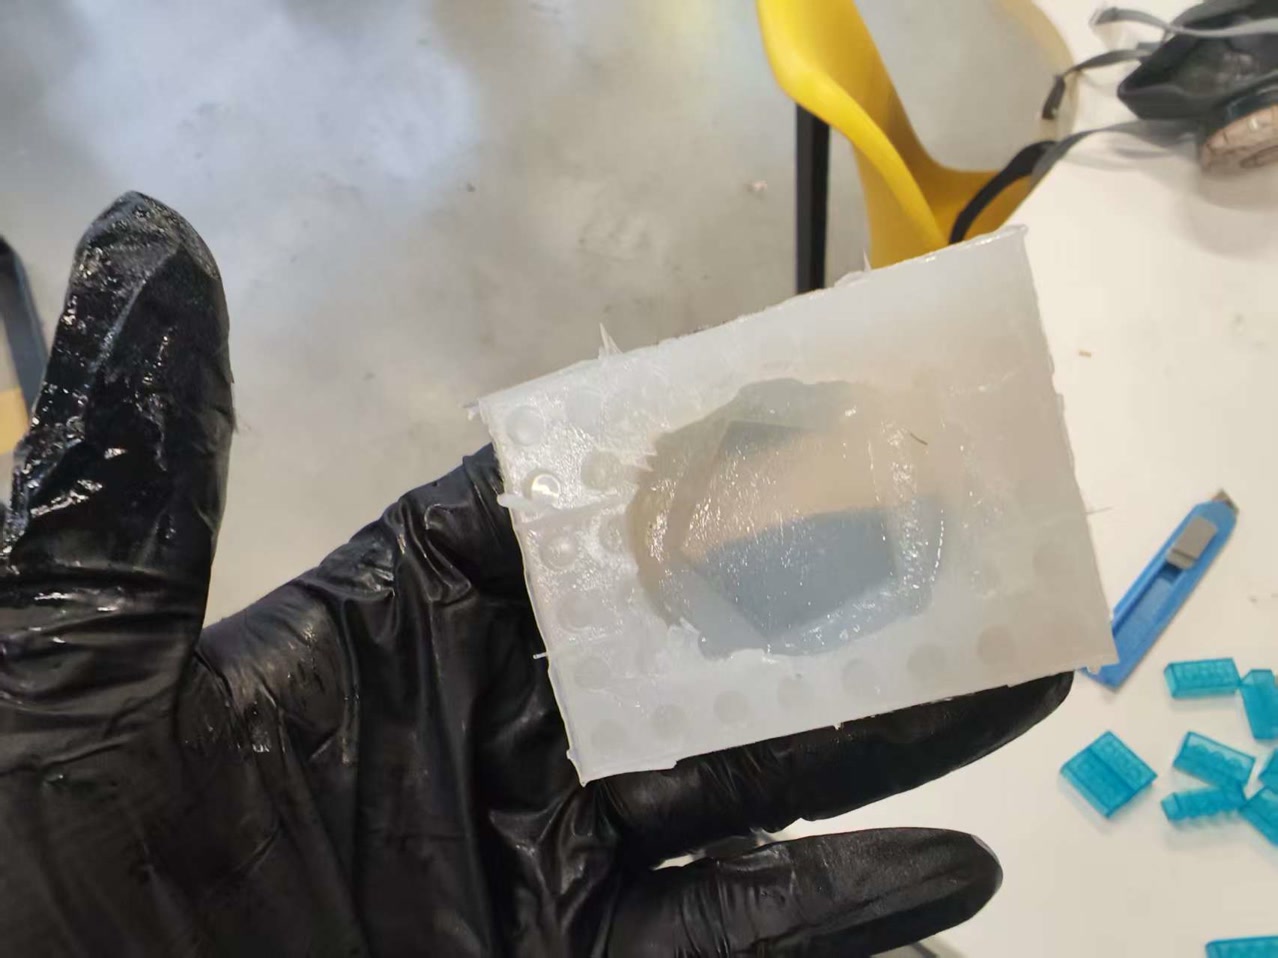
When I disassembled the mold box made by building blocks, the resulting silicone block had captured every detail—including the circular studs of the Lego baseplate.
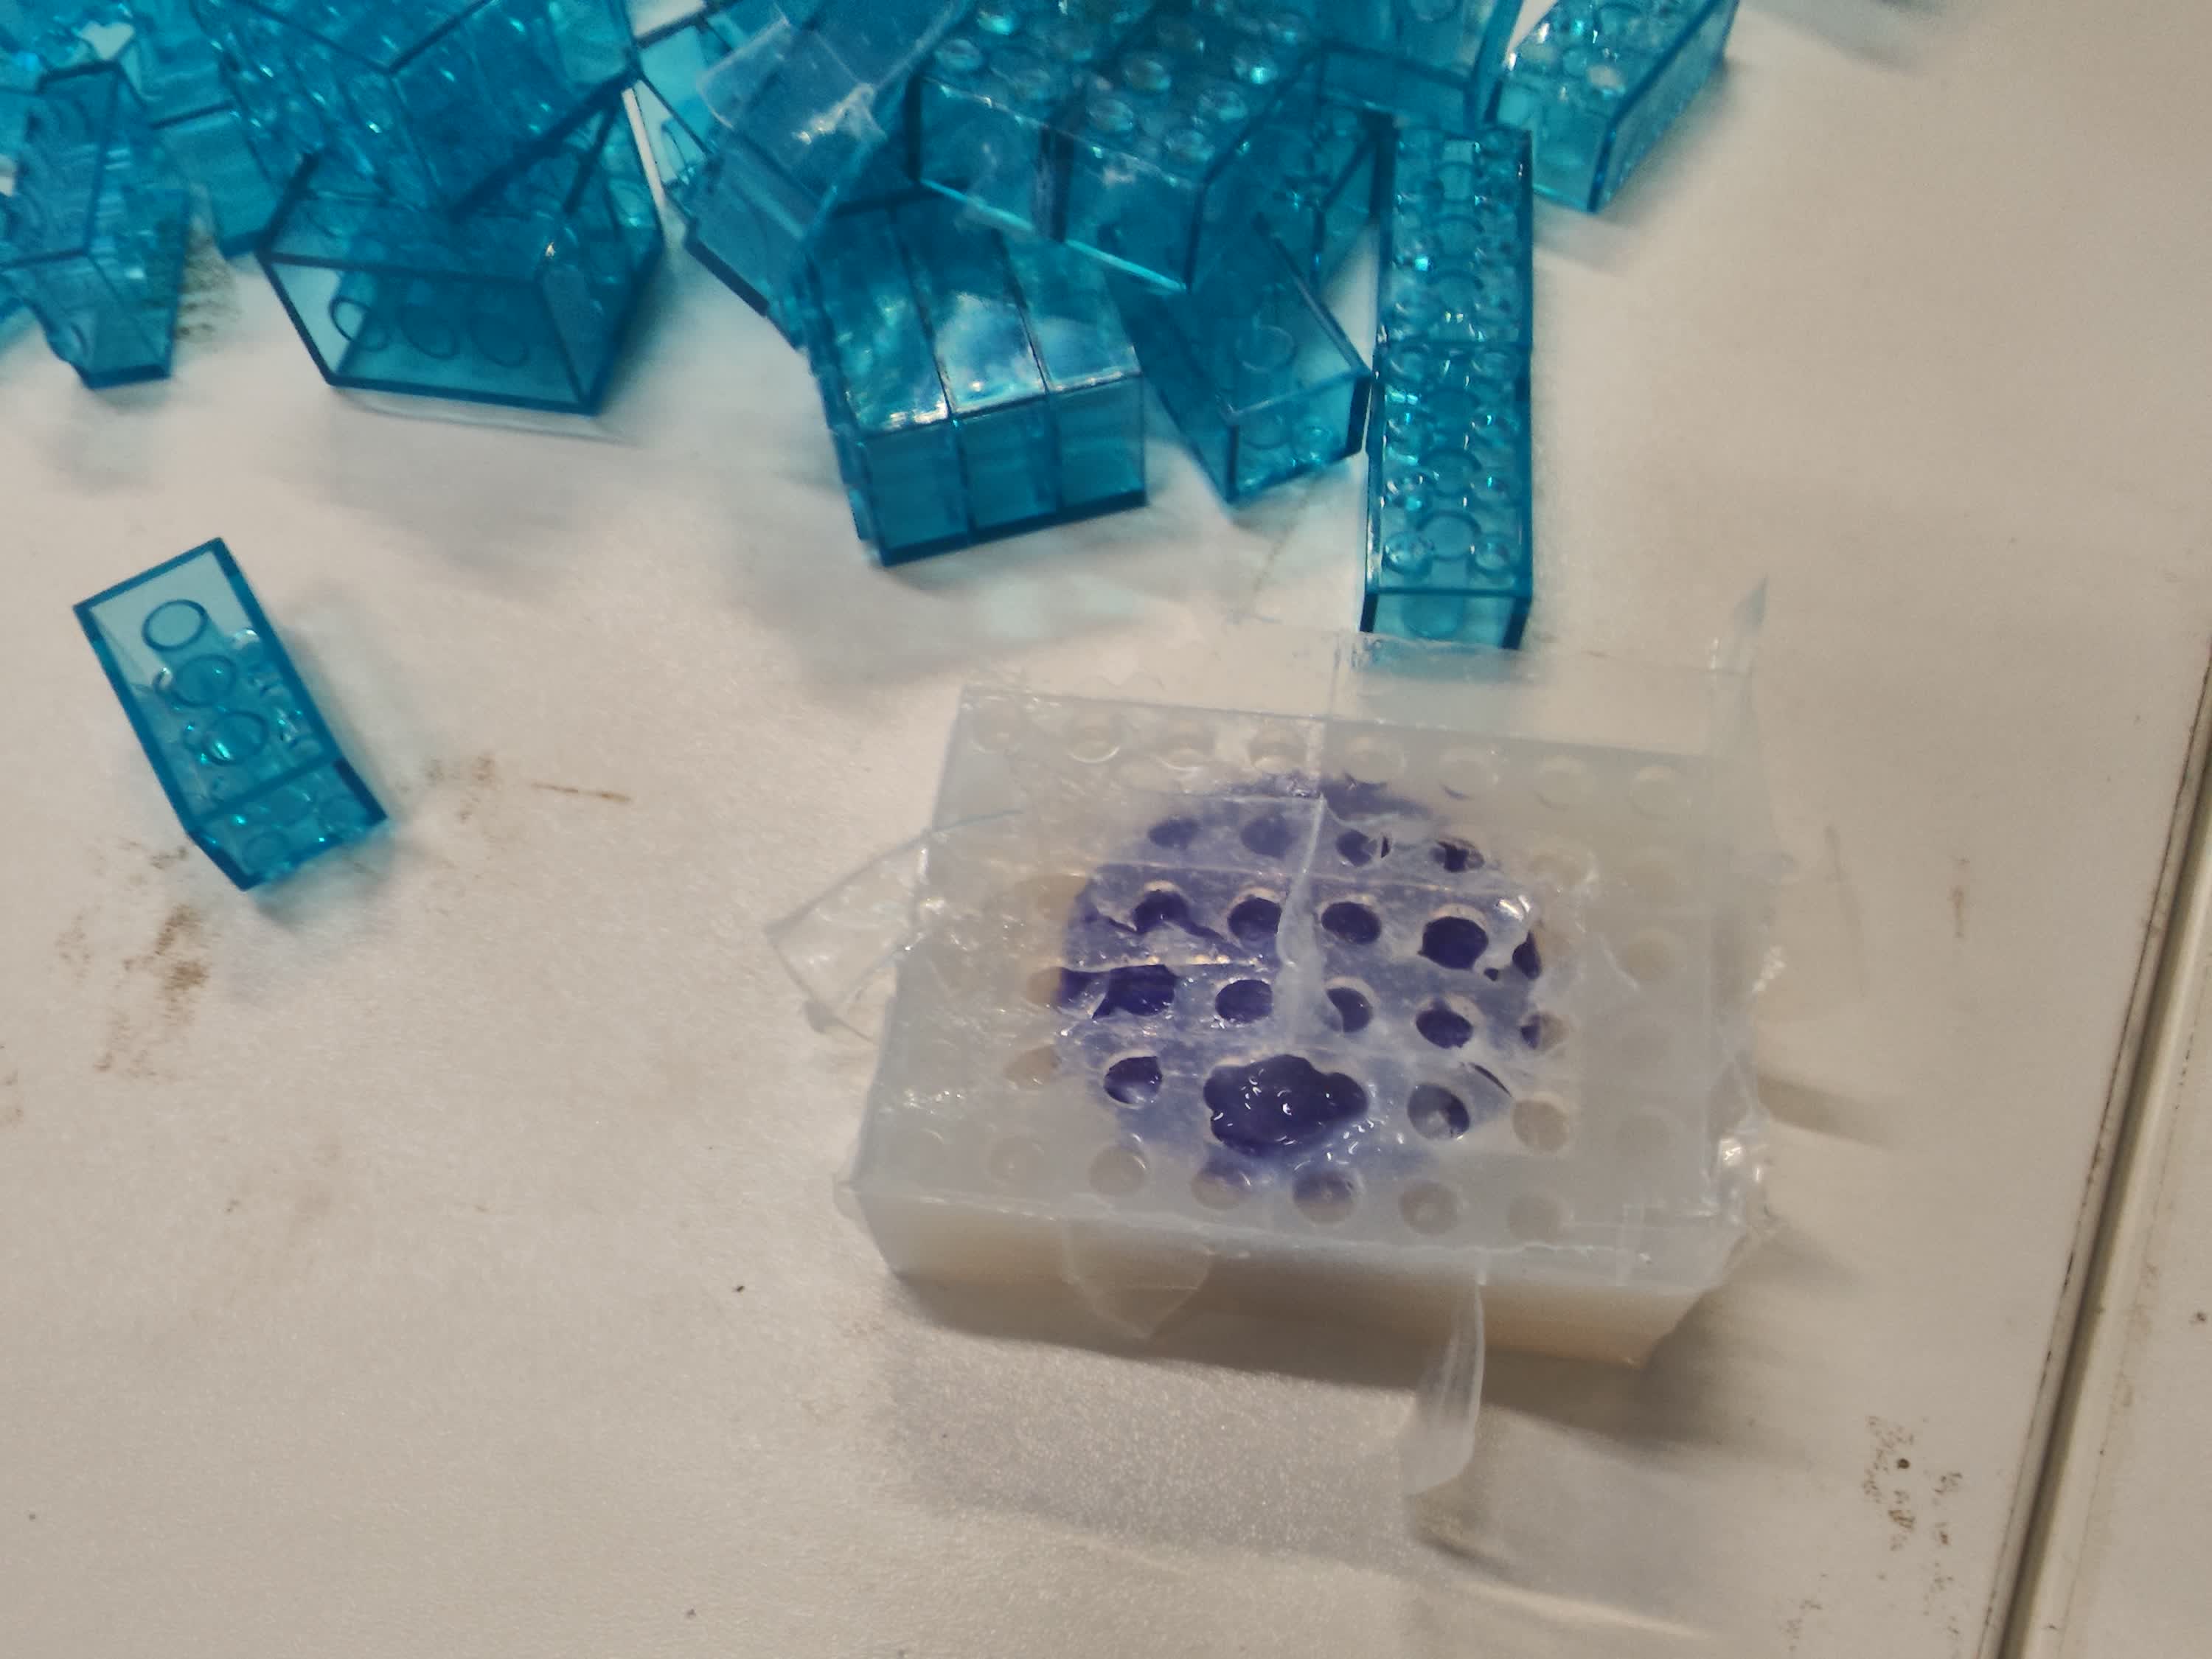
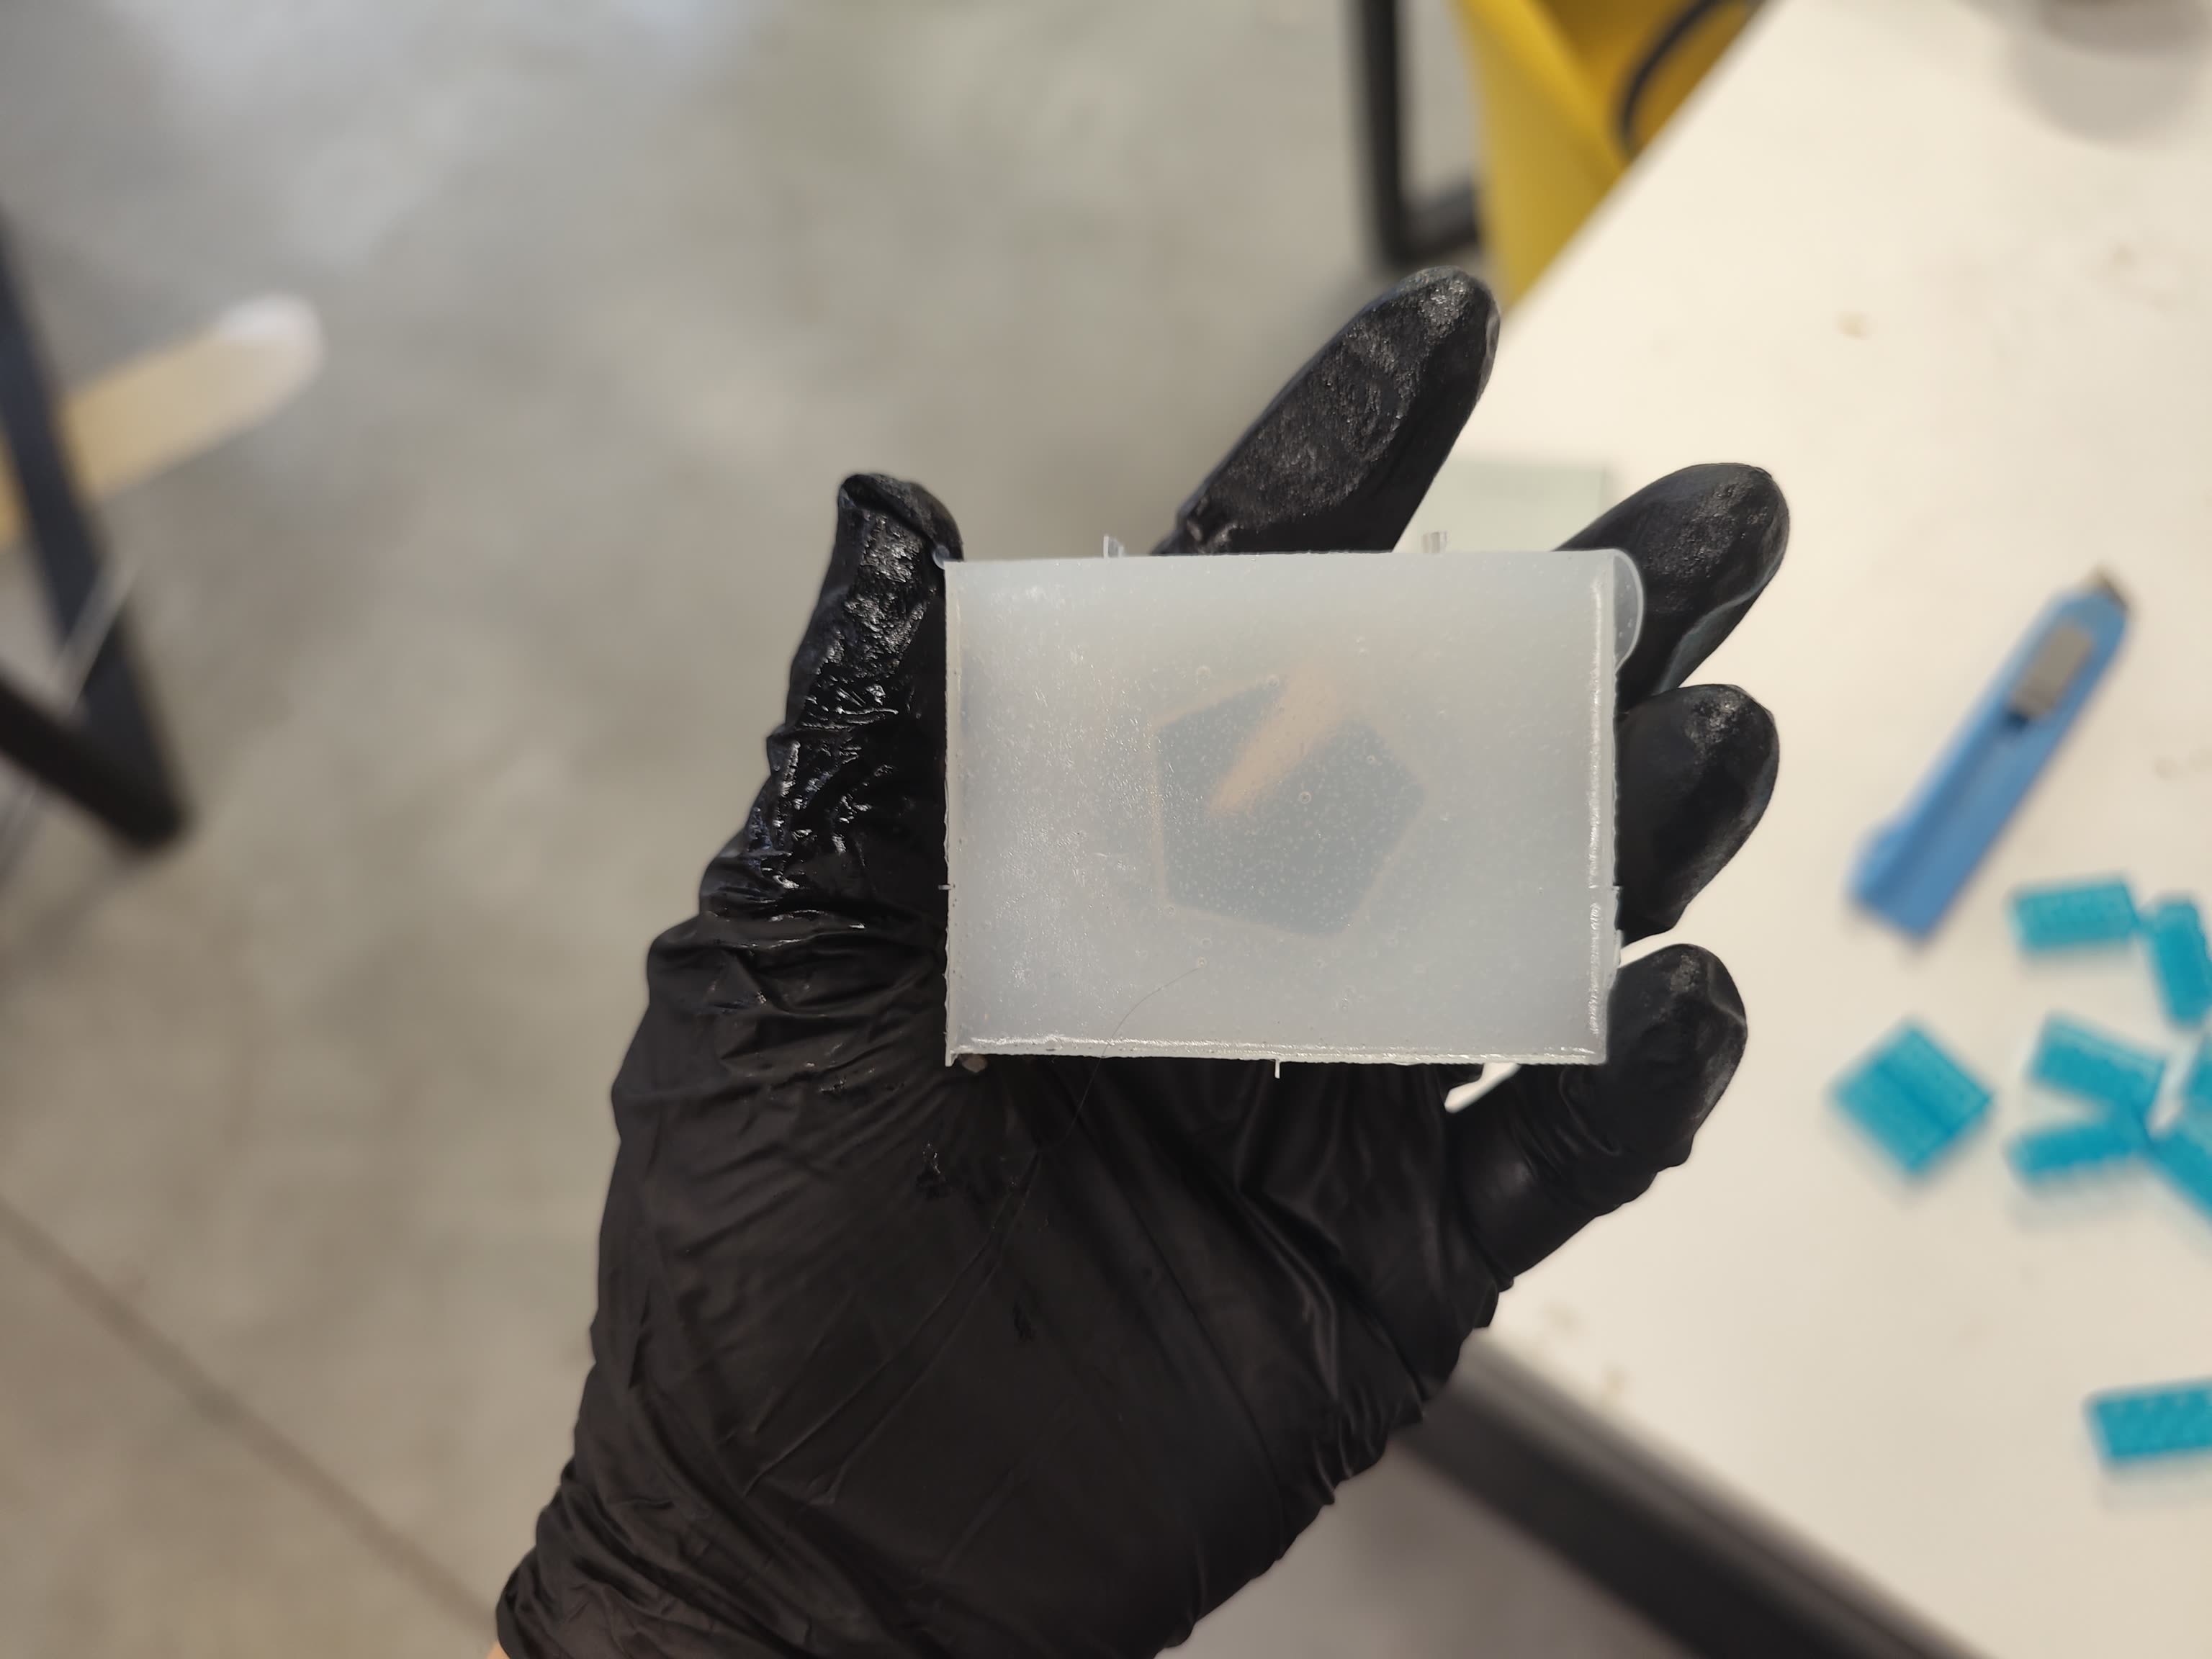
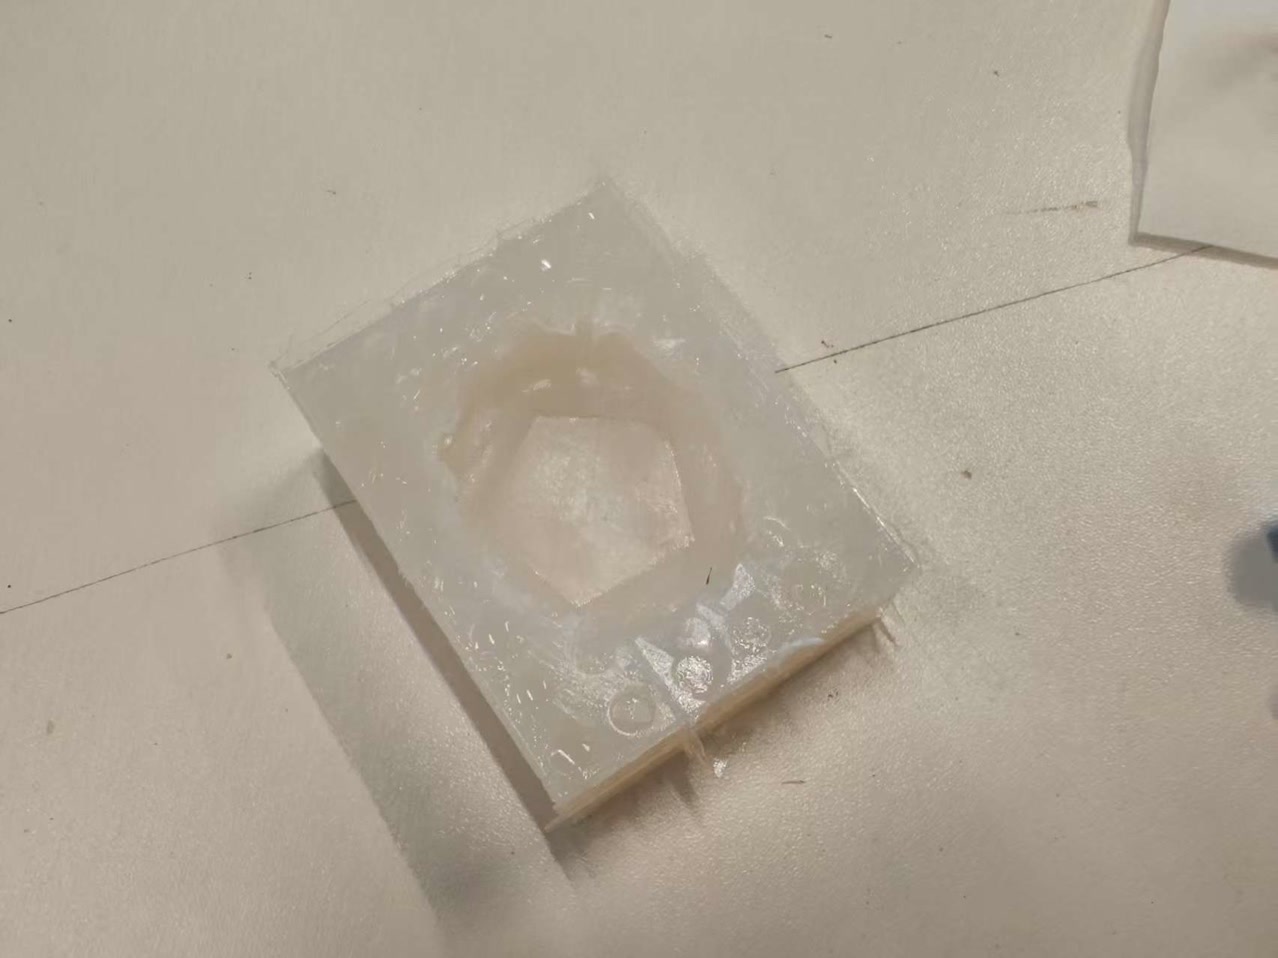
Trimming: Since it left a thin, redundant layer of silicone with small circular holes on the front of my mold, I used a utility knife and scissors to carefully trim away the excess material, ensuring the mold's surface was clean and the coin's cavity was easily accessible.
The Lingering Impact of Previous Attempts
Residual Uncured Silicone: Because I had moved the coin directly from the failed "Attempt 2" (non-catalyzed silicone) into the successful "Attempt 3" without deep chemical cleaning, I encountered 1 minor issue: There was a small amount of liquid silicone from the previous attempt stuck to the edges of the coin. This created some slight "sludge" around the perimeter, which may have slightly compromised the sharpness of the mold's edge.
Micro-bubbles: During the mixing of the 1:50 catalyst, some microscopic air bubbles were trapped in the viscous liquid. Despite my efforts to pop them with a stick, some remained. I am monitoring the mold to see if these translate into small "bumps" on the final cast.
Casting with Epoxy Crystal Drop Glue
For the final reproduction, I used Epoxy Crystal Drop Glue, known for its high transparency and gloss finish.
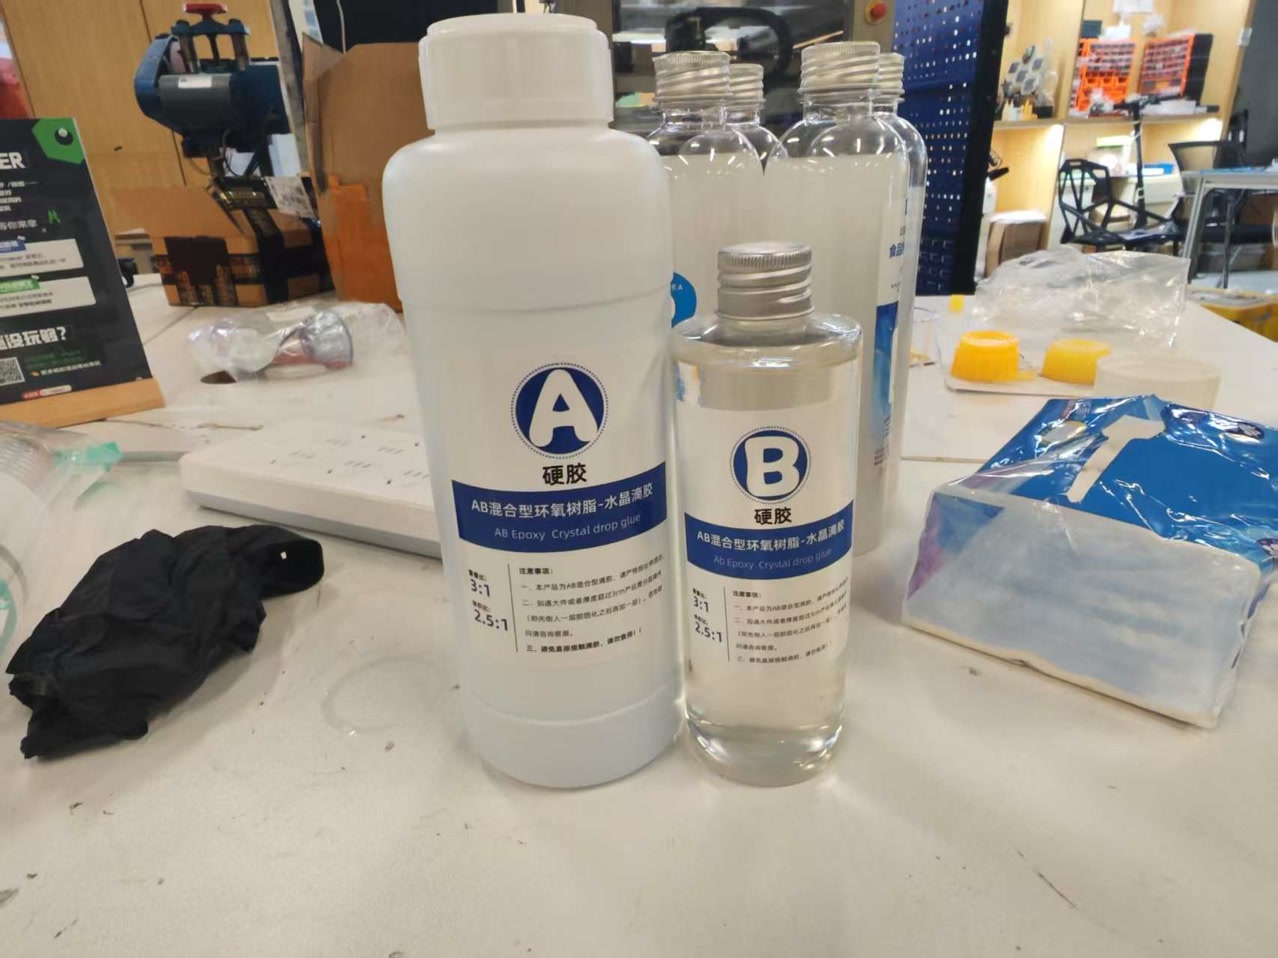
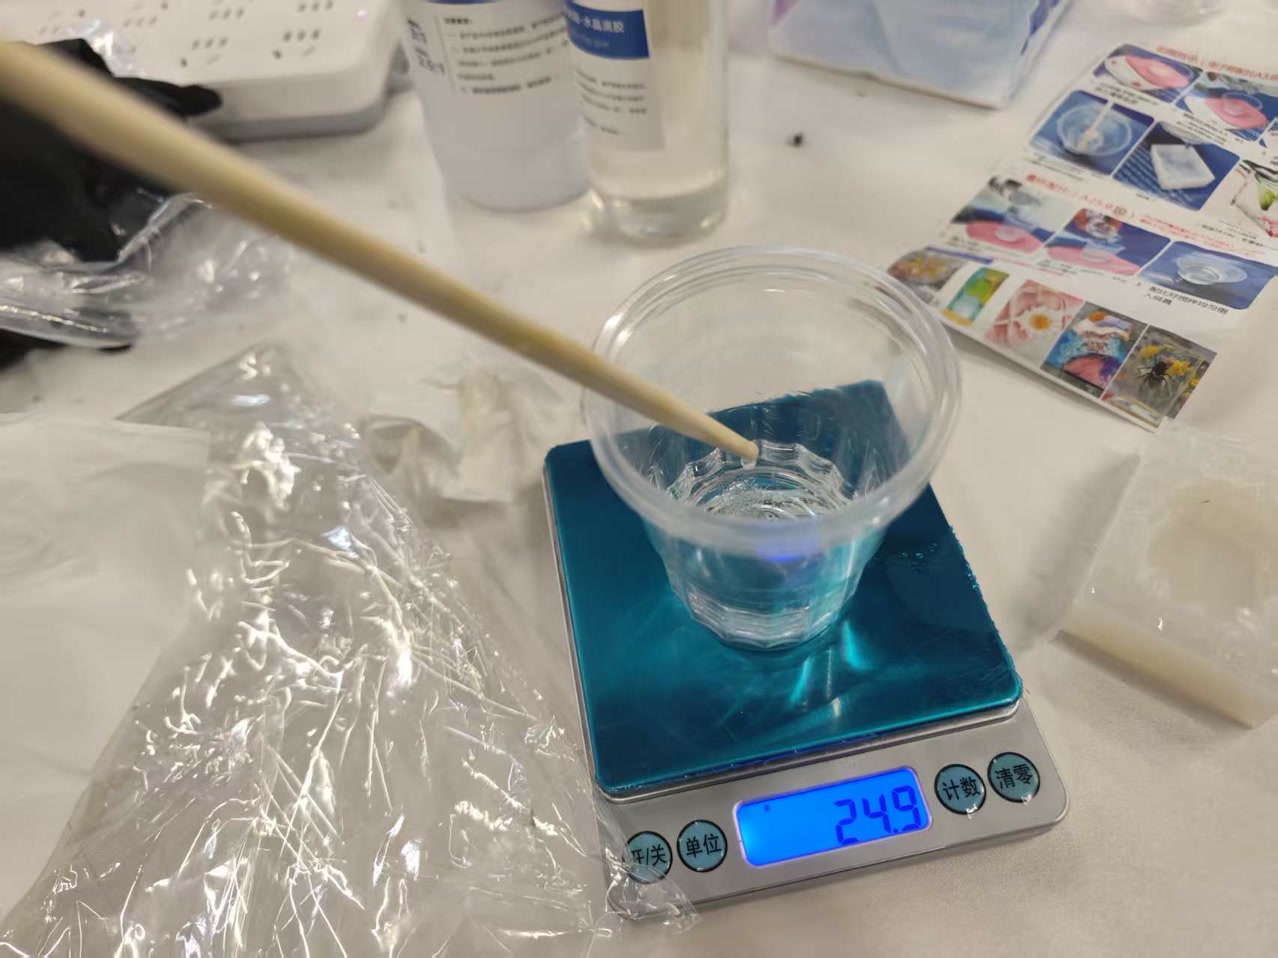
Mixing Ratio (3:1): Following the instructions for the Crystal Glue, I measured the Part A (Resin) and Part B (Hardener) at a 3:1 ratio by weight using a digital scale.
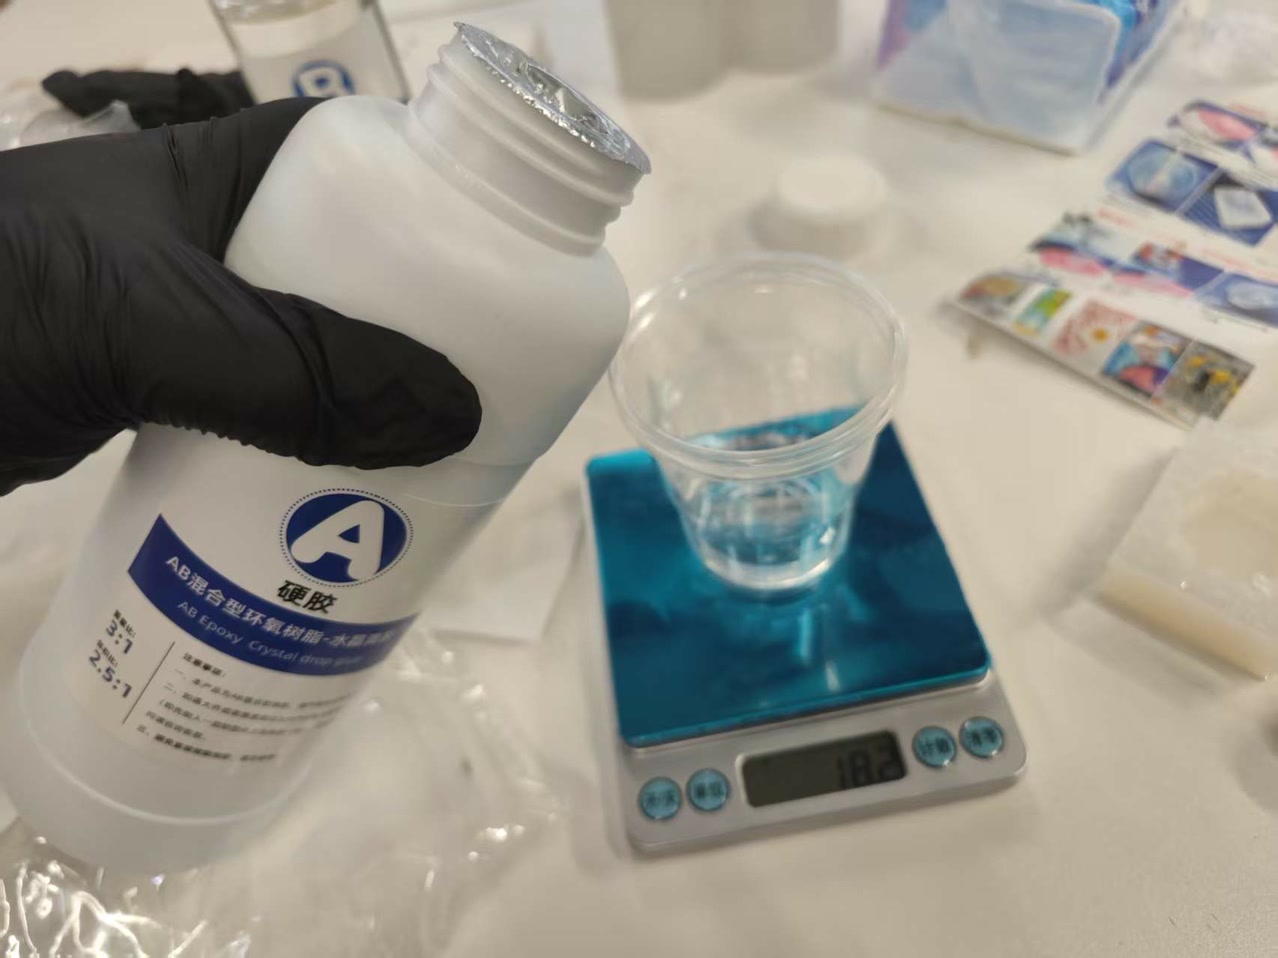
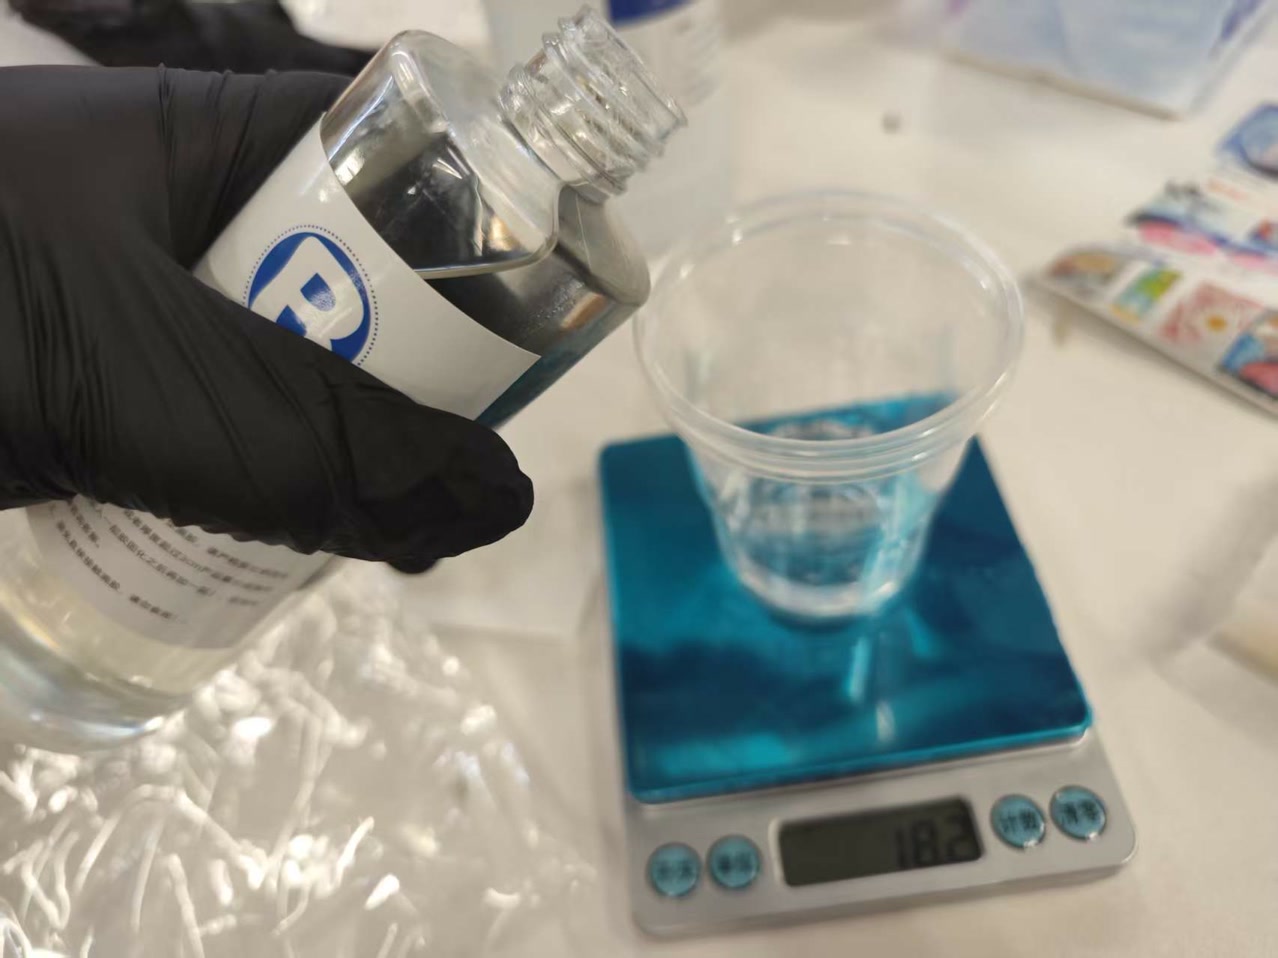
Degassing and Pouring: After mixing slowly with a wooden stick to minimize new bubbles, I let the glue sit for a few minutes to allow larger bubbles to rise and pop. I then performed a slow, steady pour into the silicone mold, starting from the center of the star relief to ensure the glue reached every fine detail.
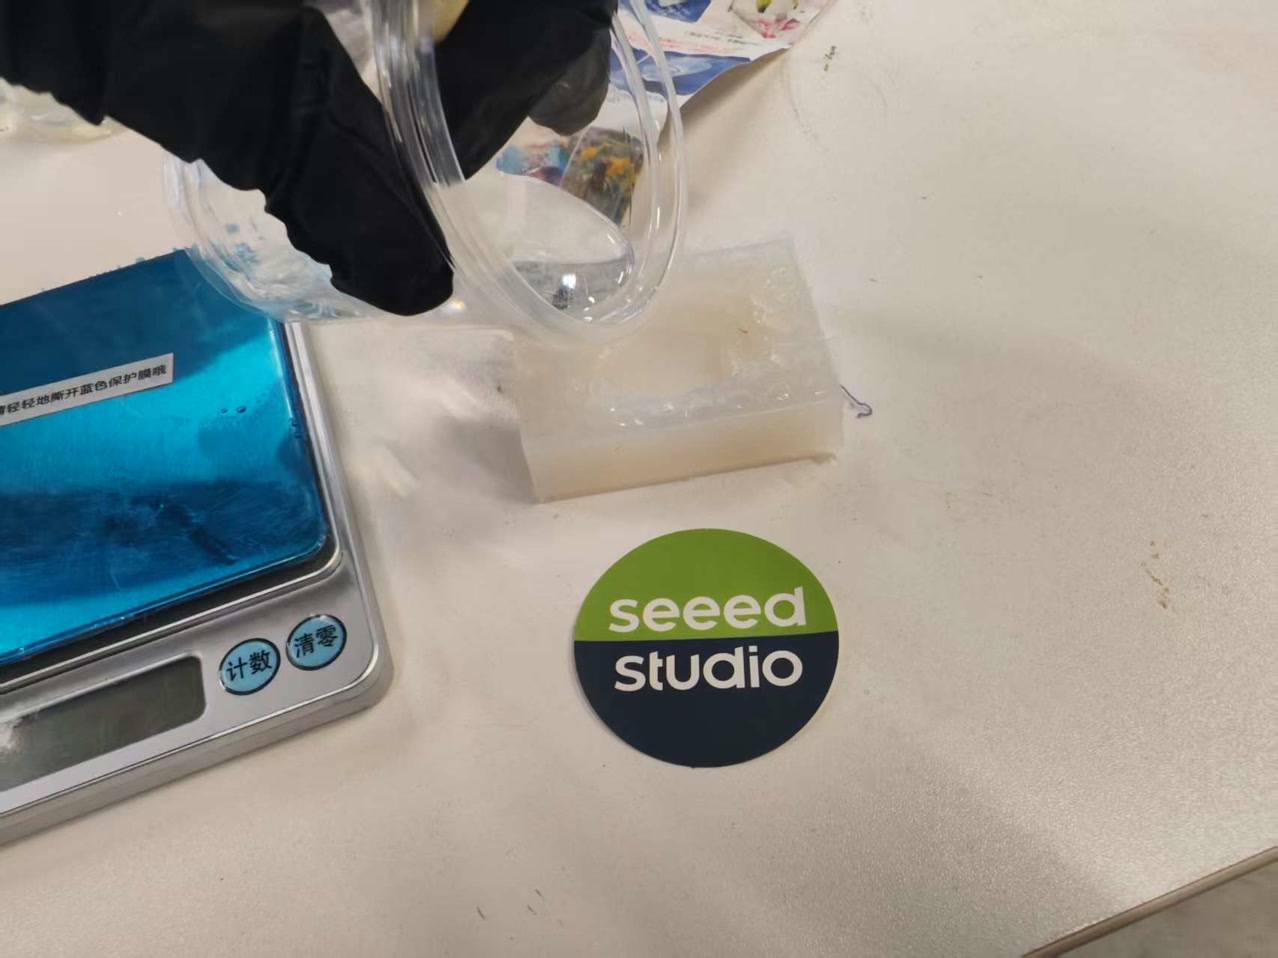
Epoxy Crystal Glue typically has a longer curing time (up to 24 hours). The mold is currently resting on a level surface, and I will perform the final demolding tomorrow to check the clarity and surface quality of the star coin.
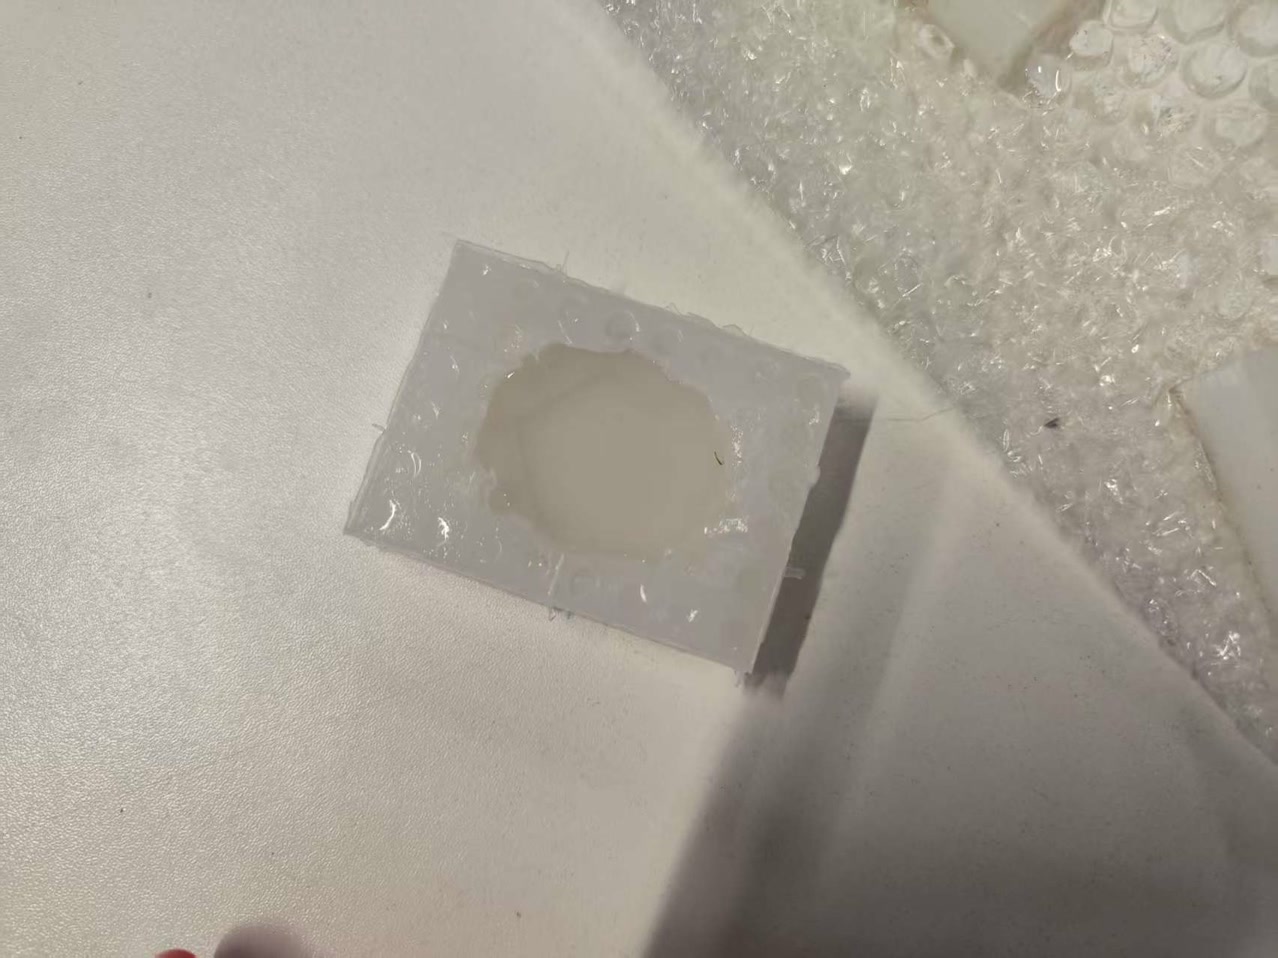
Note on Release Agent: In the final casting stage, I realized that I had forgotten to apply a release agent to the silicone mold before pouring the epoxy crystal glue. However, due to the naturally non-stick properties of silicone, this did not result in a failure. In fact, skipping the spray can sometimes lead to a clearer and glossier surface finish, as release agents can occasionally leave oily residue or cloudiness on the epoxy.
Refinement for next time: To be safe, especially with complex geometries, a light mist of specialized release agent is recommended, but for this coin relief, the silicone's self-releasing property was sufficient.
Final Result and Post-Molding Analysis
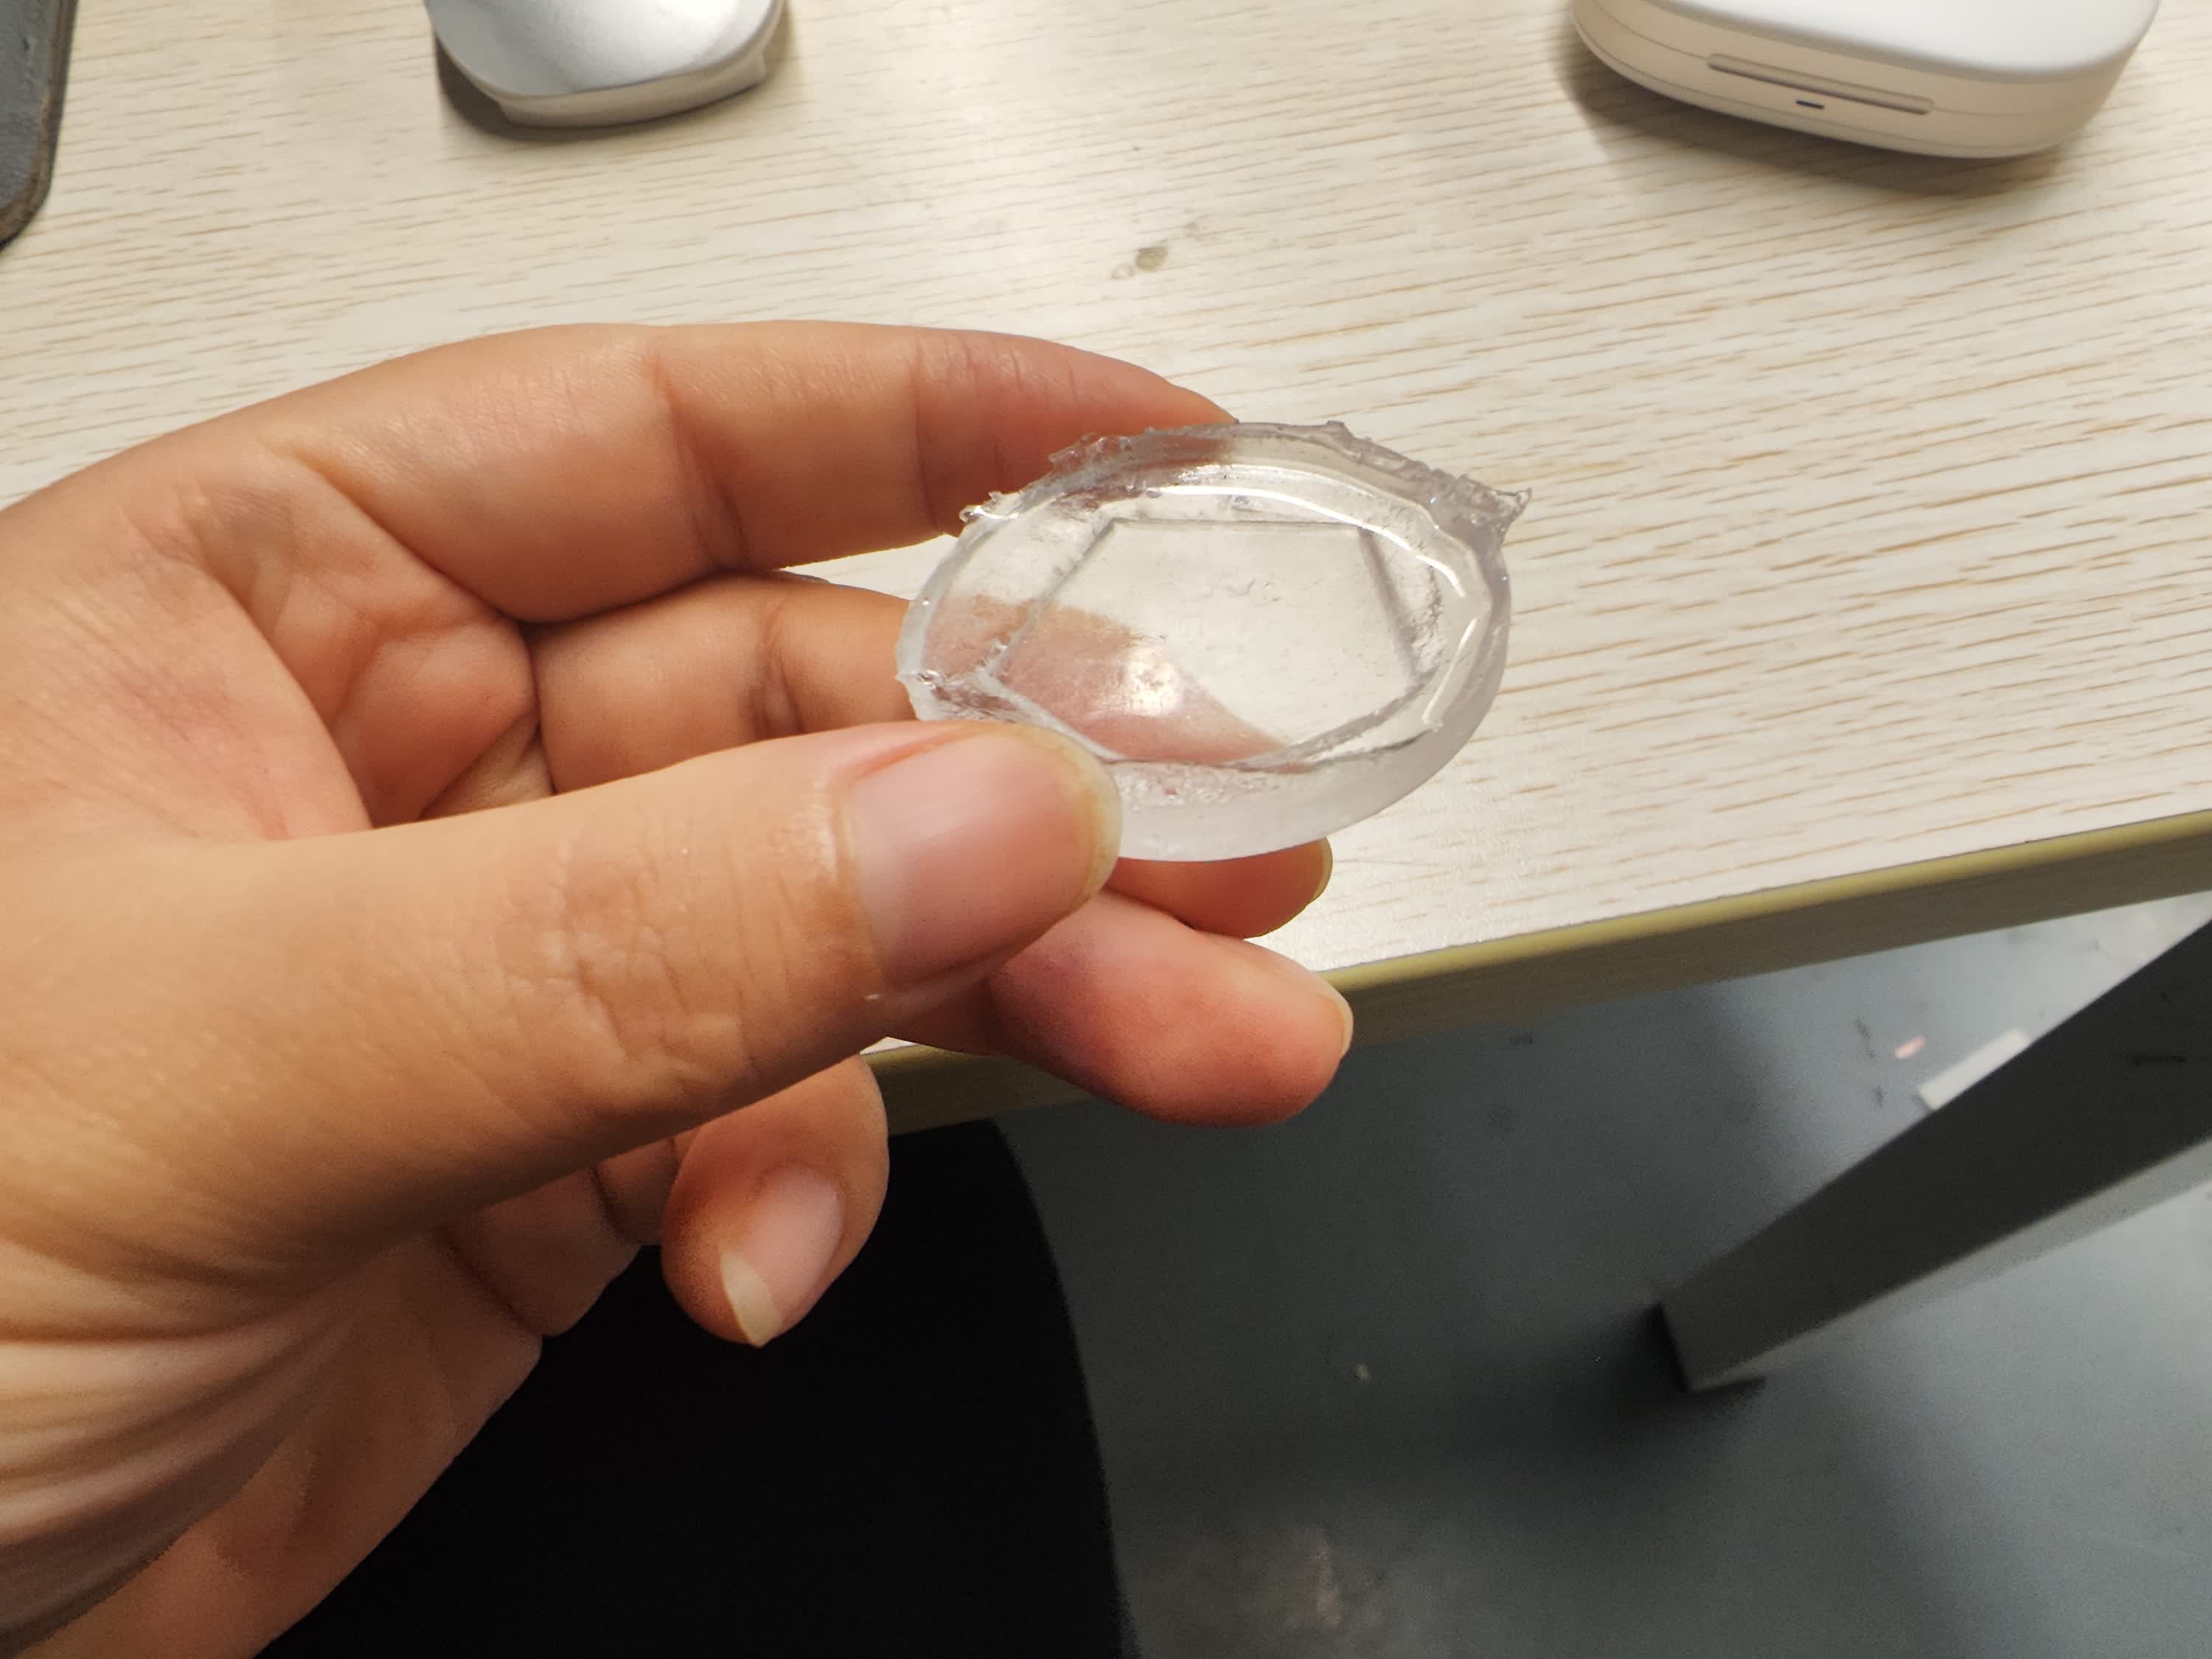
After waiting 24 hours for the Epoxy Crystal Drop Glue to fully cure, I put on my safety gloves and performed the final demolding. To my relief, despite forgetting the release agent, the epoxy separated from the silicone mold quite smoothly due to the silicone's naturally non-stick properties.
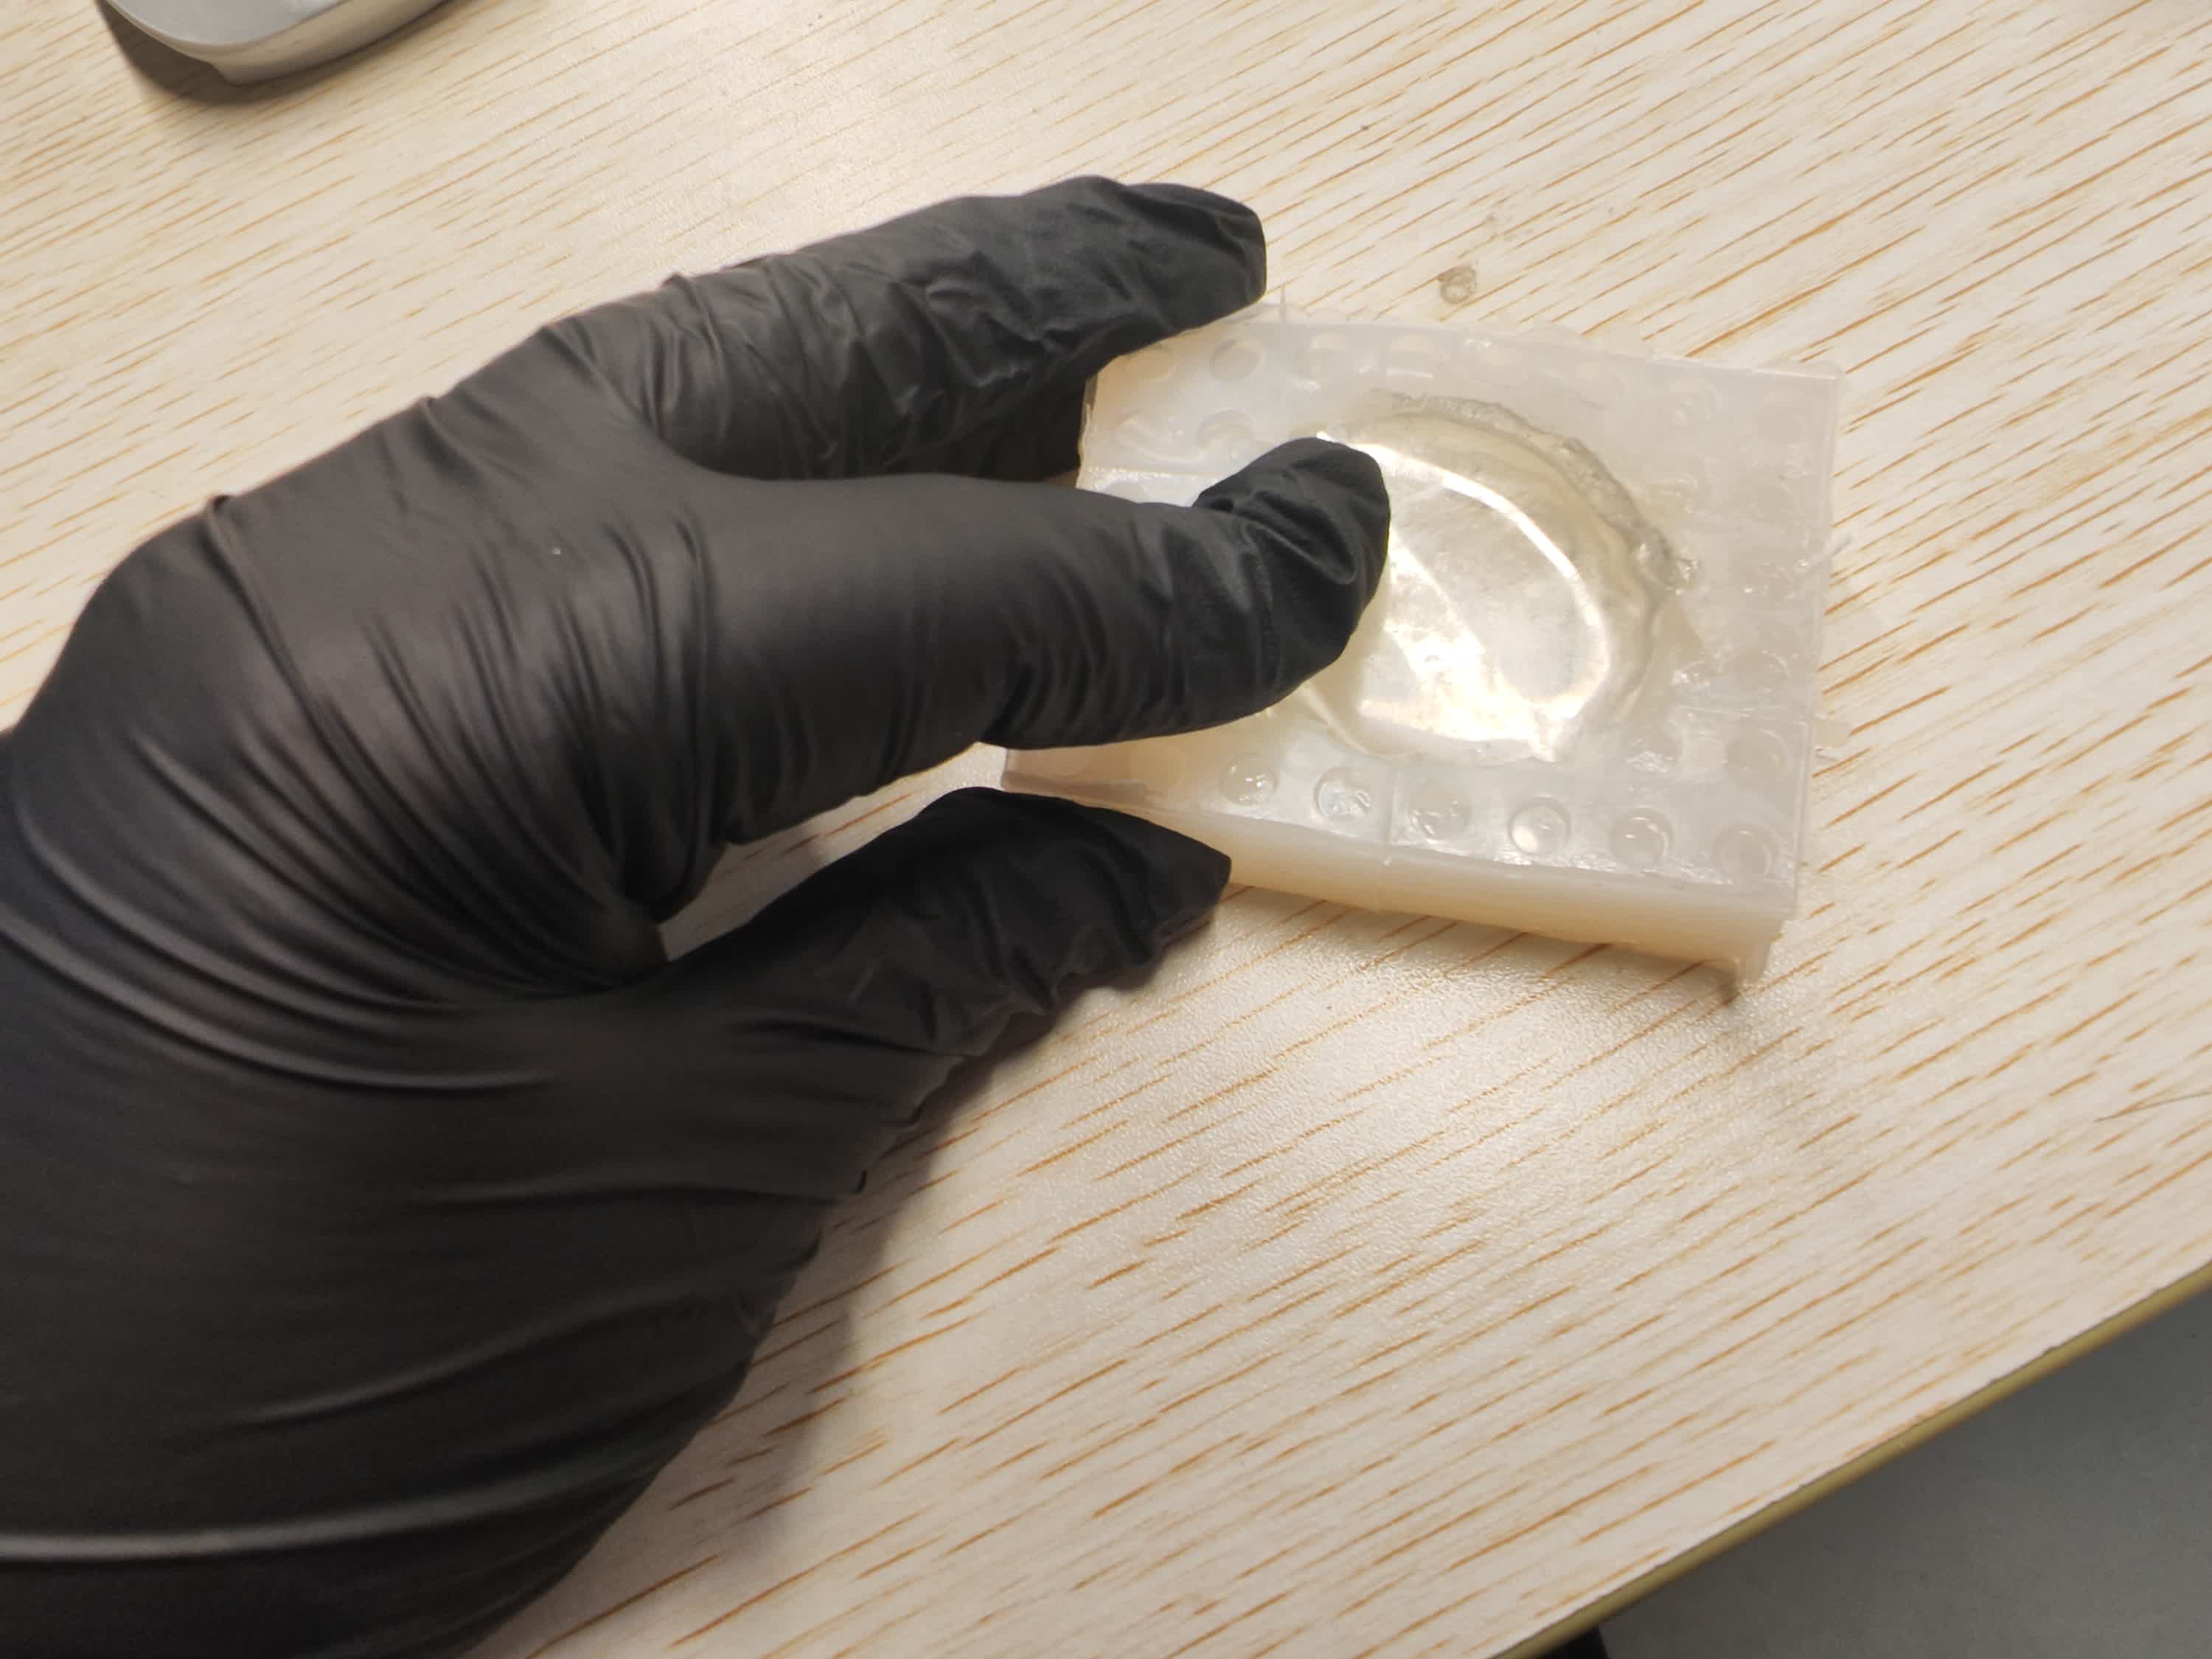
However, the final "Star Coin" was not perfect. Upon close inspection, I identified three main issues that provide clear lessons for future molding and casting projects:
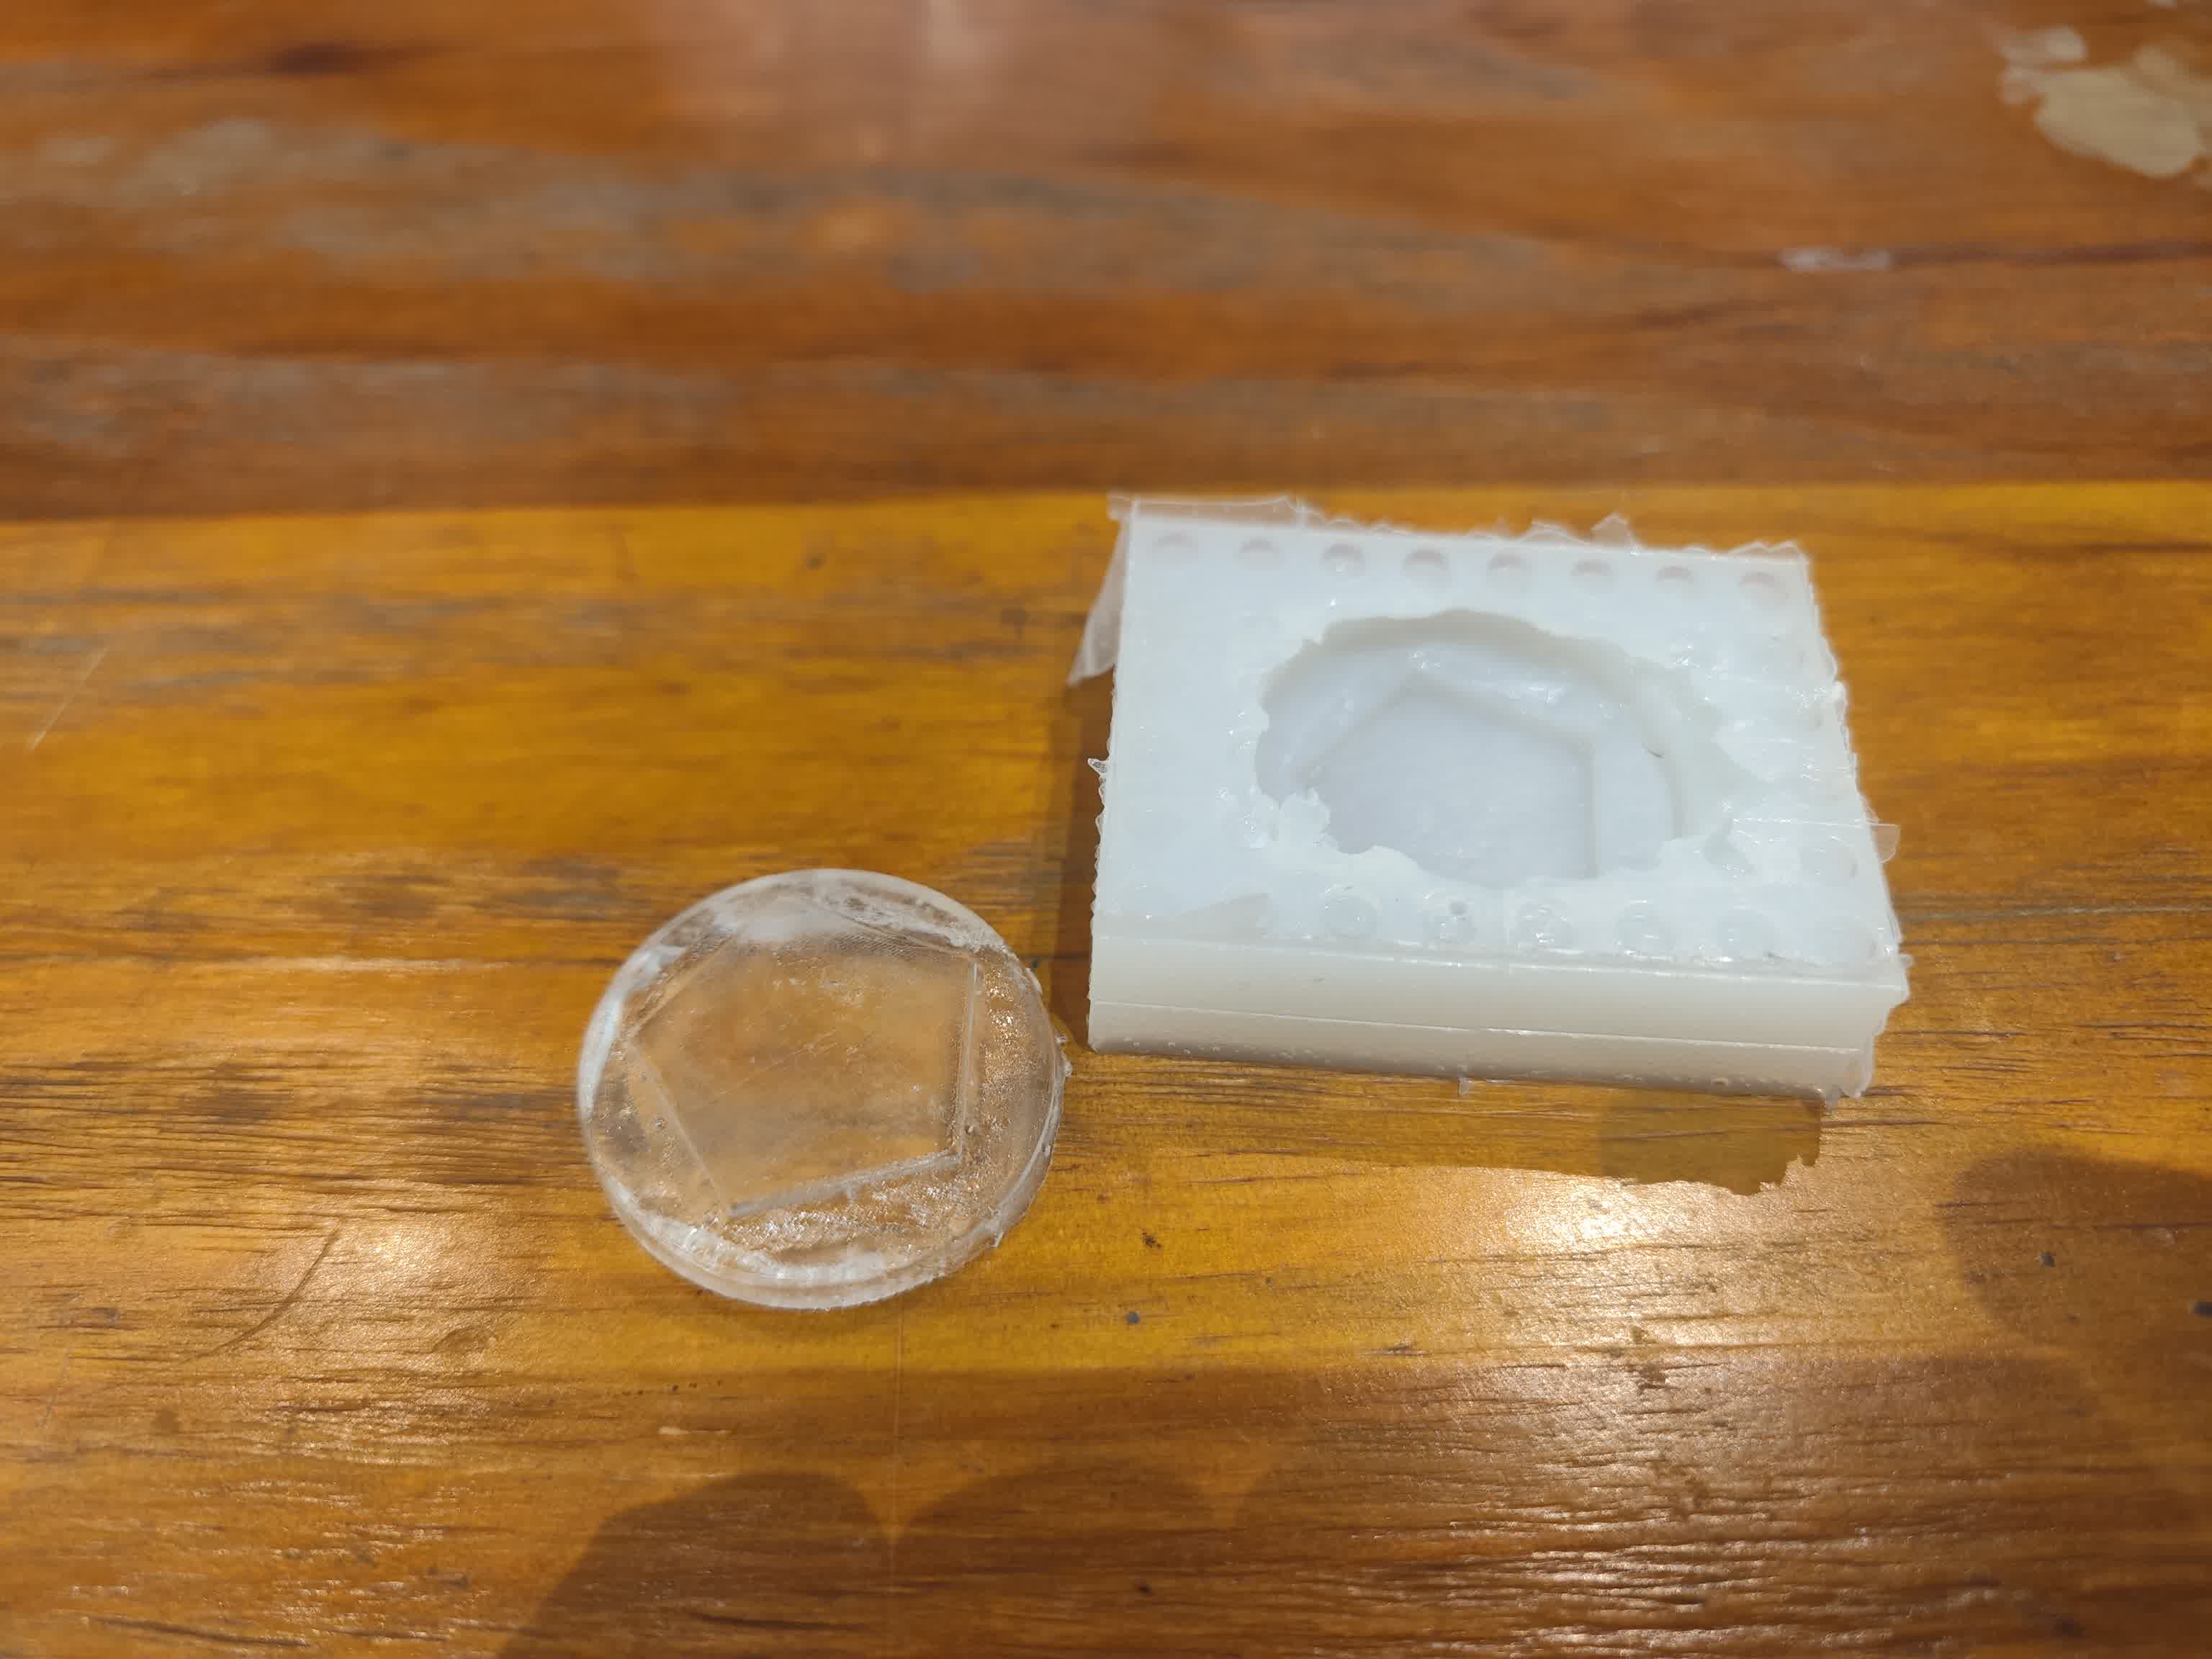
Issue 1: Blurry Detail Definition (The "Sludge" Effect)
The transition between the five-pointed star and the coin base is not sharp.
-
Root Cause: This confirms my earlier fear—the residual, non-catalyzed silicone from "Attempt 2" that I failed to clean off the 3D-printed master had compromised the mold. This liquid residue stayed at the junction of the star, creating a "blurry" or "sludge-like" cavity in the final silicone mold rather than a crisp 90-degree edge.
-
Lesson Learned: Never compromise on cleaning the master model. Any chemical contamination (like uncured silicone) will directly translate into the final cast.
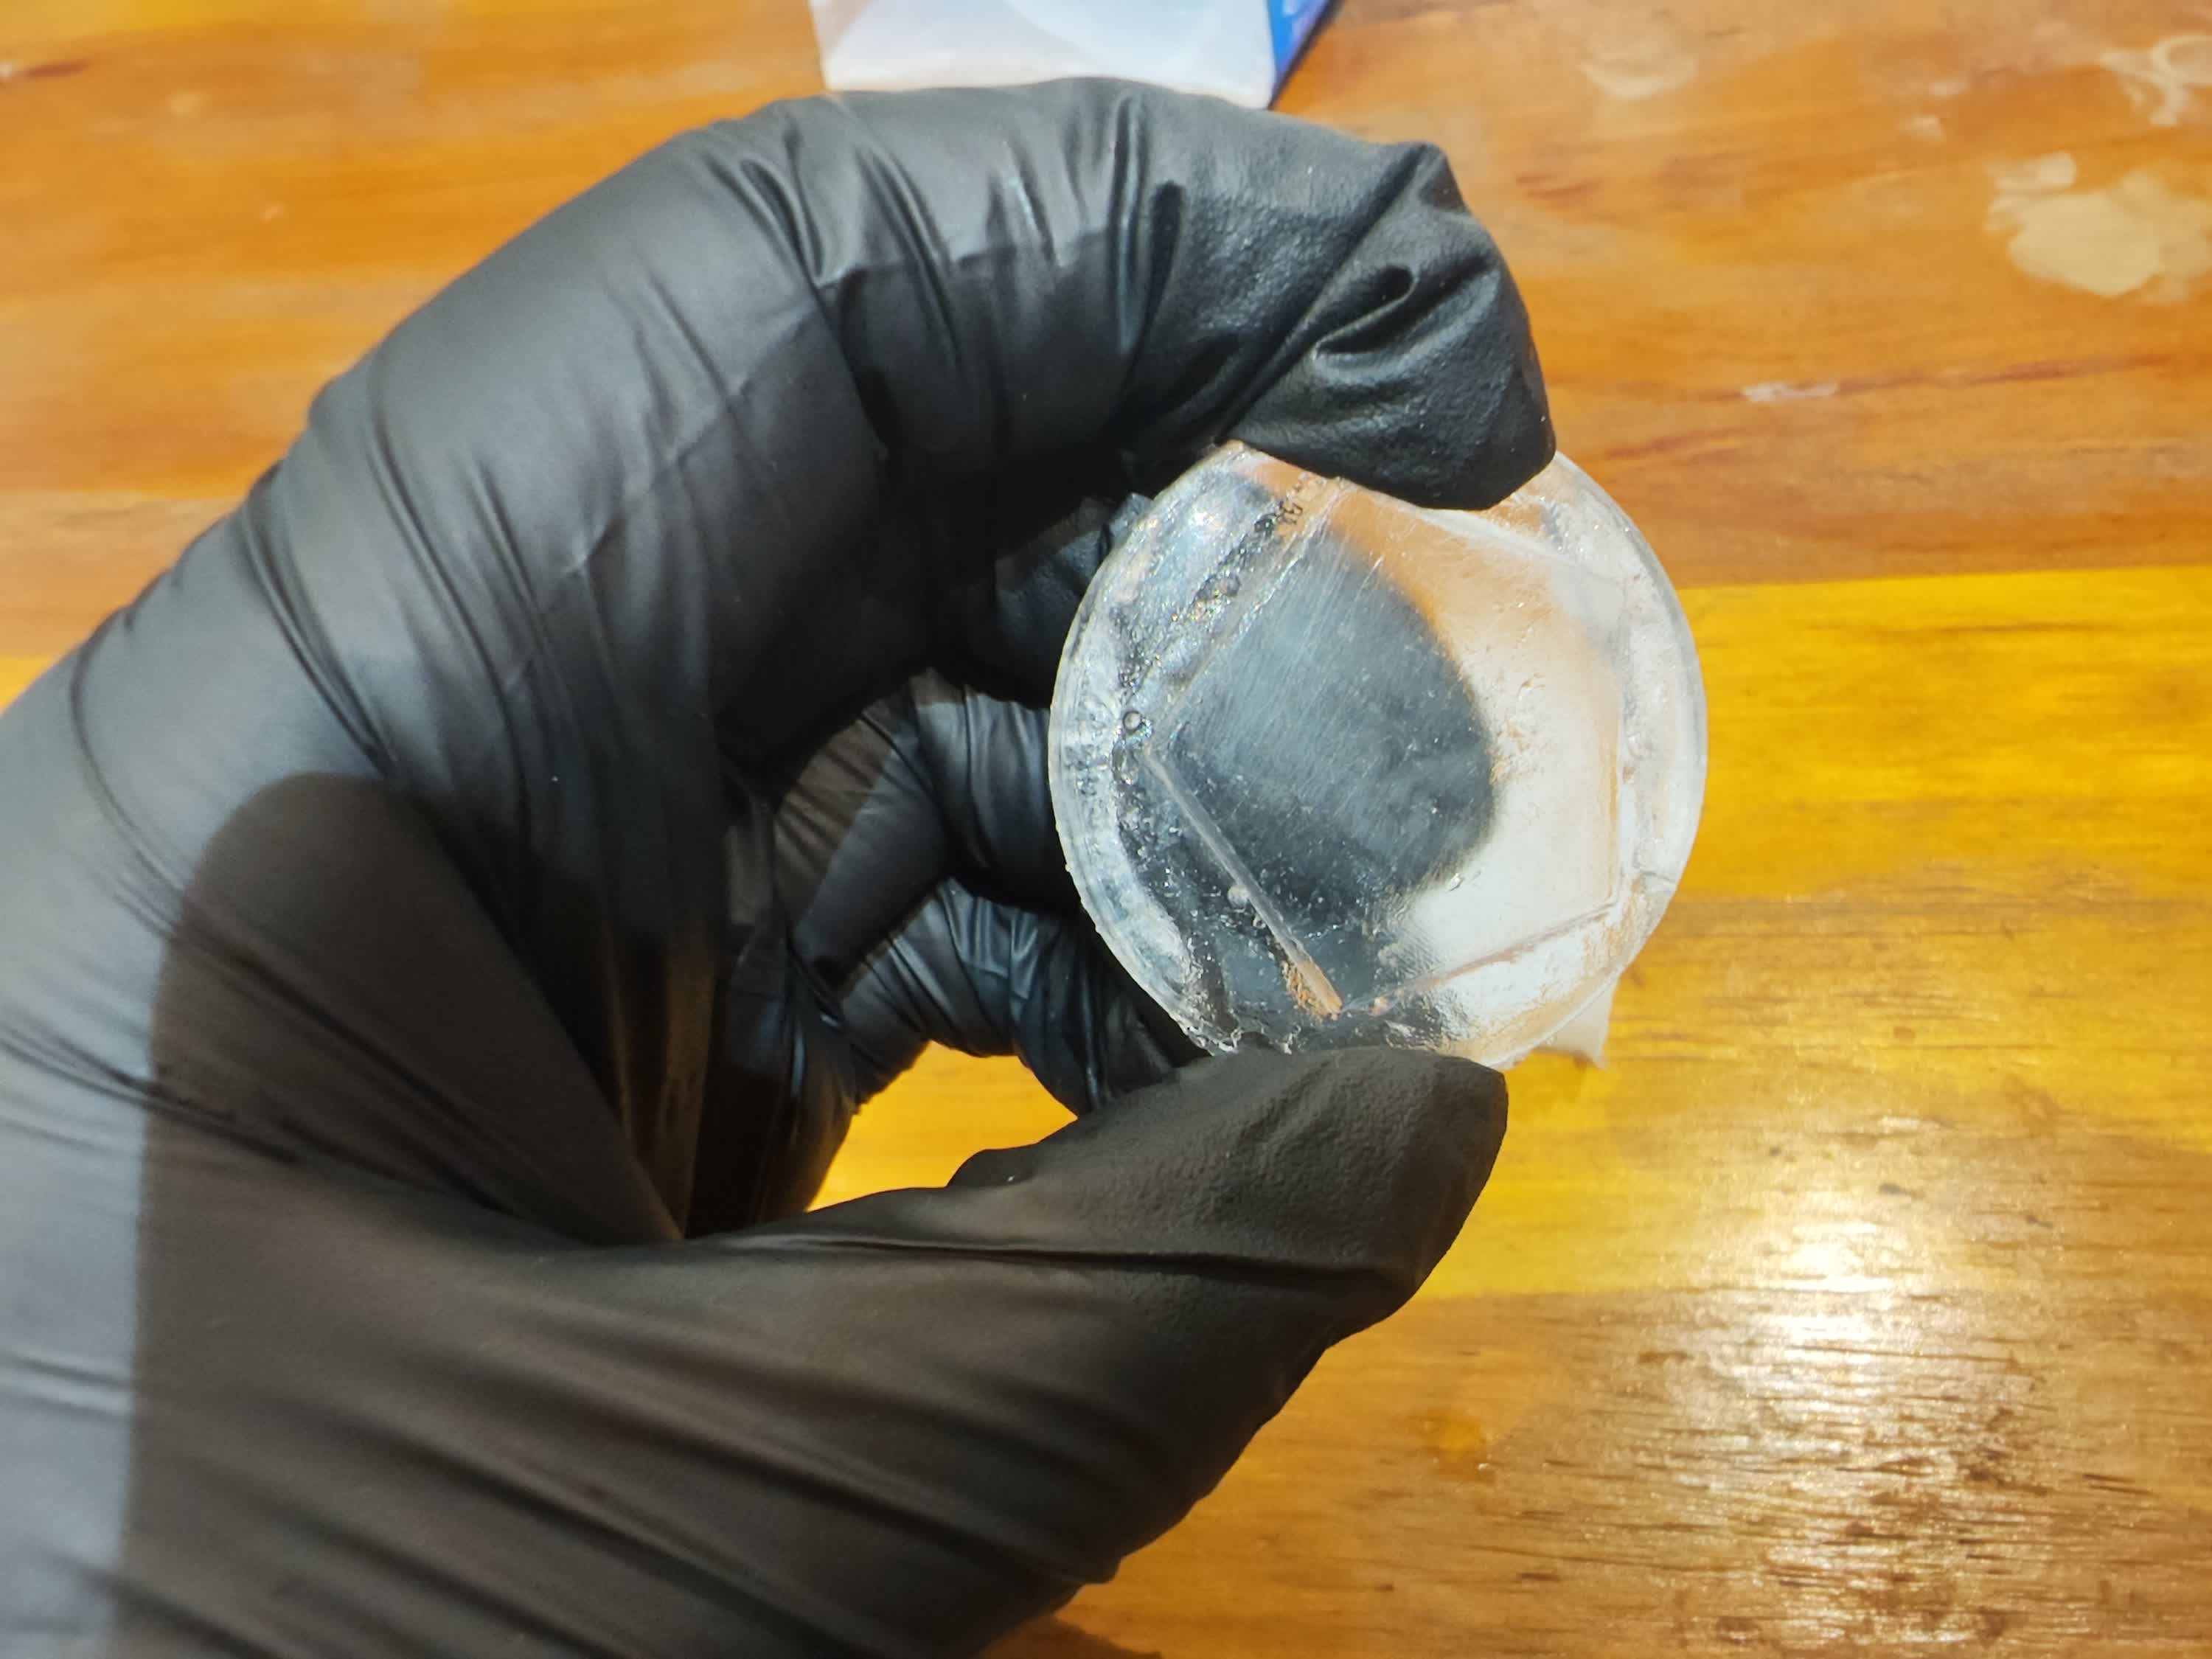
Issue 2: Structural Imperfections (Burrs and Spikes)
The bottom and edges of the coin have several small, sharp protrusions.
-
Root Cause: This was caused by my manual post-processing of the silicone mold. Using a utility knife and scissors to trim the "Lego stud" imprints was not precise enough. The small "nicks" and uneven cuts I made in the silicone were filled by the epoxy, resulting in these tiny spikes.
-
Lesson Learned: It is better to design a smoother mold box initially (e.g., a 3D-printed box or smooth acrylic) than to rely on manual trimming of a textured silicone mold.
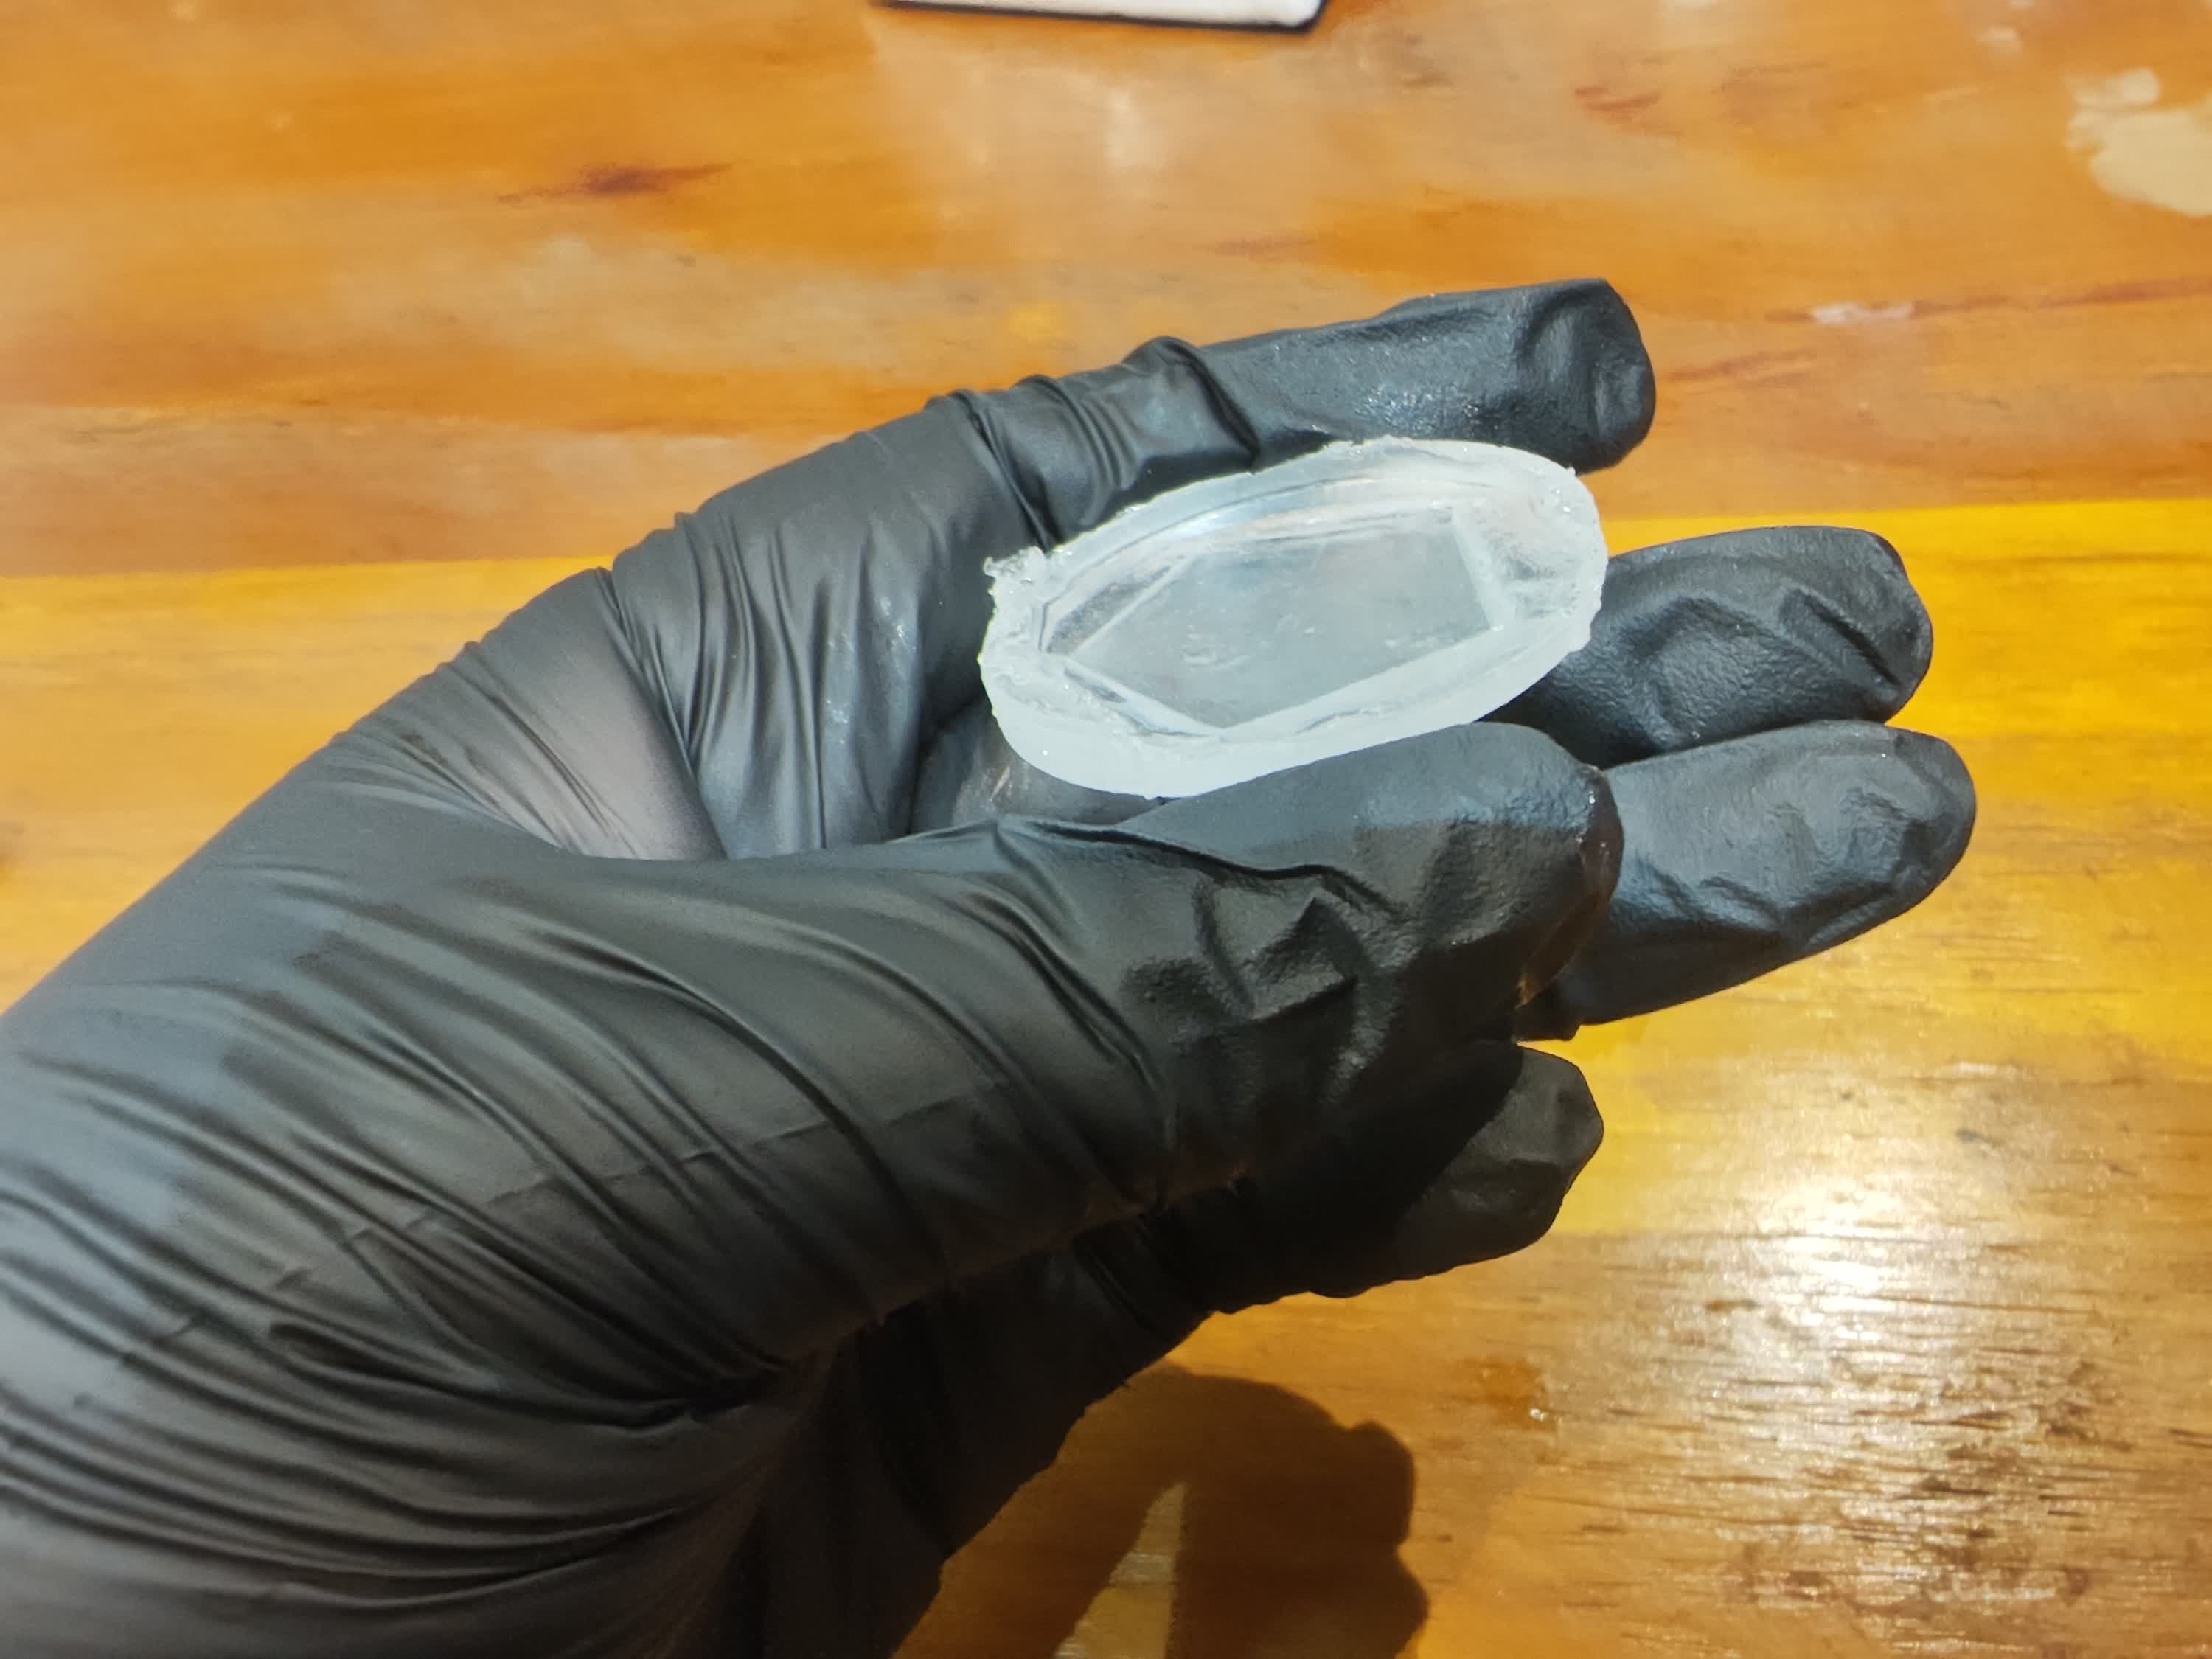
Issue 3: Incomplete Fill (The "Volume Gap")
The back of the coin is concave and incomplete; it does not have a flat, full surface.
-
Root Cause: I underestimated the volume of AB Crystal Glue needed. I did not mix enough resin to reach the very top of the mold. As the resin cured and settled, it left the bottom of the coin (which was the top of the pour) uneven and unfinished.
-
Lesson Learned: Always calculate the volume of the mold cavity beforehand or mix a slight excess (10-15% more) of resin to account for shrinkage and meniscus effects.
Final Reflection
This week was a journey of trial and error. From the chemical failure of the first two silicone attempts to the manual trimming issues of the third, I learned that Molding and Casting is a game of extreme precision.
While the "Star Coin" captured the general form, the lack of sharpness around the star and the incomplete volume remind me that the quality of the final cast is 100% dependent on the preparation of the mold. For my next project, I will ensure a clean master model and a more accurate resin calculation.