Week 13. Moulding and Casting
Table of Contents
- WEEKLY PLAN
- GROUP ASSIGNMENT:ELECTRONICS TEST EQUIPEMENT
- INDIVIDUAL ASSIGNMENT: ELECTRONICS DESIGN
- USEFUL LINKS AND RESOURCES
- FILES
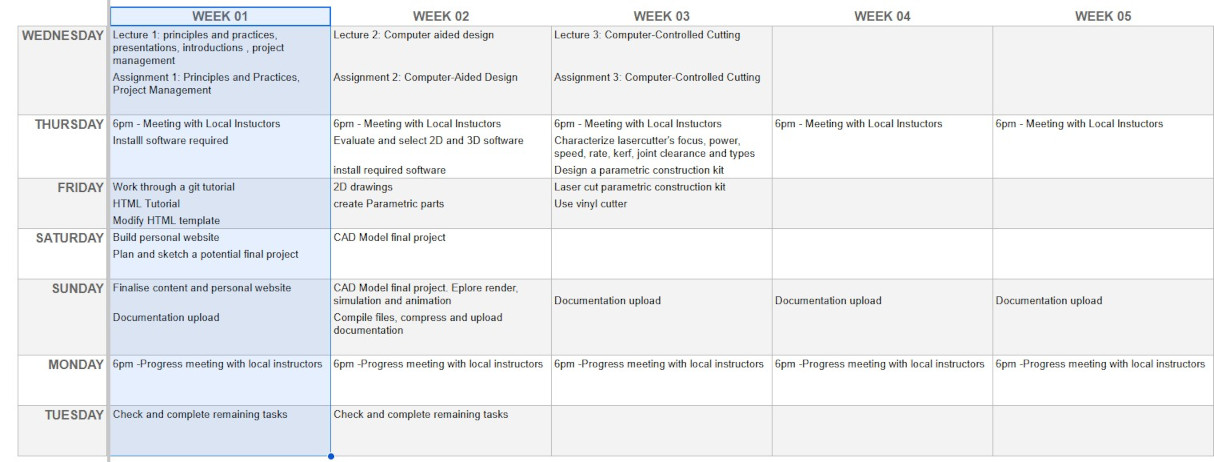
WEEKLY PLAN
Group assignment:
- Review the safety data sheets for each of your molding and casting materials
- Make and compare test casts with each of them
- Compare printing vs milling molds
Individual assignment:
- Design a mold around the process you'll be using, produce it with a smooth surface finish that does not show the production process, and use it to cast parts.
GROUP ASSIGNMENT
This is the link to the Fab Lab León Group Assignments page. Since I am completing the group assignment on my own I left the documentation on this page.
SAFETY OF CASTING MATERIALS
Text here
Text here
Text here
Text here
TITLE 02
Text here
Text here
Text here
Top
INDIVIDUAL ASSIGNMENT: MOULD DESIGN, MANUFACTURING AND CASTING
MOULD DESIGN
For this week´s assignment I am designing an object and the mould to cast the designed piece.
In particaular i am designing the compact screwwdriver handle that will have a magnetic bit holder attached.
I start by designing the screwdriver in fusion. I have a piece of wax 150x88x37 to machine both parts of the mould, so I have to take this into account to design a handle that fits within those constrains.

Based on the handle design, I create the two halves of the wax mold (green), and from them, I can create the silicone molds.

After the meeting with my instructors from Fab Lab Leon they provided me with a series of proposal to improve the moulds.
- Adding a vent for the air to escape when casting with resin
- Changing the spherical keys to align the mould for a linear channel
- Making the pouring hole bigger
- Adding a recces around the edge of the wax moulds to aid with the release of the silicone
- There is some concern with the metallic magnetic bit keeping in place during casting, so we decide to make a 3D printed support to hold it in place and aligned.
After making these changes I ended with version 2 of the moulds. I also had to mirror the moulds so when put together the vent, sprue and keys align properly.

To ensure that the suitability of the design before machining it I check the final result in Fusion abd i design a support for the moulds.


I am using the CAM functionalities of Fusion to generate the toolpaths to machine the wax moulds. I start by adding the milling tools I may use to machine, including the tool holder of the CNC so I can check for clashes with the stock.

In Fusion there are several strategies to choose from. For the roughing strategy I select “Adaptative Clearing”
This strategy first makes a series of constant Z-layers through the part and then clears them in stages from the bottom upwards.
I am using a 2mm flat-end cutter with a 22mm flute length.

Next, I generate a “Flat” toolpath. This is a finishing strategy for flat surfaces. These will finish the walls and bottom surfaces of the mould with the same tool as before.

Finally, I use a “parallel” finishing strategy that I am applying only to the remaining surfaces to machine. The tool I selected for this strategy is a 2-flute tapered conical end mill with a R0.5 ball nose.

I use the simulation feature to check the 3 strategies and that there are no clashes with the stock.
Then, I export the gcode files using the postprocessor for GRBL files. I also have to change the safe retract to clearance height to avoid hitting the Z+ switch limit of the machine.

The g-code file can now be open in UGS (Universal G-code Sender)

CNC MACHINING OF MOULDS
Before machining the wax stock, I began by testing with a high-density foam block. This turned out to be a wise decision, as I encountered several difficulties. These included incorrectly setting the Z0 and breaking a bit when I sent the machine to XY zero.


After switching to a 1/8-inch, 2-flute end mill and reusing the same foam stock, I completed the toolpaths and felt confident to machine the wax stock.


SILICON CASTING OF MOULDS


Text here
Text here
RESIN CASTING
USEFUL LINKS AND RESOURCES
FILES
CAD model of screwdriver base design: CAD_screwdriver_base_design.step
Top