Computer Controlled Machining
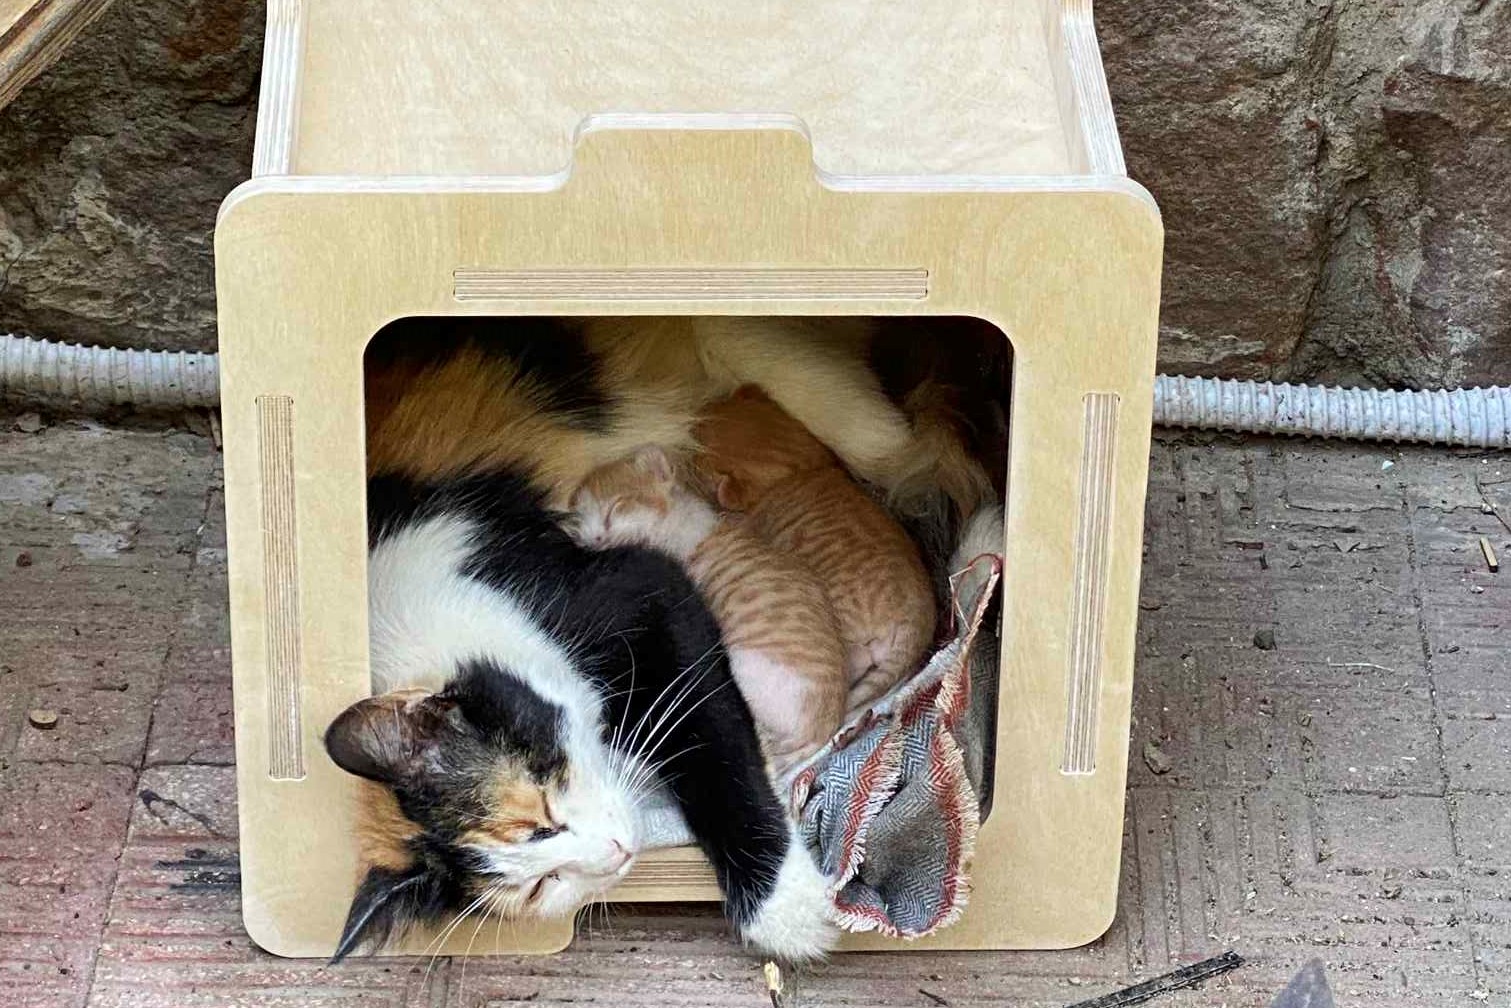
Here's a summary about what you'll see next:
- 1) Group Assignment
- 2) Individual Assignment:
-
- Design something Big(Cat House) - Fusion 360
- Prepare for Machining - ArtCAM
- Machining Time - Mach3 & Elmalky MR96
- Post Processing
- 3) Original Files
1) Group Assignment:
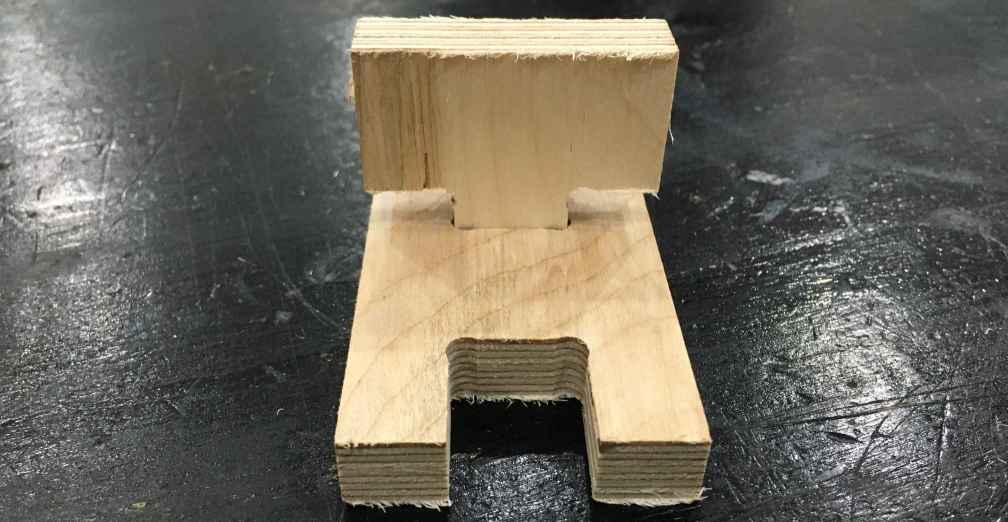
For the group assignment for this week we were introduced to the world of CNC Router, how does it work, different end mills, CAM softwares, Machine software, main principles to work with CNC Router, and got our safety training.
To make the parts press fit there are 2 important things to consider which are the bit of the endmill and the runout. So, to apply this in my group assignment I tested the dogbone joint and applied the runout Eman measured before which was 0.04 mm to make the tab and slot parts fit perfectly and help in the individual design later.
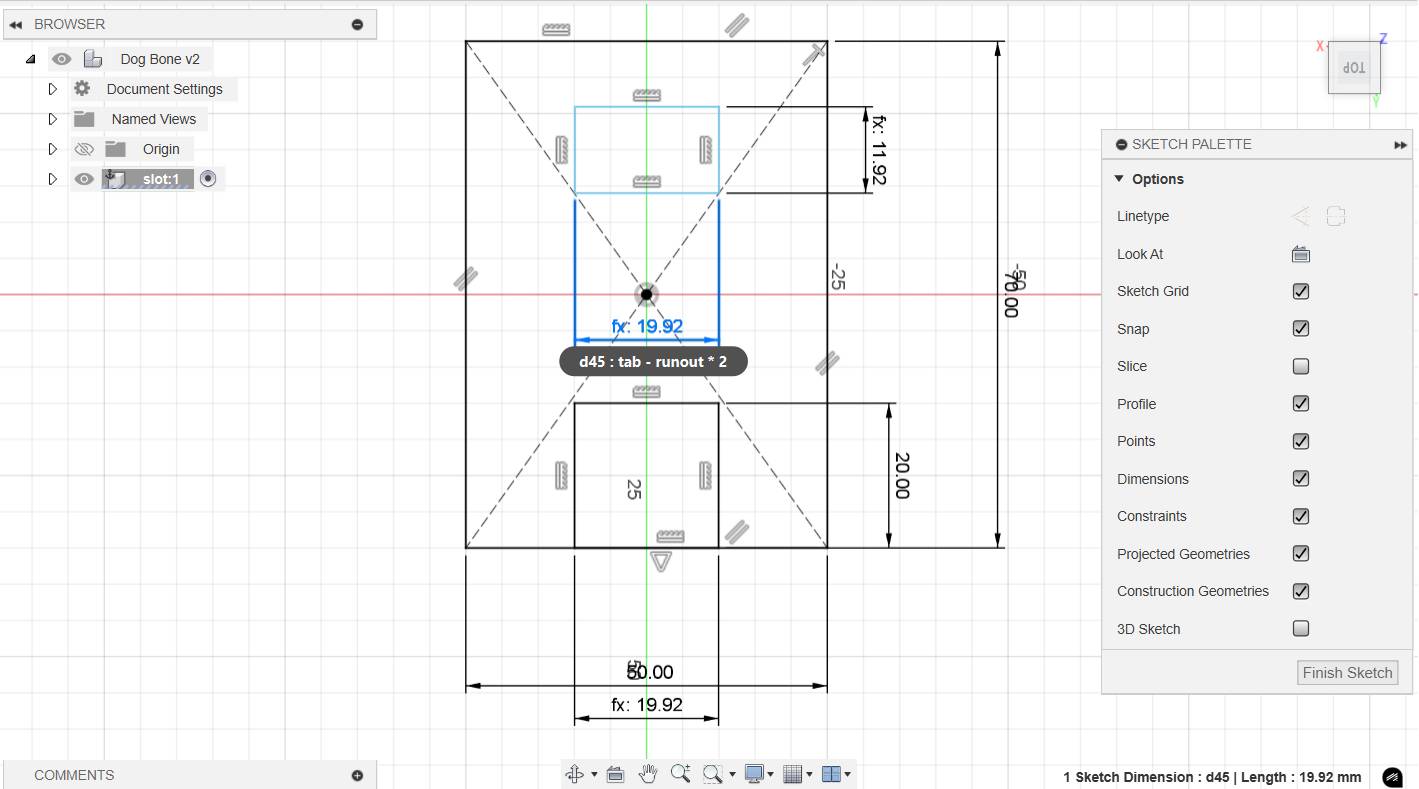
Here I designed the slot and applied the runout to it by substracting the runout twice from the tab width and height.
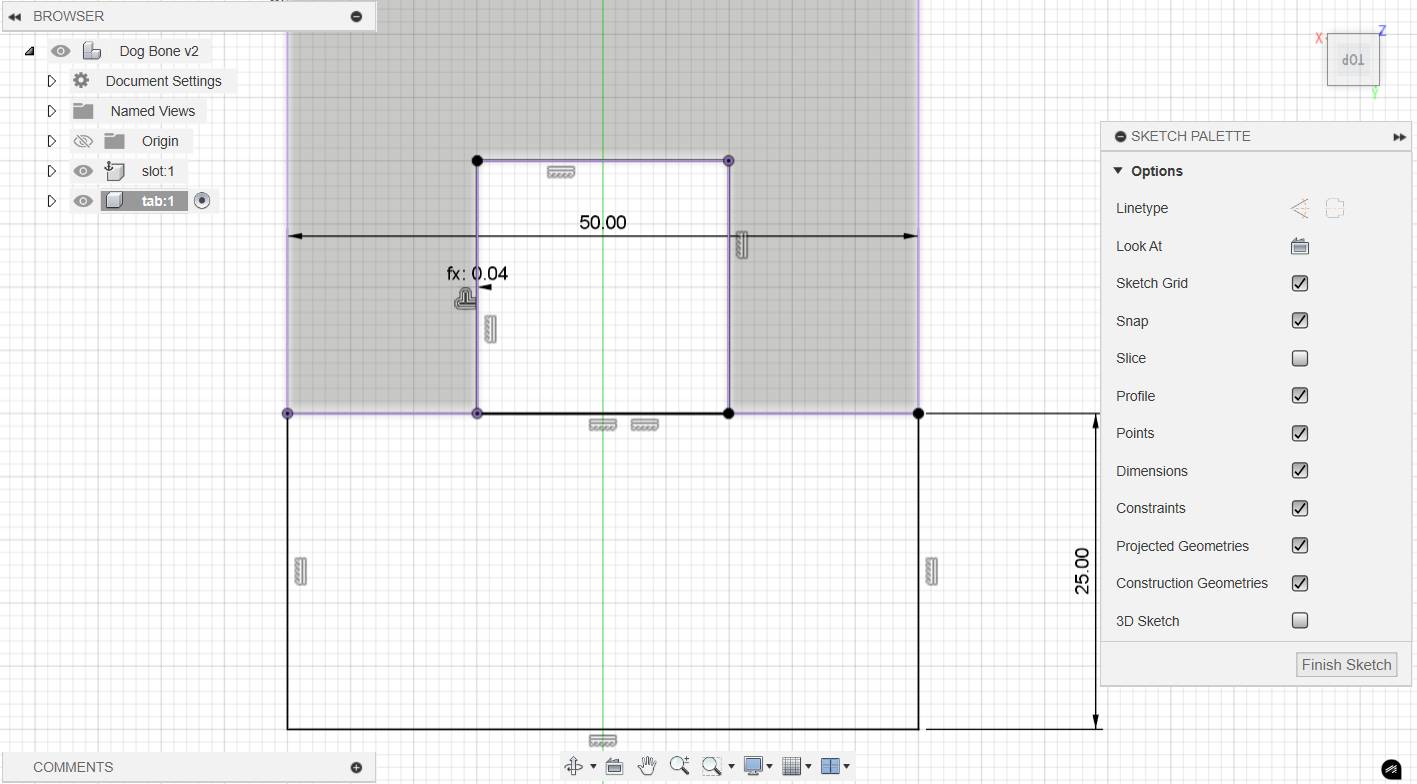
In the tab design I projected the width of the slot then made an outside offset of the runout.
Now you can see it's a good fit.
2) Individual Assignment
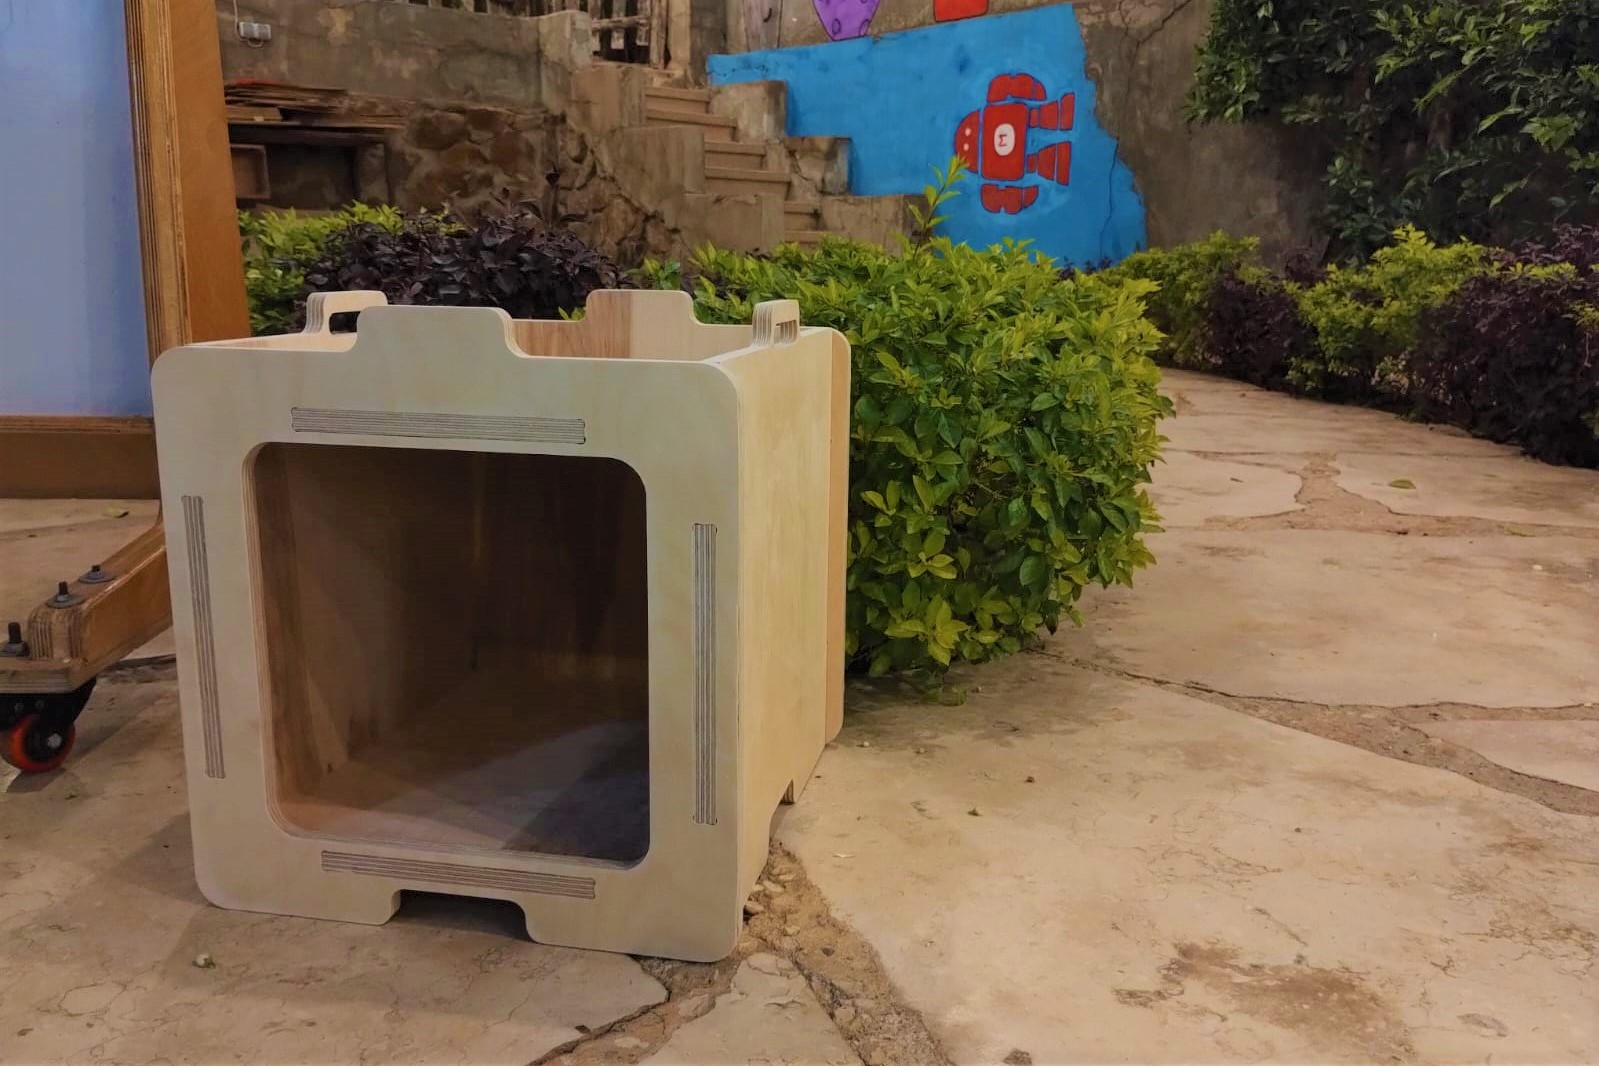
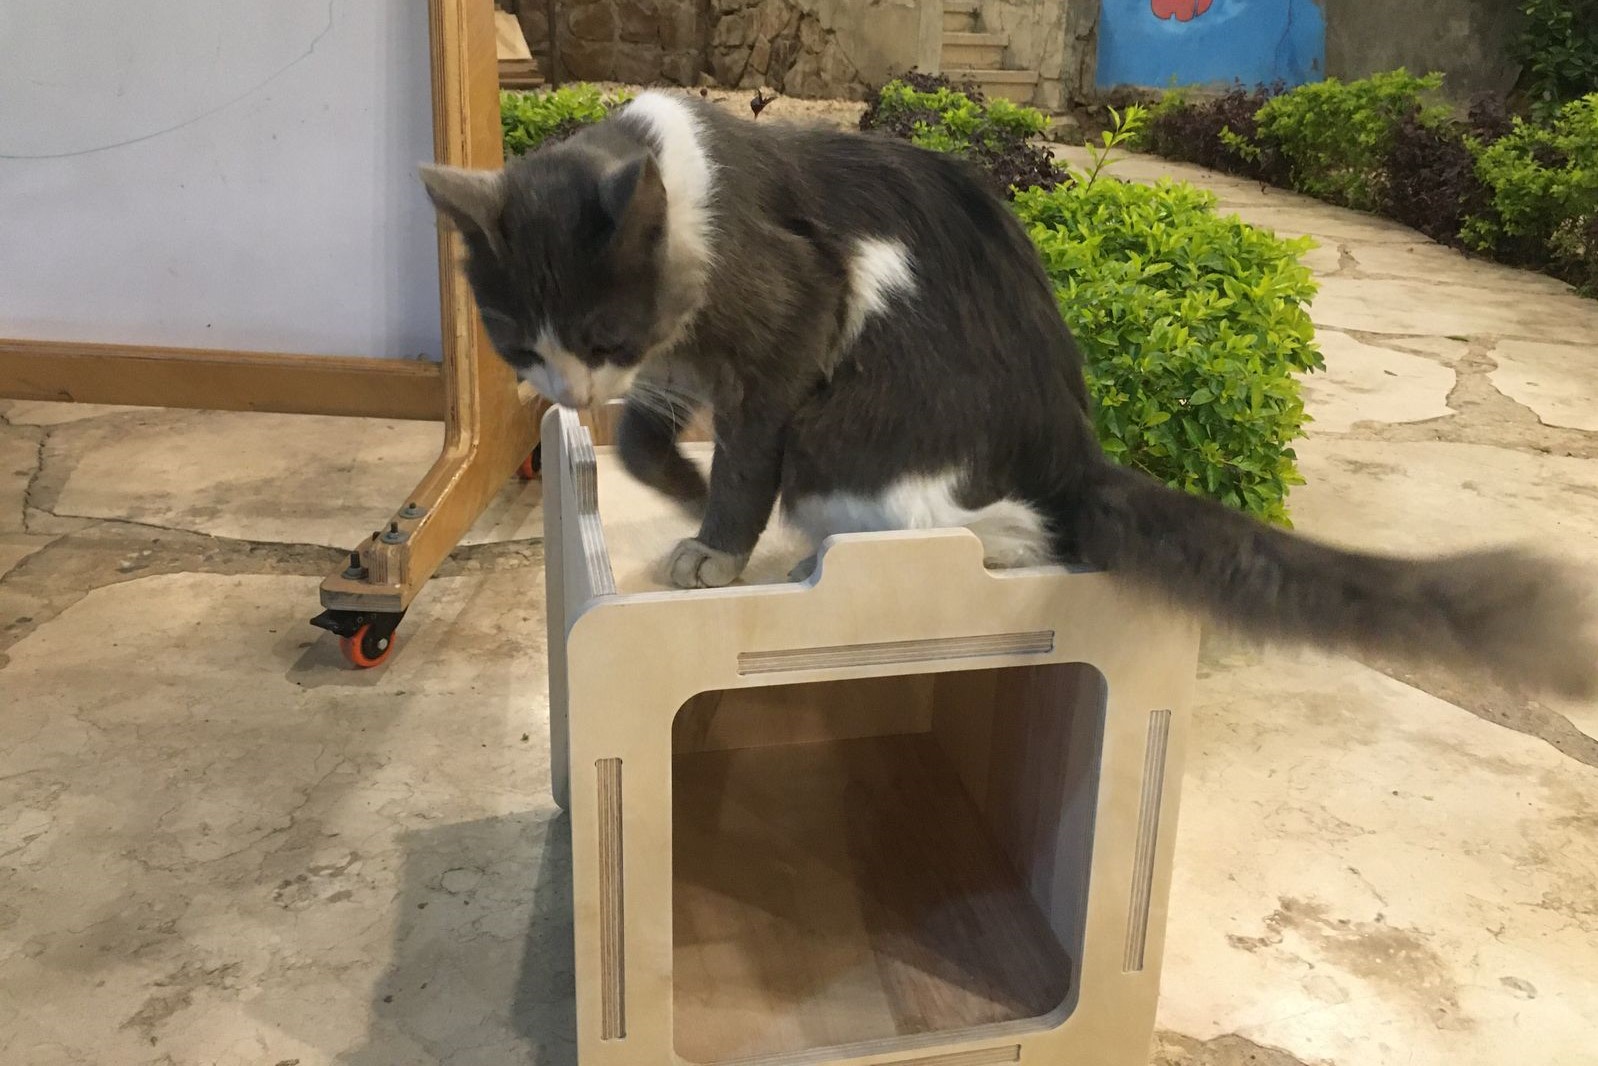
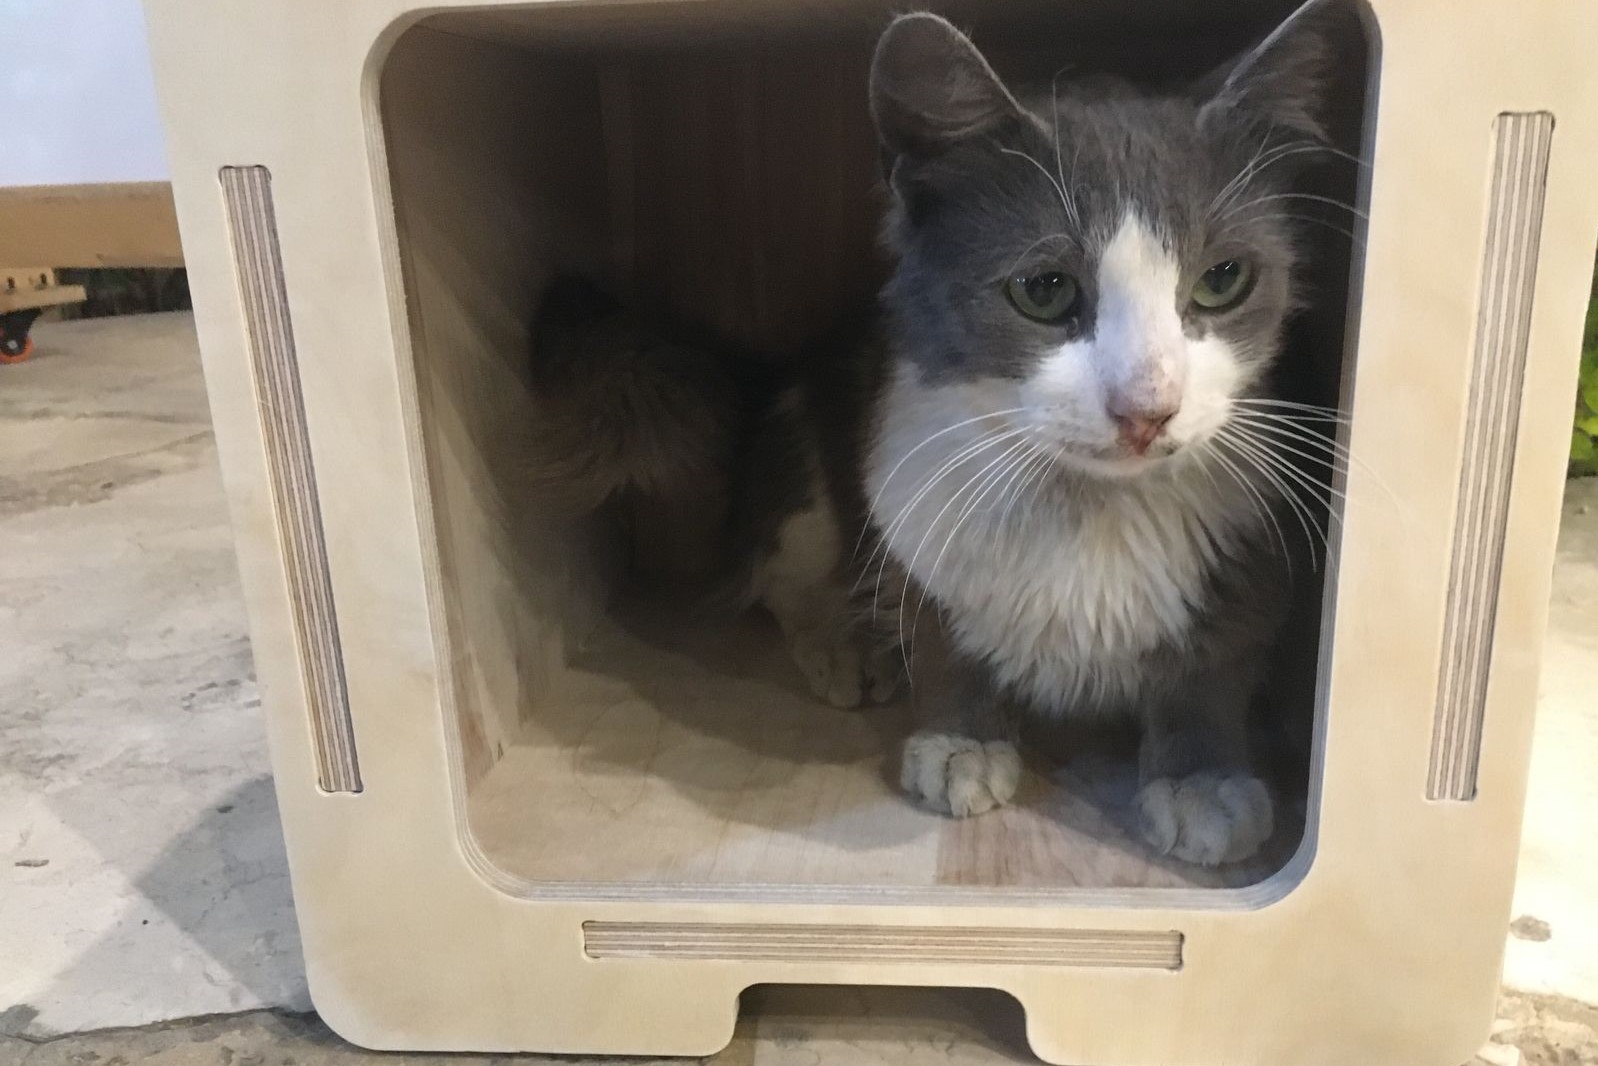
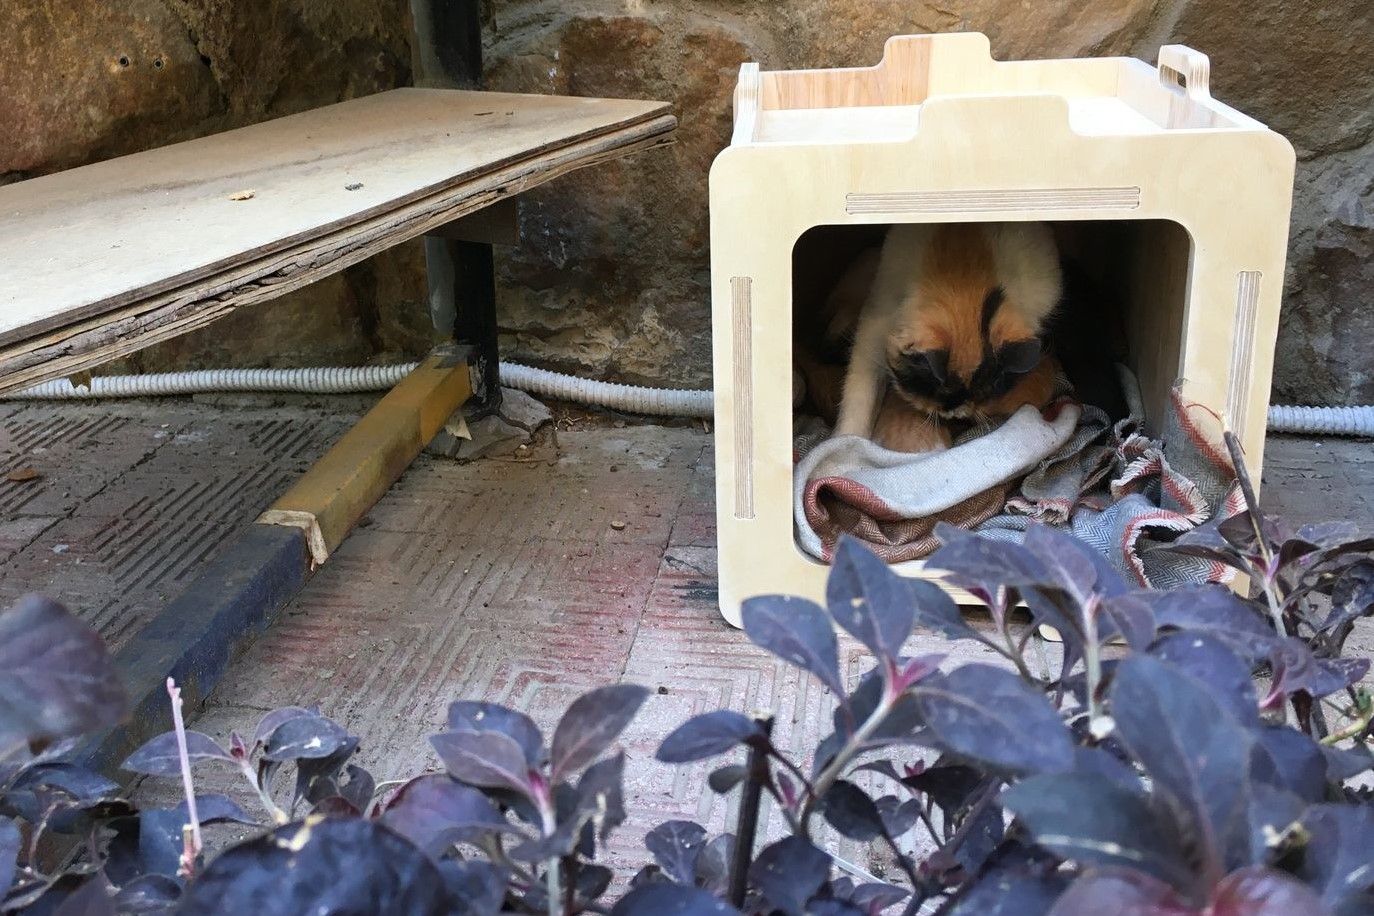
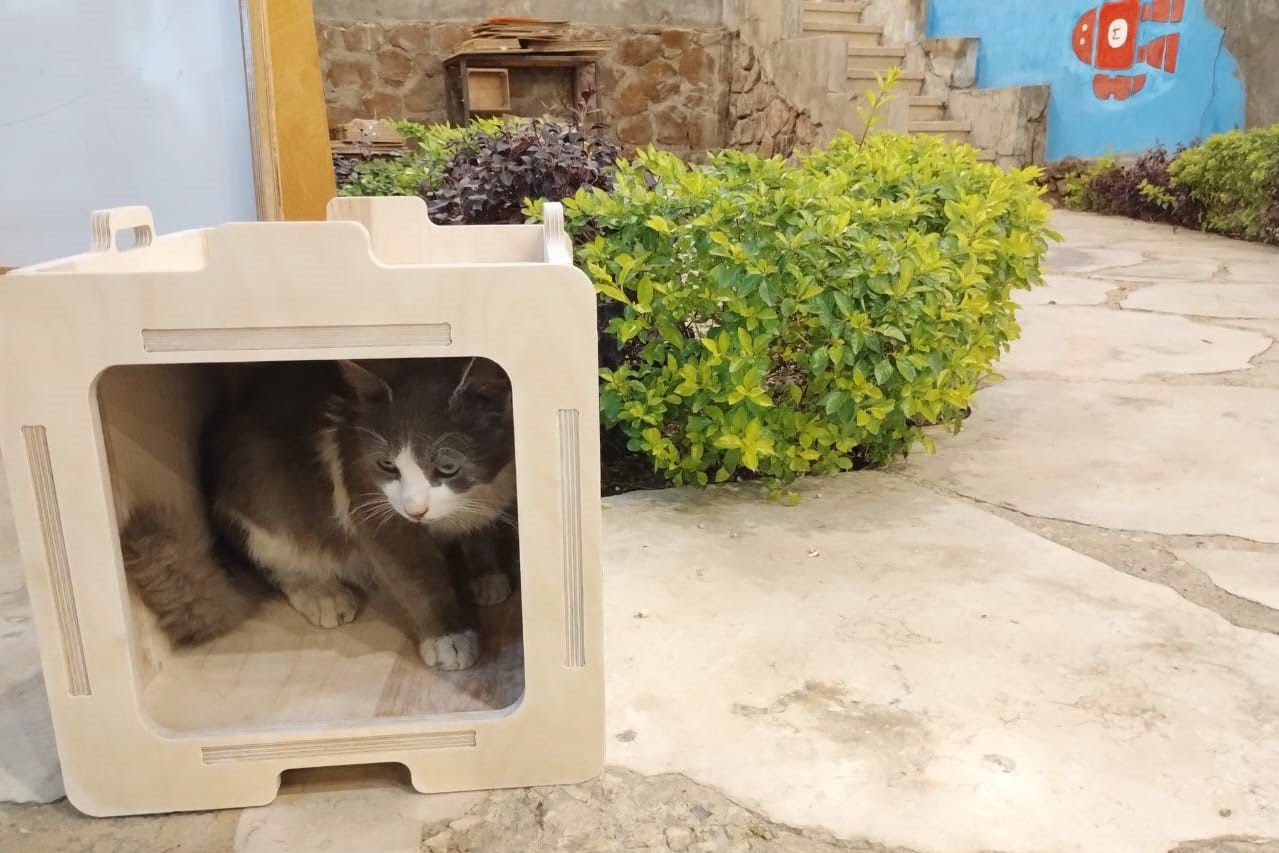
In our Fab Lab we have many cats which are considered important part of the place. I wanted to make stackable cat house for them to have some shelter in the garden, so I tested my first one. Let's walk through the journey of making it.
1) Design something Big(Cat House) - Fusion 360
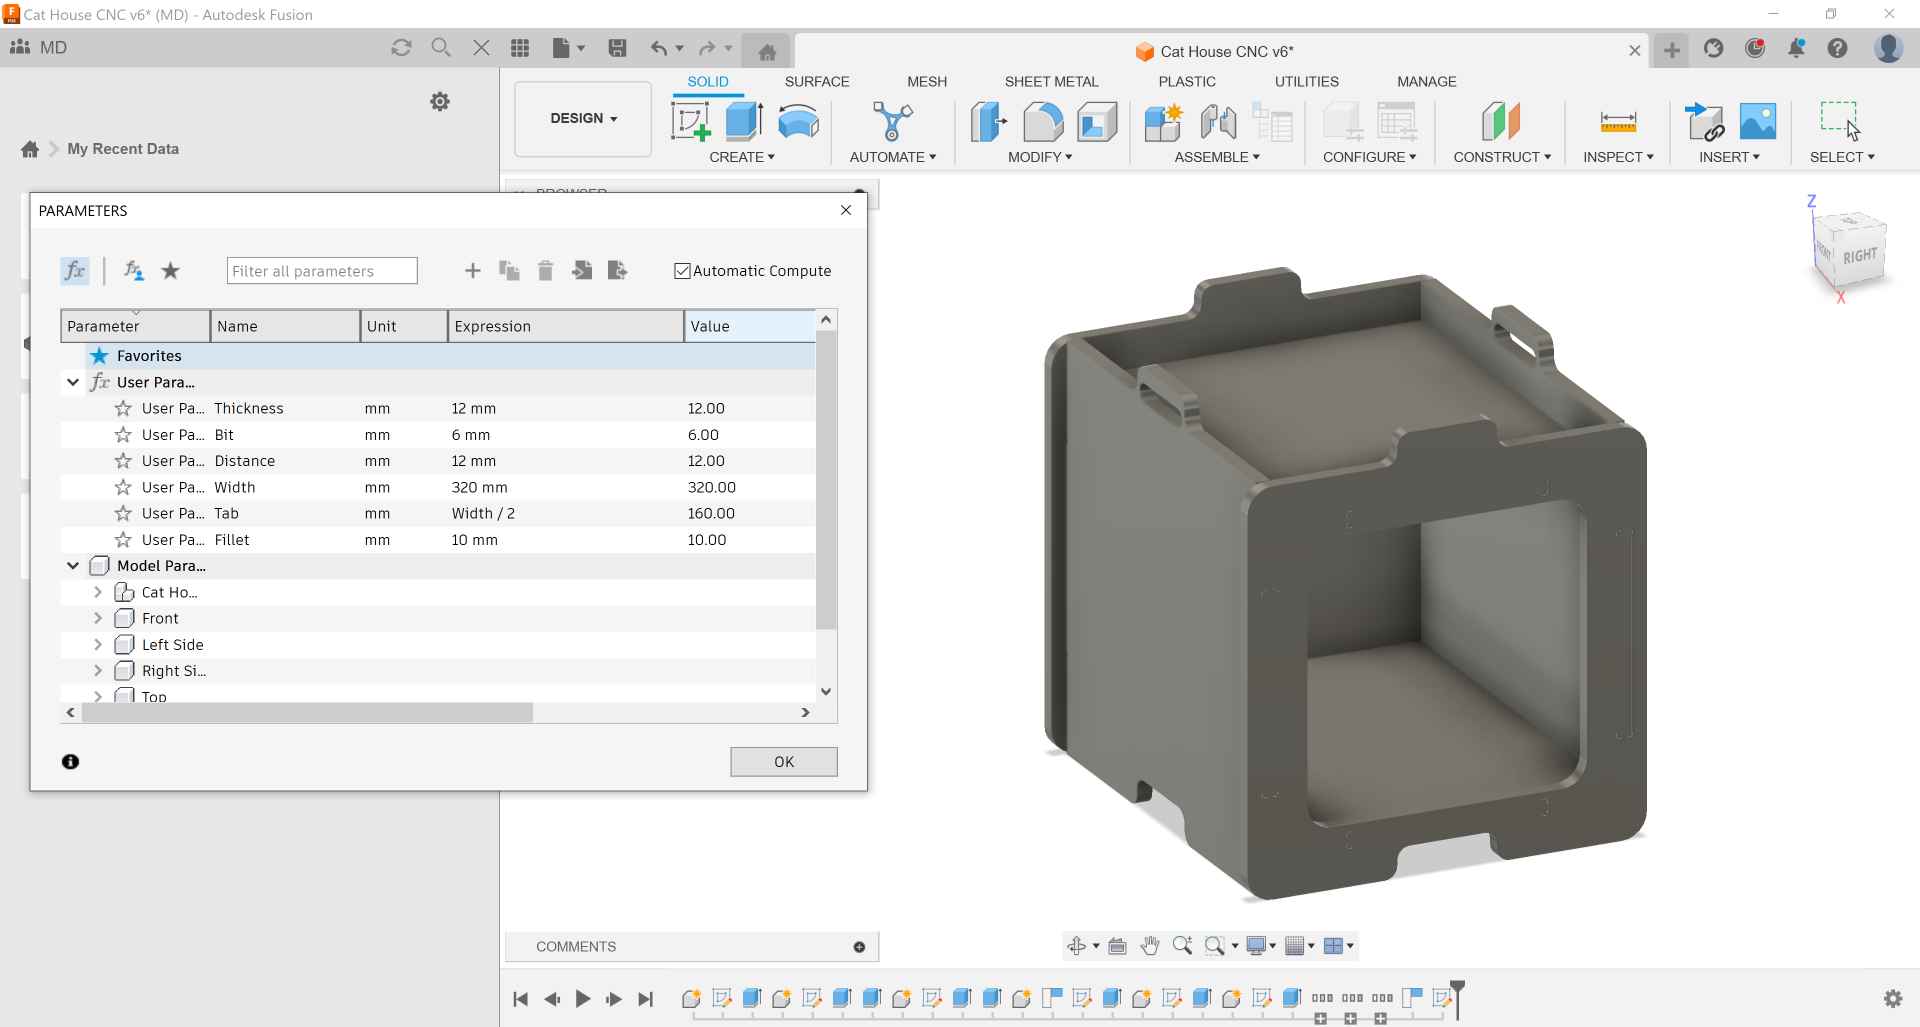
1- First of all is to set the parameters to make the design parametric in case of any change in the size, thickness, or endmill.
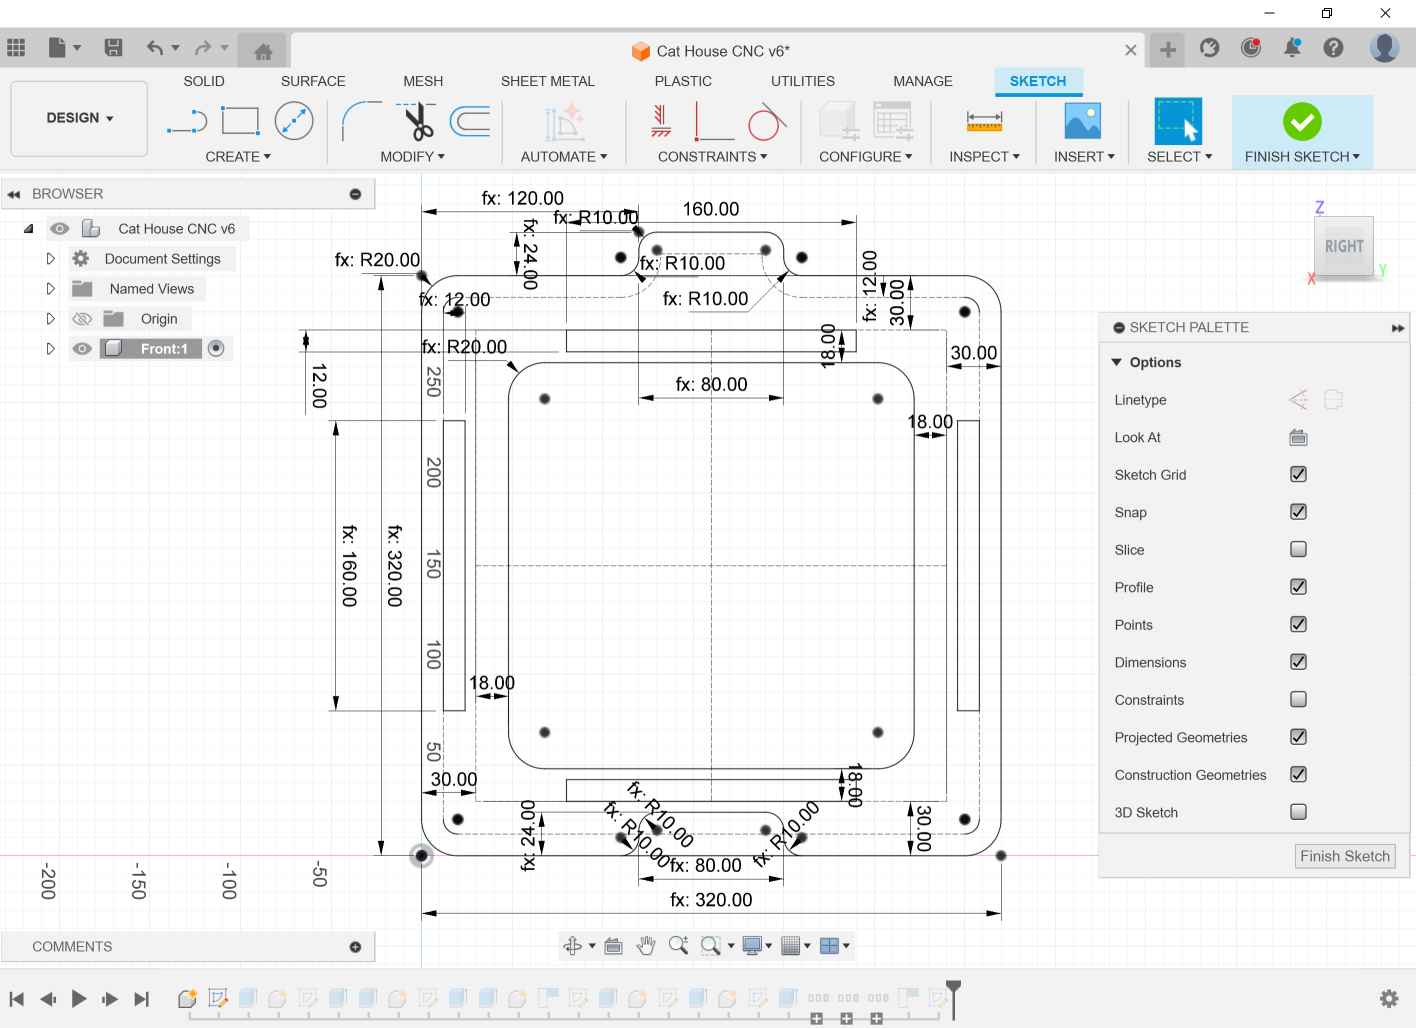
2- I started with the front face of the house to start building on it.
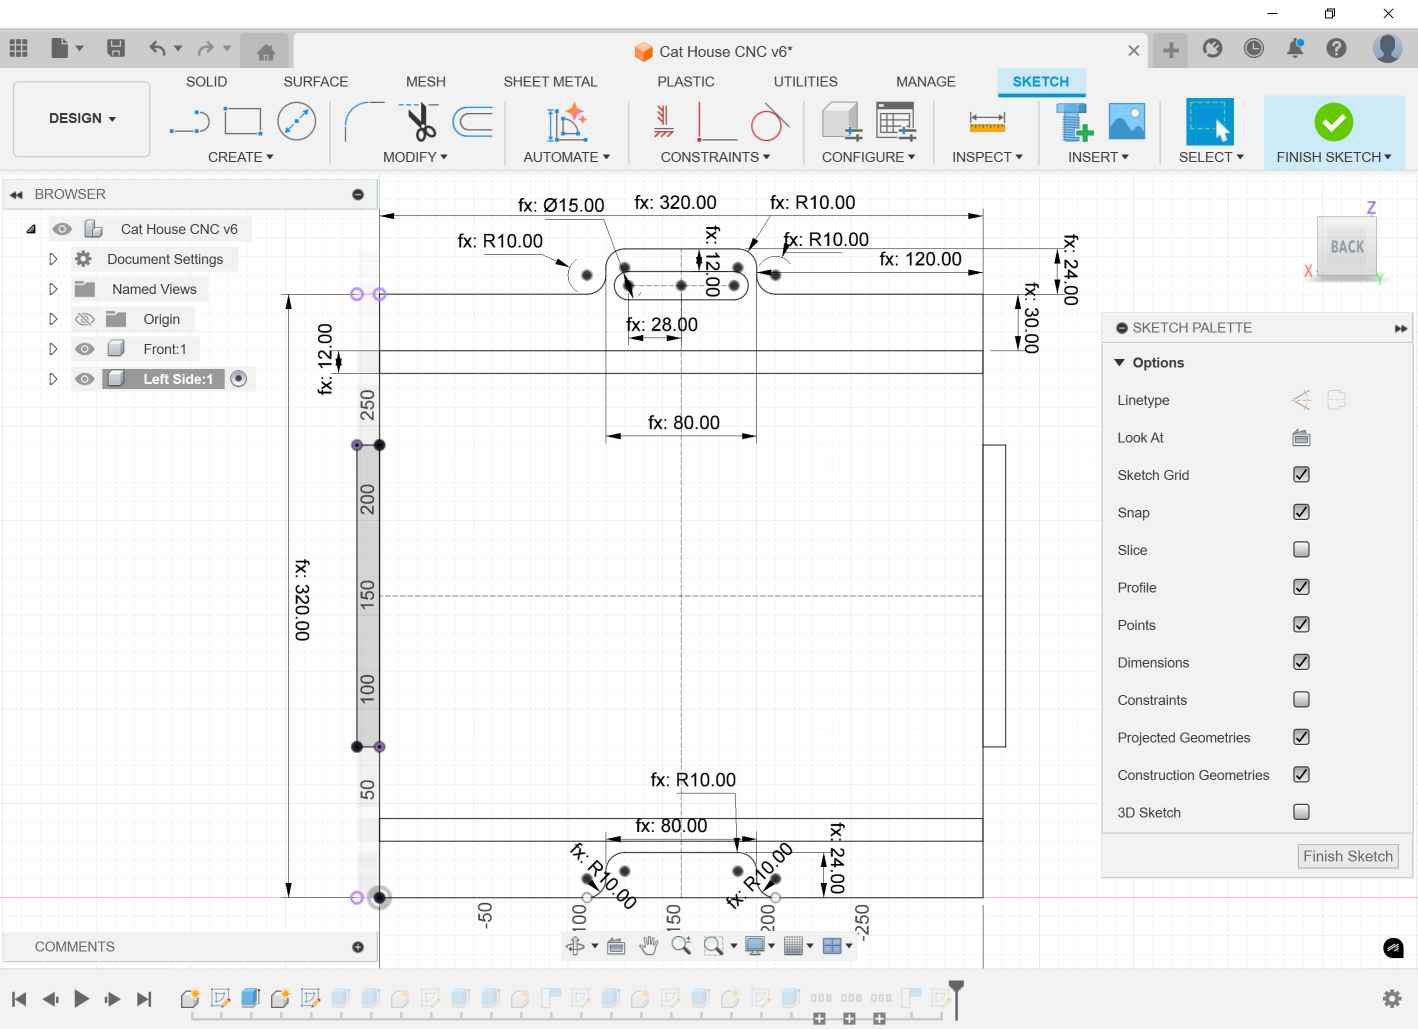
3- Then the sides of the house and made a grove in it with half the thickness in depth to slide the top and bottom parts in it.
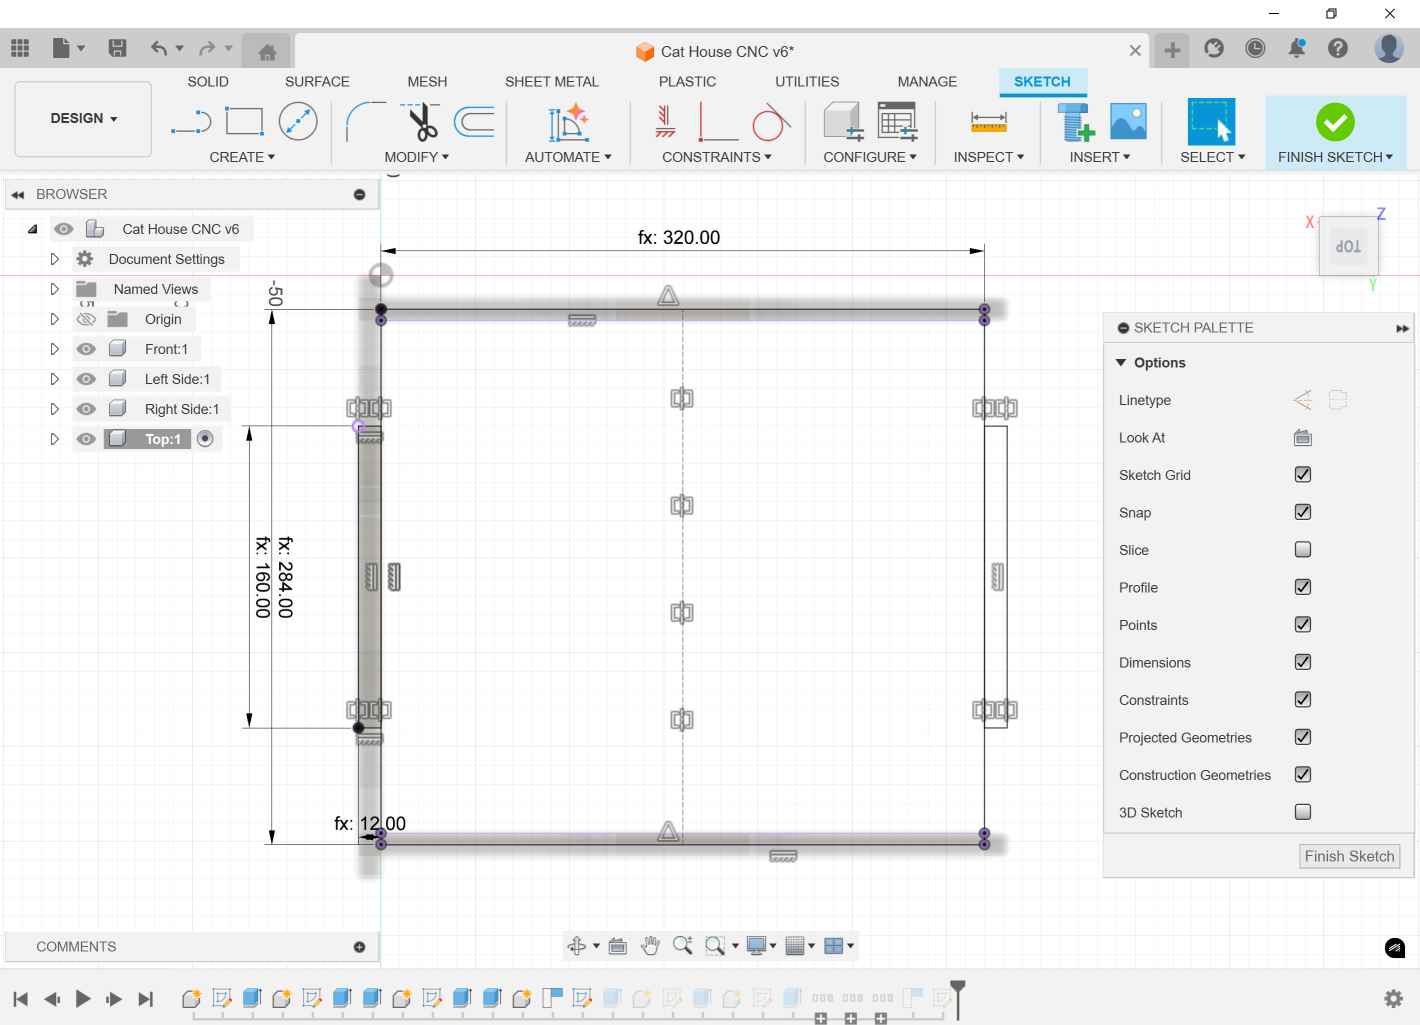
4- For the last part I sketched the top and bottom part and projected the tabs then extruded it with the thickness.
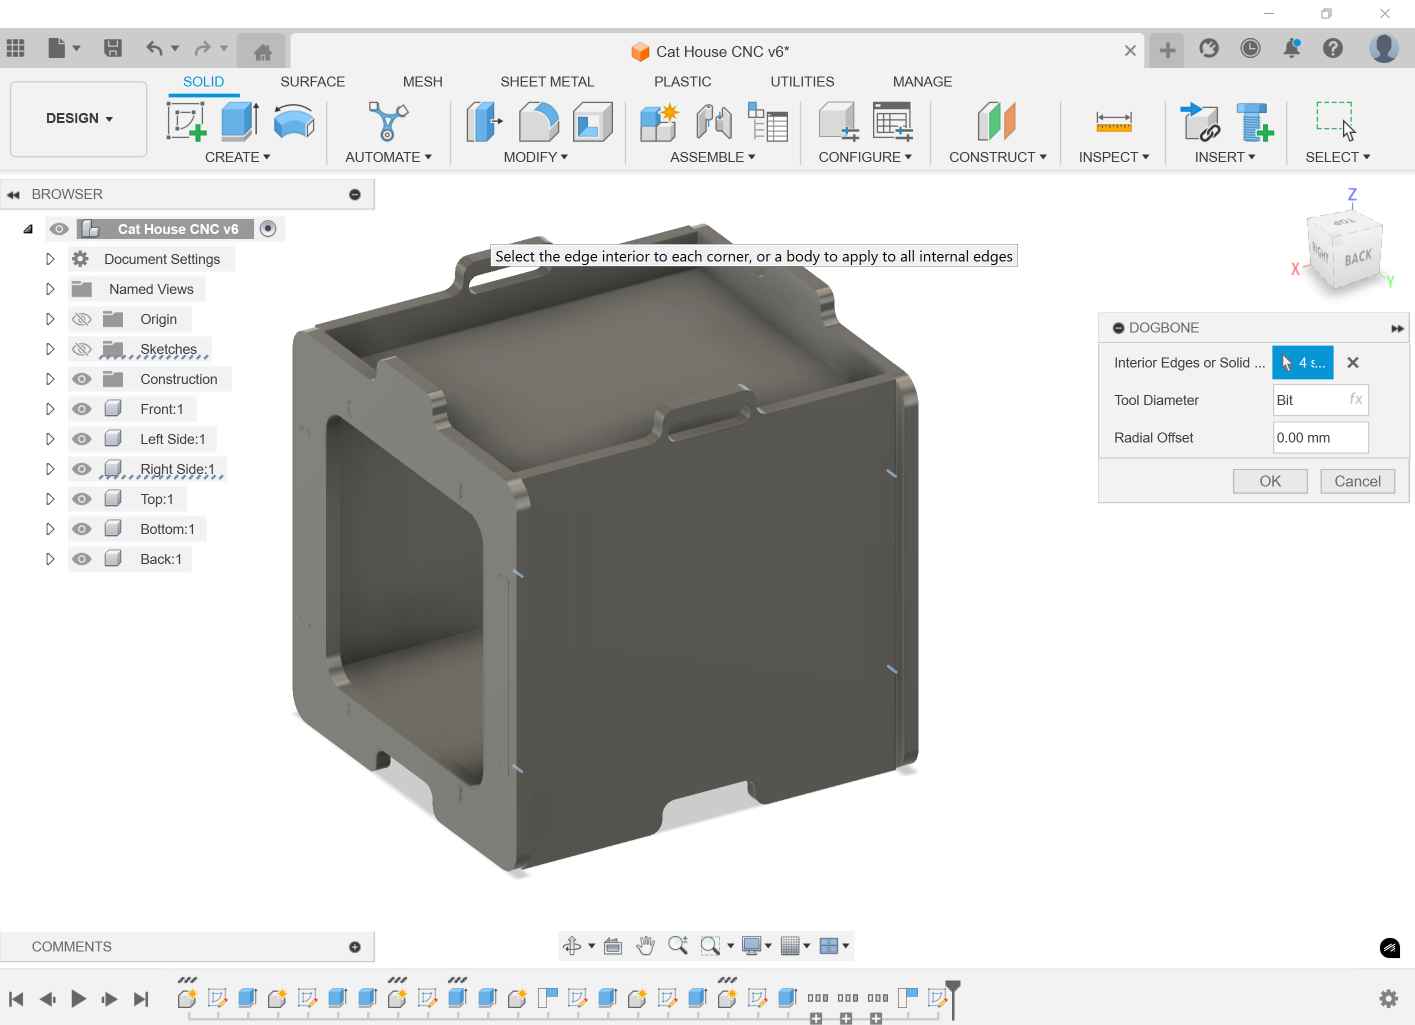
5- To make the design suitable for routing I used the dogbone addon and selected the edges I needed dogbone in and entered the Bit parameter as tool diameter.
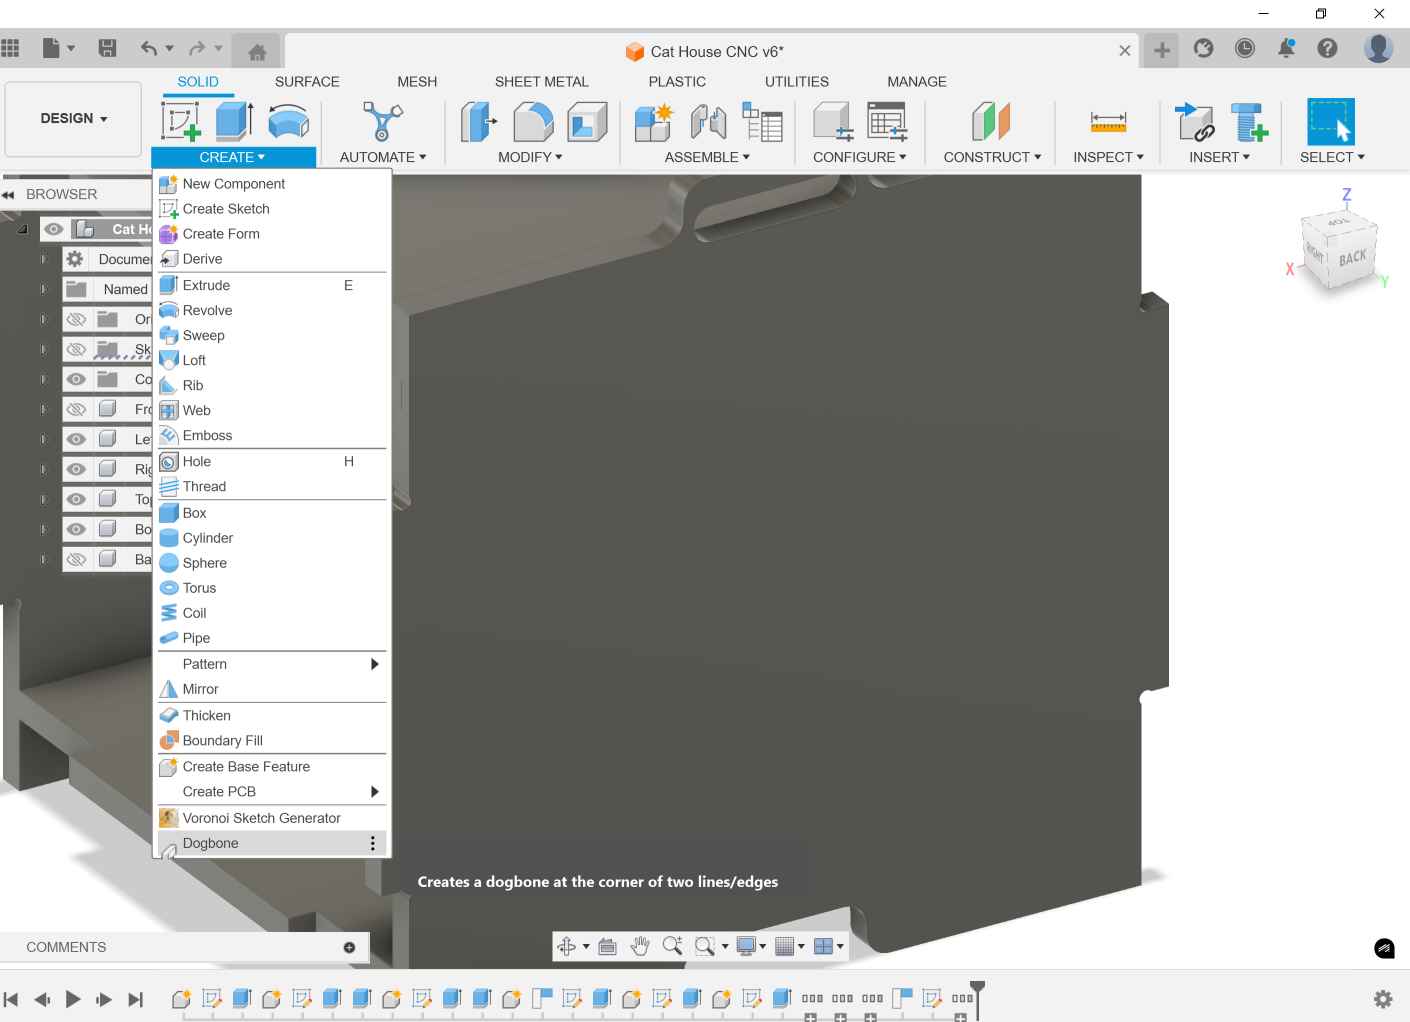
6- This is how the dogbone looks like and this where you find it. To know more about dogbone and install it.
7- At last I created sketches on each face then exported these sketches as DXF files. There are main 3 parts and the others are the same but the back I removed the opening only.
2) Prepare for Machining - ArtCAM
For this step I used ArtCAM to define toolpaths and prepare the G-Codes for the machine. Something important to consider is the sequence of the toolpaths, as we start with the area clear then the inside cutouts and finally with the outside cutout of the big part, we do this to help keeping the part in place while machining.
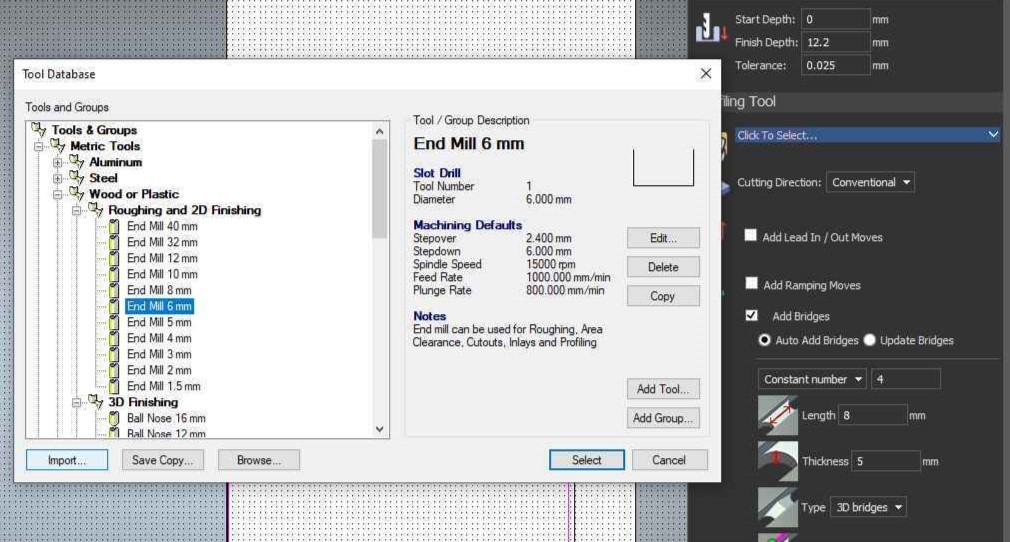
1- After importing the DXF files from vector menu I started adding toolpaths and started with the area clear and selected the tool I'm going to use from here which was endmill 6 mm and I used it in all my toolpaths.
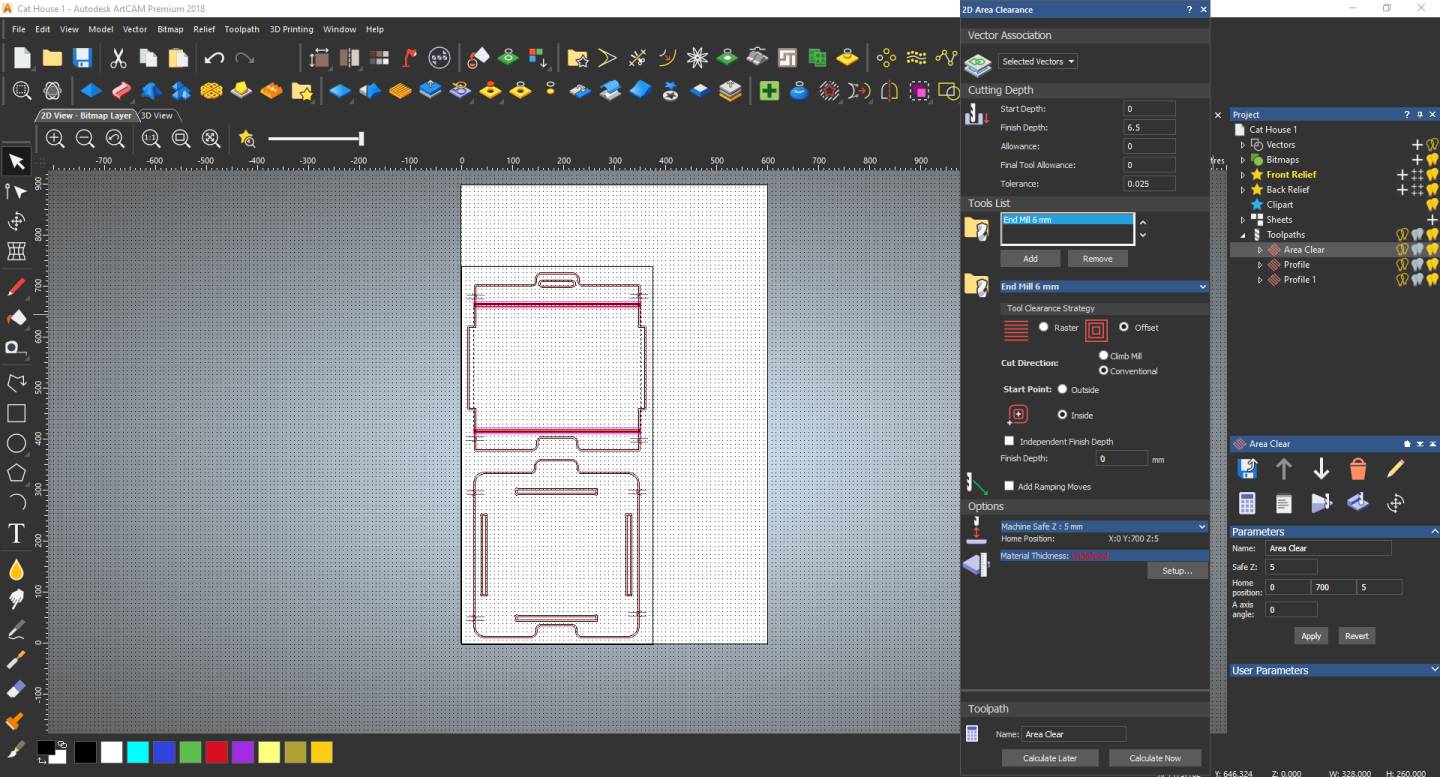
2- Then I continued defining the area clear toolpath settings for the grove. It ended at the edge of the part but Eng. Ahmed told me that this will make it not sharp at the edge because of the endmill diameter so we scaled it to go beyond the edge a little bit.
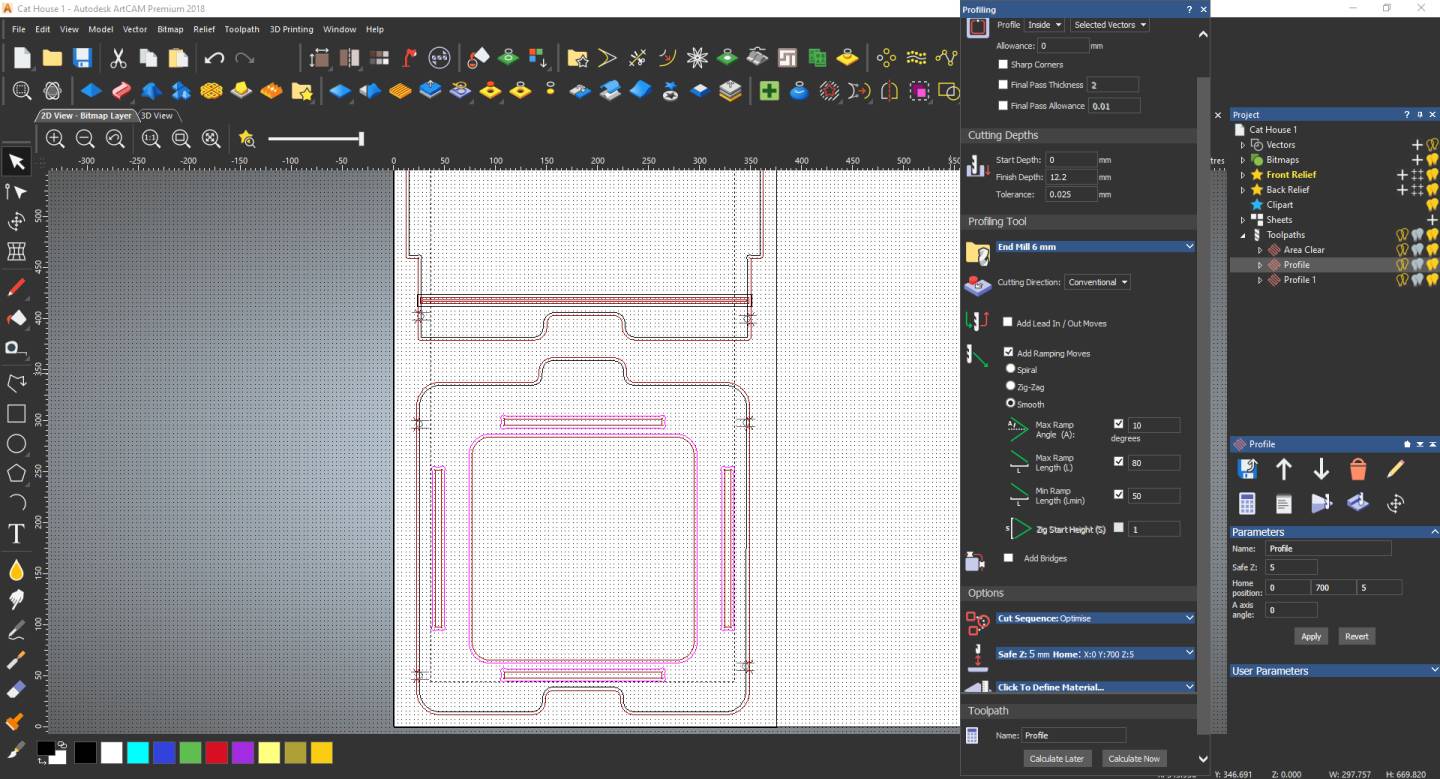
3- Now for the inside profiles I made the finish depth a little bit more than the thickness of the sheet to make sure it cuts all the way through.
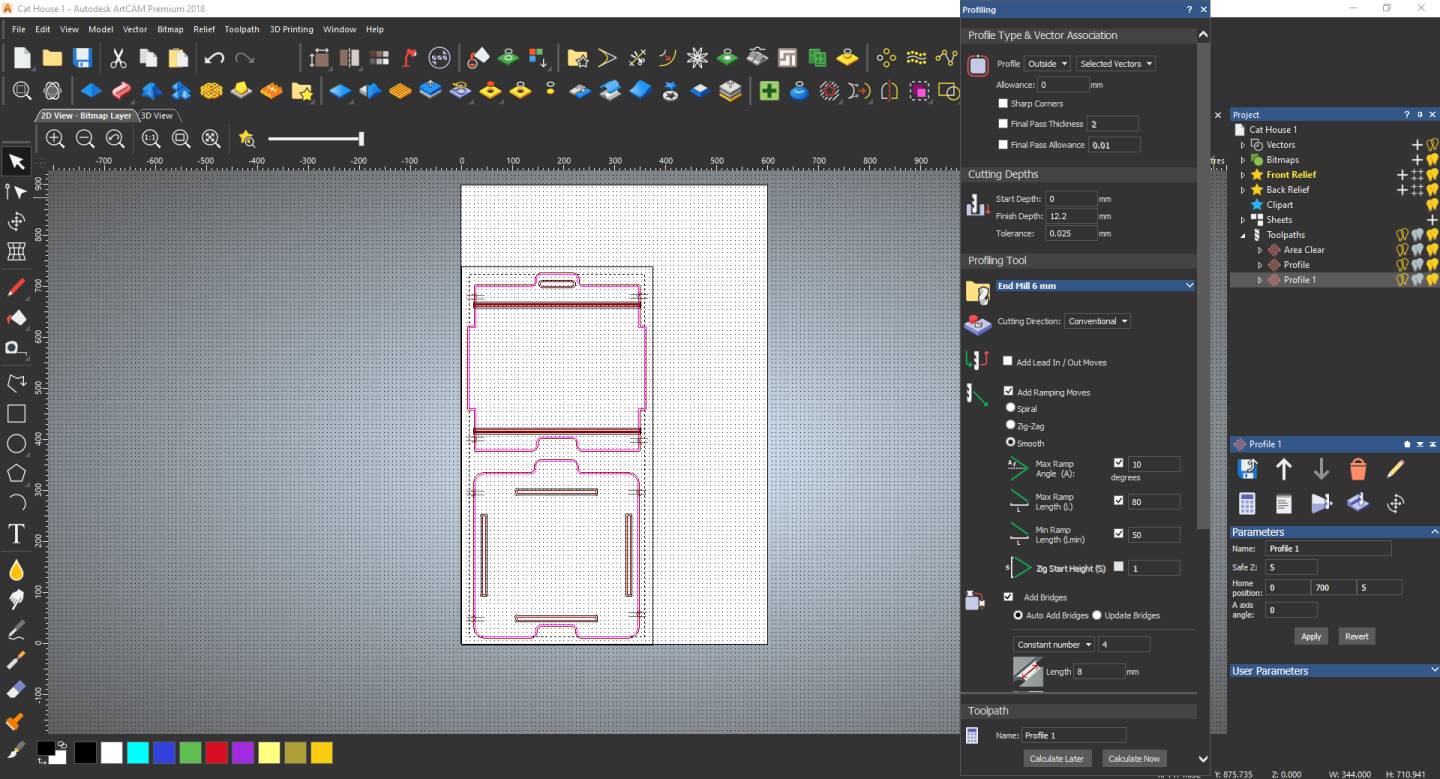
4- After that I went to the outside profiles and also made a finish depth more than 12mm, activated ramping moves and added bridges to hold the piece in place while routing.
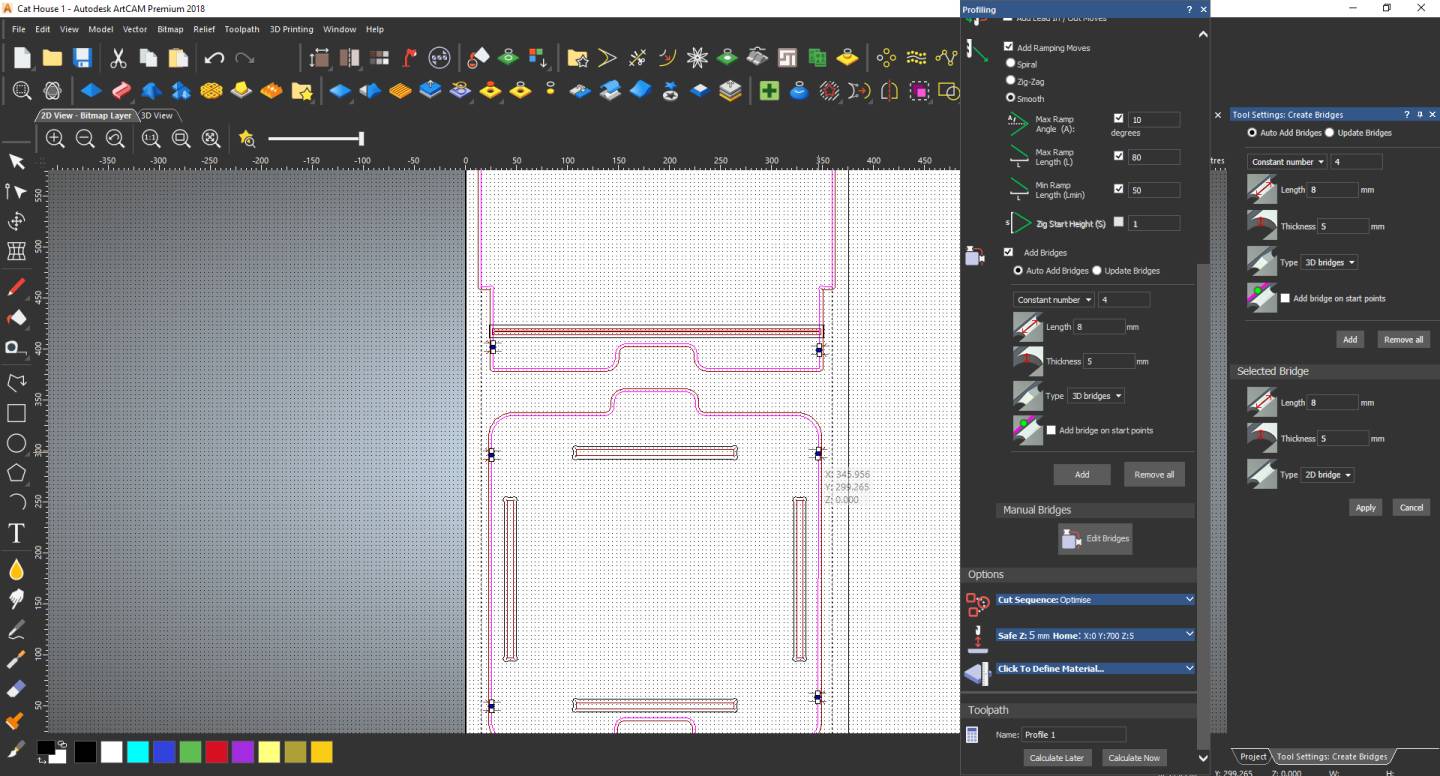
5- I edited the bridges positions as it's important that we don't have it in the direction of the wood veins so I moved them to the sides and the veins were vertically.
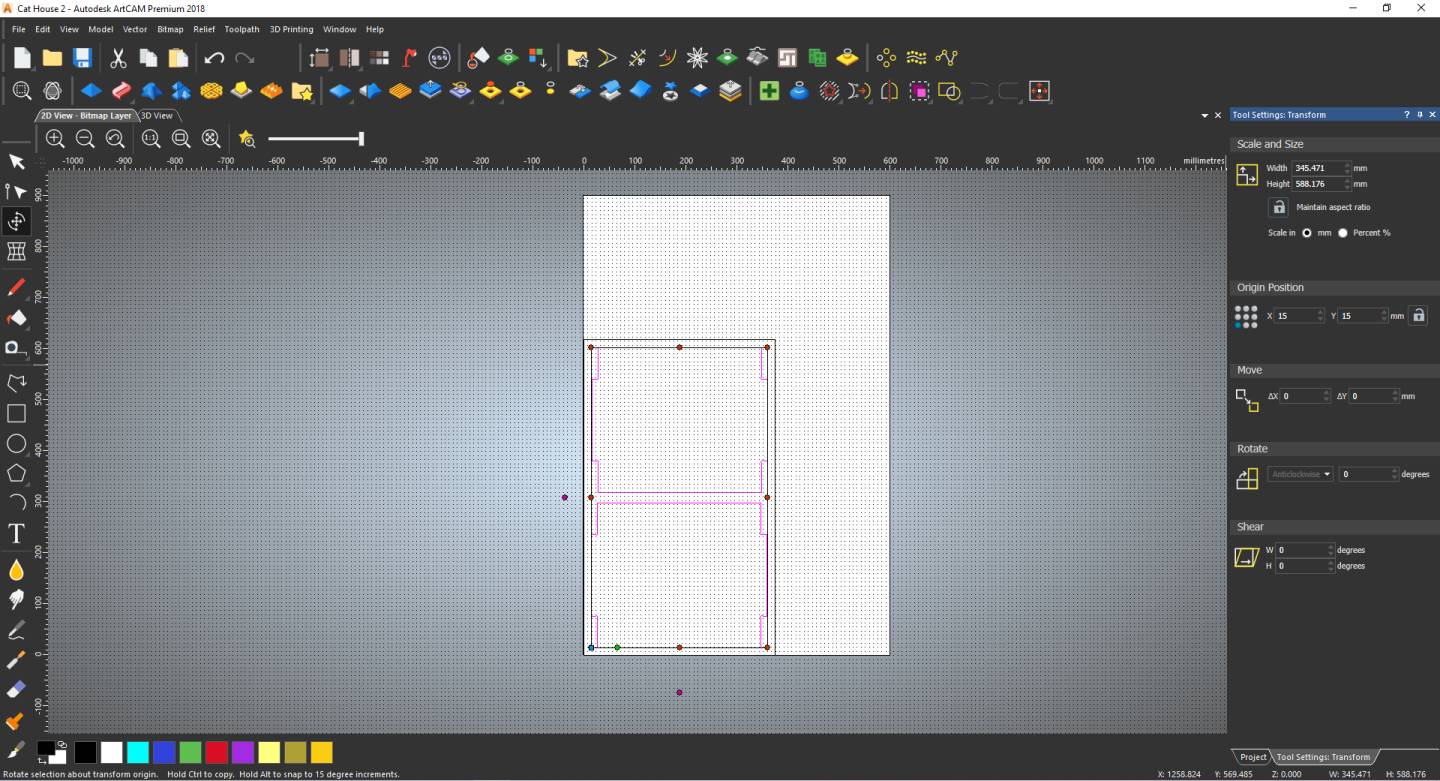
6- To first position the parts in the work area I select them and make their position away 15mm from origin point in both axis. I make a rectangle bigger 30mm than the pieces to cut the wood sheet in this size.
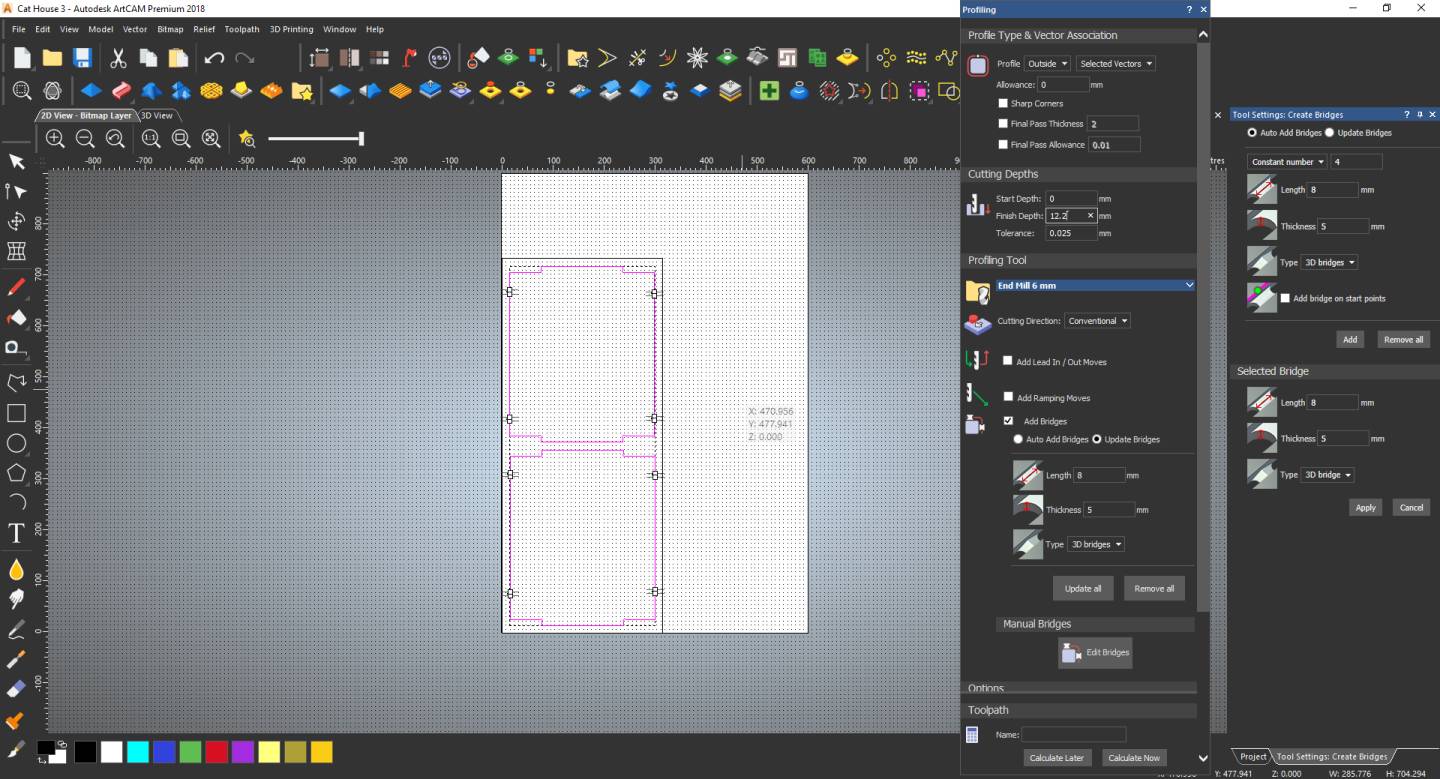
7- I rotated the pieces because I wanted the wood veins to be in this direction and these parts only needs outside profiles and some bridges.
3) Machining Time - Mach3 & Elmalky MR96
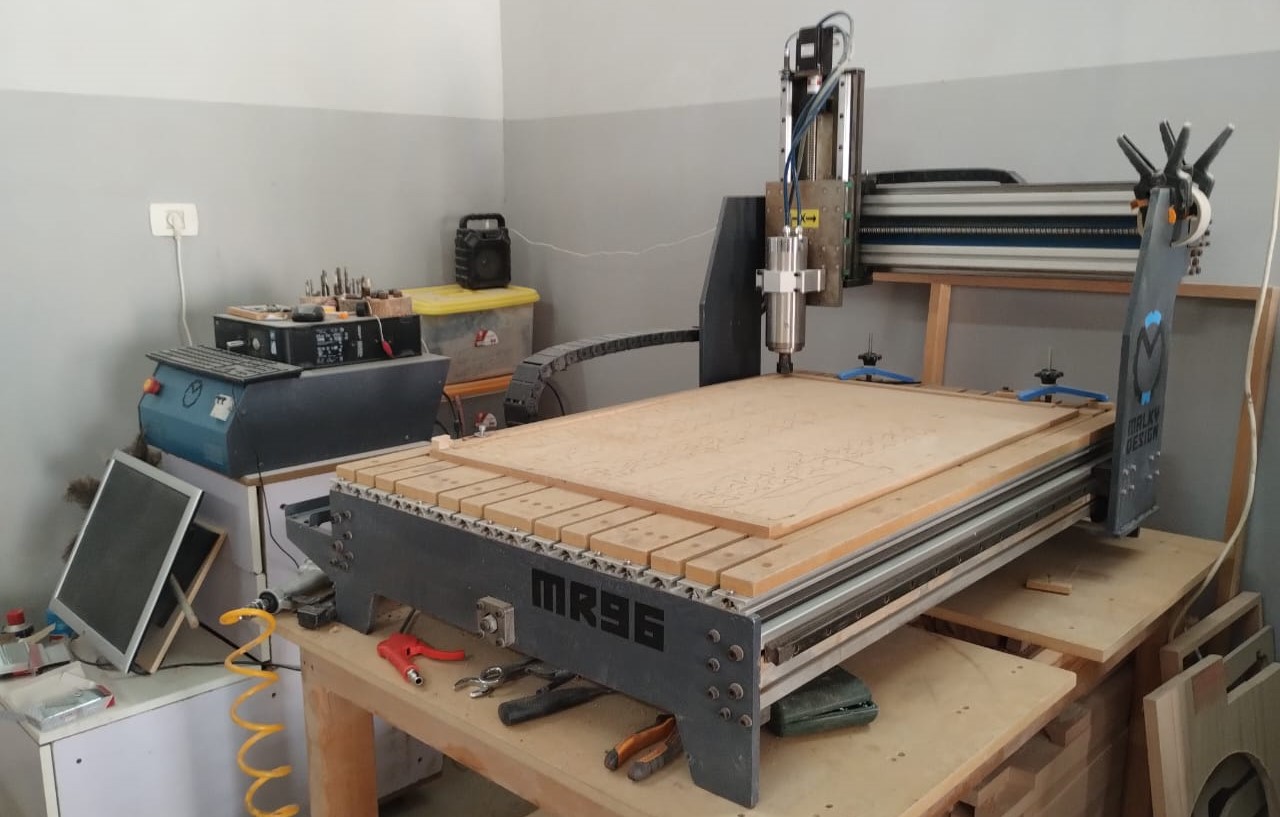
We didn't have a big CNC Router Machine in our fab lab so we went to Wonder Box and Eng. Ahmed Hussein who's the owner of the brand helped us a lot in preparing the files, operating the machine, and giving us tips and tricks in dealing with the CNC Router.
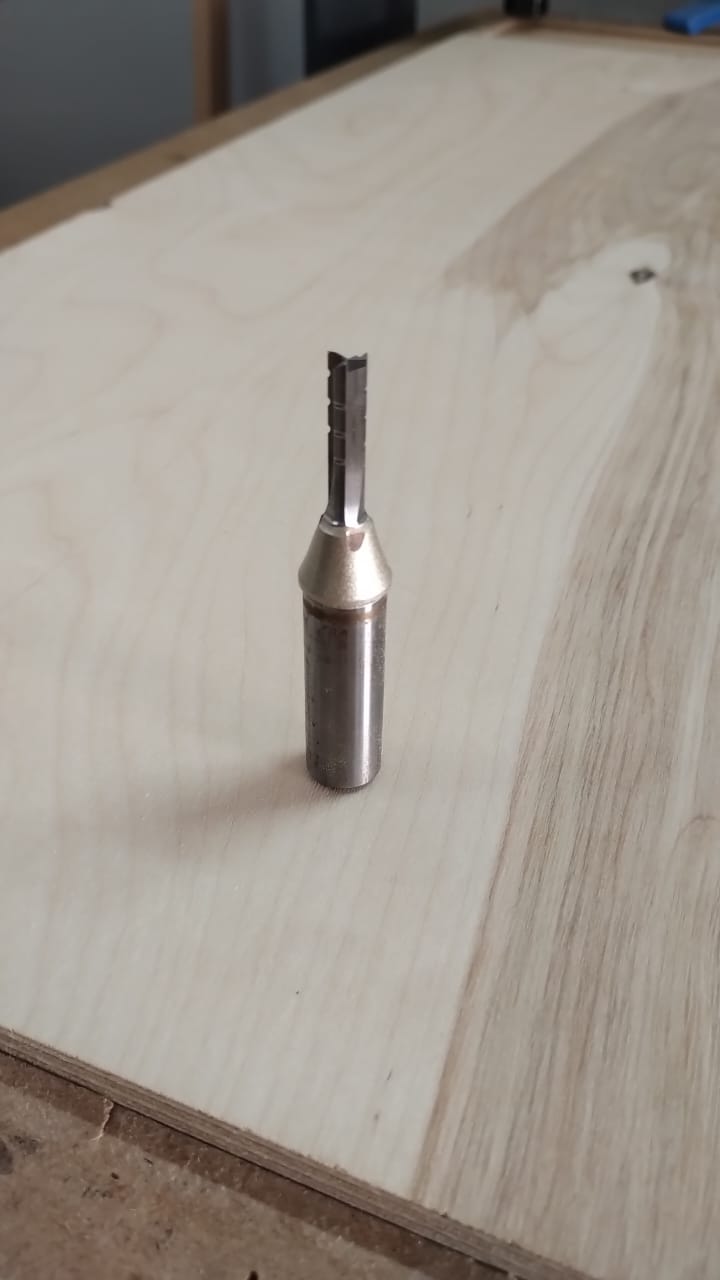
1- First, I put the 3mm flat endmill with the 3 flutes to the spindle of the machine with guidance from Eng. Ahmed.
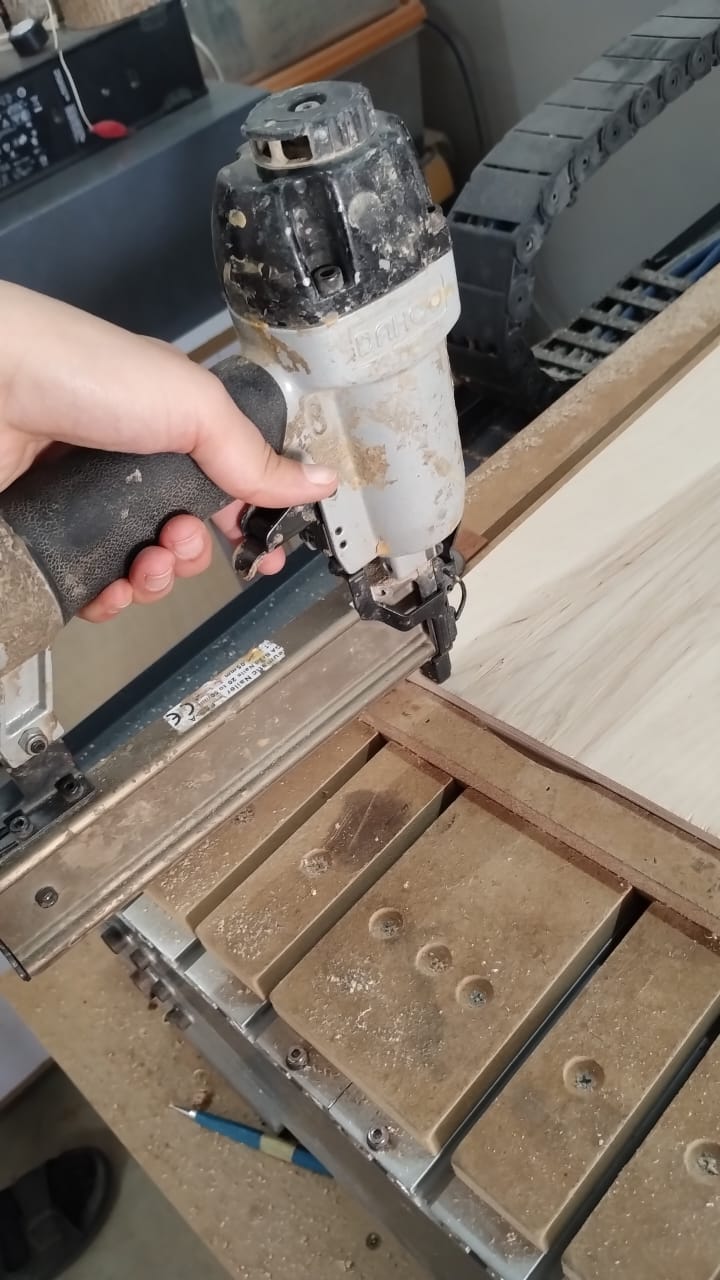
2- After putting the 12mm plywood sheet on the workarea of the machine I used nail gun with compressor to hold the sheet in place. The nails should be close to the edges within the margin we made to prevent any damage while machining.
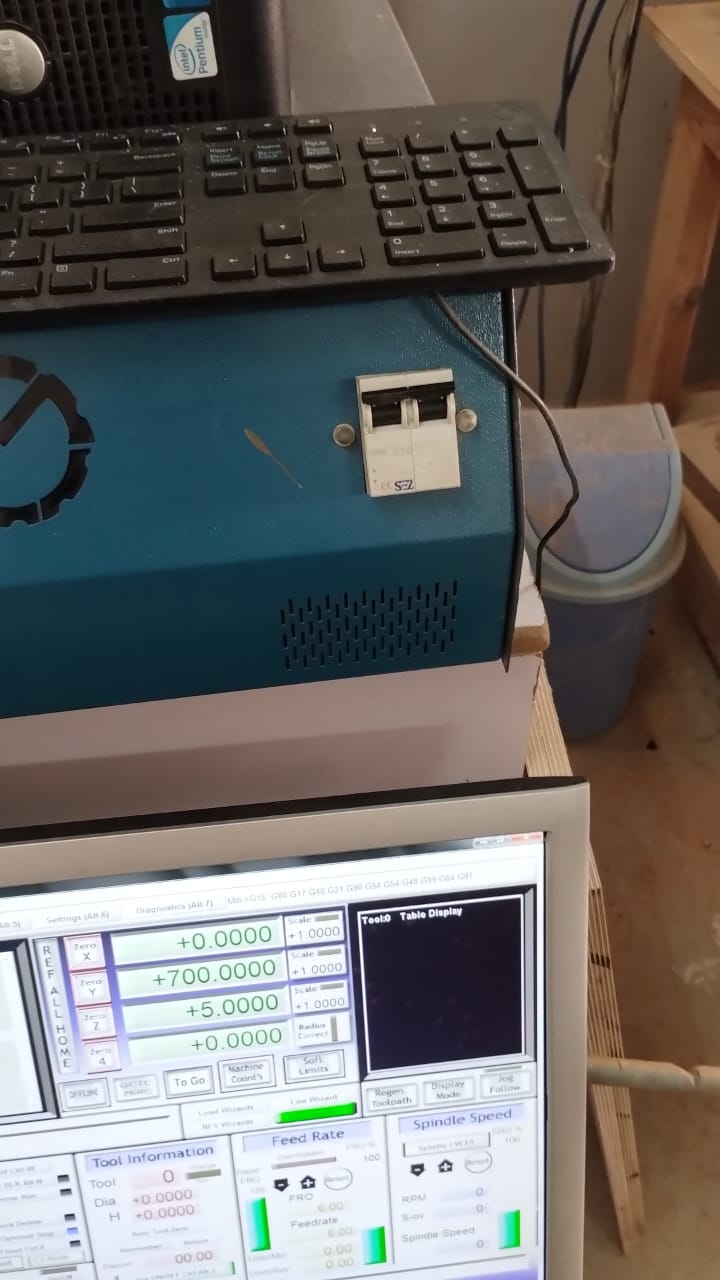
3- Then we turn on the machine by pulling up the power switch and start to work on the Mach3 software to operate the machine.
4- First you load the G-Code made by ArtCAM or any other similar program.
5- Here I brought the spindle to origin point by clicking on Go To Zero then I clicked on Cycle Start (The green button) to start routing.
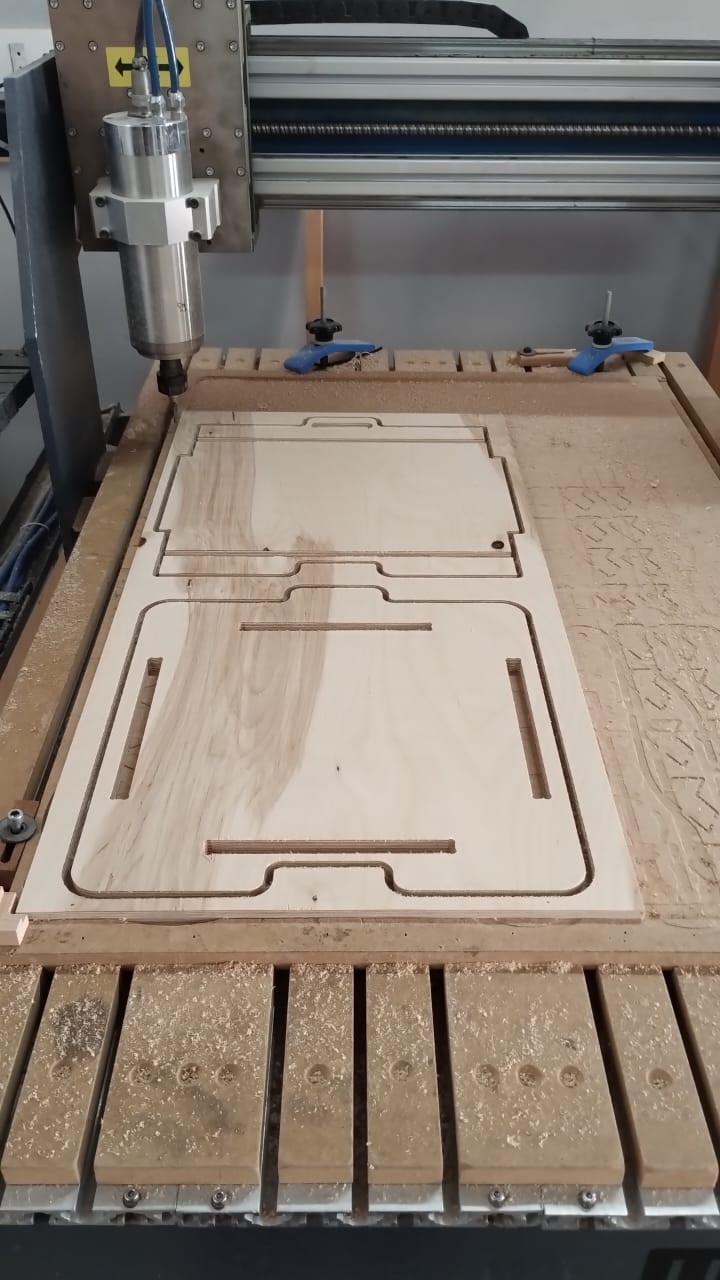
6- First sheet is dooone.
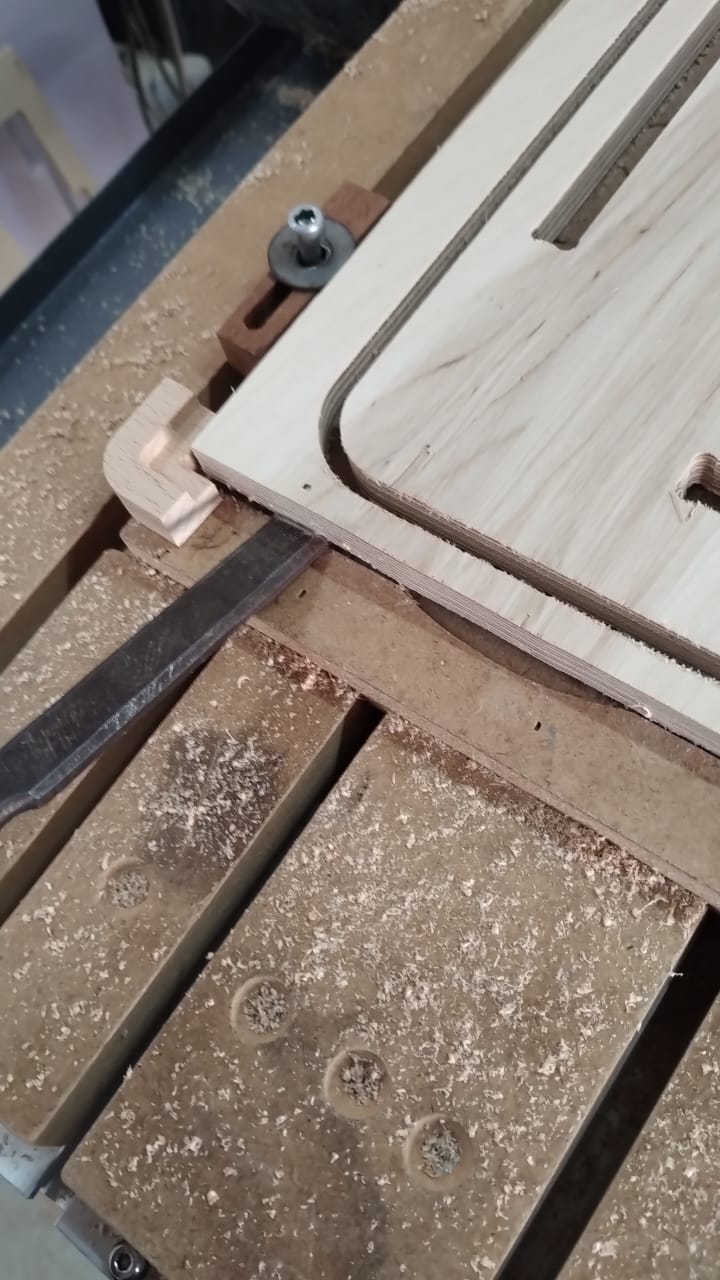
7- Pulling up the sheet by using the file.
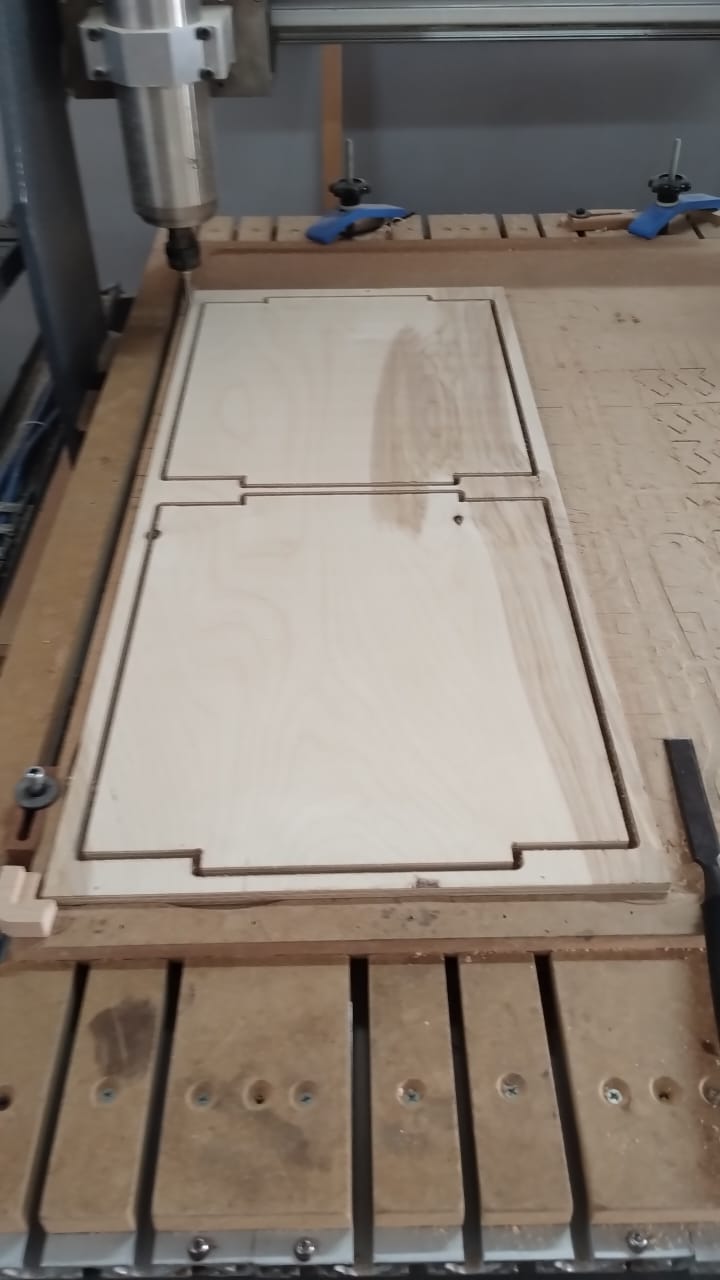
8- Last sheet is done alsoo.
9- Notice the 3D bridges which hold the parts in place while machining.
10- Removing the bridges and getting parts out for assembly.
4) Post Processing
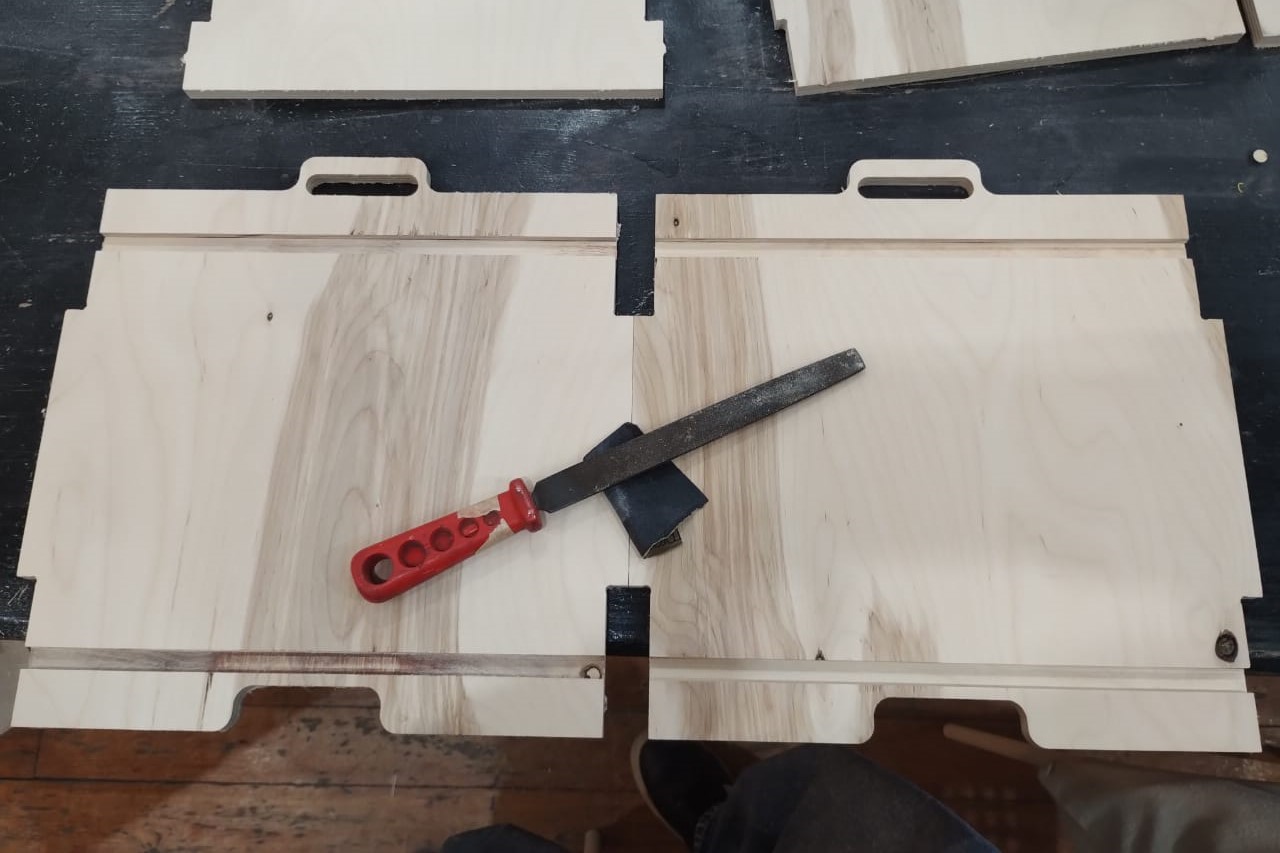
Sanding To clean the wood from ramps and some small wood parts I used the file and sand paper. Can you see the difference?
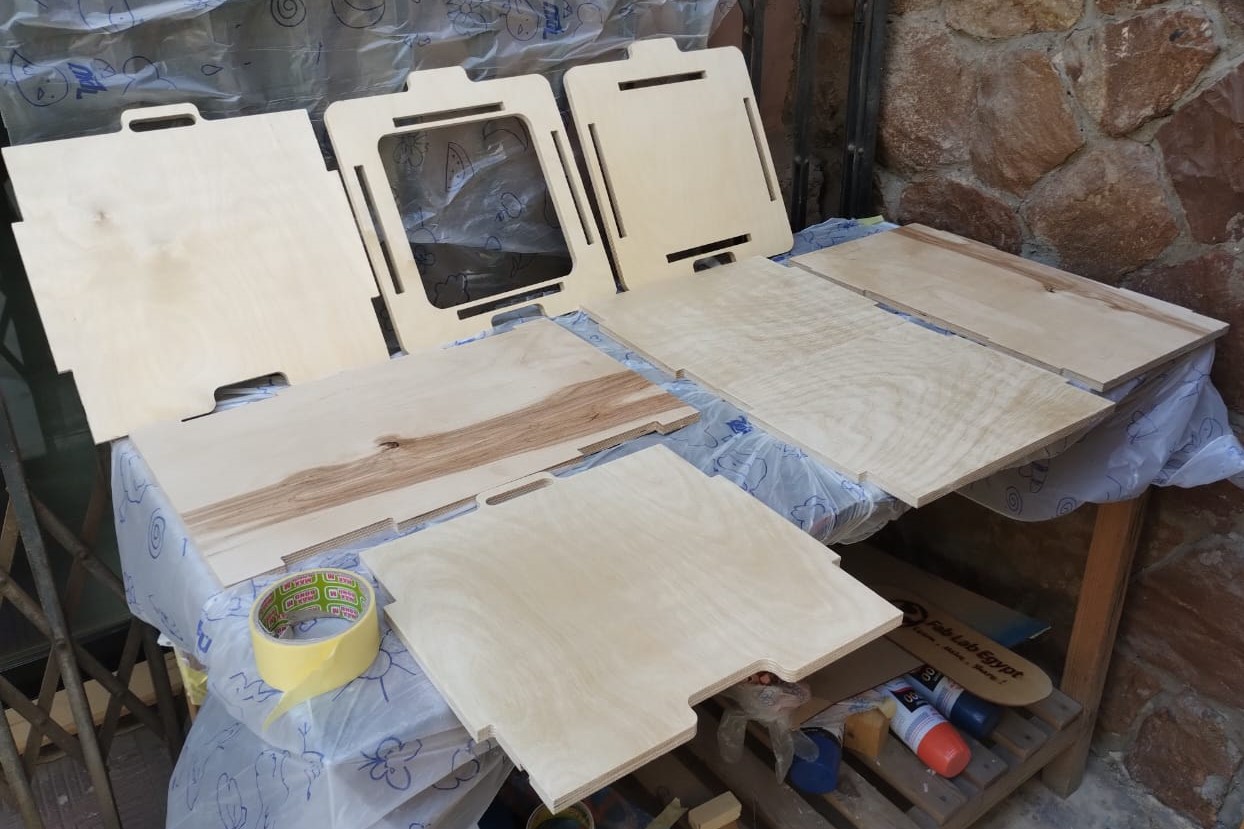
Sealer and Varnish To put the house in the garden we need it to be sealed so I used the sealer and varnish.
