
Molding and Casting
Here's a summary about what you'll see next:
- 1) Group Assignment
-
- Safety in Molding and Casting
- Test Casts
- 2) Individual Assignment:
-
- Introduction to molding and casting
- Design Mold
- Milling Mold
- Silicon Mold and Polyster Cast
- 3) Original Files
1) Group Assignment
1. Safety in Molding and Casting
Safety is a priority in any workshop, and molding and casting is no exception. Here are some key safety measures to keep in mind:
- Always wear appropriate personal protective equipment (PPE), including gloves and a lab coat.
- Ensure proper ventilation in the workspace to avoid inhaling fumes from materials.
- Be cautious when handling materials and tools.
- Follow all safety guidelines provided by the instructor or workshop supervisor.
- Keep the workspace clean and organized to prevent accidents.
This text was written with the help of Copilot.
2. Test Casts
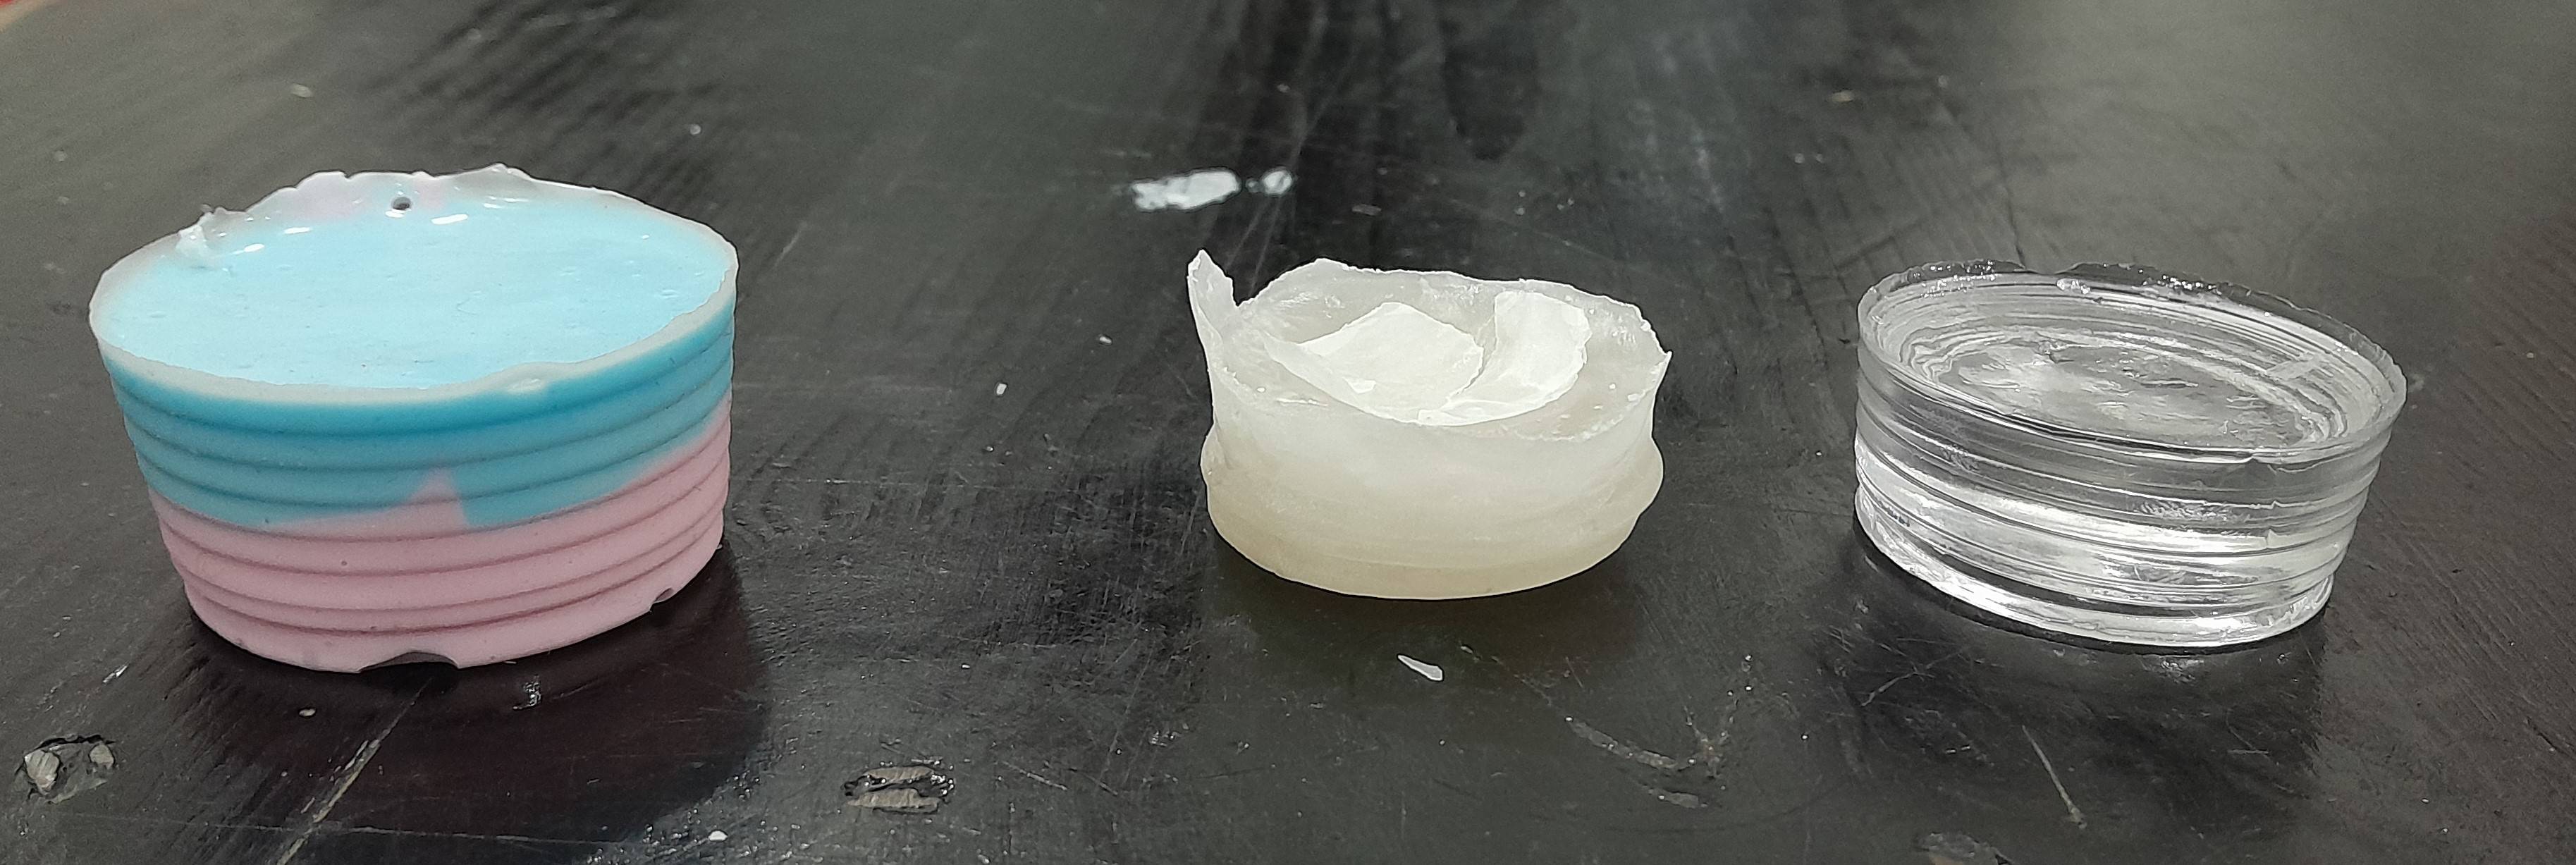
To test our materials and the proper amount of the material and it's hardener we made test samples for Silicon, Polyster, and Wax. The wax just needed some heat then pour it, it's that simple.
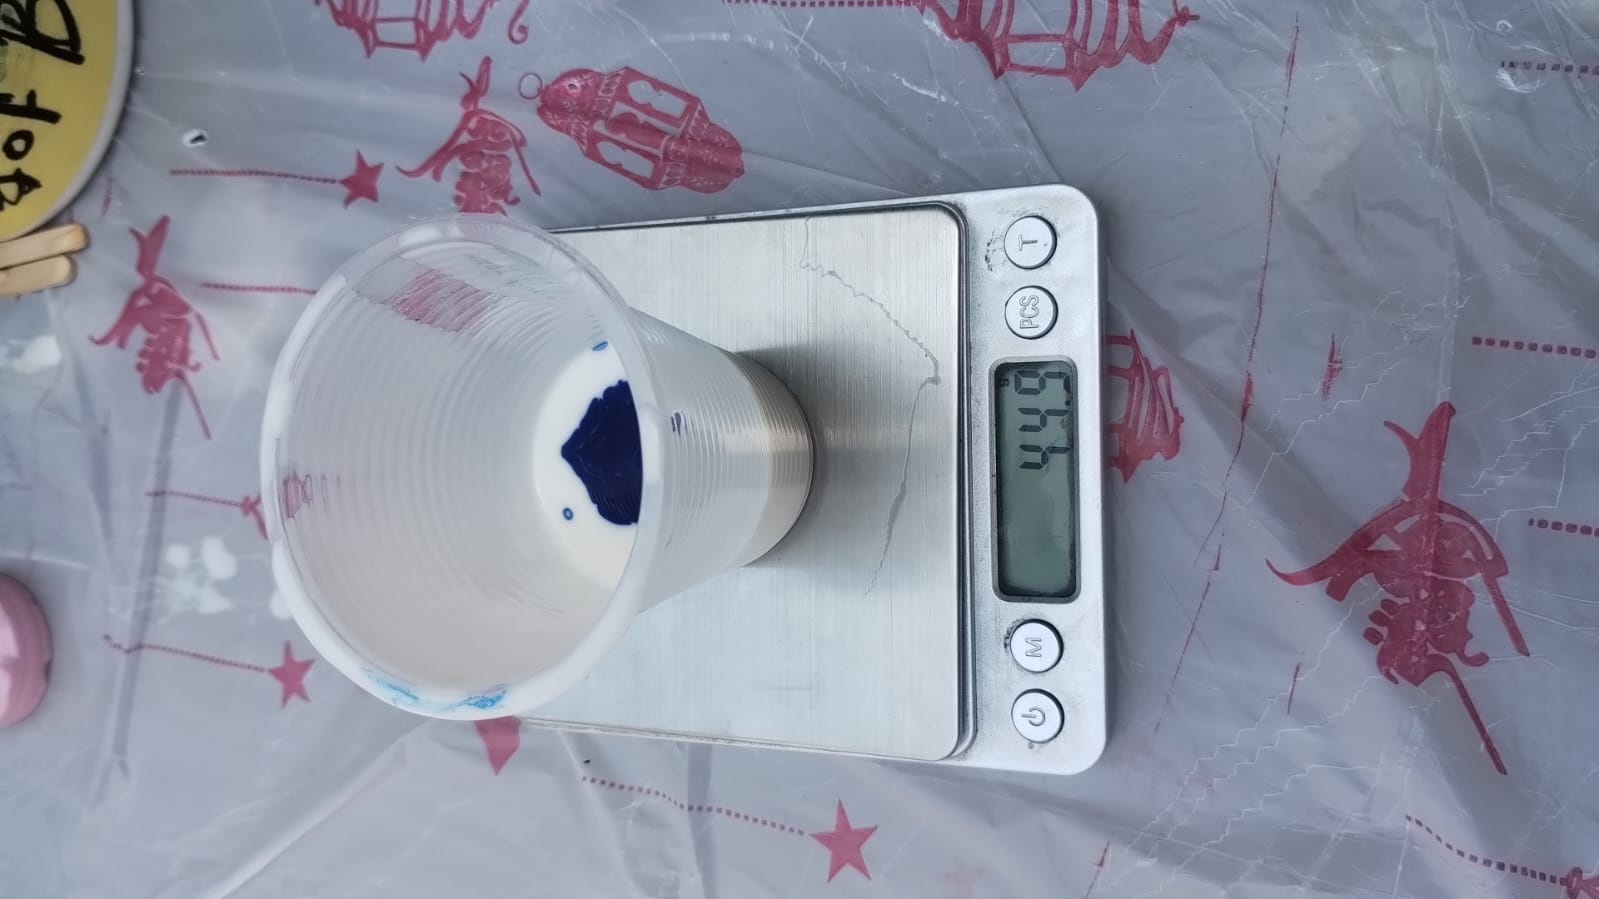
For the silicon the best results when we put 44.5g A and 0.4g B which should be about 1% but when we worked on our Individual assignment it took too long to cure so I worked with 1.5% and it cured over night.
For the polyster we added 0.7g of hardener on 25g of polyster and mixed them well. This makes the hardener 2.8% of the polyster. It cured in about 15 mins.
2) Individual Assignment
1. Introduction to molding and casting
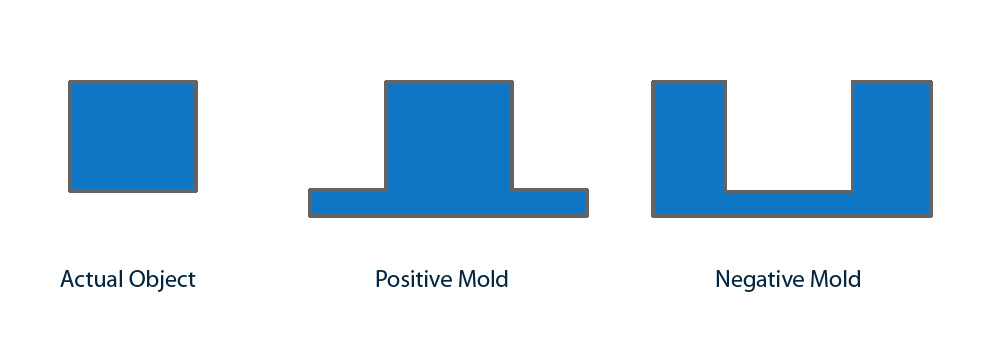
So to first start with this week I was a bit confused what should we design as there are a lot of parts that needed some fantasy imagination and someone who slept well :D. I found this image in Akhil's documentation where it shows what I'm talking about.
We start by thinking what the actual object will be and design it. In my case it's the flowery earing or medal. Then we imagine the negative mold that we will cast the object in it which is the silicon mold. Then we make the positive mold that we will pour the silicon into to make the negative mold. This positive mold is the chemical wood we will mill. So, Let's get started.
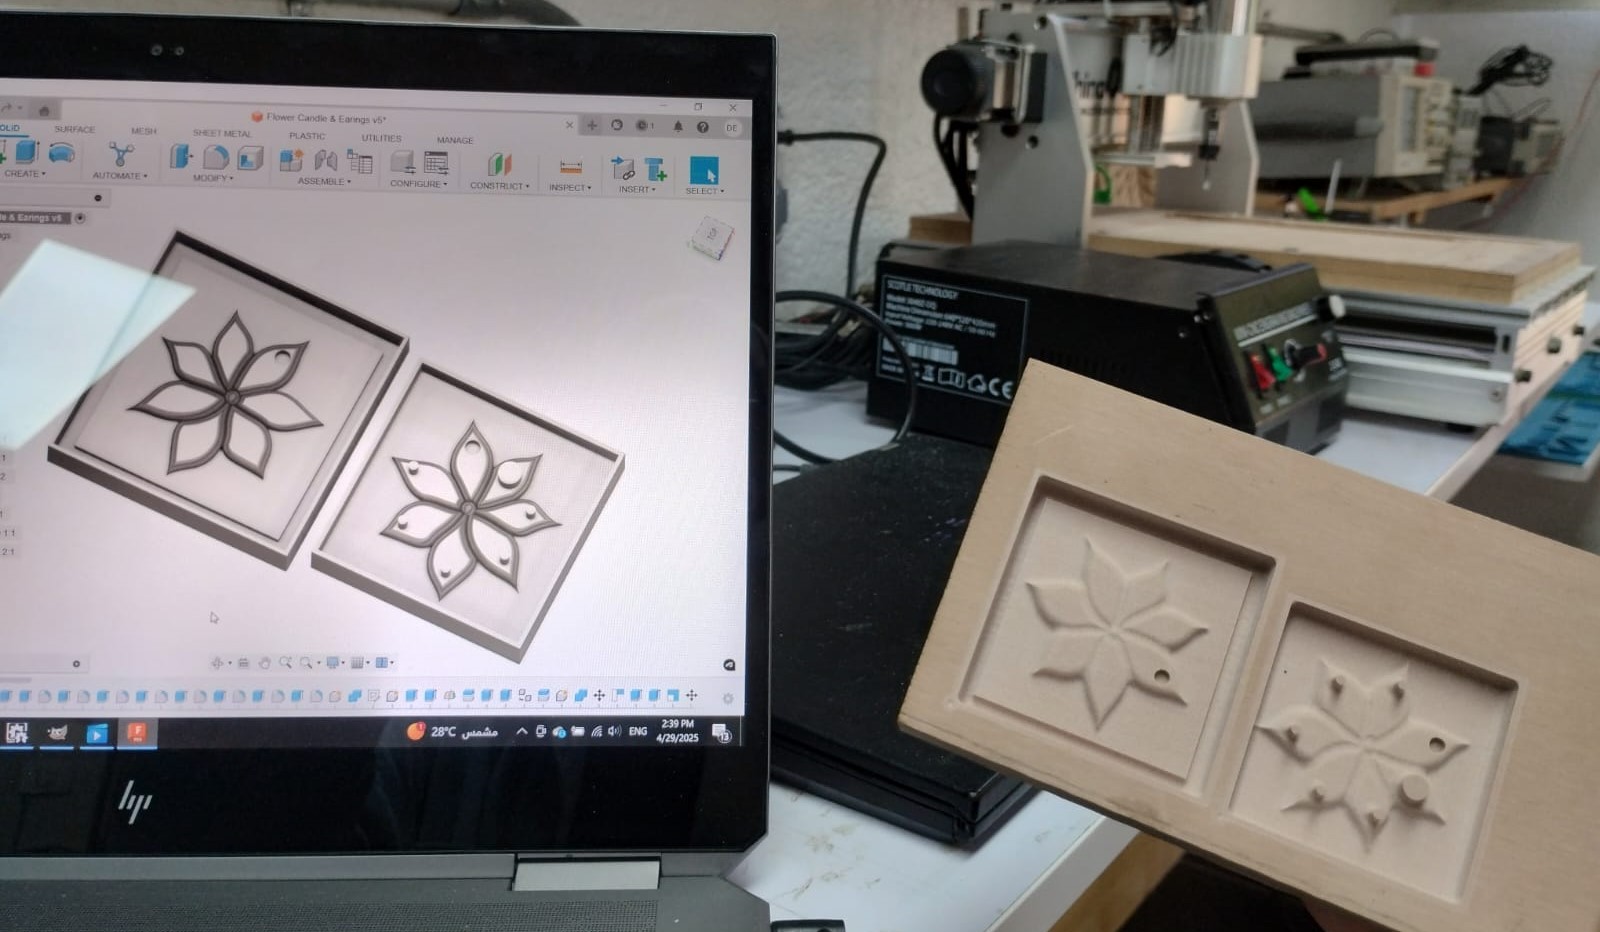
2. Design Mold
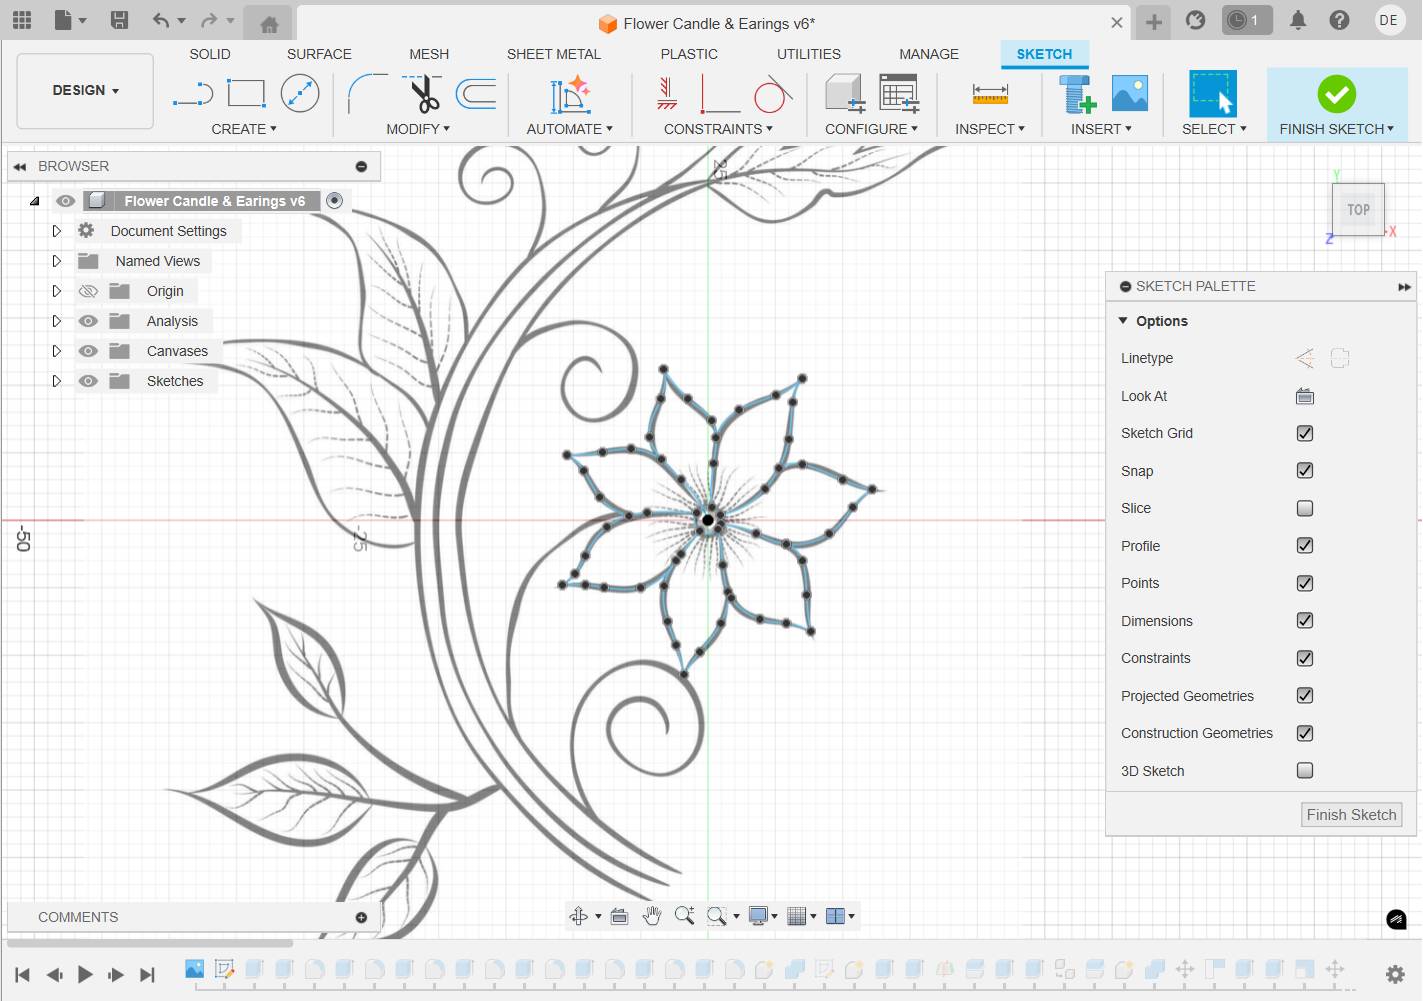
1- I imported an image of a flower downloaded from google and started sketching on it with spline to trace the flower.
2- I extruded the sketch then extruded each petal alone then made fillets.
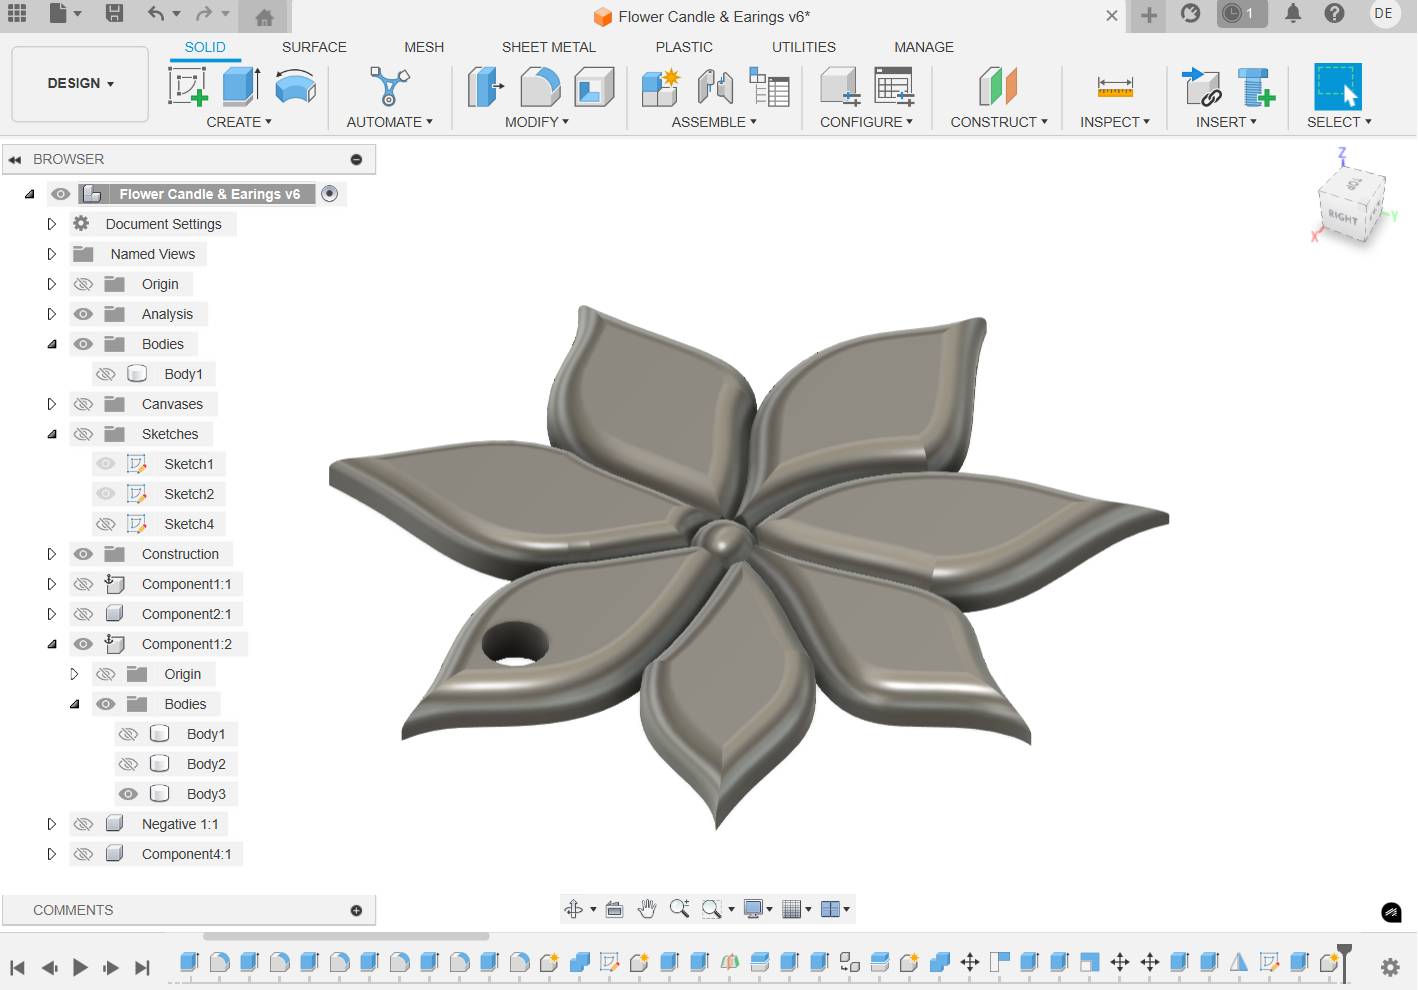
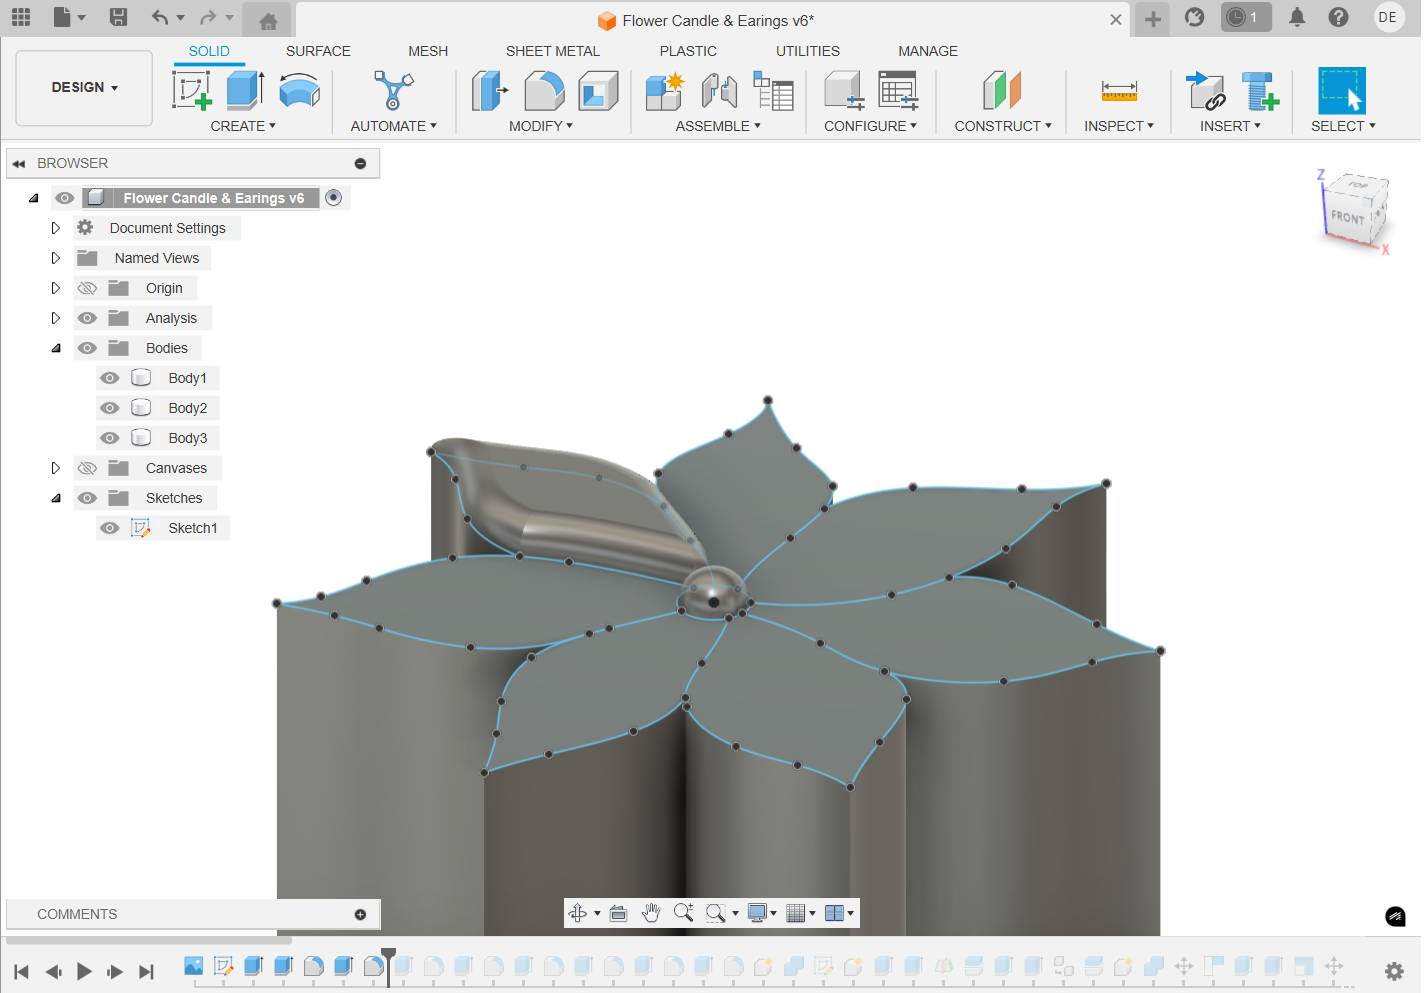
3- After finishing all petals I combined all the bodies and extruded cut a circle to hold the flower from. Then I mirrored it to make two halfs.
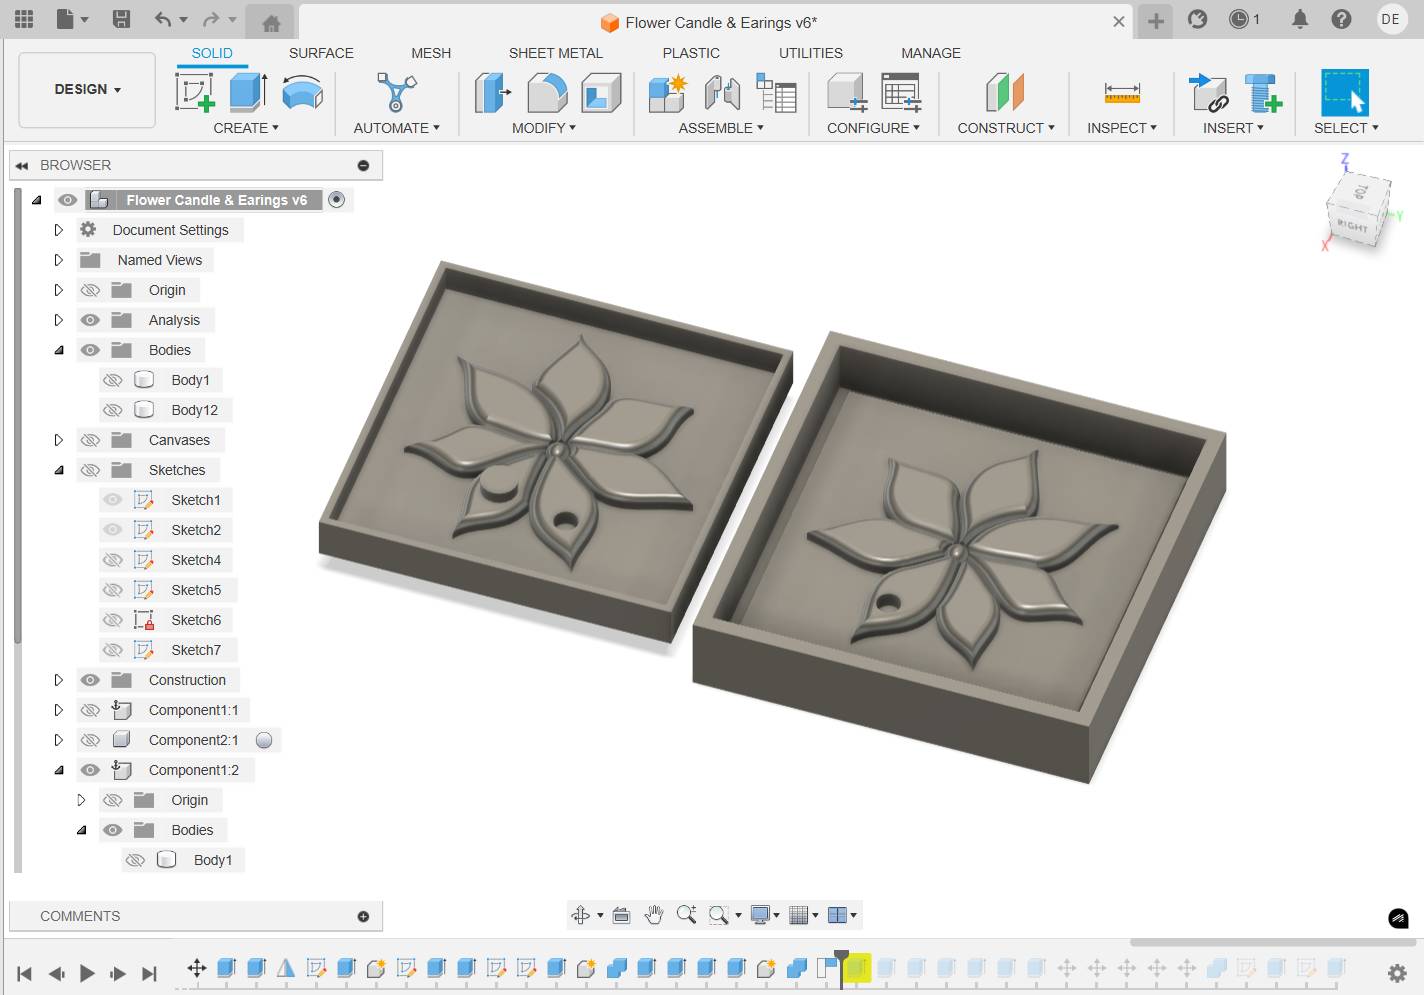
4- After a lot of thinking and imagination that I can't explain easily I made the positive molds by making some cubes, offsets, and combining.
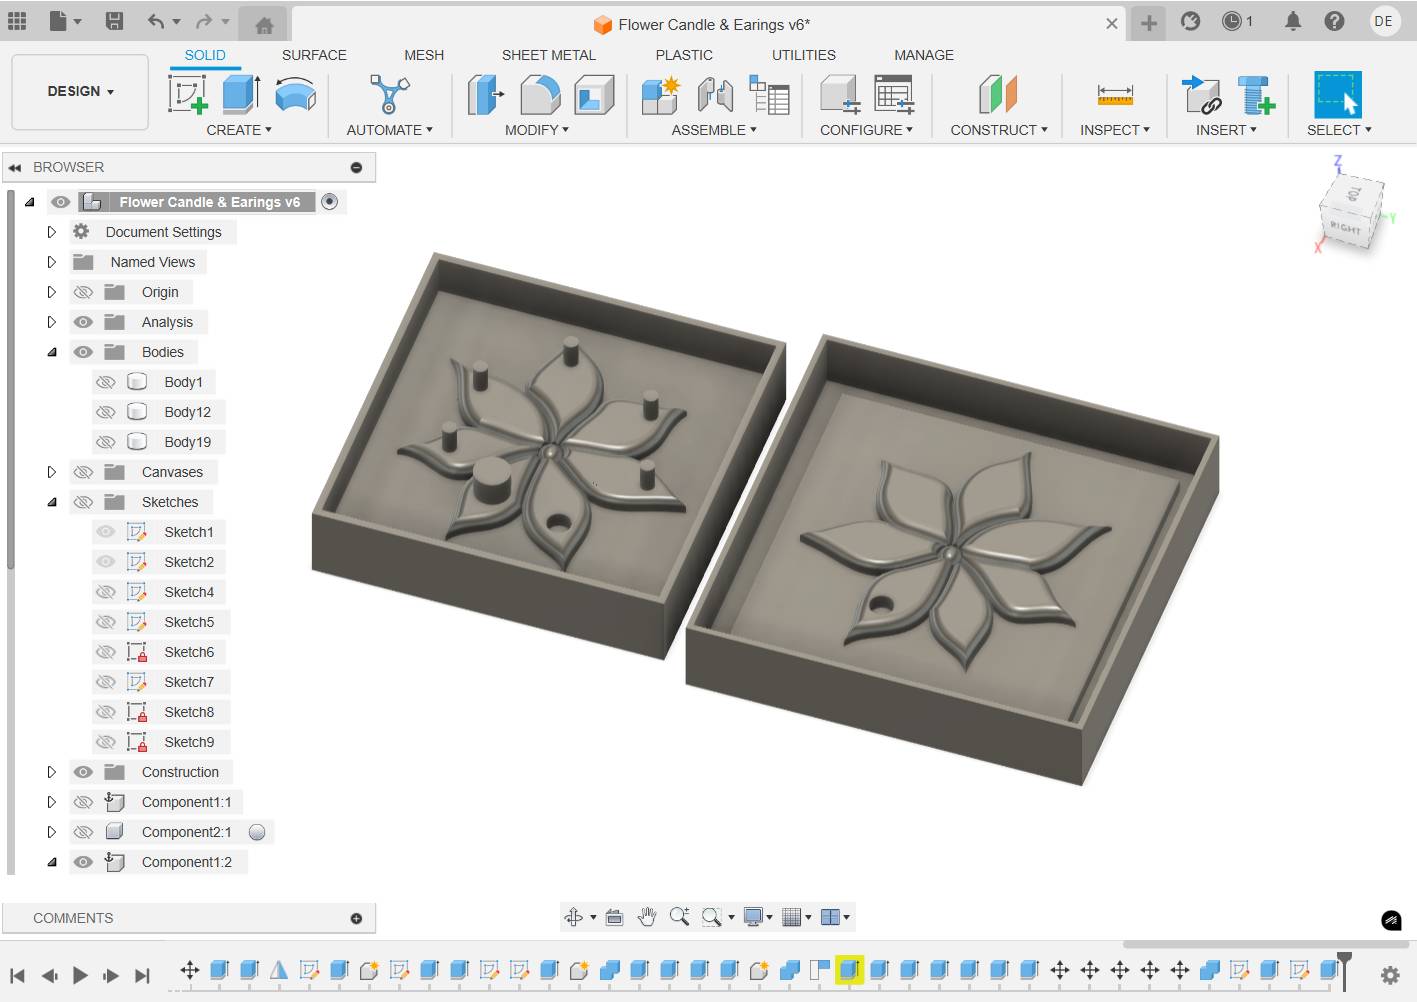
5- I added vents in all petals to make sure the polyster will reach all of them but I guess next time I'll make only one.
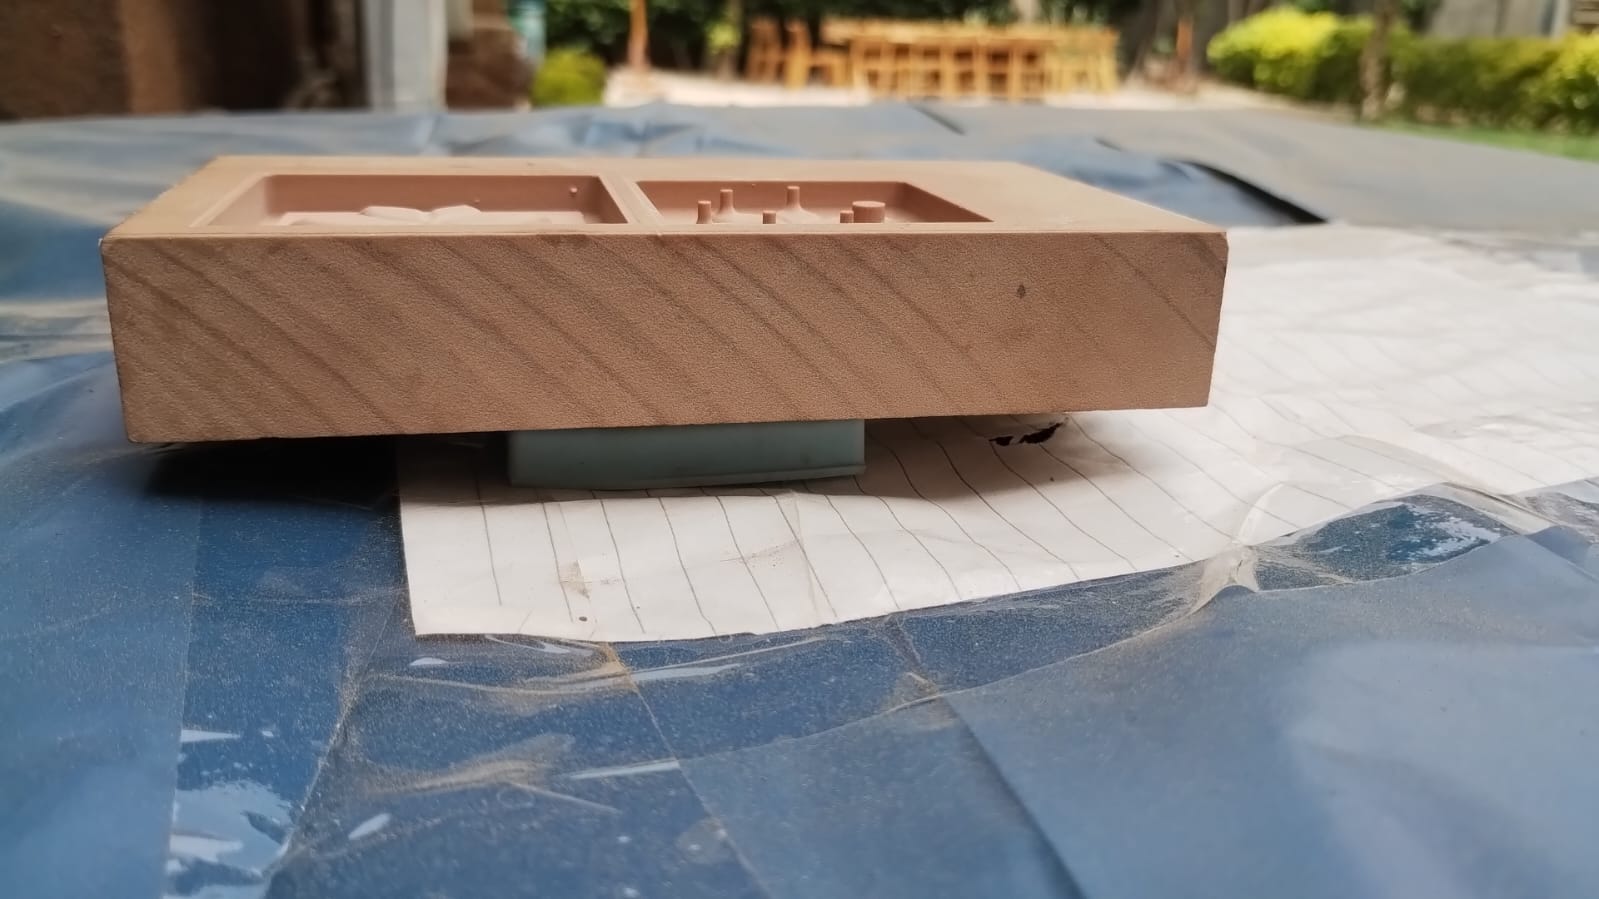
I made a larger pouring hole to pour the polyster from. I didn't want to add register pins as I thought the mold is small already so I decided to go with having a big half with walls containing the smaller other half inside its walls. The bigger one will be the one put at the bottom and the other one will be put on it and we pour from the pouring hole in it.
3. Milling Mold
3.1 Prepare for milling:

1- Using the free trial of MeshCAM and following the Tutorial to know how to use it. I imported the stl files and started with roughing.
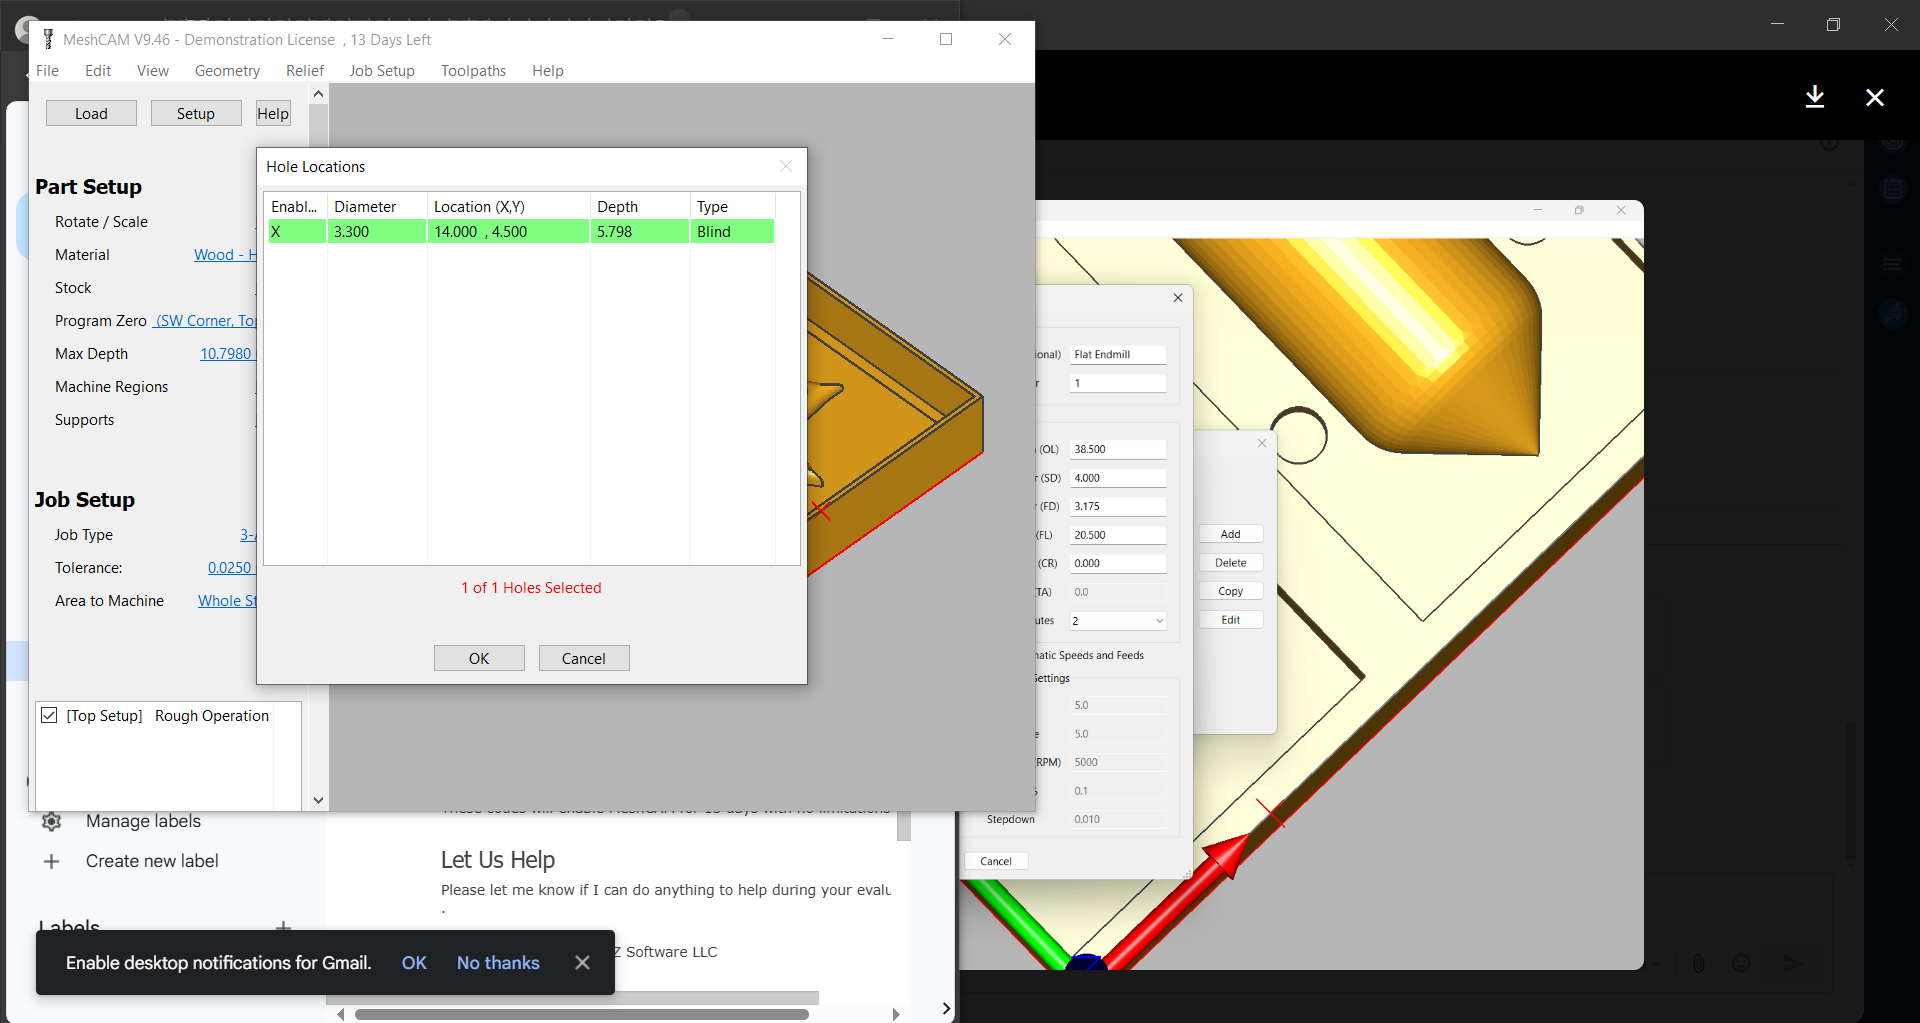
2- To solve a problem I had which was that the software didn't see the hole in the roughing toolpath because its diameter was nearly the same as the tool diameter. So I made a drill toolpath and it detected the hole.
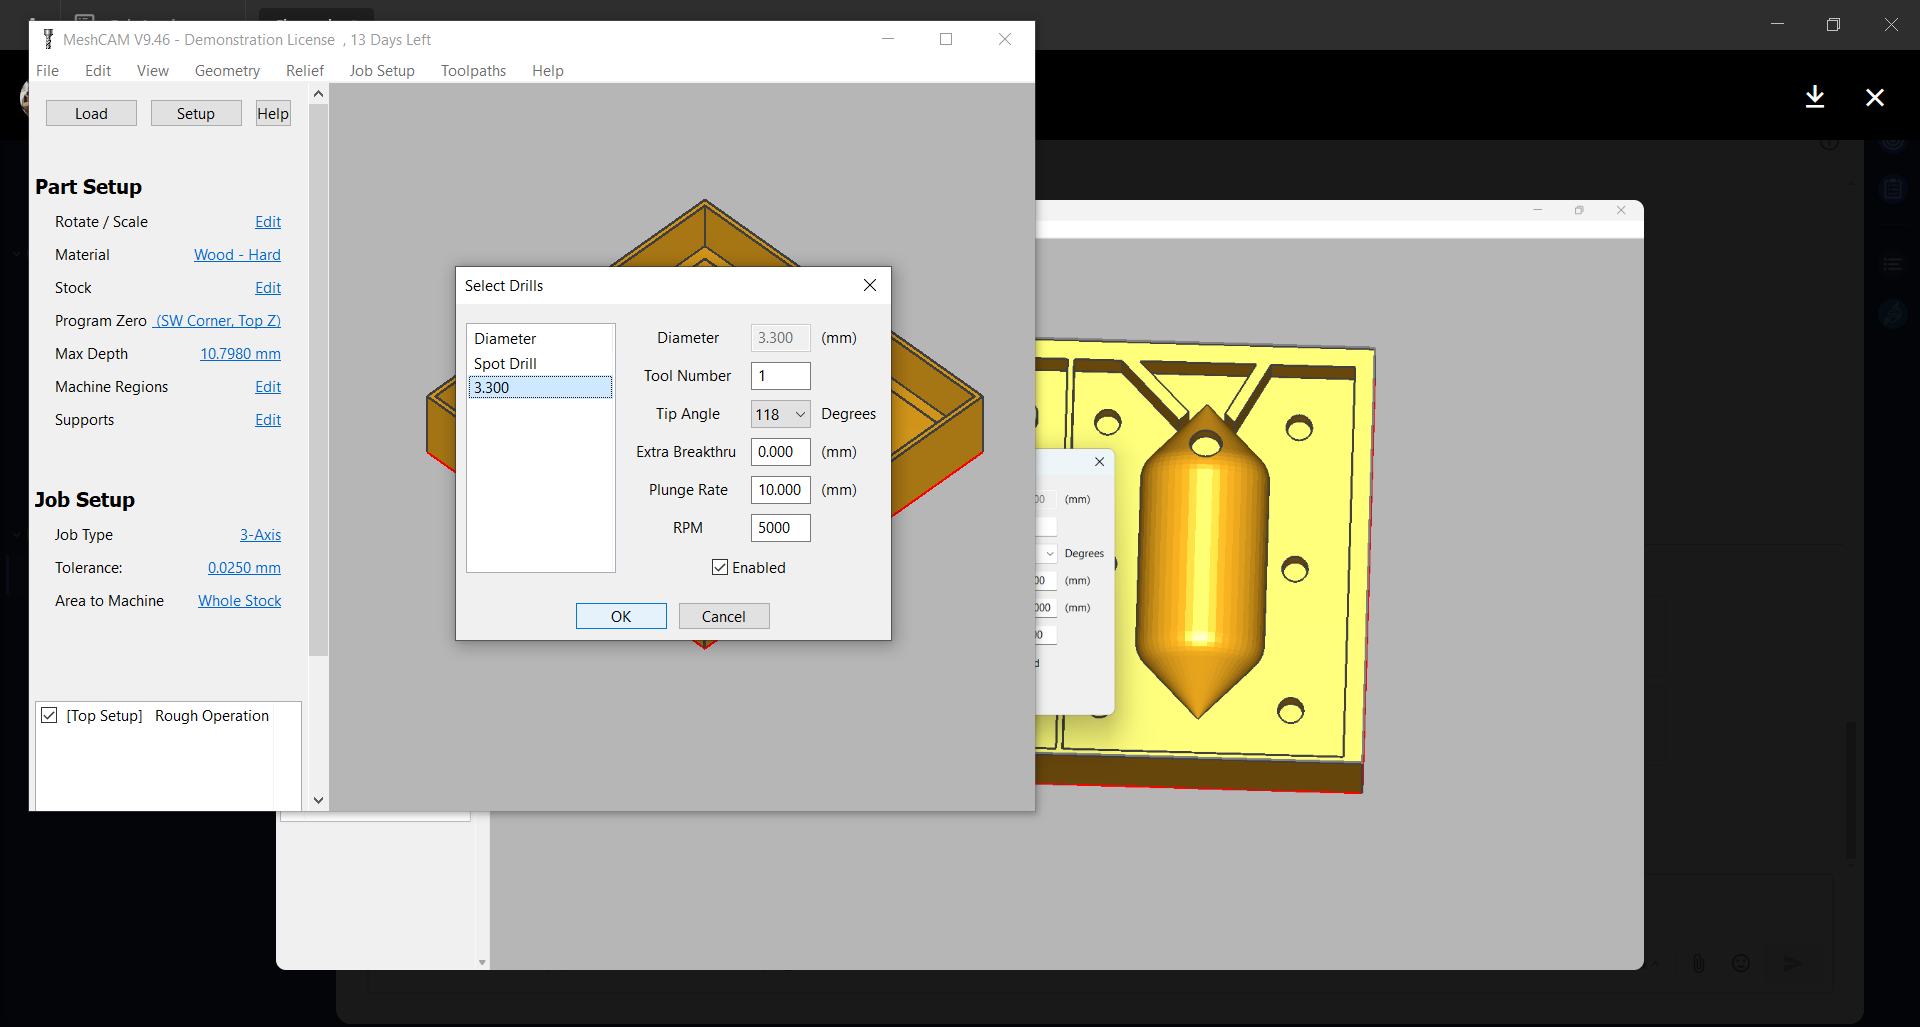
3- I disabled the spot drill and left the 3.3 drill enabled and hit OK.
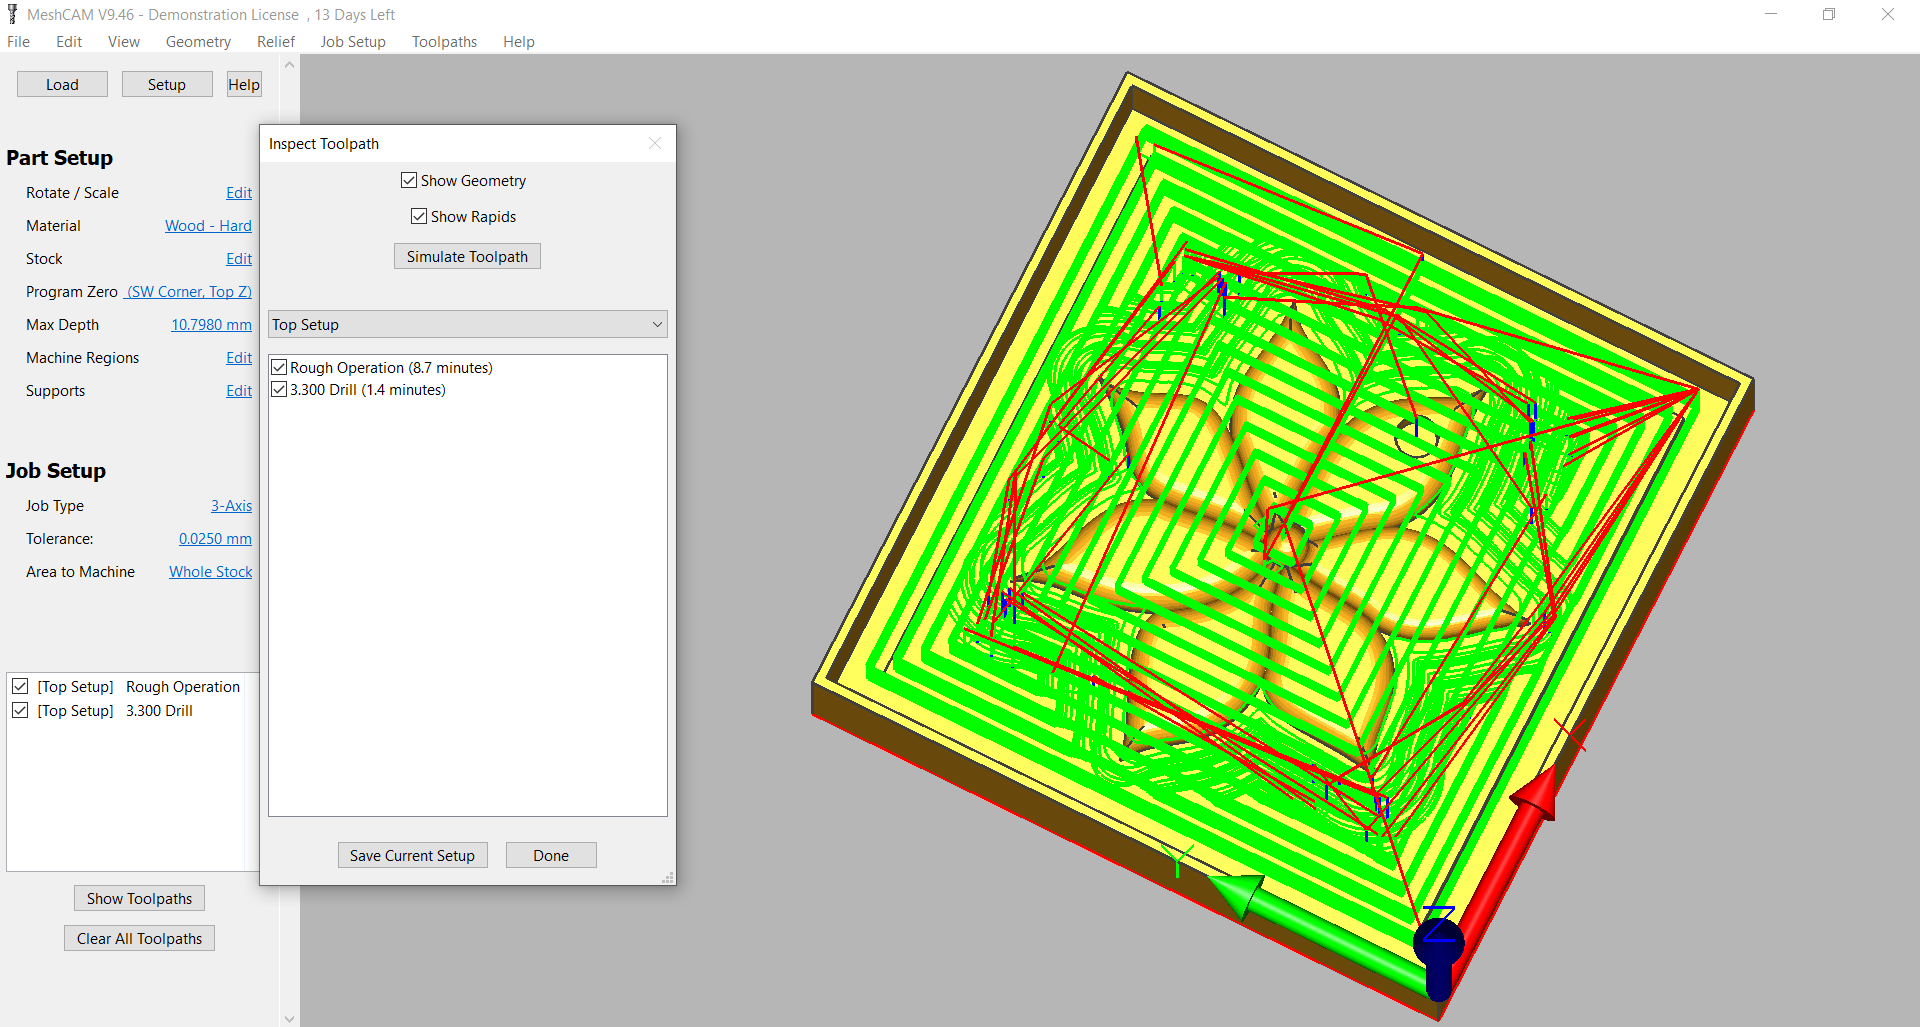
4- I then calculated the toolpaths and saved them as nc.
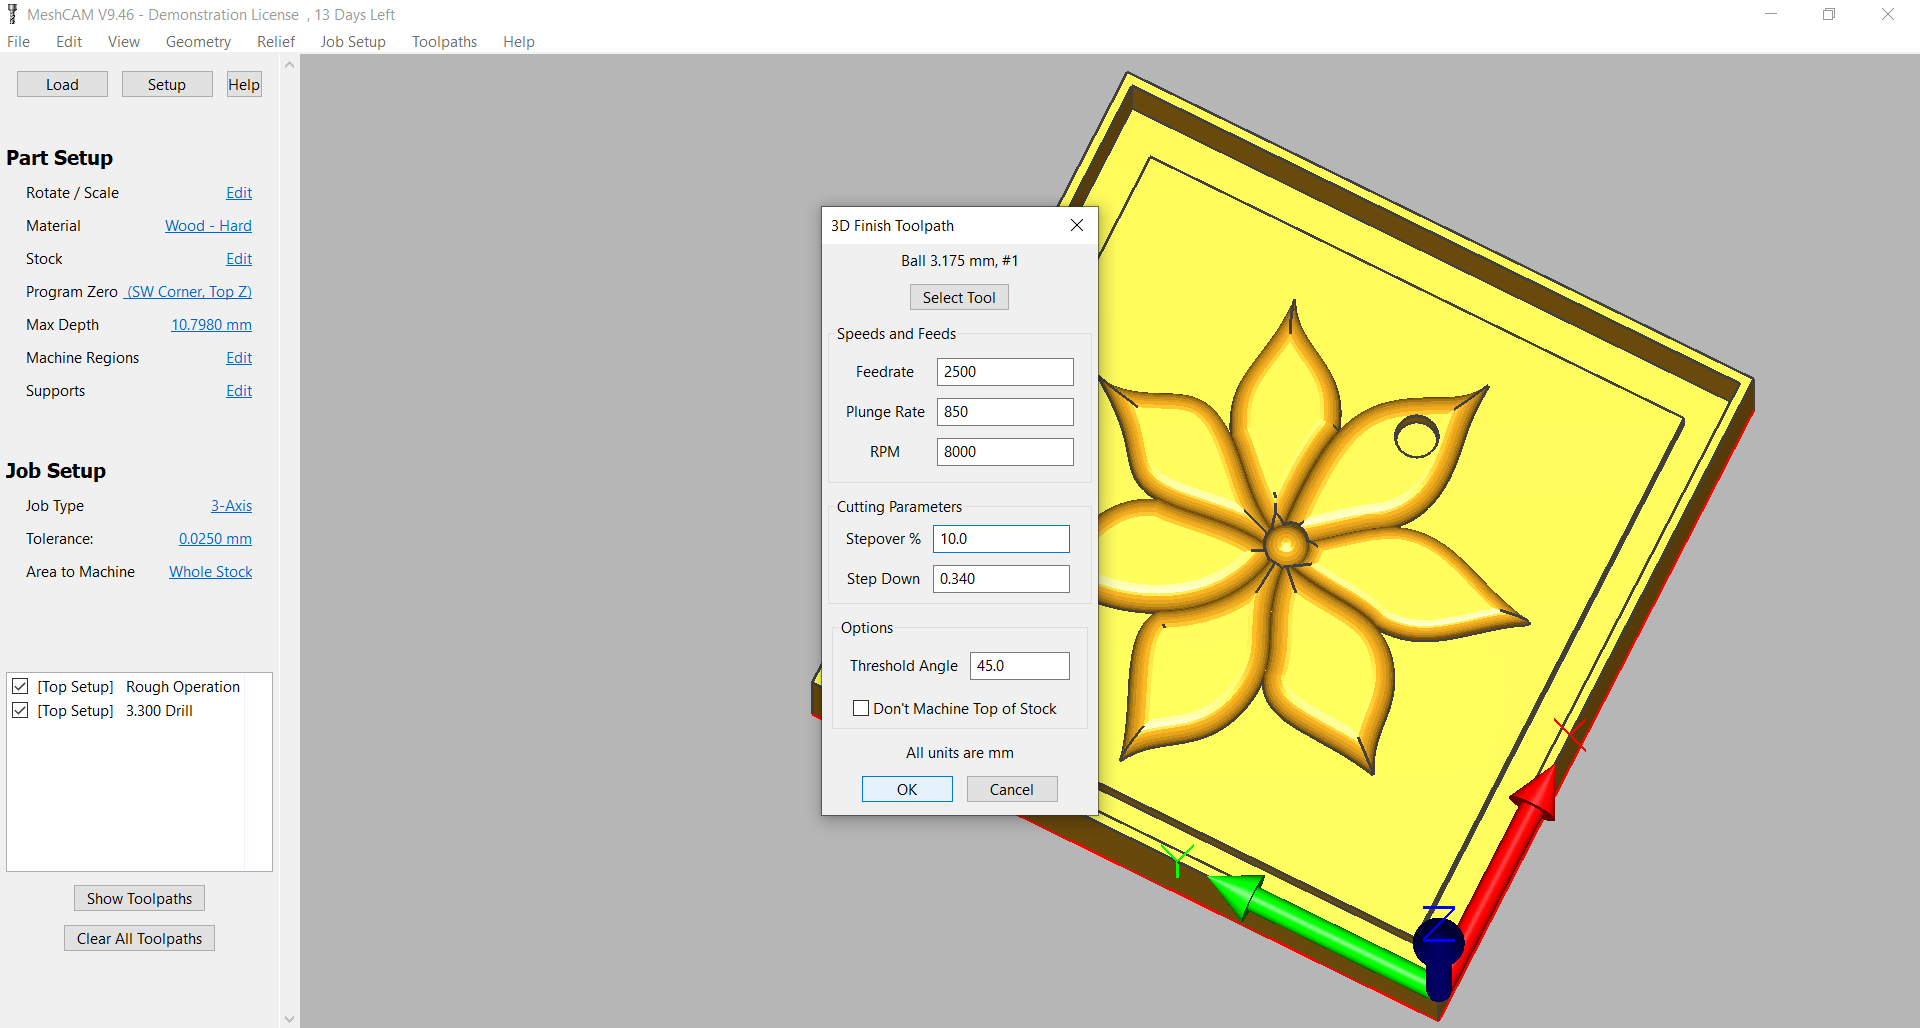
5- After roughing I made the unified finishing toolpath. All roughing and finishing had feedrate of 2500 and plunge rate of 850 but the difference between them was in the stepover which was 50% in roughing and 10% in finishing.
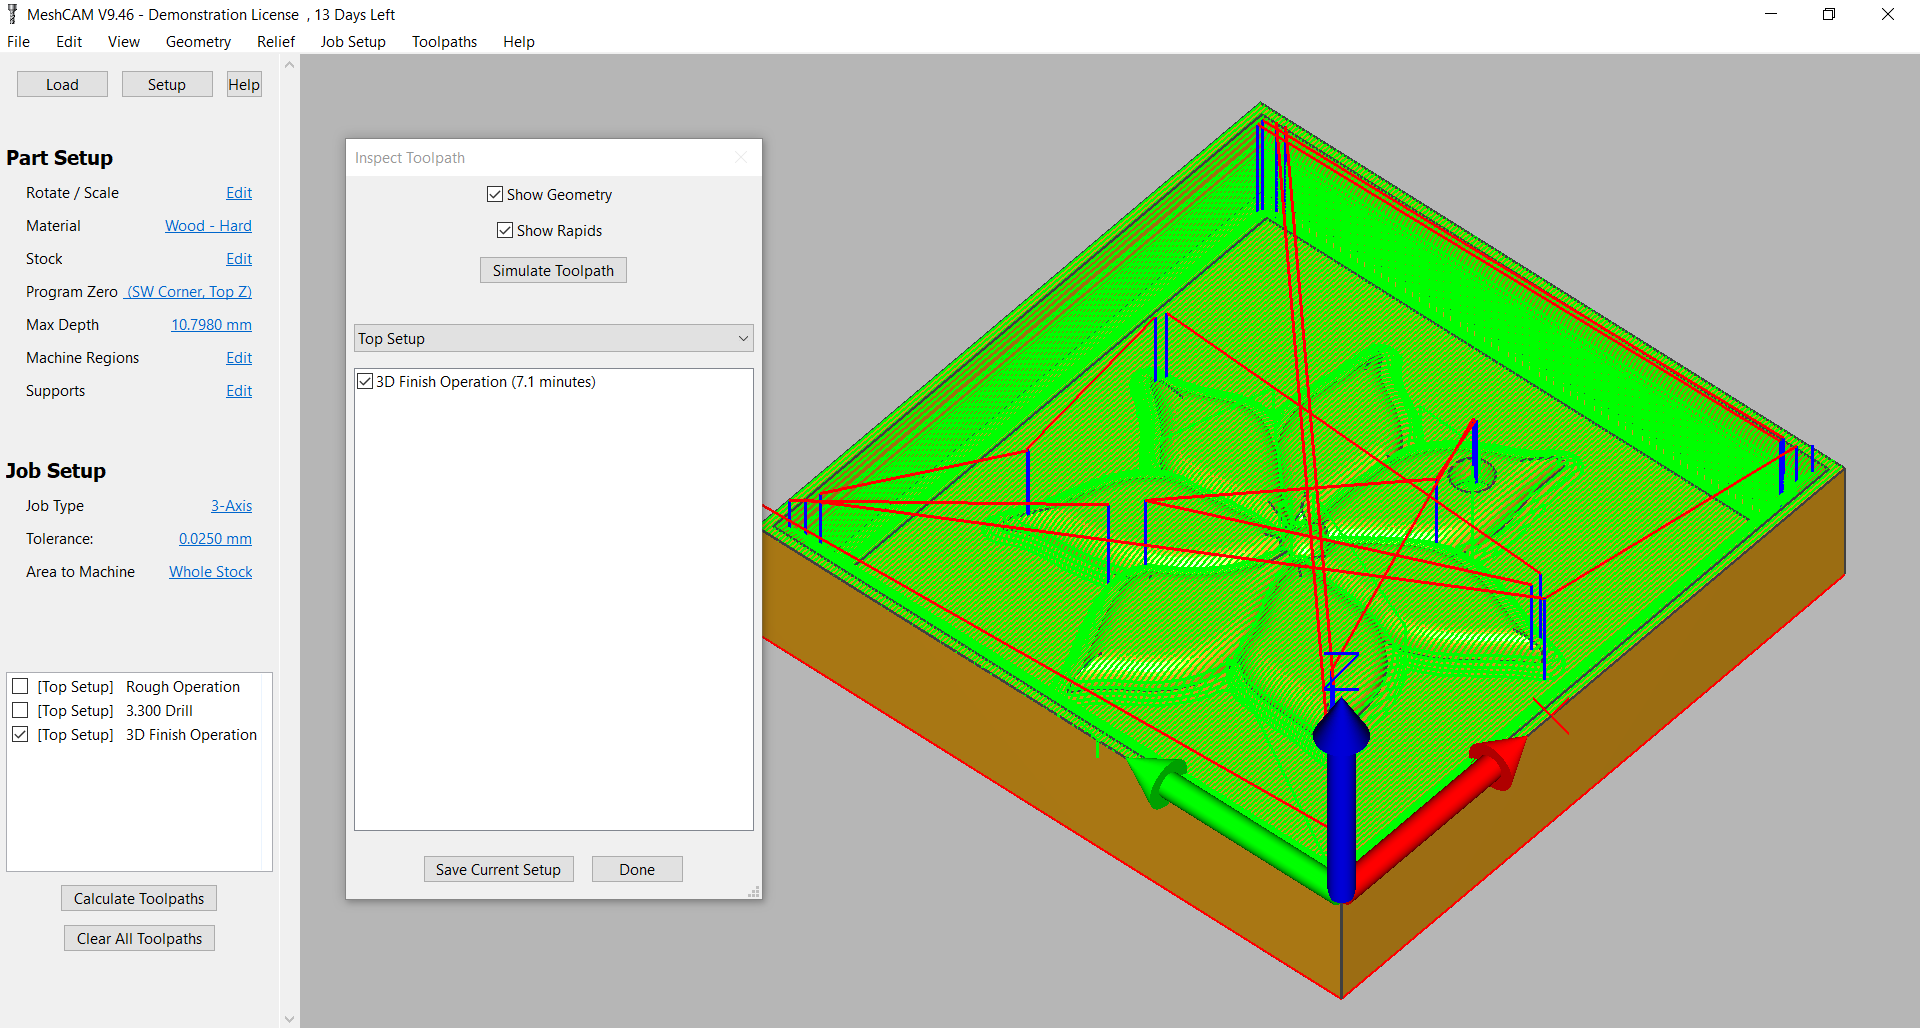
6- Here are the result of calculating toolpath of the finishing.
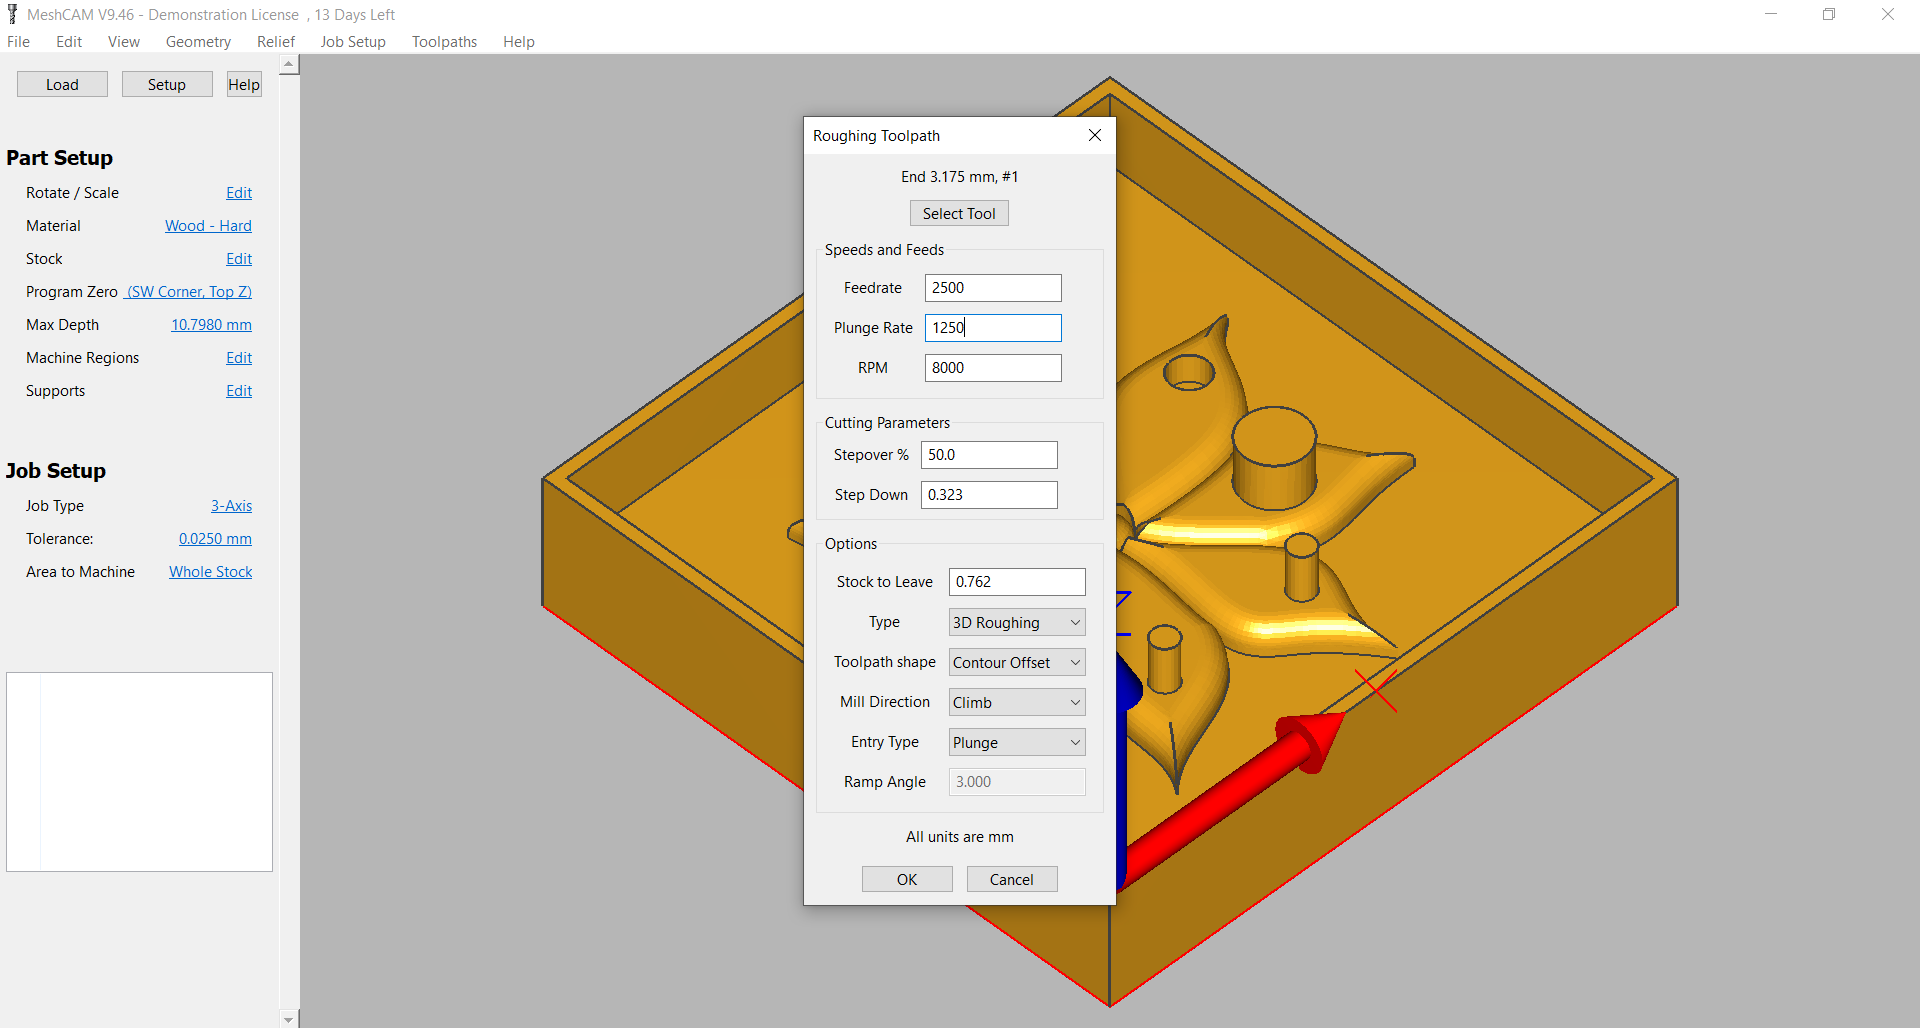
7- Same settings for the next half of mold but I wanted to change the plunge rate to 1250 so I did.

8- Calculating the roughing and drill. Let's be honest the timing showed wasn't even near the reality. So don't trust the software.
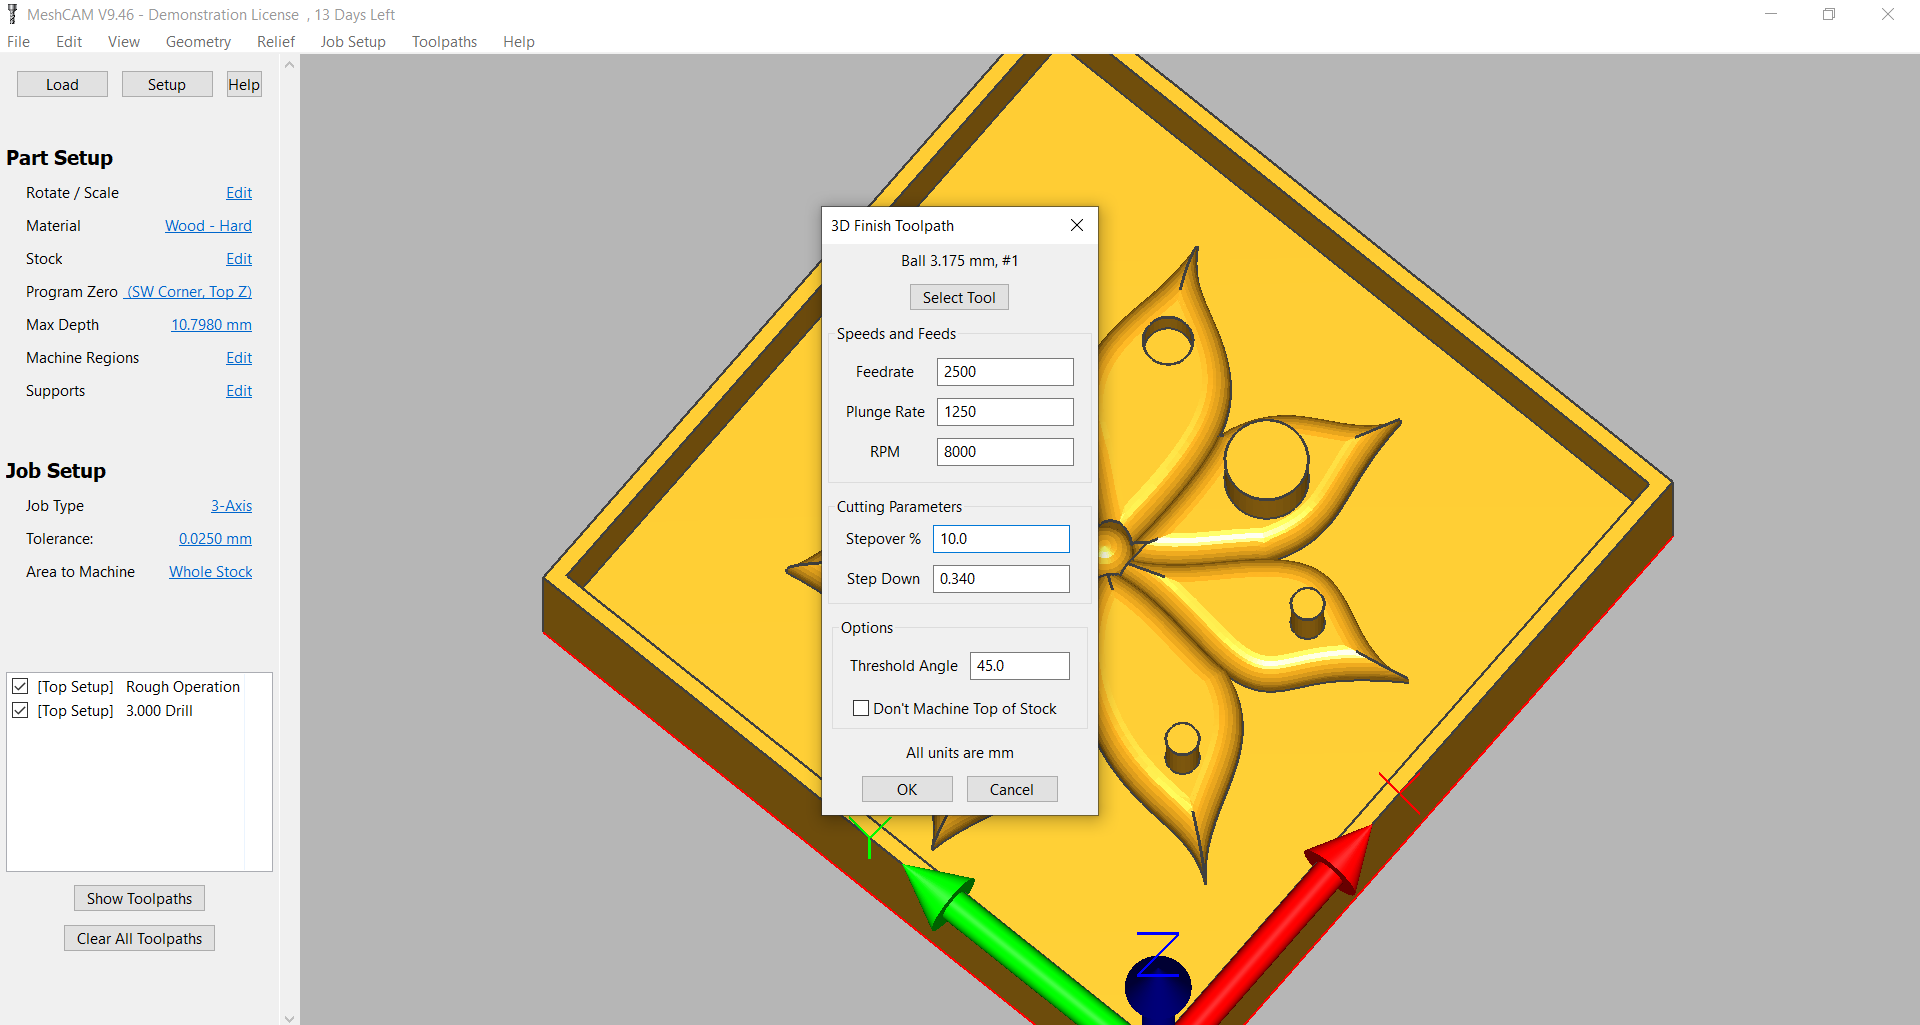
9- Same change of plunge rate in finishing. It didn't make a difference in the final result but I guess it was a little bit faster.
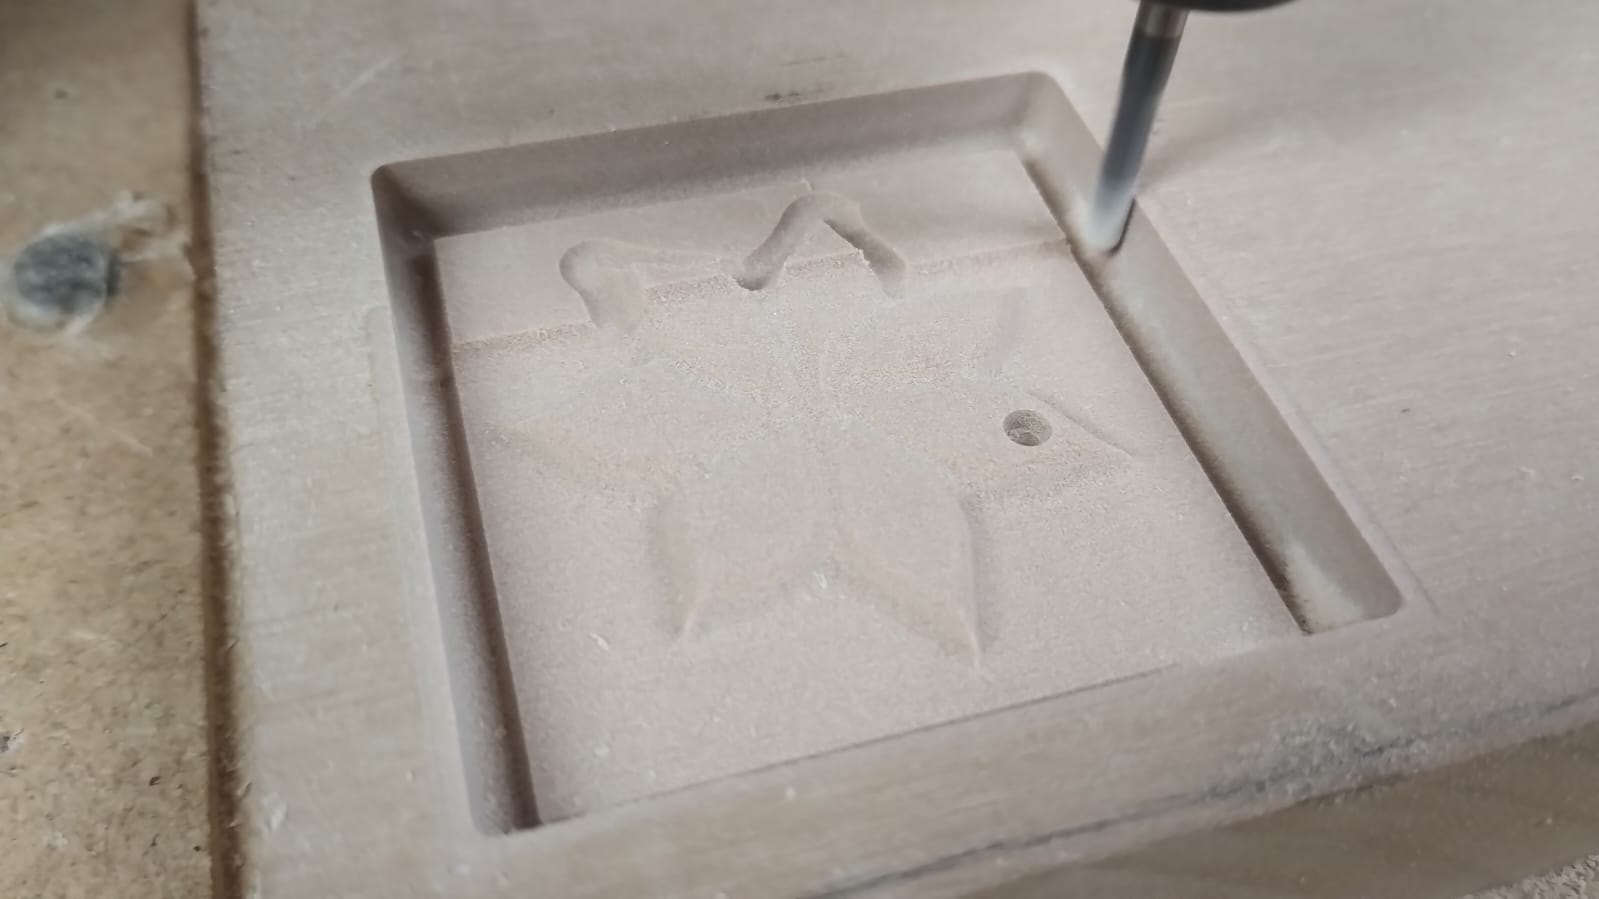
3.2 Milling:
To operate the china milling machine we use OpenBuilds. I held the chemical wood piece in place by adding a yellow tape on the back of it then adding double face on it and securing it on the machine.
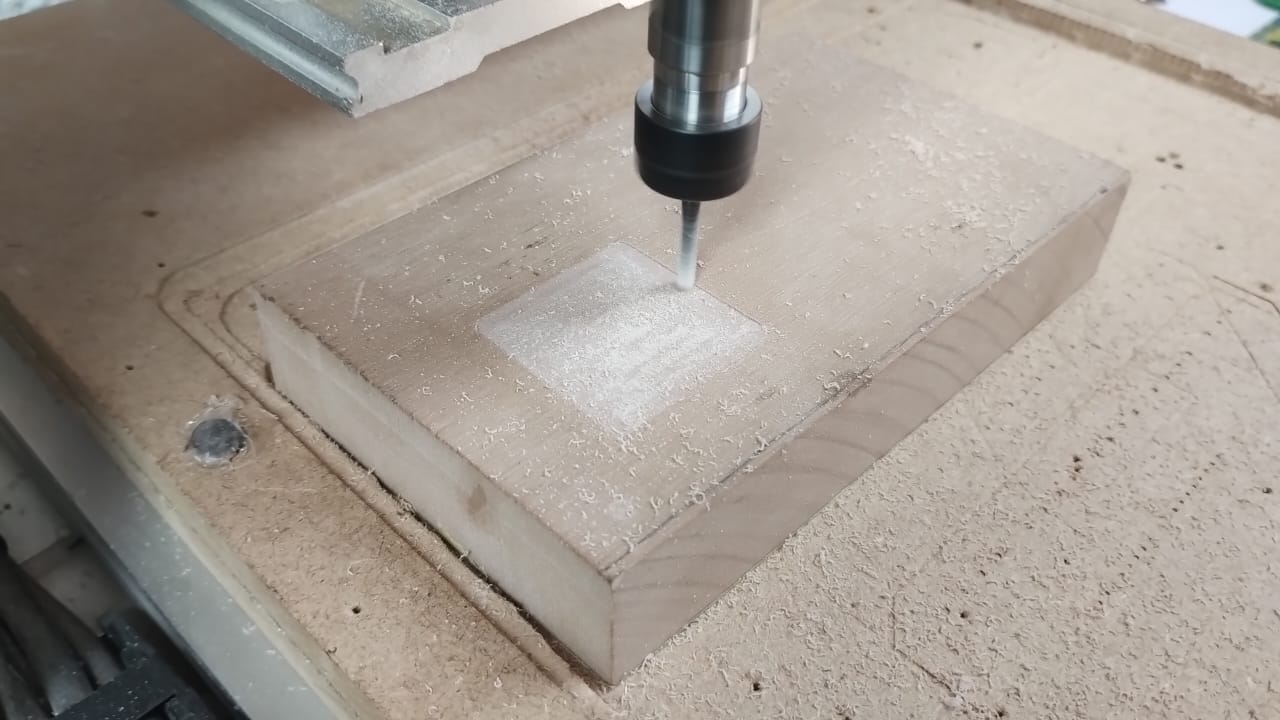
1- I used 1/8 endmill to make the roughing.
2- Roughing...
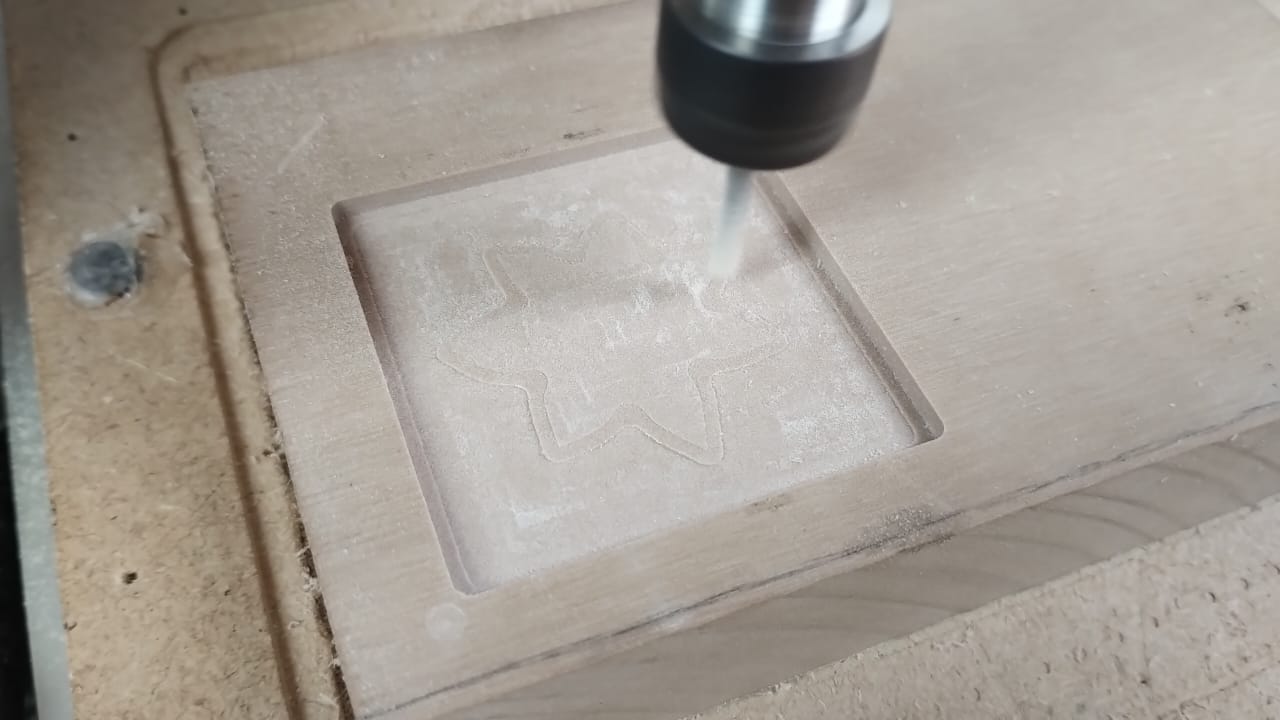
3- After roughing I changed the tool to ball nose endmill.
4- Using also 1/8 but Ball nose endmill, this is the finishing.
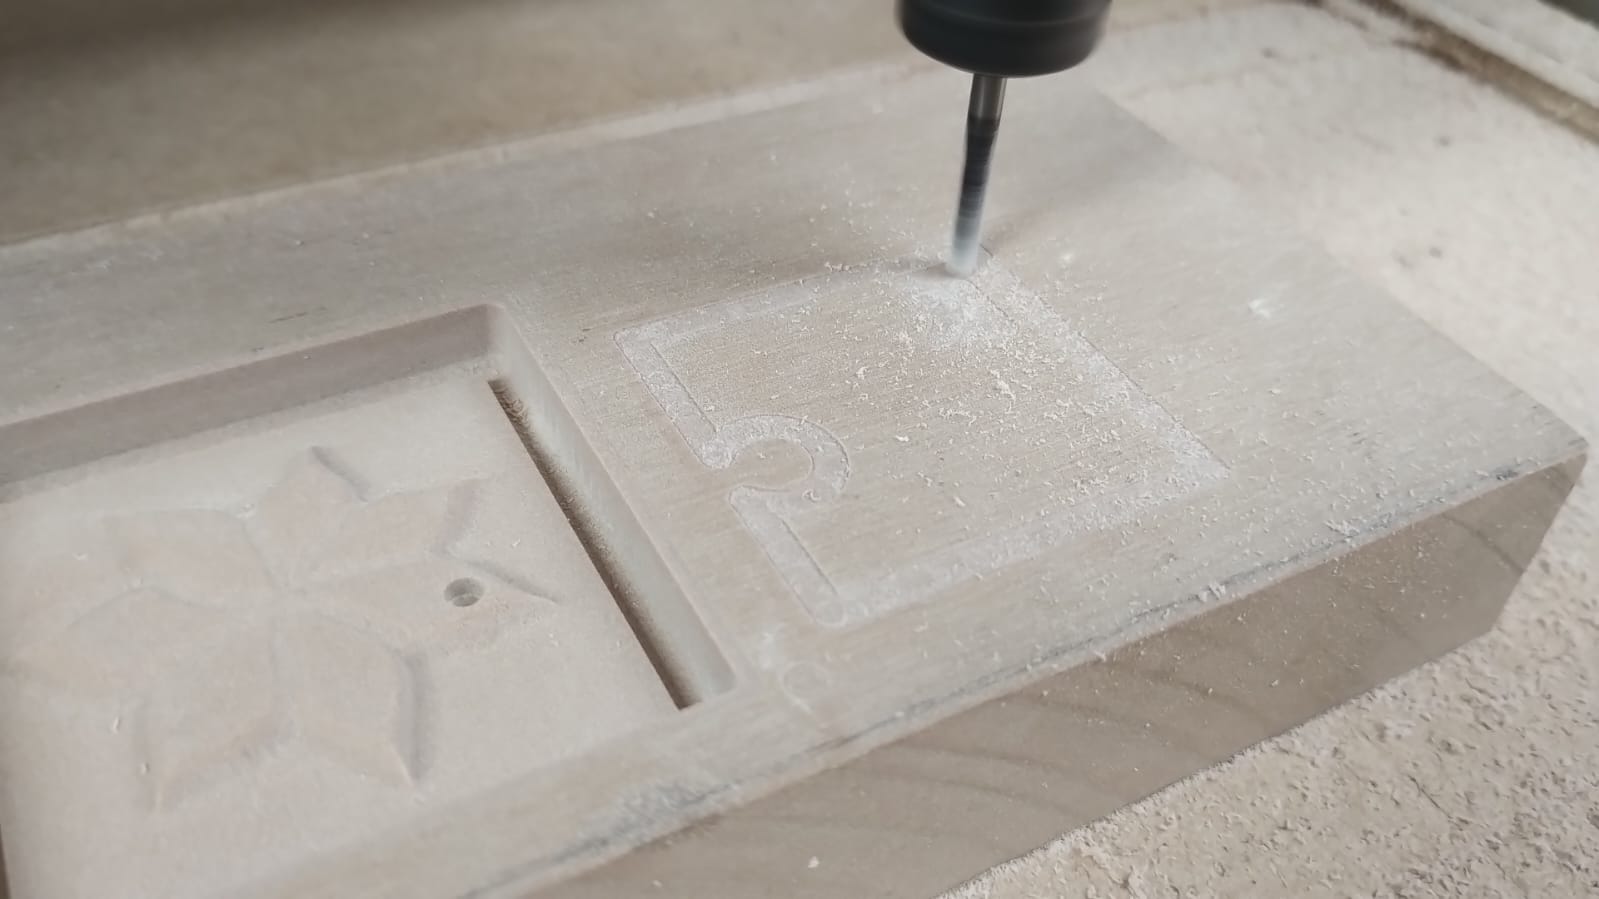
5- Repeating the process again for the next half.

6- Finished roughing the second half.
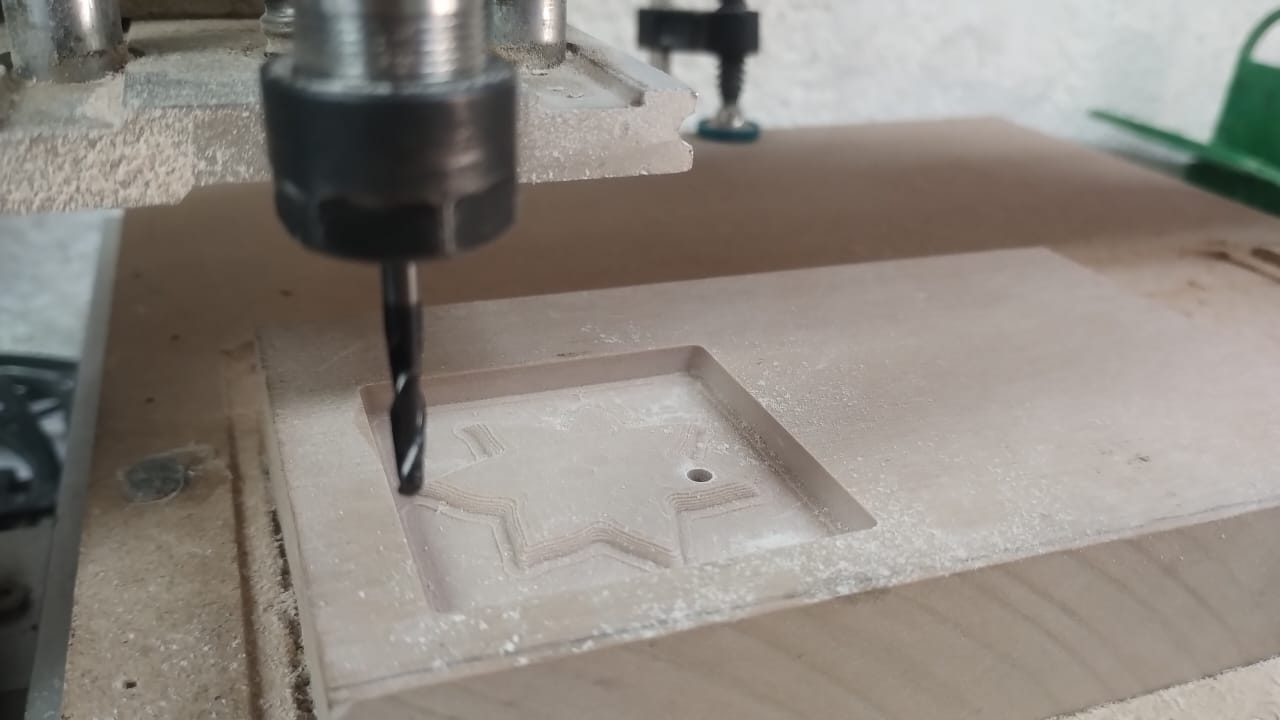
Drilling..
Finishing...
4. Silicon Mold and Polyster Cast
4.1 Silicon Mold:
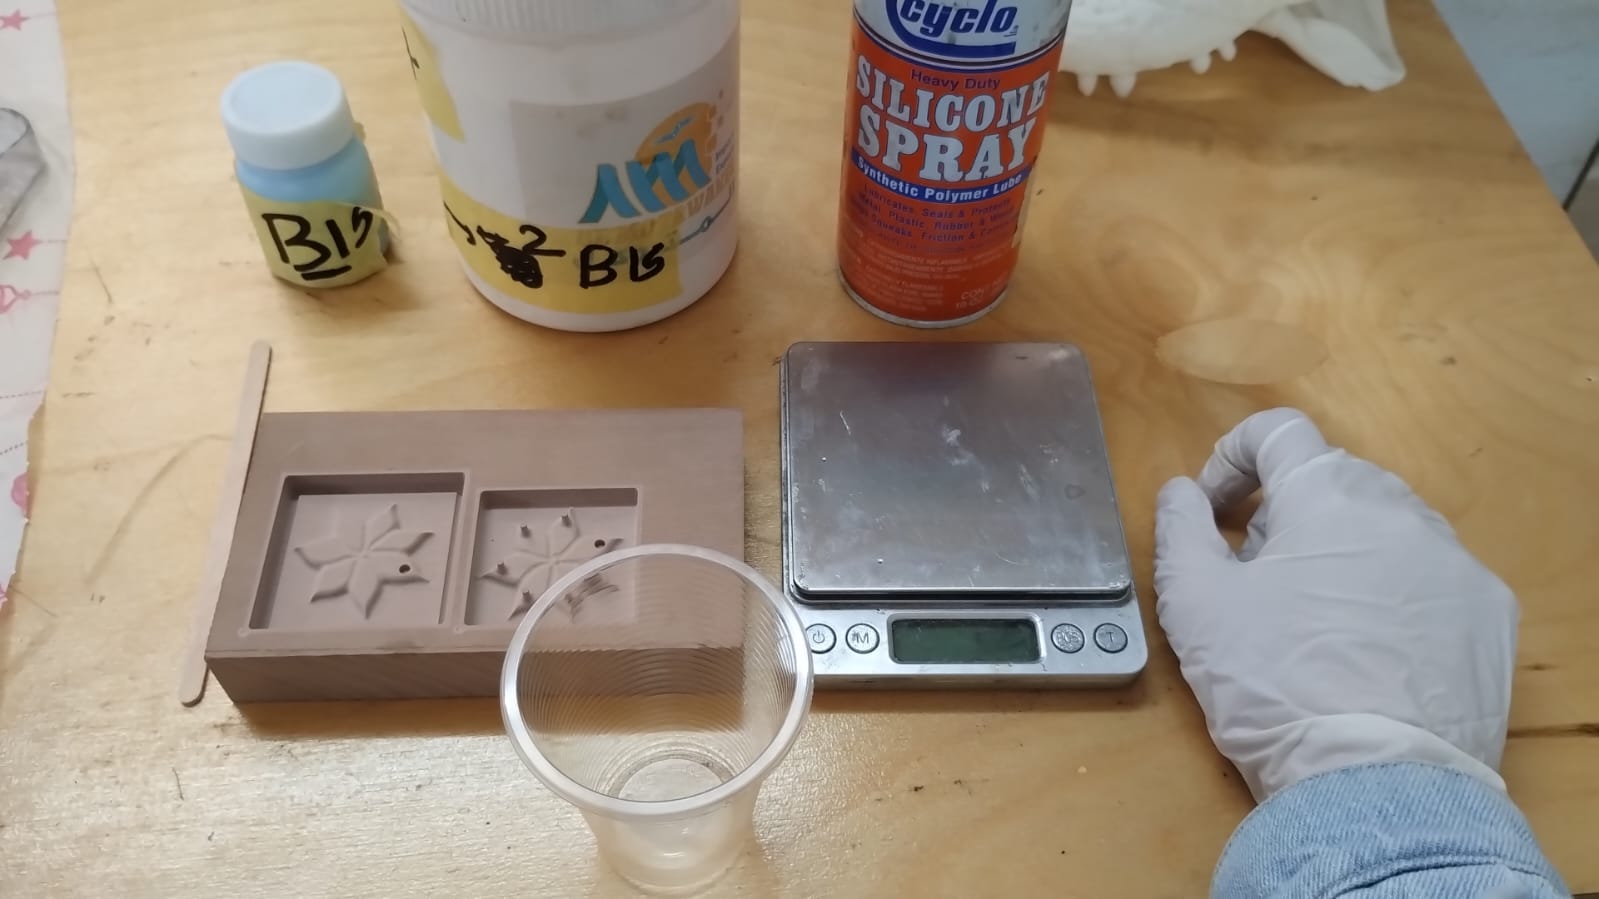
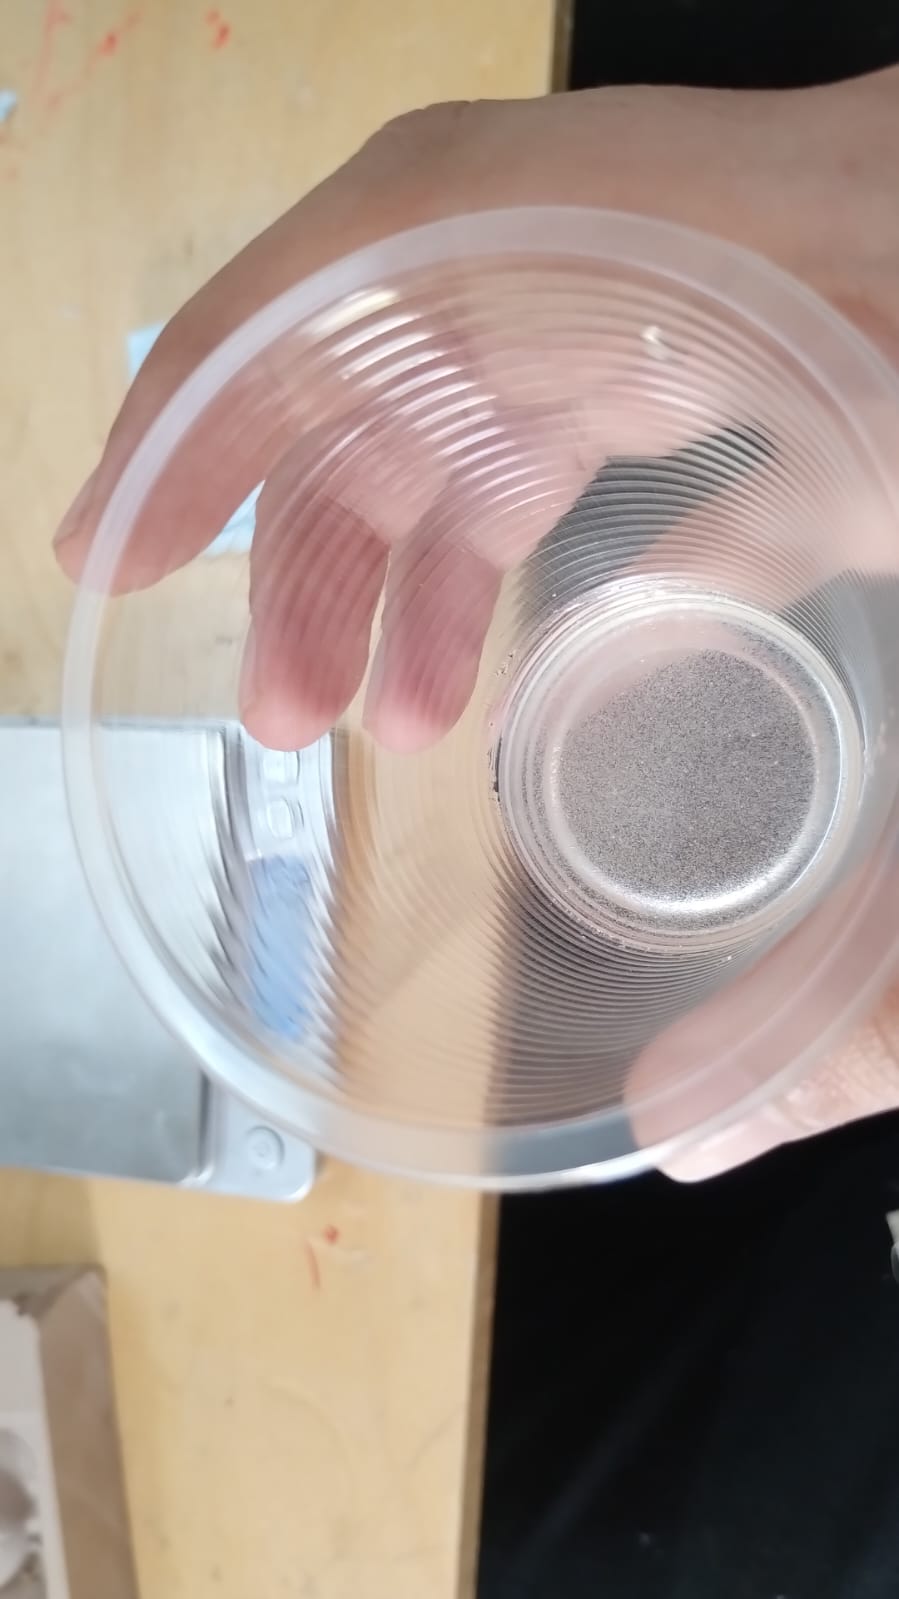
To start making the silicon mold we need the silicon, hardener, a silicone spray, our positive mold, a cup, something to stir with, sensitive scale, and surely don't forget the gloves and to be in a well ventilated place.
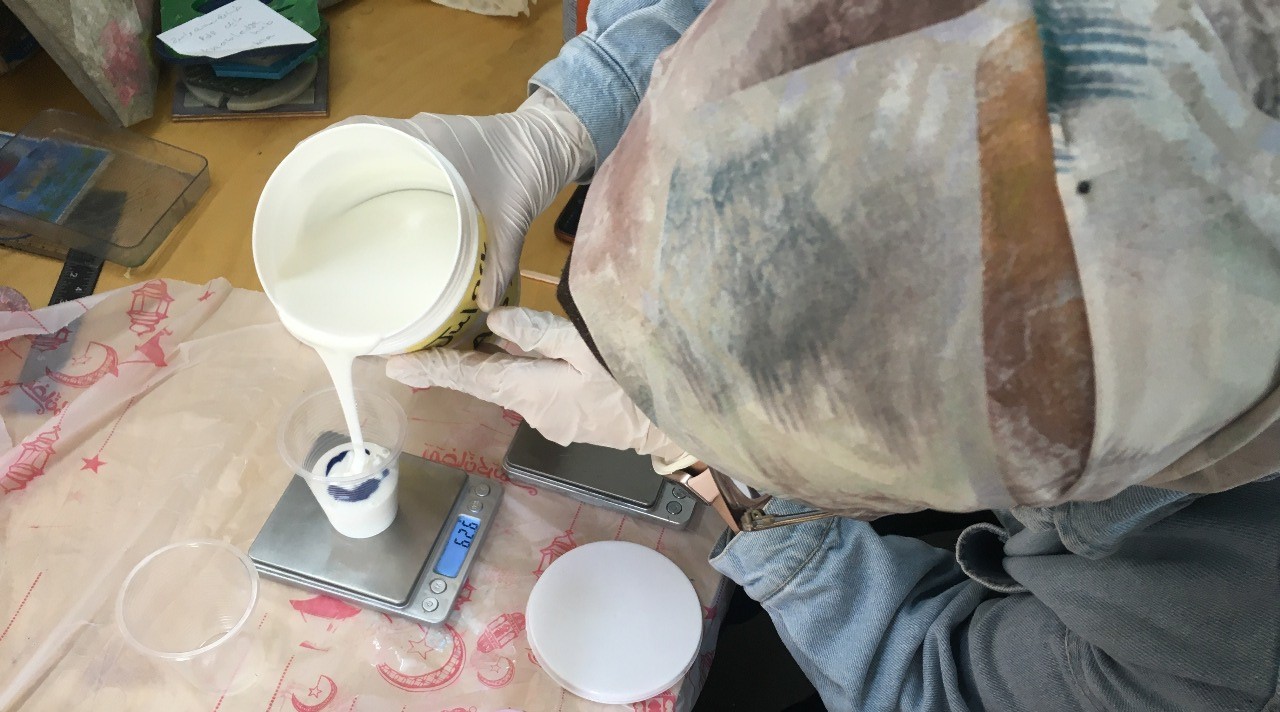
1- I used the silicon I tested in the group assignment. I mixed 1.5% of hardener with it and poured it in the mold.
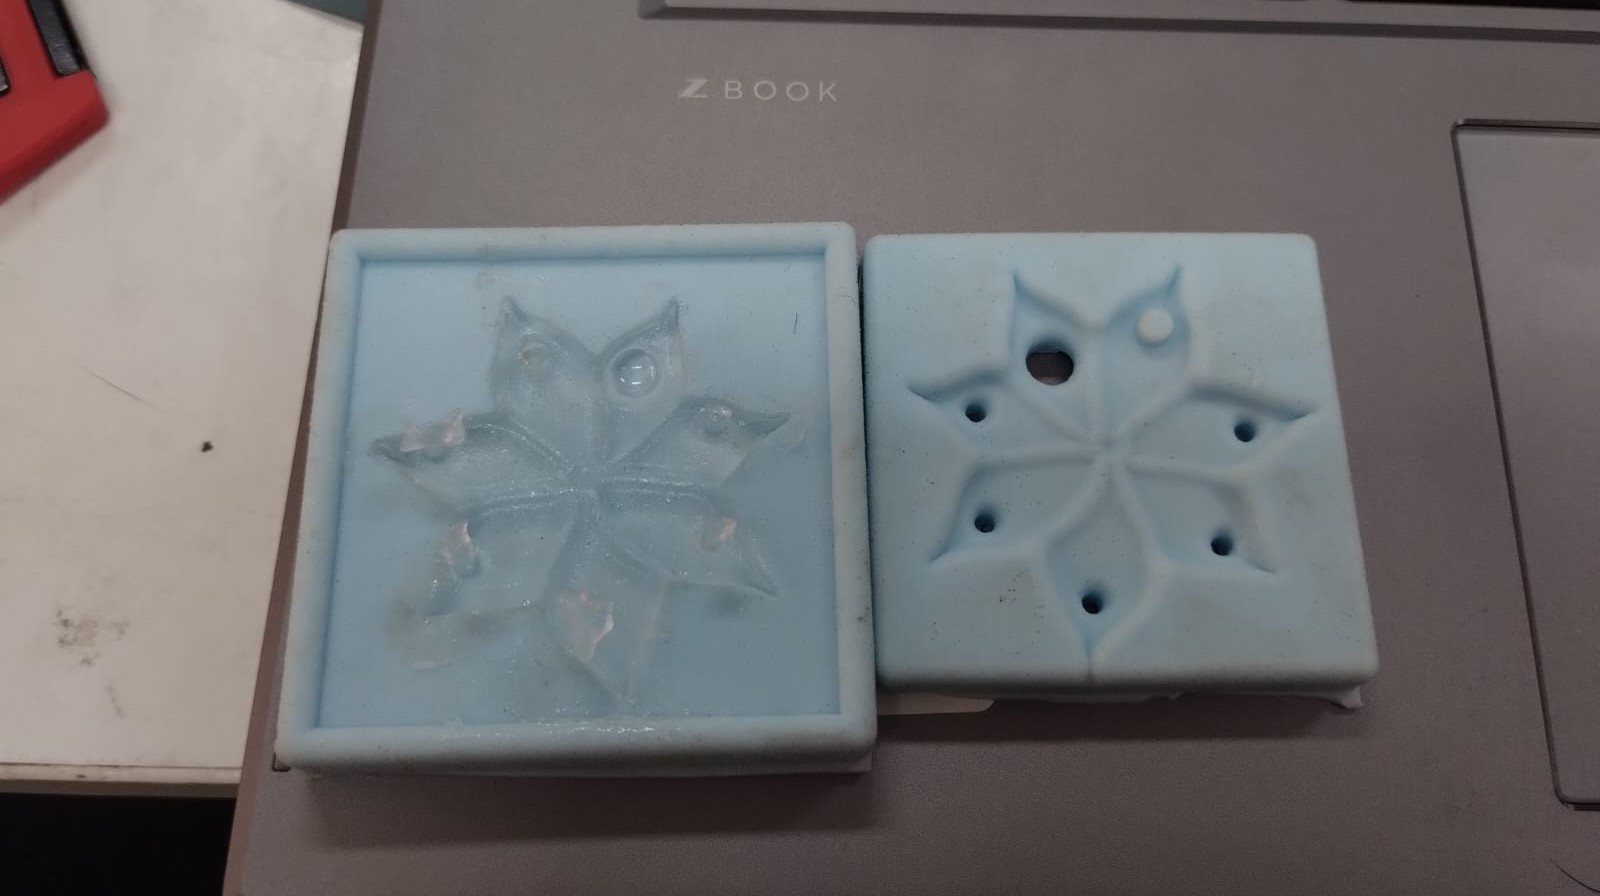
2- After waiting over night to the next day I took the silicon mold out. This was the second half I poured after spraying the spray as I forgot in the first half.
3- Thankfully, the half where I forgot to spray or use any separator was also taken off easily.
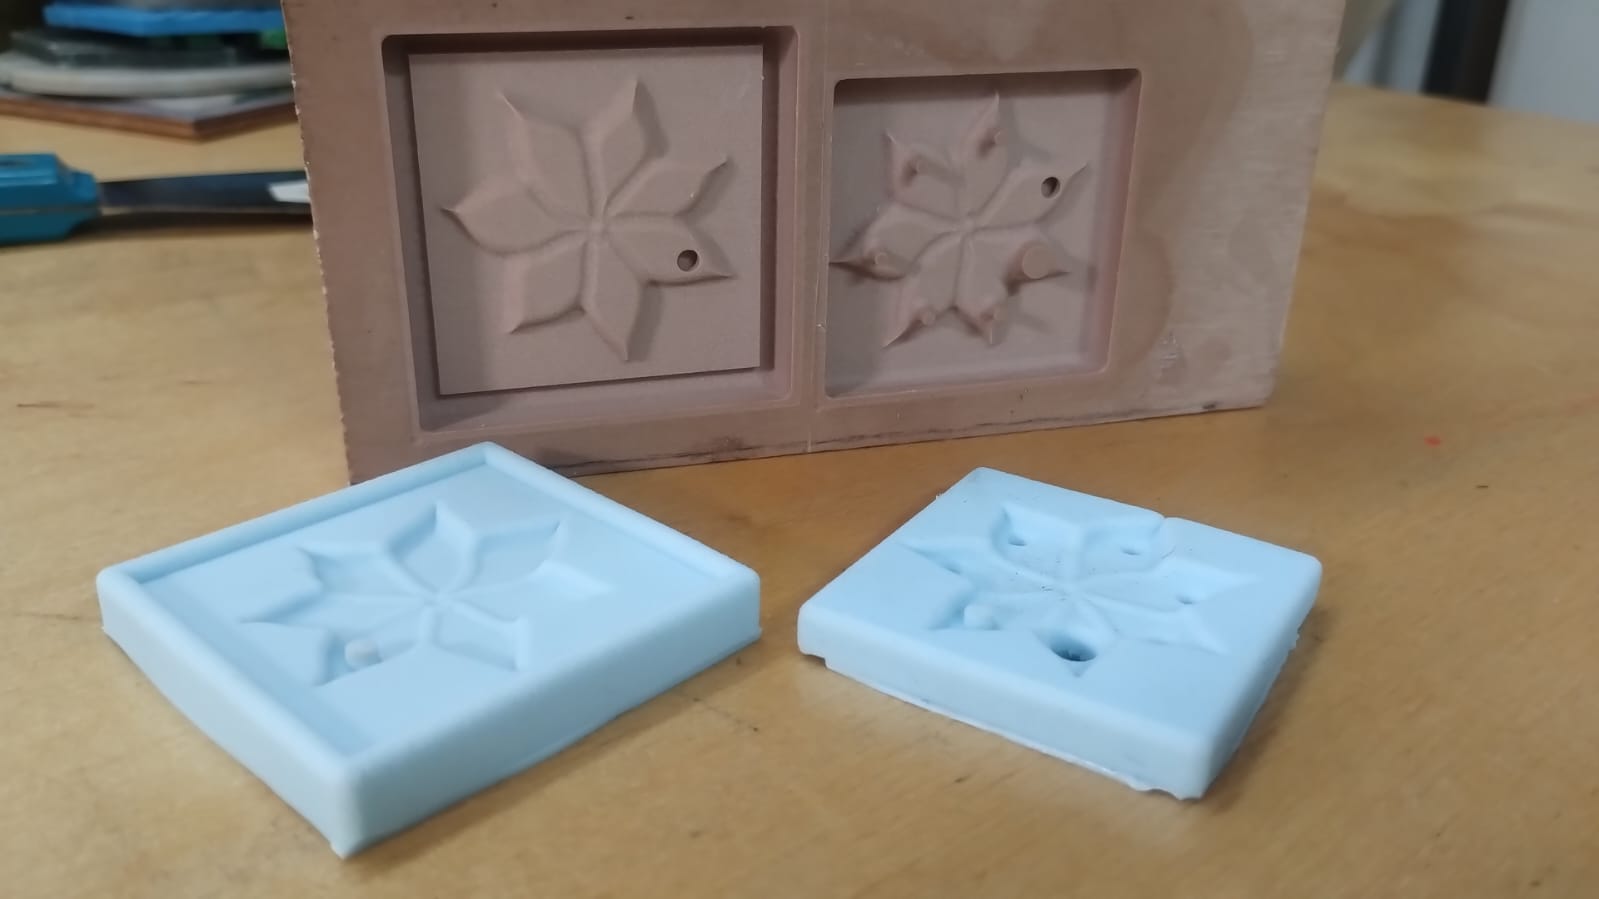
To be honest the mold had lots of small bubbles though I stirred and tried to vibrate the mixture but it was good for me as my first trial.
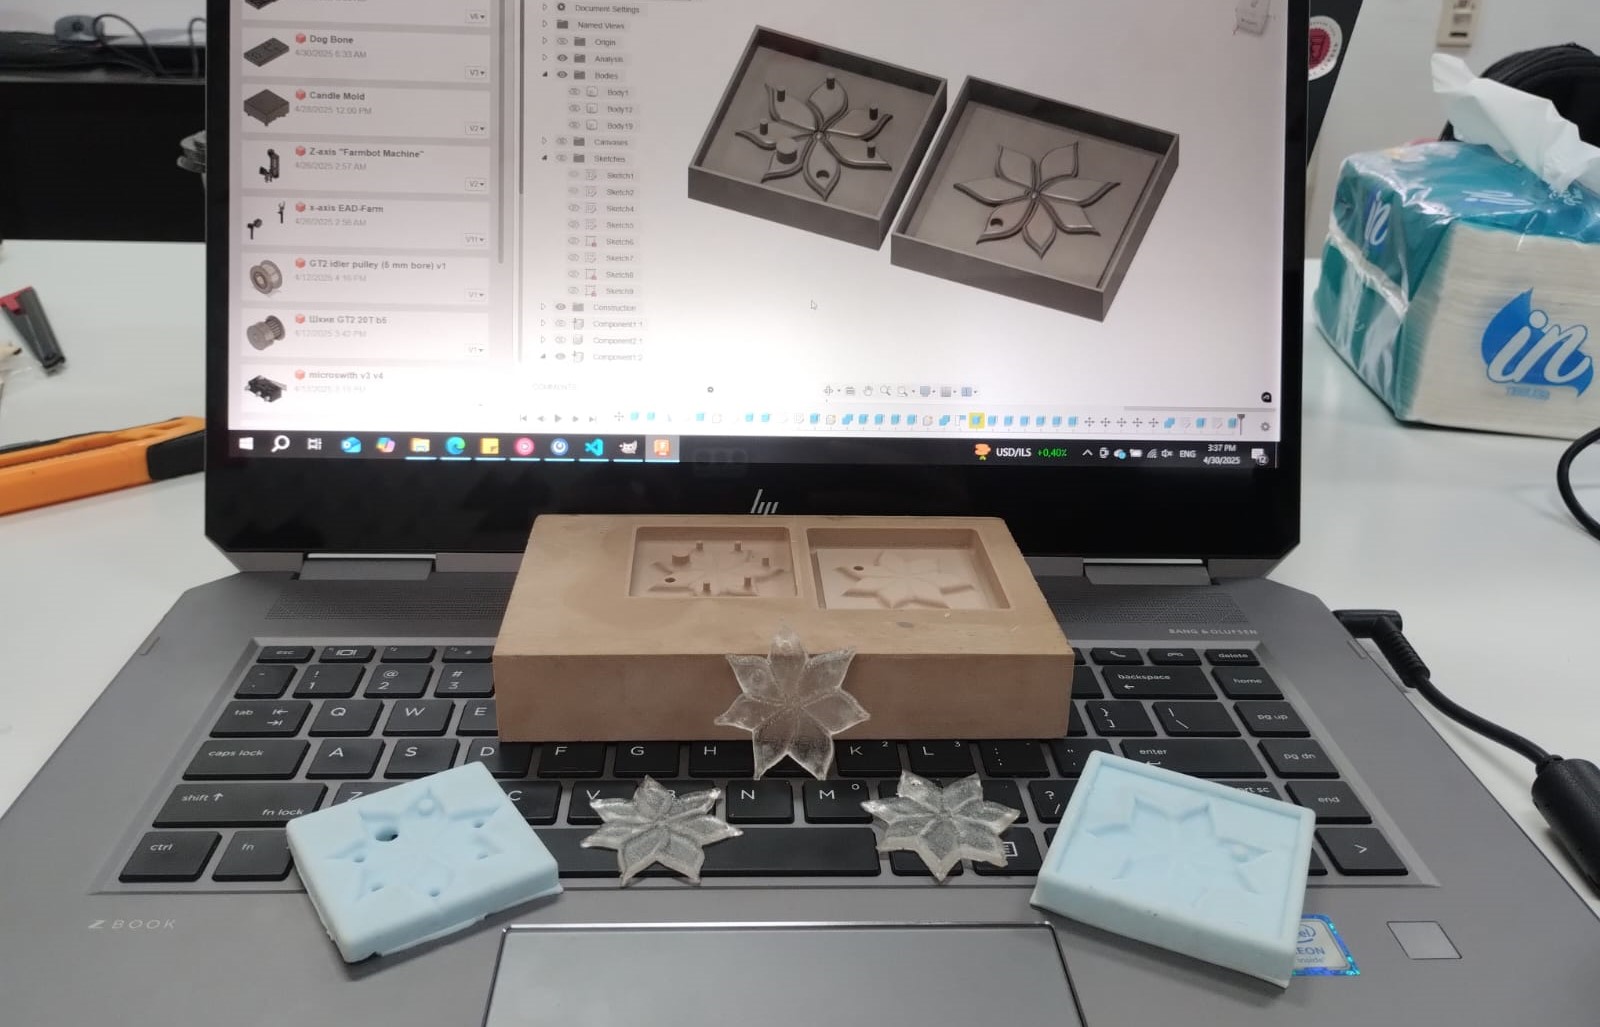
4.2 Polyster Cast:
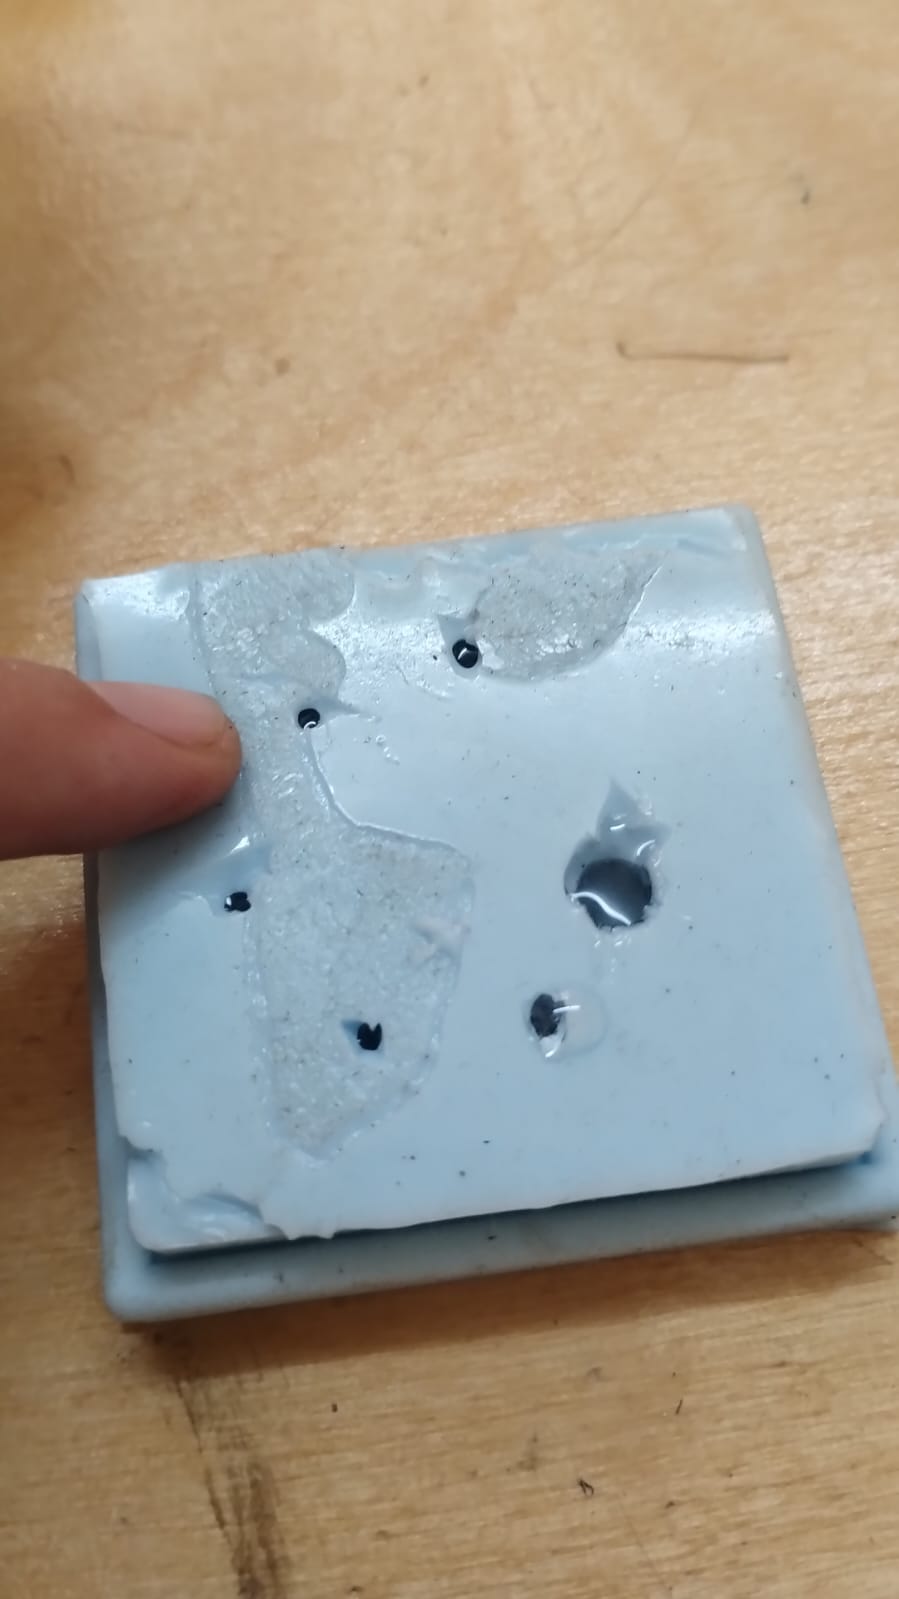
To cast the actual object I went through many attempts and used the mold as single mold and double mold. So my first one I made it using the wrong ratio and was in hurry so I took it off early and also poured more than I should, I tried to save the sitiuation but it was a total mess.

On my second attempt I used the right ratio which is 2.8% and managed to pour the right amount but sadly it had bubbles in it. On my third attempt I stirred slowly with caution to prevent having any bubbles.
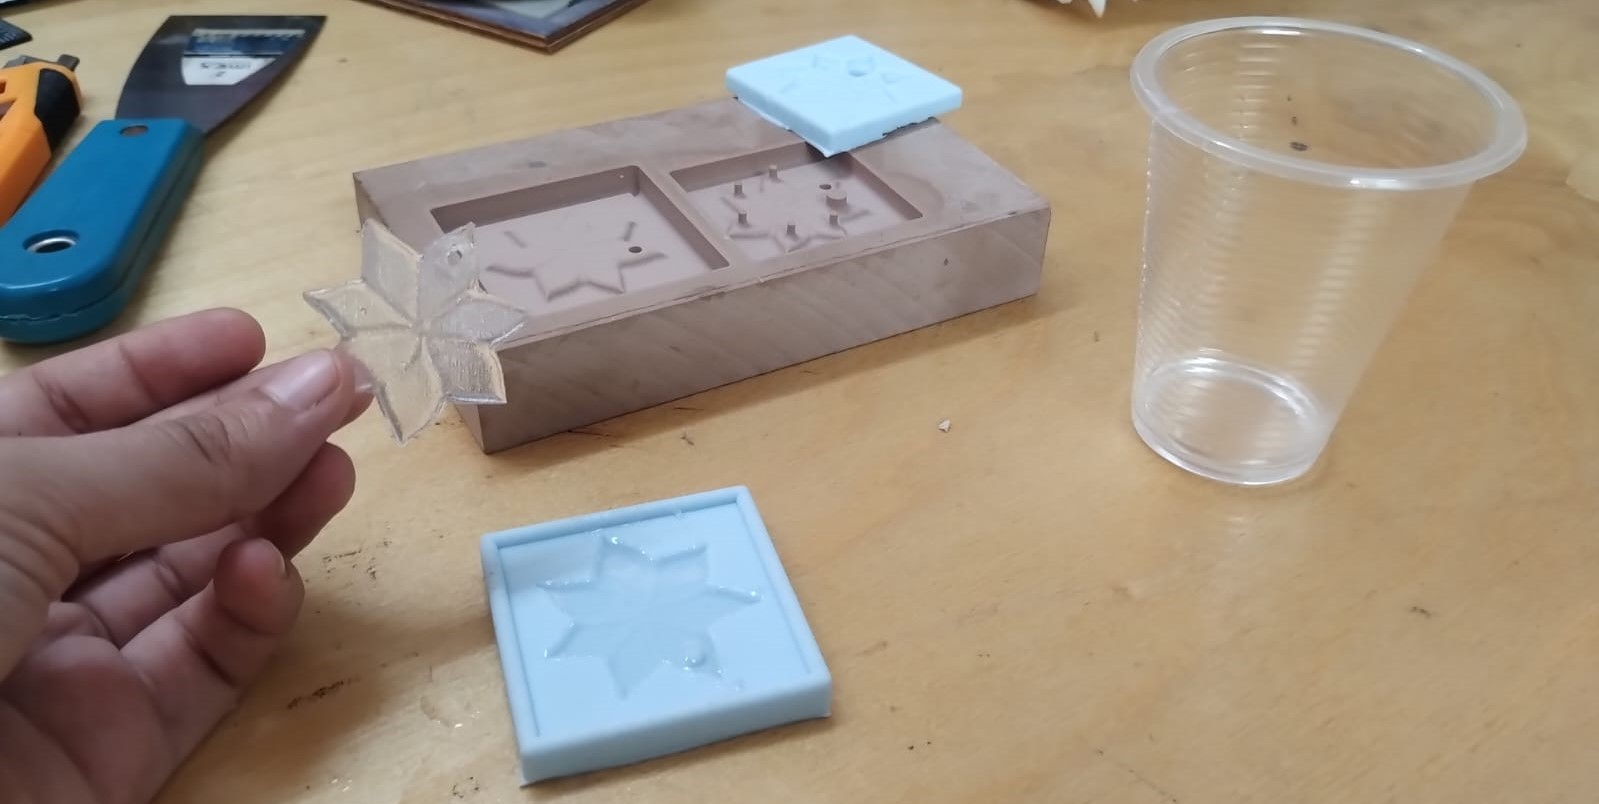
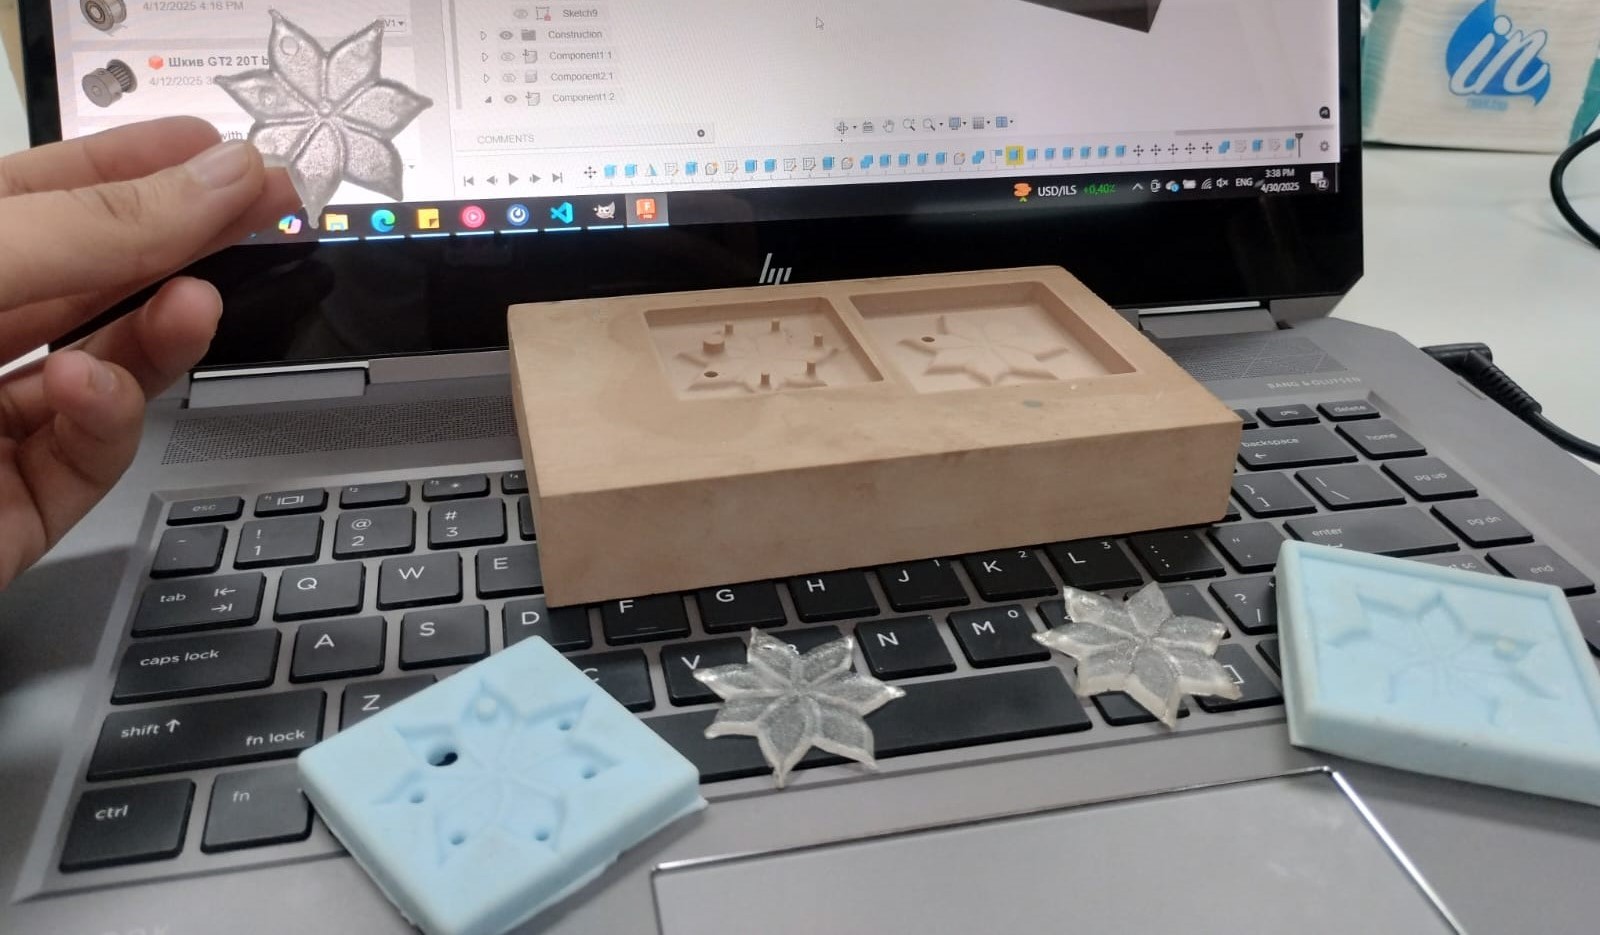
1- On this third attempt I wanted to try it as double mold to check if it works. And yaaay I didn't get any bubbles.
2- It did actually work as a double mold and the polyster came out from all vents.
3- I just put something on it to hold it in place and waited about an hour for it to cure.
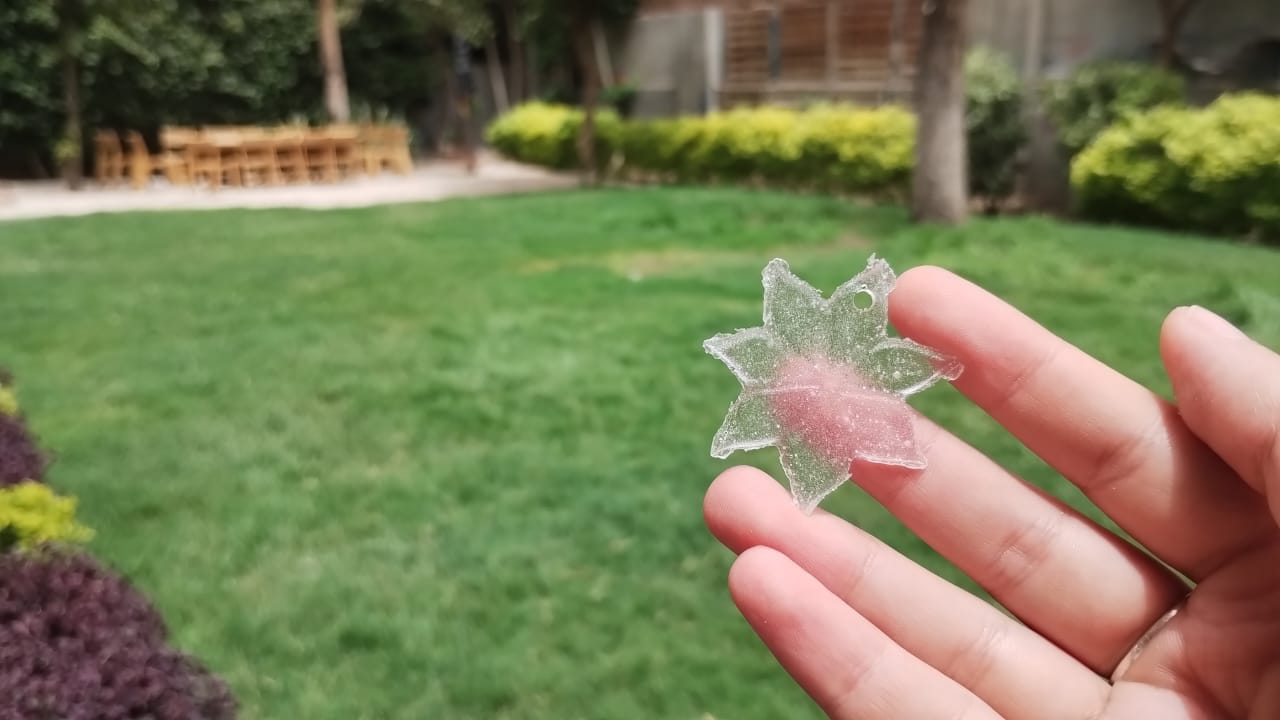
4- Here's the first look of it after opening the mold.
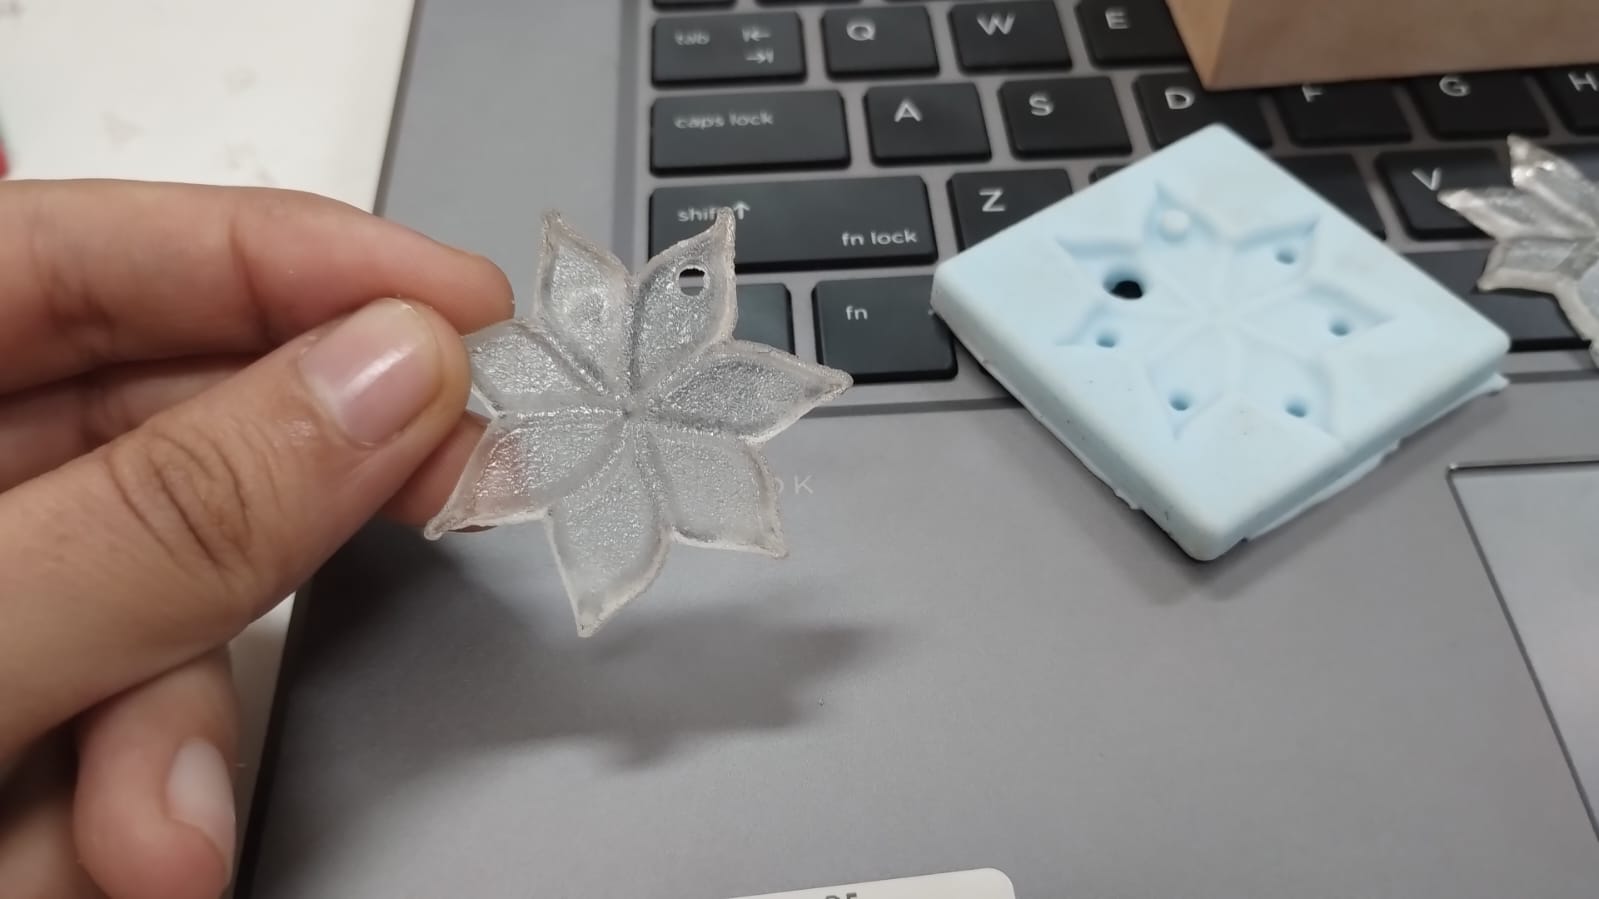
5- I removed the vents and bubbles from the silicon mold using the cutter.
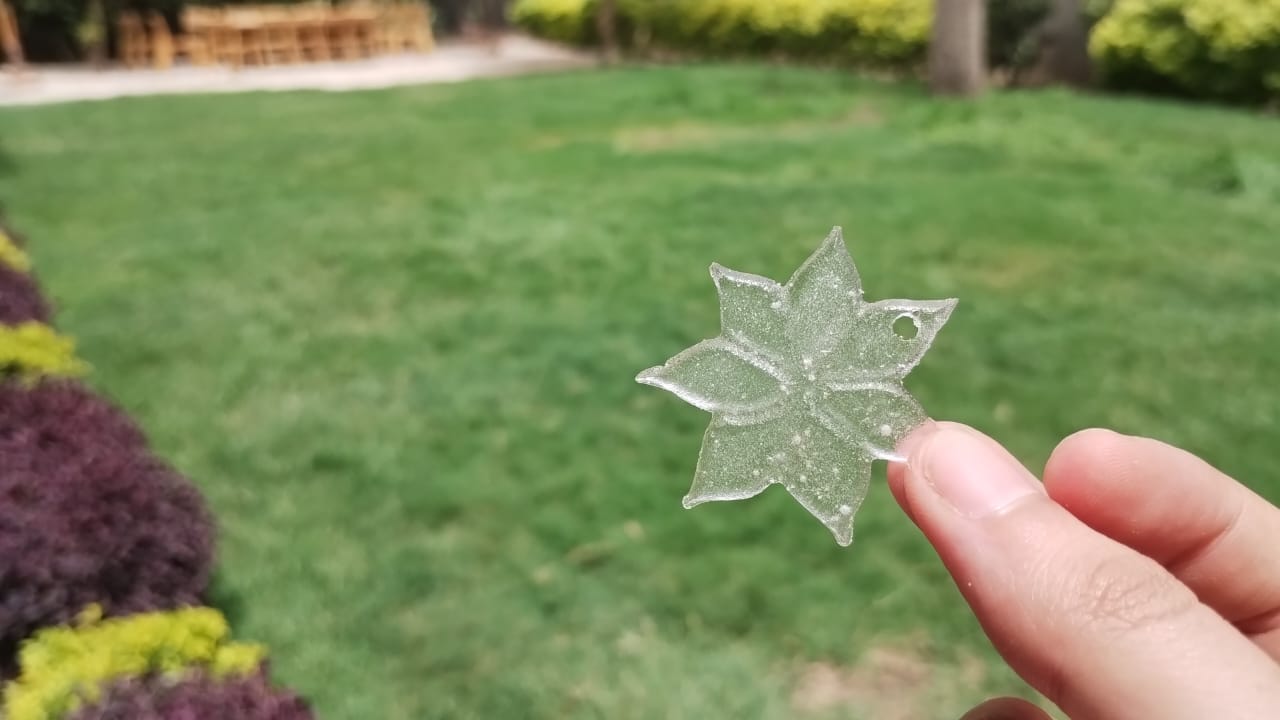
6- Voilaaa. I guess I could make more post processing later to make it look more shiny and remove the left over from the vents and pouring hole.