
Interface and Application Programming
Here's a summary about what you'll see next:
- 1) Group Assignment
- 2) Individual Assignment:
-
- Intro to MIT App Inventor
- User Interface
- Programming
- 3) Original Files
1) Group Assignment:
In the group assignment we needed to compare as many tool options as possible. So we went through some cool stuff like Scratch 4 Arduino as we made a lion sticker turns on a led connected to the arduino when we click on the lion. We could've even made more cool stuff. We also painted two circles with green and red as a simple GUI to turn on and off the built-in LED in the Arduino Uno. So let's see how to do this.
1- After installing the firmware and connecting the arduino with the COM Port we started painting new sprite.
2- Then we click on each sprite and use the code blocks to code it. That was the code for the green circle that if we press on it, it broadcasts CmdON.
3- This was the code for the red circle and it's the same as the green but when we press it, it broadcasts CmdOFF.
4- Then we programmed the arduino and made a variable named isCmdOn to be able to check it and it changes based on the received broadcated message.
Here is the result.
As they are introducing S4A in their site, I agree that they made programming way easier and simple by using the code blocks. It's a perfect option for anyone at almost any age to start with in programming.
We've also tried Processing. We did it with the help of ChatGPT to create GUI elements using a library called controlP5. I guess the best thing about these softwares that they have lots of tutorials and documents explaining how to use them and are free to use.
As for me, I wanted to make a nice looking interface for my application. So, I wanted to see the possibilities of making the interface on figma for example then coding it and making it communicate with my board. In this short journey I went through Blokdots which can connect figma with arduino but the figma option was pro and I'm not using arduino in my final project but I tried it anyway.
Then Saeed suggested me to try Make.com that also has the possibility of connecting figma to my board but I found it hard to use and didn't manage to work with it. So it ended up going to MIT App Inventor which will come next in the individual assignment and I guess I can make nice looking interface using it at the end.
2) Individual Assignment:
1. Intro to MIT App Inventor
This online tool provides us with the ability to create the interface of an app, program it, and make it communicate with your board using different communication protocols. In my case I'm using BLE to communicate between the board and the app. At first I wasn't very familiar with how all of this are done so I needed to go through tutorials.. many of them actually.
I started with App Inventor Tutorials. It helped me get familiar with the interface and the tools and how to getting started with it.
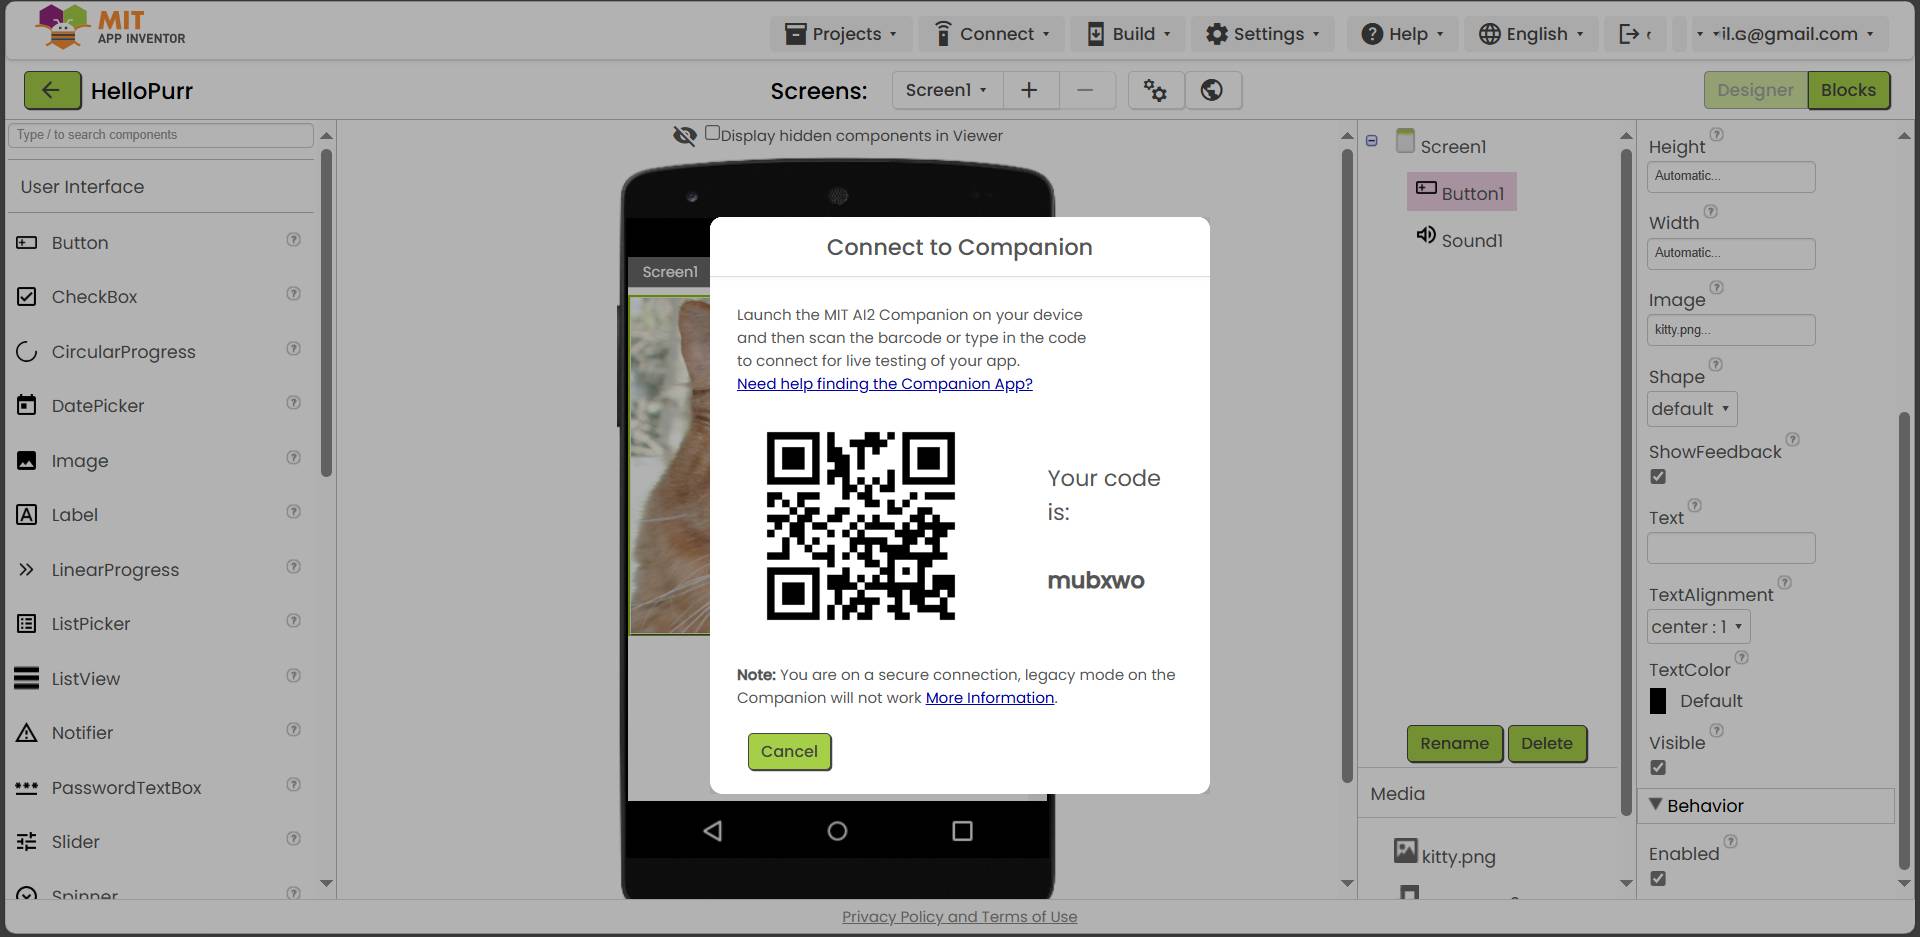
To start exploring I chose Hello Purr and downloaded the companion app on my phone then connected it using the QR Code.
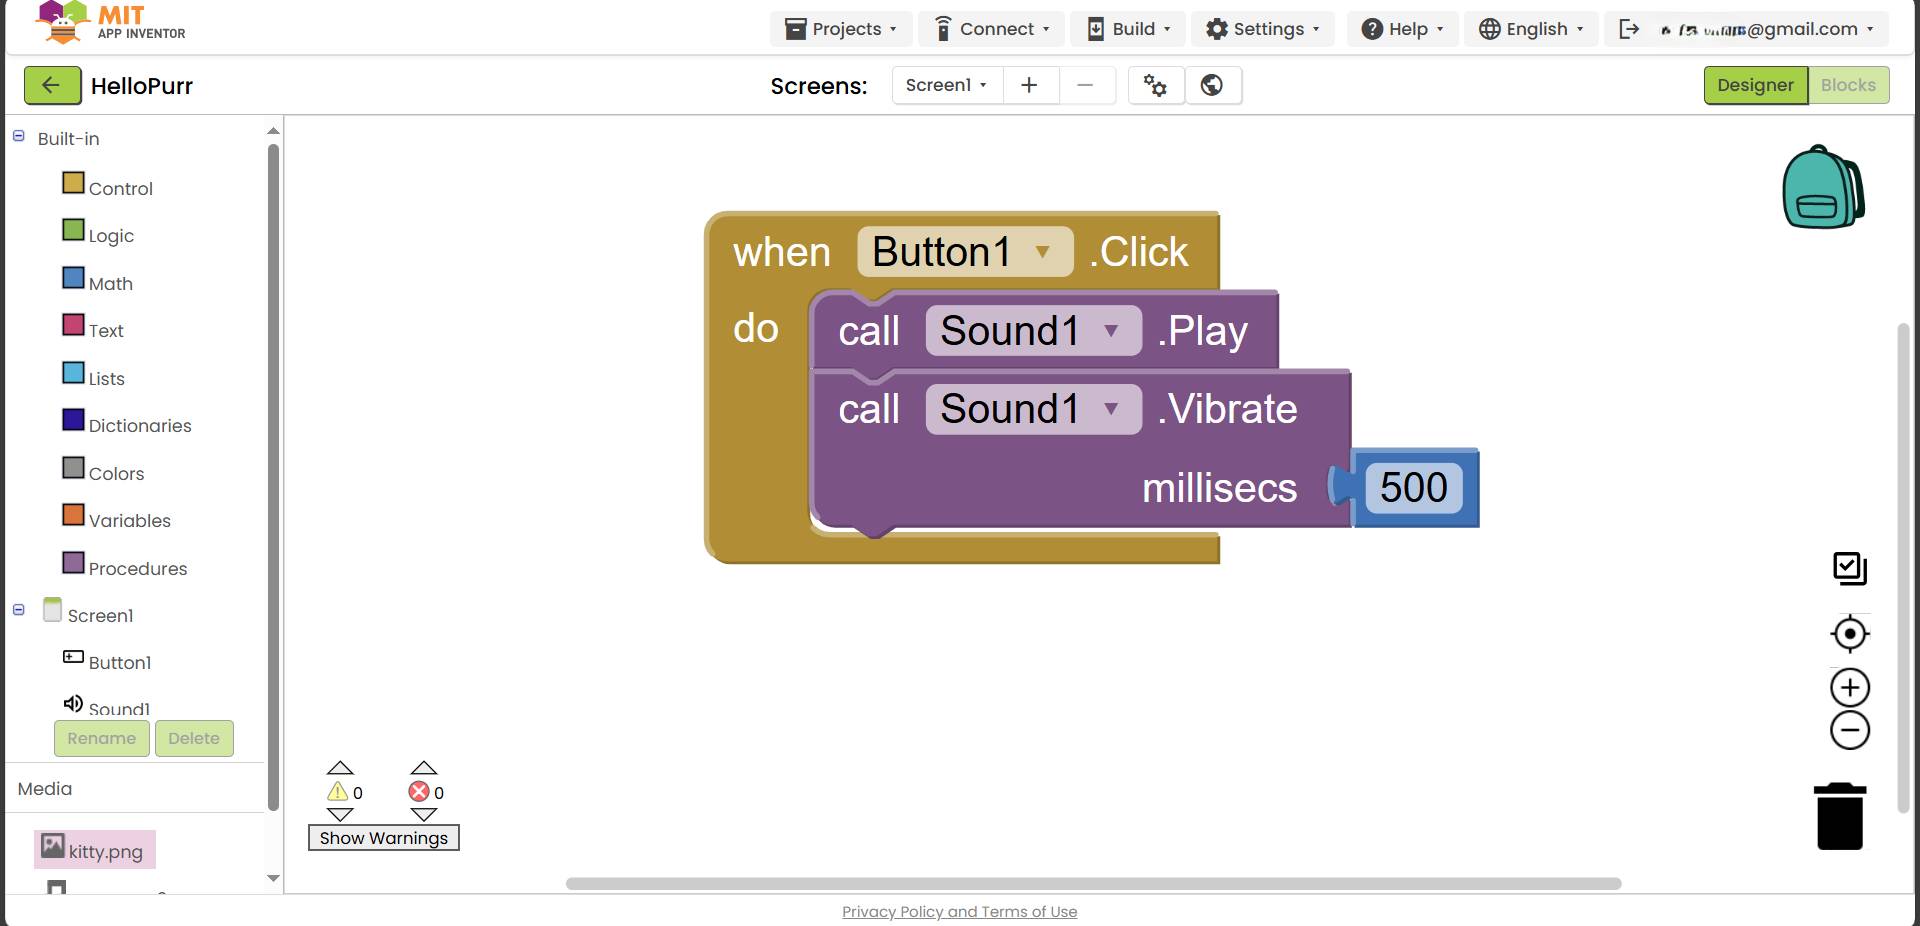
The code block was so simple as it said when I click on the button (cat image), it mewos. It actually did.
Now it's time for me to make my own app, so we start in the design section to make the interface, then we go to the blocks section to program the interface we made. Let's get started...
2. User Interface
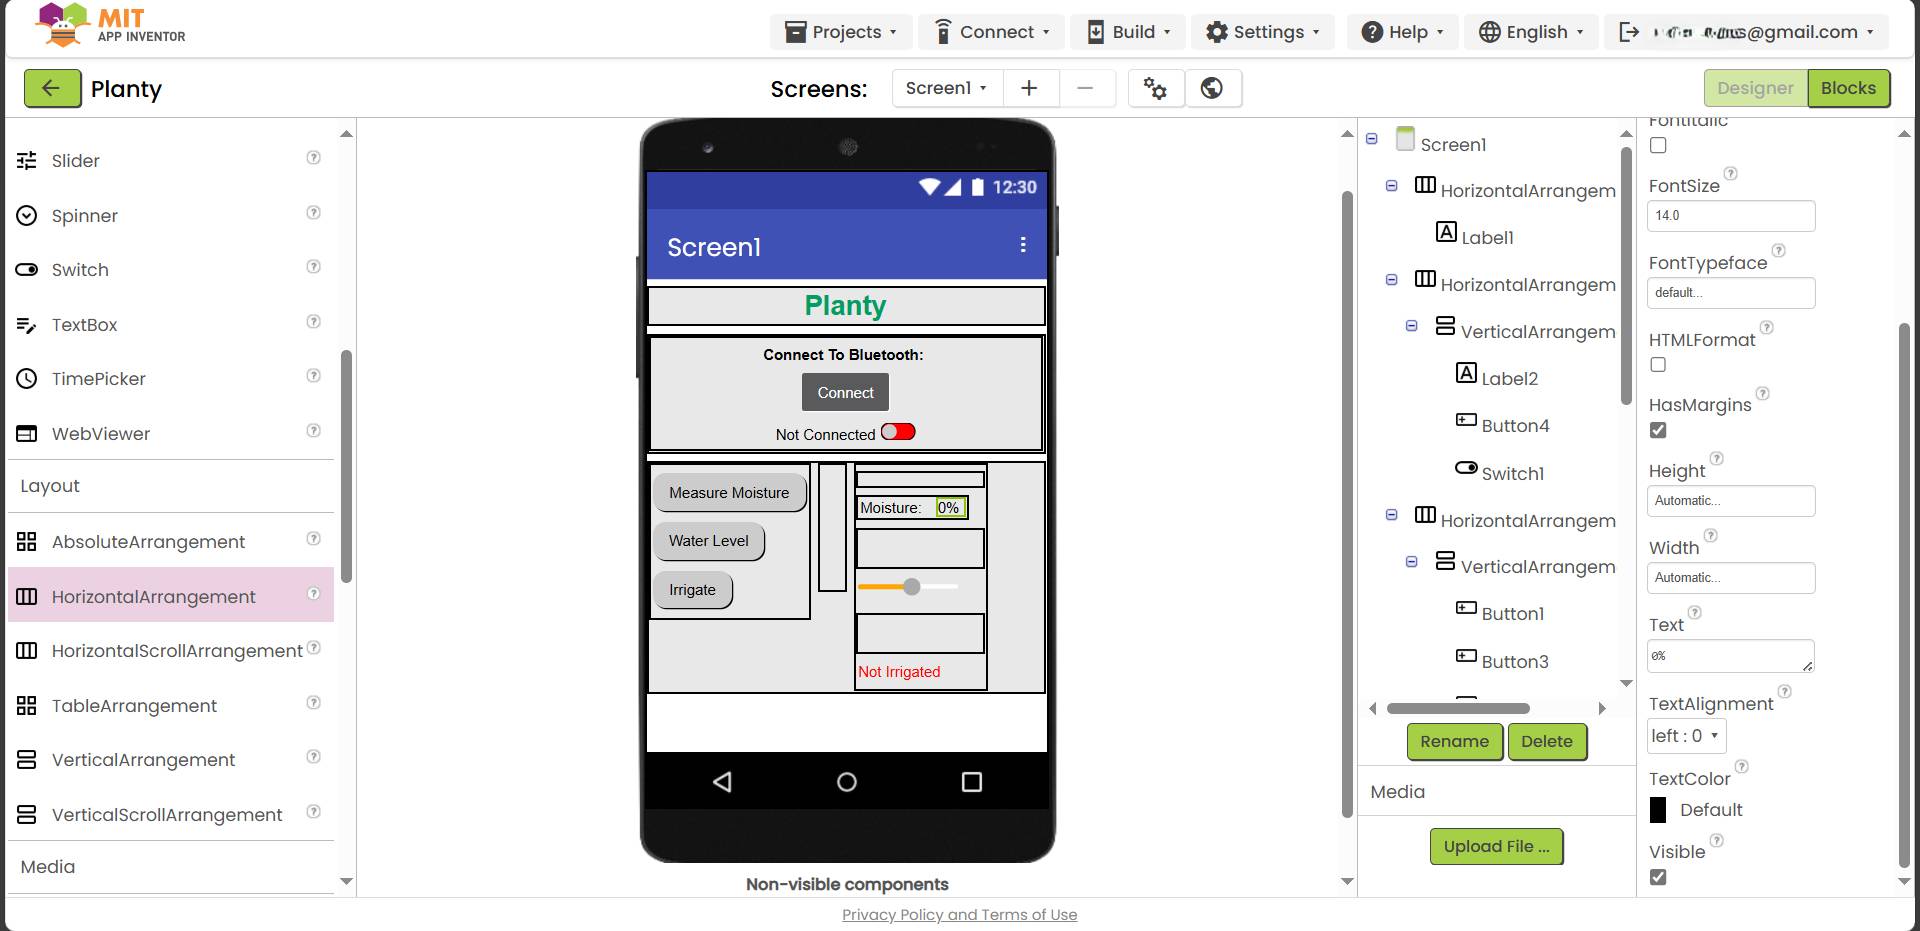
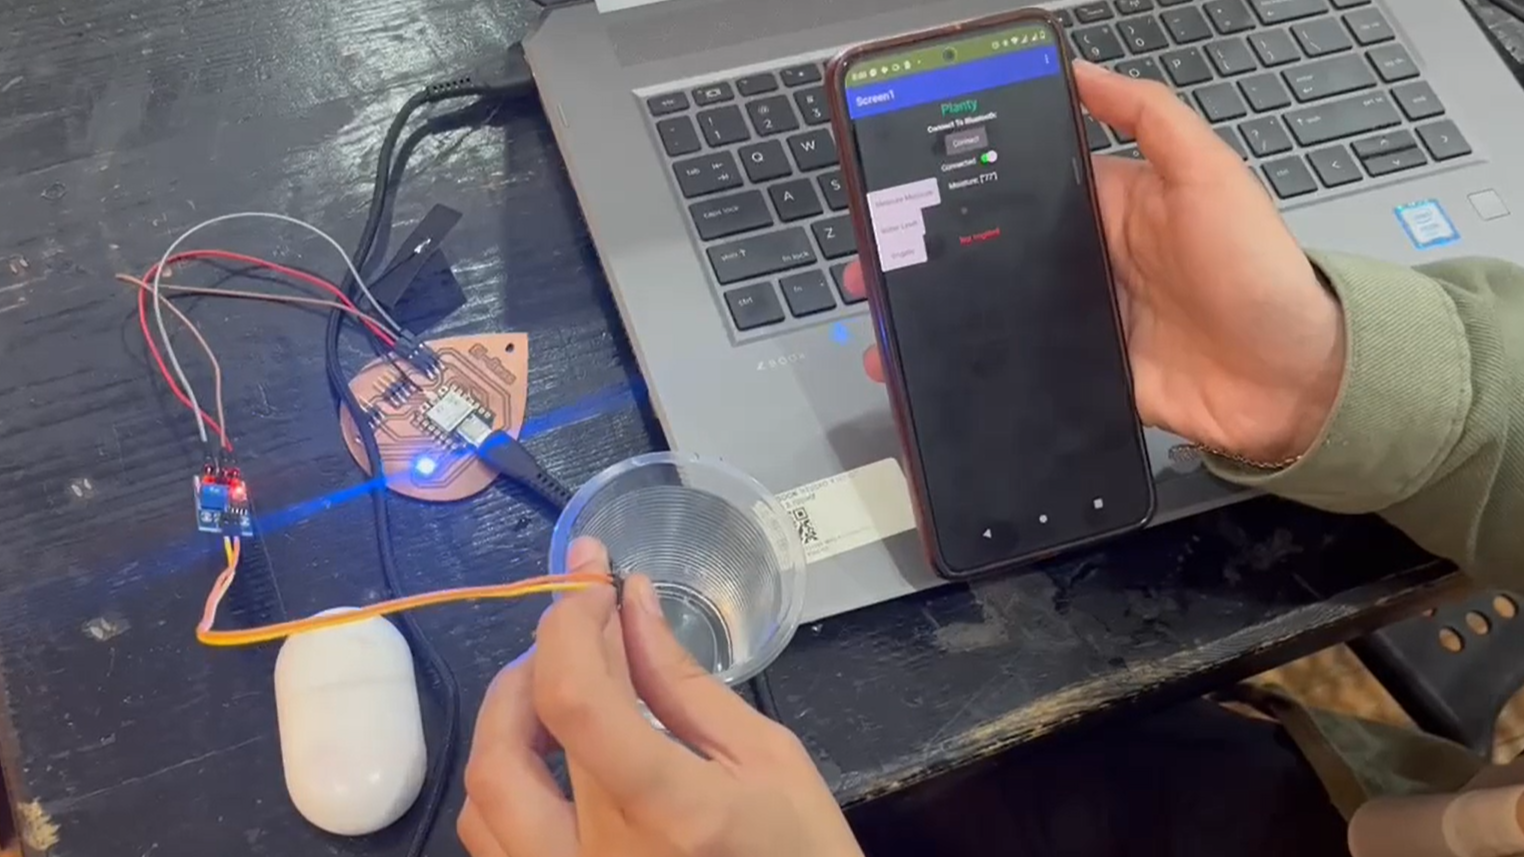
I wanted as a start to make the app able to connect via bluetooth with my Xiao ESP32-C3 board, take readings from the soil moisture sensor and display it in the app, displays how much water left in the tank, and the option to click irrigate to make the pumb work and water the plant if it really needs water and there is enough water in the tank.
Sure thing there will be so much improvements on this verison of the app, for example not enabling the irrigate button until the readings of the sensors are not low so we protect the plant and the pump. Also I'm considering adding AI chat to talk with to help taking care of the plant.
Starting to work on the interface, I wasn't so sure how I would make the layout and center stuff and separate between them. So I searched for videos making an interface and found this video which helped me understand how to layout my elements in the screen. I basically used horizontal and vertical arrangements and controlled their height or width.
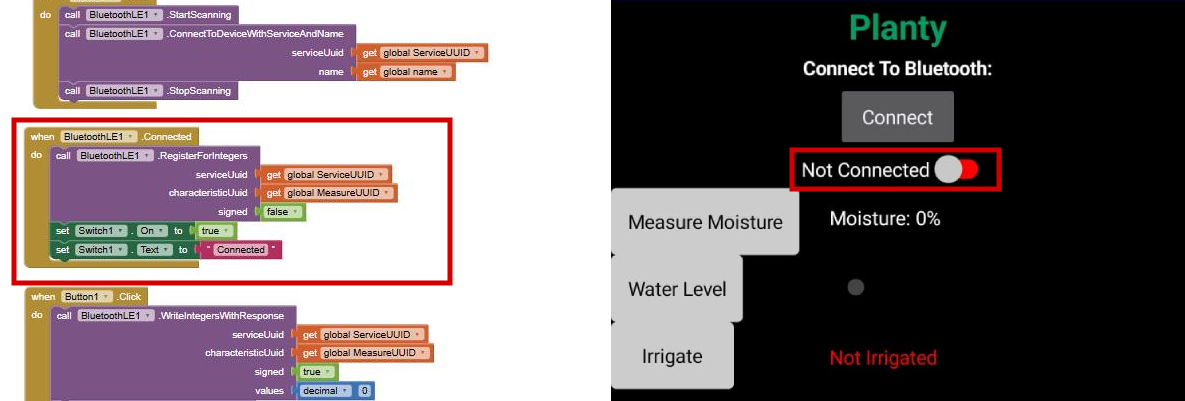
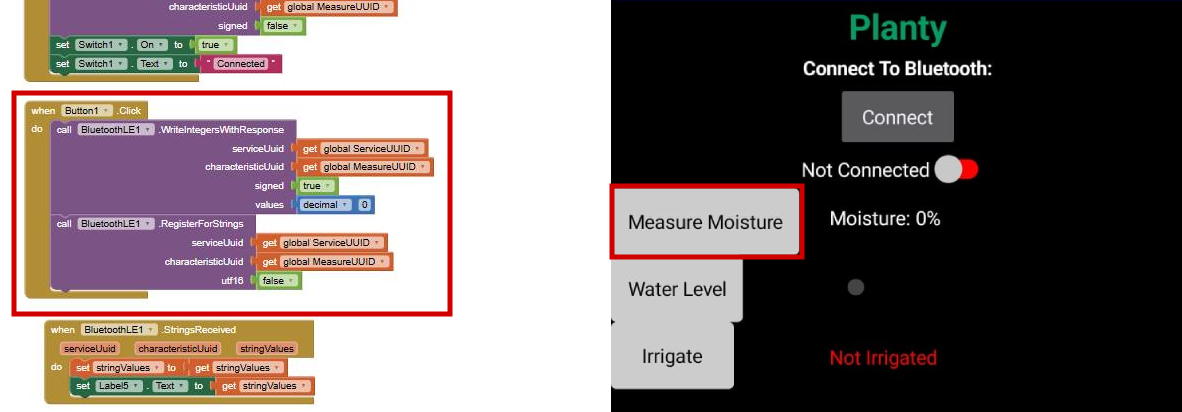
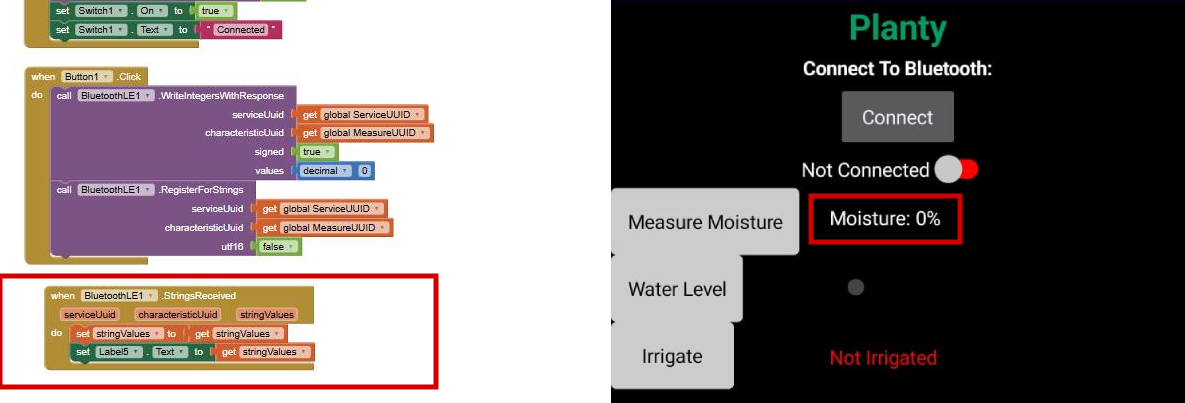
I added some labels, button to connect to the board using BLE, switch to show the status of connection, some buttons to control the sensors and pump, and labels to show the result of clicking the buttons. I also added a slider to show the water level but I haven't tried it yet. Another important thing to add is the BLE Extension.
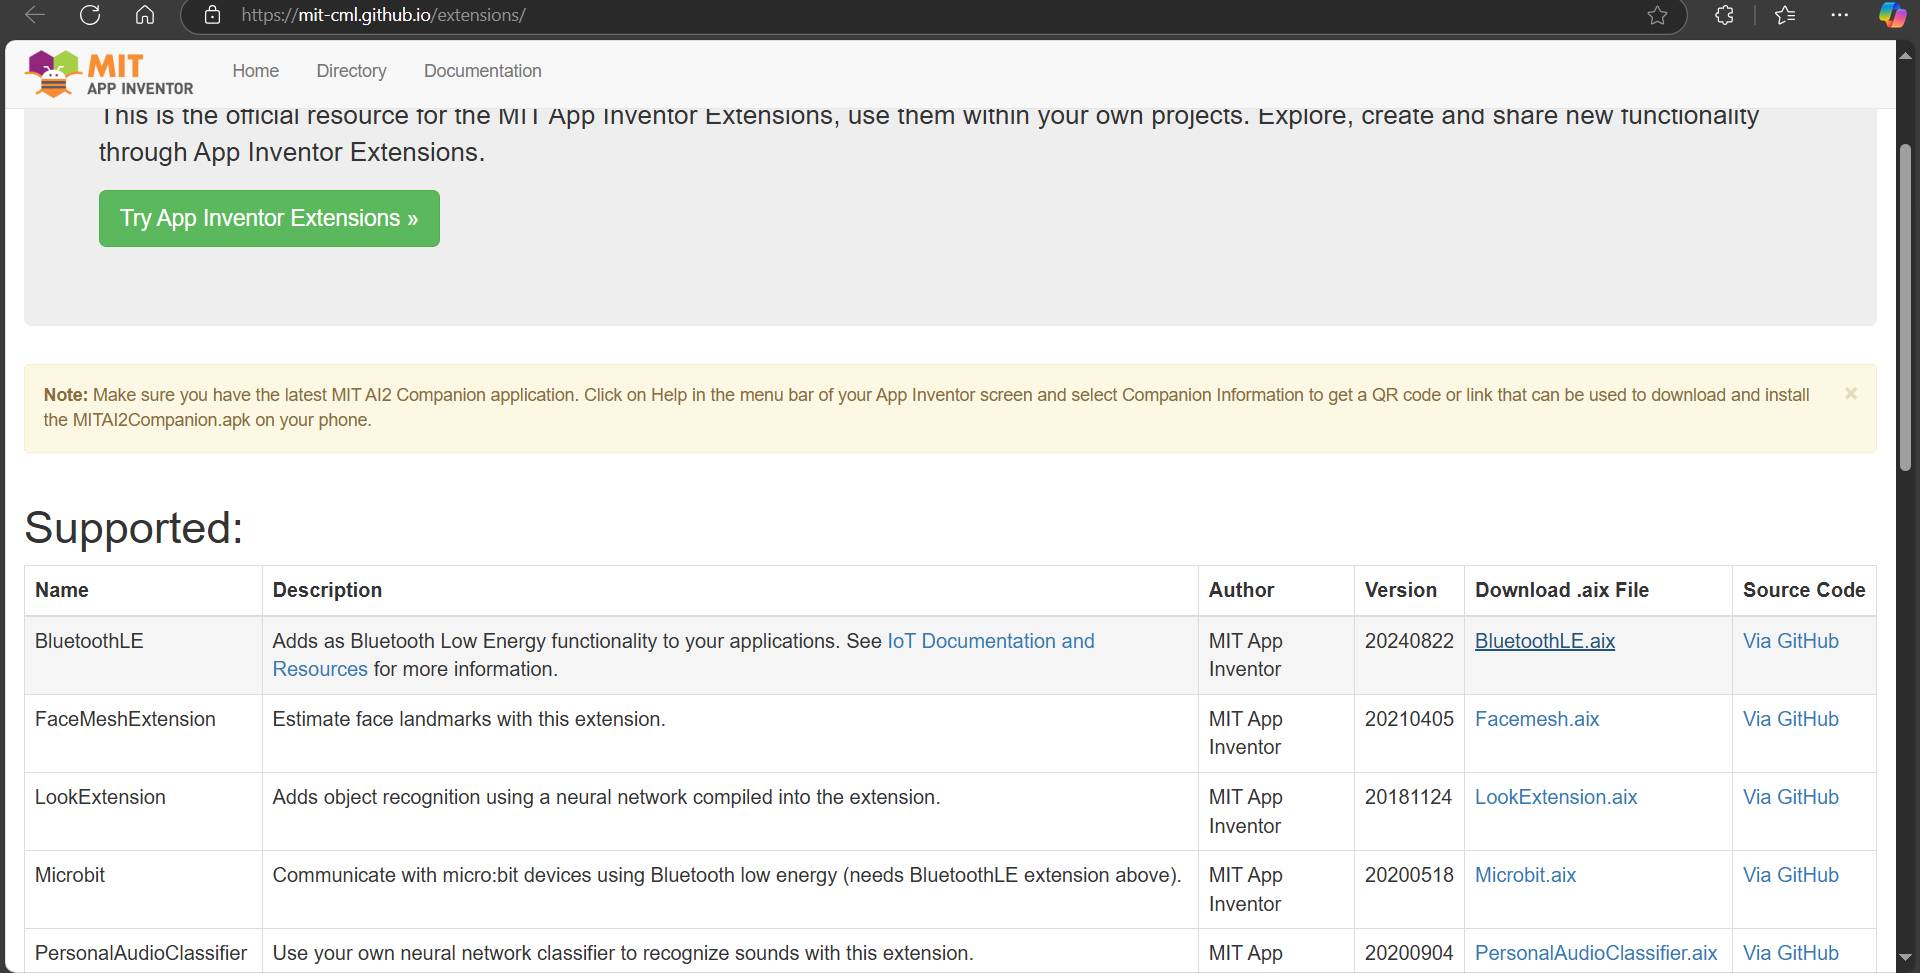
I added the BLE extention from Here by downloading the zip file of it.
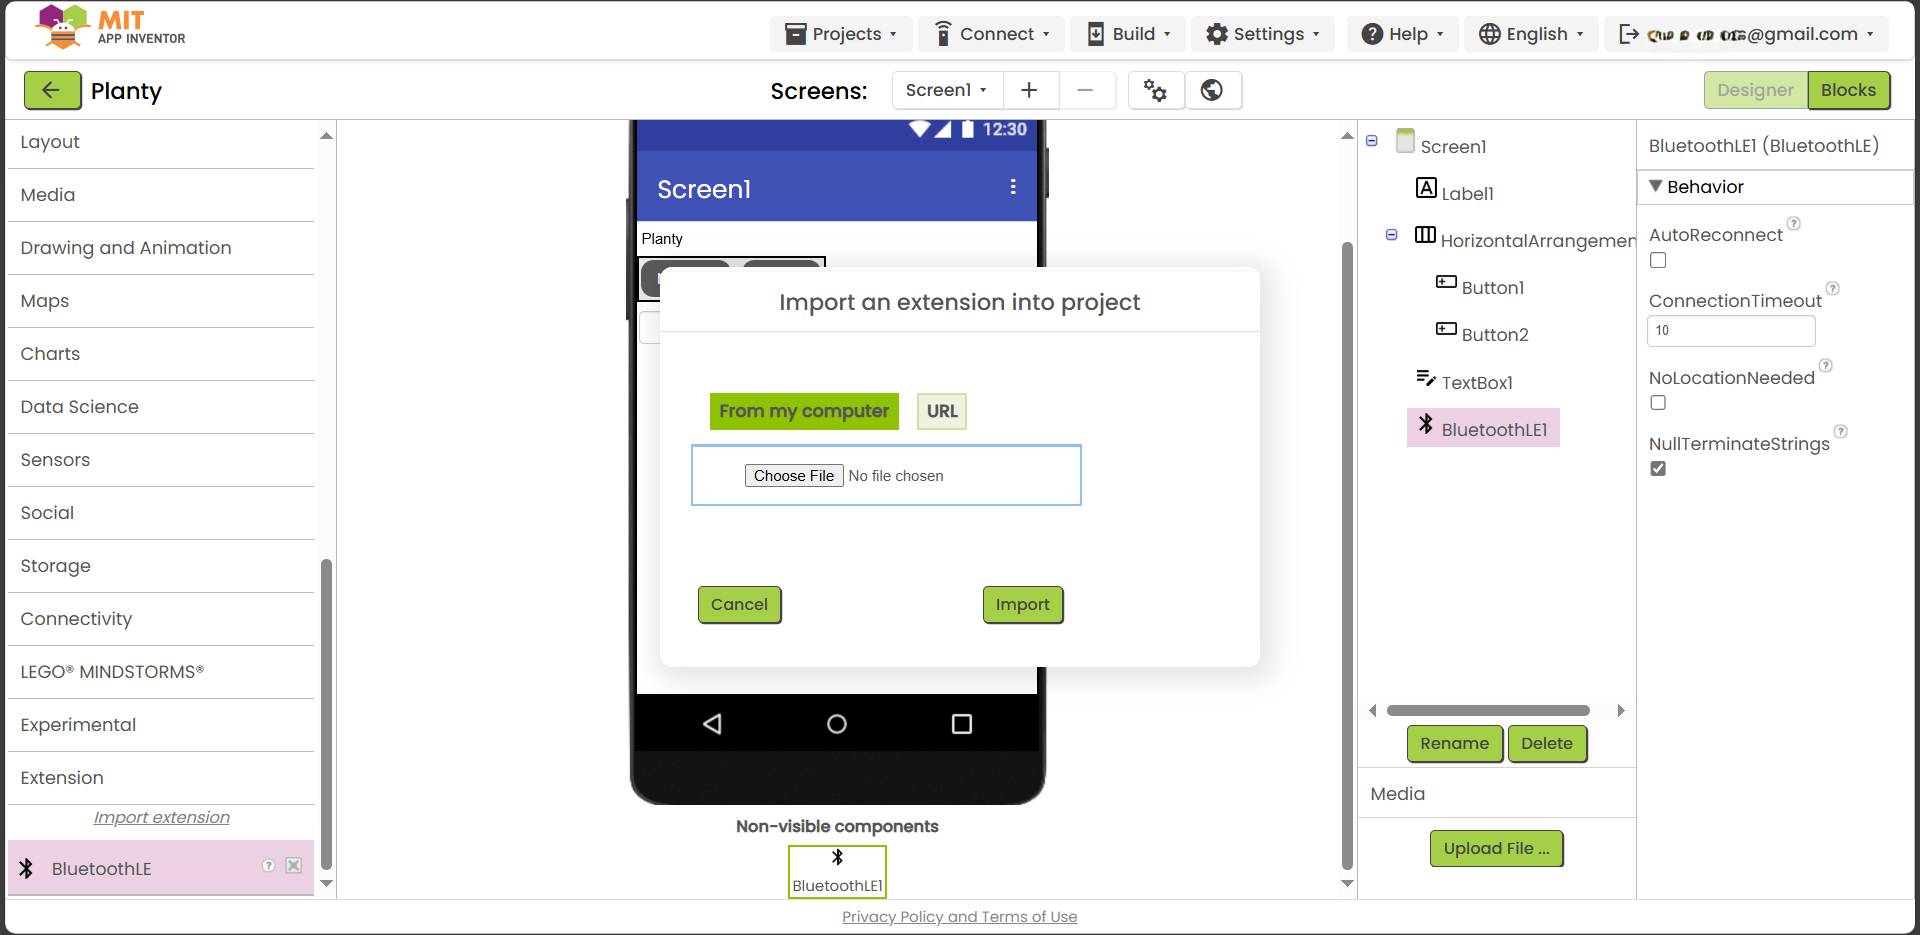
In the designer section I went to extensions in the palette menu and imported the file I downloaded.
3. Programming

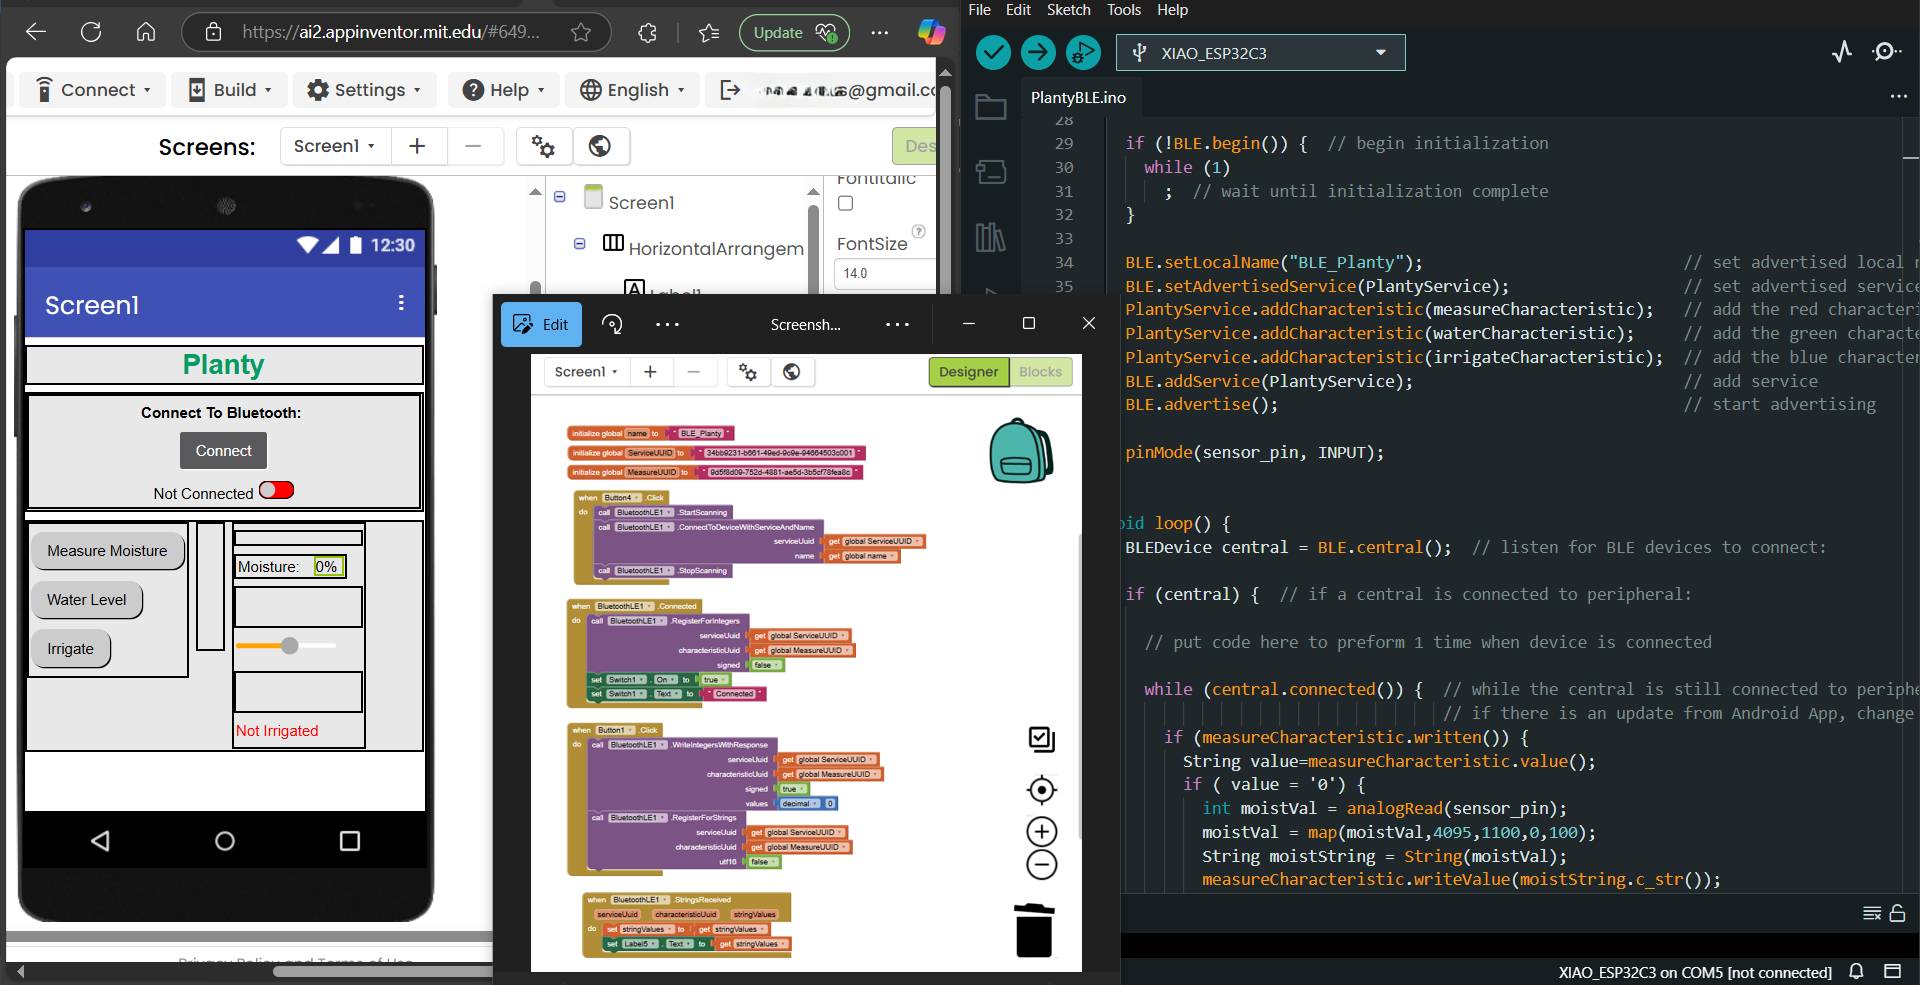
Now as it's time to program the app there are two things to do. We need to program the app itself using code blocks, and programming the board to receive and send data to the app using BLE. So this section is divided into two smaller sections.
This code is not complete yet as it was just exploring MIT App Inventor and how does everything work so there will be more to come when it comes to working on the final project.
3.1 App Programming
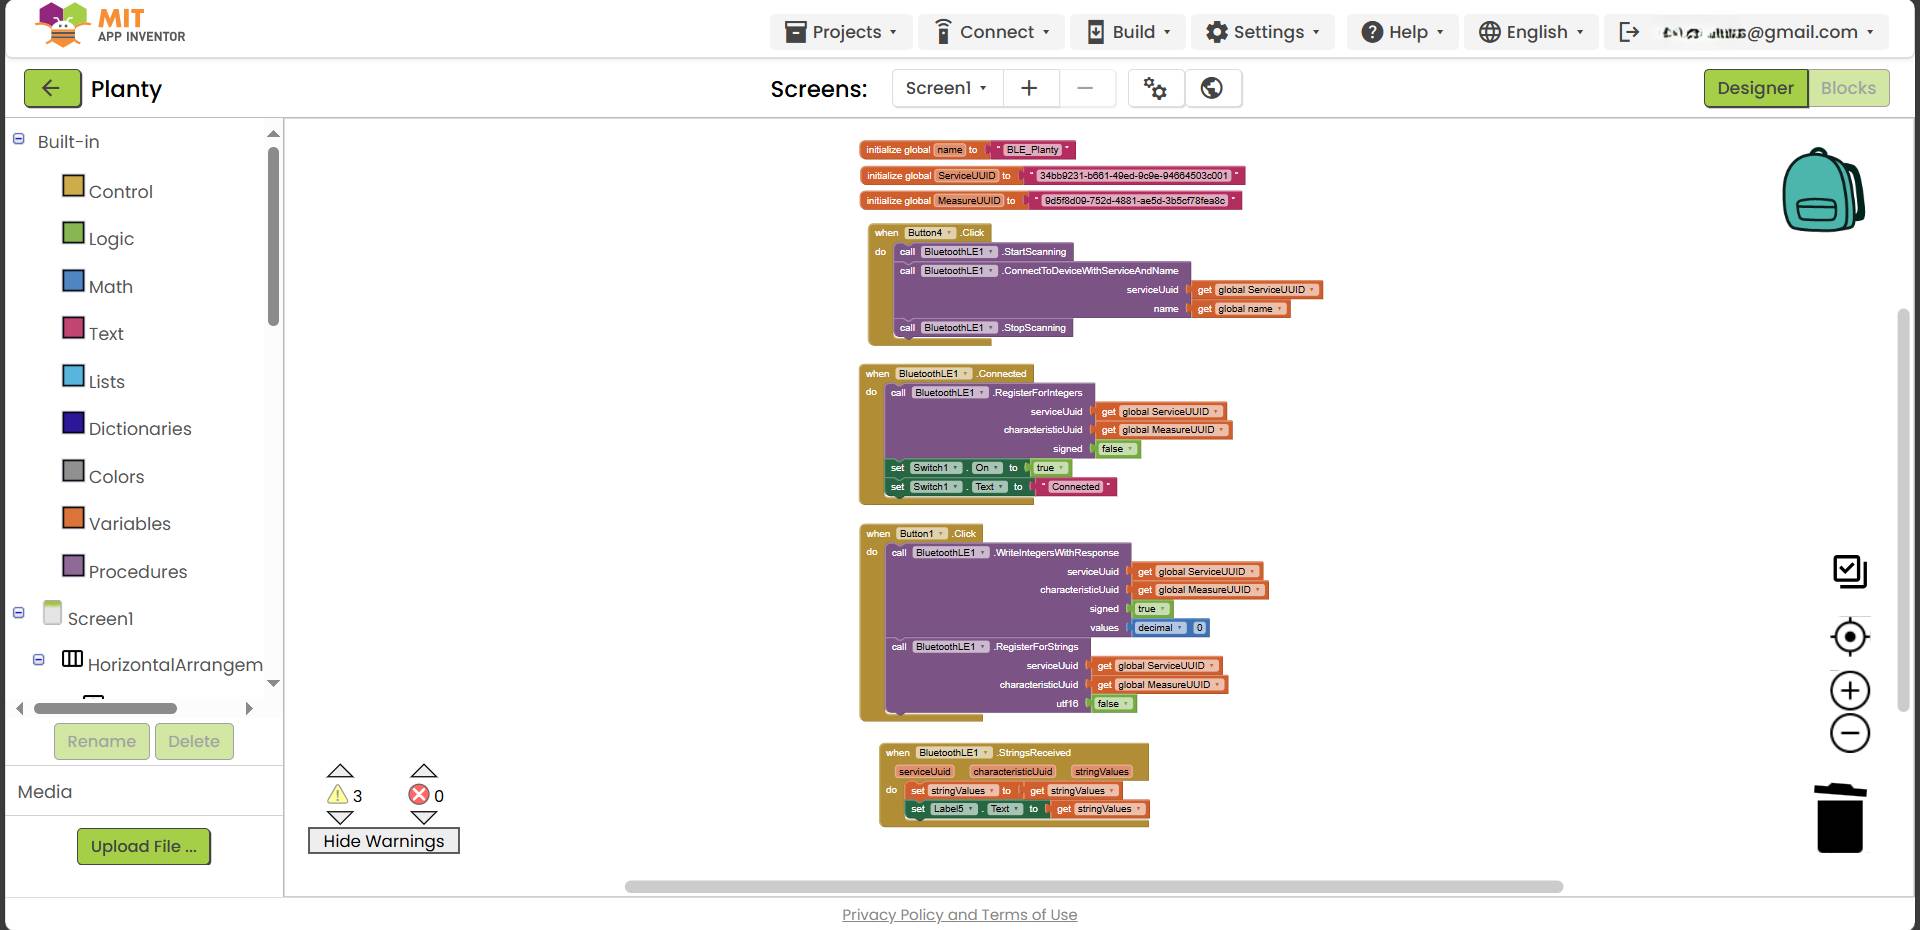
To program the app I needed to know how to use the BLE extension so I learned from This video as he was using the BLE extension to communicate between the xiao board and the app. It helped me initialize the connection and add some code in the code blocks and other in the Arduino IDE.

3.2 Board Programming
I started working on the code using the video I mentioned earlier using the BLE extension and included the ArduinoBLE library. I generated the UUIDs and made one for each button.
I included the neopixel library and defined the pin and number of pixels and other needed info for the neopixel. I also defined the moisture sensor pin connected to A1.
In the void setup I intialized the neopixel and all the services of the connection when we begin the BLE initialization. I also setup the moisture sensor pin as input.
In the void loop I said that if there is connection and while it's connected if you received the value of 0 that is sent from the app, go read the moisture and map the value of the reading from 1 to 100% and store it in a astring called moistString. This string is in the measure characteristic will be sent to the app to be shown. These lines were written with the help of ChatGPT when I didn't know how to send a string to the app.
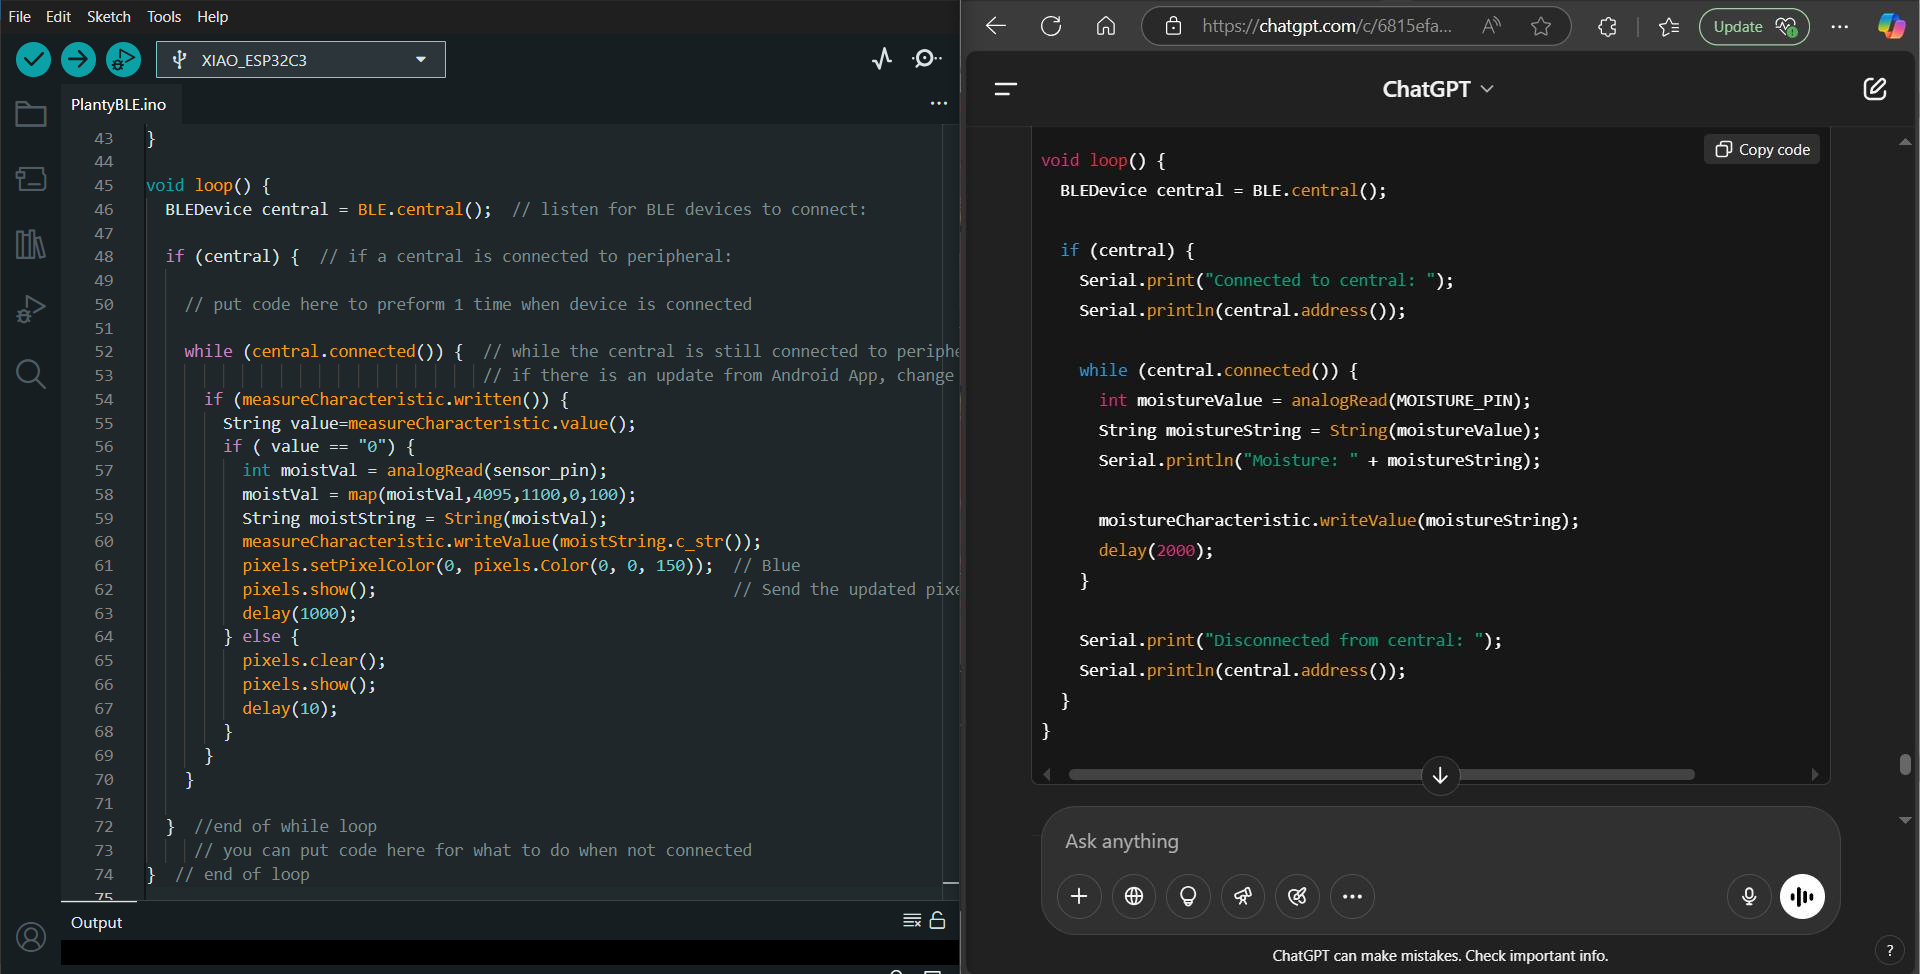
Then I made the neopixel turn blue when the reading is sent and if the value is not 0, turn off the neopixel.
Here you can see the result of all of this.