3D Scanning and Printing
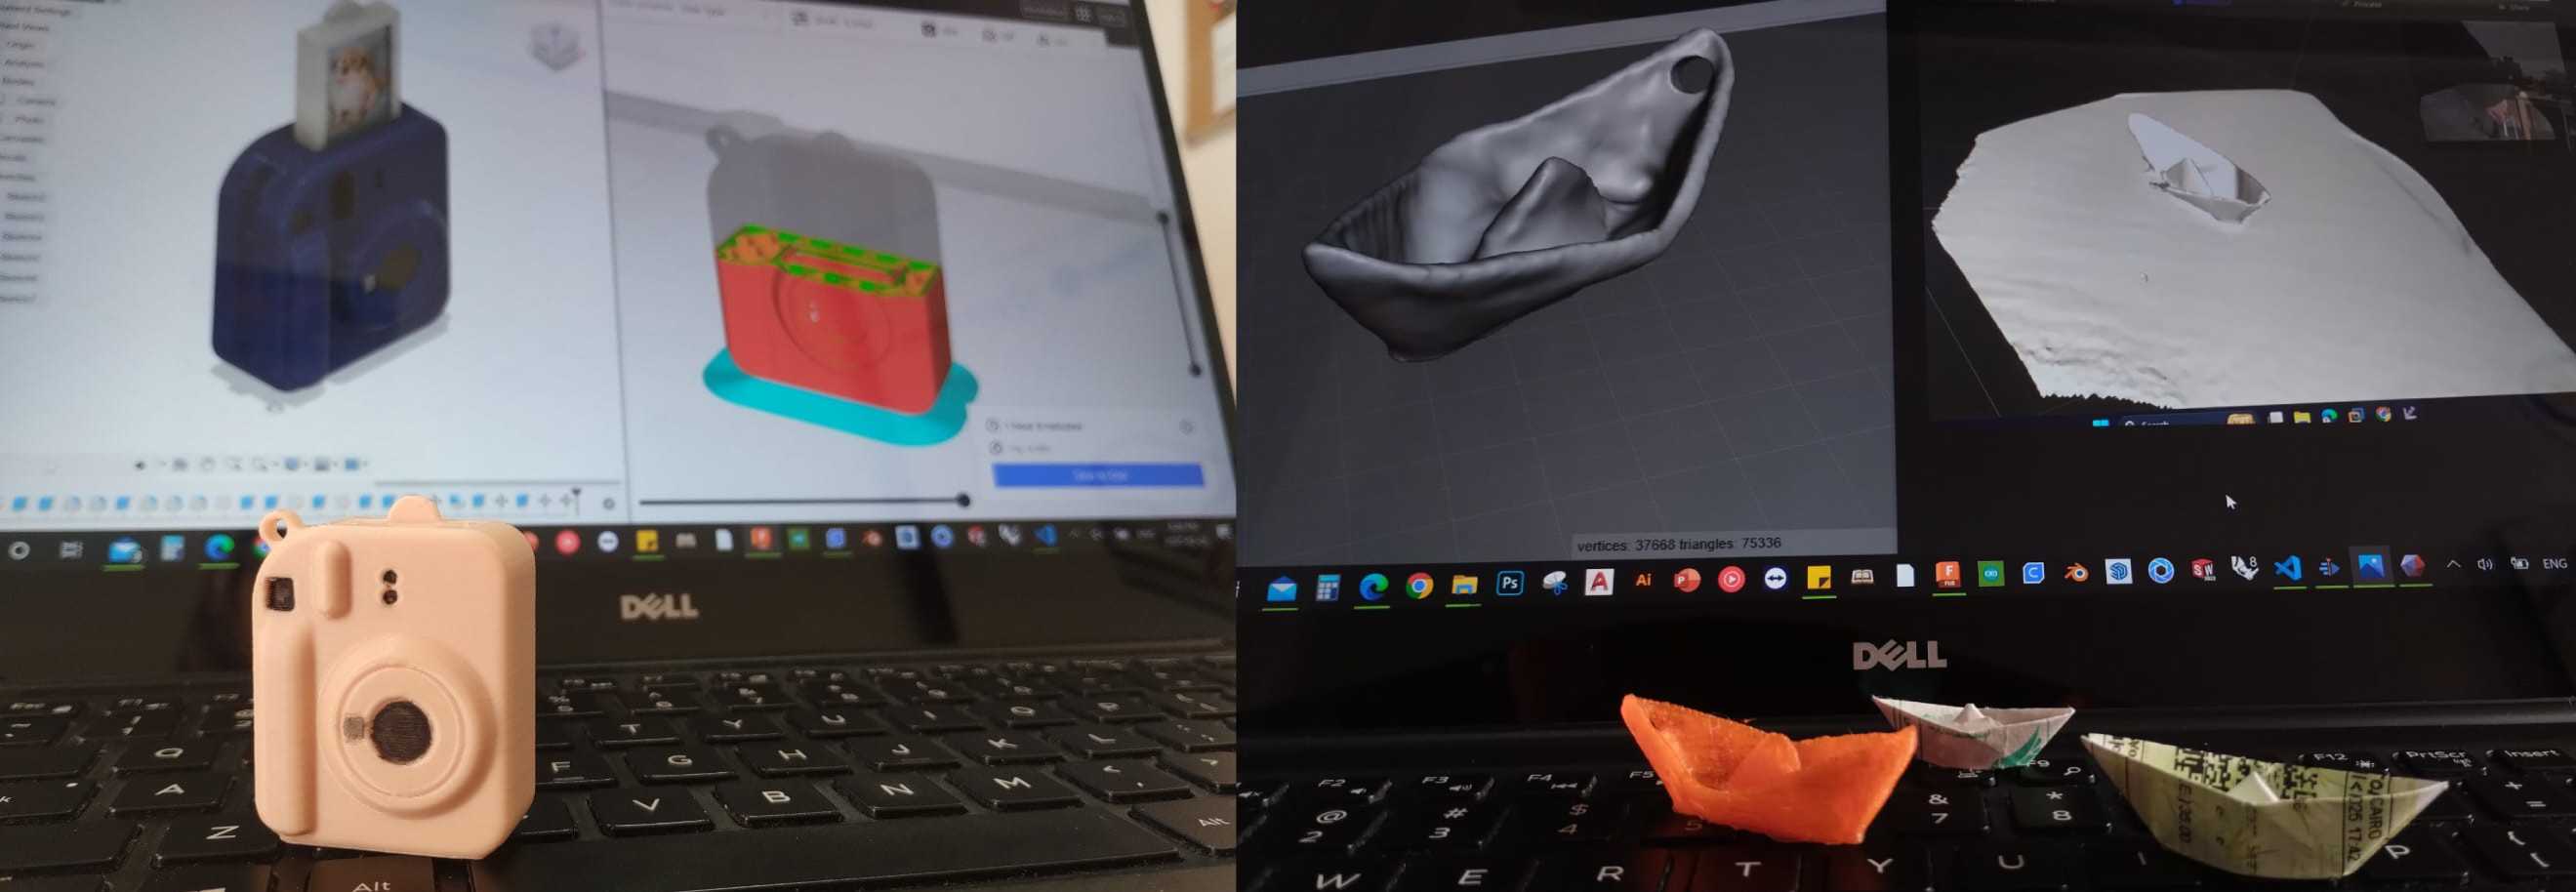
Here's a summary about what you'll see next:
- 1) Group Assignment:
-
- Clearance Test - PLA+
- Temperature Tower - PETG
- Wall Thickness - PLA+
- 2) Individual Assignment:
-
- Design Camera Keychain
- 3D Print Camera Keychain
- 3D Scanning - kinect
- 3D Scanning - Kiri Engine
- Meshmixer Sculpting
- 3) Failures Along the way
- 4) Original Files
1) Group Assignment:
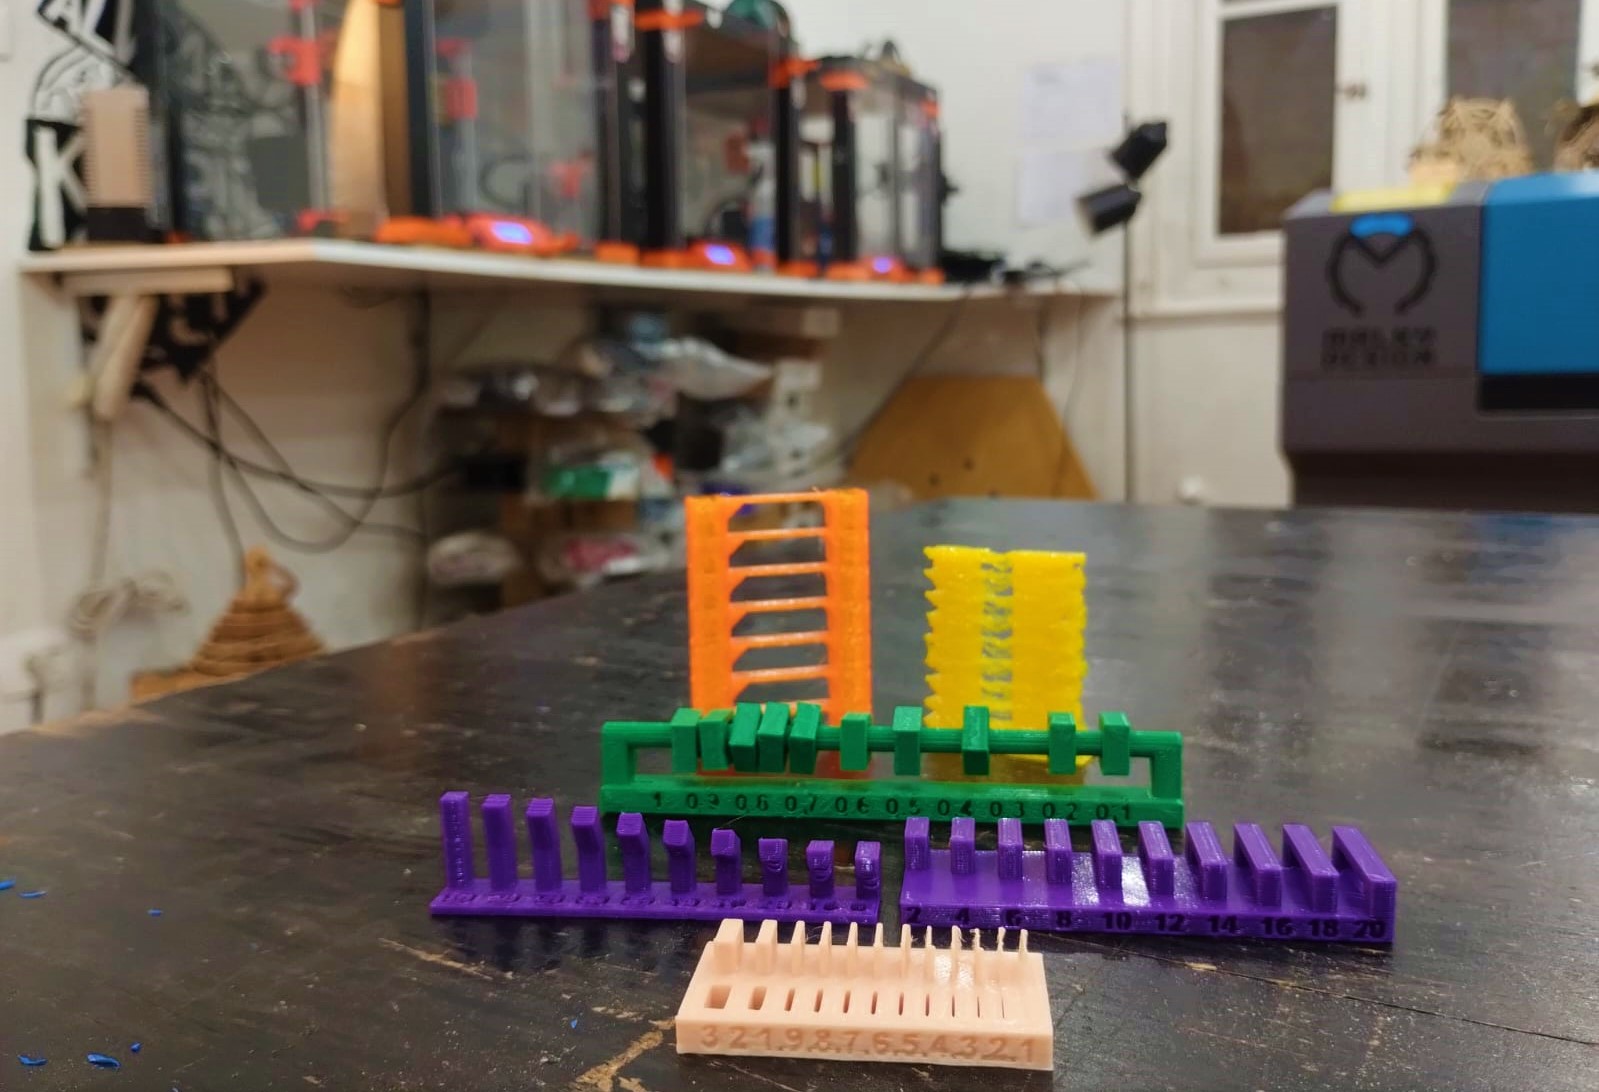
For this week's group assignment we needed to test the design rules for our 3D printer which was Prusa i3 MK3S+. I had some previous experience with 3D printing as I made a 3D printer before and worked in a 3D printing company where I worked on the treatment of 3D printed parts usually PLA and ABS only so I wanted to expand my knowledge and try more materials and deepen my knowledge in the design rules.
1. Clearance Test - PLA+
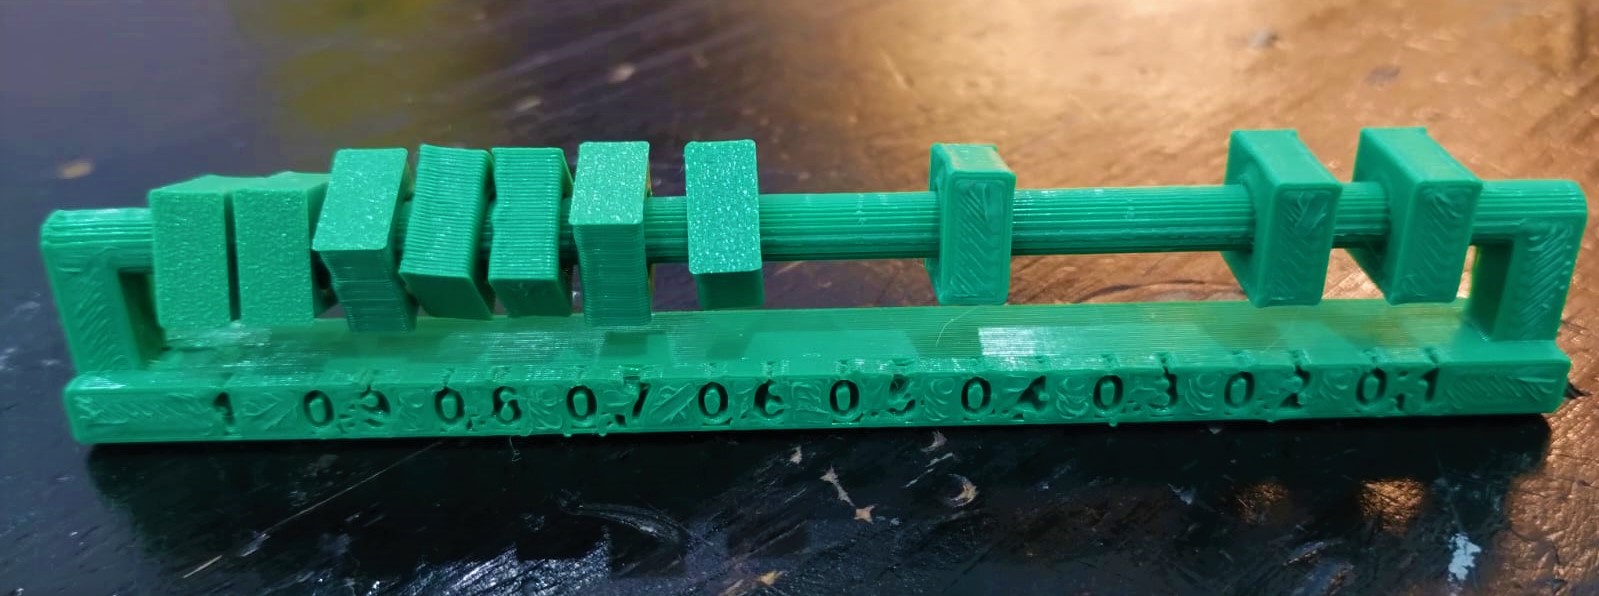
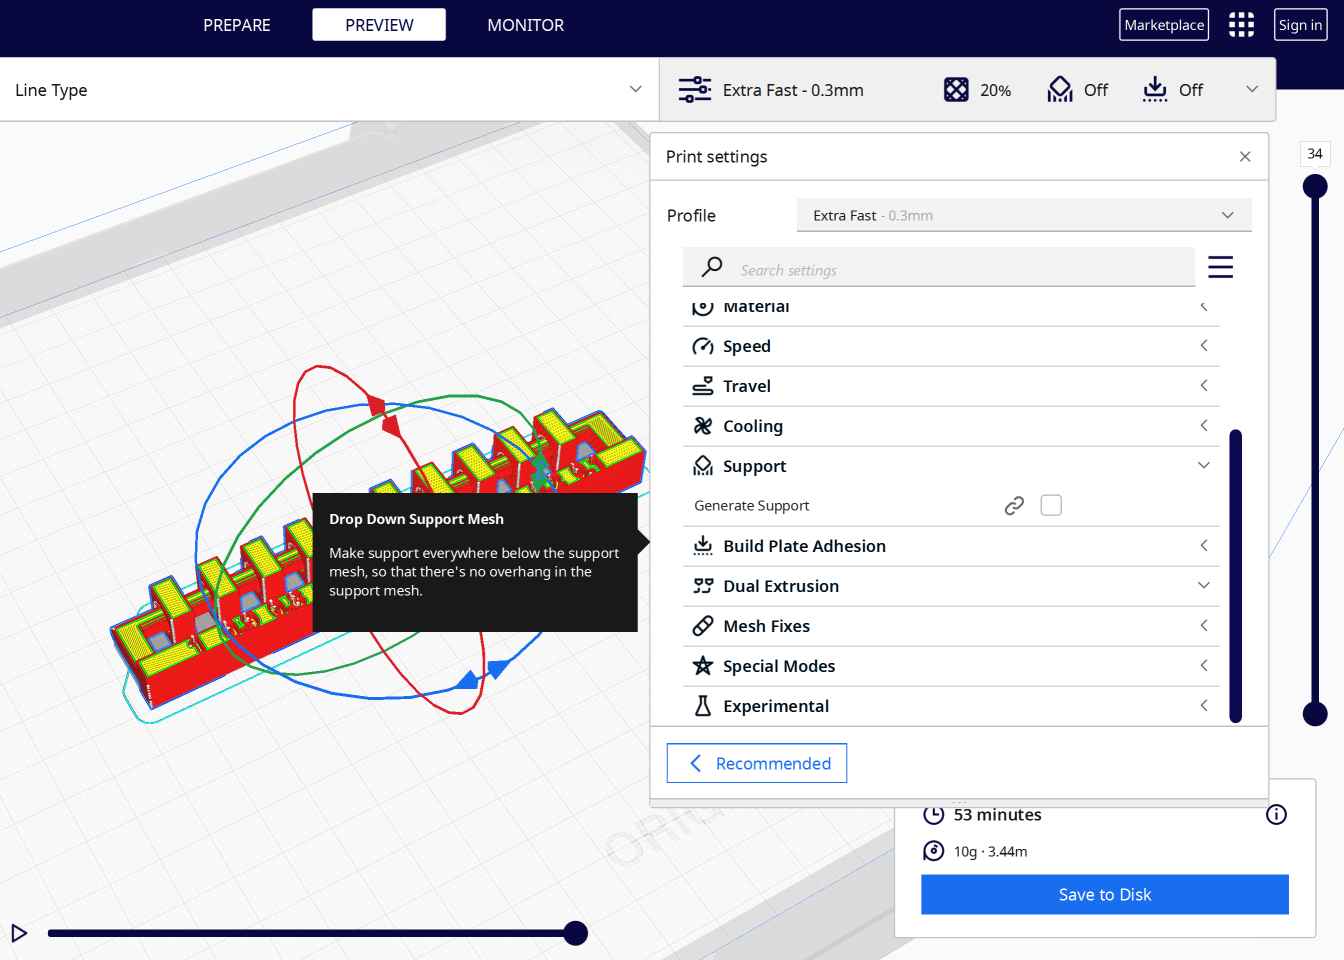
The most popular material in 3D printing is PLA or PLA+ which is a better version of PLA. So, the first test was test the clearance of this material on the Prusa MK3S+ printer. I used the clearance test file that was provided in the resources of the week and imported it to Ultimaker Cura. I had the 5.0.0 version installed on my laptop. By using the default settings for this material and to print fast I set the profile to 0.3mm and temperature to 215°C. I also placed it on its side to print it without supports in the area where the clearance is being tested. So, I used support blocker in this area and left the rest of the rod to be supported.
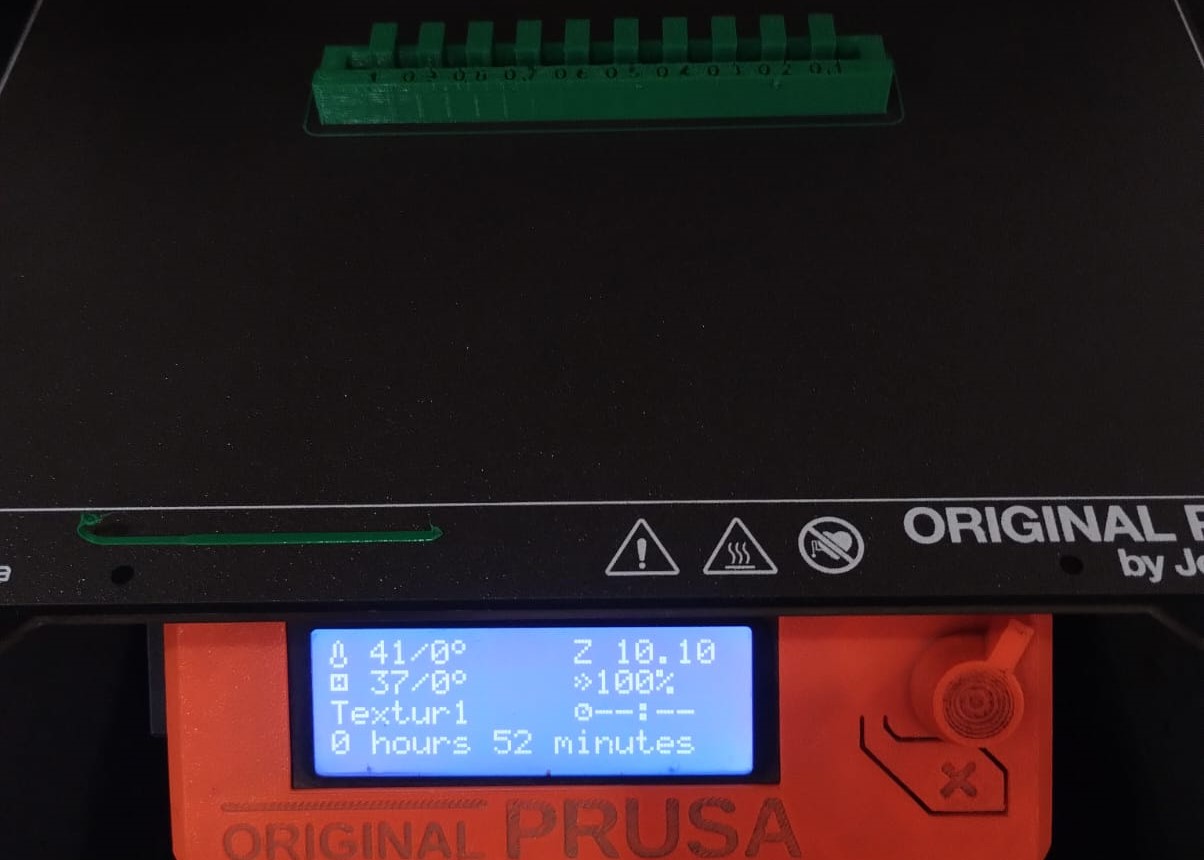
The 0.2mm clearance didn't move, and the 0.3mm had to be pulled with some strength to move and it didn't move along the whole rod. The 0.4mm clearance was the perfect clearance for me which I'll use later in my design.
2. Temperature Tower - PETG
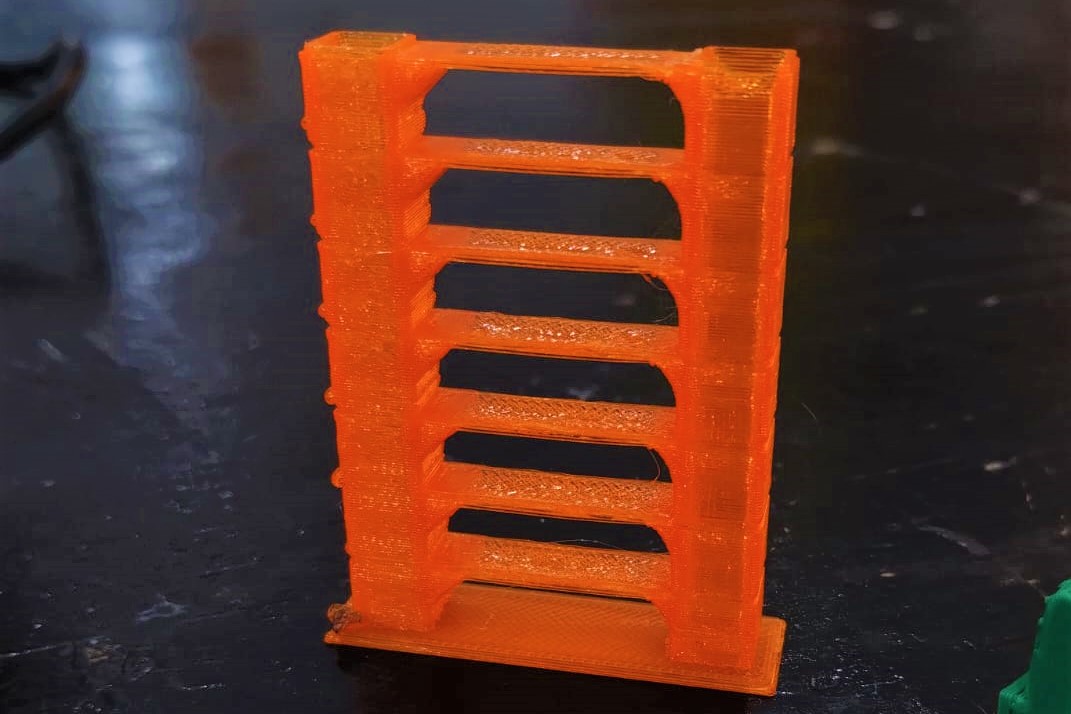
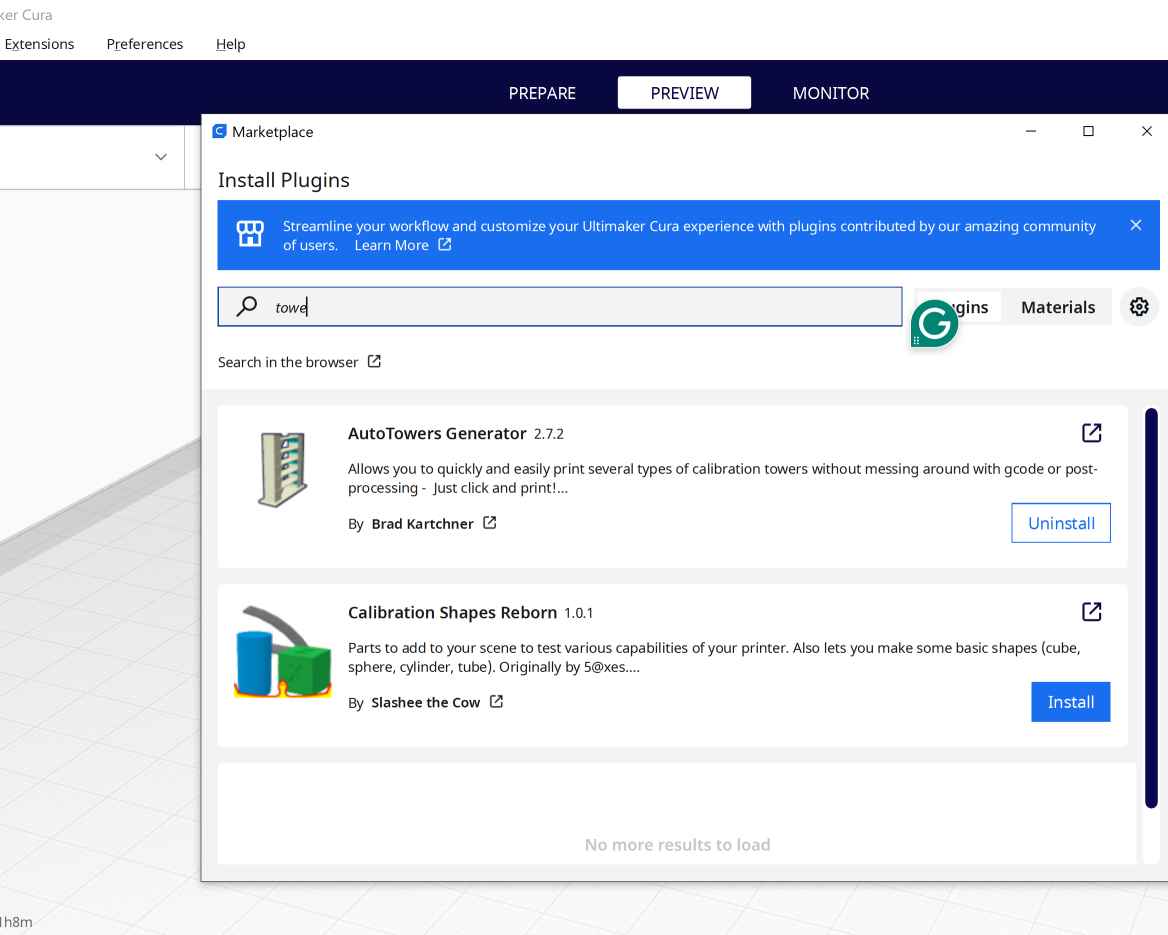
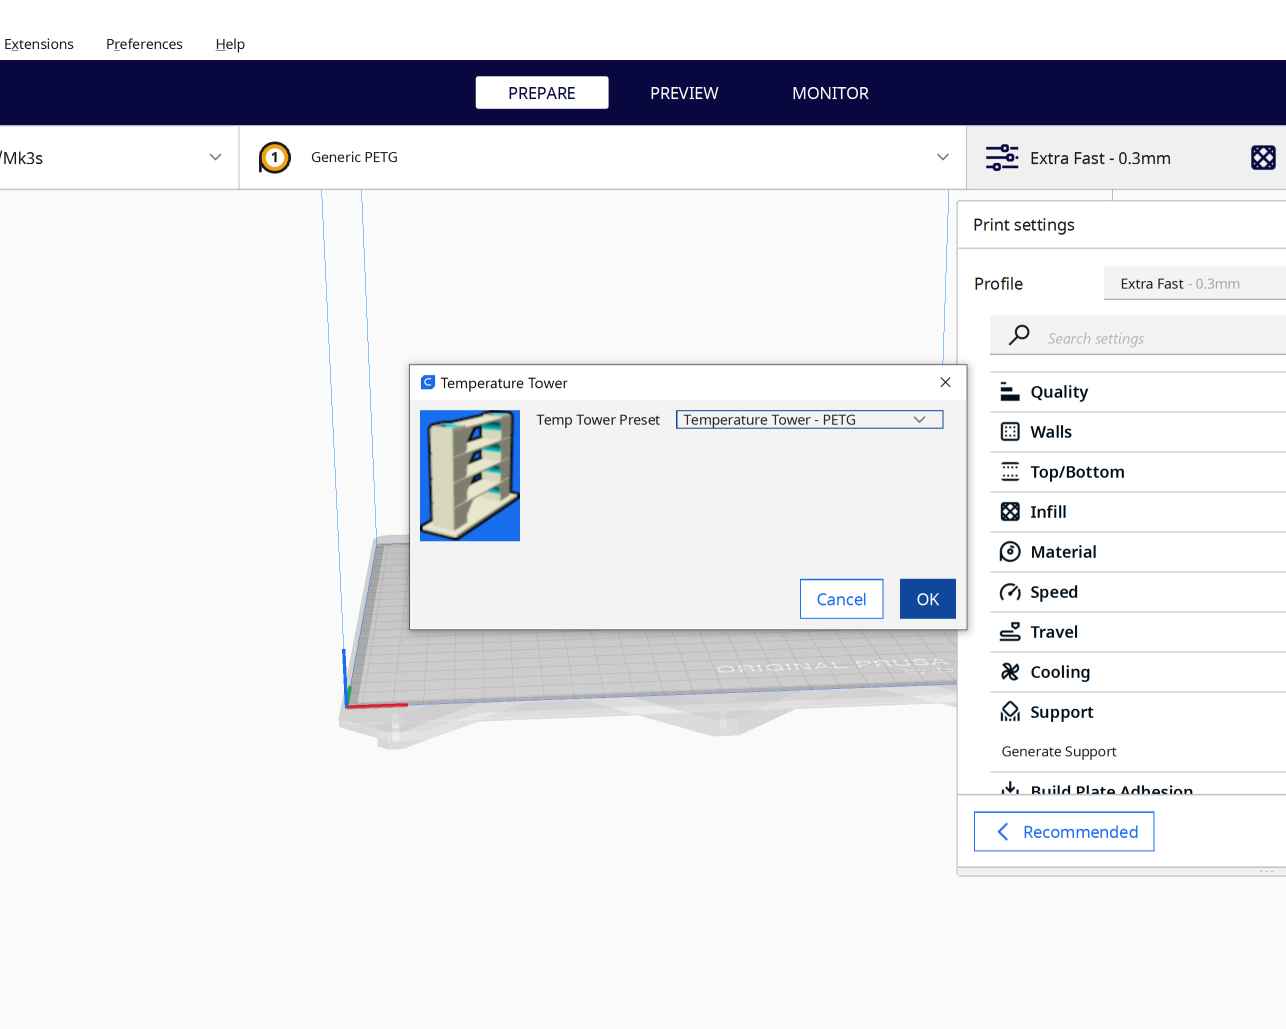
For the next test, my instructor Noha suggested I work with a new material which is considered food safe and it's PETG. To start working with it I went for the temperature tower test. I've never tested this before for any material so I did a little search to know how to do it. For previous versions of Cura it was done by going to the extensions menu and then post-processing and then add a script and choose change temp at height script. But for the 5.0.0 version it was a lot easier just by going to the marketplace and downloading the AutoTower Generator plugin. After downloading it I went to the Extensions Menu --> Auto Towers --> Temp Tower then choosing the material I want and that's it. just slice and all the temps are already set for you.
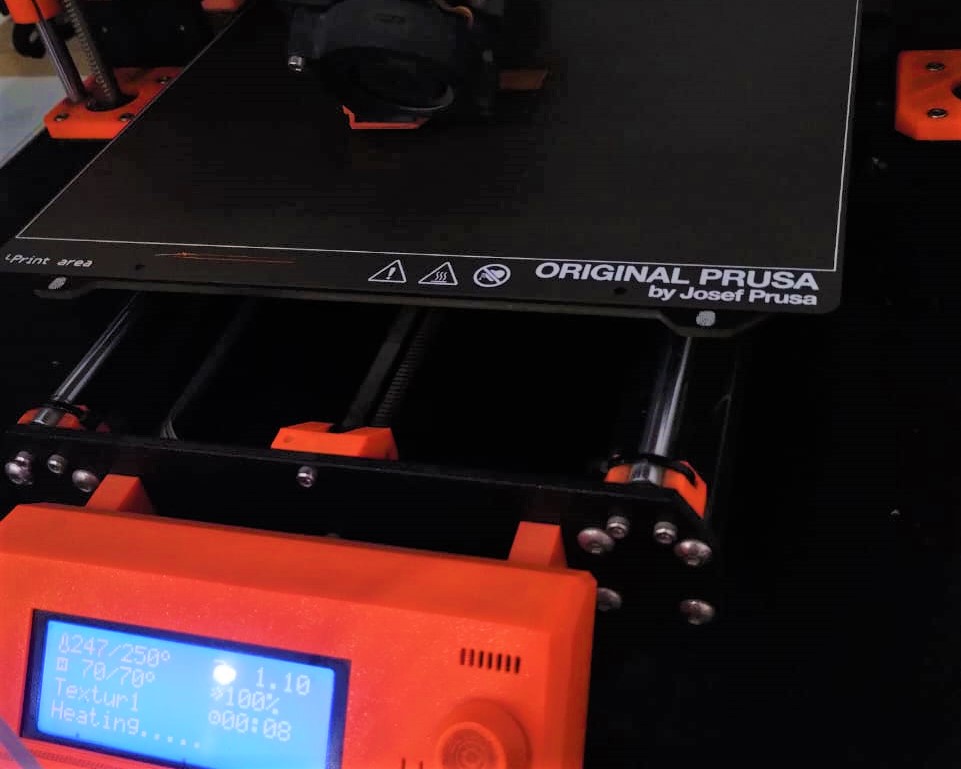
As a result for this test I realised that the best temperatures to print PETG was from 220°C to 230°C. So I decided to print in average which is 225°C.
3. Wall Thickness - PLA+
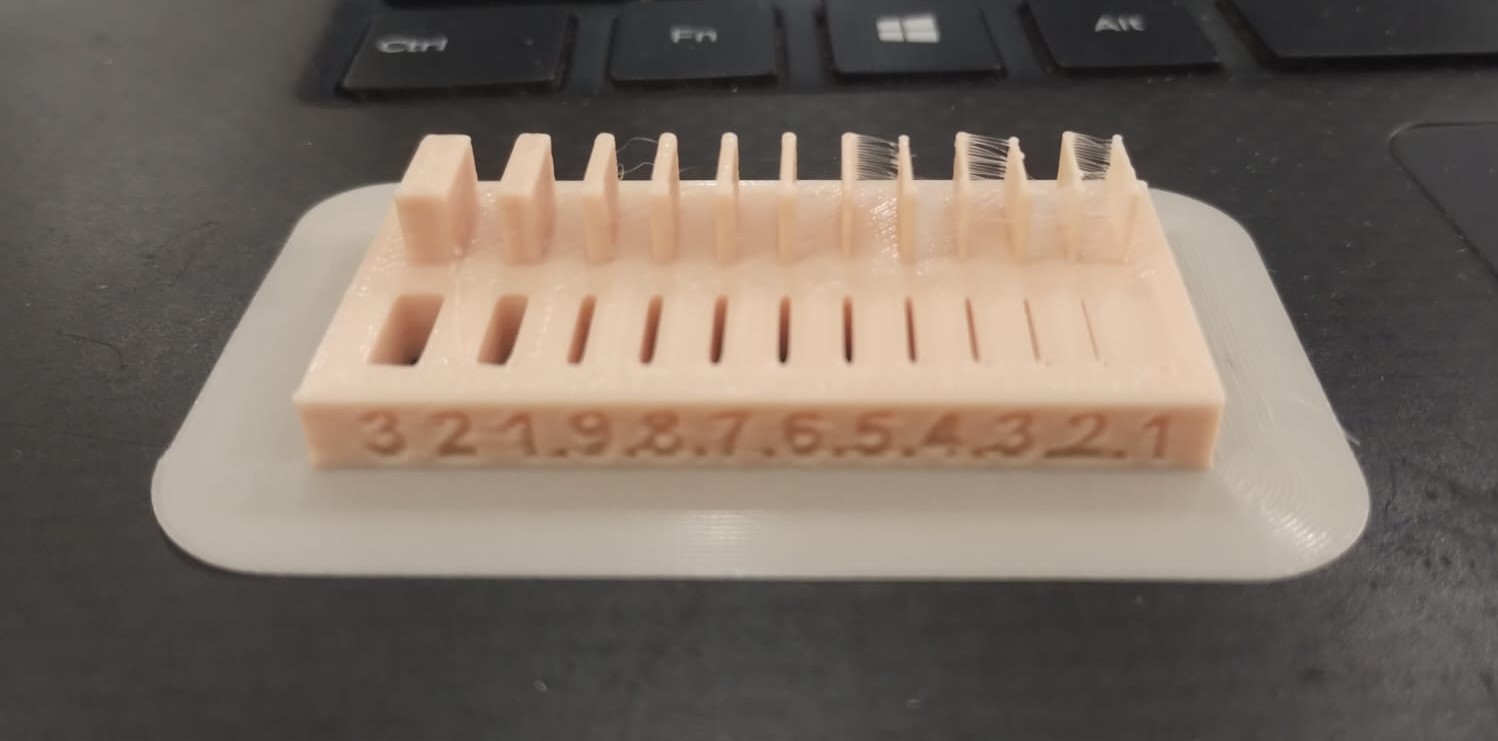
I already was working on my individual assignment so I needed to know what is the most thin wall that could be printed and what would fit a printed image perfectly. To do that, I used the wall thickness test file provided in the resources. I tested it with the default settings for PLA+. The results were quite interesting for me as I didn't think FDM could print such thin wall printed but it wasn't so strong, also the 0.1mm and 0.2mm was almost closed so the thinest possible hole is 0.3mm. As a final result I found that the 0.5mm wall thickness was the best to fit an image.
2) Individual Assignment:
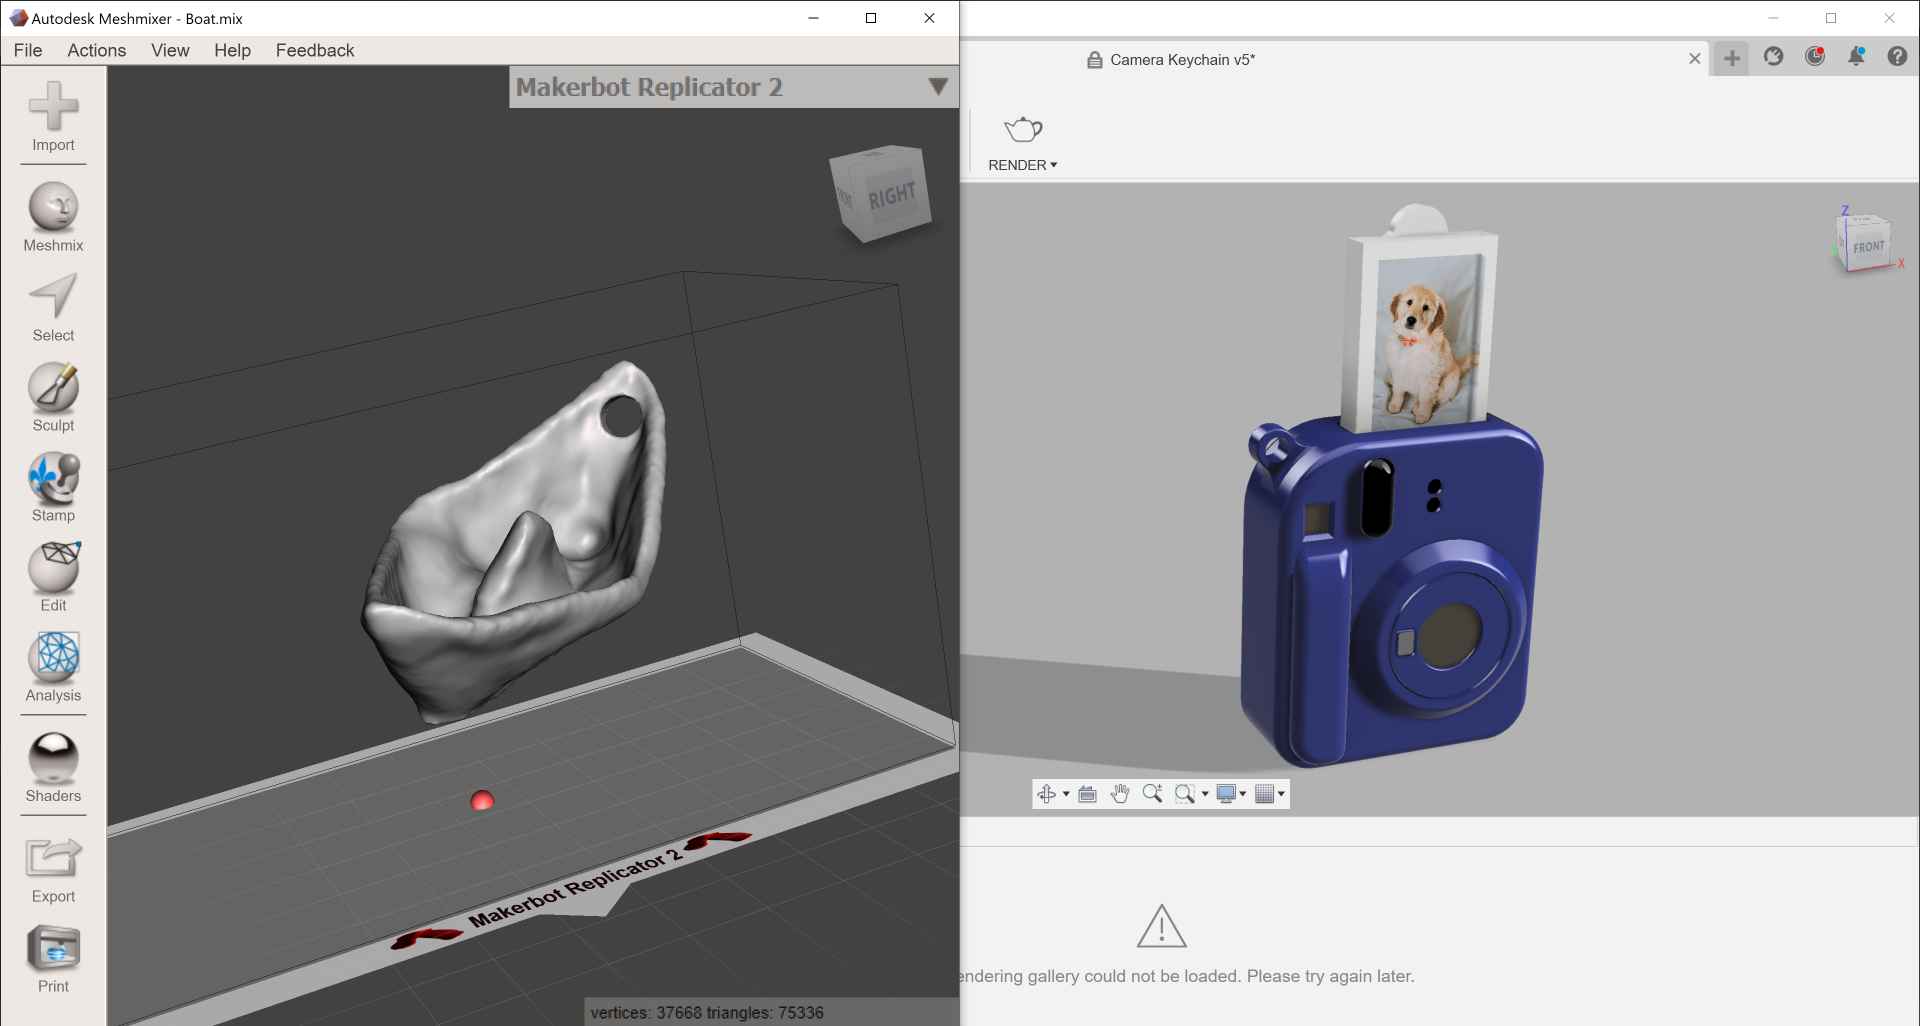
1. Design Camera Keychain
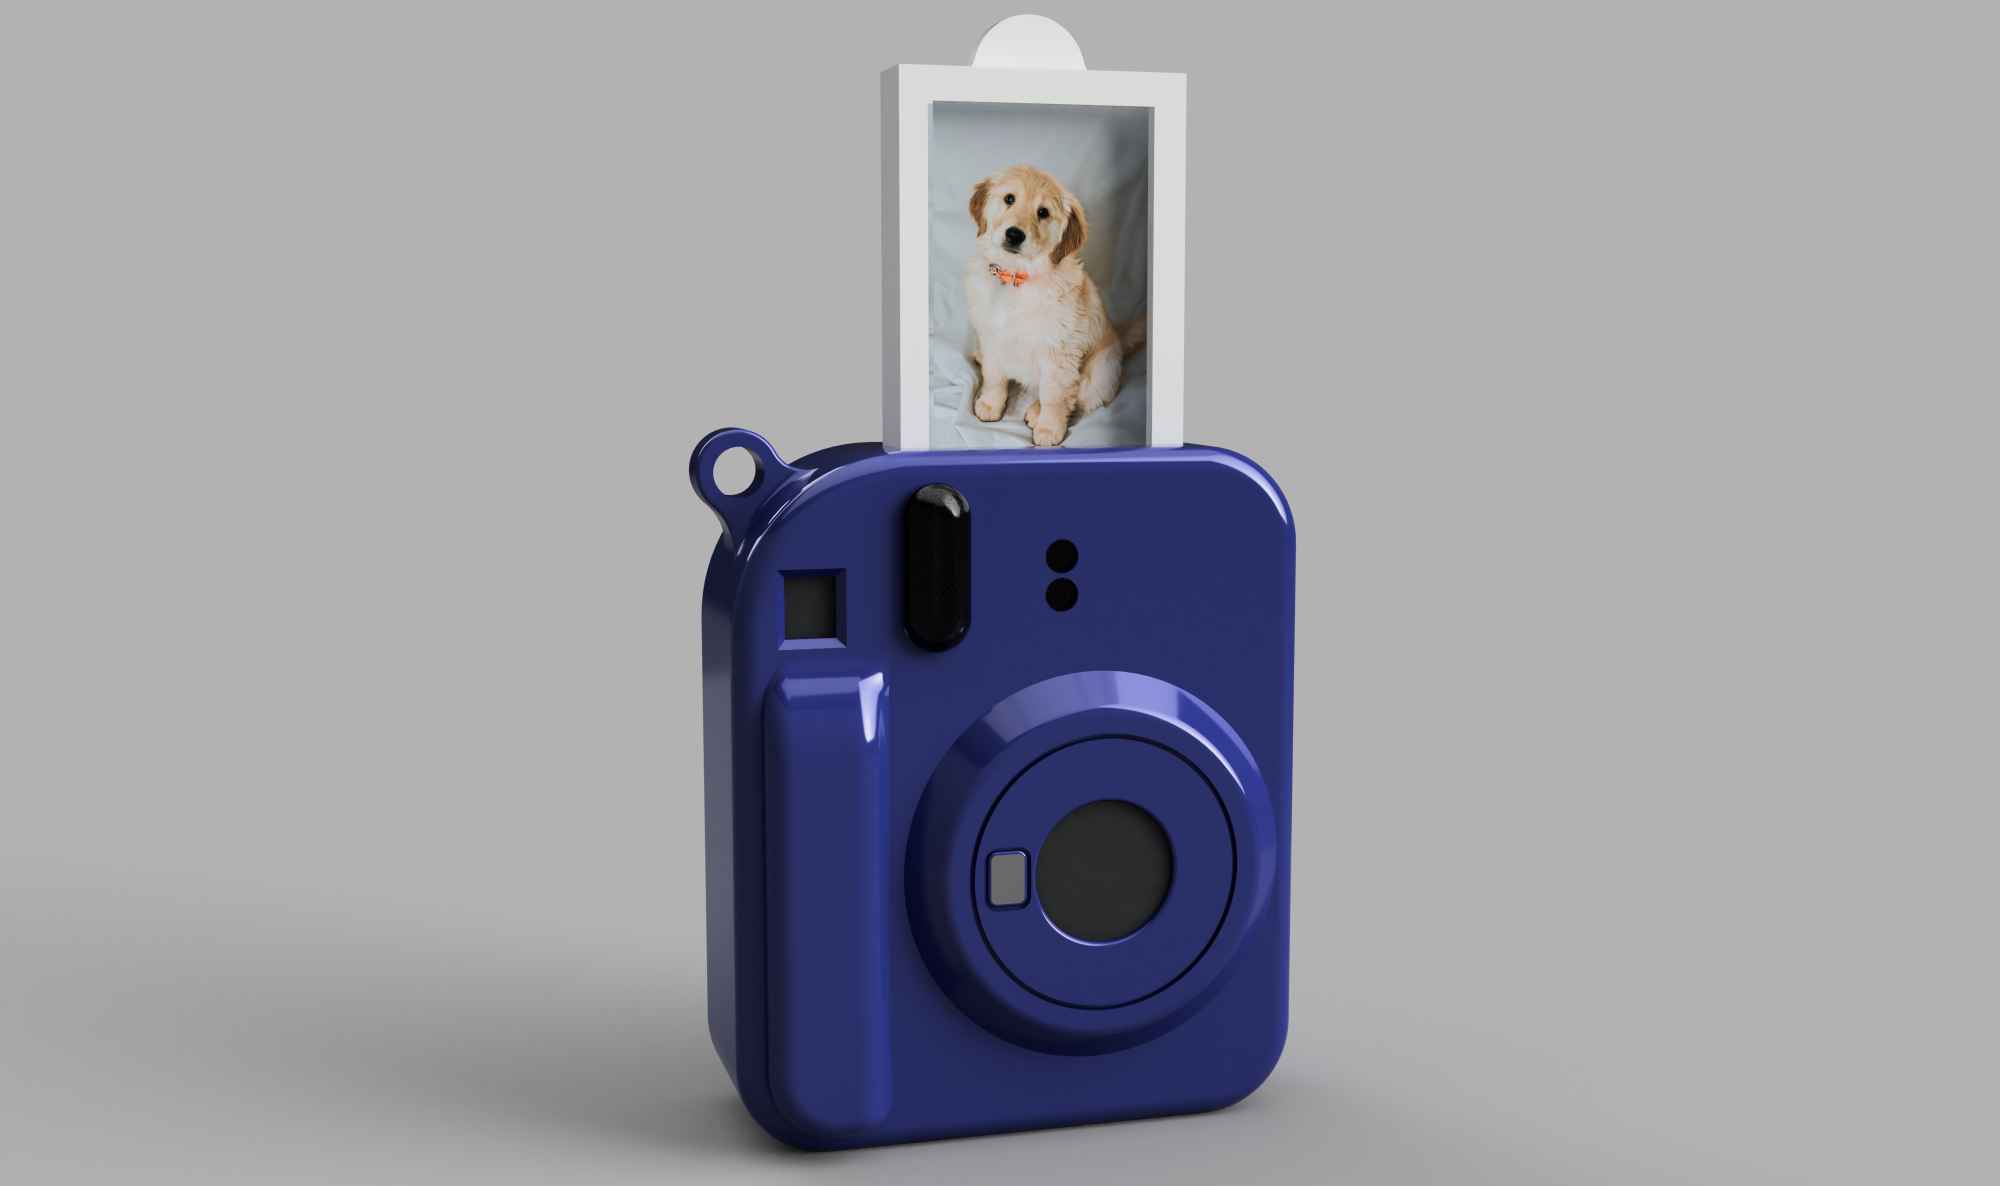
For the individual assignment we needed to design and 3D print an object that couldn't be made subtractively which means it should have udercuts, overhangs, print in place or nested parts that can't be disassembled. At first, I searched for 3D prints for inspiration and found that there were keychains in the shape of polariod cameras. So I decided to design it and it should have some overhangs but my instructor Noha suggested me to print it in place when she saw the design which was a great suggestion. So let's ses how I did it and how it turned out.
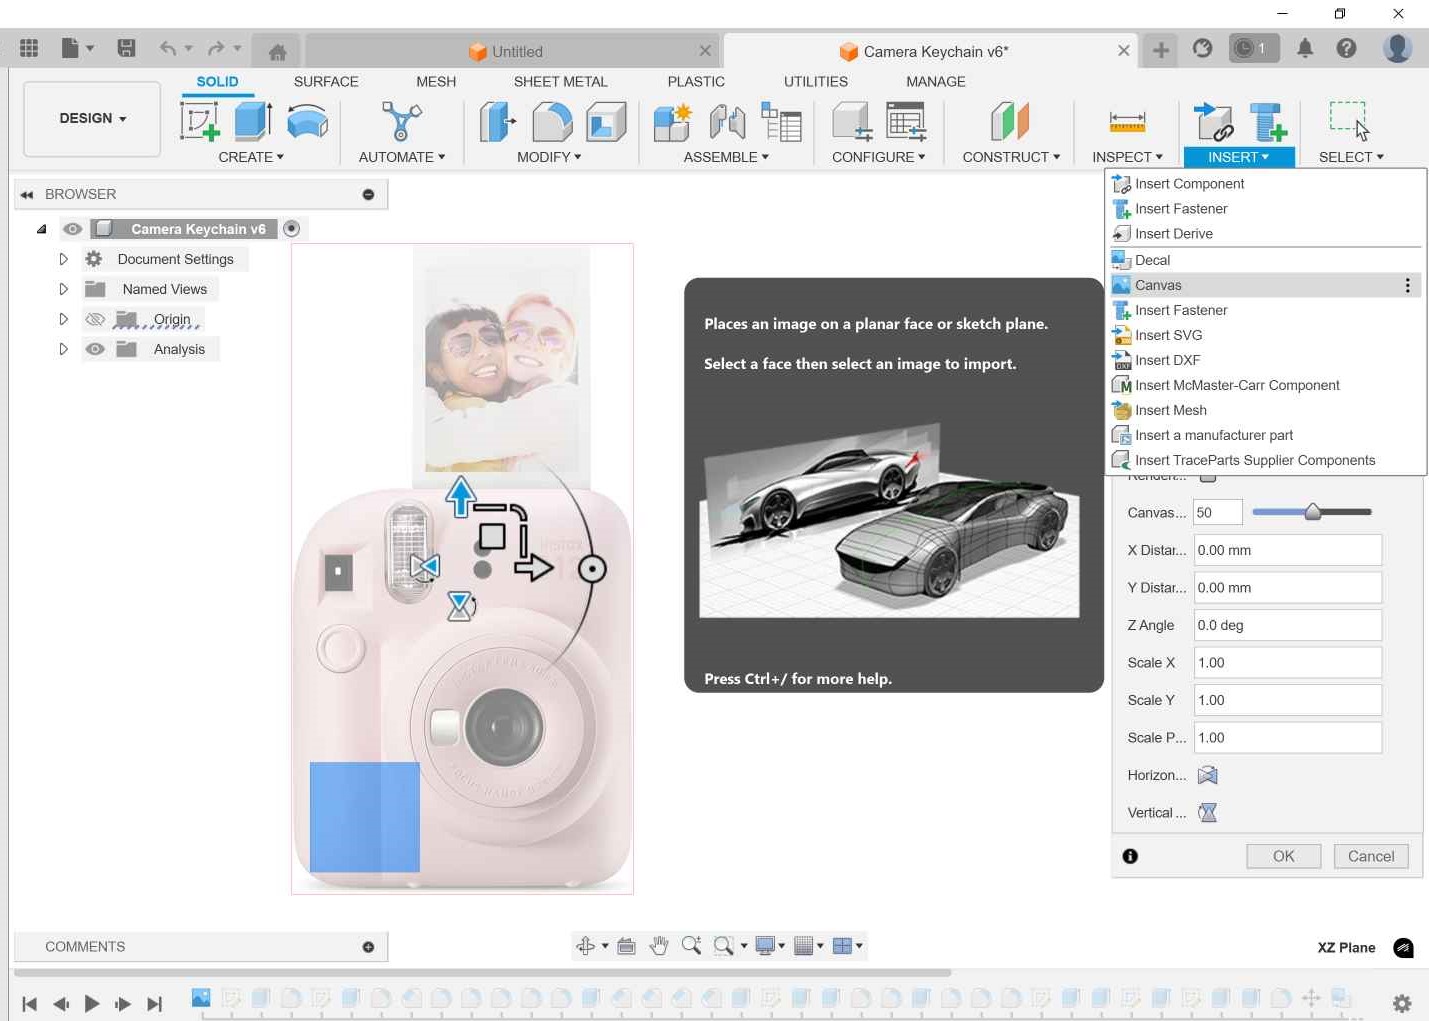
1- I inserted a canvas of a front view of the camera to start sketching on it.
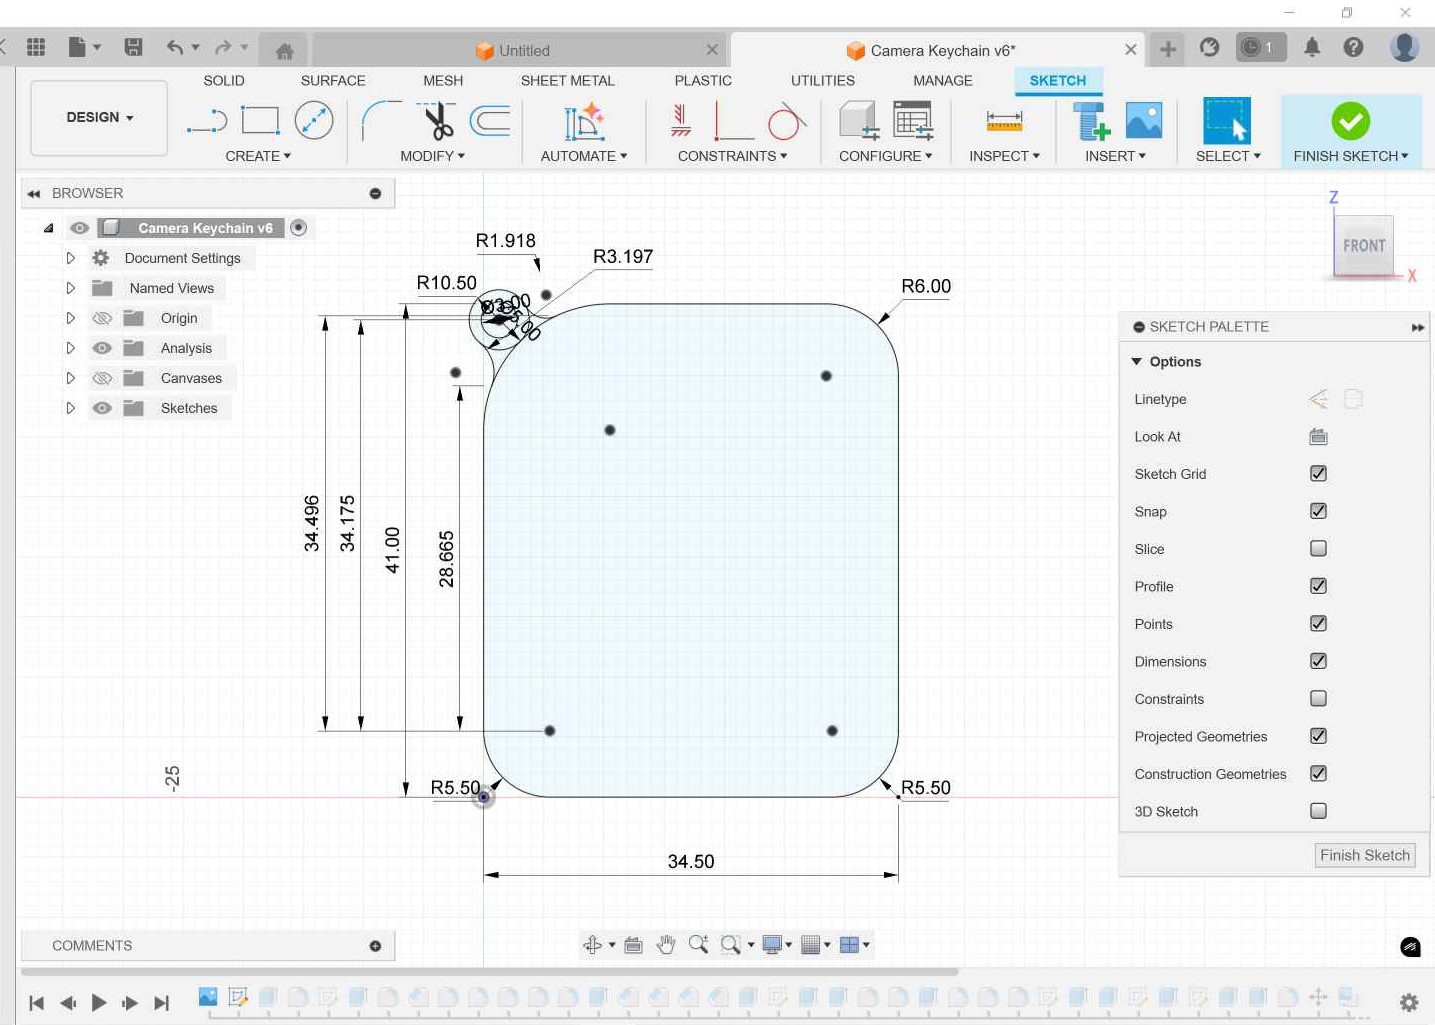
2- I created a sketch to trace the main outline of the camera from the canvas.
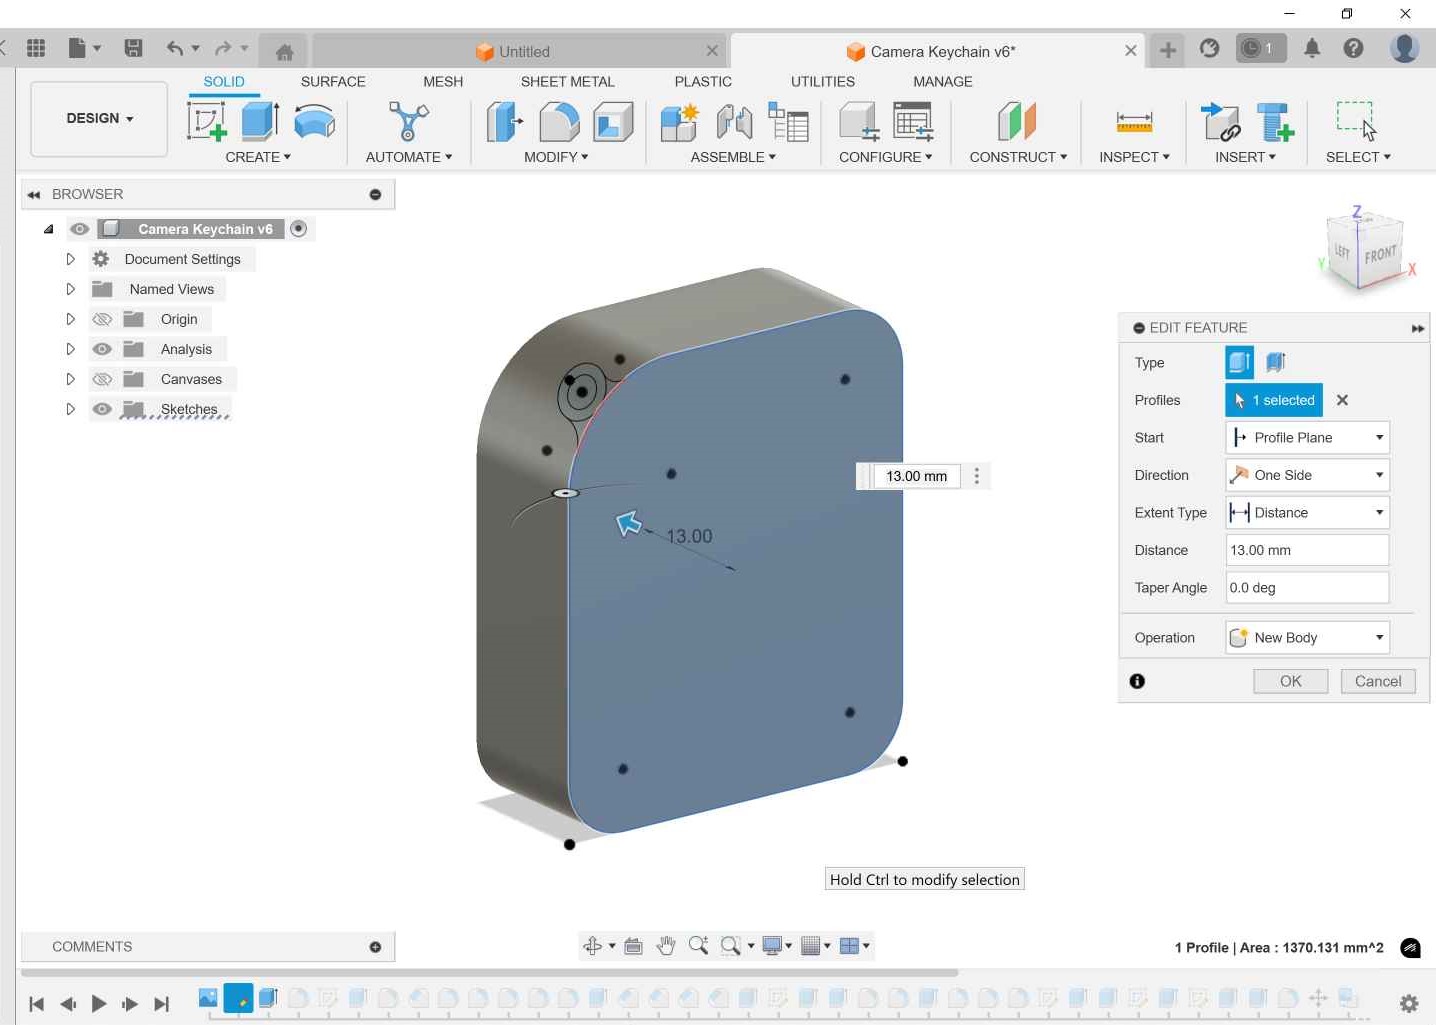
3- I then extruded the main outline to make the main body and added some fillets.
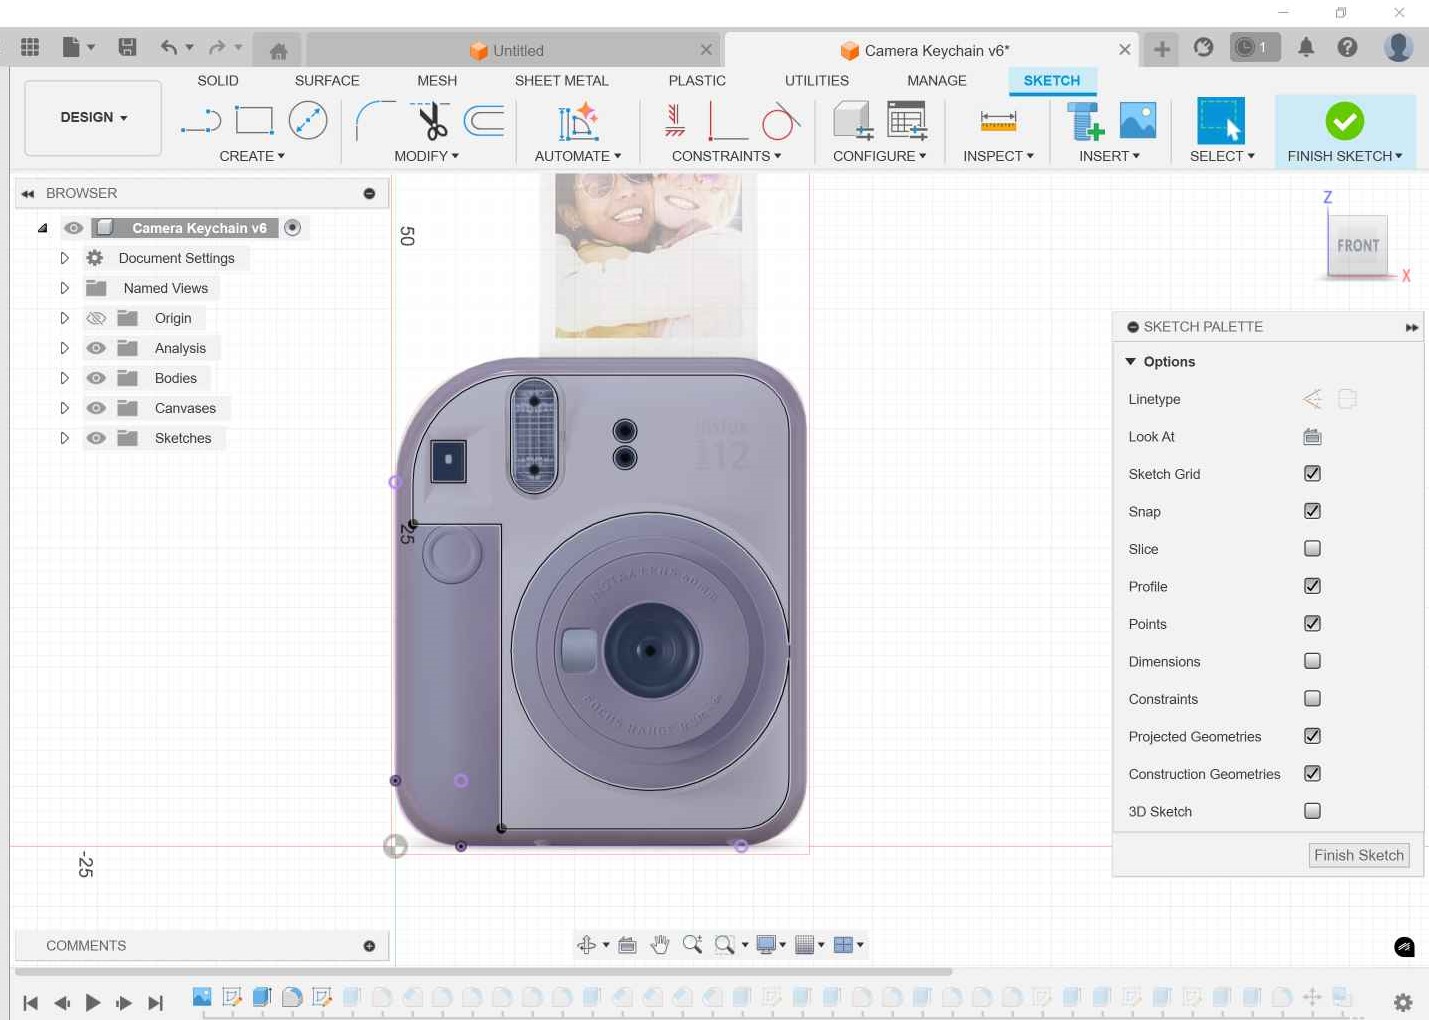
4- I sketched on the front face of the body then traced the shapes outline using sketching tools.
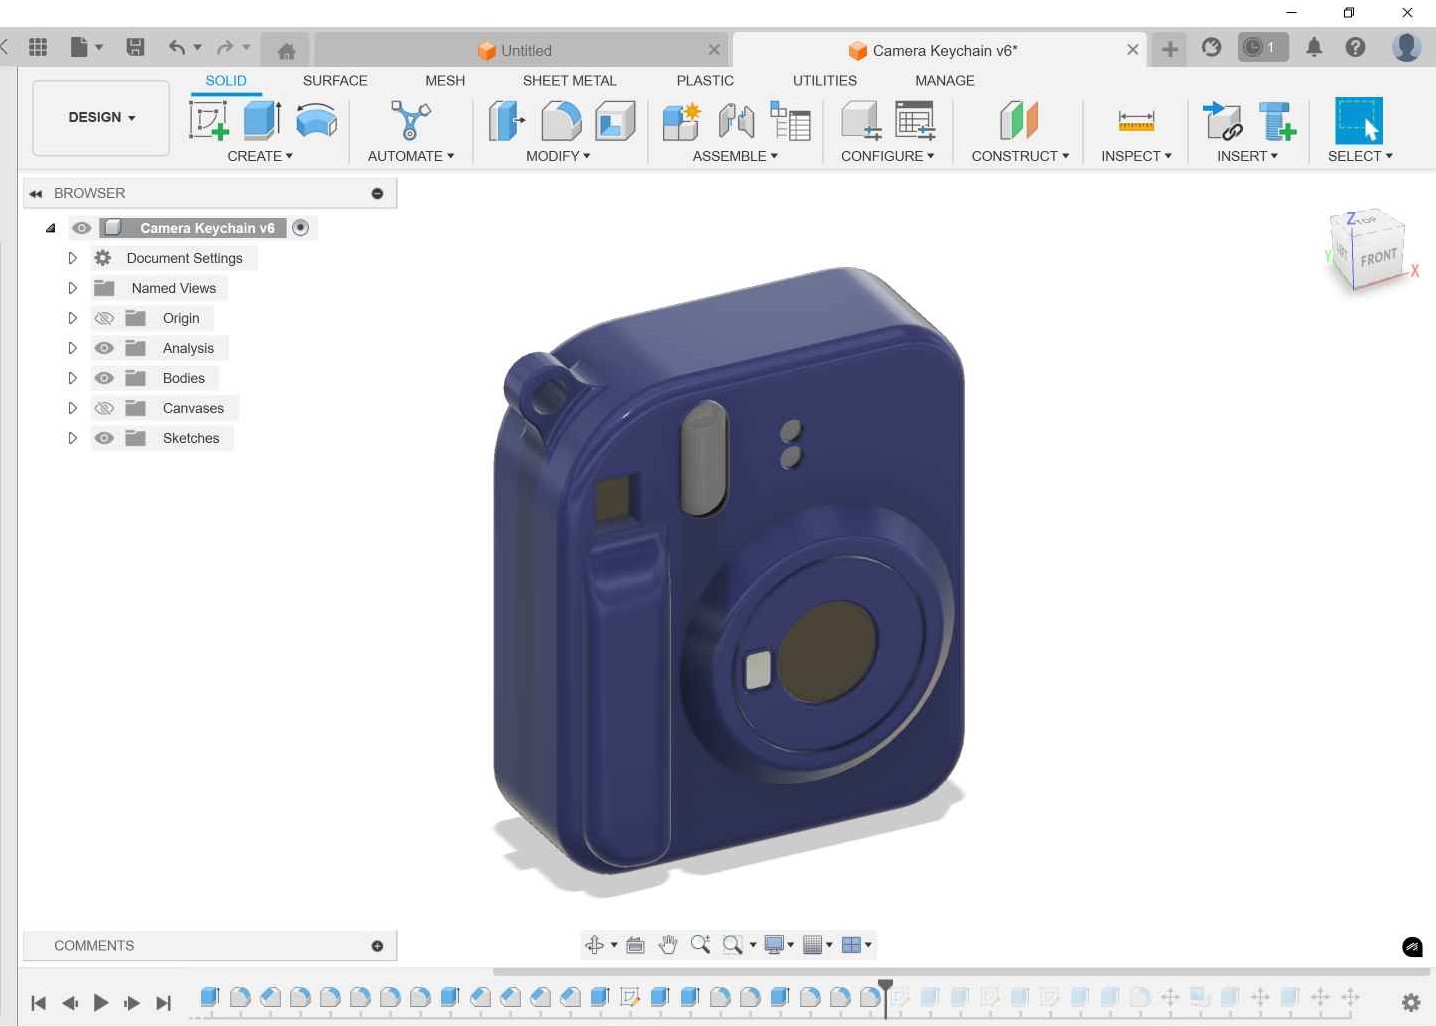
5- I then extruded the sketches I made and added some fillets and chamfers to the extruded faces.
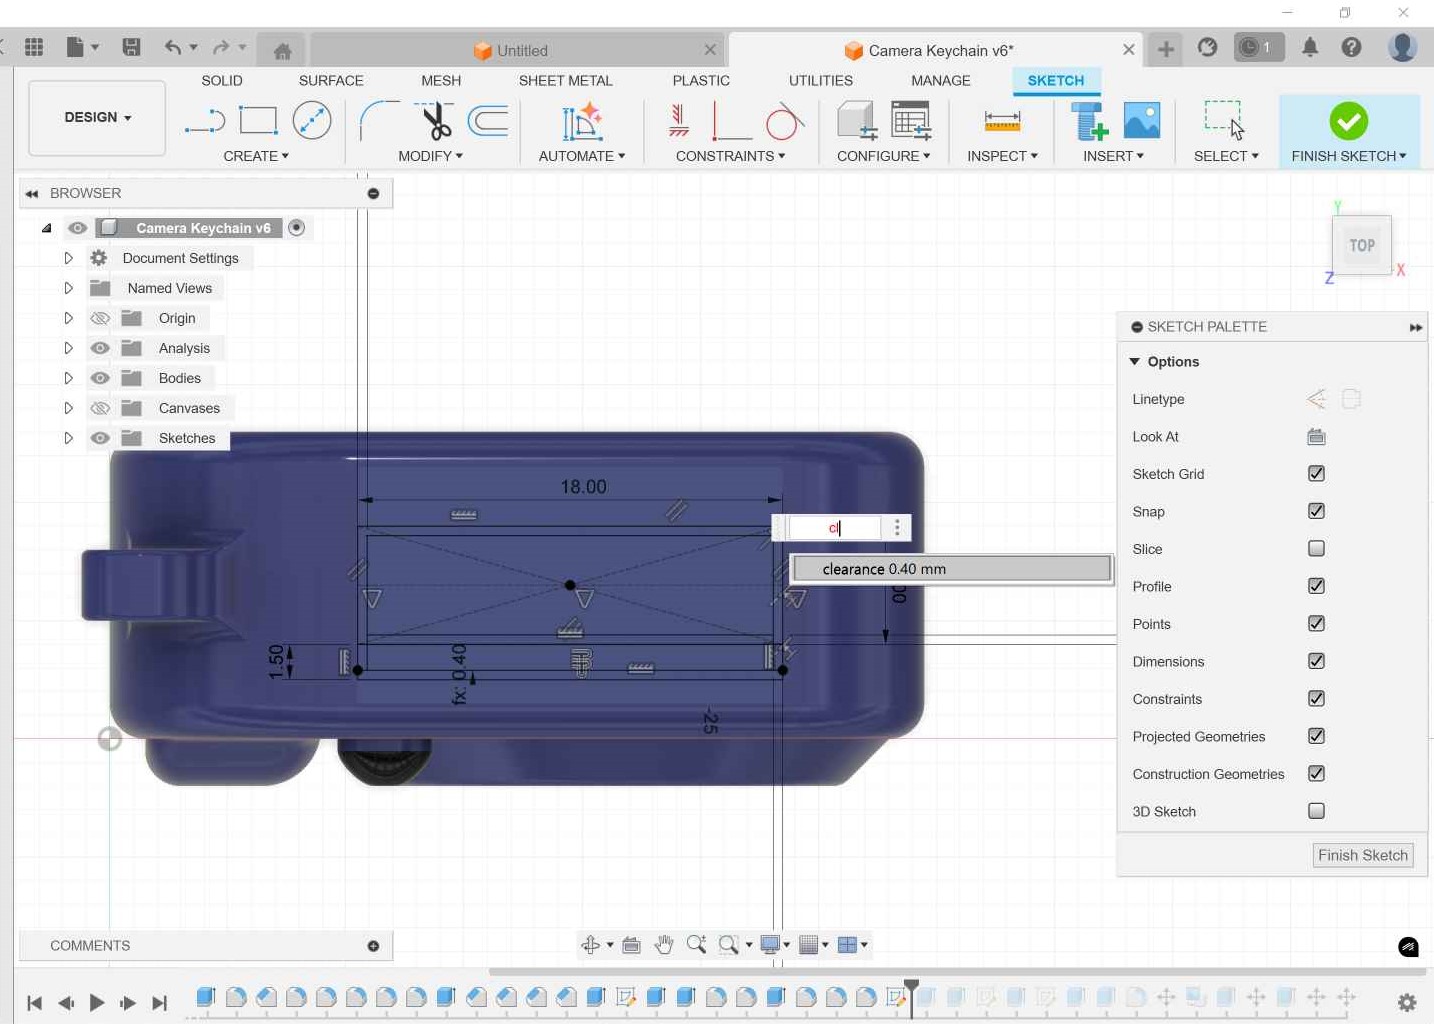
6- I sketched on the top face of the camera to start making the photo holder in place with adding a parametric clearance.
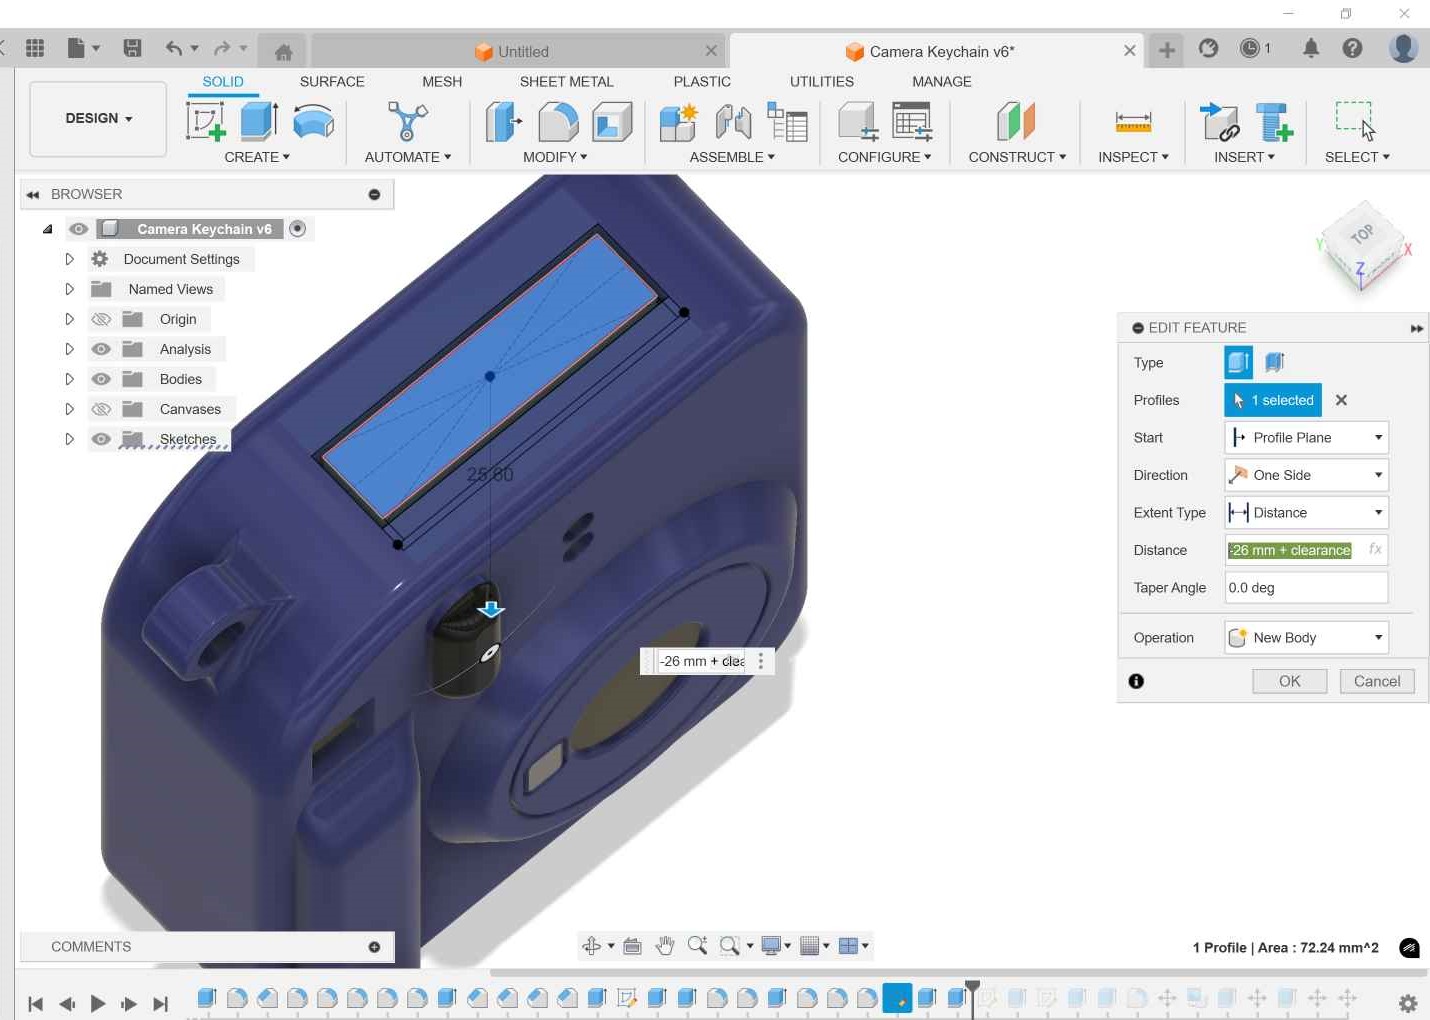
7- I extruded cut the camera body 26mm and extruded the photo holder to 26mm-clearance.
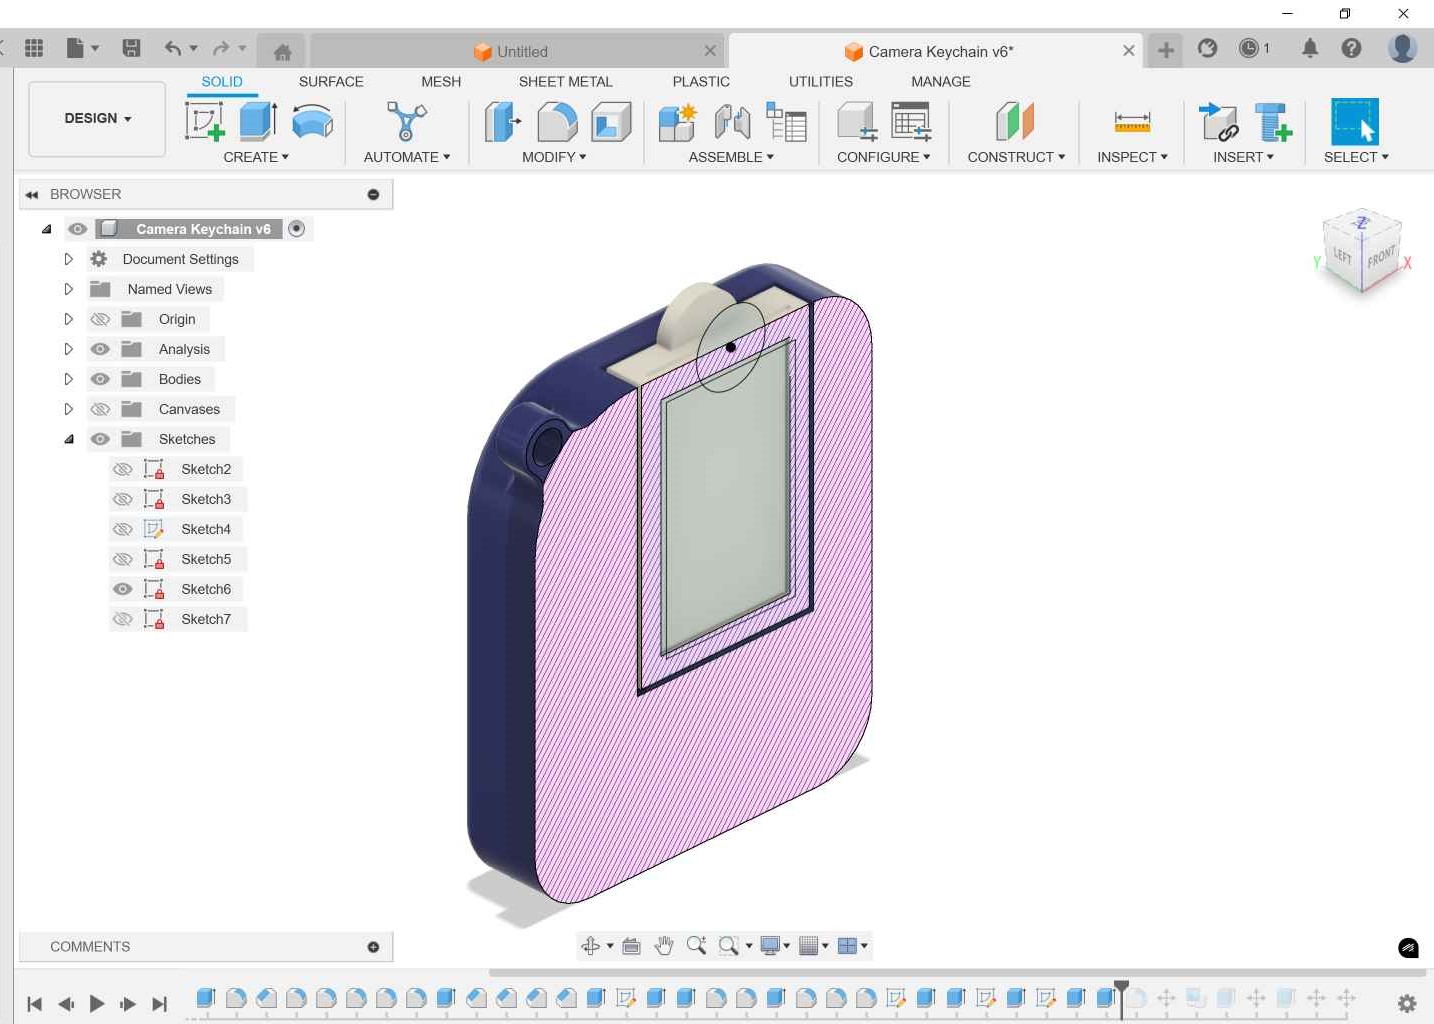
8- I sketched on the front face of the photo holder to make a frame and an opening to show the photo from.
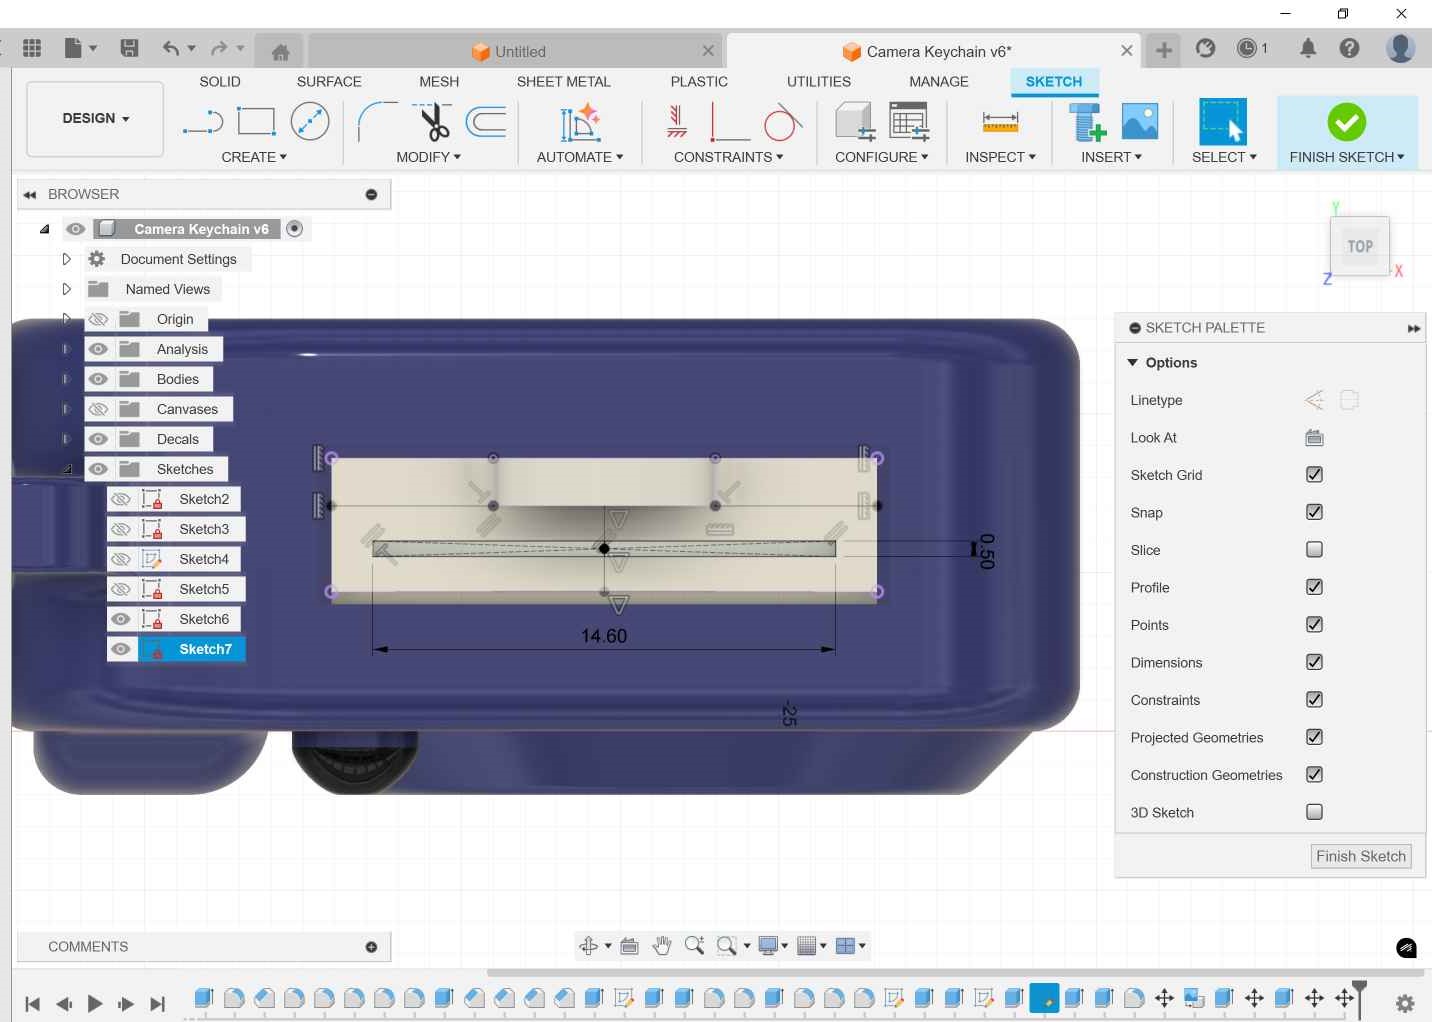
9- On the top face of the photo holder I sketched a rectangle with 0.5mm width "The wall thickness I tried before".
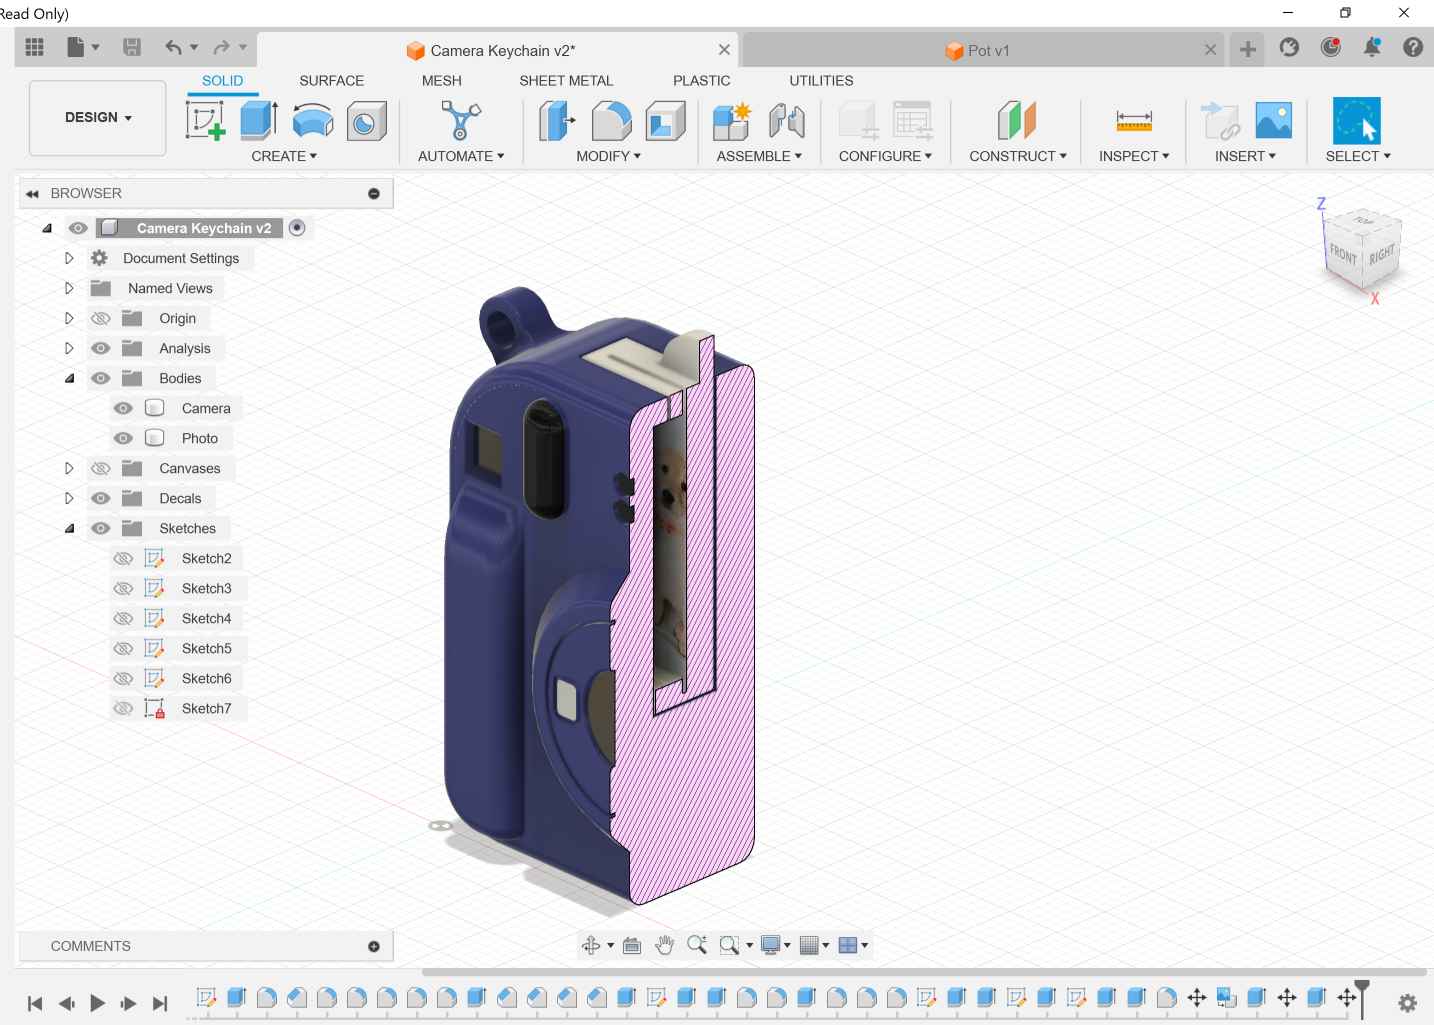
10- This is a section analysis to imagine how the photo holder will be held in place and can't be disassembled.
2. 3D Print Camera Keychain
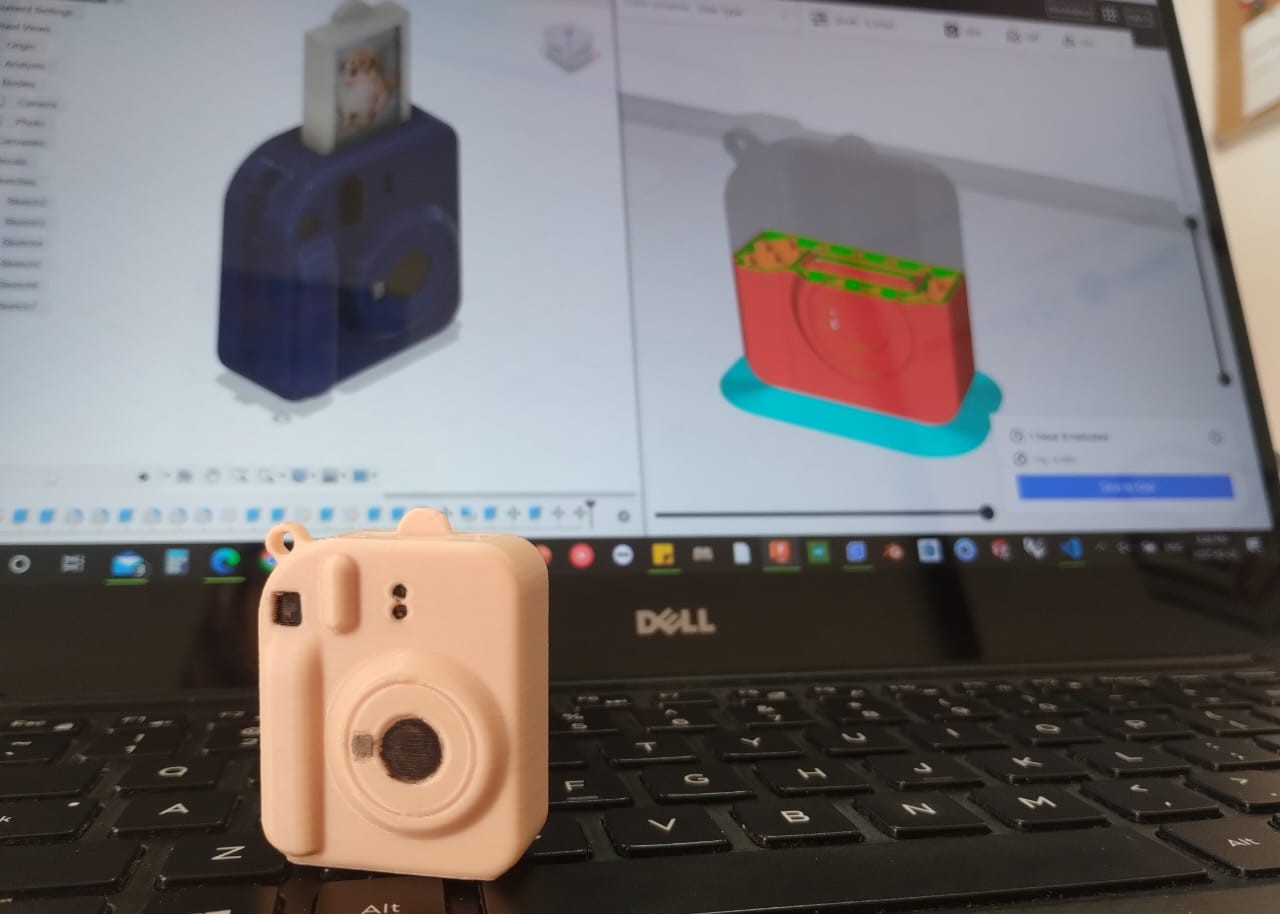
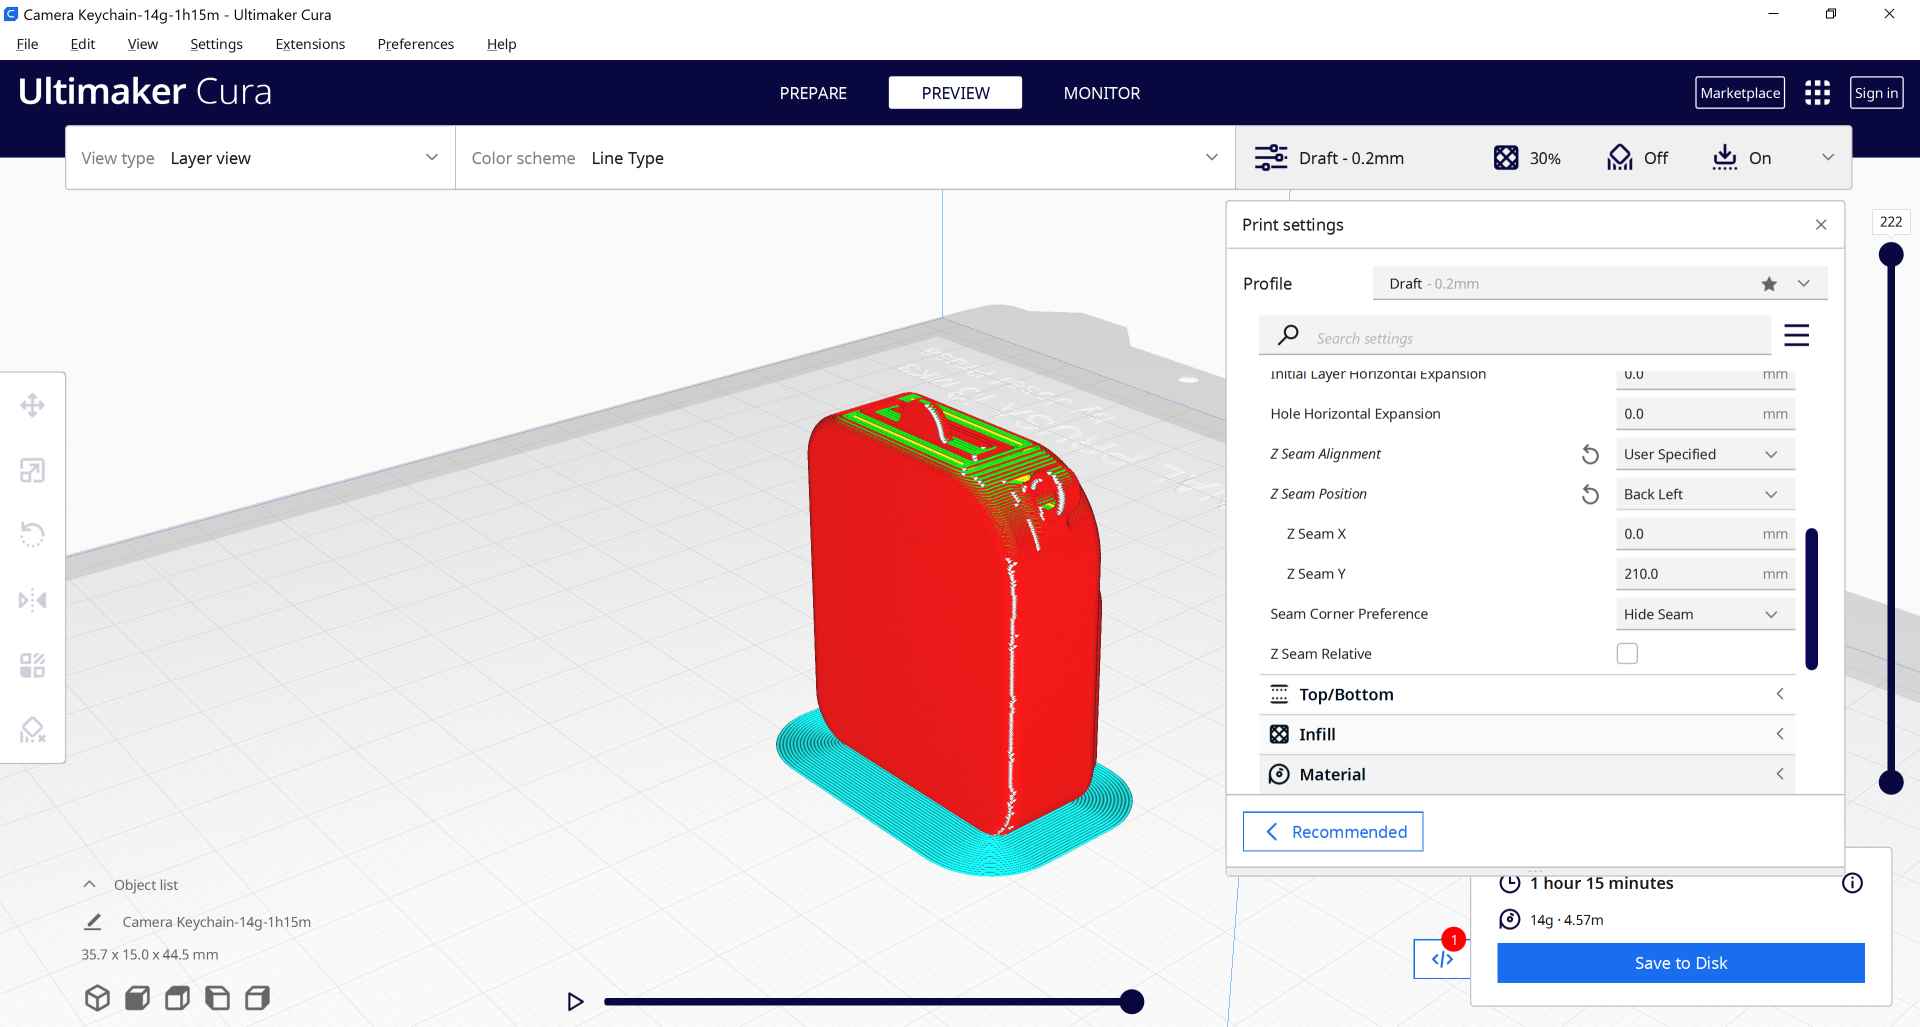
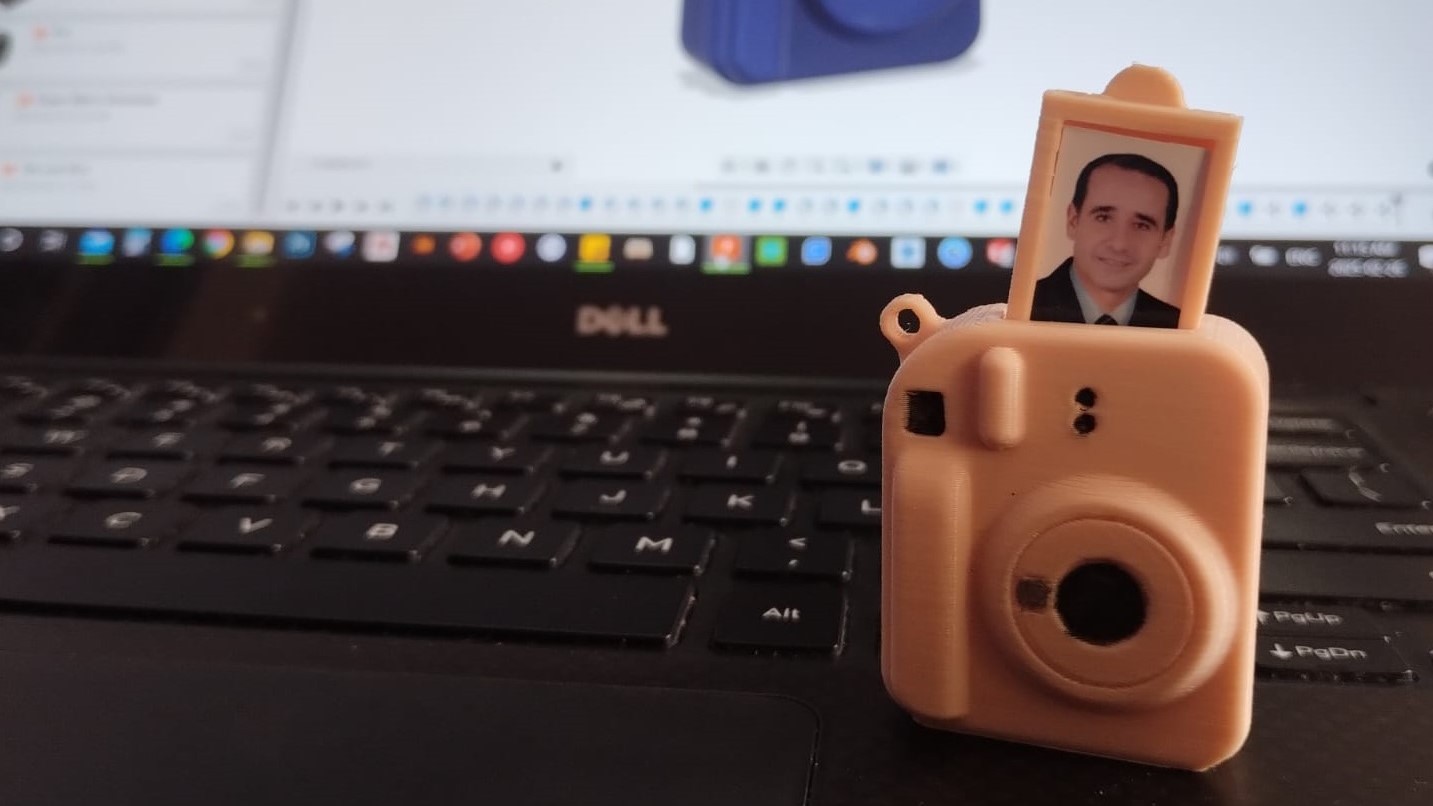
I used Ultimaker Cura to 3D print my design. I imported the stl file to the slicer and set profile to 0.2mm and the infill to 30%. It will be printed in place without any support and I set the Z seam position to Back Left and added a brim to make it stable while printing.
After printing the keychain I made some post processing. I had to move the photo holder carefully with the cutter to make it move freely. I then wanted to add some small touches with acrylic colors to the camera. And finally added a photo of my uncle Tarek.
3. 3D Scanning - Kinect
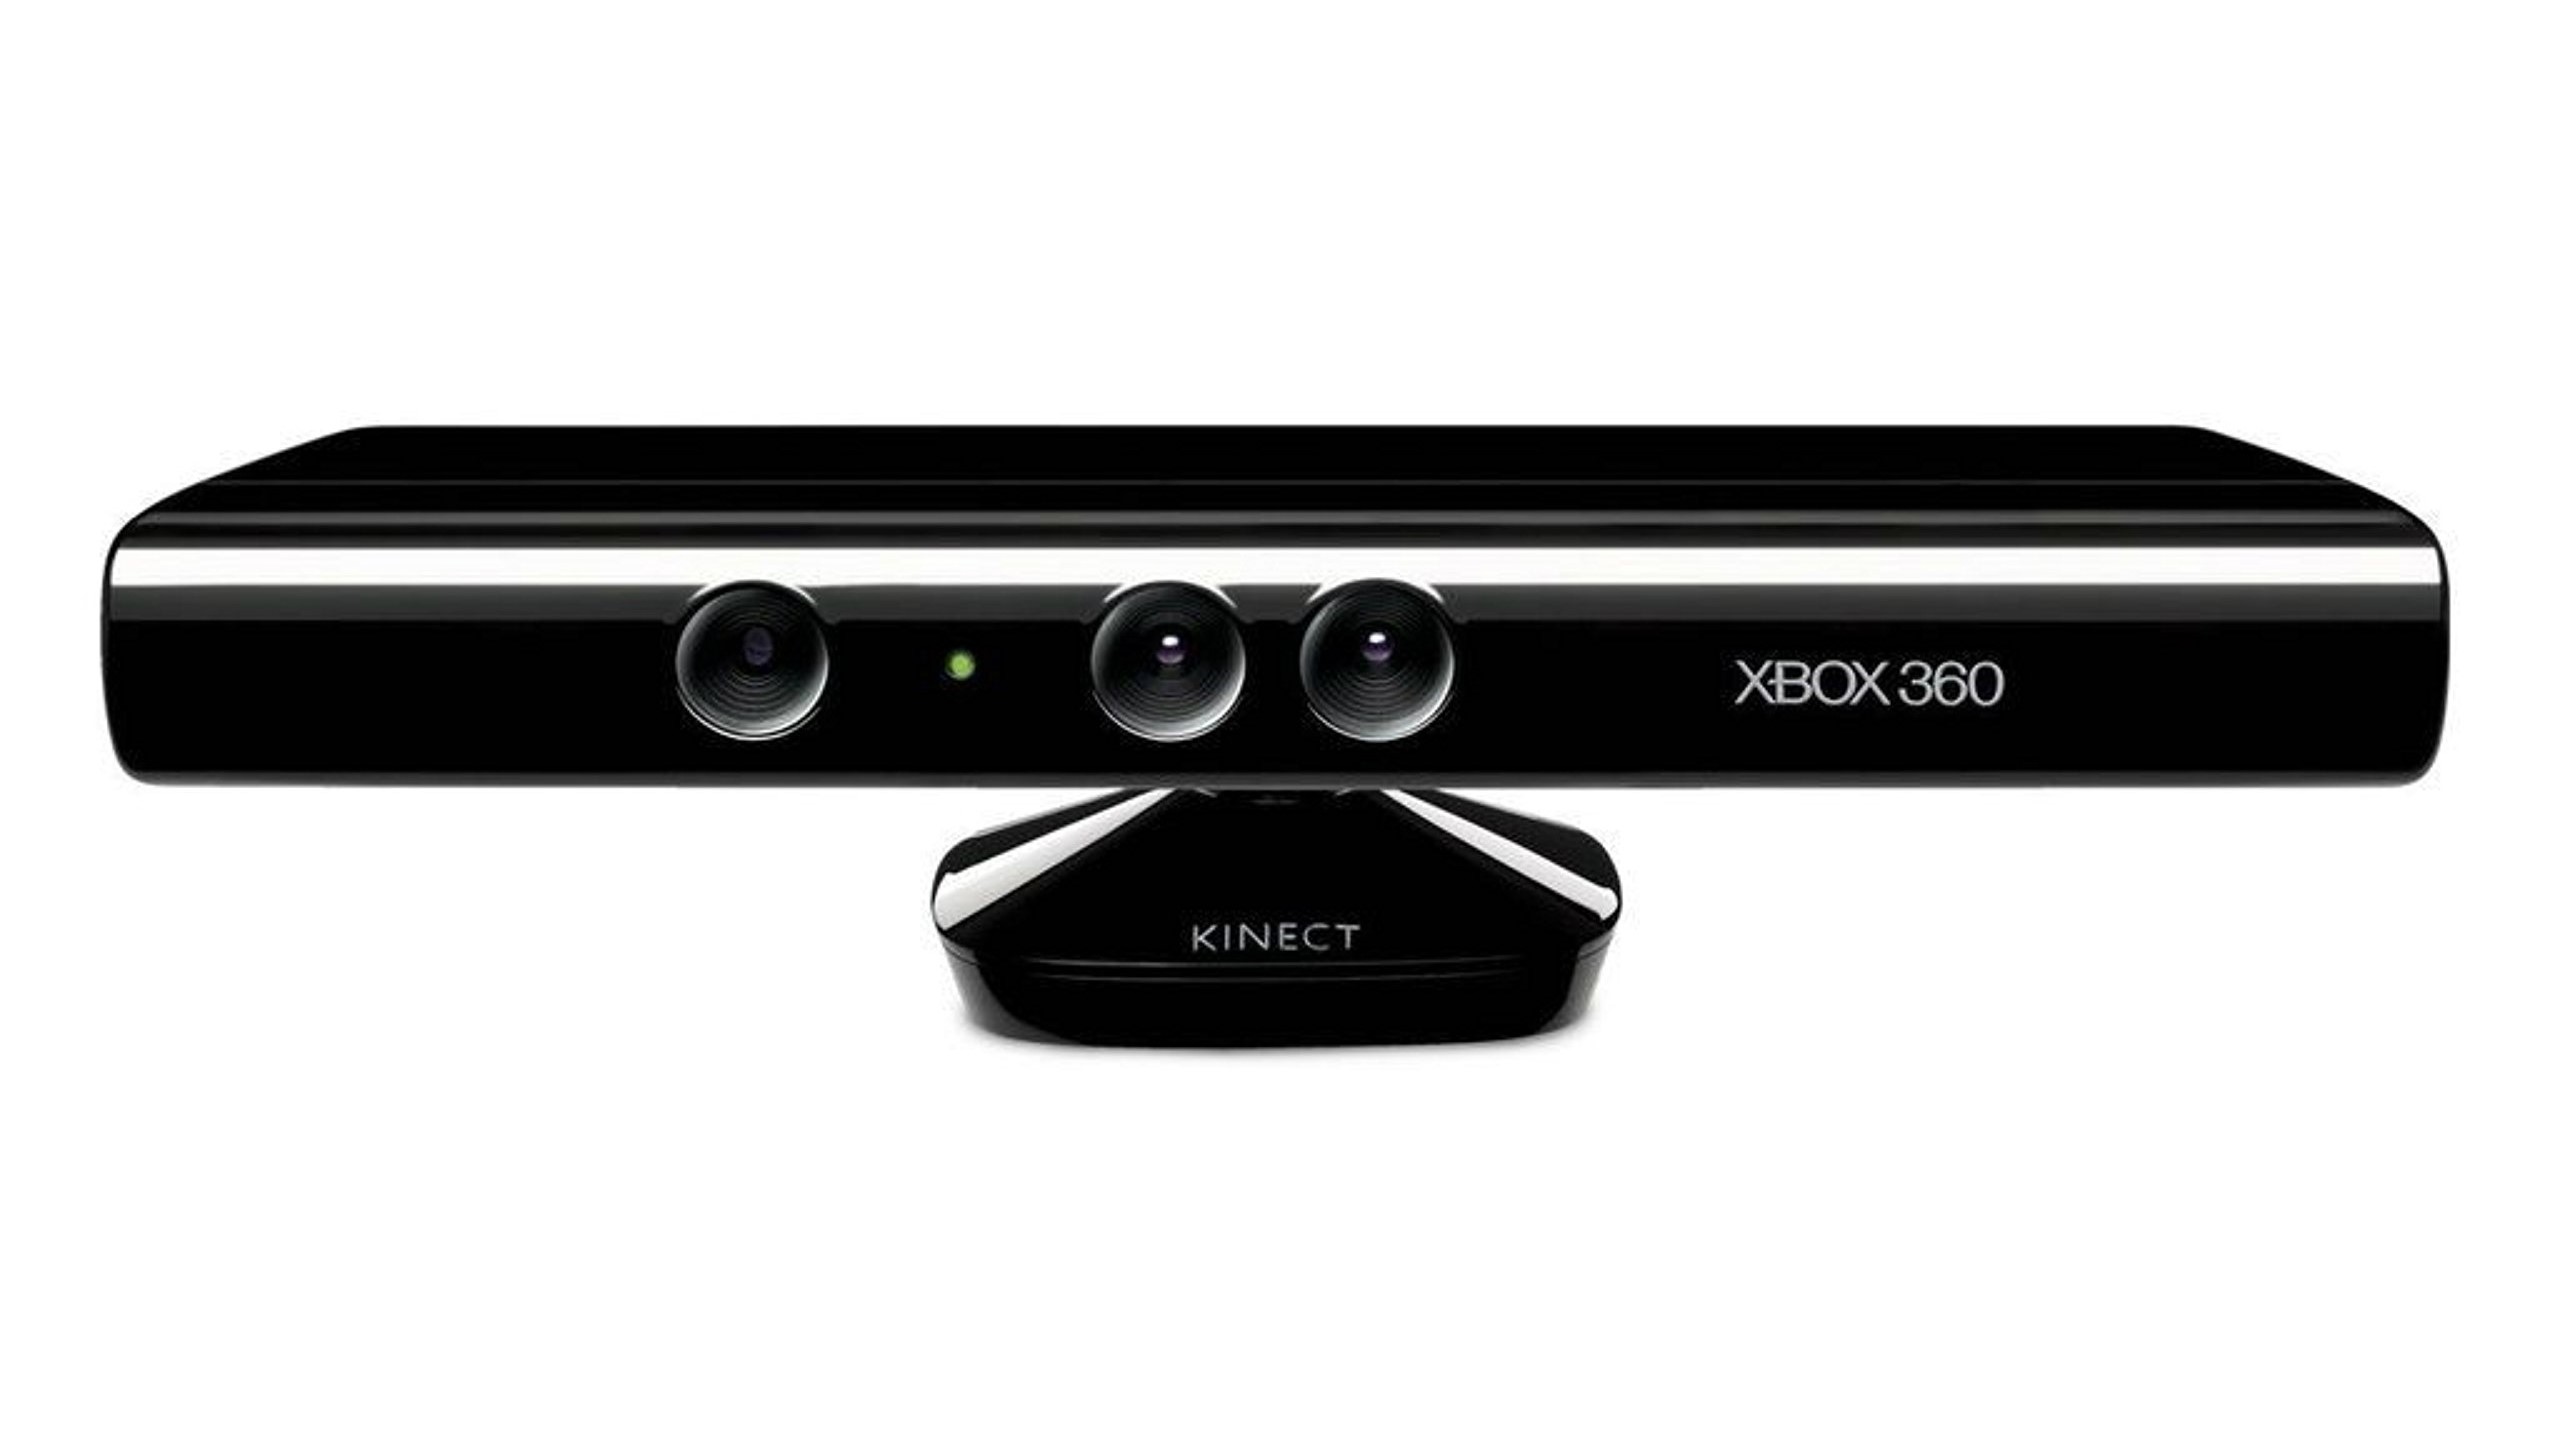
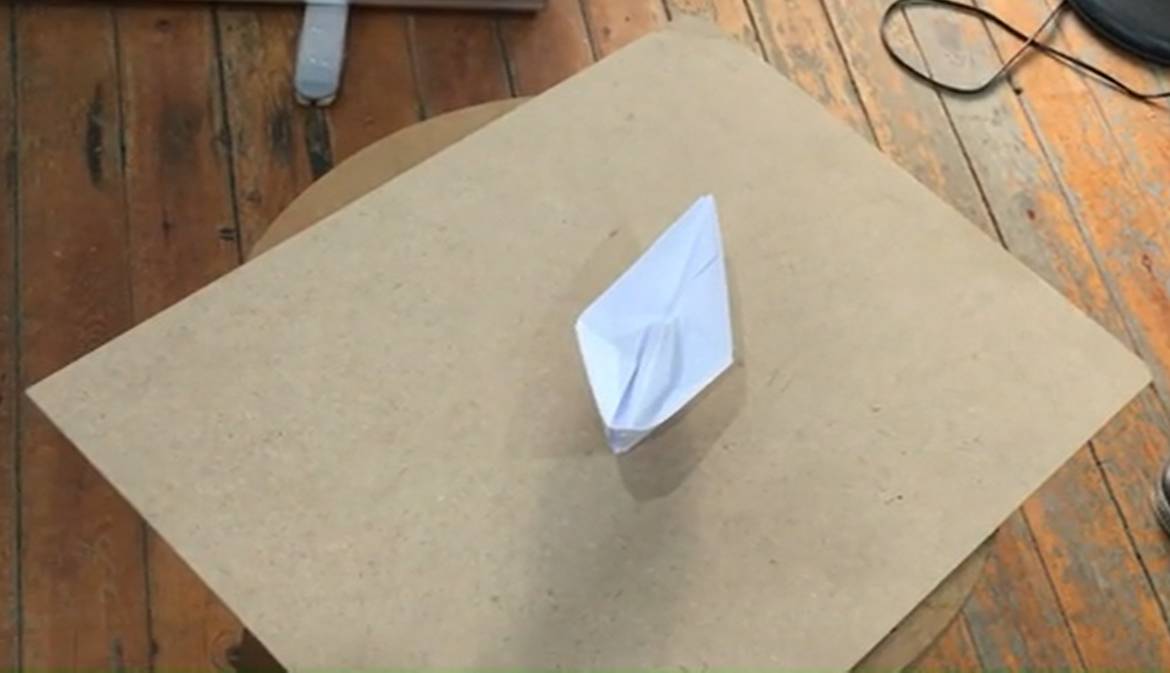
For this part of the assignment we needed to 3D scan an object. I did know there's something called 3D scanning before but haven't tried it myself. So this was my chance to try it. I used Kinect with my instructors and friends to scan some objects. What I wanted to scan for my assignment was a paper boat then 3D print it. The story behind this is that I always make paper boats with train or bus tickets and give them to my friends who joined the trip with me and they keep them in their wallets. So, I wanted to 3D print a paper boat after scanning it to make it last more.
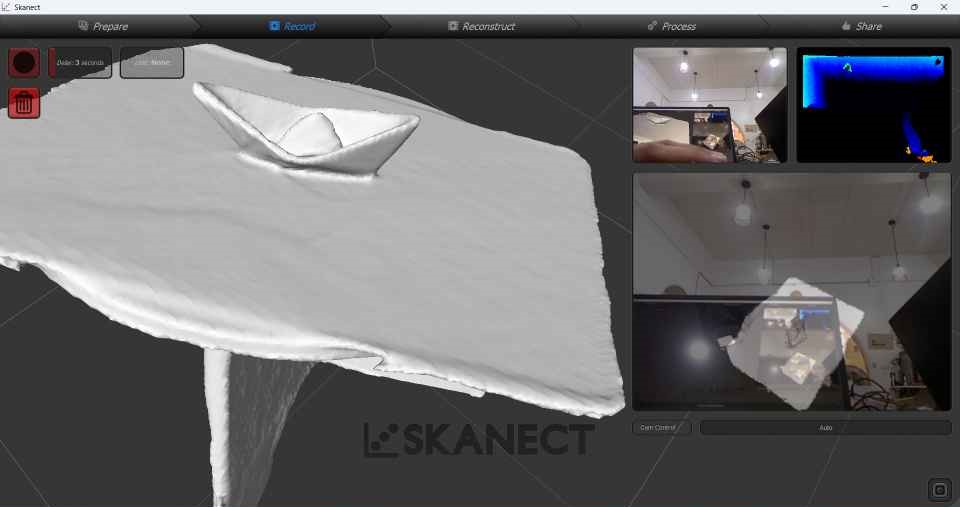
To scan using Kinect we used our instructor's Amany laptop as she had the software Skanect connected to the scanner. To start scanning you have to be away from the object around a meter so you don't get so many errors like go back to the last position or you moved to fast. I started going around the object from different angles till I was satisfied with the final look and then exported the final result as an stl file.
I first scanned a makey little statue to practice 3D scanning.
I then moved to scanning the paper boat and the result was good with few holes at some points to be fixed using meshmixer later.
4. 3D Scanning - Kiri Engine
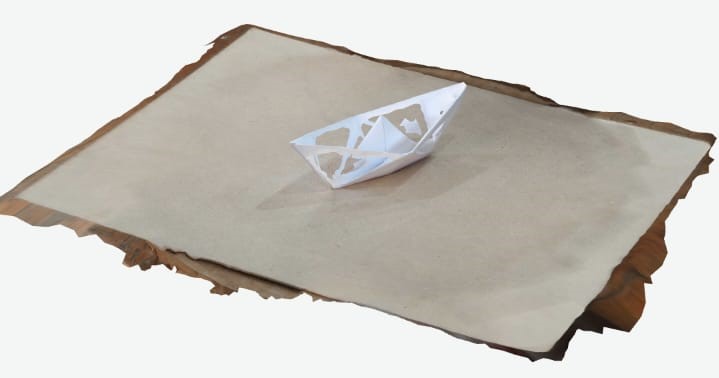
I wanted to test the difference between an expensive camera with paid software and my mobile phone with a free application. I searched for free applications that exports stl files and found Kiri Engine. I downloaded it and started scanning the same paper boat. The results were quite interesting as the details were less than the Kinect but it was still good for a free application. I used te application for other scans and it gives good results and very easy to use.
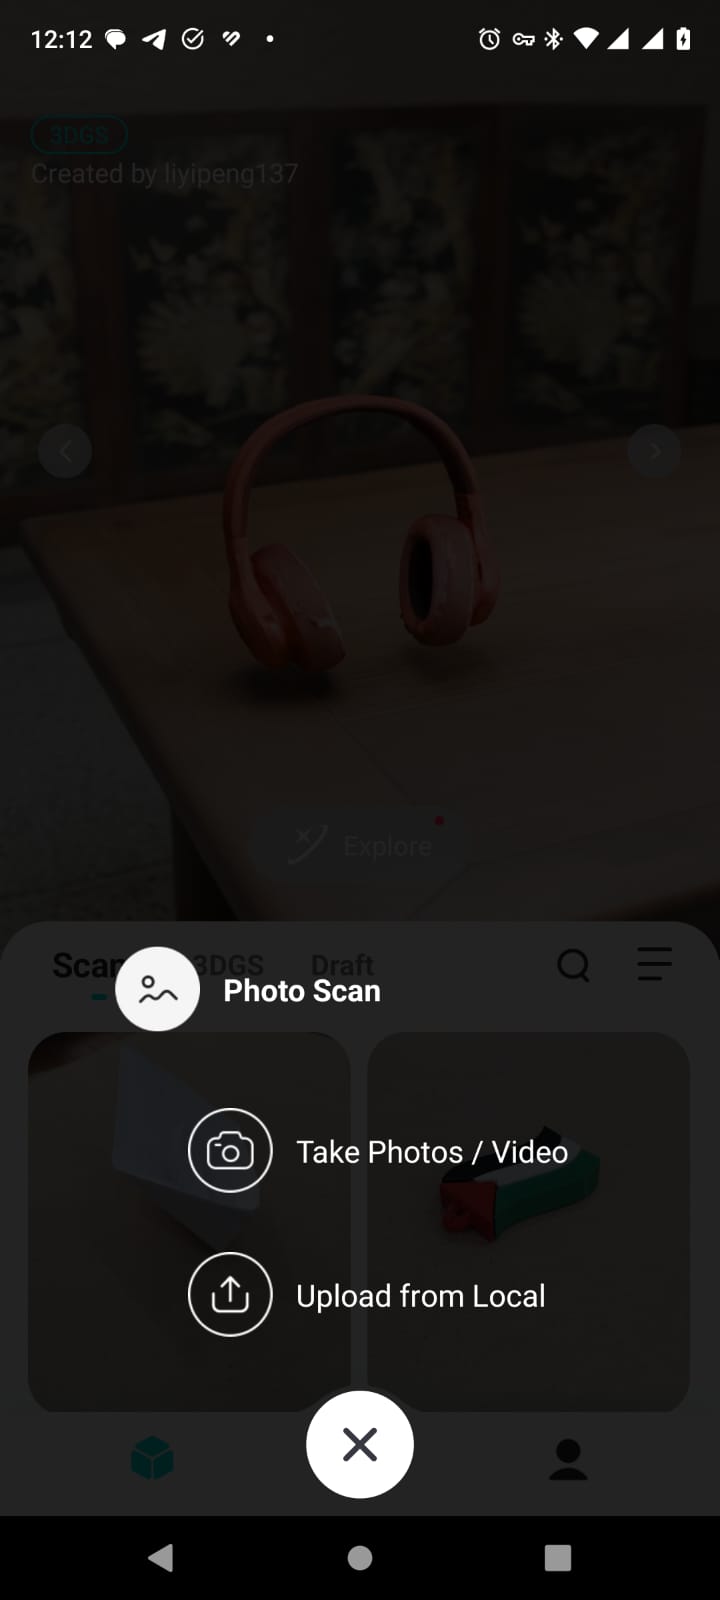
1- I started by clicking the + button and choosing photo scan then take photo/video.
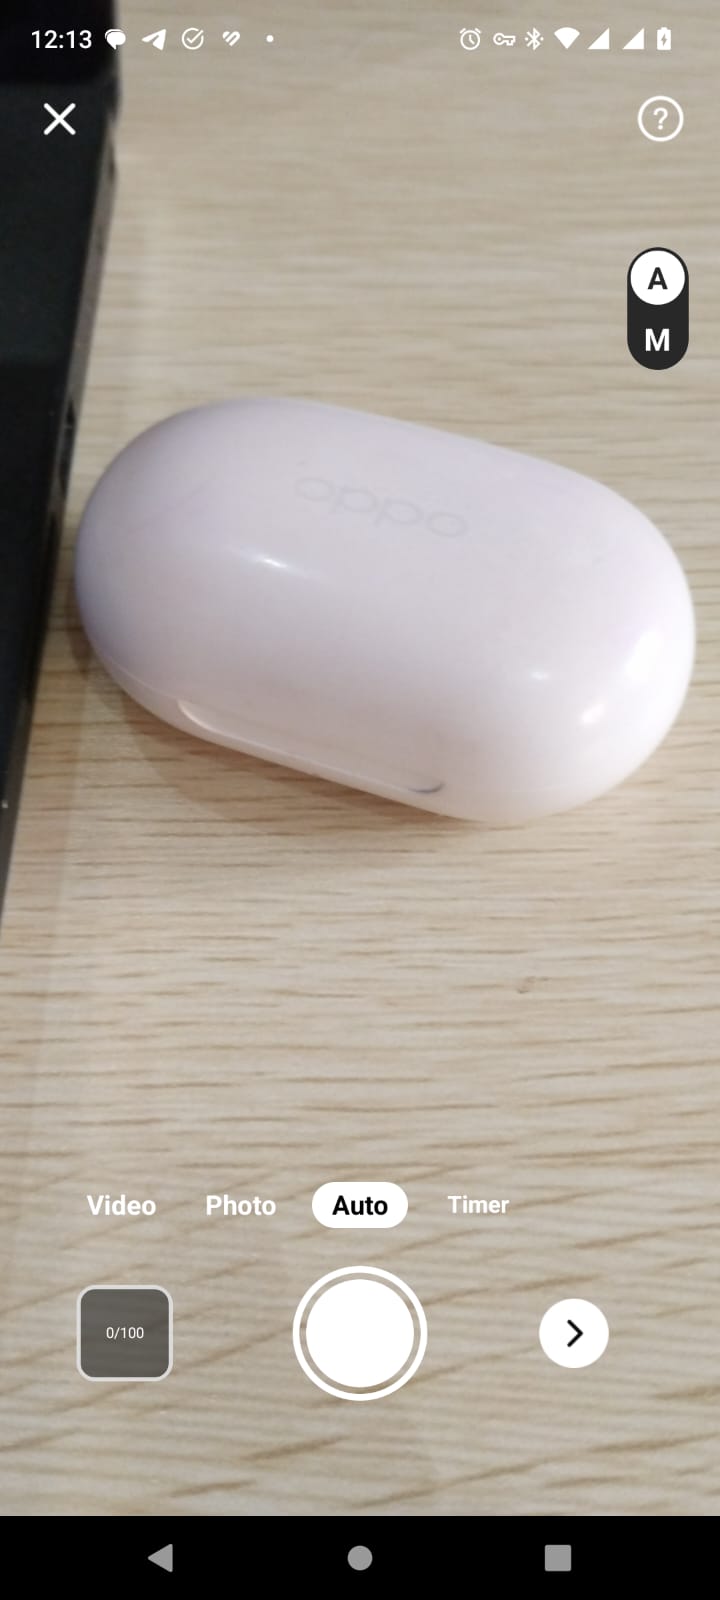
2- The max photos are 100 and min are 20 photos. I set my mode to auto then go around the object.
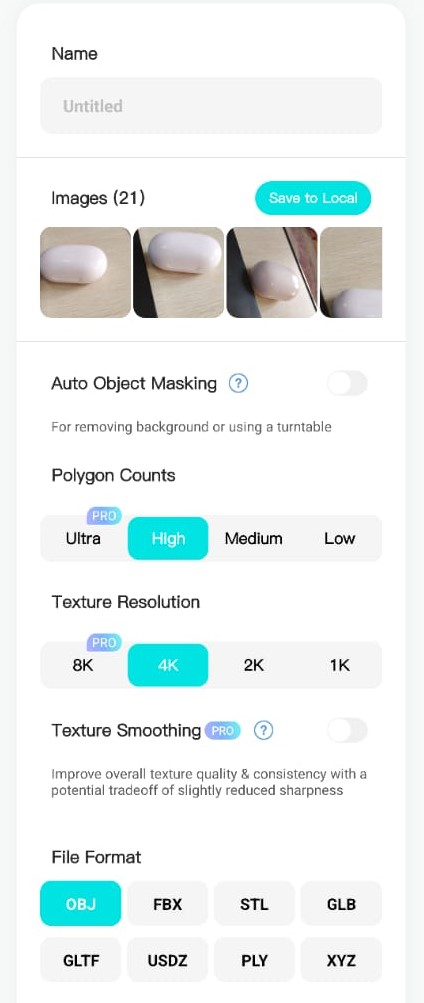
3- I click > then set the name and other settings.
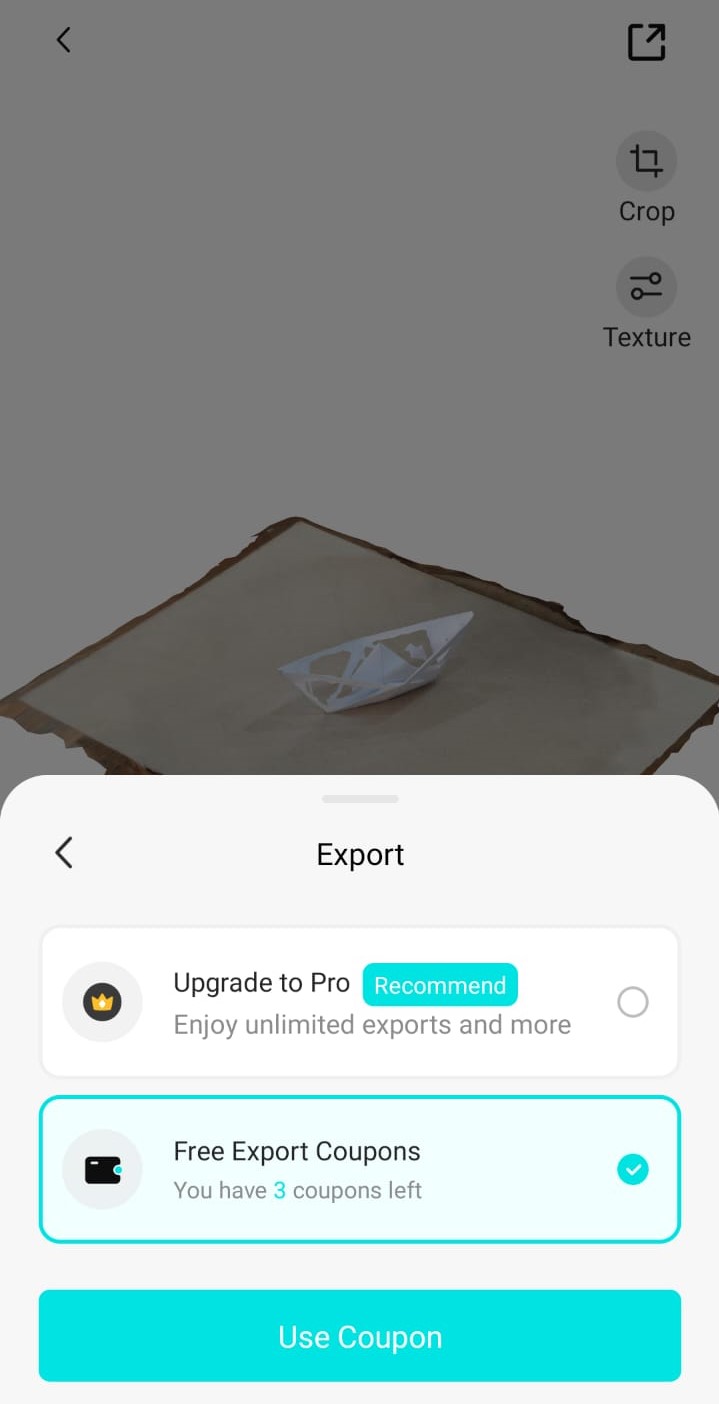
4- The app process the 3d scan for couple of minutes then you can click on it then choose export. It gives you 3 free coupons.
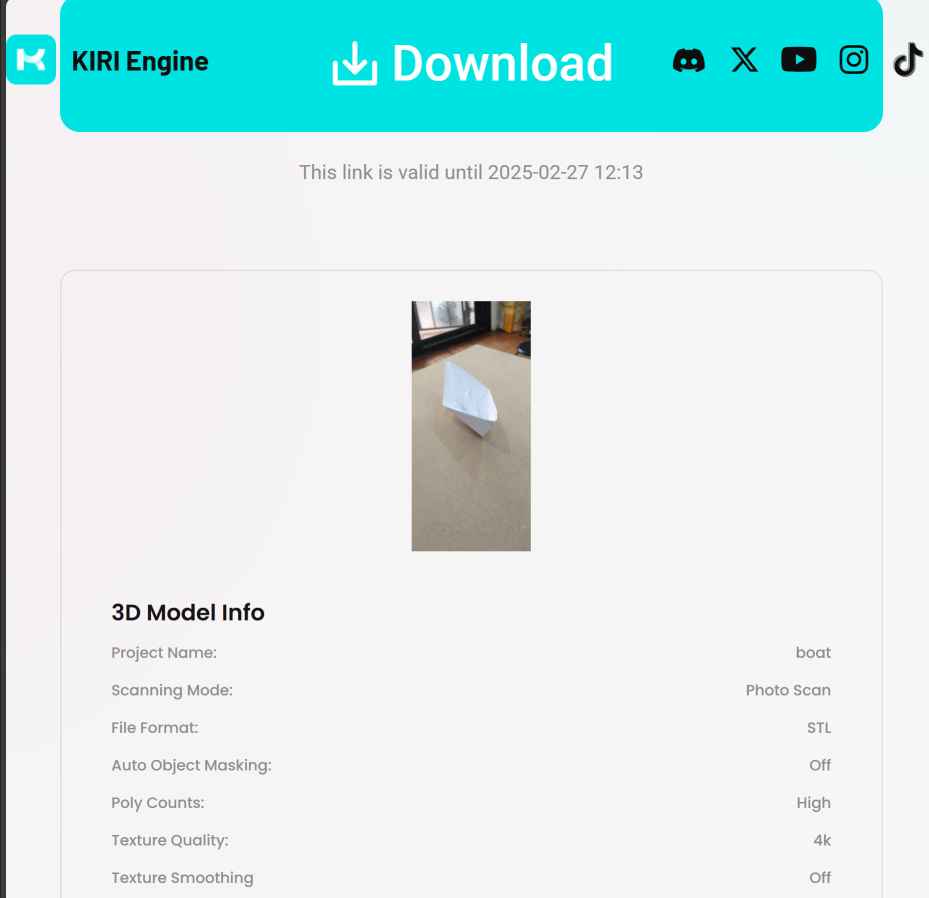
5- The exported file is sent to the mail you provide to the app and you can download it. It has 2 files original one and low poly version.
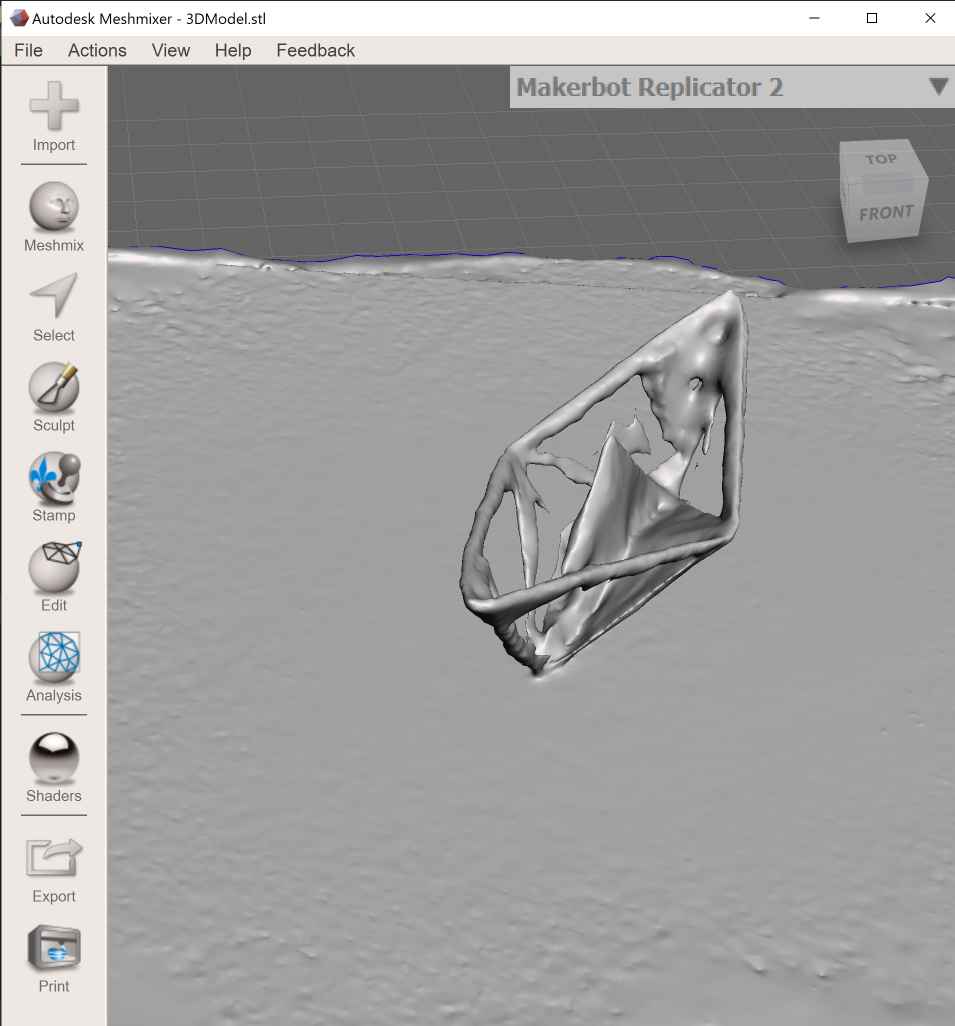
6- This is the original version when opened using meshmixer. the boat has many holes but I guess it's because of its white color is hard to be detected because when I scanned a colored object the results were very good.
5. Meshmixer Sculpting
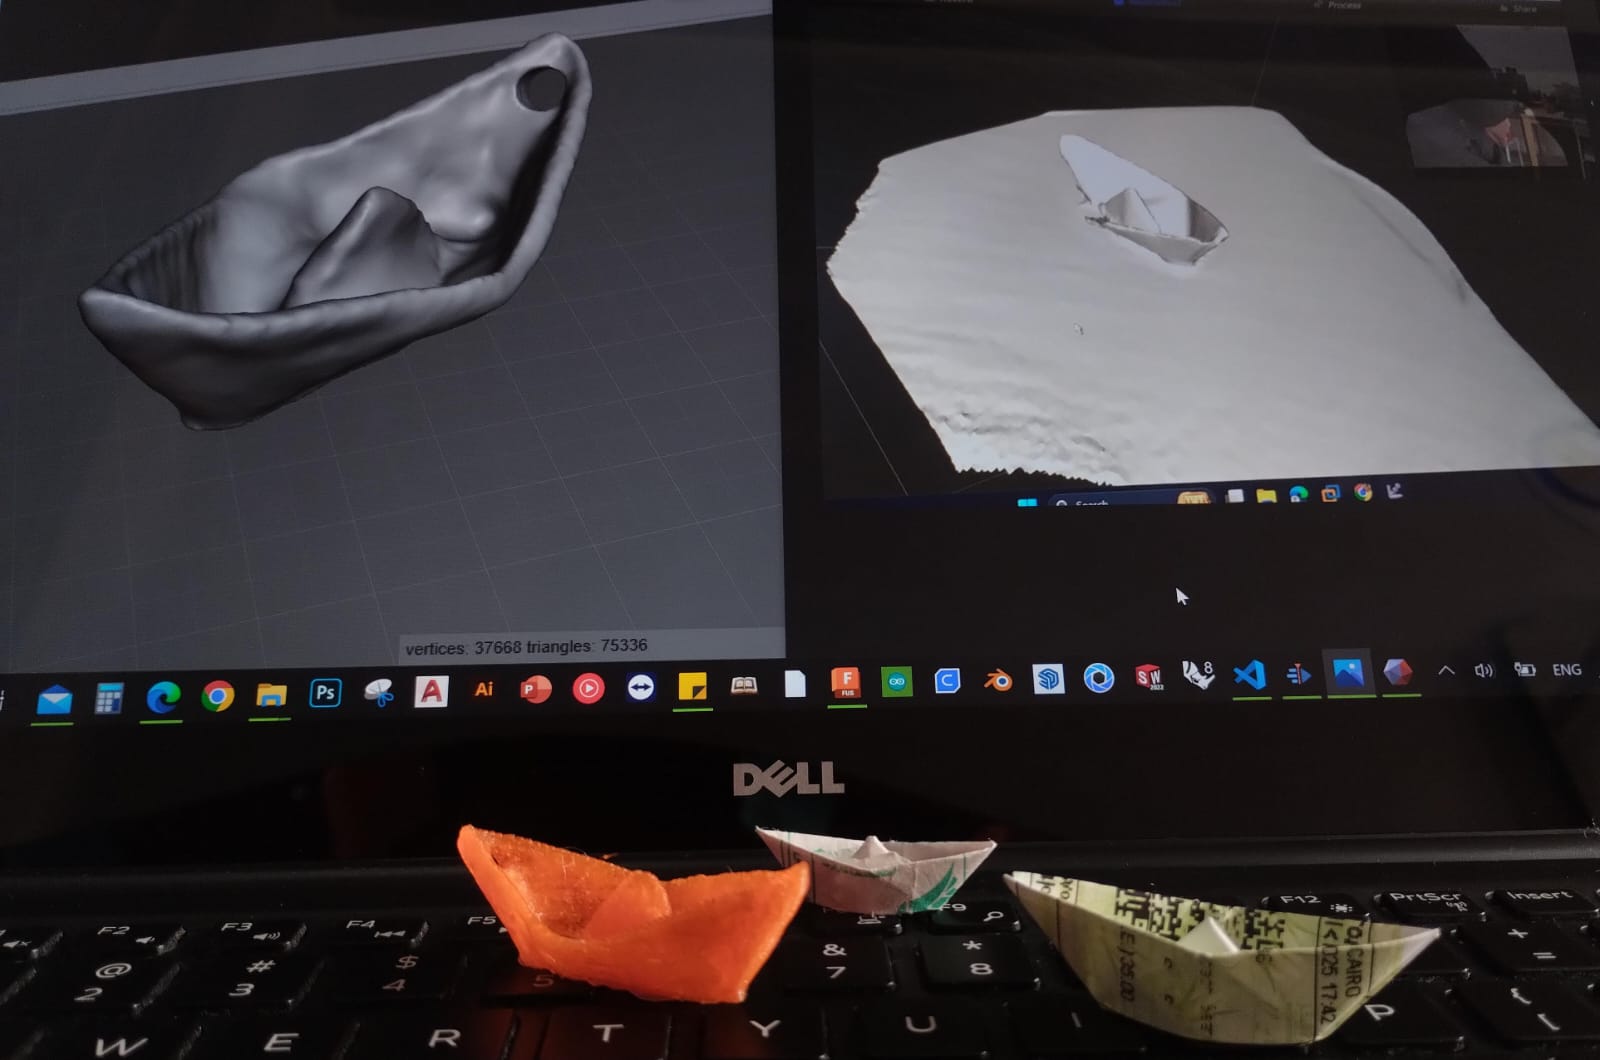
To 3D print the boat I needed to make some edits on the stl file so I used Meshmixer for this process. Here's a nice tutorial to help getting started with meshmixer.
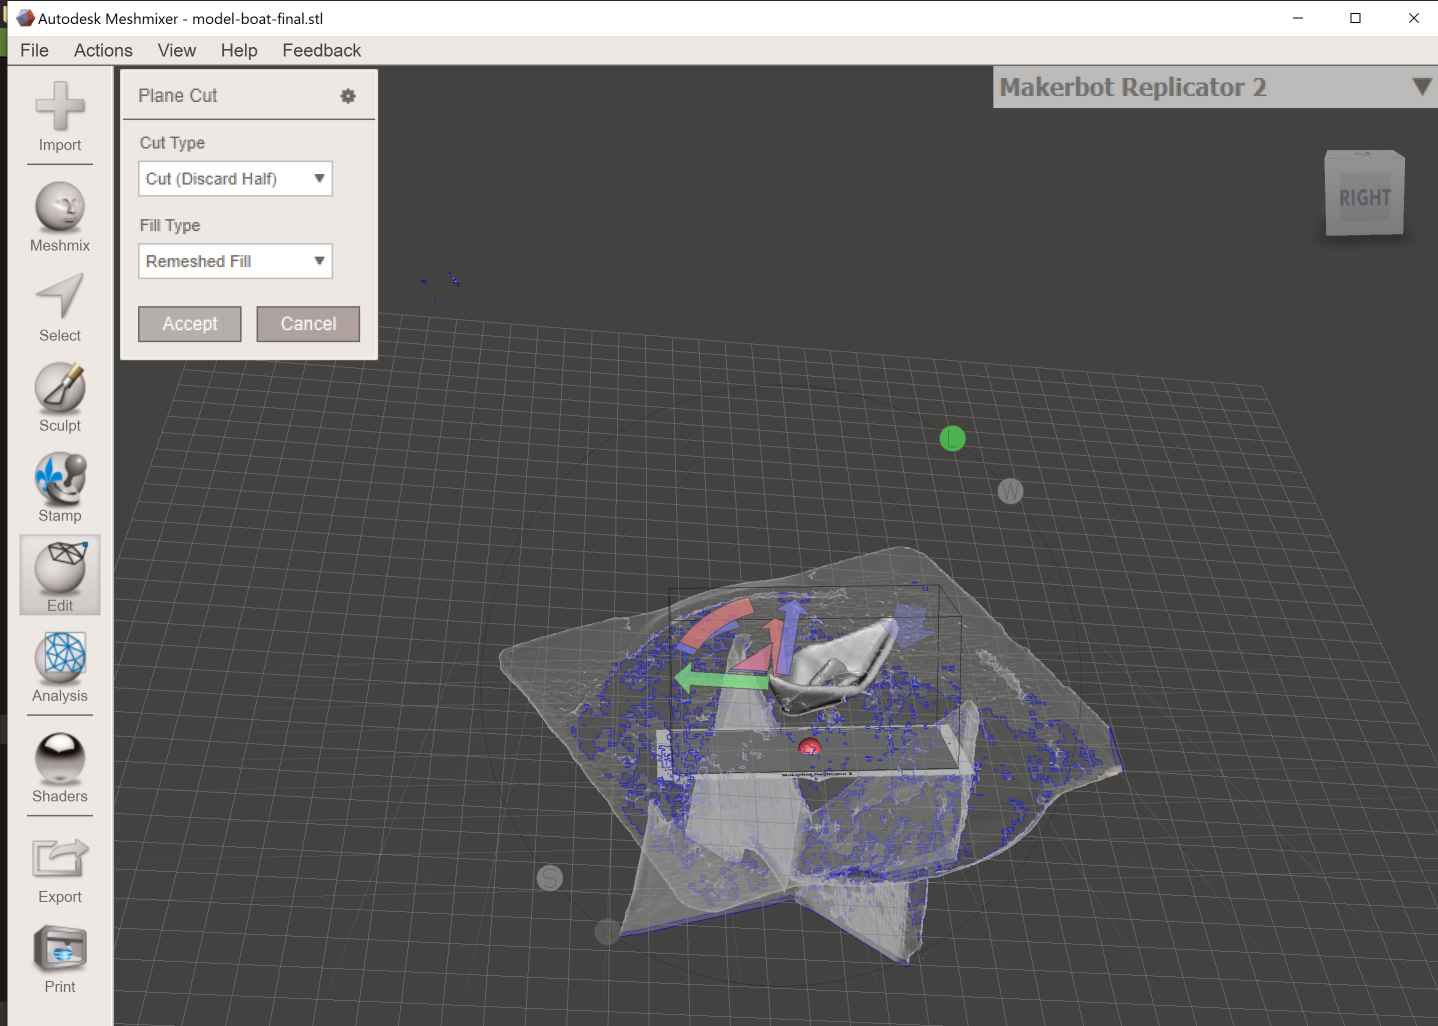
1- I imported the stl file to meshmixer and started by using plane cut from edit menu to separate the boat from the table then deleted other parts.
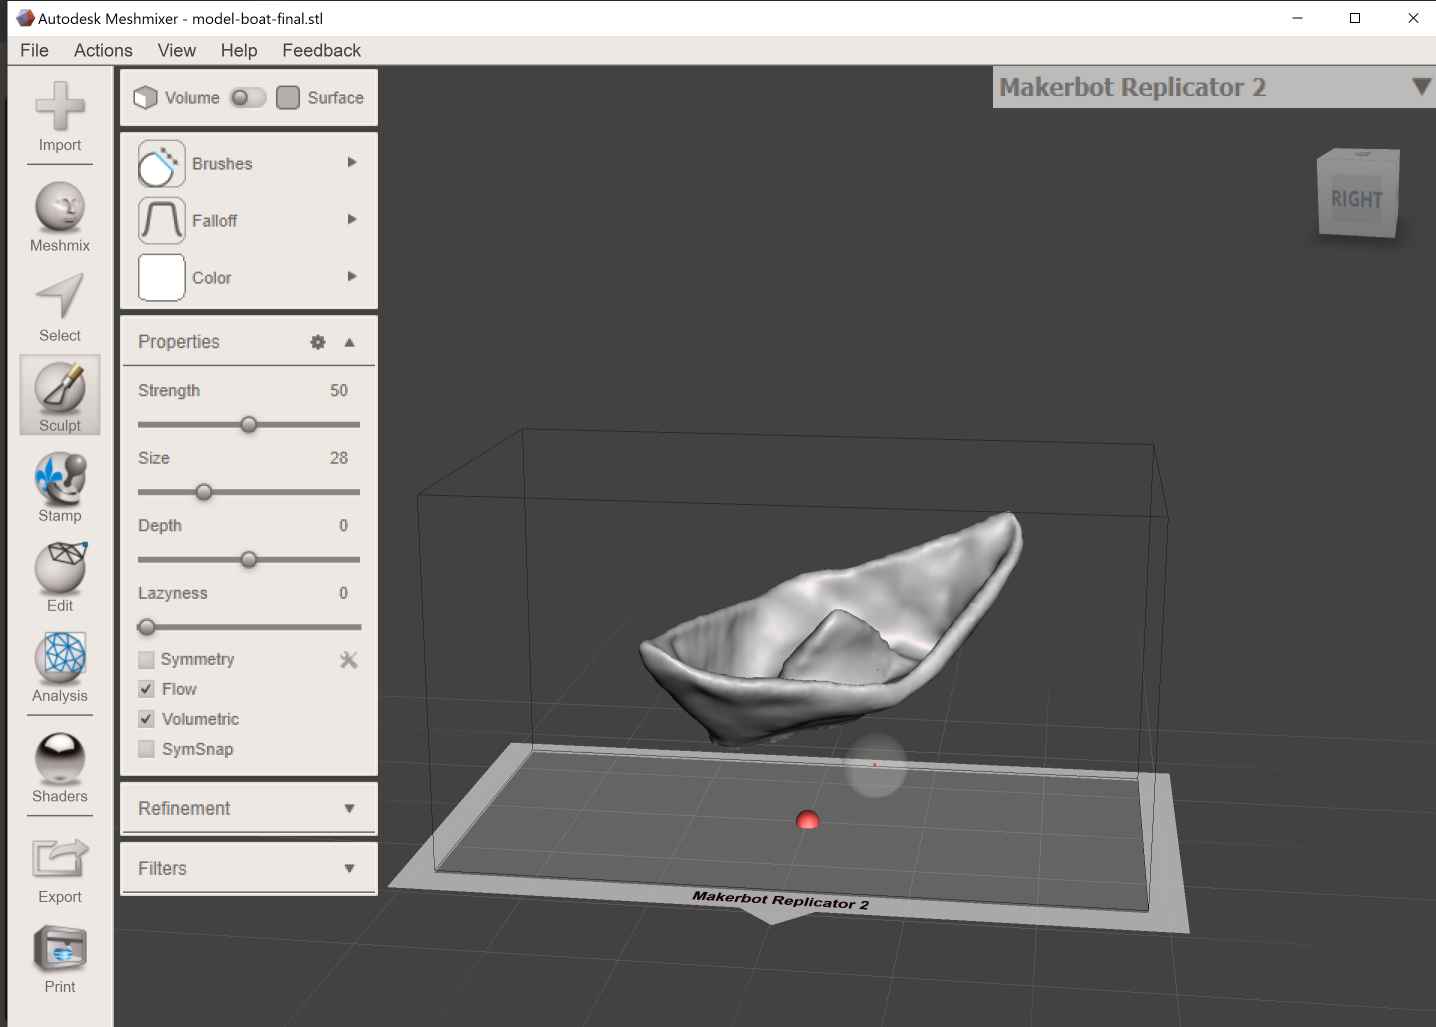
2- I used the sculpting tools to close the holes in the boat and smooth it. I mainly used brushes like move, flatten, and inflate. Then I chose make solid from edit menu.
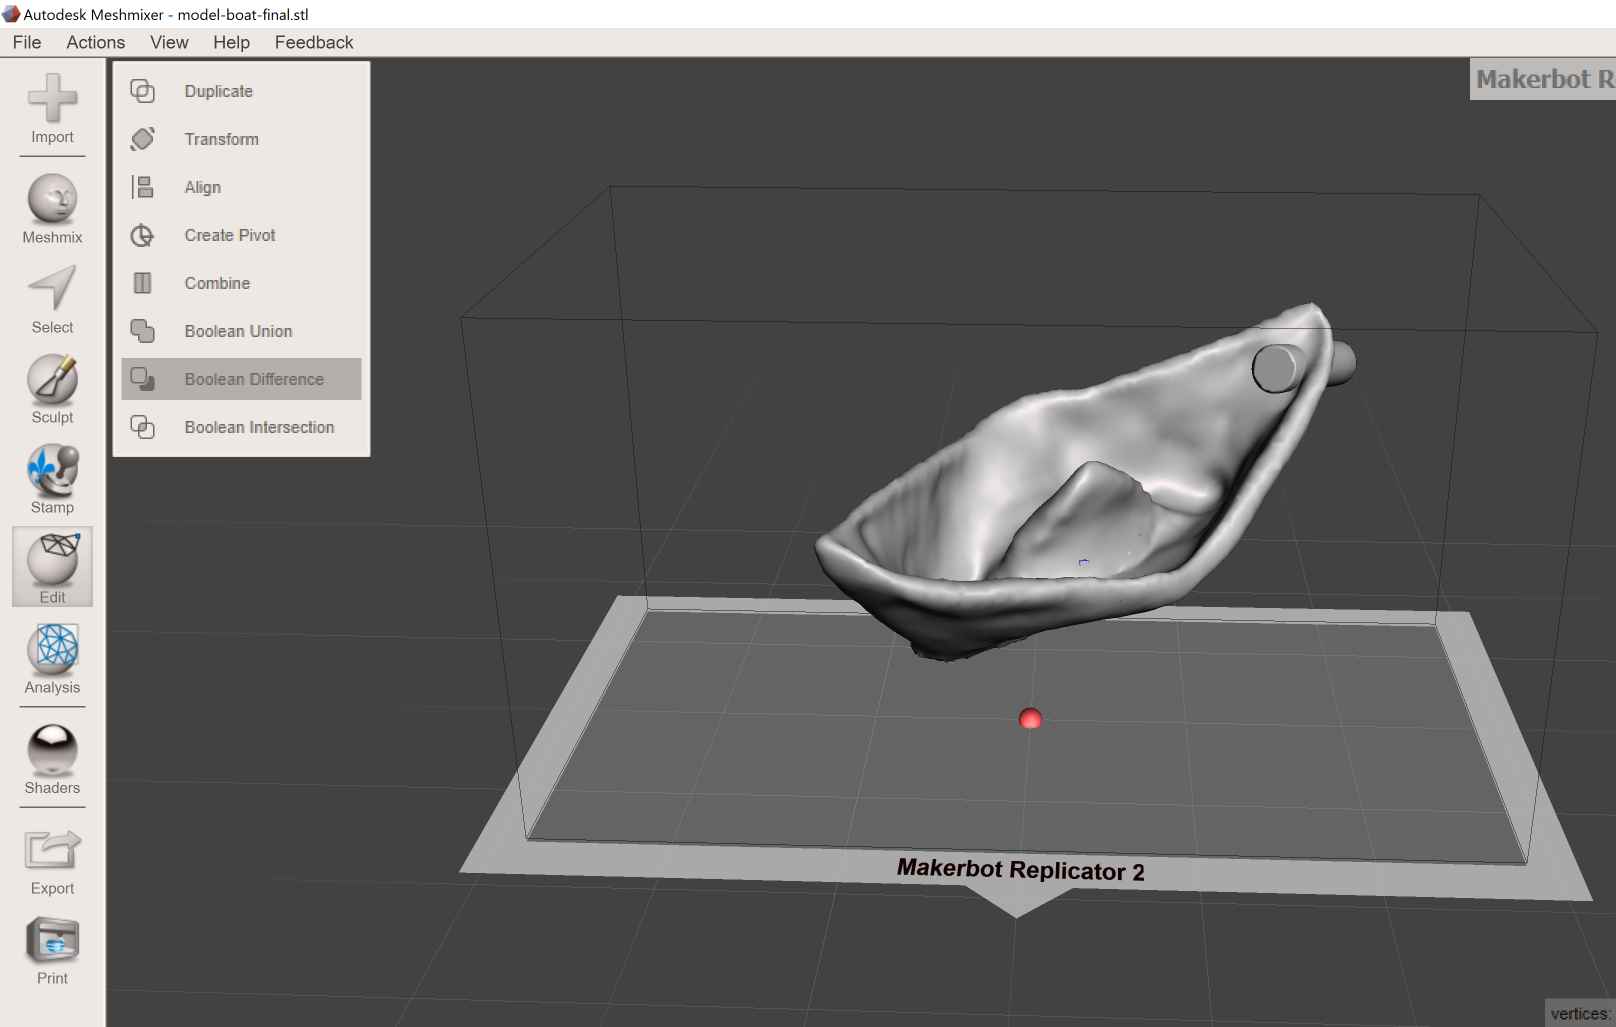
3- I then added a cylinder and positioned it through the side of the boat then selected both of them and chose boolen difference to make a hole in the boat.
3) Failures Along the way:
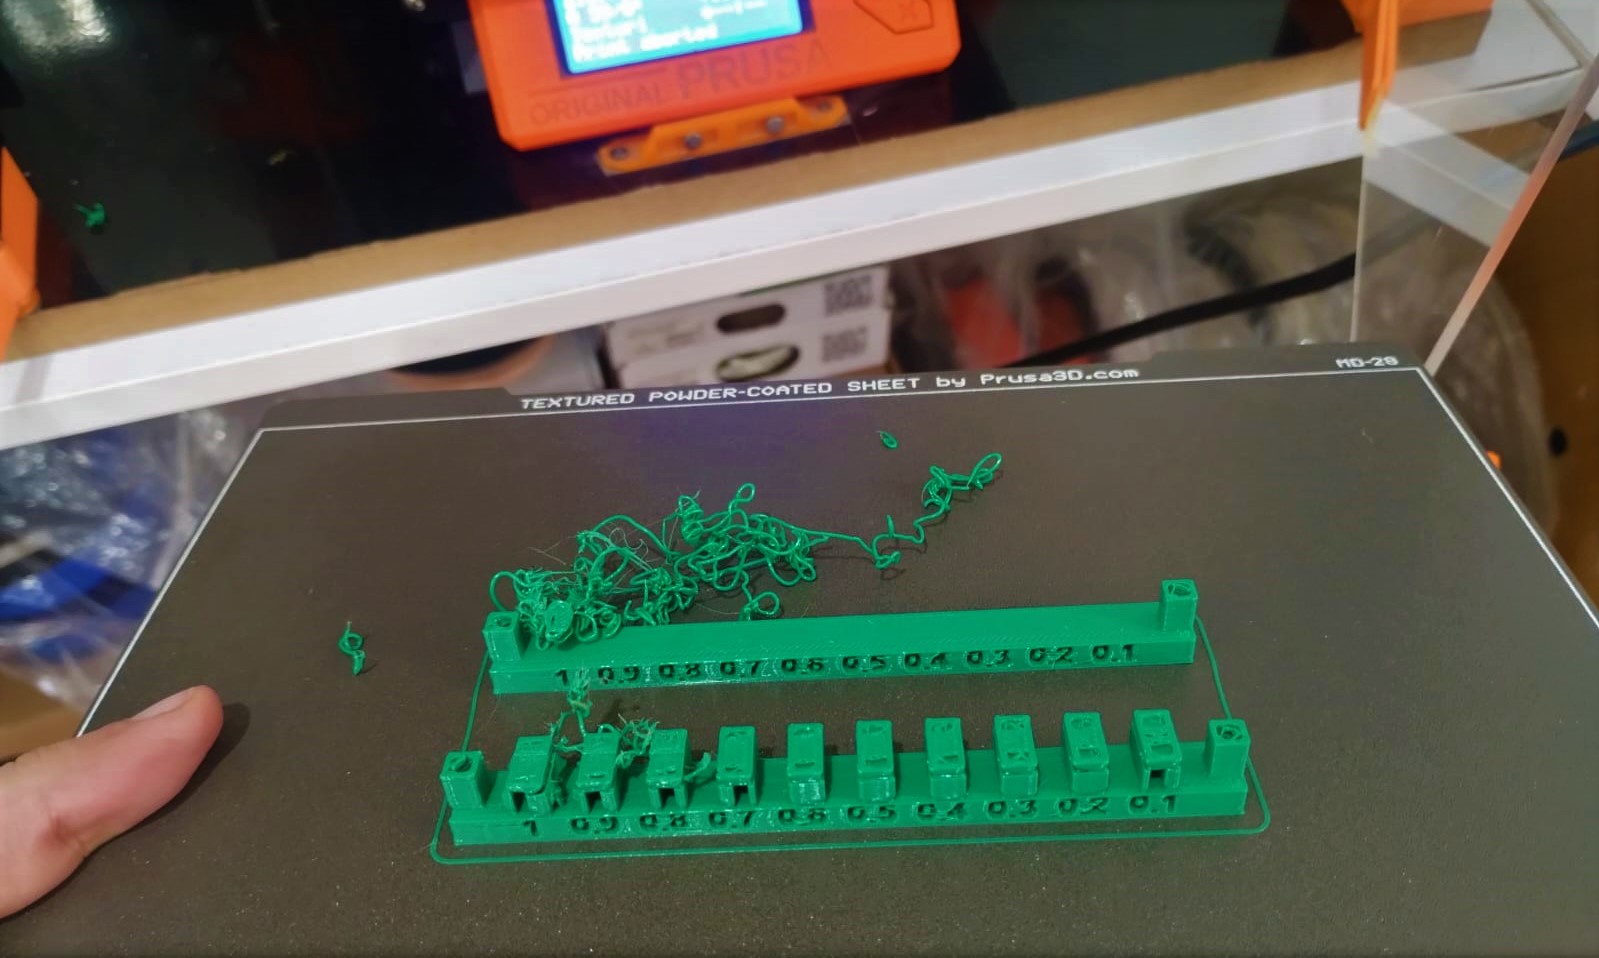
1- The first failure was when I first printed the clearance test as I put the orientation of the part wrong. I wanted to print one with supports and the other without but because of the wrong orientation the one without support was literally printing in the air so it failed. Now, I always check the orientation and the layers of the print to imagine how the printer will print it before starting the print.
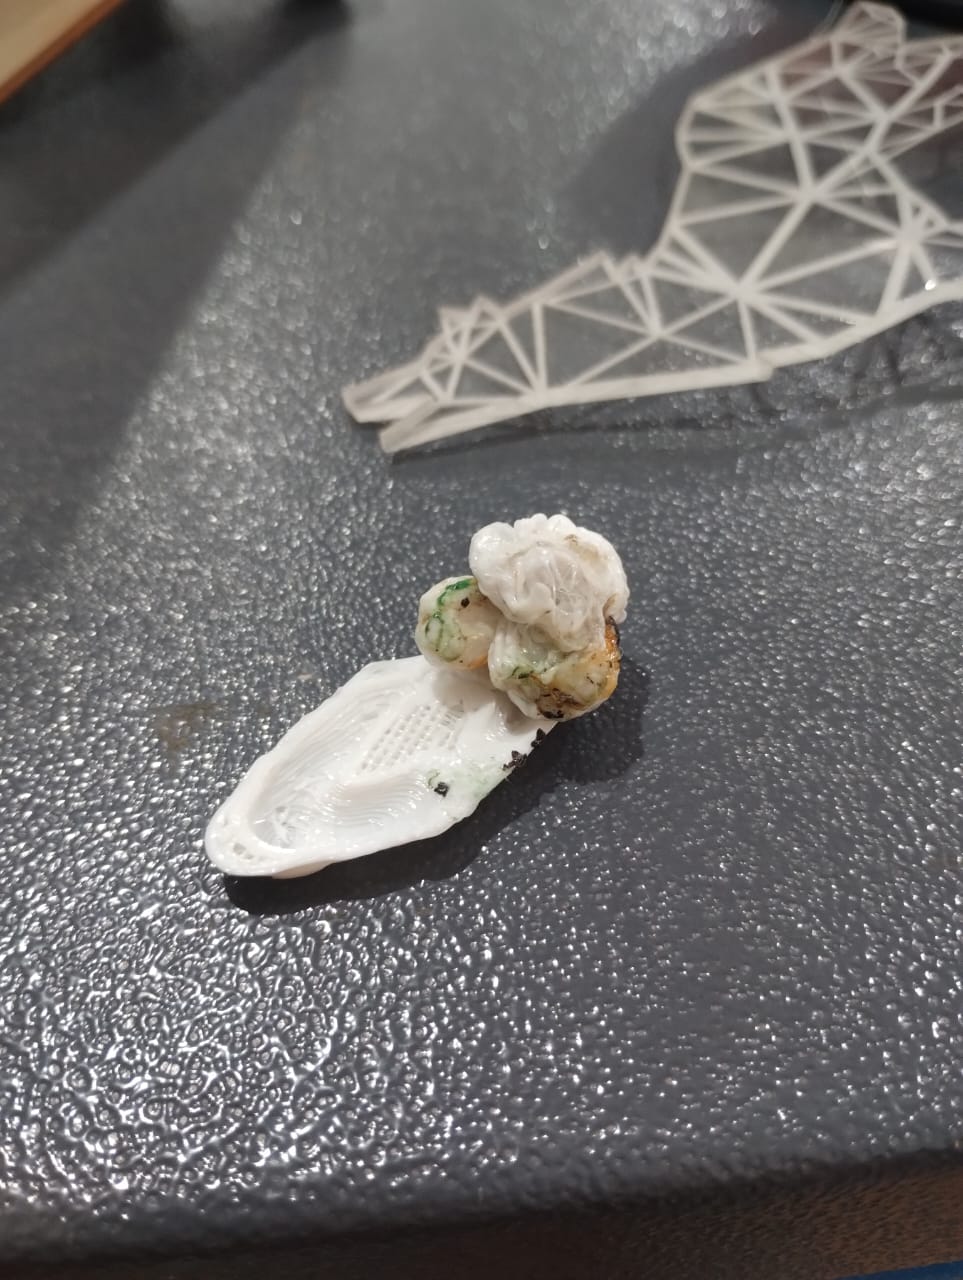
2- The second failure was when I printed the boat. I didn't add brim so the boat got off the bed because there wasn't enough adhesion.
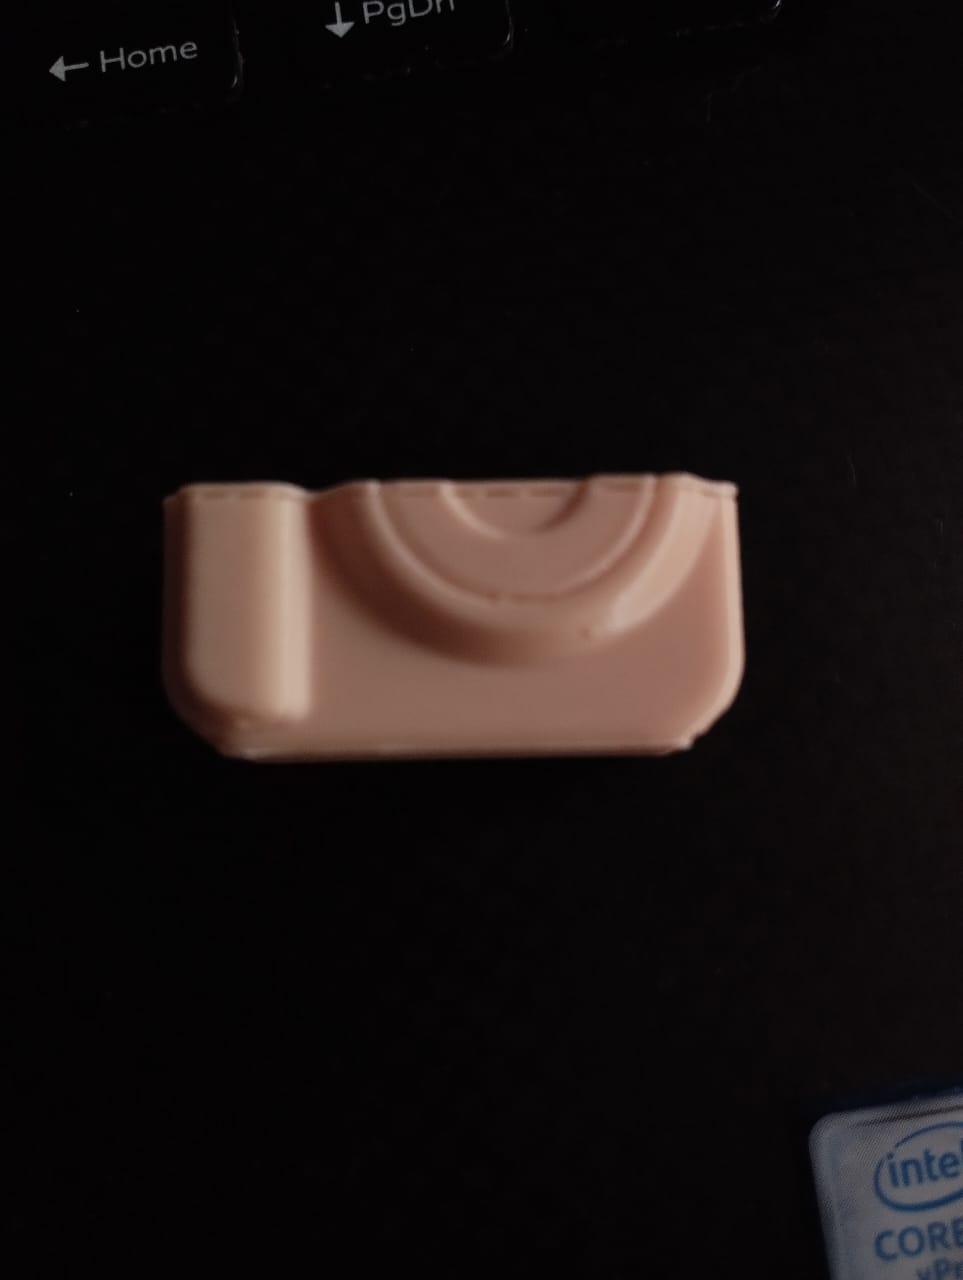
3- For the keychain I was worried that the photo holder will stick to the camera and won't move so I added a pause at height and didn't pay attention to the printer so the print cooled and I had a noticed separating layer.
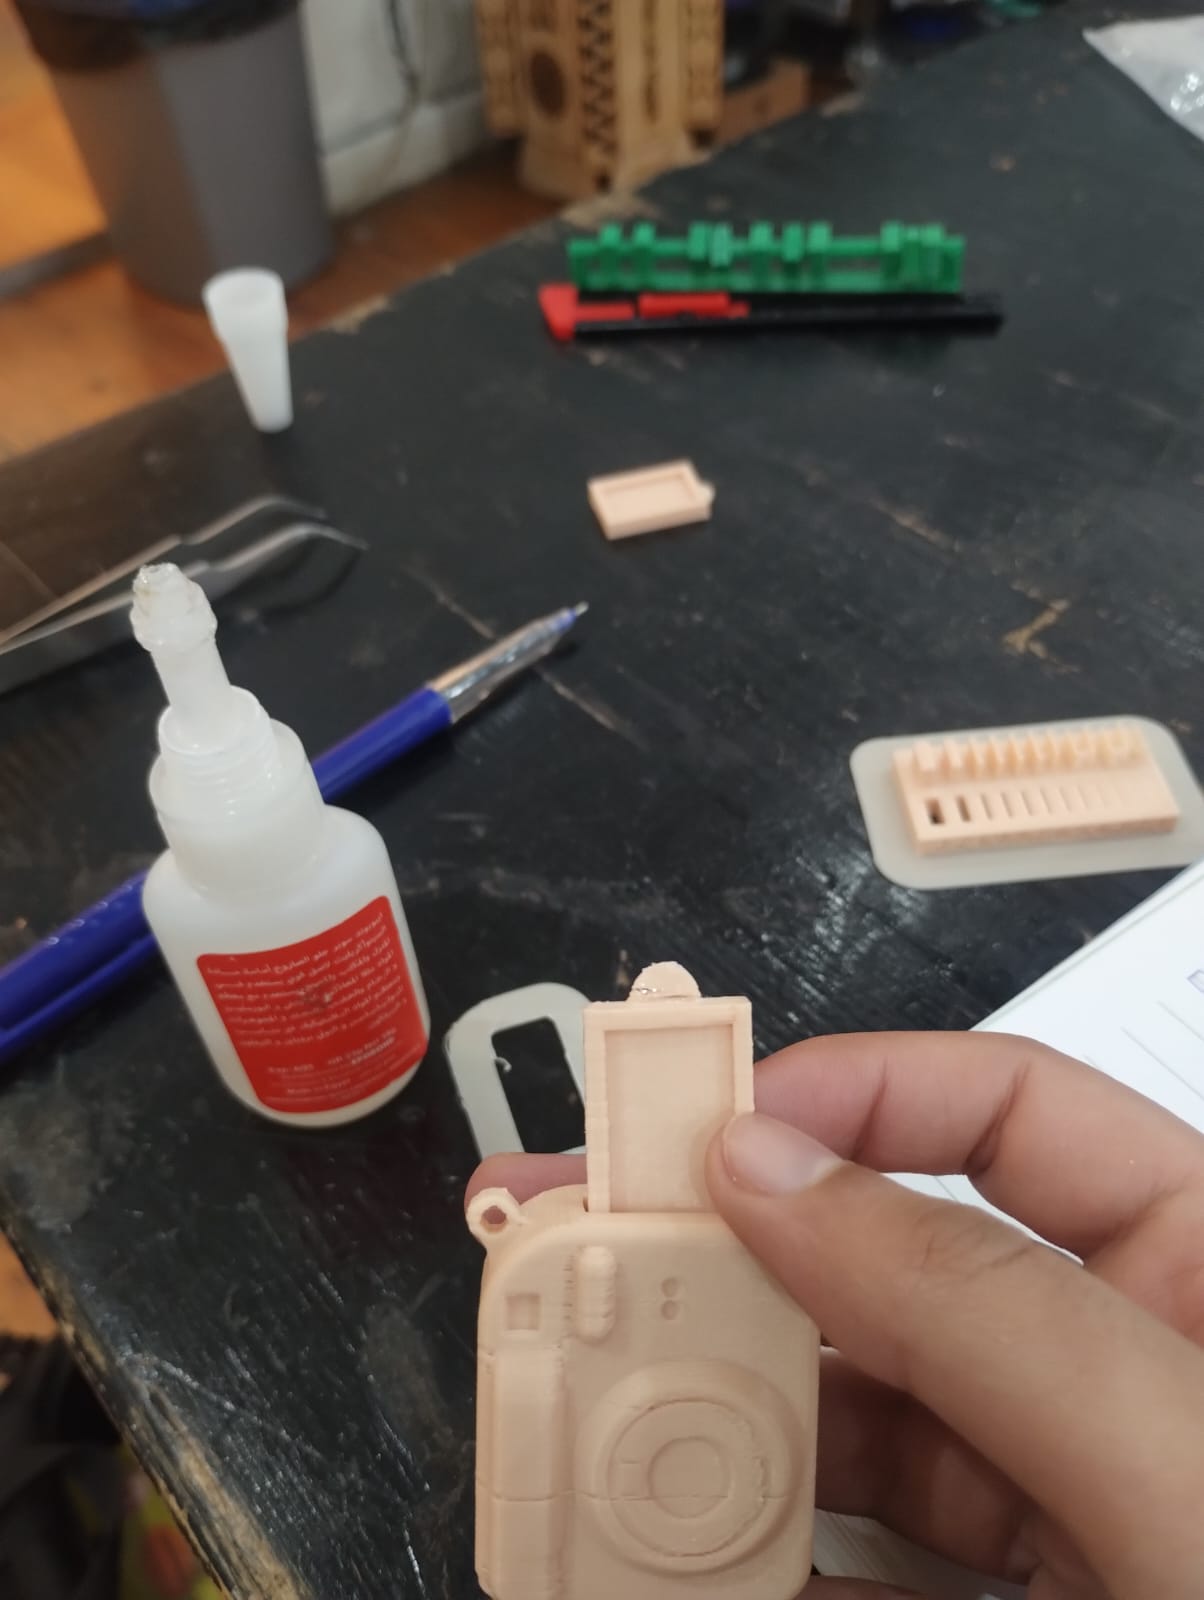
4- I had 2 problems with my keychain which was I didn't set the Z seam first so it was random and in the front and looked very bad. Also when I was separating the photo holder from the camera I pulled it hard from the half circle so it broke. I learned to be very careful and smart when dealing with 3d prints.
