Week 10: Mechanical Design & Machine Design
 My main contribution for this assignment is in the coding of the machine. As the code was downloaded from
an online source, I spent some time understanding the code as much as possible.
Firstly, I have to download the source code and set it up. Fortunately the codes were all contained in a single zipped folder.
My main contribution for this assignment is in the coding of the machine. As the code was downloaded from
an online source, I spent some time understanding the code as much as possible.
Firstly, I have to download the source code and set it up. Fortunately the codes were all contained in a single zipped folder.
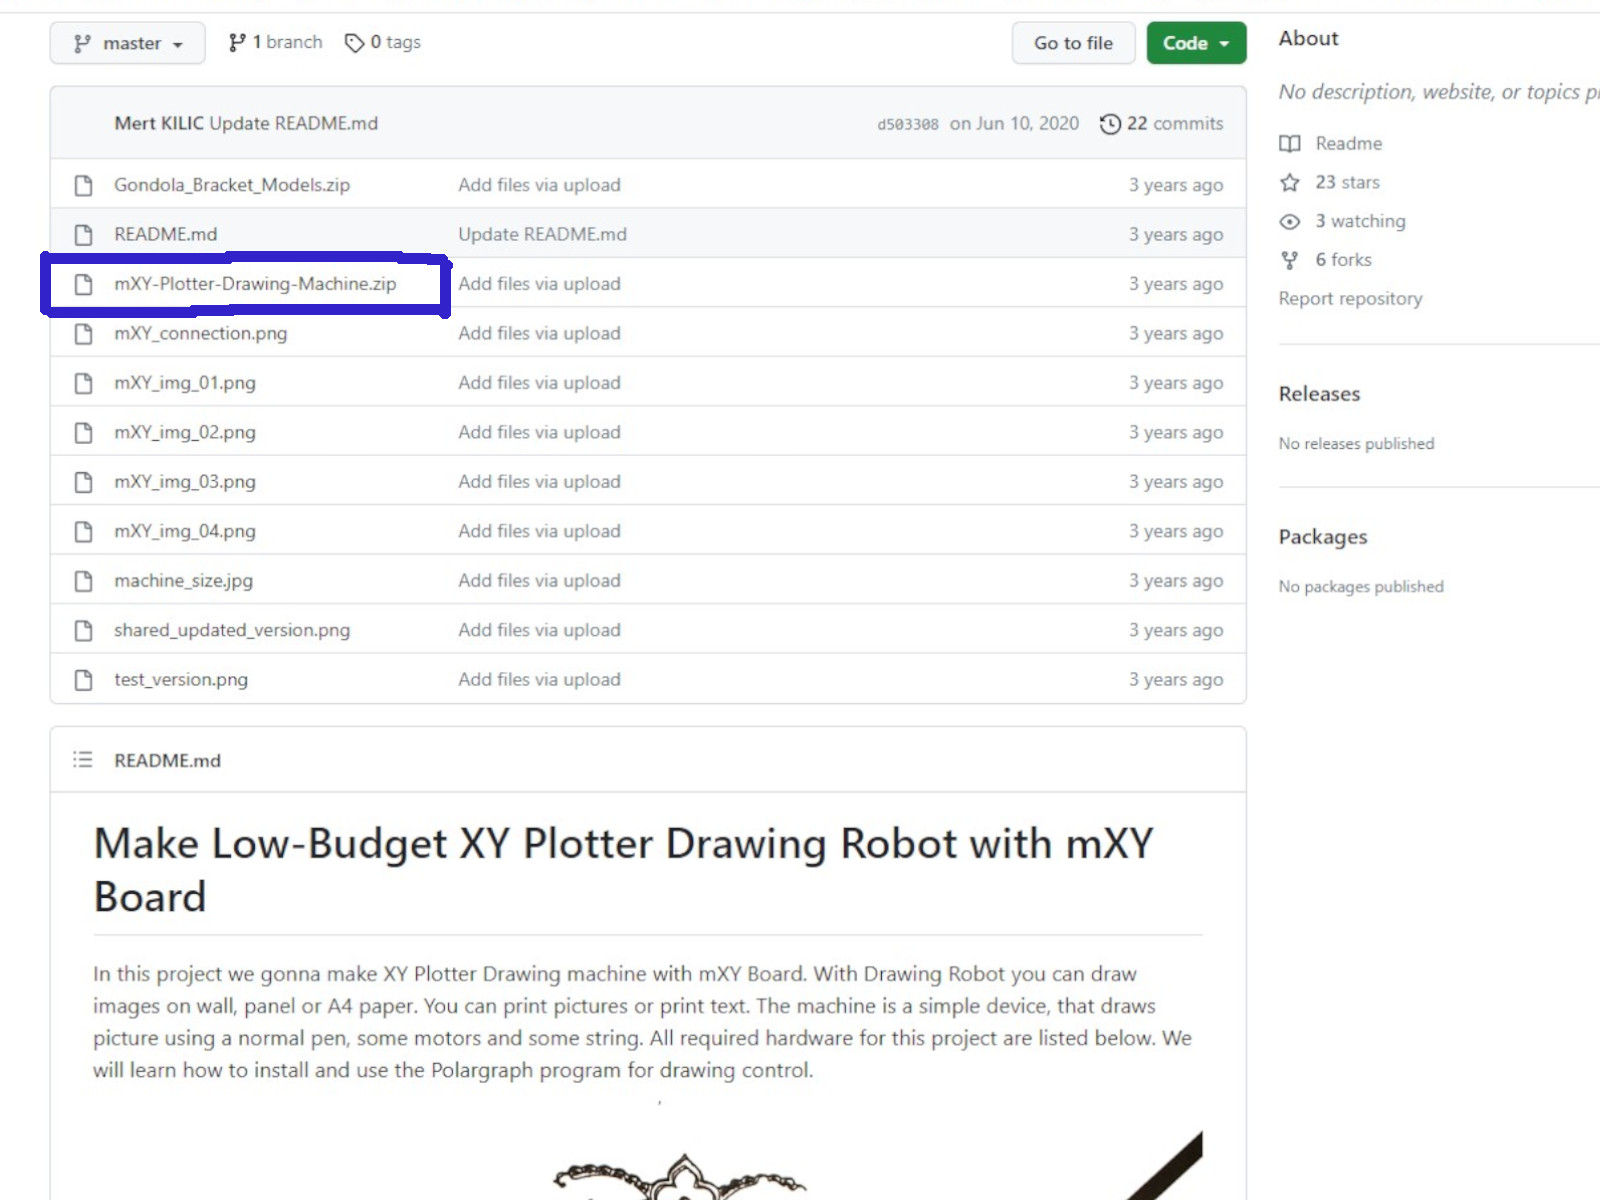 After unzipping the folder, I found all the source codes inside the subfolder arduino-source-code-libraries. Then, I followed the instruction on the Github page to set up the code.
 After setting up, the shortcut to the code was added to the Arduino IDE.
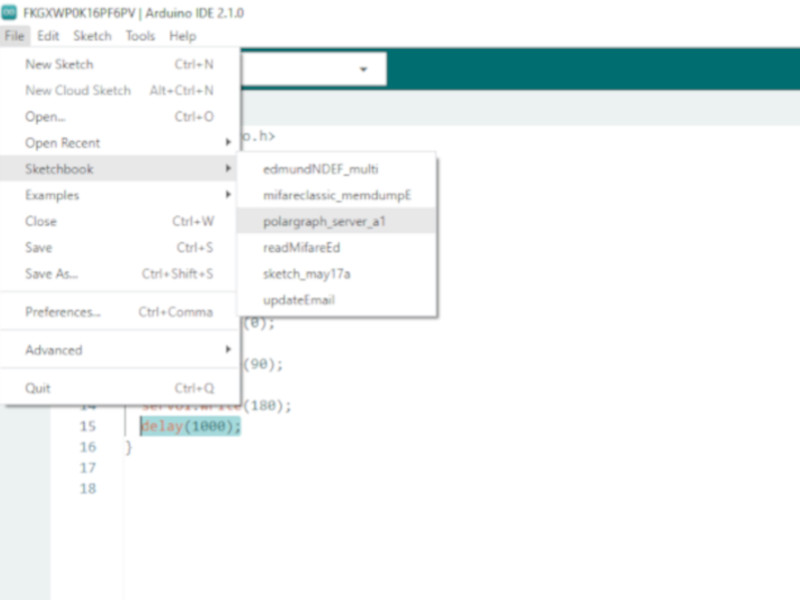 The codes were organised in tabs.
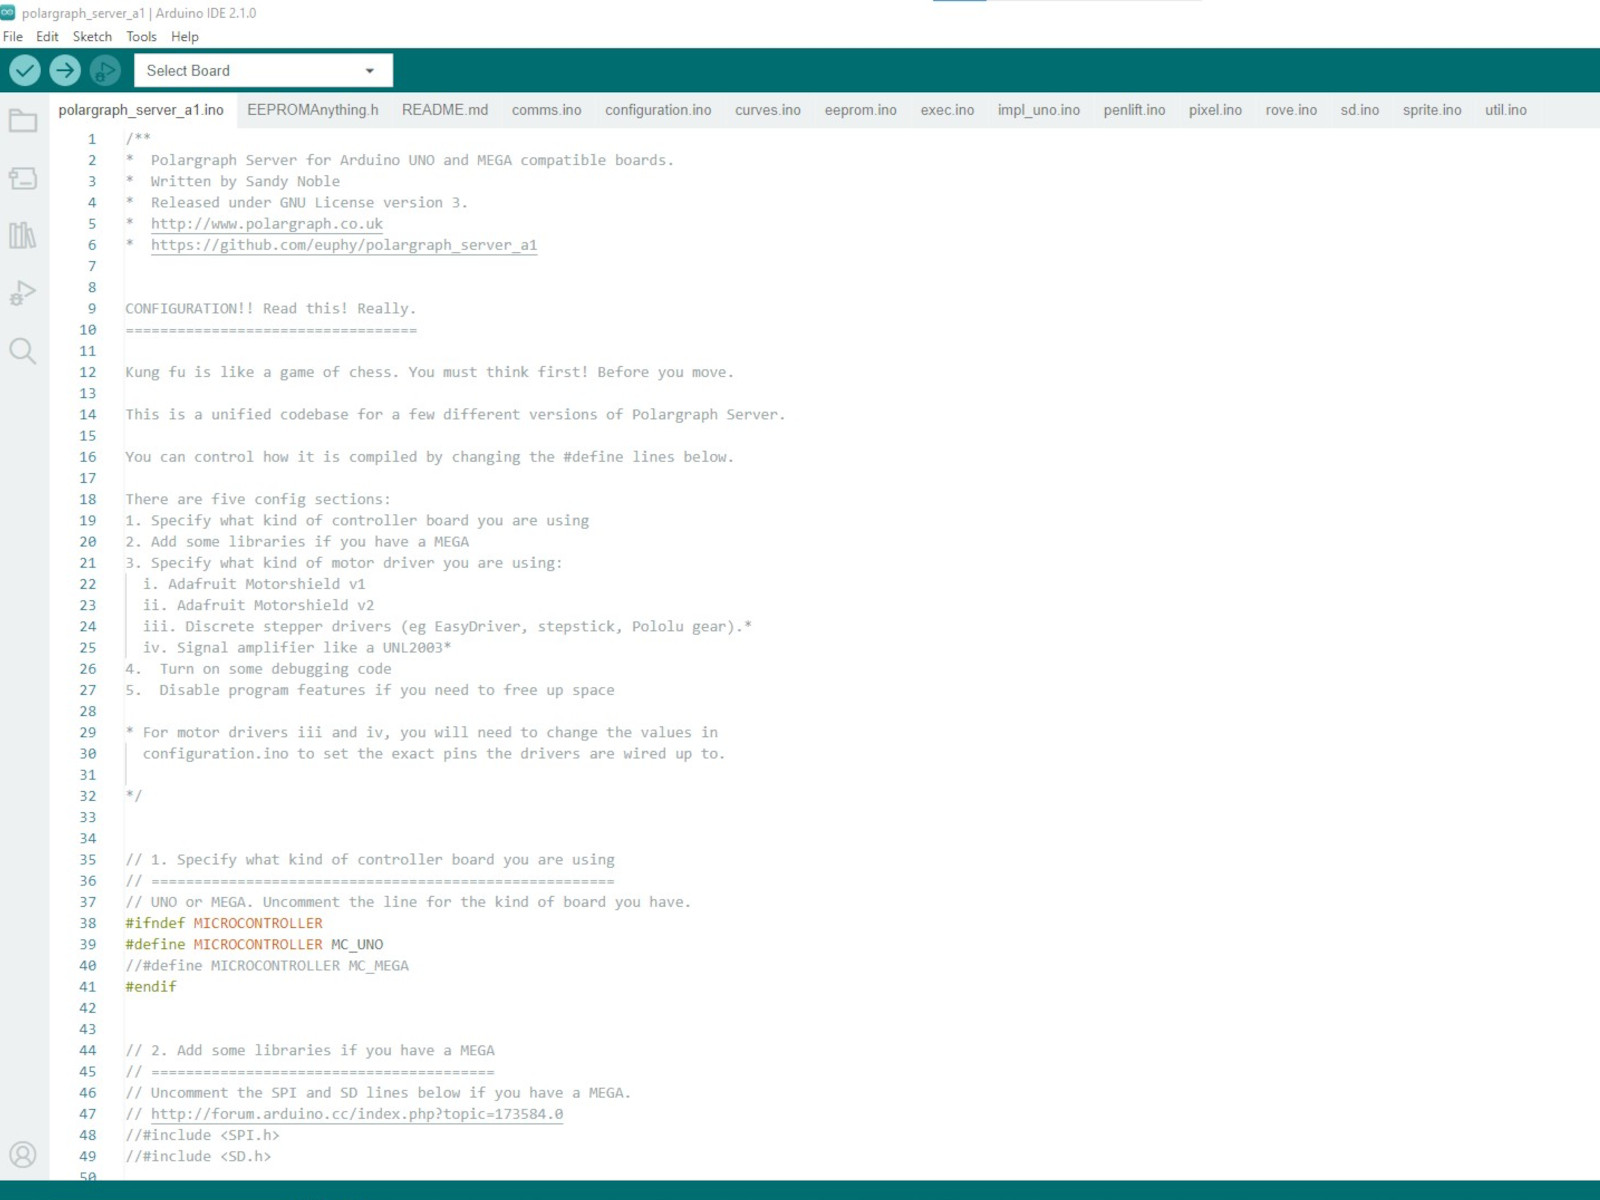 Based on my understanding, the first tab of code (polargraph_server_a1.ino) is the main code that controls the polargraph, while the information on the connection between the arduino and the stepper motor
is found in the configuration.ino tab.
The code can be used for both the Arduino board and the customized board that the project used. Therefore, it is key to understand how to connect the motors for control by arduino.
Based on my understanding, the first tab of code (polargraph_server_a1.ino) is the main code that controls the polargraph, while the information on the connection between the arduino and the stepper motor
is found in the configuration.ino tab.
The code can be used for both the Arduino board and the customized board that the project used. Therefore, it is key to understand how to connect the motors for control by arduino.
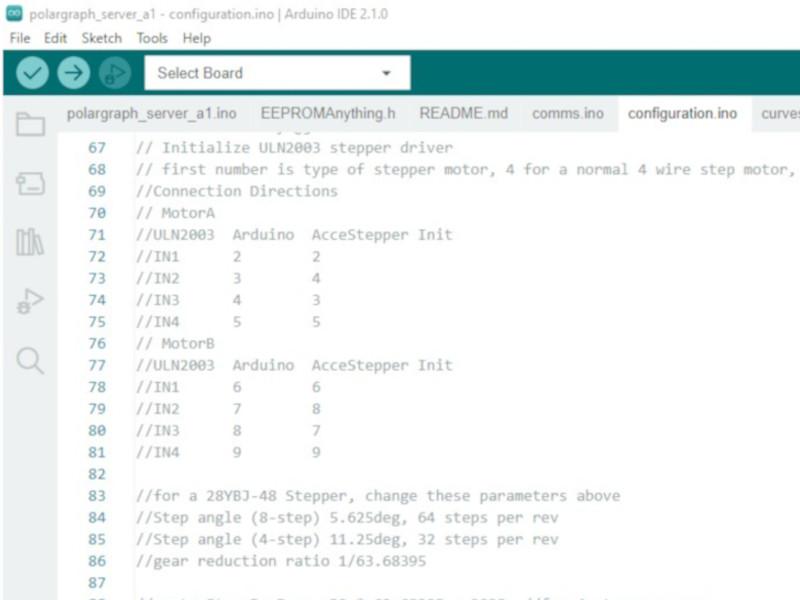 We used the same motor and driver as the original project (i.e., 28YBJ-48 stepper motor and ULN2003 driver board). We wired them to the arduino board according to what was written in the code.
There was a related project that used nema 17 stepper motors and L293D driver board. What I gathered from the documentation was that the
nema 17 motor has a higher torque then the 28YBJ-48 stepper motor we were using, but was also more costly. There were also an issue of the L293D overheating in the nema17 project.
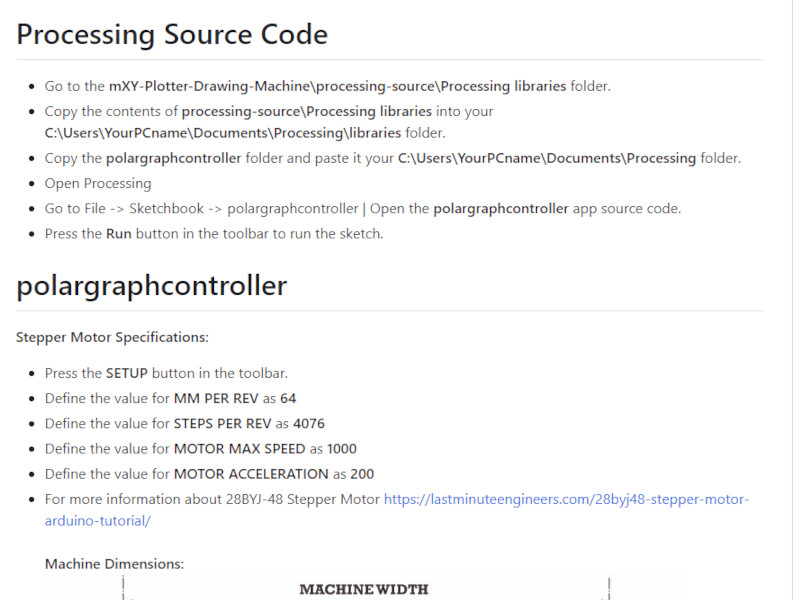
The control interface for the polargraph was created by Processing. The folder for the code was also found in the zipped folder I downloaded. Following the instructions on the Github page, I was able to set up the interface
without issue.
We used the same motor and driver as the original project (i.e., 28YBJ-48 stepper motor and ULN2003 driver board). We wired them to the arduino board according to what was written in the code.
There was a related project that used nema 17 stepper motors and L293D driver board. What I gathered from the documentation was that the
nema 17 motor has a higher torque then the 28YBJ-48 stepper motor we were using, but was also more costly. There were also an issue of the L293D overheating in the nema17 project.
The control interface for the polargraph was created by Processing. The folder for the code was also found in the zipped folder I downloaded. Following the instructions on the Github page, I was able to set up the interface
without issue.
 However, I couldn't find information in github or on the code on how to navigate the interface.
Fortunately, coursemate Bart was able to find that information on YouTube.
He then proceeded to adjust the settings of our polargraph from the interface according to the instructions in Github.
As the code as unclear about the wiring of the stepper motors, it took all of us a bit of time to figure out the wiring. Eventually we were able to get the wiring correct by moving the plotter in straight lines, then
identifying the motor that was wired wrongly and finally rewired that motor. We tested the movement again until we get the desired movement. Details of this account can be found in the
group assignment page.
From this assignment, I gained some interesting experience in machine building. Also, as this assignment requires everyone in the group to work more closely with each other compare to other assignments, it highlighted
the fact that everyone in the group has different experience and persepctive, and that communication and clear explanation if the key to completing this assignment.
However, I couldn't find information in github or on the code on how to navigate the interface.
Fortunately, coursemate Bart was able to find that information on YouTube.
He then proceeded to adjust the settings of our polargraph from the interface according to the instructions in Github.
As the code as unclear about the wiring of the stepper motors, it took all of us a bit of time to figure out the wiring. Eventually we were able to get the wiring correct by moving the plotter in straight lines, then
identifying the motor that was wired wrongly and finally rewired that motor. We tested the movement again until we get the desired movement. Details of this account can be found in the
group assignment page.
From this assignment, I gained some interesting experience in machine building. Also, as this assignment requires everyone in the group to work more closely with each other compare to other assignments, it highlighted
the fact that everyone in the group has different experience and persepctive, and that communication and clear explanation if the key to completing this assignment.