Week 5: 3D Scanning and Printing
Updates
[19/04/2023]- Design files: added link to design file of fruit model. [12/06/2023] - Design and 3D Print An Object: Updated the scale of the first print; followed up with a larger print.
Assignments
The assigments for this week are:Group Assignment
Test the design rules for your 3D printer(s)
Individual Assignments
I. design and 3D print an object that could not be made subtractively.
II. 3D scan an object.
II. 3D scan an object.
Test the Design Rules for Your 3D Printer(s)
For this group assignment, I tested the design rules for Ultimaker 3 printer. Using the stl files on the 3D printing and scanning class webpage (under design rules segment), I tested the overhang (with and without supports), angle, bridging, wall thickness, dimensions, anisotrophy and surface finish of the prints from Ultimaker 3. From this assignment, I now have a better idea of what deign rules to apply to my 3D models to get the prints I required from the Ultimaker 3 printer in our lab. Full documentation can be found on the group assignment page.Design and 3D Print An Object
For this assignment, I first used onshape to design a fruit.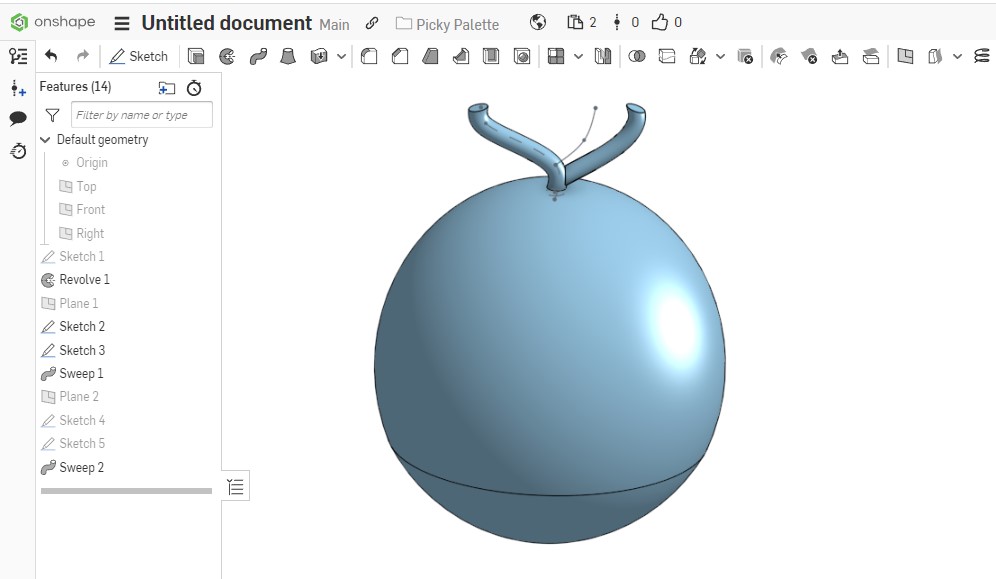 Then, I exported the design as stl. Afterward, I uploaded the stl file to voronator.com:
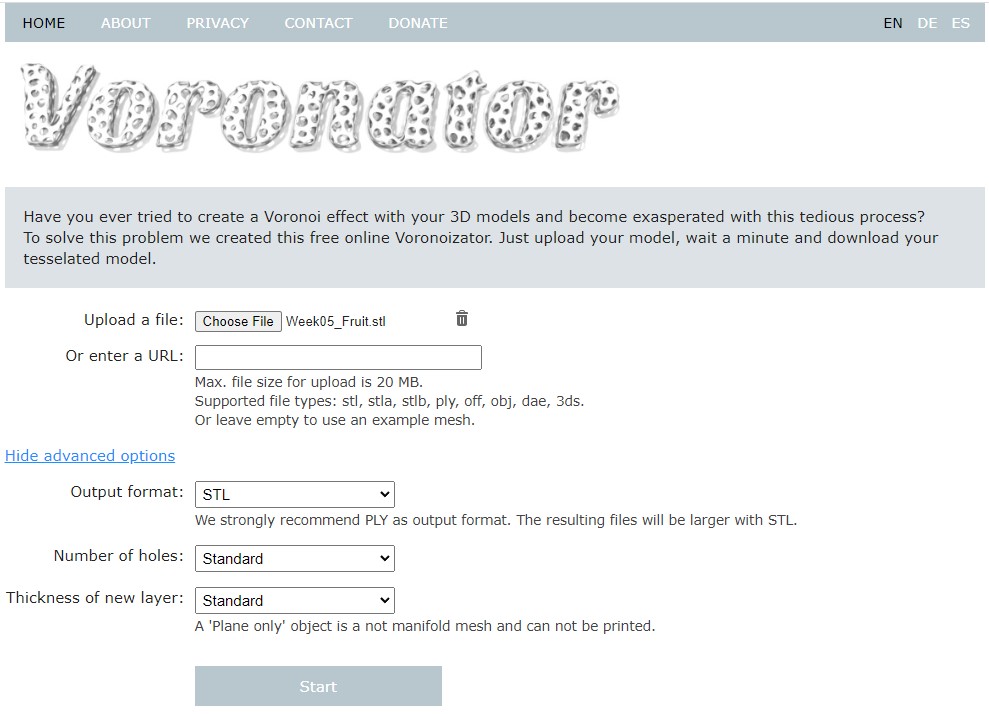 I decided to output the file in stl format, so that I can use it directly for 3D printing.
After clicking on start, the website took a couple of minute to generate voronoi effect on the fruit model:
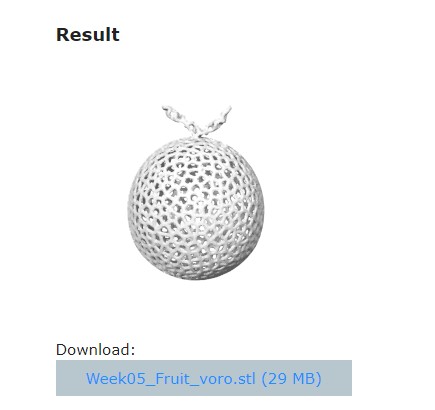 The "voronated" fruit model was then downloaded and sliced in Cura:
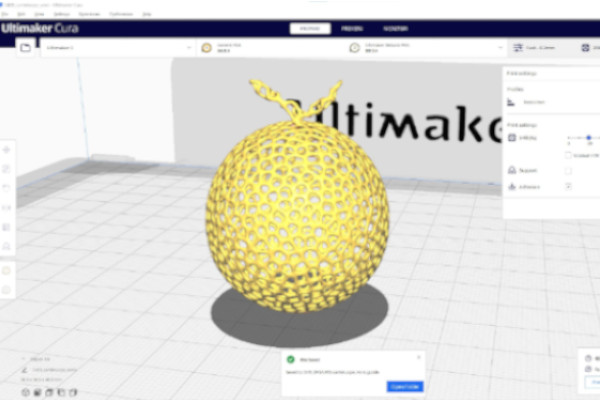 I used the default fast print settings and added a raft so that the model will have a bigger base area to adhere to the build plate.
The model was then sliced to obtained the gcode file, which was in turn submitted to the 3D printer (i.e., Ultimaker 3) for 3D printing with PLA filament. After 55 minutes, the print was completed.
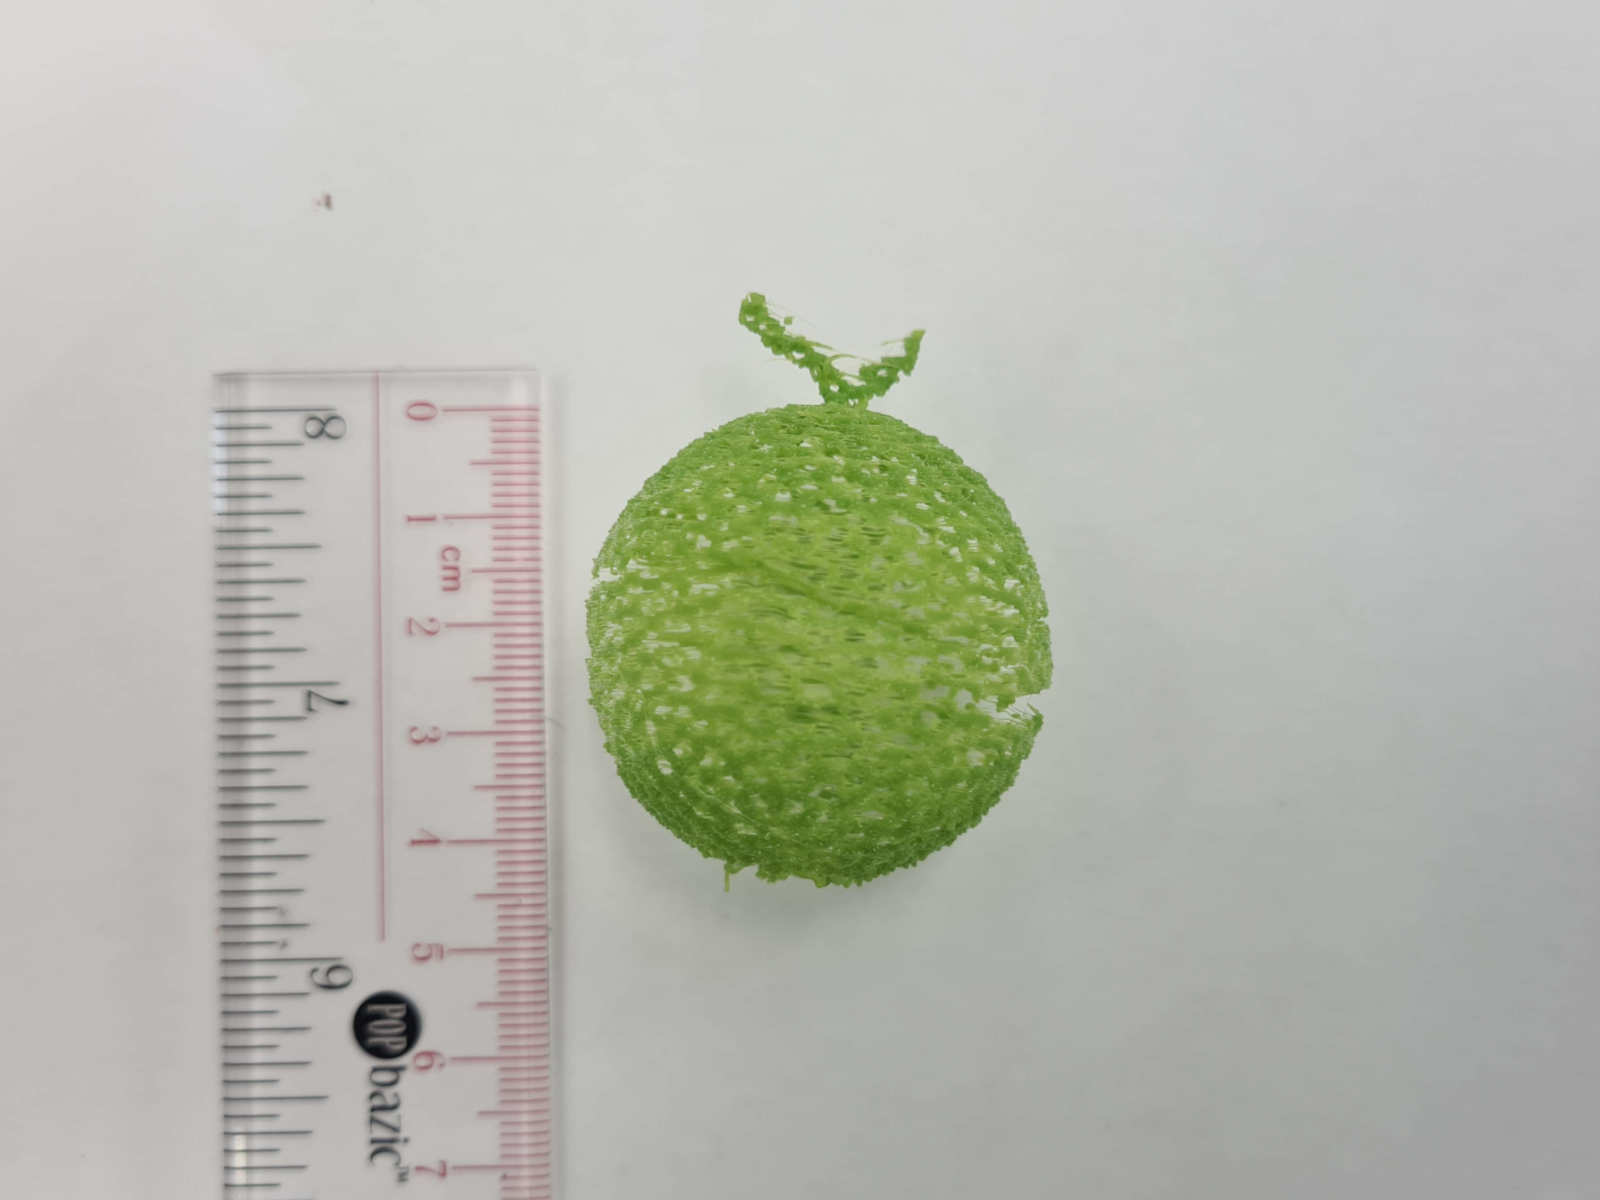
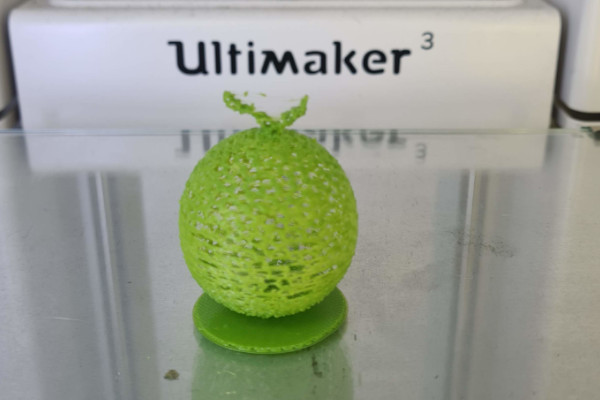 The print did not turn out that well. The wall was quite thin, making the print rather fragile. Also there are a lot of stringing. These issues were probably due to a few factors, such as the size of the print, the quality of
the filament and the print setting. I actually thought the print was too small for my liking, as it is about 50 mm in height.
The print did not turn out that well. The wall was quite thin, making the print rather fragile. Also there are a lot of stringing. These issues were probably due to a few factors, such as the size of the print, the quality of
the filament and the print setting. I actually thought the print was too small for my liking, as it is about 50 mm in height.
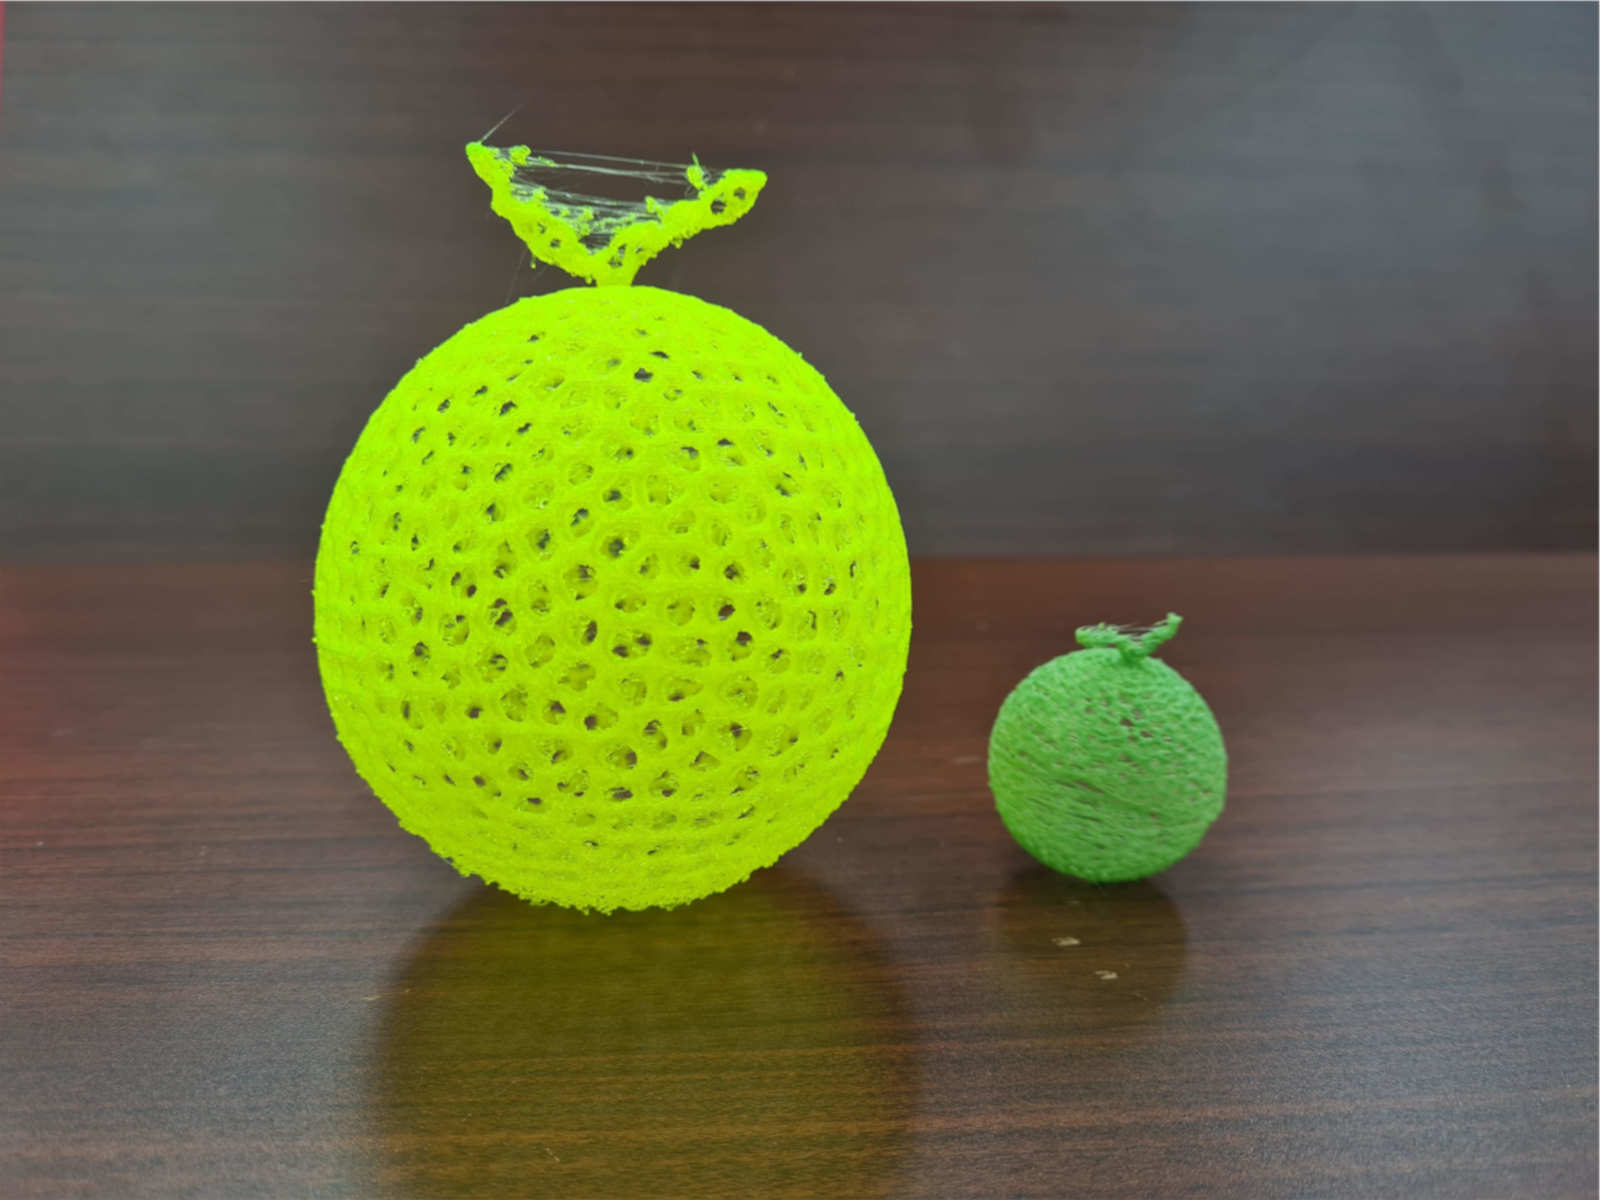
 Subsequently, I printed a bigger version, scaling the .stl file in Cura to 250%.
3D Scan an Object
I had used the Einscan Pro before, but was unable to get a successful scan as the the scanner kept losing its' tracking. I found that using these handheld scanner need some skills and patient. Therefore, this time round, for this assignment I decided to use the 3D scanner app on my phone, which uses photogrammetry. I found using this phone app easier to use compare to the handheld scanner as it didn't have the issue of losing it's tracking. It also have indicators to show the progress of the scanning.
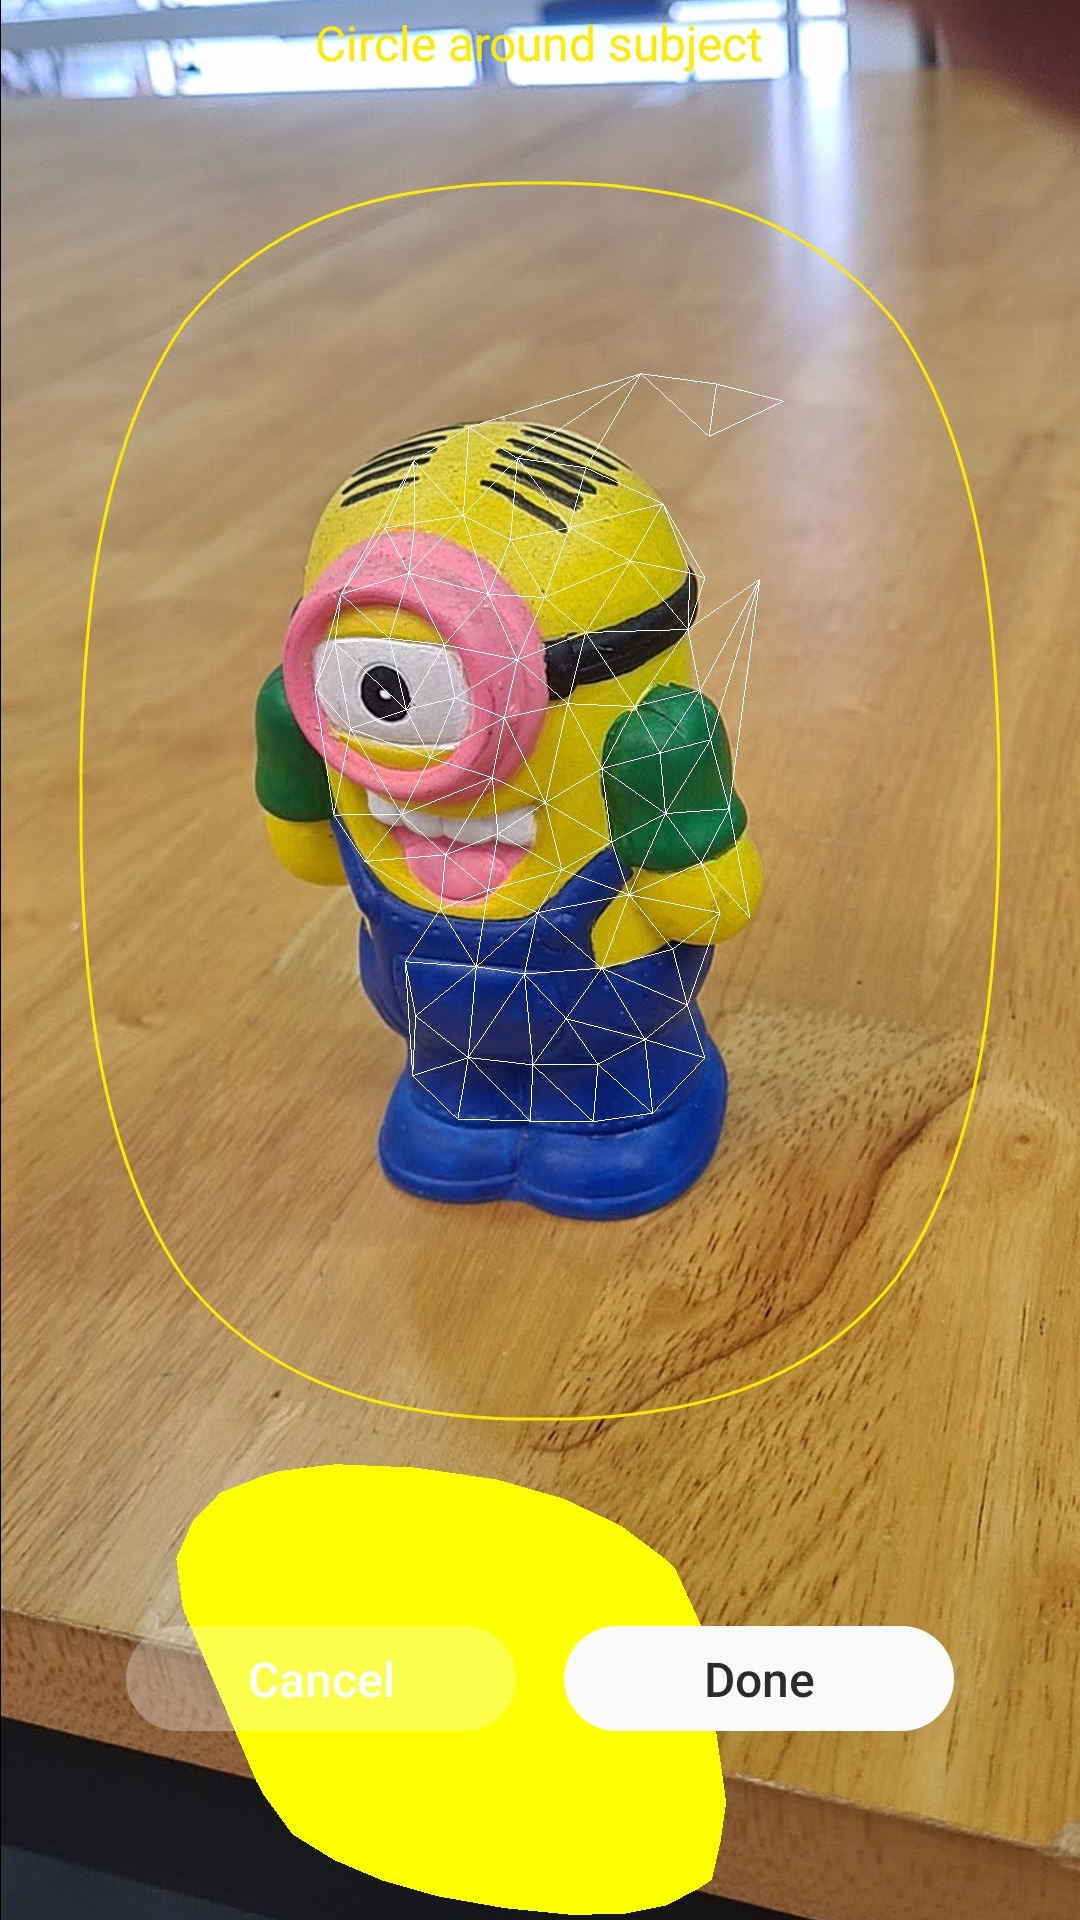 After the scan was done, the model was created. I can then import the model into MeshLab for sculpting and editing.
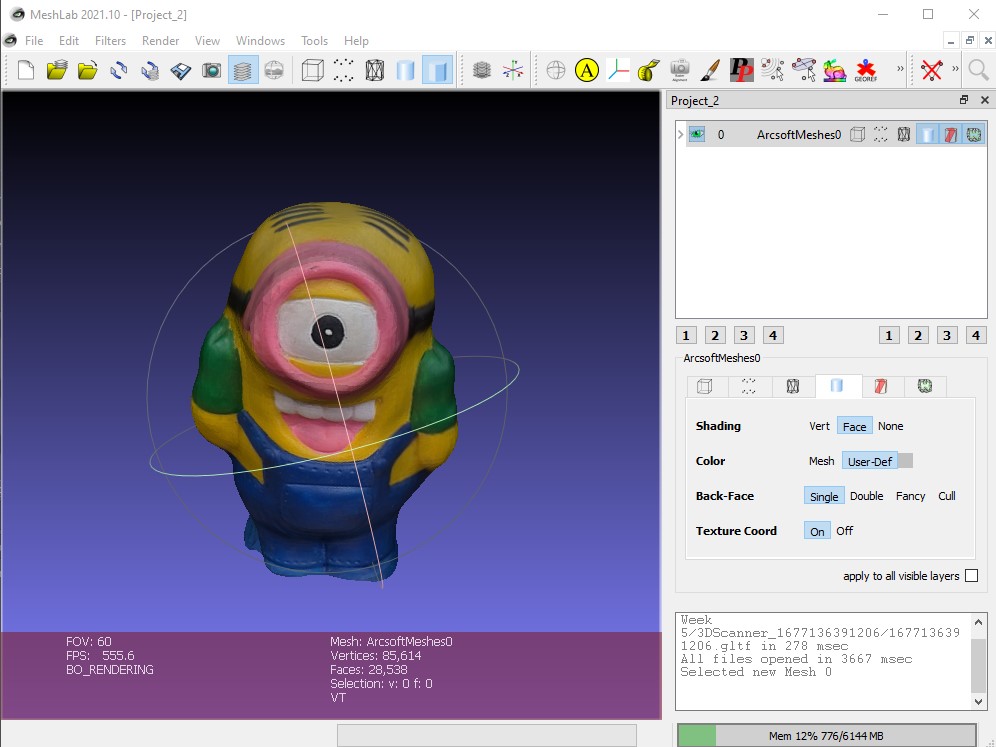 I learned that unlike scanned model created from handheld scanner, scanned images from photogrammetry needs sculpting and mesh editing. I will probably try to do the sculpting next time, but for now I will just stop here.
Design Files
Design file of the fruit model on Onshape..stl file of the "voronated" fruit model.
Model file of the scanned model.