dummy
13.MOLDING AND CASTING
This week's assignments may seem straightforward at first glance, but they are quite intricate. Our task involves designing an object using 3D software, which will then need to be exported to be milled by a CNC machine. After that, we will need to create a mold and use it to cast the object in the material of our choice.
HERO IMAGE
ASSIGNMENTS
Gropup Assignment
- Review the safety data sheets for each of your molding and casting materials, then make and compare test casts with each of them.
- Extra credit: try other molding and casting processes.
Individual Assignment
- Design a mold around the stock and tooling that you'll be using, mill it (rough cut and three-axis finish cut), and use it to cast parts.
GROUP ASSIGNMENT
When casting products, it is important to be careful as some materials can be toxic. For example, SILICON RUBBER RTV-620 requires gloves and a ventilated area for mixing the materials. The ratio of the mixture must be precise, otherwise the cast may not cure properly, or there may be bubbles in the final product. However, using this silicone allows for a long-lasting mold and a perfect finish.
On the other hand, materials like JESMONITE is more environmentally friendly, as it is not hazardous,is water-soluble, and don't contain solvents. It is also fun to work with.
You can see HERE more about the group assignment.
INDIVIDUAL ASSIGNMENT
1. OBJECT DESIGN FUSION 360
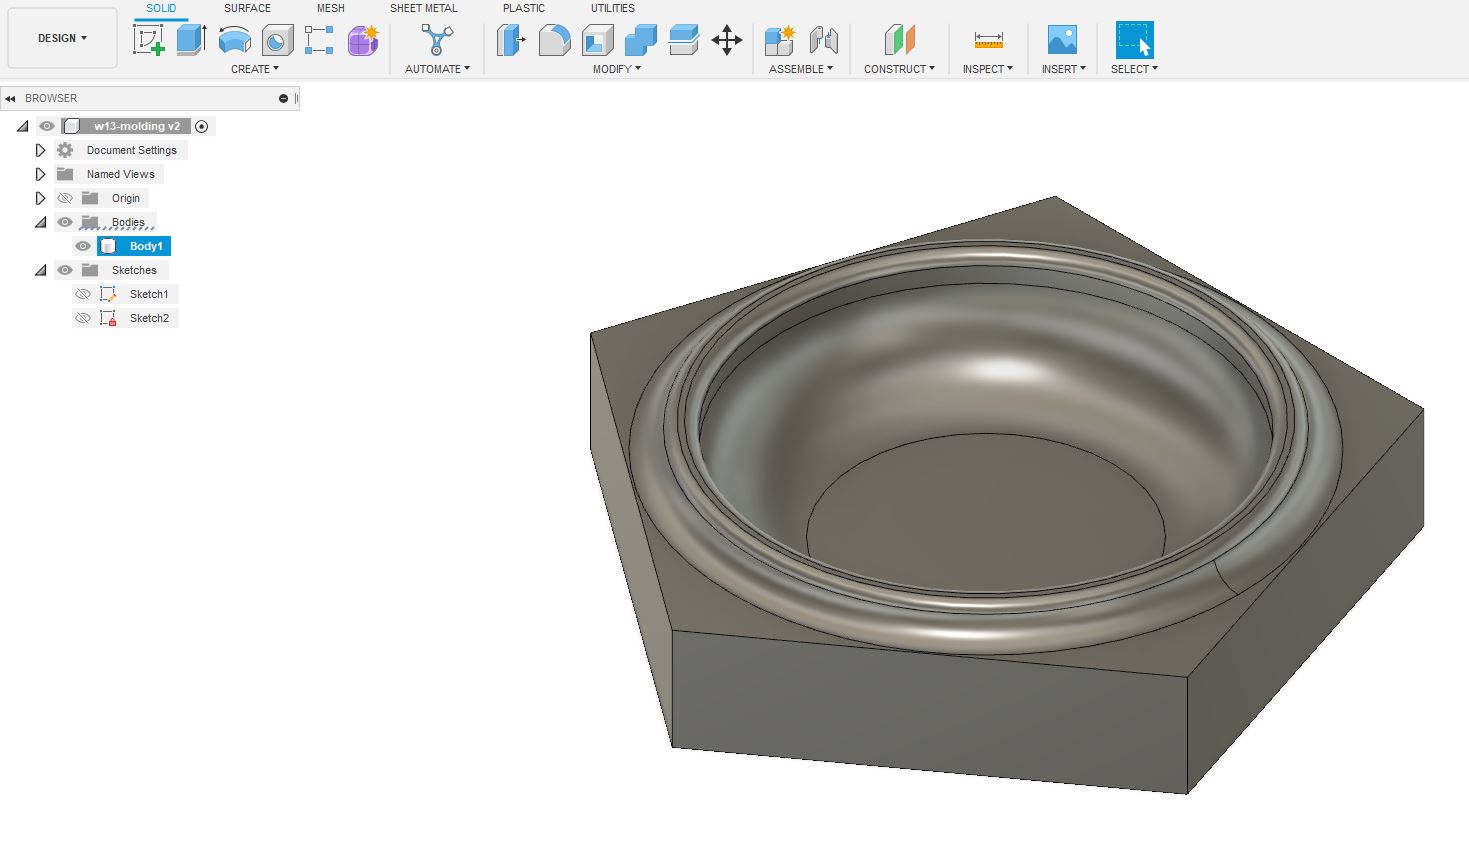
To begin, I designed a tray in Fusion 360 with the intention of using it to hold my jewelry on my nightstand.
I wanted to have the module to be reapeated and be paired with another module on the side, I drew a pentagon for it, with the Sketc> Create> Polygon>.
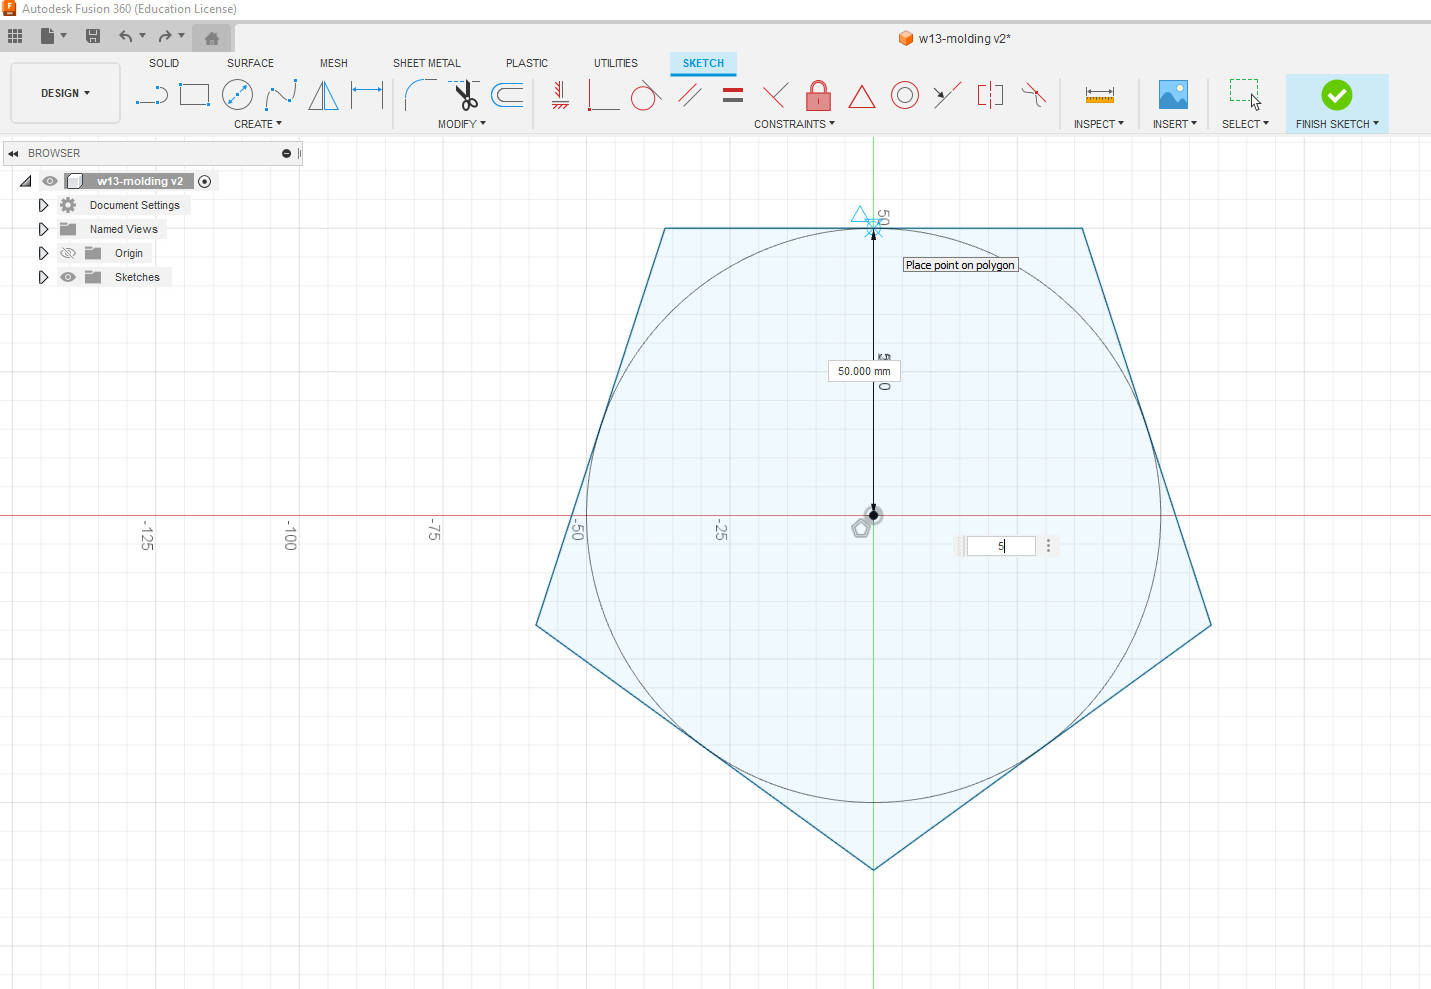
Then I pulled 20mm and draw two circles in the upper face, pulling up 5mm a ring, defining the area where the trey would be.
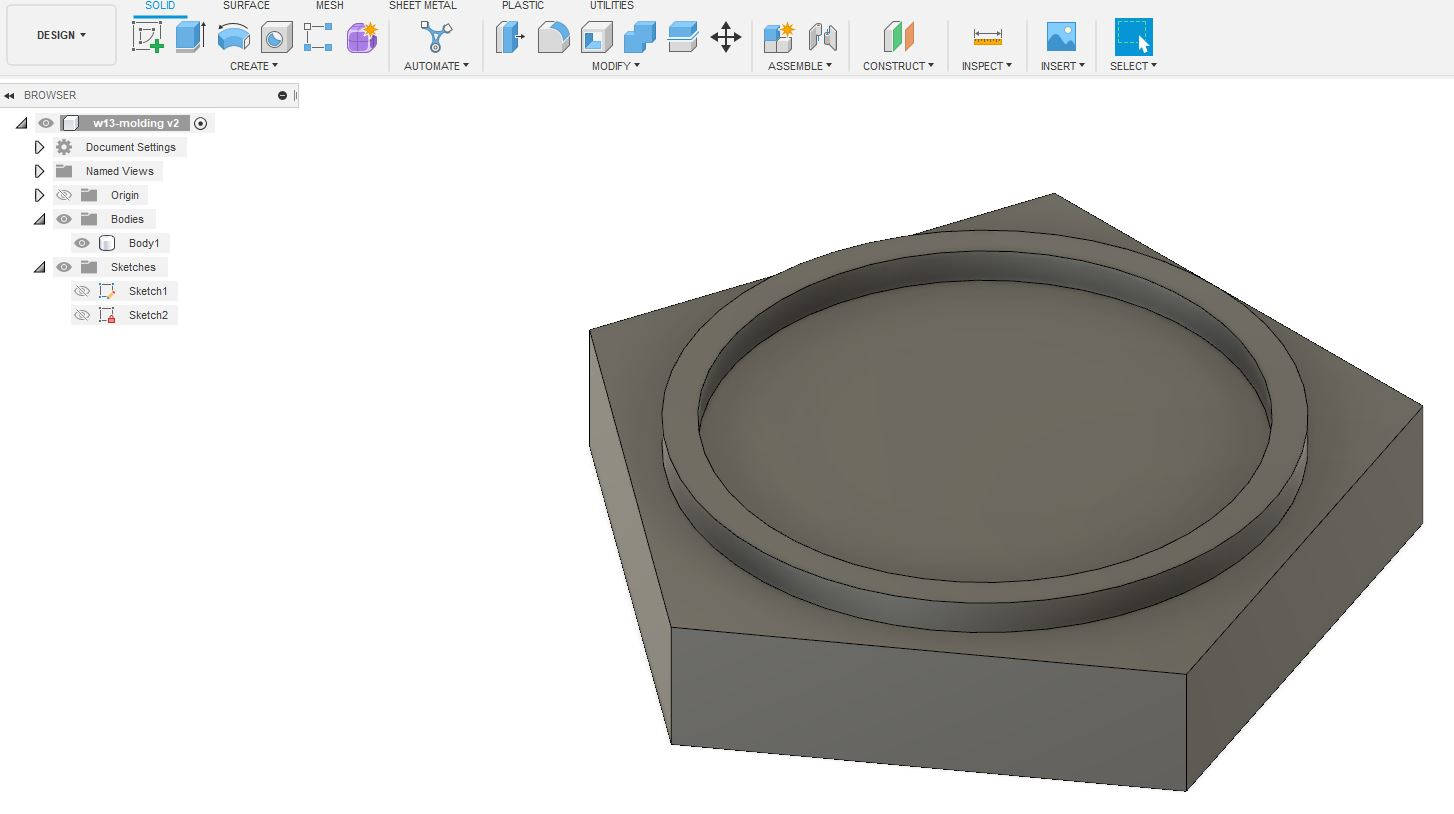
I pulled down the interior part of the circle 150mmm, making the tray deeper. After I rounded the corners with the Modify>Fillet tool, the innner corner to have a smooth surface inside the tray. The new CNC machine is able to make a very smooth round surfaces.
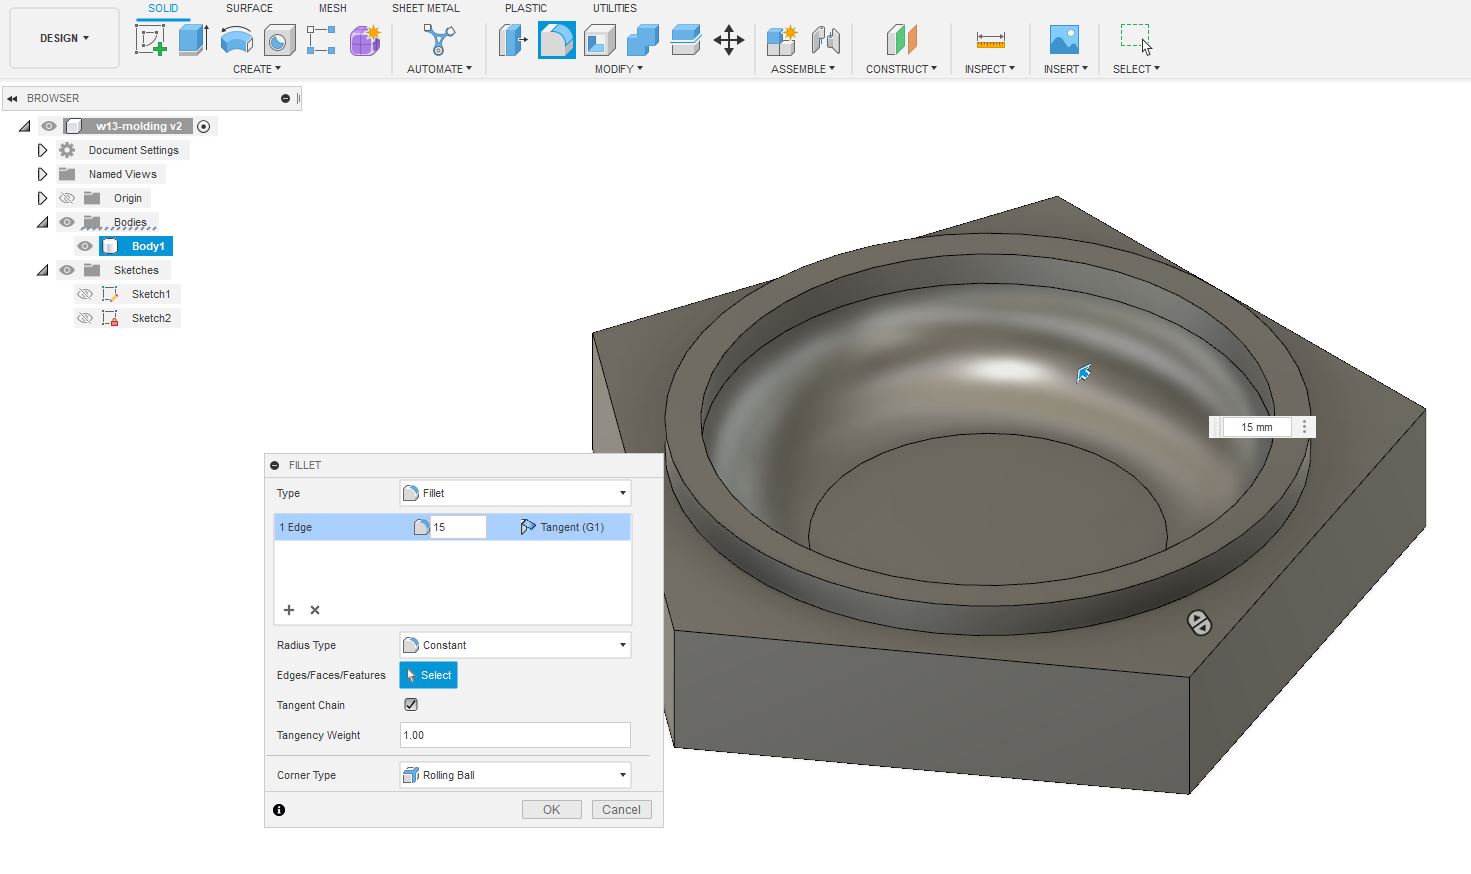
To have a a smoother finish I rounded the corners of the ring.
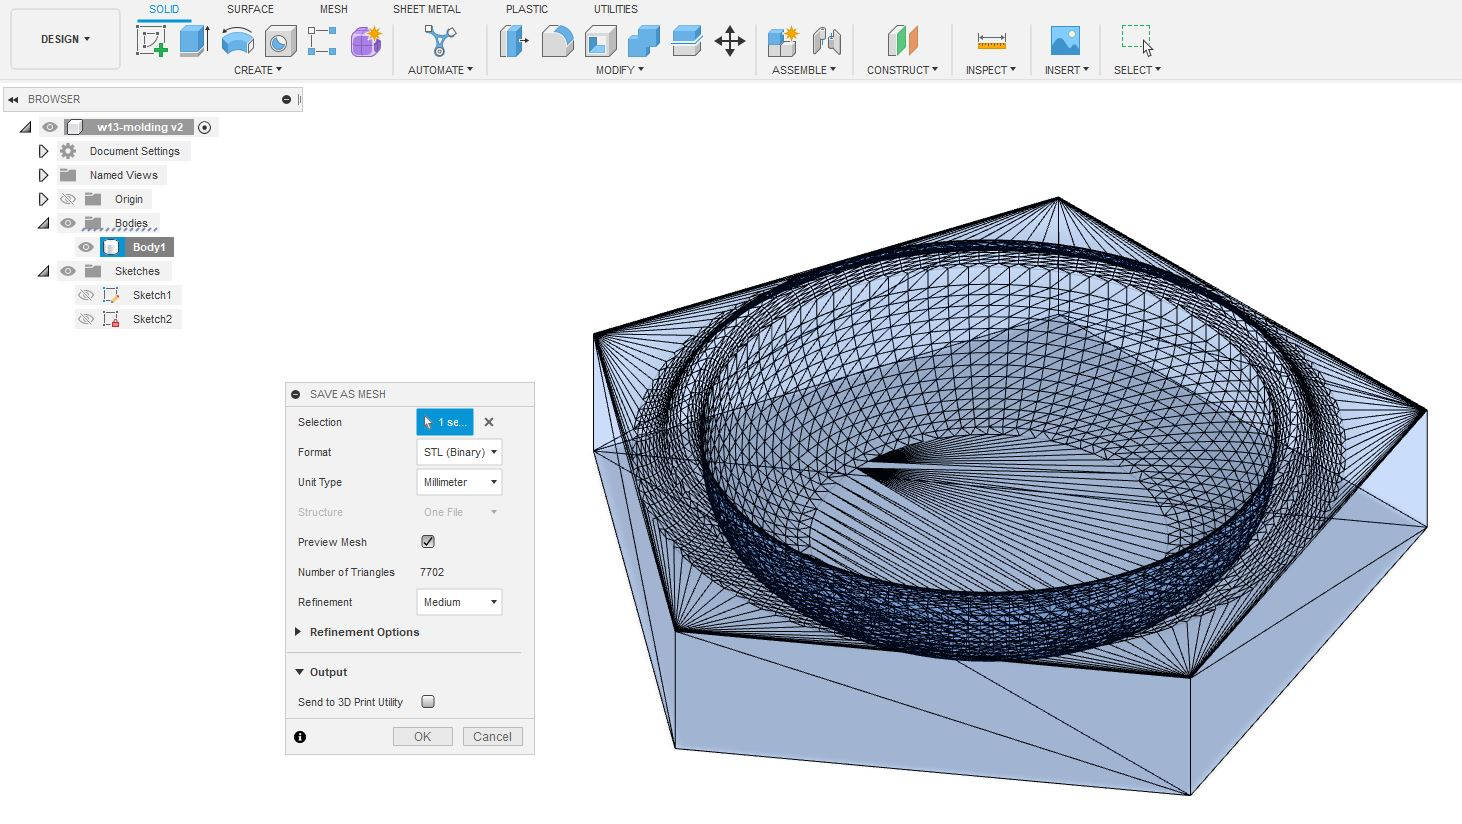
When the model was ready I proceed to save it as an STL image to be sent to the CNC software, where the milling settings could be written and the G-code generated before milling.
2. MILLING FOR MOLD MAKING
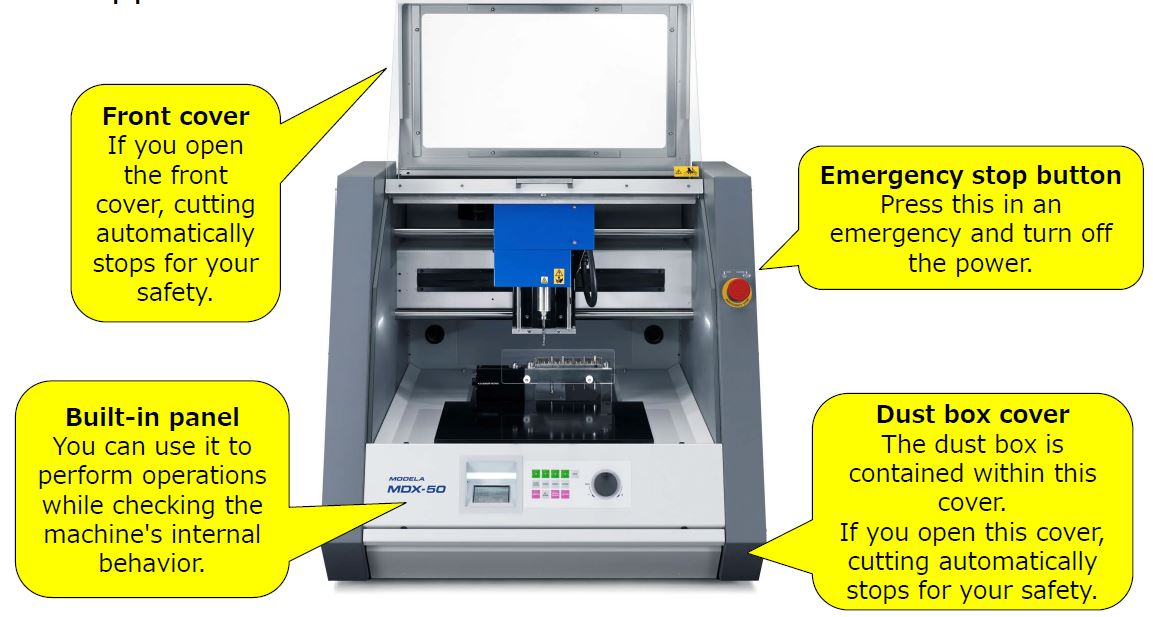
We recently added the Roland DGA MODELA MDX-50 Benchtop CNC Mill to our lab. It's a new machine that comes with an automated mill-changing feature. It offers two modes of milling that can save us time during the prototyping process. The first mode is called drafting, which produces a rough finish, while the second mode is called finishing, which provides a very high level of precision. By using these settings in combination with pre-programmed adjustments, we can efficiently produce prototypes with a range of finishes.
-Setting the X, Y and Z axxis
We have to set the starting points for the machine to start to mill, this is something we have done in all the CNC machines, see week 7. Computer-controlled machining and week 8. Electronics production.
To begin, we need to access the front panel menu and choose the option to change the mill. Once we've selected the desired mill, the machine will automatically switch to it.
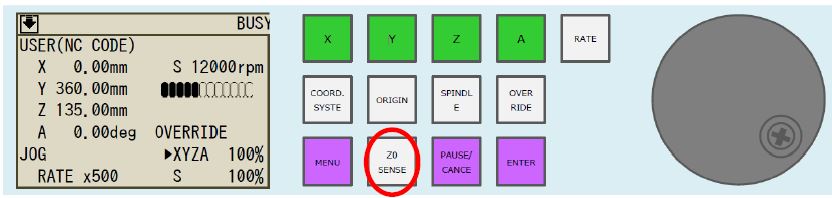
Next, we need to choose the X-axis option from the same panel and rotate the hand wheel until we reach the desired starting point. Then, we select the X-axis option again and press the Origin button until the X-position is reset to 0. We repeat the same process for the Y-axis by selecting the Y option and resetting its position to 0.
To set the origin for the Z-axis, we need to open the door and position the sensor over the desired location on the material to be milled. Once in place, we close the door and press the "Enter" button on the front panel. Next, we select the "Z0 SENSE" option and the machine will slowly lower the milling tool until it reaches the sensor, at which point it will automatically override the axis and set the origin.
-Setting up the Milling characteristics
When we open it has a window with five steps to select the settings of the milling.
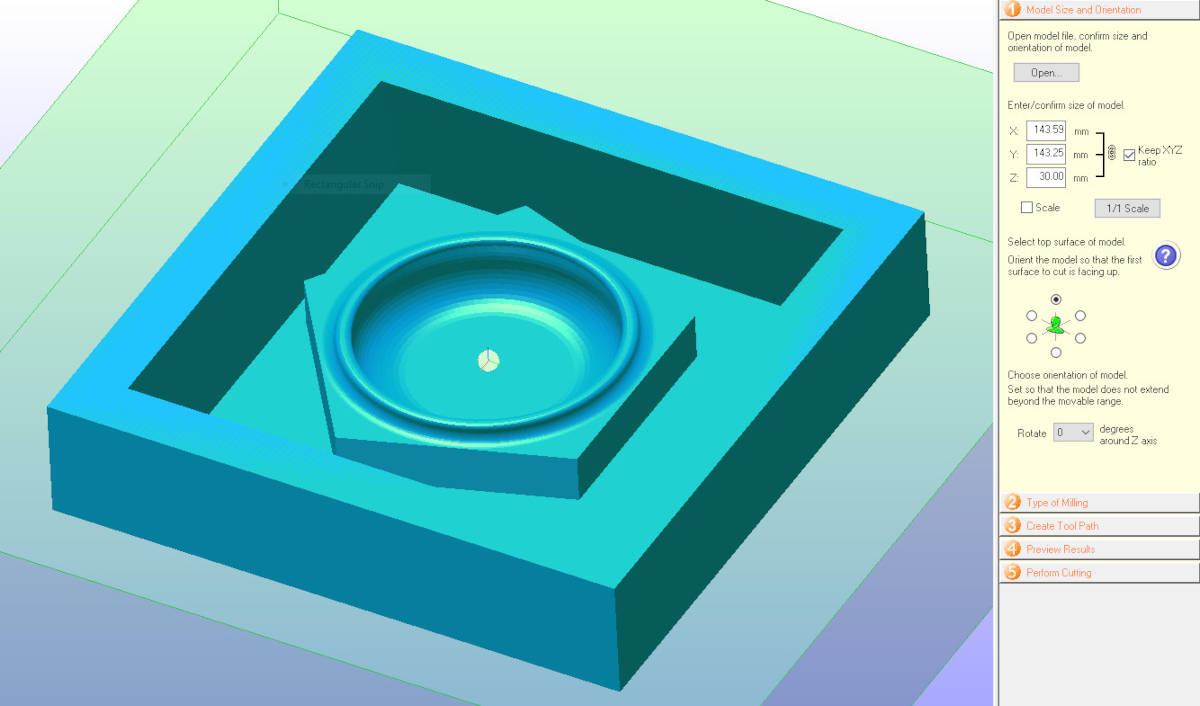
* Model Size and orientation
I initially specified the original size of the model that I wanted to print. However, but later I discovered that the machine would take 8 hours to mill my project, which was one day before the submission deadline.
As a result, I had to adjust the size of the model to make it smaller. The software we were using allowed us to change the size of the model either with constraints or without constraints in this window. In my case, I changed the size of the model while maintaining the original proportions, but with constraints to ensure it was smaller.
* Type of Milling
In this window I selected all the better finishes so I could have very smooth curves, this is one of the highlights of this CNC. Although very good finishes take longer.
* Create Tool Path
Here I choose the size of the actual material where I would mill the object, and located the object in it. It is possible aligned with the top, button or center I chose top, so the machine could take less time milling the sruface. In this window I selected "Create Tool Path" to go further in the setting of the milling.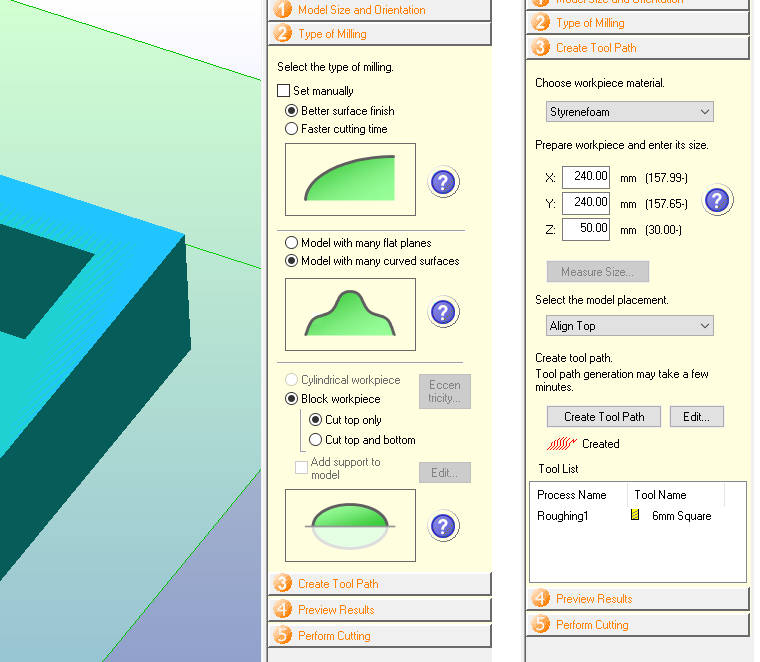
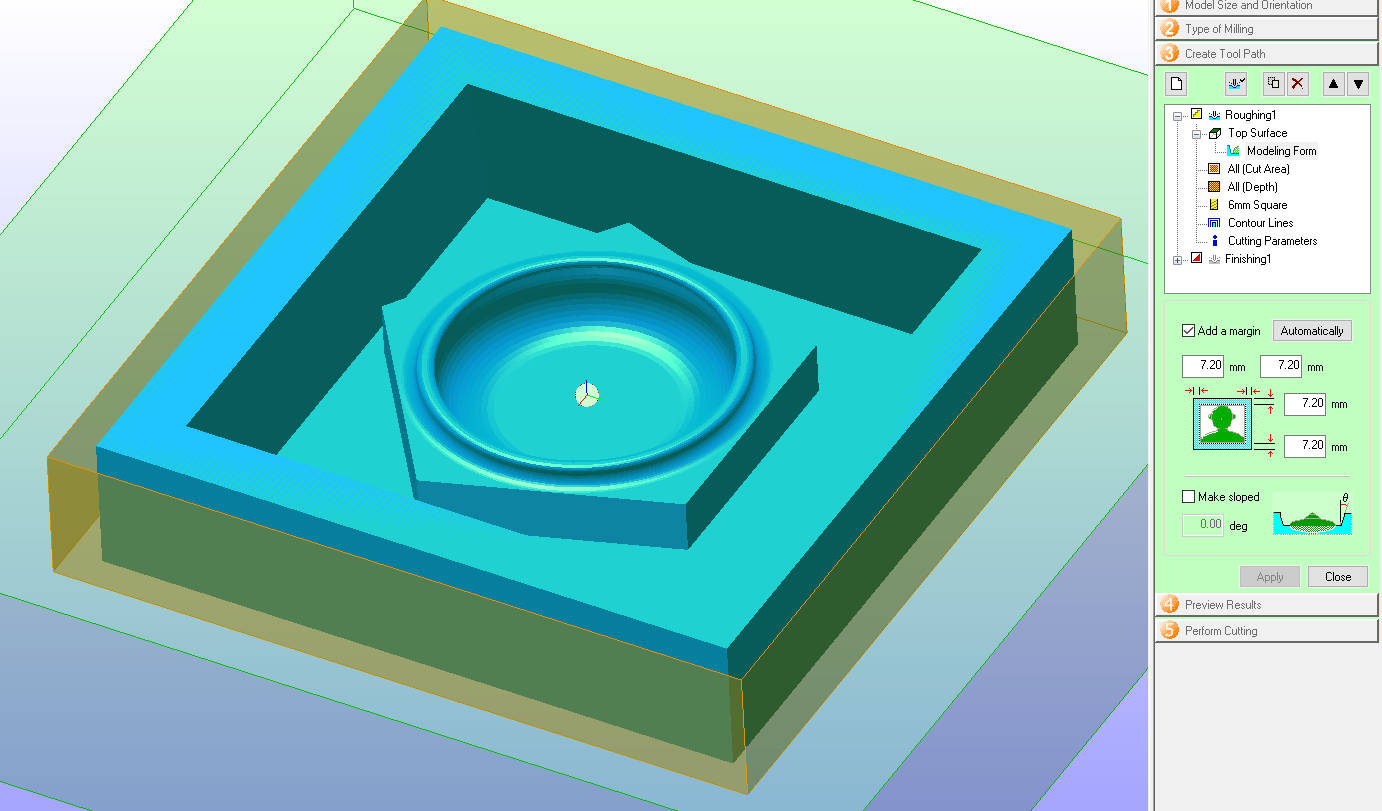
There are two types of finishes that we can opt for when milling a 3D model. The first is called "Rough", and as the name suggests, it is ideal for creating sketches of 3D models where the final finish is not of great importance. Typically, this finish is "terraced", meaning that the machine mills only in the X and Y axis. We can also choose the type of mill that we want to use for this finish. Since rough milling is typically done quickly, I selected the 6mm flat mill for the job. we can choose too to apply a certain finish just in an specific area, in my case I selected all the model to do the rough finish (the area is shown in orange)
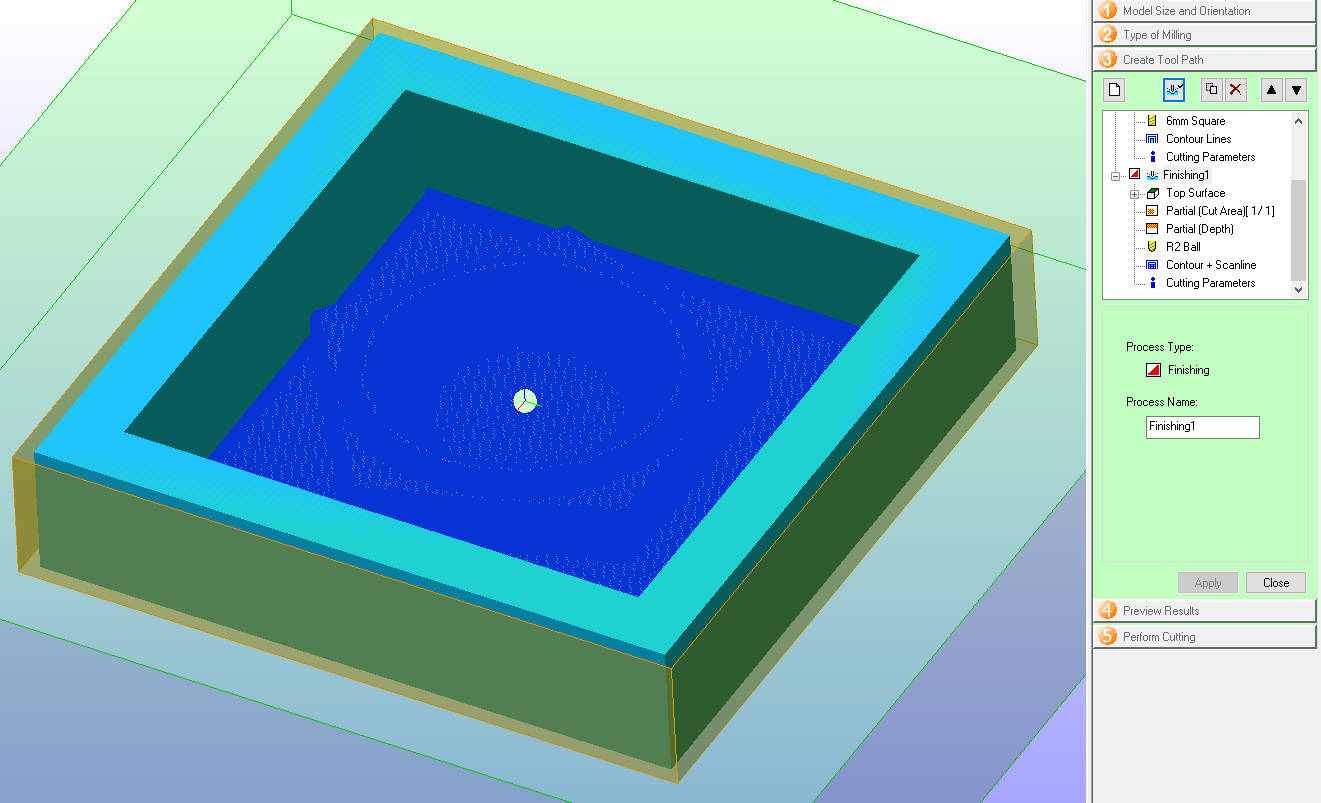
The other setting is "Finishing", here we select again the type of endmill we want to use, I used the R2 ball, that can make fine round surfaces. This finish can be applied to small area again, I chose to apply this finish just to the Pentagon area of the design and leave the rest in Rough.
The idea to have this two settings is to have more fexibility, we can print one or the other one by clicking in the setting and turning it OFF or ON, to mill respectivelly. Or we can leave them all ON to print in sequence. I printed first the Rough setting and once I inspected the model (without moving it from the milling station, I closed the door, hit enter and proceed to turn OFF the rough setting, turn ON the finishing setting and proceed with the final milling.
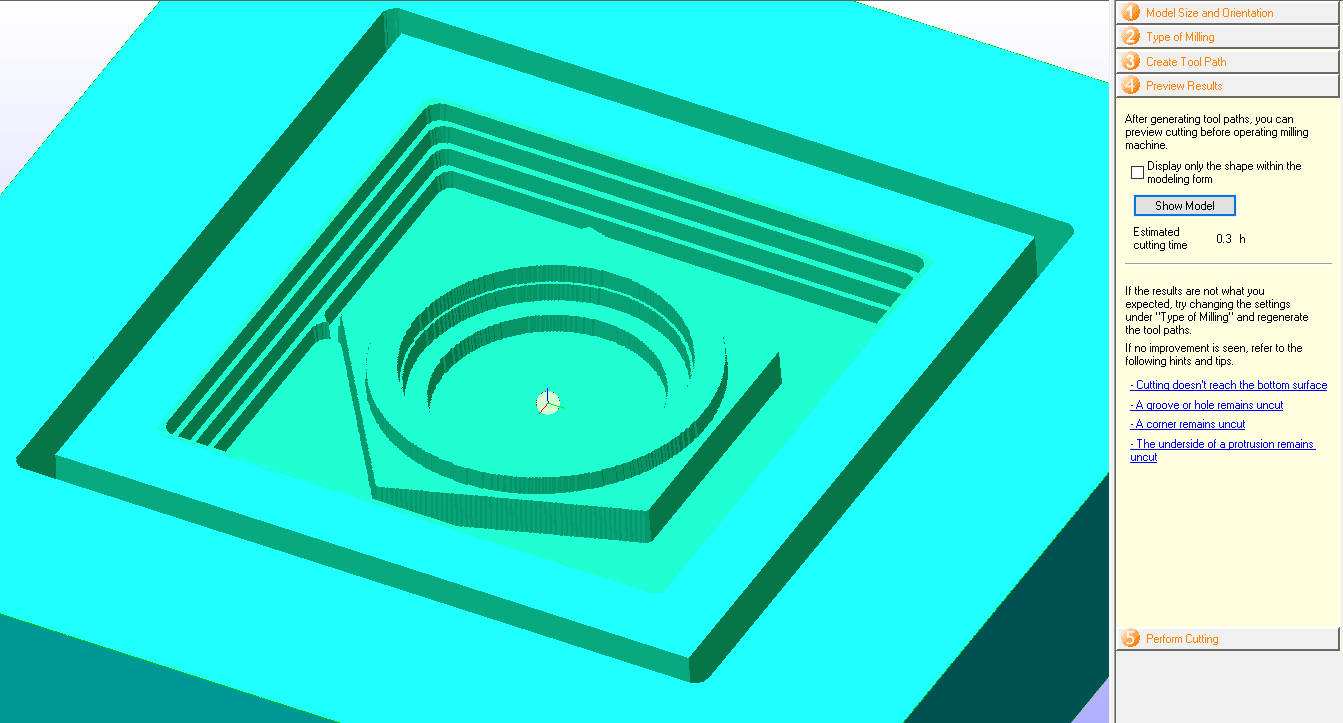
* Preview Results
In this window, we can see how the rough and finishg settings would look like.
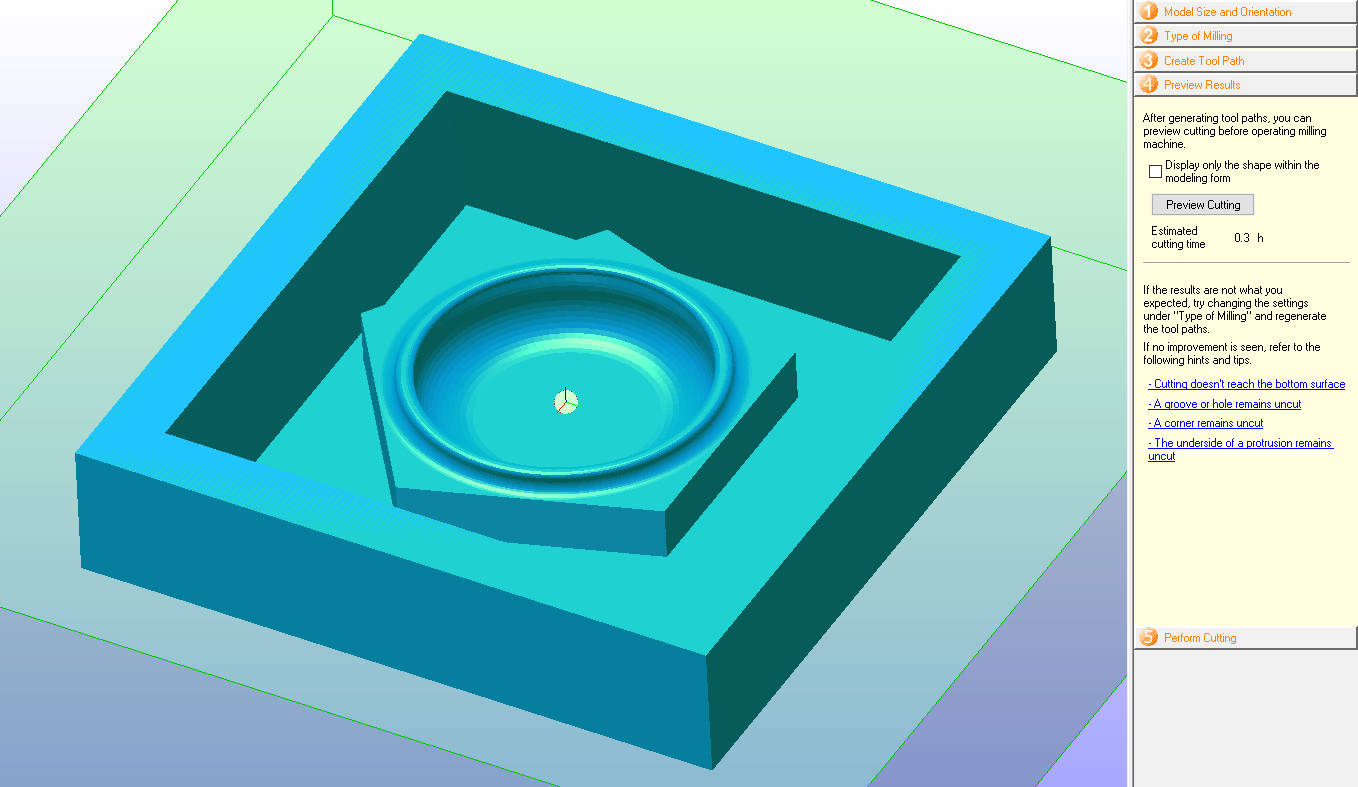
This is the image of the finishing setting.
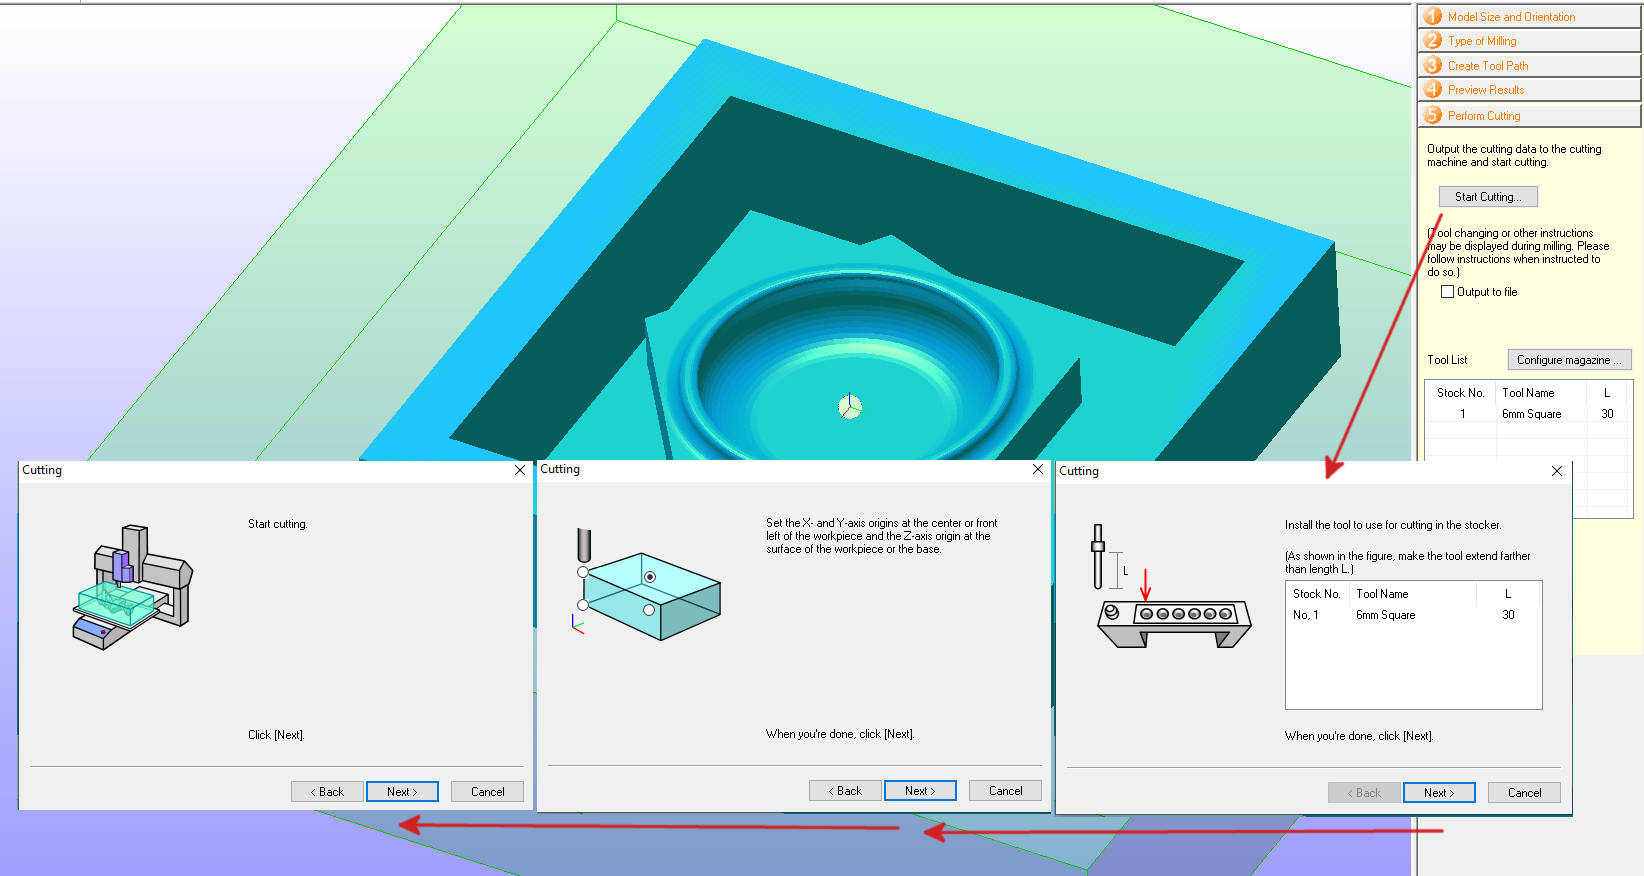
* Perform Cutting
This is the last window, it tell us the mill we have chosen in this case I started to mill the rough setting, while I turned of the finishing setting, so it only shows the mill for the Rough setting which is 6mm flat mill. As initially I set the starting point for the axis X, Y and Z at the middle of the piece of Stereofoam I choose this as the mill starting point. Then we click in Next and the machine will start doing the mill, the CNC will automatically put the selected mill.
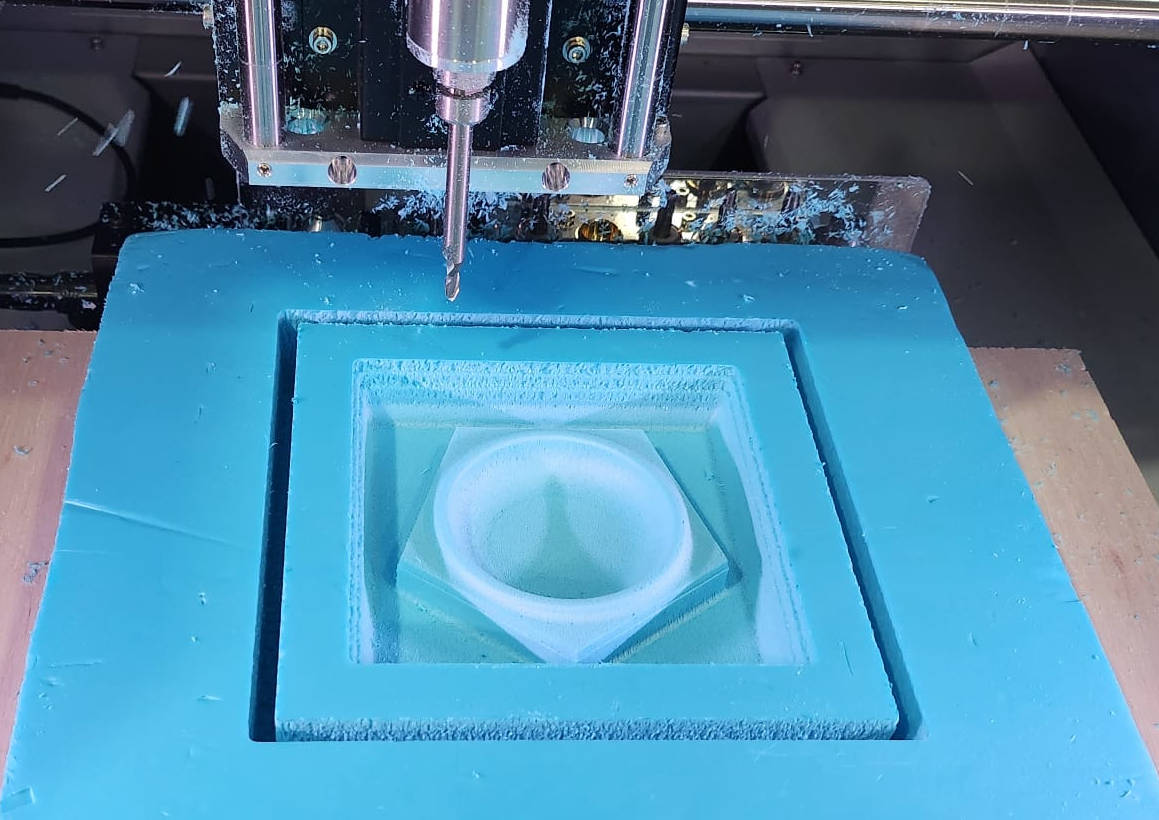
When the Rough Finish was done, I proceed to mill the finishing milling, in total it took me 4 hours to finish the milling.
This is how the model looked finished.
3. MOLD MAKING
These week I fell ill and couldn't work as much as would've liked for the week assigment, I ended up milling and casting the last two days, which is not enough time for all the details all the steps required.
On the day prior to the assignment presentation, I had my model milled. Unfortunately, it was already evening, and using "Silicon Rubber RTV-620" to make the mold, which produces a smooth finish, was not feasible since it requires approximately 24 hours to cure. Steven suggested that we purchase "Easy Mold Silicone Putty" from the DIY store, which cures in just one hour, and use it to make the mold, which I did.
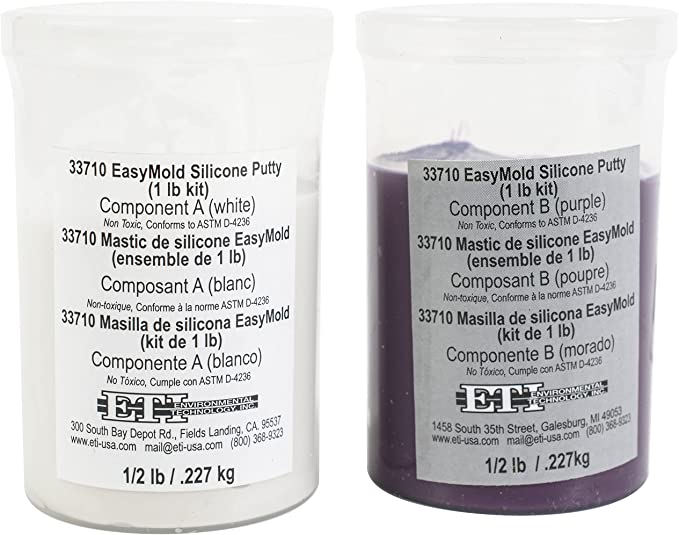
-EASYMOLD Silicone Putty
This product has a cure time of 3 minutes when used at a temperature of 21 degrees Celsius. To use it, two agents, labeled as A and B, need to be mixed together. To simplify the mixing process, they have been colored differently. It is crucial to mix them in equal amounts. Furthermore, this product is food safe, which means it can be safely used to cast food items.
|
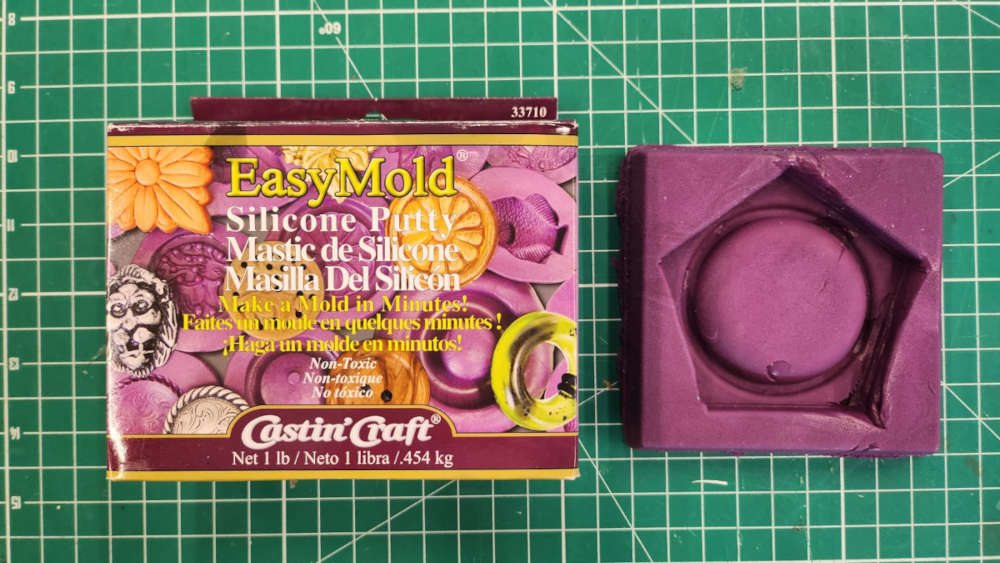
|
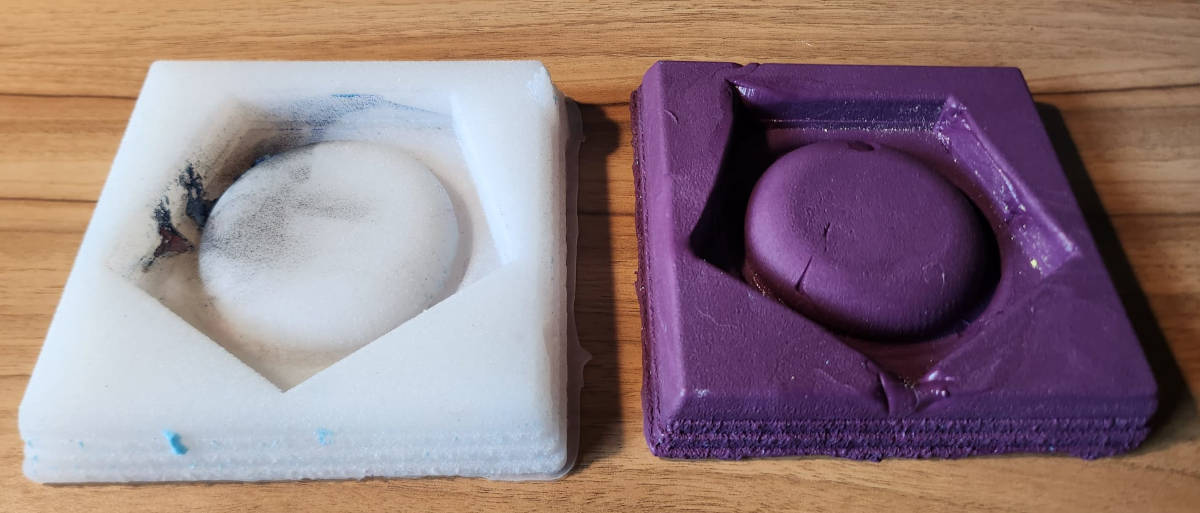
This material is relatively safe to use, check the TECH SHEET, but it is quite expensive and not ideal for creating large molds. This is because it sets quickly, making it challenging to push the mixture into the mold's cavities. As a result, the end product was not very precise and contained several bubbles. However, on the positive side, I was able to create a mold that I needed for the following day.
Upon arriving at the lab, I immediately mixed the other silicone mold. Fortunately, the use of EASYMOLD did not cause any damage to the Stereofoam model.
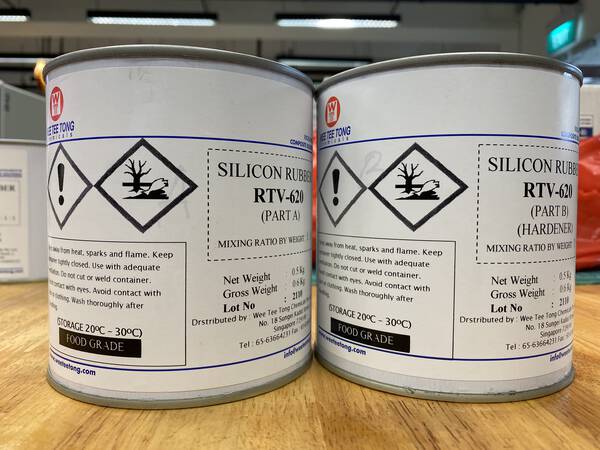
-Silicon Rubber RTV-620
This material requires more care in the handeling, it should be used with globes,it can be skin irritant and it is highly flamable. It can not be disposed in the drains and has to be contain before being disposed. TECH SHEET PART A and TECH SHEET PART B
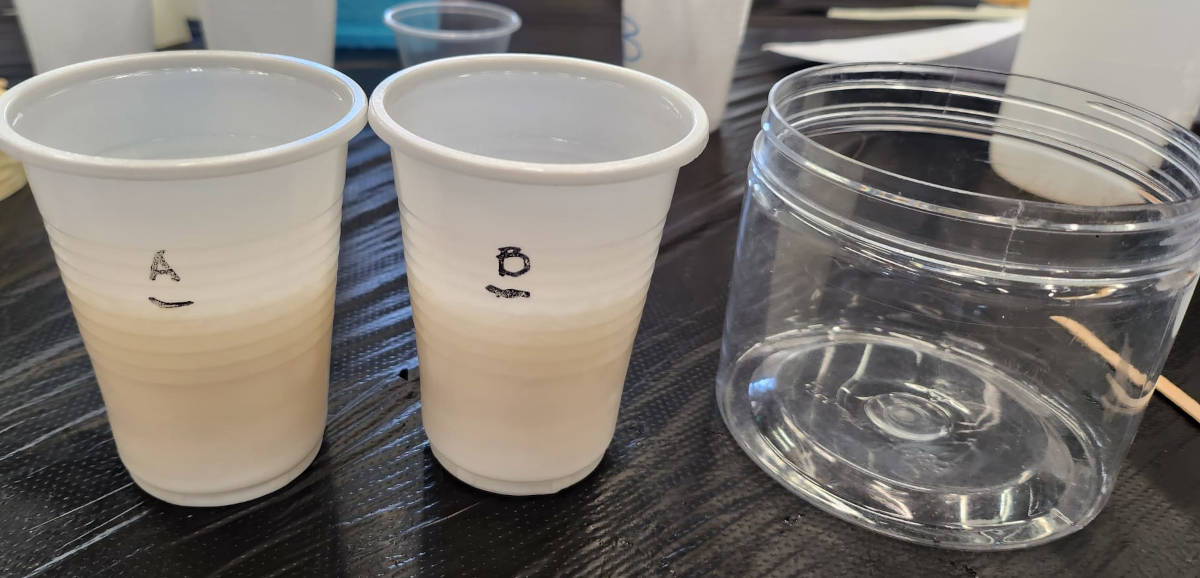
These are the materials need it, Plastic cups, mixig sticks, gloves, mixture A and B. We covered the table to protect it.
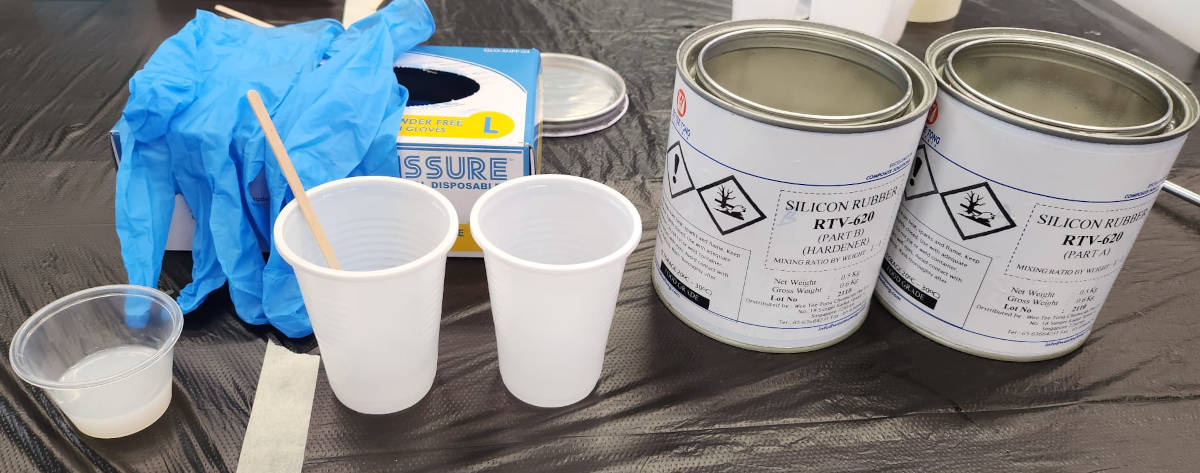
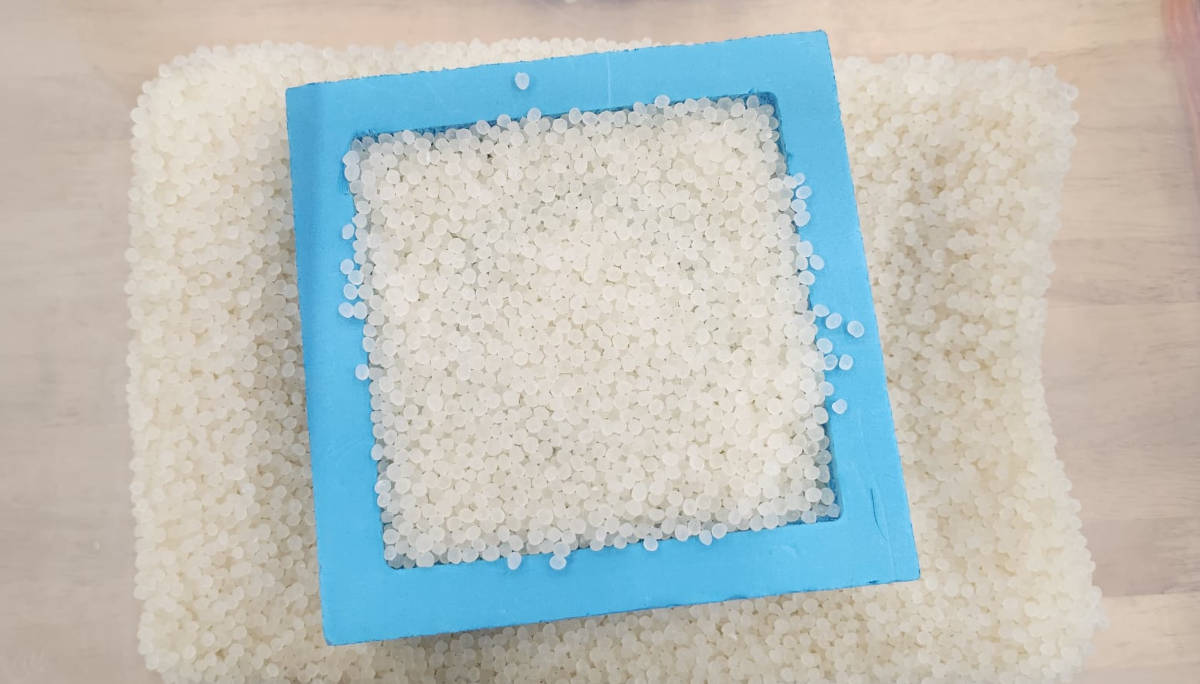
The method for calculating the parts for mixing is based on volume. To determine the required volume of the mixture, I first placed some silicone pellets into the mold. Next, I divided this volume into two cups, which gave me the precise volume needed to fill the mold and the quantity of mix A and B I need it.
Once I got the two parts of the mixing I poured them together into another container, there I had to stir trying to no make bubbles for 15 minutes.
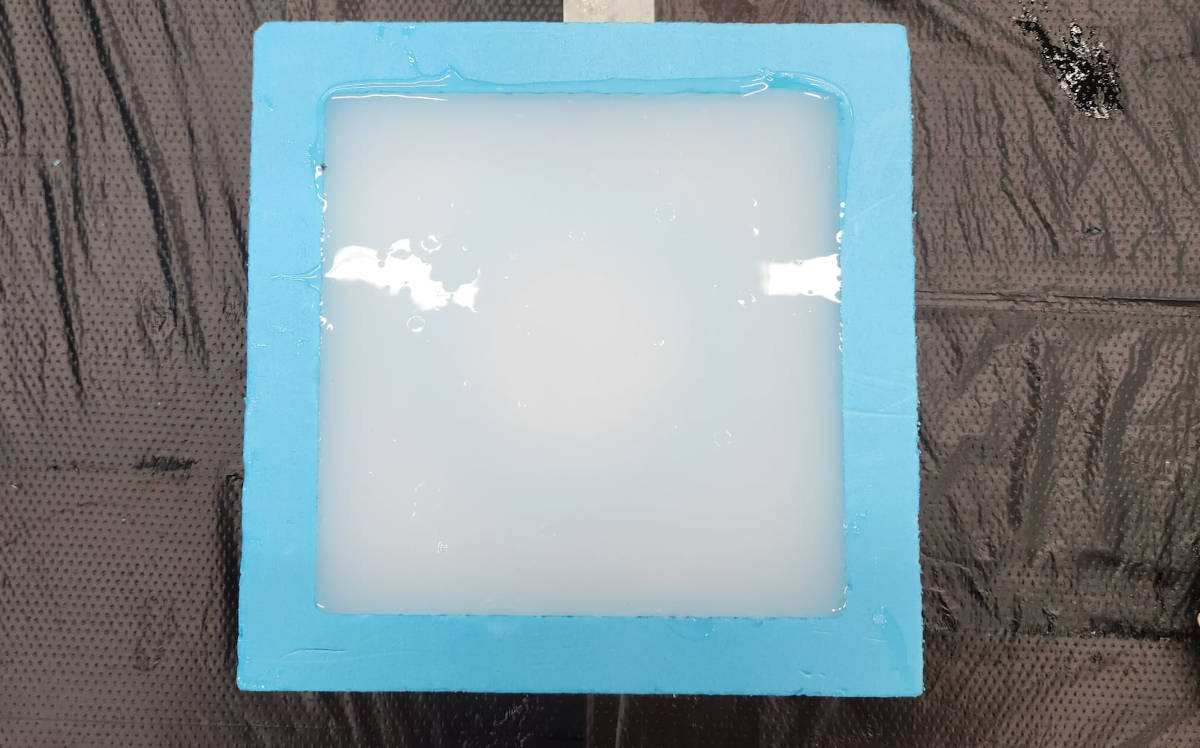
After preparing the mixture, I poured it into the mold slowly to prevent the formation of bubbles. Now, I have to wait for 24 hours to ensure that it cures properly.
4. CASTING
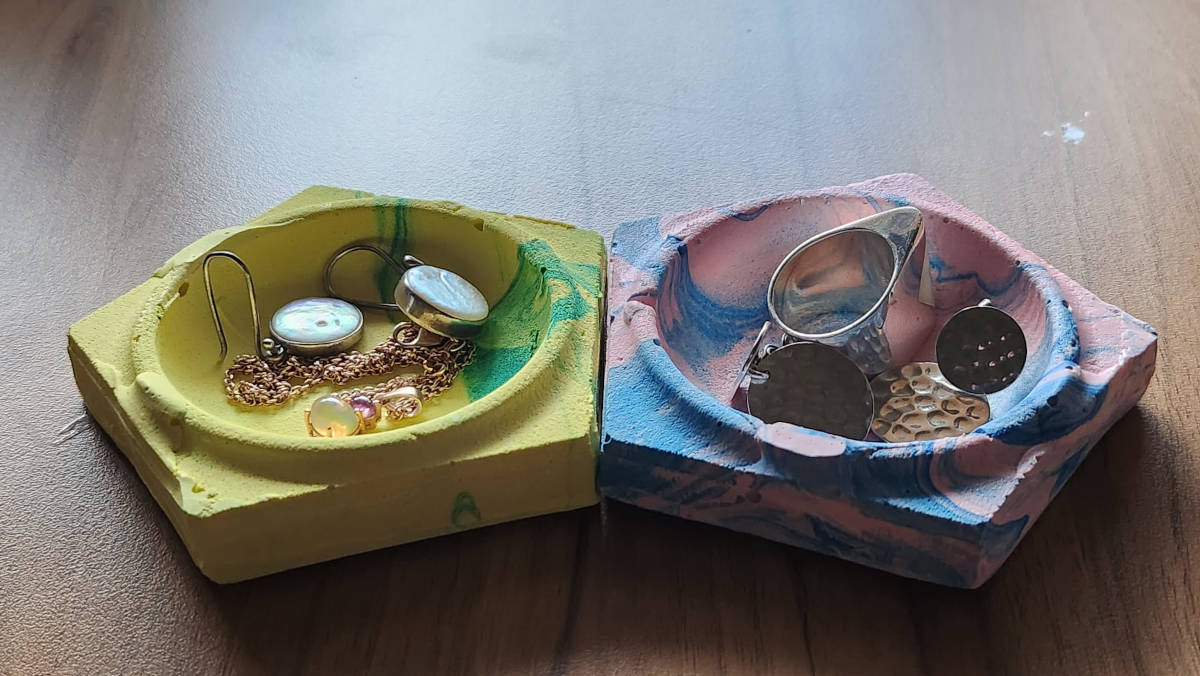
Casting was a more enjoyable part, I had to to it with my NOT perfect mold, but at this point anything that I could do was the best! As I pointed out I was out of time, last day before class. I did the casting with a beautifl material JESMONITE.
This material is "Eco-friendly", easy to use and vast to cure, and the best the results are amazing. It is an Acrylic polymer/mineral resin, see the TECH SHEET here.
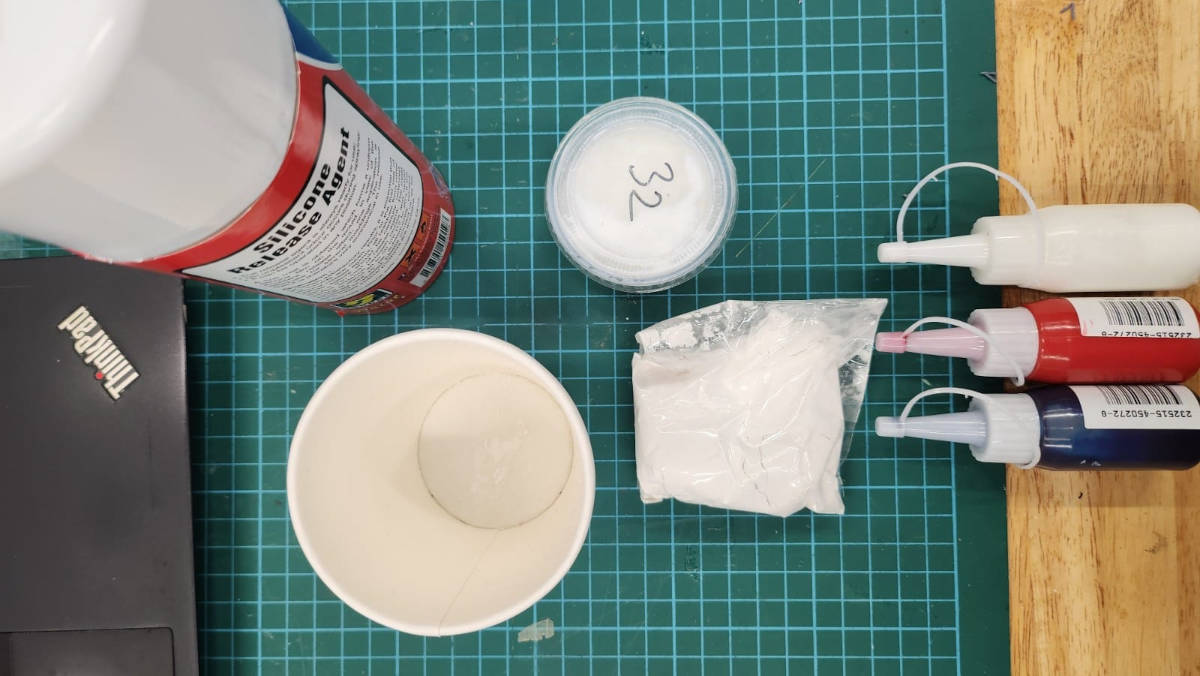
The materials that I used were "Jeminite Powder and Jesminite Liquid", some liquid colorants and silicone release agent.
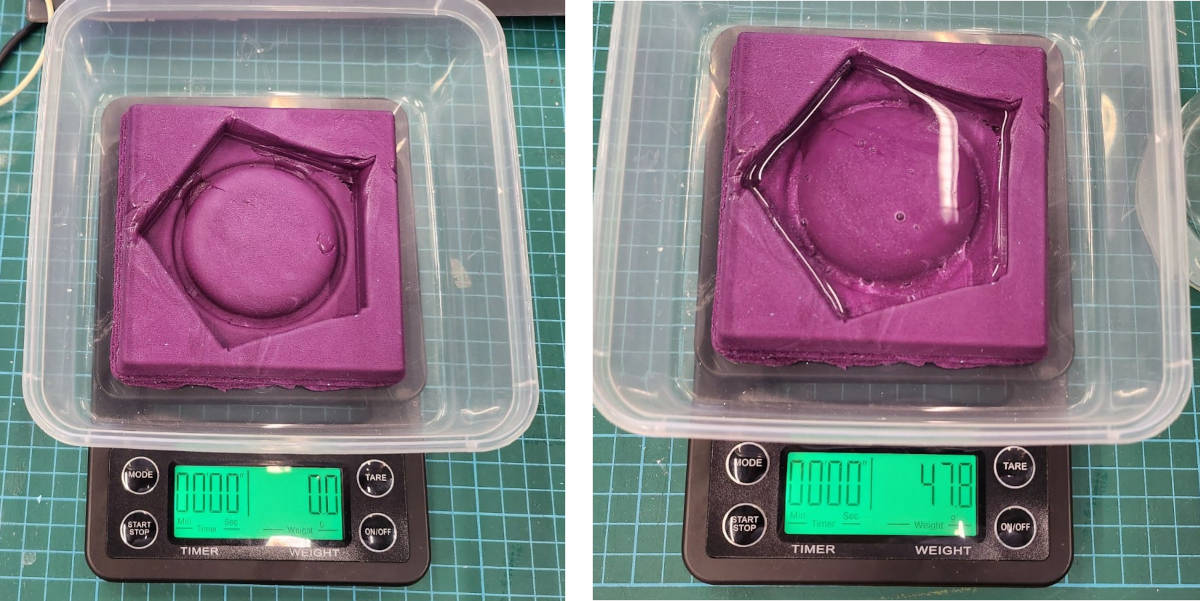
To measure the required quantity of material, we use weight as a unit of measurement. The process involves placing the mold in a box and placing it on a scale, then resetting the scale to zero. Next, we pour water into the mold section where we plan to cast the material. This step provides us with the exact quantity we need, which, in my case, was 47.8 grams. I rounded it up to 50 grams..
After obtaining the weight of the mold space, which I rounded up to 50 grams, I divided this quantity by two, giving me the required quantity of Jesmonite Liquid, which is 25 grams. To determine the quantity of powder needed, I multiplied the quantity of liquid by 2.5, resulting in 75 grams of powder.
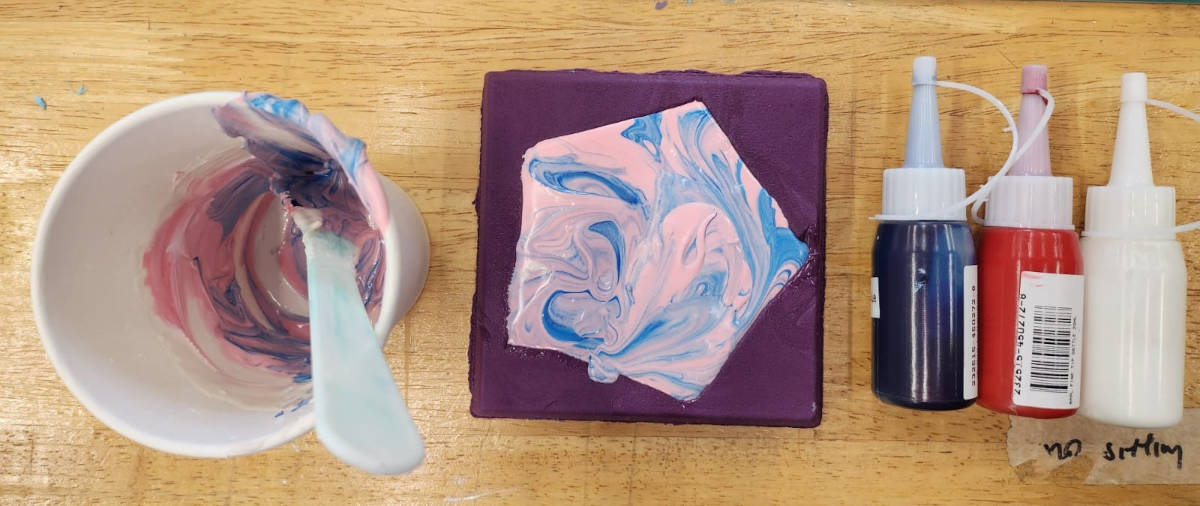
Next, I mixed the two parts in a cup using a flat spoon, ensuring that it was thoroughly blended. Mixing was an easy process as the powder dissolved quickly and easily. I then added a few drops of color to the mixture, attempting to achieve a "marble" finish. Before pouring the mixture into the mold, I sprayed a silicone release agent inside it because the mold was rough. I poured the mixture into the mold and left it for an hour, during which it cured quickly.
5. PROBLEMS-REFLECTIONS
The "MAIN" issue I faced was time. Since I started just two days before, I didn't have enough time to troubleshoot many of the problems I encountered.
- The milling process took too long. I could have shortened it by adjusting the settings. For example, I could have skipped milling the outer line of the mold since it wasn't necessary. Also, I could have made the finish less detailed, which might not have made a significant difference.
- Mold, it was kind of obvious the Silicone Putty was not a good material to use for a mold as big as this one. It gave an uneven finish and didnt go through the cavities of the mold.
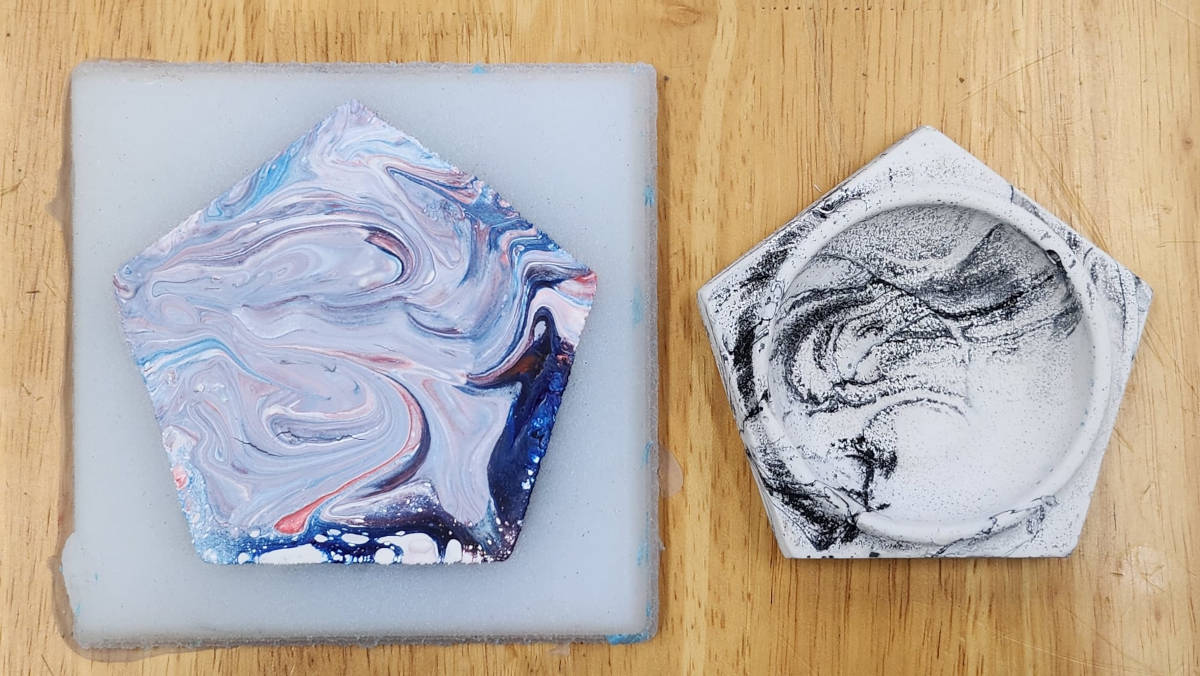
- The casting didn't turn out well neither, and the mold produced a rough finish instead of a smooth and clear one.
6. NEW MOLD
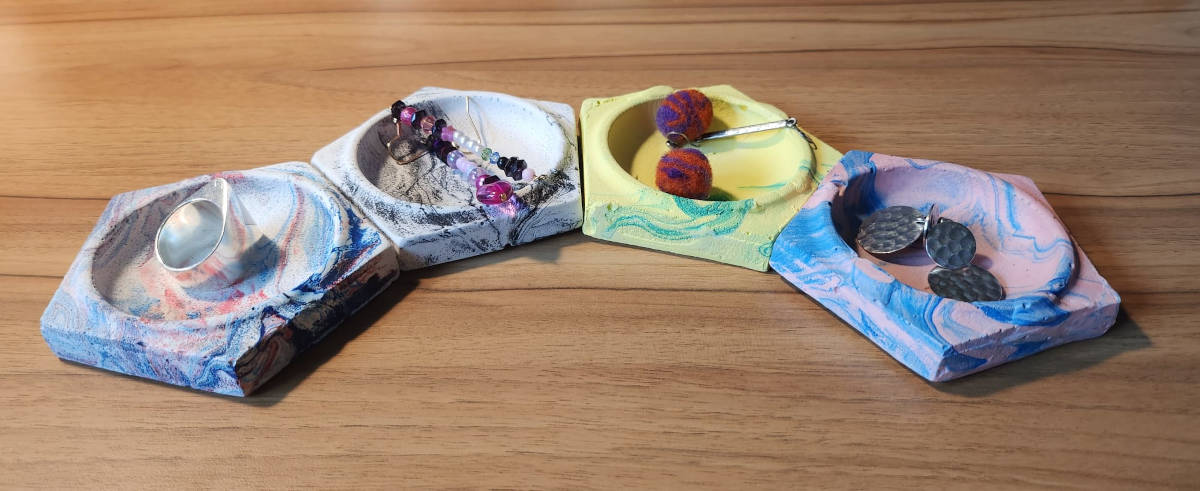
I successfully created a mold using Silicon Rubber RTV-620, and this time the result was good, with a curing time of 24 hours. I then used the mold to cast objects in Jesmonite, which turned out much better than my previous attempts. However, it is recommended to sand the objects to achieve a smooth finish.
LINKS TO FILES
- FUSION 360 MODELHERE