dummy
4. EMBEDDED PROGRAMMING
This week we got to deep our toes in "Programming". We have been introduced to the world of Microcontrollers, they are little computers where we can programm an espcific task and it will do it whith the help of software and hardware. These little "minicumputers" typically include a processor, memory and input/output peripherals.
We will be exploring the Seeed XIAO RP2040, it is as big as a coin.
HERO IMAGE
ASSIGNMENTS
-Group Assignemt
- Compare the performance and development workflows for the architectures to program the Seeed XIAO RP2040 Microcontroler.
-Individual Assignment
- Browse through the Data Sheet for the Microcontroler Program and Microcontroller.
- Interact with local input and/ or Output
- To comunicate (remotely)
- Use different languages and/or development environments
Program the Microcontroller development board to:
GROUP ASSIGNMENT
For this assignment we met with my fellow students and Programmed some tasks in Arduino, then each of us programmed the same task in a different Coding Program.
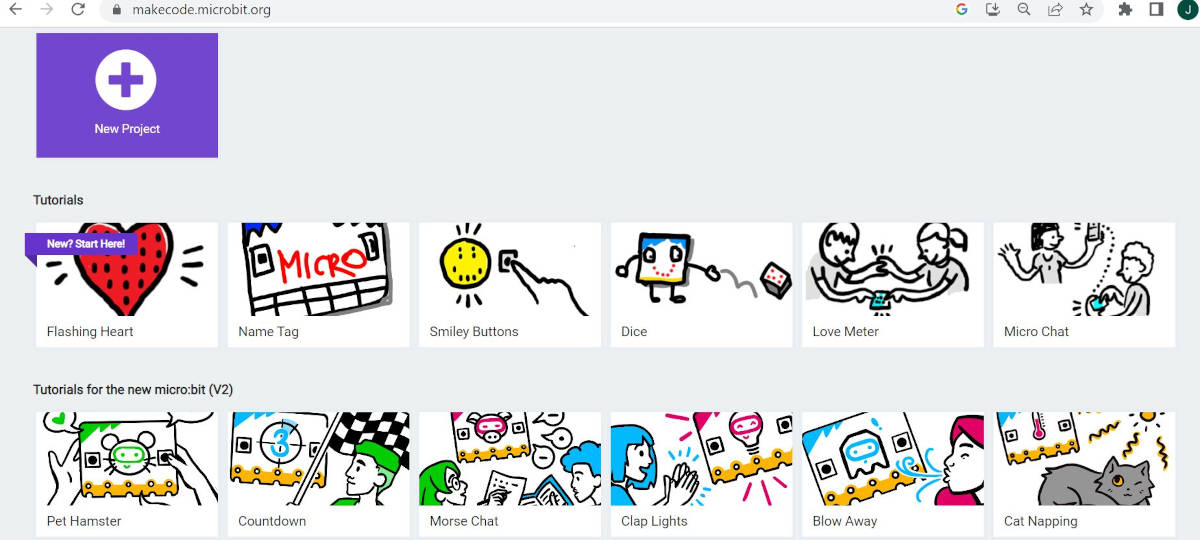
From Fab Lab group I am the one with less experience with Coding or Programming....I would say...NOT EXPERIENCE AT ALL. So we took this opportunity to introduce me to the Programming world with a "Friendly" coding program: MICRO:BIT Microsoft's MakeCode editor.
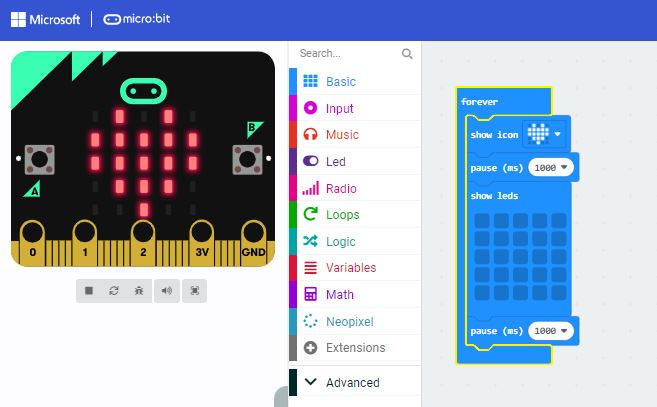
This is a very visual program meant to introduce children into programming without writing the codes but working with visual blocks that will edit and compound the task we want the Microcontroller to do.
This is a tutorial from Micro:Bit, flashing heart.
I have to say that comparing the two programs was easy to do, but at least it was fun. The programming in Micro:Bit is done directly into their webpage, there is not need of download any program, but it is important to have their brand Microcontroller, which is a bit expensive compared to the Seeed XIAO RP2040 Microcontroller.
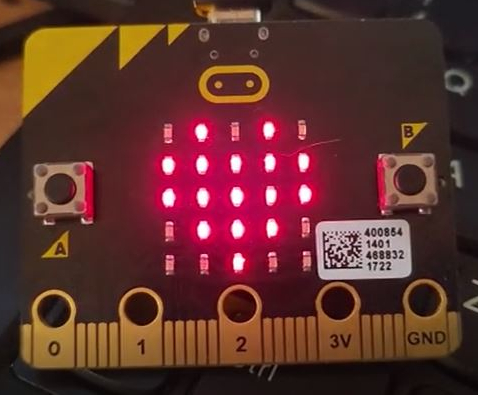
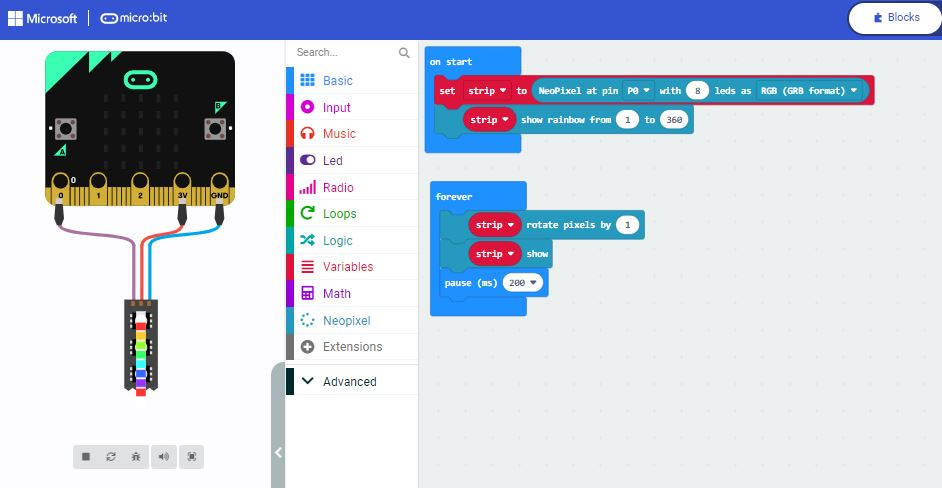
I did some of the simple programing for the Neopixels LEDs in Arduino and Micro:bit, I would say the way the lights move are not "exactly" the same but quite near.
Micro:Bit
Arduino
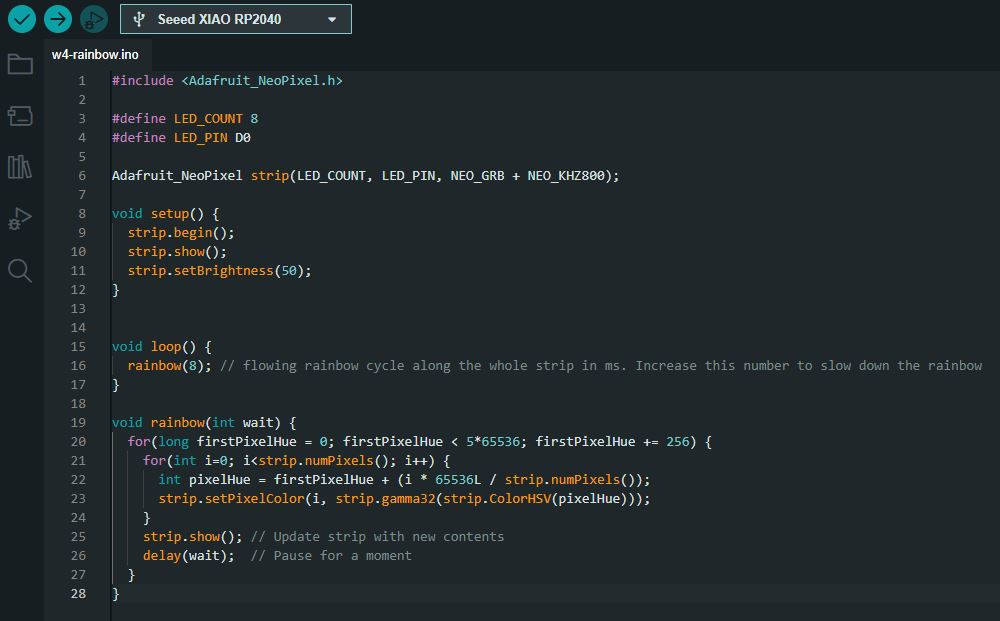
Both lights on with Micro:Bit and Arduino
You can see HERE more about the group assigment, where we compare more in detail different Programming Languages.
INDIVIDUAL ASSIGNMENT
-Microcontroler Program and Microcontroller Data Sheet
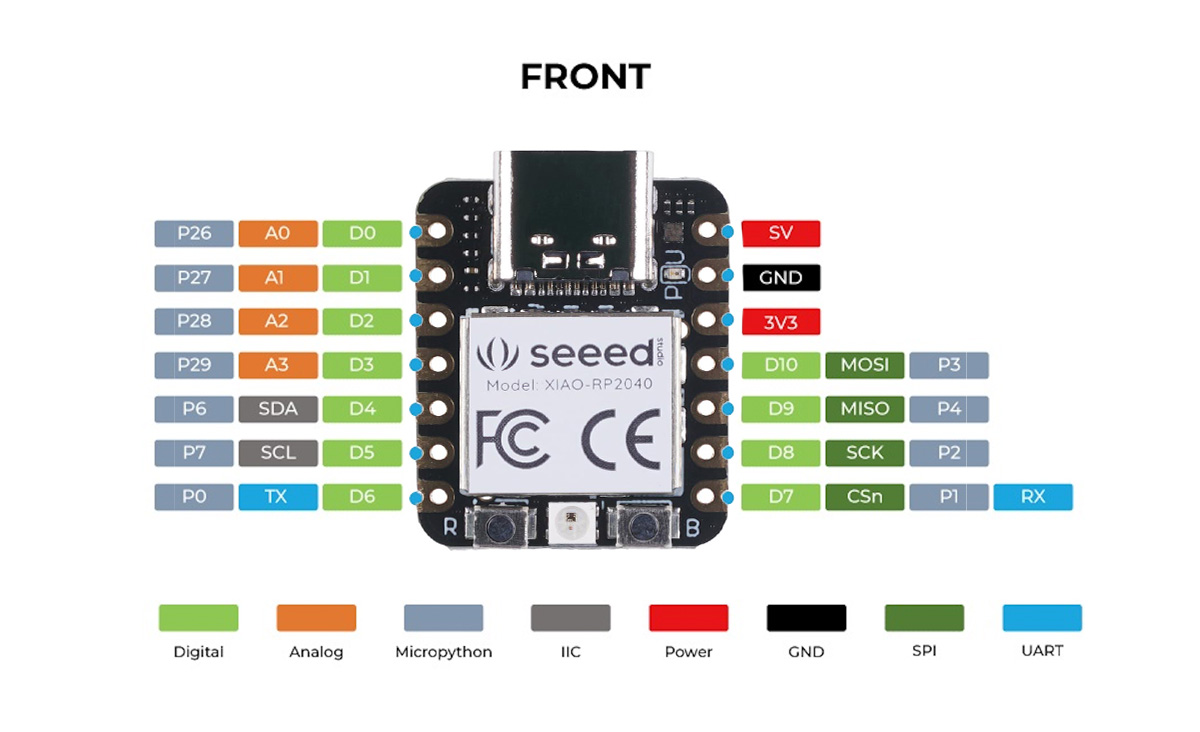
Seed XIAO RP2040 Microcontroller:
Before Programming it is important to know the bulding structure of the Microcontrollers and know its parts, this info can be found extensevely in the Wiki SEEED STUDIO page.
|
|
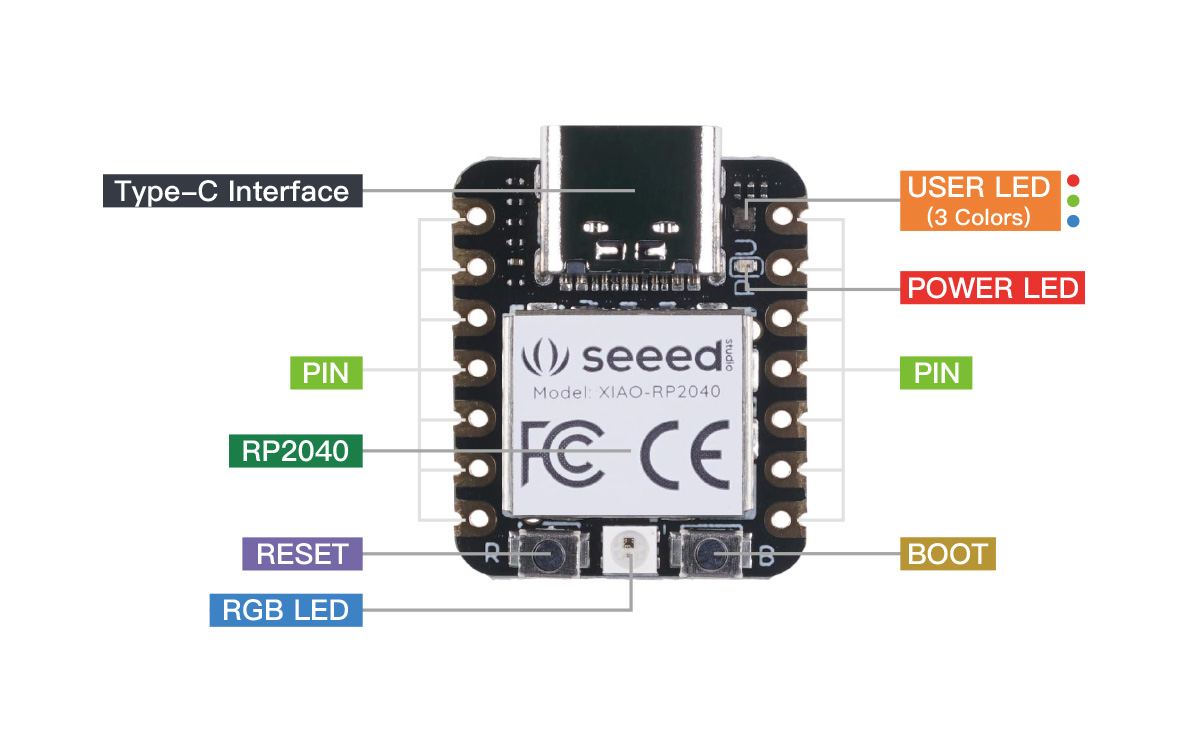
We can see in this front images the Microcontroller has a Type C connection, power led, Internal Users LEDs, a Microporcessor at the center, several PINs to connect either, Analog or Digital input/output, a reset and Boot buttons, the last one is used very frequently when Arduino sends a ERROR message because the chip can loose connection with the computer, then we have to long press "B" button to solve it and try to download the program again.
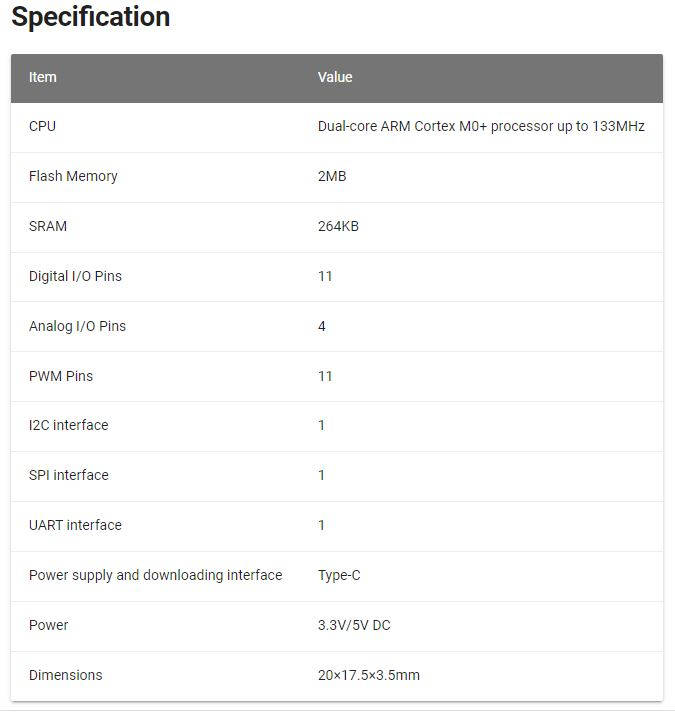
In the SeeedStudio wiki page, you can find the PDF link to the complete "RP2040 Datasheet"
Installing the Arduino Software to program:
In the SeeedStudio wiki page, you can find too a link to go STEP BY STEP to install Arduino in your computer.
- Download the program from HERE
- Launch the application
- Add Seeed Studio Microcontroller to the Arduino IDE
- Navigate to Tools>Board>Board Manager>RP2040 abd select the last version of "Raspberry Pi PicoRP2040" And install it
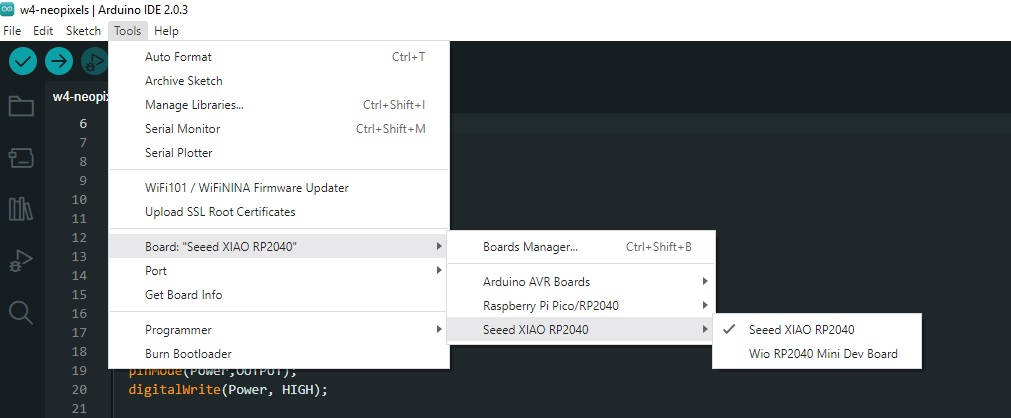
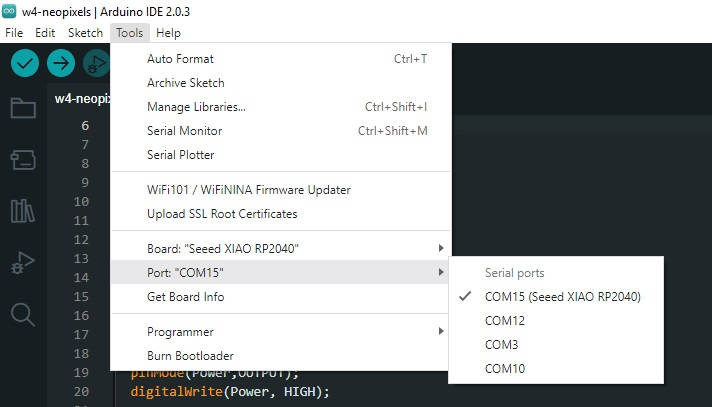
- select your board and port, Tools>Board, find "seeed Studio XIAO RP2040" and select it.
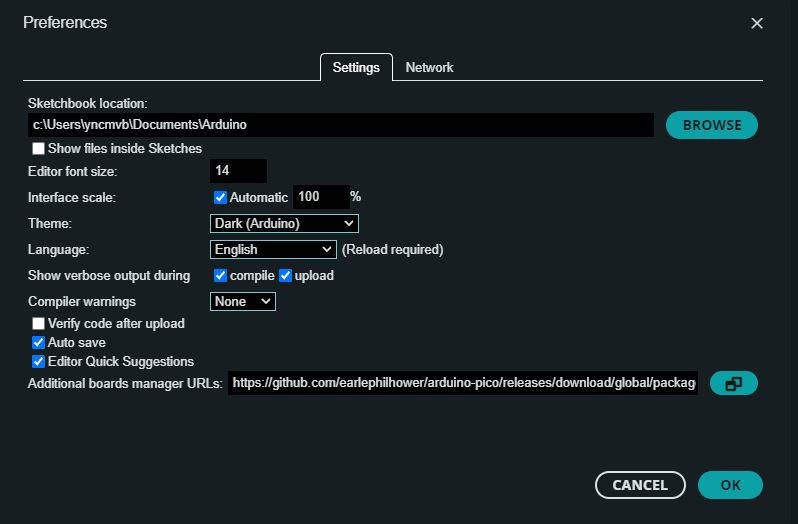
Navigate to File>Preferences and fill Additional Boards Manager URLs
-Ready to program the XIAO RP2040
Interact with local input
Arduino has some examples for us to start with the programming we just have to change some inputs to it like the Pin connections as we have them in our phisical Microcontroller and write this on the program, this is an example
-Blink (local Input Interaction)
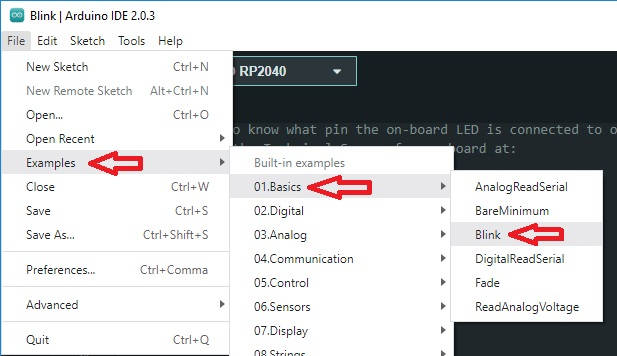
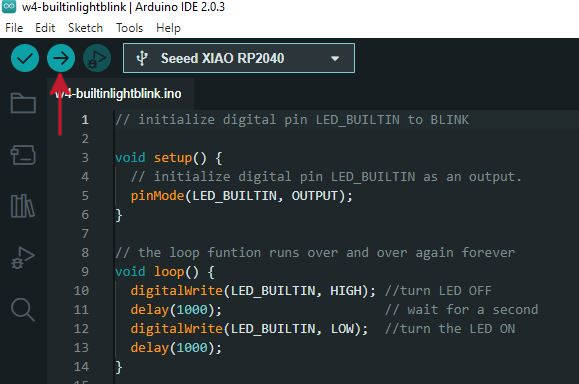
Here we just have to connect the Microcontroler to the computer and download the code to the Microcontroler, this is the result:
-Servo Knob Controlled using a potentiometer(input-Output)
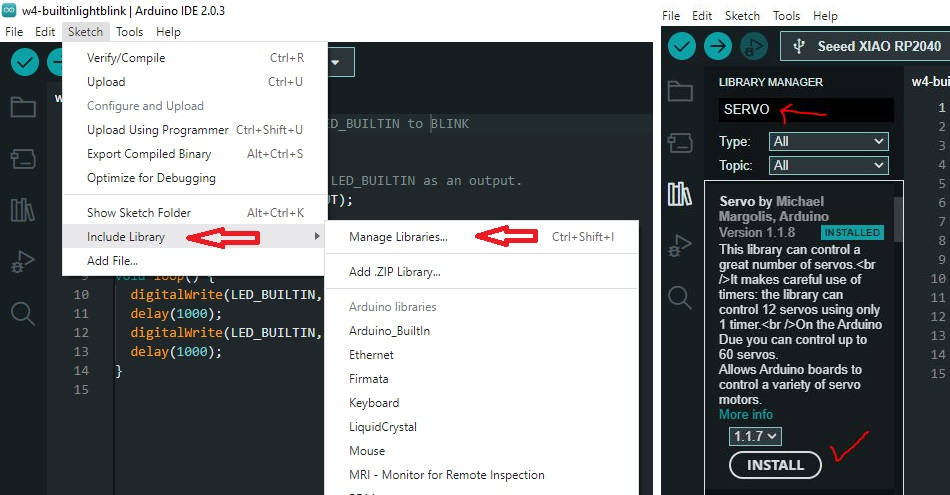
If we need extra functionalities that are not included in the Arduino library, we need to include them.
Select Sketch>Inlcude libray> Manage Libraries, then in the open library window write what you are looking for, in this case Servo by Michael Margolis, Arduino, version 1.1.8, and install it.
We can open now from File>Examples>Servo>Knob
We connect the servo and the potentiometer to the Microcontroller like in the following diagram:
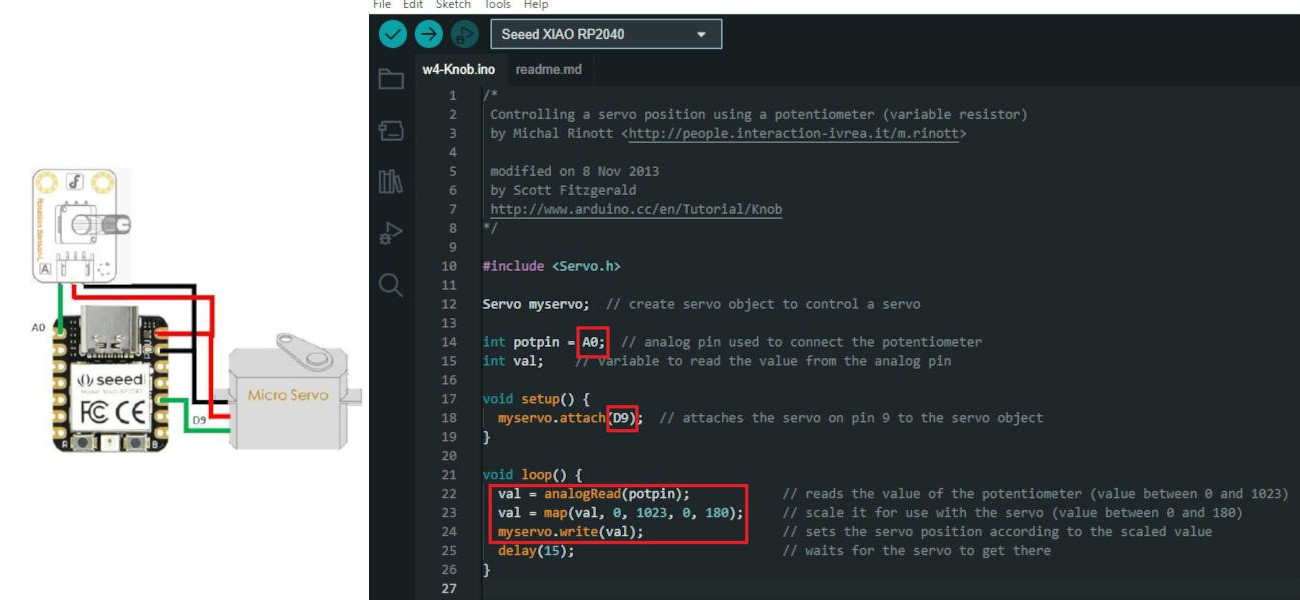
when programing with this sketch, we should write the number of the pin where the potentiometer is connected to the Microcontroller, in this case is A0, and the Servo motor is connected to D9.
The val command is to convert the analog voltage to digital voltage. This is the result:
-Comunicate remotely
This programming connects a HC-05, which is a Bluetooth Transceiver Module with a external LED.
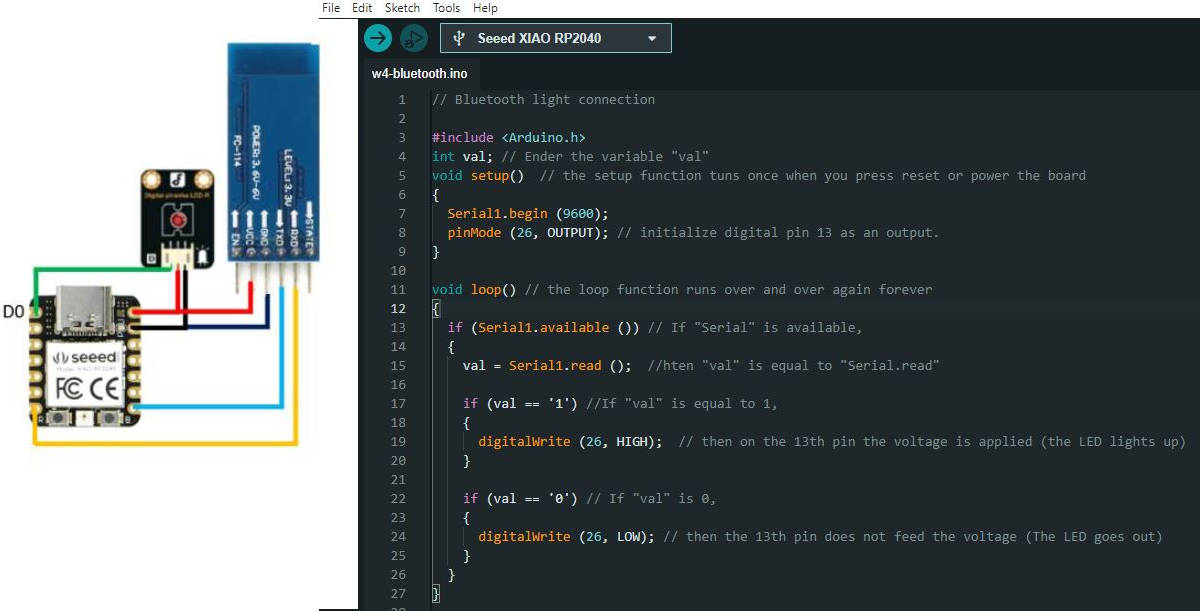
Here what the programming says is (in my words):
- Serial.begin, starts the comunication in the board
- pinMode, the pin 26 will initialize comunication with Pin 13 as an output
- if there is comunication available
- the comunication has a value to be read
- and if this value is "1" (this message is sent via blutooth to the HC-05)
- the pin 26 will send the signal to turn on the light to the pin 13
- if the value is "0" (this message is sent via blutooth to the HC-05)
- the pin 26 will send the signal to turn off the light to the pin 13
This is how it looks
LINKS TO FILES
Blink in ArduinoHERE
Controlling a servo using a potentiometer in ArduinoHERE