dummy
16.WILDCARD
ASSIGNMENT
Design and produce something with a digital fabrication process (incorporating computer-aided design and manufacturing) not covered in another assignment, documenting the requirements that your assignment meets, and including everything necessary to reproduce it.
HERO IMAGE
For this week assignment I worked with the PR1055X 10 Needle Embroidery Machine.
Embroidery machines specialize in stitching thread designs onto different materials, but they do not have the ability to produce entire garments. To create the embroidery designs, you can utilize either a commercial embroidery software or a free design software. It's worth noting that commercial software options are typically more costly and offer additional features.
1. General characteristics of the machine
- It makes 1000 stitches per min (spm)
- 360 mm x 200mm embroidery area
- It has 516 built-in embroidery designs
- 37 styles lettering
- Authomatic needle threader
- Automatic thread tension
- Full color touch screen
- Camera function
- 10 needles
- USB port
2. Workflow
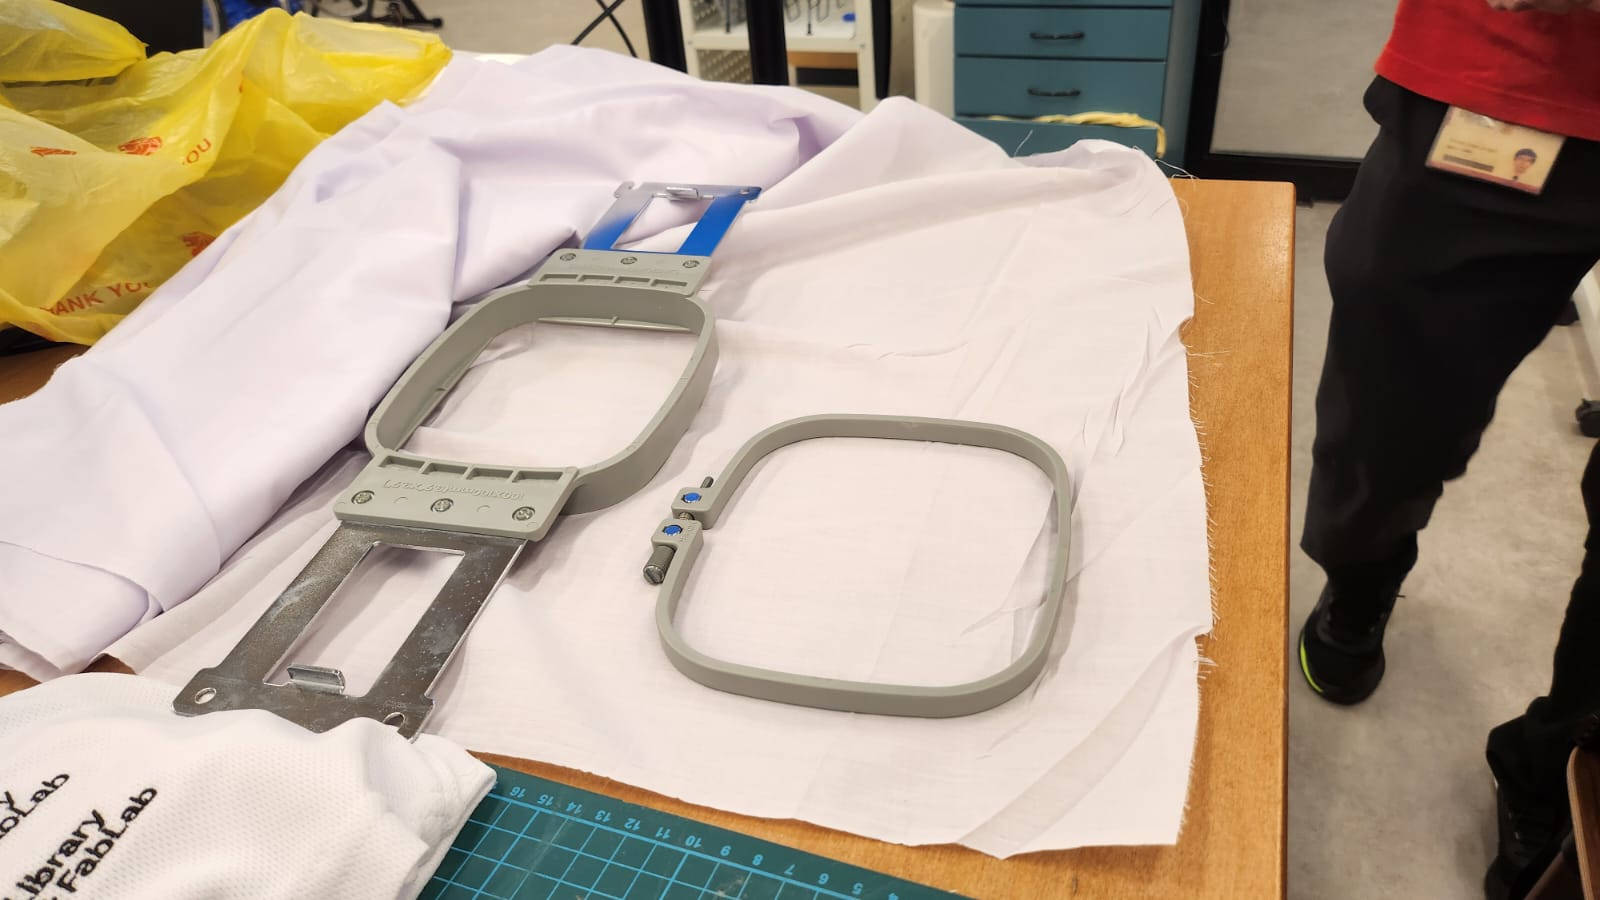
I did first some tests using the built-in designs of the Embroidery machine. The machine has different sizes of hoops which stablish the area of fabric that will be embroidered. The smallest hoop is 45mm x 24mm; largest is 360mm x 360mm; there are various sizes in between, but the fablab doesn't have the full range, I used the standard 100mm x 100mm hoop.
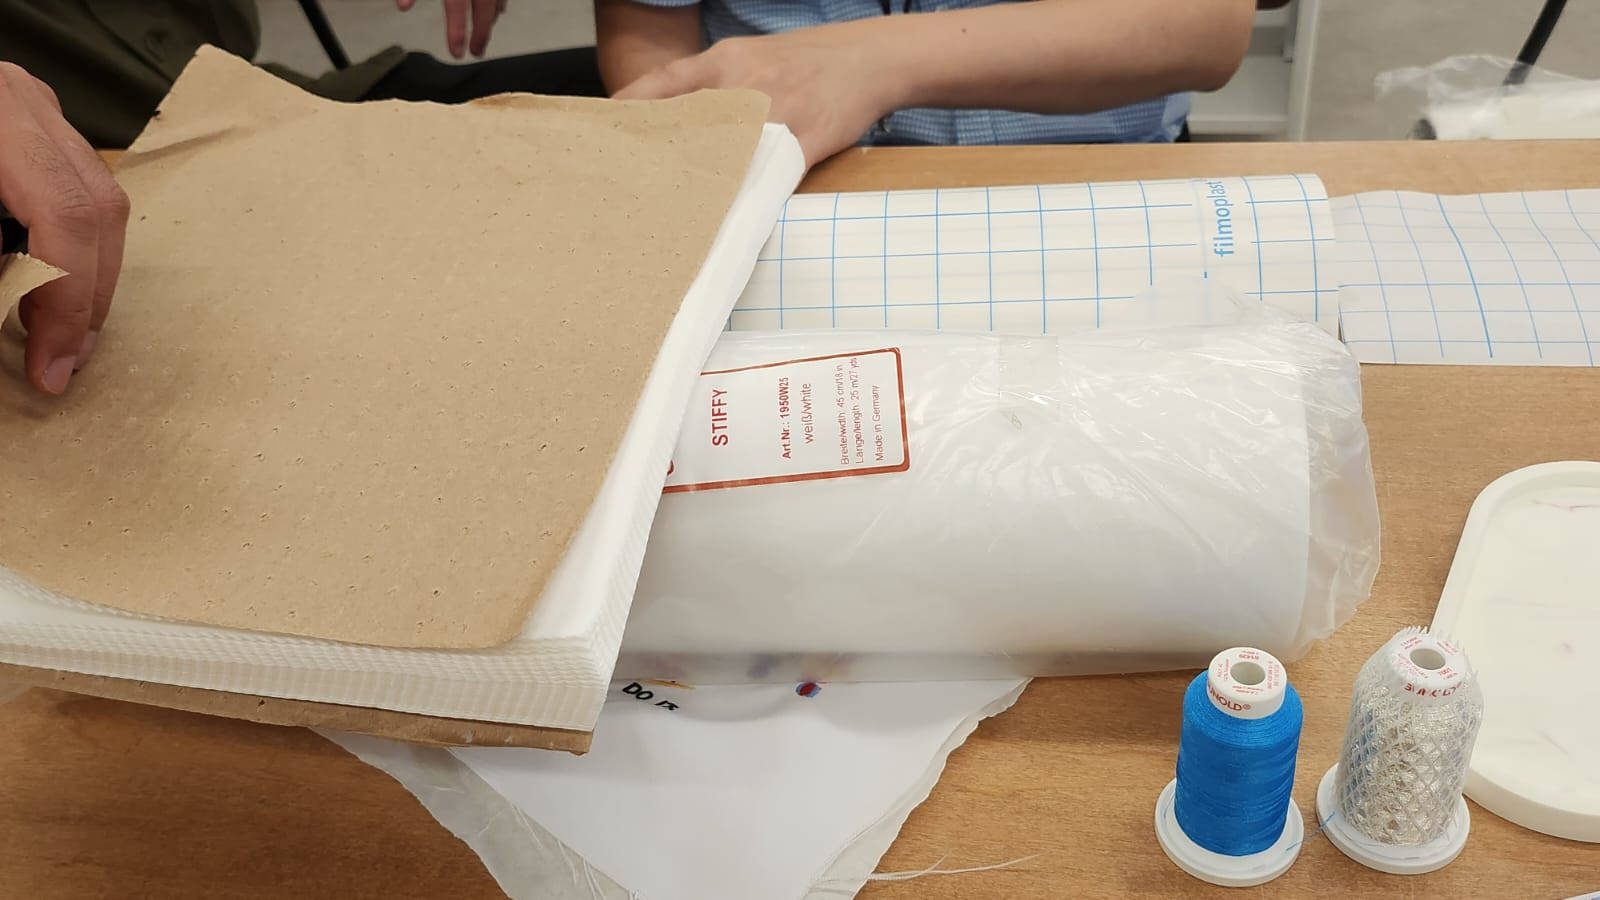
Prior to placing the fabric in the embroidery hoop, it is necessary to add a backing material called stabilizer. This backing serves to stabilize the embroidery process by providing the thread with a smooth and sturdy surface, ensuring a flawless sew-out result.There are differet types of backing, cut away, tear away, water soluble and the Gunold's heat soluble stabilizer "Hit-Away. I used the cut away as its name says it once we finish the embroidery we cut the parts of it that are out of the embroidery area.
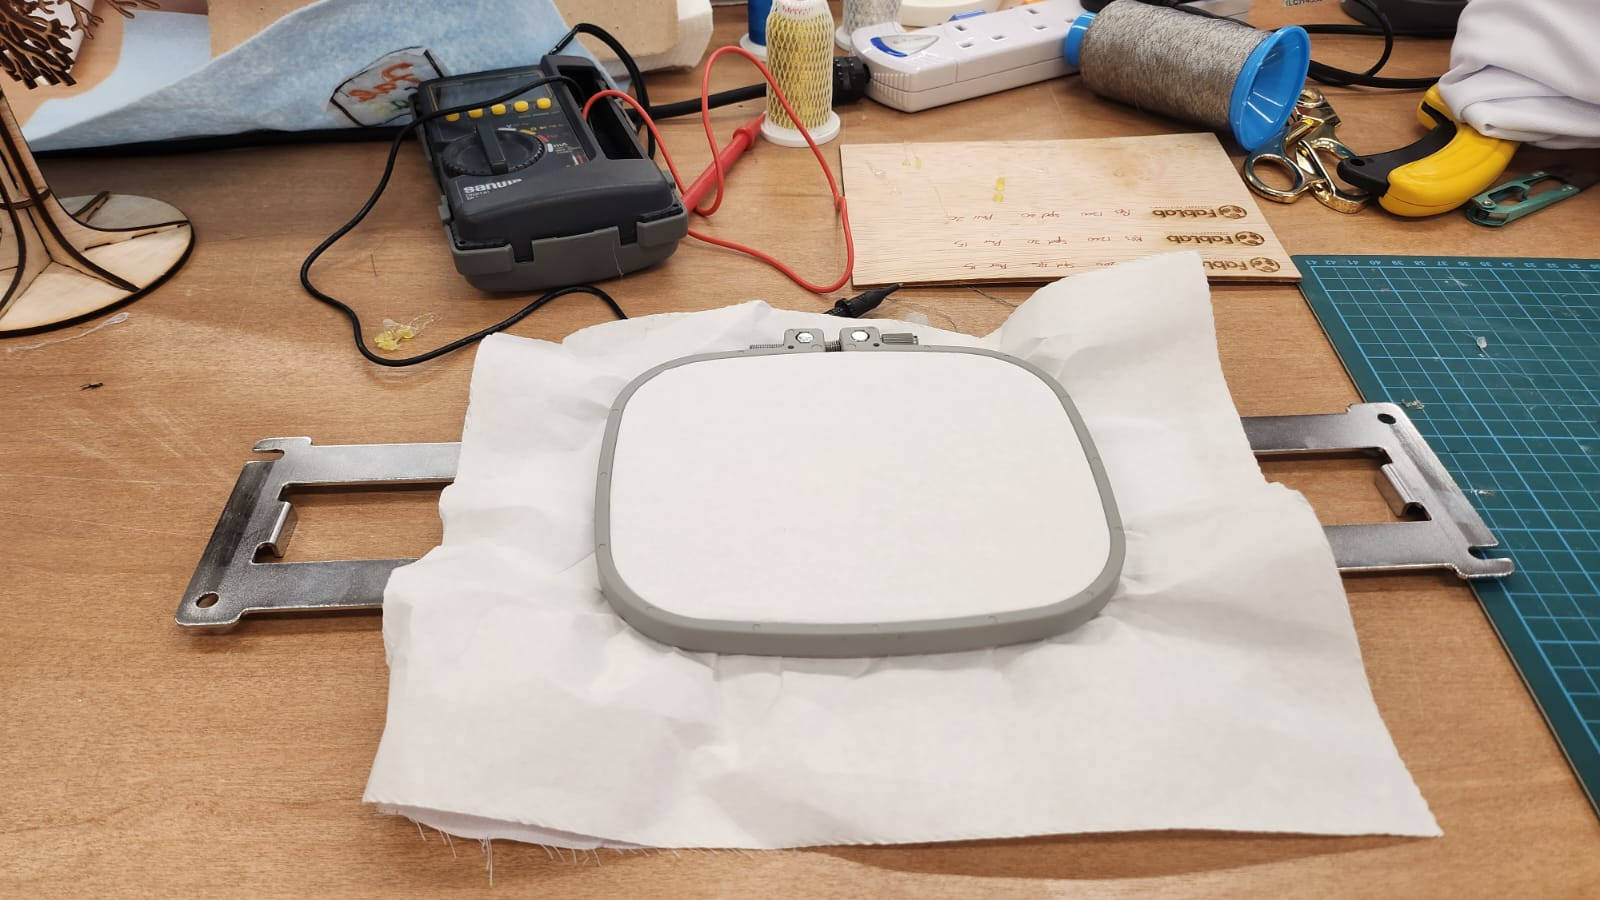
To assemble the embroidery setup, we combine the backing and fabric within the embroidery hoop. We should create a slight tension, but not overly tight. It is important to position the backing in a way that it faces the back of the area where the embroidery will be applied.
3. Test
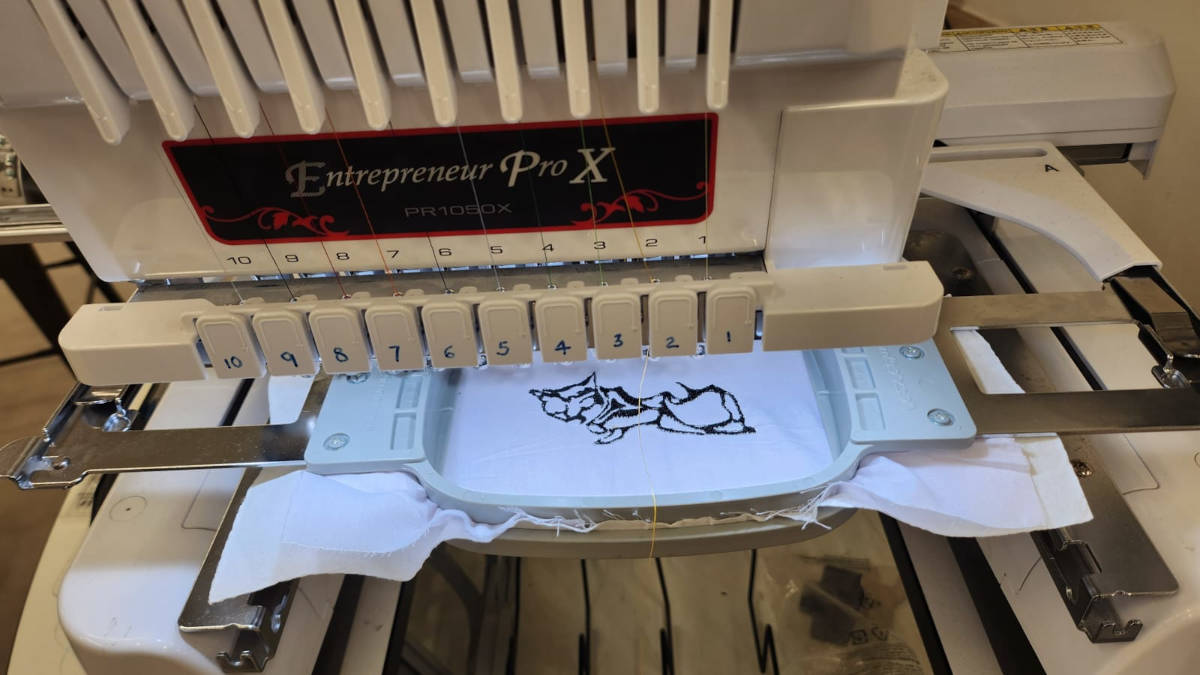
Then we should lock the loop into the frame of the Embroidery machine. When this was done, I could access the ready built-in design throught the machine screen. there it is possible to choose the design, the type of letters we can use, the type of stich and the colors.
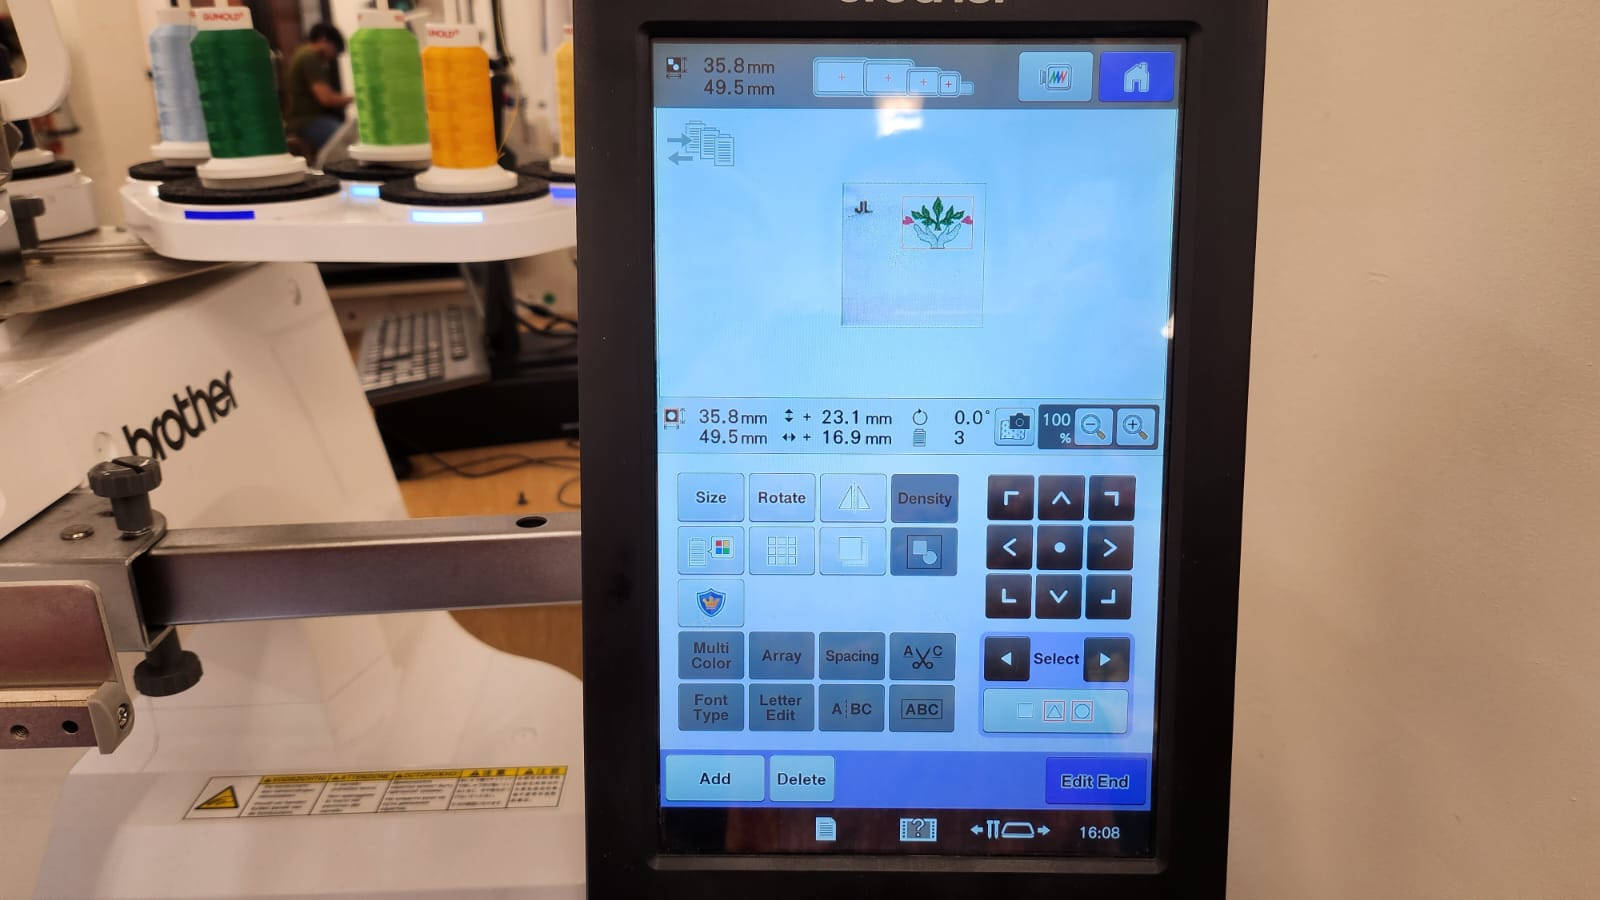
To initiate the embroidery process, I selected a straightforward design along with some letters for testing purposes. Then, I proceeded by clicking the "Start" button on the screen, which signaled the start of the embroidery process.
4. Preparing an image
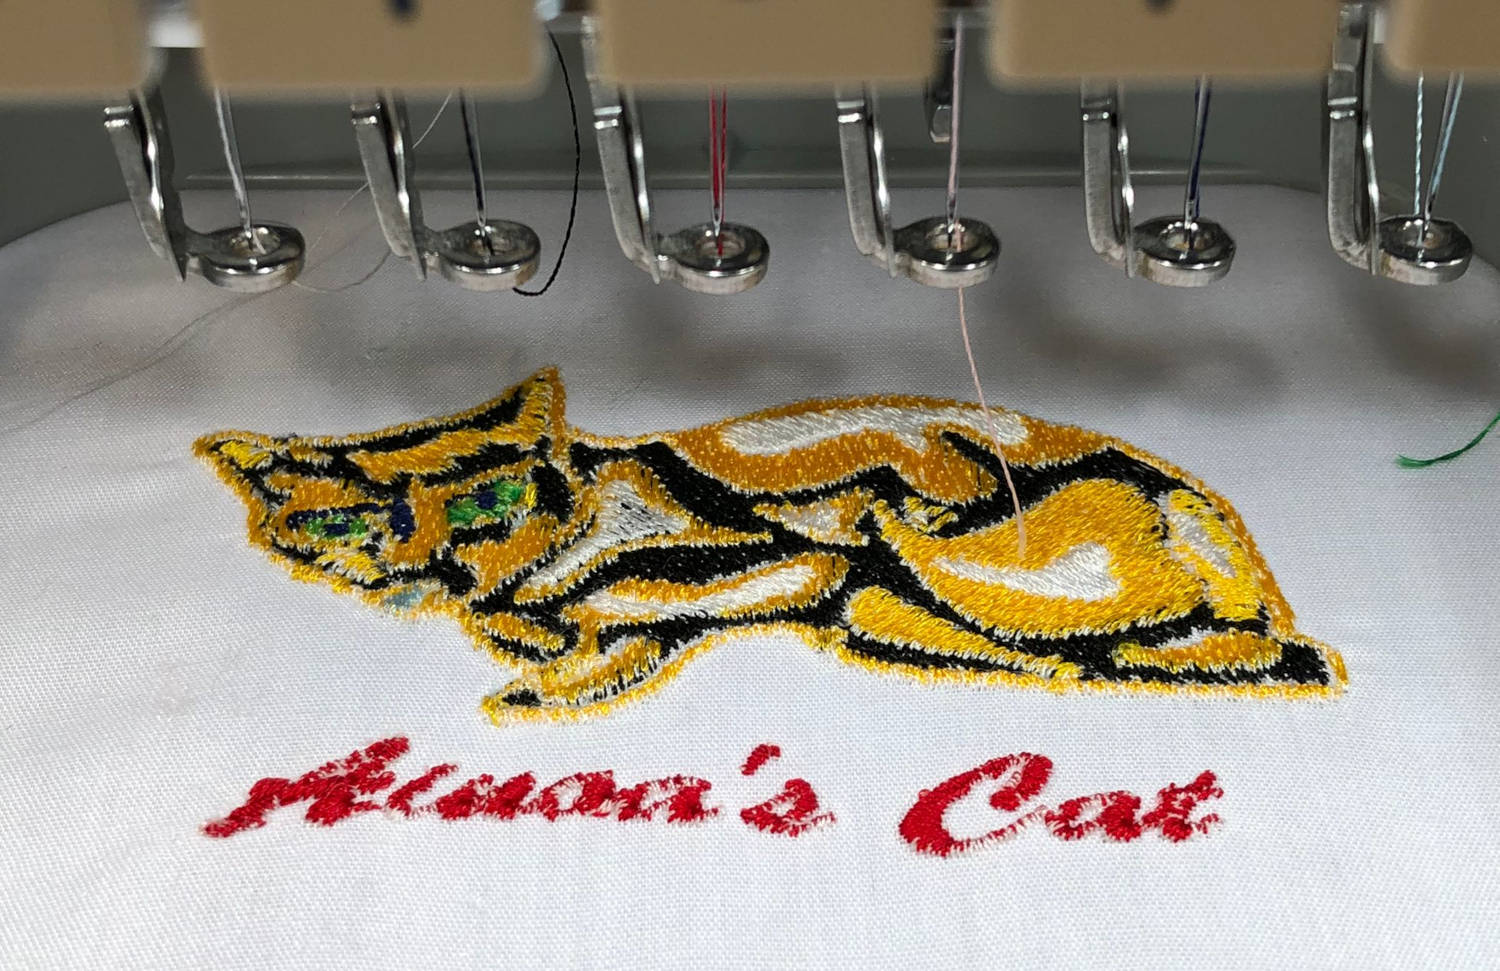
After completing the test embroidery, I proceeded to prepare the image I wished to embroider. It was a cat drawing created by my daughter using the "Procreate" software, consisting of six colors. Considering the "simplicity" of the design, I believed the process would be relatively straightforward. To edit the image and adjust the embroidery settings, I utilized the commercial program provided by the machine's manufacturer,PE Design.
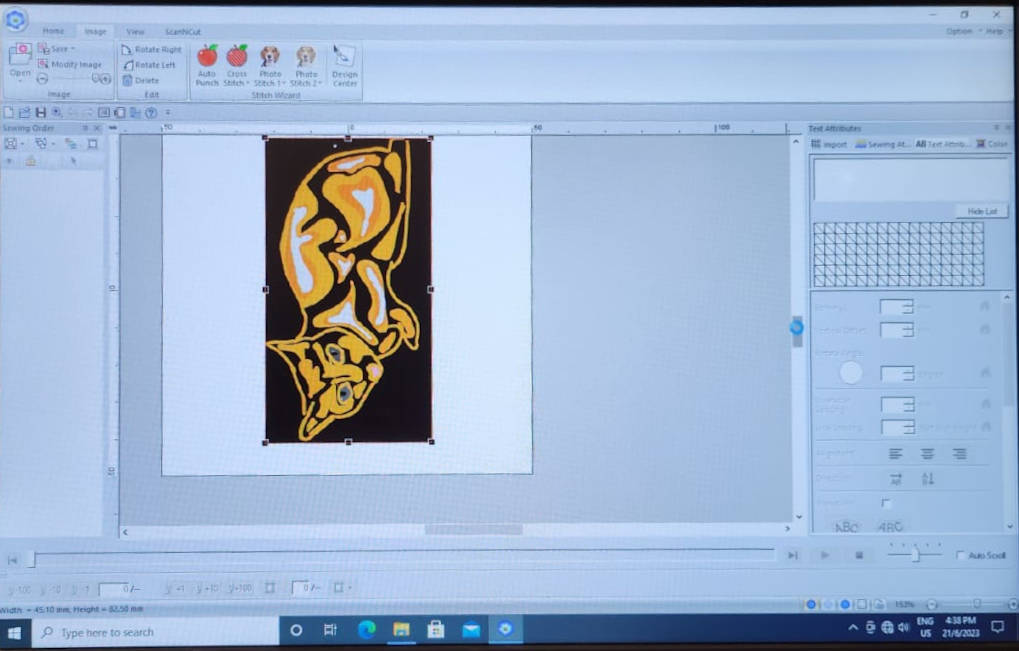
We can open different image formats in PE Design, to open them you go to Image then Open. I had an JPG, once the image is opened, the program recognizes the different colors and assigns them to separate layers for the machine to embroider.
5. Embrodeiring
To select the colors for each layer, we open the image on the machine's screen. Then, we manually choose a thread number for each color, one by one. There is a limit of 10 color threads available, including black and white.
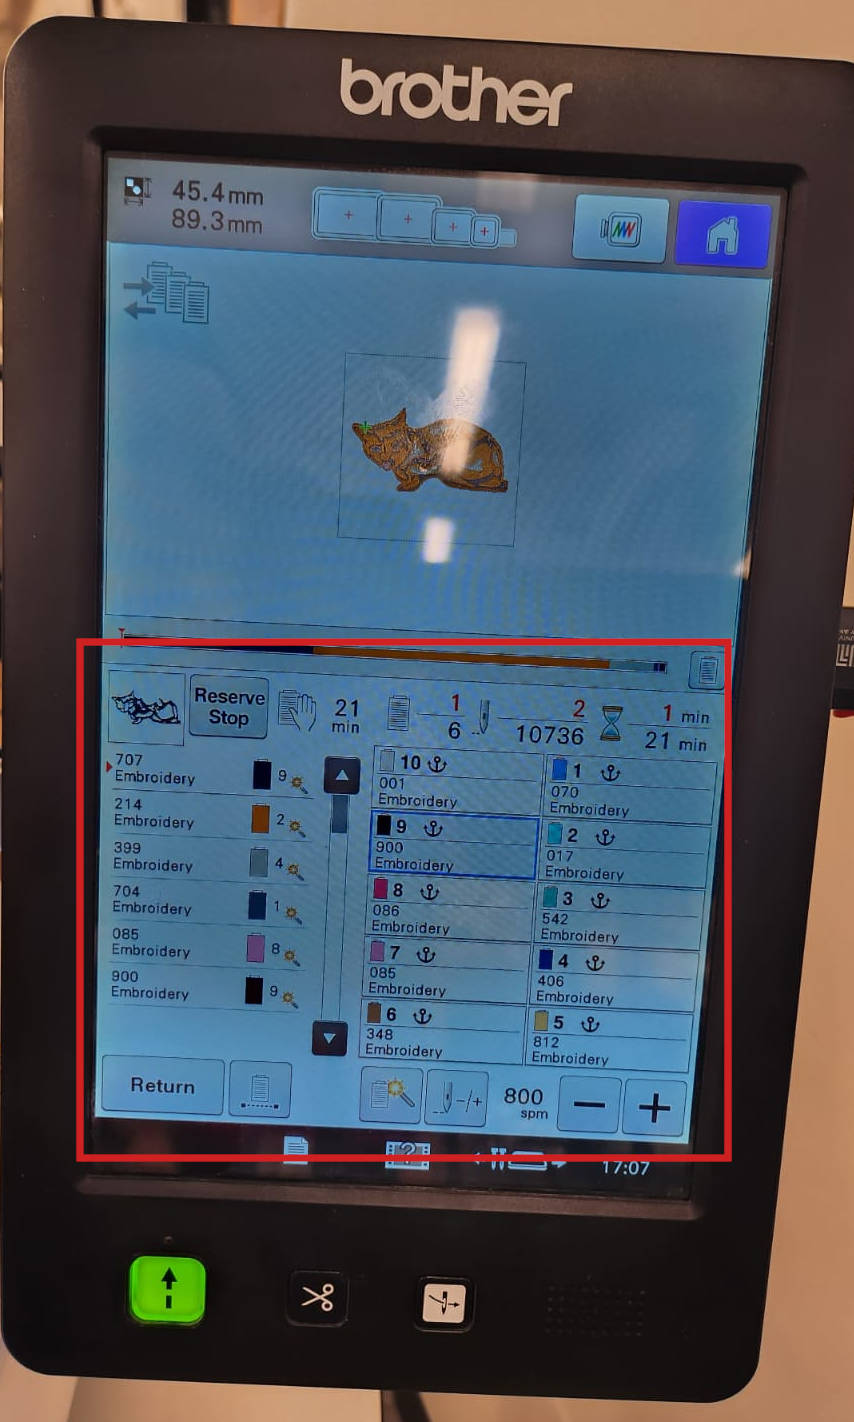
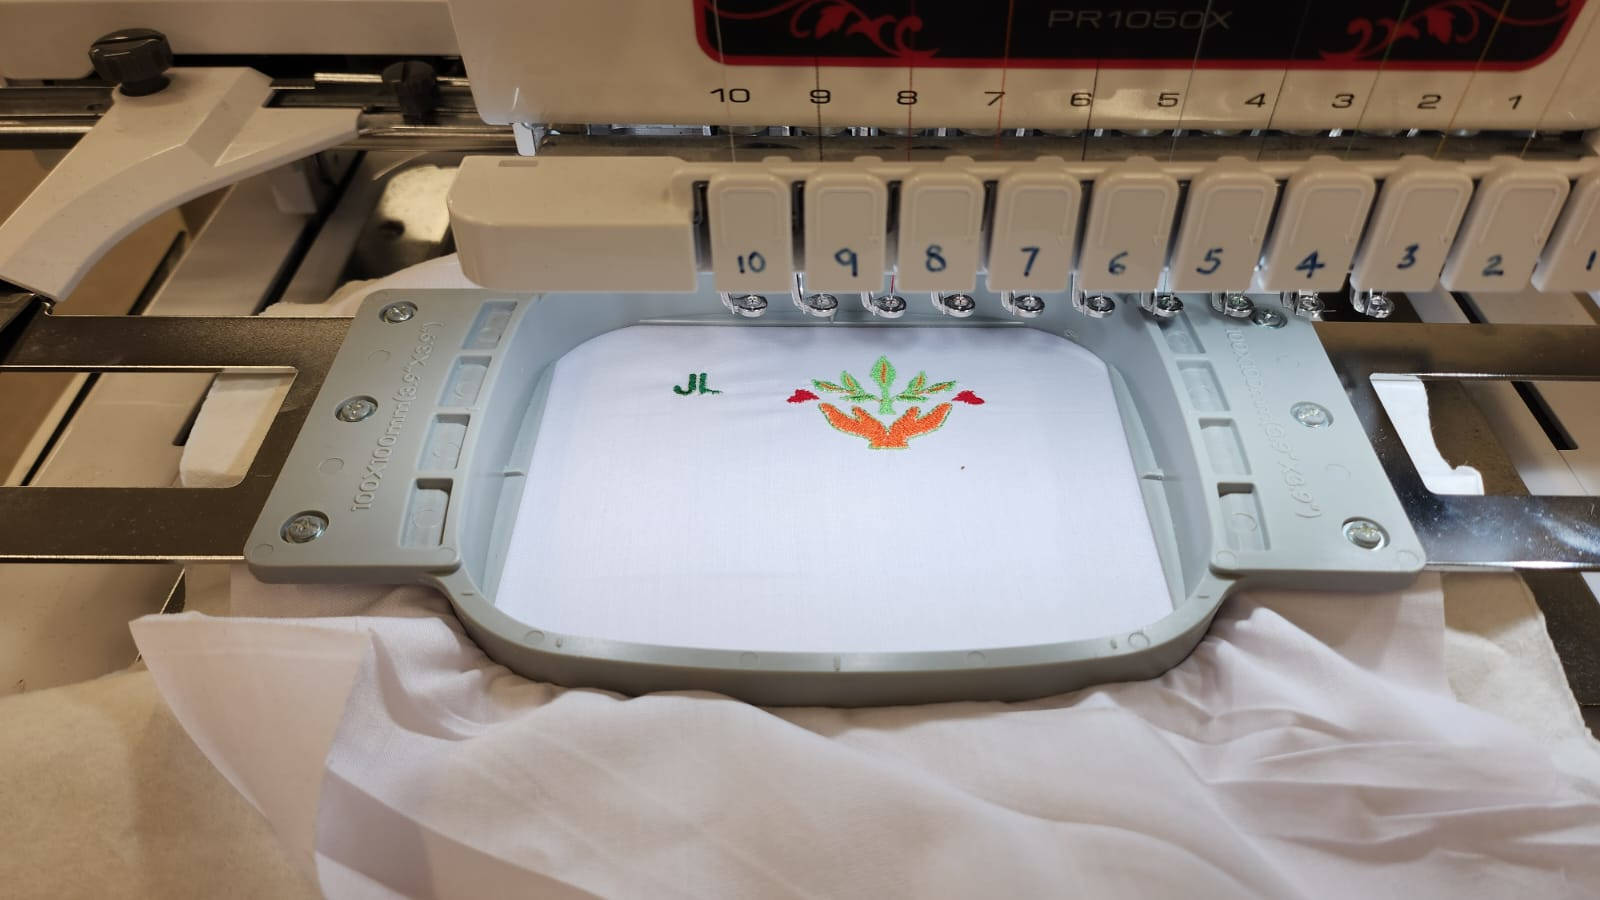
I selected in total 5 colors, when I was ready I Started the embroidery process, the machine automatically starts doing color by color.
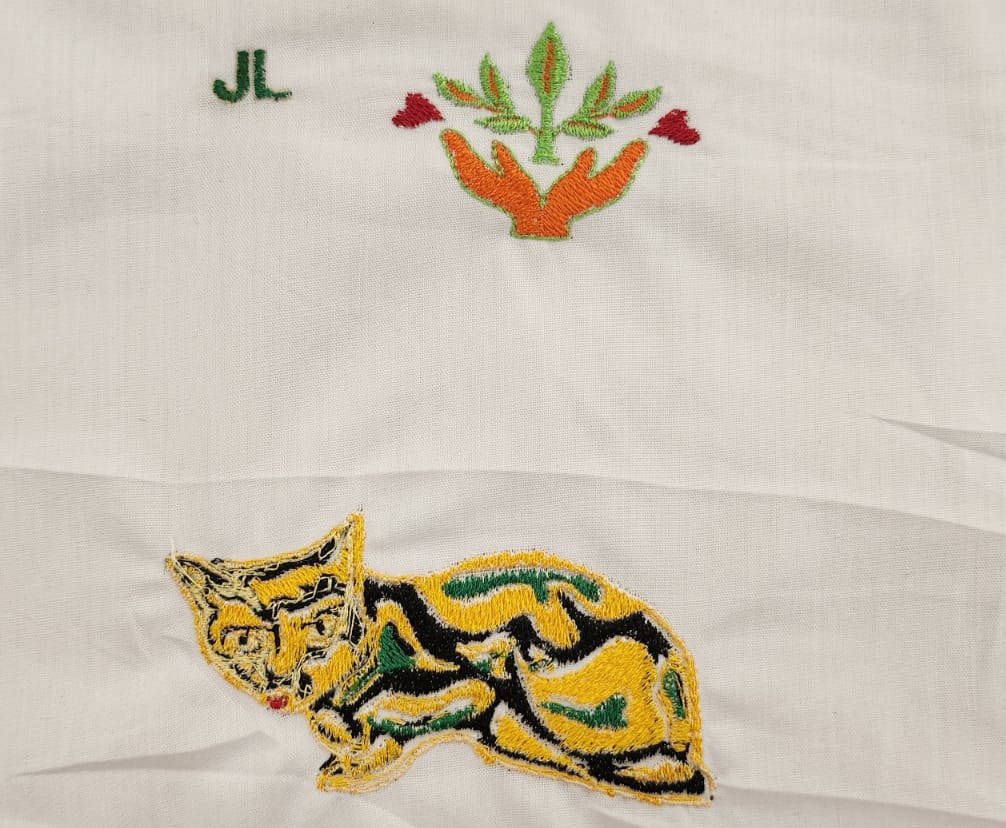
This was the final result, and I wasn't very satisfied with it. Firstly, I mistakenly mixed up some of the colors, resulting in a less desirable outcome. Additionally, the embroidery itself didn't turn out very neat compared to the test samples.
6. Problems and solutions
Throughout the process, I faced issues such as frequent thread breakage and getting stuck. It appeared that the compensation pull tension wasn't sufficient. As a result, I had to thread the machine multiple times.
When the thread is broken or gets stuck, a warning message appears on the screen. As a result, the machine stops functioning, and I was required to rethread it again when this warning message showed up.
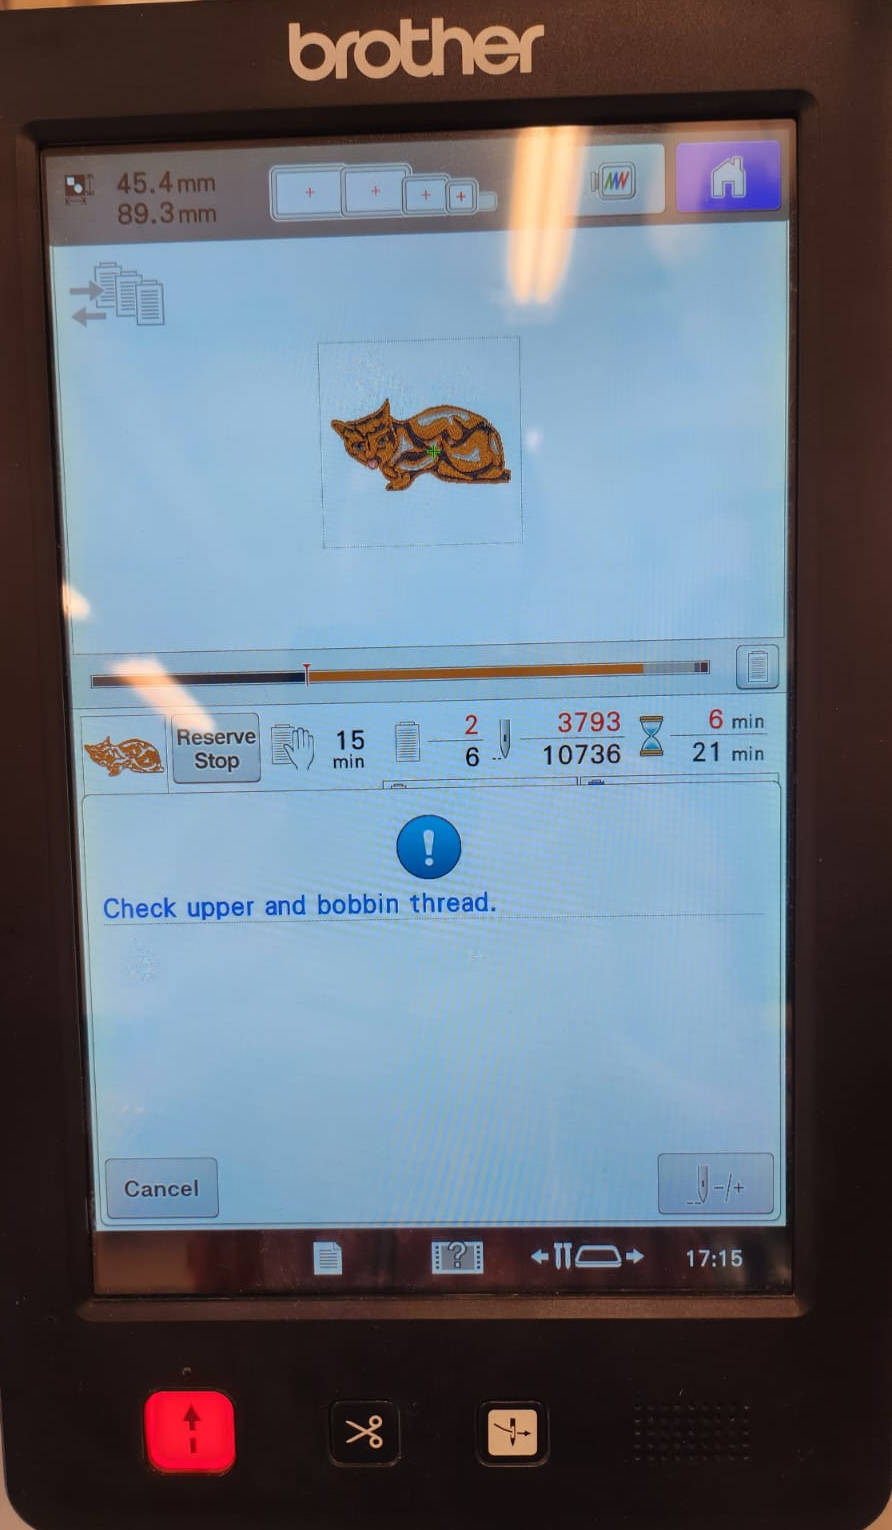
The breaking of the thread seemed to be a problem in the tension of the thread, this machine is used by a lot of students and looks like they have changed the settings tension.
We increased the pull compensation in the settings of the PE Design program, HERE it is an explanation of how pull compensation works for embroidery machines.
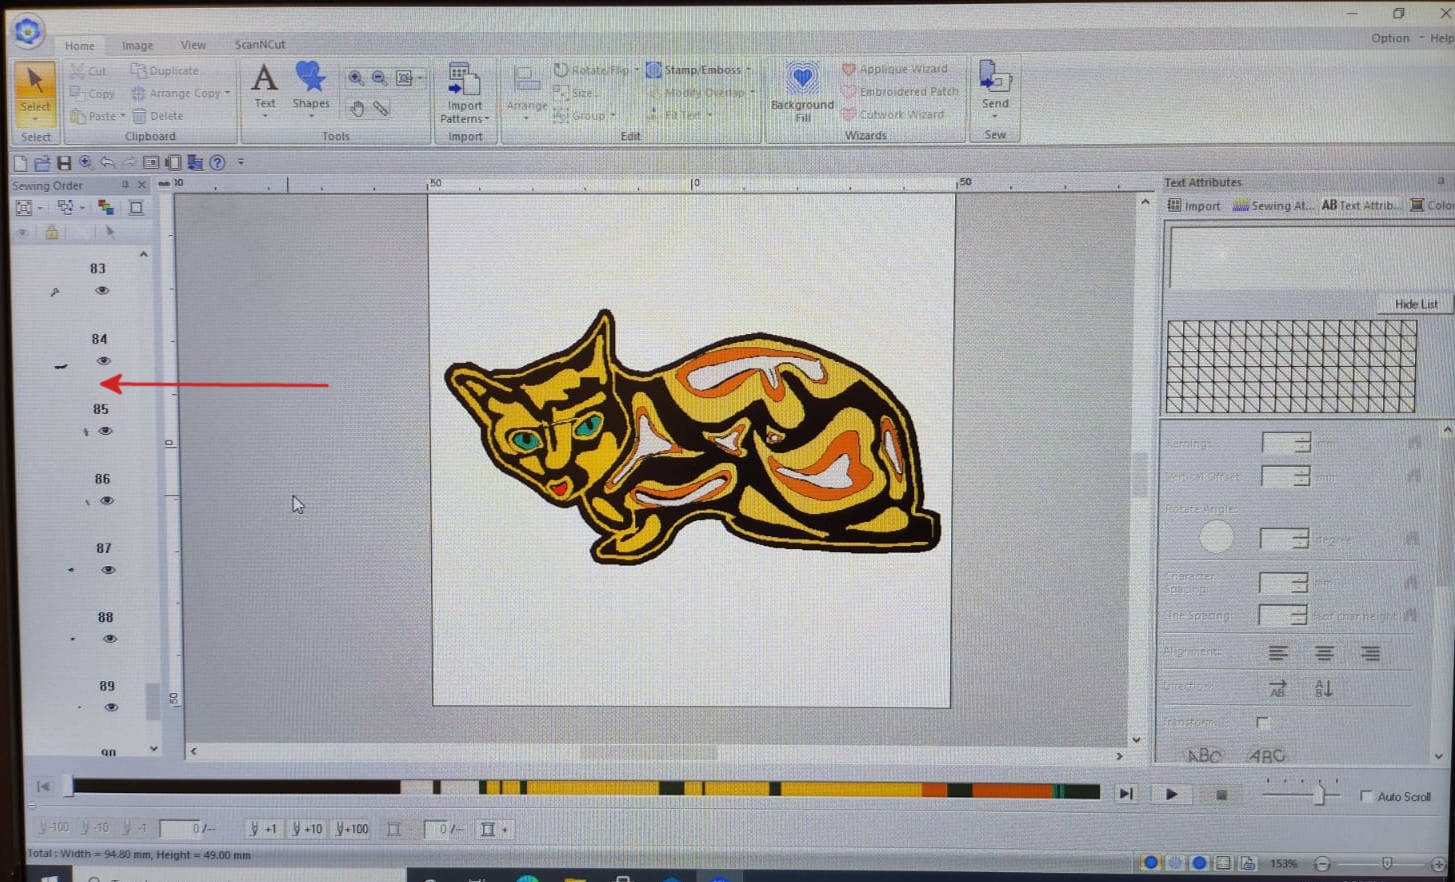
Other problem I encountered was the image format itself, as it was a JPG the program didnt read the block of colors and shapes properly and ended up having around 800 layers to embroider. To fix this I had to go back to INKSCAPE and change the image to Vector format, making sure each color was a block.
Changing the image format and the pull compensation the final result was better, and I added some text too.
Regrettably, I ran out of time to try more Software. However, I would like to mention that INKSCAPE, an open source software, offers a tool called INKSTITCH, which aligns with the open source philosophy of Fab Academy. Although it may not possess the same level of capabilities as commercial software, it presents a viable option for someone like me, who is more of an "amateur" in this field.
LINKS TO FILES
- PE Design file HERE