dummy
5. 3D SCANNING AND PRINTING
This week we got to do 3d printing!, it was a quite comforting task, as we could see the final product quite "soon".
HERO IMAGES
ASSIGNMENTS
Group Assignment
- Test the design rules for our 3D printer.
- Document our work on the group work page and reflect on my individual page what I learned about characteristics of or printer.
Individual Assignment
- Design and 3D print an object (small, few cm3, limited by printer time) that could not be easily made subtractively.
- 3D scan an object (and optionally print it).
GROUP ASSIGNMENT
For this assignment we met with my fellow students and printed some 3D already made templates, some of them found in this page ULTIMAKER THINGIVERSE.
We printed some tests for Overhang, tolerance, bridging.
With the 3D printing, I found that it is very important to take into consideration the bridging and the overhang, because this parts easily fail during the process of printing, either because it doesn't have enough printing structure or there is too much of it.
As this templates where already done it was quite difficult to fail but I could see this problem during my individual assigment.
This is an example of the the tolerance gauge test, where there are we can see how accurate is the 3D printer, it is very important for elements that interact within each other, like in assembles where you need to leave space for the parts to fit together.
You can see HERE more about the group assigment, where we see more in detail the different 3D printing properties.
INDIVIDUAL ASSIGNMENT
-Design and 3D print an object
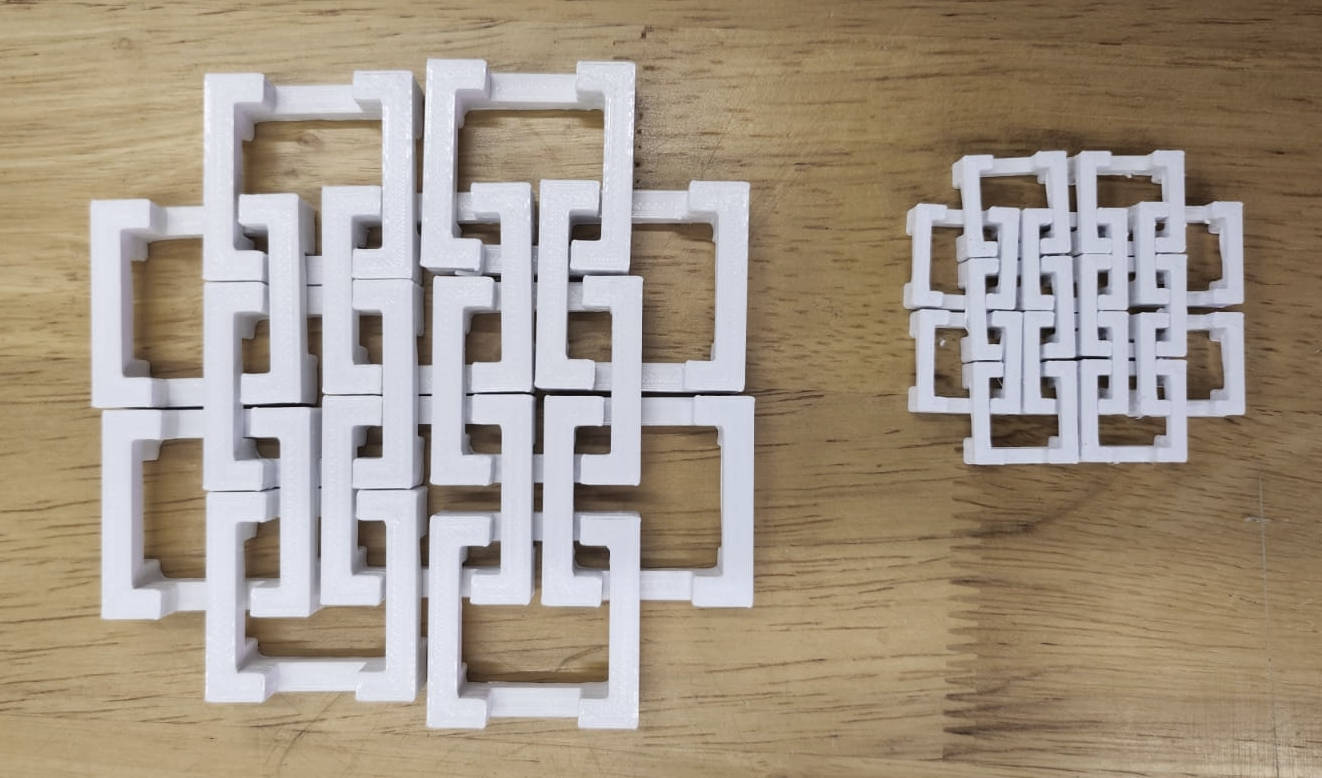
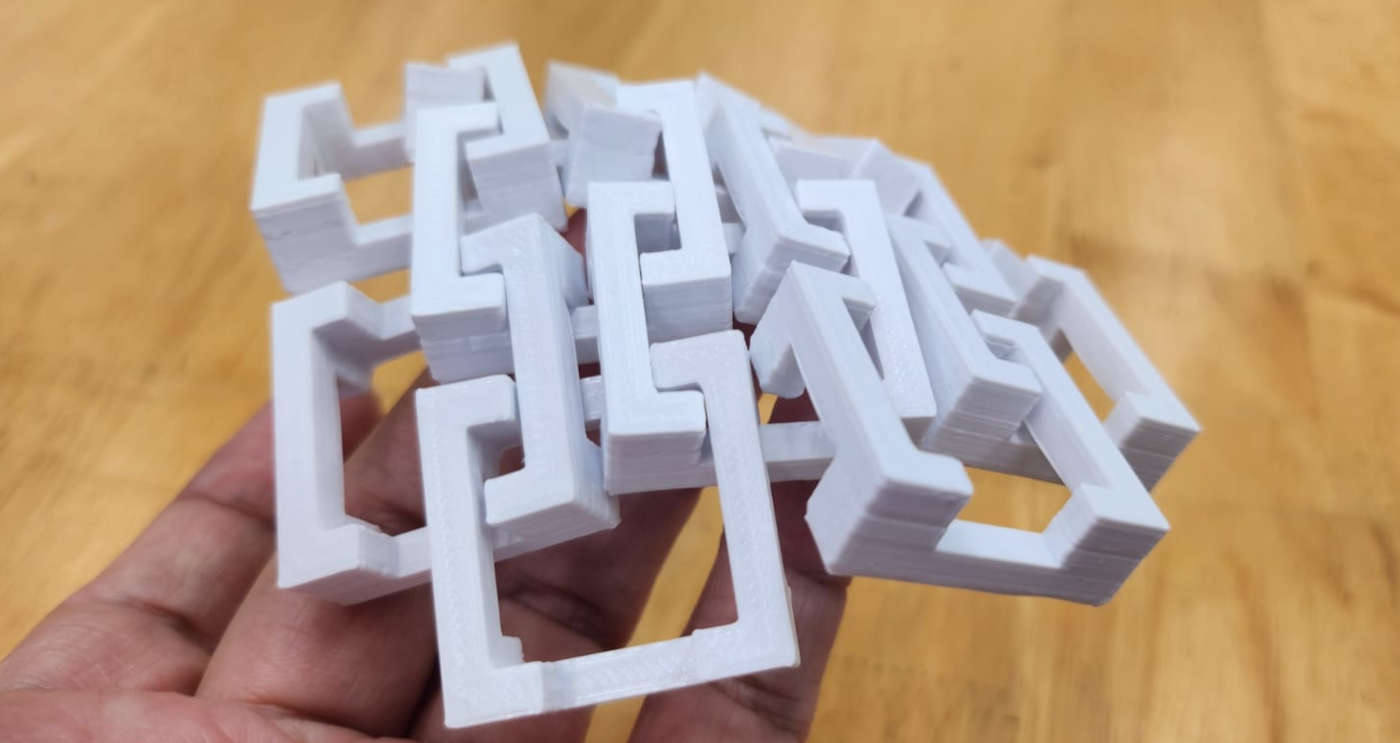
I like the textures that are created with a module repetition, for this assigment I wanted to have a module that interlocks with copies of itself to create a continuous surface...spoil alert I found after I designed this interlocking has been done already by oter people.
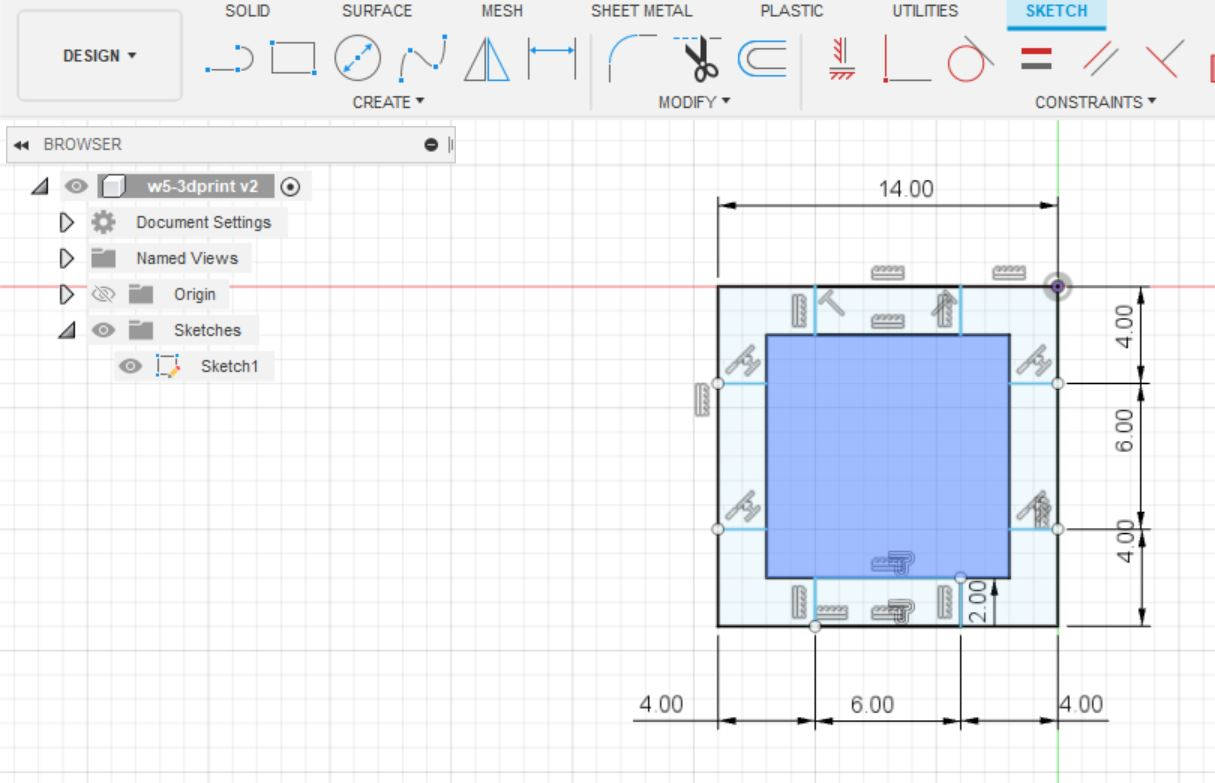
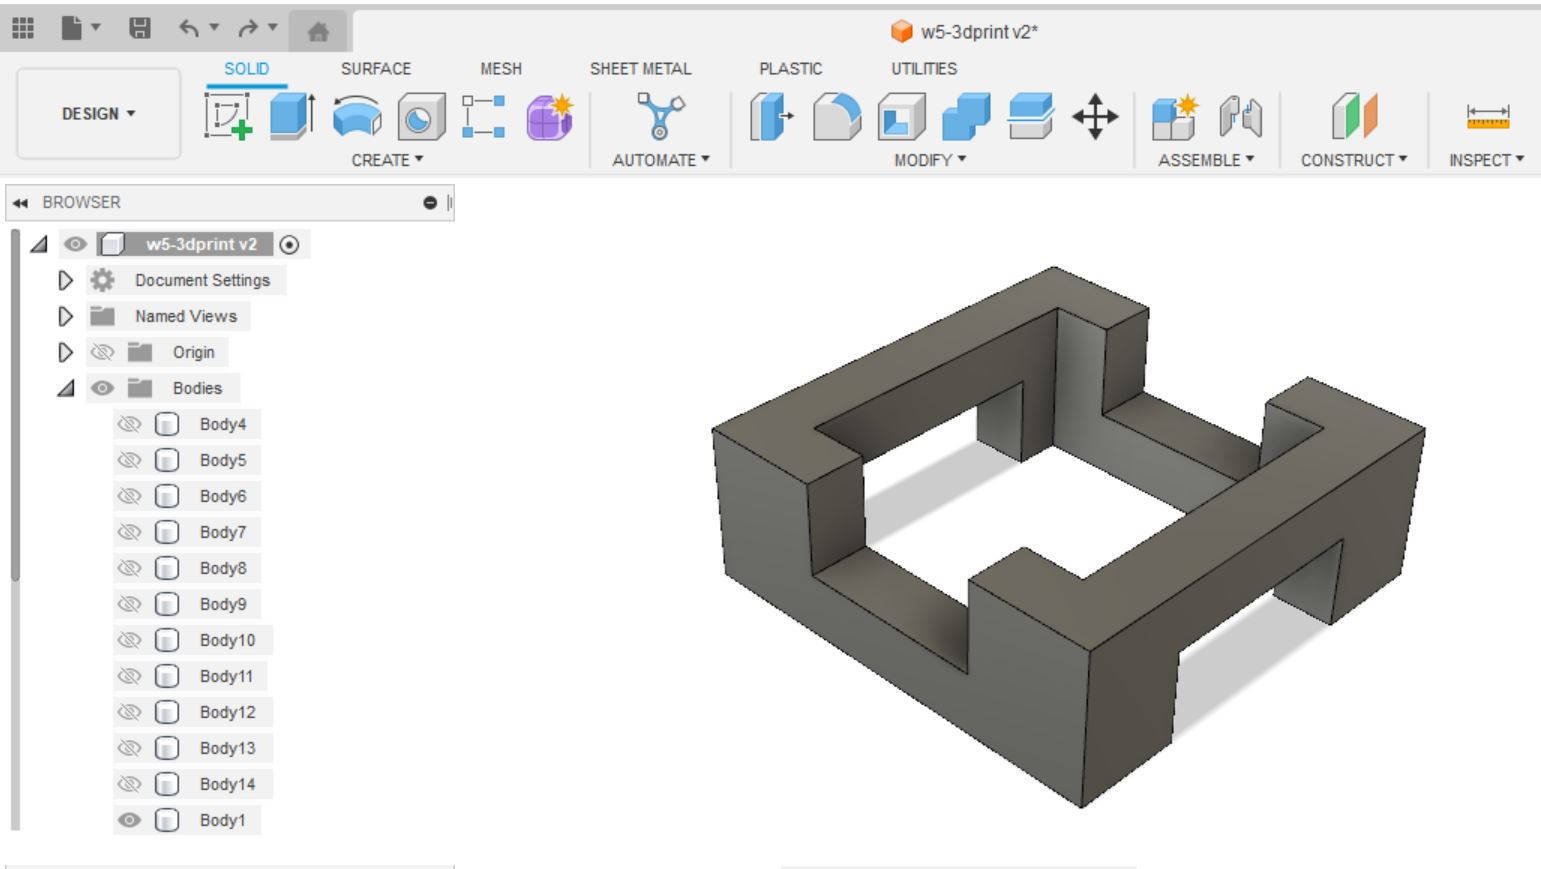
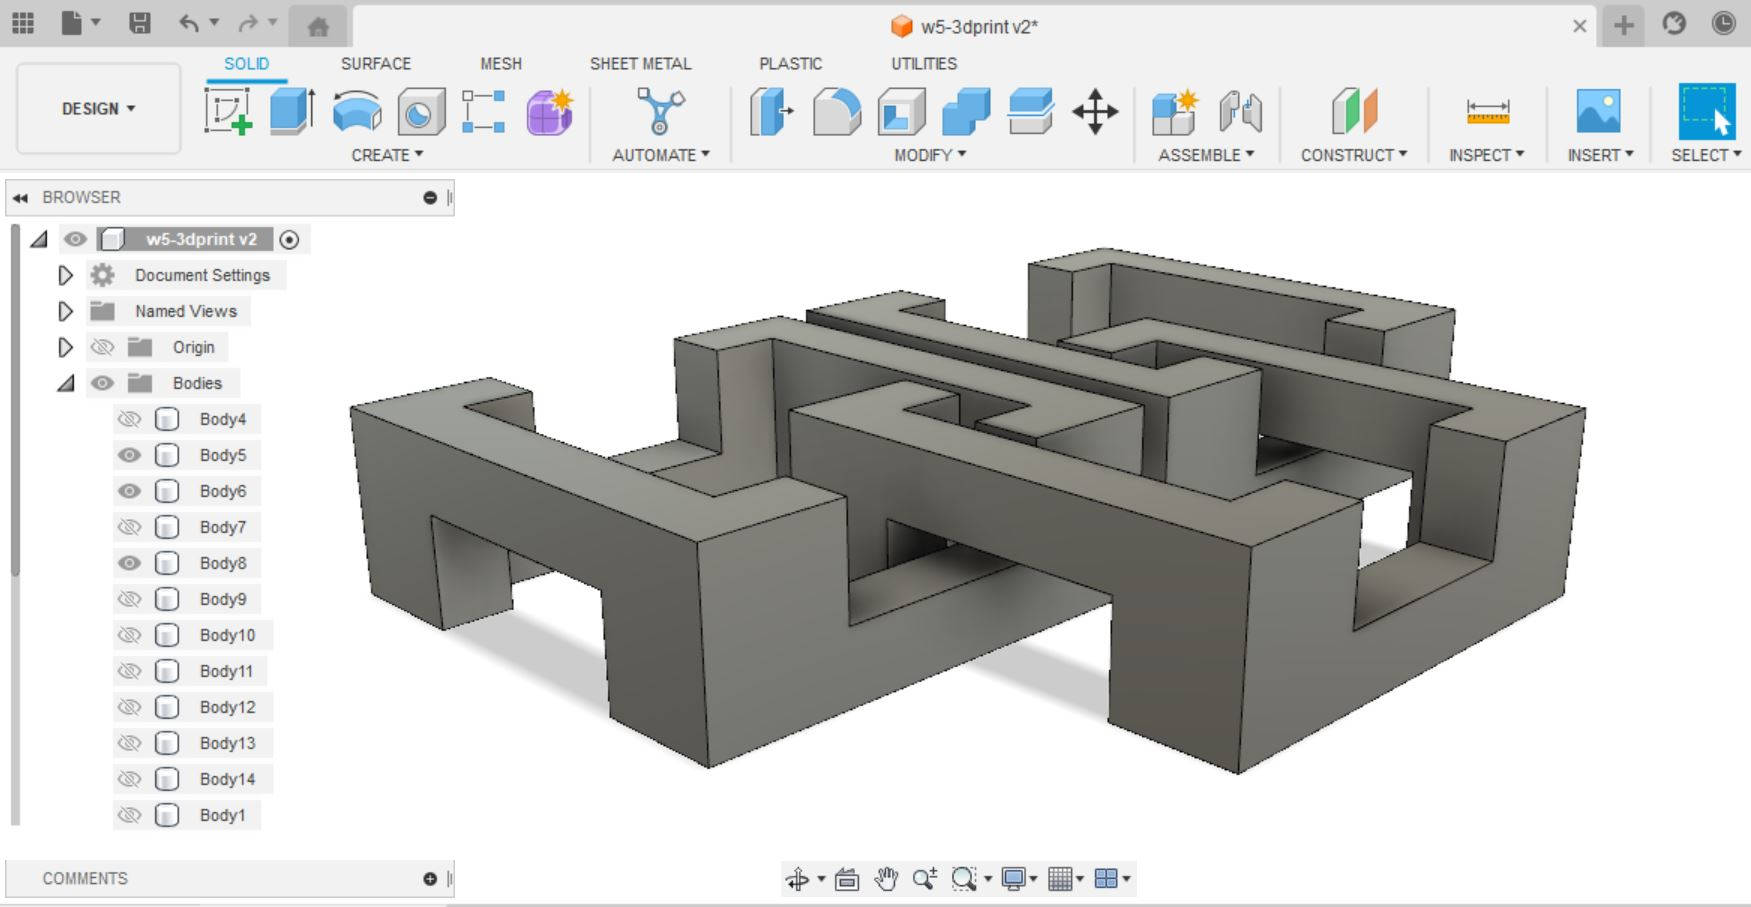
In Fusion 360 I did first in plan the module of a square,leaving space for slots in all of the sides, calculating that in each of the slots we will have had two modules interlocked, so it was important leaving space between them so at the moment of printing they printed separated
|
|
For the printing of this interlocking modules, it was very important to leave space all around each module so when printing, so the printer didn't print the modules glued together.This type of printing can not be done in CNC Machine, as the modules are interlocked and the CNC can not reach in the inner part of the interlocking.
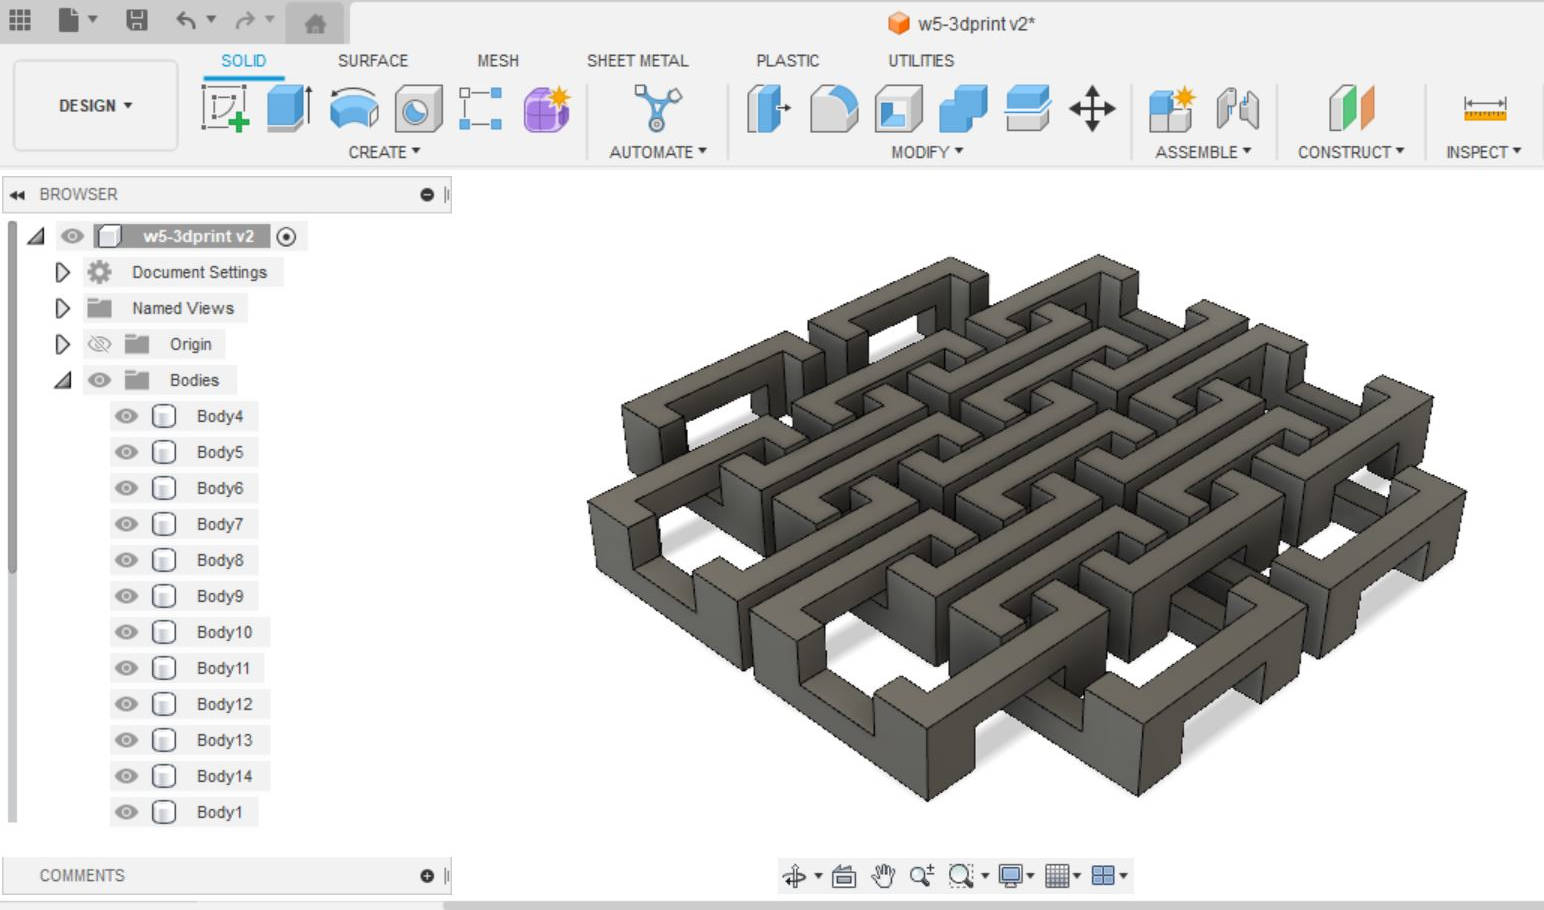
Then I repeated the modules to have a mesh of 3 modules by 3 modules.
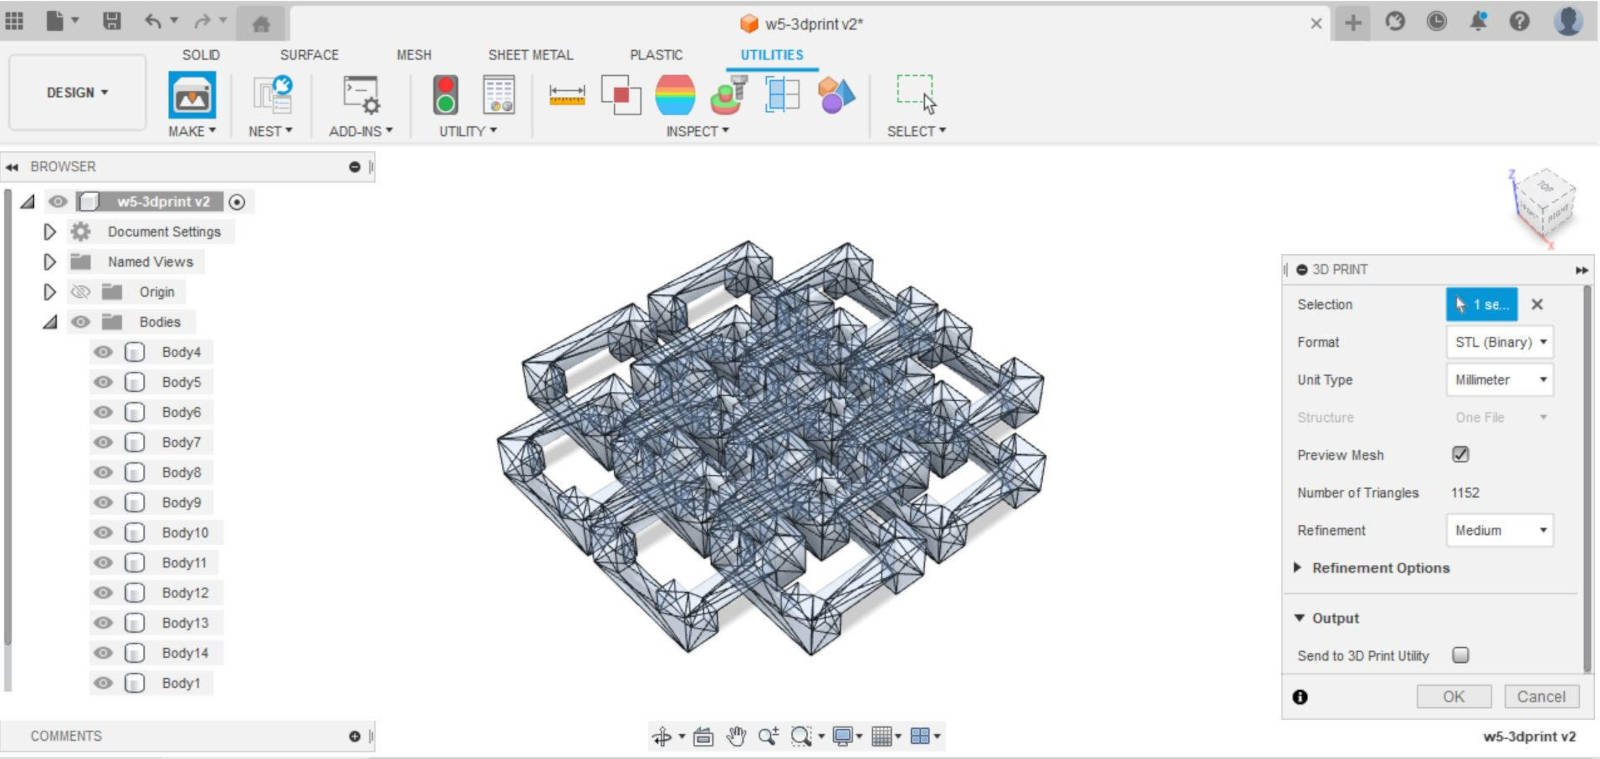
Once ready with the Object 3D design, I made the mesh of it, at the Utilities tools> make.
Then appeared a dialogue window where I choose the Mesh properties and the format for saving the file: Format STL, units mmm, Preview mesh, refinement medium (as this is a simple shape), and hit OK.
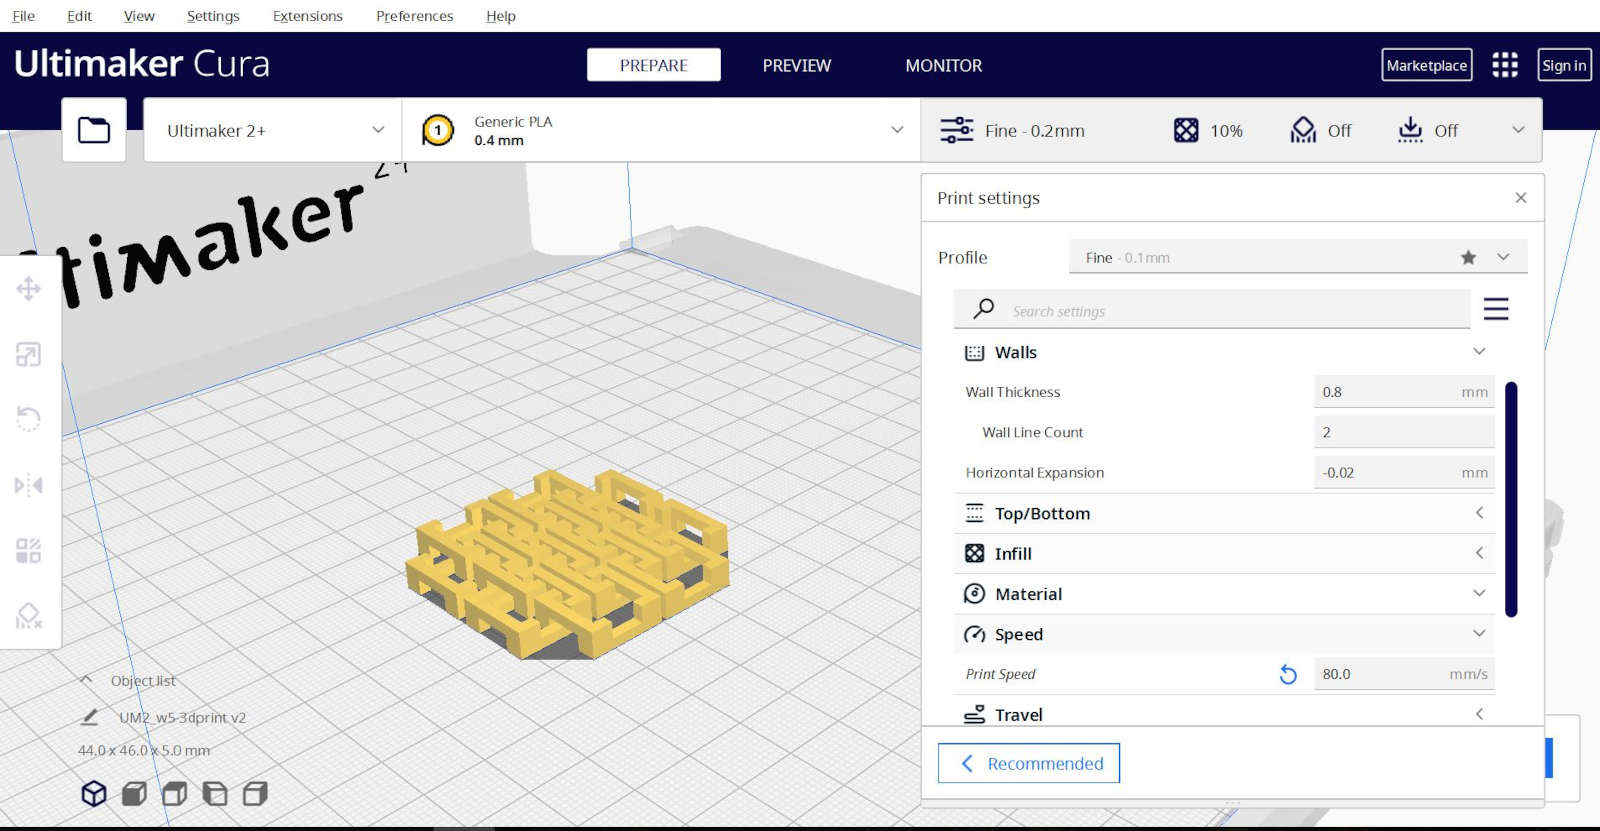
The 3D printers we have on our Fab Lab, the Ultimaker +2, use their native software to print the 3D files called Ultimaker Cura, so I installed it, and opened the file I have generated from Fusion 360. Once a 3D is opened with this program, it is possible to scale the model, move it etc, I left it in the original size. Then we have to slice the model, this means the software calculates the way the opject will be printed, the quantity of layers and the path the nozzle will have for a more efficient printing.
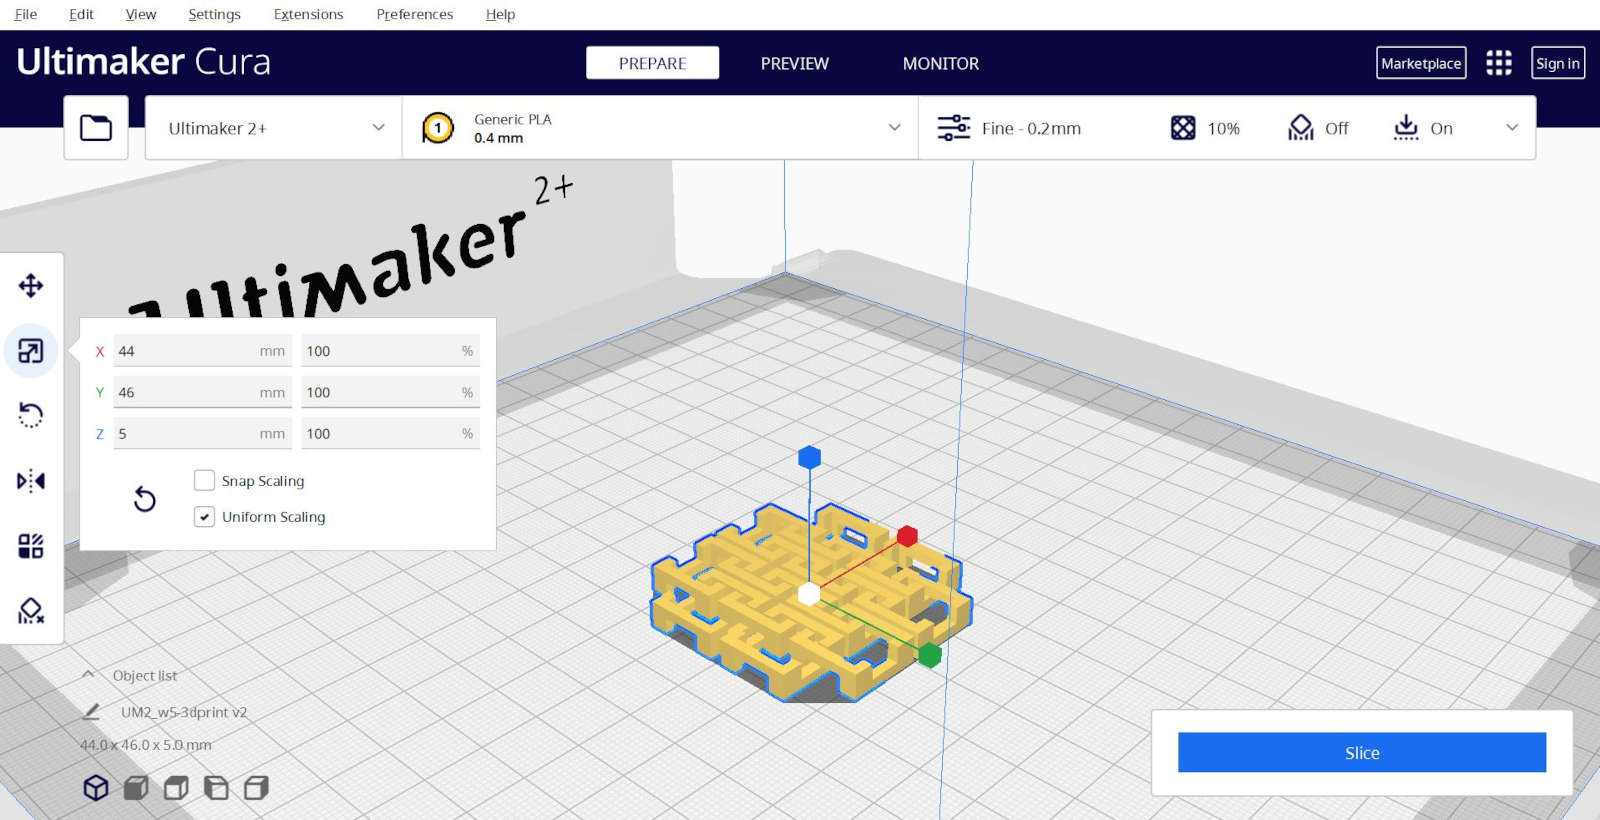
There is a window that we can open to choose more in detail the 3D printing settings:
- Profile: I choose 0.2mm, this is how thick the threath of the noozle is.
- Wall thickness: I choose 0.8 mm which is the stadart for our 3D printers.
- Infil: it is the density of the material inside the model to give it regidity or structure, I choose 10% which is not too dense and still gives a good support.
- Speed: it is the speed of the noozle making the model, I choose 80 mm/s, this is quite fast, I wanted to get the model in no more than 2 hours
- Support: depending of the model, if it has lots of bridging and overhangs, the program gives the possibility to print and extra extructure to support the model, in this case I didnt need this support as my model didnt have this problems.
- Built Plate adhesion: This can give floor structure to the models that have few points touching the 3D printing surface, this plate adhesion helps the model to work as a hole with a small "floor" in my case I didnt need it, but by accident I leaved it in the setting and it printed out.
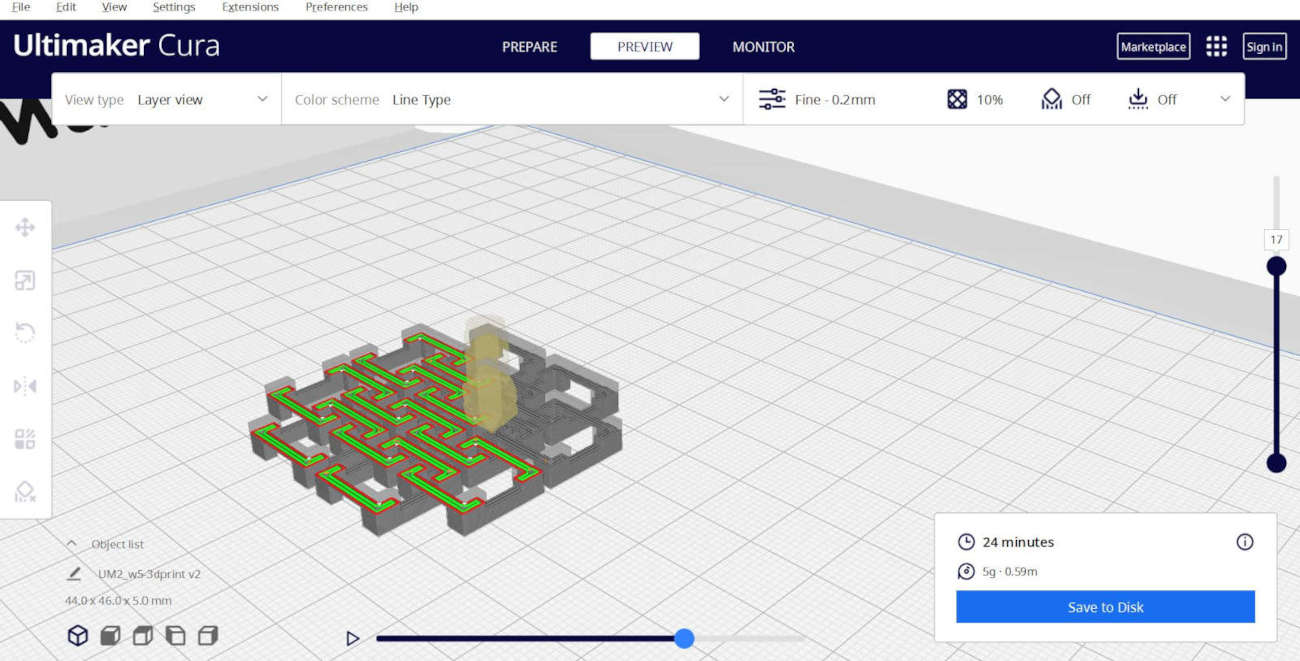
Once the settings are chosen the programgoves the alternative of seeing the way the model is going to be printed and how the support will be, in this case we dont see supports (I printed my model twice the second time smaller and without Built plate. And we can see what is the estimated time for printing. At this point we are ready to save the file as .gcode extension and send it to the printer.
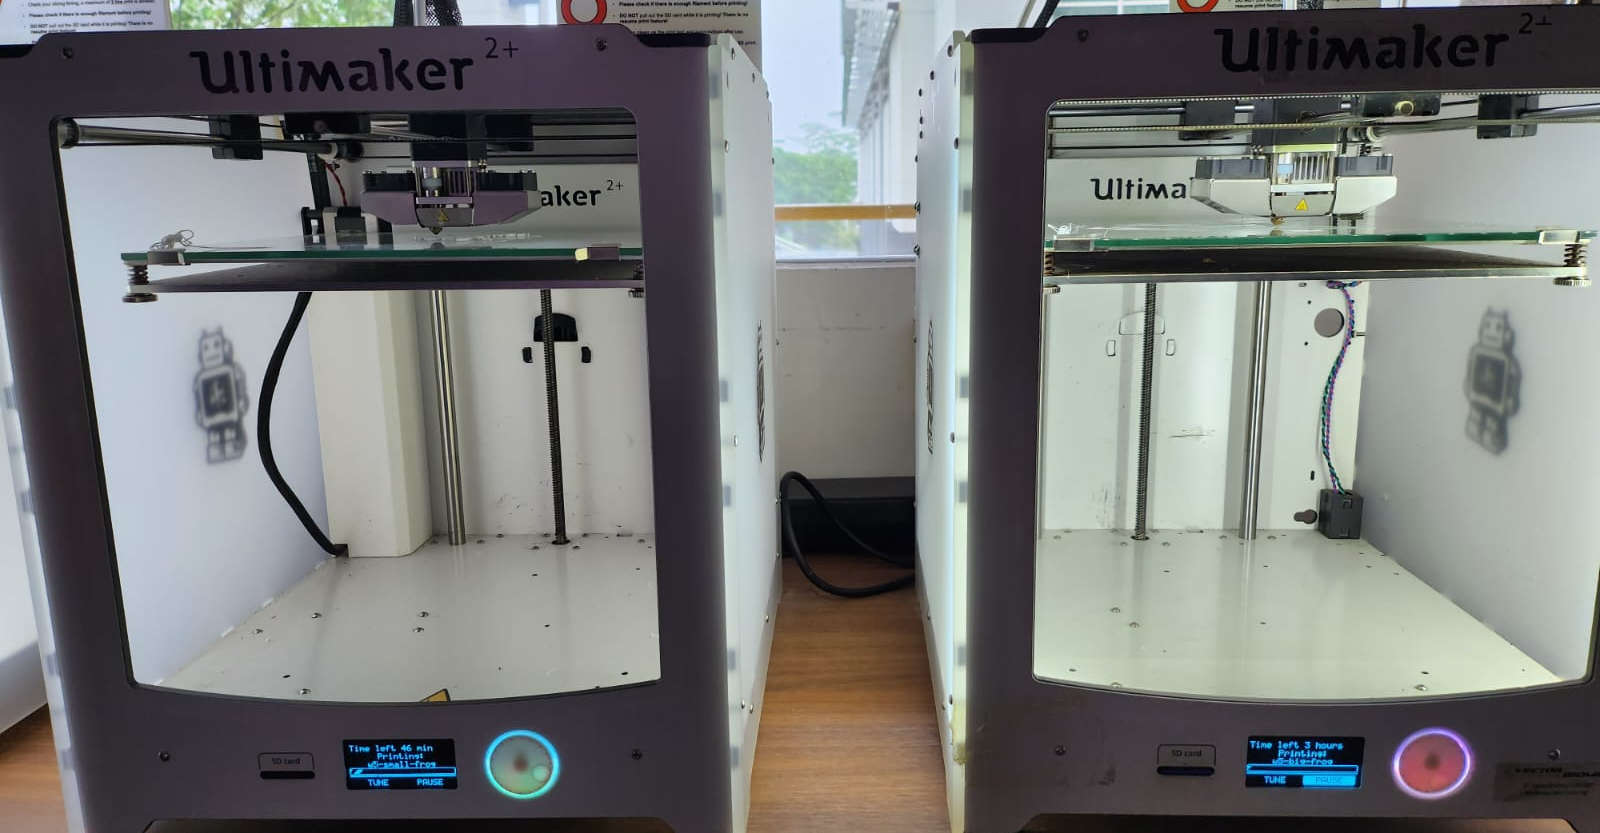
The Ultimaker 2+ has a slot for SD memory in the front in one side of the screen, they we choose the file we want to print with the selector and print the model. It takes a while for the printer to warm up, but then it starts and we can see in the screen the estimated time for the 3D printing.
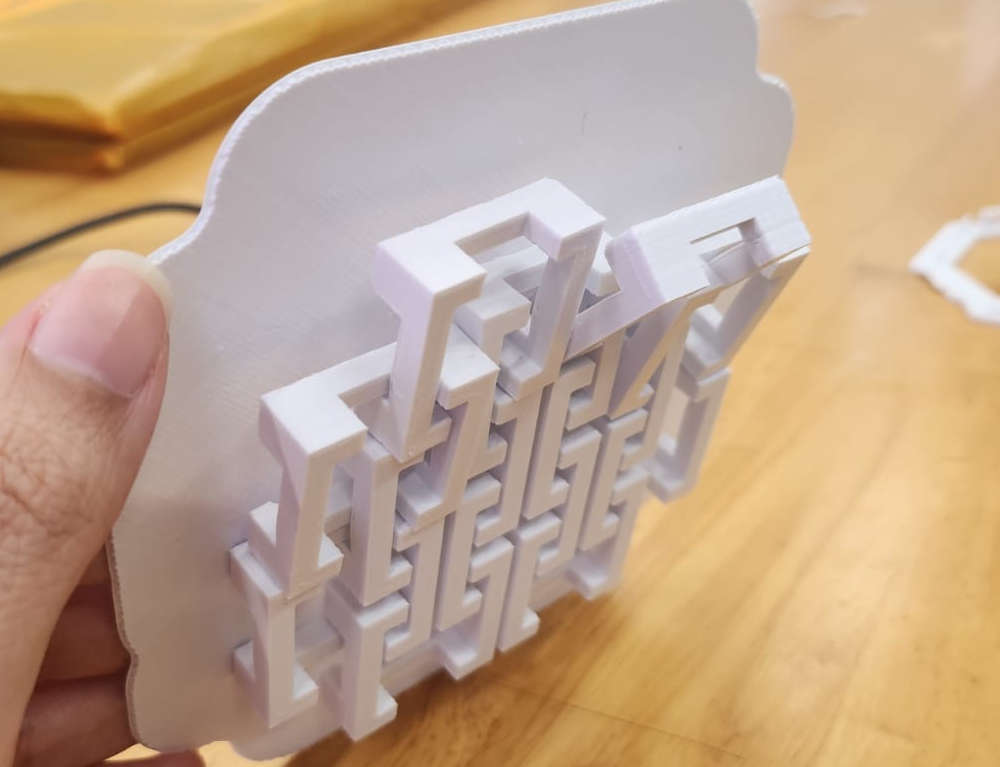
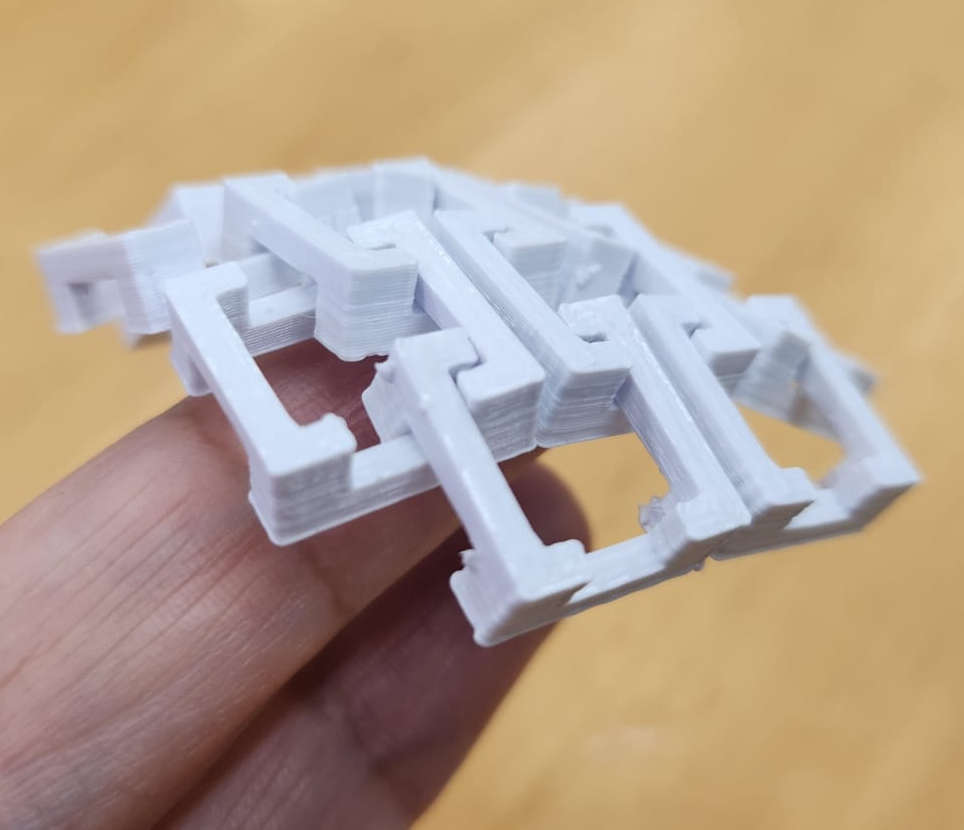
In the following imge we can see the model already printed and the unnesessary built plate, luckily it was easy to detach the model from it.
|
|
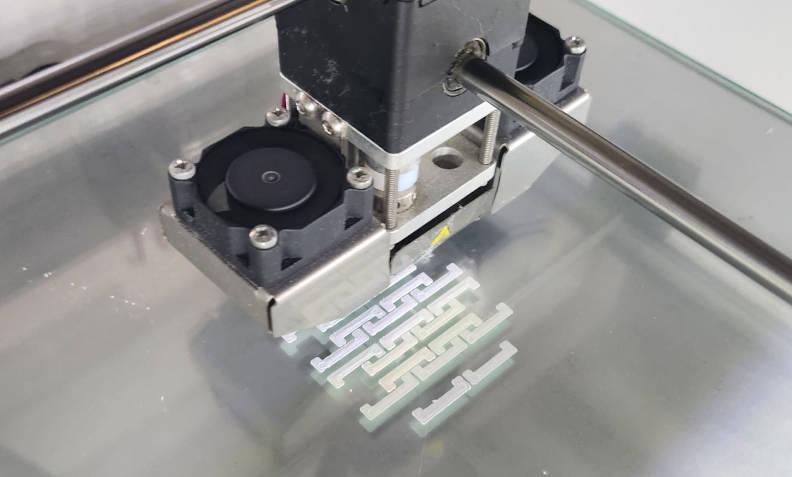
When I printed again the modules in a smaller scale, I was careful of not leaving the Built Plane Adhesion, this saved time and material.
|
|
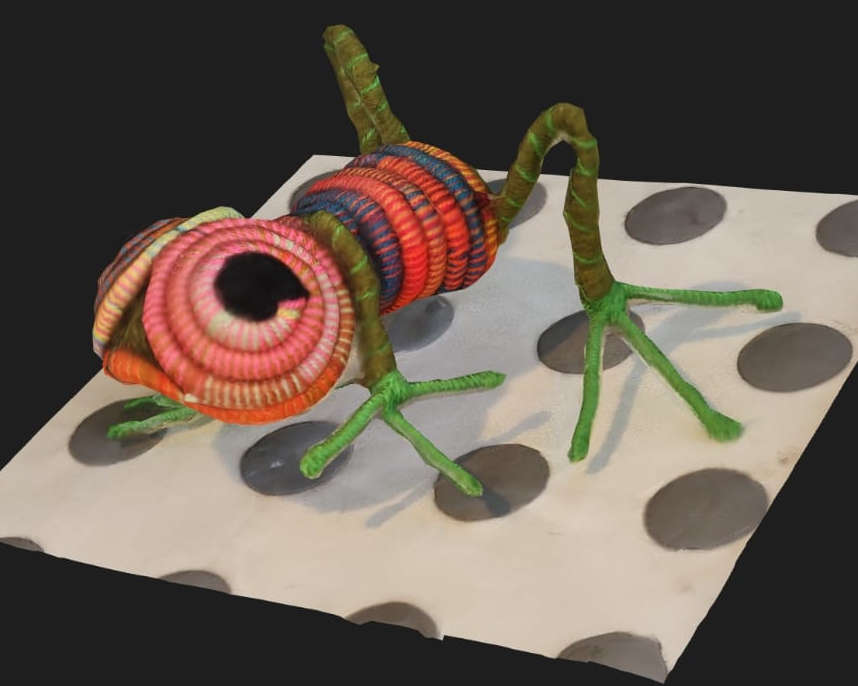
-3D scan an object (and optionally print it)
This assigment was quite playful as we could choose any object to scan, I decided to scan my object with a mobile app, nowdays they are very accurate and are for free. I started scaning inside a classroom with artifitial light, and the scanning wasnt of a good quality, talking with one of my fellow students he pointed out that outside with natural light the scanning results were optimal...he is completely right, then I made some more scans and the scanning was perfect.
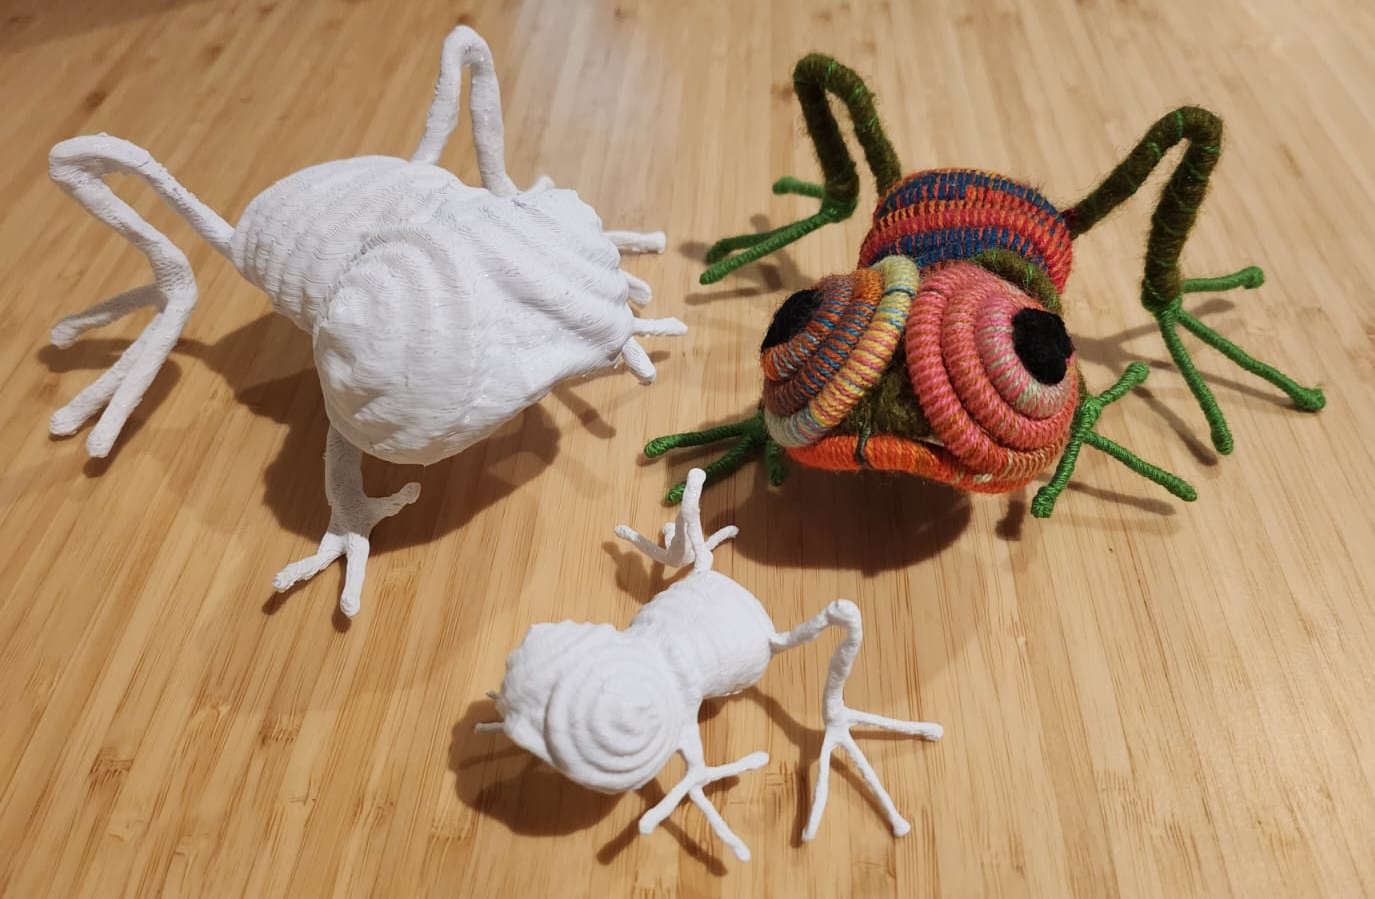
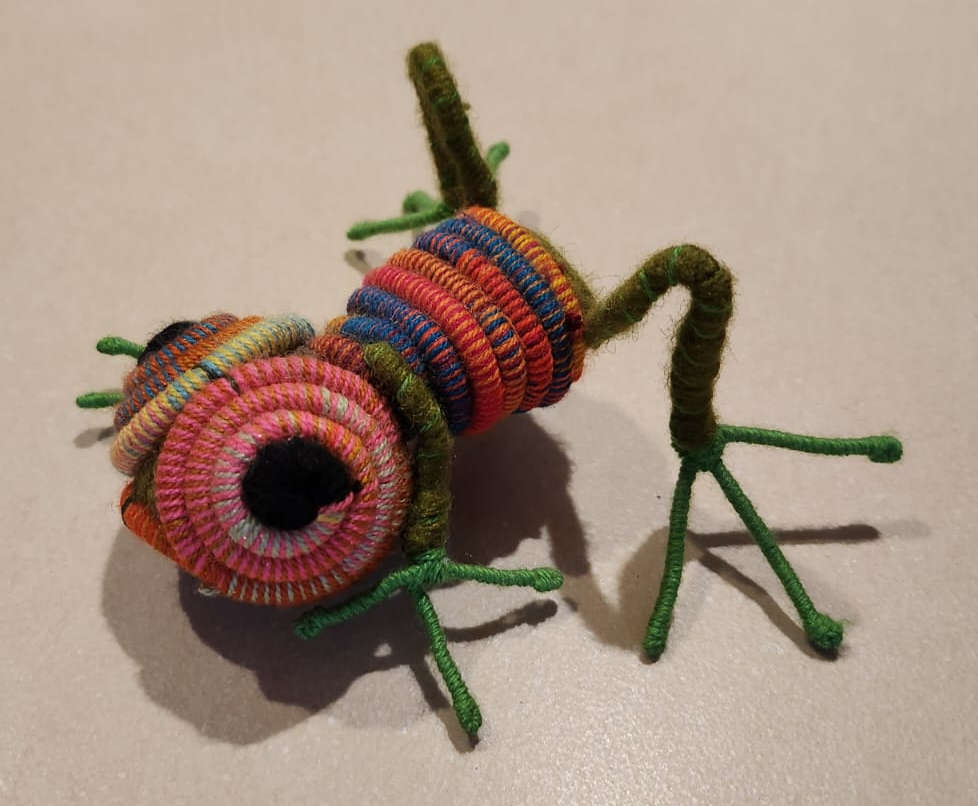
The scanning can be tricky if we dont take enough pictures from all sides of the object or if the light is not enough or if the surfaces of the object are shiny. So I decided to scan an object with a rough texture.
Here side by side the original object and the 3D scan
|
|
The app I used for the scan is called KIRI ENGINE Open source for the basic application.
Once I was satified with the scan I saved it in .OBJ format which is a 3D standard format where we can see the textures and colors of the scanned object.
The scan is never perfect as there are blind points but the more time we invest in taking the pictures from all possible angles, the better. In my case it was impossible to scan the belly of the frog, the program kind of guessed the shape but there was not Texture map for this part of the object in the final scan.
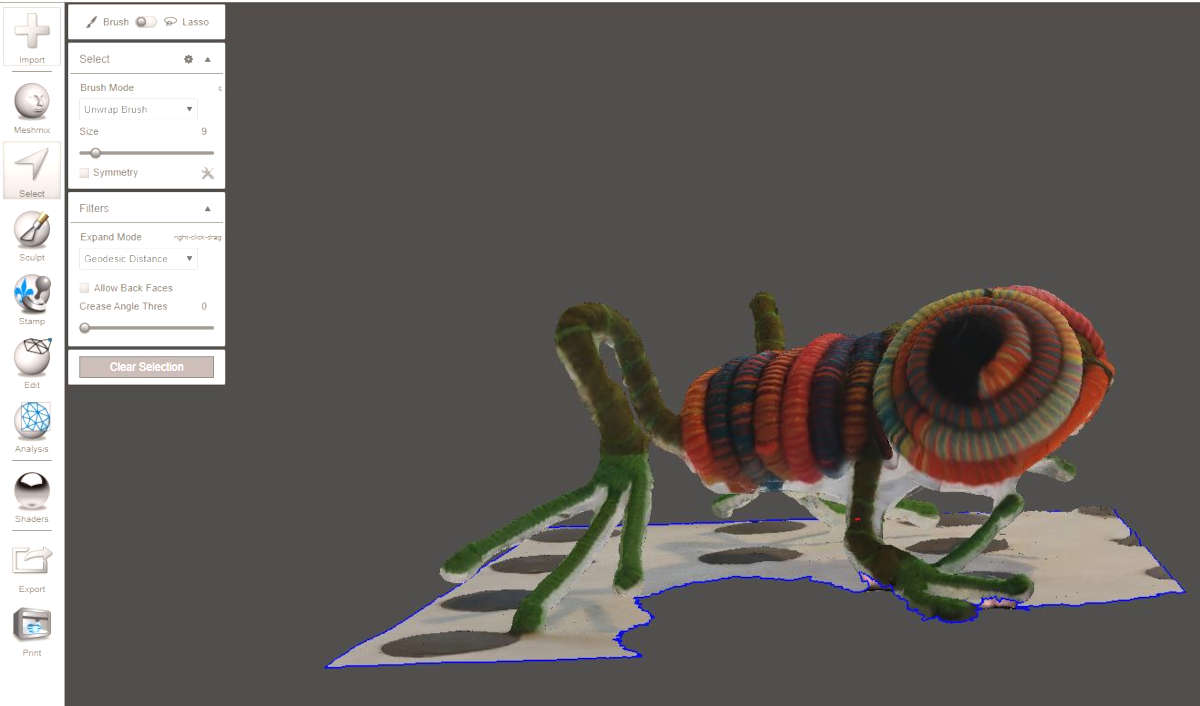
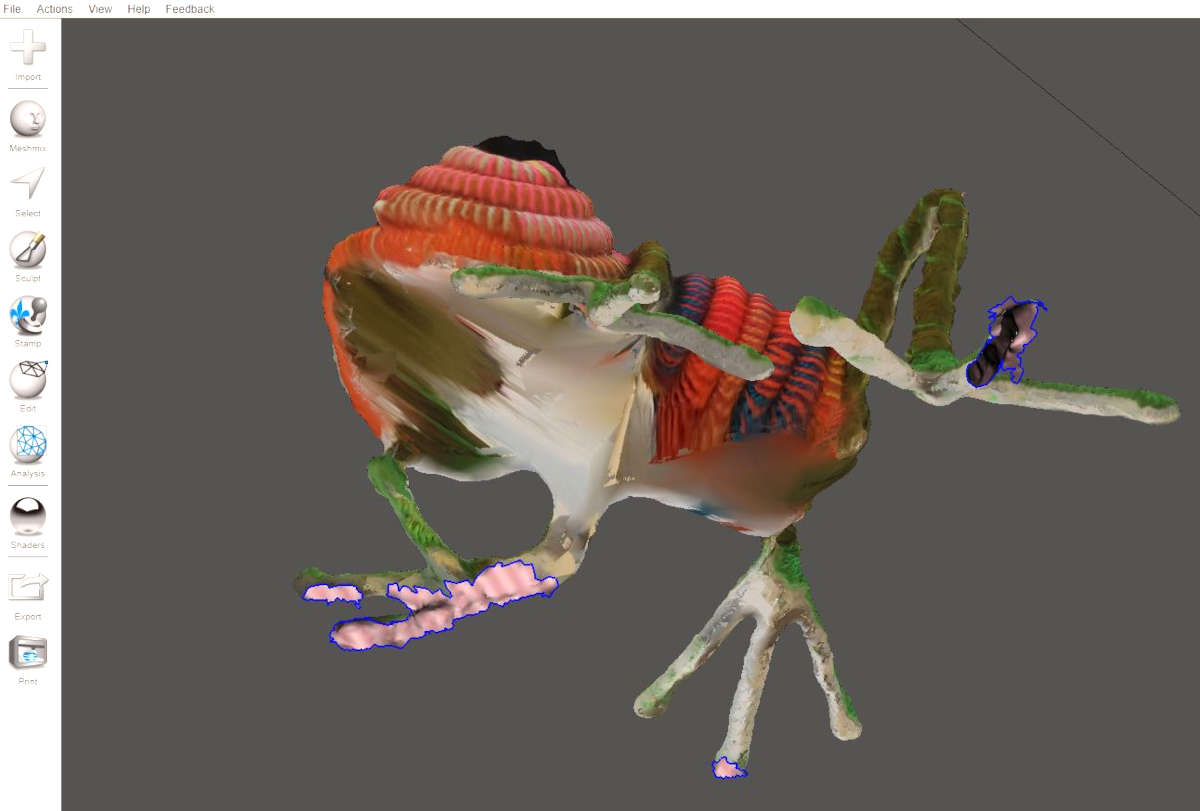
The scanning comes too with more information that we need as the surface where we scanned or funny shapes in the object, to clean up the final scan I used a different software of open source AUTODESK MESHMIXER.
This is a YOUTUBE TUTORIAL that I followed to learn how to fix the 3D scan.
Basically I had to erase the surfce were the frog was standing, but when I did it the feet were left open, so I have to filled the holes. For erasing the parts I didnt want I used the tool Brush and selected the parts. To closed the open surfaces of the feet I selected the surounding of the opening with the Brush tool and then I typed F (fill) and I filled the gaps. For the bulgy parts or uneven surfaces, I used the scultping tool.
|
|
When the 3D scanning was clean and retouched with Meshmixer, I opened an account in SKETCHFAB the basic subscription is free but has some limitations as quantity of uploads per day and size of the files.
For this exercise was enough the basic sucription. When uploading the files it is important to upload the OBJ, the MTL and the JPG files that where generated when scanning the object for the first time, otherwise the object may not show the colors or textures in the 3D viewer, it happened to me, luckily a fellow student suggested me to upload all the files and it worked. Sketchfab, gives precise instructions on how to embedded the 3D viewer into an HTML file.
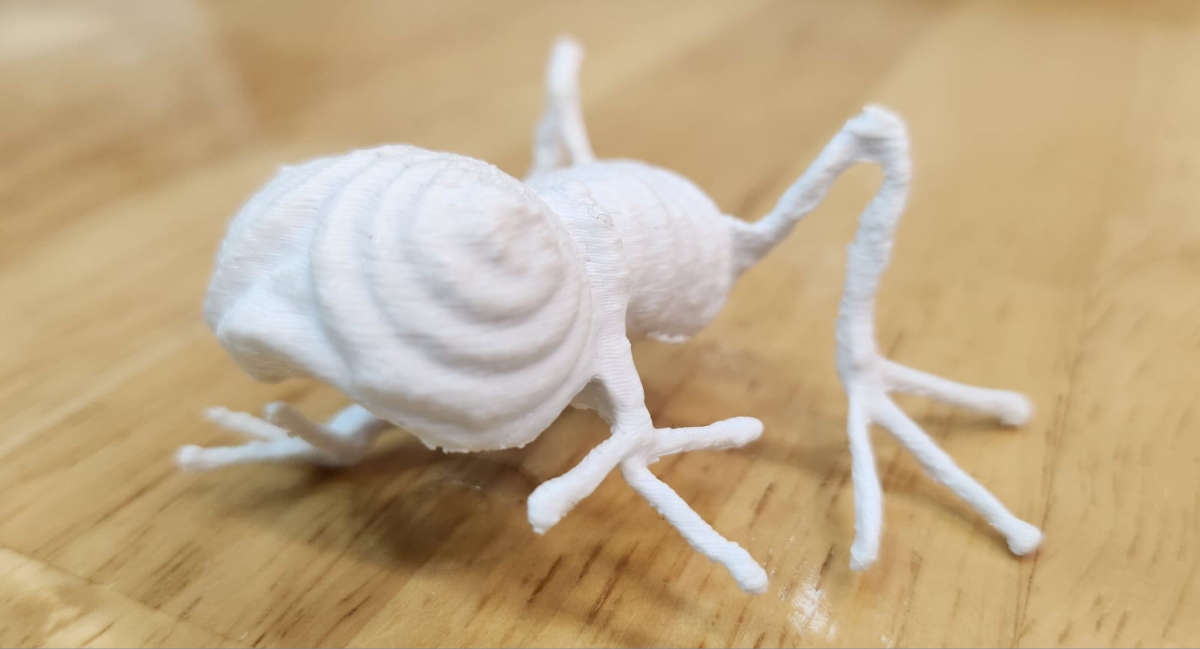
Printing the scanned object...
Here things got a bit more complicated as the object, the frog had a particular shape, so when I openen the file in Ultimaker Cura, it showed in red the places where I needed extra Support to be printed, and the program didn't give me the option to choose where to place the structure and the quantity of it (at least I couldnt finf it).
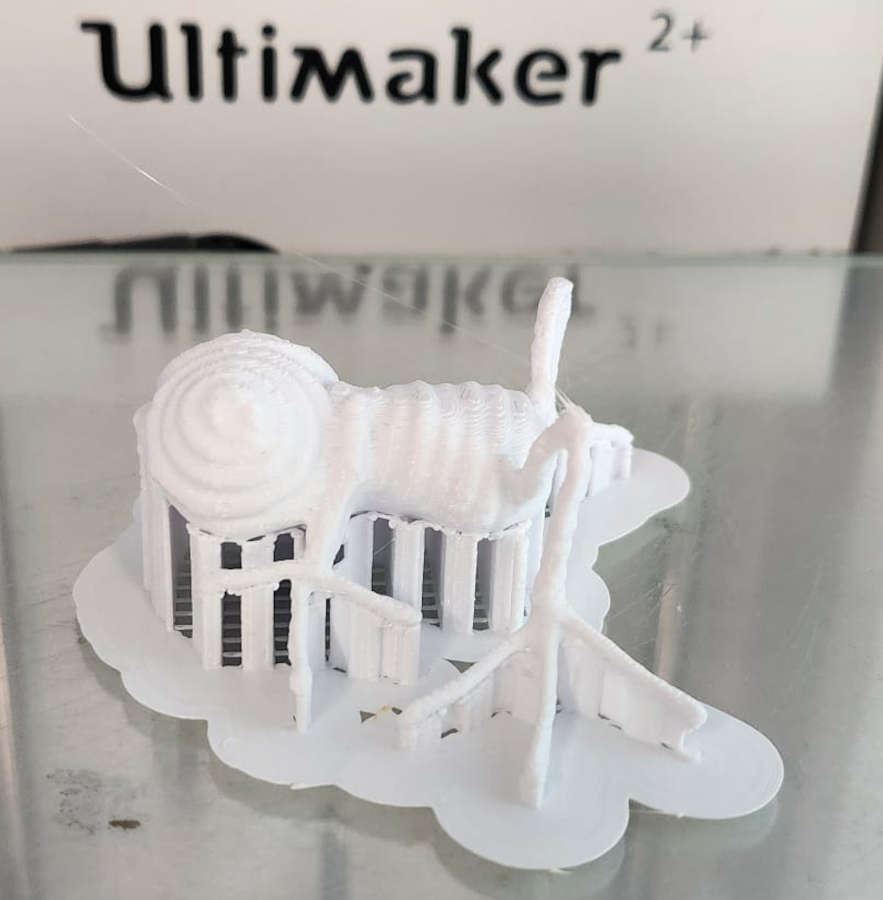
The Supporting structure suggested by the program was basically all under the object and in top of that I had to put a built plate adhesion as only one foot was touching the printing plane.
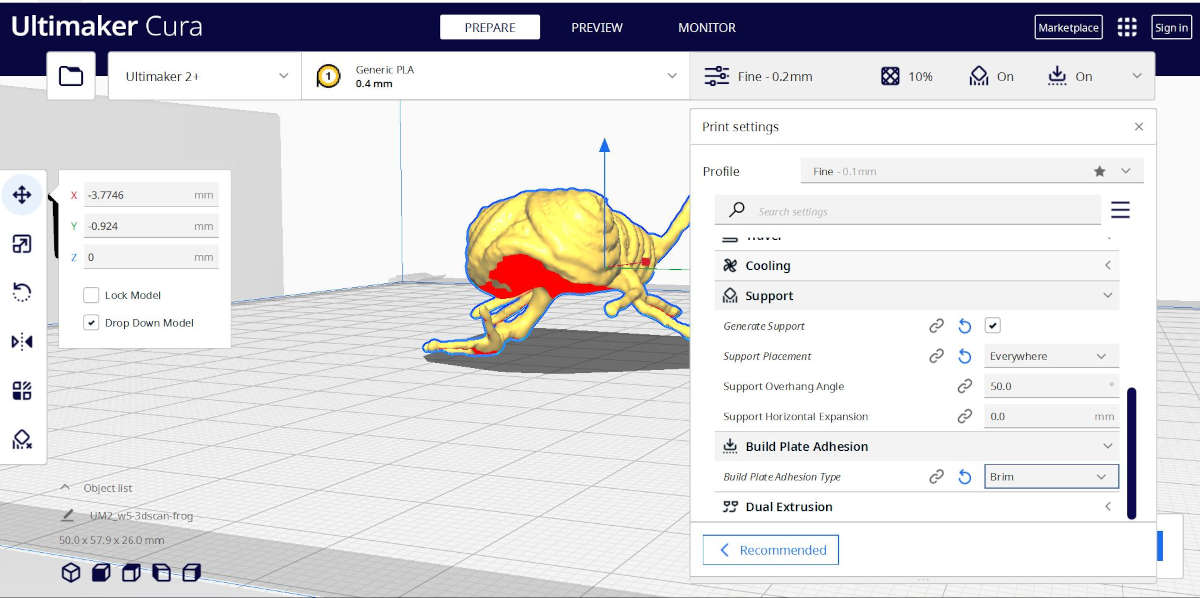
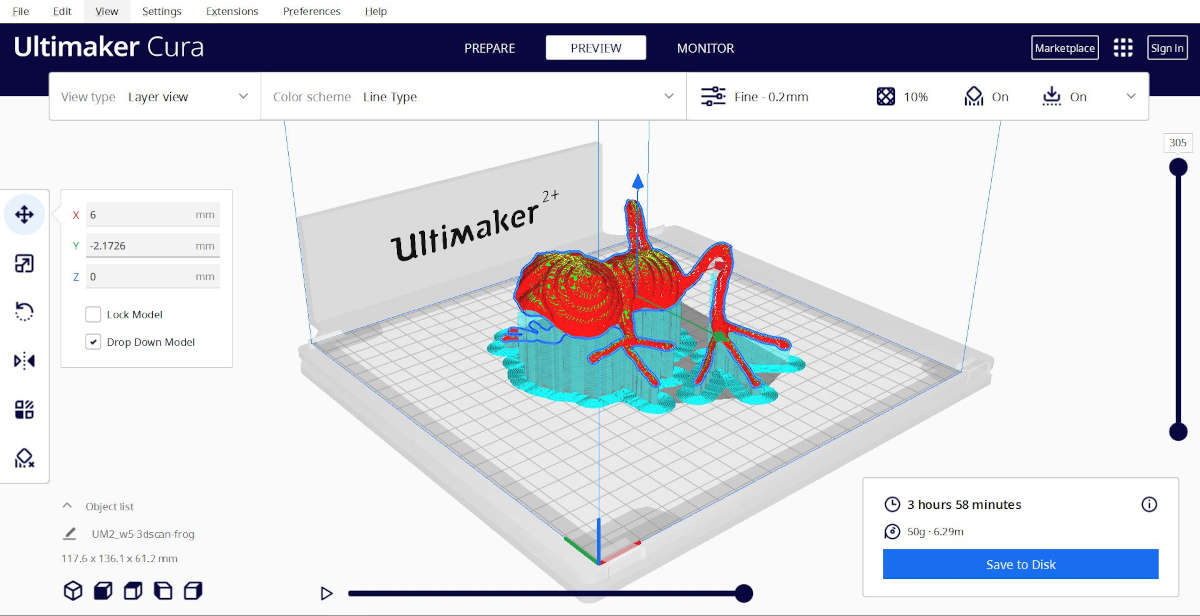
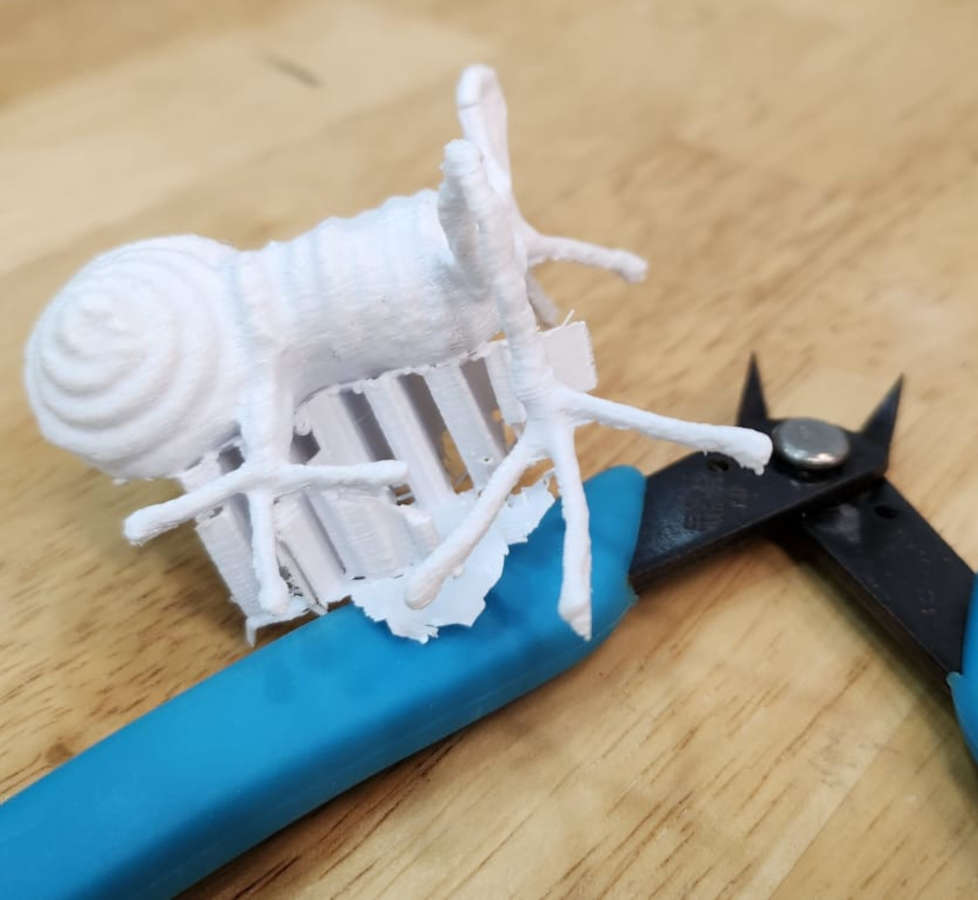
This type of printing takes longer and later it is difficult to take appart the Supporting structures without damaging the object. I decided to print a scale to one of the 3D scan and other smaller.
|
|
|
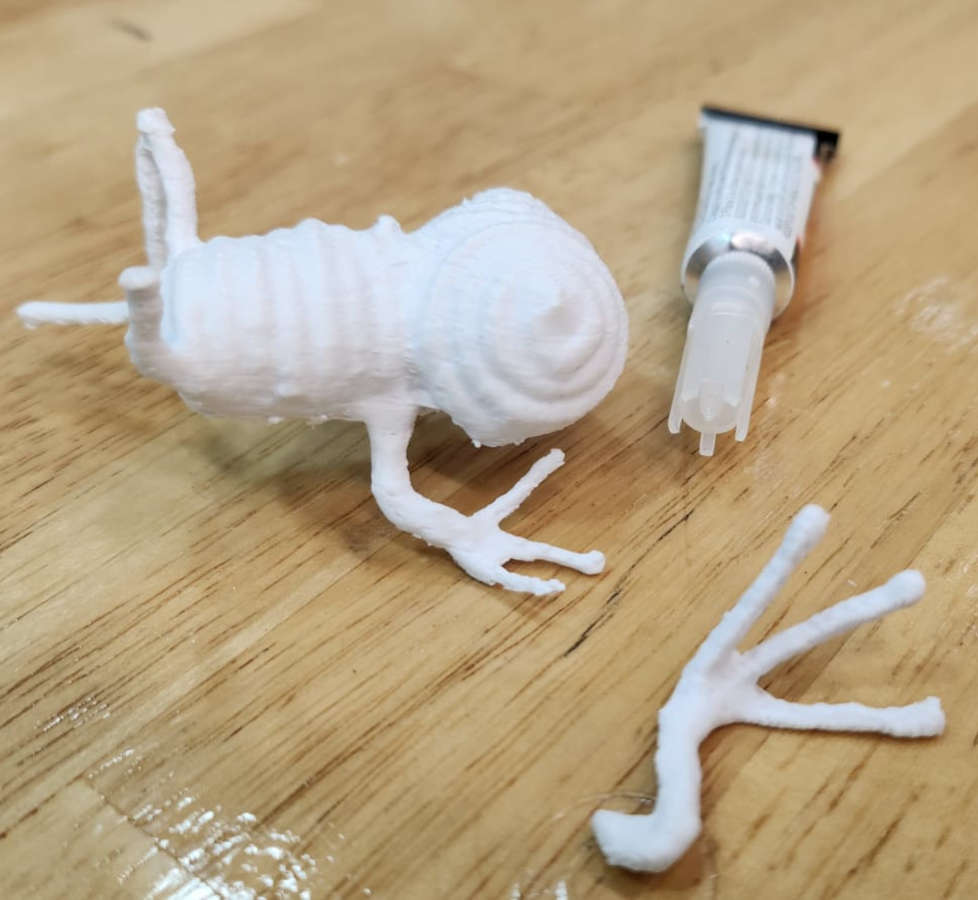
The final result for the 3D scanned and printed object wasn't that bad (fixed with glue) and given its shape and texture was a bit forgiving.
Having the option to 3D print our designs and models opens up a big door for creation, as we can create on the go, make prototipes and with them and the 3D tools get a desired outcome. It is useful for printing parts that are not possible to fabricate in other way, as with the interlocking shapes, it is possible to do everything in only one print, not having to assemble different parts.
3D scanning can be very useful specially for organic shapes, like more accurate prosthesis for people so they feel more comfortable. It can be used too to scan parts that are unique, then we can regenerate them in 3D. With this exercise I learned how easy it can be, and the different tools to get a good scan mmodel to publish and print.