Machine Week - Group Project
TeaManator

For machine week I worked in a group with Hafey and Svavar alongside our instructors Árni and Þórarinn. We all joined in Fab Lab Reykjavik to collaborate on our project. We considered a few ideas but decided on making a tea making machine. The machine is one linear axis with a stepper motor and a servo motor. The stepper moves the servo along the axis and the servo dips a teabag into a cup of warm water, then moves further on the axis and drops the used teabag into a trash container. See the full Group Page here.
My contribution
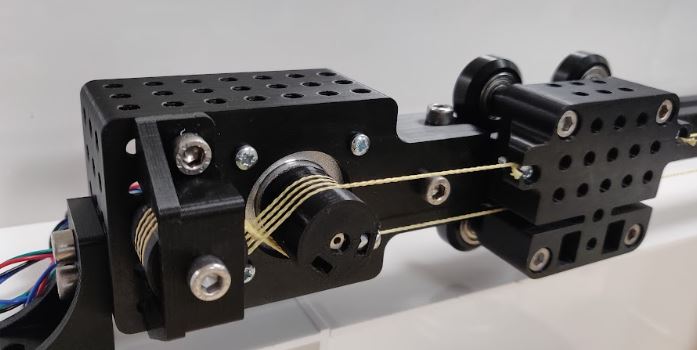
During our first team meeting we decided on making a linear axis. We considered a few designs but we all really liked the Beehive-Axis and wanted to give it a try.

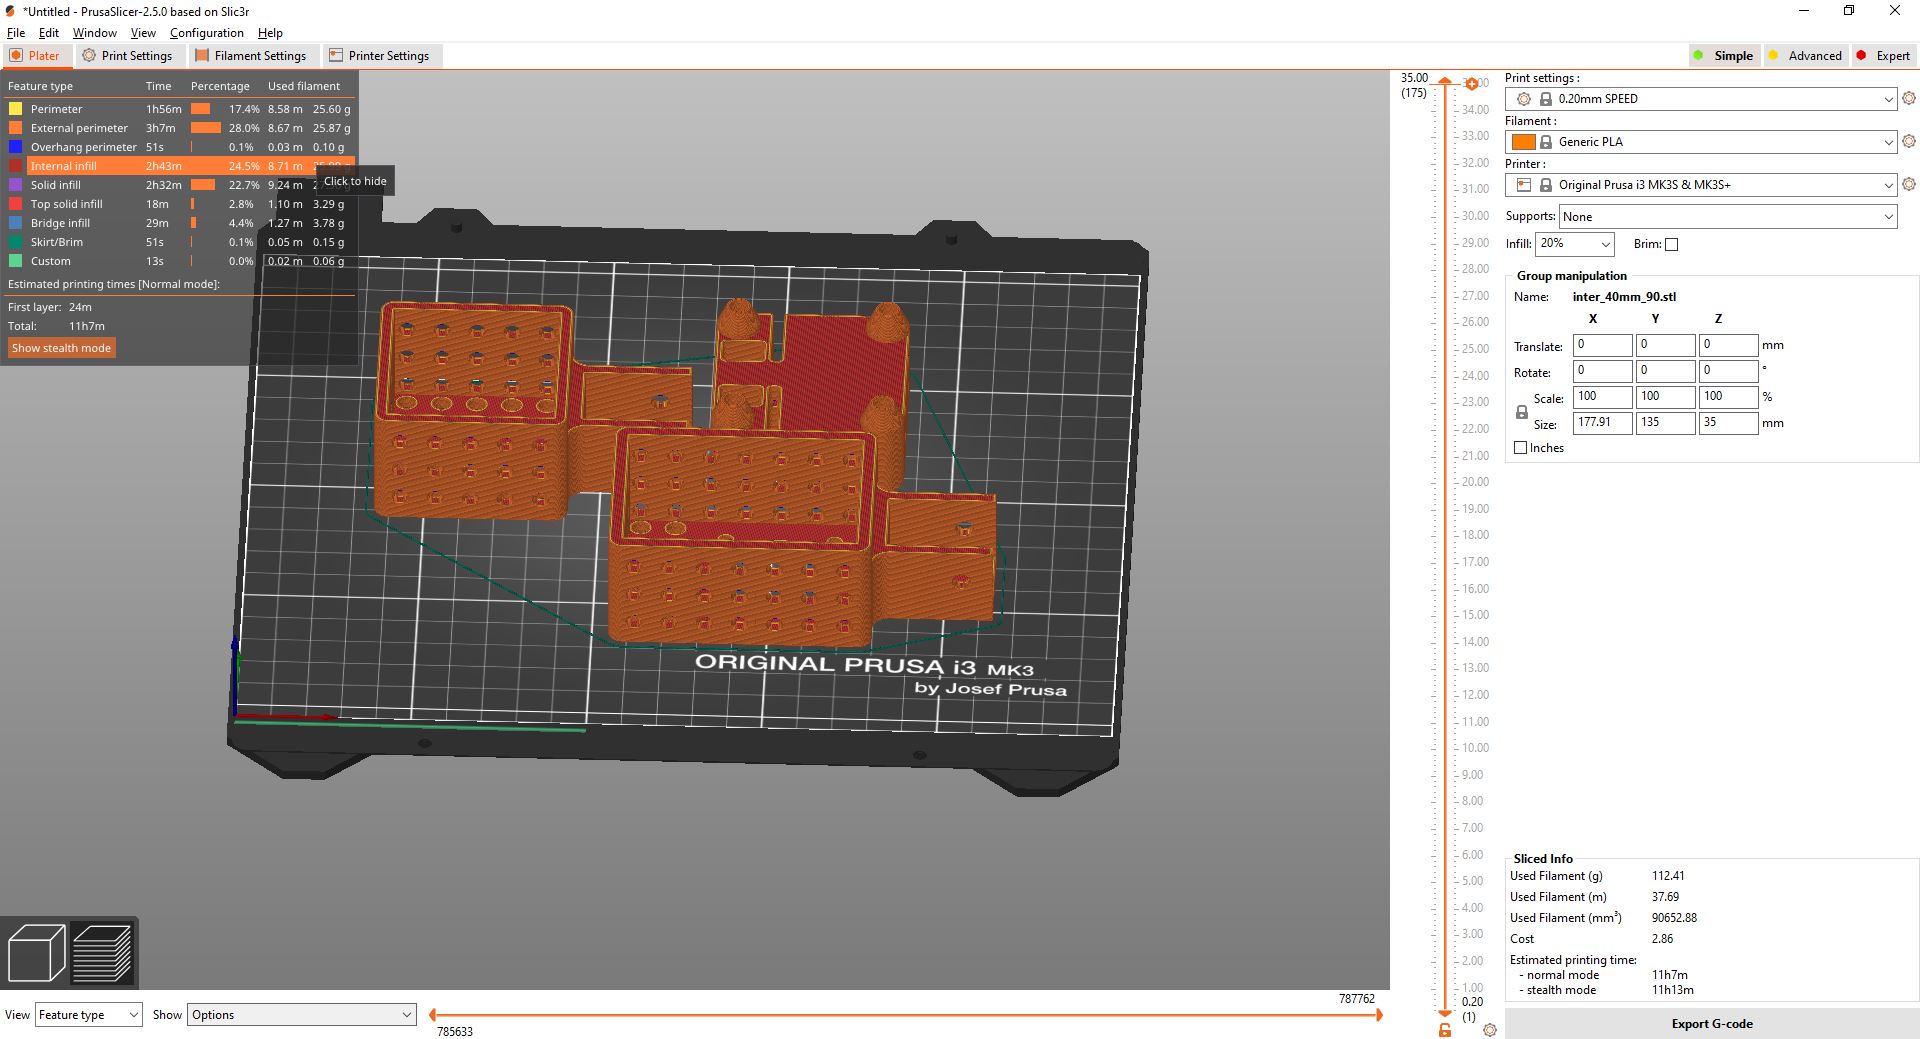
I downloaded the 3D parts, sliced in PrusaSlicer and printed on our Prusa i3 MK3S+
Bigger parts
Smaller parts + beam
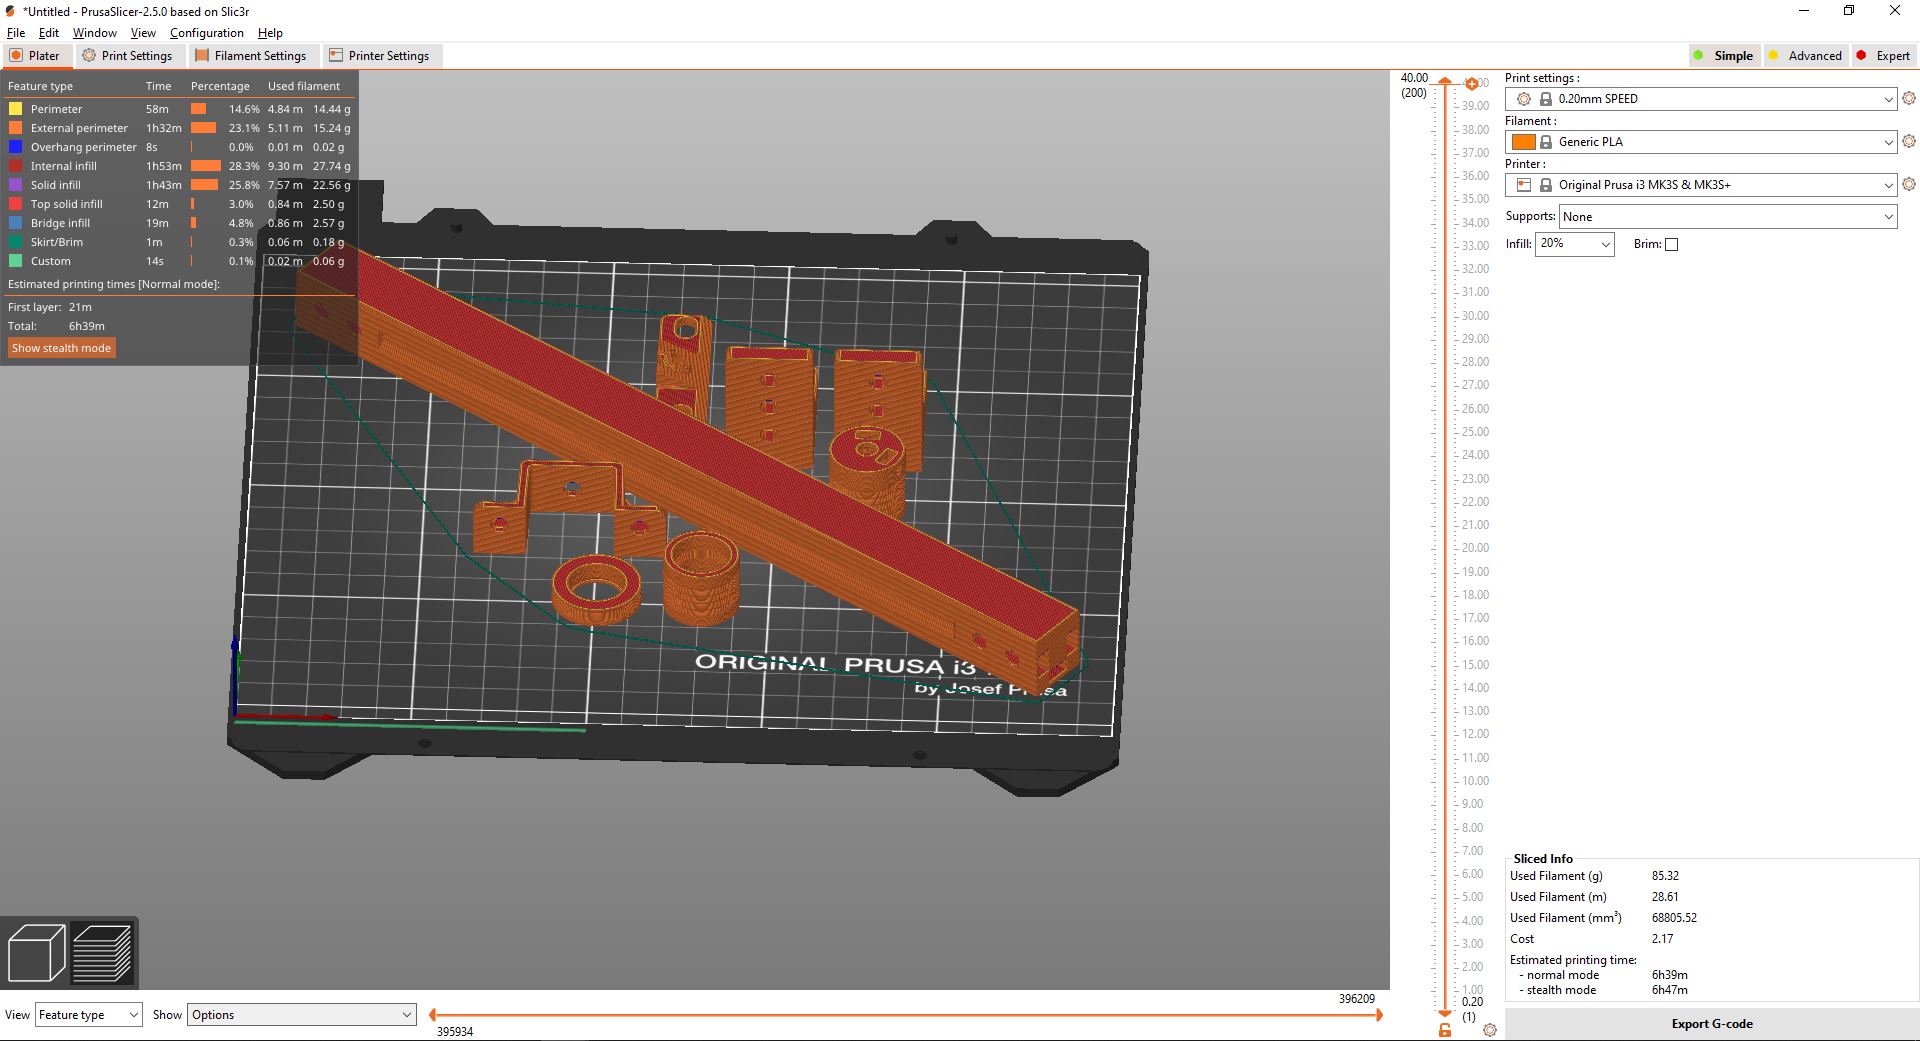
The print time for the bigger parts was about 11 hours and little under 7 hours for the smaller parts + beam. We have two Prusa printers so we were able to print both at the same time.
The 3D prints came out perfect. Árni assembled the pieces which was pretty straight forward.
PCB - first/second spiral
The first spiral of developing the machine was making everything work with an Arduino Uno. Svavar did most of the work with the Uno and meanwhile I tried to make a PCB board. I downloaded the Eagle file for a Xiao stepper h-bridge board from the Modular Things project. The board I downloaded was too closely routed for our milling machine with 1/64 bit so I attempted to re-route a few of the traces. We contacted Quentin about the board and he told us about a few things that were not necessary which I took out. I was unsure about the purpose of some things on the board, for example if the 5v power was external or not and after conferring with my instructor I made changes to the board, mainly removing the 5v external and hoping that the 5v from the Xiao would be enough.
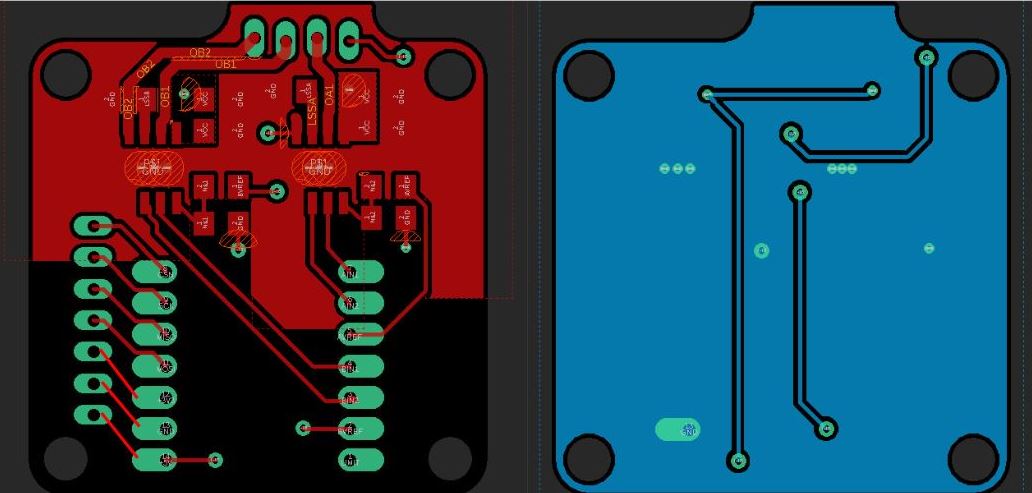
Original board
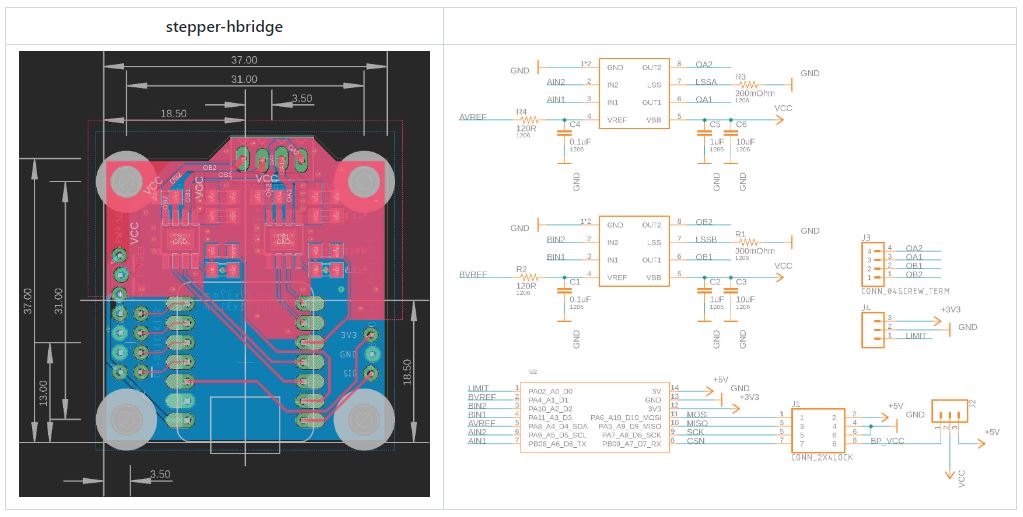
My board with changes
I milled my design, in the first attempt the top milled perfectly and for some reason the bottom milled nearly through the board
First mill Top
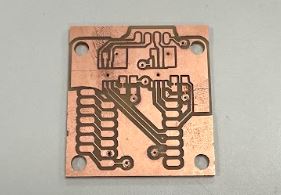
First mill Bottom
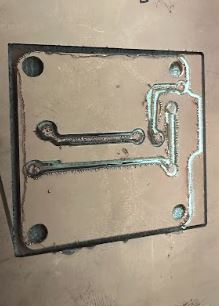
I milled the board again and this time it milled perfectly. I soldered the components to the board. We did not have the exact resistors and capacitors but I went ahead and used compenents that me and my instructurs believed to be close enough.
We tested the board and it did not work. We were able to measure with the oscilloscope some readings but we later learned that we needed external power for the stepper motor.
PCB - third/fourth spiral
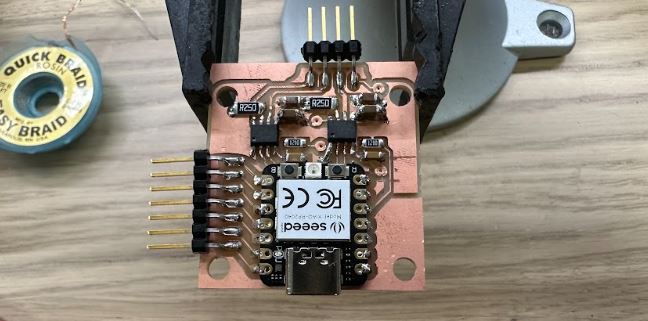
While Svavar was working on the third spiral, a board using drv8825 stepper motor controller with a Xiao, I milled another version of a stepper board from Modular Things. Xiao_RP2040 Dual H-Bridge board.
This board design was only milled on one side and did not need any editing to be milled on our milling machine. First we simply downloaded the .png from the site and started milling but realized soon that the board was way too big. So, I downloaded the Eagle file and exported the board as a .png and milled that. The board came out perfect and this time Árni soldered the components. We had the right components for this board and it worked perfectly.
Here you can find the printable axis project along with code examples. And here is the modular things website to control the servo.
At this point Svavar had his version working with the stepper, servo, endstop button and makeTea button so we used his design. But I intend to dive deeper into the Modular Things.
Code
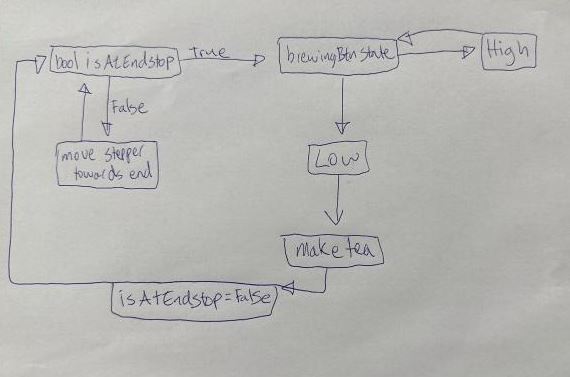
After the first spiral where we had tested the stepper and servo we had basic code to control the motors but I brought everything together and added the code for both the endstop button and the makeTea button. I also created a state diagram to show the flow of the program.
Program state diagram
// Include the Arduino Stepper Library
#include <Servo.h>

//defining buttons and bools
#define endStopBtn  4
#define brewBtn  2
bool isAtEndstop = false;
bool isBrewing = false;

int brewingBtnState = 0;

// define direction pin and step pin
#define dirPin 26
#define stepPin 27
#define sleepPin 28
#define resetPin 29
// define microstepping signal pins
#define m0 0
#define m1 7
#define m2 6
#define stepsPerRevolution 200

Servo myservo;  // create servo object to control a servo

int pos = 0;    // variable to store the servo position

void setup()
{
	pinMode(endStopBtn, INPUT_PULLUP);
	pinMode(brewBtn, INPUT_PULLUP);

	myservo.attach(3, 800, 2200);  // attaches the servo on pin 9 to the servo object

	// Declare stepper driver pins as output:
	pinMode(stepPin, OUTPUT);
	pinMode(dirPin, OUTPUT);
	pinMode(sleepPin, OUTPUT);
	pinMode(resetPin, OUTPUT);
	pinMode(m0, OUTPUT);
	pinMode(m1, OUTPUT);
	pinMode(m2, OUTPUT);

	// initialize the serial port:
	Serial.begin(9600);
}

void loop()
{
//Stepper setup
	digitalWrite(sleepPin, HIGH);
	digitalWrite(resetPin, HIGH);
	digitalWrite(m0, LOW);
	digitalWrite(m1, LOW);
	digitalWrite(m2, HIGH);

	int endstopBtnState = digitalRead(endStopBtn);
	Serial.println(brewingBtnState);

	while(isAtEndstop == false){
	endstopBtnState = digitalRead(endStopBtn);
	if(endstopBtnState == 1){

		//move stepper a few steps at a time until it reaches the endstop button
		myservo.write(0);
		delay(15);
		digitalWrite(dirPin, LOW);

	for (int i = 0; i < 16*10; i++) {
		digitalWrite(stepPin, HIGH);
		delayMicroseconds(1000);
		digitalWrite(stepPin, LOW);
		delayMicroseconds(1000);
	}

	}

	else{
		//if here then the endstop button is pressed, then move the stepper 5? steps away from button and put
		//isAtEndstop variable to true to get out of endstop routine

		digitalWrite(dirPin, HIGH);
	// Go 10 steps slowly:
	for (int i = 0; i < 16*10; i++) {
		digitalWrite(stepPin, HIGH);
		delayMicroseconds(1000);
		digitalWrite(stepPin, LOW);
		delayMicroseconds(1000);
	}

		isAtEndstop = true;
	}
	}

	while(isBrewing == false){
		// Serial.println("Press button for Tea");
	brewingBtnState = digitalRead(brewBtn);
	Serial.println(brewingBtnState);
	if(brewingBtnState == 0){
		Serial.println("Making Tea");

			digitalWrite(dirPin, HIGH);
	for (int i = 0; i < 16*140; i++) {
		digitalWrite(stepPin, HIGH);
		delayMicroseconds(1000);
		digitalWrite(stepPin, LOW);
		delayMicroseconds(1000);
	}
		myservo.write(130);
		delay(500);
		myservo.write(30);
		delay(500);
		myservo.write(130);
		delay(500);
		myservo.write(30);
		delay(500);
		myservo.write(130);
		delay(500);
		myservo.write(30);
		delay(500);
		myservo.write(130);
		delay(5000);
		myservo.write(0);
		delay(2000);


		digitalWrite(dirPin, HIGH);
	for (int i = 0; i < 16*260; i++) {
		digitalWrite(stepPin, HIGH);
		delayMicroseconds(1000);
		digitalWrite(stepPin, LOW);
		delayMicroseconds(1000);
	}
		delay(500);
		myservo.write(180);
		delay(2000);

		isBrewing = true;
	}
}
	isAtEndstop = false;
	isBrewing = false;
}
Future development
There isn´t much I´d change in how we went about developing the machine. We tried different controllers, an Arduino Uno, and a custom PCB. We also tried using a stepper controller from the modular things project.
In the future I would like to work more with Modular Things and make the machine run on a Modular Things board. The only issue I have with Modular Things is that it is meant to control a single "thing" with each board. I would like the board to control both the servo motor and the stepper motor. I plan on working on this in the future but somehow I need to figure out how to make the board control both motors. I´m not sure if I need to make a custom board or if I can somehow use the existing board to control both the stepper and servo motors.