Assignment
Model (raster, vector, 2D, 3D, render, animate, simulate, …) a possible final project, compress your images and videos, and post it on your class page
Learning outcomes
- Evaluate and select 2D and 3D software
- Demonstrate and describe processes used in modelling with 2D and 3D software
Model (2D, 3D) a possible final project
2D Vector
Before trying out new software I wanted to check out the clone tool in Inkscape. Since I started working at Fab Lab I have gotten used to working in Inkscape and I find it easy to work with. There are some tools and features I have not used before including the Clone tool and after seeing Neil demonstrating the tool I was eager to try it out for myself.
I created two sides of a simple box plan with fingers to join the sides together. I created one finger using the box tool and then using the clone tool I created the rest of the fingers.
The clone tool works sort of like parametric design but I would not use it in the case I tried, making a snap-together box. It took longer than expected and did not produce the results I was hoping for. I will use Inkscape as my go-to 2d Vector software.
2D Raster
This week I wanted to take the opportunity to try some new software, starting with 2D software. I already have experience with Adobe Photoshop and I have wanted to move towards open source software so I decided to dive into Gimp. I have tried Gimp in the past but not spent enough time to call myself proficient.
I played around in Gimp for a while and I will definitely use Gimp again when I need to manipulate images. I found it easy to use and I like the fact that it is open source. Gimp will be a good tool to have in my toolbox.

I did not spend too much time in Gimp this week but I played around with some filters and effects. From now on Gimp will be my go-to 2d Raster software.
3D
I have used SketchUp in the past but not for a long while now. I have also used Tinkercad and sometimes when I need simple geometry I jump into Tinkercad. I find Tinkercad extremely easy to work with and comfortable to be able to use in a browser. I also have experience using Zbrush for character creation and organic modeling. The 3D software I have the most experience with is Maya, I used Maya for years and consider myself very proficient having used most of the tools in modeling, animation and rendering.
This week for 3D modeling I decided to try Blender and Fusion 360.
Blender
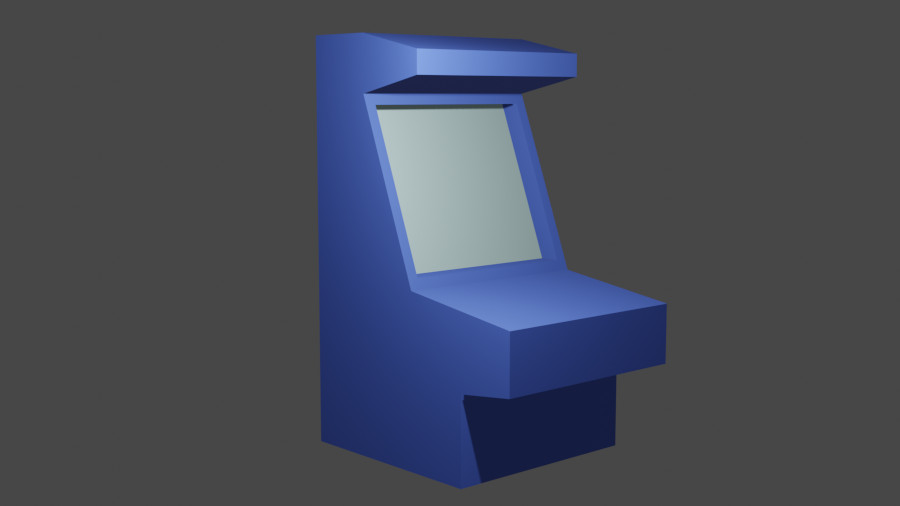
I went through a simple tutorial going over the some of the basic tools. I made a blockout model of an arcade, mostly using extrude and transform. I also added materials to show different colors on the model.
I have experience in using Maya 3d software and have heard Blender is a powerful equivalent.
During this excercise I learned how to use the Extrude tool as well as the Transform and Rotate tools. Also learned how to change colors of individual faces. Since the model I made is very simple I did not need more tools.
Comparing Maya to Blender I can see that Blender has most, if not all, the tools I am used to using in Maya. The only difference is the workflow. In conclusion I would like to spend more time in Blender and get used to the workflow. I would like to replace Maya with Blender because Blender is free and open-source. I will definitely use Blender more in the future.
It will take some time for me to get used to the Blender workflow compared to Maya but I will definitely be using Blender in the future.
Fusion 360
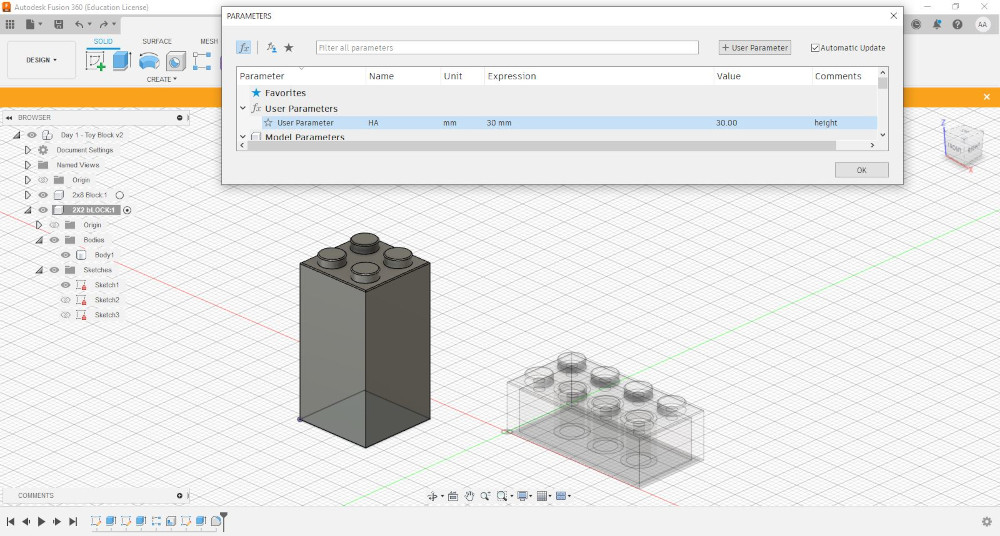
I have not used Fusion before but I have wanted to give it a try for a while now. I decided to spend most of this weeks time getting to know Fusion. I started by going through a tutorial on the Autodesk website, but quickly moved to Youtube for a more quick paced tutorial. I found a tutorial on Youtube that went over the basics of Fusion and I was able to follow along and create a simple Lego brick type model. I played around with parameters and was able to create a parameter to control the size of the brick. Link to Youtube tutorial
After going through the first tutorial I wanted to make my own project from scratch. I decided to make a housing for the electronics I will be using in the final project. It should be a box with a lid secured with screws.
I looked through two different tutorials and mixed and matched elements from both. After a while I had a box and a lid, with holes through the lid securing it to the box.
All sizes were controlled by parameters but when I changed the parameters the model did not respond correctly. I tried to fix the problem but could not figure it out.
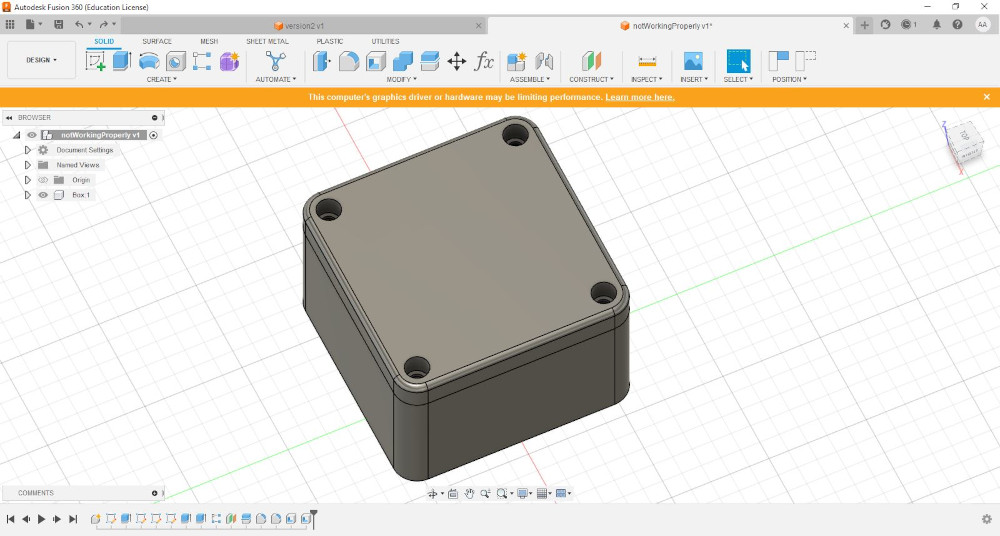
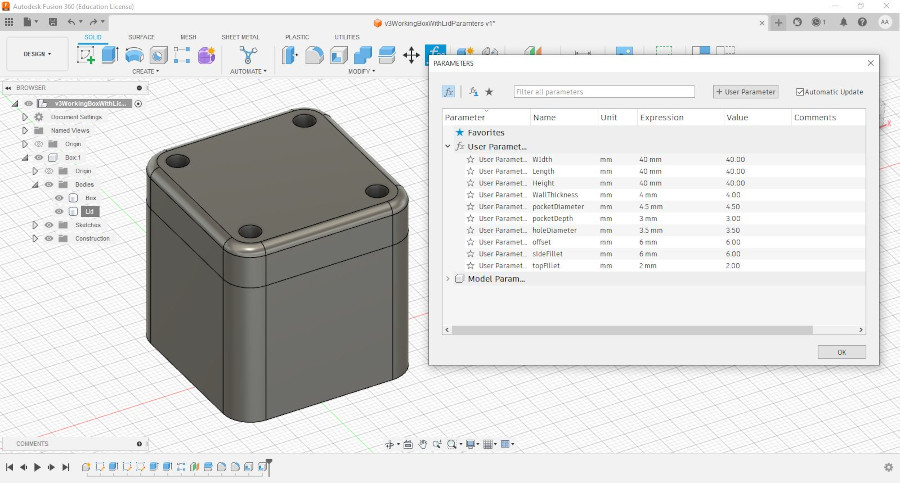
I started again from scratch and this time I was much quicker at modeling the box and lid. Since I had modeled the box and lid before I knew what I was doing and what parameters I needed to control. I was able to get the box and lid to work with parameters. Here is the box and lid before parameter change.
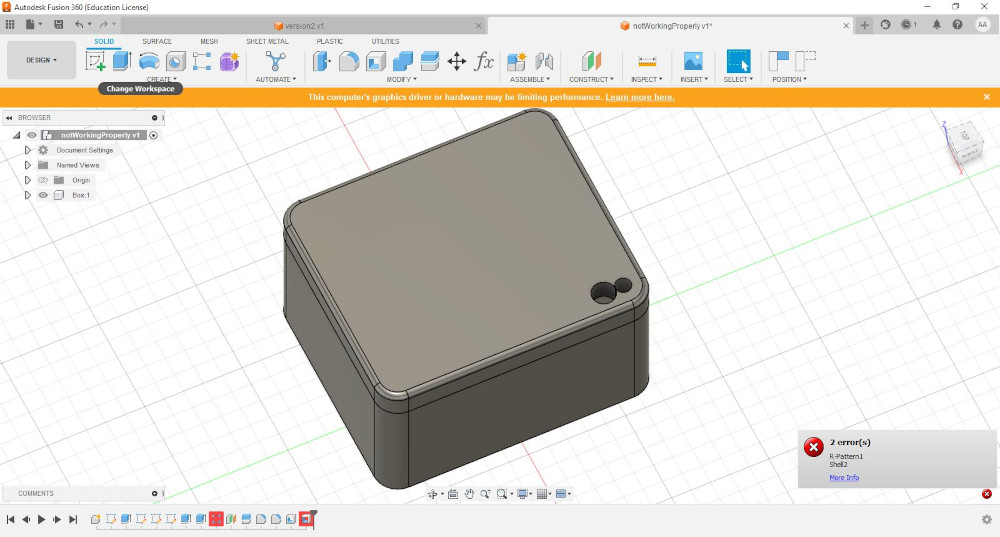
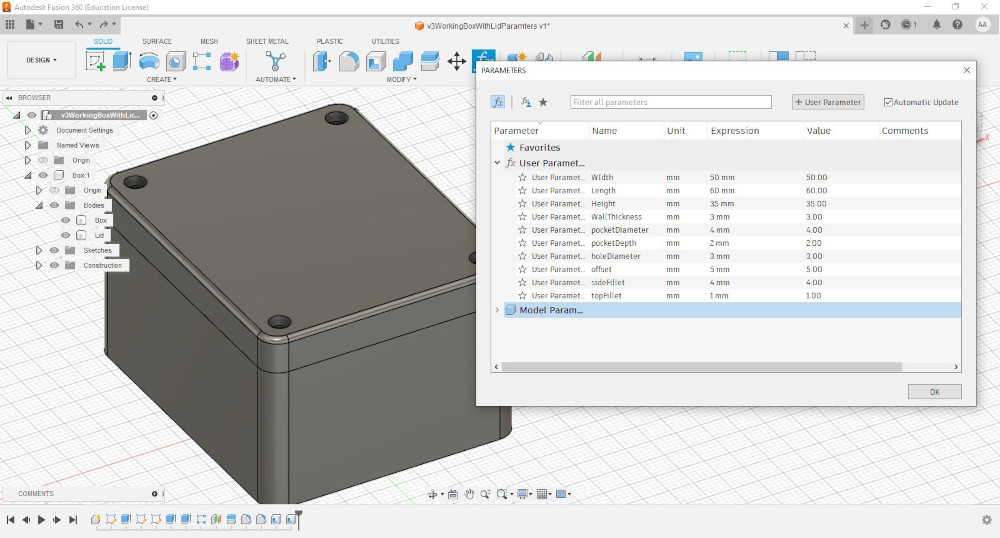
And here is the same model with different parameters.
Even though this is a pretty simple model I learned a lot about working with parameters and working in Fusion 360. I will definitely spend a lot more time in Fab Academy working in Fusion 360.