4. Computer controlled cutting
Group assignment:
- Characterize your lasercutter’s focus, power, speed, rate, kerf, and joint clearance
- Document your work to the group work page and reflect on your individual page what you learned
Individual assignments
- Design, lasercut, and document a parametric press-fit construction kit, which can be assembled in multiple ways. Account for the lasercutter kerf.
- Cut something on the vinylcutter.
Working in group:
-
This week progress should have been made with the characterization of the laser cutter. That is, the position of the laser tip for better performance when cutting (calibration). The laser cutter is still in the process of arriving at my institution IESP “Francisco de Paula Gonzales Vigil”.
-
We searched the city for companies that do this work and we found two. Laser cutting work here in Tacna, Peru is between 1.50 and 2.50 soles per minute. We decided to make the laser cut, which would logically charge 1.50 soles/minute.
-
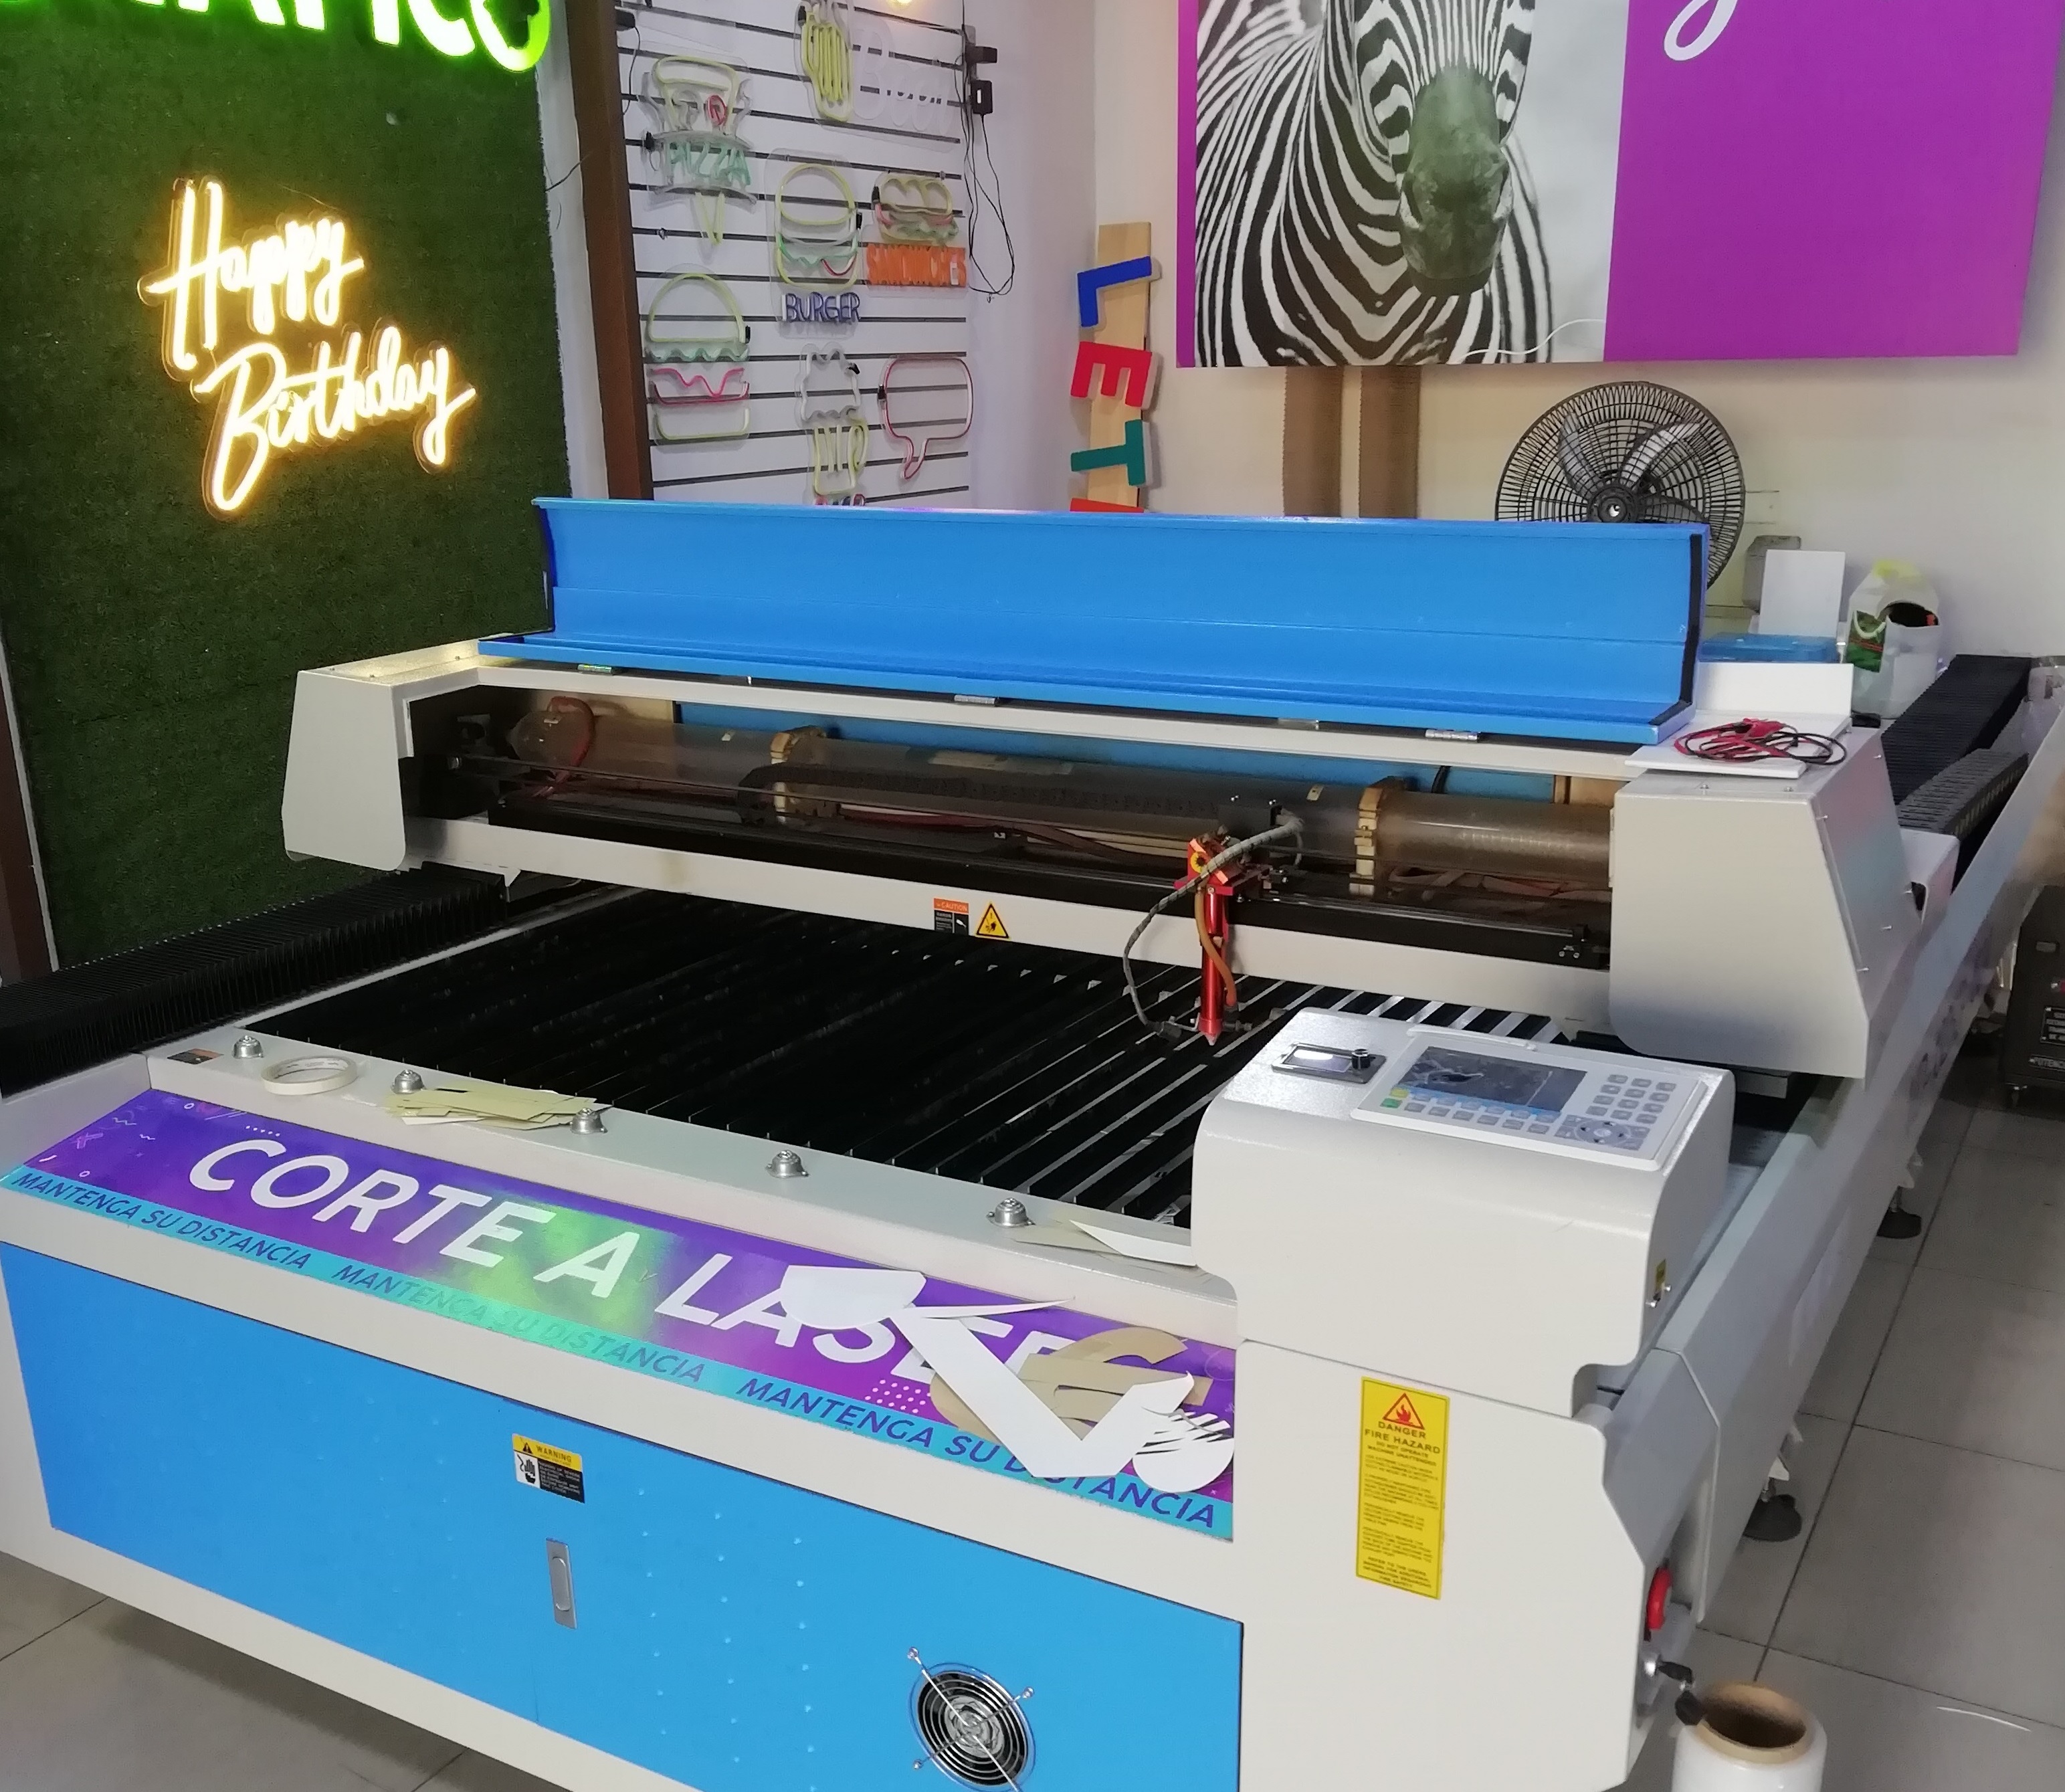
According to the owner, the laser cutter is Bodor Laser brand of Chinese origin, with a 60 x 90 format. An image is shown:
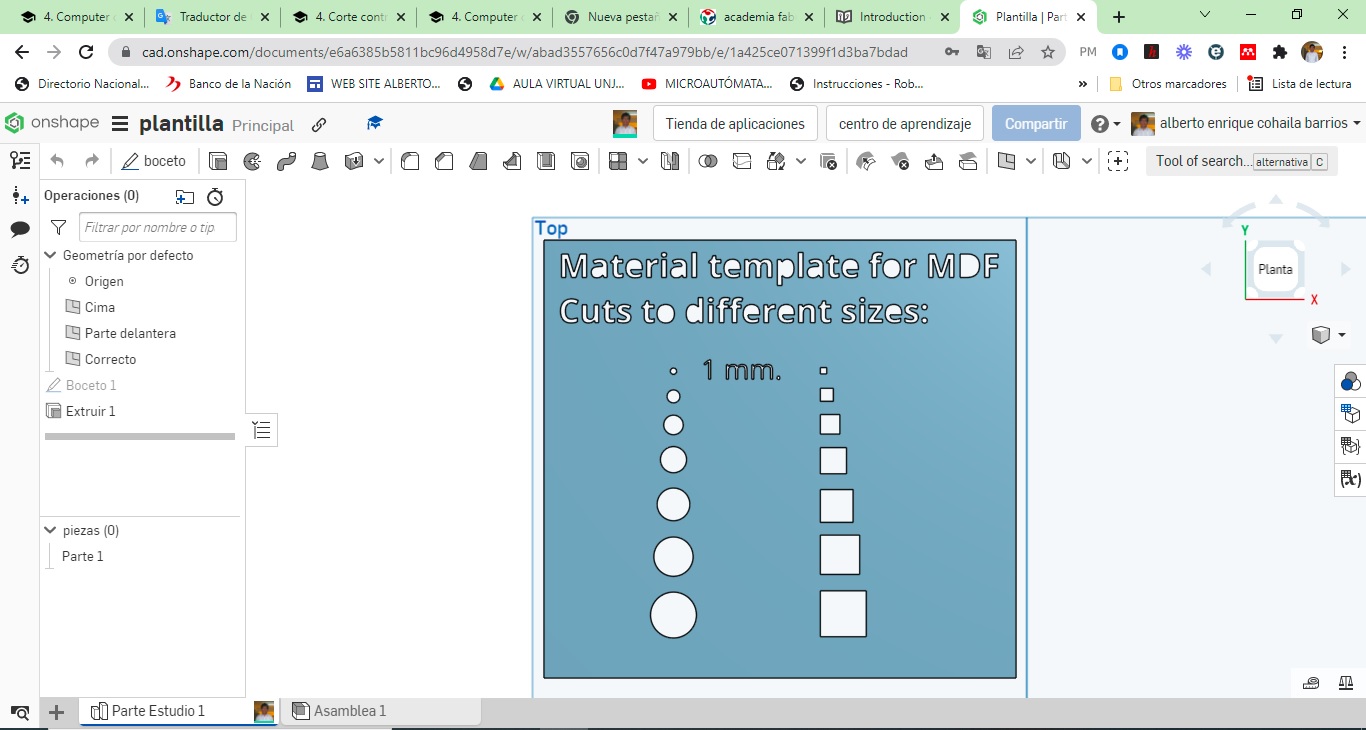
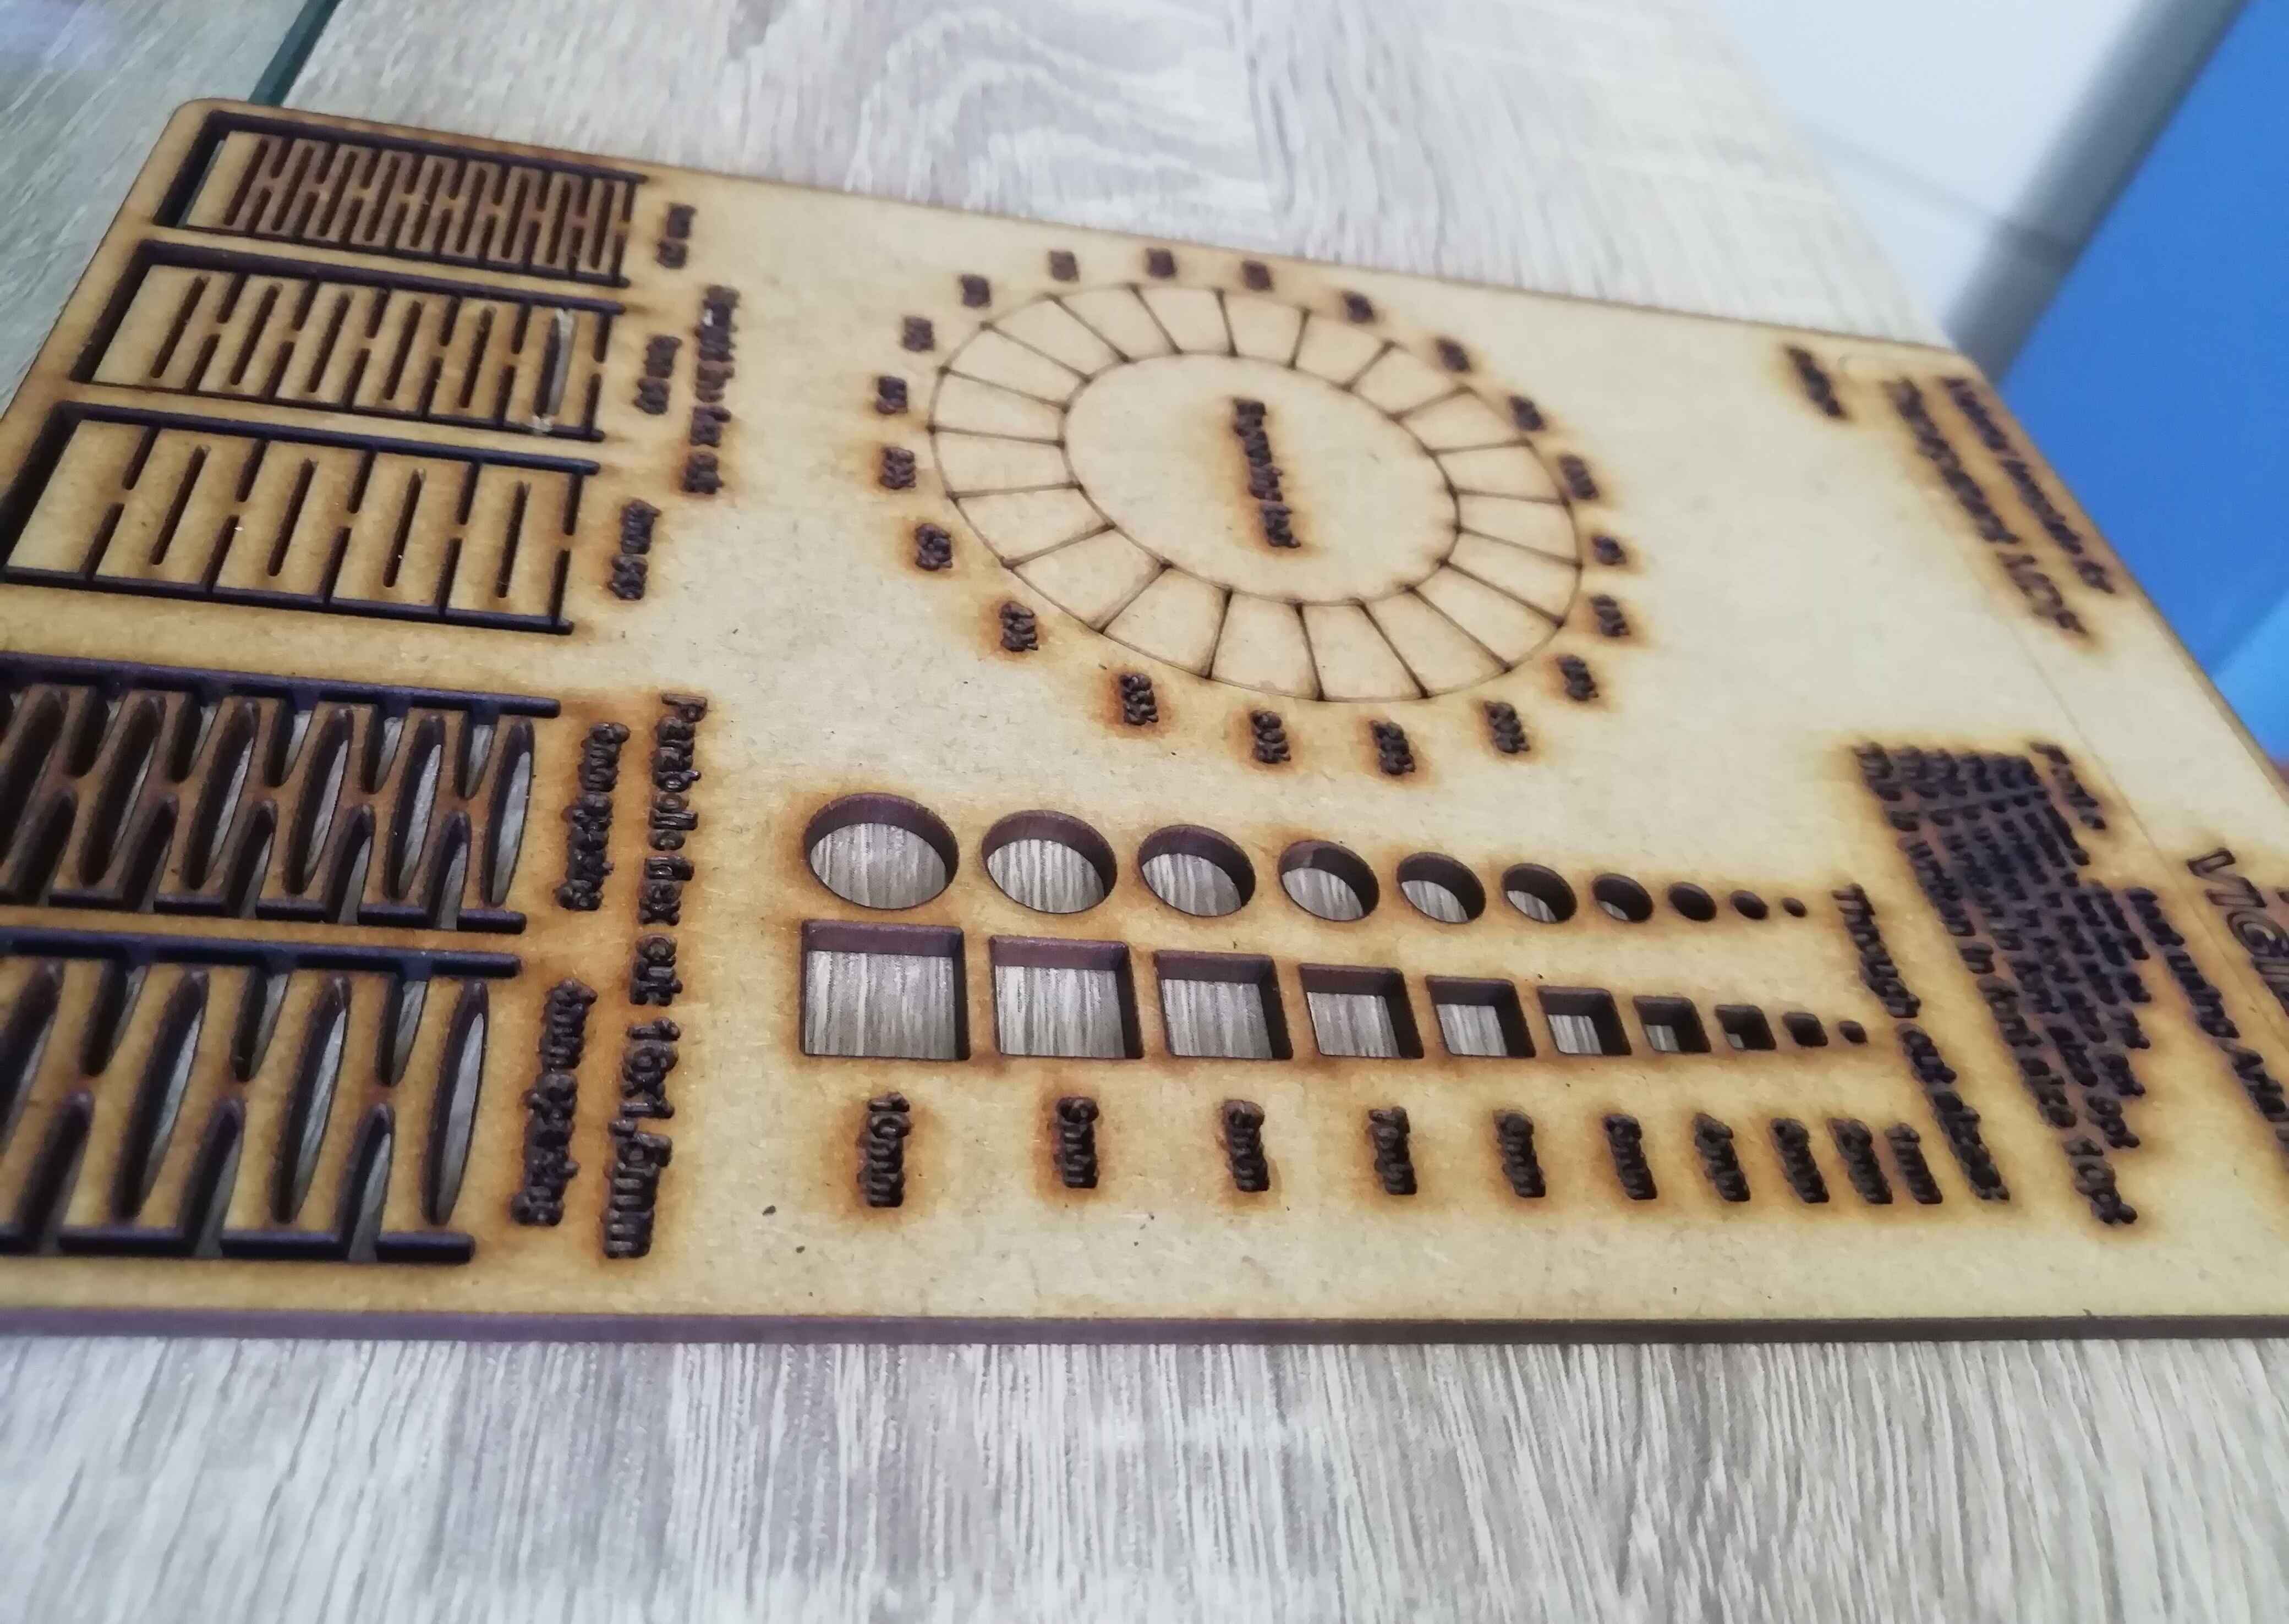
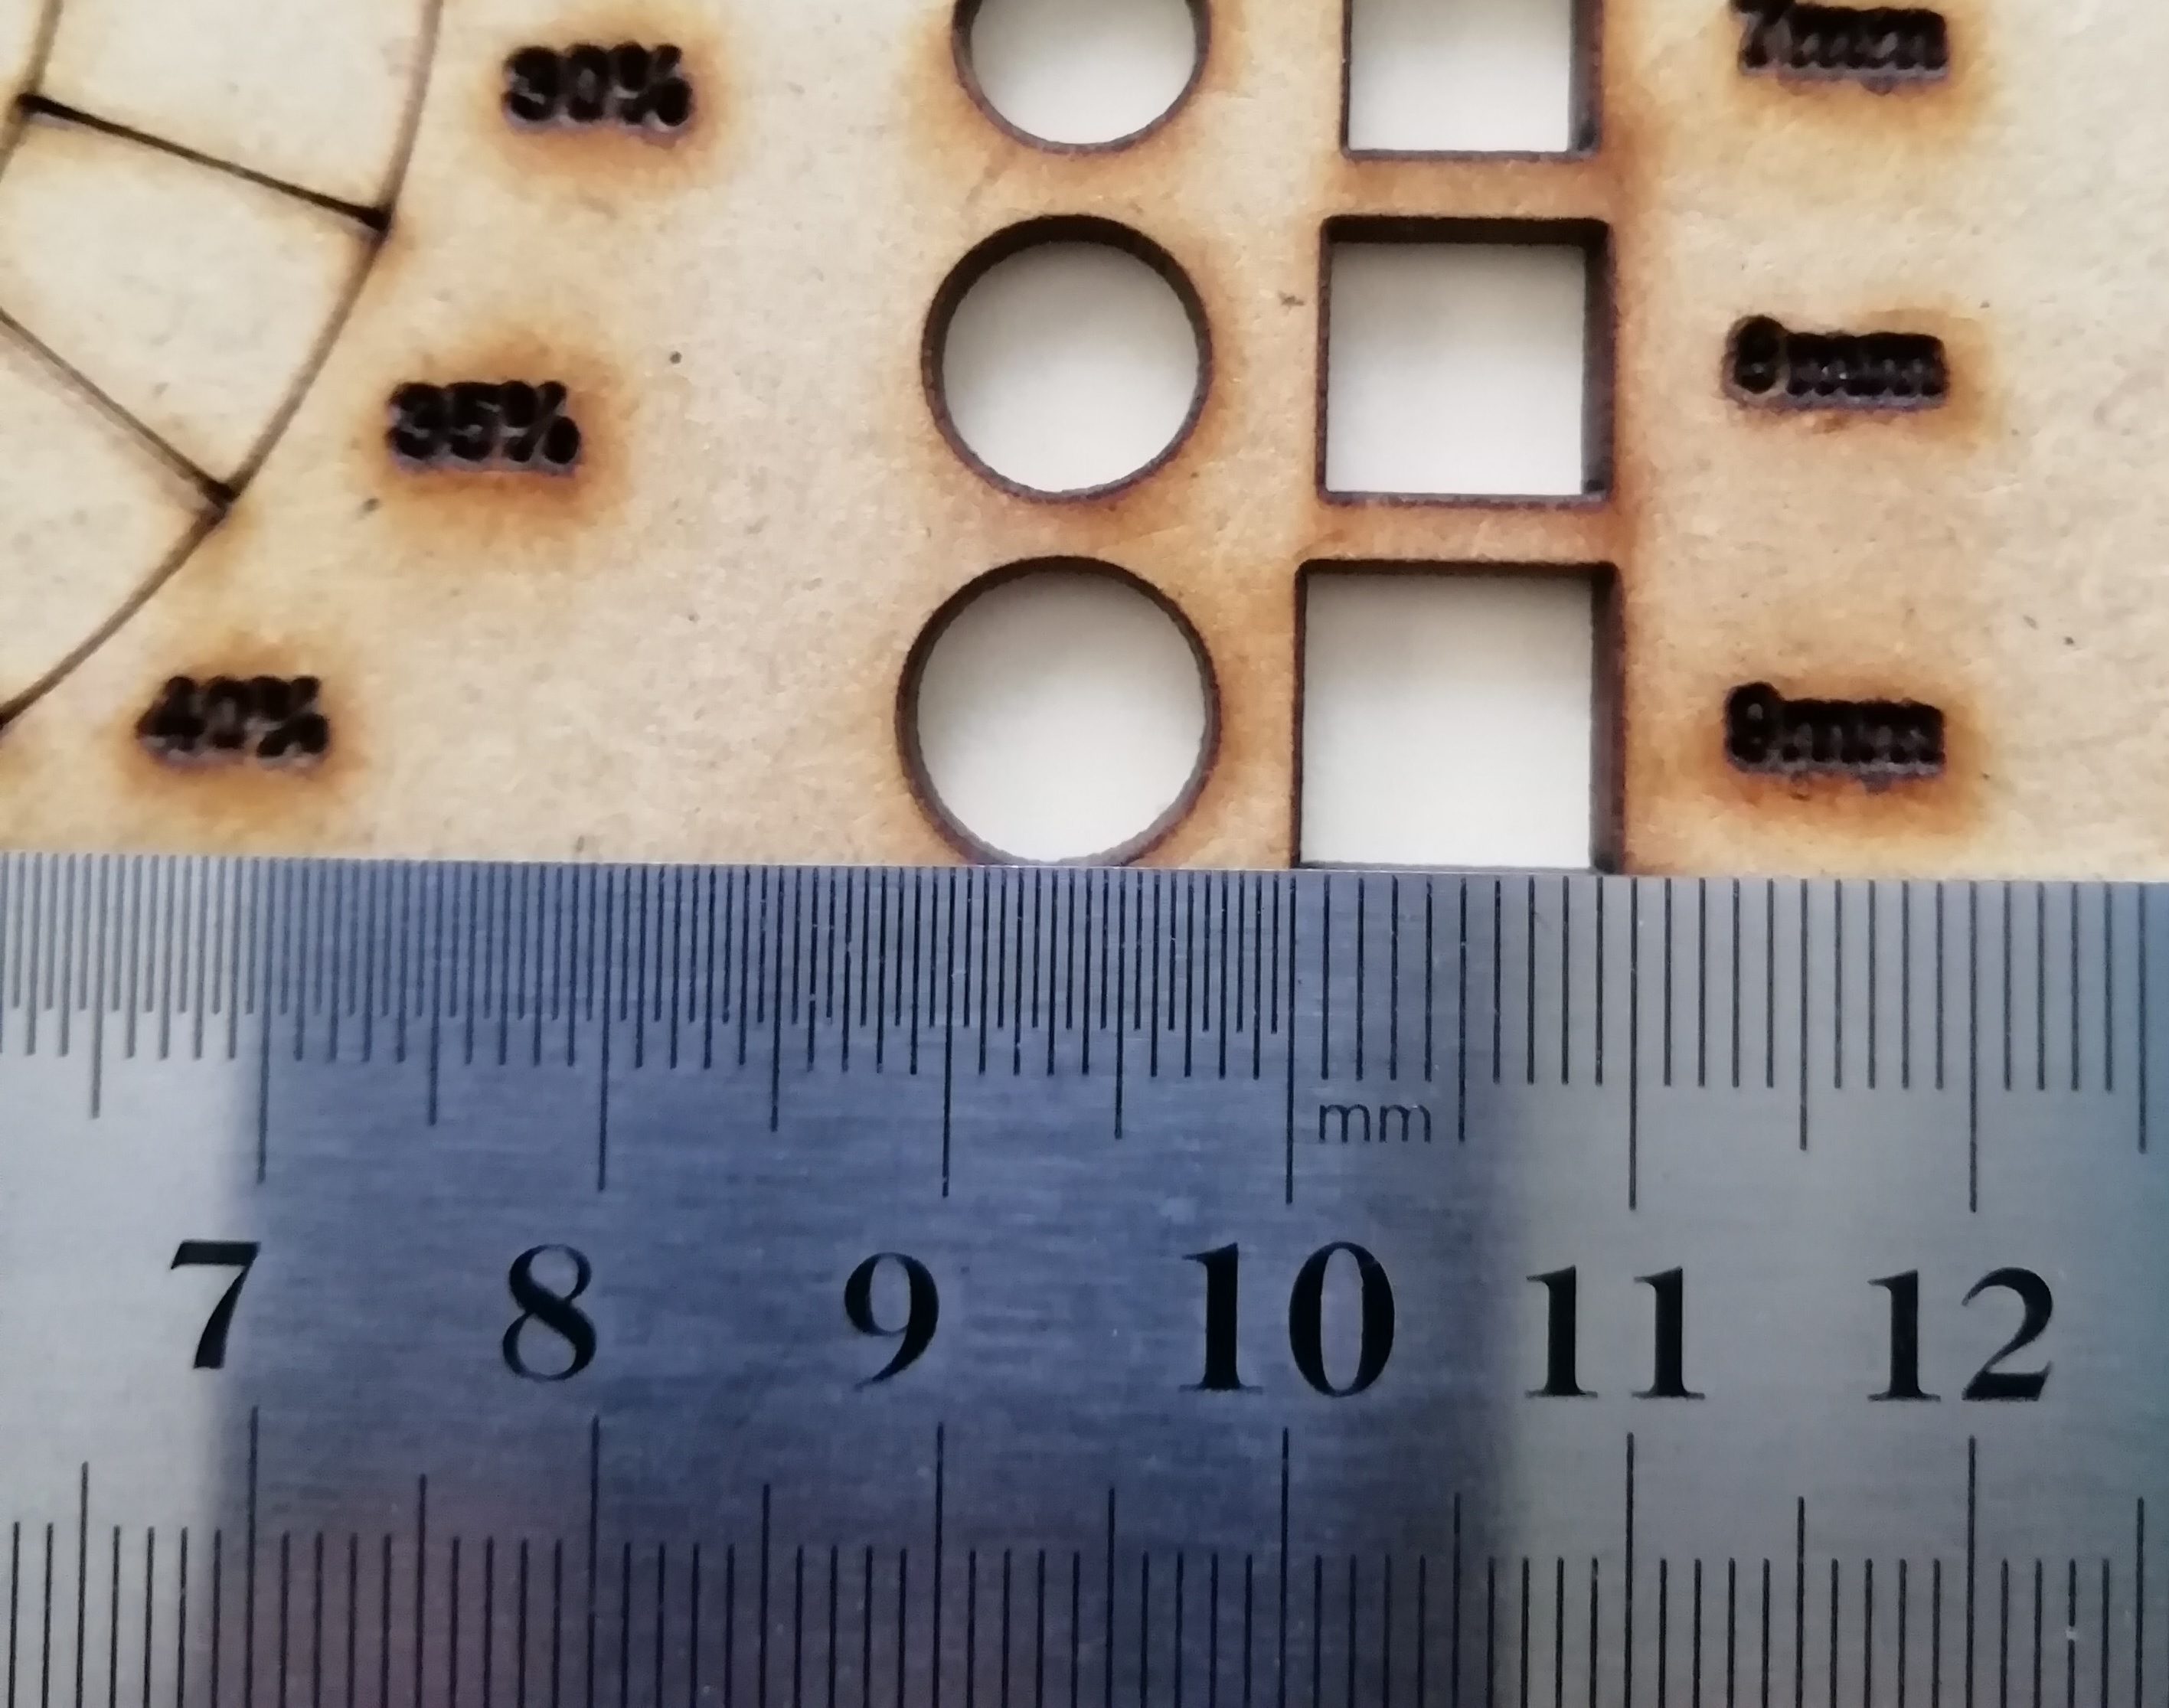
- Firstly, to make the characterization, we look for a design pattern for cutting regular areas. A template was designed en Onshape with several cuts at different distances, for two pieces: circular and square: 1 mm a 7 mm.
- We coordinated with the businessman to test the power of our cutting template and he told us that he needed the file in CorelDRAW format.
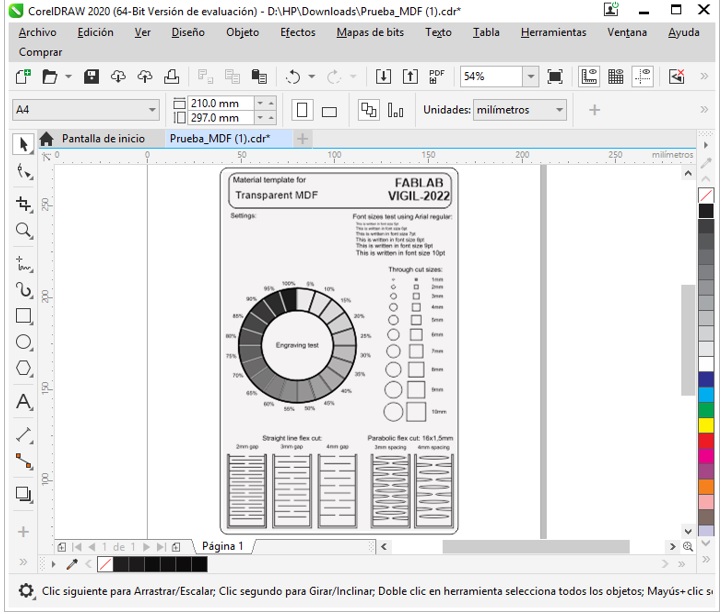
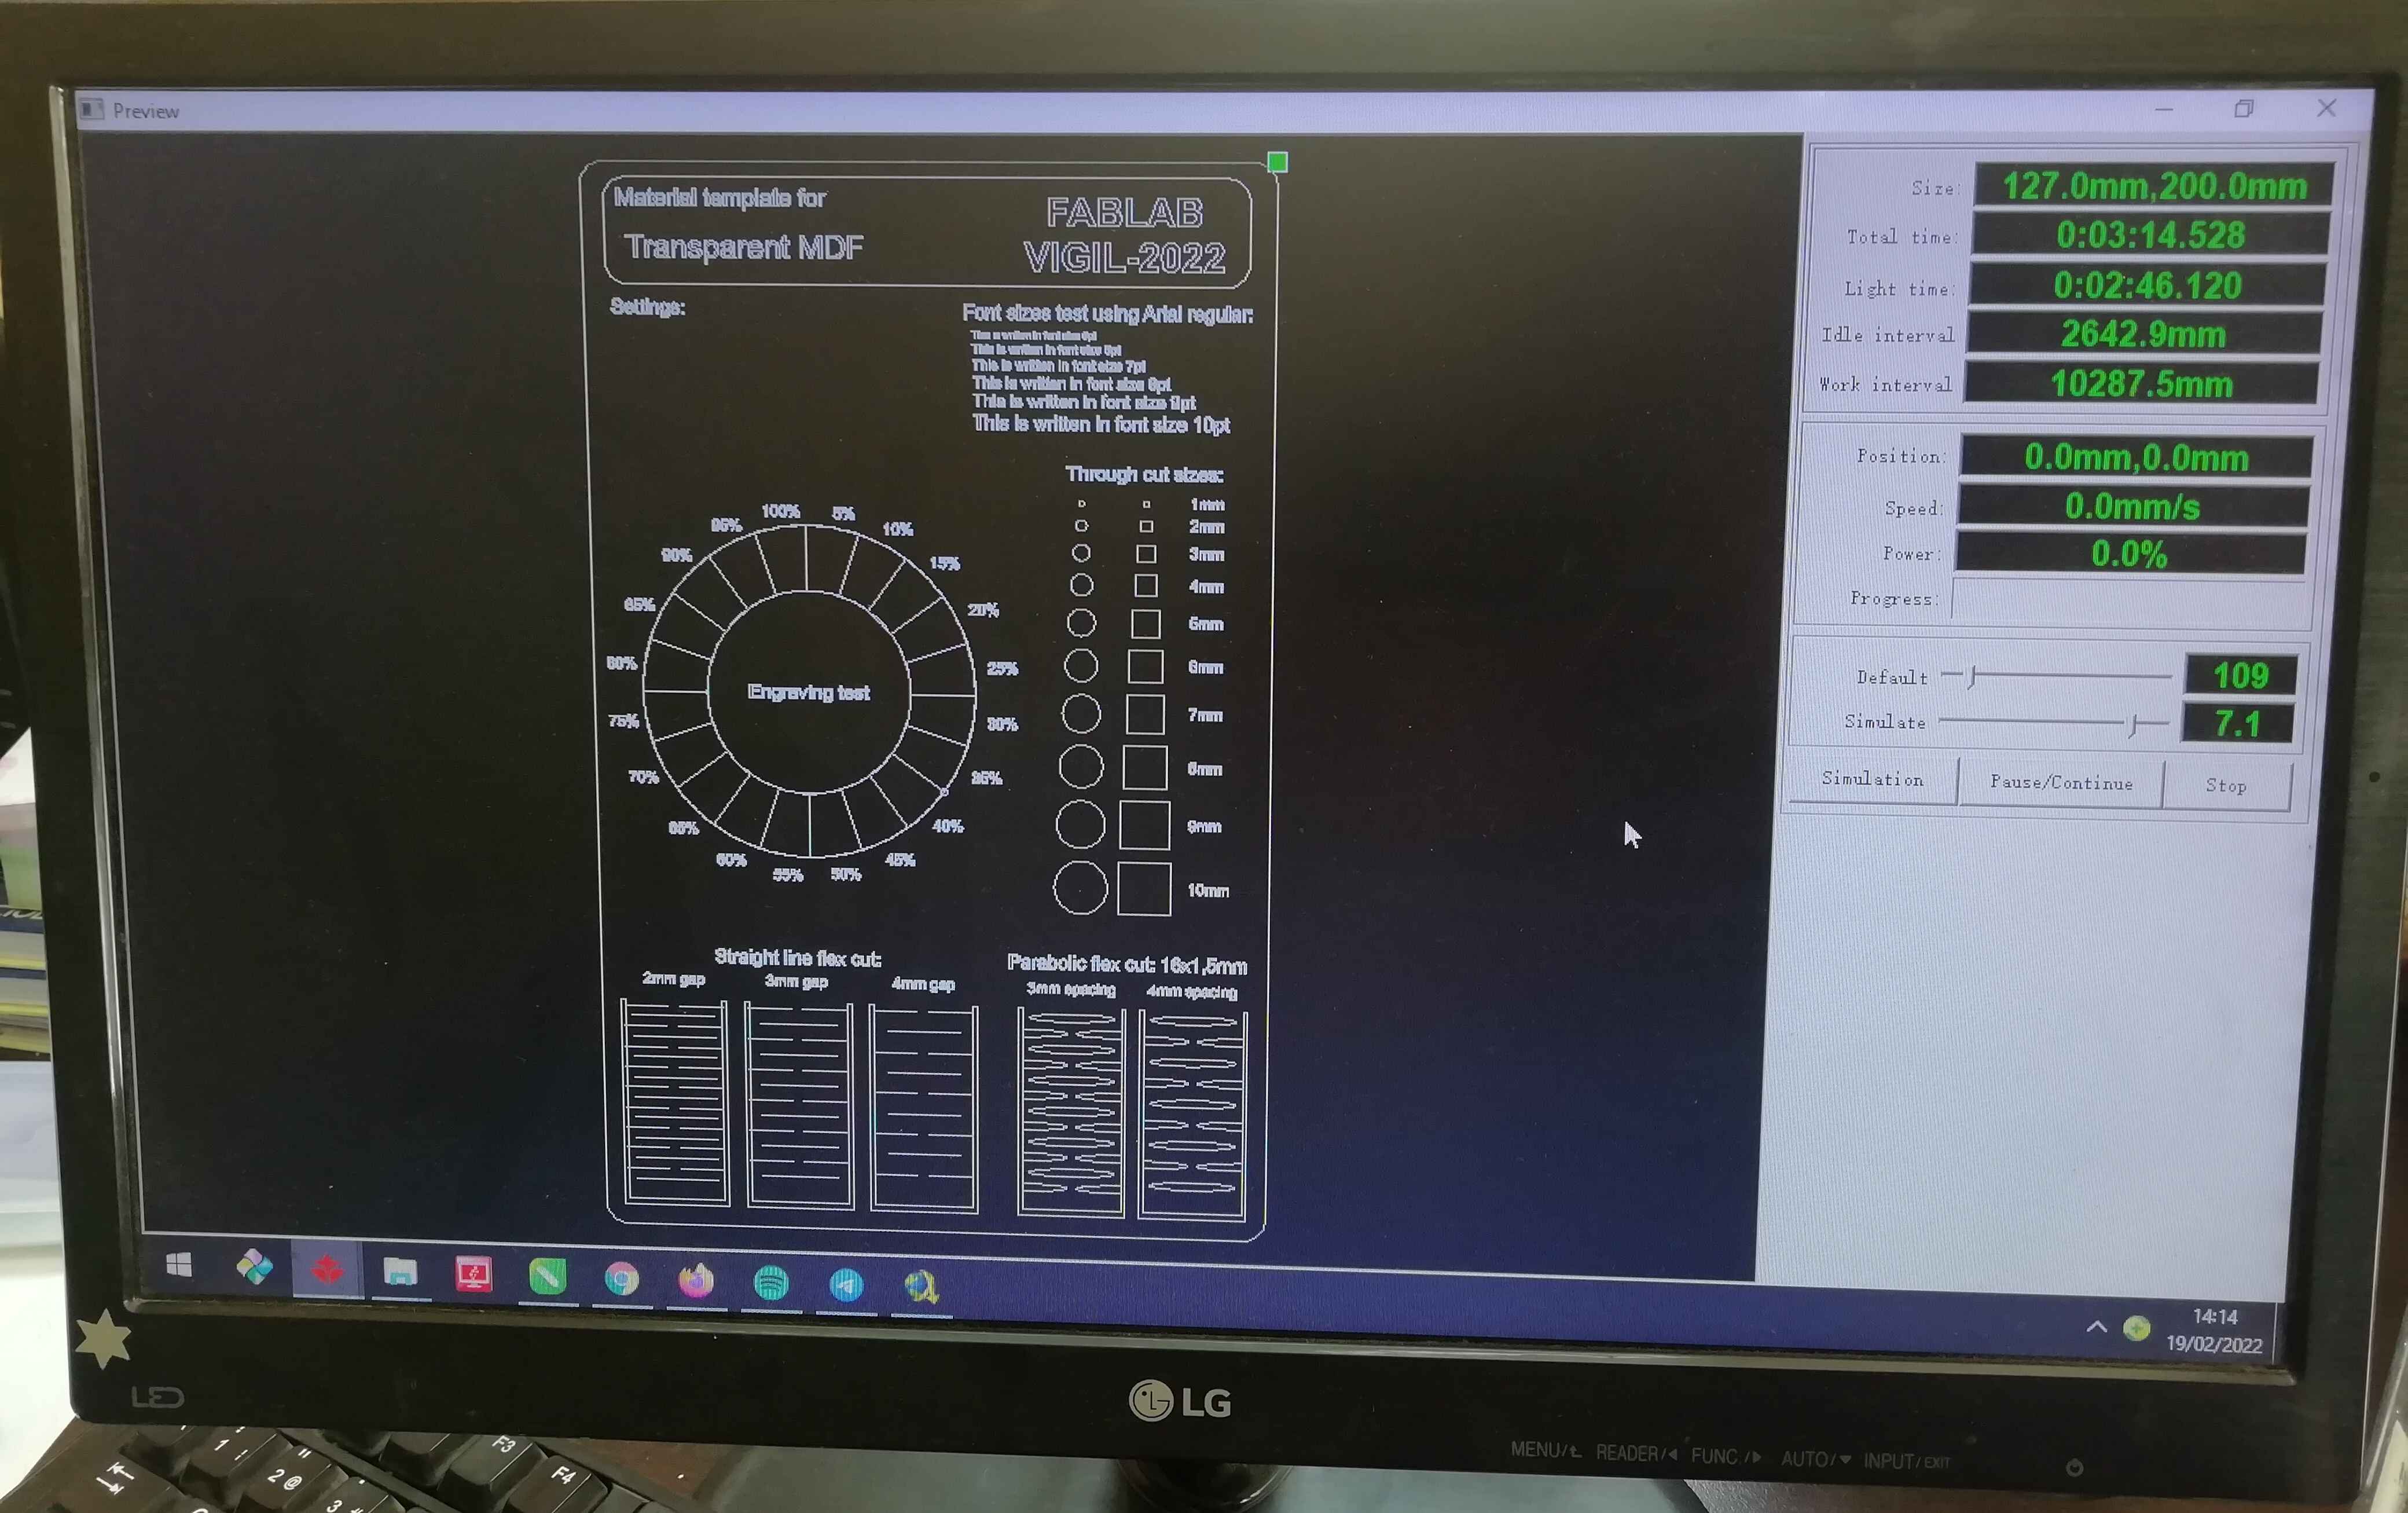
- As indicated, the laser cutter works with a power of 70% in MDF material. A preview image before laser cutting shows the estimated cutting time of 3.14 minutes for the 120 mm x 200 mm format.
- An image of the cutting process of the template in MDF material.
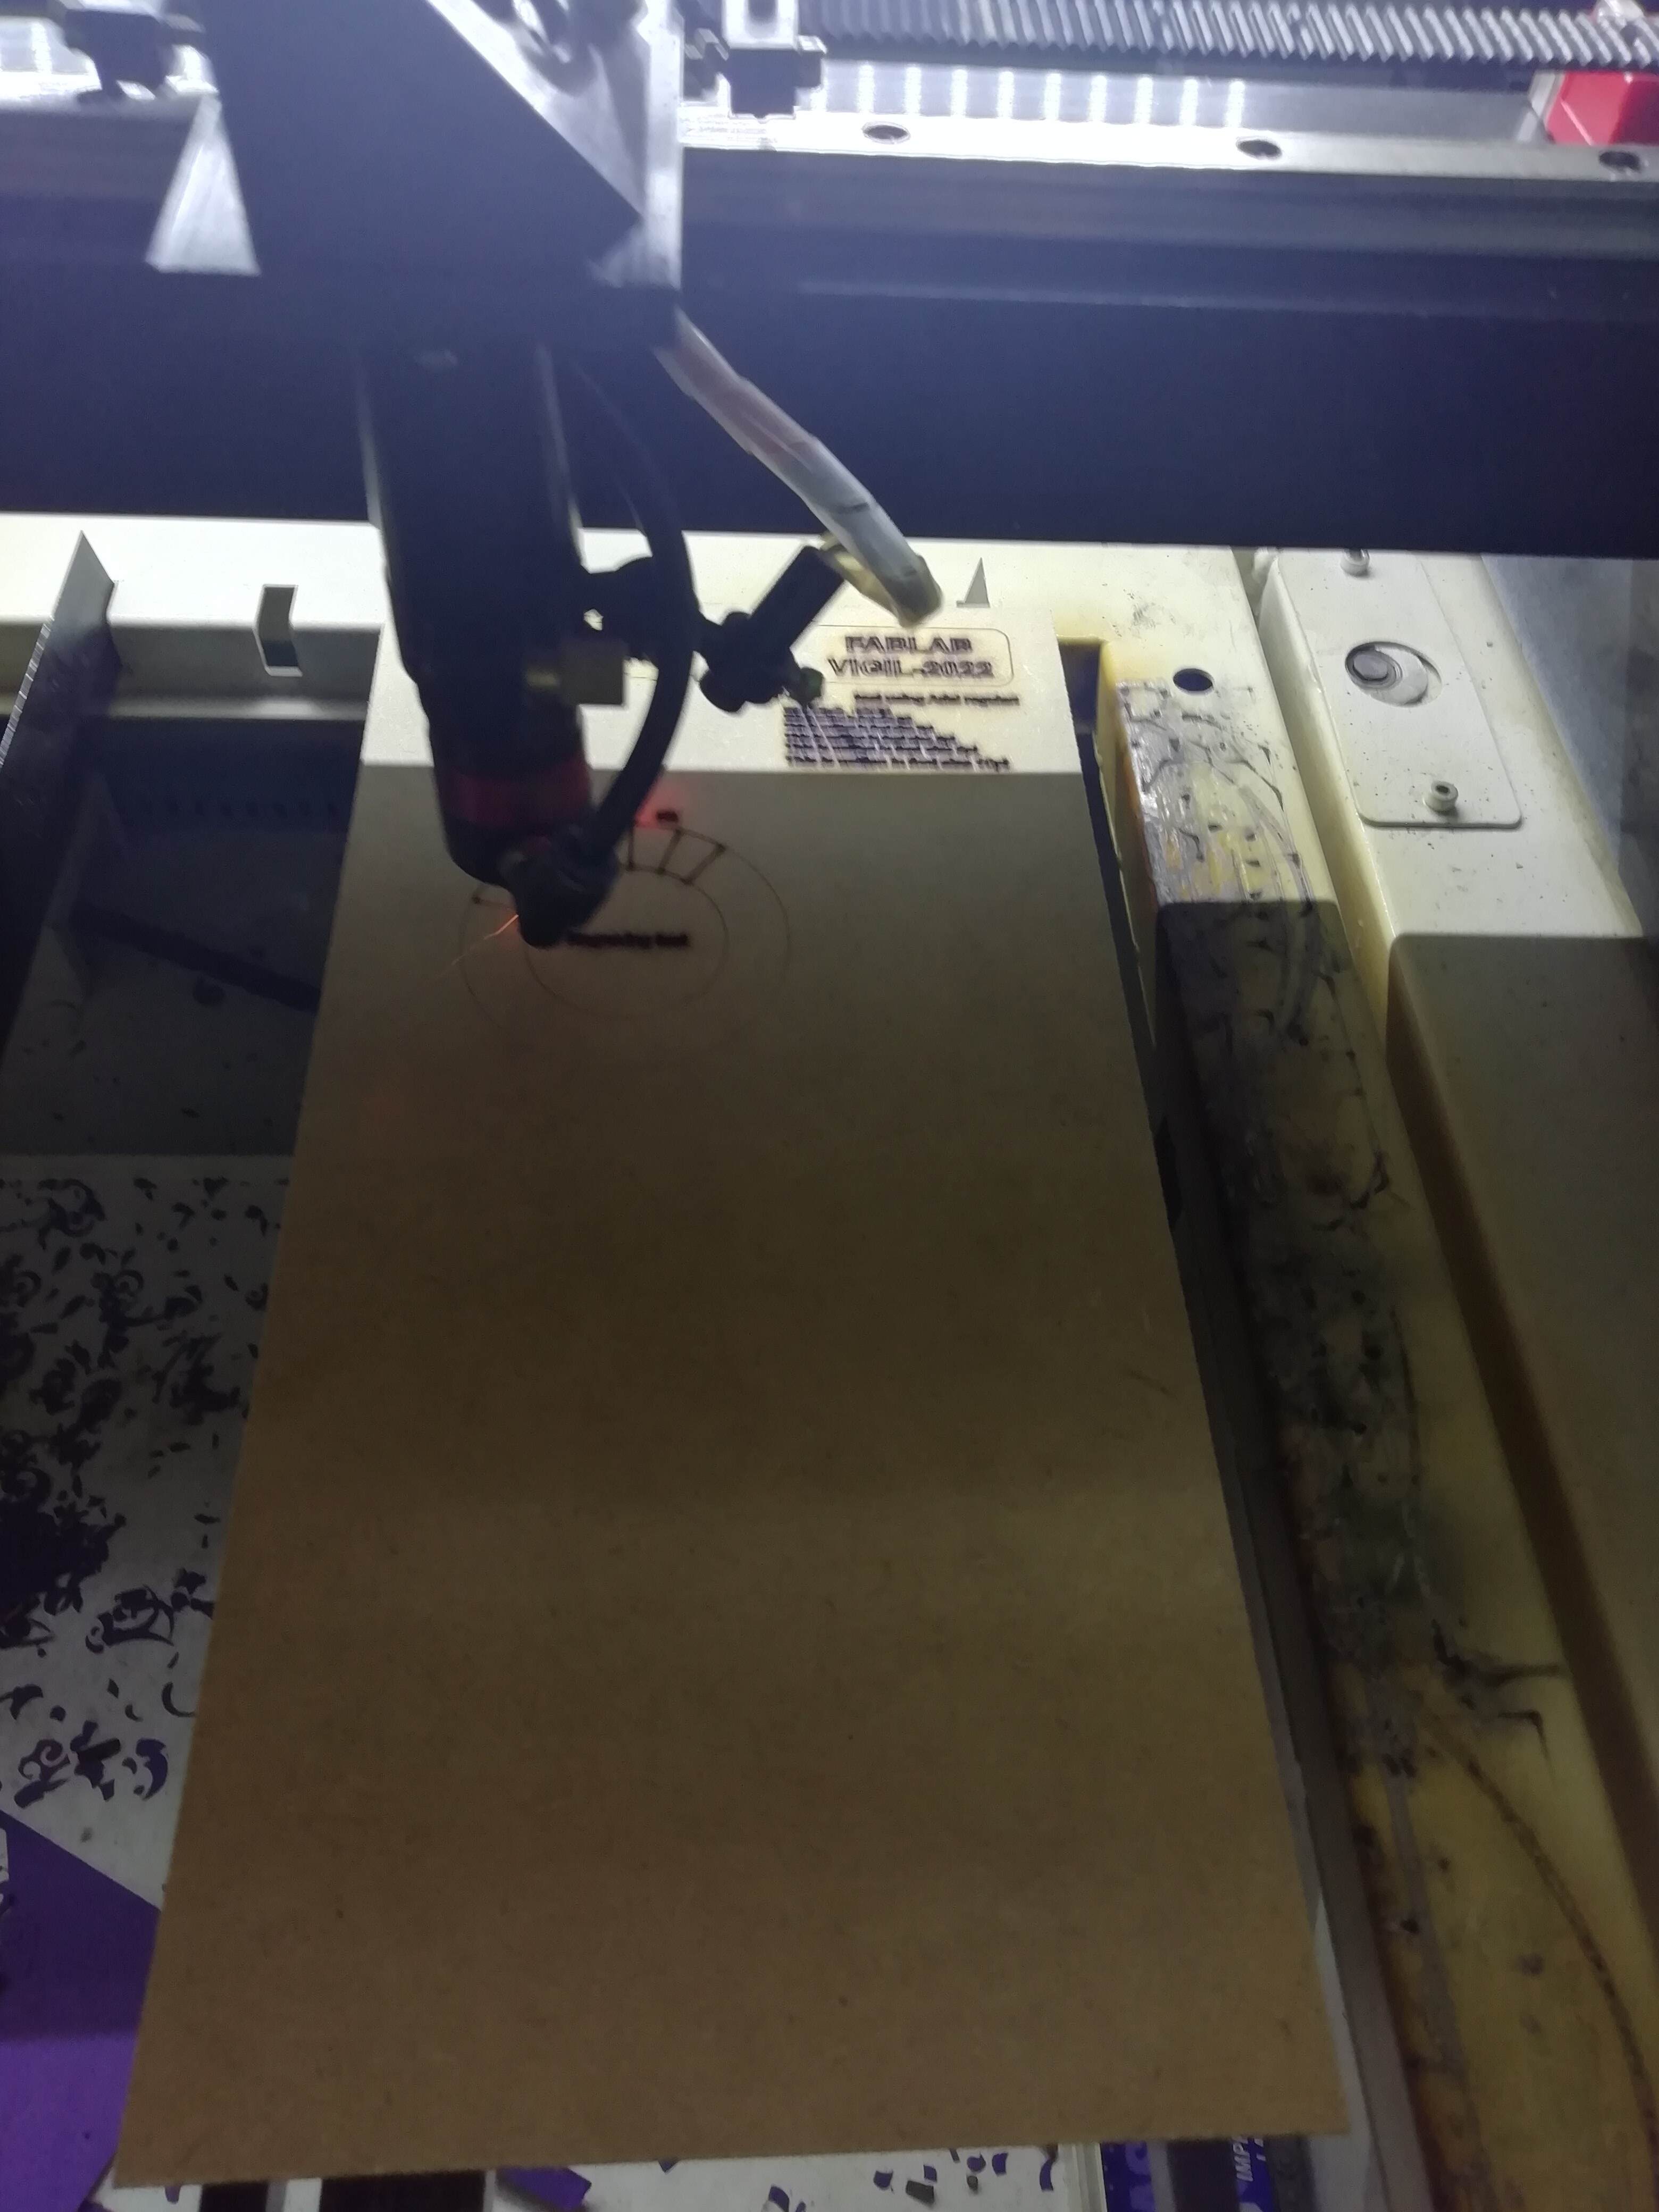
- This is a short video showing the laser cutting process.
- This is how the cut is at a depth of 2.8 mm. Typical smell of burnt wood after laser cutting.

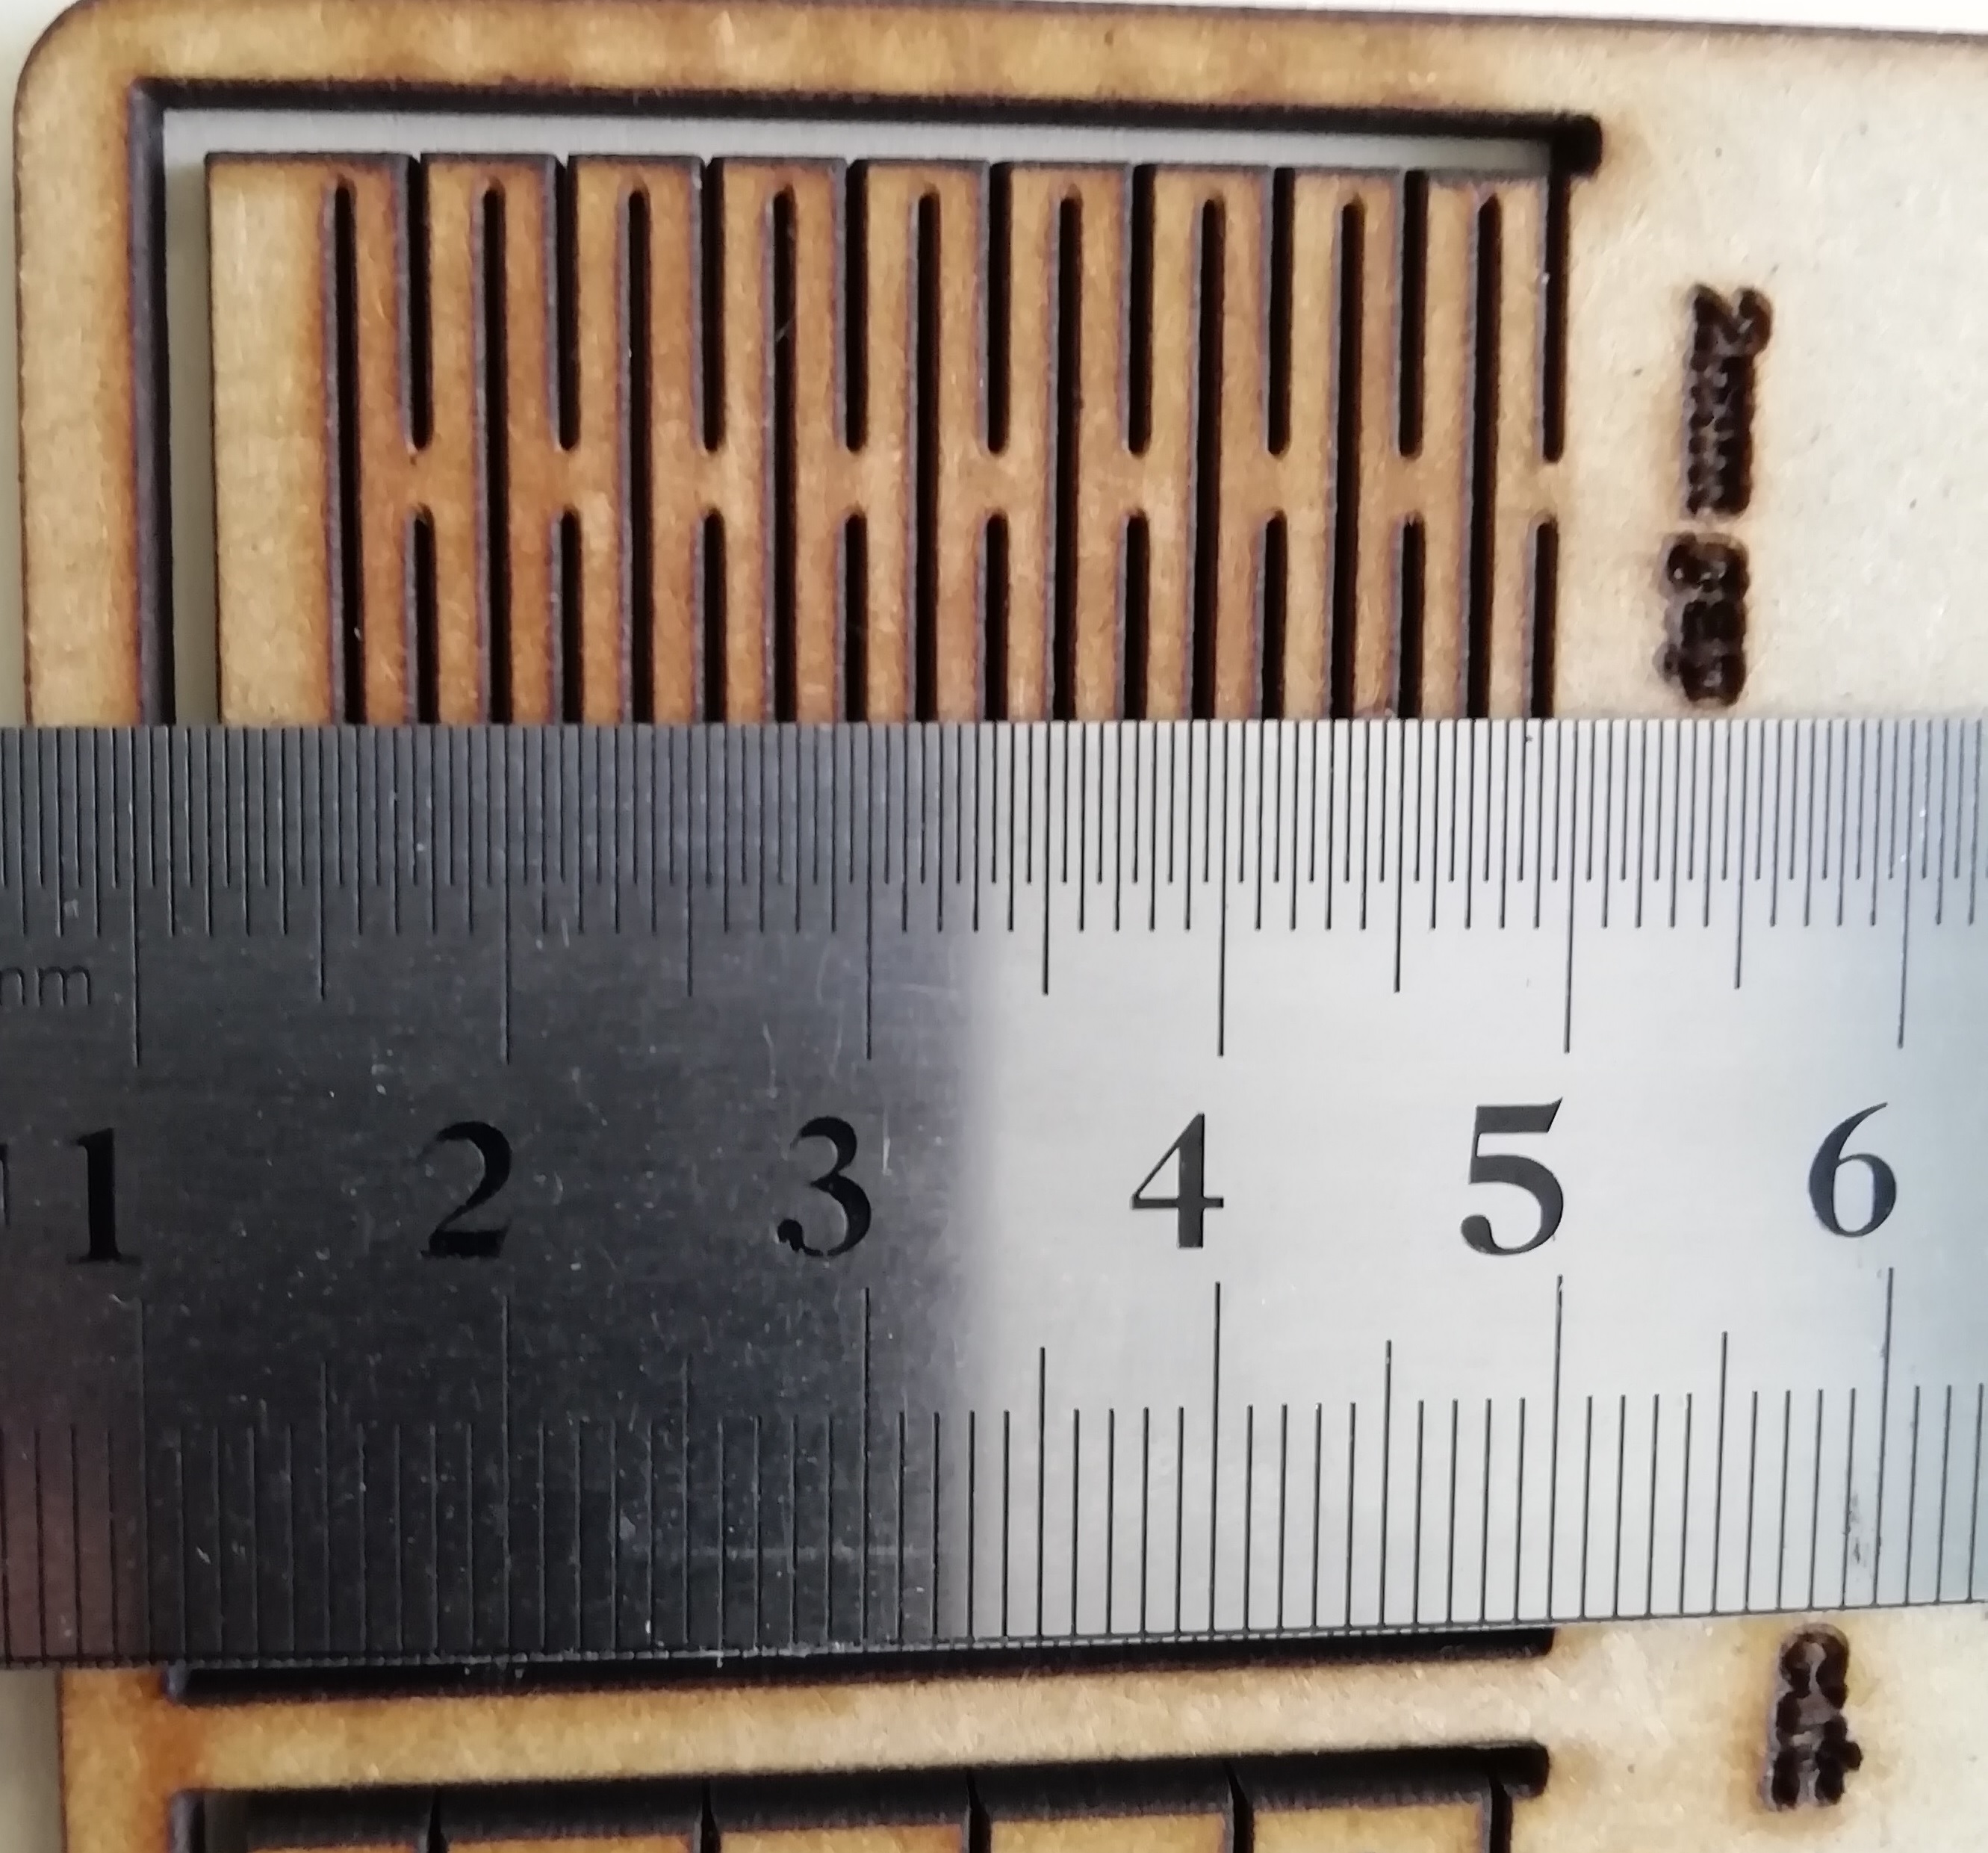
- A side view of the cut.
- Verifying the measurements with the metric ruler with 0.5 mm accuracy (we did not have the Vernier at hand). Measuring to 2mm.
- Measuring to 7mm, and
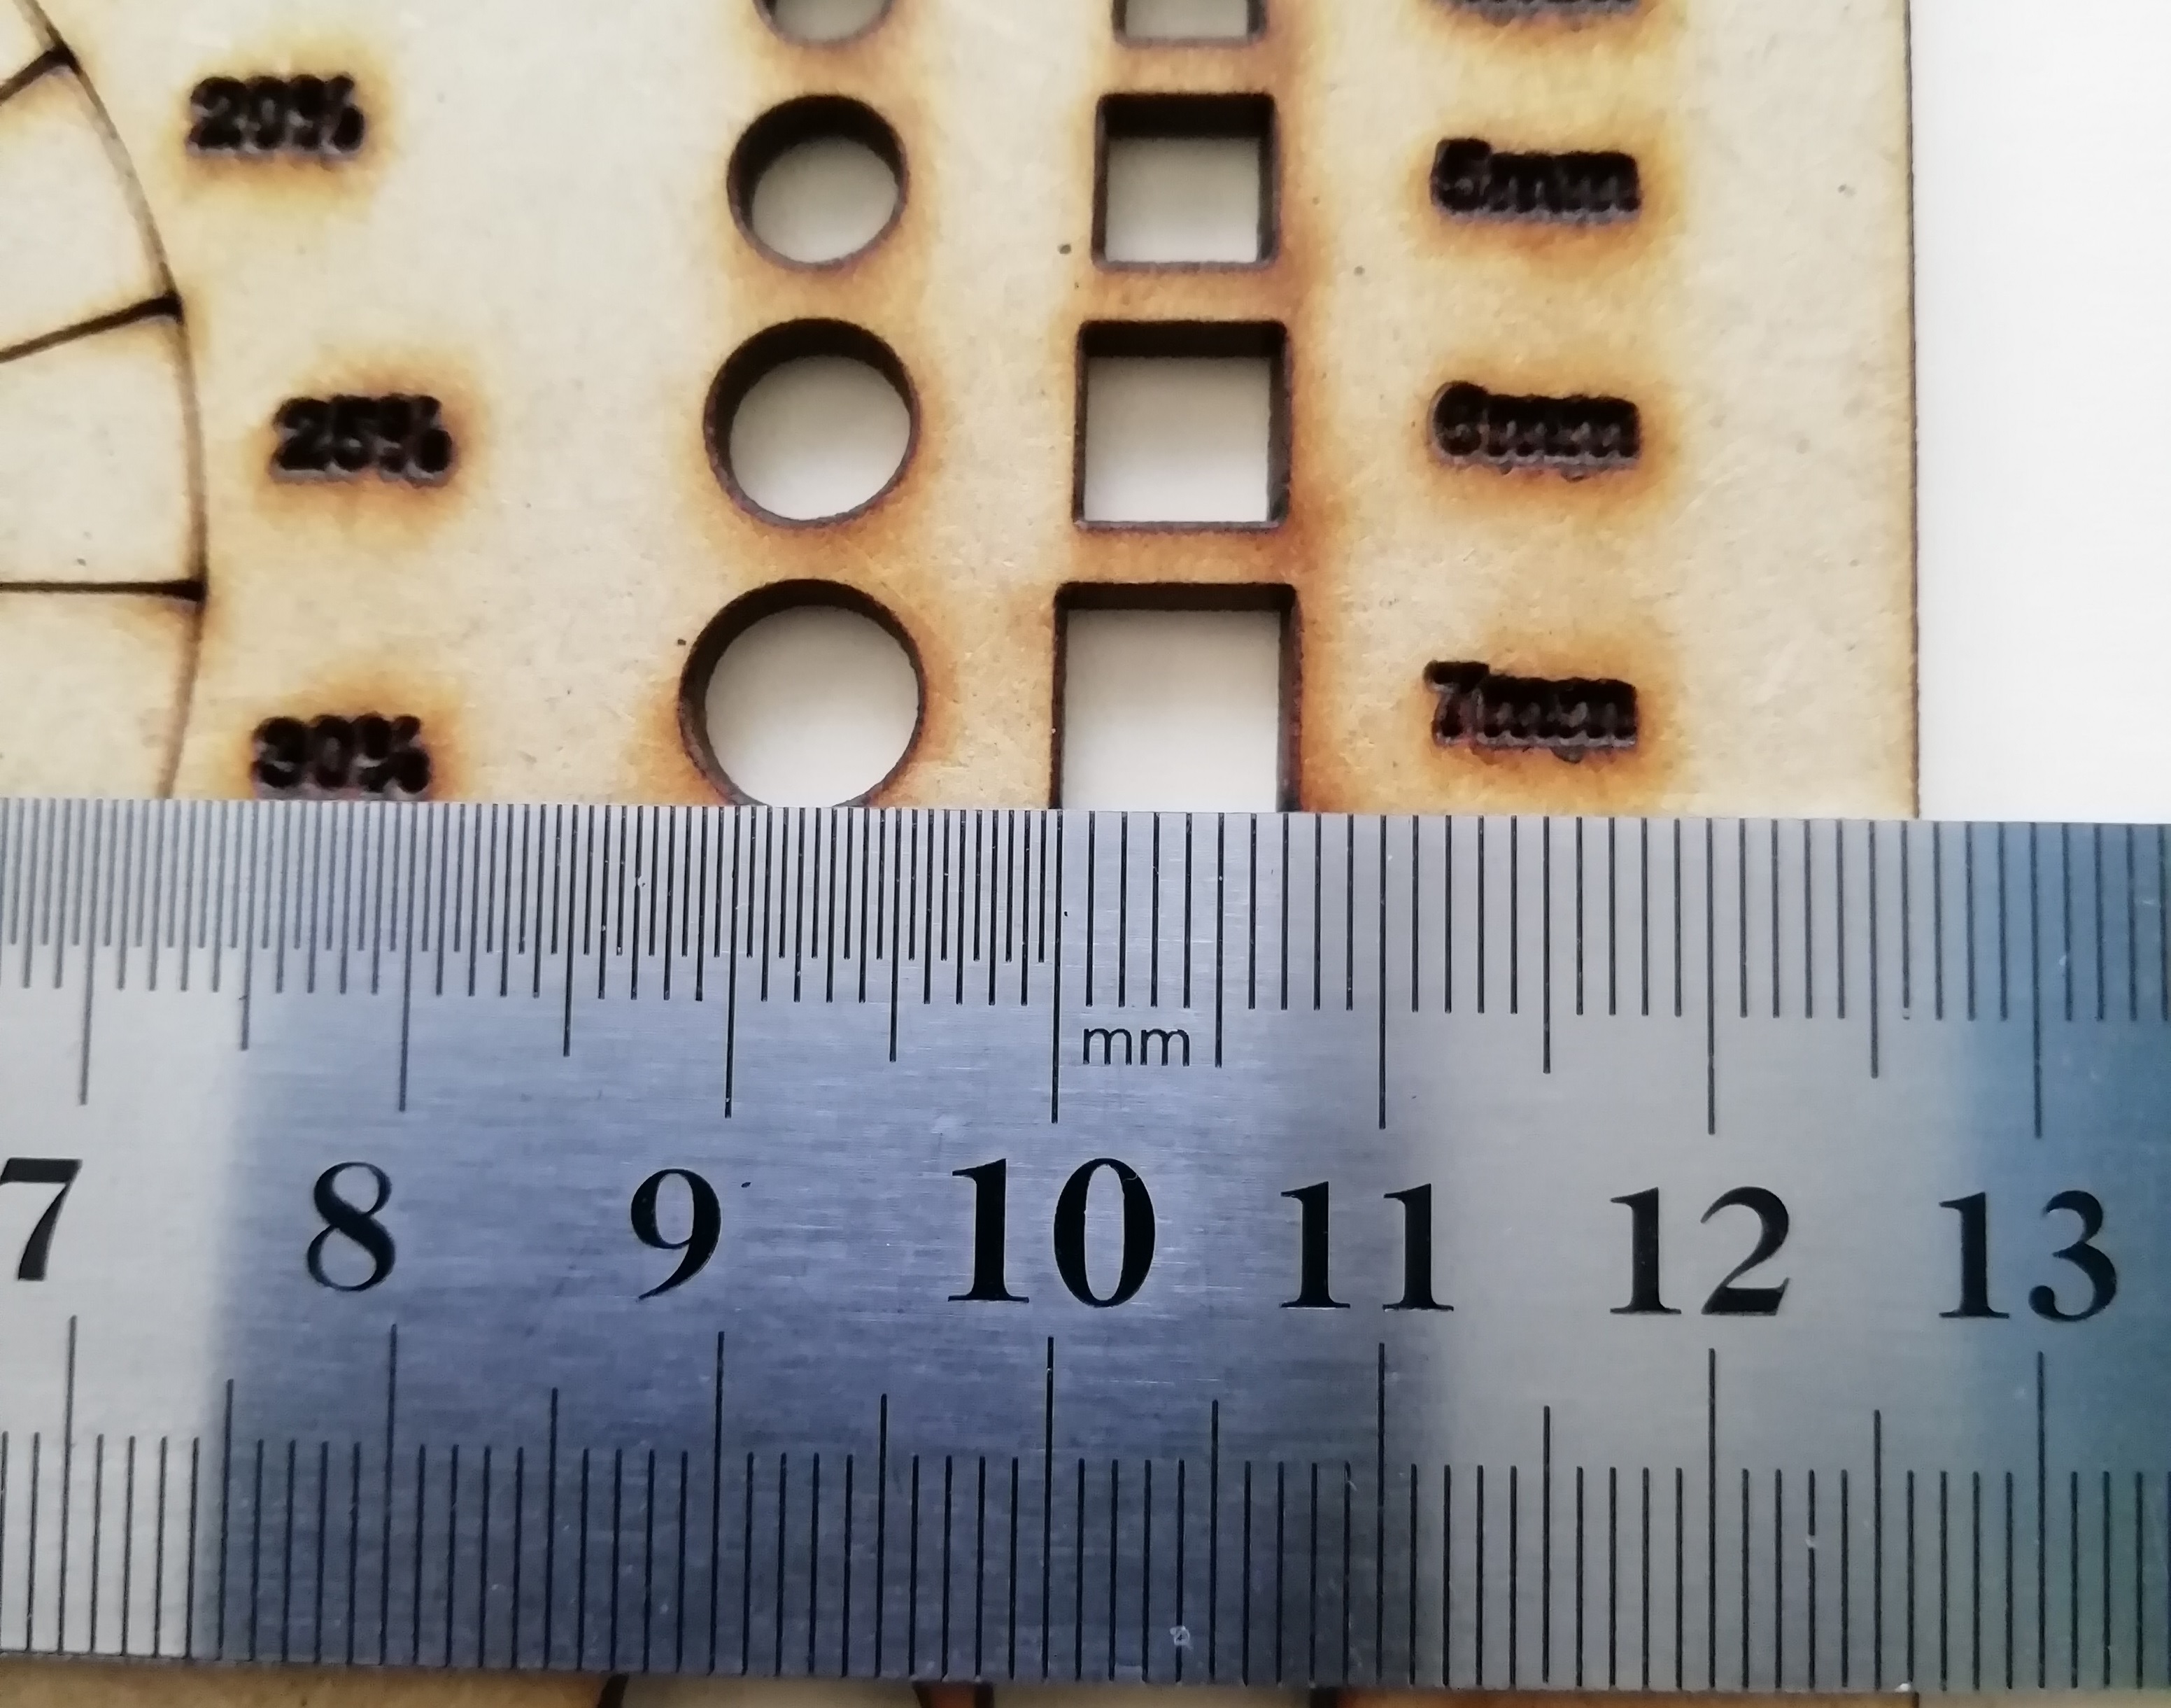
- Measuring to 9mm.
Working individually:
A. Design the Parametric Kit
-
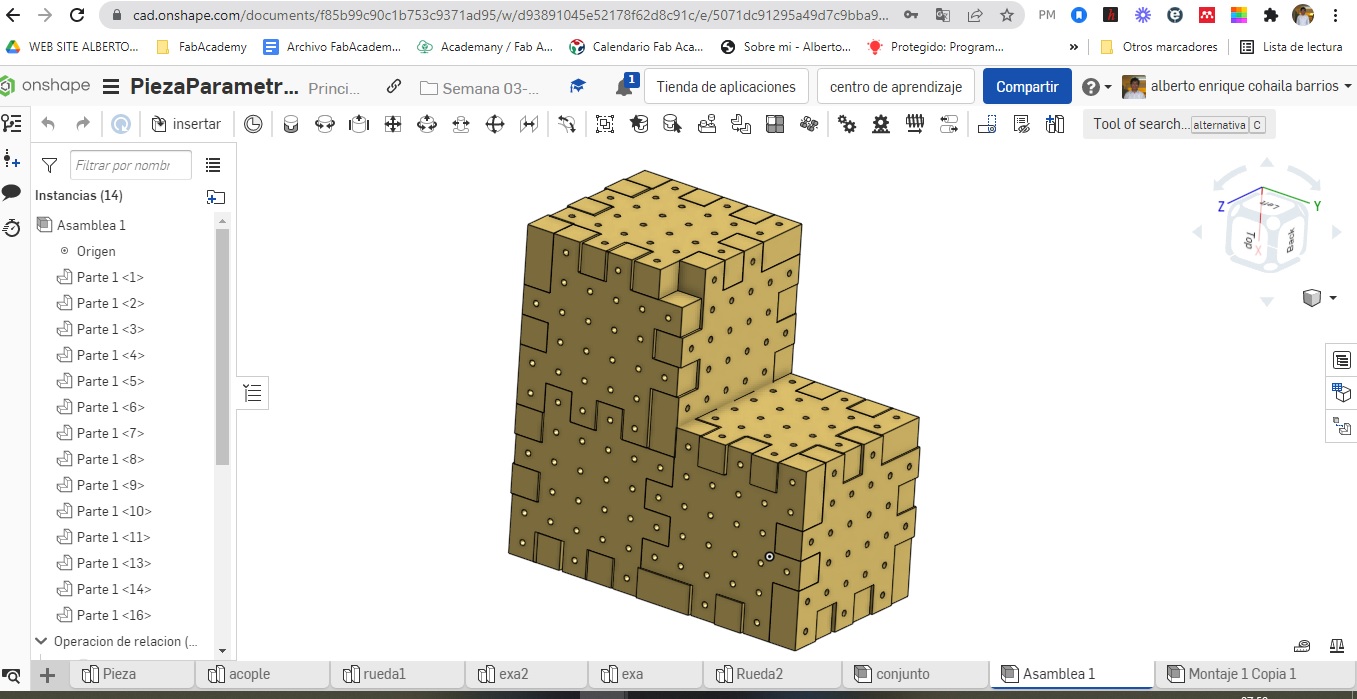
For the design of the parametric kit I am using Onshape software. It is composed of one piece, which are assembled and can form figures like cubes or other moving figures like a cart, etc.
-
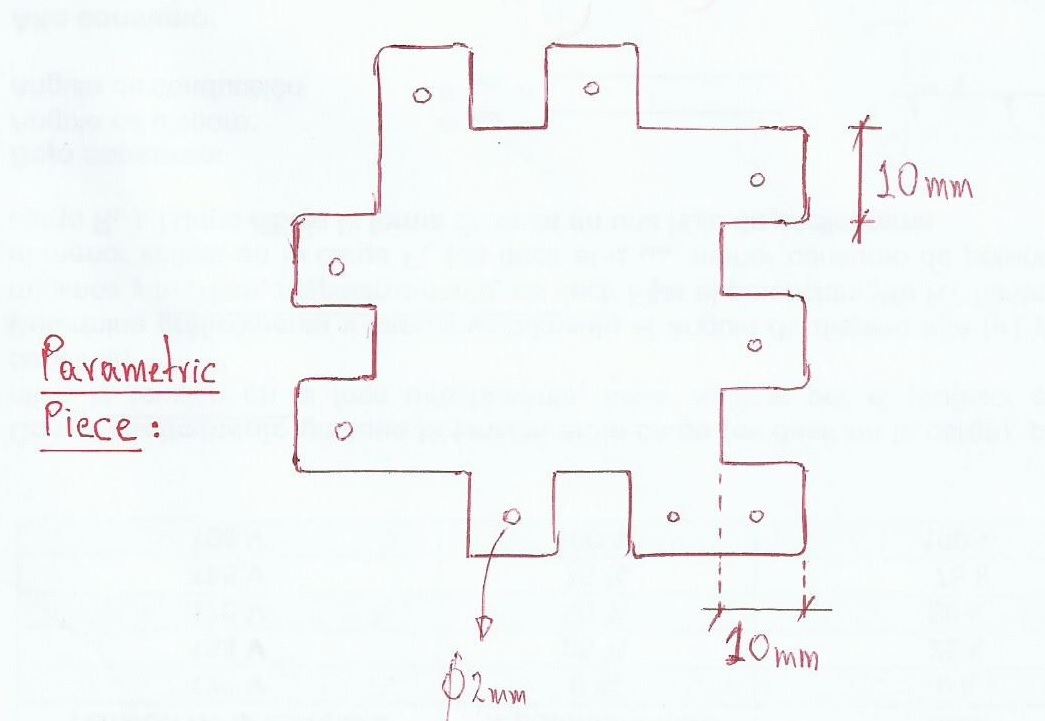
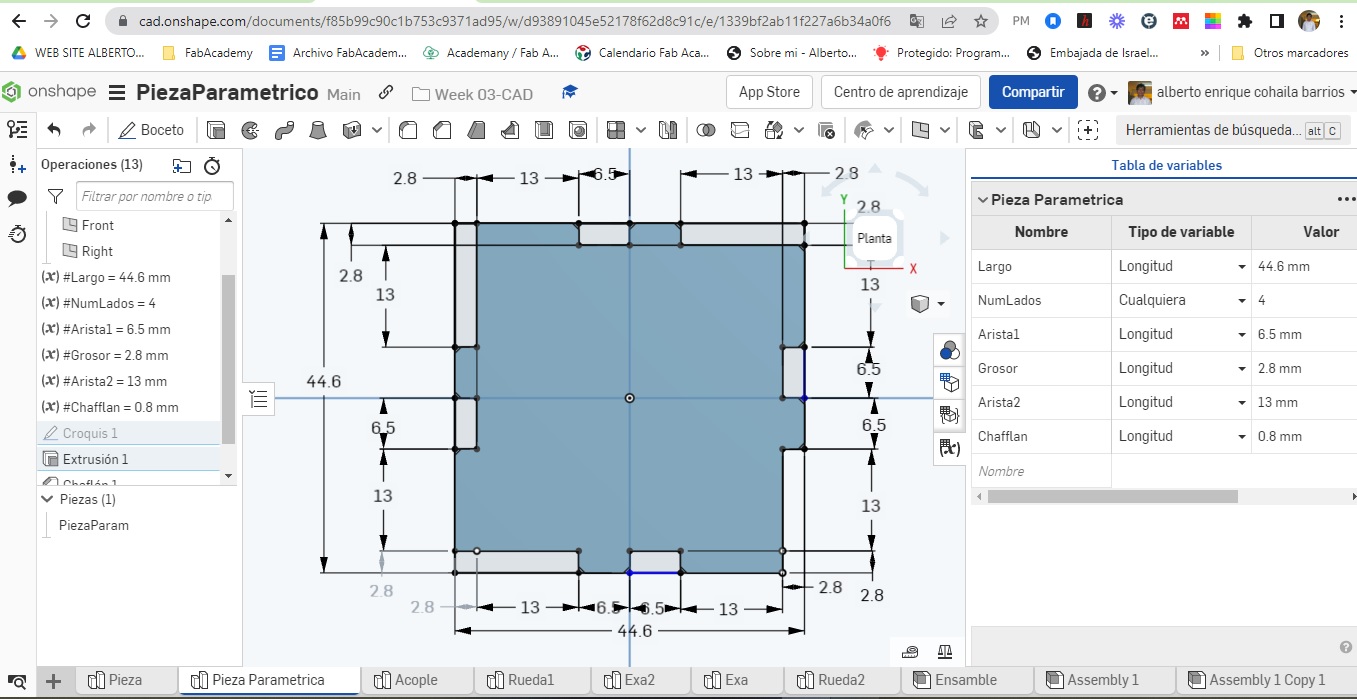
First I make the design of the pieces by hand on a sheet of paper. I give the measurements according to what I want. In this case 10 mm each small edge.
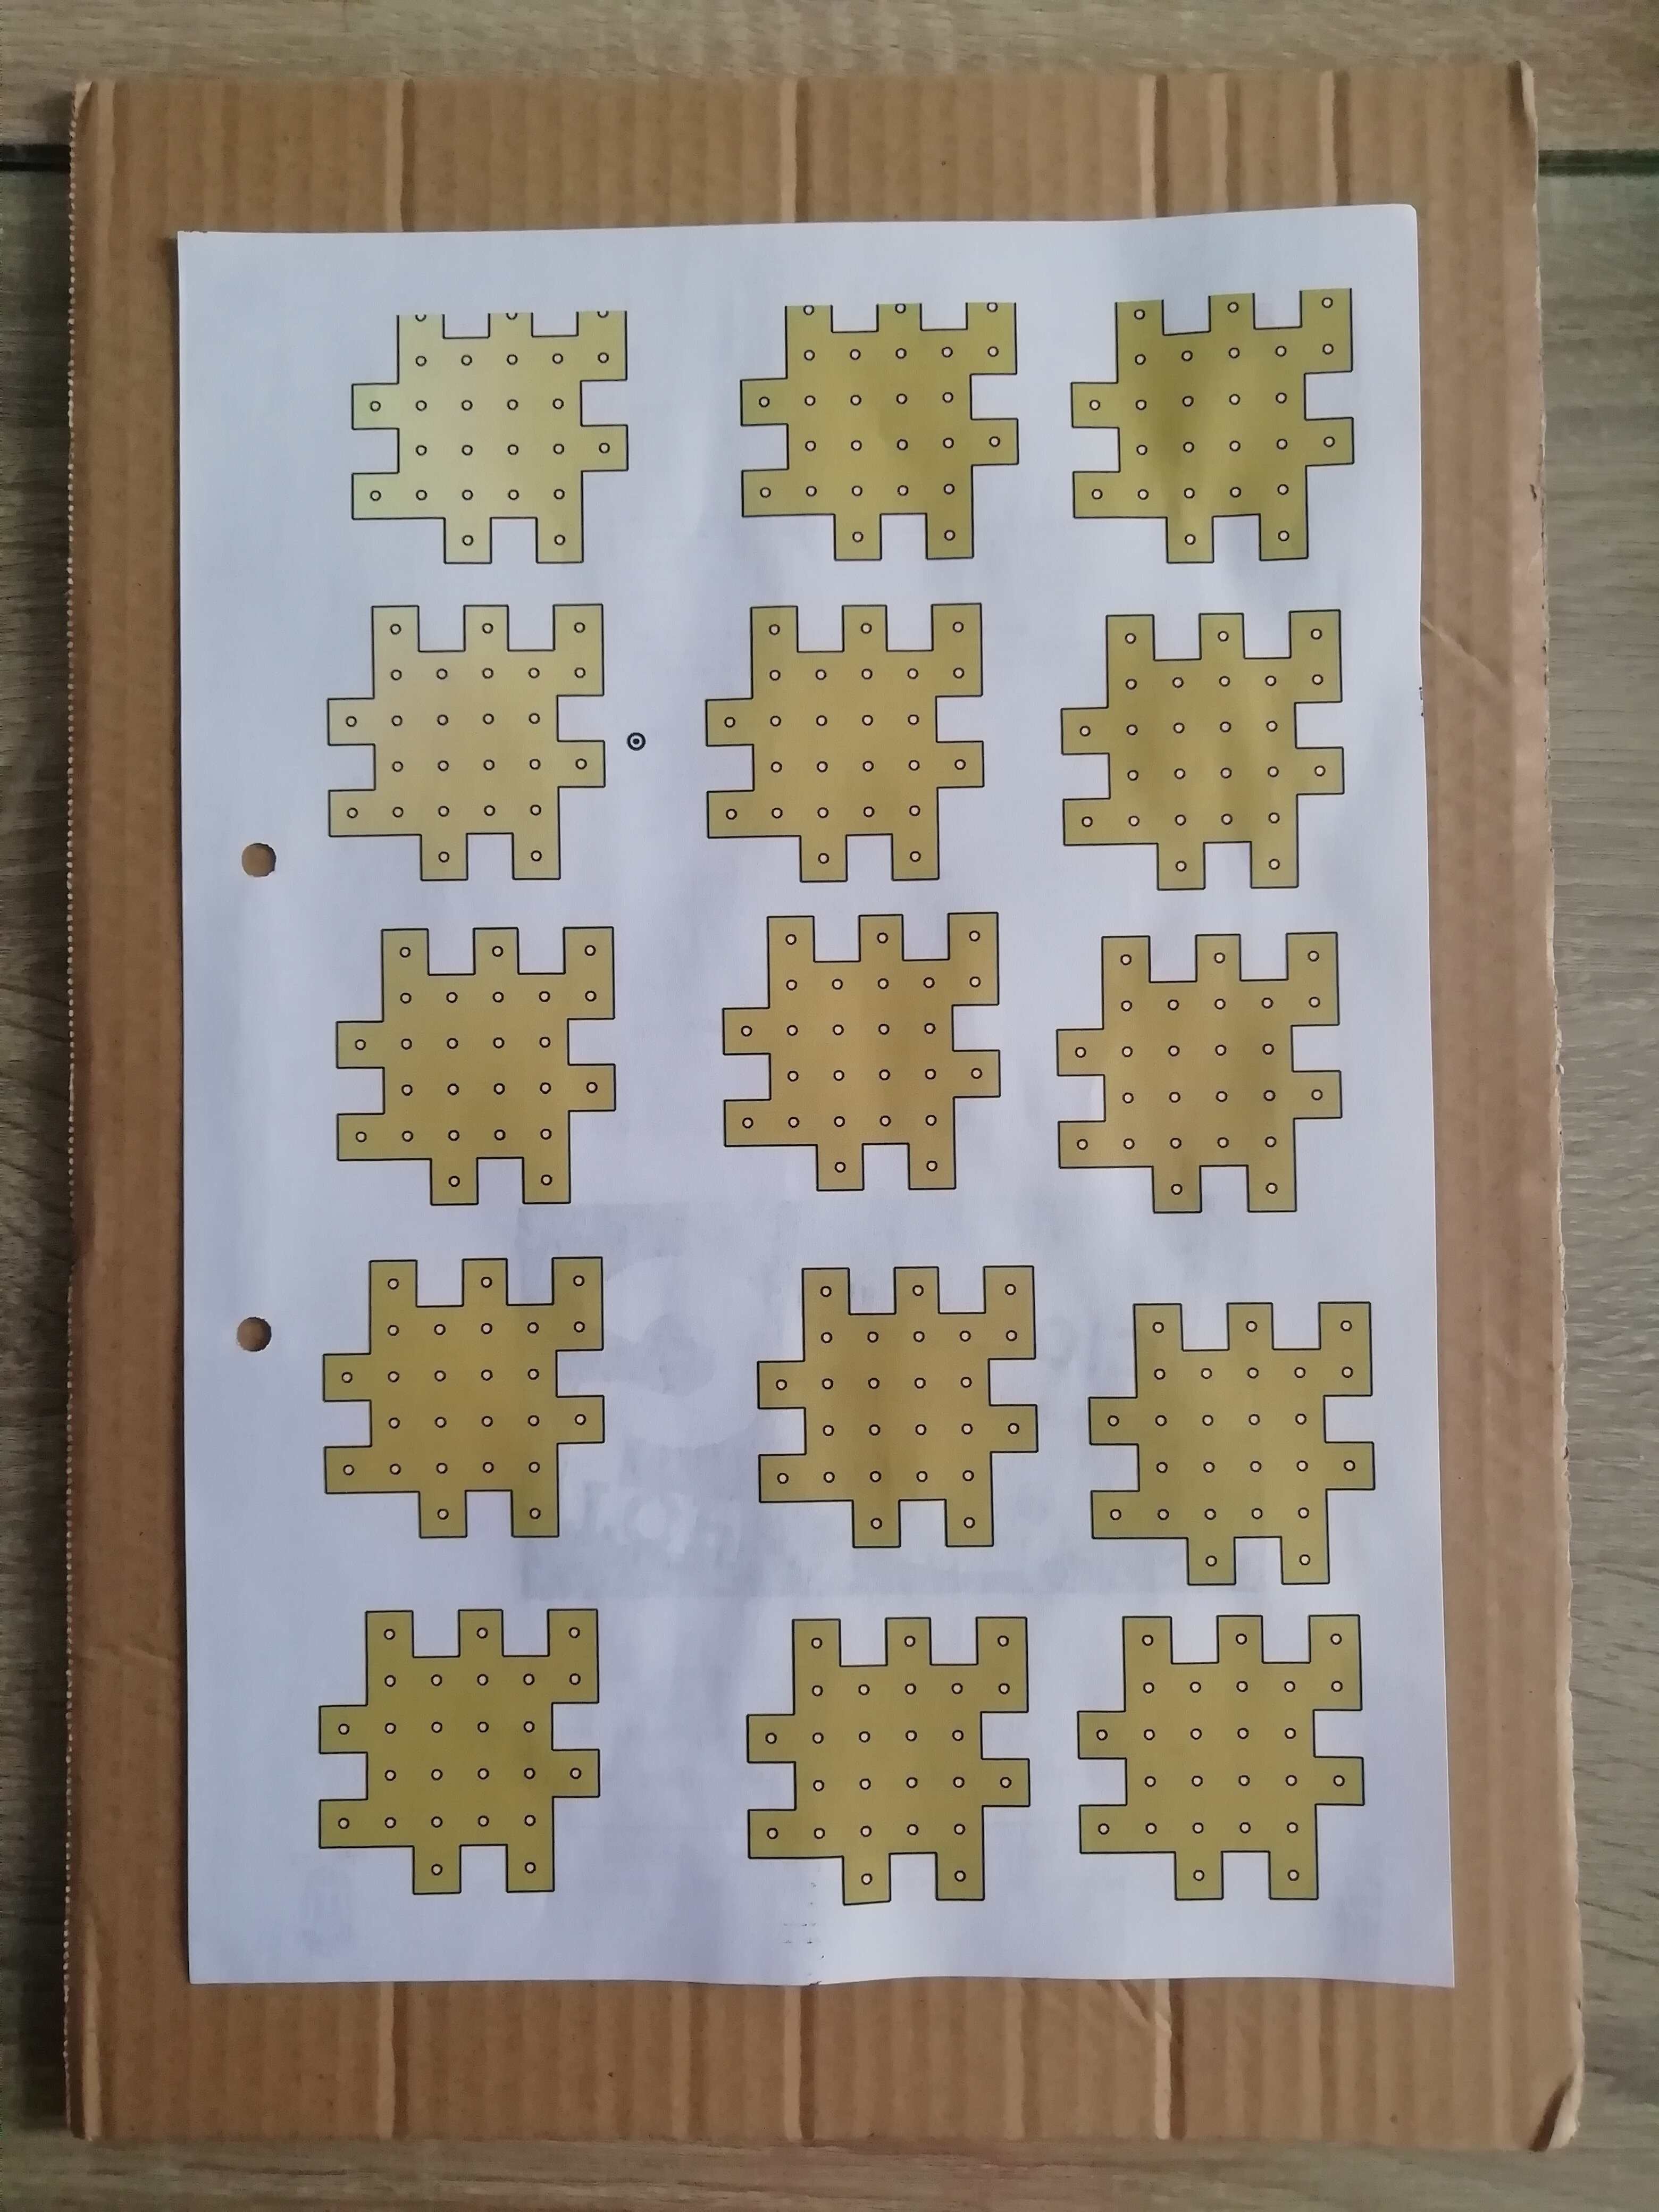
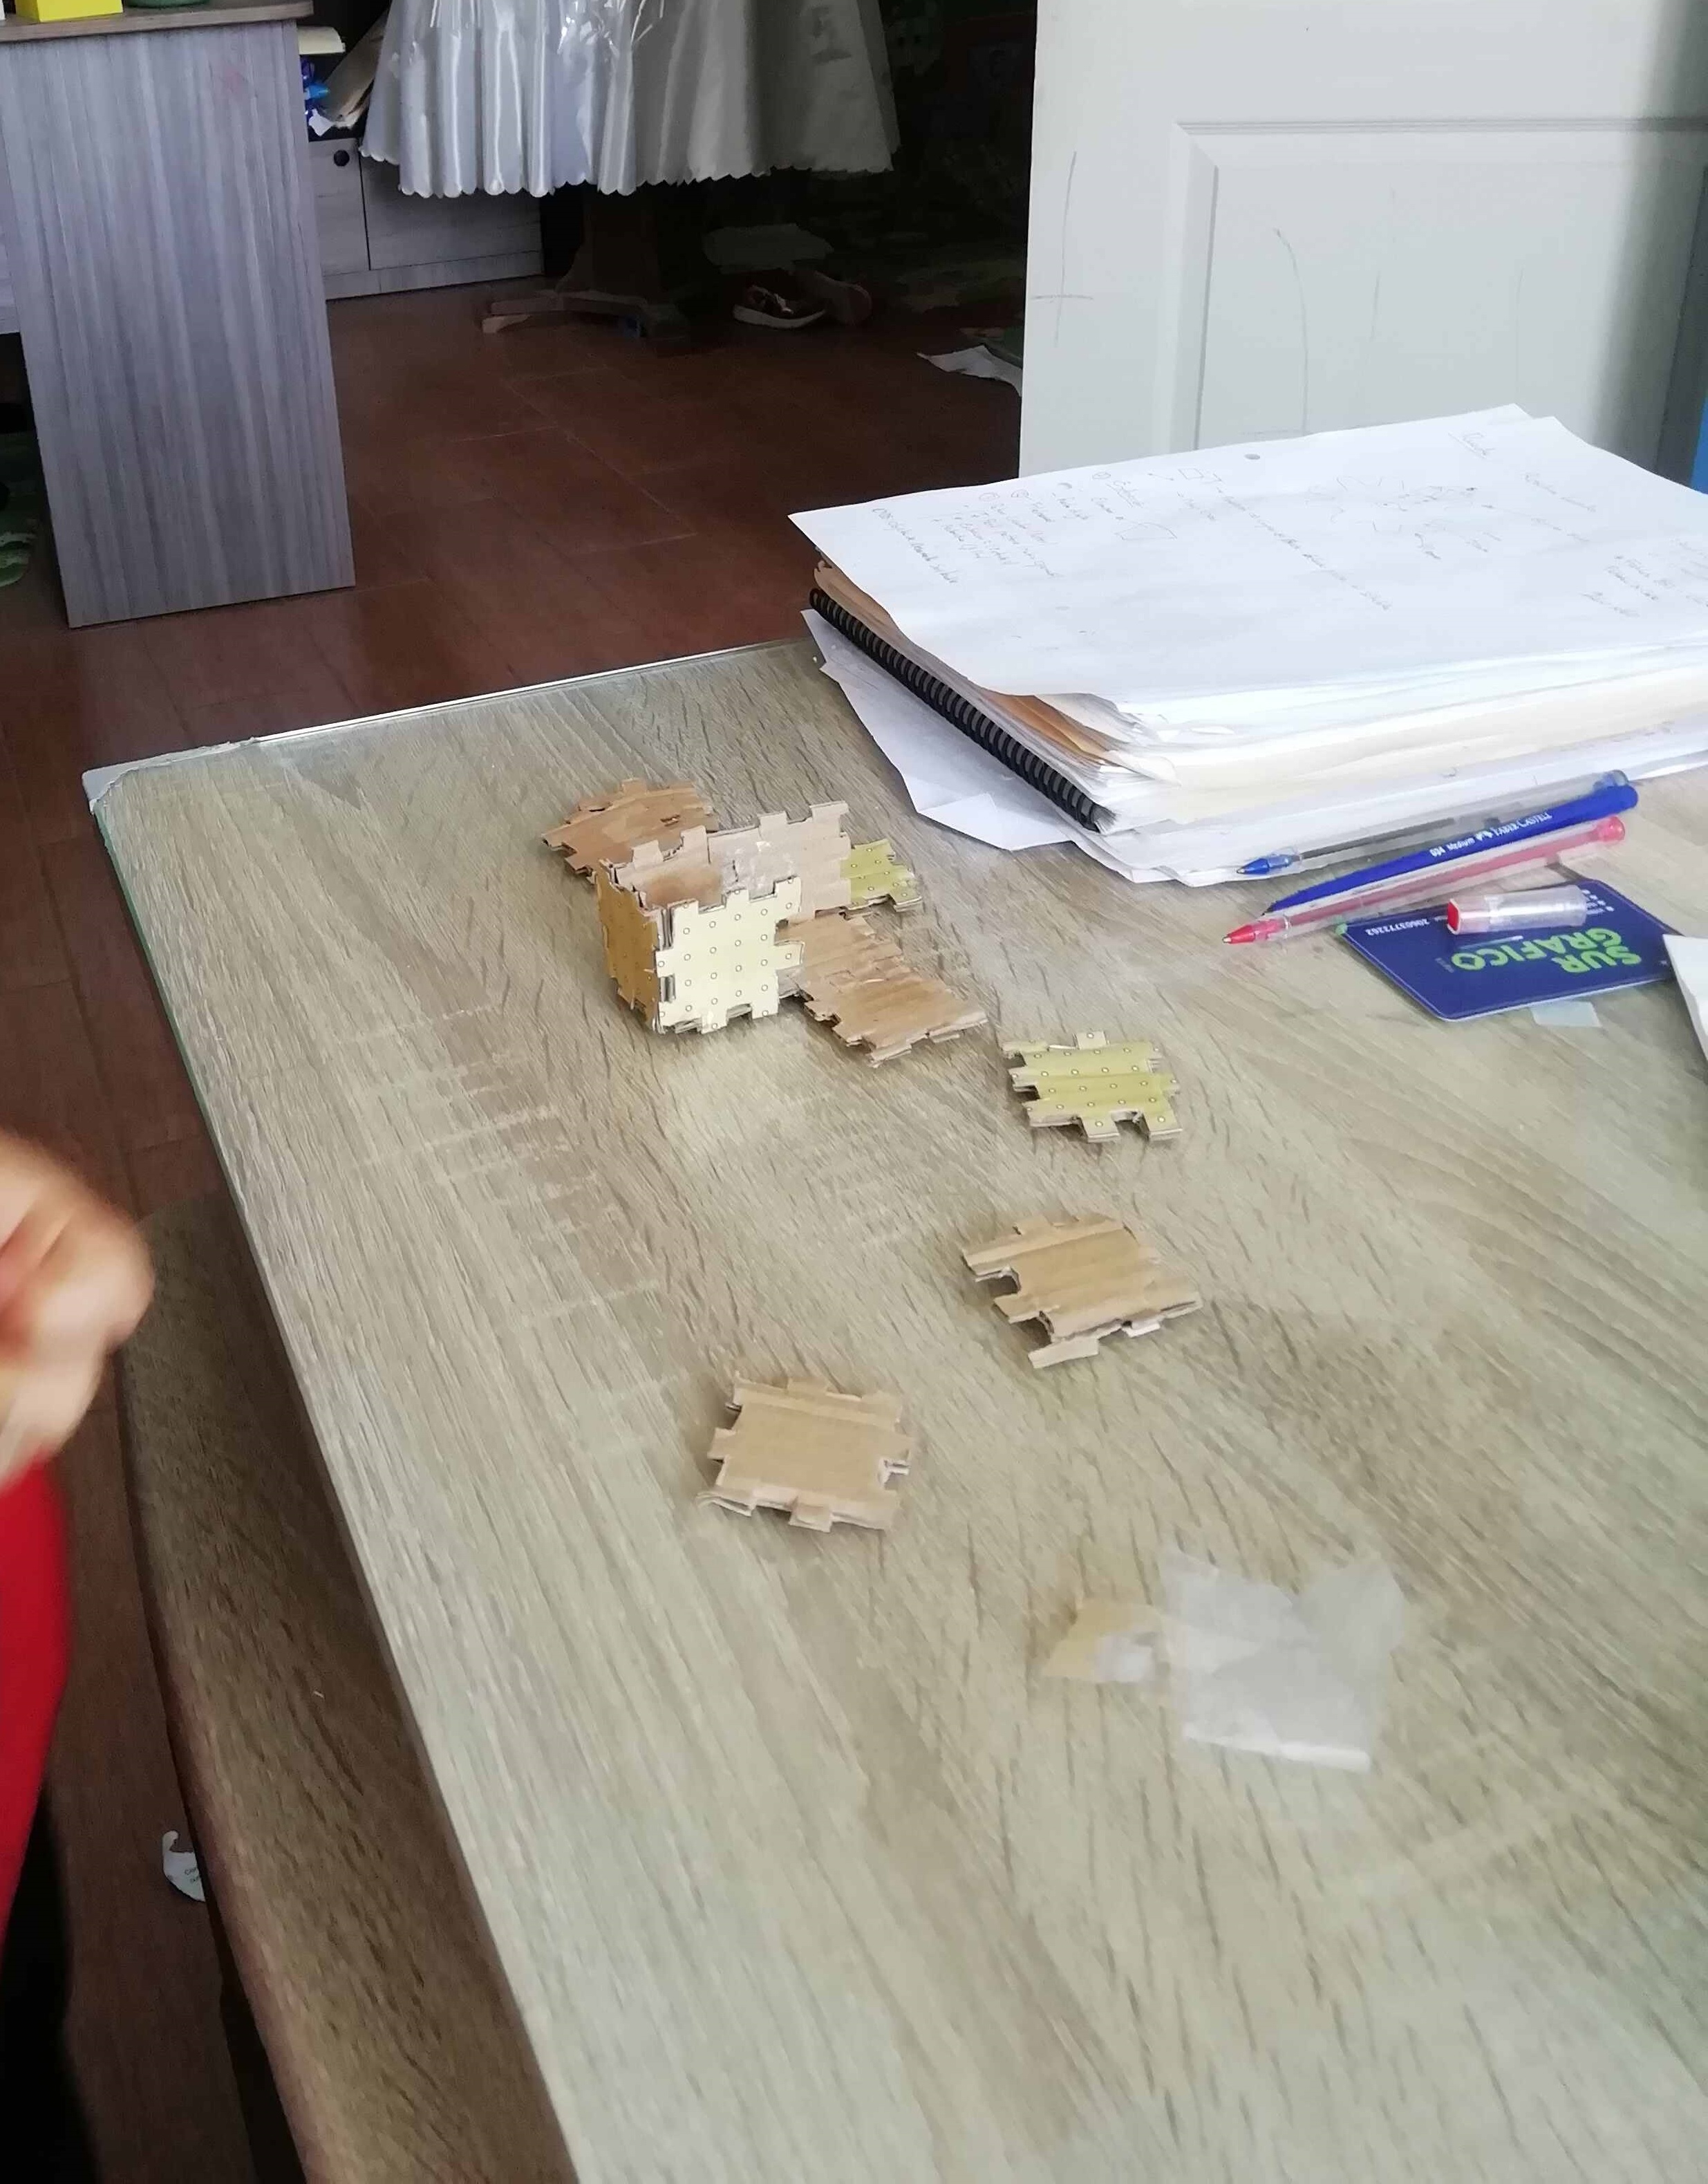
- The design in Onshape, I print it on paper and glue it on a 2.8 mm cardboard. I do it this way to start cutting with scissors (as I indicated at the beginning, my institution does not have a laser cutter yet).
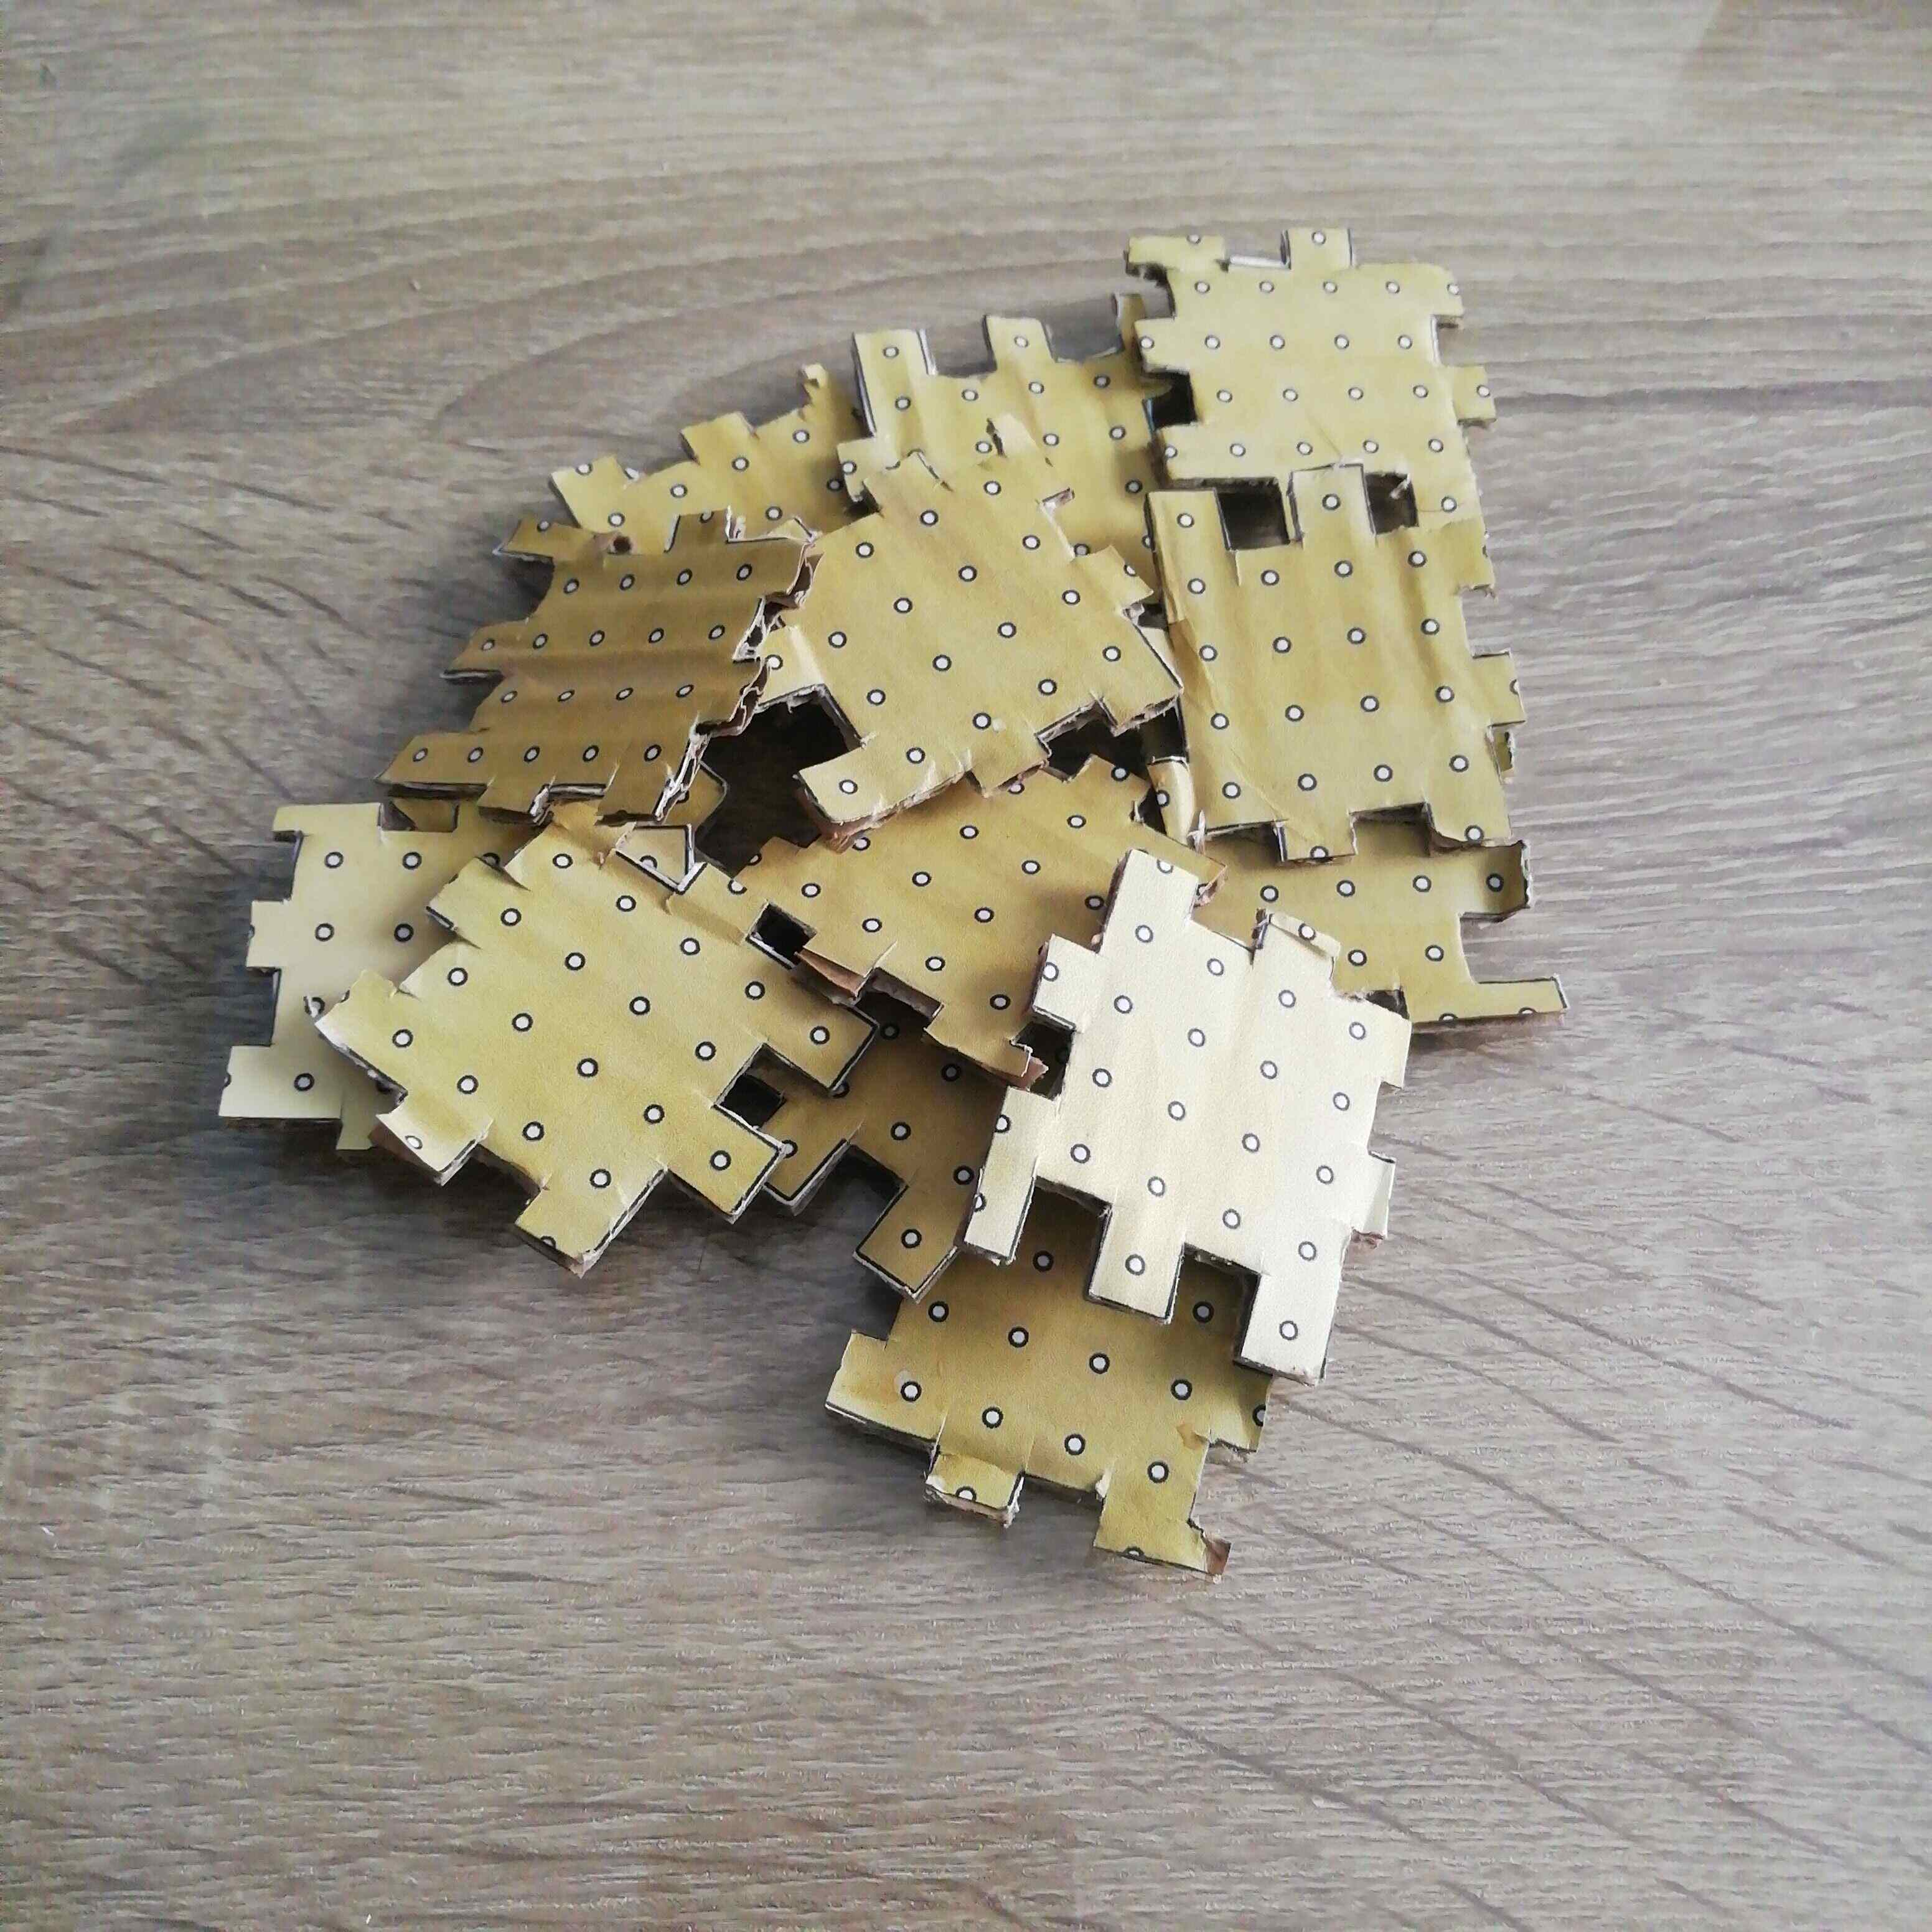
- It took me a little over 2 hours to cut the 15 pieces trying not to go over the cutting line of each piece. The most laborious were the internal cuts, for this I helped myself with a cutter. Finally this is how it turned out:
- I quickly start the assembly.
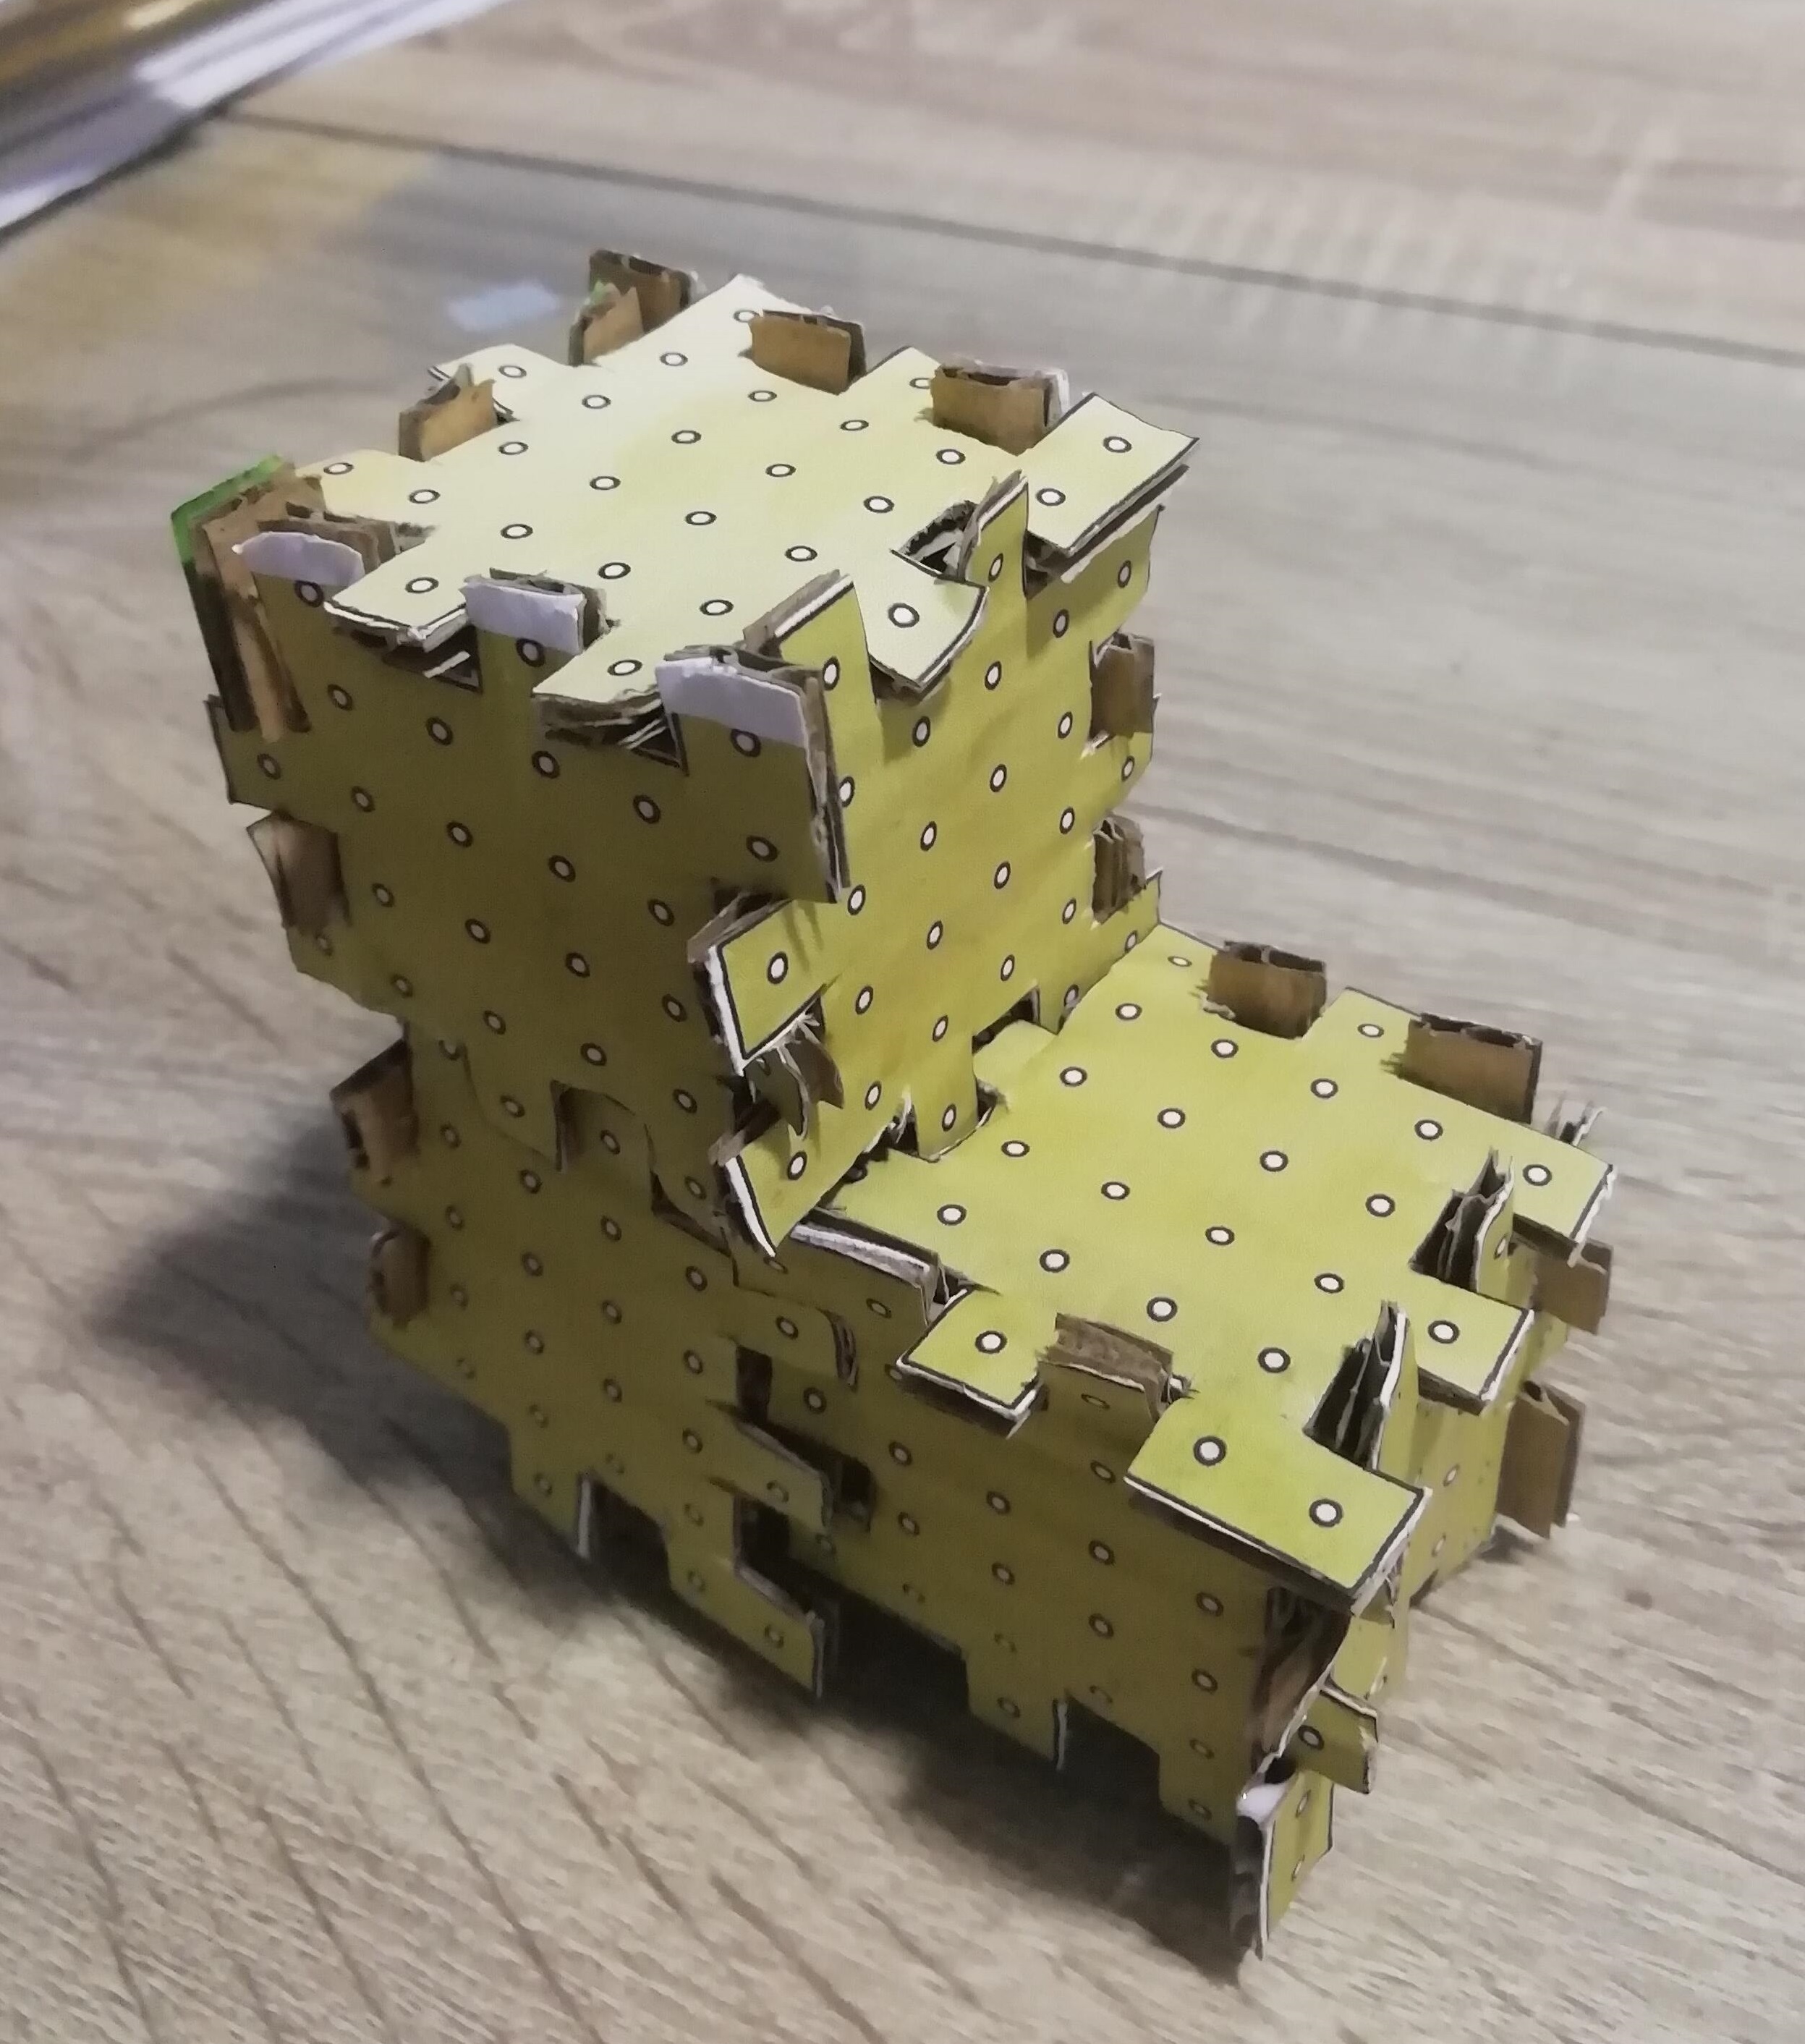
- After a lot of patience and calm, this is how it turned out:
-
During the assembly I realized that the external edges were very large, 10 cmm. I had to correct it to the thickness of the cardboard, i.e. 3 mm. For this I had to cut all the edges of the 15 pieces one by one and reassemble it. This took me more time than planned, but I realized that the size of the edges depends a lot on the thickness of the cardboard where the laser cut is going to be made.
-
You learn from your mistakes, as an old reflan says. I put it back together and it was spectacular. I was happy with my parametric design.

- I can conclude that with laser cutting the fit of the parts would be better. I also forgot to make the “chamfers” but in this case I think it was not necessary.
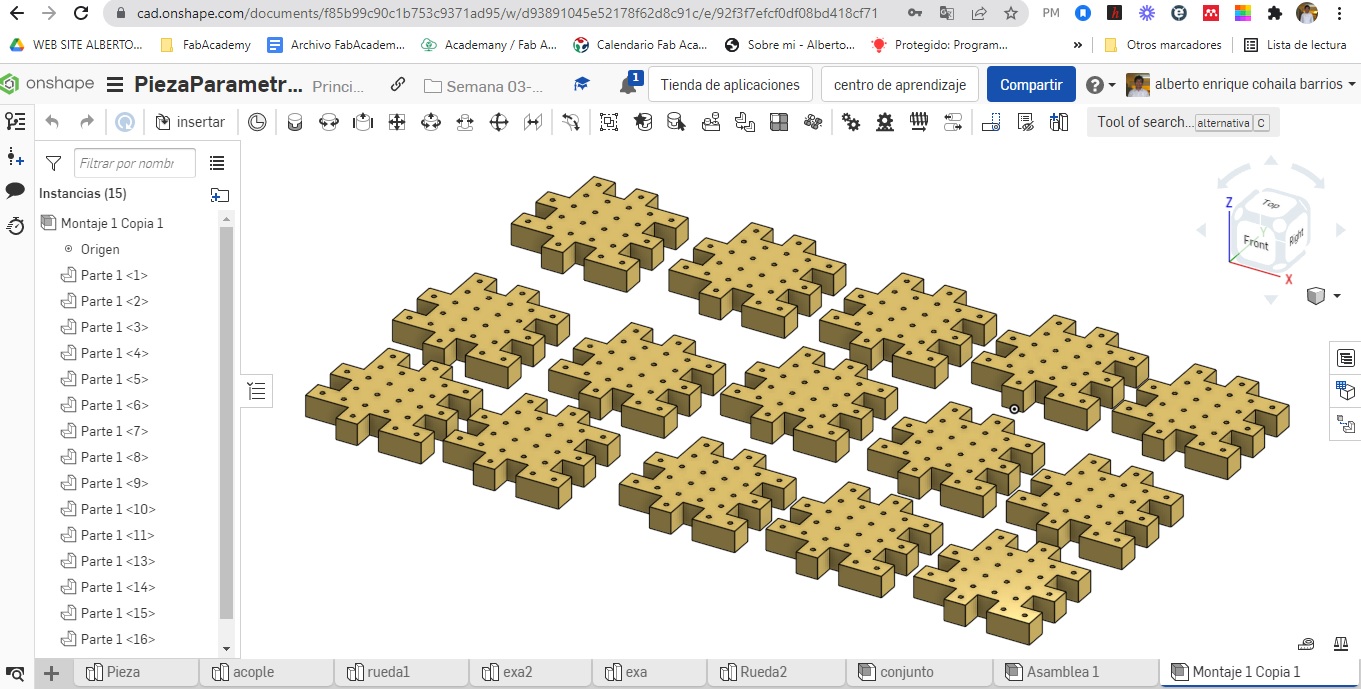
a) Onshape design:
- This is the parametric part design in Onshape.

- Fit 15 pieces on an A4 sheet for printing.
- This is an assembly process.
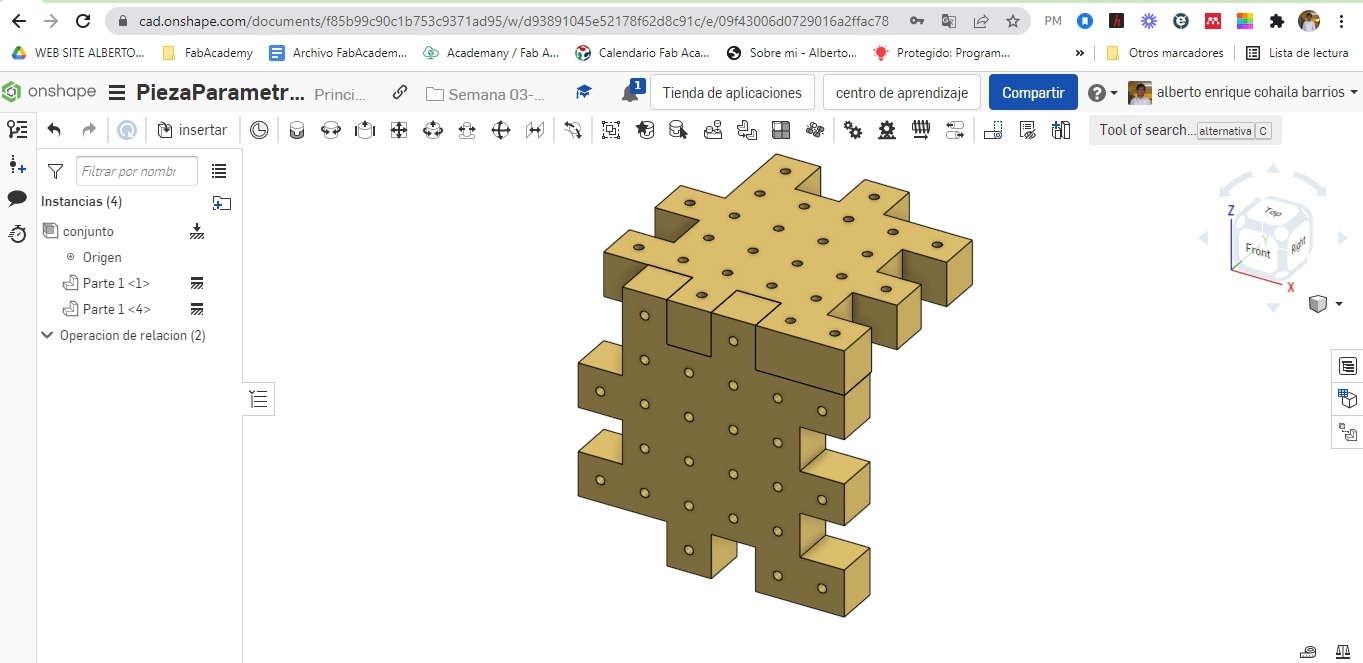
- This is the fine 3D assembly process.
-
The pieces in scale were very large, so I gave smaller measurements again so as not to use a lot of material.
-
I redid the design of the pieces using parameters of length and thickness of the MDF.
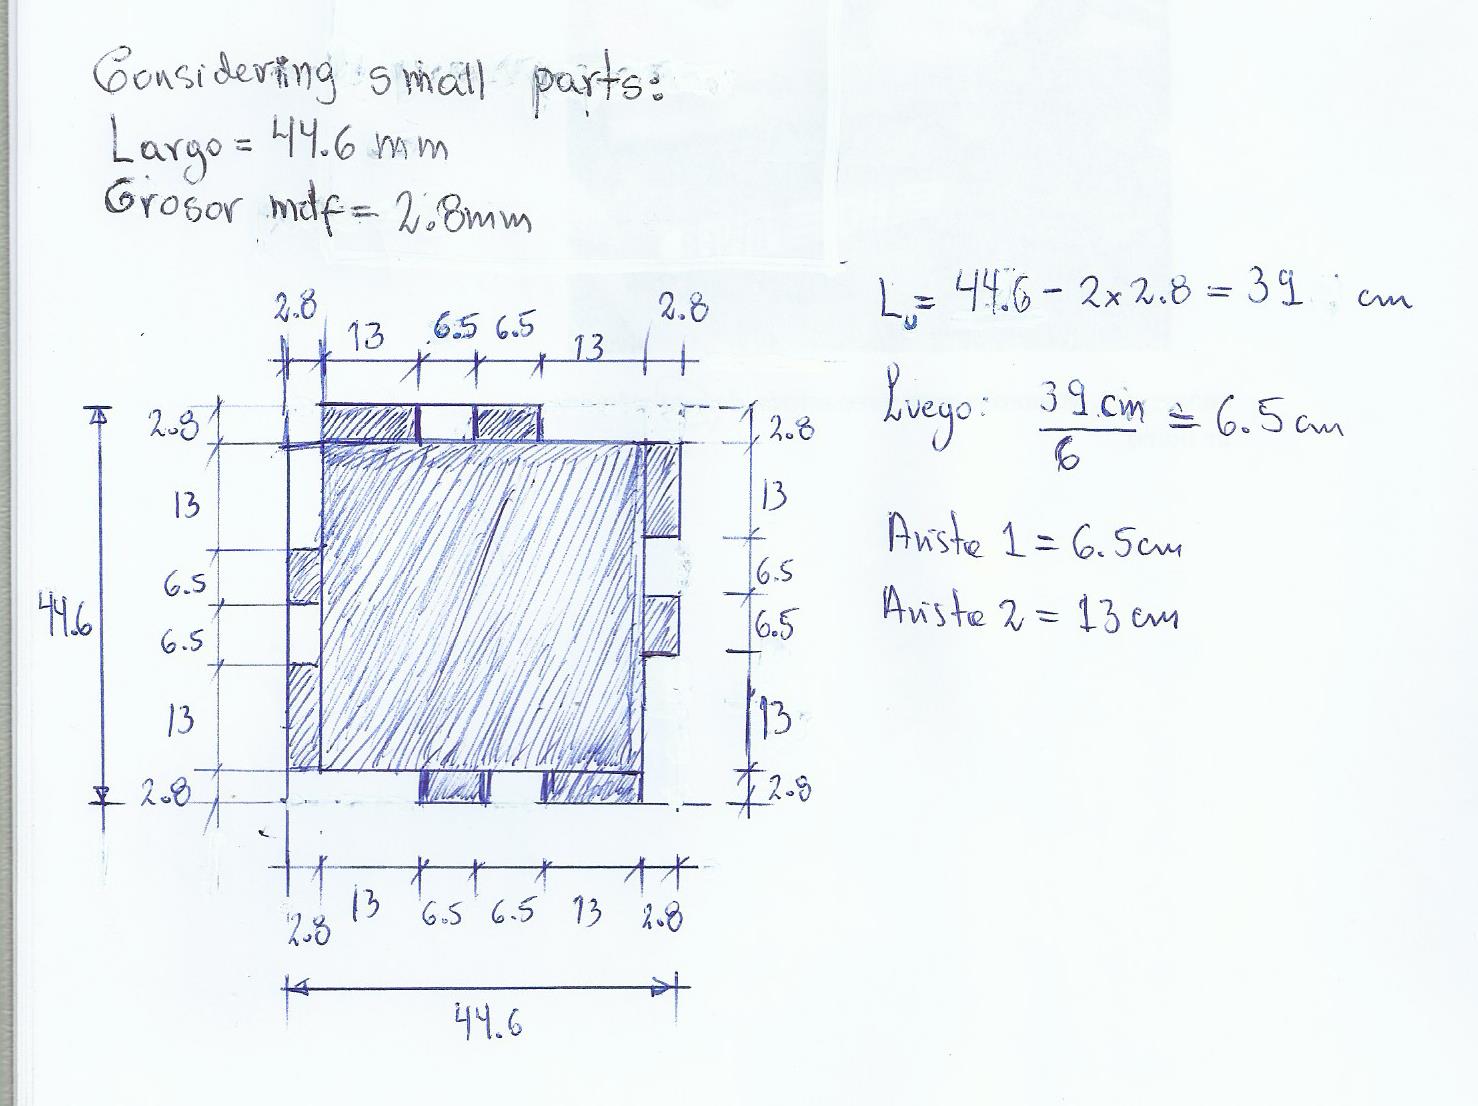
- Design the parametric part with the above measurements in Onshape.
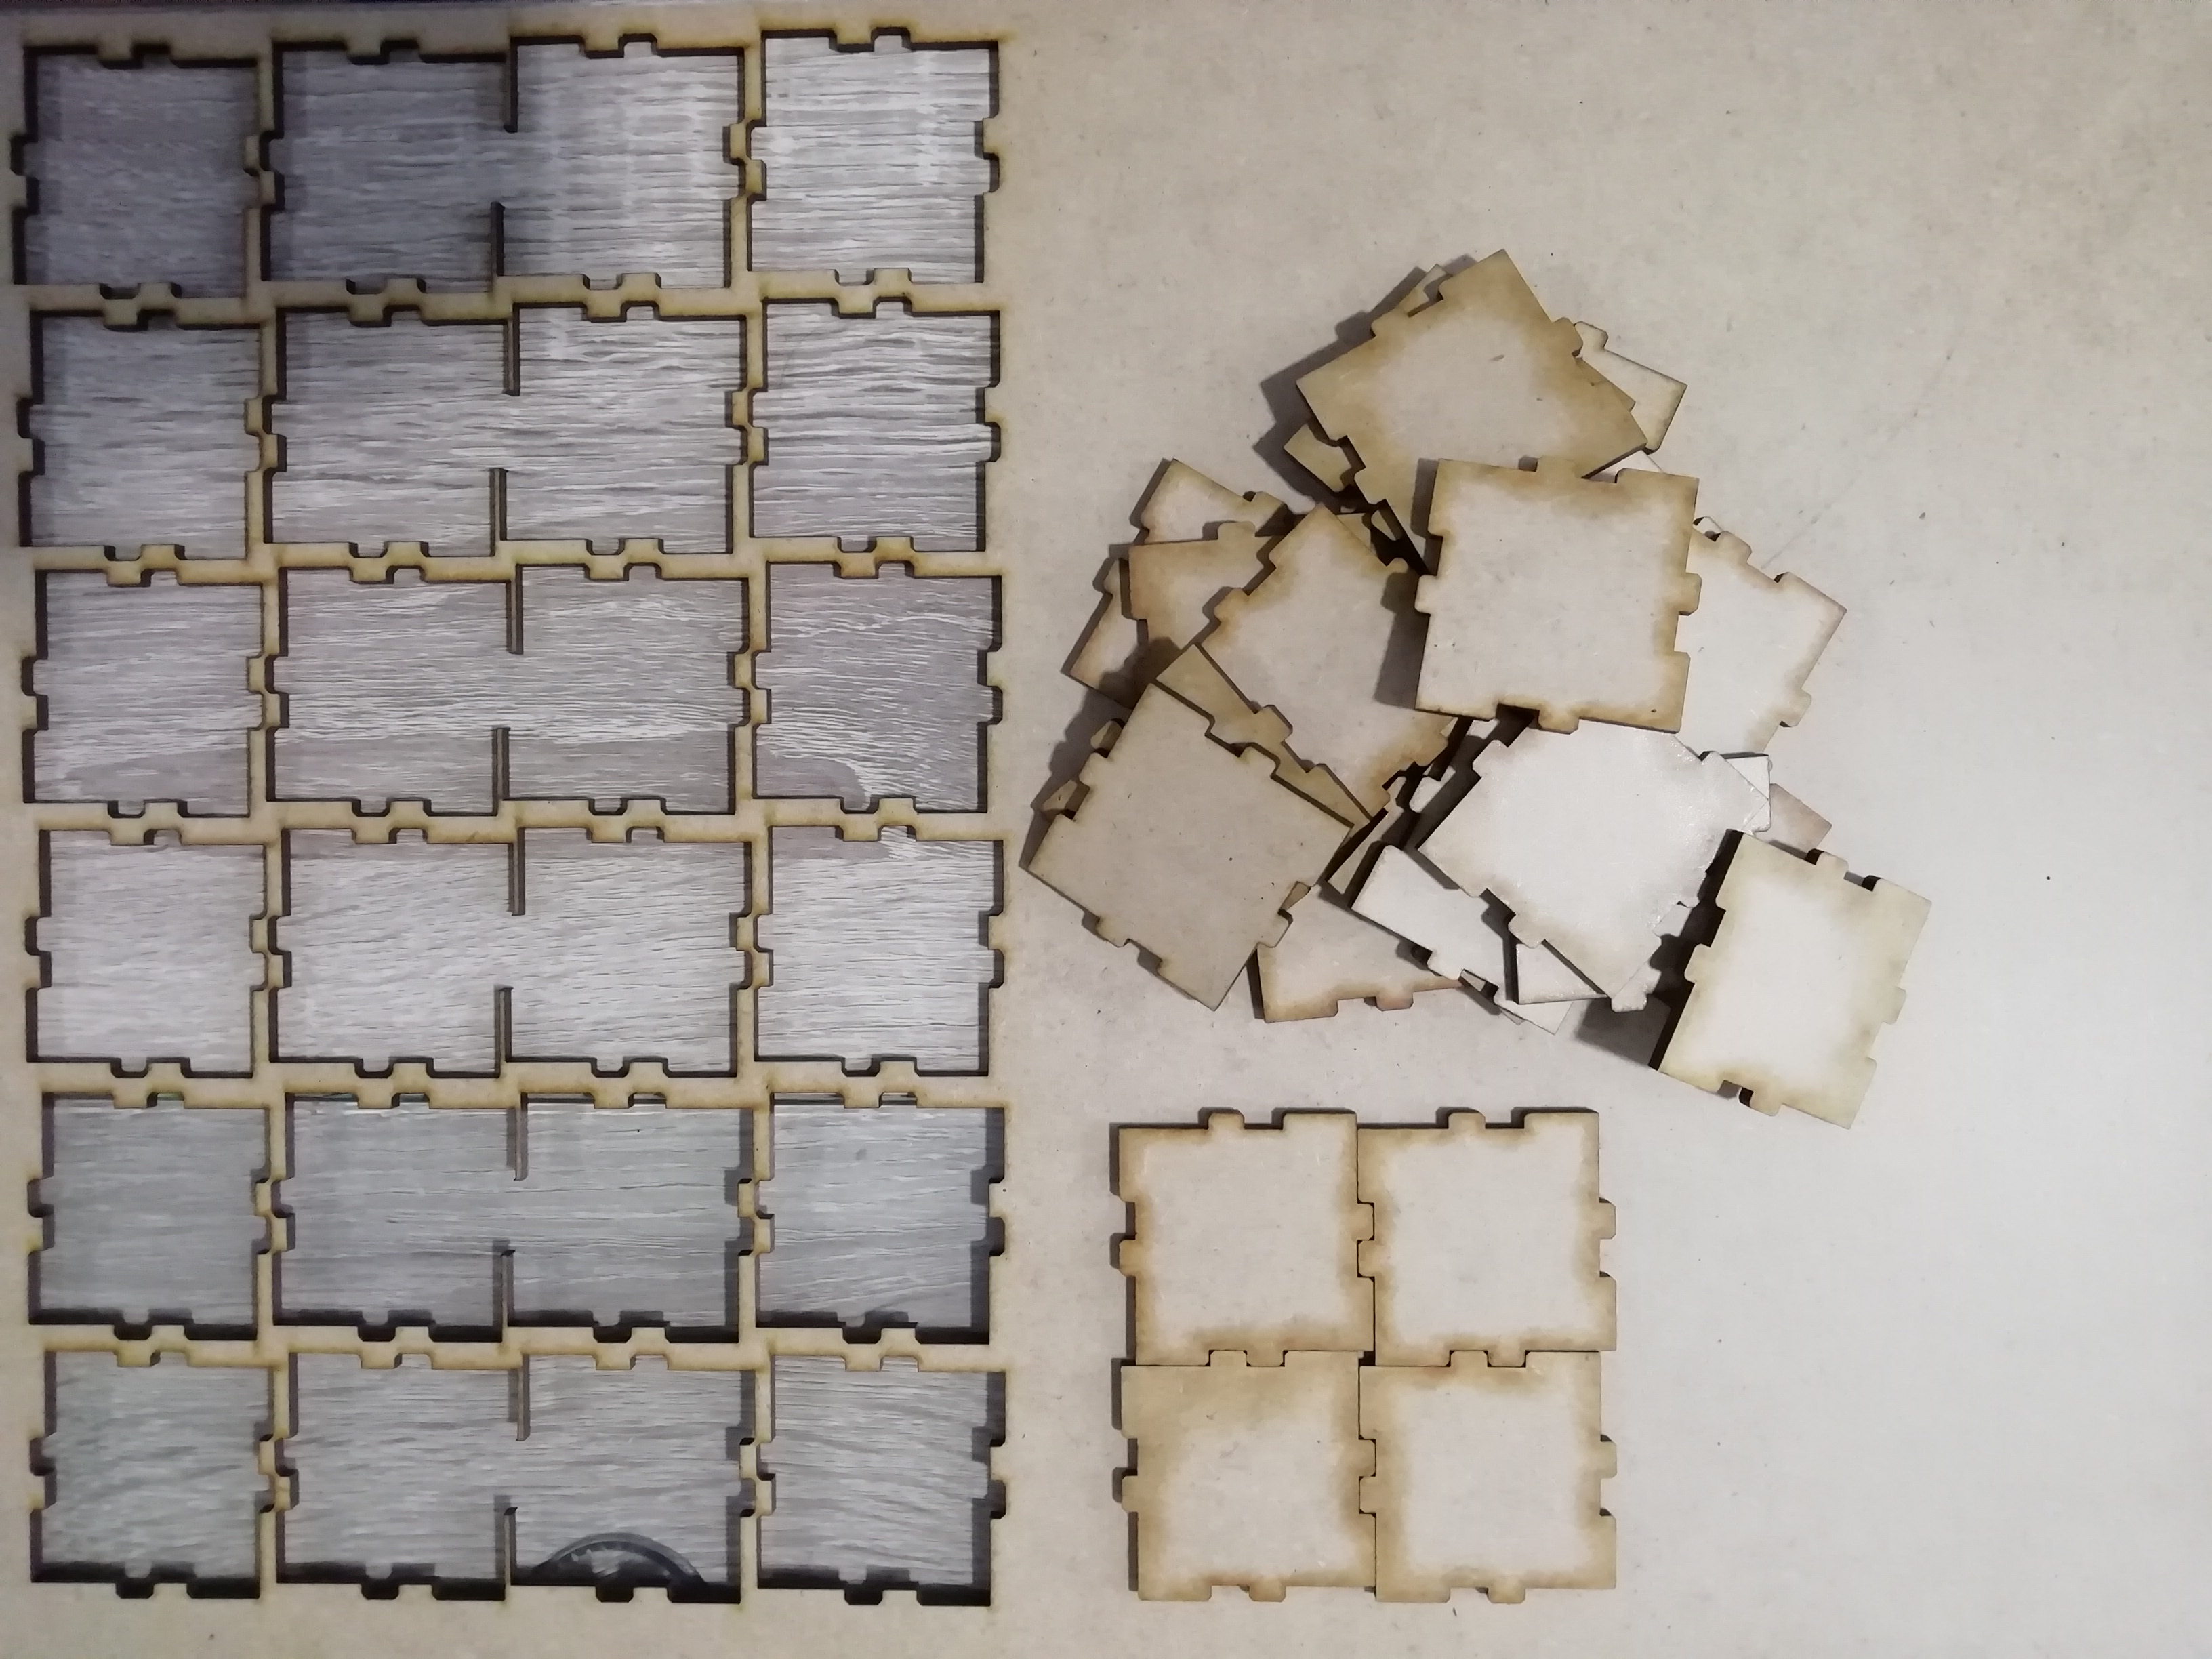
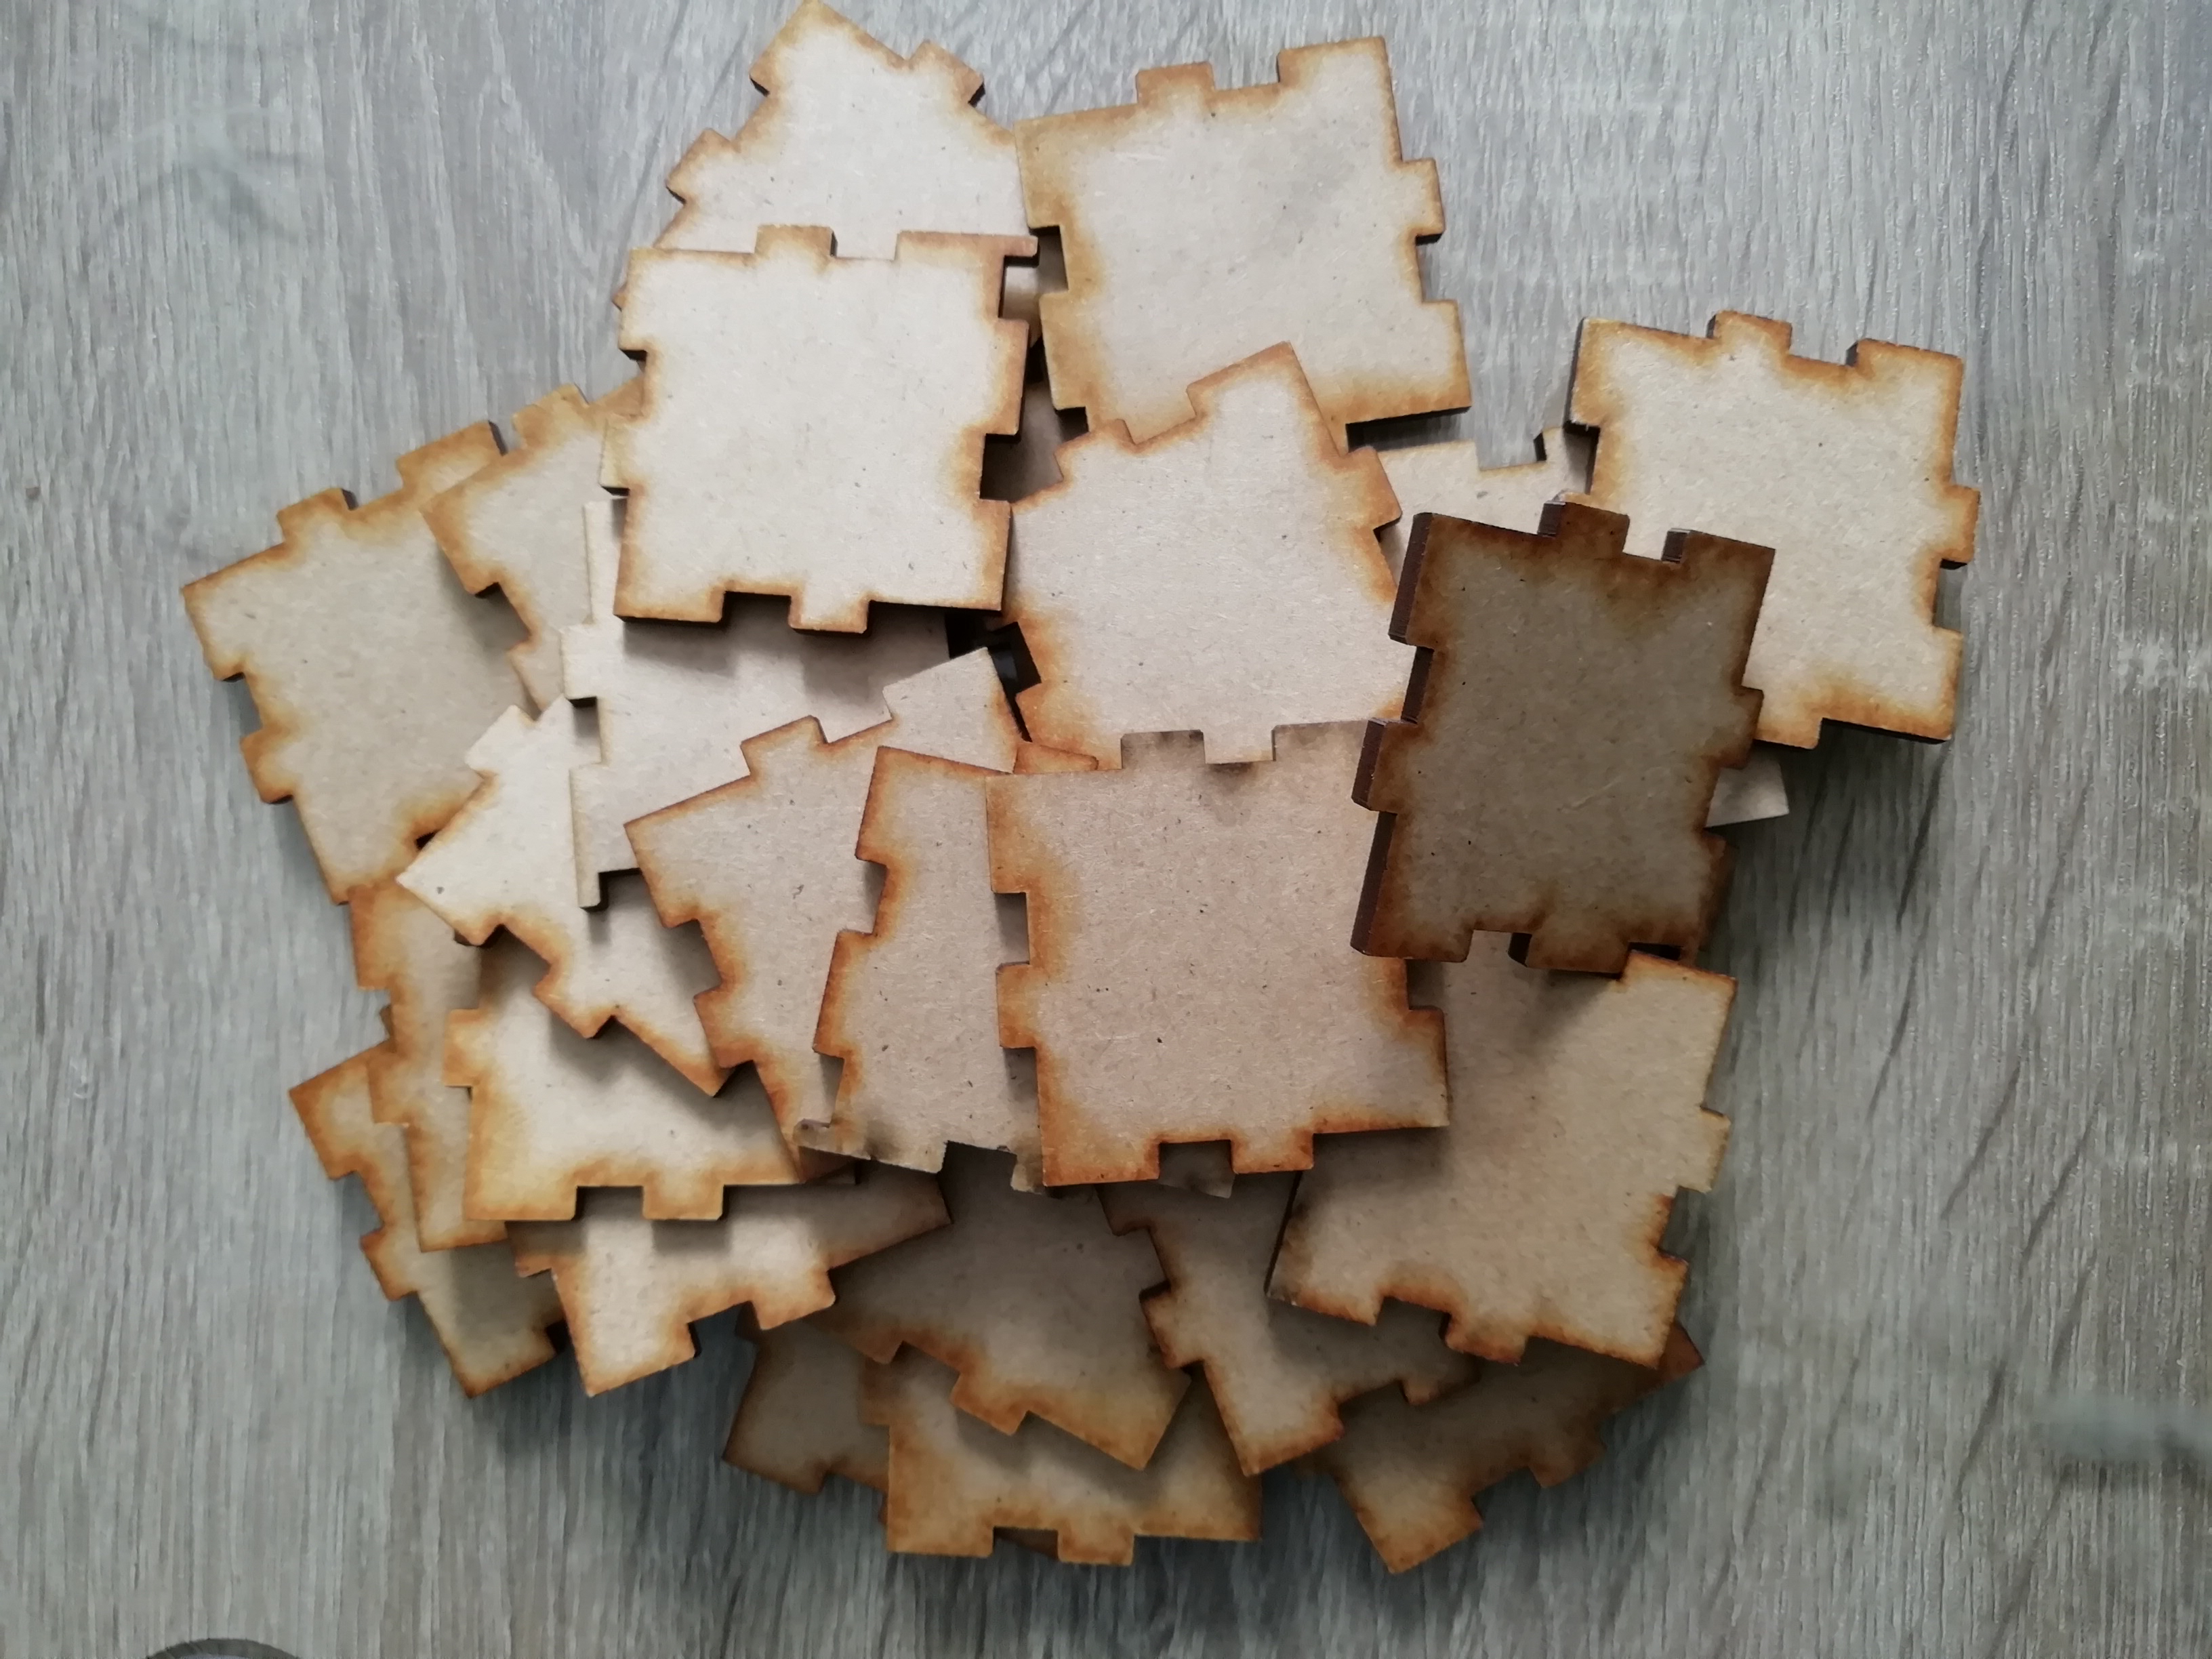
b) Cutting
- Then I download the piece in .DXF format to take it to Corel,
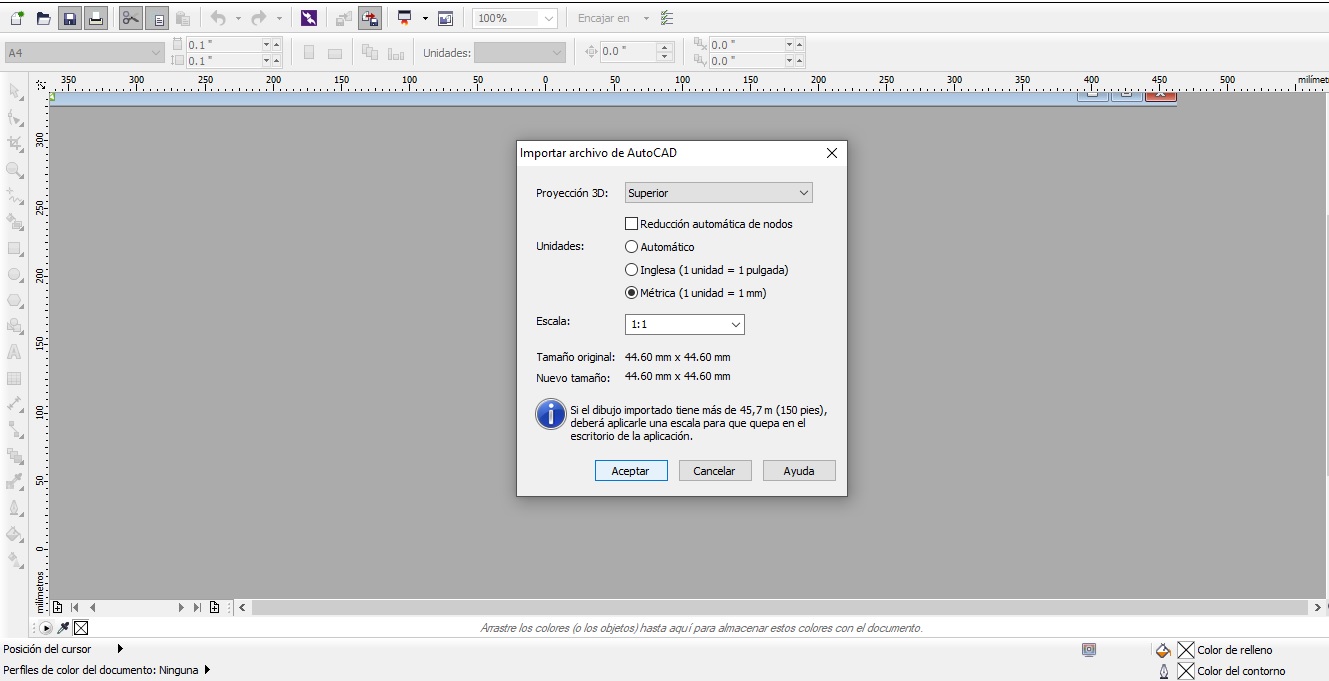
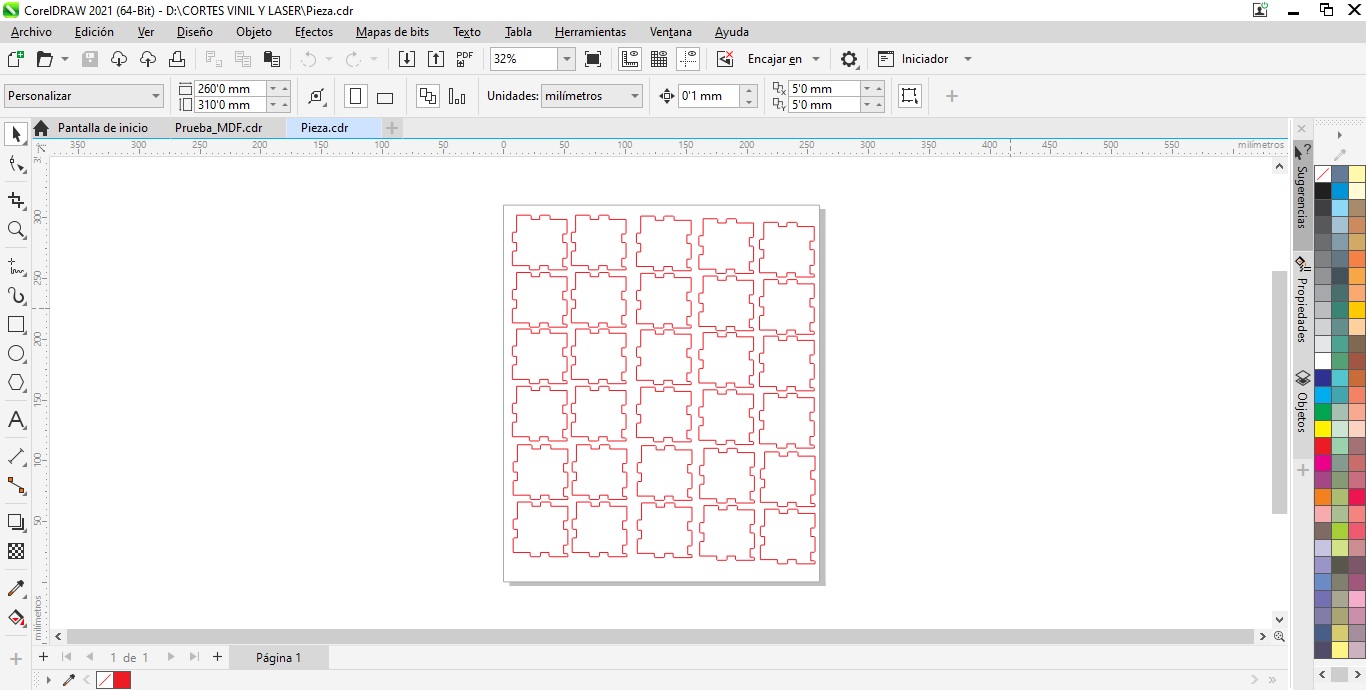
- and make the laser cut.
c) Assembly
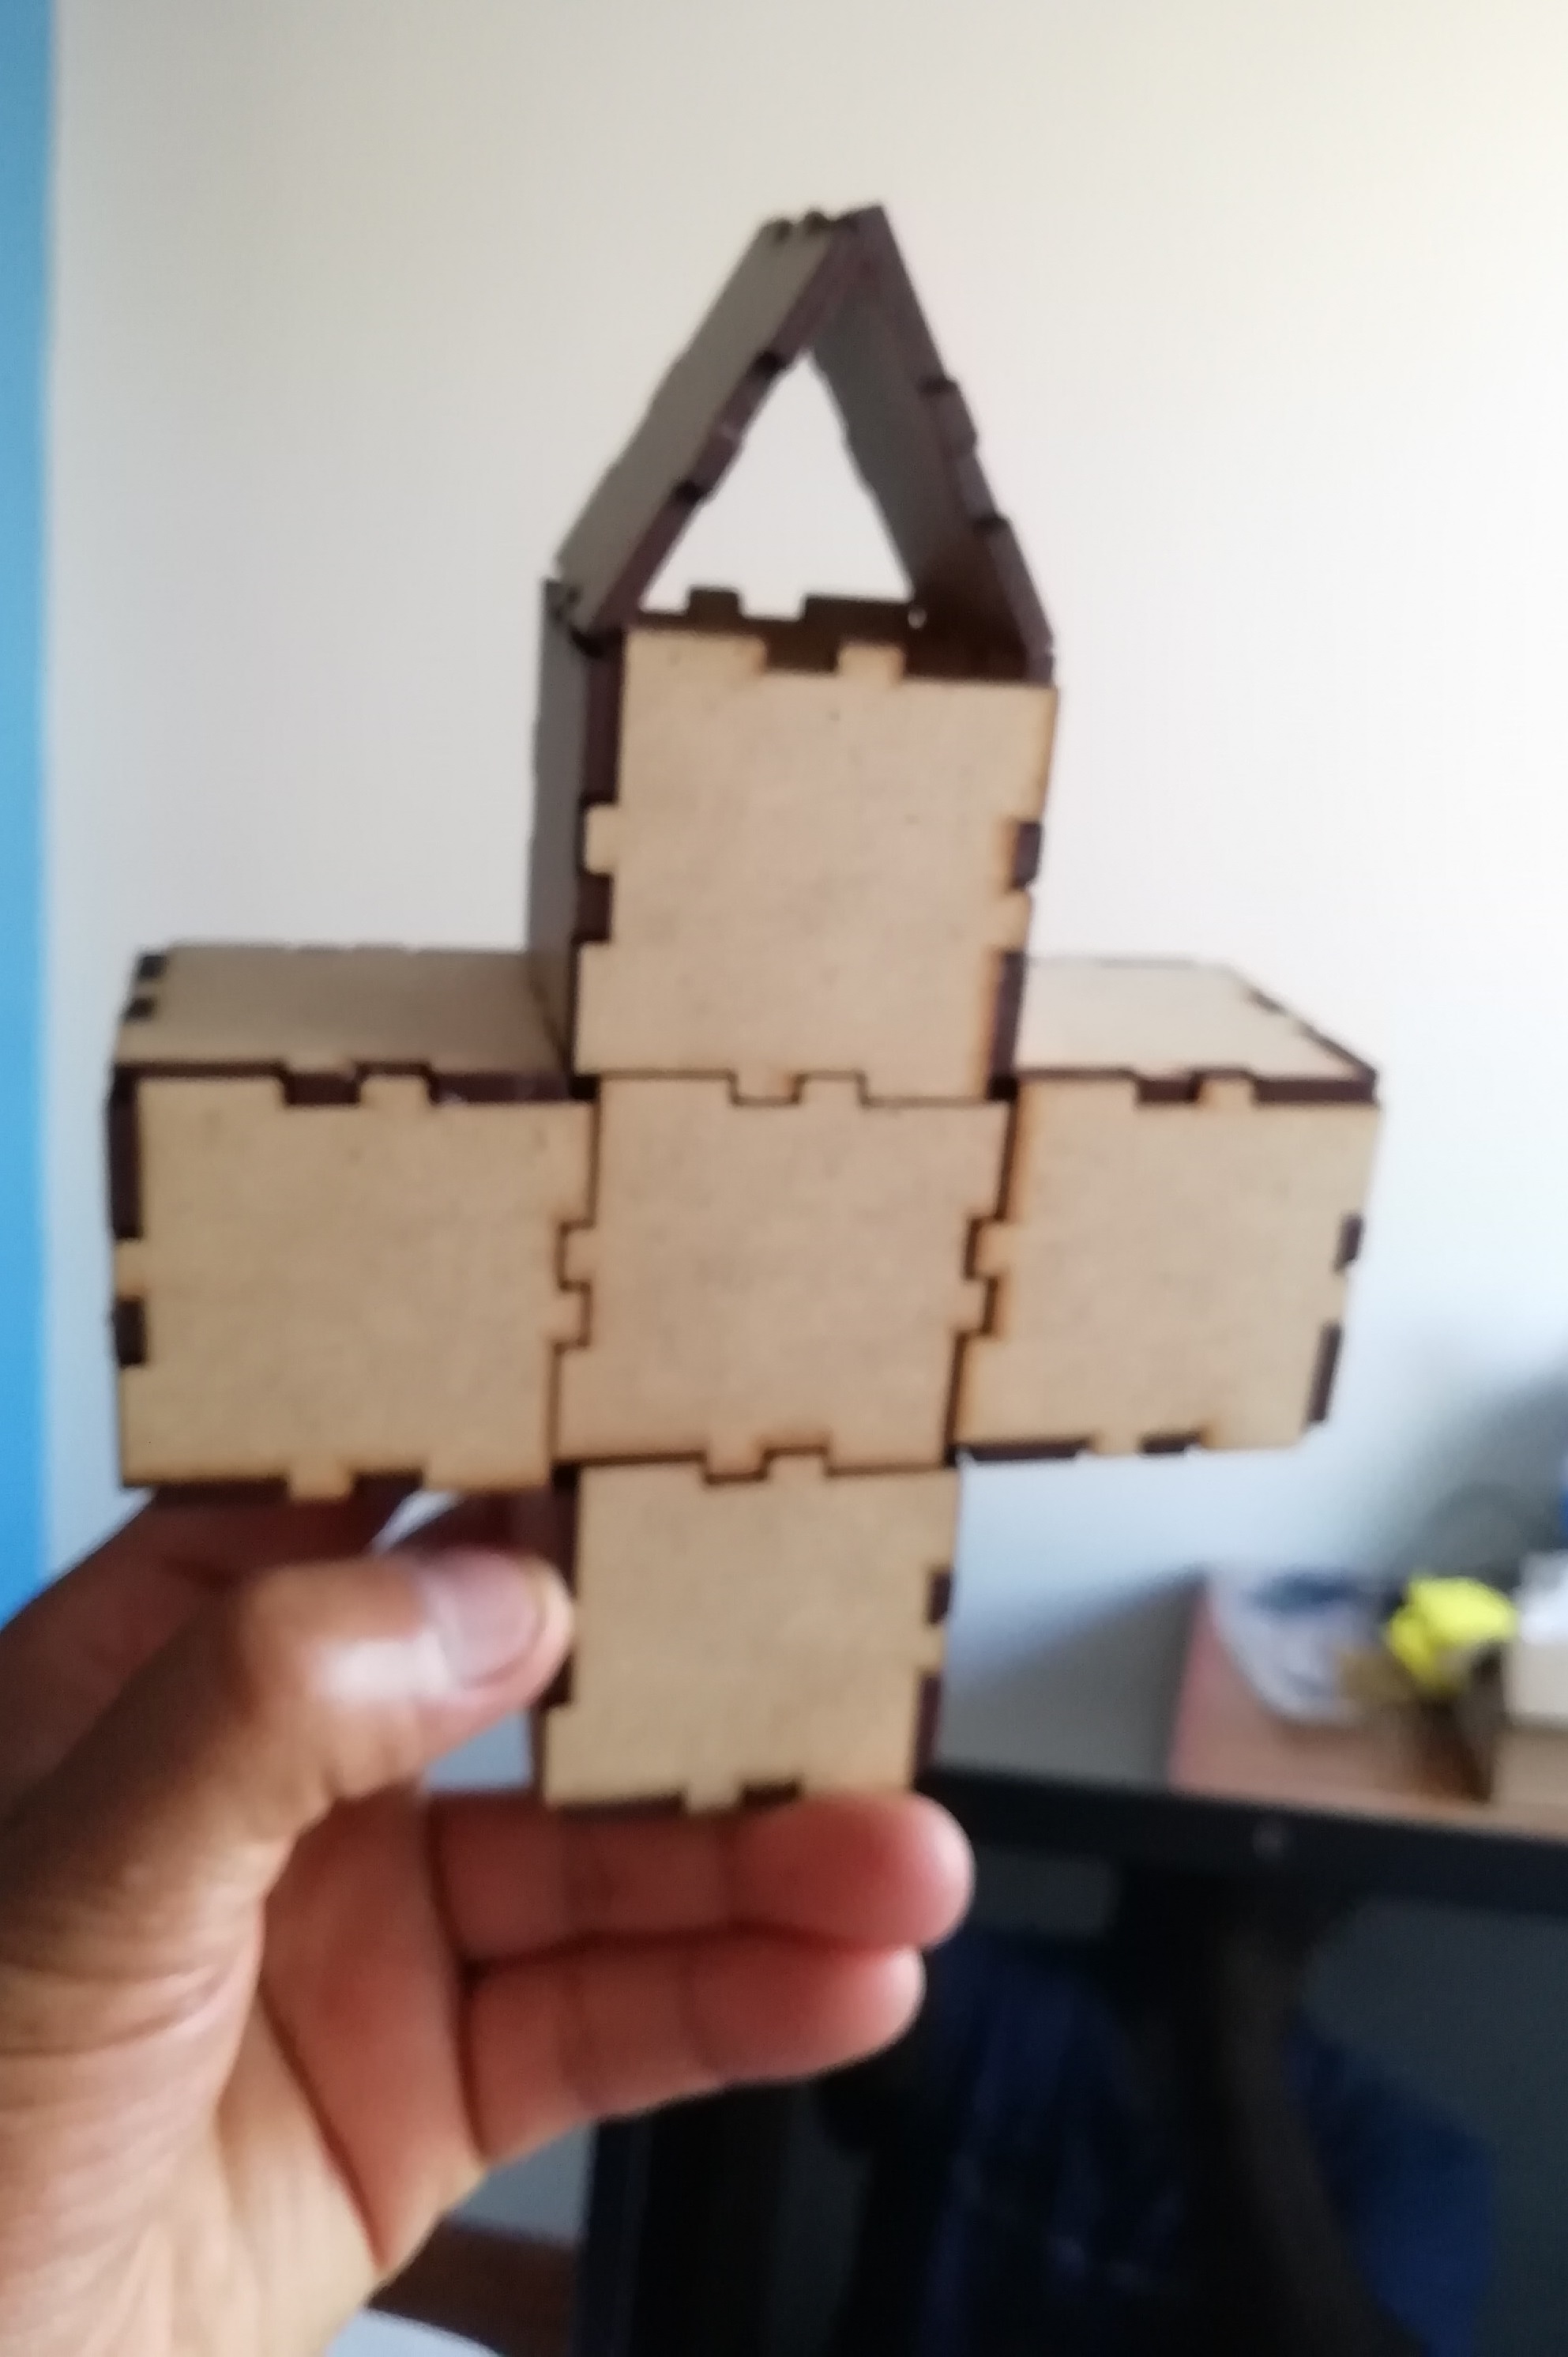
- Once I have the square pieces I propose to put together a little man with a triangular cap.
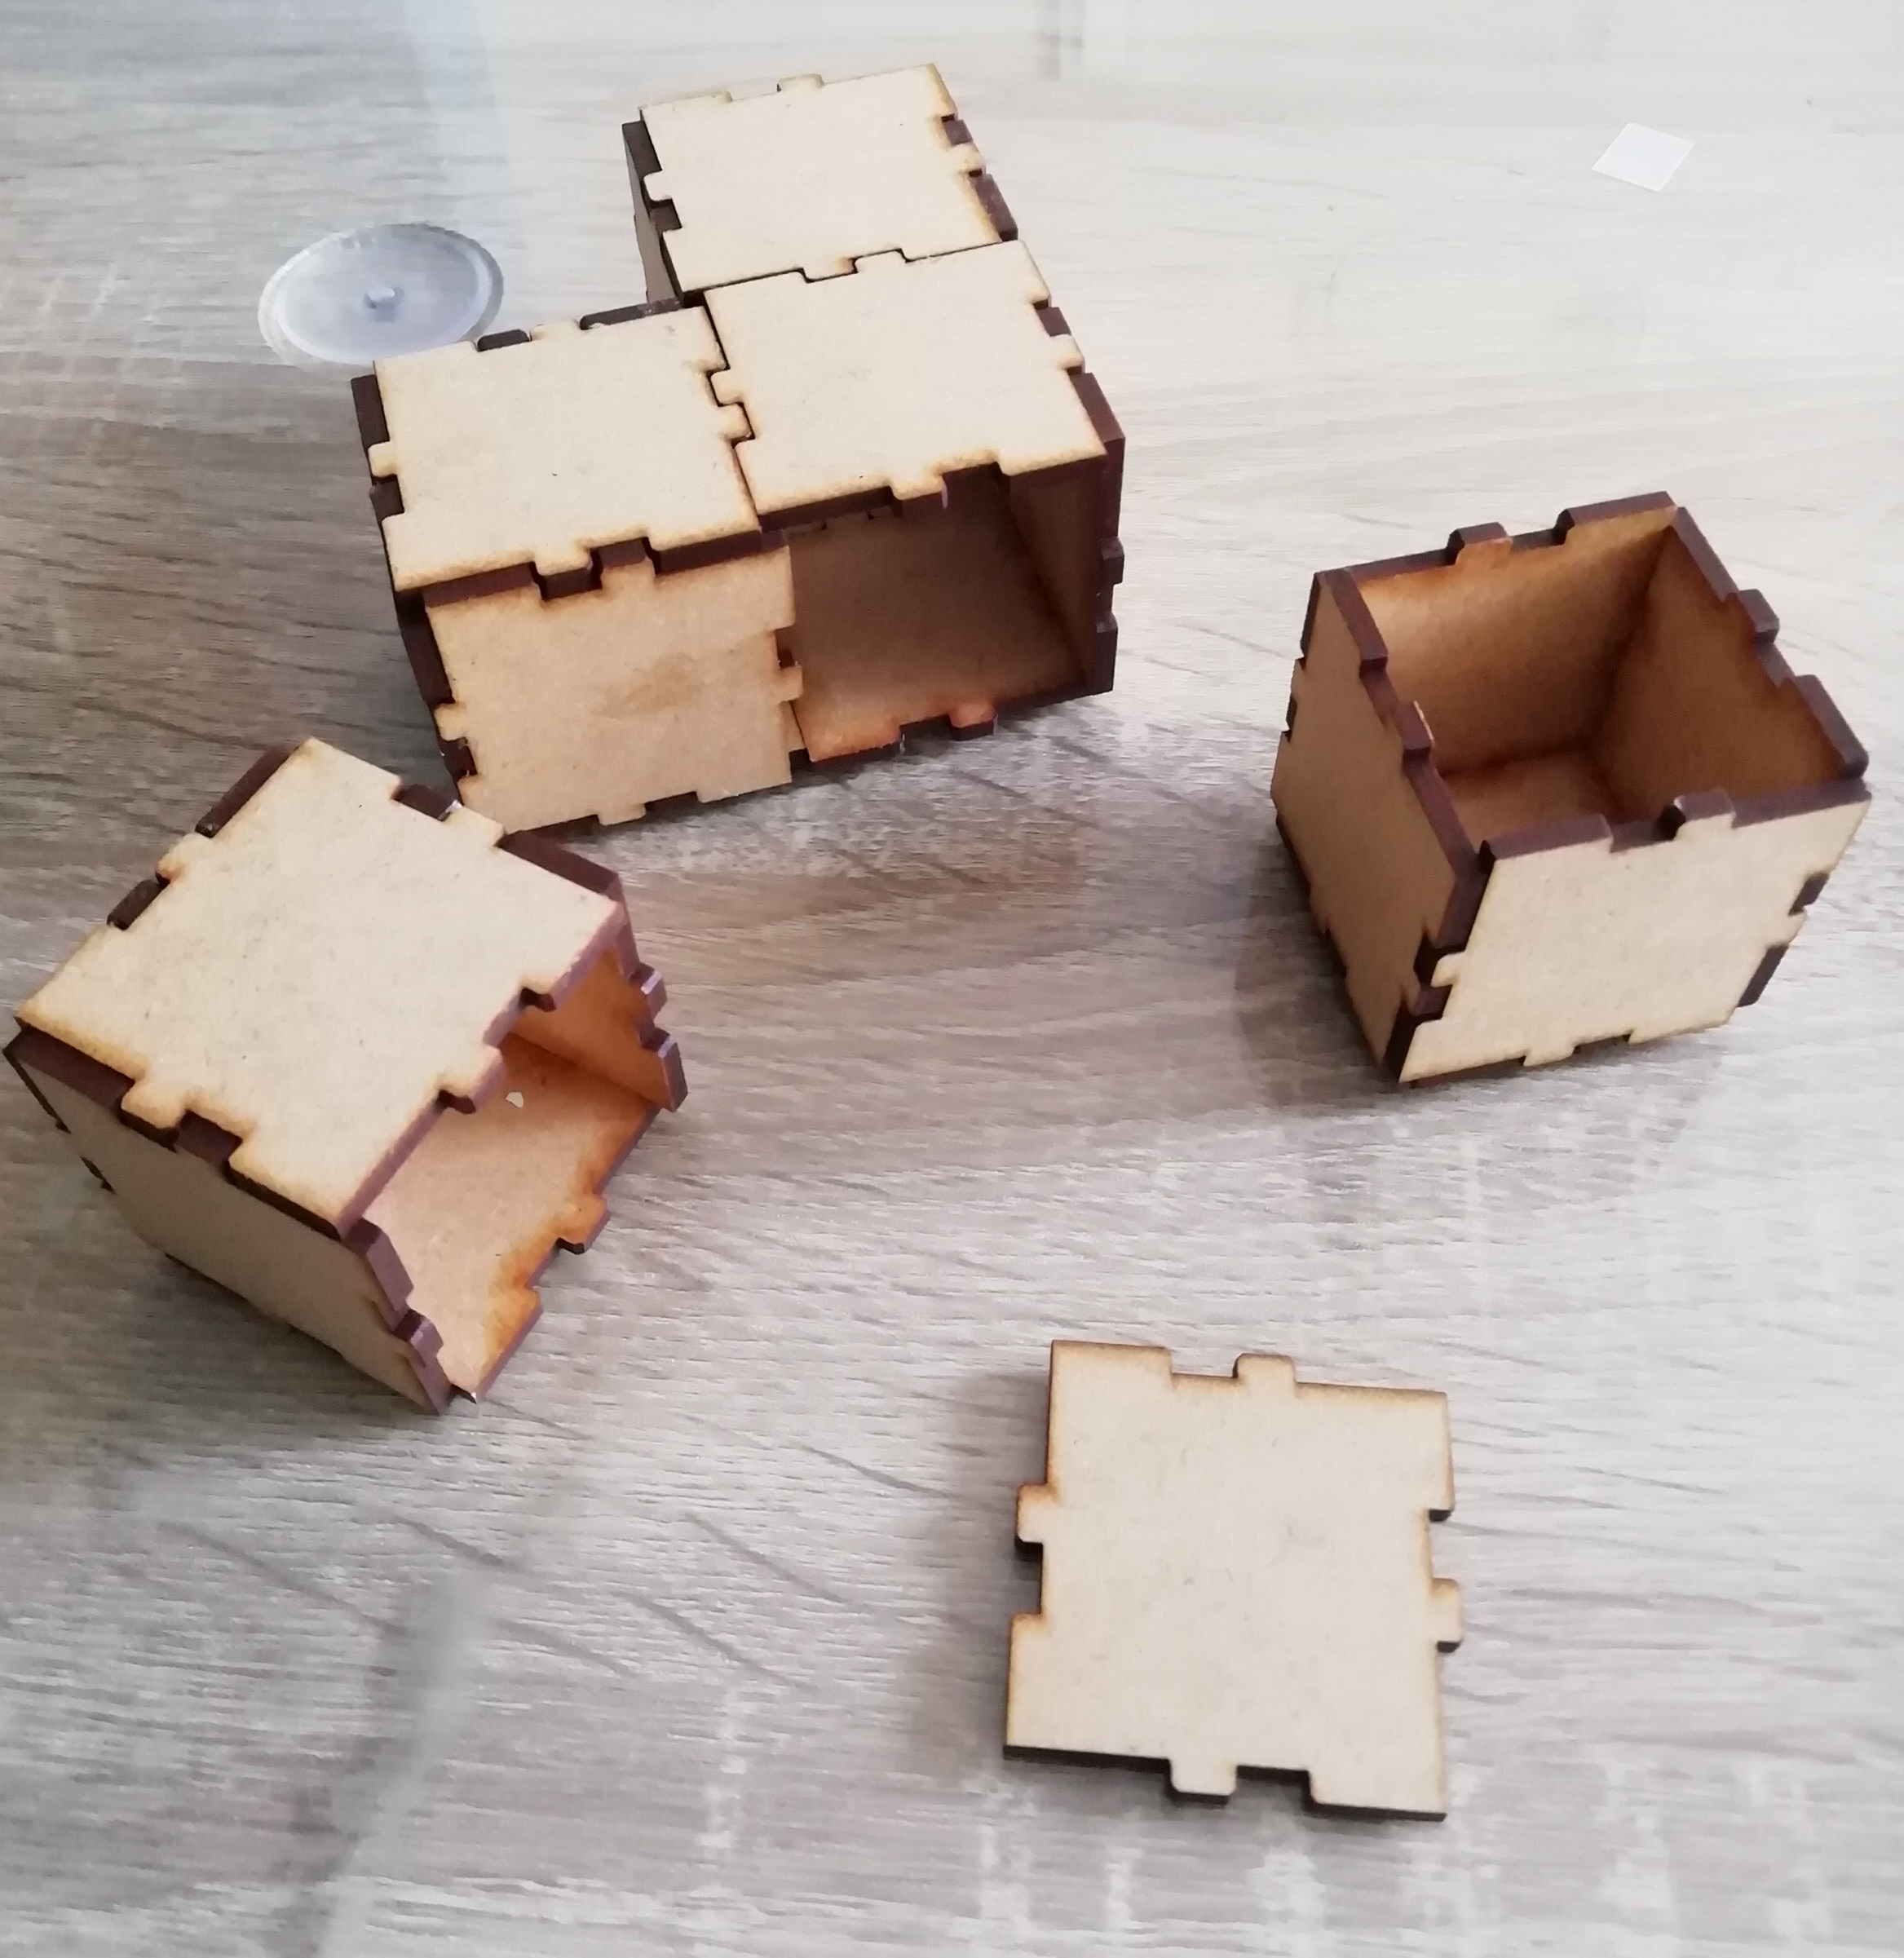
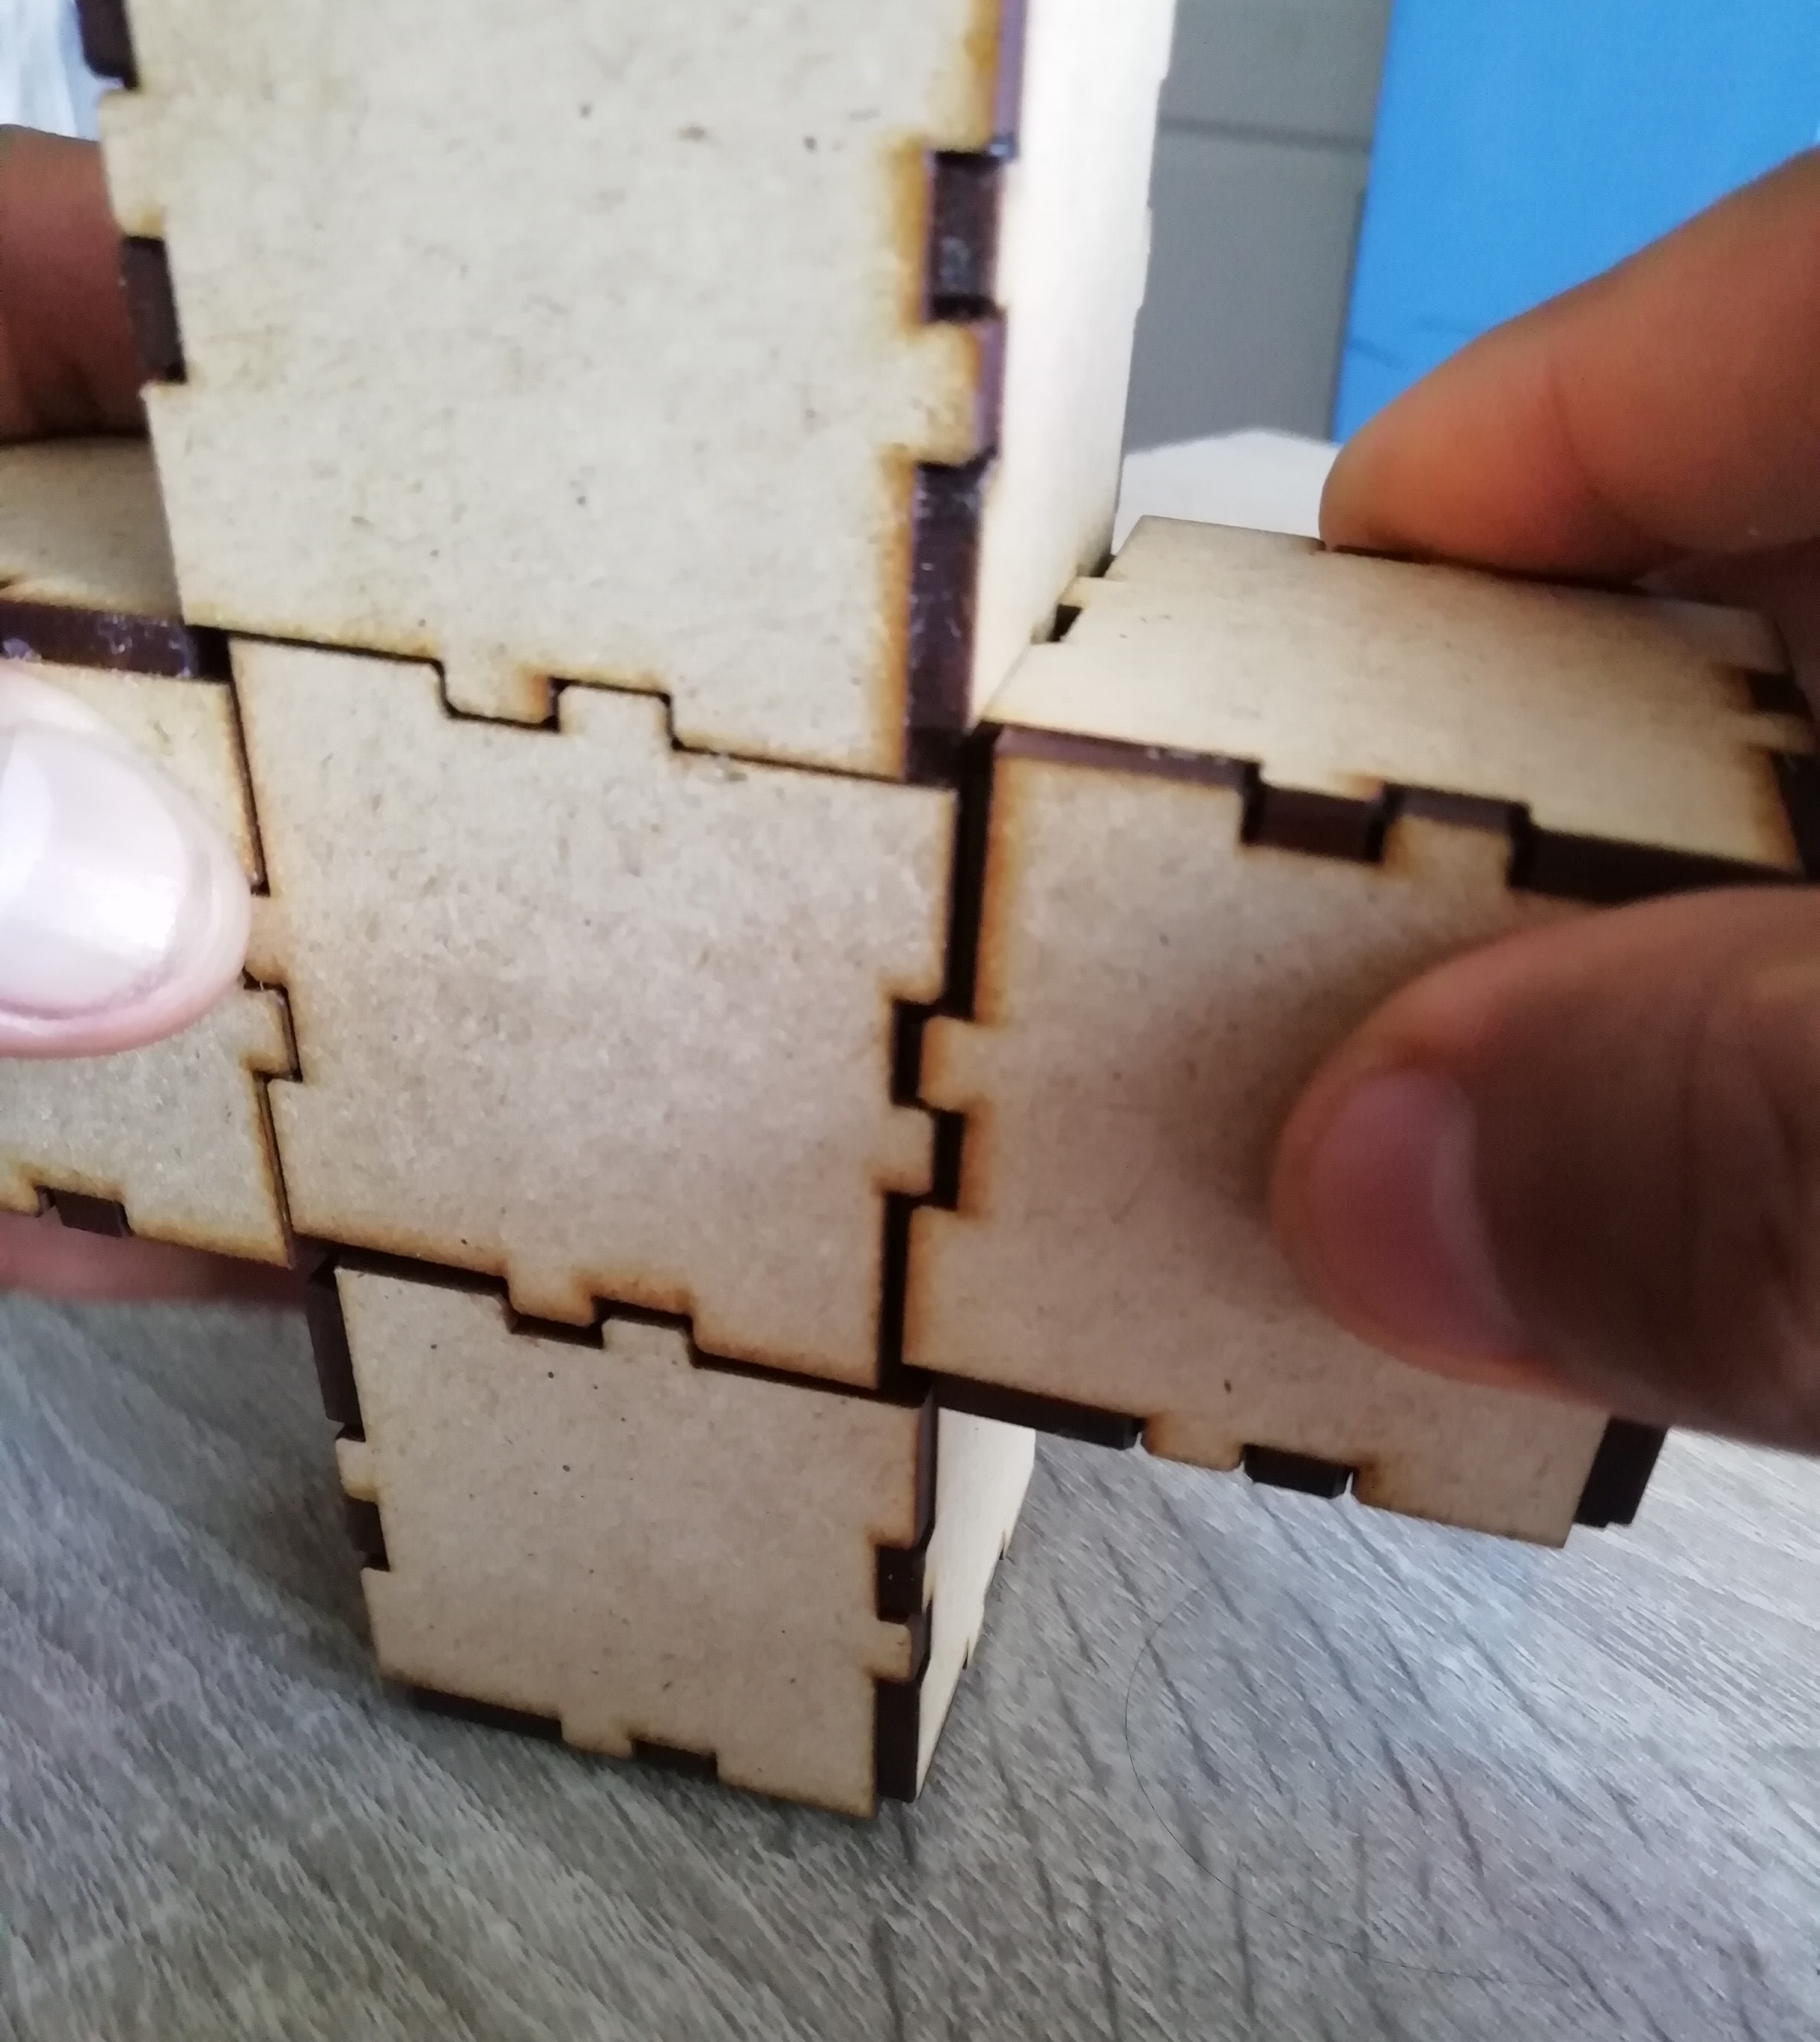
- I start to join the cubes,
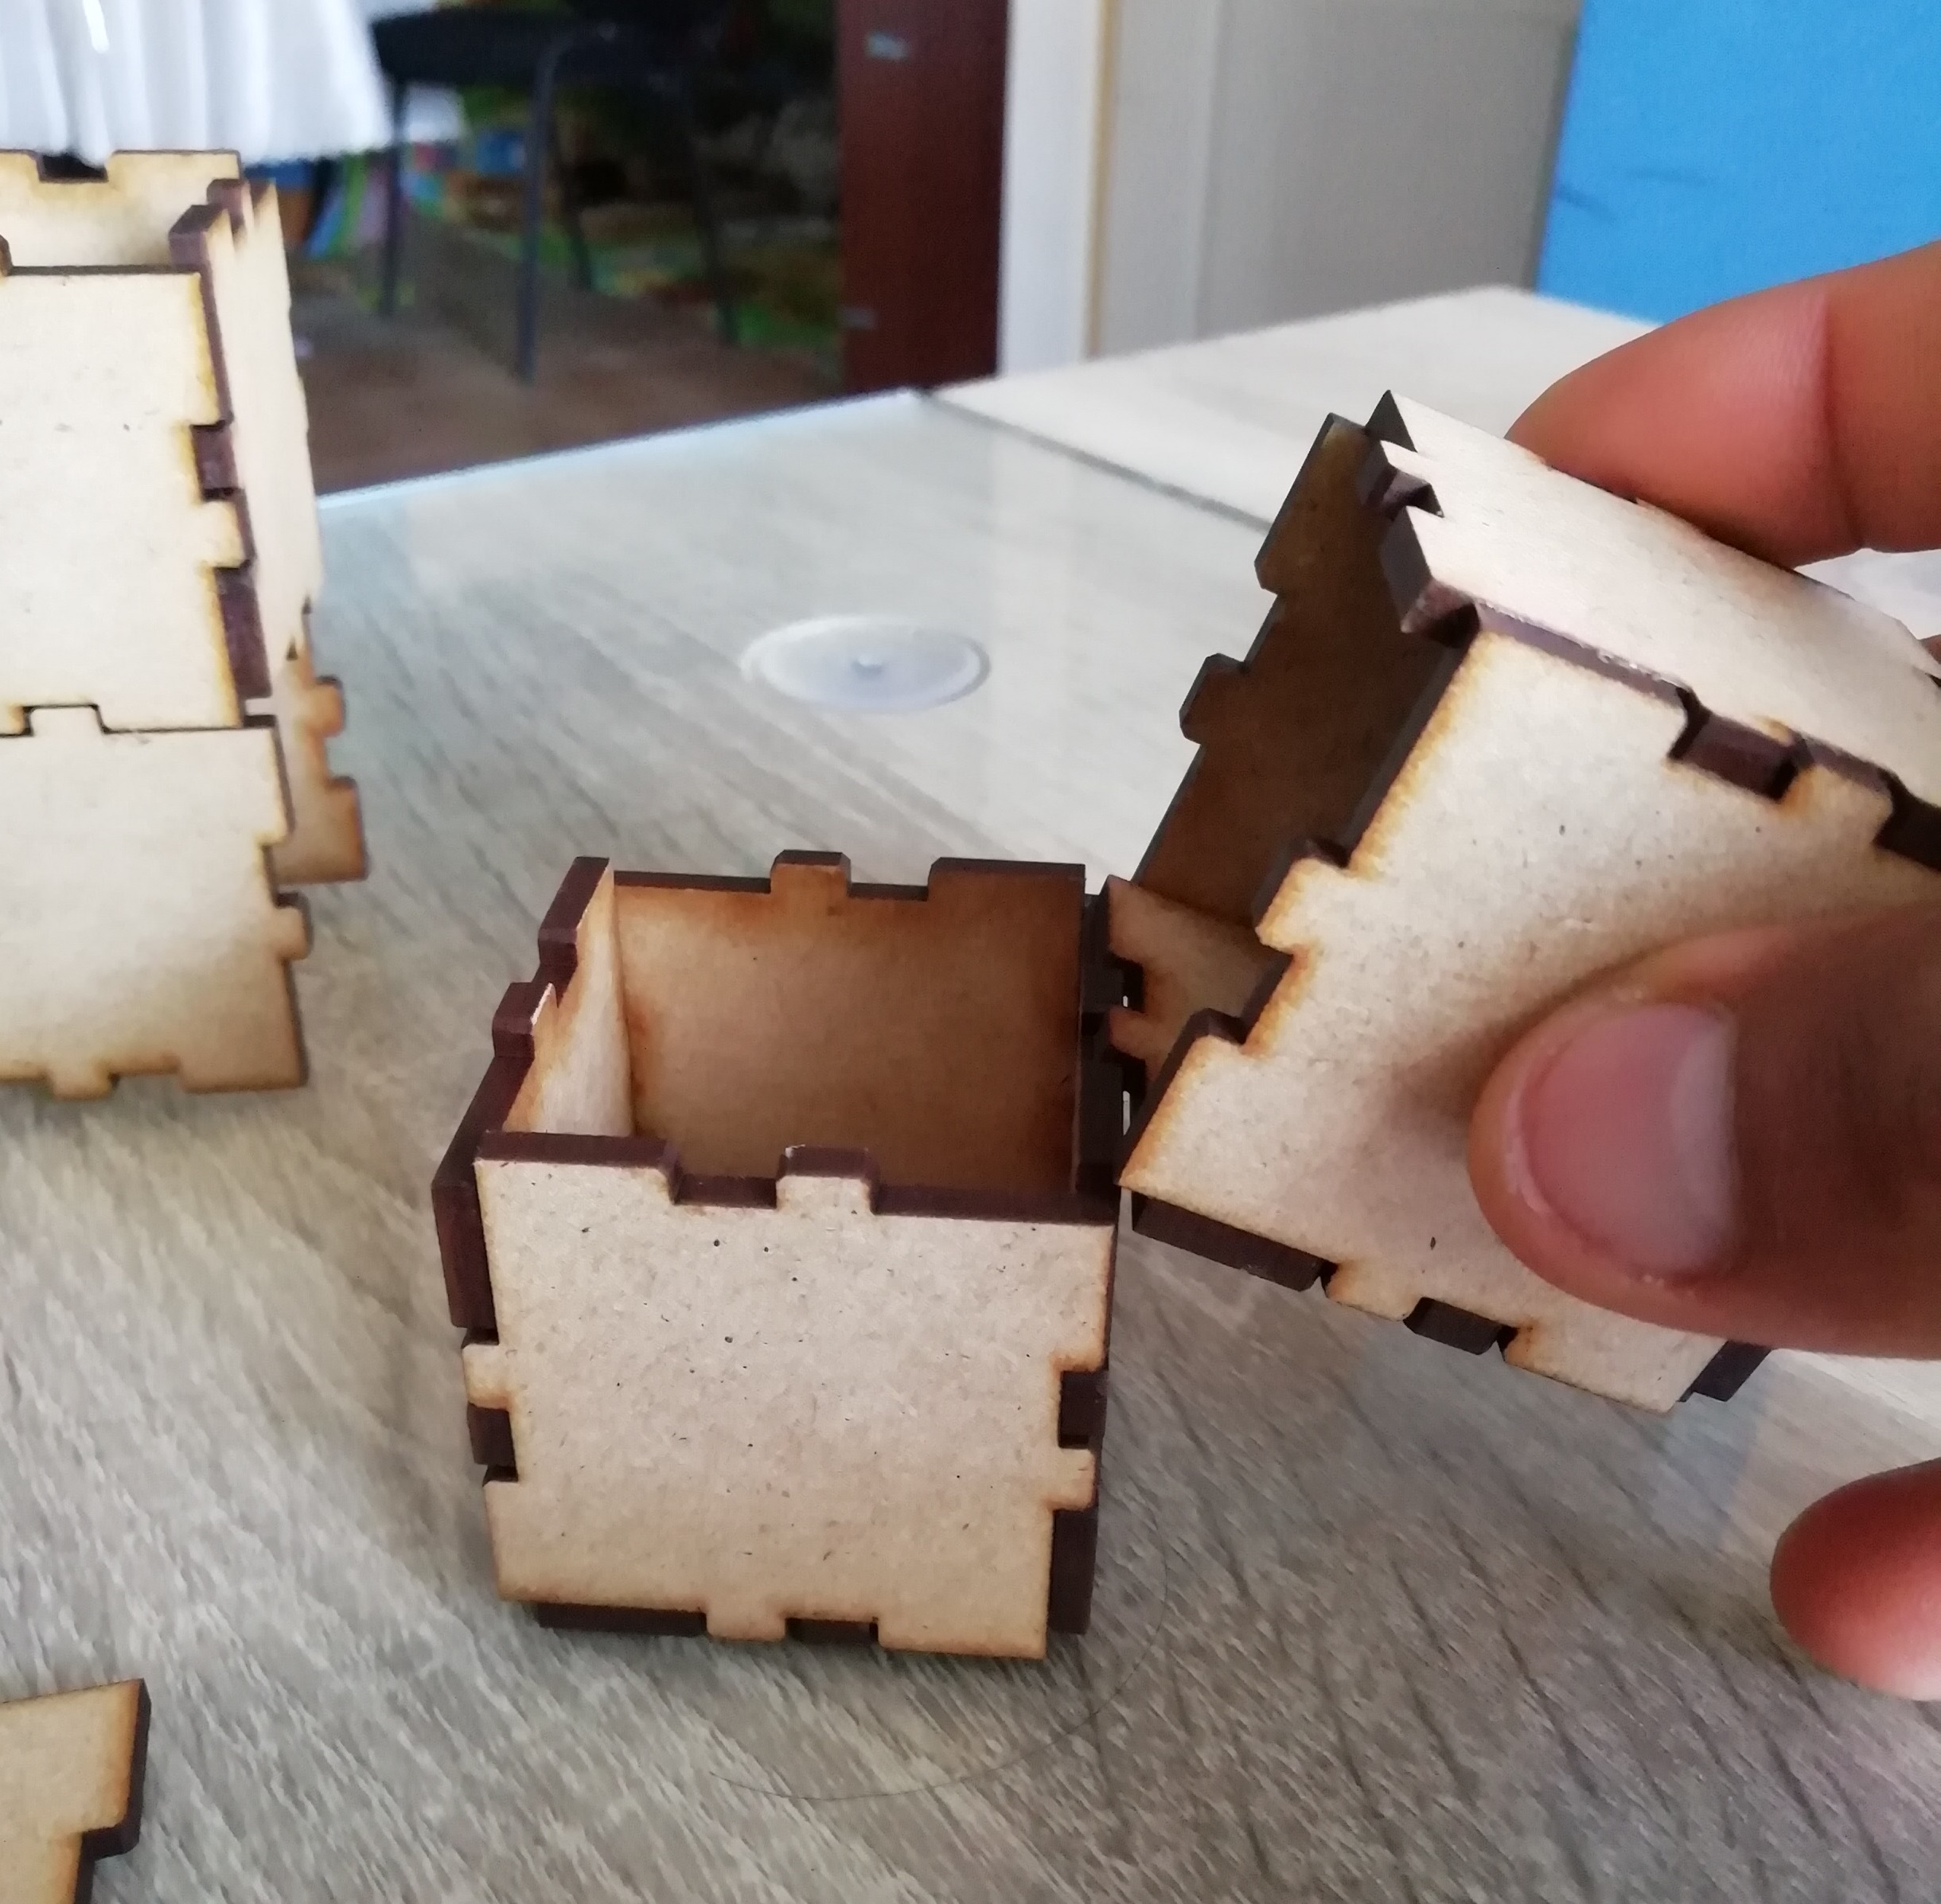
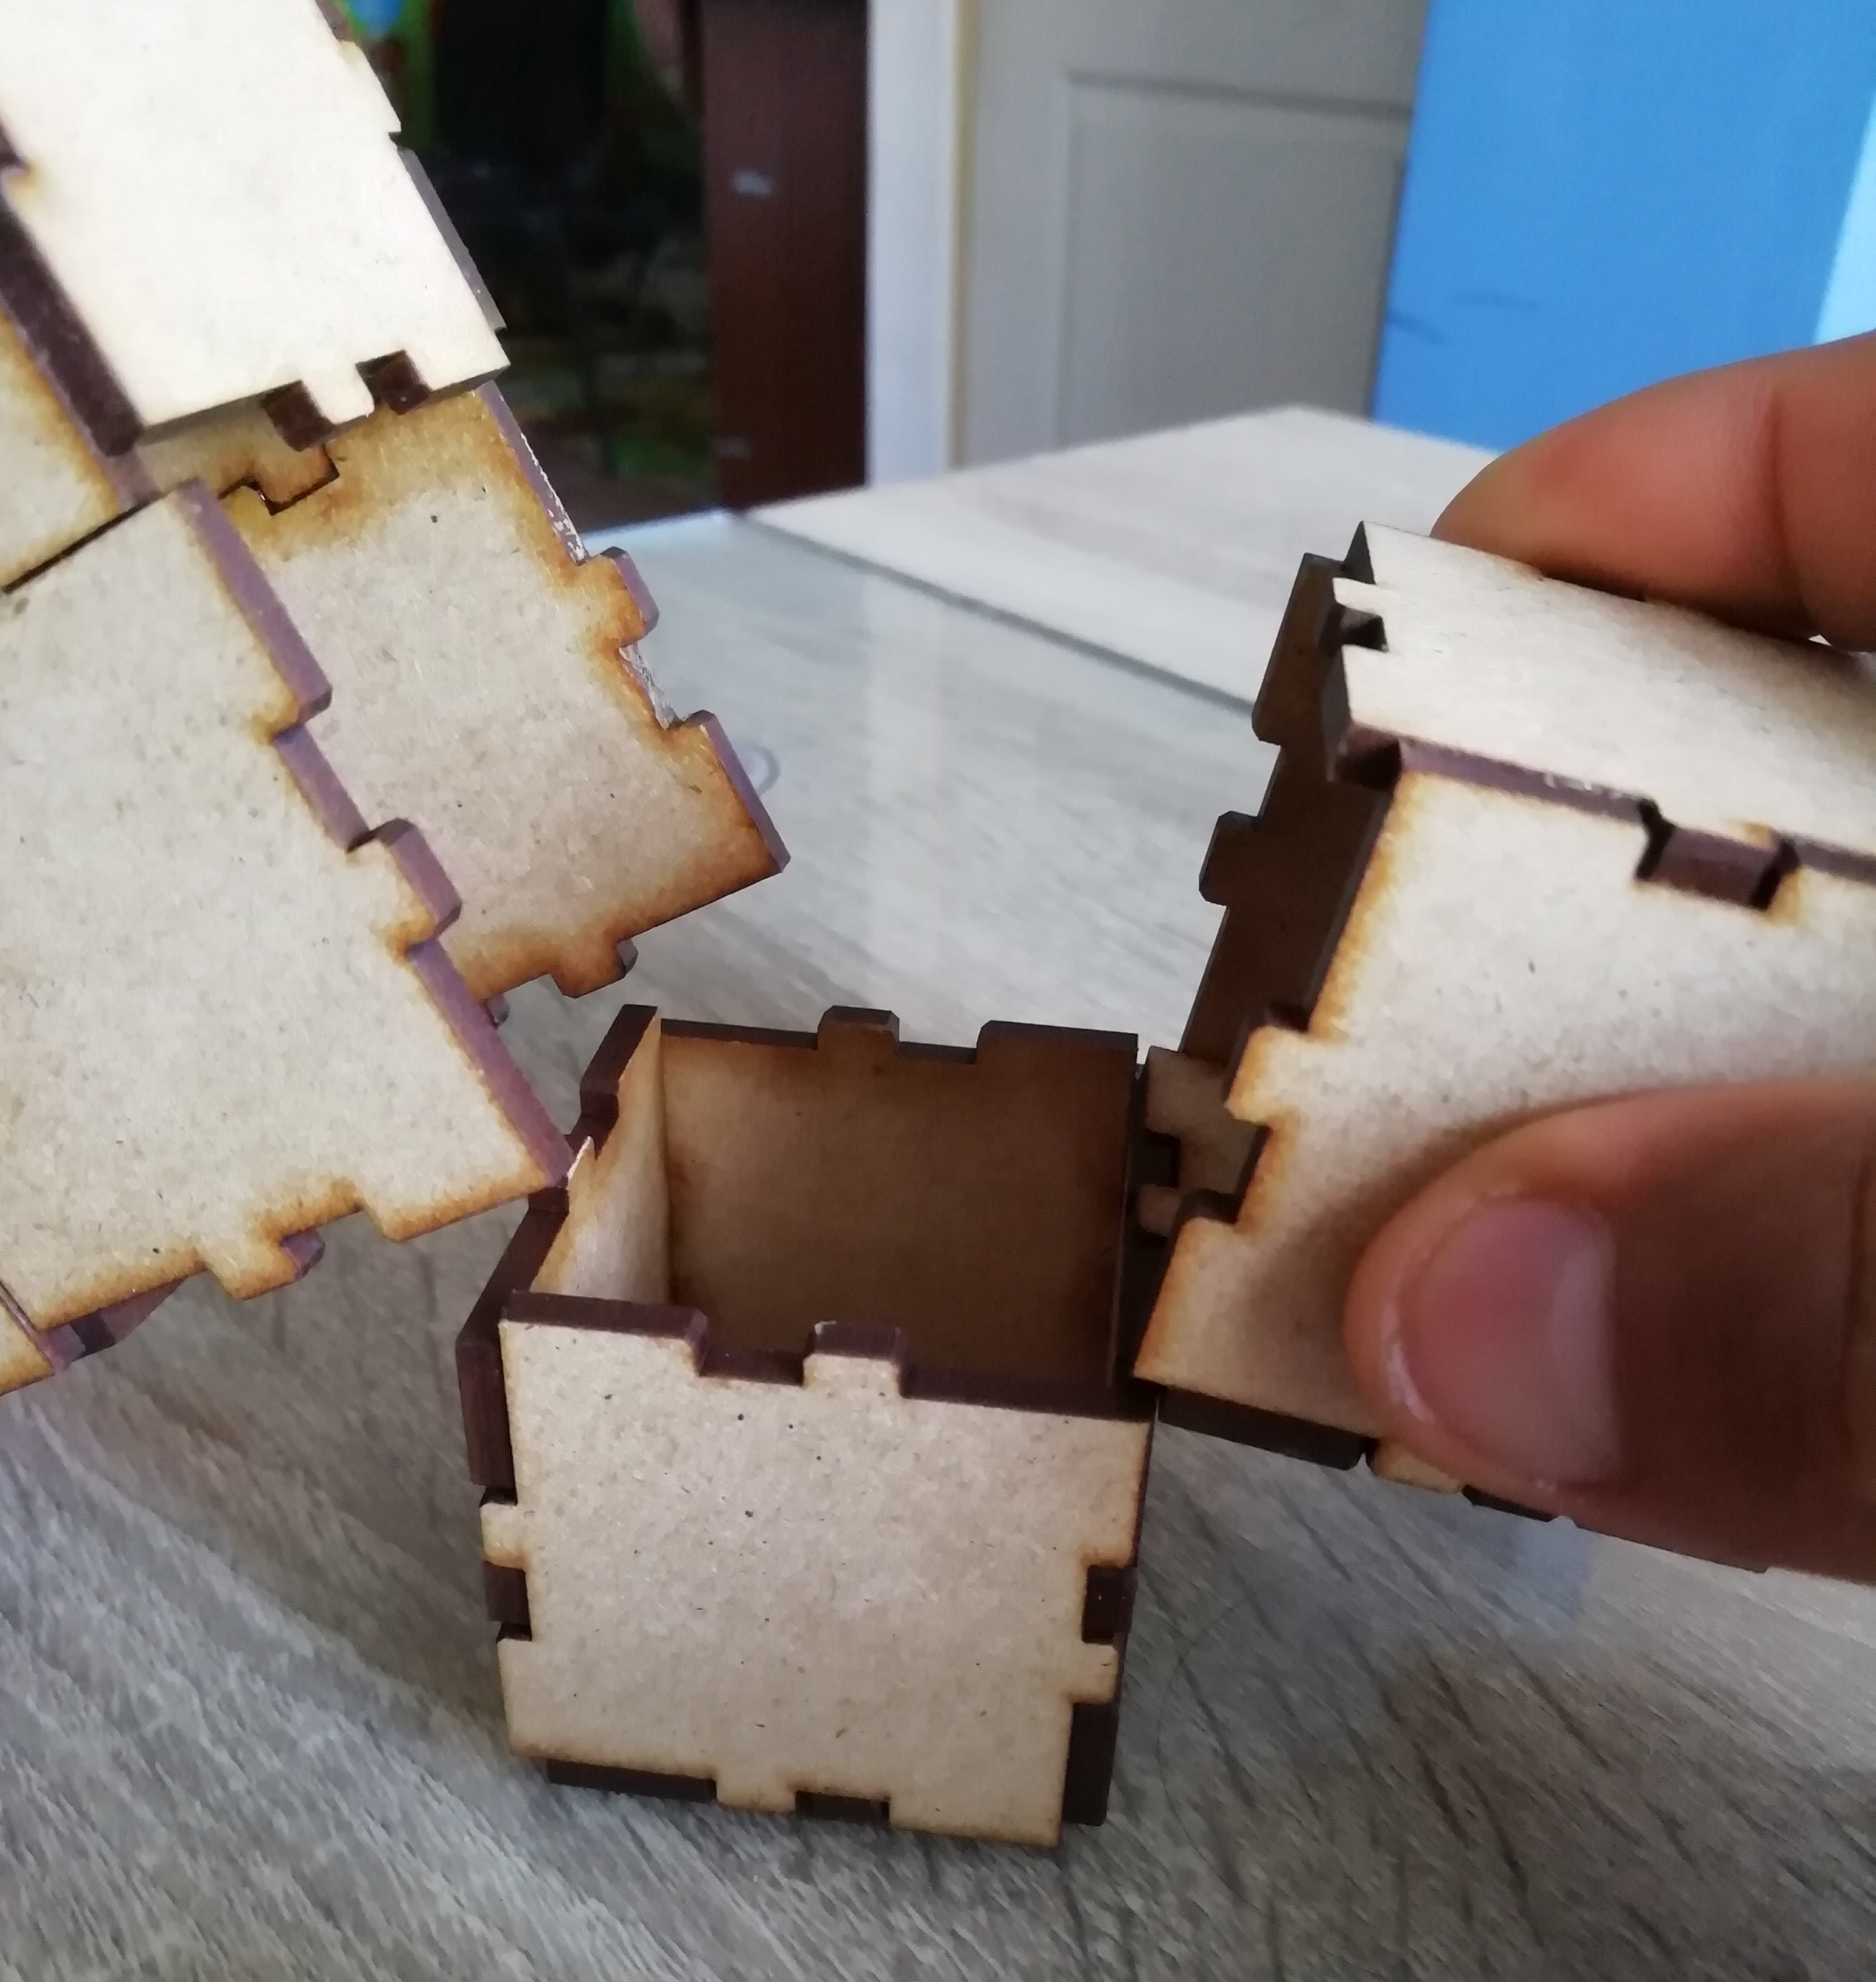
- I adjust it to pressure,
- Place the part of the hat,

- Finally the little man is ready.

B. Vinyl design and cutting
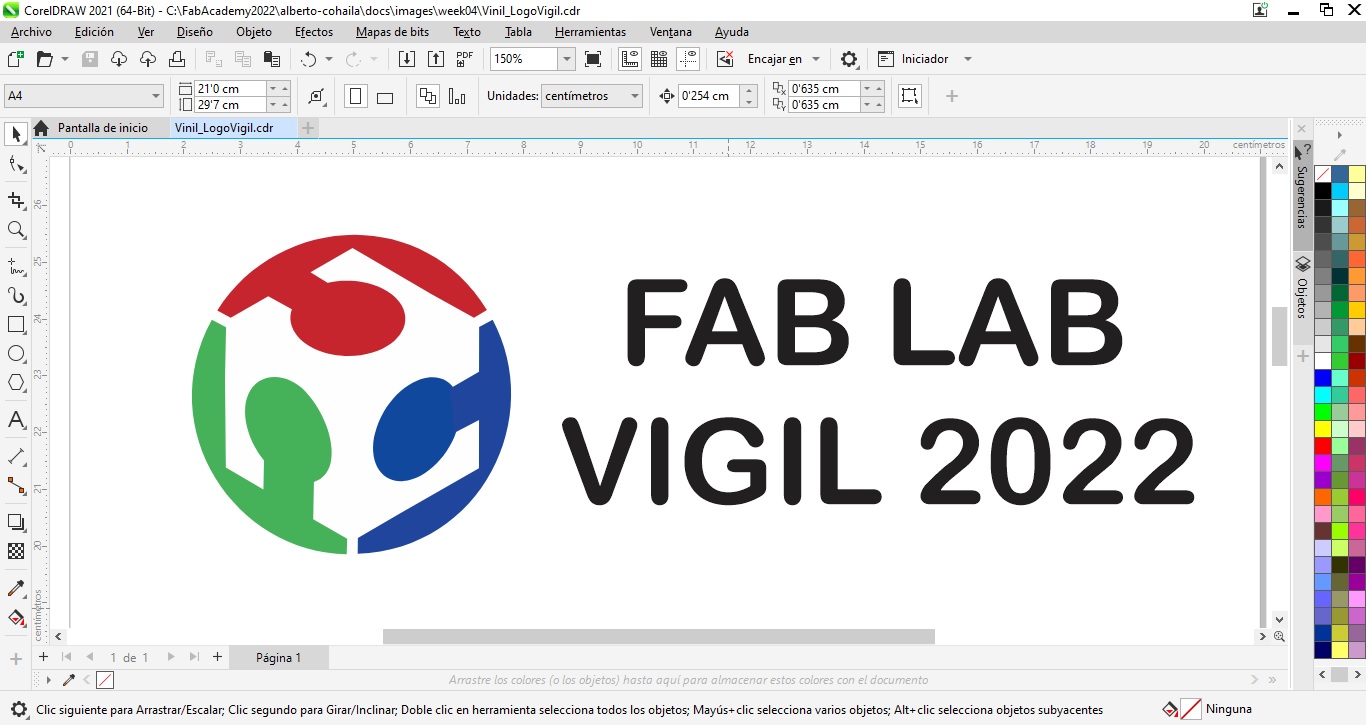
- For this task, I decided to design the typical FabLab logo and add a text to it: FabLab Vigil 2022. I drew it in Corel Draw version 2021.
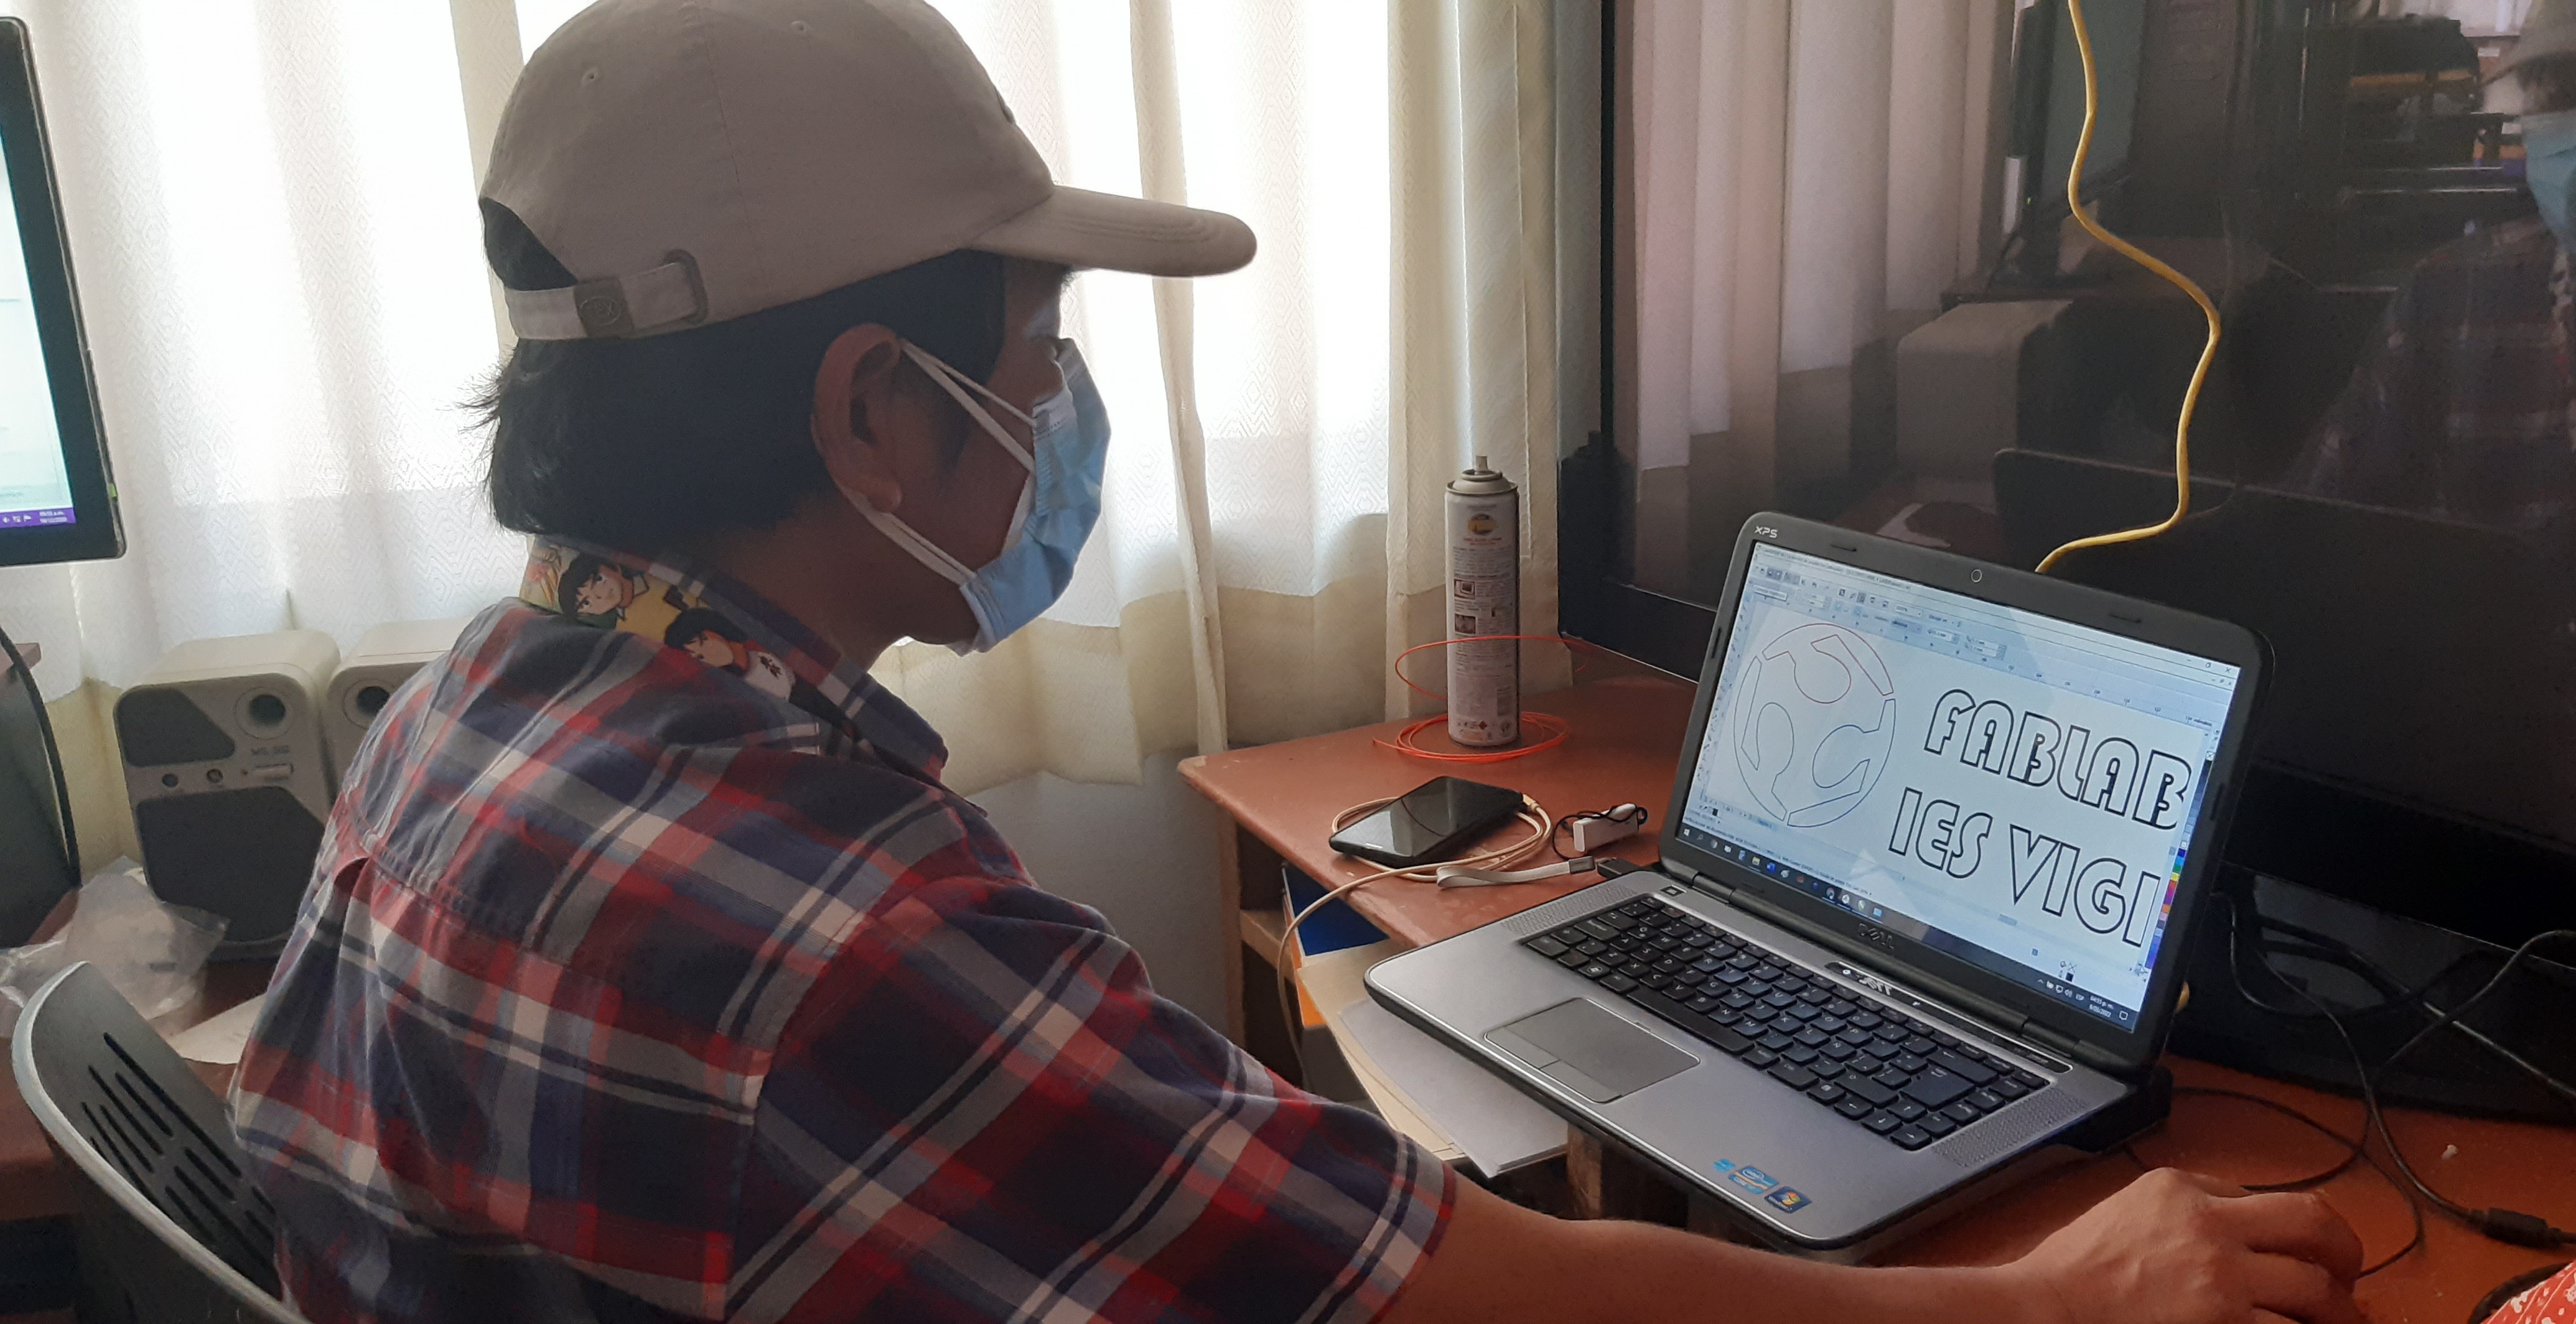
- This is the proposed design in Corel Draw.
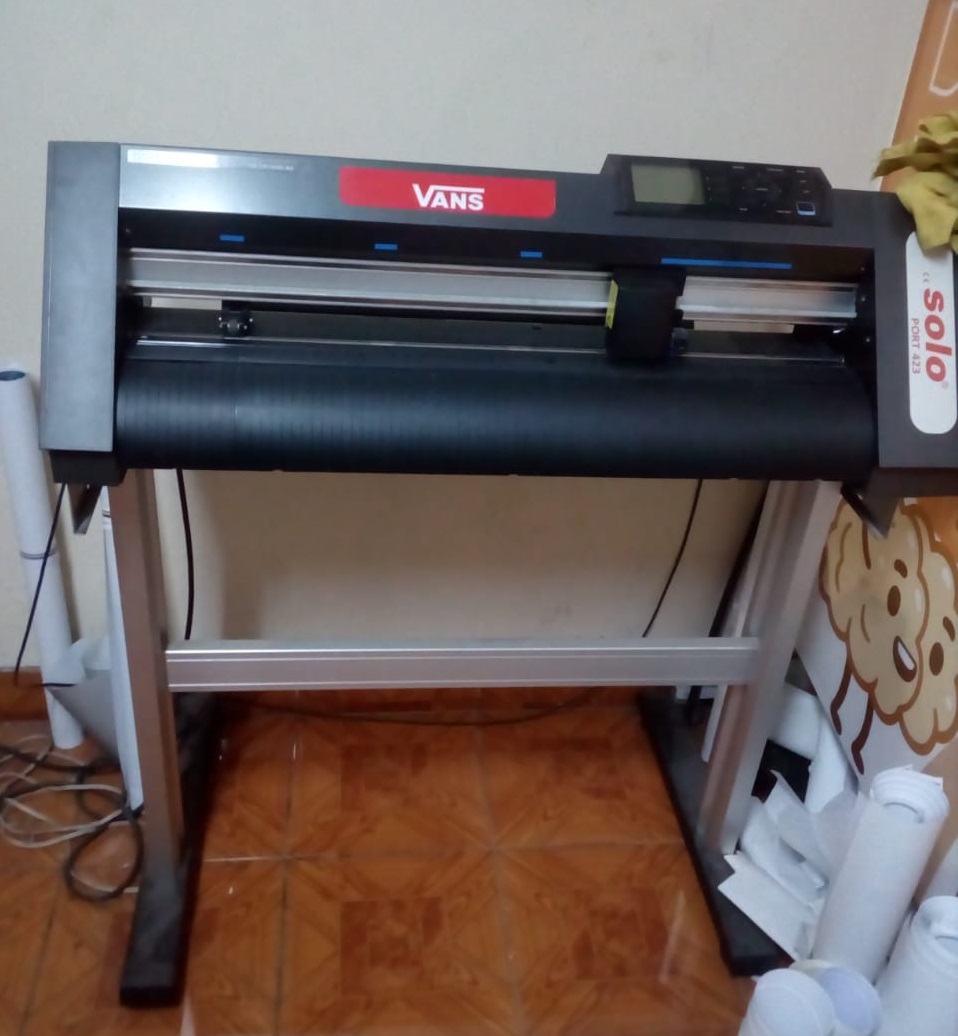
- As even to date the IES “Francisco de Paula Gonzáles Vigil” in Tacna does not have a vinyl cutter, this activity was carried out through a private workshop in order to see anticipated results. The cutting plotter is Graphtec brand.
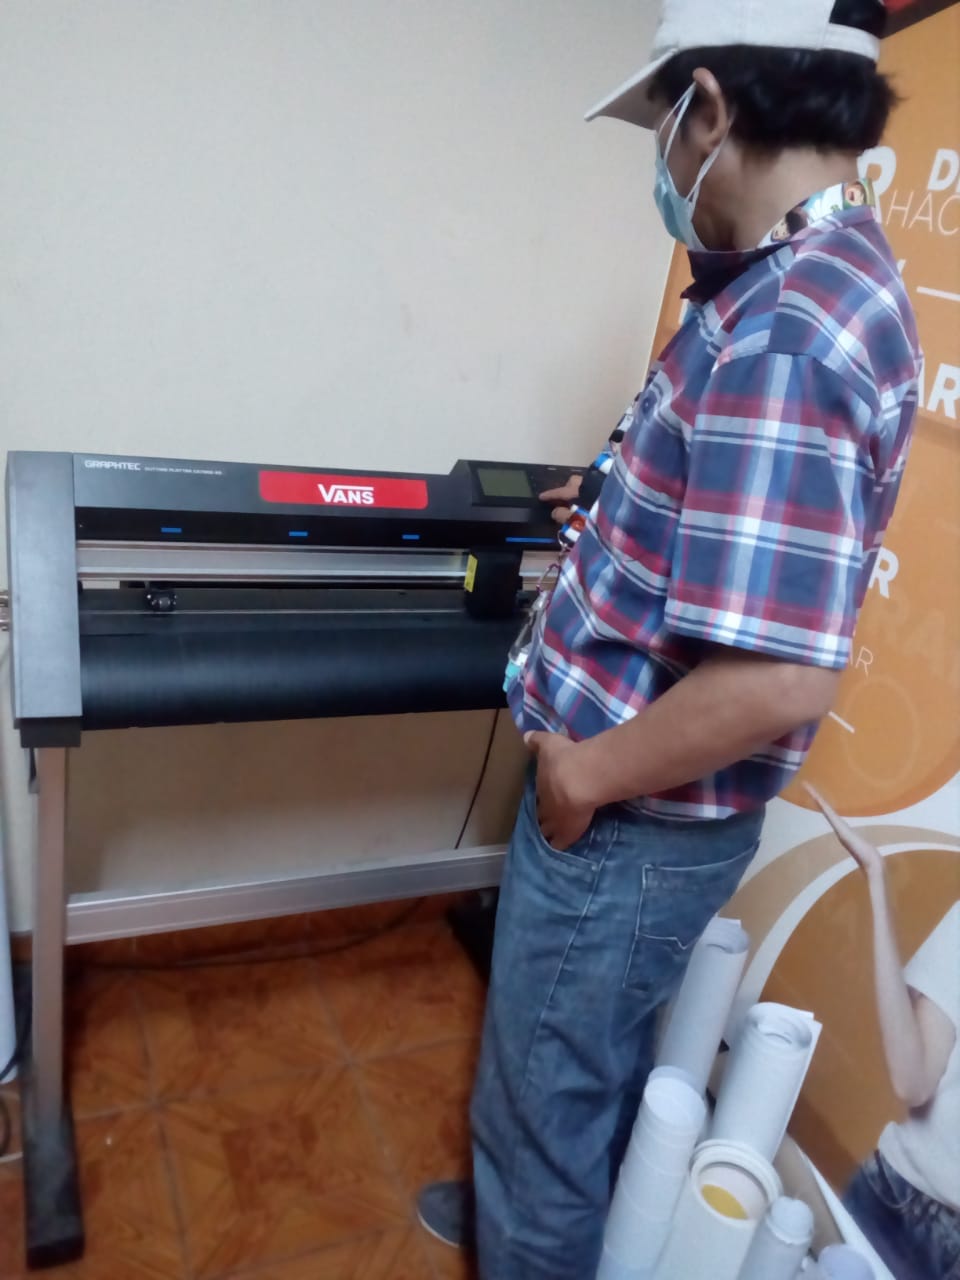
- Permission was requested from the store manager to turn on the cutter plotter.
- The red vinyl was placed, y
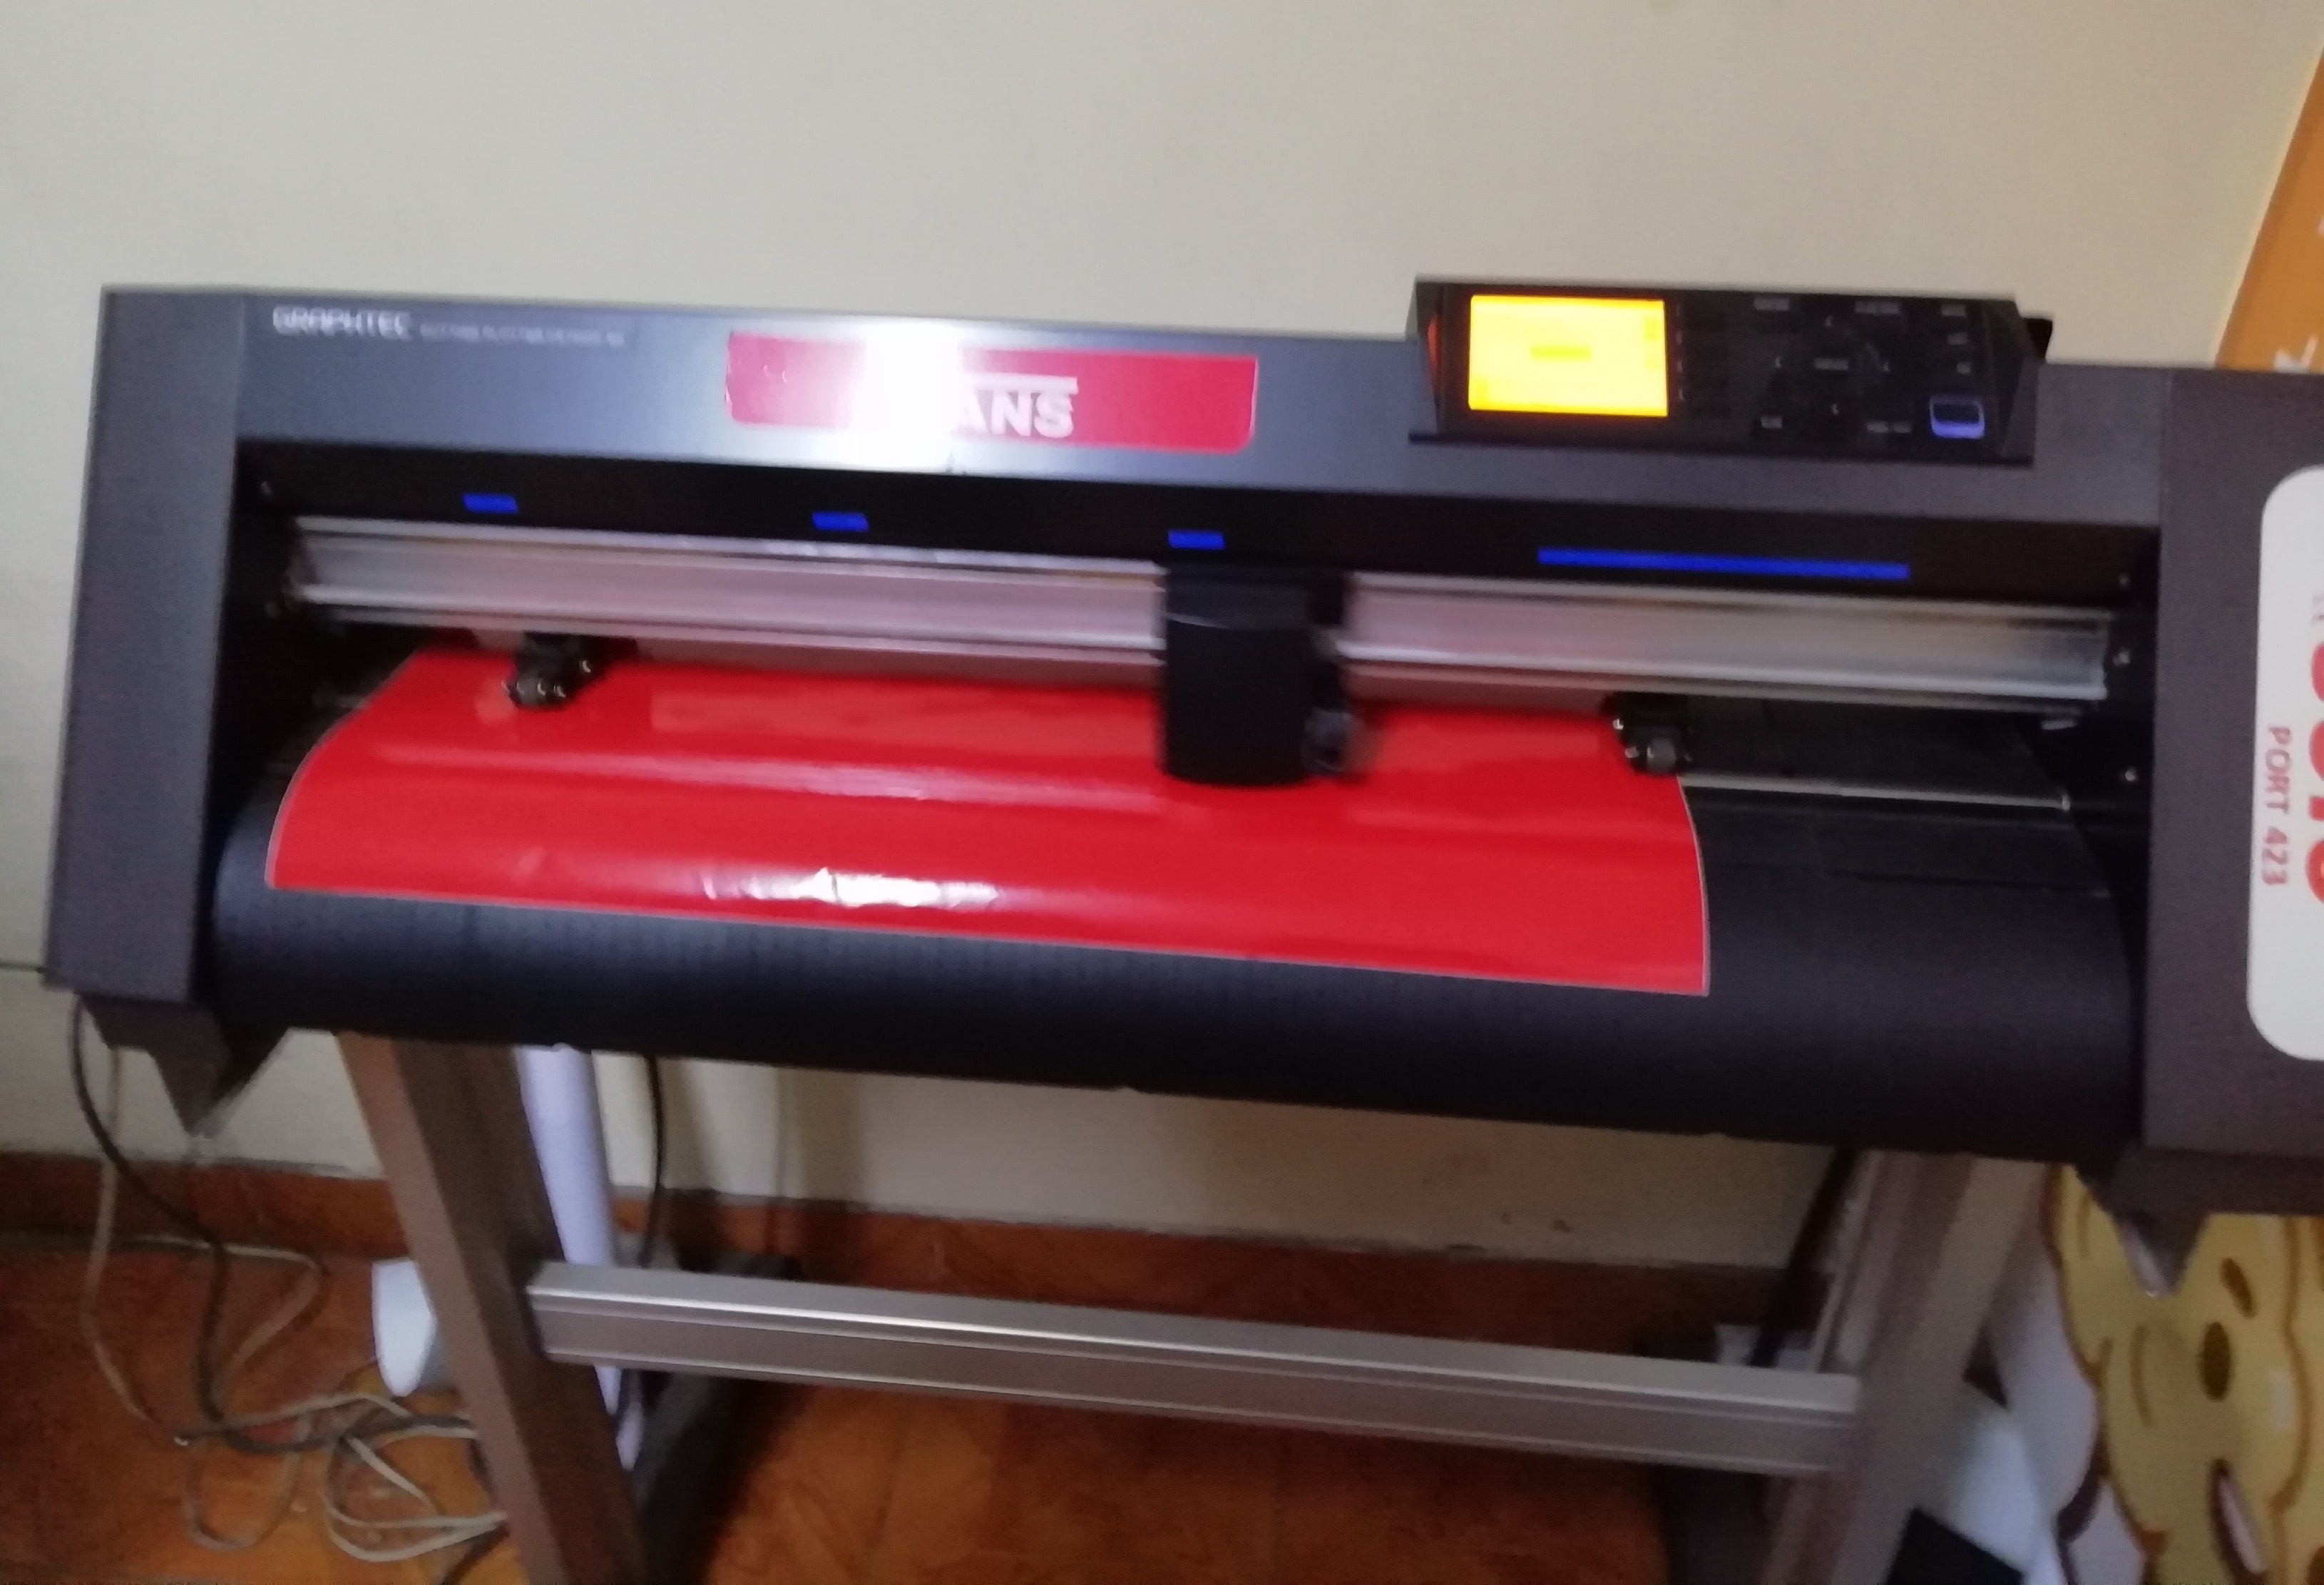
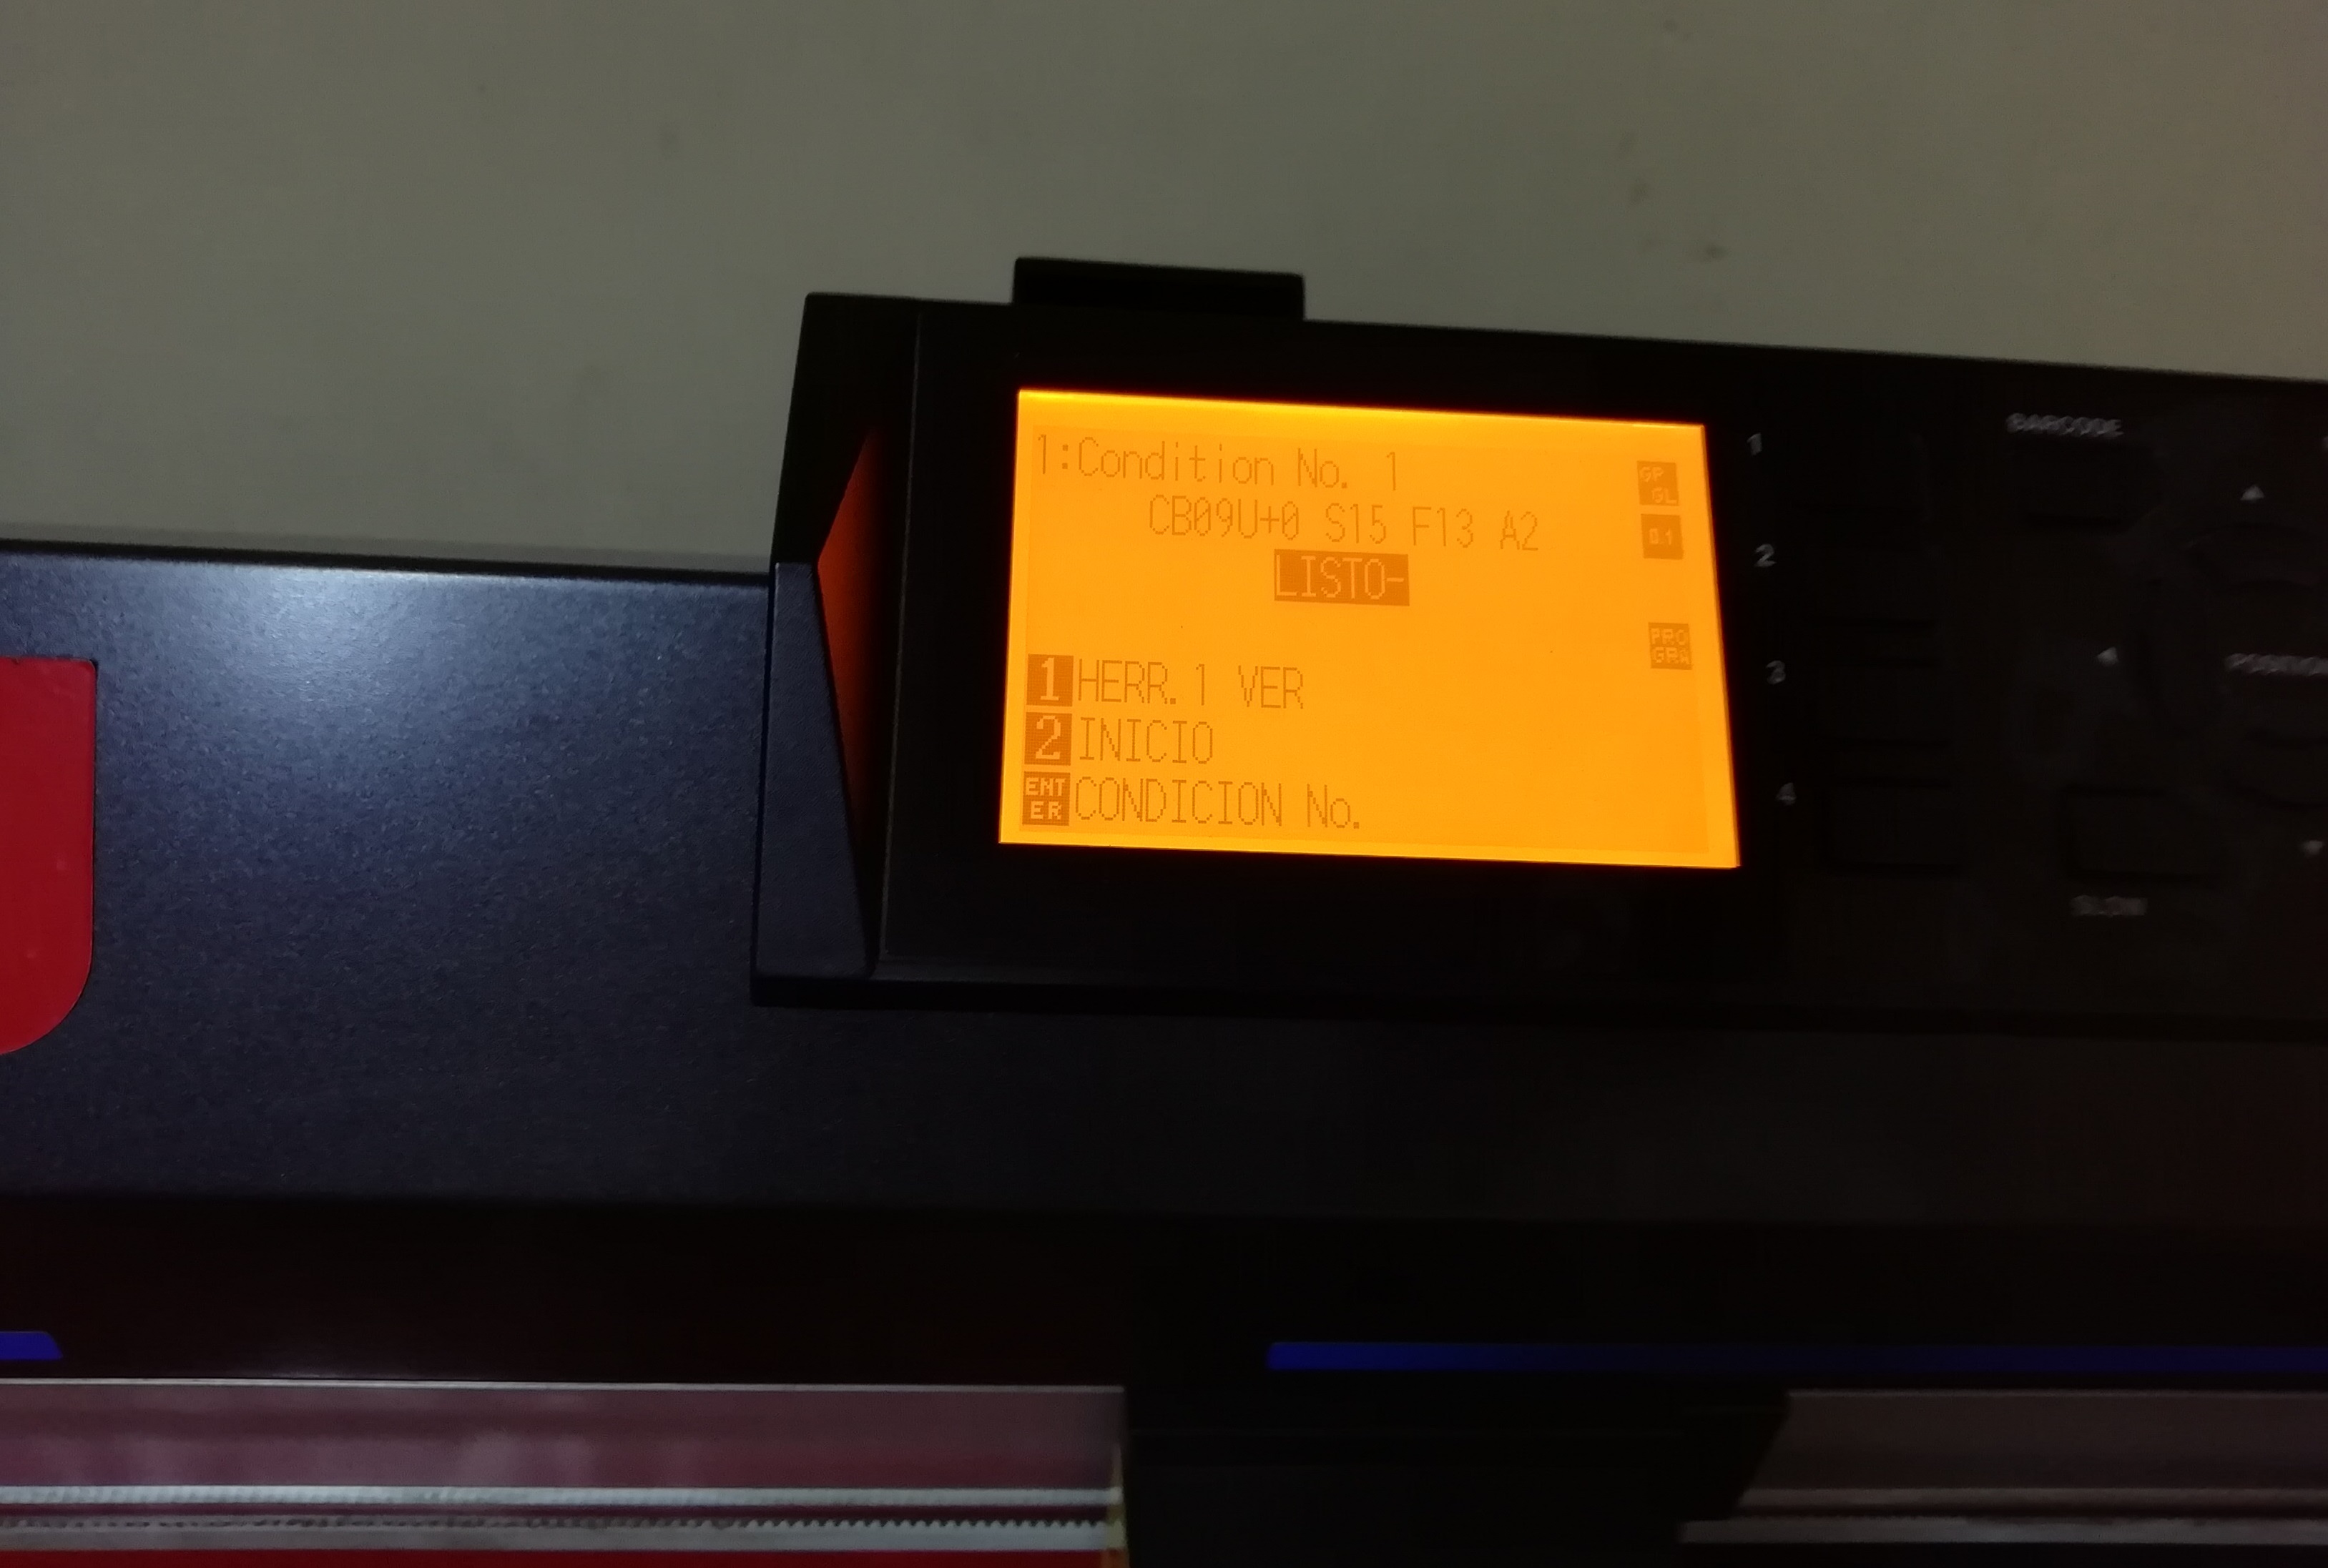
- Start was pressed.
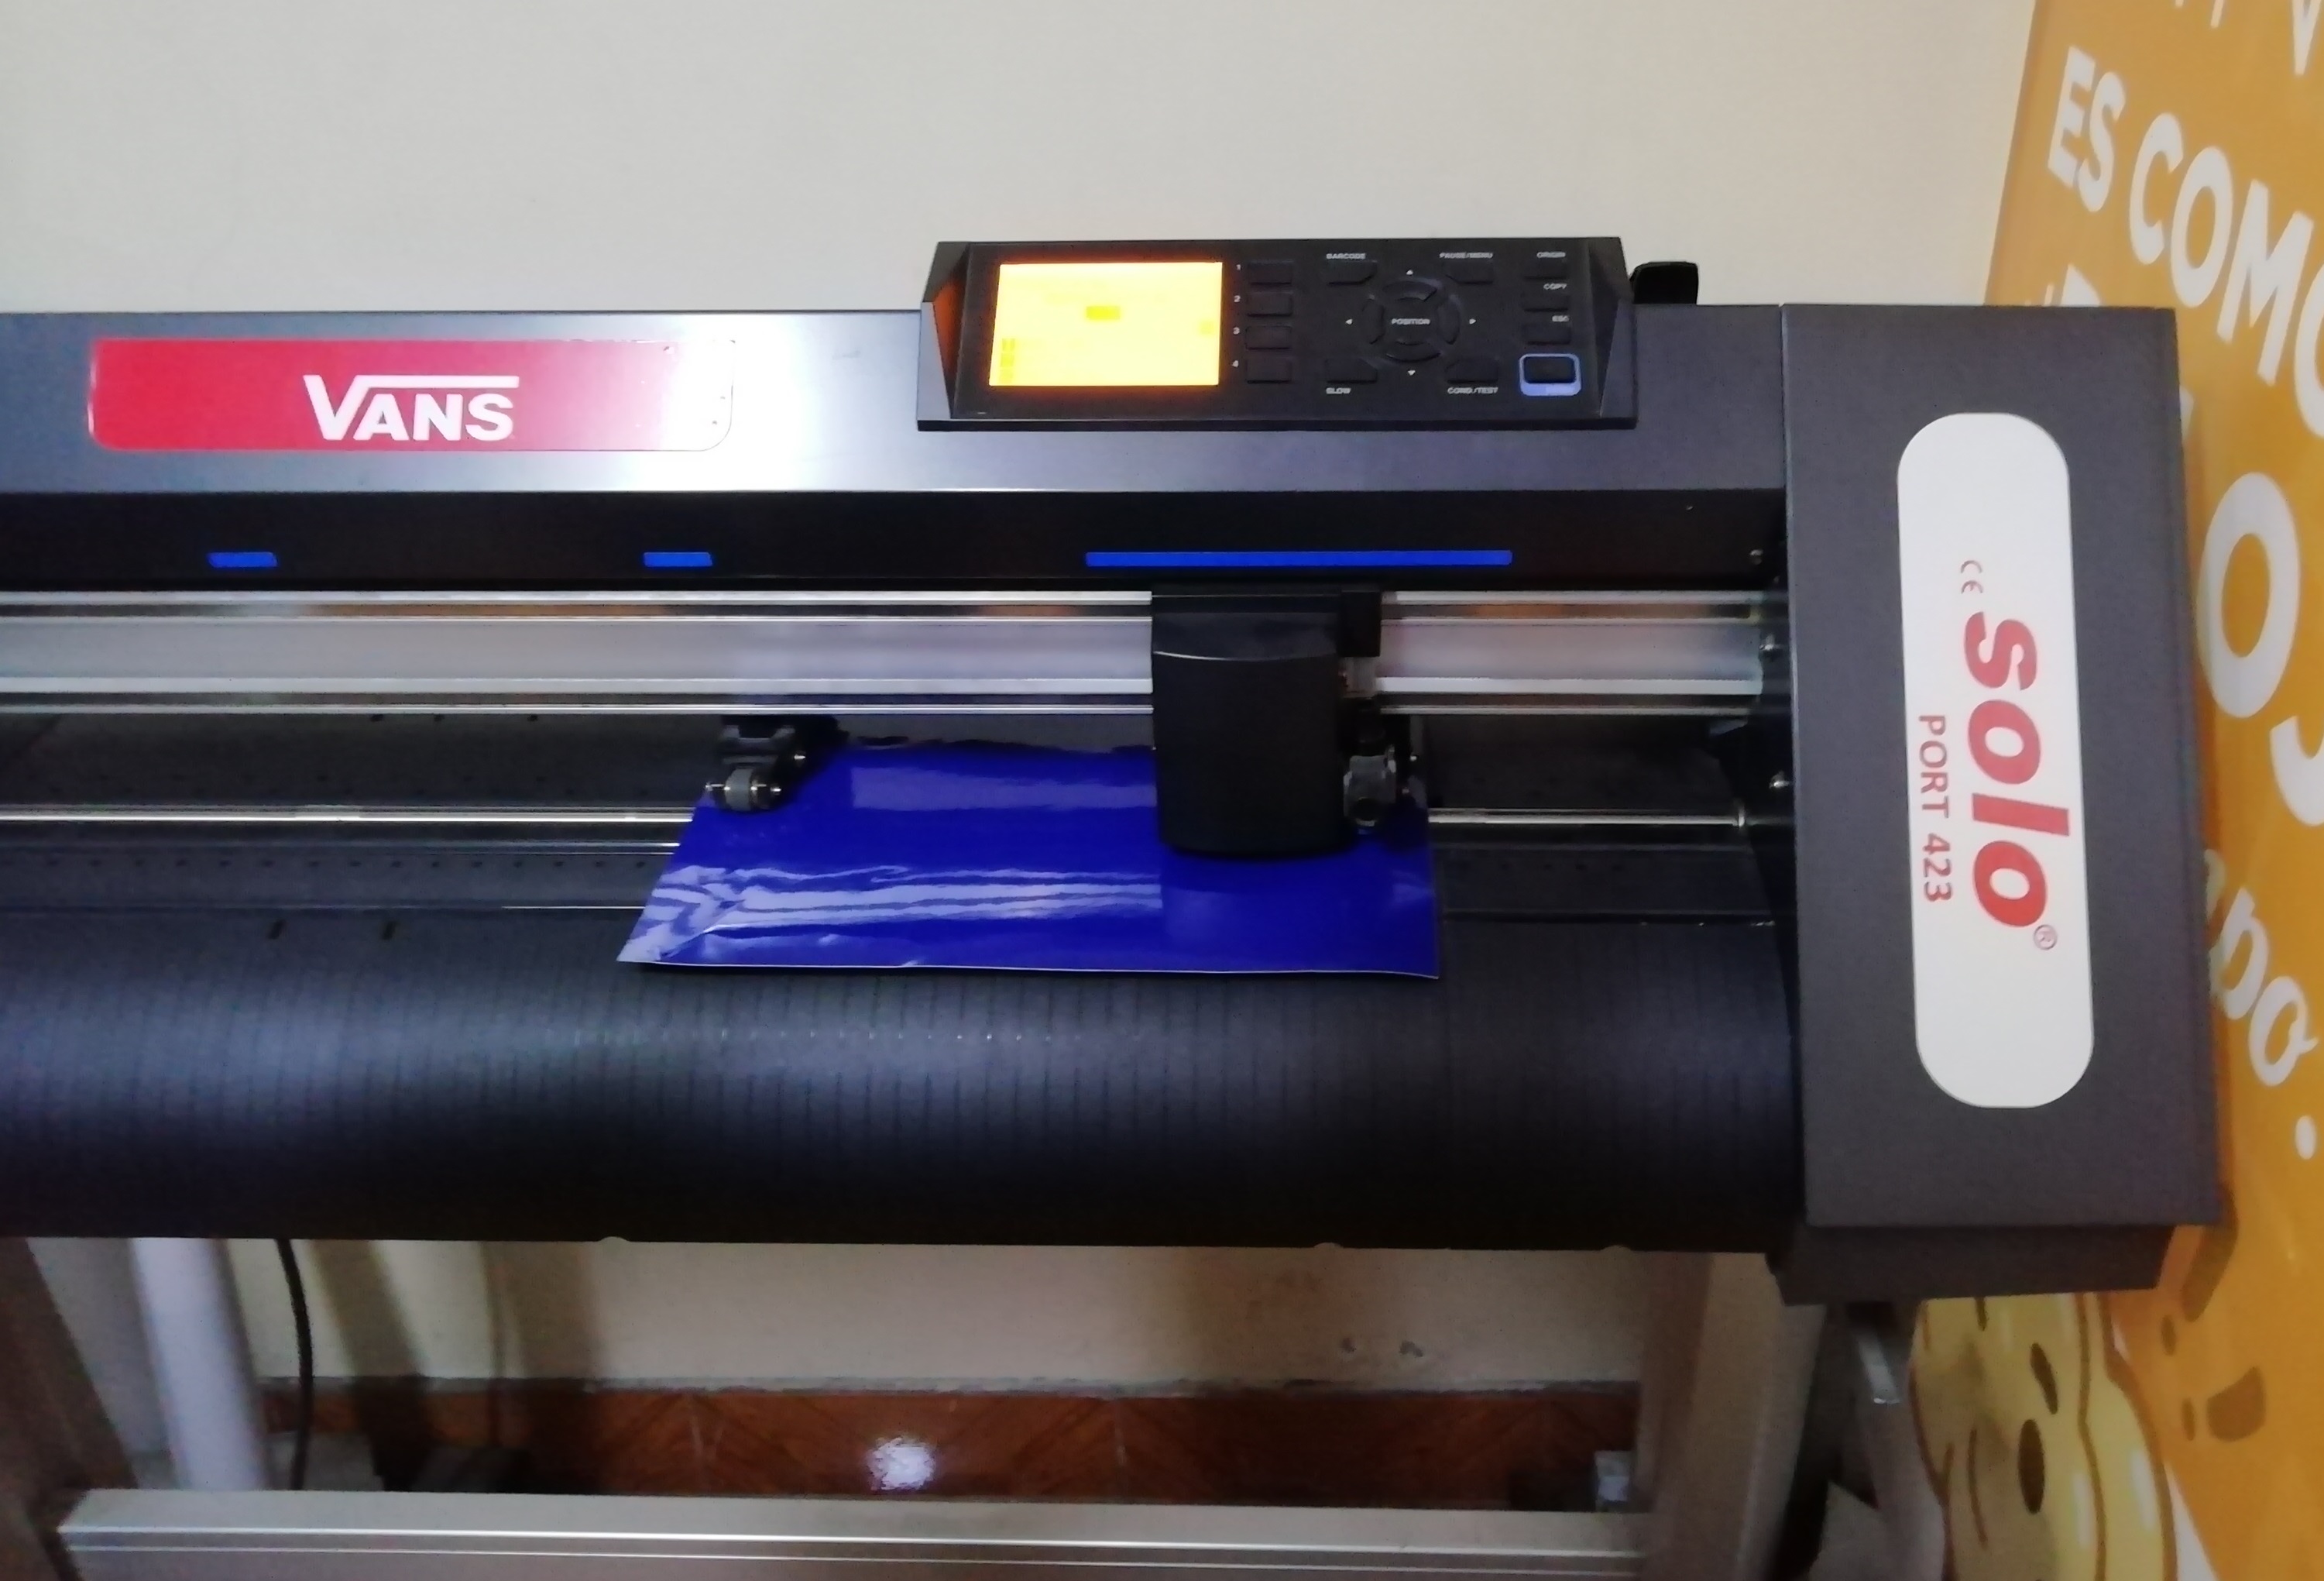
- Similarly for blue vinyl, and
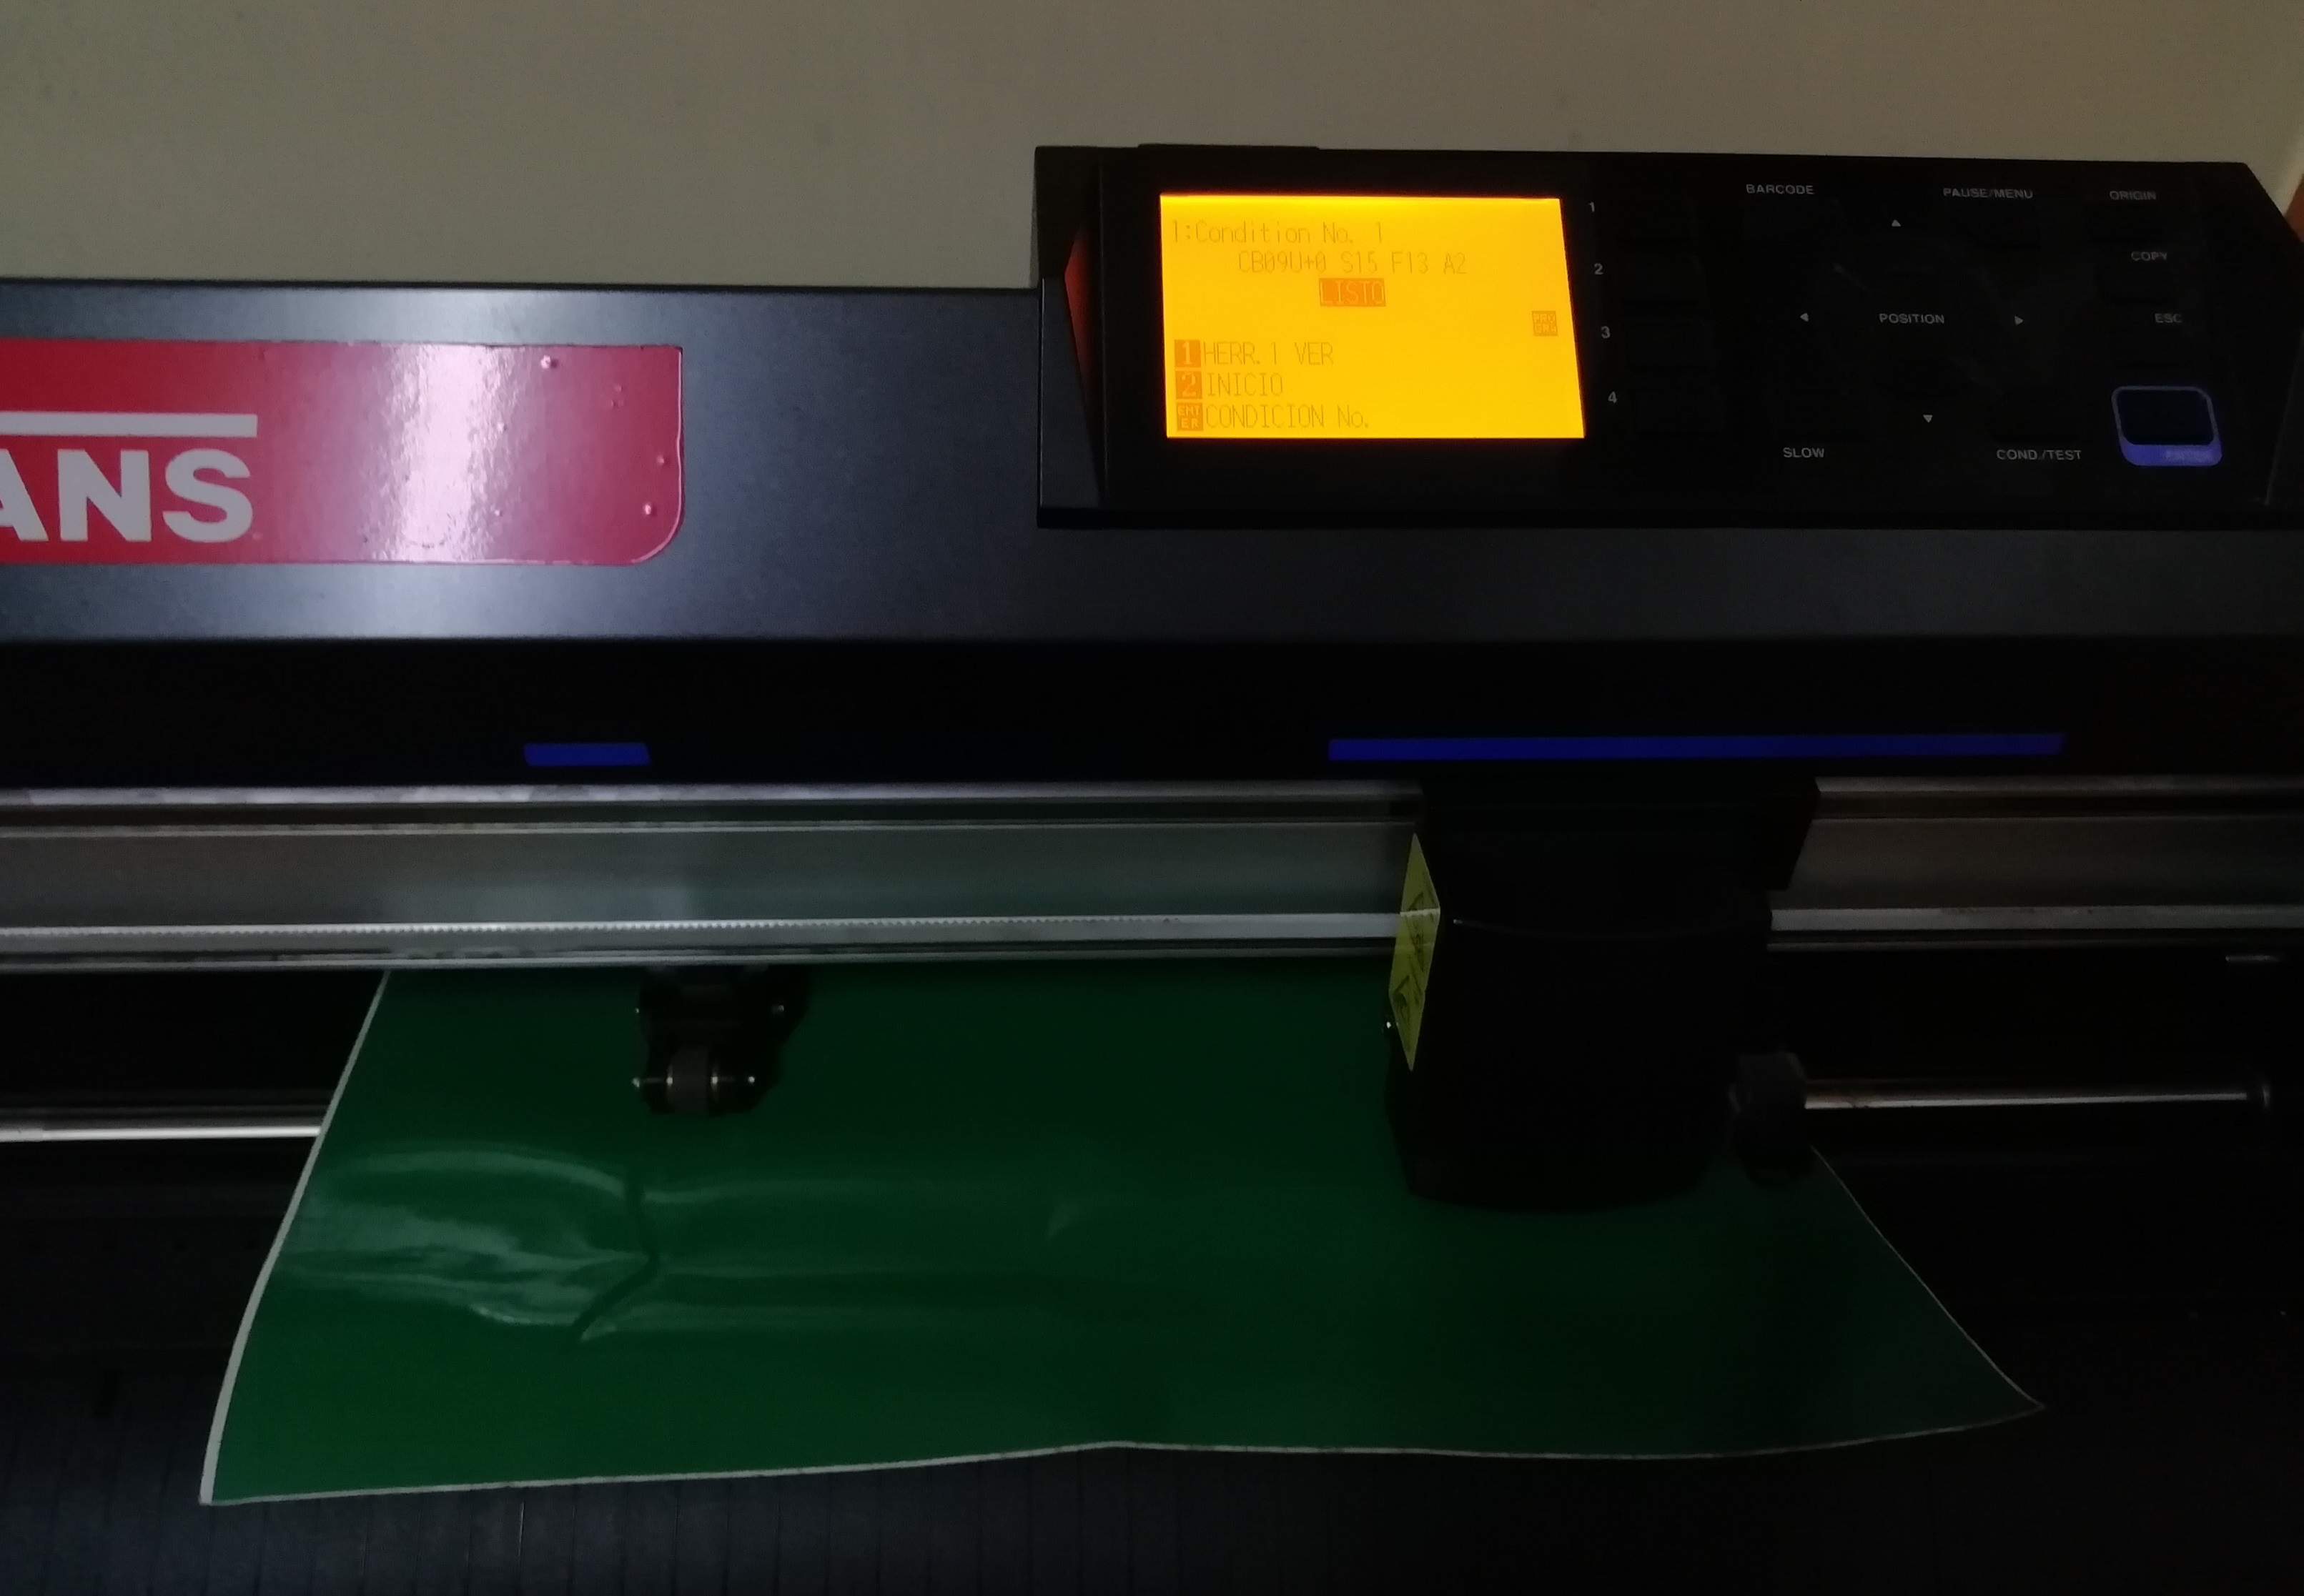
- Green vinyl. The text was white vinyl. (no other color was available)
- Then proceeded to order the cuts before assembling it.
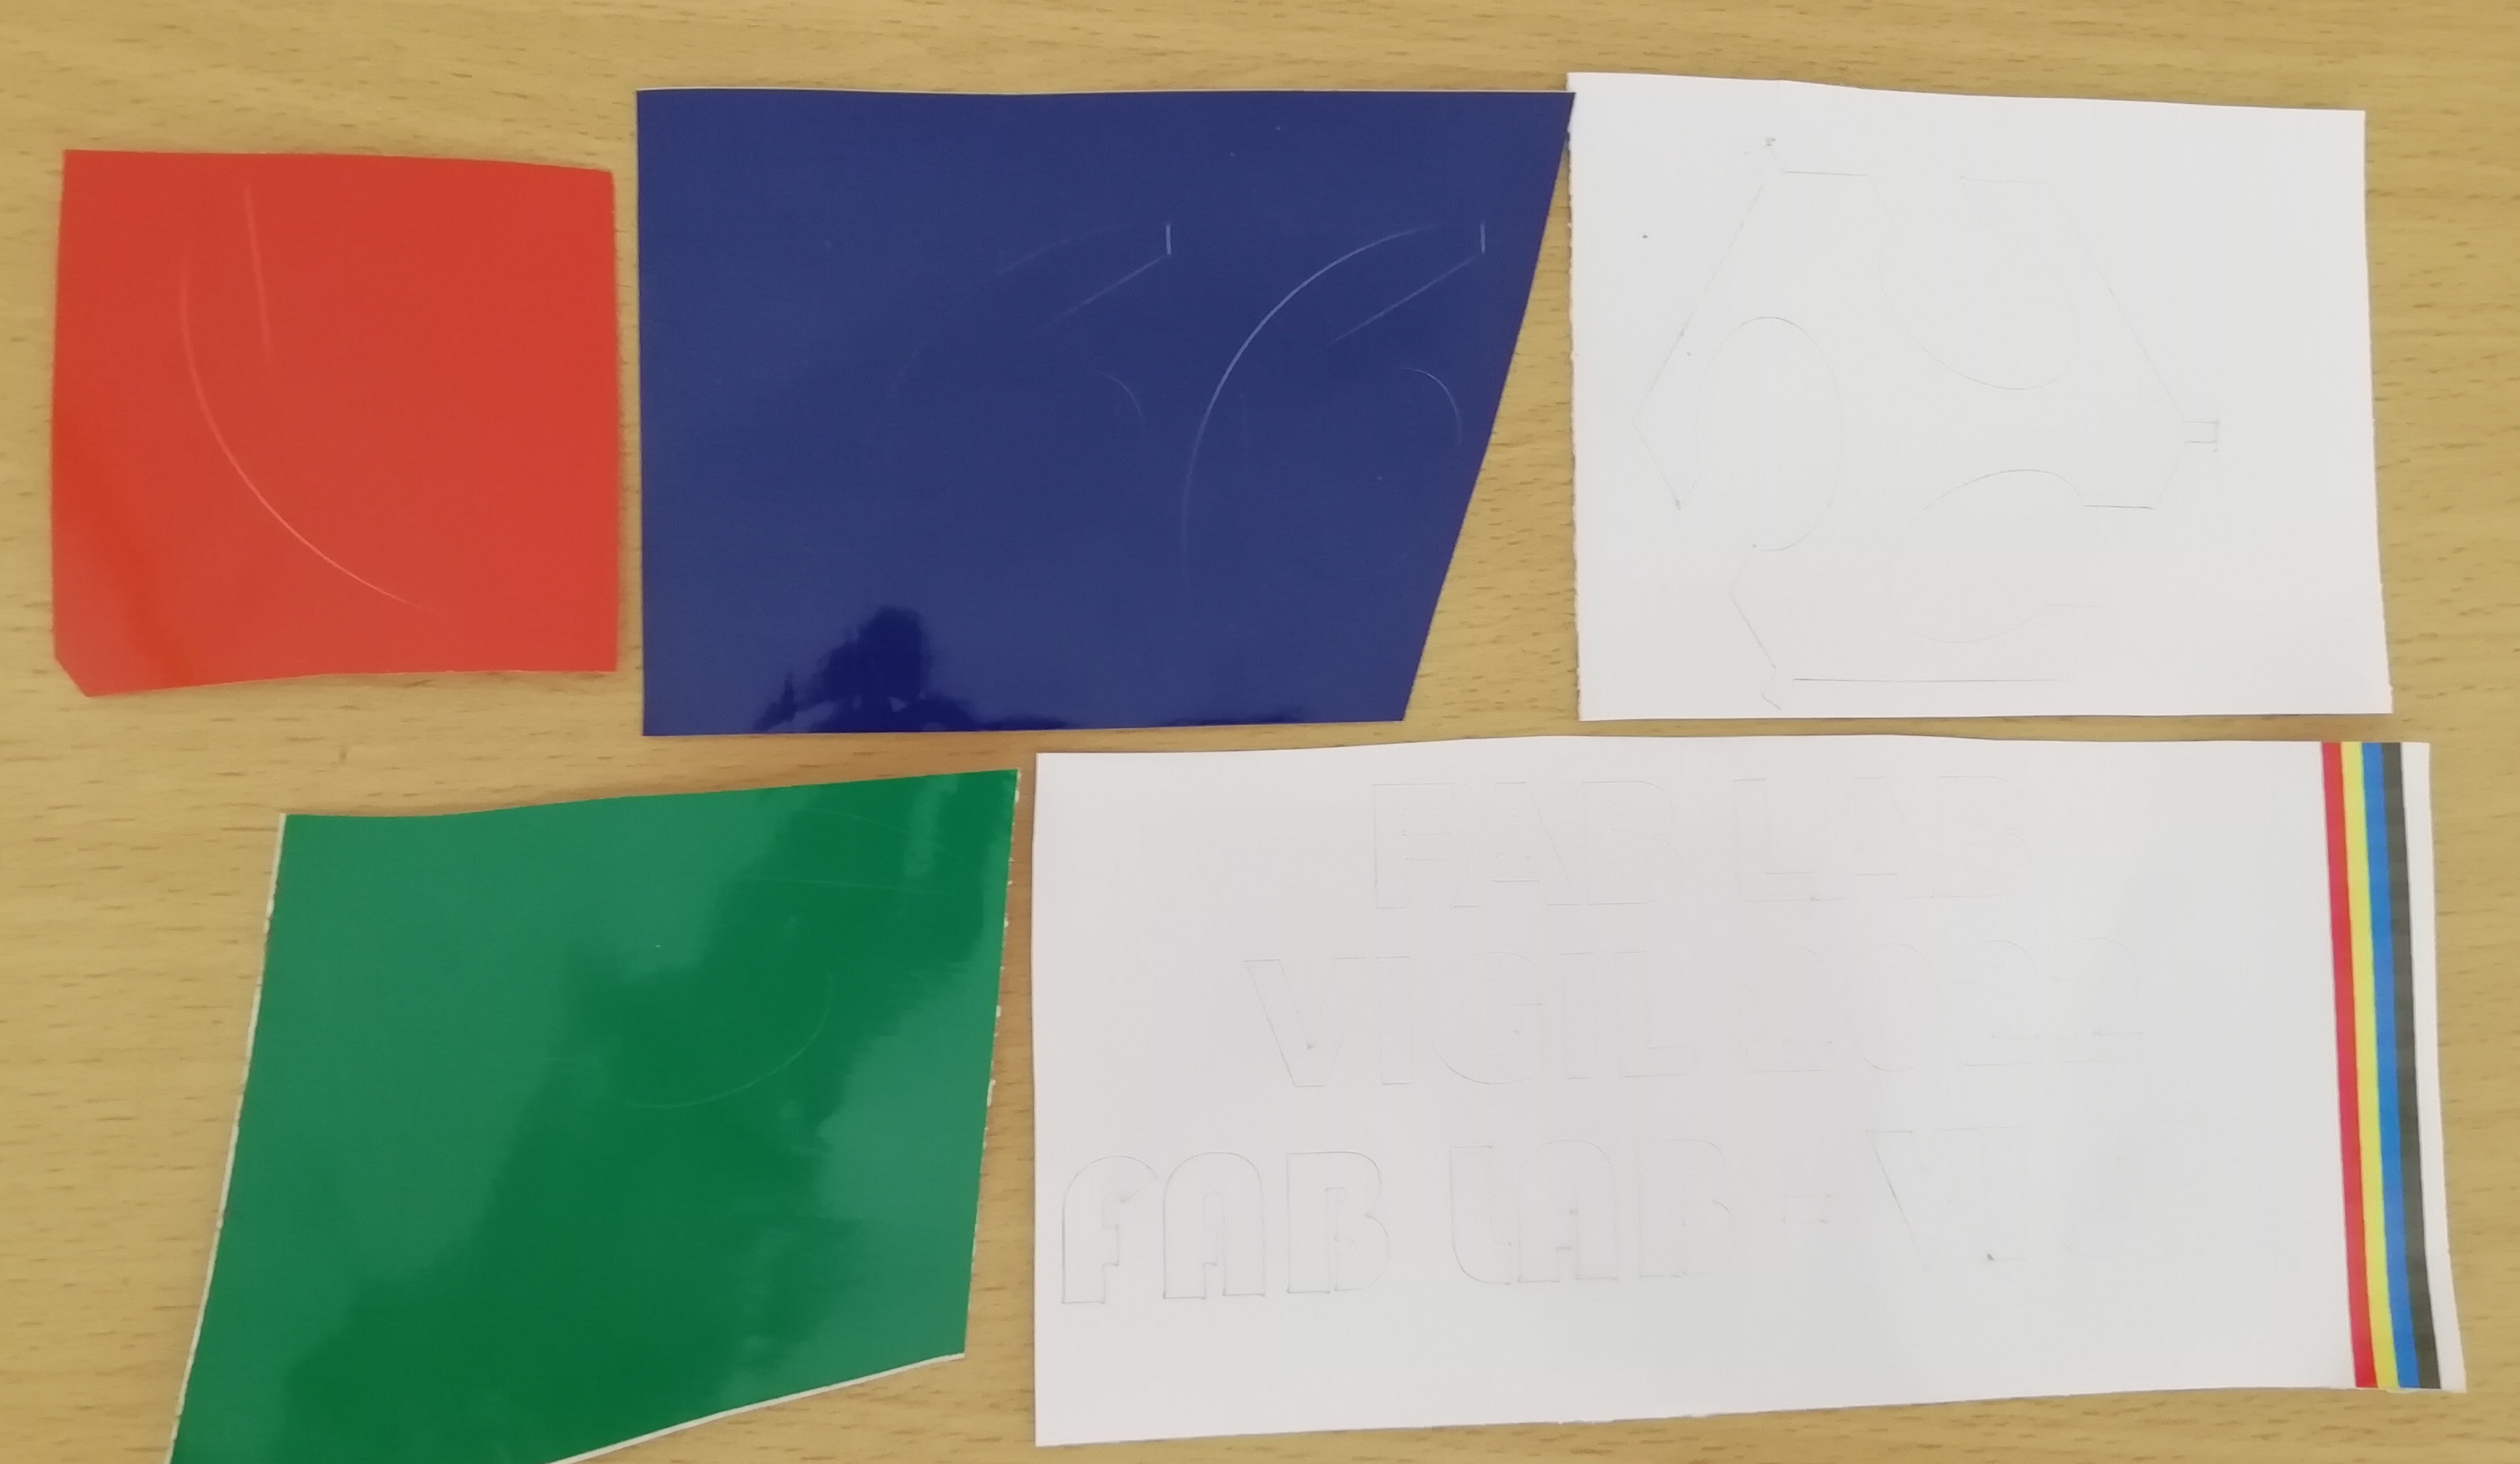
- Separate the cut from the rest of the material
- I remove the sticker.
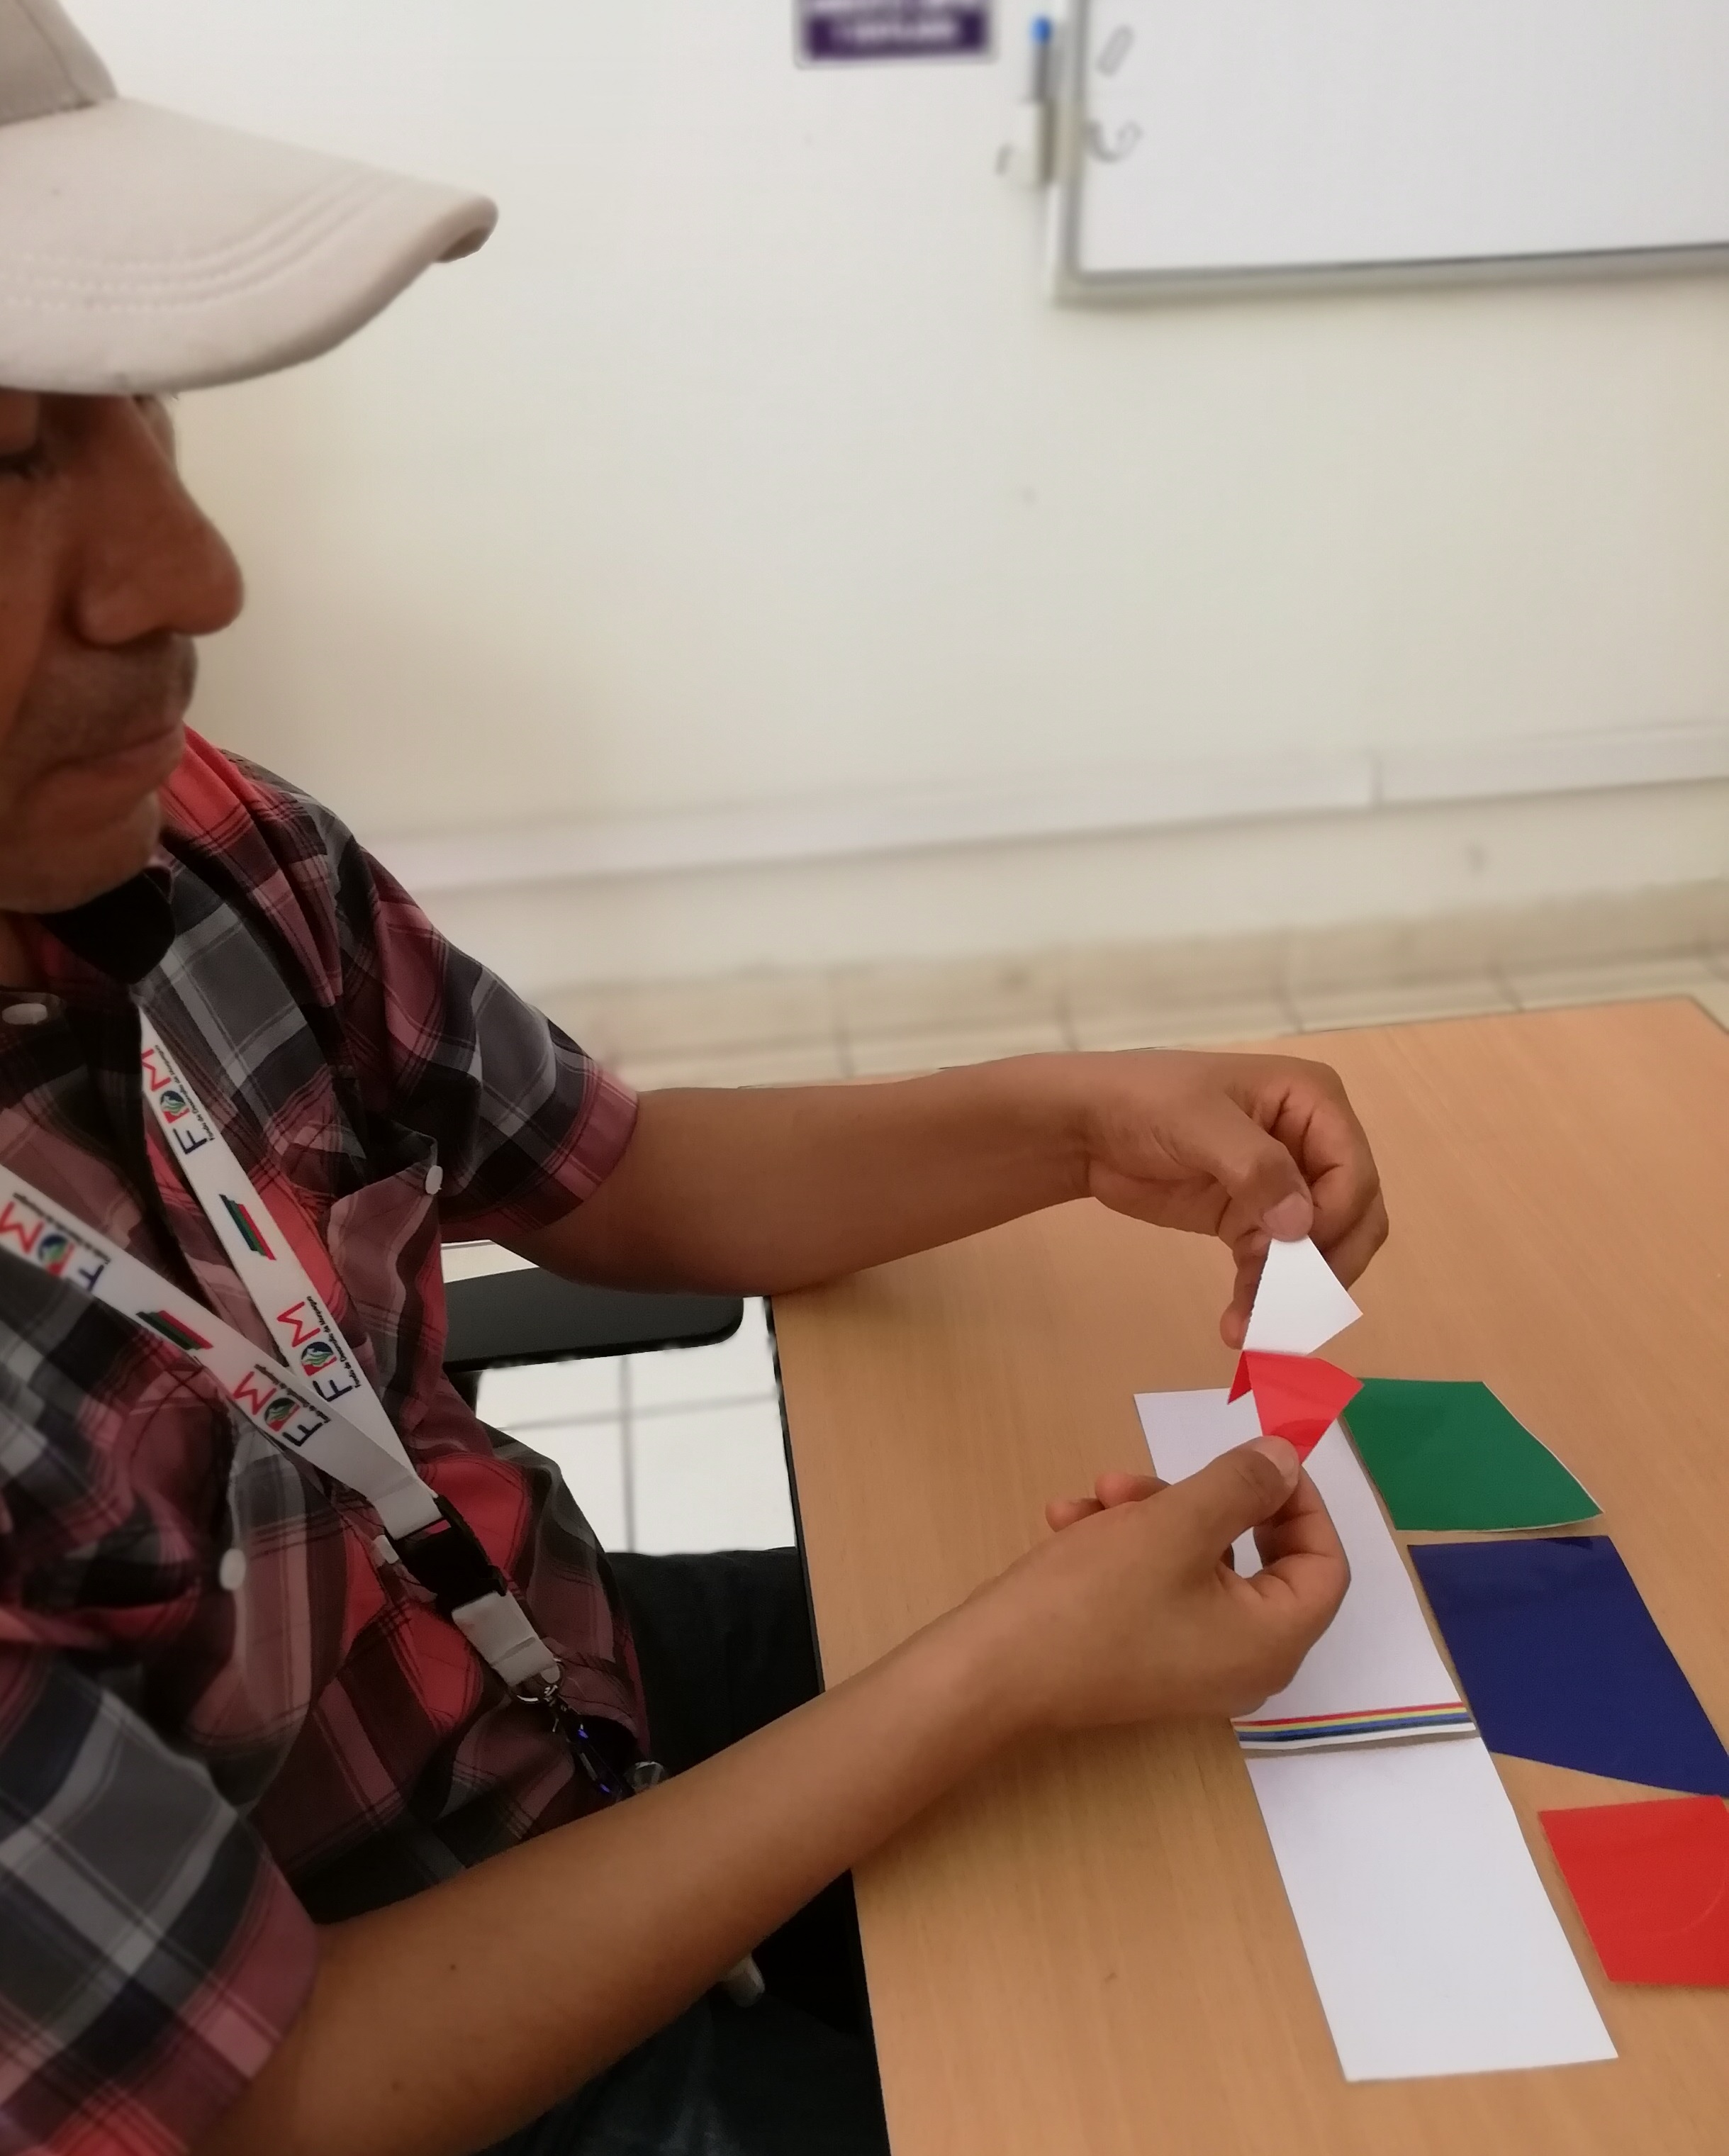
- I make a previous paste on white vinyl to have a reference of the distances,
- For the text, I paste vinyl (red) on it, I remove the entire text with the help of the cutter, gently trying not to move it. The red sticker allows the text not to move when pasting where you want.
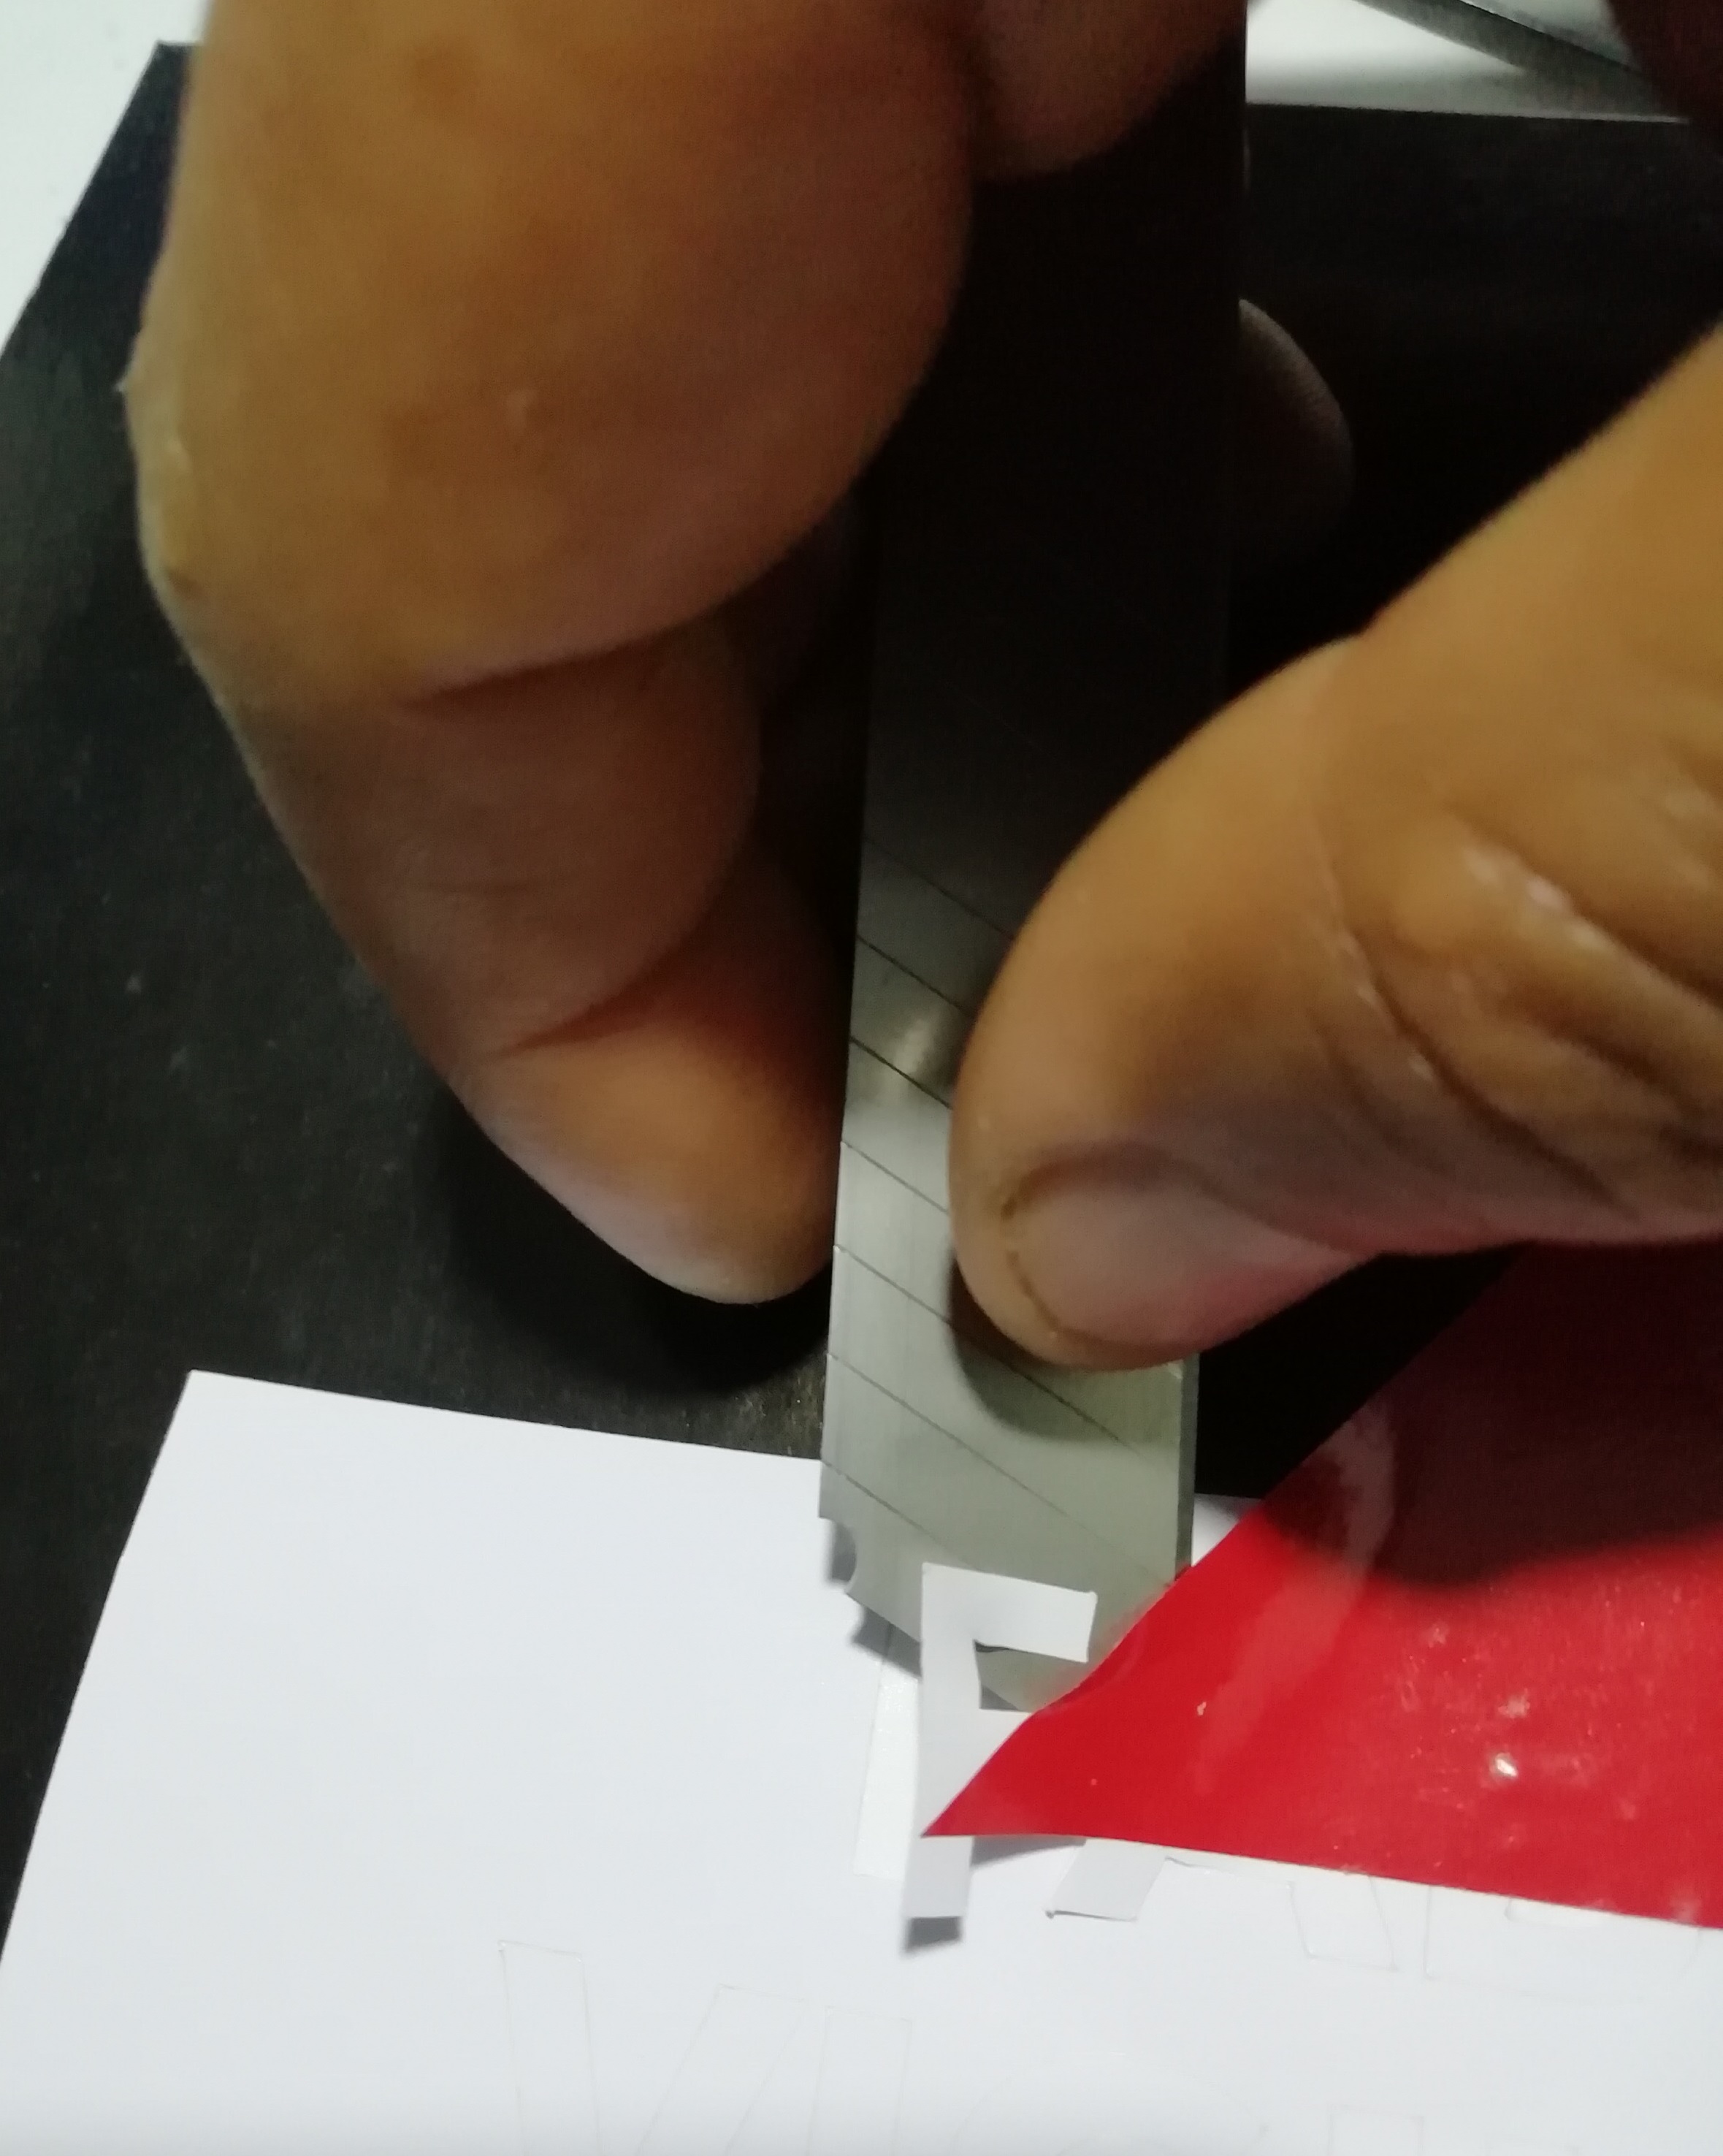
- Supporting me with a ruler, I carefully paste the text on the top of my Laptop.
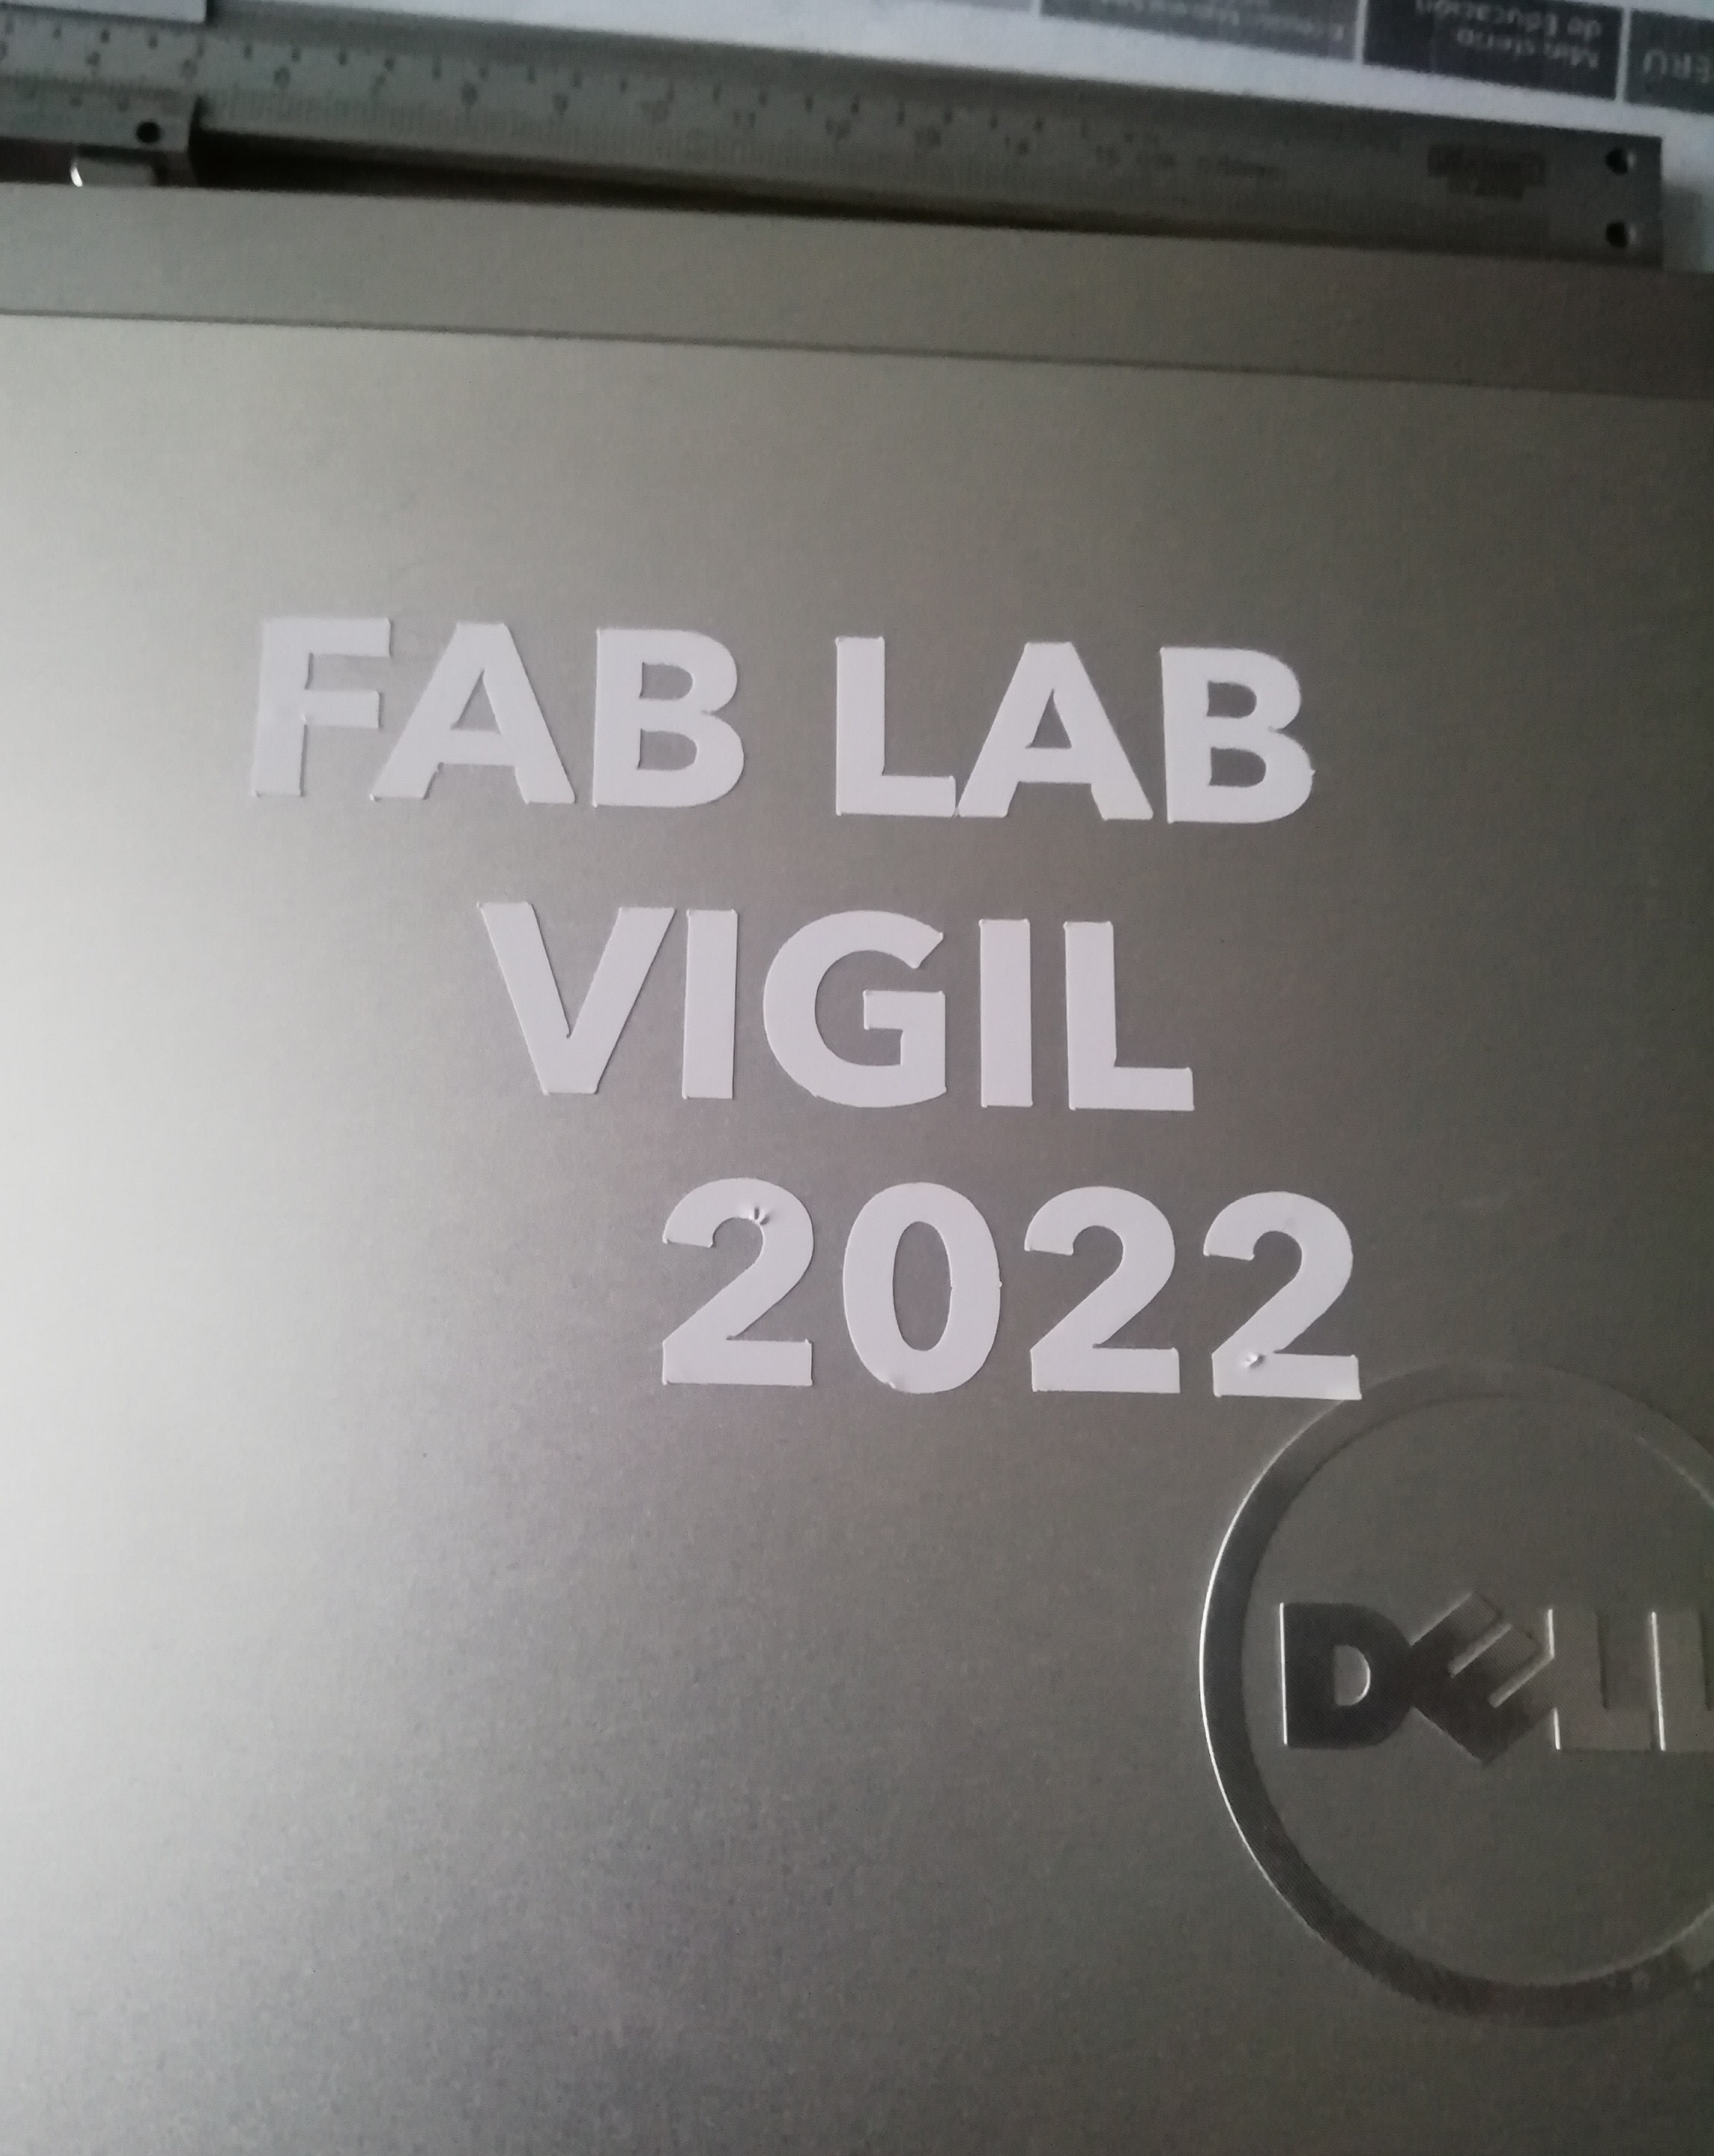
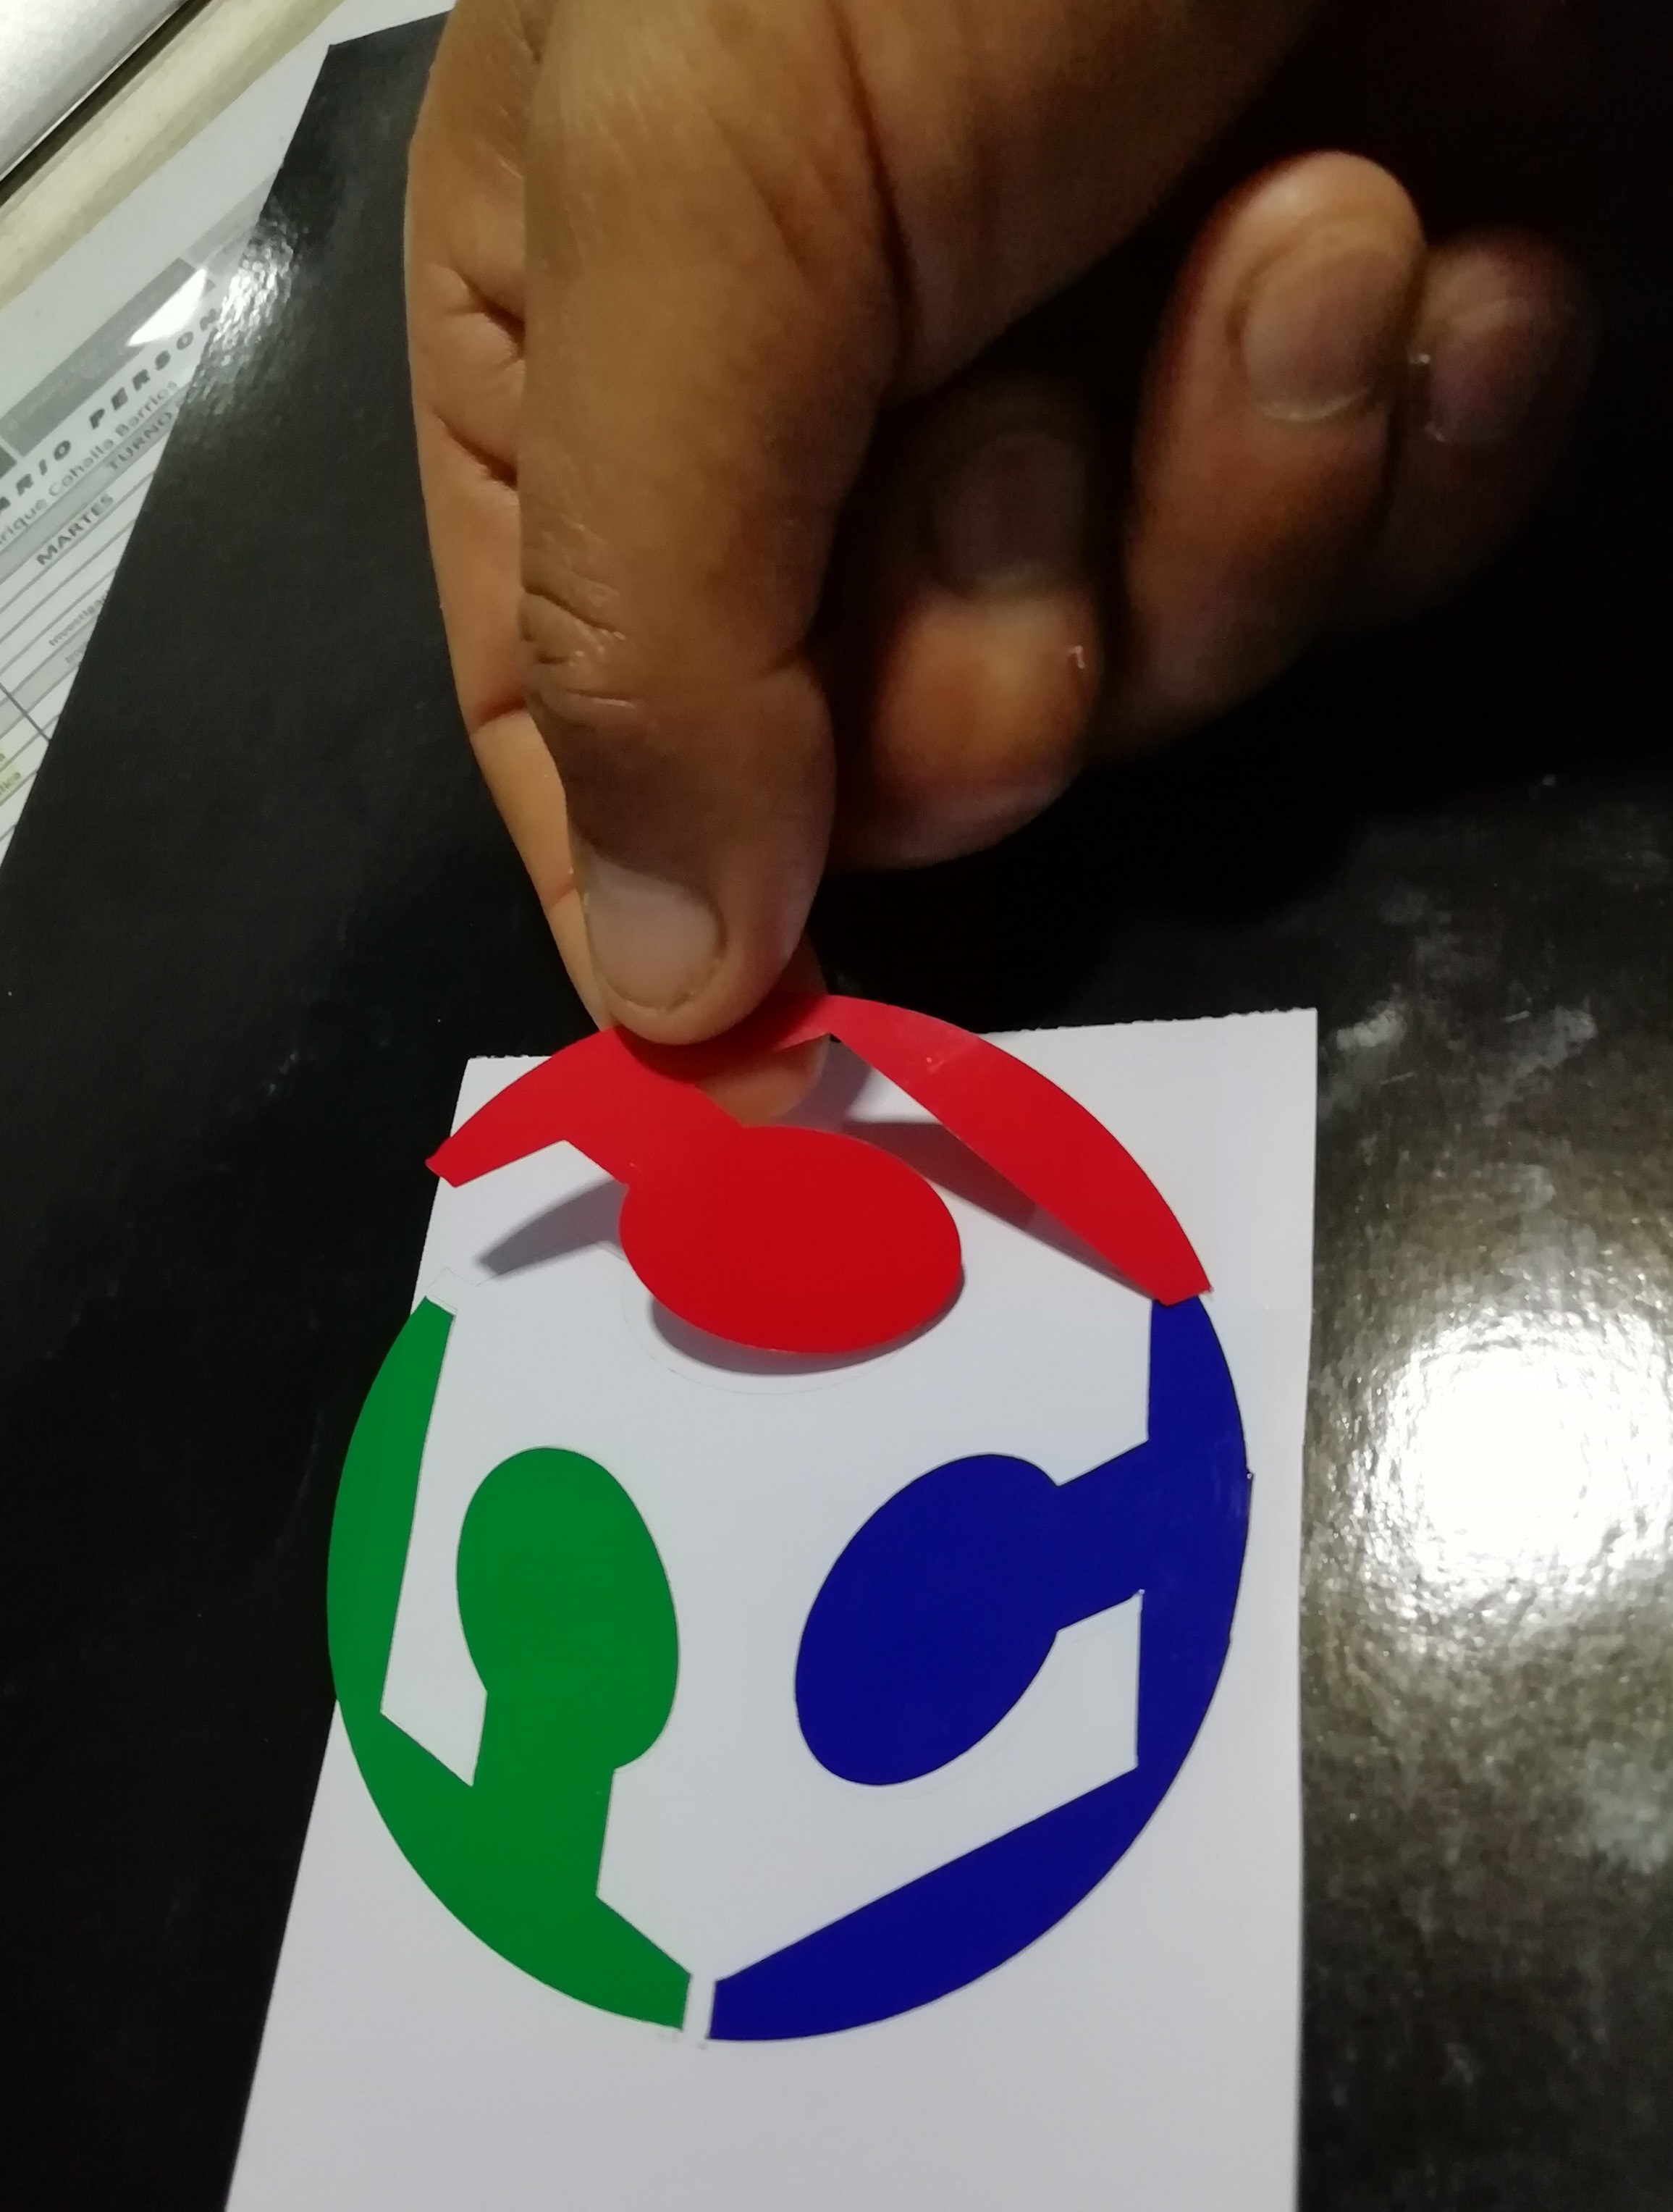
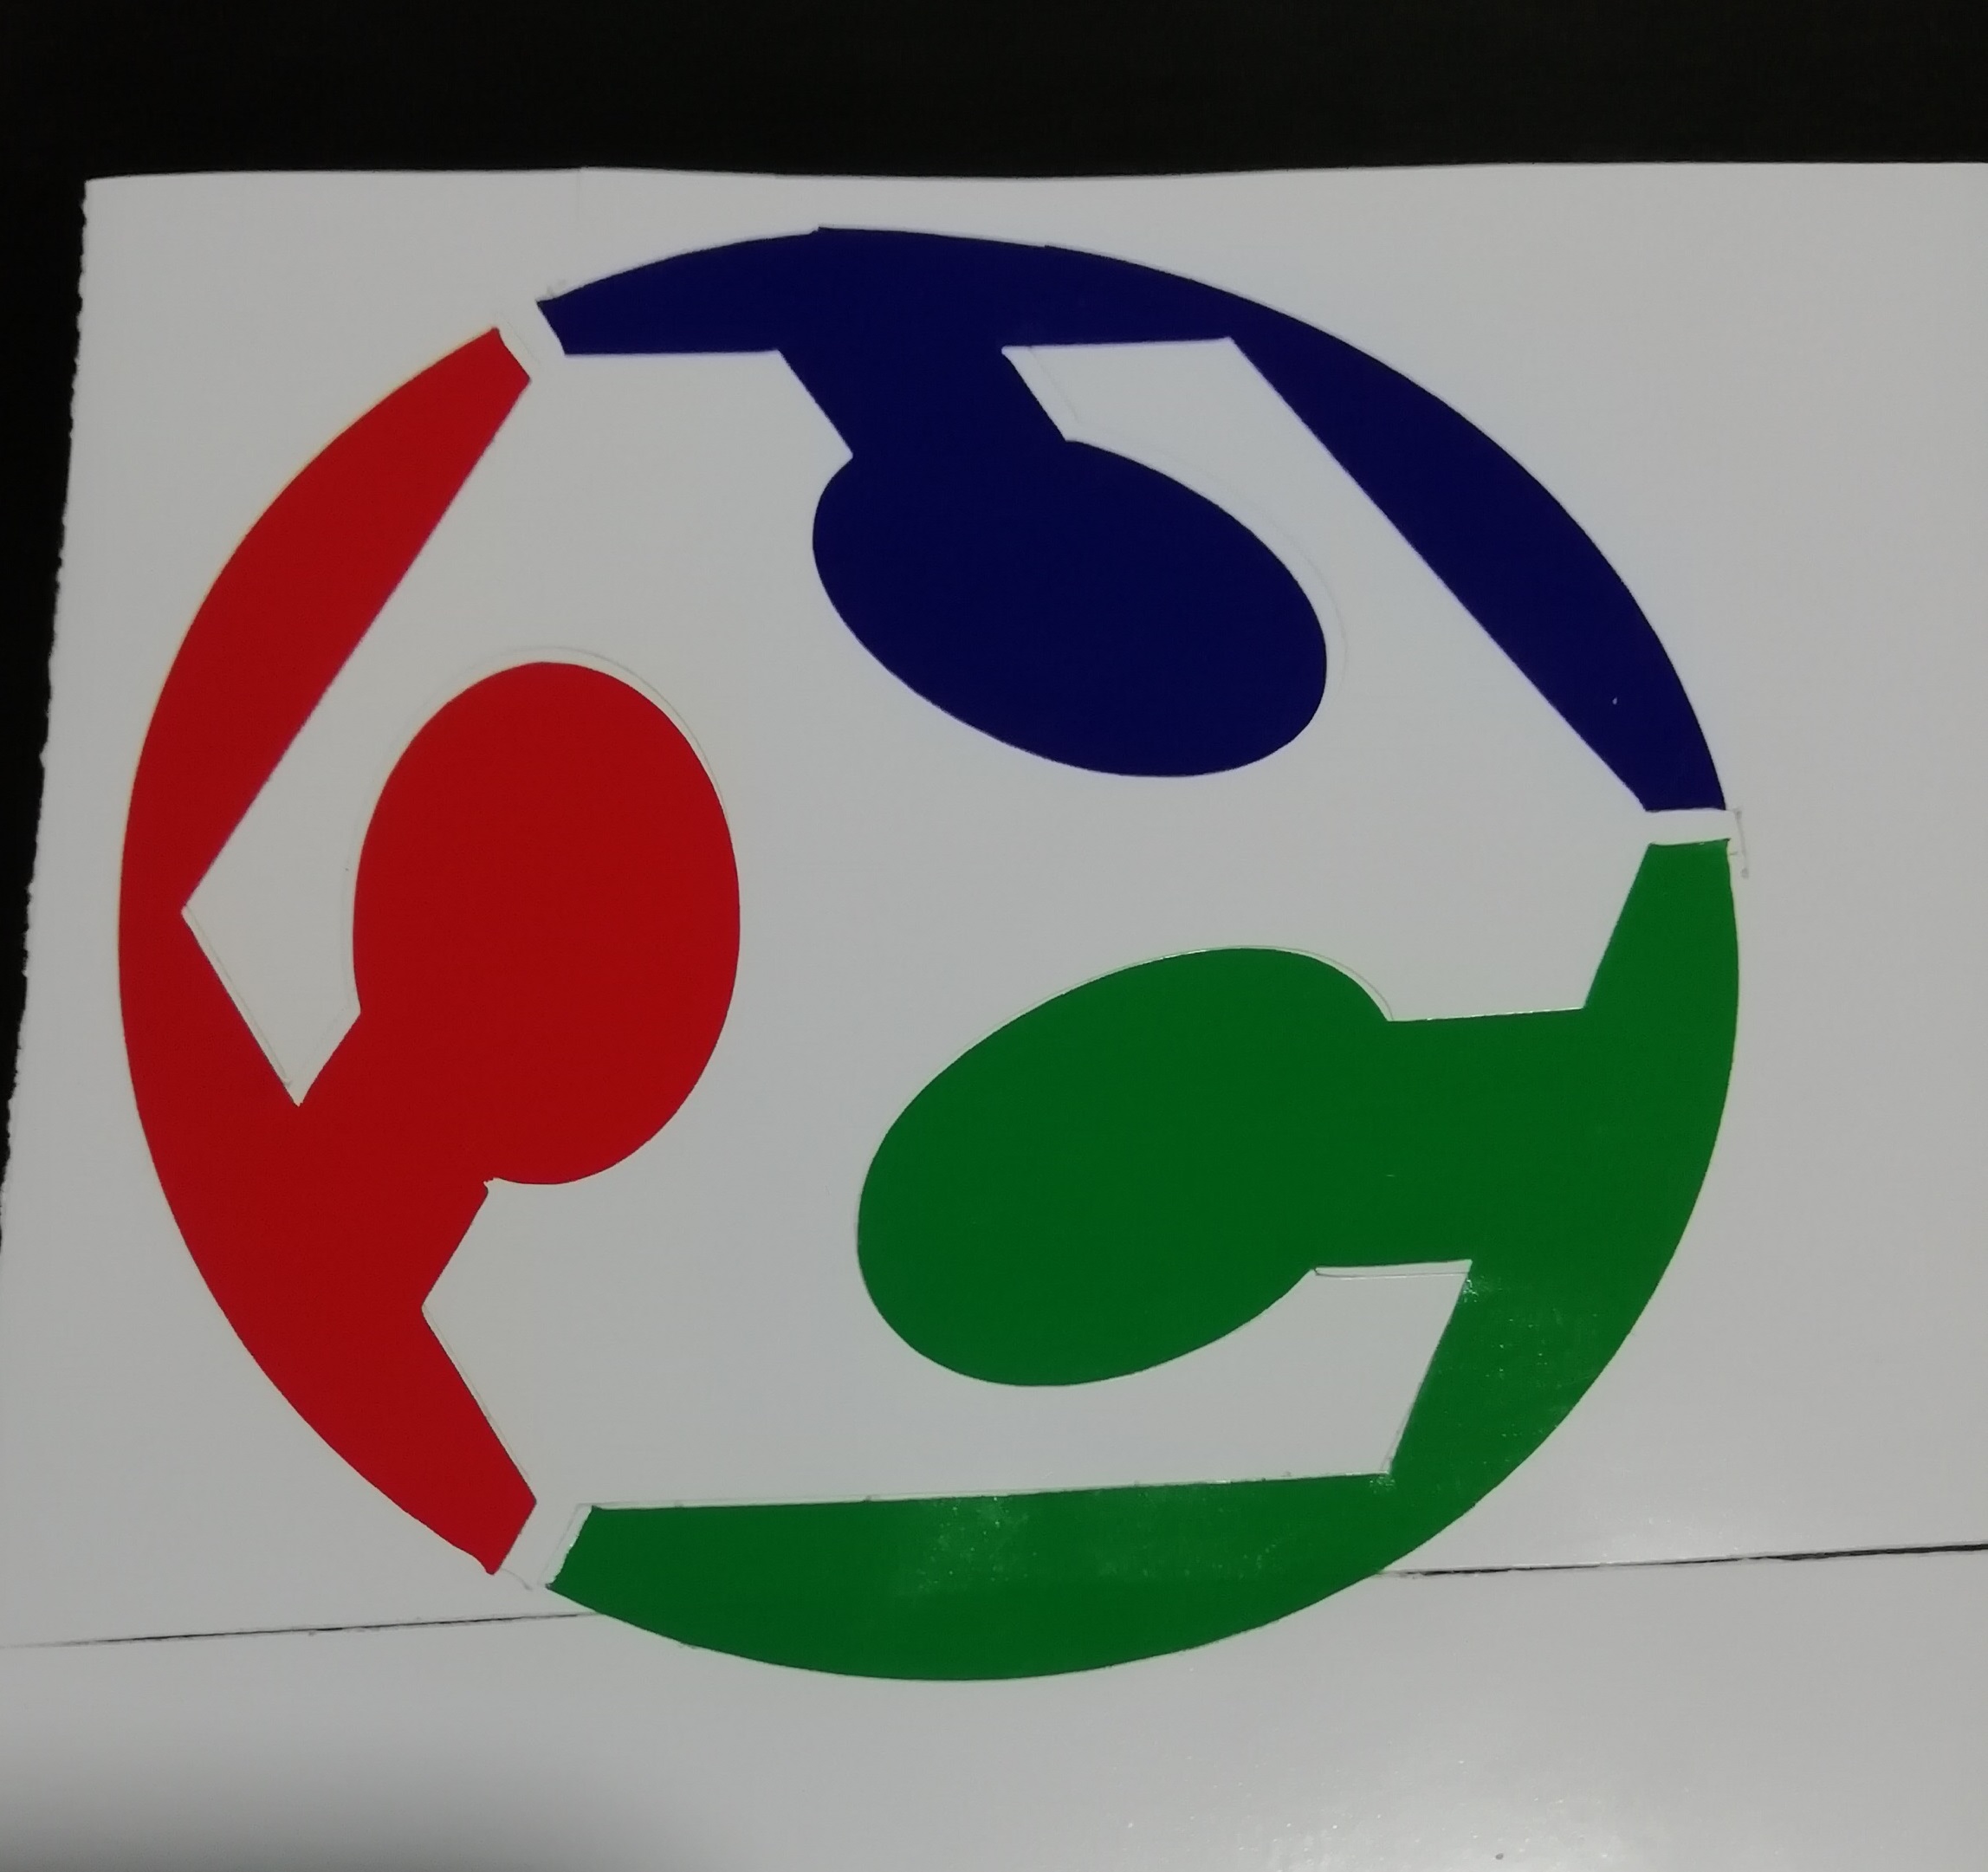
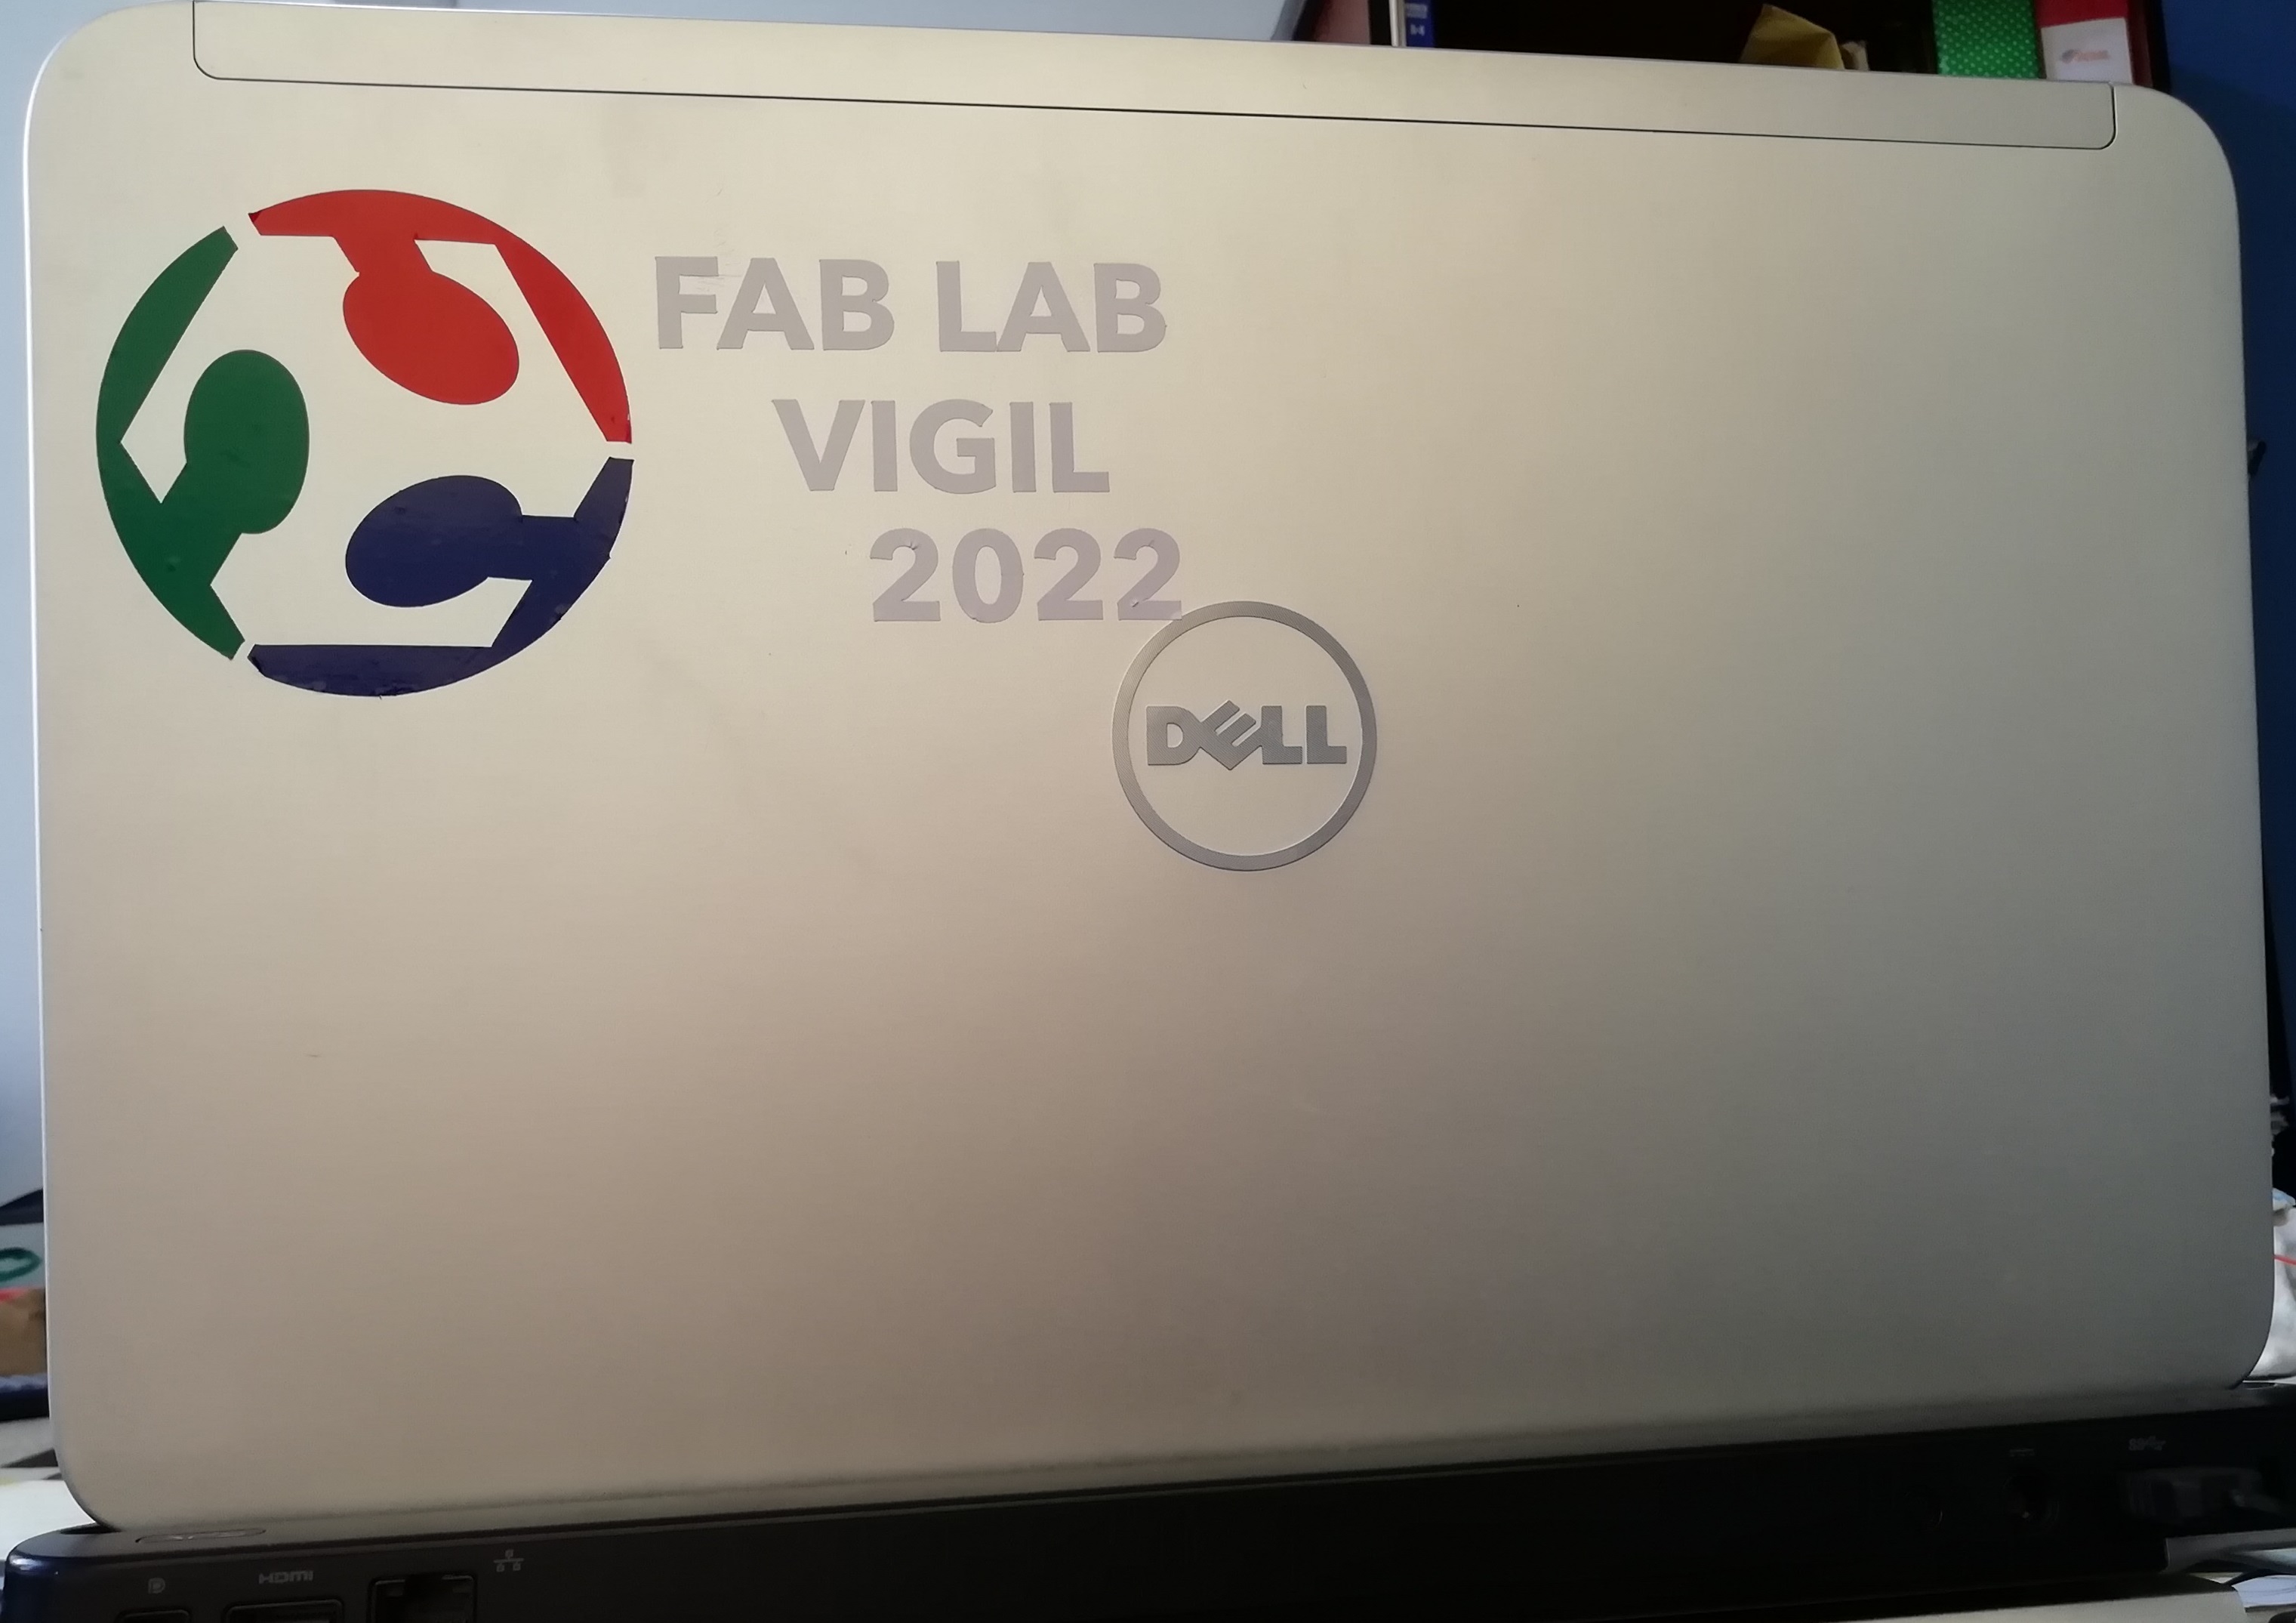
- The logo with the full text looks like this:
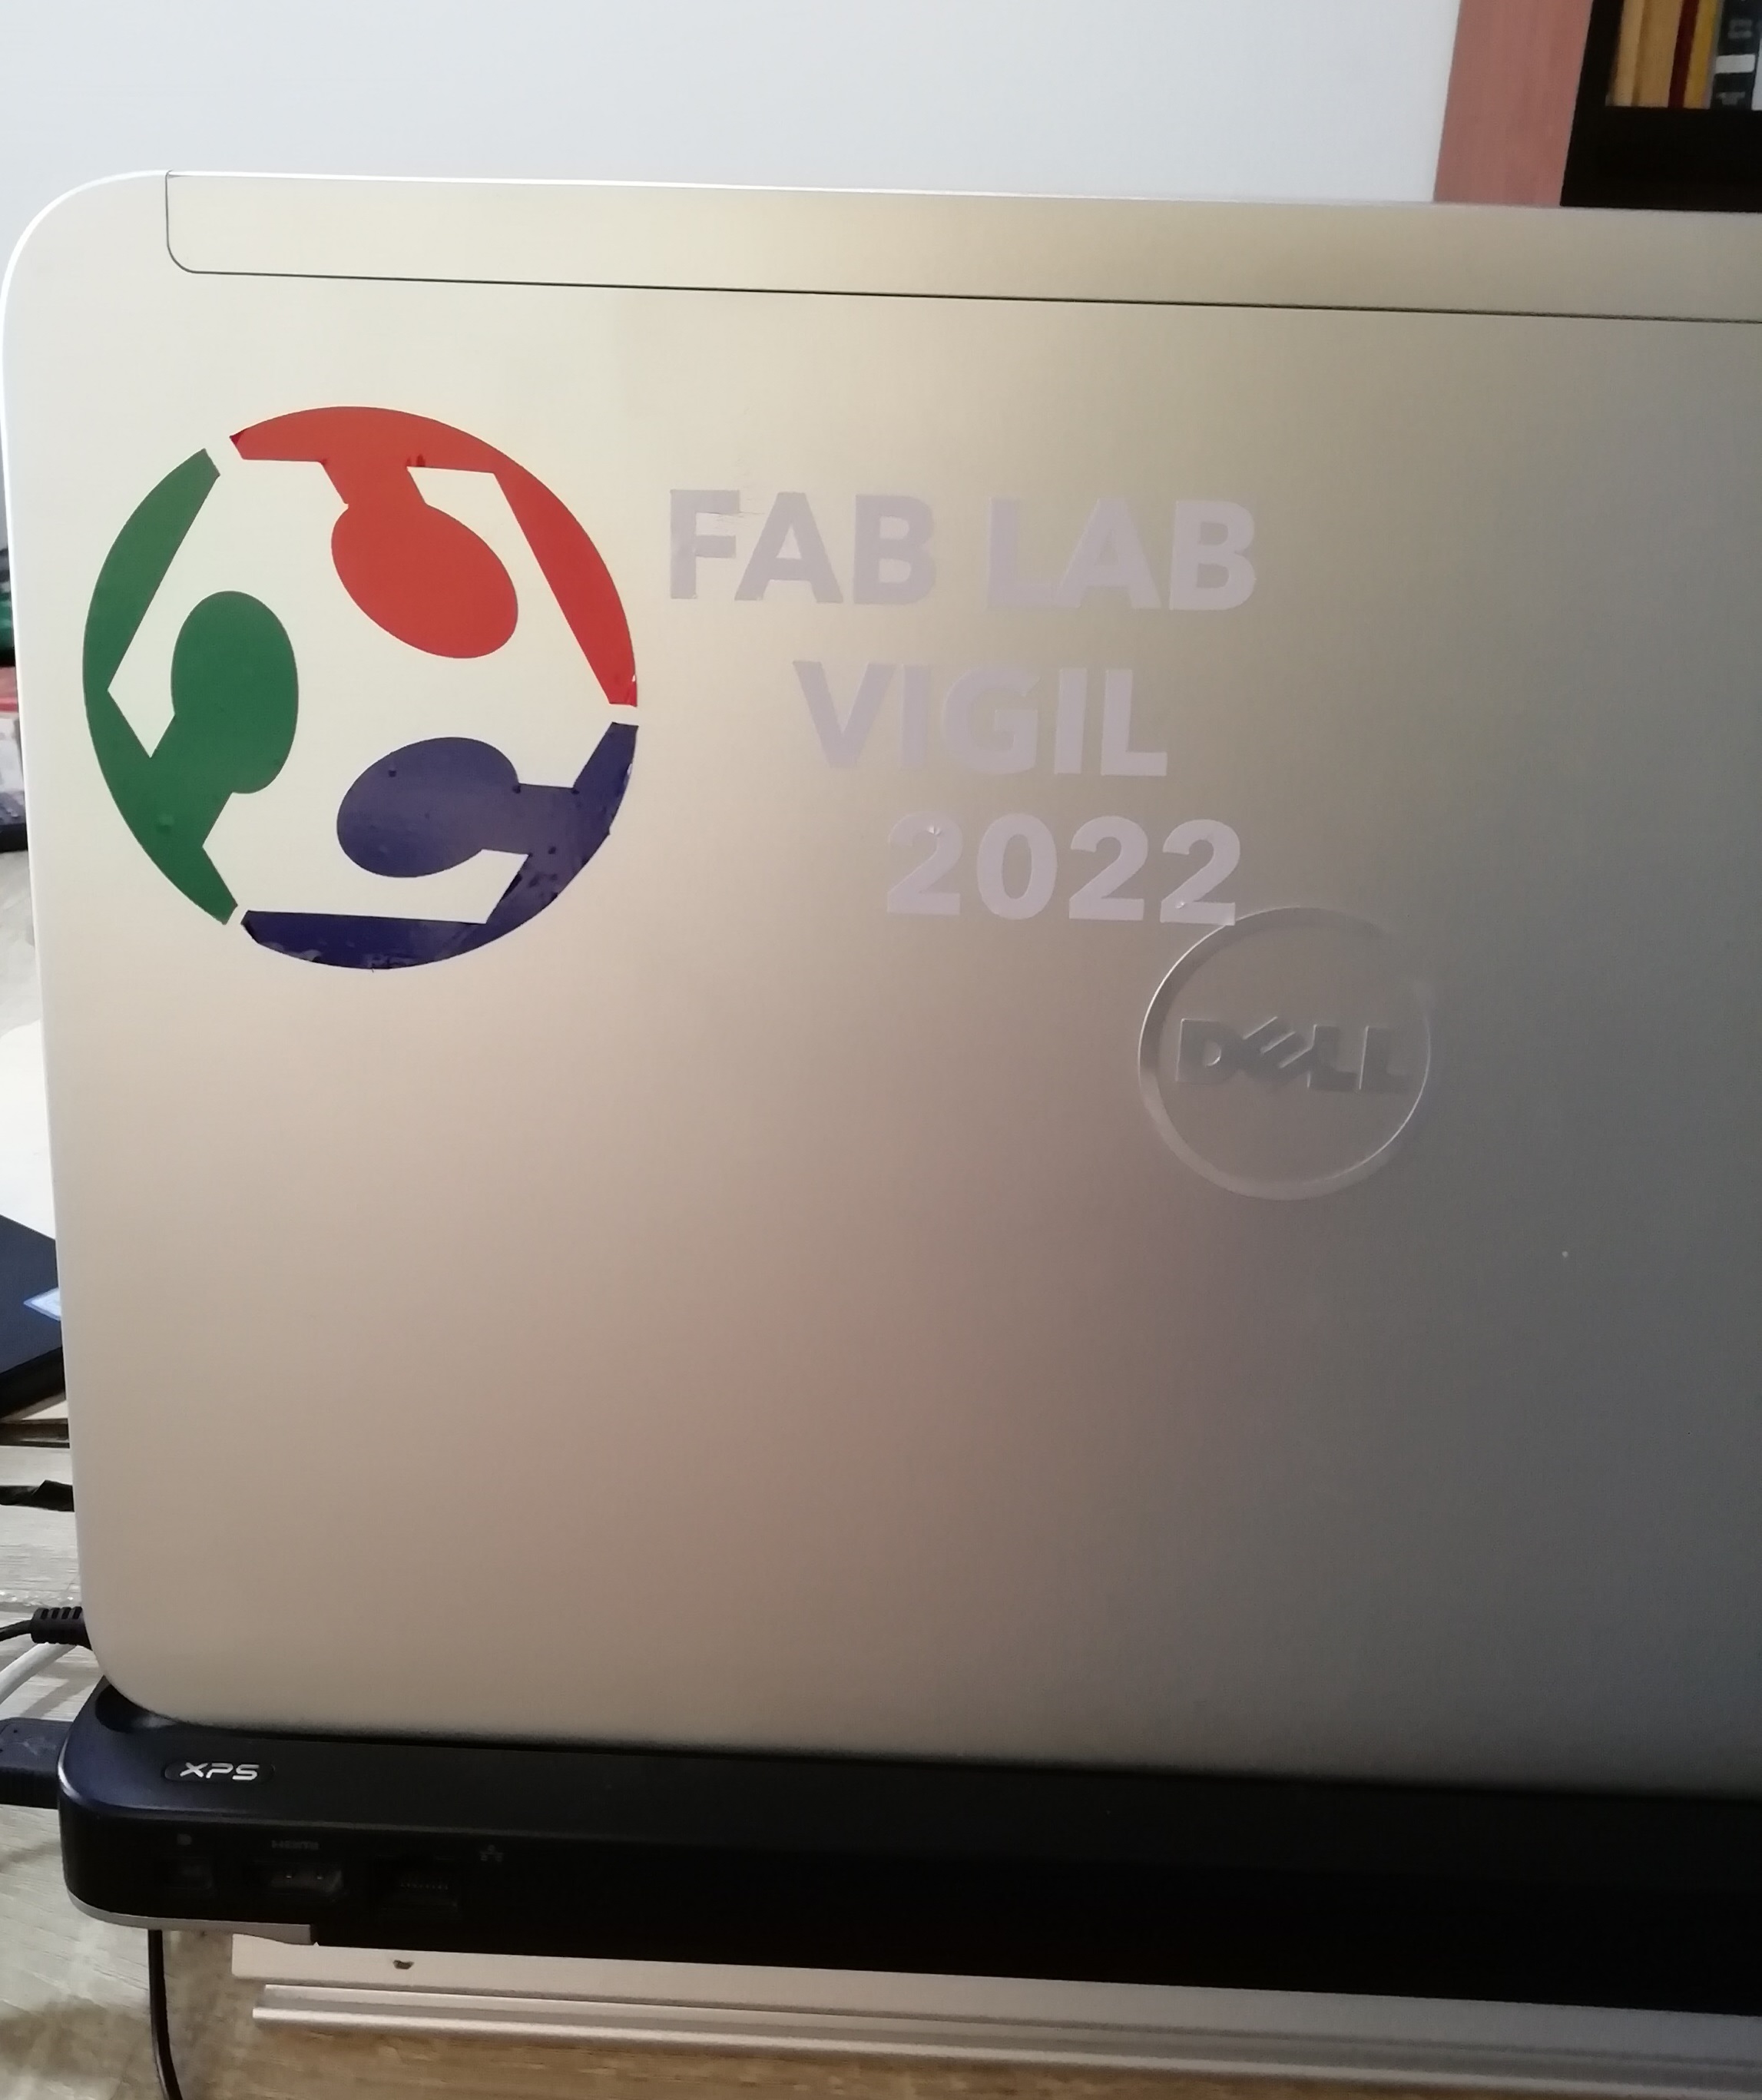
- Finally, after a lot of battling and with patience, the vinyl cut turned out excellent. Gave a better look to my laptop. It was worth the effort.
-
I must point out that at first glance cutting vinyl seemed like a simple job, but when I started working on it, it had its little complications.
-
This is a hero image.
Design Files:
| Description | Files | |
|---|---|---|
| - Parametric part design | Pieza Parametrica.dxf | |
| - Vinyl design | Vinil_LogoVigil.cdr |