1. Principles and practices
Assignment
- Plan and sketch a potential final project
This week I worked on defining my final project idea and started to getting used to the documentation process.
Research my project
- The first assignment (1st week) was about a project idea, which by the end of the FabAcademy should be assembled and running. Well, I had two ideas, personally, they are good. The first was to make a prototype of a water level control and the second was a programmable two-way traffic light with crosswalk. Both ideas are linked to education. After a day of thinking and philosophizing, I decided on the first idea, (somewhat more complicated than the second idea) because I see it of greater use as a training prototype for students of the Process Control course that I teach at Francisco de Paula Gonzales Vigil Institute (FPGV).
Final Project Proposal
- I intend to prototype a low-cost water tank level control to help better understand control theory for students majoring in this area. An image is shown below, made up of two tanks, a compressor motor, two valves and water pipe connections. The support base is the main structure that contains the tanks and other elements.
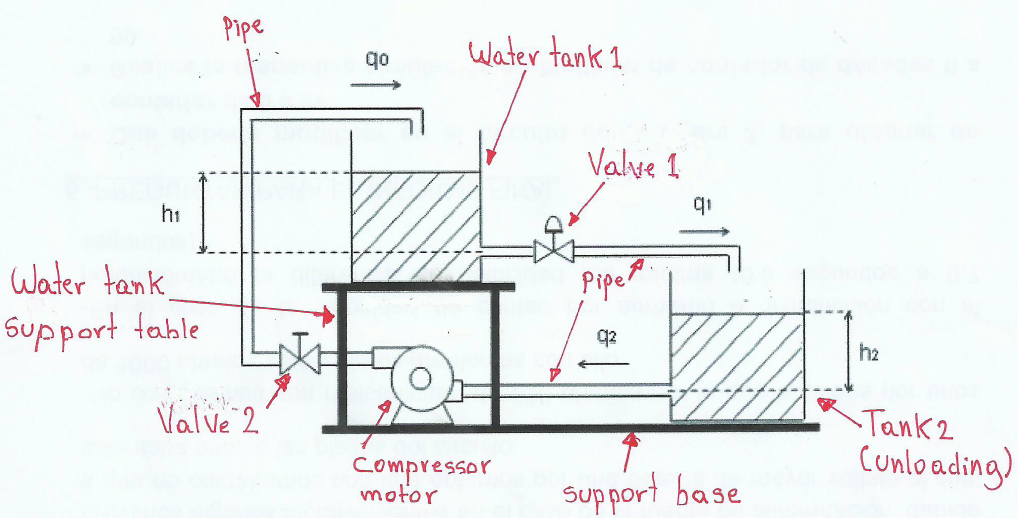
-
Once the prototype is built, the objective is to maintain the liquid level (h1) in a pre-established range in tank 1. If there is a lack of liquid in tank 1, a sensor must detect the liquid, turning on the motor to absorb water from tank 2. For this, the appropriate electronics must be added to carry out this command.
-
The idea focuses on building the base support structure for the two water tanks. The support base must also contain the necessary electronics (sensors, actuators, etc.) so that everything works as a complete system, that is, the level control prototype.
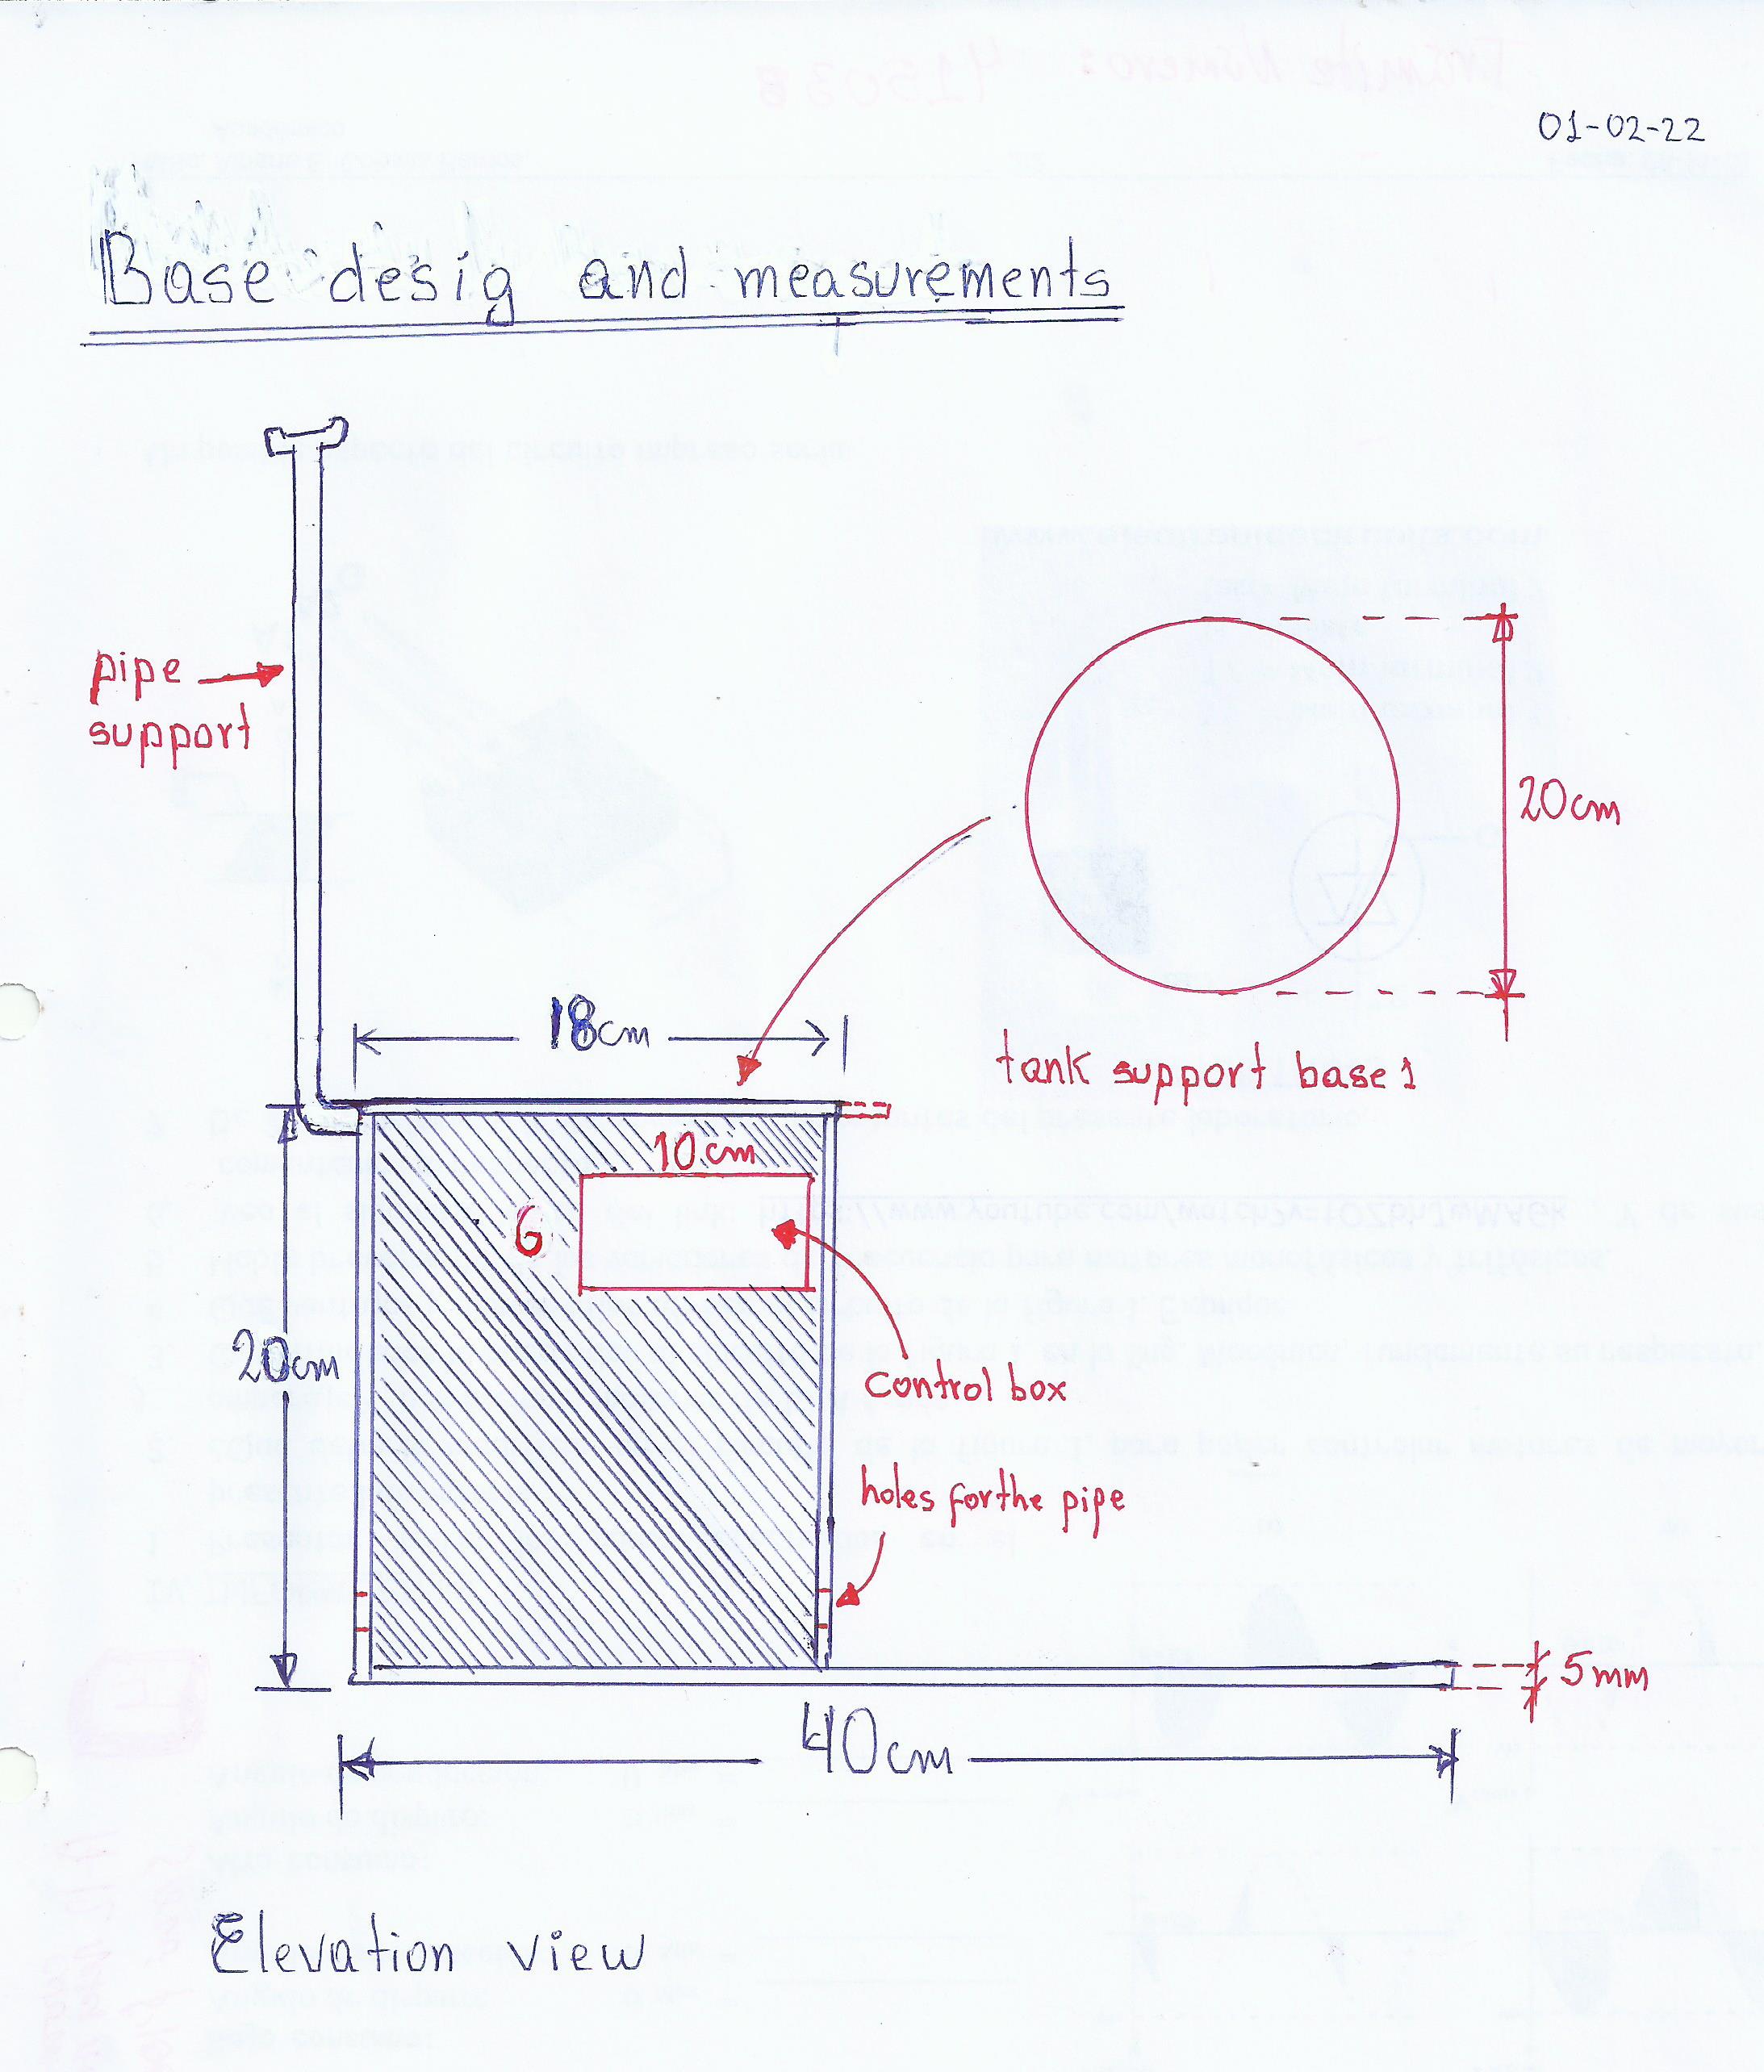
- The matured project idea is shown in the following image, where I have added a pipe support:
Control electronics: FabDuino
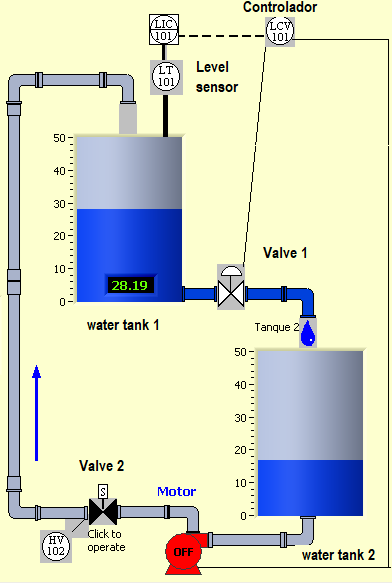
- Once the construction of the level control prototype is finished, the necessary electronics that can control the process must be assembled. But the main component “brain” is the Controller. Initially I thought of using PLC, but I set myself the challenge of developing it with FabDuino (a version of popular Arduino). A diagram of how the complete system should look like is shown.
What it will do?
-
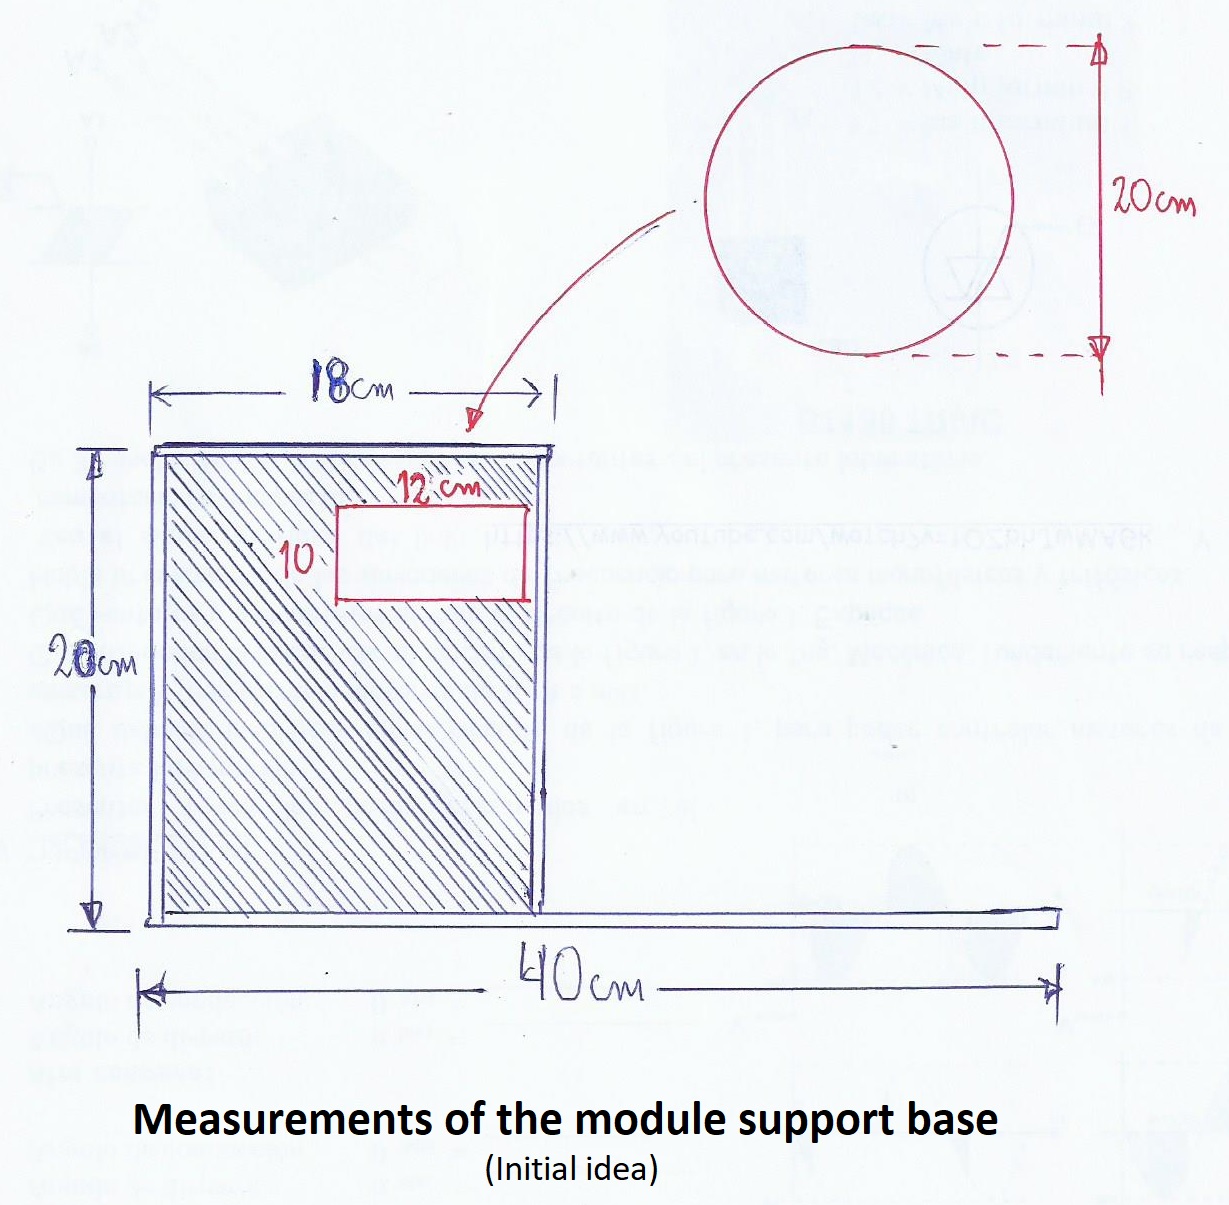
First, I must design according to the measurements the support base in CAD. Then I simulate the design and adjust measurements if necessary. Then I integrate in the design the necessary electronics to check the operation. I mount the tanks and other elements on the support base. Finally, I must program the FabDuino controller in C language and test its operation.
-
As I said before, the FabDuino controller must maintain the liquid level in tank 1 at a set value, how does it do it? with a logical control algorithm that processes the values coming from a level sensor. It compares an output value with an input value to adjust the level through the compressor motor and valve 1.
Who will use it?
- It was used by training and training companies in Automatic Control as a training module and a better understanding of the theory. Also students of colleges and universities together with the teacher who teach subjects related to control.
Video
- An appreciation of something similar can be seen in the following video: (Courtesy of Diego Alviani)
Explanation:
The video shows a transparent container with labels indicating the level in units of milliliters at intervals of 250 ml. At the top, an ultrasonic sensor (HC-SR04) calculates the distance of liquid in the container. The LCD display shows the liquid level in ml and cm. When the water level reaches 1500 ml, the water pump turns off. If the liquid drops to 250 ml, the motor is turned on again to fill with water up to 1500 ml. The system is programmed in Arduino so that it meets the water level control conditions of the container.