14. Networking and communications
Individual assignment:
- Design, build, and connect wired or wireless node(s) with network or bus addresses
Group assignment:
- Send a message between two projects
Group assignment
This week we had to send a message between two projects. We have to use my electronic board designed in the assignment about input devices (which uses an ESP32 chip) to make it communicate with Edward’s board that he designed in his assignment about output devices (which uses an AT-tiny 1614 chip).
For communication between the two boards, we used the I2C protocol. I will talk about the I2c protocol in my individual work.
I was responsible for programming my board to send information from the connected humidity sensor to Edward’s board. Edward’s board receives the information and performs the action of turning on the water pump when the humidity is below 40%.
You can see the installation in action in the video below.
The two sets of codes are bellow
- For the INPUT BOARD (Master Code)
    #include <Wire.h>
    #include <LiquidCrystal_I2C.h>
    #define SECOND_ADDR 9
    LiquidCrystal_I2C lcd(0x27,16,2);
    int sensor_pin = 34;
    int x = 0;
    int value ;
    void setup()
    {
      Wire.begin();
      Serial.begin(115200);
      Serial.println("Reading");
    }
    void loop()
    {
      value= analogRead(sensor_pin);
      Serial.print("Moisture : ");
      x=map(value,0,4095,0,100);
      Serial.println(x);
      Wire.beginTransmission(SECOND_ADDR);
      Wire.write(x);
      Wire.endTransmission();
      delay(500);
    }
- For the OUTPUT BOARD (Slave Code)
      #include <LiquidCrystal_I2C.h>
      #include<Wire.h>
      #define SECOND_ADDR 9
      LiquidCrystal_I2C lcd(0x27,16,2);
      int x;
      int pump = 1;
      void setup() {
        // put your setup code here, to run once:
      pinMode(pump, OUTPUT);
      Wire.begin(SECOND_ADDR);
      Wire.onReceive(receiveEvent);
      Serial.begin(9600);
      }
      void receiveEvent()
      {
      x=Wire.read();
      }
      void loop() {
        // put your main code here, to run repeatedly:
      if (x<=40)
      {
        digitalWrite(pump,LOW);
        Serial.println("Pump Off");
        }
      else
      {
        digitalWrite(pump,HIGH);
        Serial.println("Pump On");
        }
      }
Individual assignment
For this assignment we have to make boards communicate with each other using a Communication Protocol. In my case I will use I2C protocol to make two boards communicate with each other that I had designed in the previous assignments. To do this I will follow these steps.
Workflow
- How use I2C protocol
- Connect your boards together
- Program your Master board
- Program your Secondary board
- Run your programs and observe the communication between microcontrollers
- Debug as necessary
1. How use I2C protocol
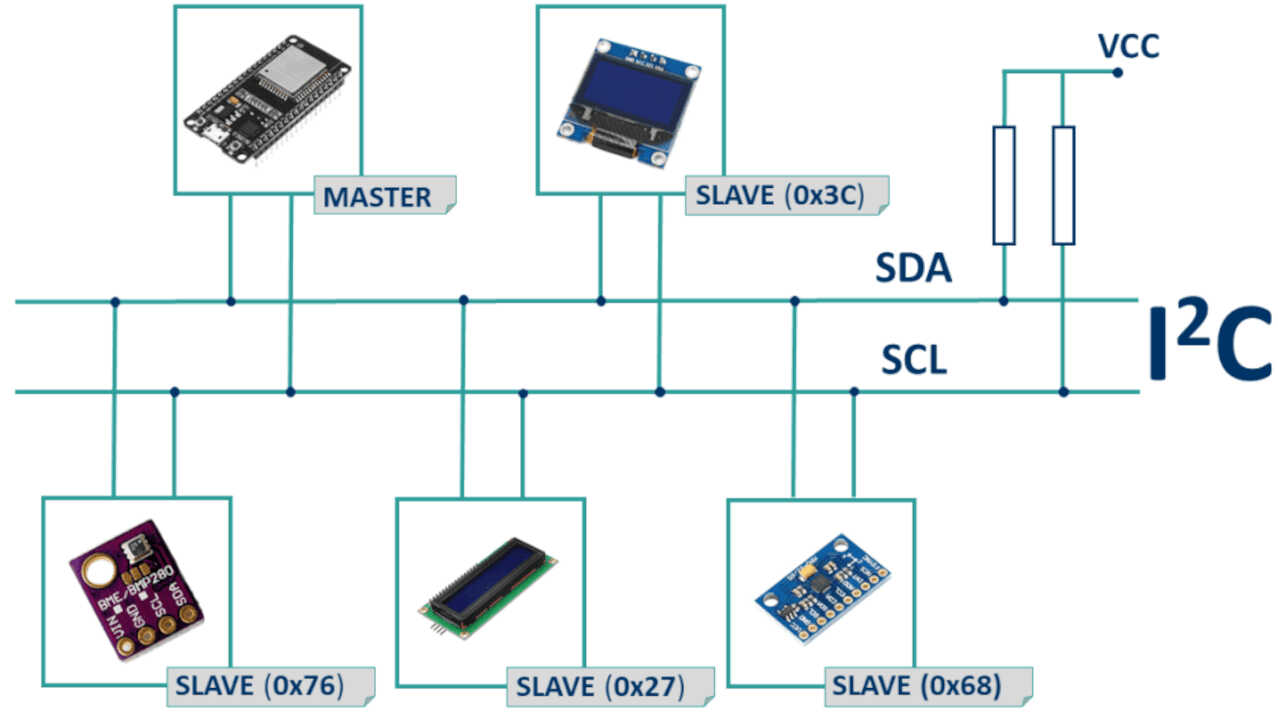
To connect I2C protocol you must connect between the SDA and SCL pins between the two chips with a 4.99 kOhm pull up resistor between those and the VCC line as shown in the following diagram.
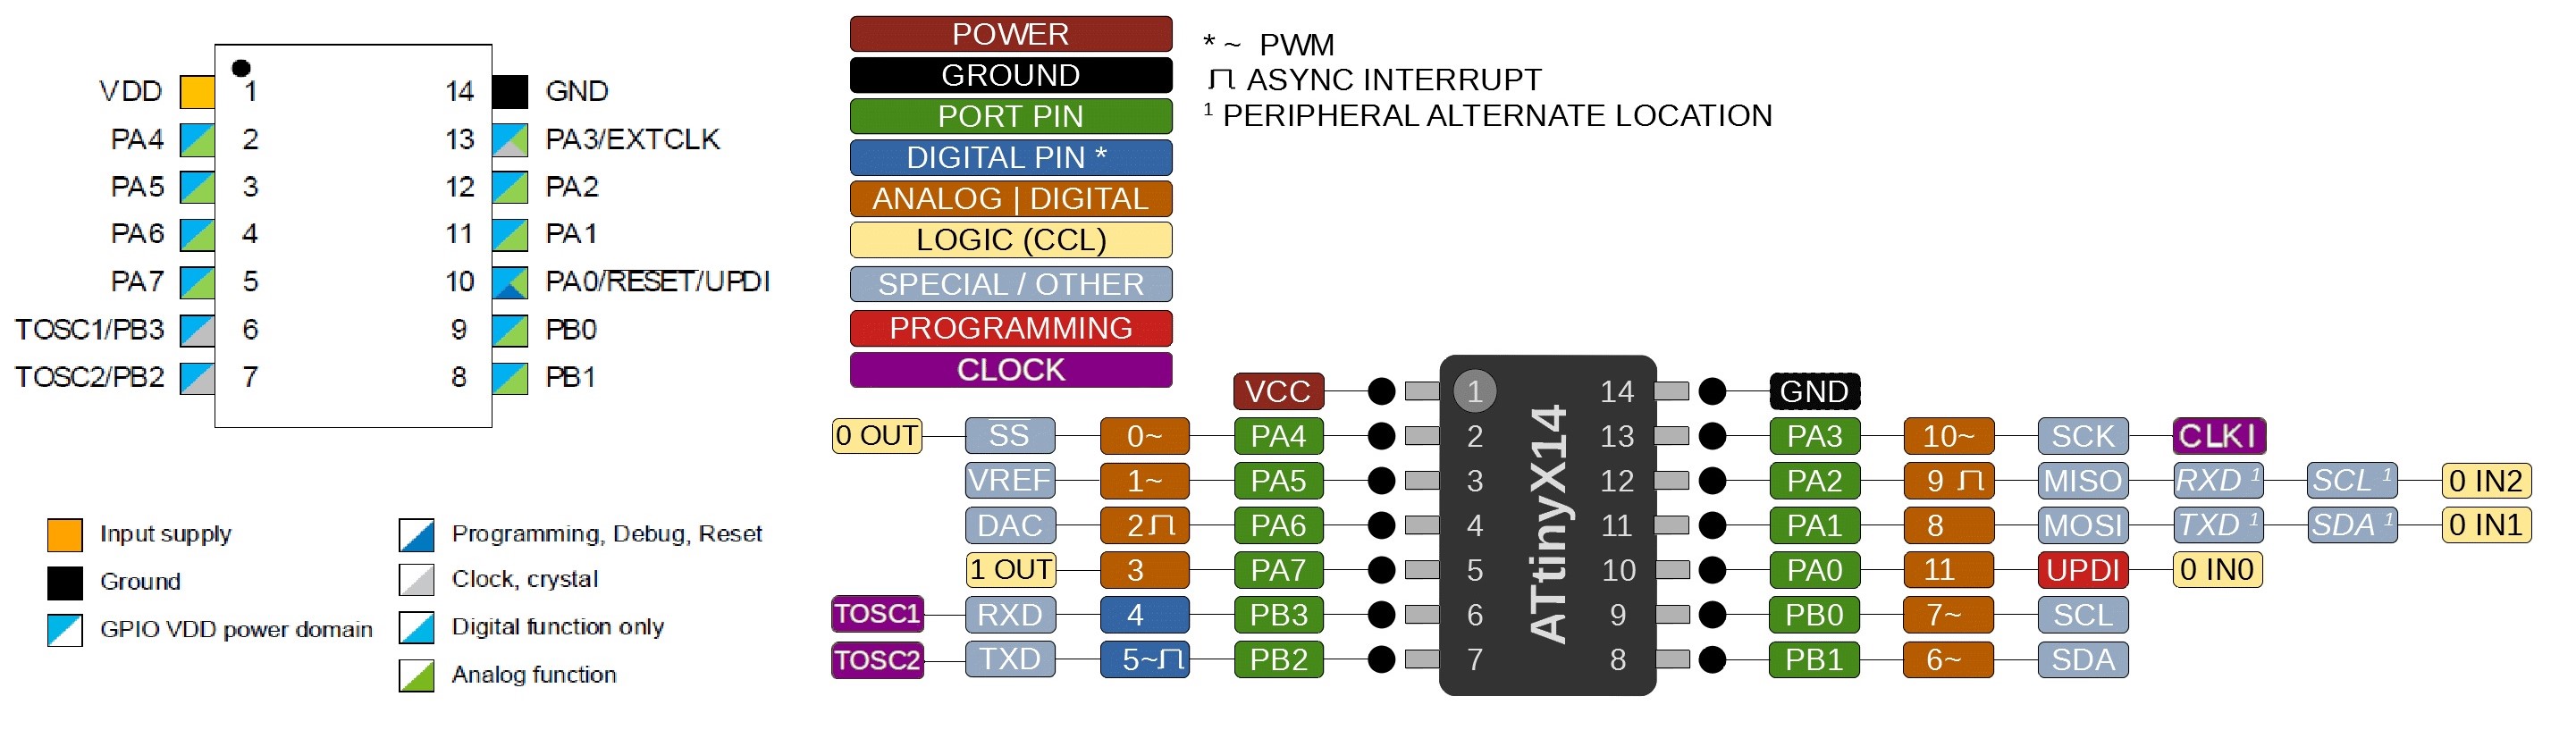
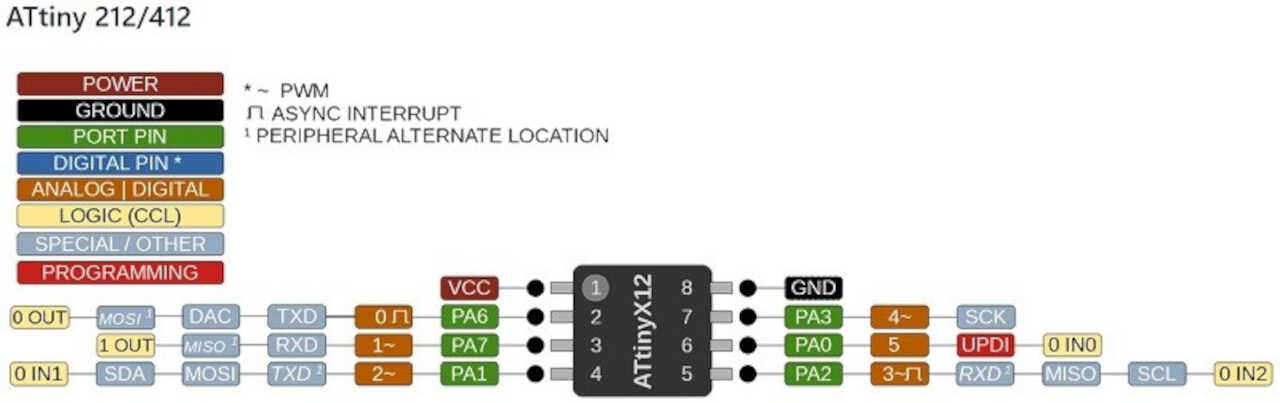
For this assignment, I used two boards previously built, one for the electronic design assignment and the other for the output device assignment. The microcontrollers used for these two assignments are the Attiny1614 and the ATtiny412.
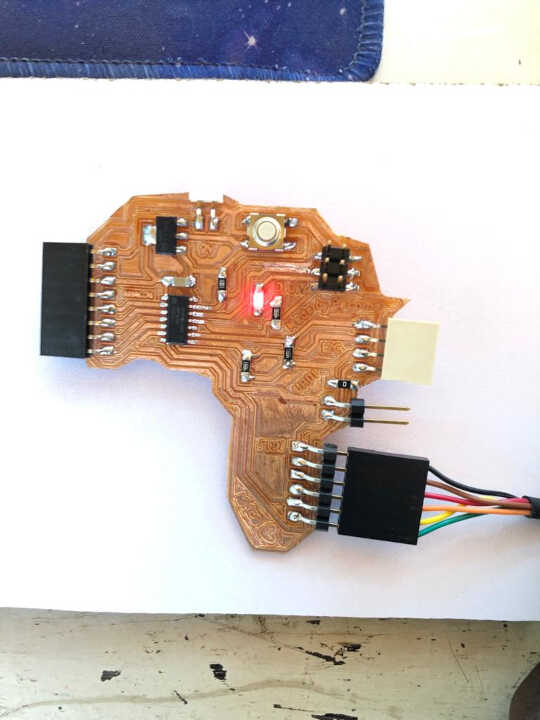
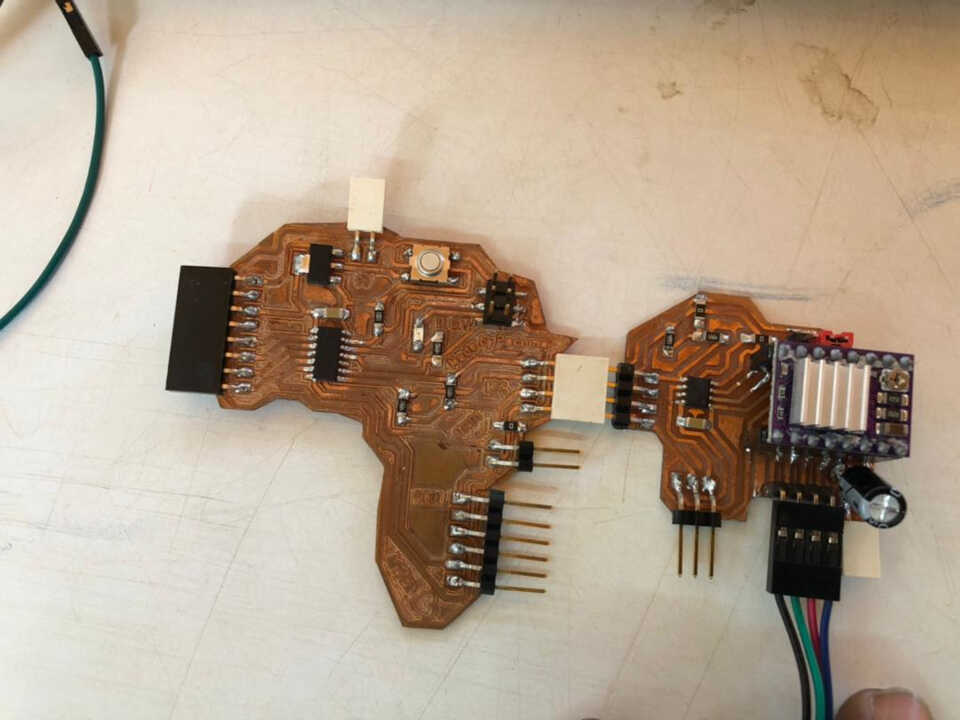
- Africa board
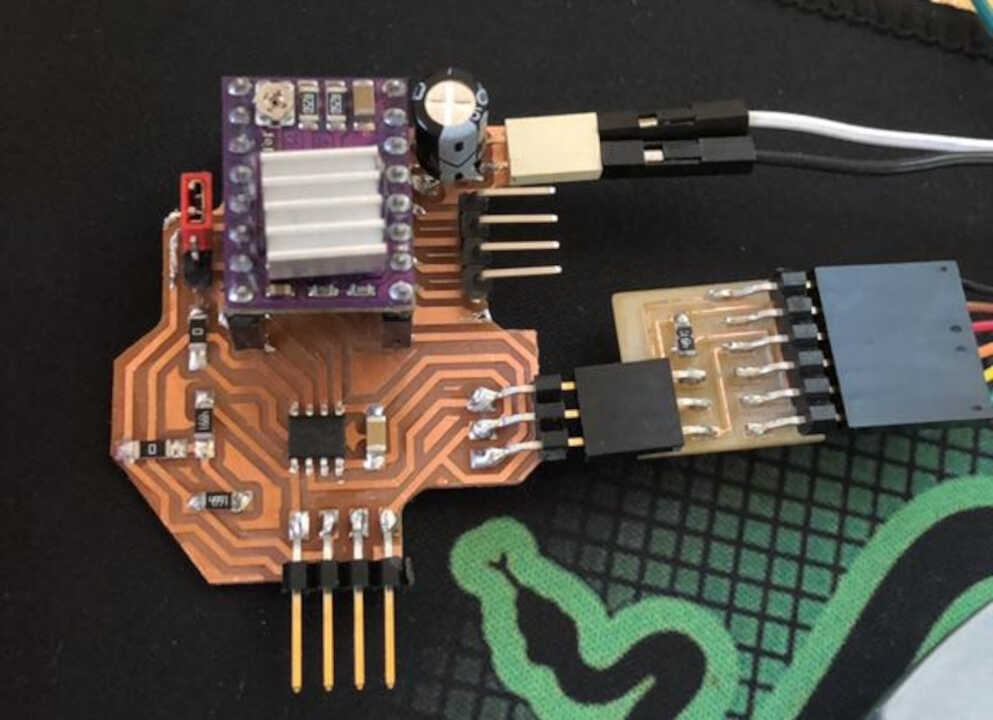
- Output device board
2. Connect your boards together
During the realization of my previous assignments I had provided I2C outputs on each board to facilitate the connection between them
3. Program your Master board
To use the I2C protocol you need to call the Wire.h library and define the address of the secondary board (SECOND_ADDR 9).
You next need to initialize the Wire library using the Wire.begin() command in the void setup().
You then need to initialize a transmission to the secondary using the commands:
Wire.beginTransmission(SECCOND_ADDR);
Wire.Write(Variable);
Wire.endTransmission;
The code for the master board is shown below.

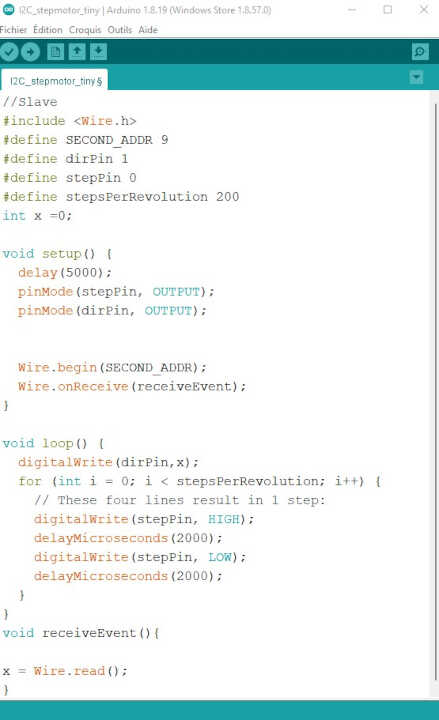
4. Program your Secondary board
On the secondary board you need to again include the Wire.h library and define the board’s address (SECOND_ADDR 9). Again you want to initialize the communication but tell the microcontroller that you it will be a secondary by adding the name of its address Wire.begin(SECOND_ADDR).
The thing that is different for programming a secondary board is you have to define a “receiveEvent” function and call it using the command Wire.onReceive(receiveEvent).
In the receiveEvent funciton you need to read the value from the command using the wire.read() command.
The code for the secondary board is shown below.
5. Test
Group Assigment
6. File
What went wrong/What went wel
For this mission, I had no problem. I was using the I2C protocol in the past without really understanding the concept. This mission gave me a better understanding