Final Project
Why this shape ?
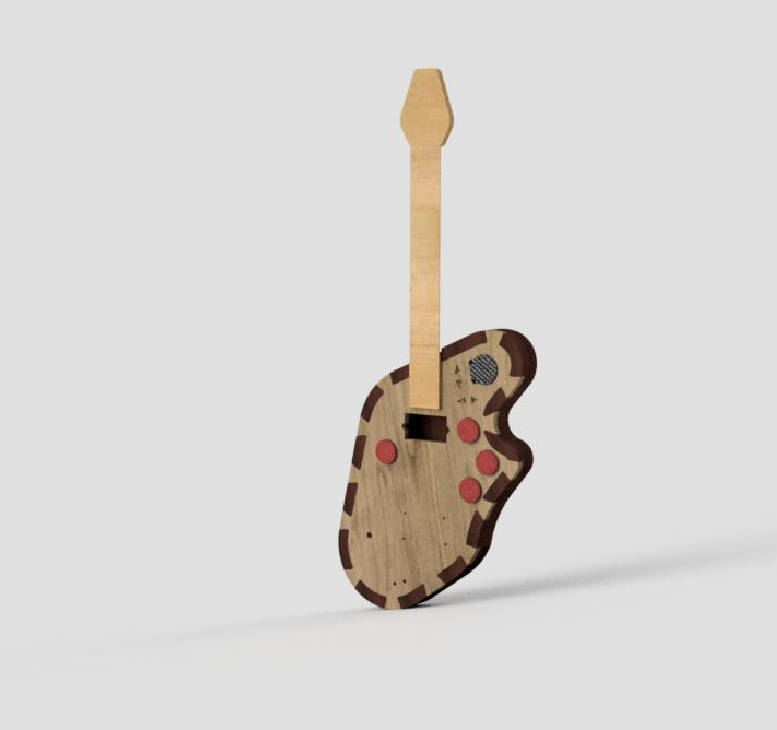
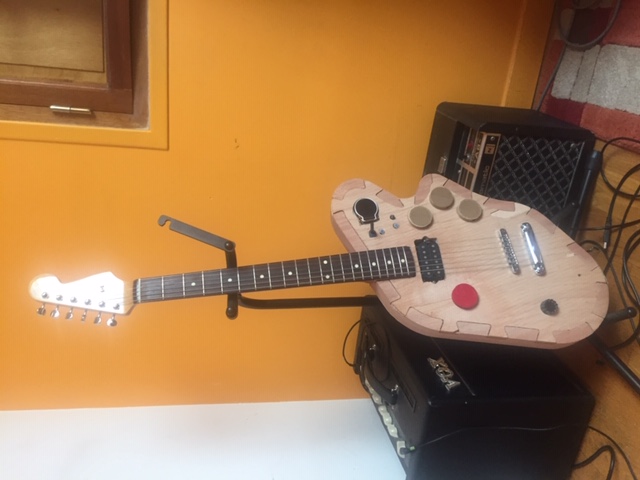
Needless to say that for an electrical guitar you don’t need to resonate the chords with the body. So we can make pretty much any shape, the only matter is that the guitarist is comfortable playing the guitar. The shape of the body reminds the F coming from the FabTar which is an homage to the Fabacademy where this guitar will be designed.
What are the functions of the guitar ?
-
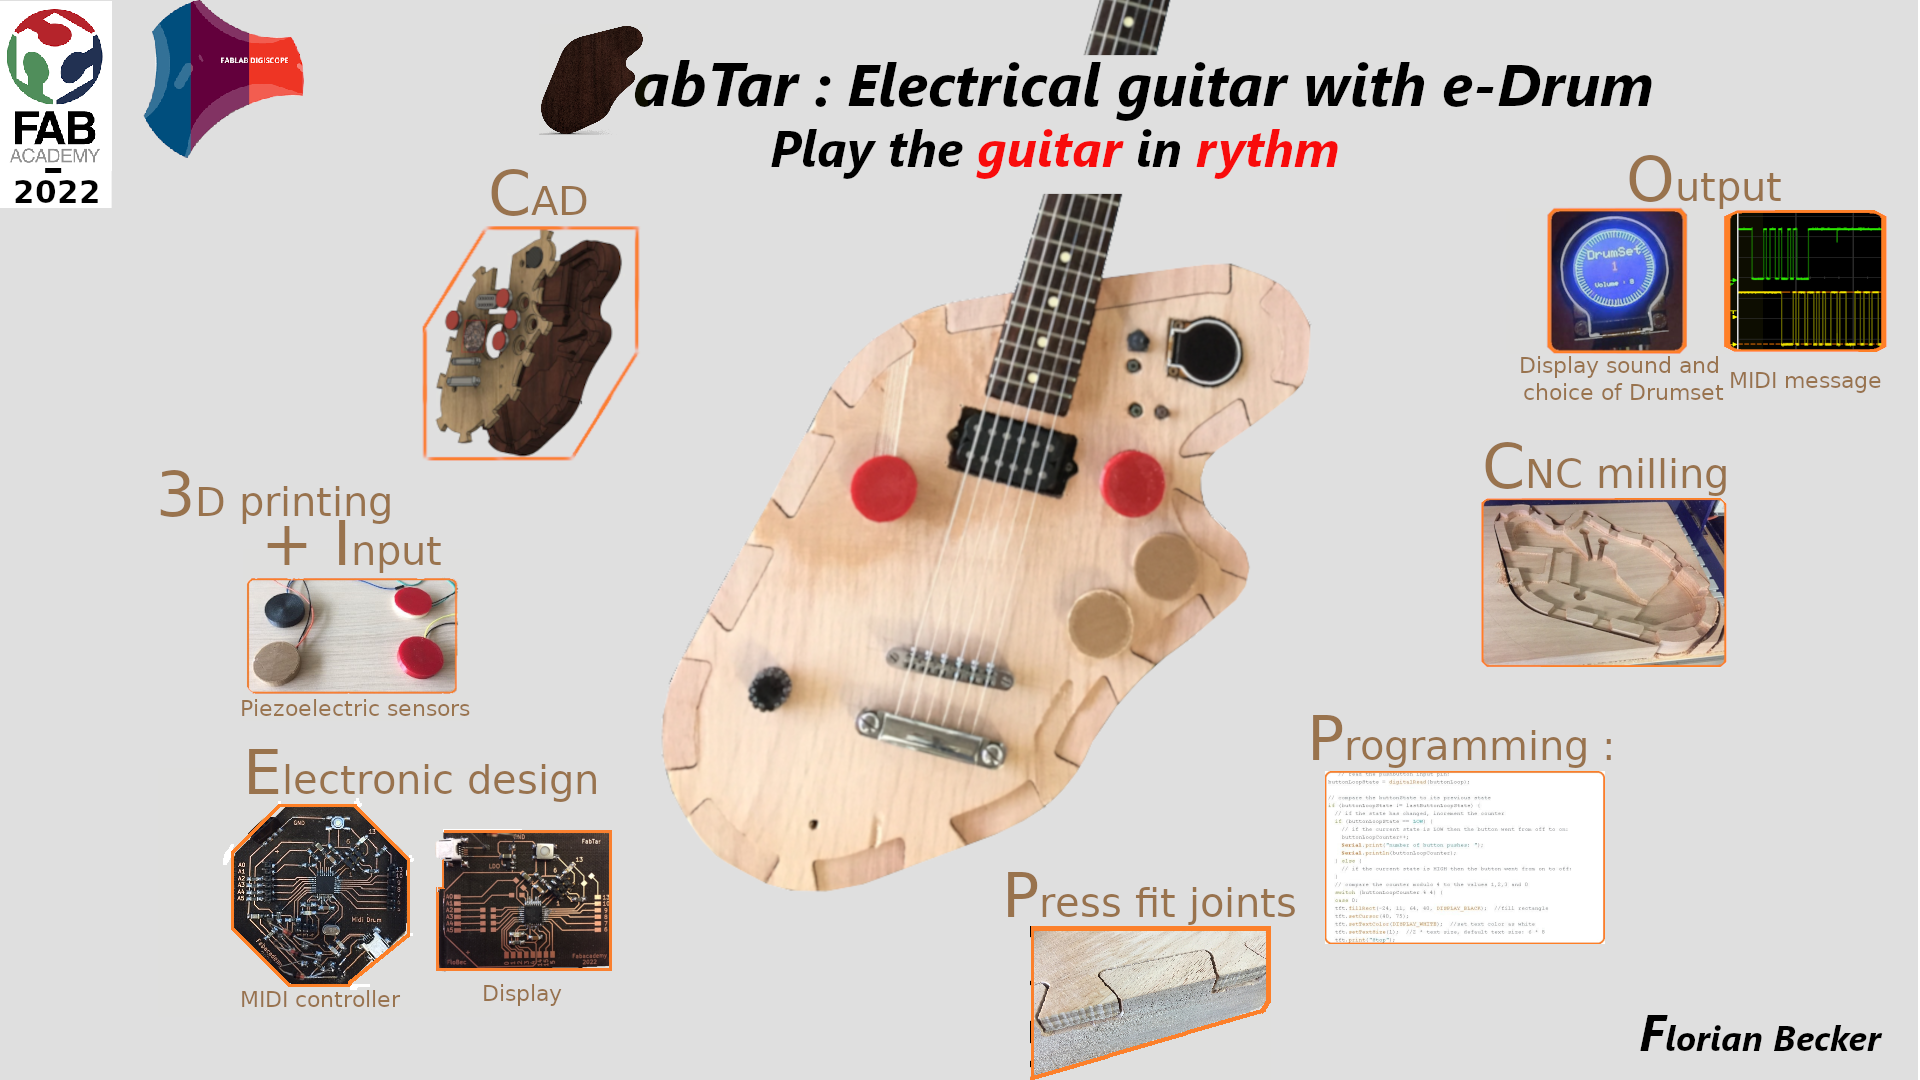
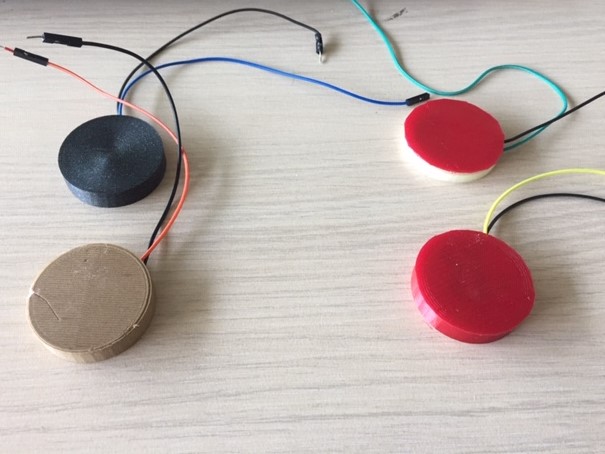
Drum part : Drum pads on the body of the guitar. They have a piezo electric sensor. The piezo electric sensors are used as analogical inputs which are converted by the board into MIDI signal (a note and a volume) send to the serial port of the computer.
-
Keyboard part : 3 buttons (one for changing drumsets, one for recording the loop and one to clear the loop) and a potentiometer to change the drums volume. They send MIDI signal to the computer.
-
Display : Show the changes and the state of the loop
-
Guitar part : Electric guitar with standard pick ups
Links to the presentation
Weeks I worked on my final project
Computer aided design, week 3: I drew the shape of the guitar
Computer Controlled Machining, week 8: I added joinery to the design of the guitar. I milled the top body part.
Embedded programming, week 9: I made tests with MIDI code. The final code was made on project development
Output devices, week 11: I made the board for the display
Input devices, week 13: I made some tests with different materials for pads
Application and Implications, week17: Whose done what beforehand
Invention, intellectual property and income, week18: I chose a license for the project
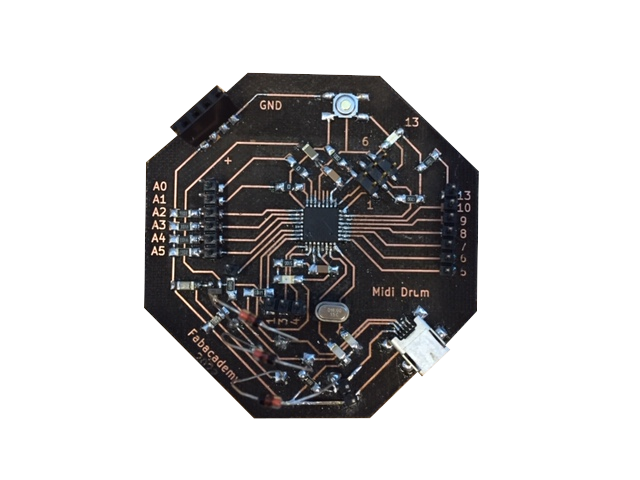
Project development: I made a new board for MIDI controller. I worked on programming and realisation of the “keyboard” part controlling the interface on the computer. I worked on a new design for the bottom body part and milled it
2D and 3D Modeling
All the CAD parts were made in Fusion 360 :
Electronic part
The electronic part is made of 4 piezo electric sensors, 3 buttons (one for changing drumsets, one for recording the loop and one to clear the loop) and a potentiometer to change the drums volume.
Drums
The piezo electric sensors are used as analogical inputs which are converted by the board into MIDI signal send to the serial port of the computer.
On my computer, I use Ableton as a synthesiser and Hairless-midiserial with LoopBe1 to send the signal from the serial port to the MIDI port.
Different pads tested :
board design
Keyboard
One button is used to change the drumset which is directly programmed in the board.
Two buttons are used for the loop section : They both send a MIDI message to the computer. I then attribute it to the correct function in the synthesiser.
One potentiometer is used to control the volume. It sends a MIDI control message to the computer. I also attribute it in the synthesiser.
Display
Display volume, actual drumset and state of the loop (Recording, Play the loop while recording, Play the loop while not recording and Stop)
Guitar part
Demonstration
Final project files
code for display and MIDI controller
MIDI board (with BOM)
Display board (with BOM)
Licence

This work is licensed under a Creative Commons Attribution-NonCommercial-ShareAlike 4.0 International License.
Materials
| Qty | Description | Price | Link | Notes |
|---|---|---|---|---|
| 1 | Mahogany wood 400x550x43 | 65.00 € | Fabrique à guitare | |
| 1 | Plywood 500x750x12 | 19.00 € | Leroy Merlin | |
| 1 | Display | 16.00 € | Go Tronic | |
| 2 | Copper Clad Board | 10.00 € | Farnell | |
| 2 | MCU - Atmega328P | 6.00 € | Farnell | |
| 1 | Miscellaneous electronic components | 10.00 € | Farnell | |
| 1 | Filament (6.5g/padx4) | 1.00 € | Prusa PLA | |
| Total | 127.00 € |