3. Computer Aided Design
Assignment: Model (raster, vector, 2D, 3D, render, animate, simulate, …) a possible final project, compress your images and videos,and post a description with your design files on your class page
This week I worked on testing out different CAD programs for 2D and 3D modeling. I was also going to use one of the programs to create a detailed model of my final project.
2D Design
Gimp
I had never used Gimp before and I was interested to learn. I normally use Corel Draw as my 2D software but Corel is concidered a vector while Gimp is primarily a raster software. I downloaded it and started working.

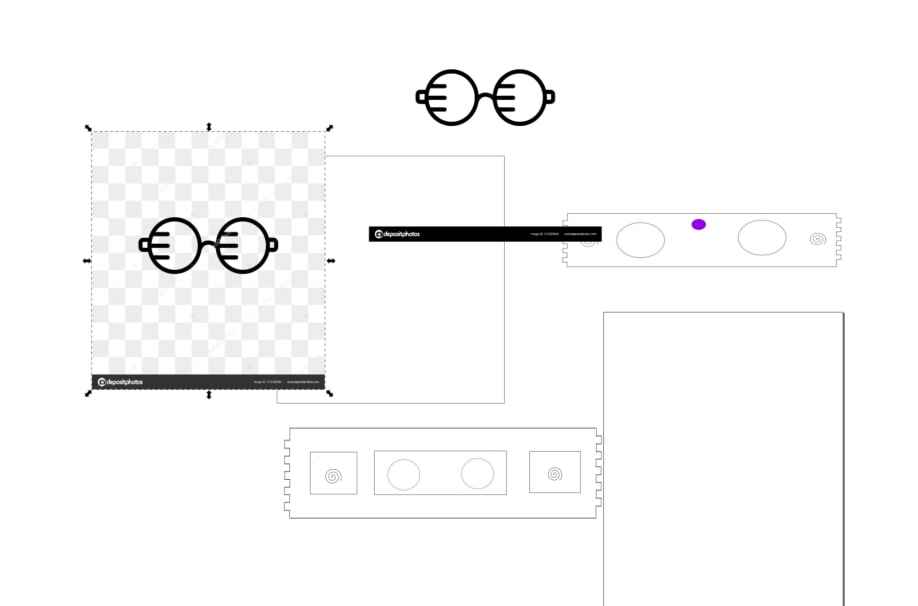
I just wanted to test the software so I downloaded a Naruto svg that I would be able to manipulate.
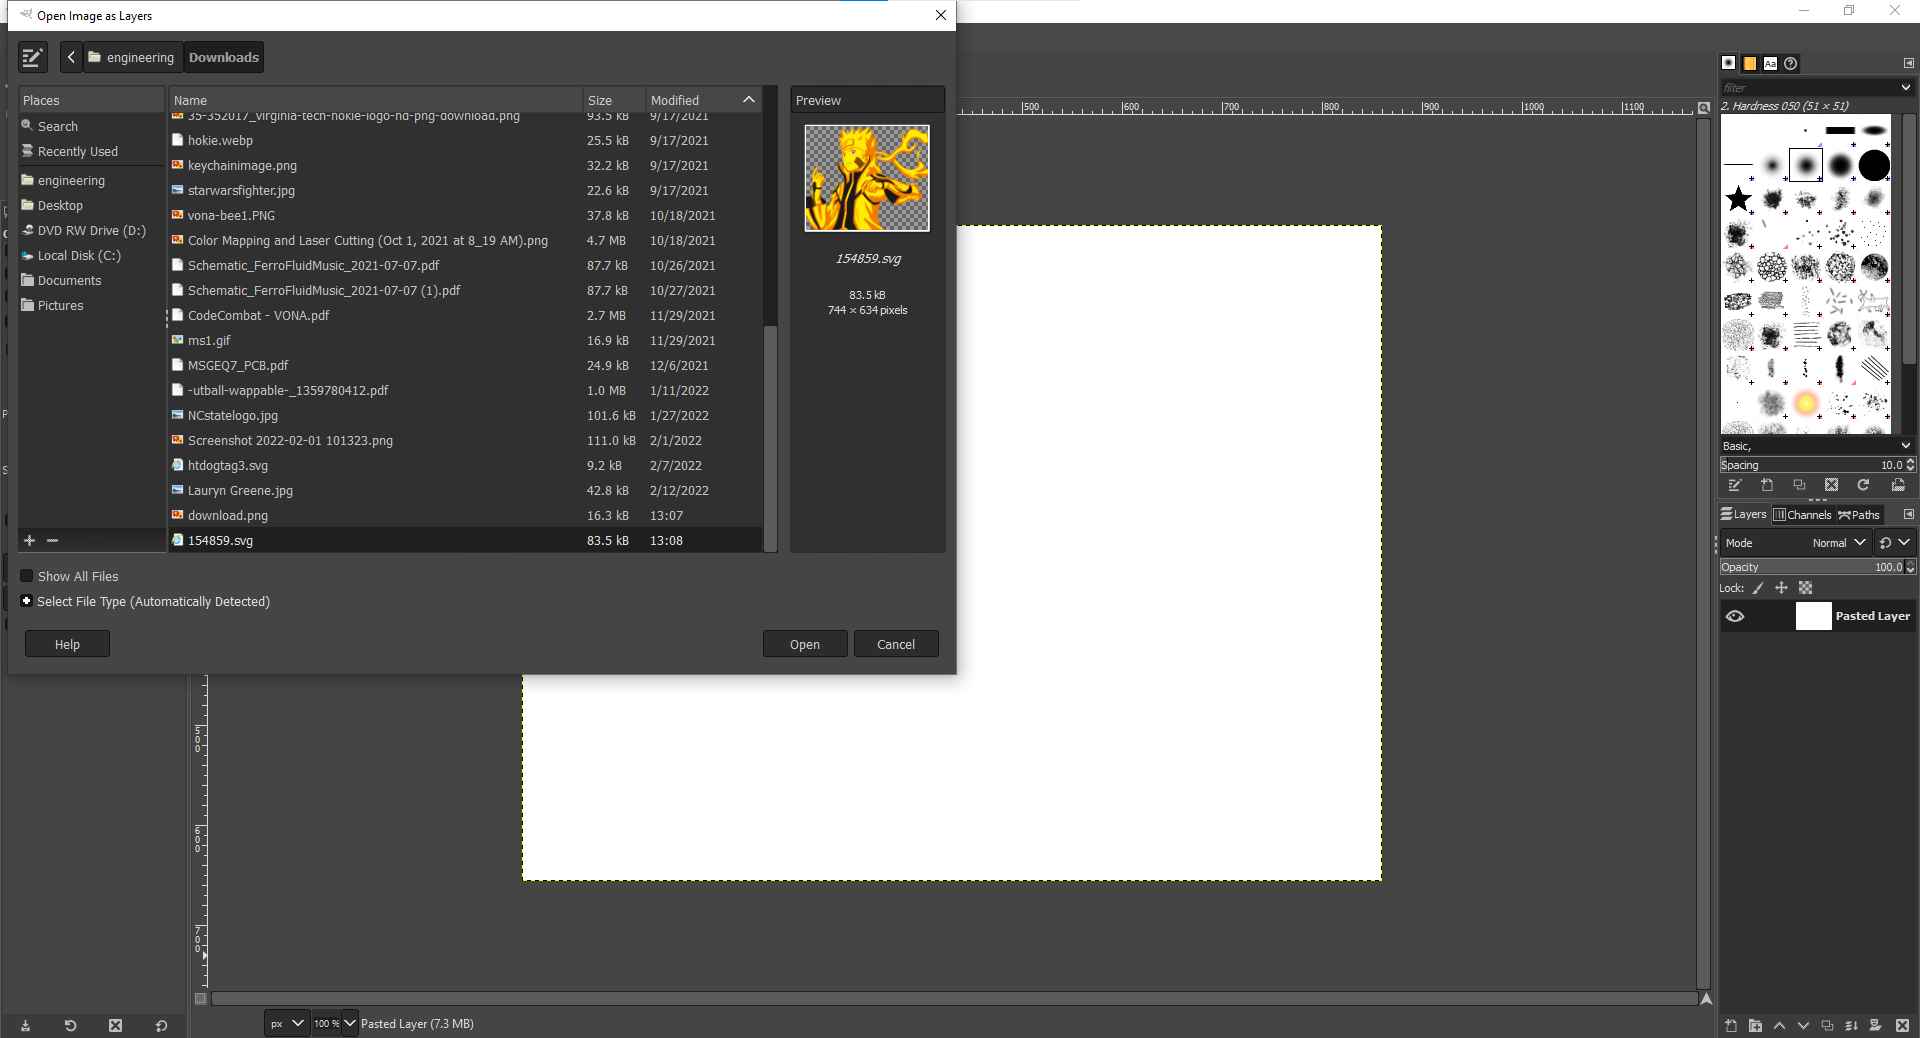
I was having a tough time becoming accustomed to the layout. For example, loading in the SVG mentioned earlier took me around 7 minutes, though once it was loaded I tried multiple tools. Some tools I didn’t even recognize and I started experementing with those. I tried to perform a simple bitmap trace but I couldn’t find the tool. I found this one tool that allowed me to select different parts then perform some tasks with the selected part.
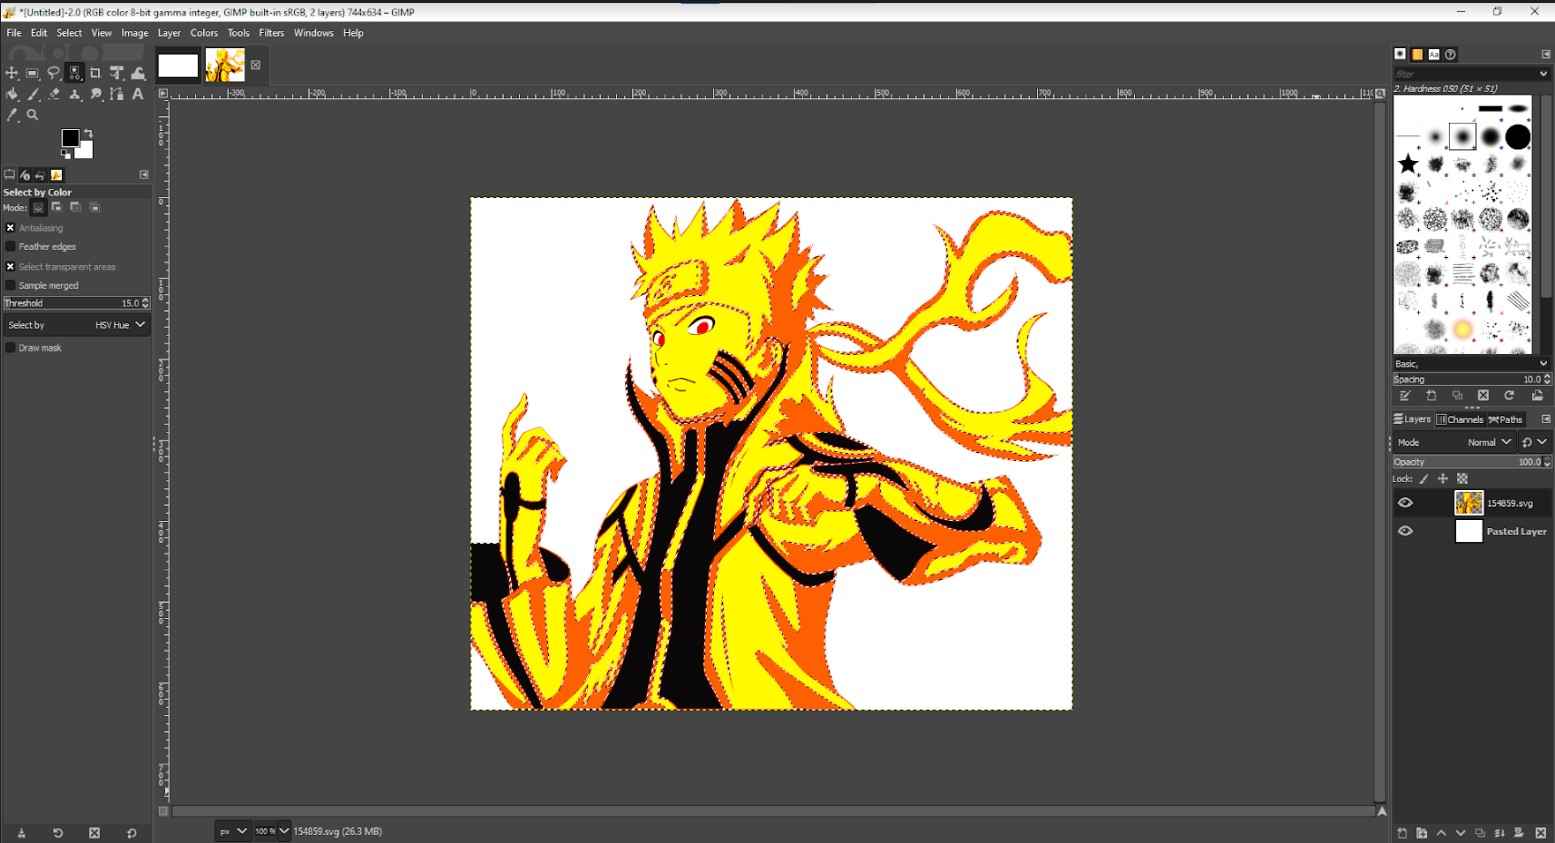
Gimp seems like a powerful software when explored to its full extent, however I am just more comfortable using Corel Draw. It was fun to use the software and it also helped me understand conceptually the possibilities of all the 2D and 3D softwares out there.
Inkscape
I faintly remember using Inkscape my sophomore year of high school, but I had to refamiliarize myself with the app. I didn’t use a guide video, I just messed around with the software. My goal for using Inkscape was to create 2D sections of my final project using tabs. I didn’t have a reference image to put in so I started from scratch.
Top of bottom layer (bottom left rectangle)
I first created a rectangle using the square and rectangle tool on the side bar. For the dimensions, I didn’t specify because I was just testing the software. I first wanted to curve the sides but I was having trouble with this.
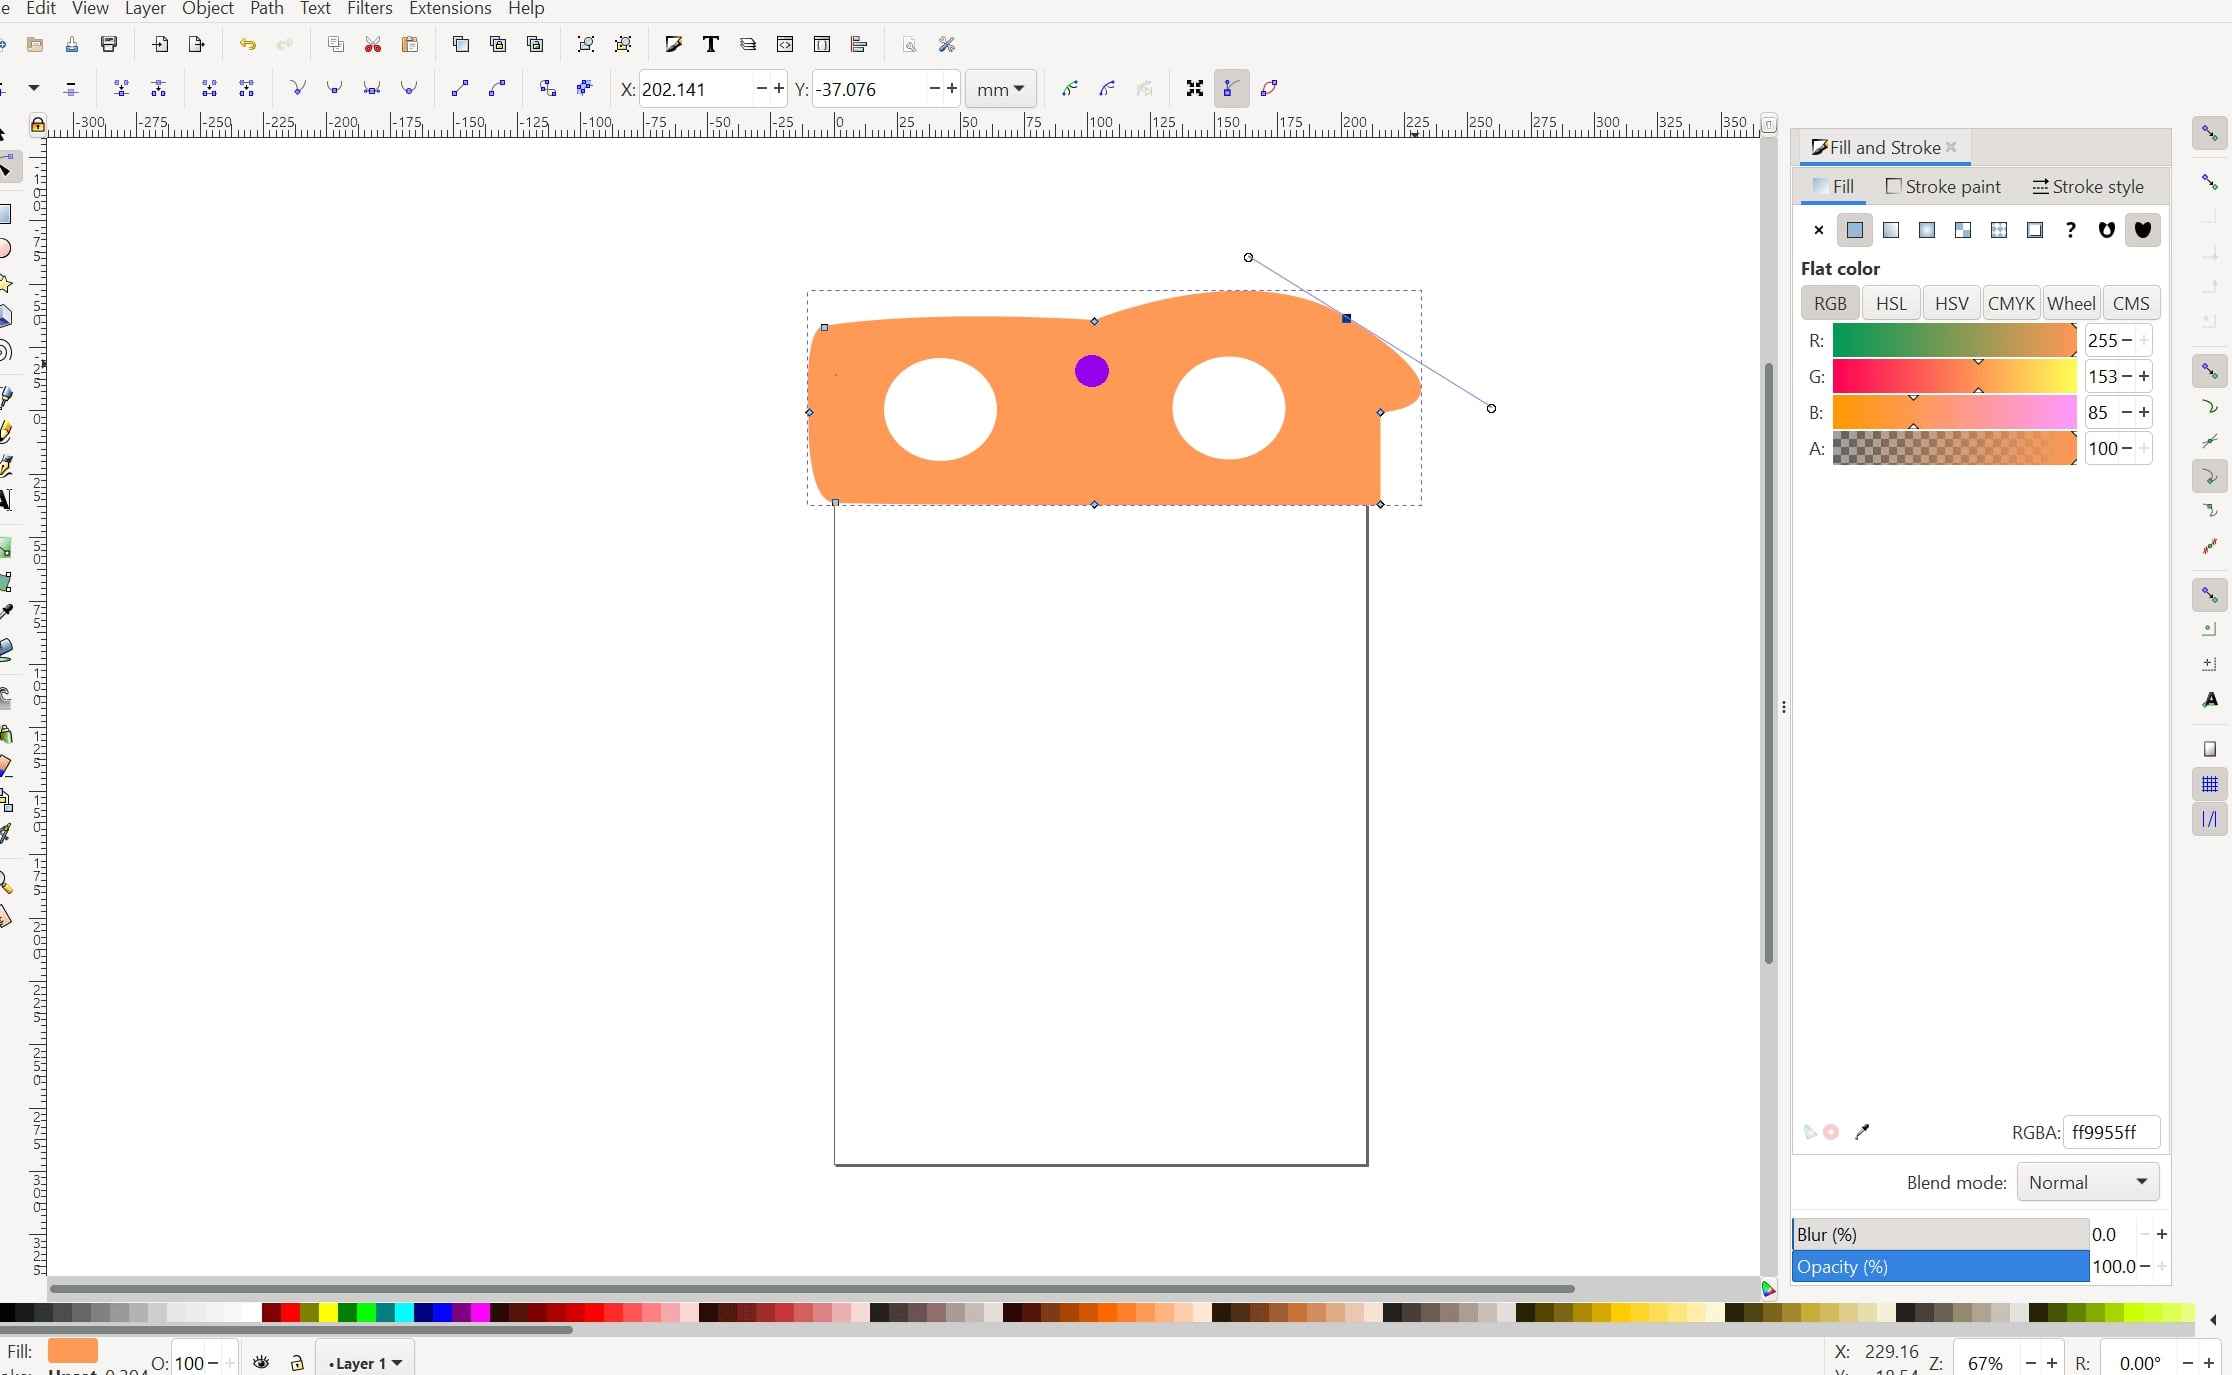
I decided I wasn’t going to do this and focus on 2D designing my project. I then made 3 more rectangles to signify where the glasses and the stepper motor would fit. I then put spirals to further emphasize this, I then added two circles and changed the colors. This process was simple but making the tabs would be the hardest part. I tried adding tabs on the rectangle as it was, but this wasn’t working so I had to create two parallel lines using the rectangle as a reference point. I then used the line tool to create the tabs but ran into some issues. The line tool had multiple categories that I didn’t recognize and through trial and error I found the paraxial line tool. I then ran into a problem of not having the correct angle, I would estimate it but it was hard to get it exactly 90 degrees. I had to use CTRL and it would lock the angle in place. Measuring the distance of the tabbed lines was also a difficult step that I couldn’t figure out.
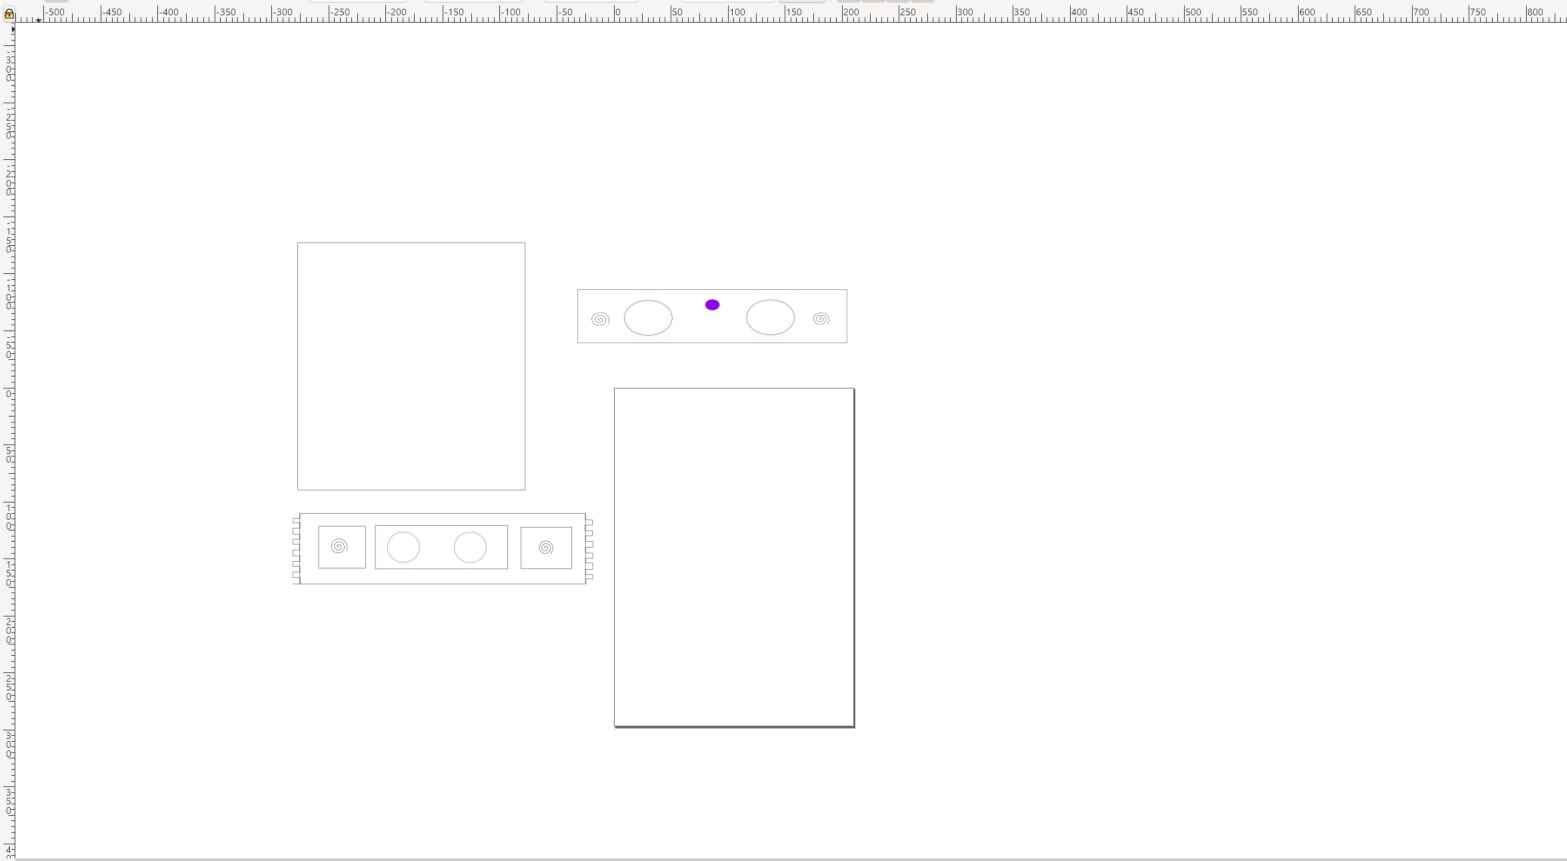
I repeated the same step for the layer with the UV light to create tabs (top right rectangle). I then focused on the front of my design. I wanted to have an image so I imported a glasses image and made it into a bitmap then added some text and changed the color, the process was easy also.
Finished Inkscape Design
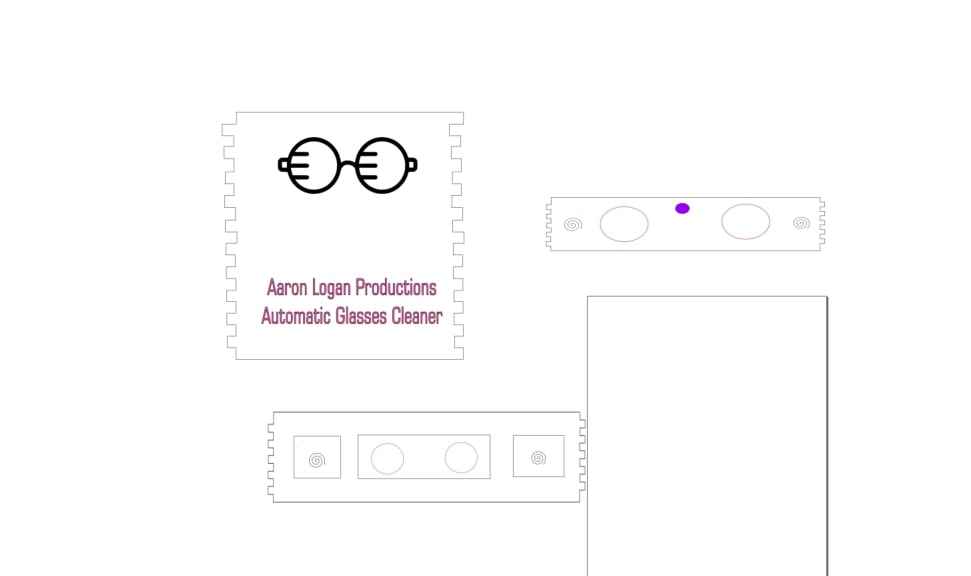
| Piece | Meaning |
|---|---|
| Purple Cirlce | UV Light |
| Spiral | Reference Point for Threaded Bar |
| Red Cirlce | Cleaning Pad |
Corel Draw
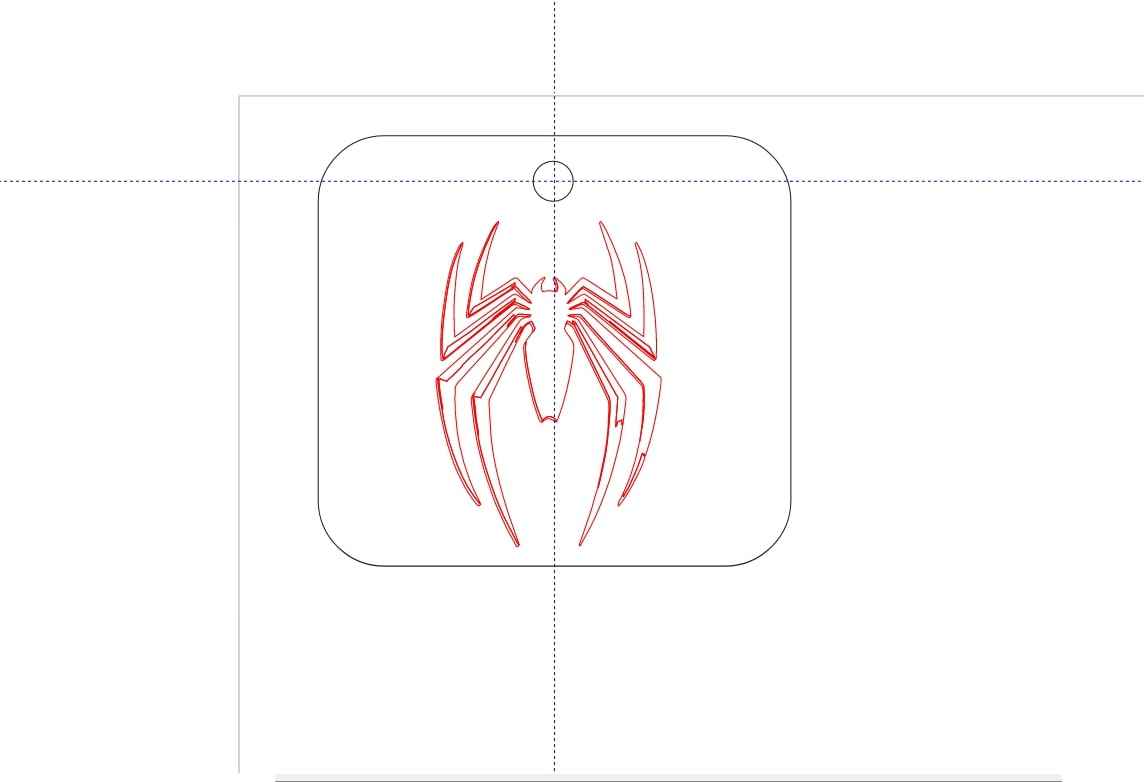
 I already have some experience with Corel. So when using this software I didn’t need a guide video, I used my previous experience to help me through this process. I wanted to make something I could use in real life. I decided on a spiderman key chain using this image
Designing
- I created a square and curved the edges
- I imported a spiderman logo PNG from here from to trace a bitmap of. I then aligned the newly created bitmap with the frame of the keychain.
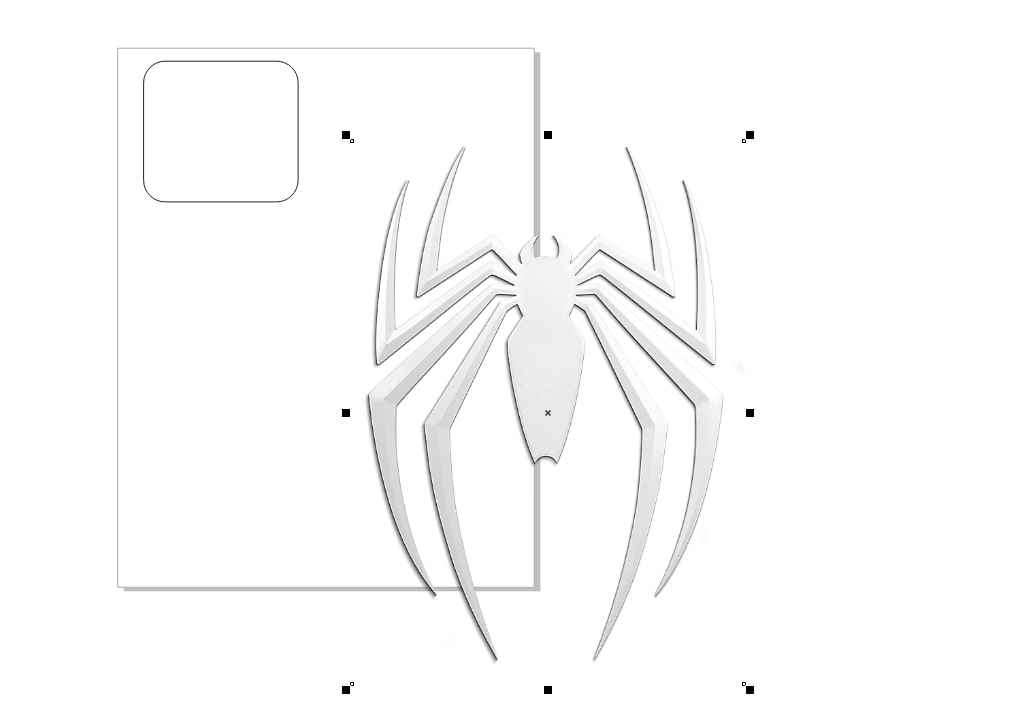
- Made the circle and outline hairline while leaving the spiderman logo as a raster
- I centered a circle close to the top,
Corel VS Inkscape
I perfere CorelDraw of Inkscape for a couple of reasons
- I could curve my rectangles easily
- When created tabed lines it was easier to measure the distance
- Could move objects backwards and forwards on the layer easier
3D Design
Onshape
I already did my final project in Fusion 360, but I wanted to at least try to create a rough sketch of what it would look like in Onshape. Similar to the other CAD softwares I’ve used for this documentation, I didn’t use a guide video and just explored the different commands using my previous experince with fusion. The layout was also similar to Fusion too so navigation was easy.
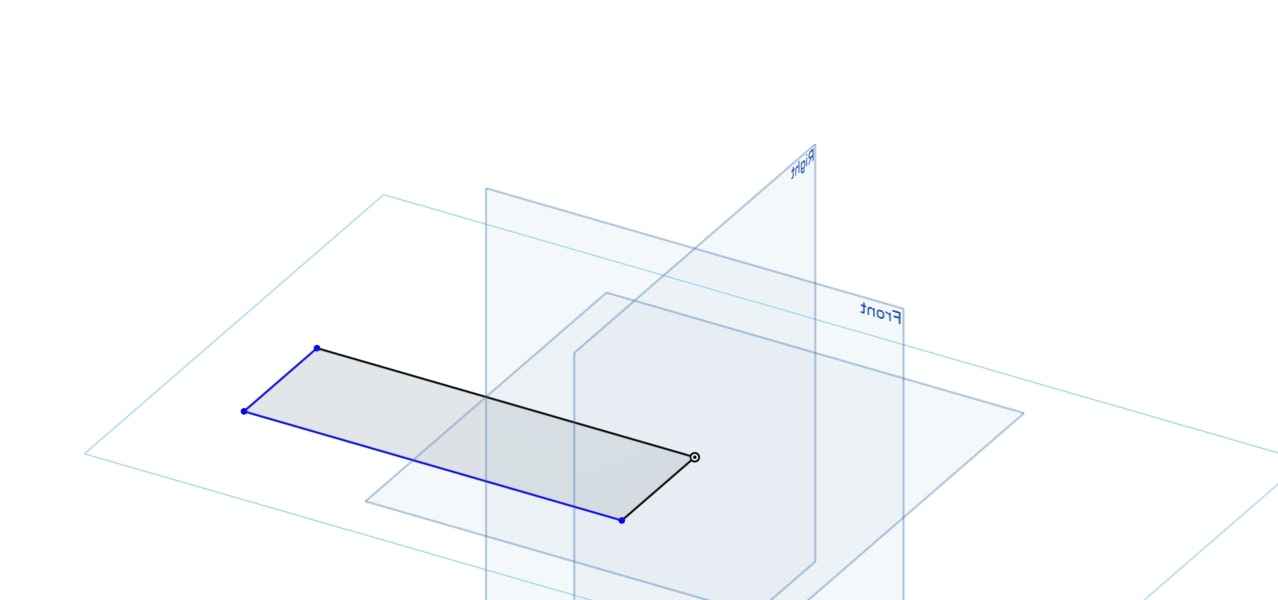
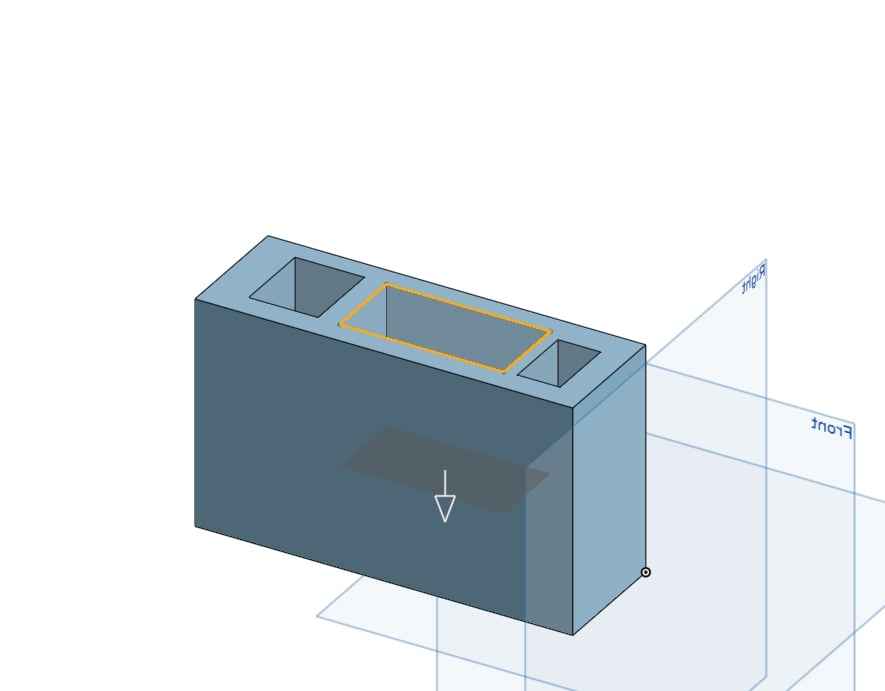
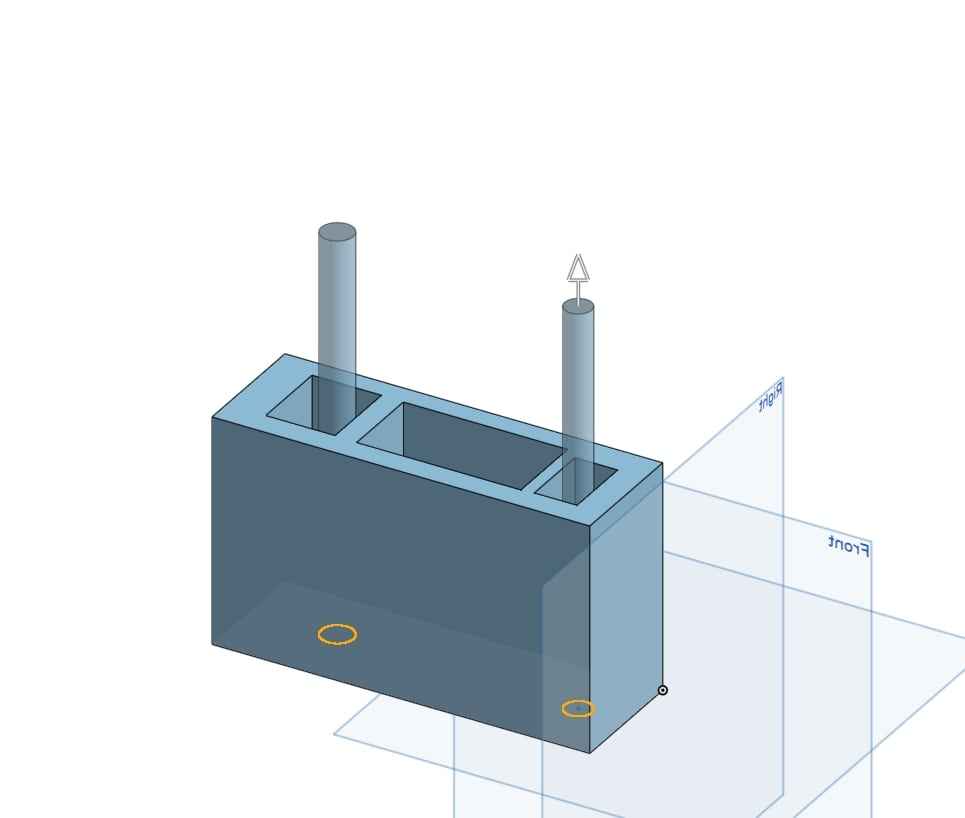
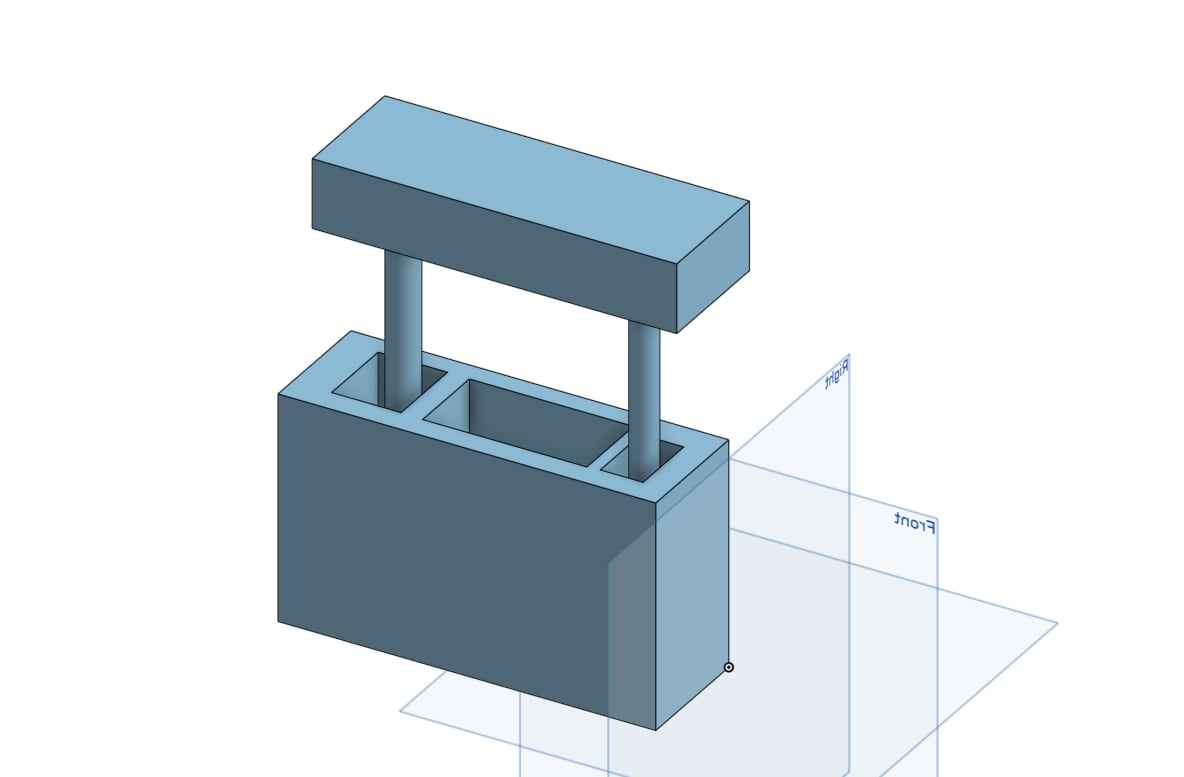
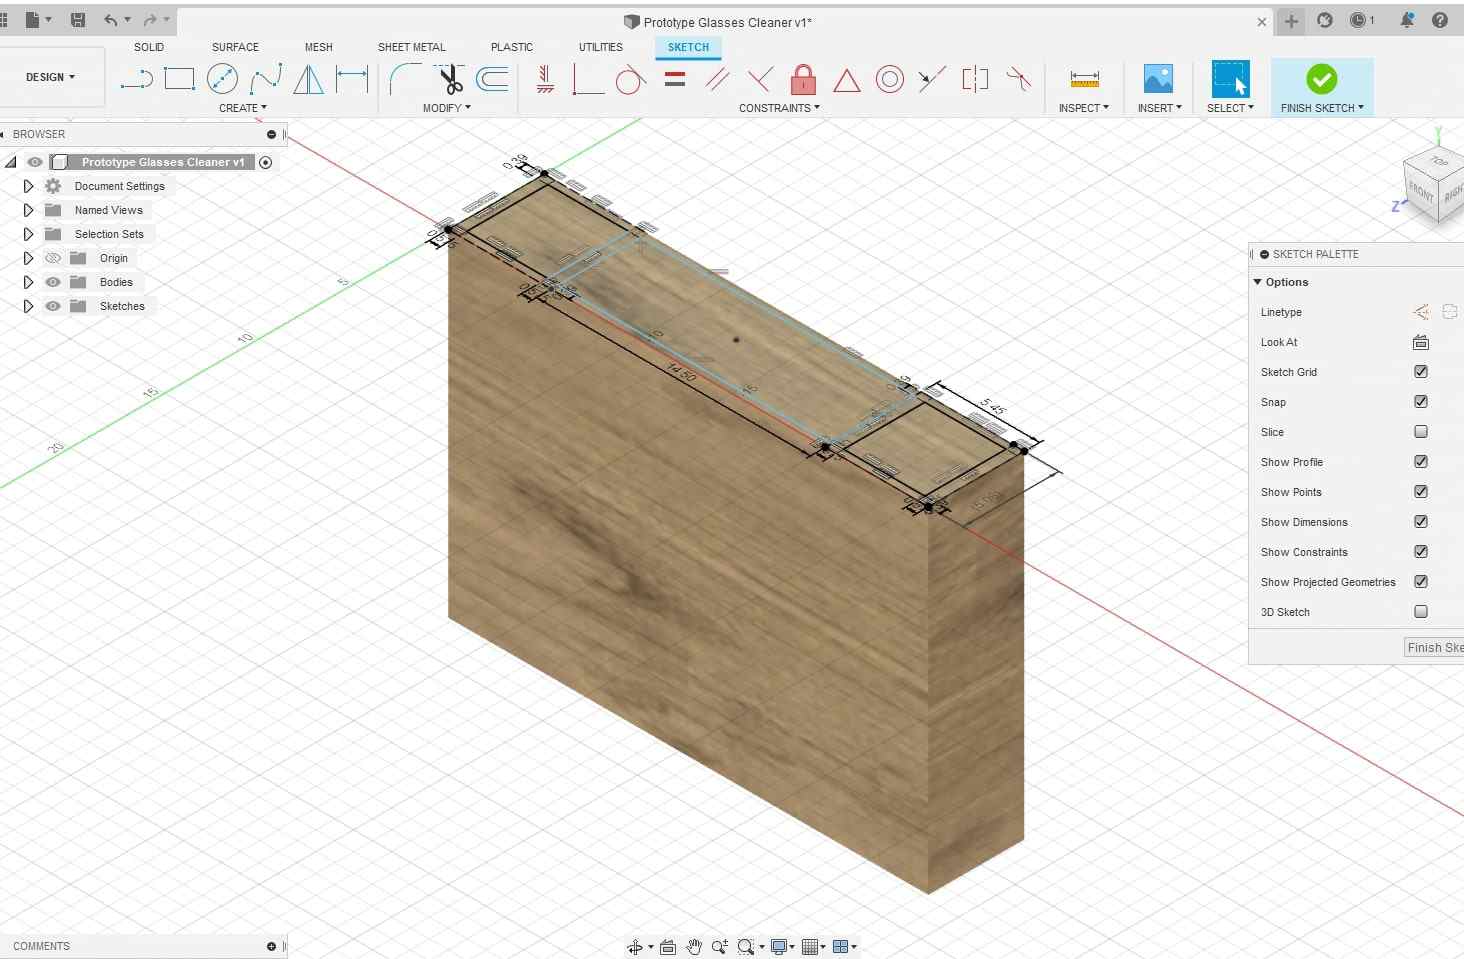
I created the rectangle that I was going to extrude for the base of my design, and exactly like I did in Inkscape, created the 3 extruded holes in the base. One difference I noticed with Onshape is that when I created a rectangle sketch, my rectangle wouldn’t deselect, it my cursor would keep making rectangles. I didn’t like this difference. I then created the two threaded cables of the stepper motor, but I couldn’t find the thread tool for the extruded cylinder. I then created a top layer for the top pads by making the sketch plane the top of the cylinders. After this my test design was good. I like the software overall, but I believe Fusion has more customizable features that help when designing.
Fusion 360
I’ve done a lot of work in fusion since I’ve been at Charlotte Latin School. I have some projects already in my repository that are shown below.
I’ve 3D printed, laser cut, and design in fusion . A lot of my knowledge of fusion is thanks to, Product Design Online who created this playlist called Learning Fusion 360 in 30 days. He goes over the features that fusion 360 has to offer, while making different projects. Some of my projects are below. As I mentioned earlier, I created my final project Fusion 360 and explained a good bit of the process there, but to reiterate, I did the following:
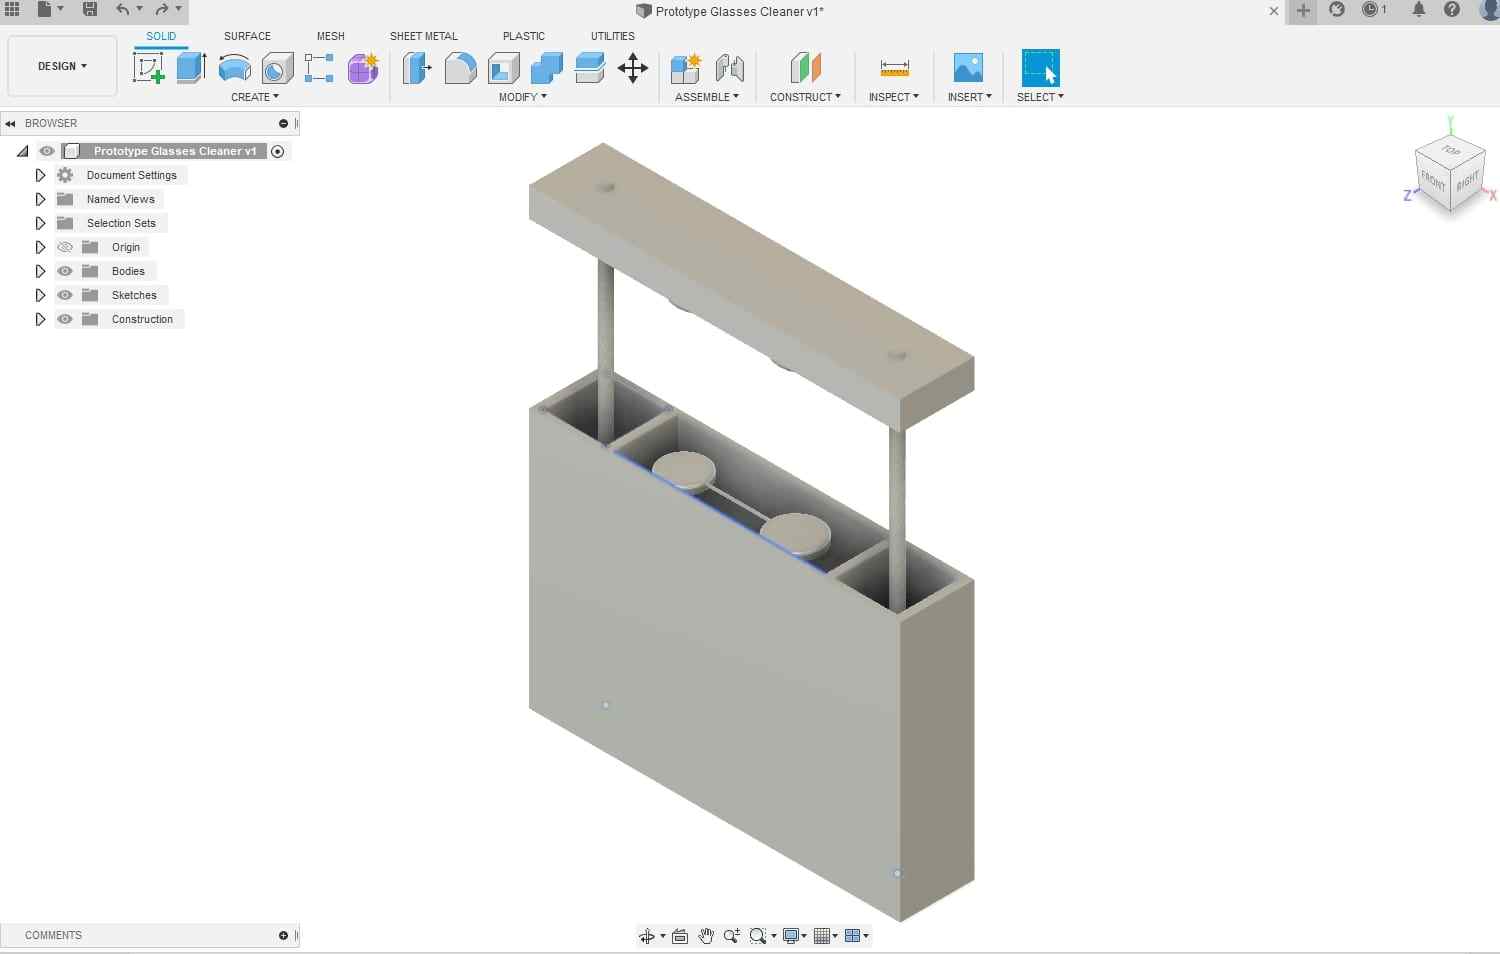
- Create 3D box using box tool
- On the top create 2 squares and 1 rectangle to reverse extrude to create holes for the glasses and the stepper motor (at first I had an appearance, but it became distracting and decided to remove it)
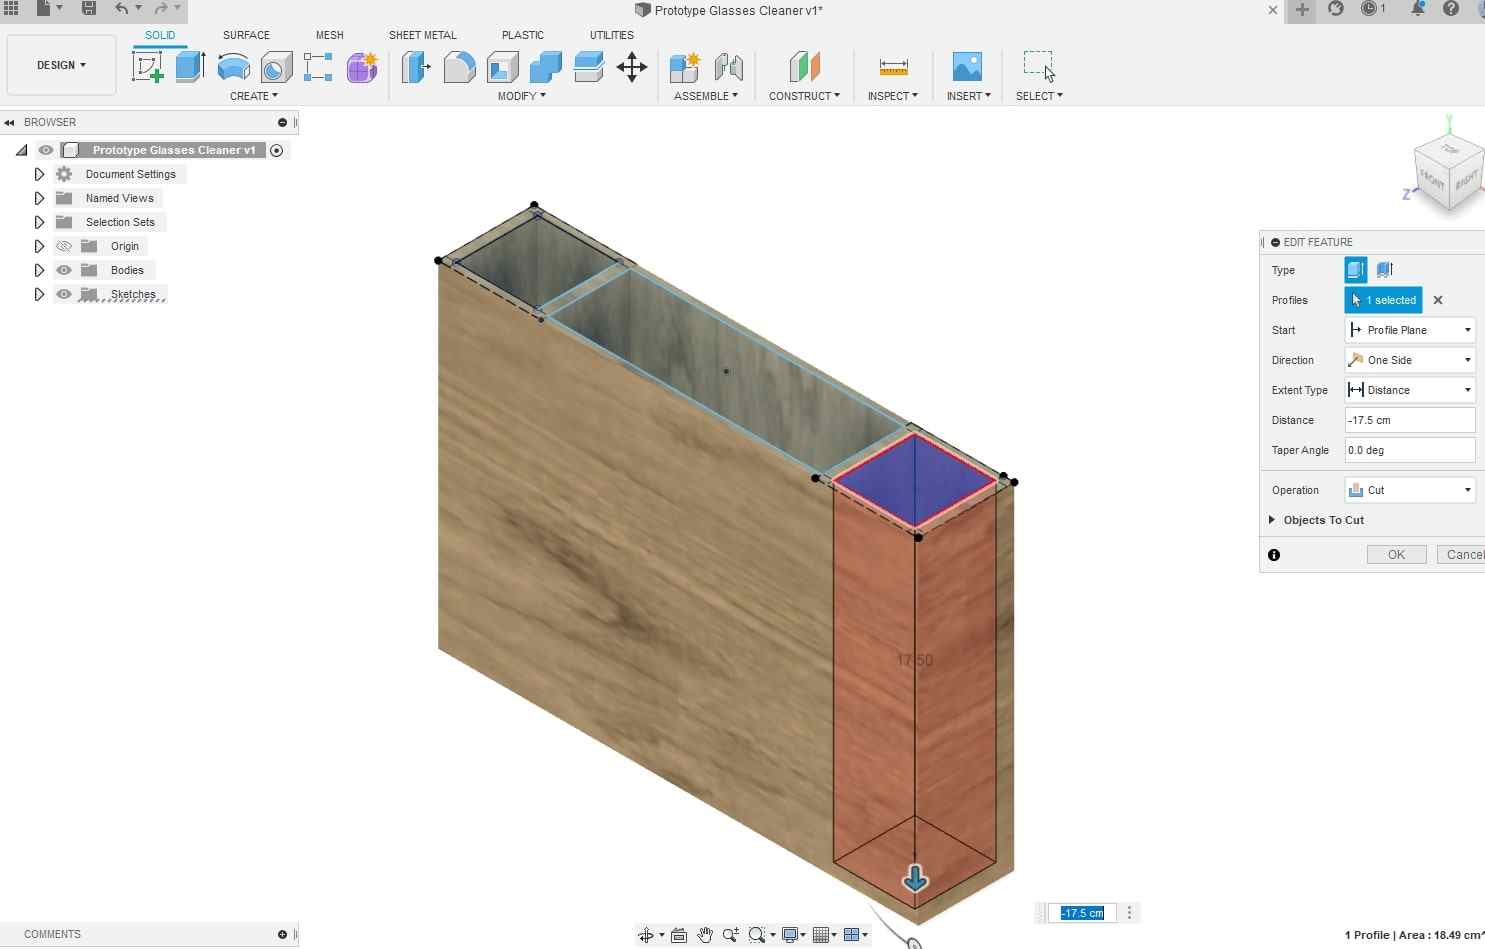
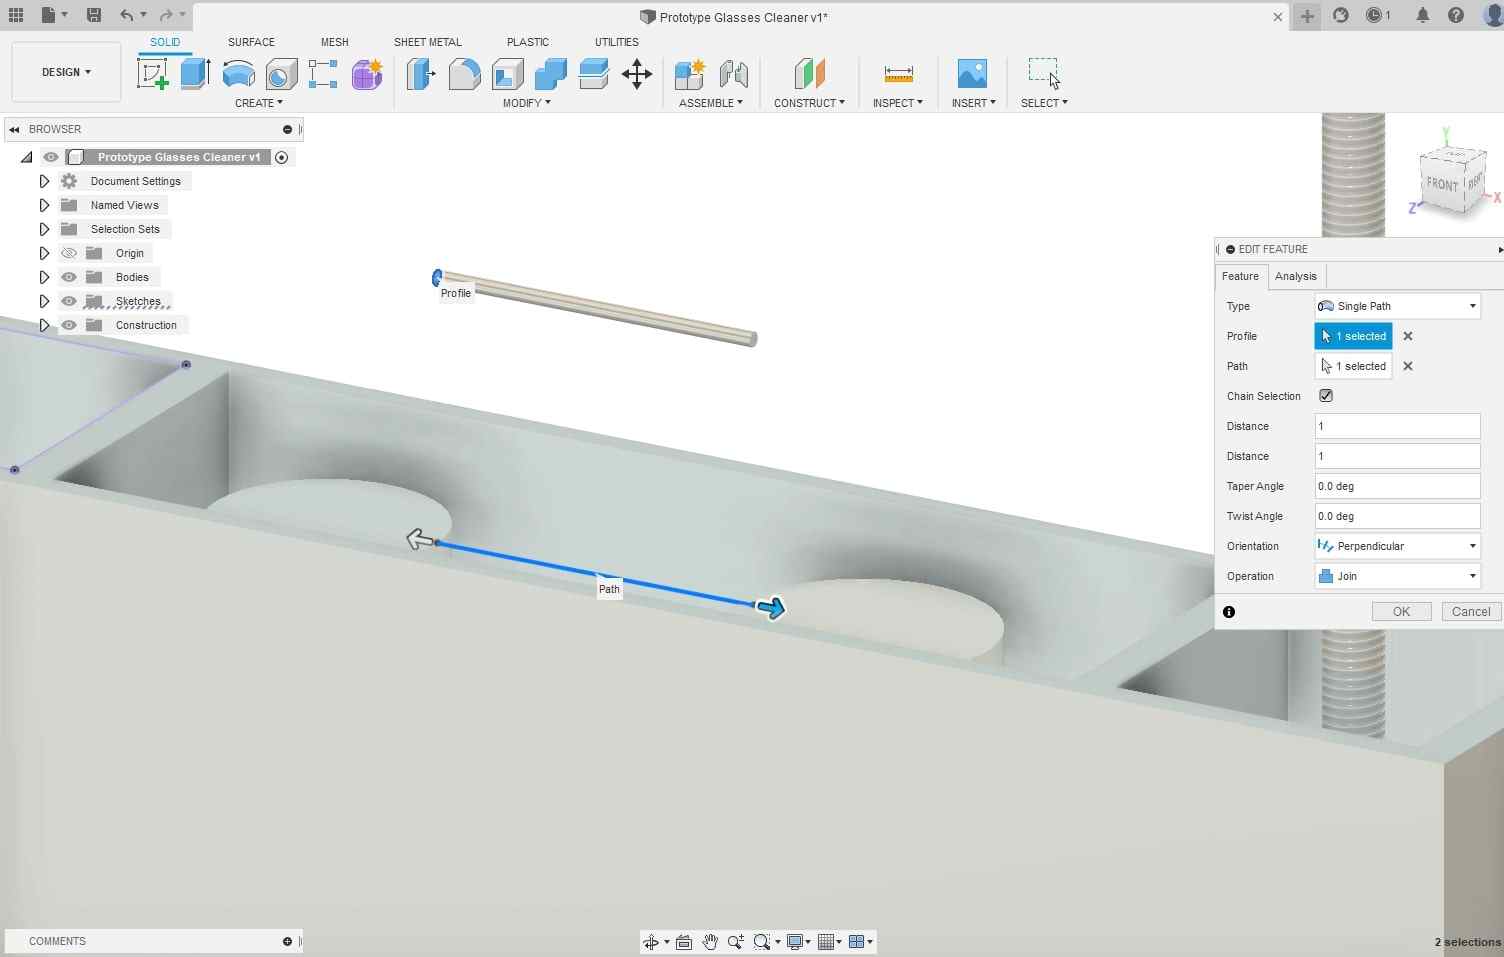
- Created another plane on the distance from where the bottom of the reverse extrudes are then used the cylinder tool to simulate the threaded rods from the stepper motor. I made the length 31cm and I used the thread tool for aesthetic purposes.
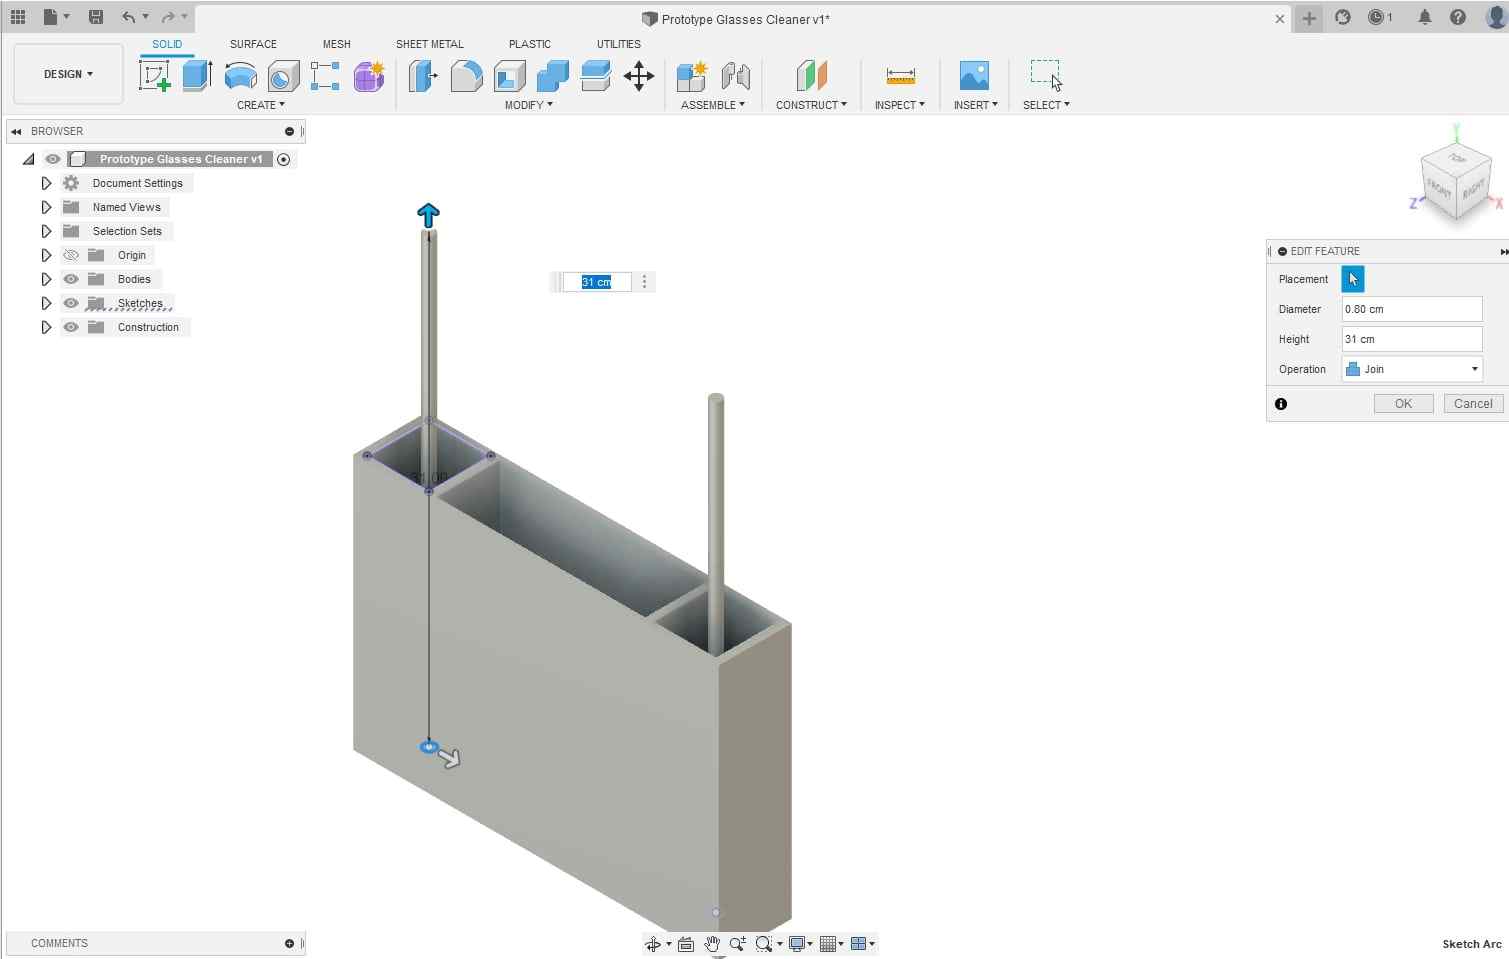
- I added the top layer my using the box tool with the same 2D dimensions as the box, but I changed the height. I also made sure to have the rods stick out. I then added two cylinders for the eye pads and one for the UV light.
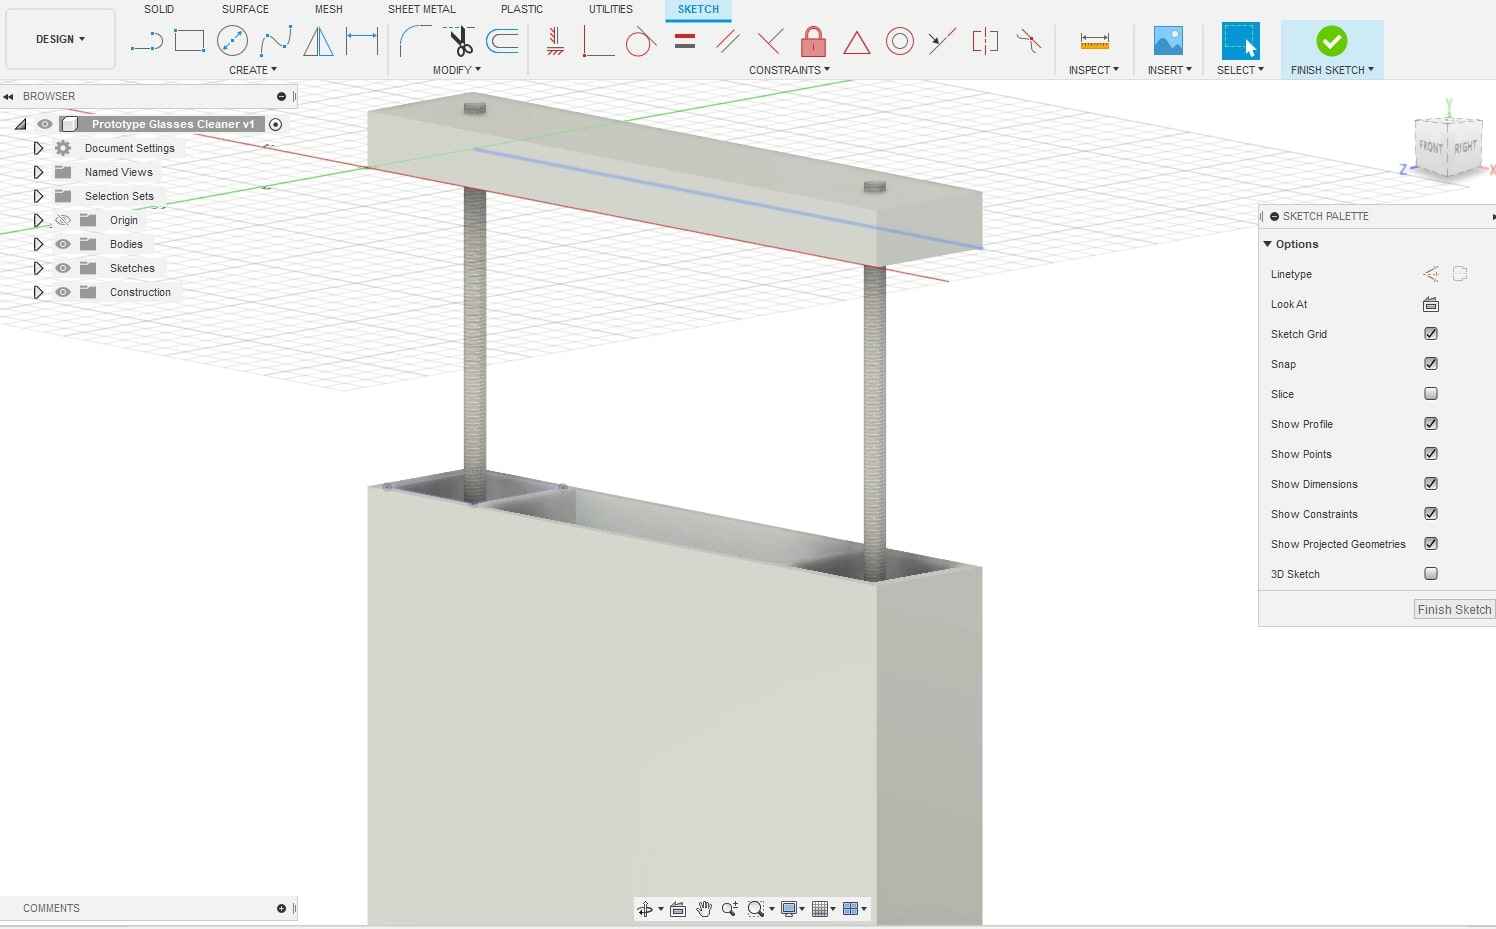
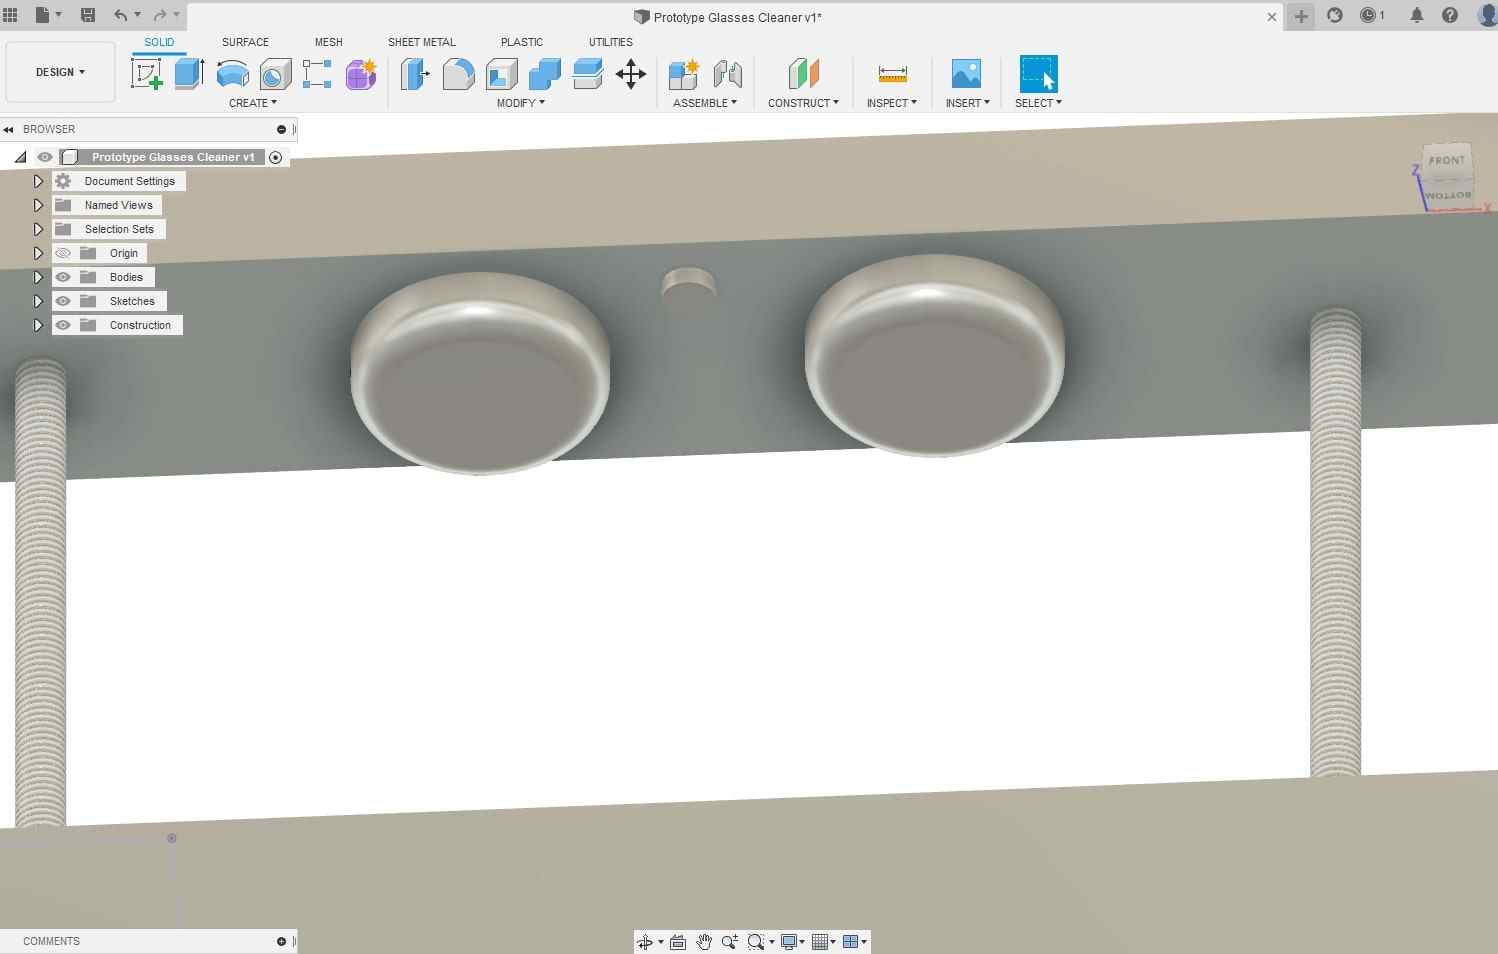
- I then created another offset plane for the bottom lens pads. I repeated the same steps as before except I created a tangent plane to connect both pads. I used the plane to create a line between each of them then used the sweep command to connect them
Using Render and Animation in Fusion360
I always thought that Fusion360 was a simple 3D designing engine but I after looking at this I realized it could do much more. I had never tested the render feature in Fusion360 so I went to testing. I used my glasses cleaner file as a template for testing. I was unfamiliar and I simply wanted to make the image look nice. I started looking through all of the options avalible and I was able to find a way to make my file render. I didn’t figure out how to move the camera so the object was at the center of the frame. I with more practice I believe that I can create some amazing renders, however, the feature is something I don’t see myself using all too often during this class because I usually use Fusion360 to create prototypes and design STL files. Though, it was a nice feature to use and in the future I could see myself using it more often.
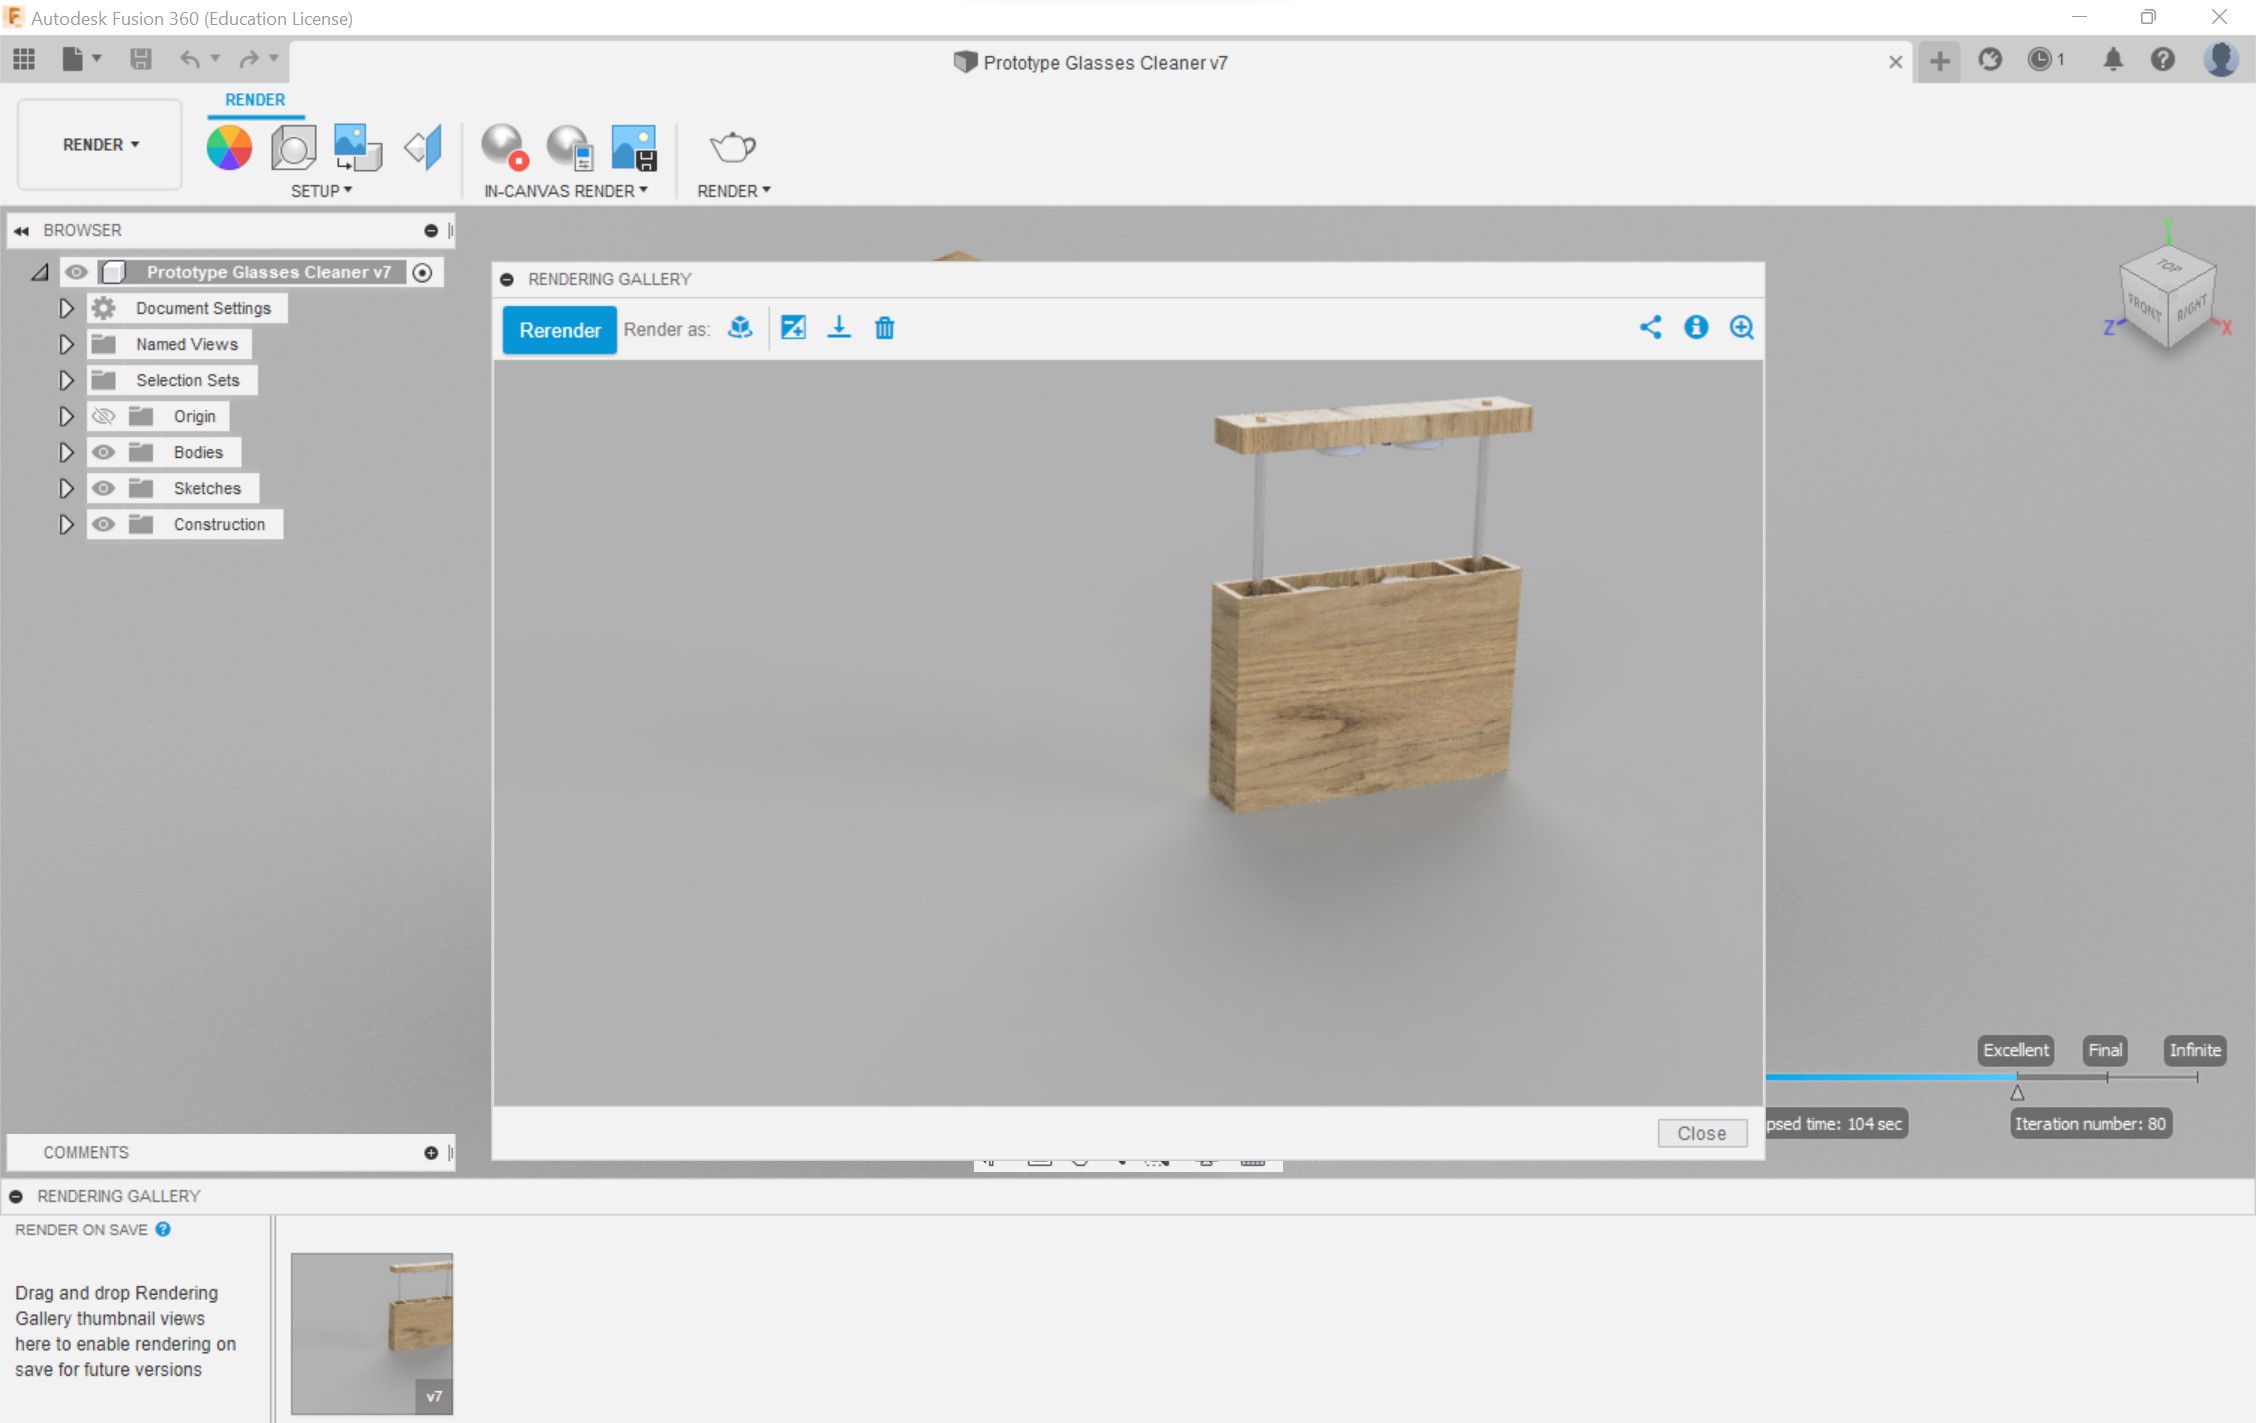
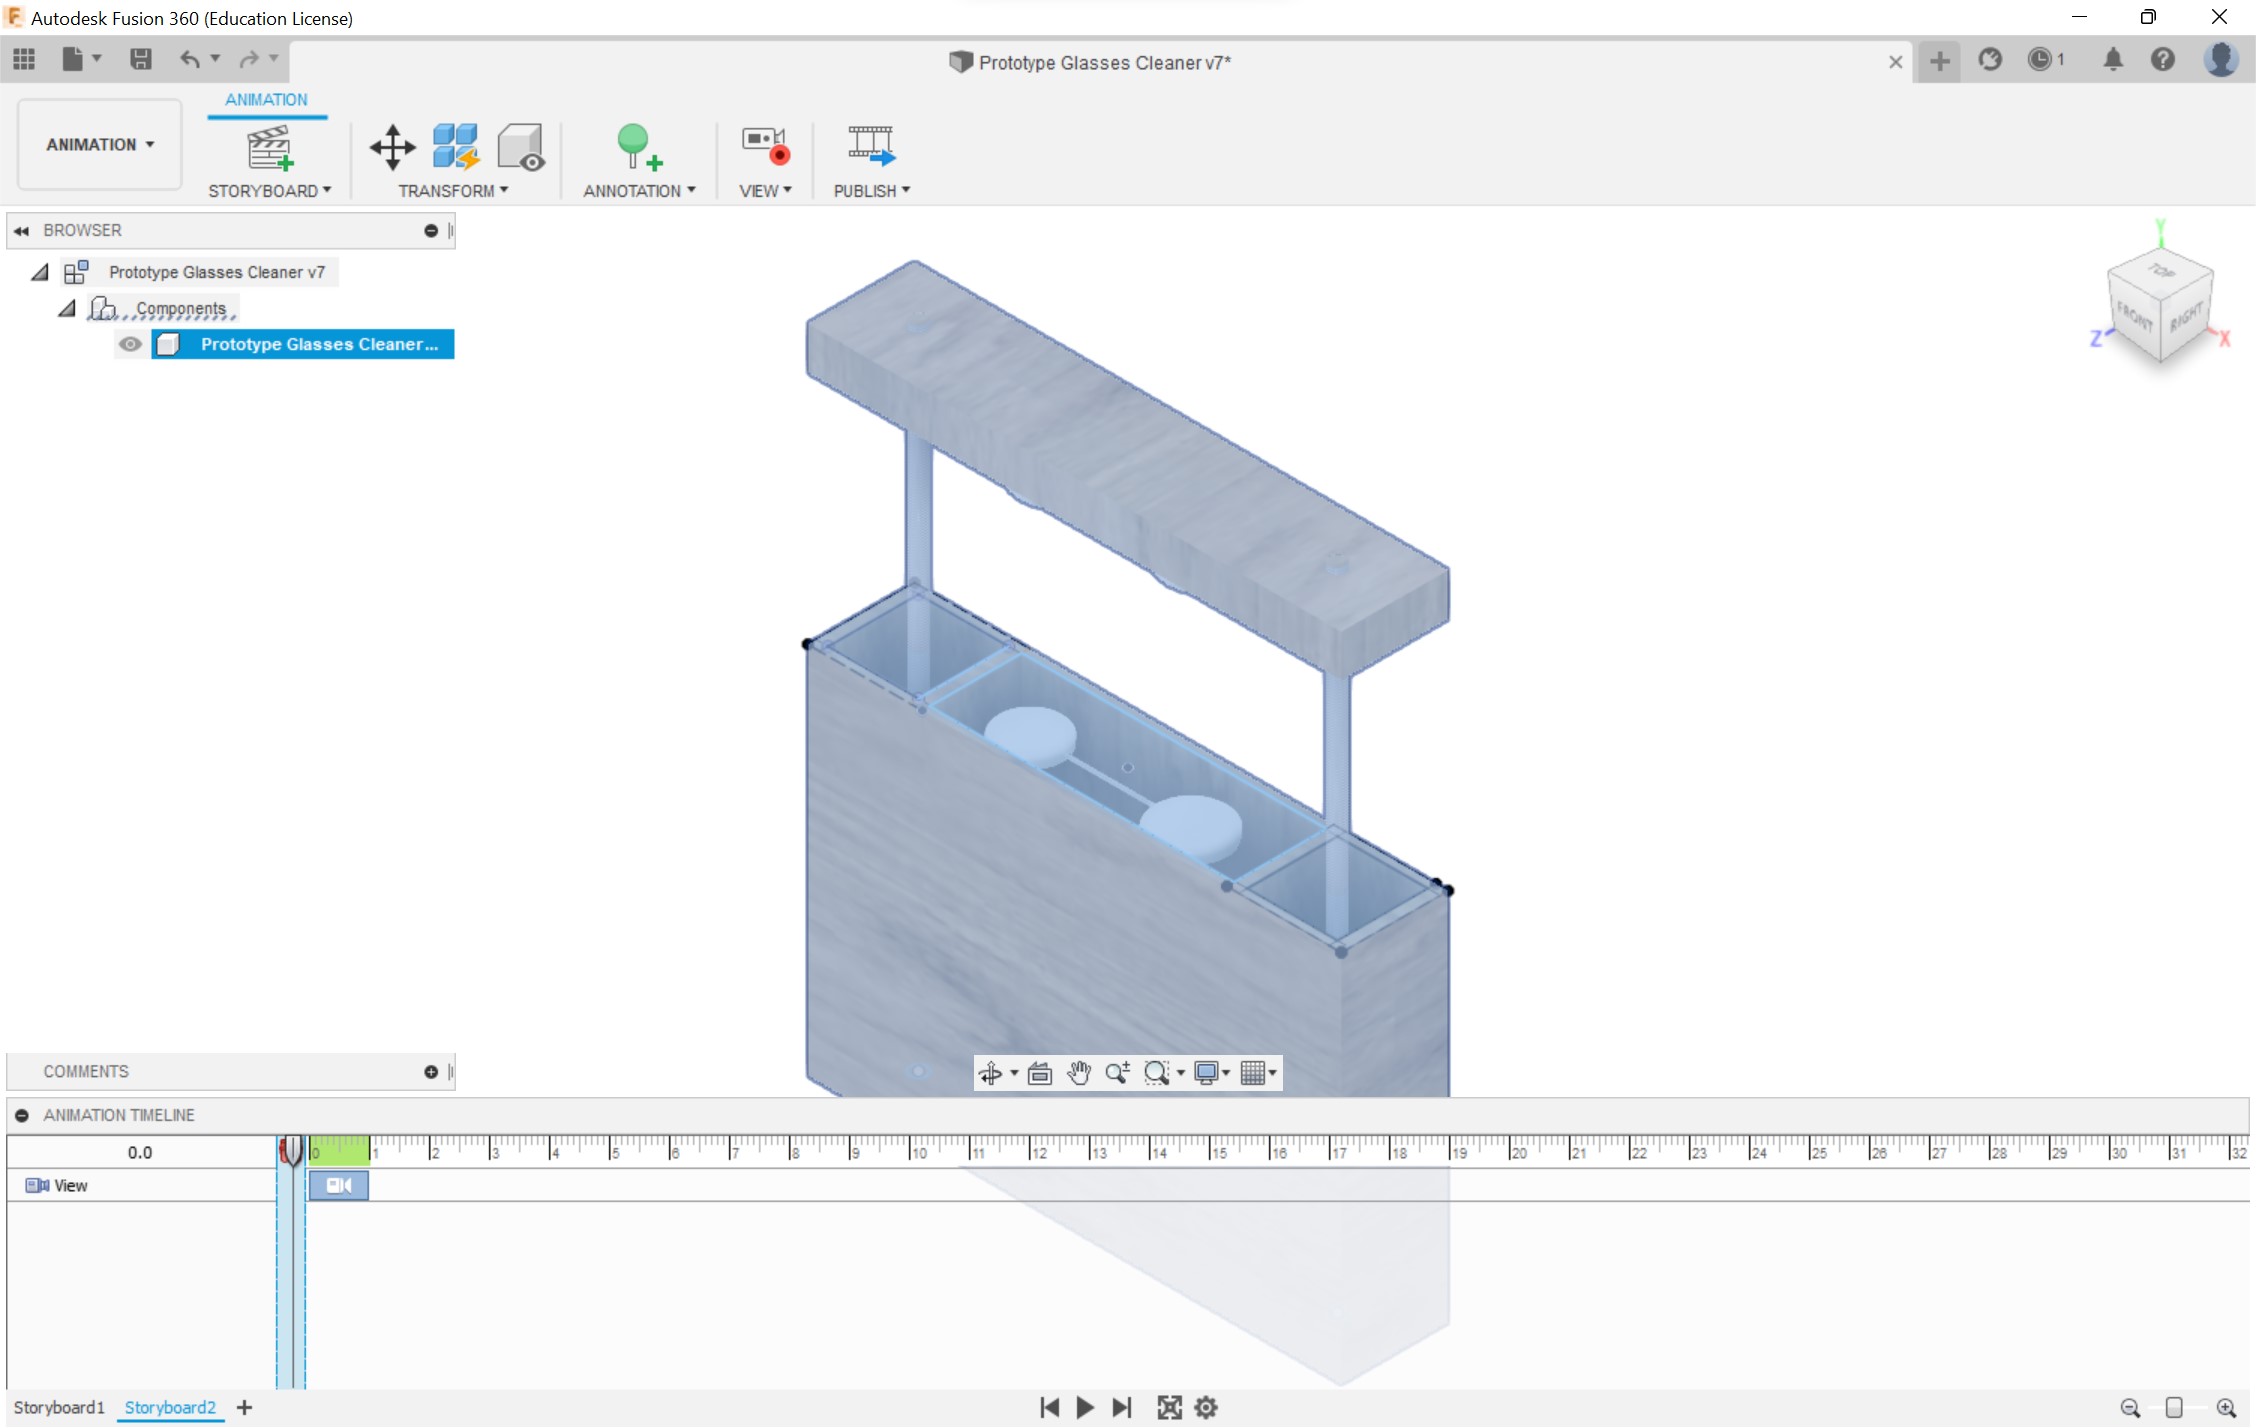
I tried to use the animation feature however I ran into some problems with my components. I designined my CAD glasses cleaner as one body so the threaded rods on the side were concidered part of the whole body. I wanted to make them rotate and show the top layer move down as they moved but I couldn’t. I was only able to create an animation where the camera would zoom in on the object. Next time I design something in Fusion360 I will make sure to take the animation feature into account.
Final Fusion 360 Design
What I Learned
During this week I learned how to test different CAD programs and find similarites and differences between them. Each program has their advantages and disadvantages, but they all serve a basic purpose. What sets most of the programs apart for me, was the flexibility and the user interface. I had to learn most of these programs before using them and it was much easer to learn Corel Draw then Inkscape. I belive this is becasue of Corel Draws’s interface and smooth user input.
Files
My CAD files are here