2. Project Managment
Assignment: Work through a git tutorial build a personal site in the class archive describing you and your final project
- Python
- Visual Studio Code
- Git
- GitLab
- Mkdocs
- My Repository on GitLab.
Installing Screen Recorder

Before I begin downloading all the necessary applications for Fab Academy, I downloaded this screen recorder app to make the documentation easier to follow. The app helps me create a GIF of my screen so I can have a visual of what I was doing during the process.
I would like to thank Drew Griggs for creating this workflow on how to properly download everything. The guide was specifically made for macOS, but I was able to use it for my PC.
Installing Python and pip
I had two options for installing Python. I could either download it from the Microsoft store which is version 3.10 or I could download it from the website, version 3.10.2.Following this video by YoutTuber Amit Thinks he used version 3.10, so I choose to download 3.10. Another significant factor was that version 3.10.2 was an experimental version and not an active one according to the python website. After I downloaded Python, I performed the following steps

- Check “Add Python 3.10 to PATH”
- Check “Precompile Standard Libraries”
After these two steps were completed, I installed Python. To check that Python downloaded on my computer, I went into my computer’s command prompt and typed out Python --version. I wanted to check to make sure the path was correctly installed on my computer and followed this workflow by Liquid Web. It turns out that the path wasn’t correctly integrated into my User variables for Administrator. I corrected this error and continued installing.
I next installed pip in my computers command terminal using
1. curl https://bootstrap.pypa.io/get-pip.py -o get-pip.py
2. python3 get-pip.py
Installing Visual Studio Code
Taking advice from Teddy Warner, I installed Visual Studio Code. I wanted to run everything through this application such as Git, GitLab, C++, and Mkdocs. The installation was fairly simple. I went to the website and selected the option for Windows x64. After finishing downloading it I opened it. To test to see if it was working I typed “python --version” into the VSCode terminal and it worked.
Downloading Git
I went to Git to download the app. I clicked on “Download for Windows” section with version 2.35.0. Simplilearn helped me with this video. I choose the “64-bit Git for Windows Setup”. My only change was that I selected “Use Windows’ as default console window”
I also used this video
Connecting My Computer, to GitLab and Mkdocs
Setting up SSH Key
I followed Drew Grigg’s workflow mentioned earlier. I copied this command into the GitBash terminal
ssh-keygen -t ed25519 -C "<AaronSSH>".
The next step was to Enter file in which to save the key I pressed enter then I needed to put in a Passphrase. My mistake here in retrospect was that I never inputted one. This error would come up when I was trying to pull files from GitLab. Besides that, I copied the SSH key from the GitBash terminal and tried to input it into GitLab. I kept receiving an error “The form contains the following error”.
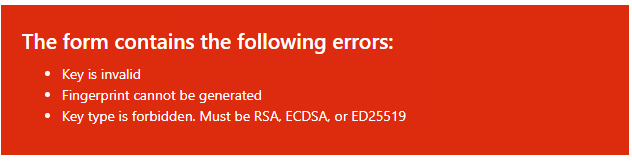
After consulting with Graham Smith, I realized that I was copying the wrong SSH key. I needed to copy the SSH from my files. When I opened this file, I saw that the key was much longer and when I put this one in, I was able to clone my repository.
Cloning My Repository Into VSCode
This was a very easy process. I went to the clone section of my repository then copied the link into VSCode, then I opened the repository into it.
Mkdocs Setup
Through the VSCode terminal I wrote the line pip install mkdocs, this worked. In order to make sure it was installed correctly I wrote mkdocs --version I received the error mkdocs is not recognized as the name of a command

I was deeply confused as to why I was receiving this error. I tried reinstalling mkdocs, but this error would keep occurring. Looking at Teddy Warner’s site I figured out that I didn’t type the command
pip install mkdocs-materialpip3 install mkdocs-git-revision-date-localized-plugin.

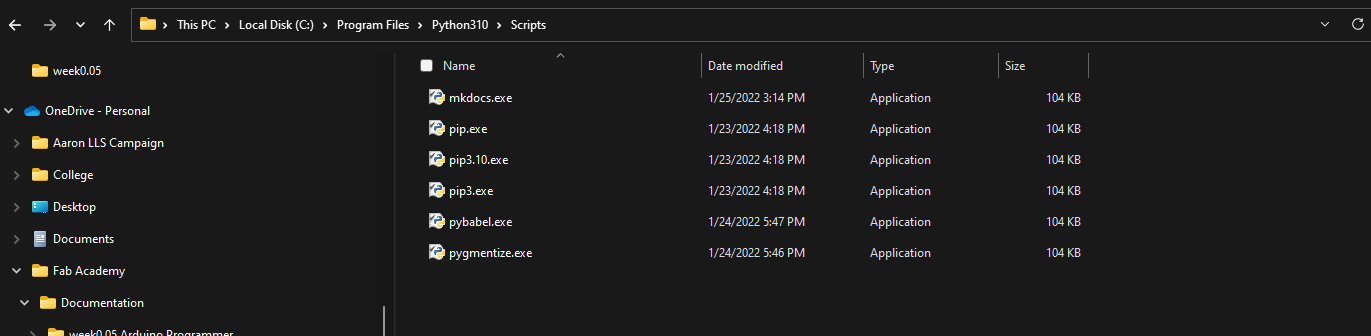
After running these commands, I tested to see if mkdocs installed properly and it worked. The next step was to build my website using the command mkdocs serve. This command didn’t work. I received the error couldn’t recognize mkdocs as a command. After troubleshooting for an hour I realized it was because the EXE file for mkdocs wasn’t in the same directory as the YML file. I knew that the YML file was in the correct place, but I had to search for the EXE file. I found it in the Scripts file within the Python directory. This makes sense because when I first downloaded mkdocs it mentioned that the file was in the scripts directory, I just never paid attention to it.
After moving this I still received a message when trying to build my website that mkdocs couldn’t recognize the “theme”. This was because the materials file wasn’t in the same place as the YML file. After moving this I ran the command mkdocs serve and it didn’t work because my directory wasn’t correct. After I fixed this I ran the command and it worked. I was able to edit my website locally. My overall problem with installing Mkdocs came down to these factors
- Python path wasn’t correctly integrated
- Couldn’t run
Mkdocs serveuntil after I finished installing everything for Mkdocs - When installing and running all of the components, they weren’t in the correct directory
Git: Pull, Push, Commit, and Add
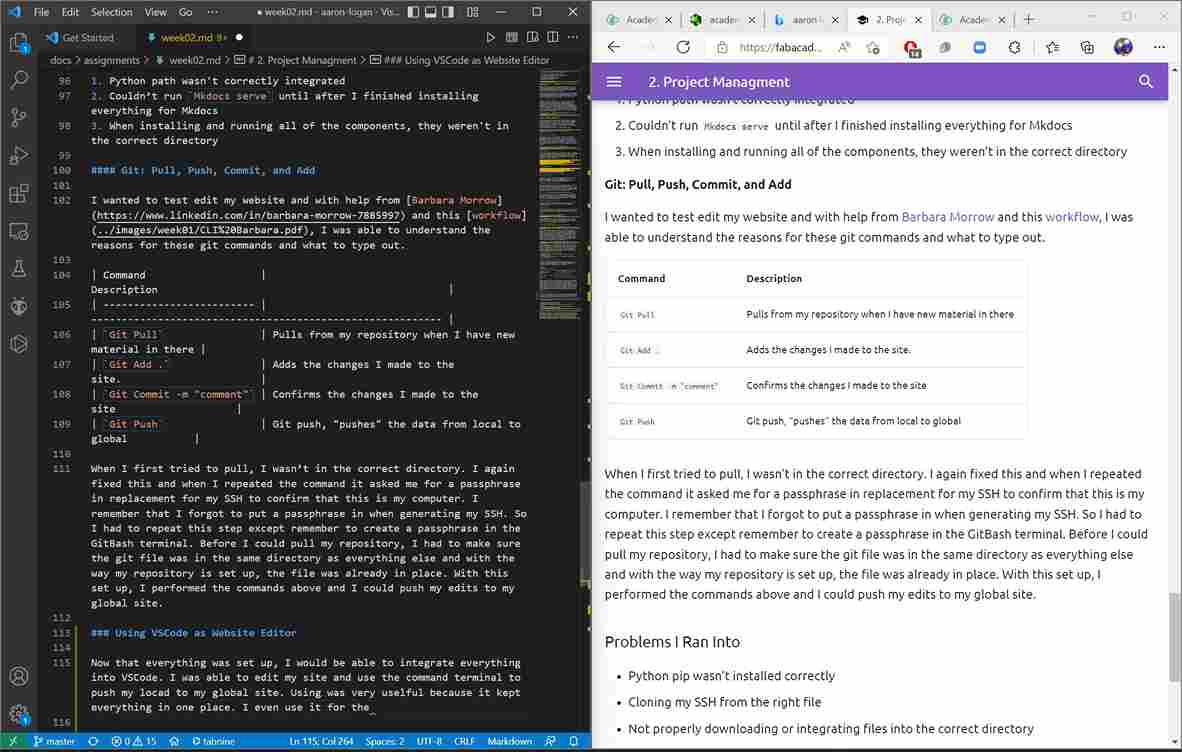
I wanted to test edit my website and with help from Barbara Morrow and this workflow, I was able to understand the reasons for these git commands and what to type out.
| Command | Description |
|---|---|
Git Pull |
Pulls from my repository when I have new material in there |
Git Add . |
Adds the changes I made to the site. |
Git Commit -m "comment" |
Confirms the changes I made to the site |
Git Push |
Git push, “pushes” the data from local to global |
When I first tried to pull, I wasn’t in the correct directory. I again fixed this and when I repeated the command it asked me for a passphrase in replacement for my SSH to confirm that this is my computer. I remember that I forgot to put a passphrase in when generating my SSH. So I had to repeat this step except remember to create a passphrase in the GitBash terminal. Before I could pull my repository, I had to make sure the git file was in the same directory as everything else and with the way my repository is set up, the file was already in place. With this set up, I performed the commands above and I could push my edits to my global site.
Using VSCode as Website Editor
Now that everything was set up, I would be able to integrate everything into VSCode. I was able to edit my site and use the command terminal to push my locad to my global site.

Using was very uselful because it kept everything in one place. I even use it for the group documentation.
Useful Applications and Templates
Imagemagick
The steps to using Imagemagick are fairly simple. I used this video for the installation process. After that I wanted to be able to shrink files in a directory for my repo size. I came across the offical Imagemagick site with documentation on how to use the app. The commands that I will be using is the following.
- Reduce file size in directory
magick mogrify -resize 1280x1280 *.jpg
To use this command I have to be in the directory with all of the images that I need to compress and take note The changes made are not reversable. I made the mistake of making the pixel number too small. In my case 256x256 was too small and the images weren’t readable.
- Reduce a single file
magick mogrify -resize 1280x1280 example.jpg
Again you need to be in the same directory with the respective file that you are trying to compress.
- Change file type in directory
magick mogrify -format jpg *.png
This example changes all of the .PNG files in the directory to .JPG files.
Ffmpeg
I would like to thank Alaric Pan for helping me with this. I first installed Ffmpeg using this video. I tried to install it a while back but I wasn’t able to get the path variables to work properly, but after watching this video I was able to. I was looking a while for the commands to use to compress my videos. I came accross these commands from opensource.com and Alaric Pan’s site. I had to make sure that I was in the directory with the intended file to either convert or reduce.
- Convert Videos to different formats
ffmpeg -i "input.mkv" "output.mp4"
This example shows how to convert an .mkv video to a .MP4 file.
- Take away audio from a video
ffmpeg -i "example.mp4" -vcodec libx264 -b:v 1000k -vf scale=-2:1080 -an "product.mp4"
This command takes away audio from example.mp4
- Compress video file size
ffmpeg -i cornerBeforeLeveling2.mp4 -vcodec libx264 -crf 32 cornerBeforeLeveling3.mp4
This command was where I started to see some errors which stemmed from the video codec or libx264. The documentation on it is here. The command uses a library called libx264 to help with compression. When I first tried to use ffmpeg, I used libx266 and the video wouln’t embed into the repository. Thankfully, Alaric has great eyes and noticed that I wasn’t using the correct video codec. I switched it to libx264 and it worked. The Constant Rate Factor (CRF) is the default quality setting for x264. The higher the value, the higher the compression, although this may lead to quality loss.
Embedding Video In Markdown
Finally to embed the videos the command is below, make sure to use ../../images or else the files won’t embed.
<video width="700" controls>
  <source src="../../images/example_file_path.mp4" type="video/mp4" />
</video>
Embedding PDF Files In Markdown
Since markdown can utilize HTML5 the best way to embed PDF files is to use HTML with iframe. This is a template that I found from w3docs.com
<iframe src="..\..\images\example_file_path.pdf" height="600px" width="100%"></iframe>
Problems I Ran Into
- Python pip wasn’t installed correctly
- Cloning my SSH from the right file
- Not properly downloading or integrating files into the correct directory
- Not downloading all the necessary material for the programs to run
- Not inputing a passphrase for my SSH
- Not typing in the commands correctly
What I Learned
Throughout this process I learned about web designing (integrating and the difference between local and global servers. I learned how to run my site locally and view all of my edits a soon as possible but these edits aren’t on my global site. In order to commit my edits, I need to push the changes. I learned how to code in markdown with tables, bolding, titles, headers, etc.