6. 3D Scanning and printing
Q. Individual Assignment:
design and 3D print an object (small, few cm3, limited by printer time) that could not be made subtractively.
In this week as a group assignment we have to test the design rules for your 3D printer(s). For our group assignment click here for more details.
Before I shared what I have done this week let me share about the additive and subtractive manufacturing or milling.
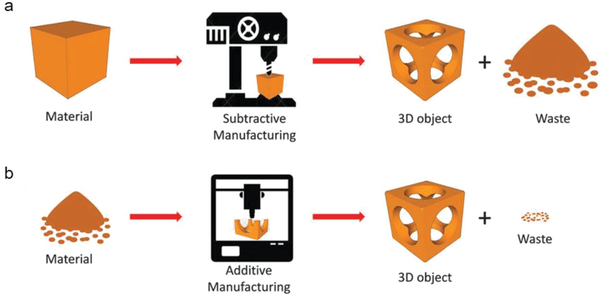
SUBTRACTIVE MANUFACTURING
In subtractive manufacturing, the material is processed by material‐removing machines such as Shopbot, laser cutter, etc.. as per our digital design before acquiring the final 3D product. The drawback of the subtractive milling is, it produces large amount of residual material.
## ADDITIVE MANUFACTURING
In additive manufacturing, the material is processed by a 3D‐printing machine, which adds only the required amount of material layer‐by‐layer before the final 3D object is printed.
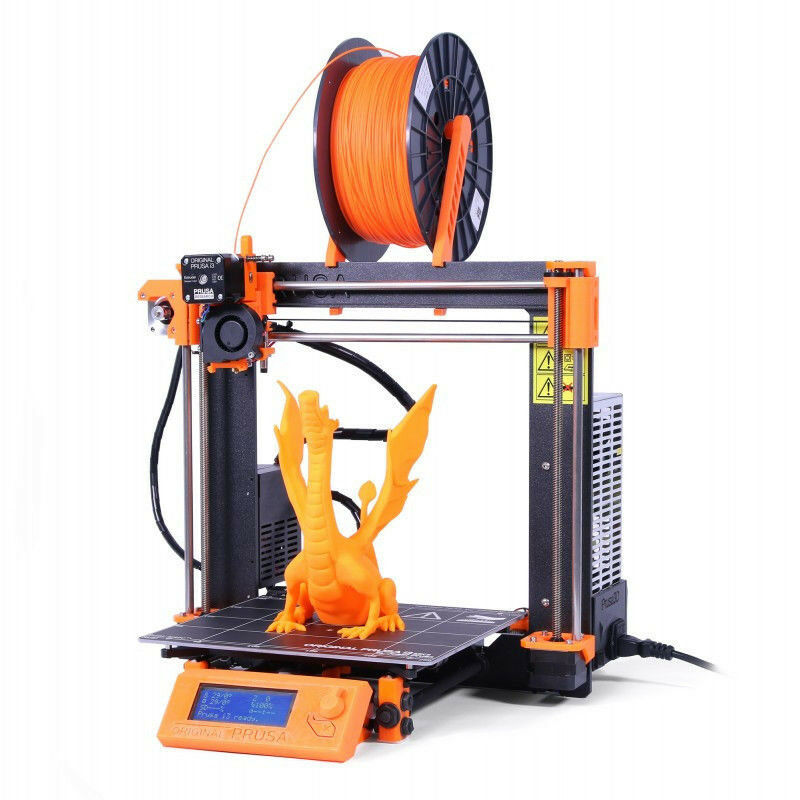
Now, for this week we have to design something that cannot be made using subtractively. so, for that I have used fusion360 to create my designs in 3D and used Original Prusa i3 MK3S+.
I designed 3 different Products which I can used it later.
1. I have designed a dumpling circular rapper machine which can be used for making HONTOE. HONTOE is the most special food which is served only once in the year during the new year which is only celebrated by two states in the our country. click here to explore about the festival and hontoe.
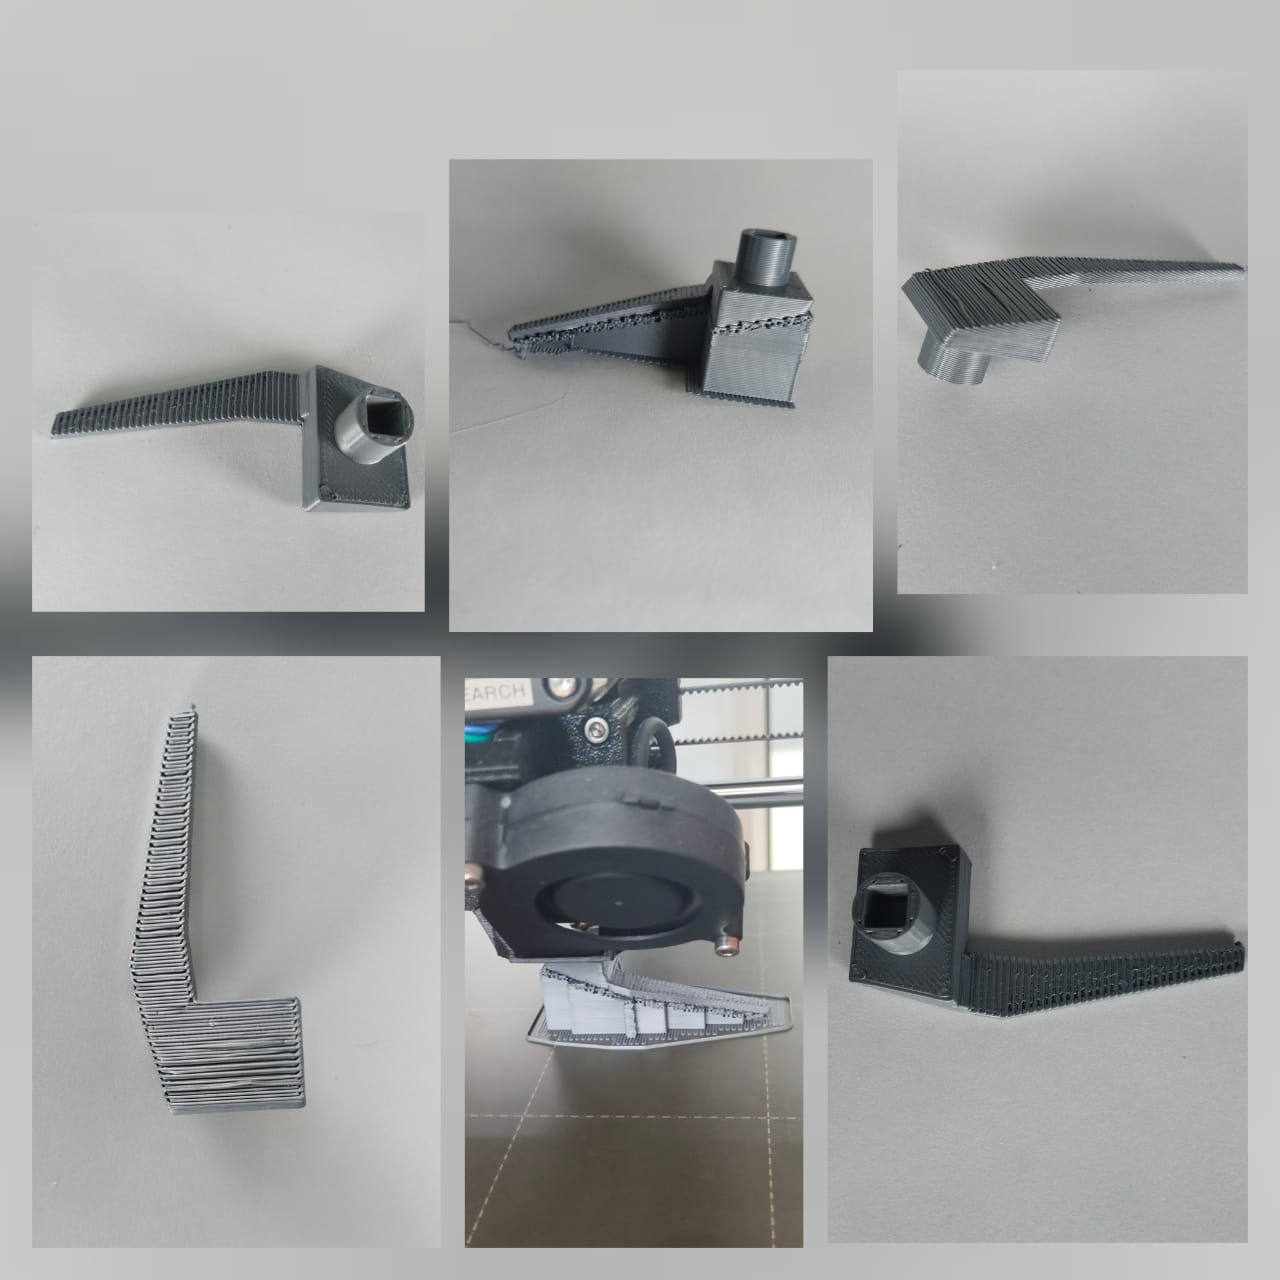
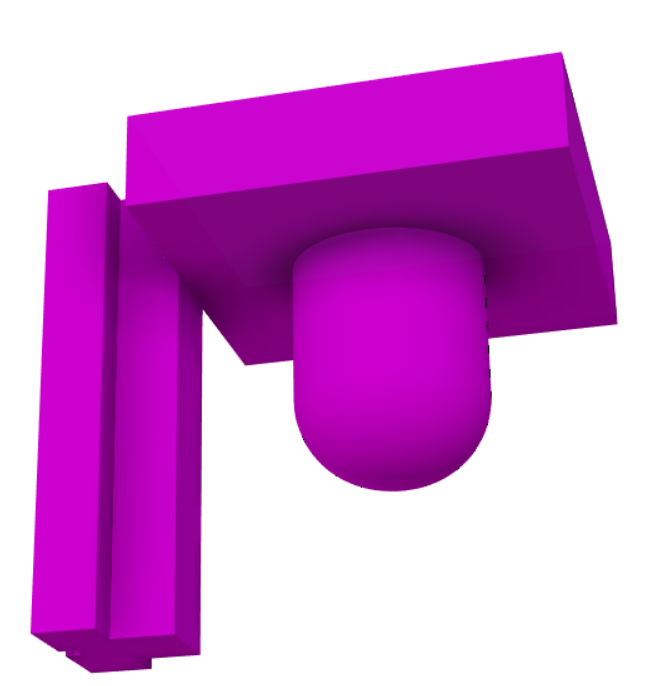 2. The another one is I have designed a arrow centerest which is rare in the market and expensive too. AS I love playing archery I decided to design a centerest.
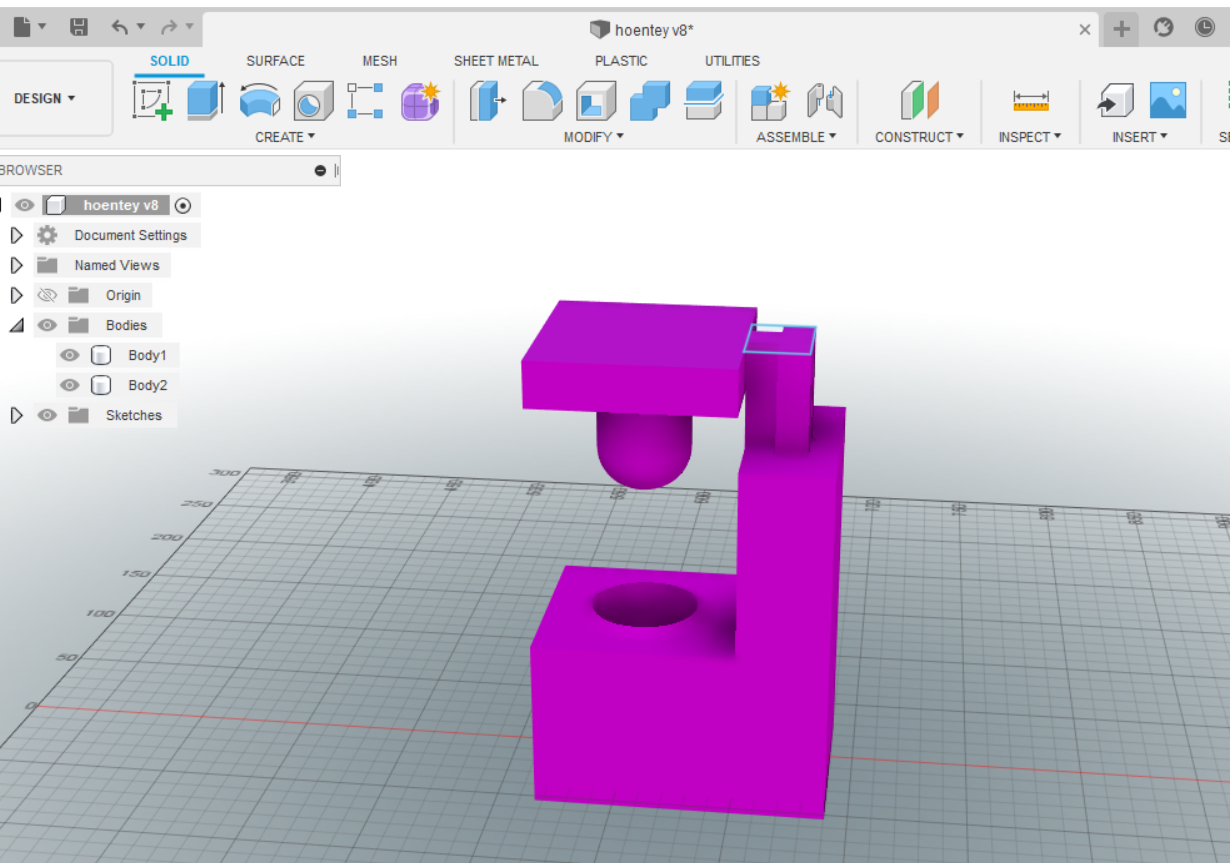
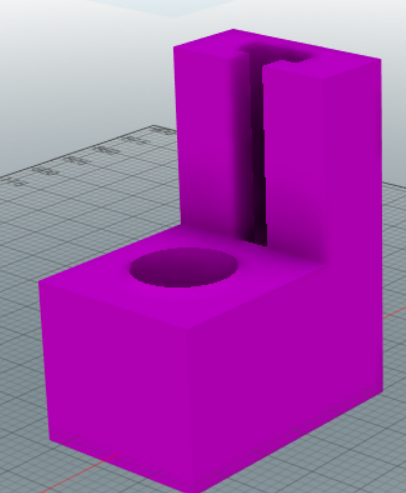
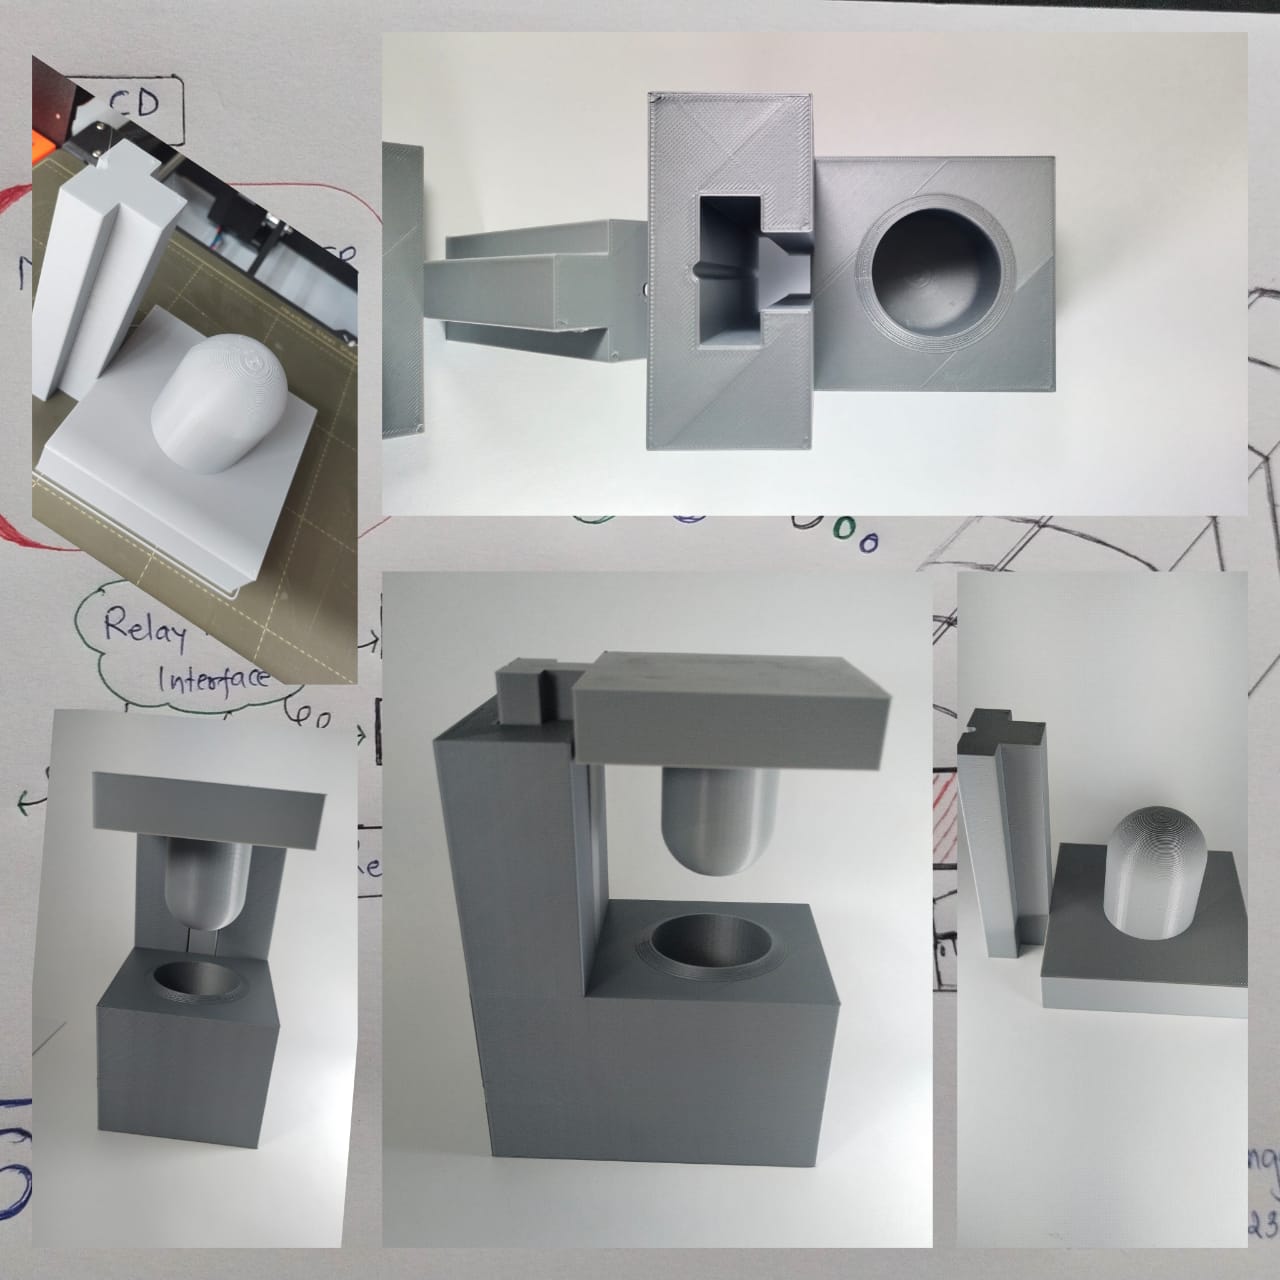
 3. To explore more about the 3D printer I have decided to design something complex. I designed a box that contains a floating circular object inside.

I am not going to put down all the steps of how I made the designs as this is our 6th assignments and I am pretty sure all of you have mastered a designing software by now.
THE PRINT RESULT
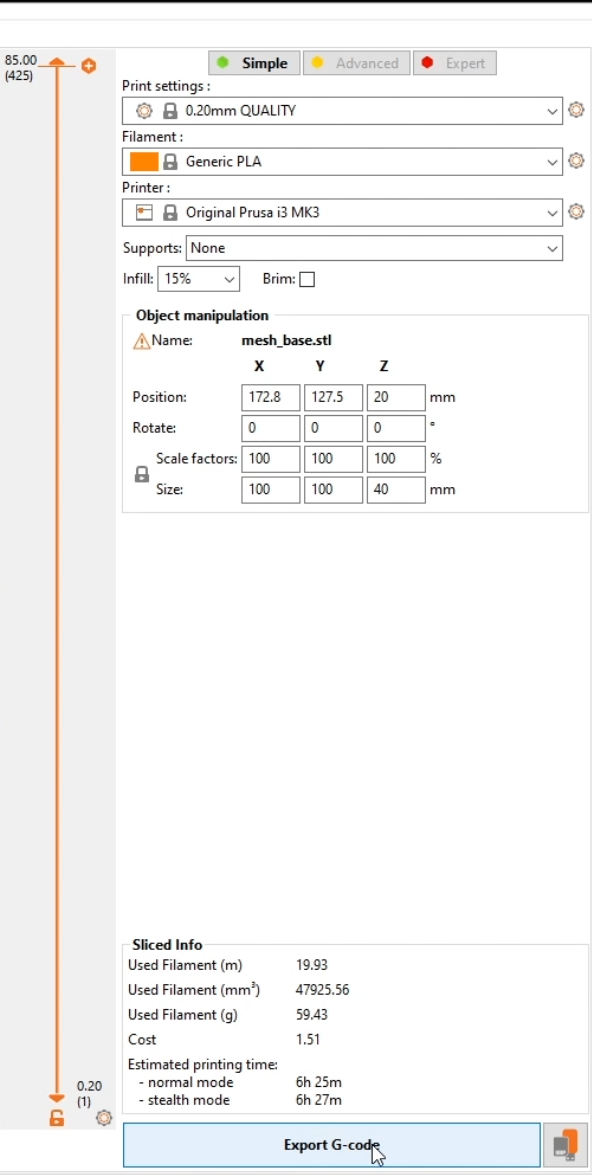
Before I present the printed result, let me share which software I have used and the steps to transfer the files from fusion to prusaslicer to the printer.
I have installed the prusaslicer to transfer the files to printers.
From fusion 360, make sure you transfer the design files in STL format.
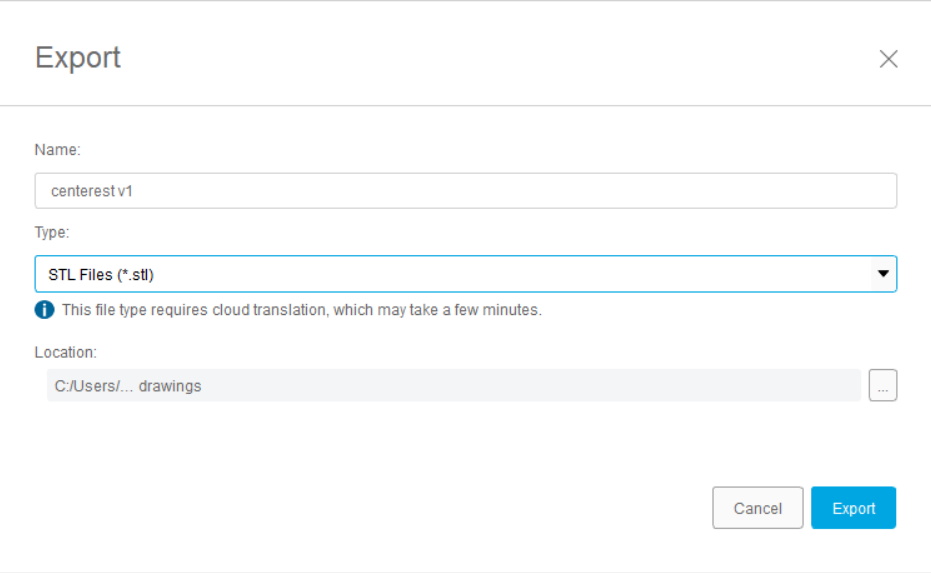
Once you have .stl file, import the file in pursaslicer by either using drag and drop or File Import.
Then, if you wanted to change your model orientation, use rotate tool R to make adjustments.
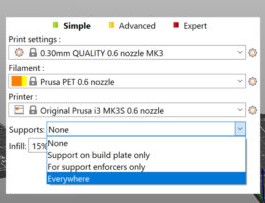
Then select the printer, materials, and print profile or layer height. To print good quality use 0.15mm or 0.2mm, if it’s for draft you can use 0.3mm.
It may be necessary to give support to your structure if there are overhangs. To give support there are few options like Everywhere, support on build plate only or for support enforces only.
There is another option INFIL, what it does is it will fill the inside of the model. You can adjust based on your structure usage.
 It is always better to preview G-code before printing. If you click the Slice now button, it will automatically switched to preview mode.
If everything is good , you can proceed and export G-code in SD card of the printer to print your structure.
It is always better to preview G-code before printing. If you click the Slice now button, it will automatically switched to preview mode.
If everything is good , you can proceed and export G-code in SD card of the printer to print your structure.
RESULT
The dumplig machine.
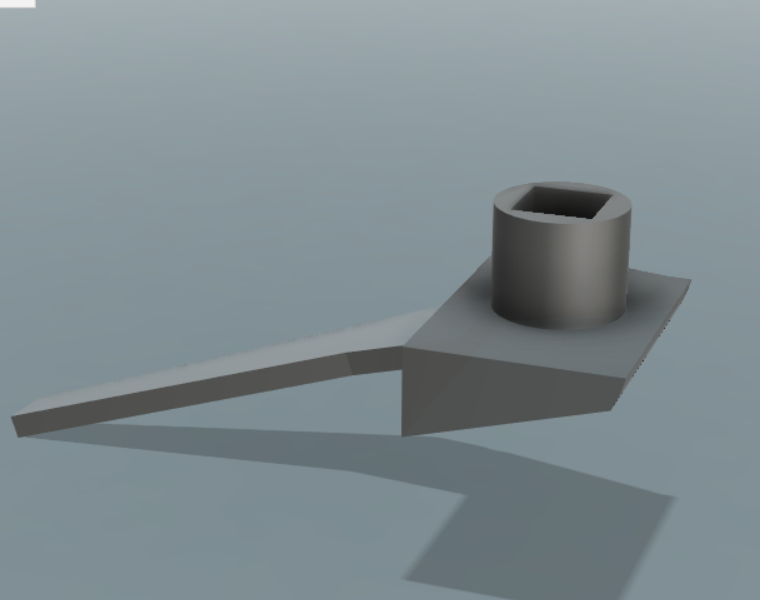
When I designed my dumpling machine, I made some overhang structures and thought that I can’t make it with subtractive method. But later when I transfered the file to prusaslicer, I changed the object orientation and realized that it can be made subtractively. so, I made another design that is the centerrest.
The centerrest.
 The Khorlo box.
 In this design I made another object inside the box and I gave support thinking that the ball should freely float inside the box. The printing was successful, unfortunately when I tried to remove the support I couldn’t do it as I gave suppot everywhere.
Now I learnt that when we design something we should keep in mind that we give a small support when we design by connecting the object with few structures or we should use some water soluble support which can easily dissolve in water like PVA (polyvinyl alcohol).
3D scan an object
What is 3D scanning? 3D scanning is a process of analyzing and collecting data from an object to recreate its shape and appearance, digitally. Once you scan the objects, it become a 3D model which can be used to reconstruct, analyze, or simulate ideas.
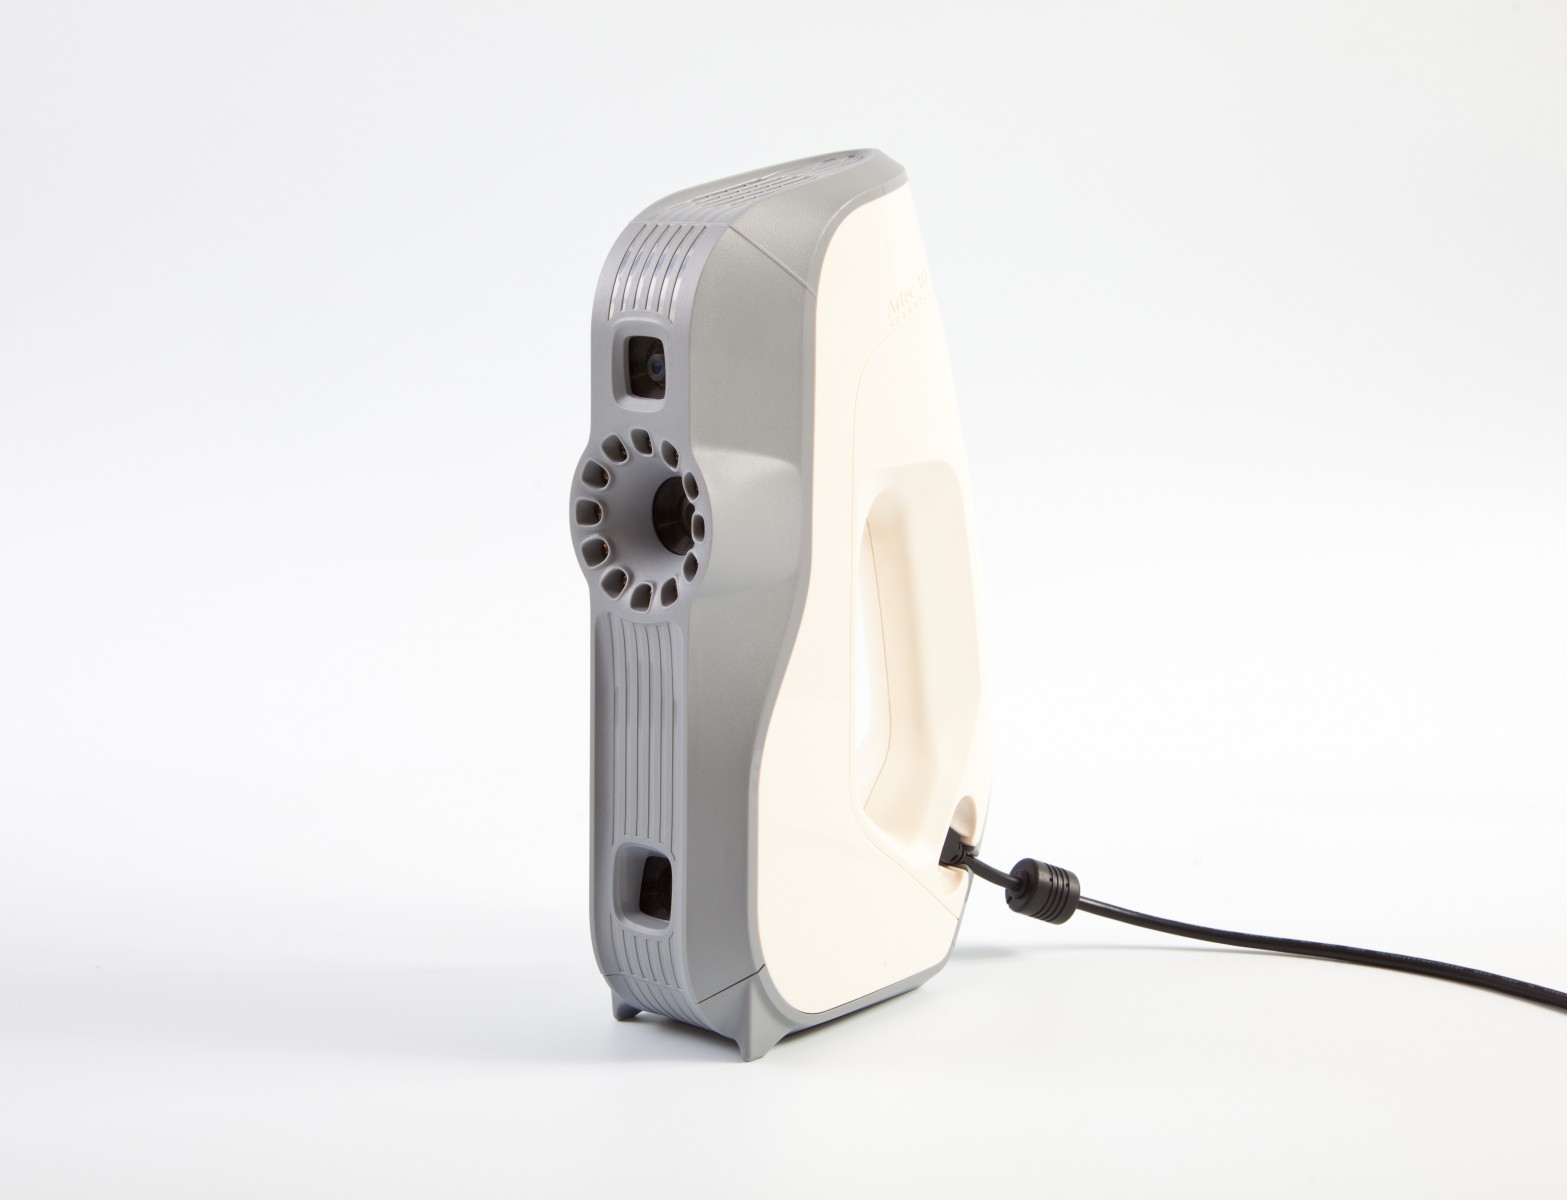
For the 3D scnning assignment, I have used the ARTEC EVA Scanner to scan and used Artec Studio 16 software for data processing.
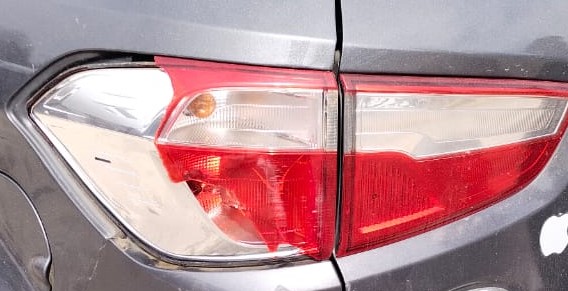
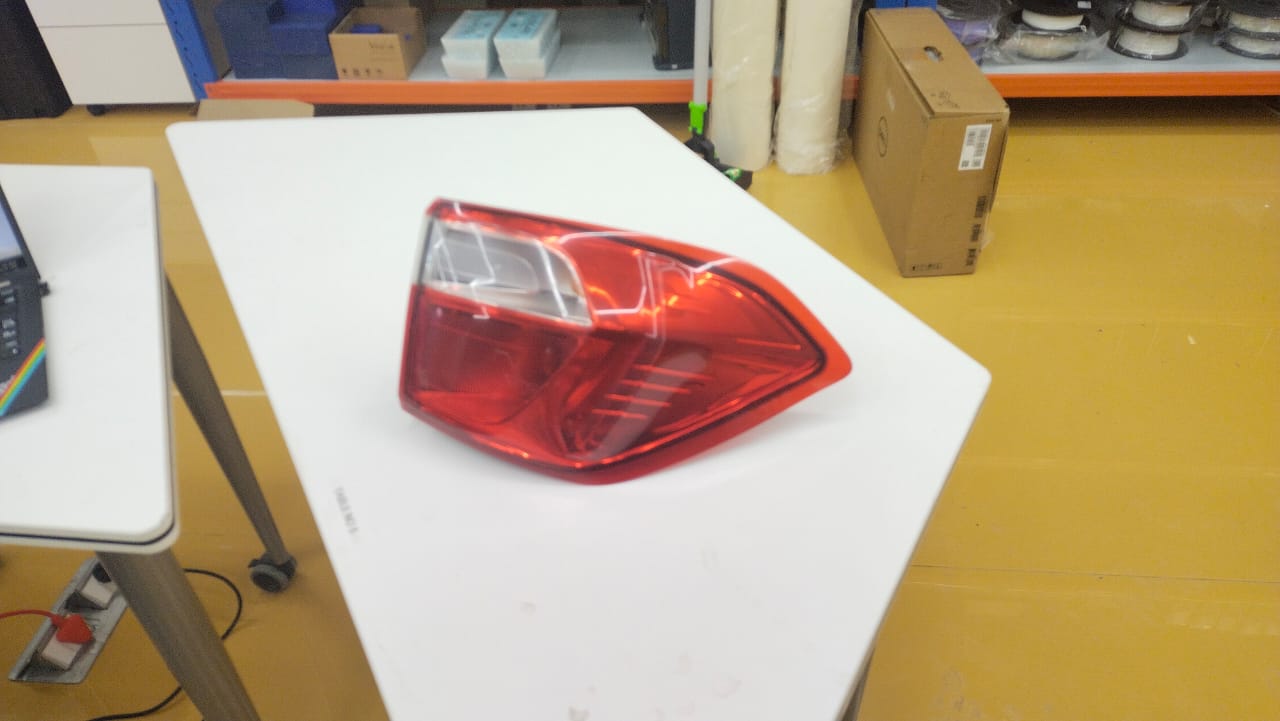
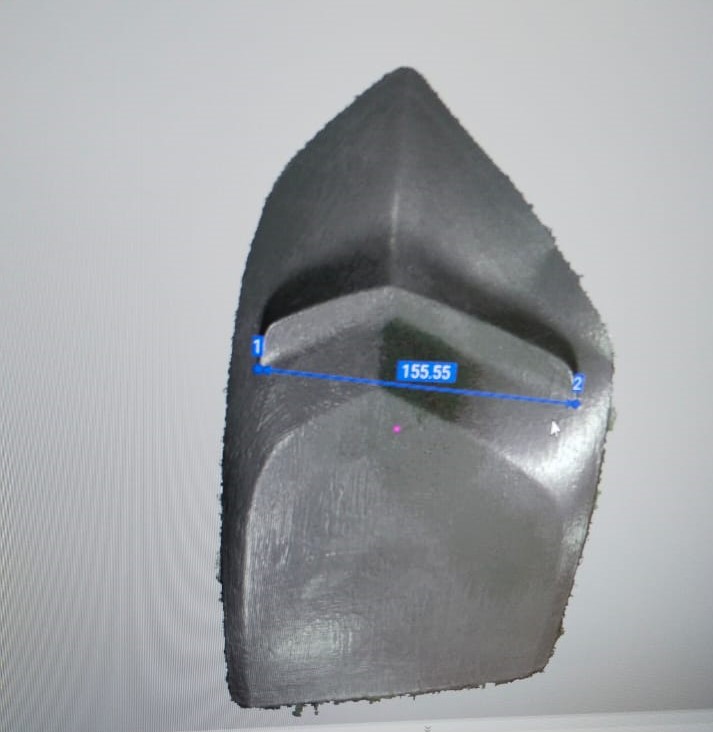
I have decided to scan and print my cars broke tail lamp which is currently not available in the market.
Here are the procedures I followed to scan the object using Artec eva scanner.
- I removed my cars tail lamp and prepared it for 3D scanning.
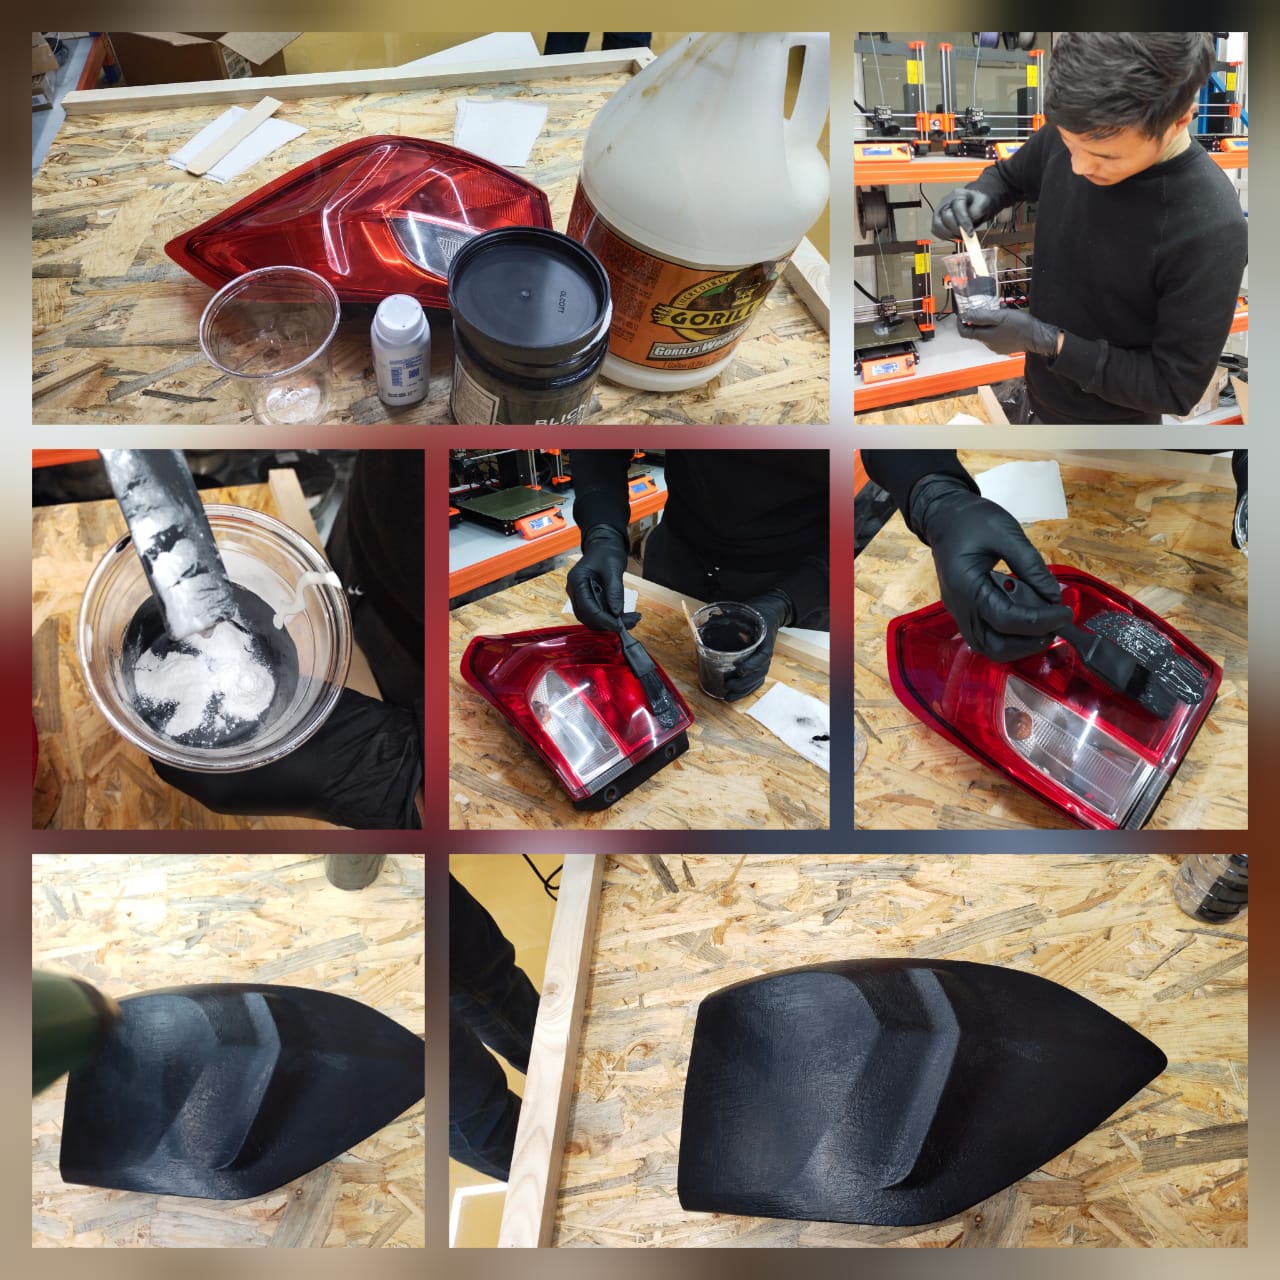
- Initailly we tried to scan the lamp but as it is shinny surface, the scanner was not able to captured the object. So, we decided to cover the surface with something which is not reflective.
Fran suggested me to use a spary and I even seeked help from Artec sales about how we can scan shinny surface. Thier suggestion was simillar to Fran to use a special spray to scan, unfortunately we are under lockdown and operating under containment mode. So the idea of spary was beyond our reach.
Then Sibu ad I decided to use wood glue which can be later peeled off. We added a black color in the wood glue and added some powder to make it mat black.
- I connected the Artec eva scanner to computer and opened the Artec Studio.
- I created a new project before getting started. I clicked on scan button to start scanning.
- I clicked on preview on the scanner.
- To captured the object, I was instructed to pay close attention to object on the computer screen rather than looking at the actual object.
- I was told to maintain a proper distance and proper scanning techniques.
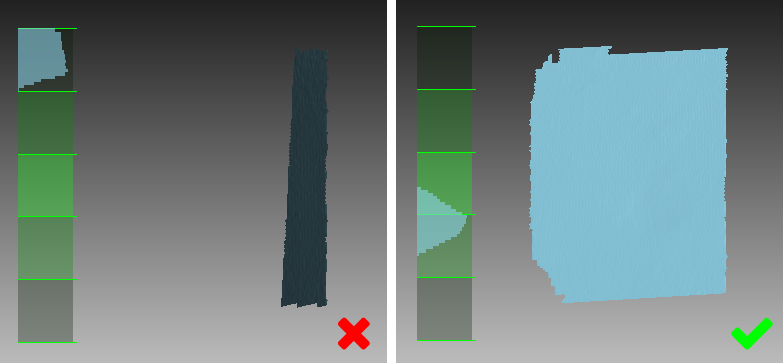
- Once we are in proper distance, start record options appears on the screen. Clicked record to start capturing and gradually moved the scanner around the object while monitoring the process in computer.

- Once I successfully captured the object from all sides, I stopped scanning by pressing the stop button.
- After that I removed the base and other unwanted parts by ctrl+
select + delete button.
We can also use autopilot option to model the creation as per our need.
Printing For printing the scanned object, we decided to use stratasys J55.
STRATASYS J55
The J55 Prime 3D printer introduces full color, high fidelity with tactile, functional and sensory capabilities - making the efficiency and quality of PolyJet Technology more affordable and office friendly than ever before.
Create everything from quick design iterations to high quality final prototypes, all in a compact, quiet, and odorless process. Learn more about J55 here
UNFORTUNATELY I COULDN’T USE THE J55 PRINTER AS IT RAN OUT OF INK.
BUT I WILL DOCUMENT HERE IF I EVER GET A CHANCE TO USE THIS IN FUTURE. Currently I am here in super fablab, Thimphu and only super fablab have these sophisticated machines.
Learning outcomes
- Learnt how to use the Prusa 3D printer
- Level up my confidence in using CAD software specifically fusion 360
- Learnt how to use Artic scanner.
- Learnt the differences between additive and subtractive manufacturing.
- Learnt how to use preusa slicer software.
ORIGINAL FILES
Download all the original files from here.
Thank You