3. Computer Aided design
Assignment of the week:
Model (raster, vector, 2D, 3D, render, animate, simulate, …) a possible final project, compress your images and videos, and post it on your class page.
OBJECTIVES OF THE WEEK
- 2D DESIGNING and EDITING: Raster vs Vector.
- Learn different 2D softwares.
- Try different 3D CAD softwares.
- Rendering and Animation of CAD design.
- Learn how to compress image and video size using different softwares.
2D Designing and Editing: Raster and Vector.
2-D stands for 2 dimension/ direction. 2-D is any virtual object with no appearance of depth.
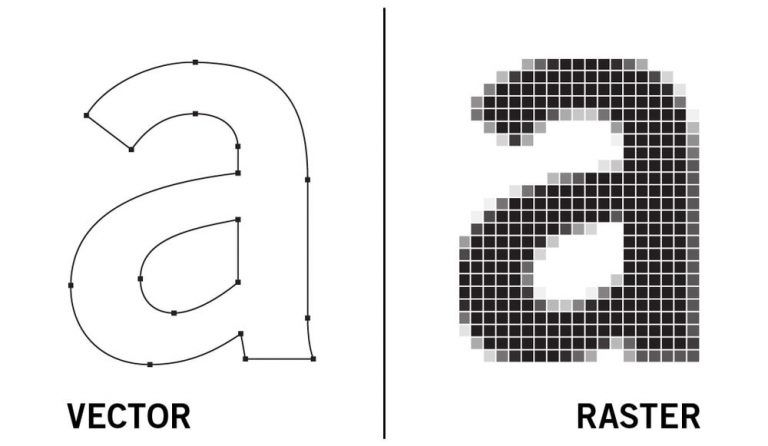
RASTER IMAGE and VECTOR IMAGE
Raster image are an arrays of pixels whereas Vector image are made up of lines and paths.
If we stretch a raster image , the image starts to loose its details and show up pixels. Whereas Vector image if stretched, donot show pixelization and modify itself accordingly and gets adjusted.
Q. WHY I HAVE TO RASTERIZE AND VECTORIZE IMAGE IN FABLAB?
Raster image are mainly used during laser engraving works in Fablab. During laser engraving the images are engraved by the laser machine line by line or points by point and the material parts are removed pixel by pixel. Laser engraving follows bi-directional process in which engraving is done in alternative fashion in both direction. Application: Filled letters, images and wood engraving.
Vector image are mainly used during laser cutting, laser engraving and in CNC machine in Fablab. The main differences between Laser cutting and Laser engraving is the choosing of the power supply. If low power setting is choosen, the line is ‘scored’ and if high power choosen, it produces a ‘cut.’
2-D softwares.
GIMP
GIMP is an open source image editing software similar to photoshop with almost all features.
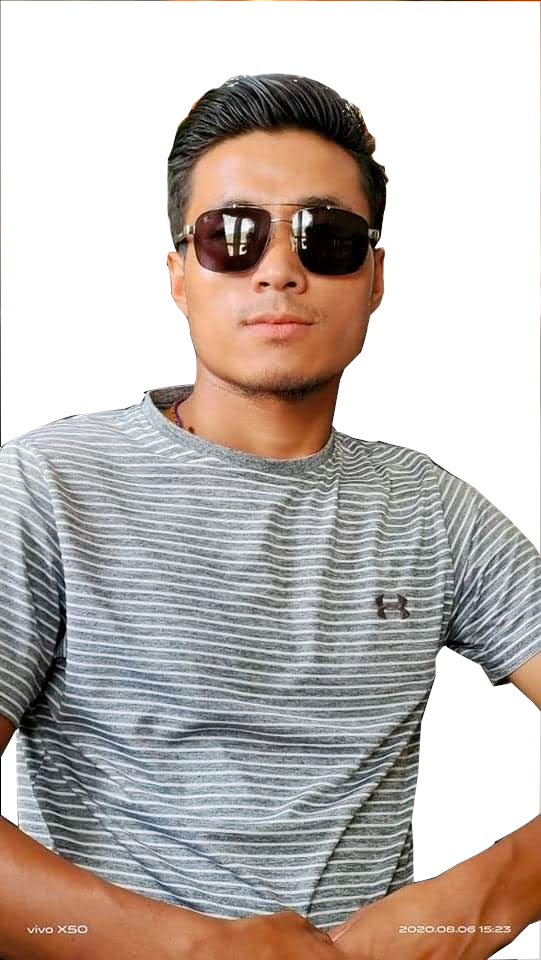
I have used GIMP to edit my photo, here I tried to remove my image background using path tool. I didn’t add any background to my image, instead I changed it to white background.
 I even tried to modify my startup logo which I have created few years back using GIMP. I used differnt tools like;
color tool, adjust color curves, brush tools, bucket fill tools, layers, etc..

![]()
Vectorizing a raster image
software used: Inkscape
I opened my inkscape software and imported an image which is white and black in color.
following are the steps to image vectorization
- Go to tool bar and select path.
- Select the trace bitmap.
- Inside the trace bitmap select single scan which is for single color image vectorization.
- Select the image and try to increase or decrease the brightness threshold to get your required vector image.
- Click on update and click apply only once.
- You will find changes with different brightness threshold like in the image shared below.
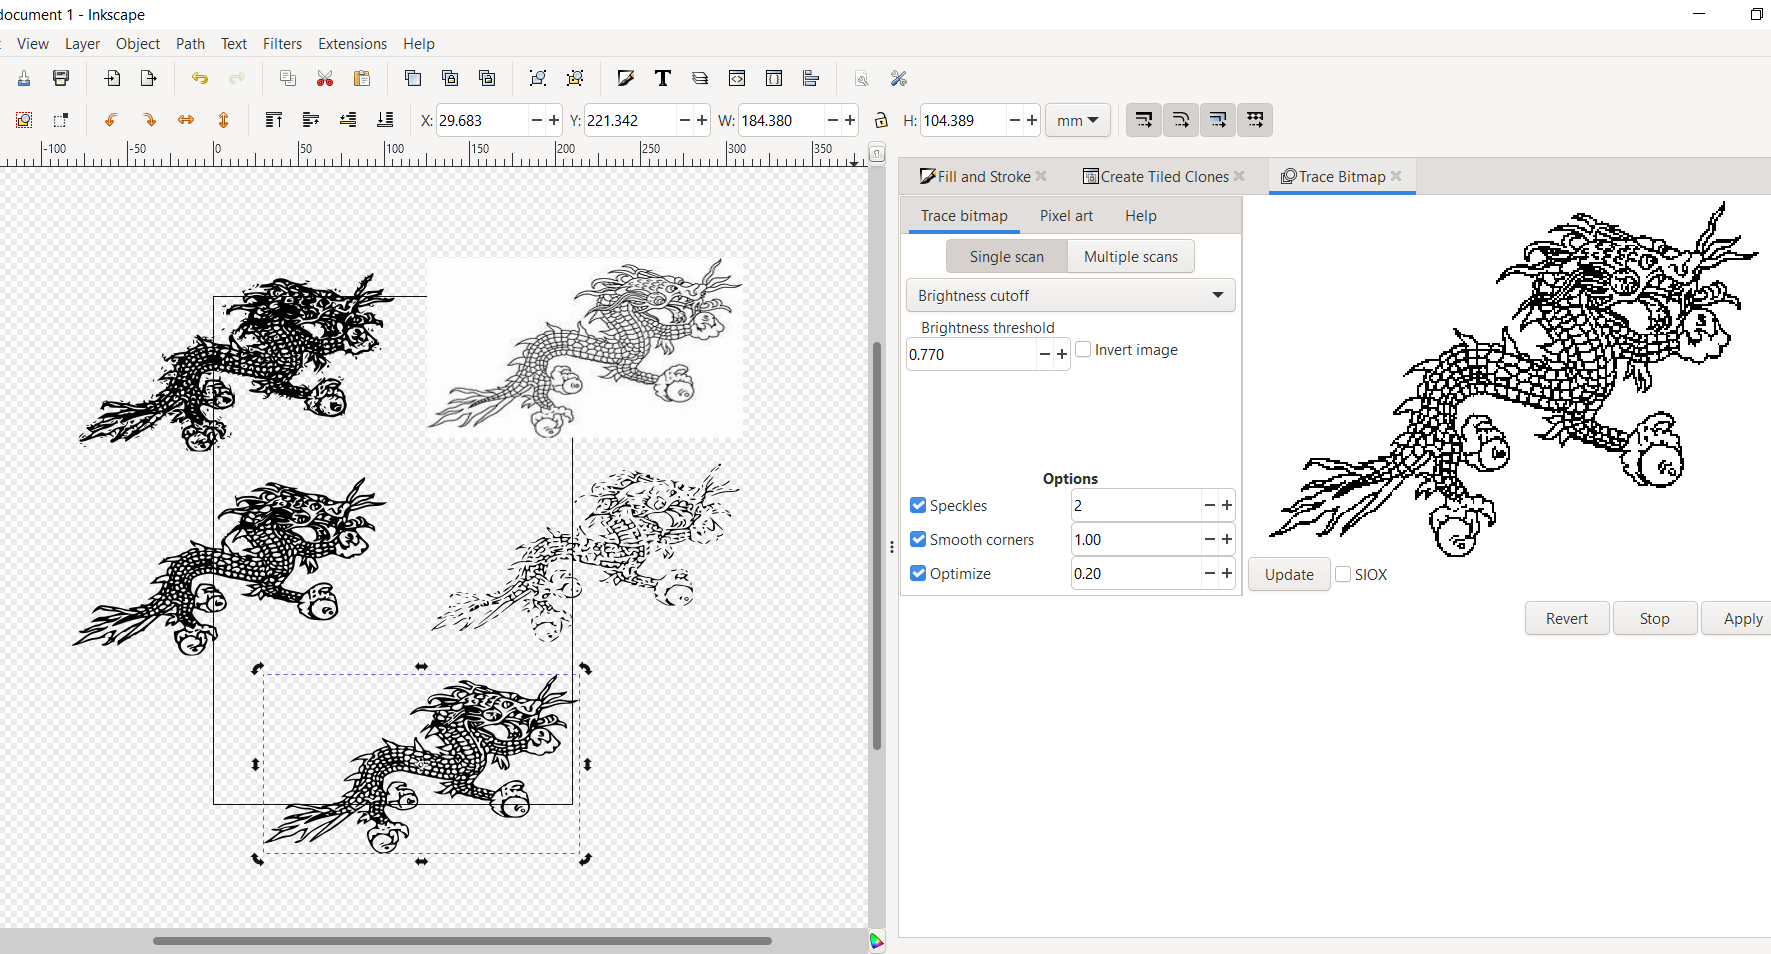
I have tried with different brightness threshold and at the end I selected only one and deleted the others.
I had to decide my image size so that the machine would cut my image without any issues therefore I unlocked the lock button which is right above scale margin and selected the unit to mm. I set my width to 210 mm and units converted to mm. After that Click on the margin lock and select top =5, rest left,right and buttom will automatically change once u unlock the key. Click on the Resize page to drawing once you finished making changes. The image border size will get changed as I have shown in the image below.

3D CAD software
3D CAD, or three-dimensional computer-aided design, is technology for design and technical documentation, which replaces manual drafting with an automated process. 3D CAD software precisely represents and visualizes objects using a collection of points in three dimensions on the computer. 3D help us to conceptualize, create, validate, communicate, manage, and transform our innovative ideas into great product designs.
There are many types of CAD software in market, some are free and for some we have to pay depending upon its capability, use and ecosystem.
Some of software are; - Fusion-360 - AutoCAD - solidworks - onshape - FreeCAD - Z-brush - Blender,etc.
I have no experience in using 3D CAD softwares, but I tried to use Fusion 360 and AutoCAD for Fab Academy. I wanted to try Solidworks and FreeCAD, unfortunately I couldn’t install them in my computer. I will try to learn all the tools and features used in these two softwares because I think once we know one 3D CAD software, we would know about the features and tools to make different shapes and geometries which helps a lot while shifting to other CAD software.
Model your Final Project Using 3D Design Software.
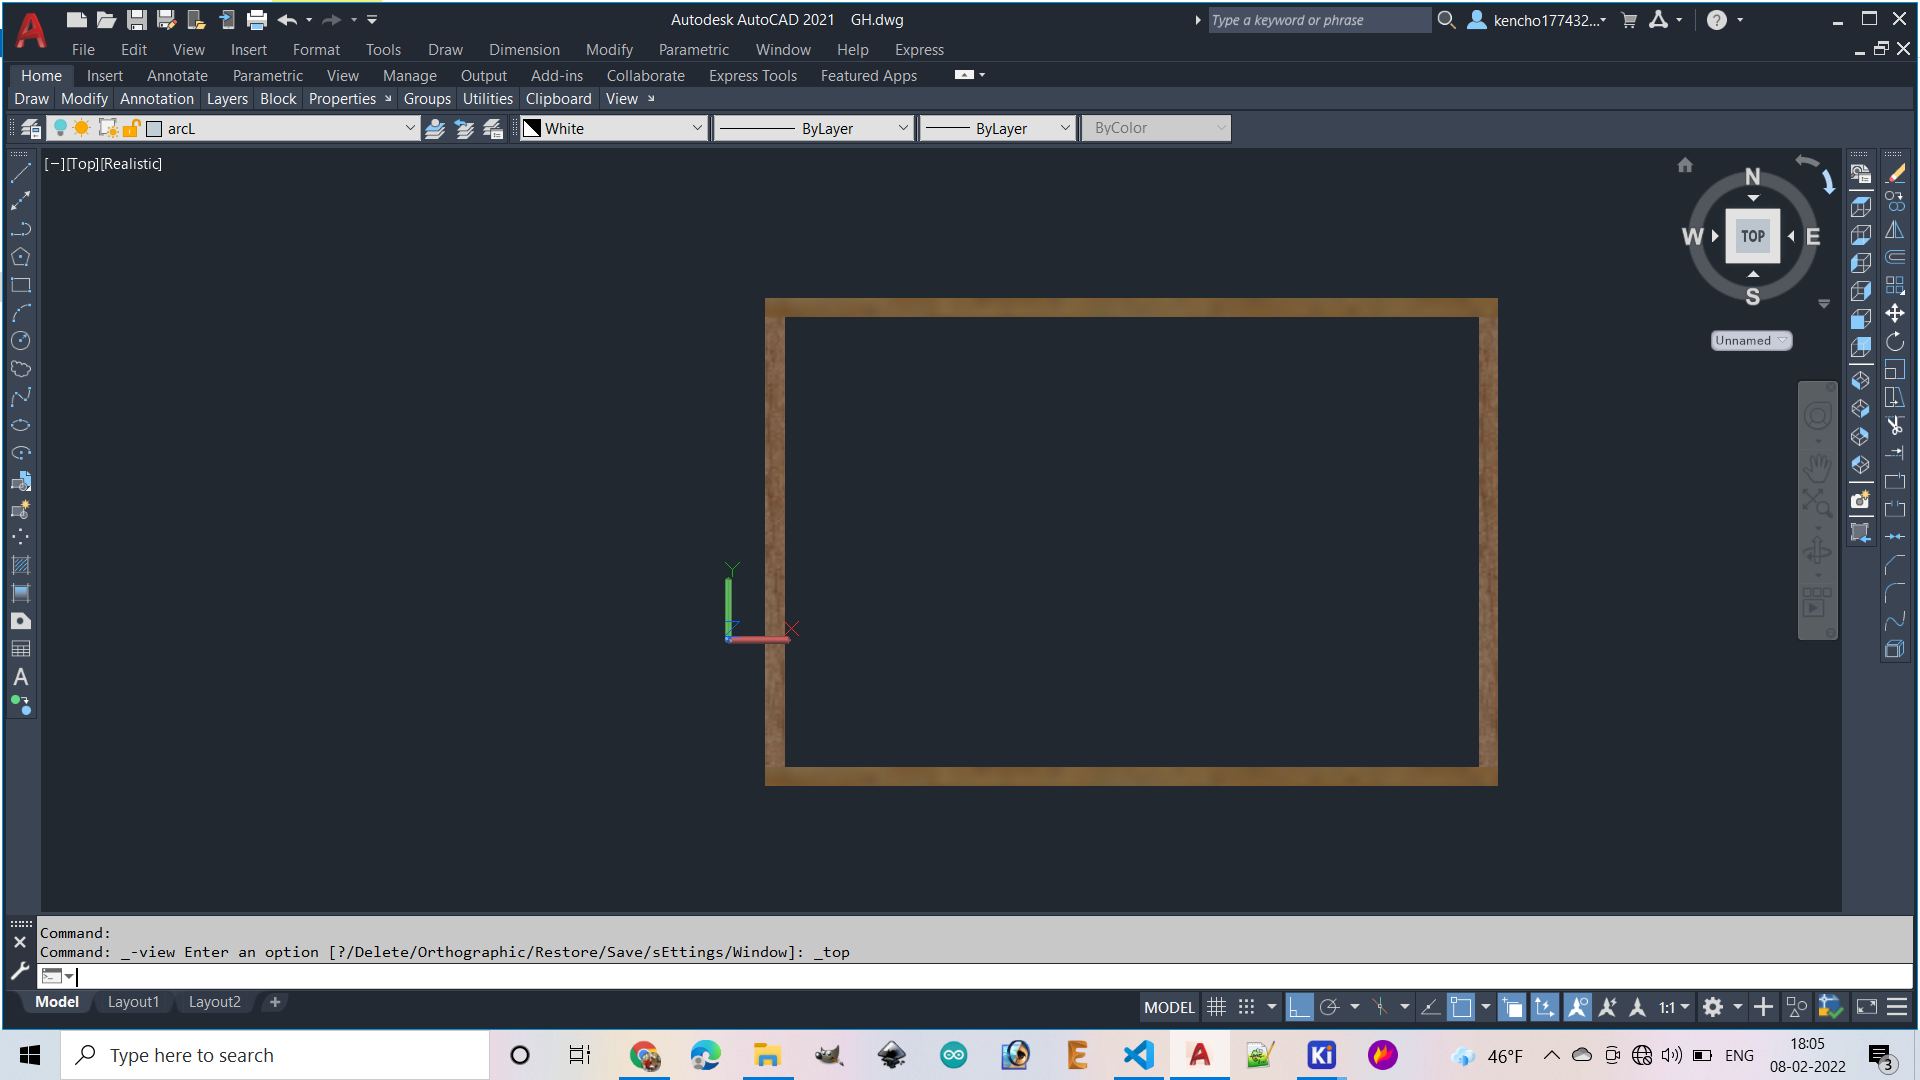
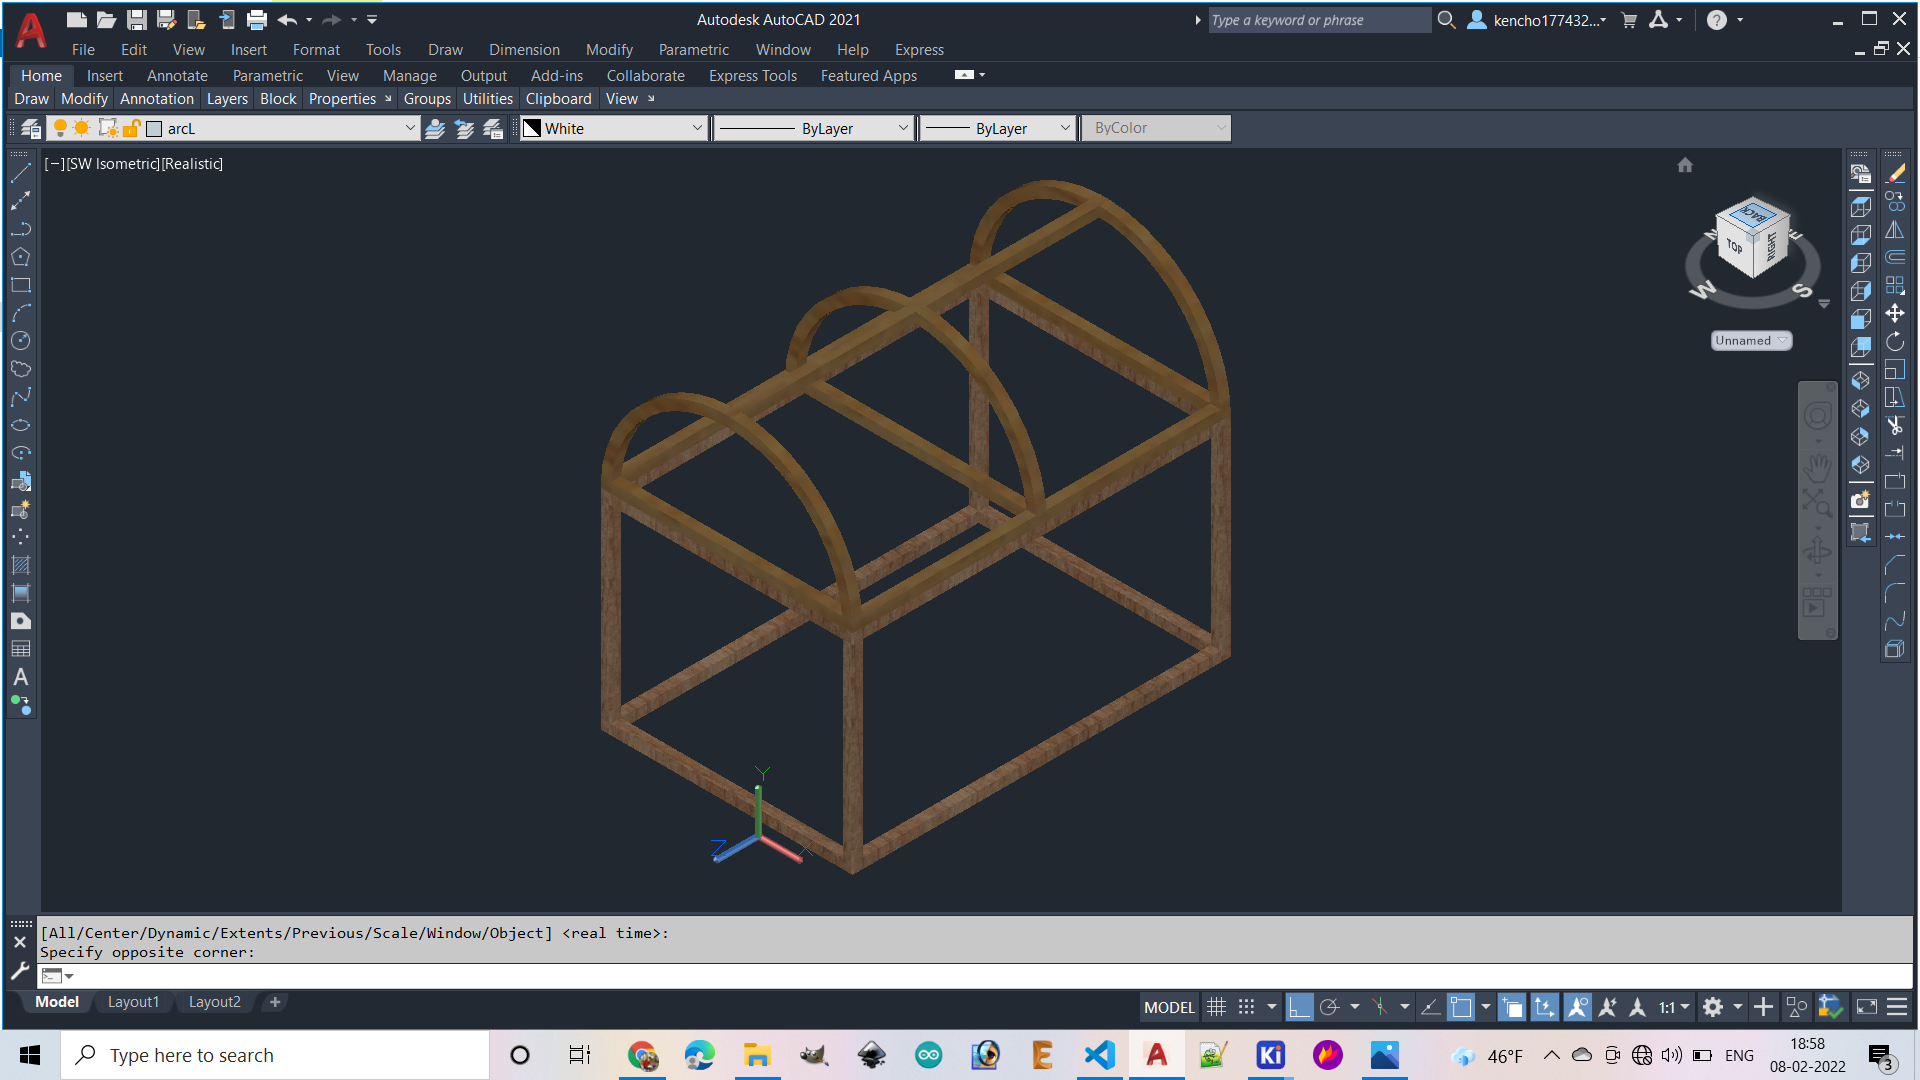
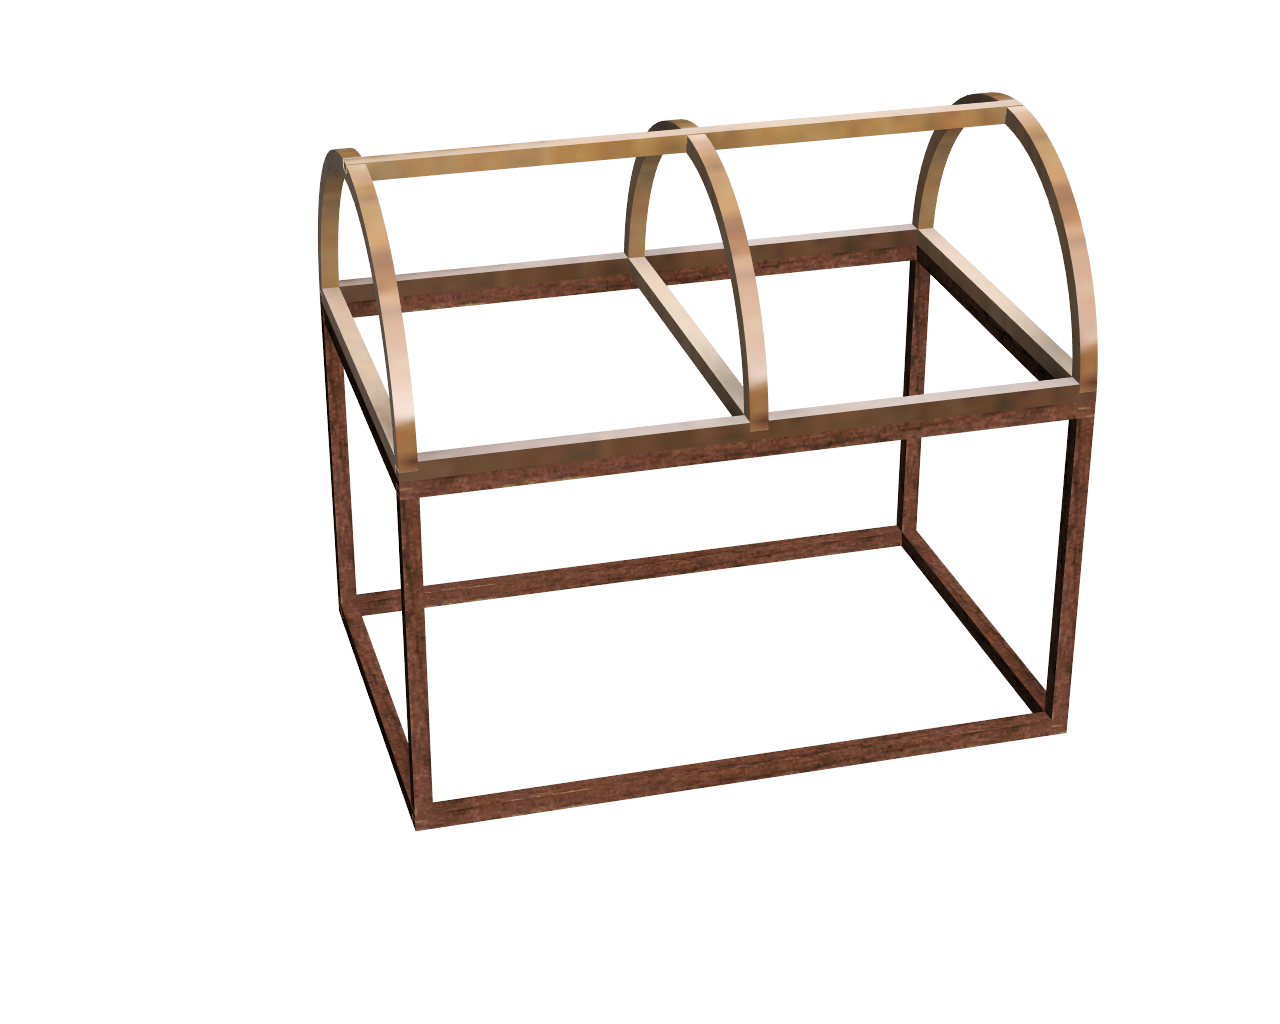
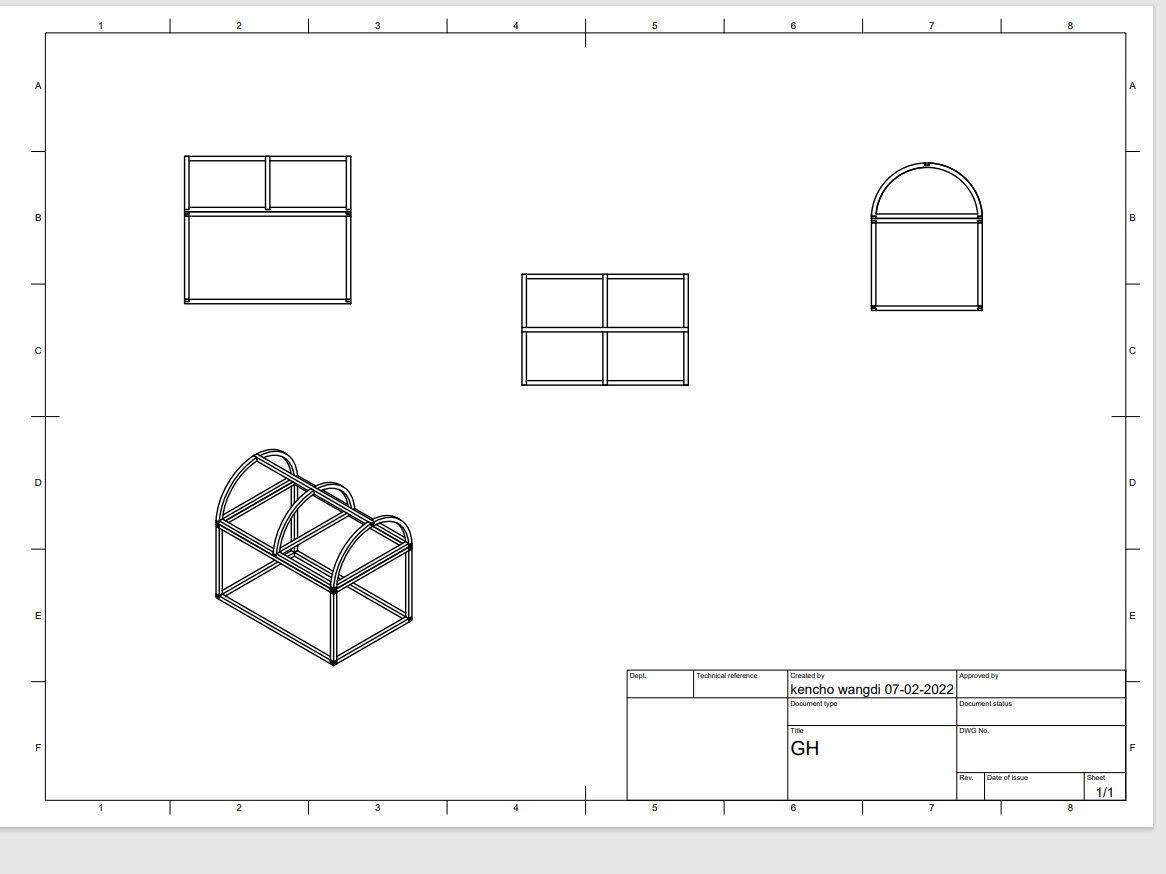
To model my final project I have used AutoCad software. My final project is on smart greenhouse so I tried to make a structure of Greenhouse which I can later cut it during computer controlled week using laser cutter.
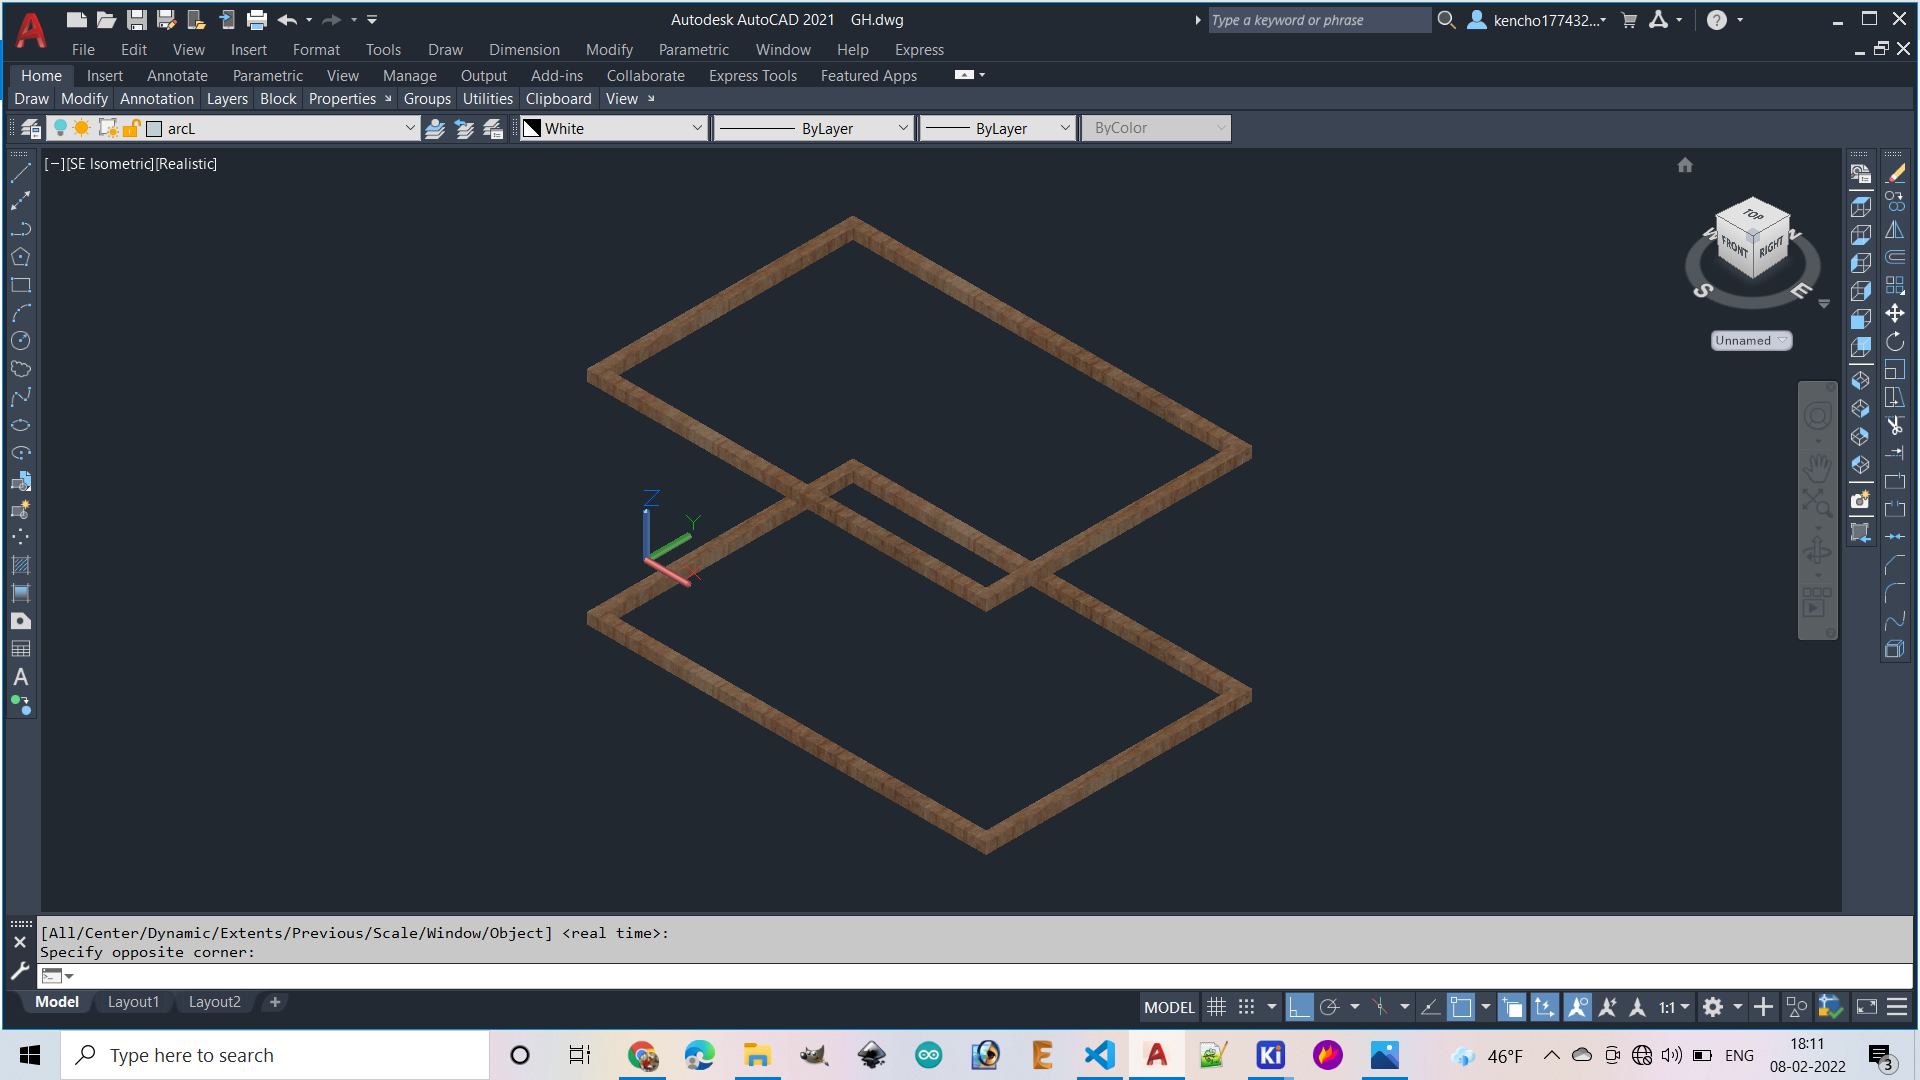
There are two basic parts in my design. 1. cuboid of 300mmX200mmX150mm. 2. semi-circular prism of diameter of 200mm and legth of 300mm.
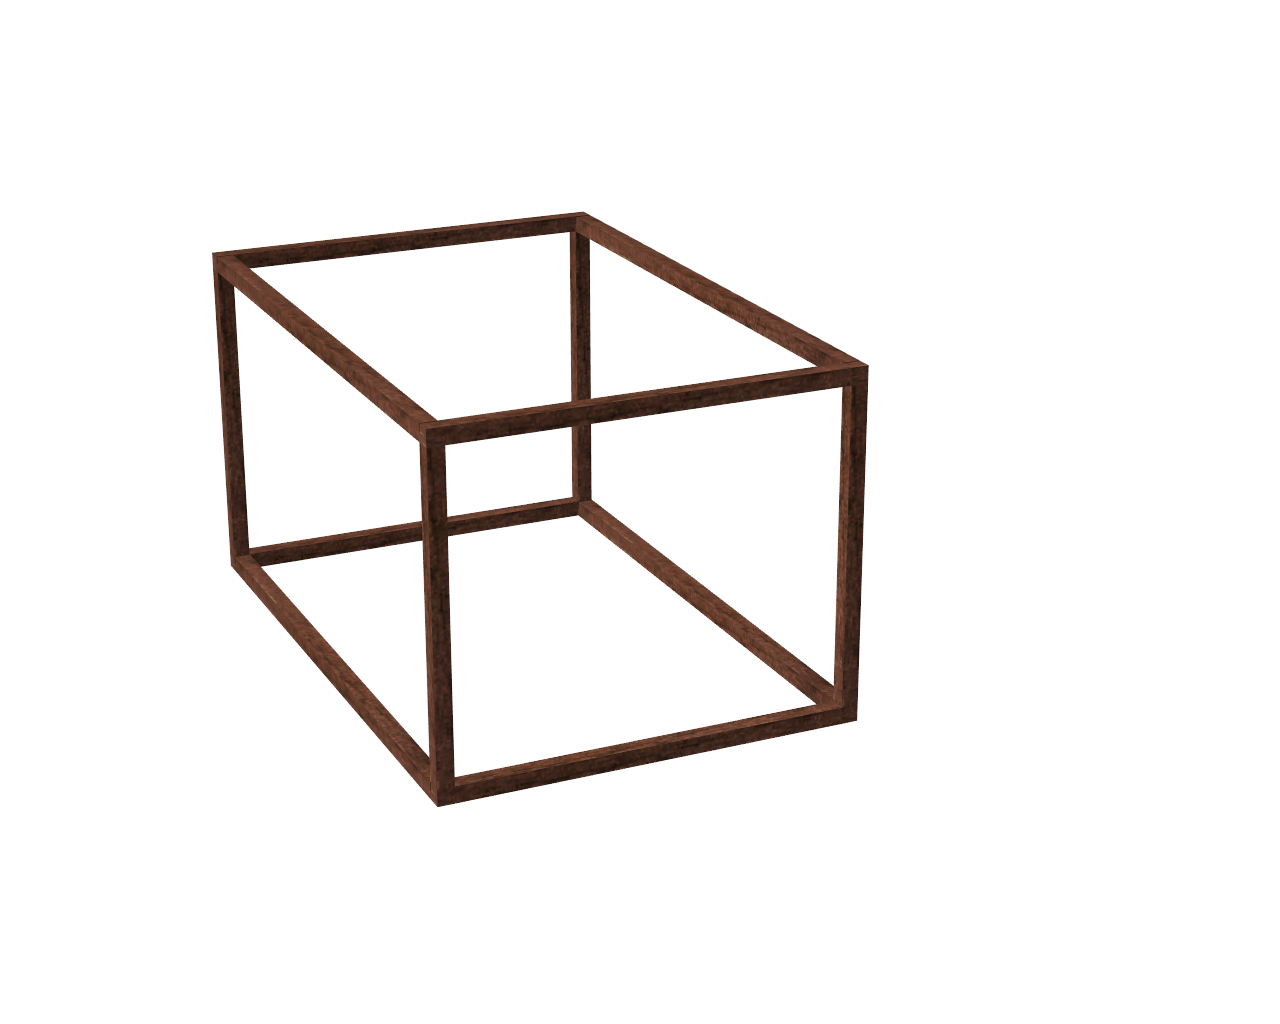
In 2D or in a top view, Firstly I drew two lines of 300mm(length) and 200mm (breath) and then I drew a square of 8X8. I used the sweep tool to create 3D members of lengths 300 and 200 and cross section of 8X8mm.
Then I duplicated both the members. I assemble them so that they are positioned in rectagle.
 I viewed these design in an isometric view(3D) and created a copied and moved it vertically 150mm.
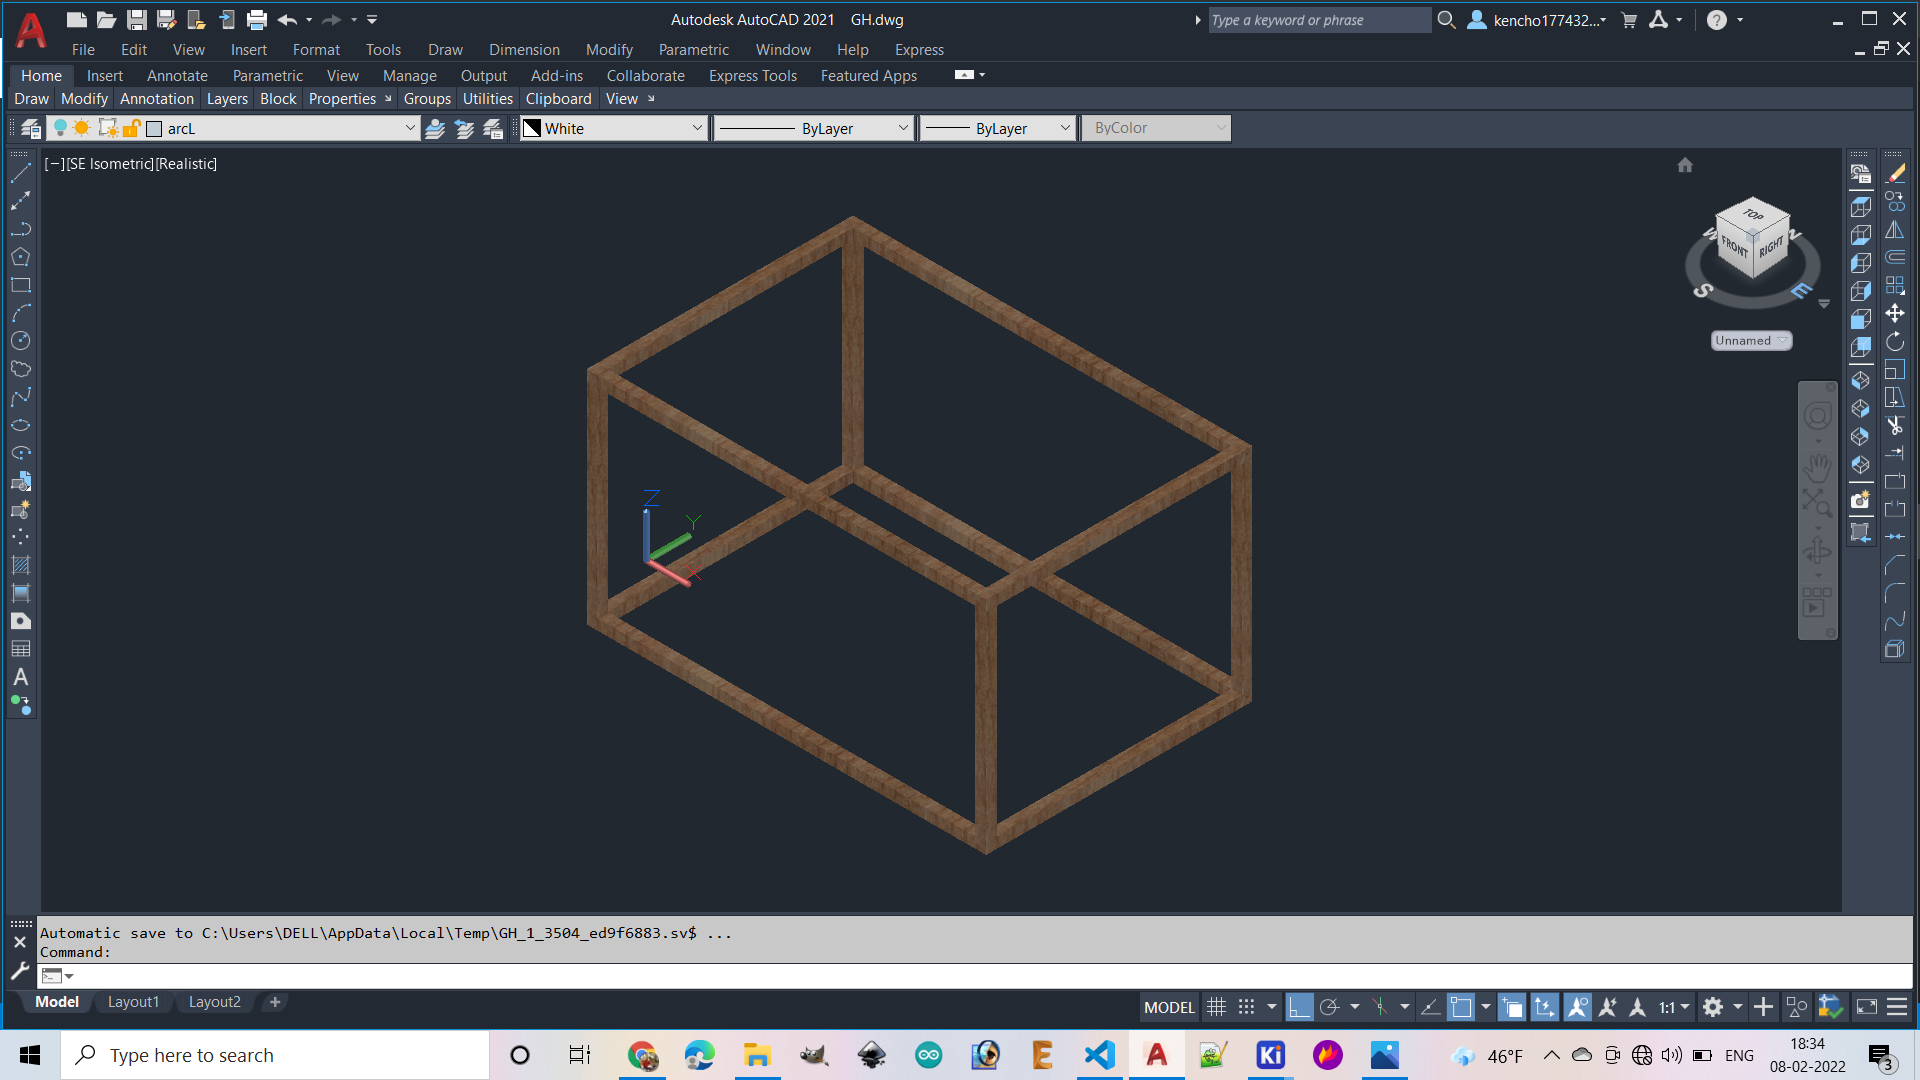
Then I drew a square of 8*8 and extruded through 150mm. Created four copies and arranged each on four corners.
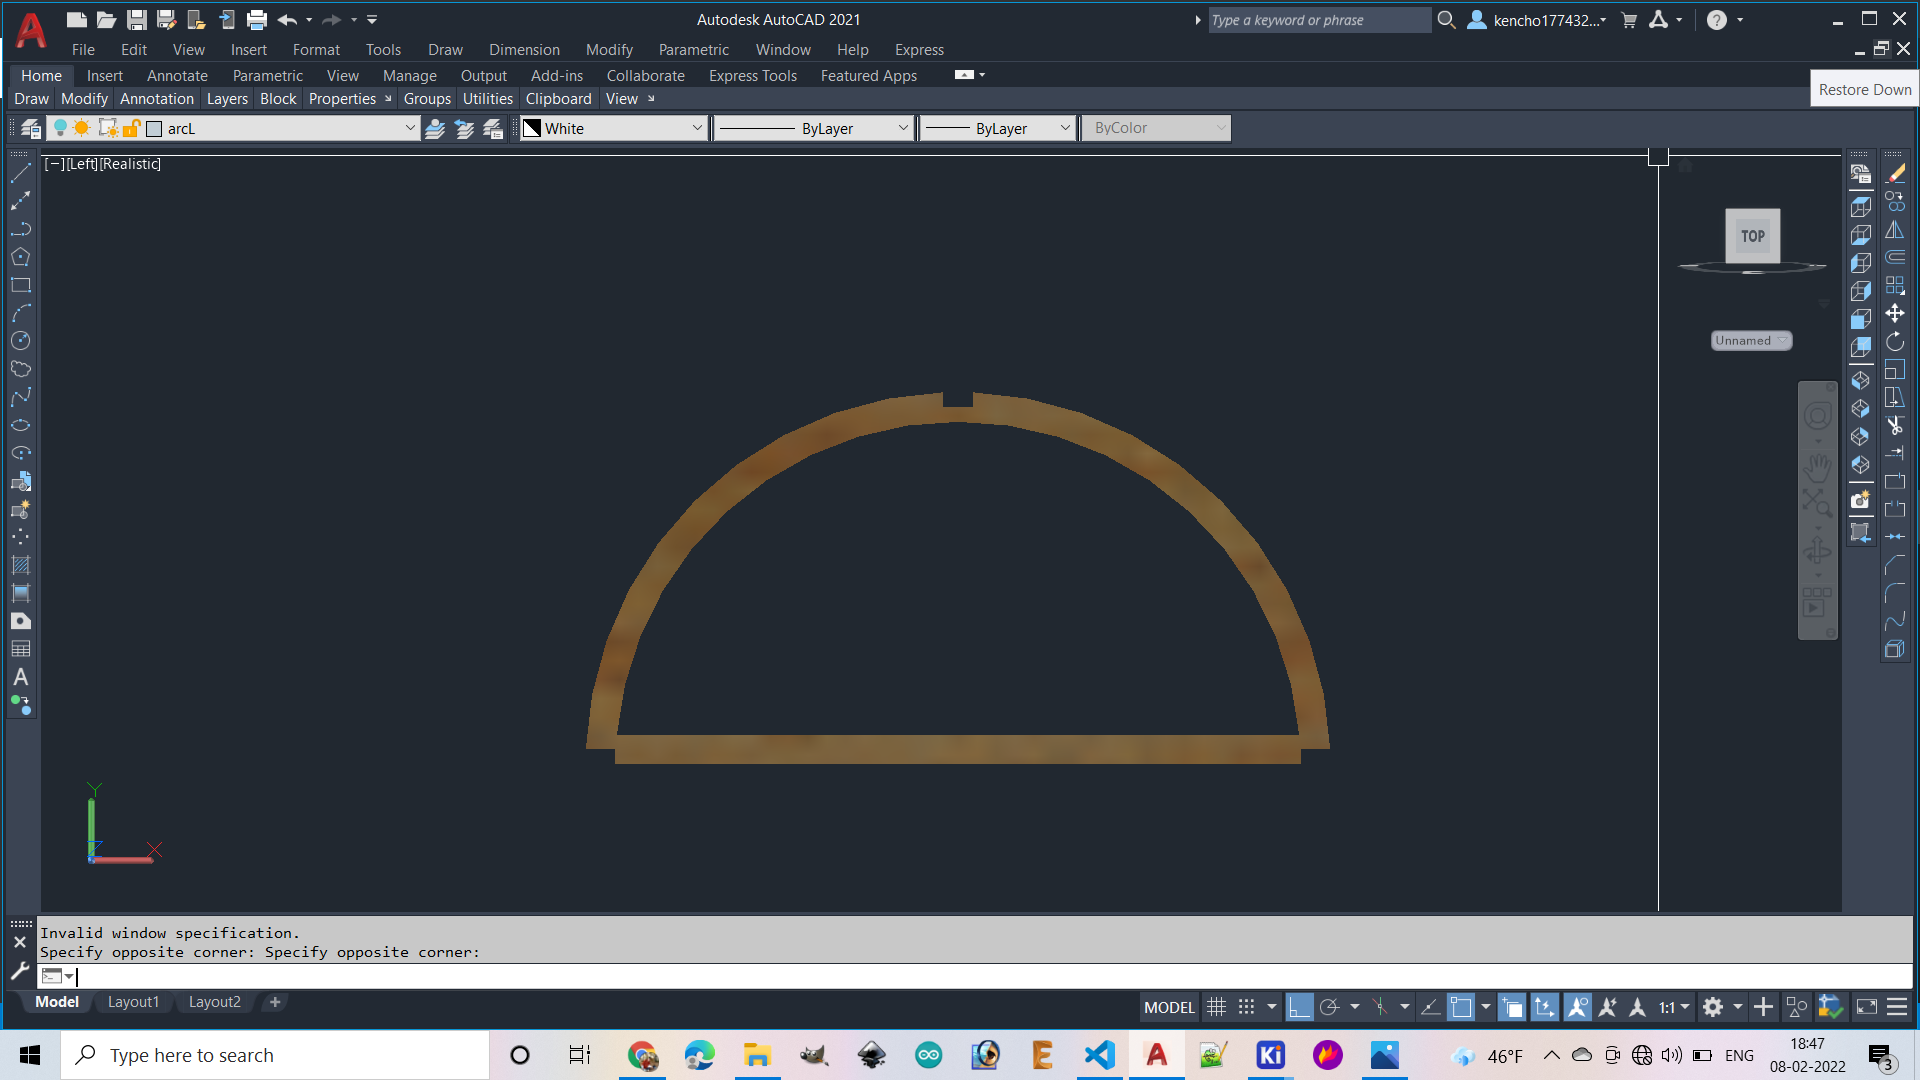
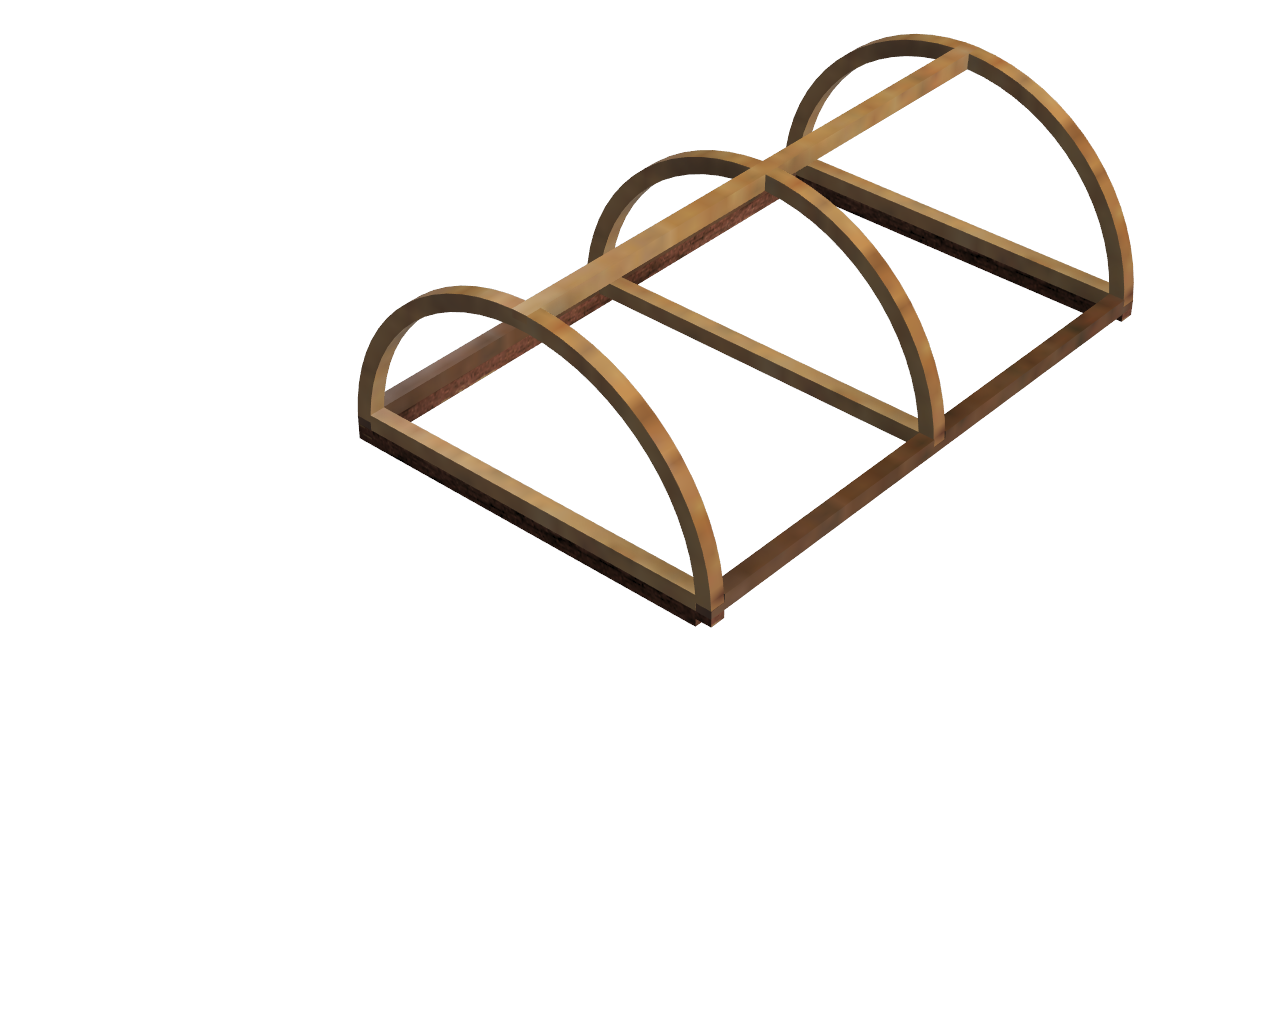
 After that in side view(2D), I drew a circle with diameter of 200mm and a rectangle of 200*8mm. Then I trimed the circle to semicircle and placed on the top of the rectangle.
Then I used offset tool on the semicircle to create a copy inside at 8mm distance.
Then I extruded the concerntic semicircle through 8mm and then subtracted the smaller from the bigger.
After that in side view(2D), I drew a circle with diameter of 200mm and a rectangle of 200*8mm. Then I trimed the circle to semicircle and placed on the top of the rectangle.
Then I used offset tool on the semicircle to create a copy inside at 8mm distance.
Then I extruded the concerntic semicircle through 8mm and then subtracted the smaller from the bigger.
I copied the arc 3 times and placed them on the top at equal interval.
After that I made 3 copies of 300mm member and placed two at the bottom and one at the top.
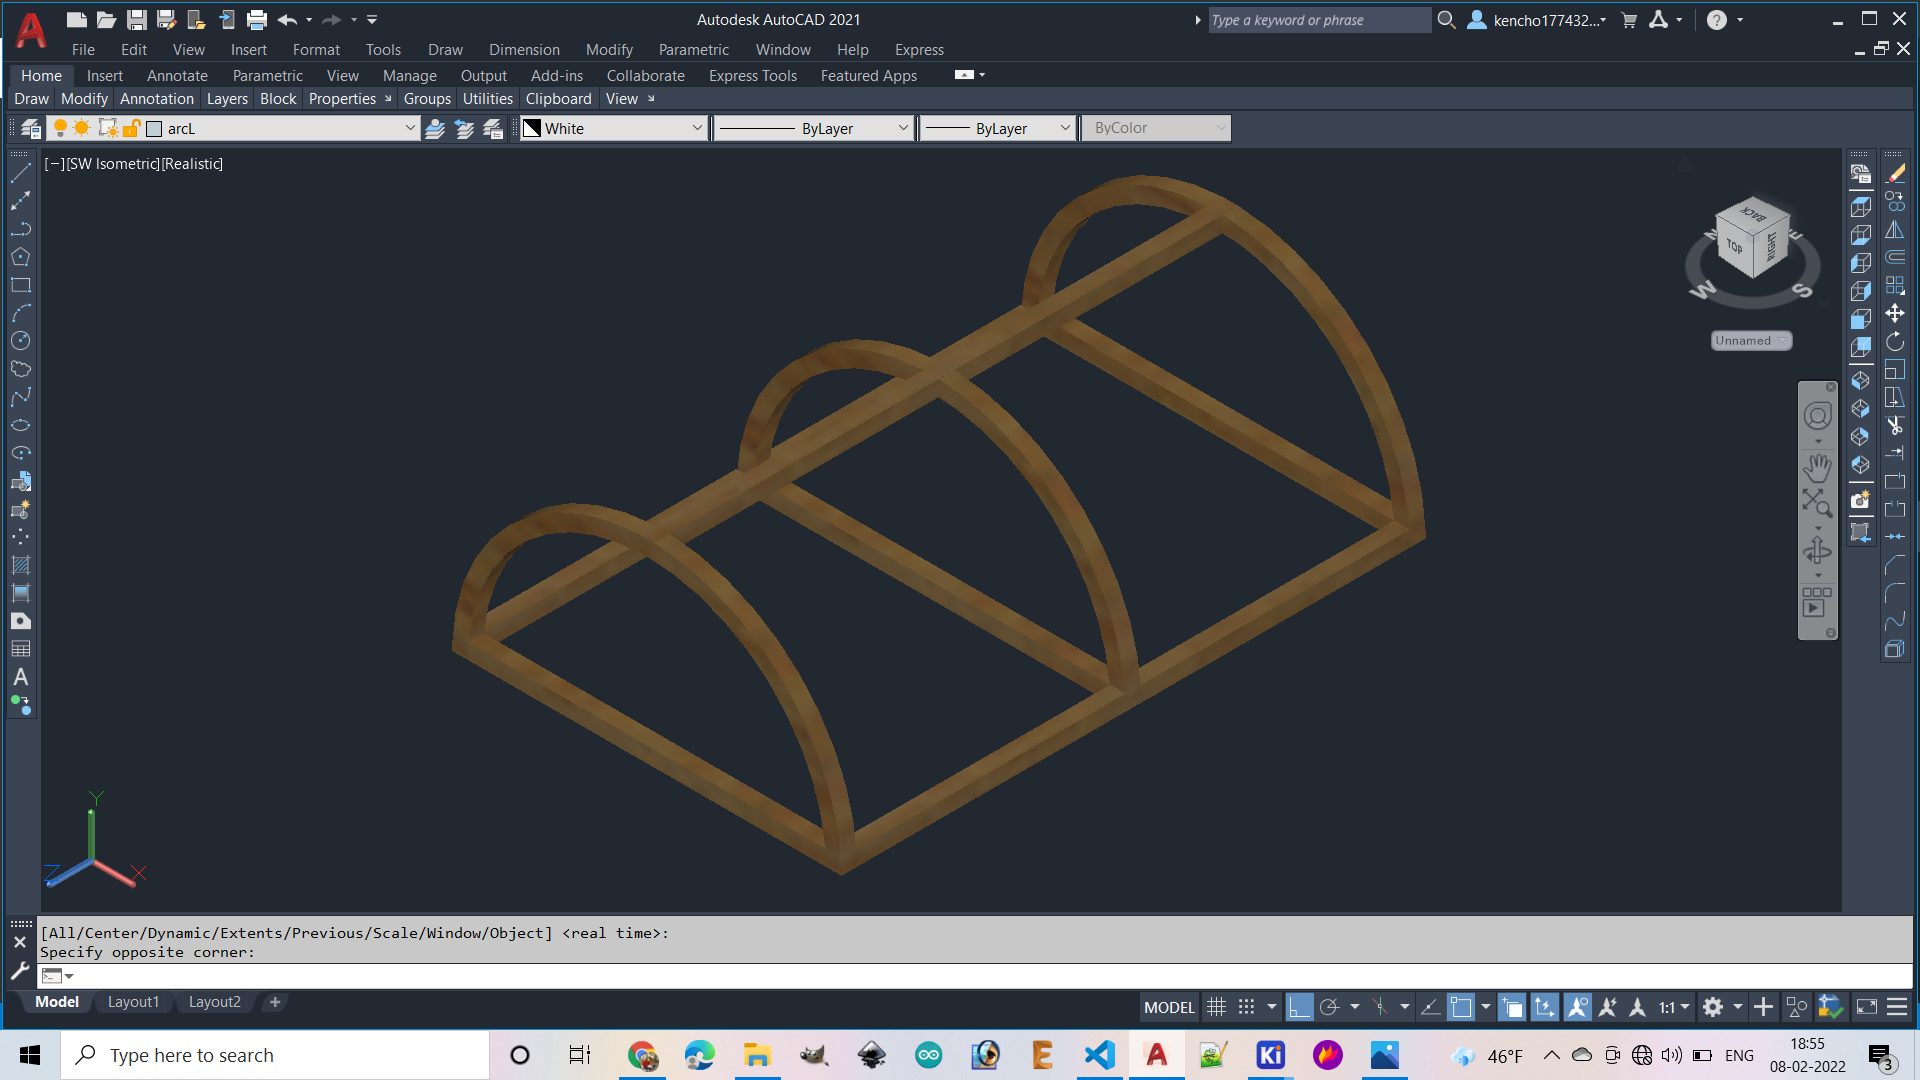
Finally all the parts are assembled together as shown in the image below.
FUSION 360
I tried to use fusion 360 to create some more 3D designs. Before I design any of my project parts, I freely sketch some objects using 3D tools. I saw a video tutorial over youtube on how to use different tools. I followed the tutorial to draw the same objects. I clicked on CREATE and selected ‘create sketch’ to choose a surface. I made a rectange and explored different solid tools such as extrude,revolve, hole, presspull,fillet,combine,etc.. Finally I made a similar object which i saw on youtube ++++++++using the above commands.

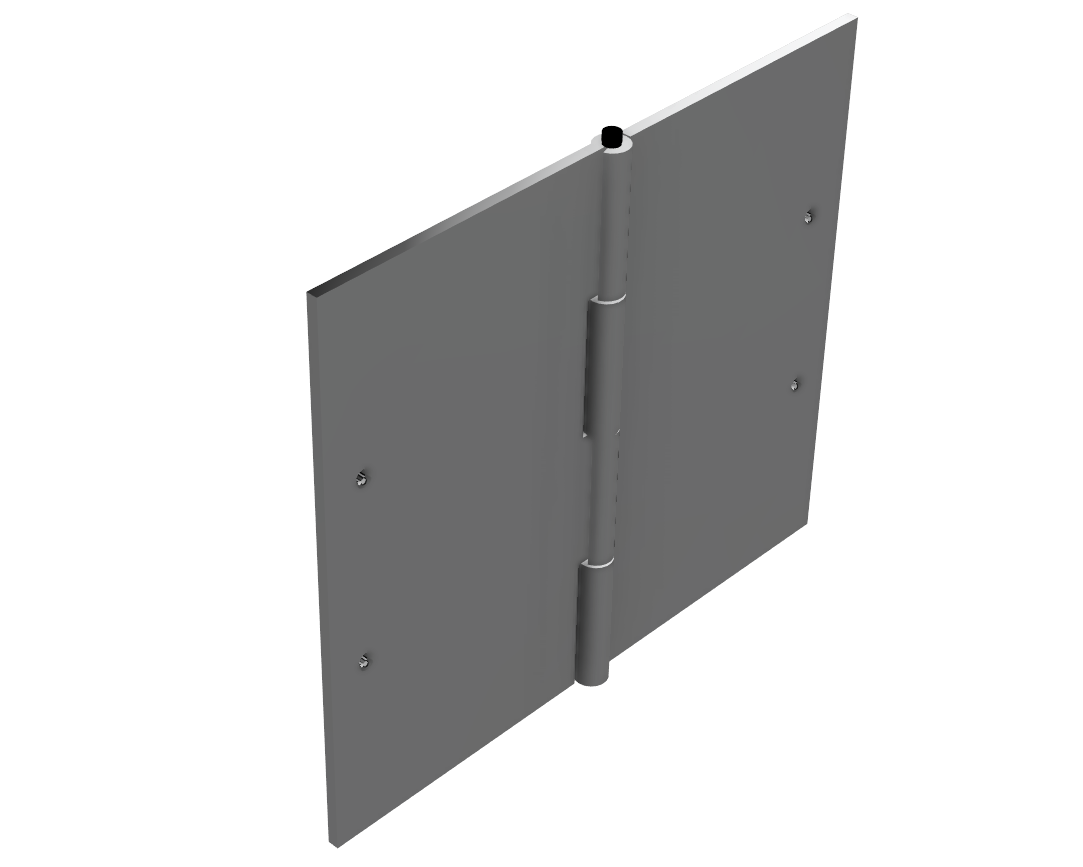
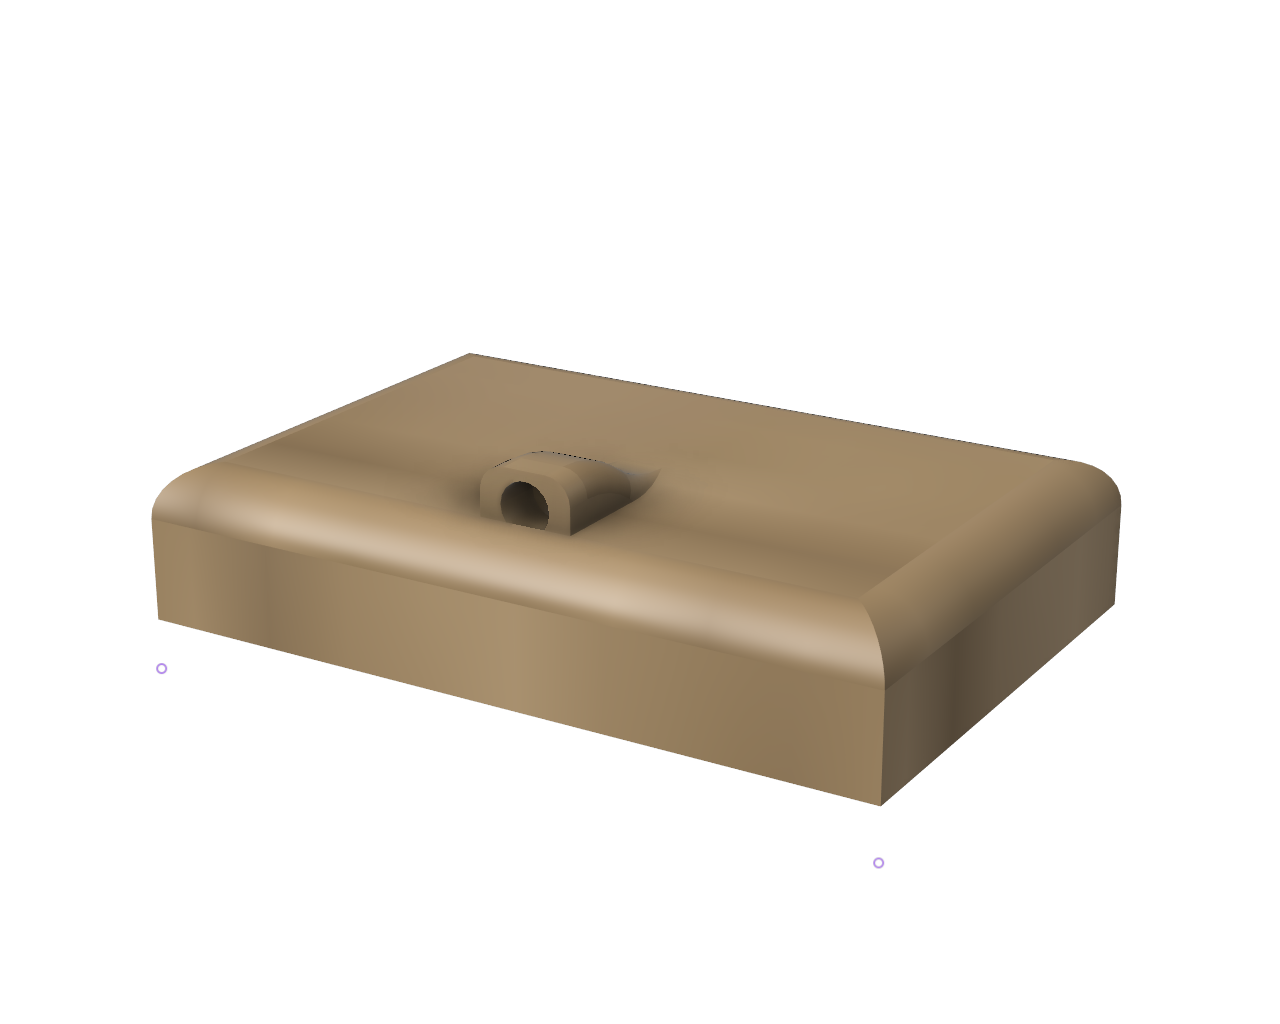
After that I tried to make a door hinge which I will use in my final project to assemble my entrance door of greenhouse. Making door hinge is much easier compared to my first sketch.
First I made a sketch in my rough book and then I used fusion 360 to replicate my drawing.
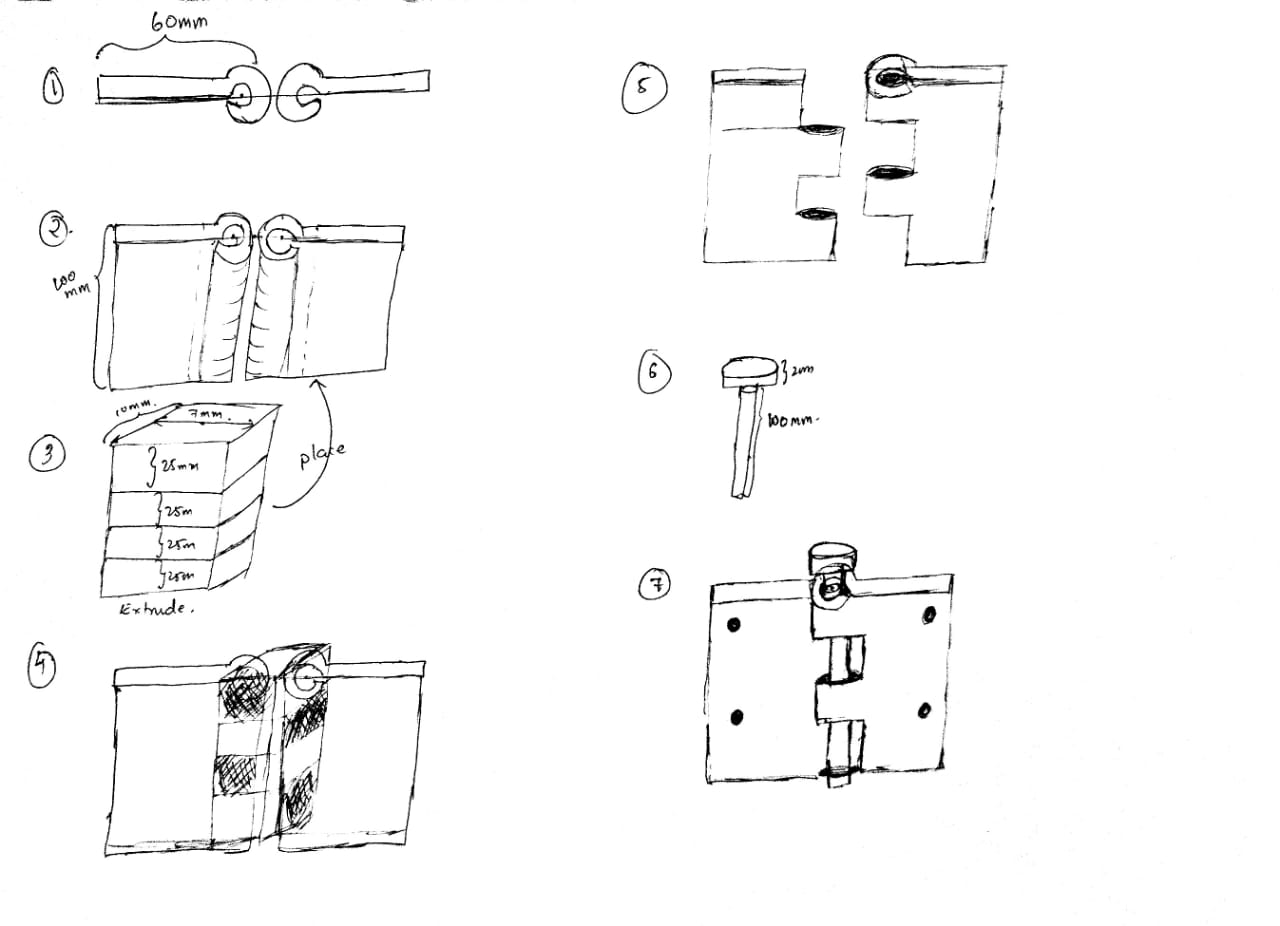
To make the hinge I followed the following procedure.
- 1. Drew a cross-section and mirrored them.
- 2. Extruded the cross section through 100mm
- 3. Drew 4 rectangles of 7 by 25mm
- 4. Extruded the rectangles and align them on the hinge plate.
- 5. Subtracted 2 alternative cuboid from each plate to make hinge knuckle.
- 6. Drew two concentric circles and extruded them to make hinge pin.
- 7. Assembled the hinge parts.
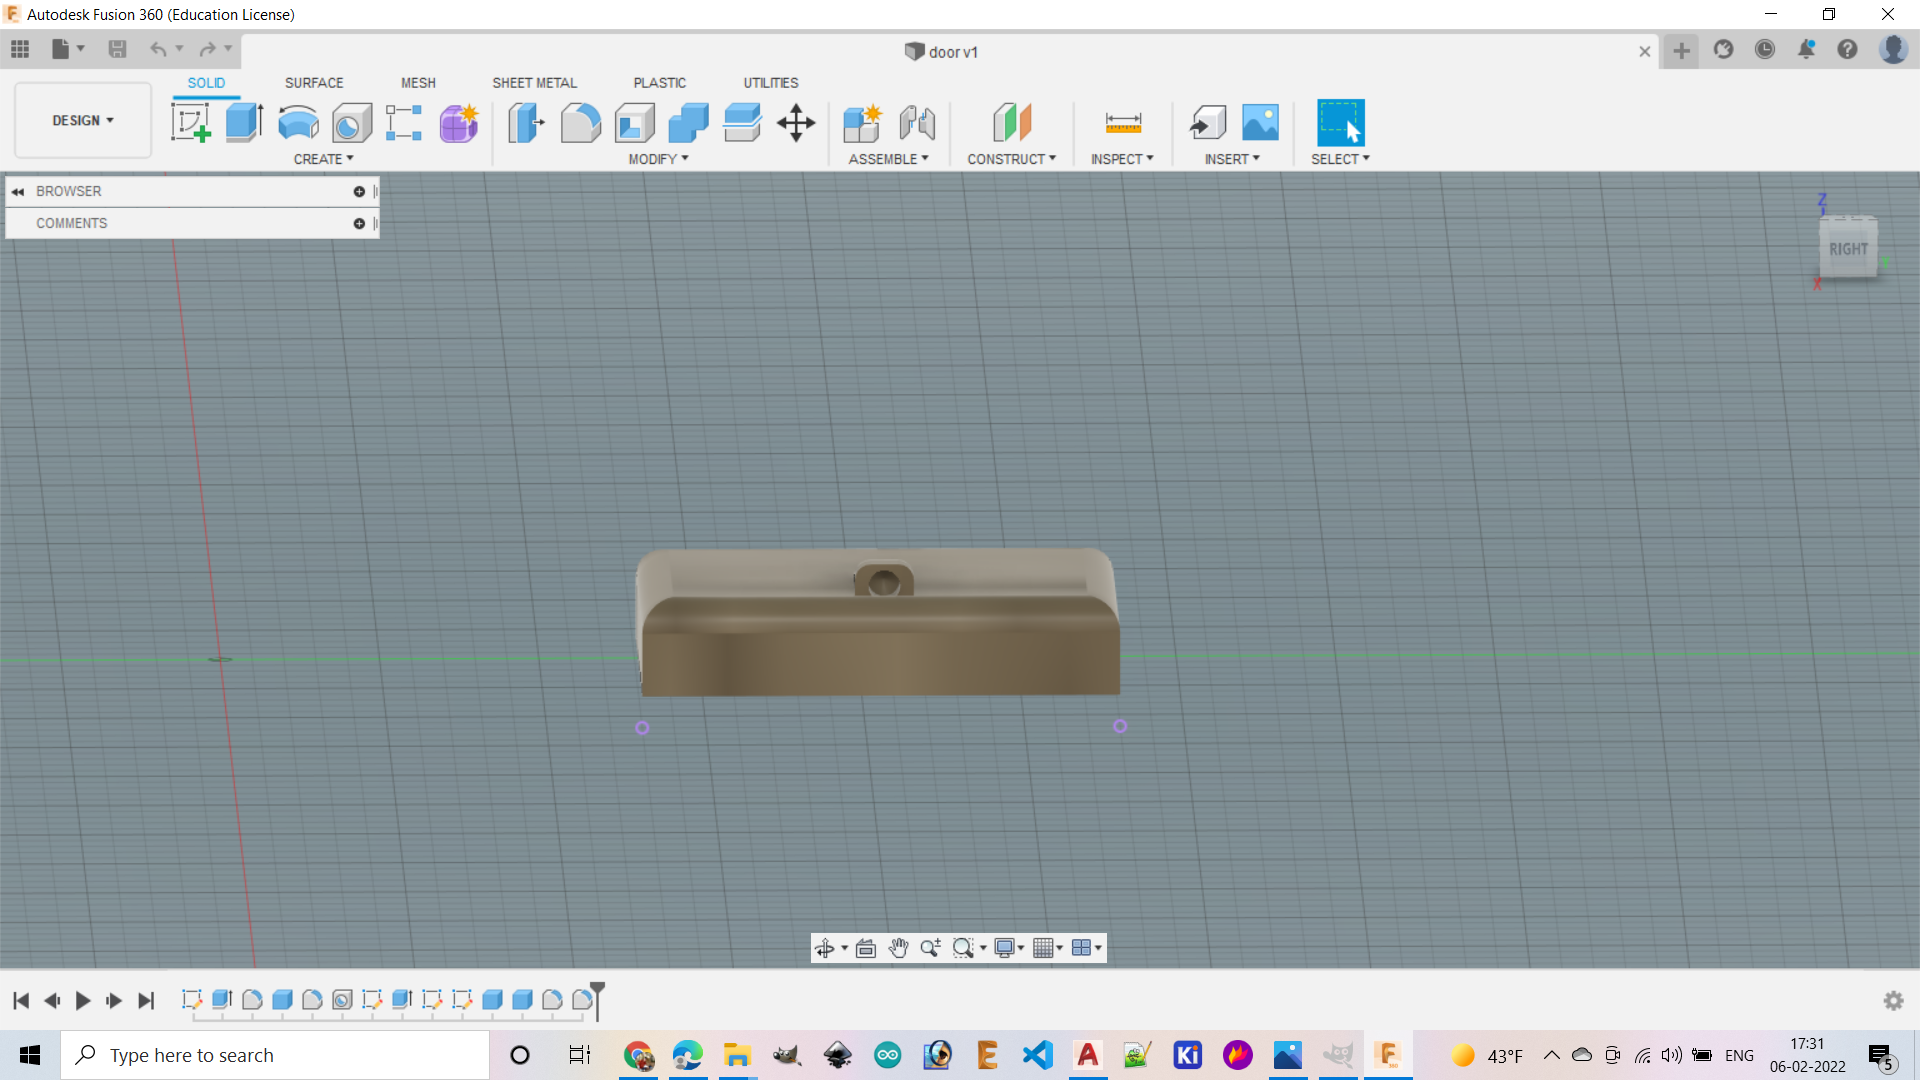
I even designed a door in fusion 360 which I will use it as my greenhouse door in my final project.
Render and Animation
To render and animate my drawing, I uploaded my autocad design which was saved in .dwg formate in fusion 360. Then click on ‘DESIGN’ and select Render. There are two options where i wanted to render my image: In-canvas rendering and Capture image. I selected capture image to render my design. We can select different options under capture image (I have used the default options) and saved my file to my computer instead in the cloud in .png. We can also change the appearance by choosing the render appearance button. Then drag and drop the library to change appearance. Repeat rendering once again and download the file.
Here are few Rendered images.
Animation
To make animation, click on DESIGN and choose the animation from the dropdown. Animation timeline will appear, click on the view button to start recording. Slide the bar of animation to 10 sec. and adjust/ paly your drawing in different angles. Then click on the view button and bring back the timeline to zero and push the play button to check the recording ansd save it on either cloud or in your local desktop. In my case i have recorded it in my desktop.
How to create drawing from Design.
To create drawing, go to DESIGN and click on Drawing. A Create Drawing page will pop up, change units to mm and click on ok. Select different perspective view and paste it. Then export the drawing in pdf form.
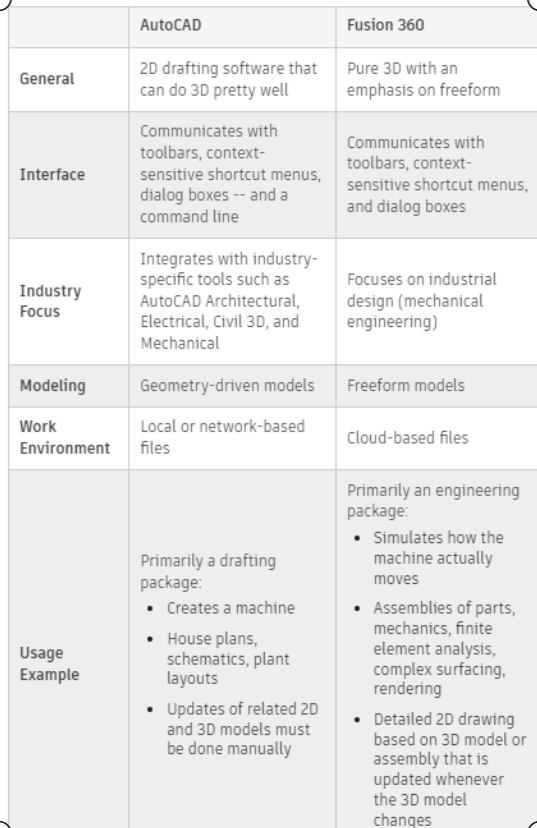
Before I shift towards the image and video compressing tools, let me write down the comparision between the two CAD softwares I have used this week.
Comparision between AUTO CAD and FUSION 360.
How to compress images and videos
REDUCE MP4 SIZE
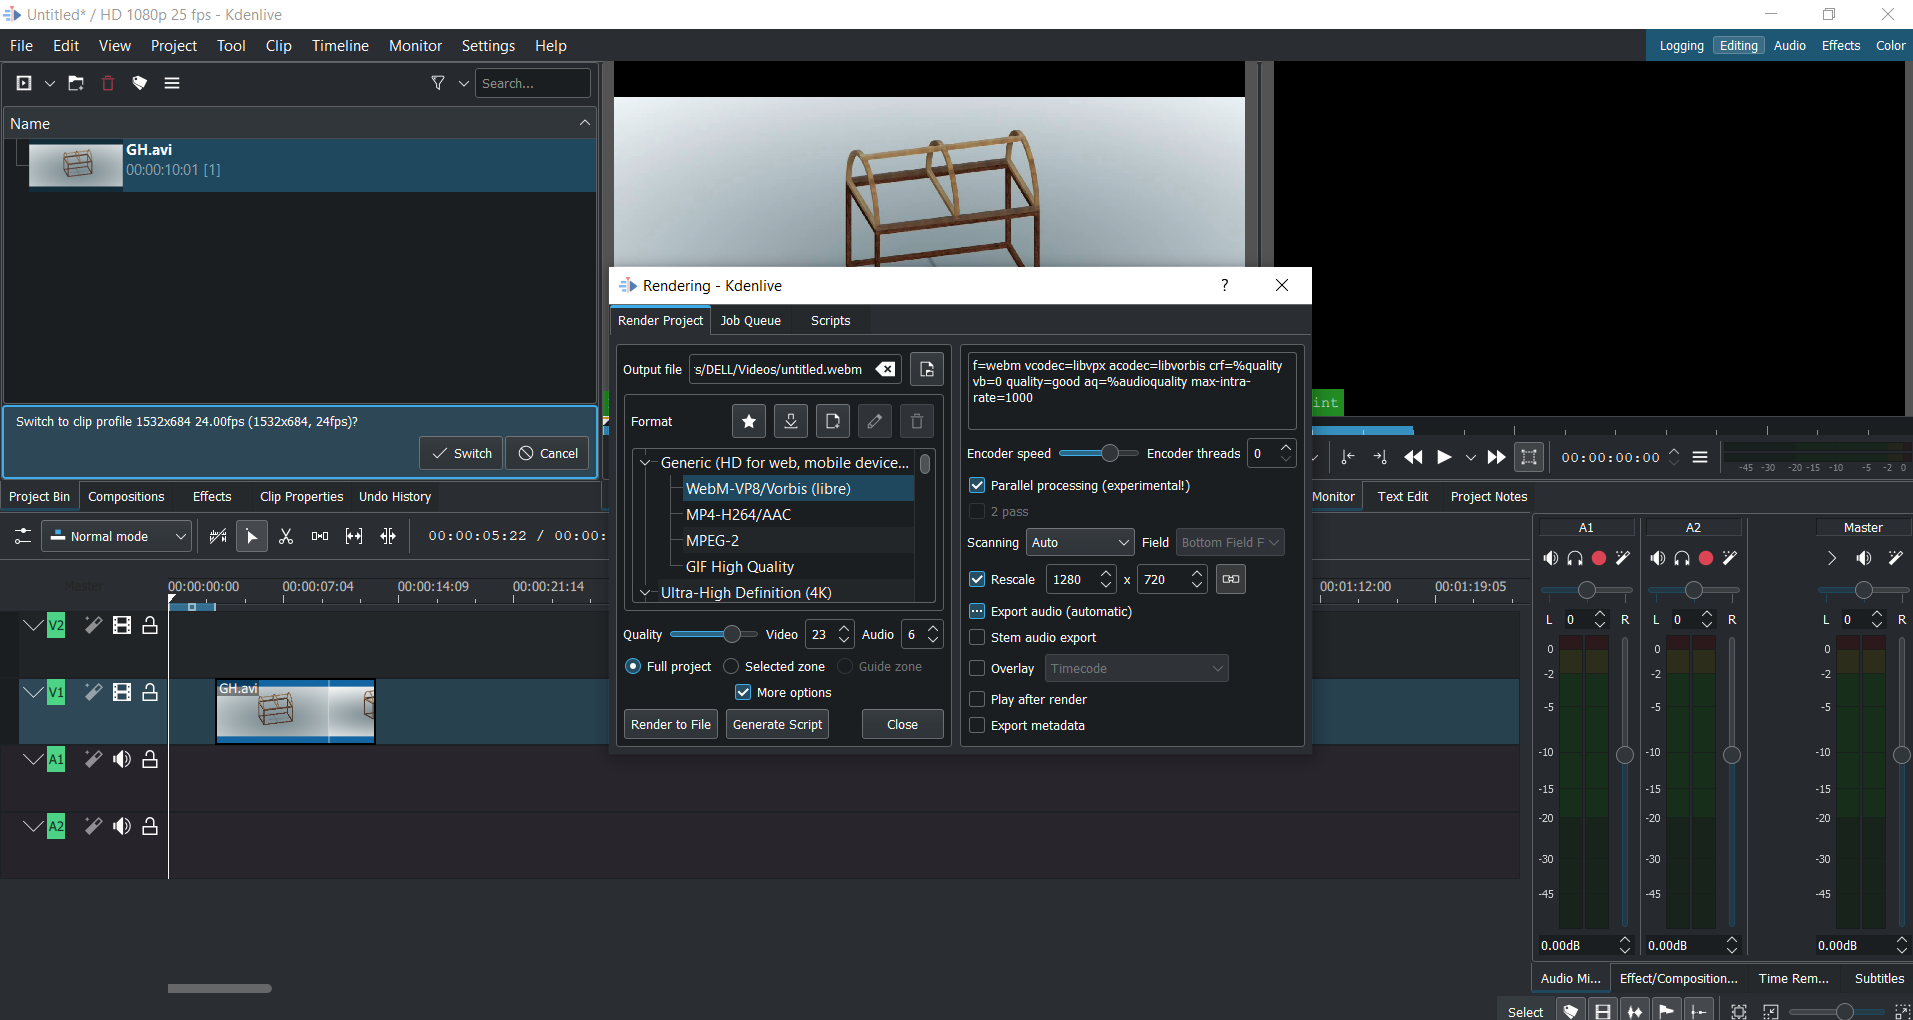
I have used Kdenlive to compress my MP4 size. Actually there are many video editing tools in Kdenlive, but I have used only video compressing tool as I am running out of my time.
kdenlive software.

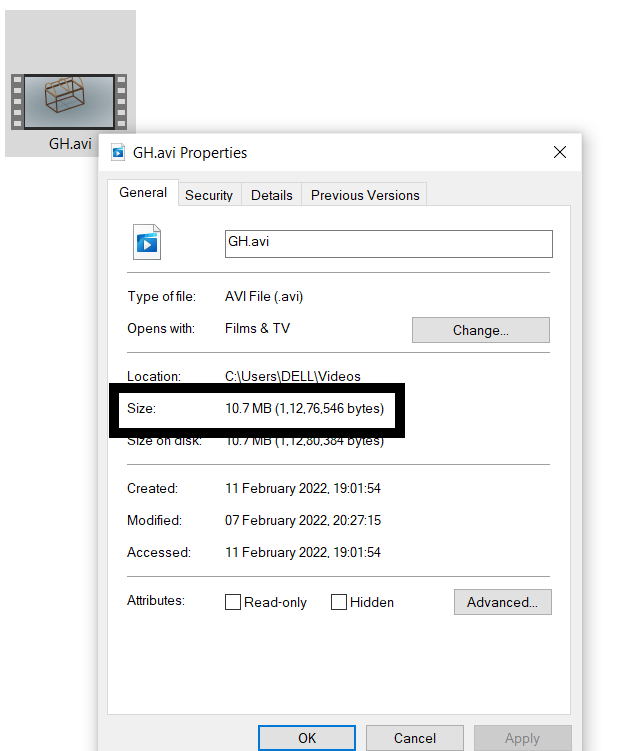
I have compressed the animated video which was created using fusion 360. Initially the video size was 10.7 MB. You might have watched the video which I have shared in my fusion 360 animation documentation.
Now to compress the video, I have draged and dropped my video in Kdenlive and put it in the timeline. Now click on the Render from project dropdown menu and select the more option button.
Select the Rescale button and make sure to preserve the aspect ratio. In my case I have selected 1290 by 720 and clicked the render to file option.
Now go back to your folder and check the size of compressed video. My video is compressed from 10.7MB to 520 KB
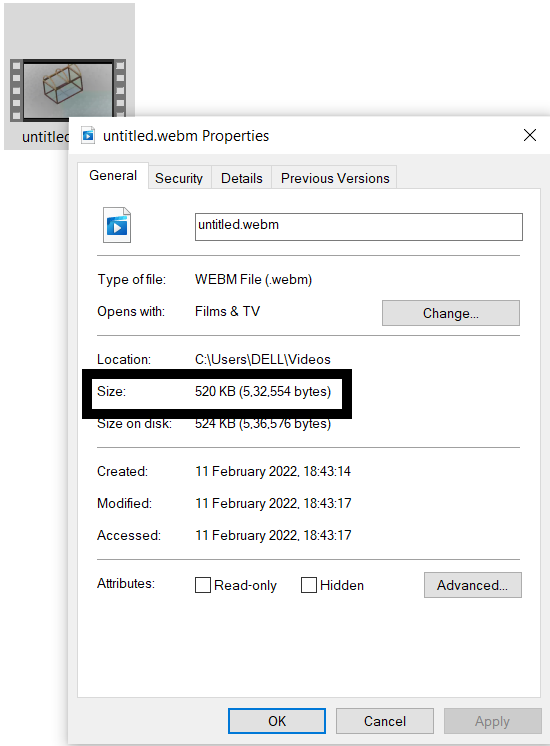
IMAGE COMPRESSION TOOL
To compress my images, I have used XnConvert software.
 It is very easy to use. You just add the pictures that you wanted to compress using Add Files tools and choose the action tools to compress your image as per the need.
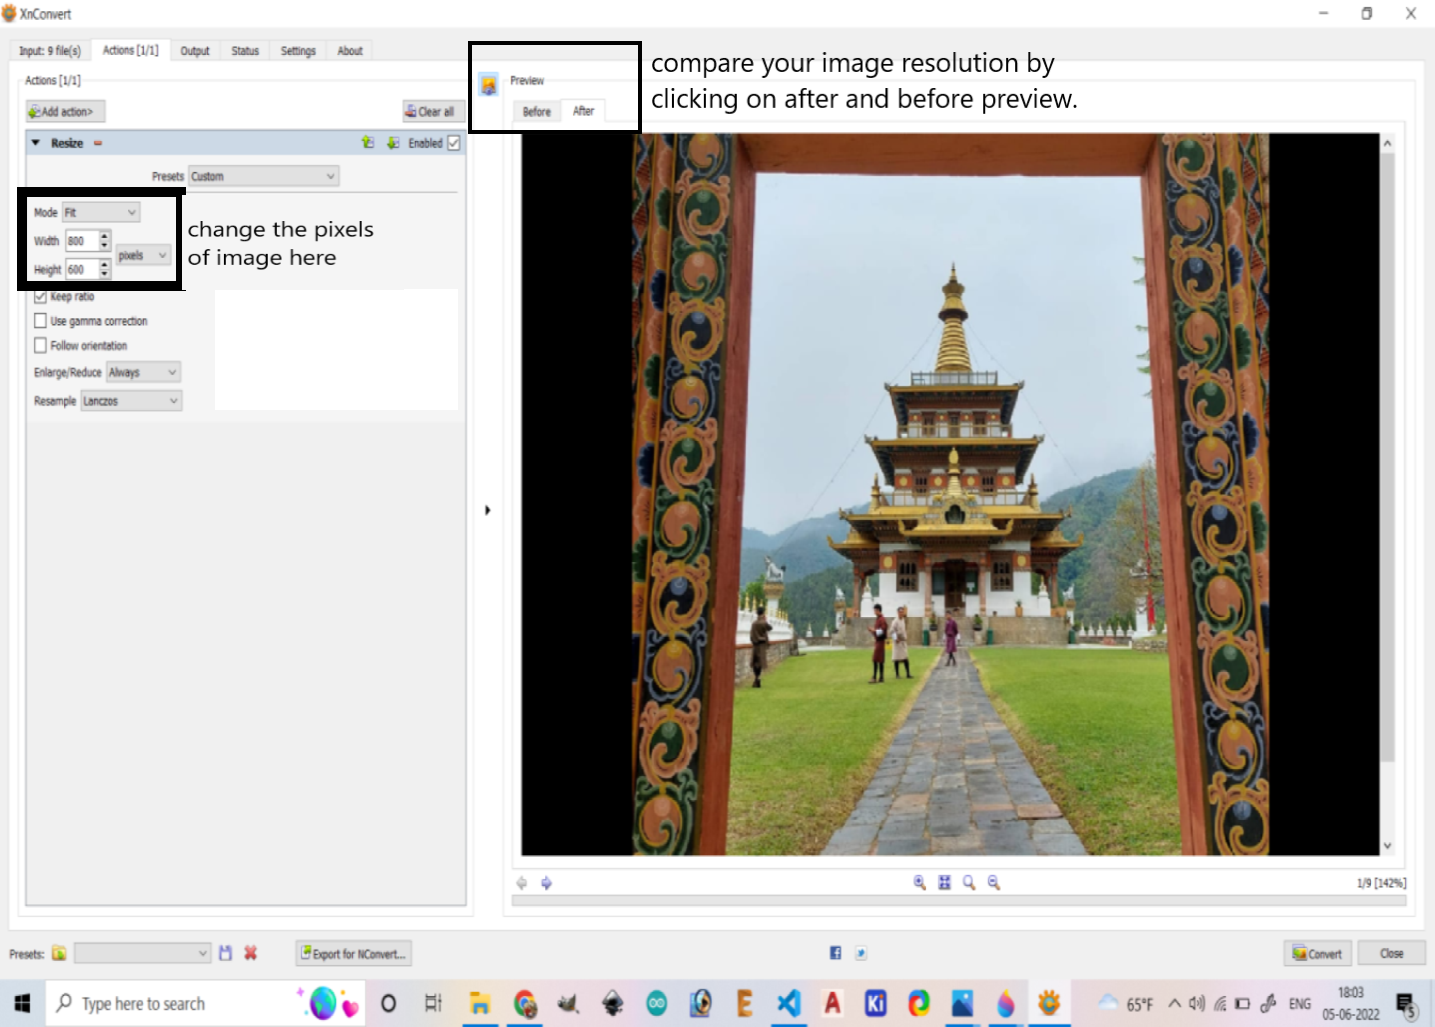
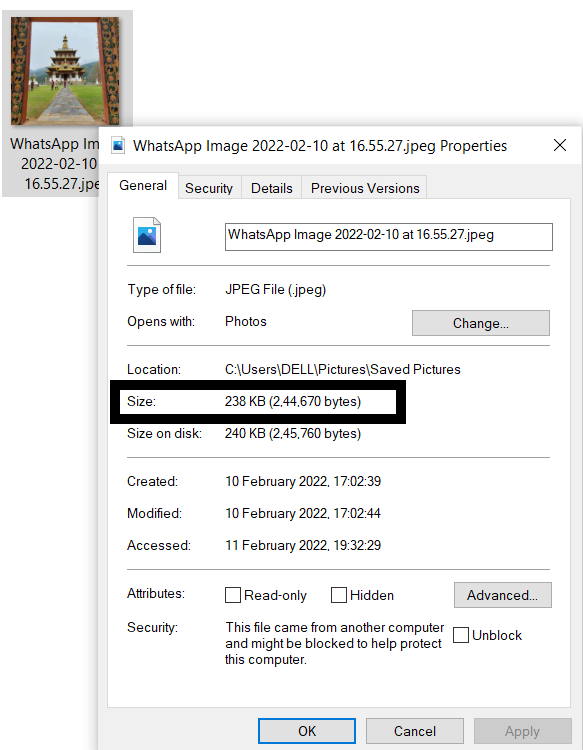
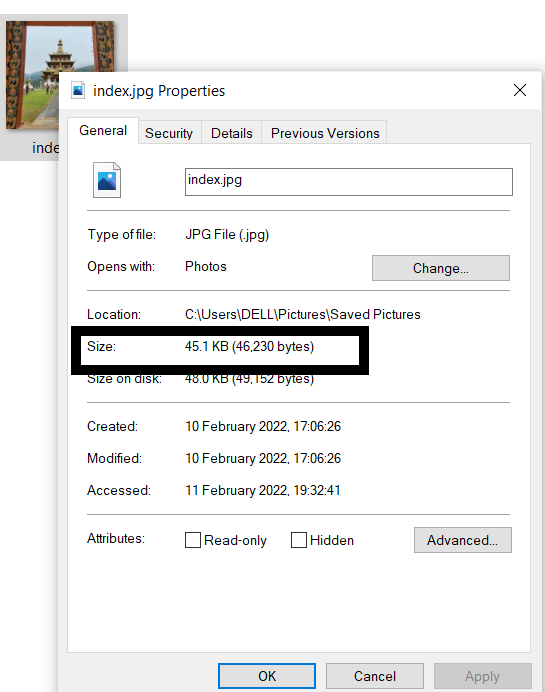
You can compare the uncompressed and compressed size of images.
UnCompressed.
Compressed.
Problems and Errors.
In this week I didn’t face much issues using the CAD softwares and 2D softwares as I have referred some of the youtube videos on how to use these softwares.
Learning outcomes.
From this week assignment I got introduced to different 2D and 3D softwares. I learnt how to vectorize and rasterize images, render and animate the cad designs. I even learned how to compress video size using kdenlive software and image compressing software like Xnconvert.
Original Files
Download all the original files from here.
THANK YOU