Table of Contents
Assignment Designing the board Making the board Programming Serial Communication Design Files^
- Write an application that interfaces a user with an input and/or output device that you made
- Compare as many tool options as possible
For this week I had a great idea, I would make a gaming controller so that I can play a python game. I had been working on a small python game for a bit, so I would finish it and connect it to a board! I decided that I would use 5 different buttons, four on the right representing the arrow keys and one on the left, which would be the space key.
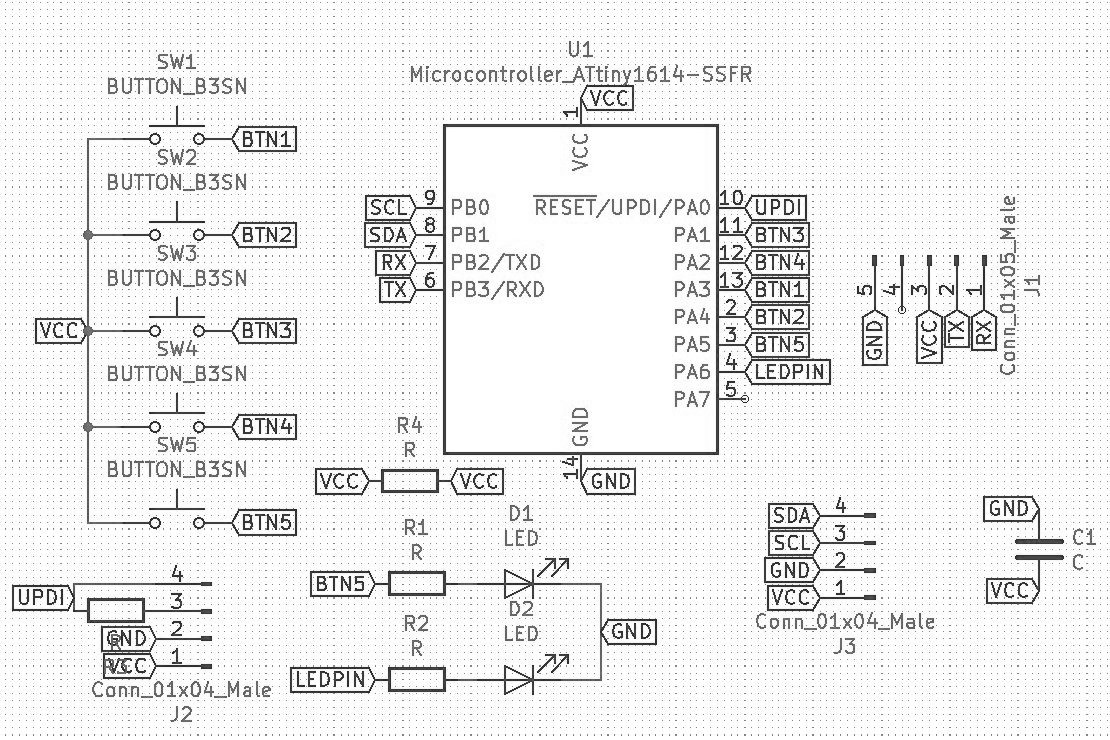
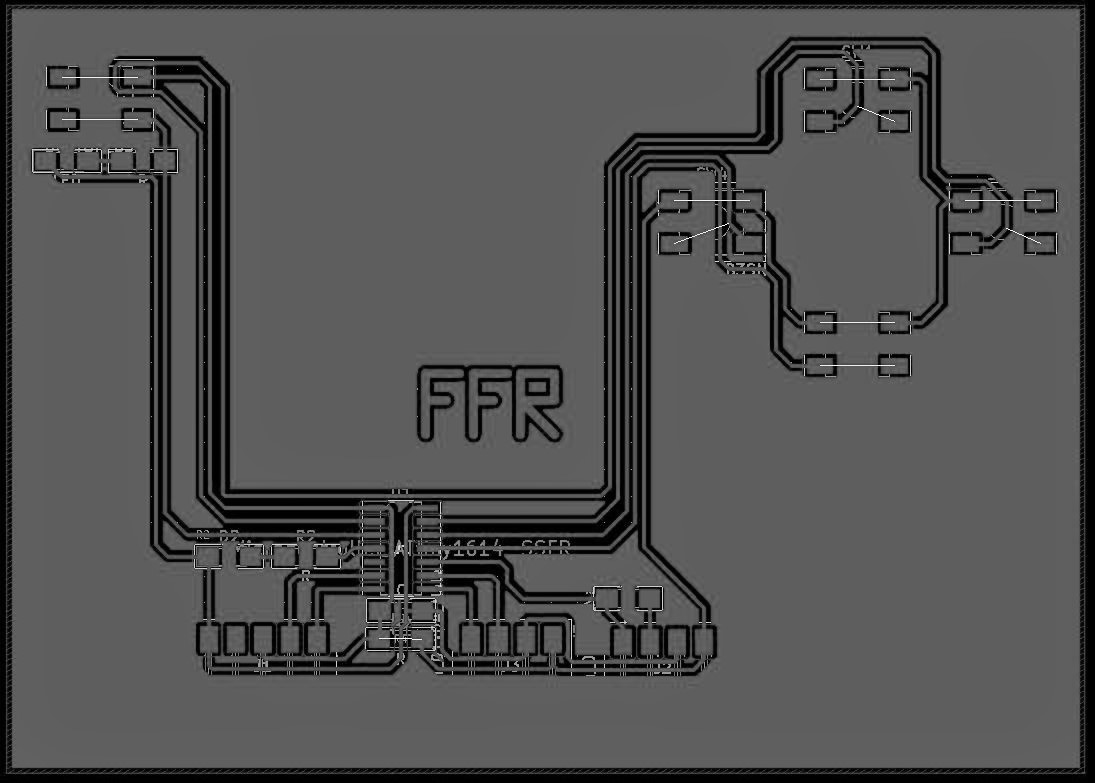
I tried a first draft, and decided to use the entire board, because it had to fit in you hand. So, I designed the board in KiCAD, and also added 3 different ways to communicate with the ATtiny1614. I have the buttons all connected to the ATtiny1614 on a pin and on the other side the VCC. You can see 3 connectors one with RX and TX, one with UPDI, and one with SDA and SCL. Hopefully, I can program it with these three.
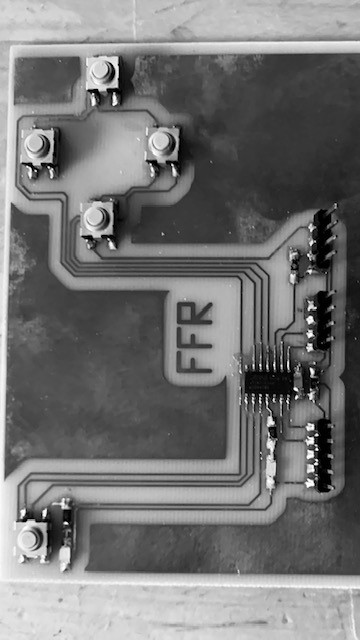
After I got my schematic design done, I started designing the traces and sorted the mess out, I got it done with only one jumper! The outline is the whole board, and I drew a few squares on a broken one, to see where my thumbs rested naturally. Then, I translated it to the 5 buttons.
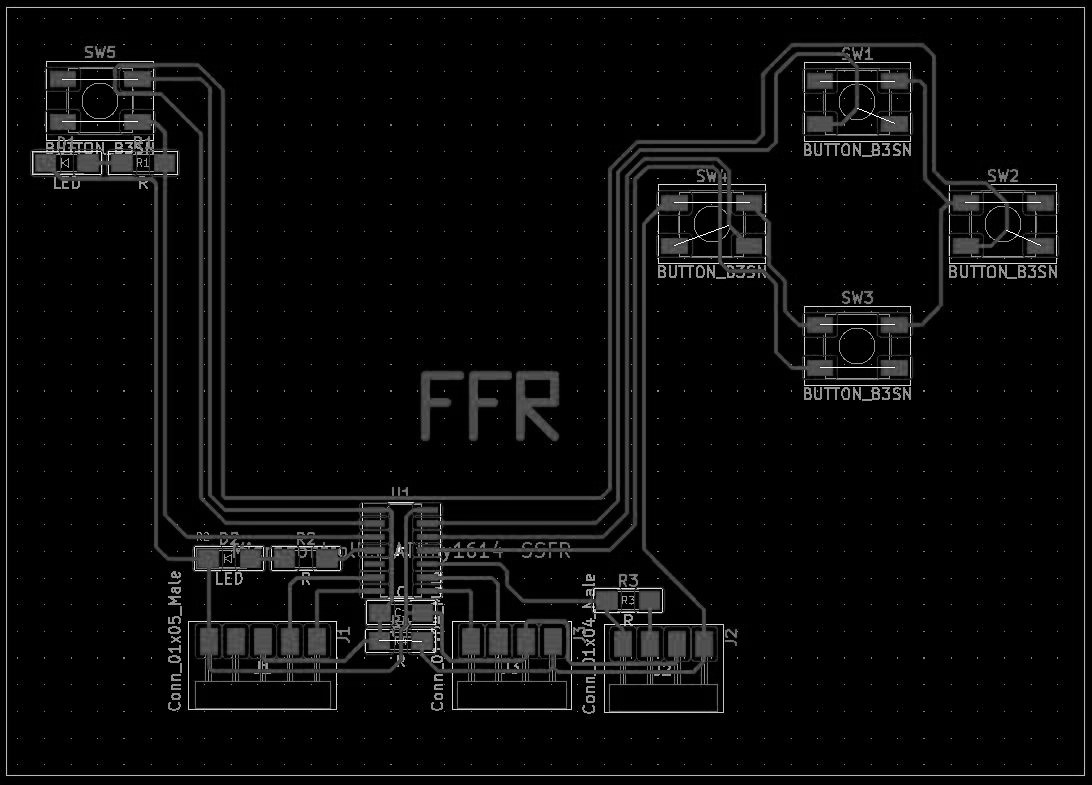
Later on, in the lab, I was informed that I should probably fill the rest of the area in, so that the acid would not eat everything. So I added in a shape connected to nothing at all. I didn't give enough clearance though, and that might mess up things afterwards. *foreshadowing*
I documented the etching process in wildcard week.
For soldering, I tried using a new method, a heat gun, for bigger buttons I planned to use, but this did not go well. I melted those buttons, so I decided to use conventional soldering with the regular SMD buttons.

I want to make a game that I can control with the board I made earlier. The game would be 10 by 10 tiles, each tile being either empty, a rock, or a raft. The player starts in a random spot on the board, and the other player as well. Then the first player would place three tiles. They do this by placing on one of the four cardinal directions around their player. The player moves to the new tile, and then they can place 2 more, so each turn they place a total of 3 tiles. If a player places two rafts that surround a row or column of enemy rafts, they capture those rafts. But wait, there’s a twist! The player can jump onto any raft they want, even an enemy player’s one. Then they can place tiles. The goal is to have as many of your rafts covering the water.
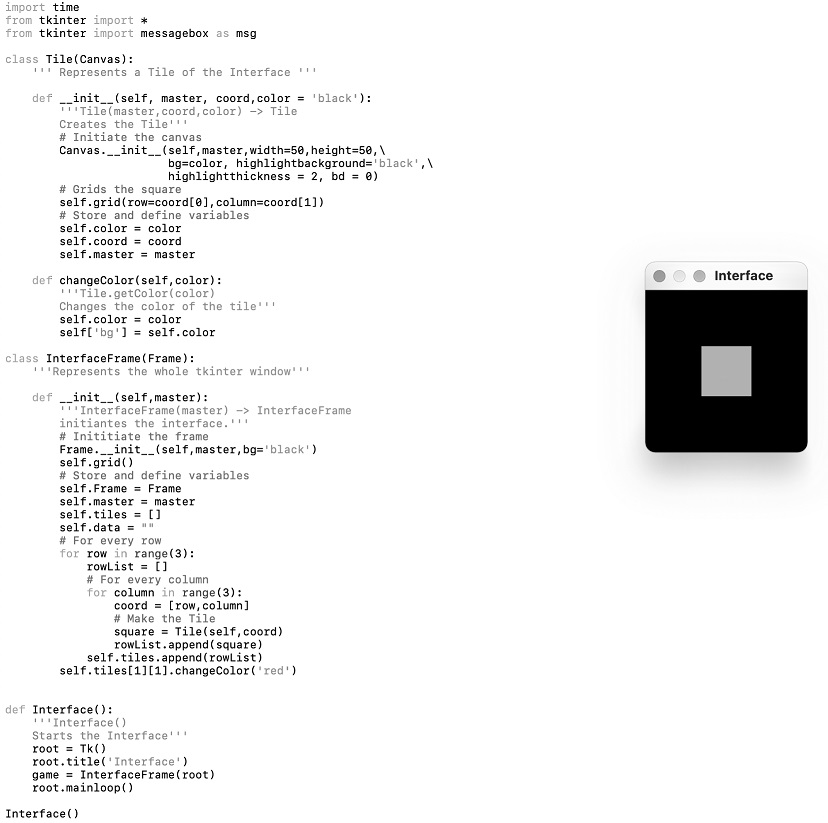
I started by importing Tkinter and random, the two libraries I need for my game. Then I made my first class, Tile. This would represent each tile in my game. I made my initiating function and bonded some buttons to it, so that when you click, the tile knows. I also added an empty text area, as I wanted to make my players just be an Asterix of a darker color. I then made a bunch of functions that returned values, like it’s coordinates and its color. I also made a function that alerts the frame whenever it is clicked by calling a function.
Speaking of the frame, this is basically the part that controls the whole game. So, I made the class, and initiated the frame itself, making it have a black background. I then defined a whole bunch of variables, such as the player colors, and the size and many more. I then made the actual board itself, by putting a loop inside another loop. One loops for the width, and another for the length. So, it is in a row, then loops for every column, and makes a tile. After that I save that in a massive list. Next, I added a border, the rocks, and the players with three different functions. Basically, the border just made all the surrounding tiles black to make a nice border, the player and rock function in the same way. They randomly select a tile, then make that a rock or a player. If it’s occupied, it just runs itself again and starts over. Then I bind the arrow keys and the spacebar and highlight the top left tile.
So let me talk about highlighting. The way I want my game to work with the arrow keys and the spacebar, or my 5 buttons, will move a selector around, which is just a white border around a tile. You can change which tile is selected with the arrow keys and select it with the spacebar. This eliminates the need for a mouse but both ways work well.
Next, I made the functions needed for the frame. I started with the square clicked function, which basically is the function that the tile calls when it is clicked. It sells the frame what tile it is, so the frame knows which one it is. The frame first checks if it is a legal move, with another function. This function checks if the tile is occupied, and then compares the tile with the current player on it and the tile selected. If it’s not one of the tiles in the four cardinal directions, it rejects the move. However, if the tile has a tile on it, the function interprets the move as a jump, and then calls on another function to move the player there.
Anyways, once the square clicked function knows if the move is legal, it transfers the player there and changes the tile to a raft of the current player’s color. I also made a function for winning, and another which checks what key is pressed when one is pressed, so it can move the highlight if it’s an arrow key or select the tile if it’s a spacebar. I then quickly made a function for winning, and another function outside the class which sets up the Tkinter. That was it!
Now obviously there were many, many bugs while making this, but they were all eventually solved using google and a bit of thinking.
Now I started on working on getting Python to talk to a serial port. I decided on using pyserial (https://github.com/pyserial/pyserial) which had a few tutorials on and was the easiest to download. Dowloading some of these things is hard, but I discovered a nice (https://packaging.python.org/tutorials/installing-packages/ ) tutorial on it. I found an easy tutorial online on it which worked first try with my board! Here (https://www.youtube.com/watch?v=TJYcTe0vSQI ) it is, I used my own code on the PCB, but the python was the same. (Obviously changing the port.)
I then wanted to use Tkinter along with this. However, for some reason, my board did not want to work with the four ‘arrow key’ buttons. They didn’t function at all and gave strange signals that were all over the place. Since I needed 5 buttons for my game, I settled on just using one. I would change the color of a tile on the screen with a button press, much less impressive, but it’s all I got.
So, I started typing up a simple code. I wrote the code for removing the extra stuff around the main message, and the simple Tkinter program for a tile. (With a border of course.) I got the Tkinter working, and the processed data working, but not both! I was looping the code that checks for any messages and updates the tile’s color because I did not want it to happen only one. Even though this loop came after me setting up everything with Tkinter the window would not pop up until the loop was over! This happened even without the serial and was quite annoying.
But here is a video of the processed data being spit out in IDLE, which was now serving as a Serial monitor like the one in the Arduino IDE.
And here is a simple picture of the Tkinter window with the code.