- Test the design rules for your 3D printer(s)
- Design and 3D print an object (small, few cm3, limited by printer time) that could not be made subtractively
- 3D scan an object (and optionally print it)
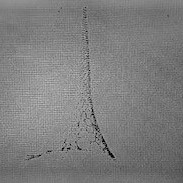
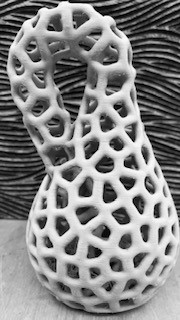
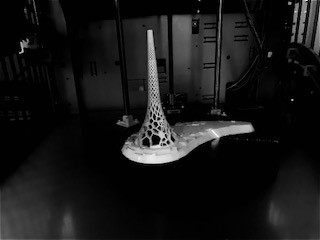
For this week I've got to 3D print something that cannot be made subtractively. Something that the CNC or Laser Cutter can't do. But first I'll characterize my 3DPrinter by printing a klein bottle. Its non-orientable surface is perfect to test my printer's capabilities when printing without support material. The end result can be seen in the sidebar image. It printed perfectly including it's mesh like walls.
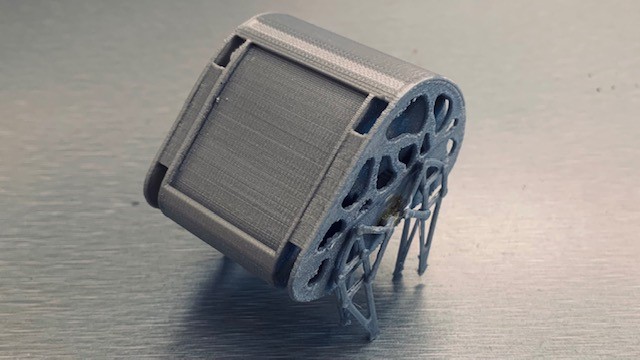
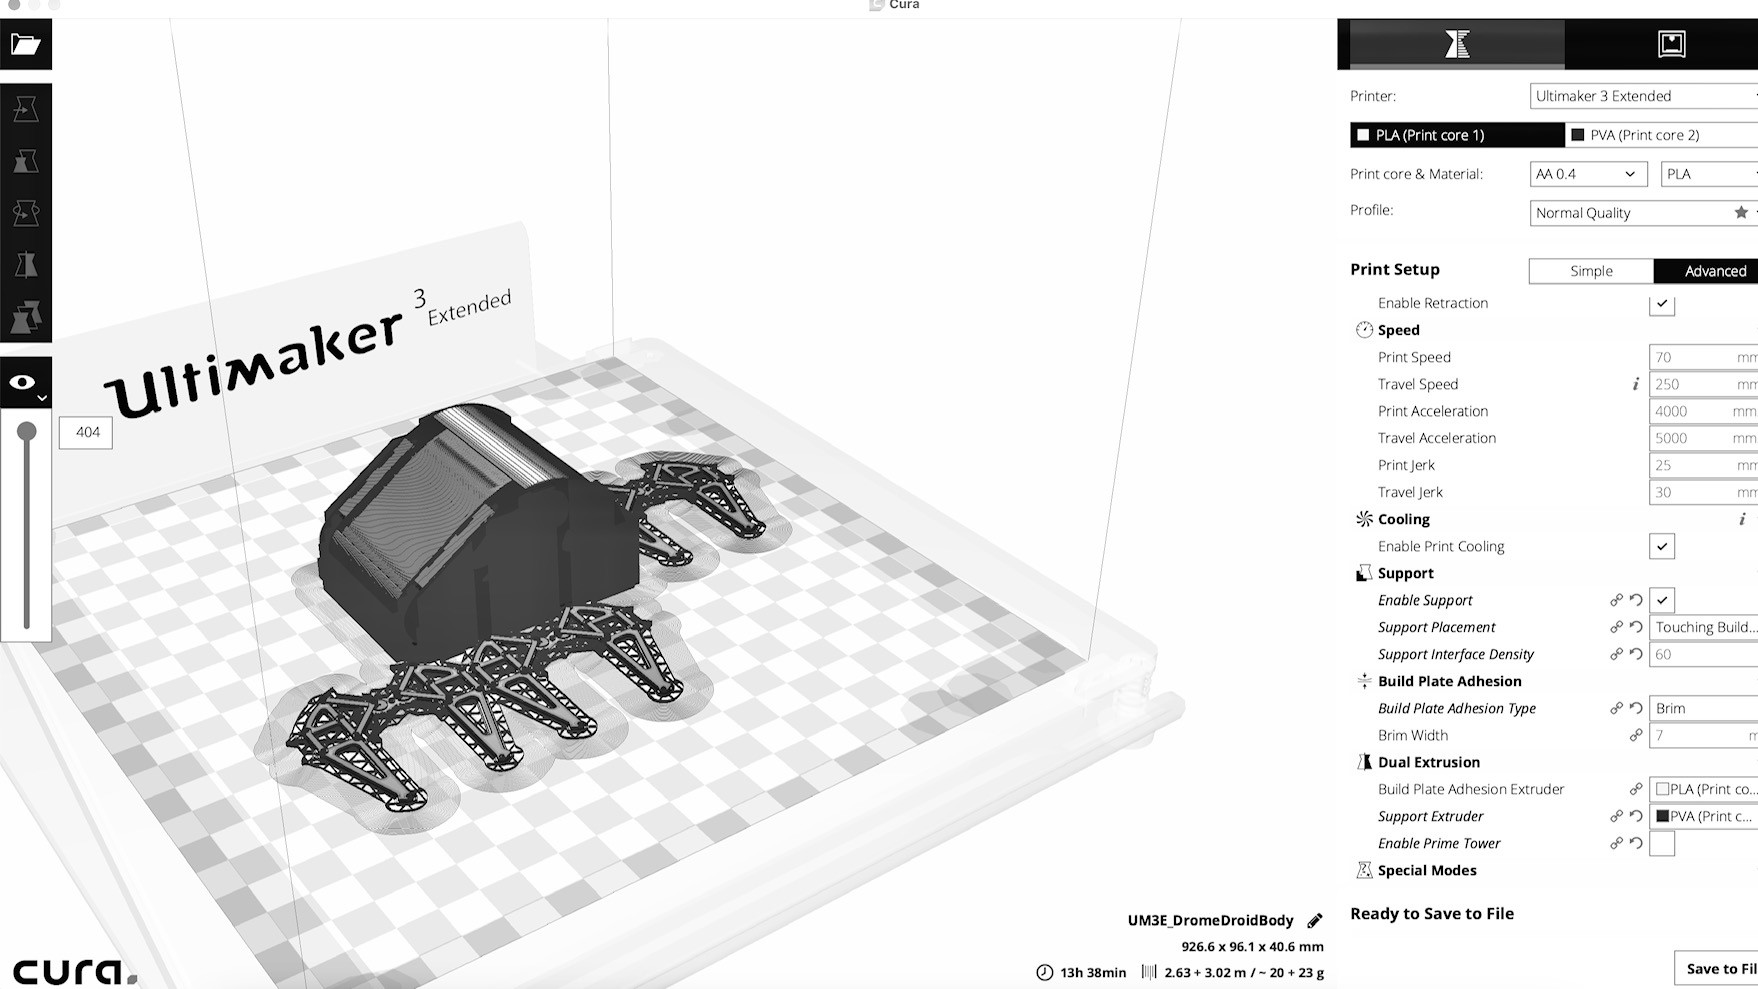
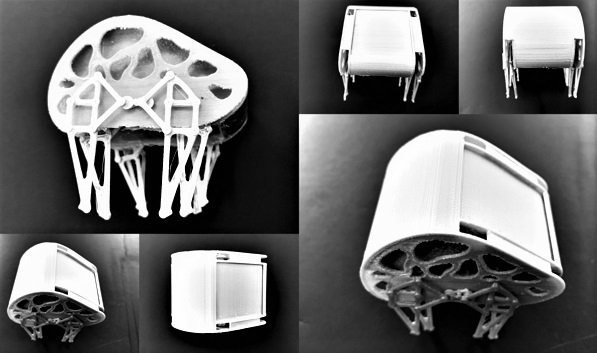
The DromeDroid's shape is also a very unique and challenging shape to 3D print. As an assembled whole model it is definitely something that cannot be cut, it's sides are curved, and it has a hollow area inside and on its side walls. I exported the Fusion360 file as an STL and opened it up in my 3D printer's Ultimaker program, Cura. When checking the file, the 3D printer could not generate the legs as part of the assembly, because of the scale and proportions of the model relative to the 3D printer's work area.
I decided to separate the body from the individual legs and increase the thickness of the legs. I then exported the five components into the Cura program. This time it was able to simulate a possible print. Next, I needed to decide on the support material given that I have a lot of hollow shapes. I decided to use the same material as the print material for support, but with different settings so that it could be easily removed from the print. I then placed all five components in the most optimal way so that the printing time would be reduced and that the material consumption would be low.
With my instructor's reccomendations for the optimal settings, I now have a working Cura model, ready to be printed. I walked over to the 3D printer, put the USB drive in and clicked print. Then the printer began it's magic.
We came in the next day to check on the print, it was complete! It looked perfect! I carefully removed it form the print bed with a spatula and started removing the support material with a tweezer. I snapped off each piece carefully like my instructor told me. "Be very careful!" Once the five pieces were completely void of supports I searched for some very strong glue like the one used for assemblying airplane models. Thankfully this type of glue worked with the PLA materal and I can now assemble my 3D printed model.
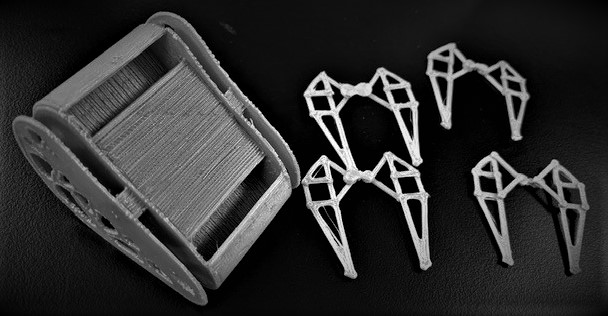
I glued the four legs to the body carefully, in order to achieve the finished model. Even though I had to assemble the legs to the main body instead of printing it as one complete assembly, it would have been impossible to manufacture this assembly with a subtractive proccess. Here is the glorious 3D printed DromeDroid:
The lab has a XYZ Printing Pro 3 in one, 3D scanner, printer, and laser cutter that I could use. I decided to scan a little model of KAUST University's emblematic monument, the Beacon. It is a monument with a complex shape and hollow. I proceeded to scan it, selecting some basic settings, like the color and clicking go.
The scanned result was not very good, specially its resolution. Perhaps this was because it was an old scanner and had been repaired previously, although it was currently supposedly fixed. The result was a pretty blurry and very pixelated scan, which was also unable to export... but oh well, at least it gave out something!