- Review the safety data sheets for each of your molding and casting materials, then make and compare test casts with each of them.
- Design a mold around the stock and tooling that you'll be using, mill it (rough cut + (at least) three-axis finish cut), and use it to cast parts
For this week, I'm making an Oloid. The Oloid is a really cool, weird shape that rolls perfectly with a good center of mass. It's made when you take two circles at 90 degrees of each other and intersect them halfway into each other and loft the sides together. They say a picture is worth a thousand words, but a 3D model is worth a thousand pictures! (Hmm I should just submit a 3D model for my english essays, one million words!!!) Anyways, see for yourself what it is below.
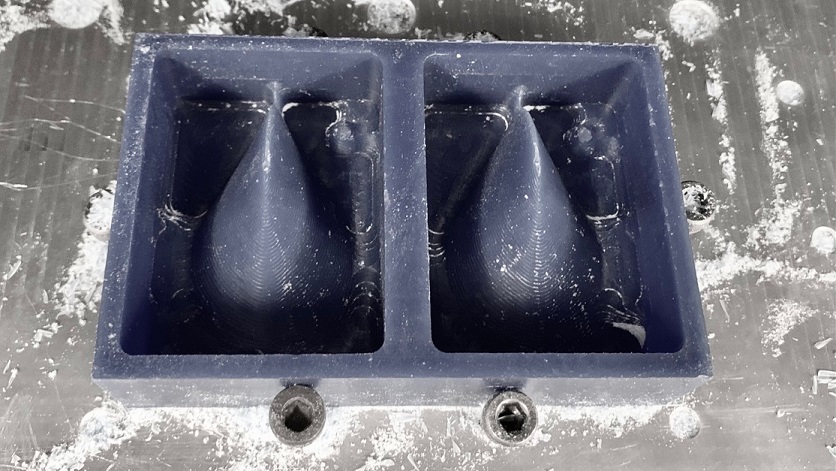
Okay know that you know what I'm talking about, let me talk about my mold. So I'm milling a mold for the mold, because I can't mill the final mold, I'll need to mill a mold of the mold, which is possible. A positive shape to create a negative shape so to finally be able to get the positive shape in return. I'll be making a two part mold, with the parting line along the edge of one of the circles. I'll also be making four hemispheres on the four corners, so that both sides of the mold push together nicely. I'll also need two chimneys to pour in the epoxy and to vent the air.
I started out by making the Oloid itself, which was easy to make after a quick simple google search. You make two arcs, and loft them together to get one quarter of the oloid, then you mirror it twice to get the full one. I split the one in half to get my two sides, then I made a rectangle around the mold that gave it a sensible margin, and cut the rectangle out of the block that represents the wax. I added four hemispheres so that the two side would align perfectly. I also made the two chimneys so that I could pour the smooth on in the mold.
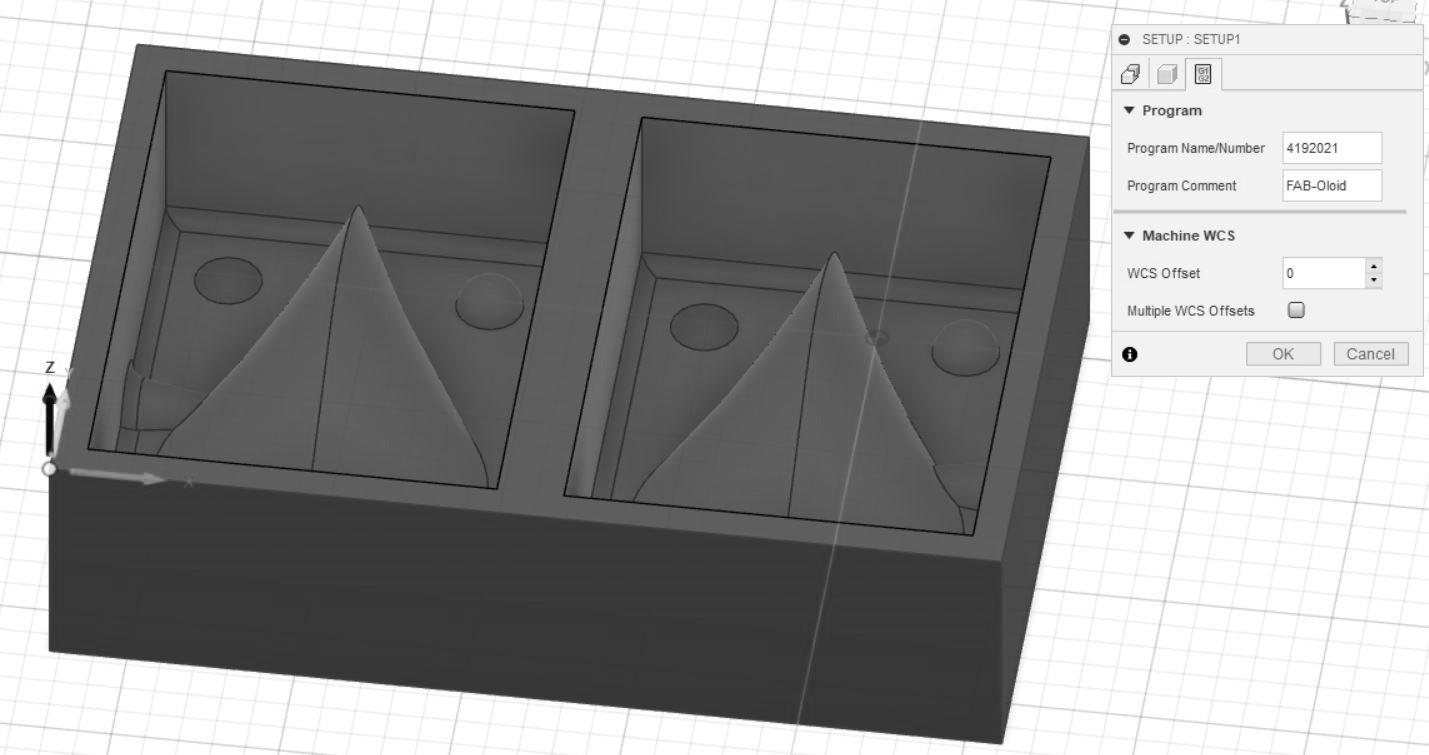
Once the actual design was complete I need to start the toolpaths. I started out by making the setup, I set the operation to milling, and made the stock match the block of wax exactly. Then I started on making the tools, which was very easy, as I just took them from the lab's library. Now my setup was done, and I just needed to make the toolpaths with the three toolpaths.
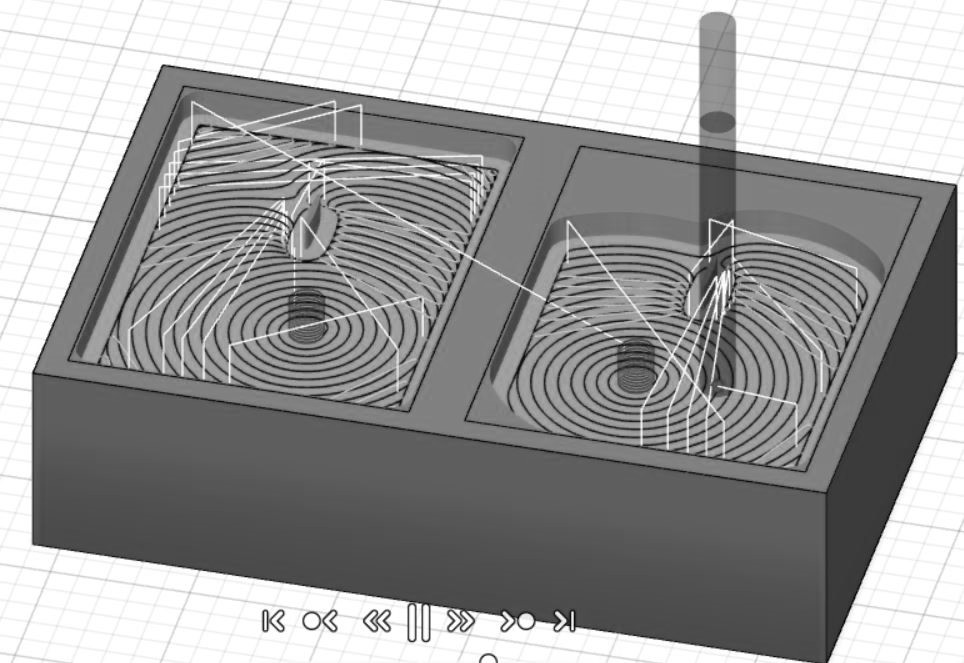
Then I started making all the different toolpaths. I used adaptive clearing for my rough cut, which got rid of all the material. For some reason, it would do one layer then move to the other side and do a layer, so it was always moving back and forth between the pockets, but I didn't mind. Then with my medium tool, I smoothed all the edges with a contour cut which cleaned up the sides, the hemispheres, the chimneys and the oiloid itself. I then did another path with the same tool, a scallop cut, which smoothed the hole thing even more by moving in tiny steps along each cut. Next I used the finished tool to make everything perfect with another scallop path. There are so many lines for this toolpath that fusion renders it as a solid color covering my stock.
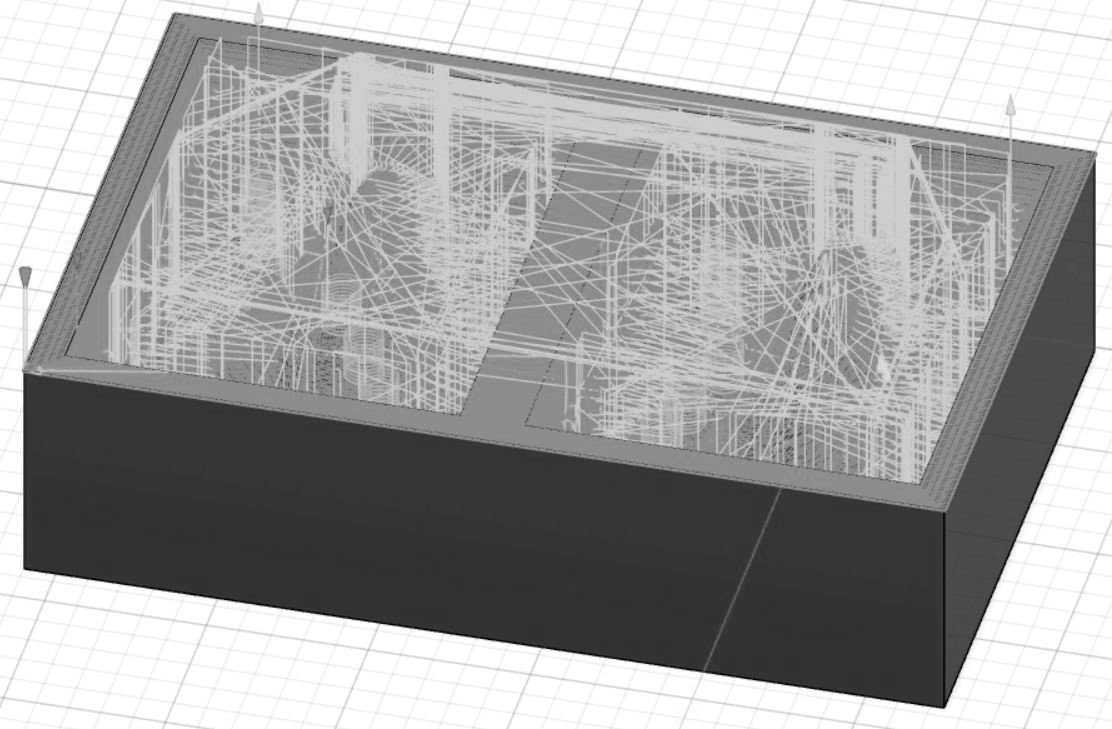
Since the toolpaths looked like a 3D print gone wrong, I simulated all the paths at once, and watched it at a fast speed, everything looked good in this check!
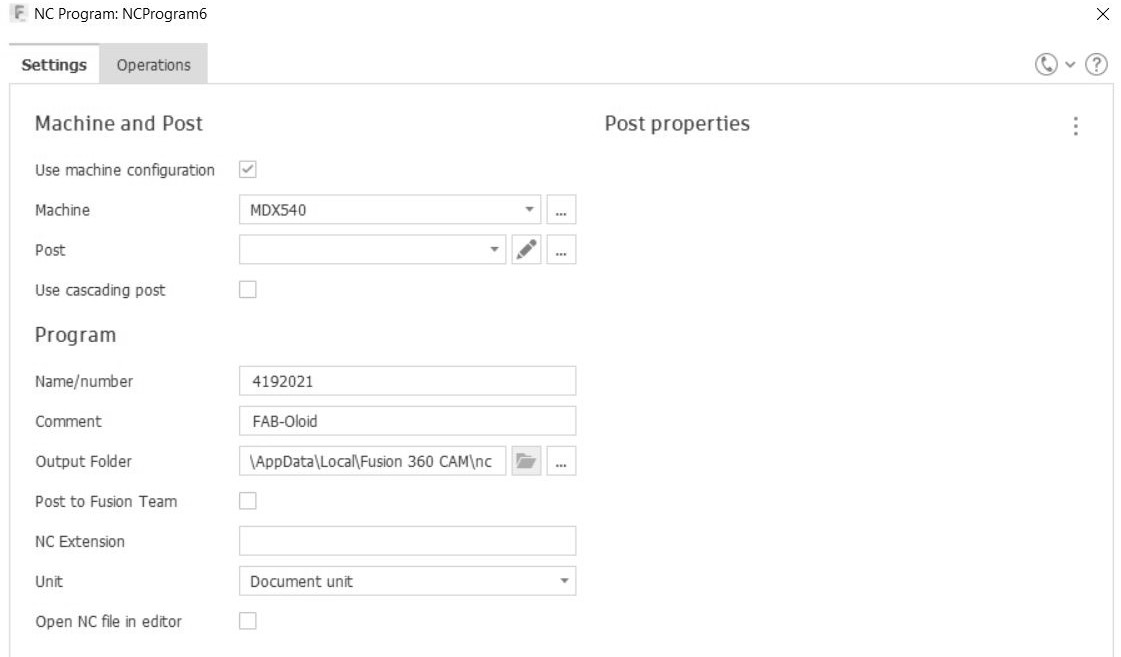
Once I was satisfied with the toolpaths, I posted everything together in one G-Code. (Later on I would post each individualy as I couldn't use the toolchanger.) All my setting were looking good, as I already picked the machine and name of my file when making the setup, so I posted it, and got ready to mill!
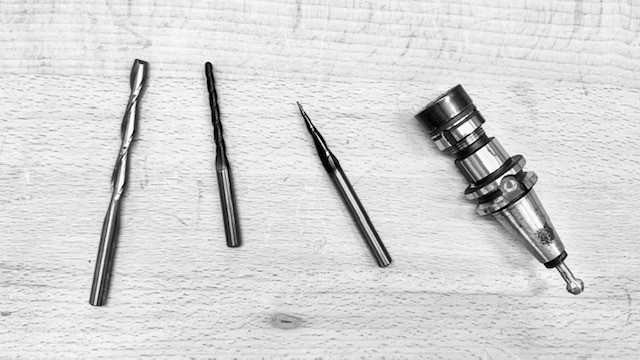
Getting the bits in the collet was quite hard, but the lab had a wrench and a holder specifically for the collet, which made it much easier.
Next, I have to set the job's axis. For the Z axis, I just used a simple sensor, that measures the height of the tool automatically. But for the X and Y, you have to do it manually in this machine. To do that, you move the tool as close to the stock as possible, and then put a piece of paper between the two. Move in with very small steps towards the stock, and when you feel the friction, stop. Set that as the X or Y origin. Now the edge if the tool is against the stock, you need the center of the tool to be on the edge of the stock. So you move the tool towards the stock by half the diameter. Then set that as the X or Y origin. Then repeat for the other axis.
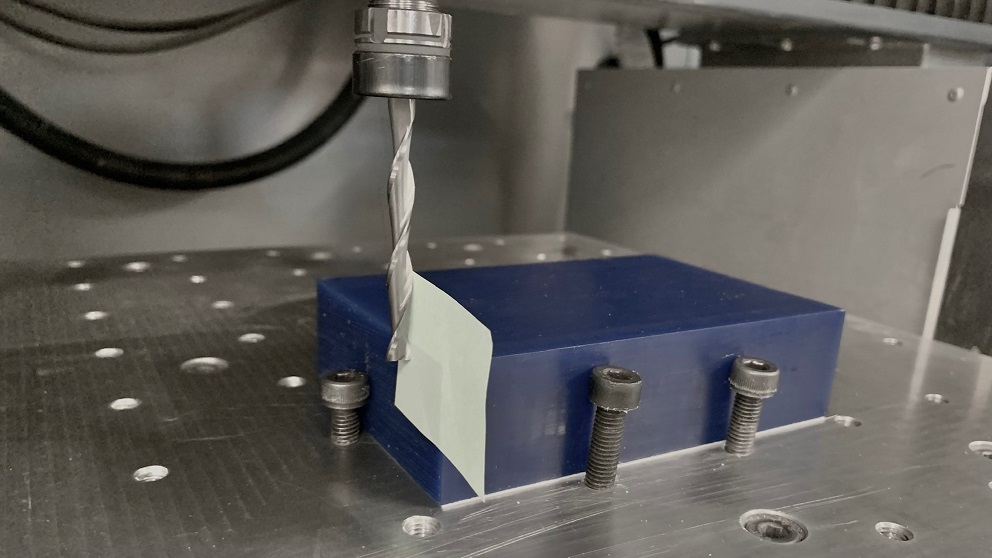
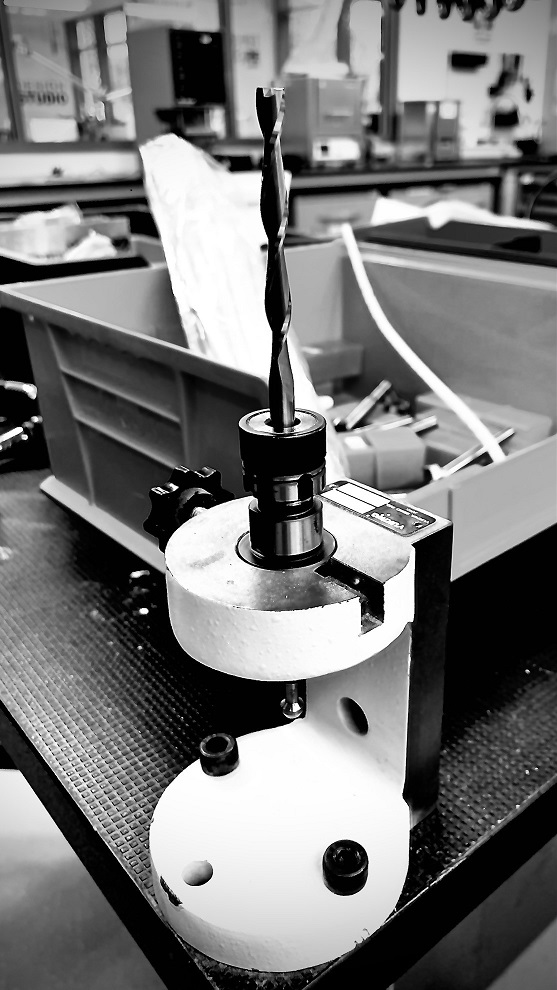
So now, I uploaded the path, and clicked go, starting at slow speeds to make sure it's correct and it matches the simulation in Fusion360. It looked right so I sped it up, and watched the milling! Once the rough cut was done, I cleaned up the shavings, to be able to see, and to melt them down for later use. I then inspected the rough cut. It was pretty smooth for a rough cut, around 3D-printer quality.
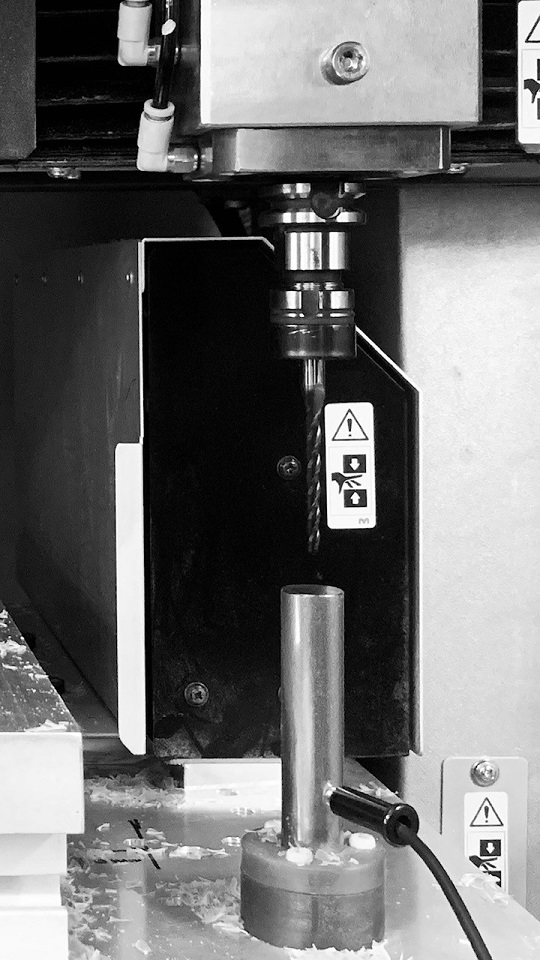
Then I changed the tools one more time, and sent the medium cut, and finally after one more tool change, the fine cut. Then it was complete!
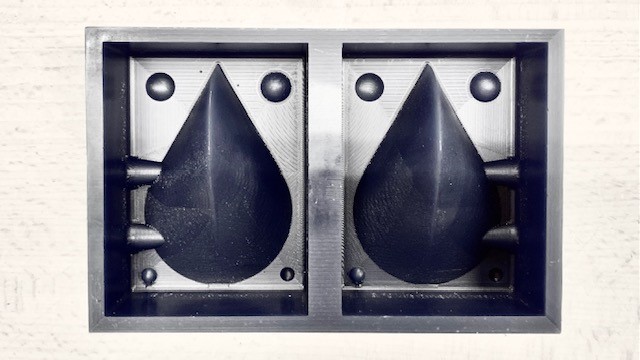
Now it's time to cast the mold. I am using Smooth-On's Ecoflex 00-50 Platinum Cure Silicone Rubber. I read the material safety data sheet, and learnt that it's a pretty safe to use and even certified to be skin safe. Nevertheless, it needed to be used with adequate ventilation so I mixed it under a ventilation hood. but I had to use a special glove to use it. I measured how much was needed for my mold cavity using water, and then gave a bit more. The mix ratio is 1A:1B by weight of its two parts. I mixed both of them in a cup for 3 minutes per the instructions, making sure they were properly mixed.
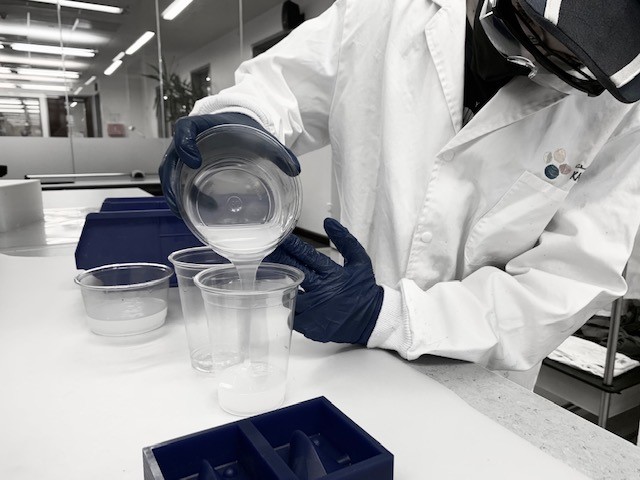
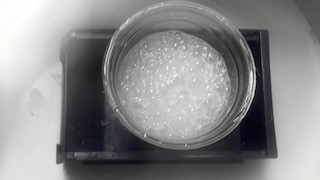
After mixing I degassed as recommended in the MSDS to eliminate any entrapped air bubbles in a vacuum chamber, making sure it did not expand outside of the cup and made a mess.
After degassing, I then poured it into the mold, and covered it to keep it safe. It looked good!
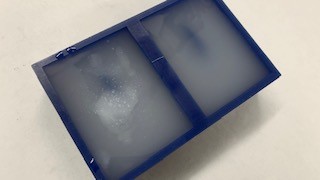
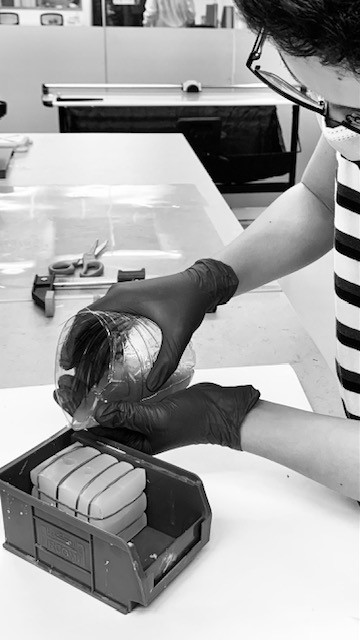
Once that was done, I pulled it out, which was simple and easy. I then binded the two sides of the cast with rubber bands, and mixed Smooth-On's Smooth Cast 321 part A and part B. Its an off white colored resin with a 1A:1B mix ratio. It has a pot life of 9 minutes and a 30 minutes curing time. and put in the vacuum chamber again. It was getting warm, so I quickly poured it in.
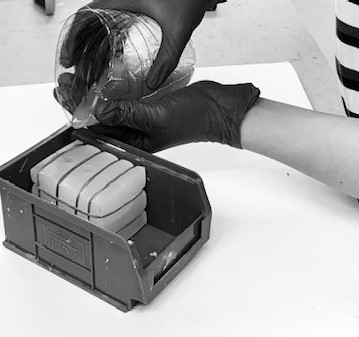
Once poured, I brought it back home, and let it sit overnight. The next morning, I opened the mold, and inspected the oloid, see it for yourself!
The process was pretty simple, and I loved it! I can't wait to make a food safe mold, and have some chocolate oloids!