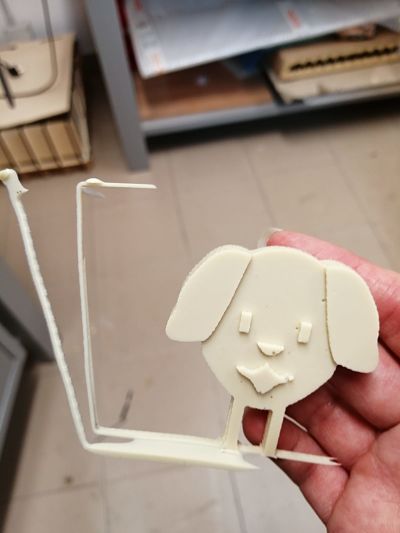
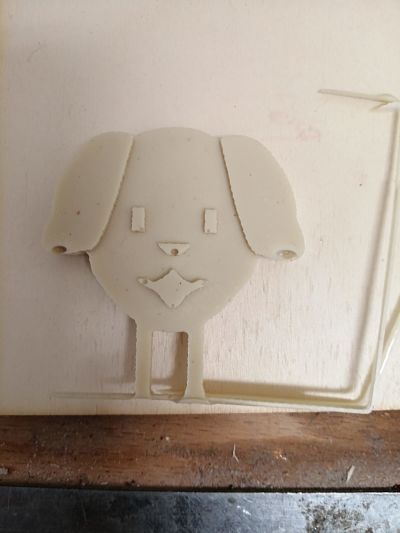
______________ MOLDING AND CASTING ______________
GOALS:
- GROUP ASSIGNMENT:
- Review the safety data sheets for each of your molding and casting materials
- Make and compare test casts with each of them
- INDIVIDUAL ASSIGNMENT:
- Design a 3D mould around the stock and tooling that you'll be using, mill it (rough cut + (at least) three-axis finish cut), and use it to cast parts.
| 3D CAD DESIGN |
For this week project, I decided to mold and cast a small decorative dog face icon for my dog house.
I designed both the dog face icon and the wax mold stamp with Onshape, but I wanted to test also how the silicone mold would come out, so I designed also the negative (silicone) mold on a separate sketch.
__________________ POSITIVE (WAX) MOLD __________________
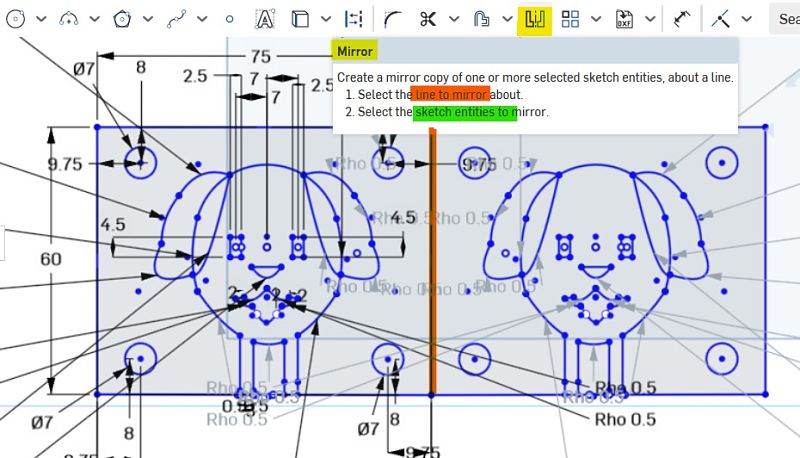
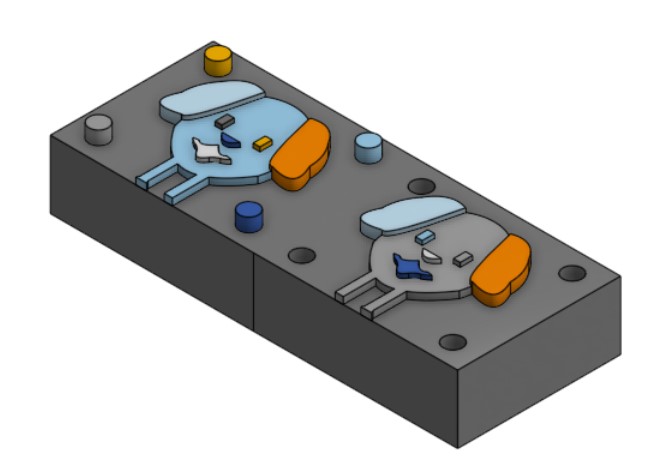
The final sketch looked like the image below. The original dog icon an the keys sketch is the one on the left. I duplicated it with the mirror tool.
Since my block of wax was 180x75 mm, I calculate my rectangular base a bit smaller (lenght: 150 mm, width: 60 mm) and left enough space for the margins.
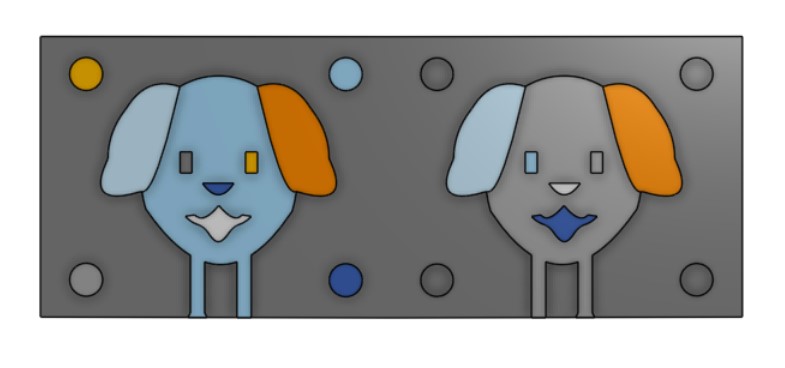
This is how the extruded sketch looked like from top and isometric view.
The total thickness of the icon was 4 mm, while the keys were 5 mm of thickness.
________________ NEGATIVE (SILICONE) MOLD ________________
Once I had my positive mold I decided to try to simulate how the silicone mold would come out.
So I created a base for the silicone mold on top of the positive mold I already had, and I extruded it.
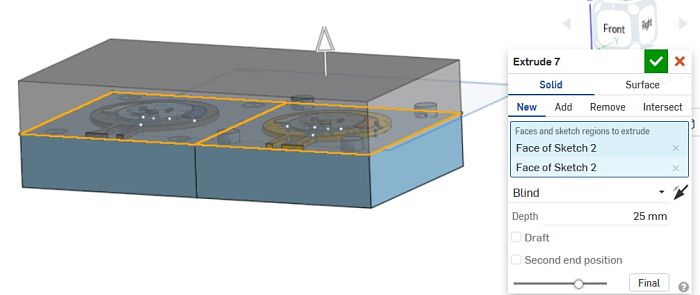
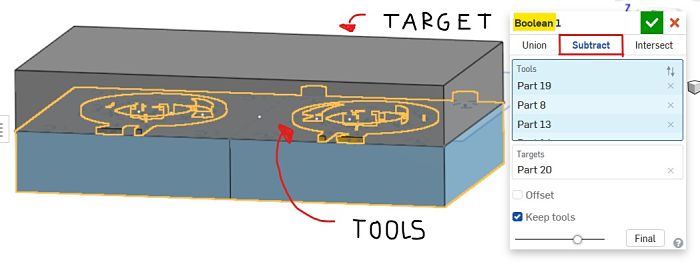
After that I remove the internal icon mold with a Boleean - Subtract.
I selected the dog icon mold as the Tools to subtract,
and the base for the silicone mold I had extruded in the previus paragraph as the Target surface.
Moreover, since I needed the icon mold to remain on my first block of material, I pinned the option Keep Tools. This way even after the Boolean - Subtract the dog icon mold would remain attached to the original block of material.
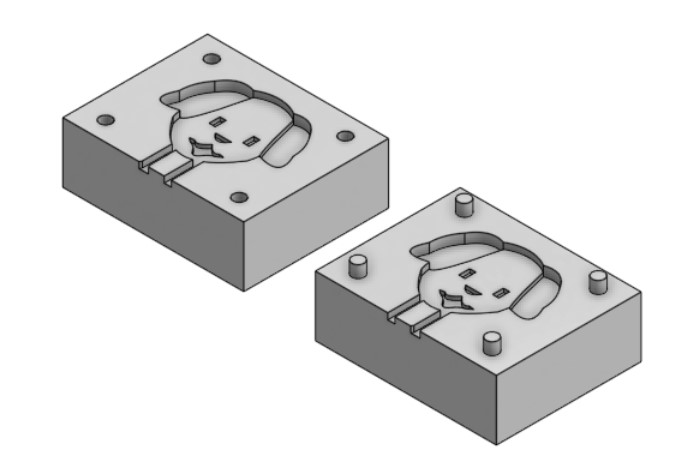
This was the final result of my 3D CAD silicone mold.
| 3D MILLING |
_____________________ VECTRIC CUT3D _____________________
To create the g-code files for the Roughing and Finishing for the Roland Milling Machine, I used the software Vectric Cut3D.
Once I imported the STL file, there are 7 required phases to prepare the file:
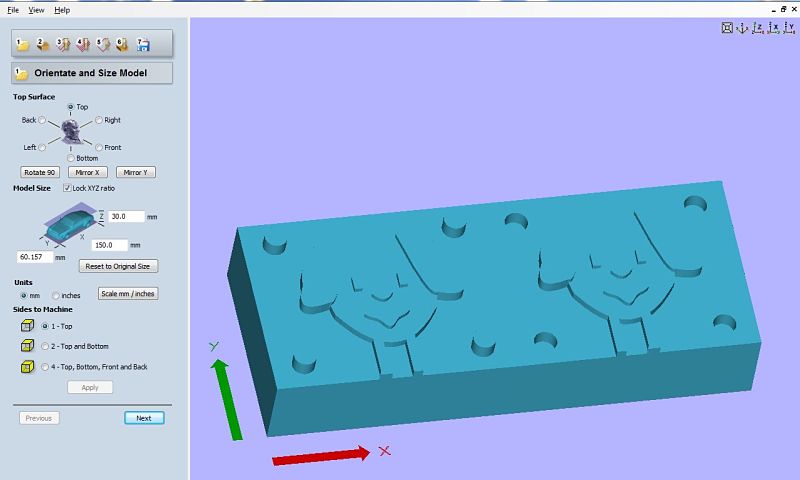
1_ORIENTATE AND SIZE MODEL
Here I orientated my object on the surface, choosing the TOP area.
In Model Size I locked the XYZ ratio.
I choose mm as a unit and "Top" in Sides to Machine.
2_MATERIAL SIZE AND MARGINS
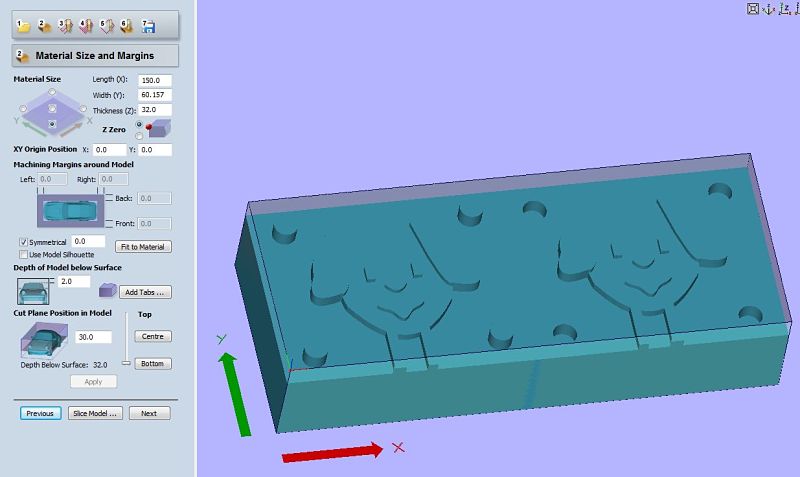
Here I checked the material size, which I left as the same sizes of my model. Then I set my origin in the bottom-left corner.
I didn't intend to extend the size of the plane area, so I left untouched the Machining Margins around Model menu.
The setting of Depth of model below surface was really important because it would create the margins around the model for casting the silicone, so I set 2mm as a margin height.
The Cut Plane Position in Model set the maximum deepness that the mill is going to reach. Since I had also holes, I decided to bring that setting all the way to "Buttom".
3_ROUGHING TOOLPATH
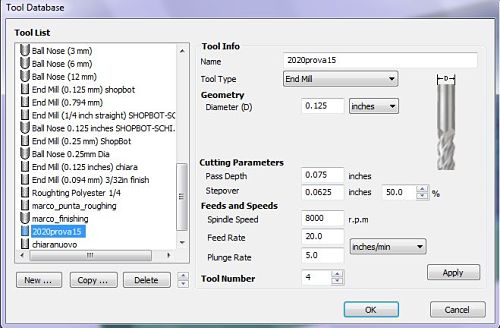
First of all, I selected the type of mill that I was going to use.
I opted for 1/8 end mill. As for the the mill parameters, the group works that I did with my classmates were really helpful and I decided to go with them. The only thing that I changed was the feed rate.
After seeing the milling of my friend Olivia and the problems she encountered with the wax rolling up on the endmill several times, I opted for a 20 iches/min feed rate, instead of 15 iches/min.
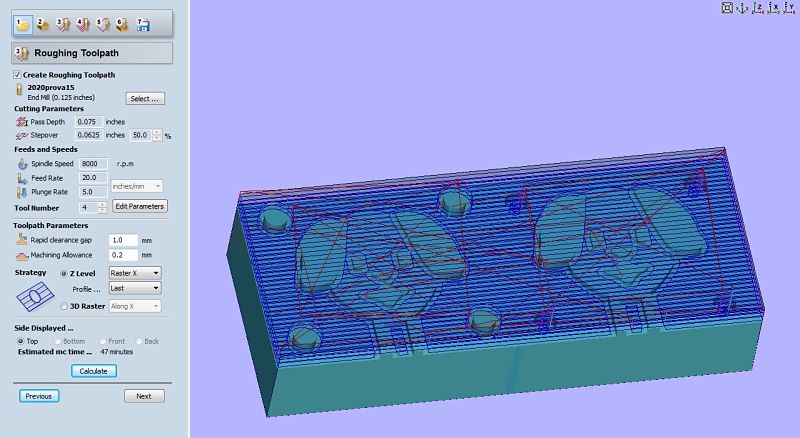
In the Toolpath Parameters I also set the machining allowance to 0.2 mm. Having such tiny and small part as the eyes, nose and mouth of the dog icon ( their width was just 2 mm) , I was worried that the 1/8 end mill could ruin them. So I decided to left that 0.2 mm as a safety margin during the roughing and then remove it with the finishing.
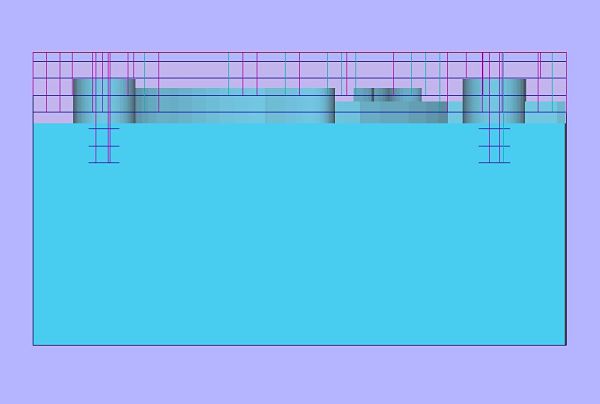
As a cutting Strategy, I choose the Z level Raster x, Profile: Last. I checked that the mill was cutting everything, and it was at this moment that I encountered issues with my first design. The diameter of the keys of my first design was only 5 mm and the mill (1/8 inch = 3.175 mm) couldn't enter well inside the holes, so I changed the diameter to 7 mm and the roughing preview of the keys holes was much better.
4_FINISHING TOOLPATH
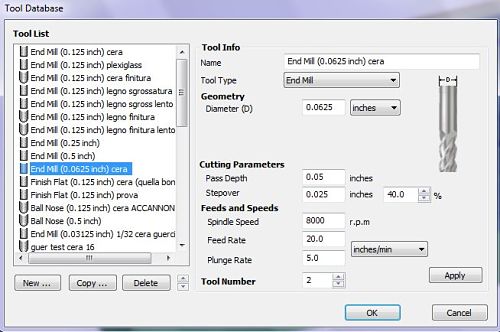
For the finishing mill settings I choose the 1/16 inches, 2 flutes endmill, changing the stepover to 40% and the tool numbers to 2. Keeping 20 inches/min feed rate and 5.0 plunge rate.
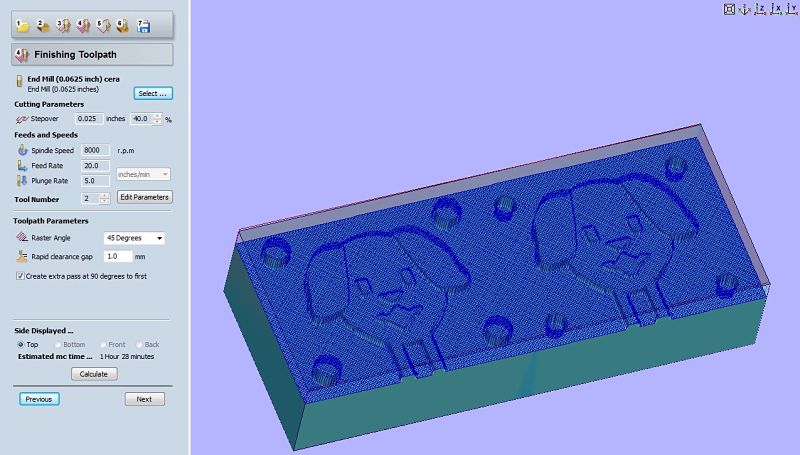
In Toolpath Parameters, I selected the Raster Angle to 45 Degrees and I pinned the option: "Create an extra pass at 90 degrees to first".
5_CUT OUT TOOLPATH
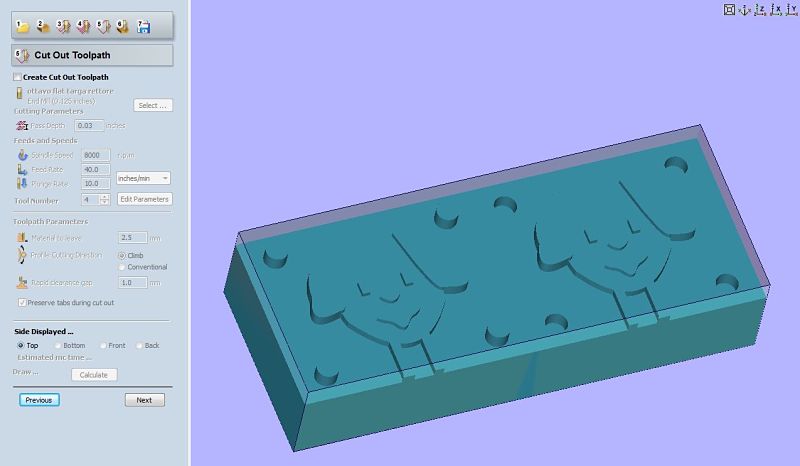
This window set the parameters for cutting the entire object shape and cut it out from the material, but since I didn't aim for that, I left unpinned the Create Cut Out Toolpath option and I proceded with the next phase.
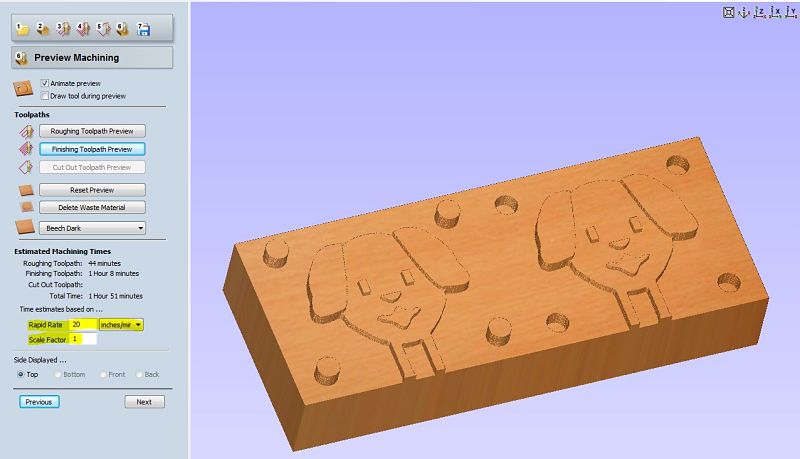
6_PREVIEW MACHINING
Here I could visualize the preview of both the roughing and finishing process, as well as the Estimated machine Time, which was less than 2 hours (including both roughing and finishing).
Keep in mind that in the Estimated Machine Times parameters you must ensure to have the same Rapid rate and units you choose in the roughing/ finishing mill settings. In my case it was 20 inches/min.
The scale factor must always be 1.
7_SAVE TOOLPATH
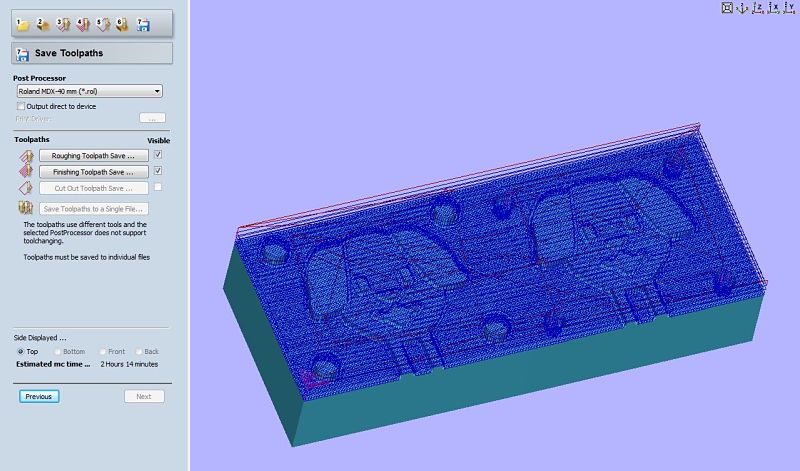
The last step was saving the roughing and finishing in two separate files. After ensuring that the Post Processor was set to Roland MDX-40 mm(*.rol), do not click on Output direct to device, otherwise it will connect directly to the Milling Machine.
Click on Roughing Toolpath Save and Finishing Toolpath Save to save the files.
______________ ROUGHING VS FINISHING RESULTS ______________
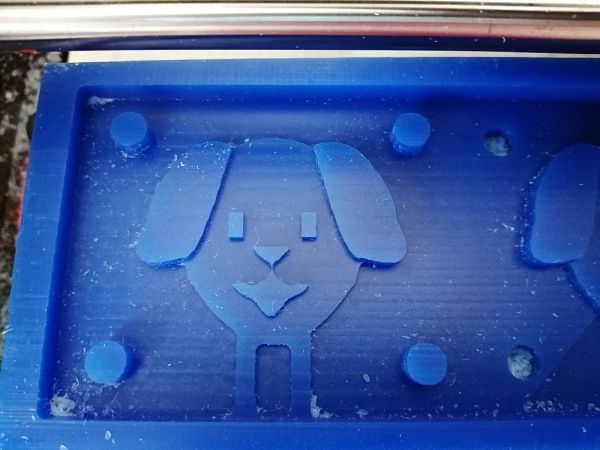
Here you can see the roughing result.
And half icon comparison between the roughing and the beginning of the finishing.
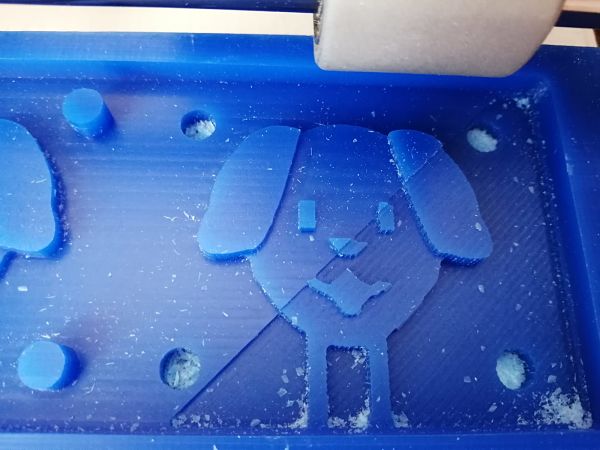
Here, you can clearly see the machine allowance (0.2 mm) that I left during the roughing, being cutted during the finishing (it was really a thick cut for 1/16 end mill, for this reason, at half-face cutted, I checked the cut, fortunately it was clean and the endmill didn't stop).
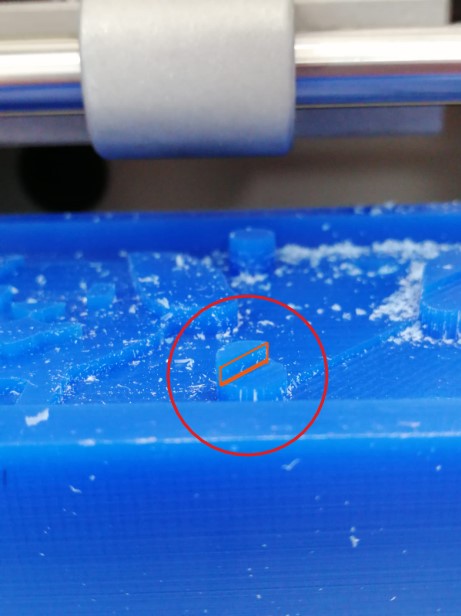
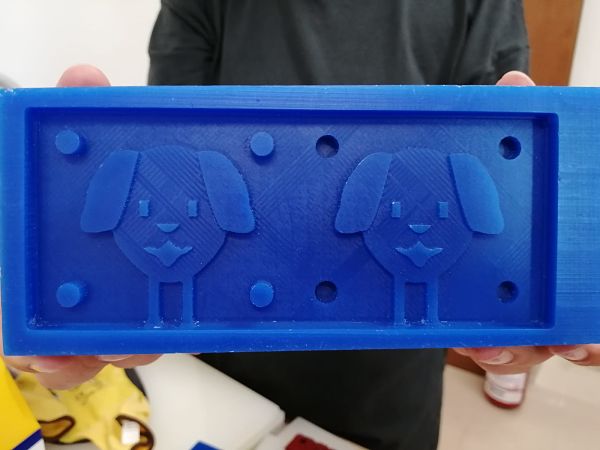
This was the final result.
I was satisfied since it came out well, even the smallest and critical parts (eyes, nose, mouth).
The 20 iches/min was also I really good setting for the feed rate, the wax didn't end up rolling on the mill, not even once.
| SILICONE MOLD |
After milling, it was time to cast the silicone, to create the silicone mold.
Our instructor, Simone Guercio, explained that there are specific terminology we must kept in mind while reading the safety data sheet of the silicons, especially:
- Mix Ratio = is the specific quantity of Part A and B (reagent that help increase the viscosity) to create the mix. It can be sorted by weight or volume etc...Ready carefully the material data sheet
- Pot Life = is the maximum amount of time it takes to the mix to increase its viscosity
- Cure Time = is the amount of time the mix takes to solidify in the casted shape.
- Shelf Life = is the expiration date of the material under certain condition (temperature, light etc...)
__________________ MOLD MAX 60 SILICONE __________________
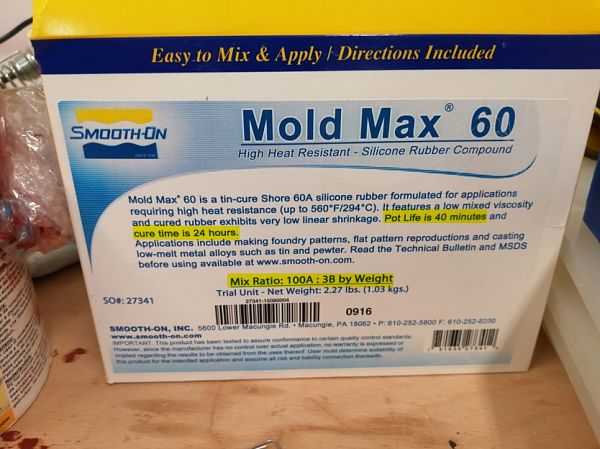
The first silicone I tried was the Mold Max 60 , which have:
- Mix Ratio = 100g Part A : 3g Part B by weight.
- Pot Life = 40 min
- Cure Time = 24 h
After wearing a protective uniform and mask, I started to stirring for a few minutes the Part A material of the silicon with the help of a wooden stick.
My wax mold was 150x60, so I decided to go for 120 g of Part A, and since Part A was already viscous ( it was used for about an year), I decided to used just 1.3 g of the reagent.
Using a gram scale digital balance to measuring each part, I started pouring slouly Part A into a plastic glass and I ended up with 119.2 g of Part A.
Then, I poured 1.3 g of reagent.
I added 0.2 g to the 120.3 g of the photo showed below. So at the end I had a total 120.5 g of mix.
119.2 g of Part A.
1.3 g of Part B.
I slowly stirred the mix, which felt so viscous from the start. I already knew the reagent quantity (1.3) was too much.
Then I slowly casted the mix into the wax mold.
With the help of a wooden stick, I spread the mix evenly to smooth out the surface, and I gave the wax mold little taps against the table to ensure that the silicone reached every angle of my mold.
The last thing to do was waiting 24 hours and see the results.
Well...the results weren't good at all, as you can see from the photos below.
I had troubles with bubbles in the center of the icon, not to mention the inexistent keys. The silicon didn't even reach the key holes, mayble because the mix was too viscous (I poured too much reagent in the mix).
With the second try. I mixed 100 g of part A and 1 g of reagent B. I poured the mix ten time slower than before, and I focused a lot on the key holes (a problematic area to reach if you cast the silicon to fast)
.
Taking a look a the completed casting session, the surface is much smoother than my first attempt, but I will see the result after another 24 h waiting...
_____________ GOMMA SILICONICA GLS-50 _____________
Another silicone that I tried was the Gomma Siliconica GLS-50.
This Silicone had a Mix Ratio of: part B = 5% part A, and a Cure Time of 18 h.
I mixed 120,2 g of part A and 6,2 g of reagent B.I casted it into the wax mold and waited for 18 h.
The results were quite good. Even tough I still didn't managed to reach one of the keys, this silicone mold was much better than the first one.
This silicone was much more soft than the other one, and had more of a jelly consistency.
| RESINE MOLD |
_____________ SINTAFOAM 1.1 RESINE _____________
As a first resine I used an old-opened sintafoam 1.1 Resine.
Mix Ratio = 1:1.
Cure Time = 40 min.
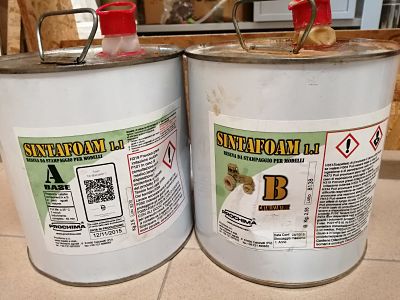
I used about 16.3 g of part A and B.
Since the reaction starts really quickly, after stirring the mix and feeling it a little bit warm, I poured it inside one of canals (the other one is for the letting all the air come out) I had designed.
Before preparing the mix, you have to prepare your silicone mold. For this first attempt I decided to use my first silicone mold (the Mold Max one). So I attached the four keys together and then I pressed together the two parts of the mold with a clamp.
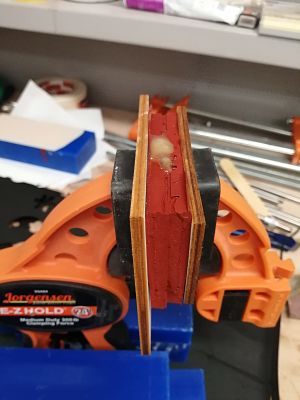
After 40 min I checked the result. The mold didn't come out well. It didn't even came out at all, since part of the silicone remained attached to the resine mold.
My Instructor, Flavio Lampus, suggested me that this could be caused by the silicon not completely dry out. Very odd, because I left it dry all the weekend, but still, some areas of the silicone mold were very sticky and kind of watery.
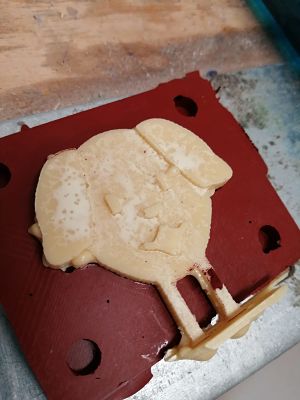
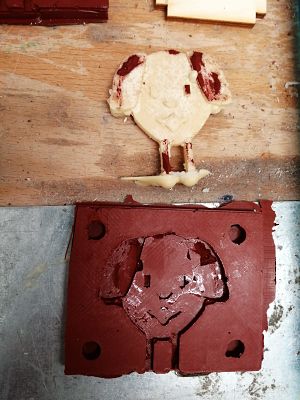
In my next try, I used my new silicon mold (the Gomma Siliconica one) and a recently opened Sintafoam 1.1 resine kit.
This time I mixed 10 g of part A and B. I sprayed the silicone mold surface with a Mold Release Agent (Mann Release Technologies: Ease Release 200). and I pressed the silicone mold with using two clamp.
The results were a mix of feelings.
First of all, the good thing was that, even with few, little bubbles here and there the surface mold were the smoothest I had ever made ( after 3 texture failures), maybe the fact that the Resine was new and also using the Mold Release Agent helped a lot.
The bad news was that, during the Cure time, part of the Resine had not only fallen down form the injection conduct(in the pictures below you can see the dried resines around the silicon mold.
For this reason, maybe, there was any resine left for the last part of the dog's hears. Another possibility could be that it was just two bubbles that had formed.
Next time I will have to check that the resine doesn't fall around the silicone mold and also press the two parts of the silicone mold together a little bit more with the clamps.
