____________ WILDCARD WEEK ____________
GOALS:
ASSIGNMENT:
- Design and produce something with a digital fabrication process (incorporating computer-aided design and manufacturing) not covered in another assignment, documenting the requirements that your assignment meets, and including everything necessary to reproduce it.
During the moldig and casting week I experimented using subtractive technique for creating the negative wax mold and then pouring in the silicone cast.
In this wildcard week I decided to experiment with an additive technique by 3D printing a mold and a counter mold. I will then create 3 different mixes of cardboard, water and vinil/cooked rice/cornflour and pressed it between my molds using clamps.
The last step is going to let the pressed compound rest for a few days and see the results.
| 3D DESIGN & PRINTING |
The first thing I did was designing the mold on Onshape.
Here there is the link to the Onshape document.
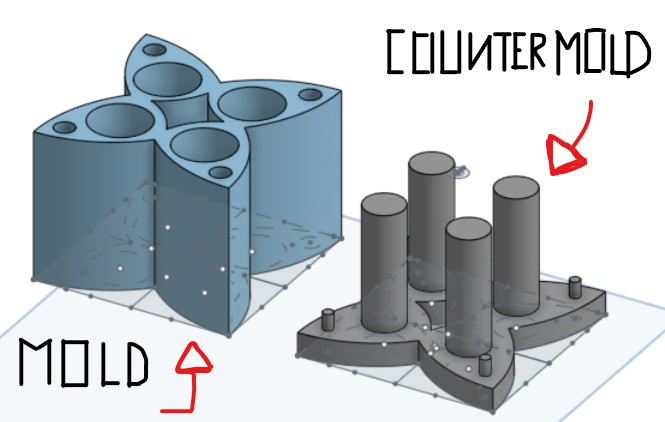
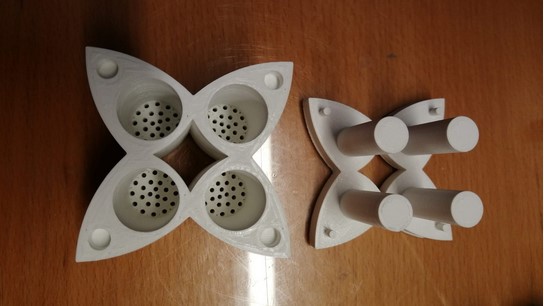
Keeping in mind the tolerance of the Ultimaker 2+, I decided to left 1.5 mm margine between the mold and counter mold keys as a safety precaution.
I also left 3 mm magine on each cilinder holes to let the compost go up while pressed so that it will create the walls.
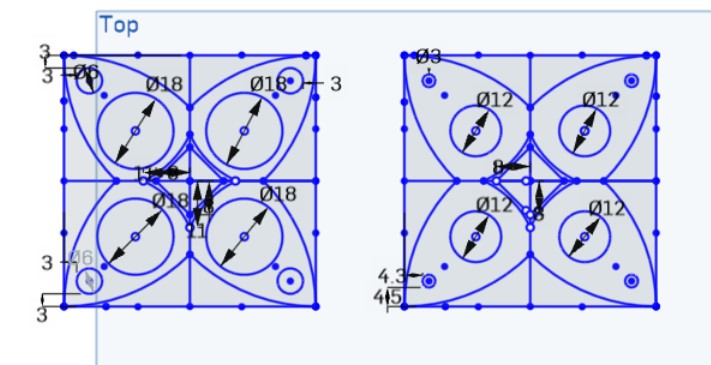
At the bottom of the mold I create holes of 2mm of diameter (using the circular pattern) to let out the water and let the compost dry.
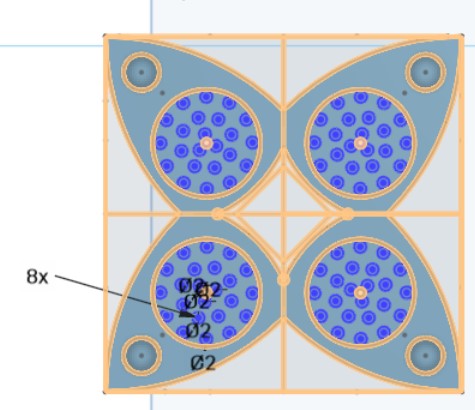
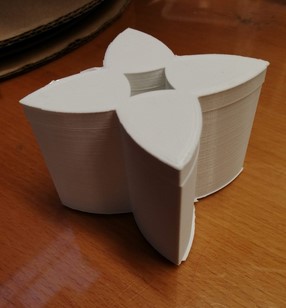
This was the assembly preview.
After exporting the stl files of the mold and counter mold, I imported them on Ultimaker Cura 4.5 and changed the settings for the Ultimaker 2+ ( the same settings used during the 3D scanning and printing week).
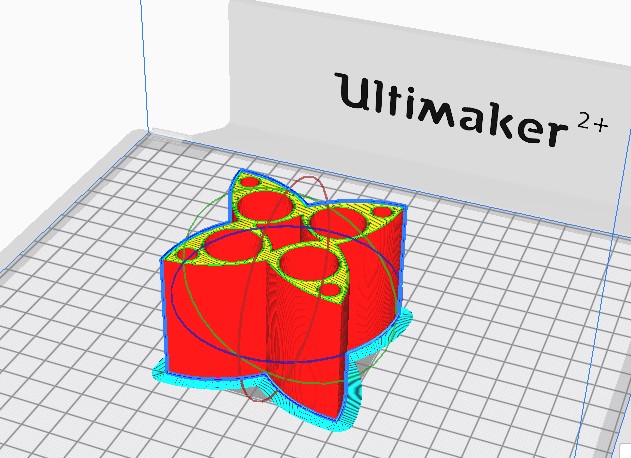
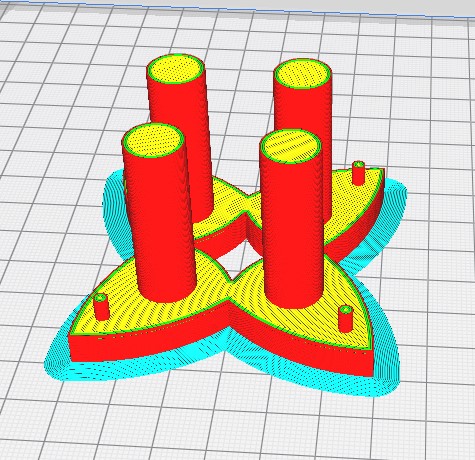
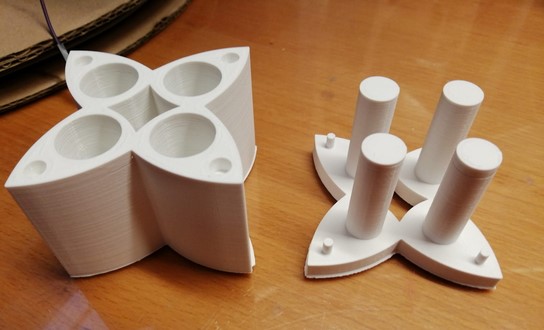
After the extimated printing time (3 hours in tot.), this was the final result.
| CASTING |
Once I had the mold an counter mold, I started preparing the ingredients for the three mixes :
- MIX_1: 16gr of cutted carboard, 5gr of cornflour, 4 spoon of water
- MIX_2: 16gr of cutted carboard, 10gr of cornflour, 4 spoon of vynavil
- MIX_3: 16gr of cutted carboard, 10gr of cornflour, 4 spoon of cooked rice
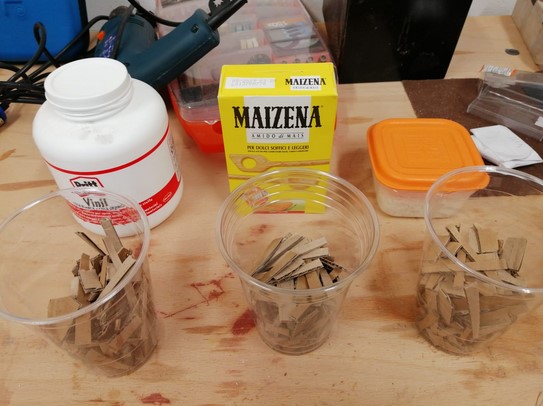
Then we mixed the three mixes with a mixer.
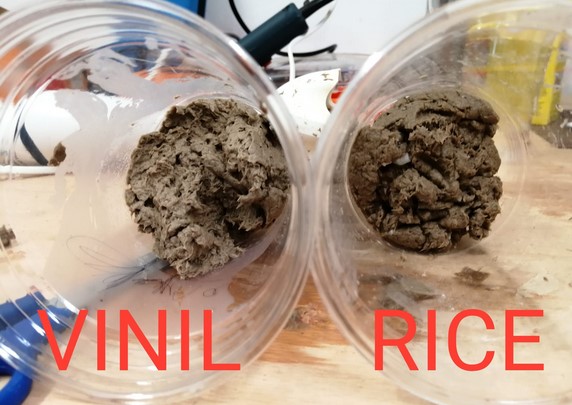
And I poured one of each mix into one cilinder hole.
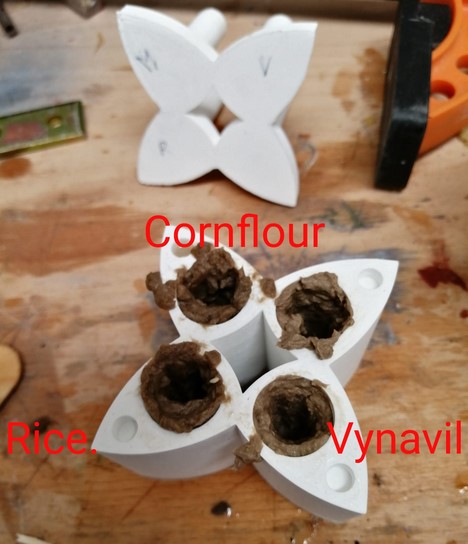
And then I pressed the mold and countermold using two clamps.

Now I will have to wait a few days to see the result. I will update this section once the compounds will be completely dried.
| RESULTS & CONSIDERATIONS |
I took out the clamps after 7 days and the result was this.
It might be a a little bit disappointing to see, but this is how experiments works. This test gave me a lot of insight and ideas on how to improve the design.
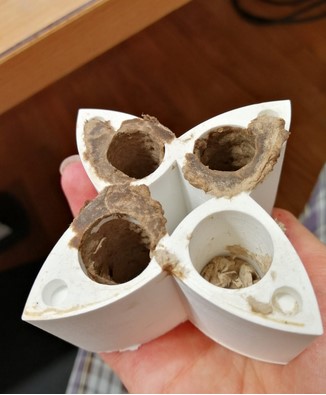
This were all the considerations that I have made out of the result:
- Orizontal design instead of a vertical one: In fact, the more the mold design develops vertically, the more difficult will be for the compound to go up ( even if pressed with the counter mold).
- Empty counter-mold with holes for water (bigger than 2 mm): The fact that the compounds were still moist after 7 days it a clear sign that there wasn't enough air circulation for the compound to absorb water and dry. For this reason, it would be a good idea to implement an empty counter mold and add holes onto the walls to allow air circulation even in the internal section of the mold.
- Division of the mold in two vertical part: so it can facilitate the removal of the dry compound from the mold
- Adding a detaching agent/product to prevent compound adhesion to the mold: When the compound dry it remains very attached to the mold, so adding a waterproof agent like beeswax or waxy detaching agent to the mold before pouring the compound could be a good solution to to prevent the dry compound to stick to the mold.
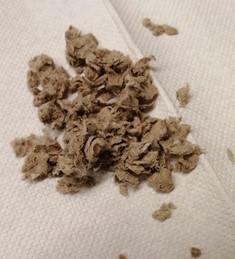
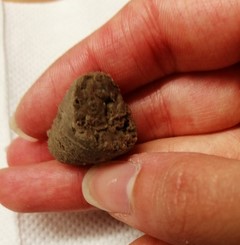
- Smaller pieces of cutted cardboard = easier mixing process = smoother compound = compound will dry in a more compact shape: The youtube video that I linked in the Reference section said that the size of the cutted cardboard pieces didn't matter if they were well mixed, but I found that if you start with pieces bigger than 4cm, this will affect the mixing process ( it will be slower and difficult) and dipending on the mixer's power that you are using, it might not be able to cut all the pieces into a smooth mix. And if you haven't a smooth mix, the dry result will not be as compact and soon as you touch it, it will cruble like the left picture below.
In the right picture, instead, there is the same mix but with smaller pieces of cutboard and, a longer mixing process and smooth compound. The result is a more compact shape. - Cooked rice and Vinil are a better option than Cornflour
- Drain excess water from the compound mix with a sieve: it is just an idea, but it could be worth a try.
- Key tolerance at 5 mm is enough (1.5 mm is too much)
